Category Archives: Analysis

Filters

Author:
Category:

ISO,aperture photo shoot

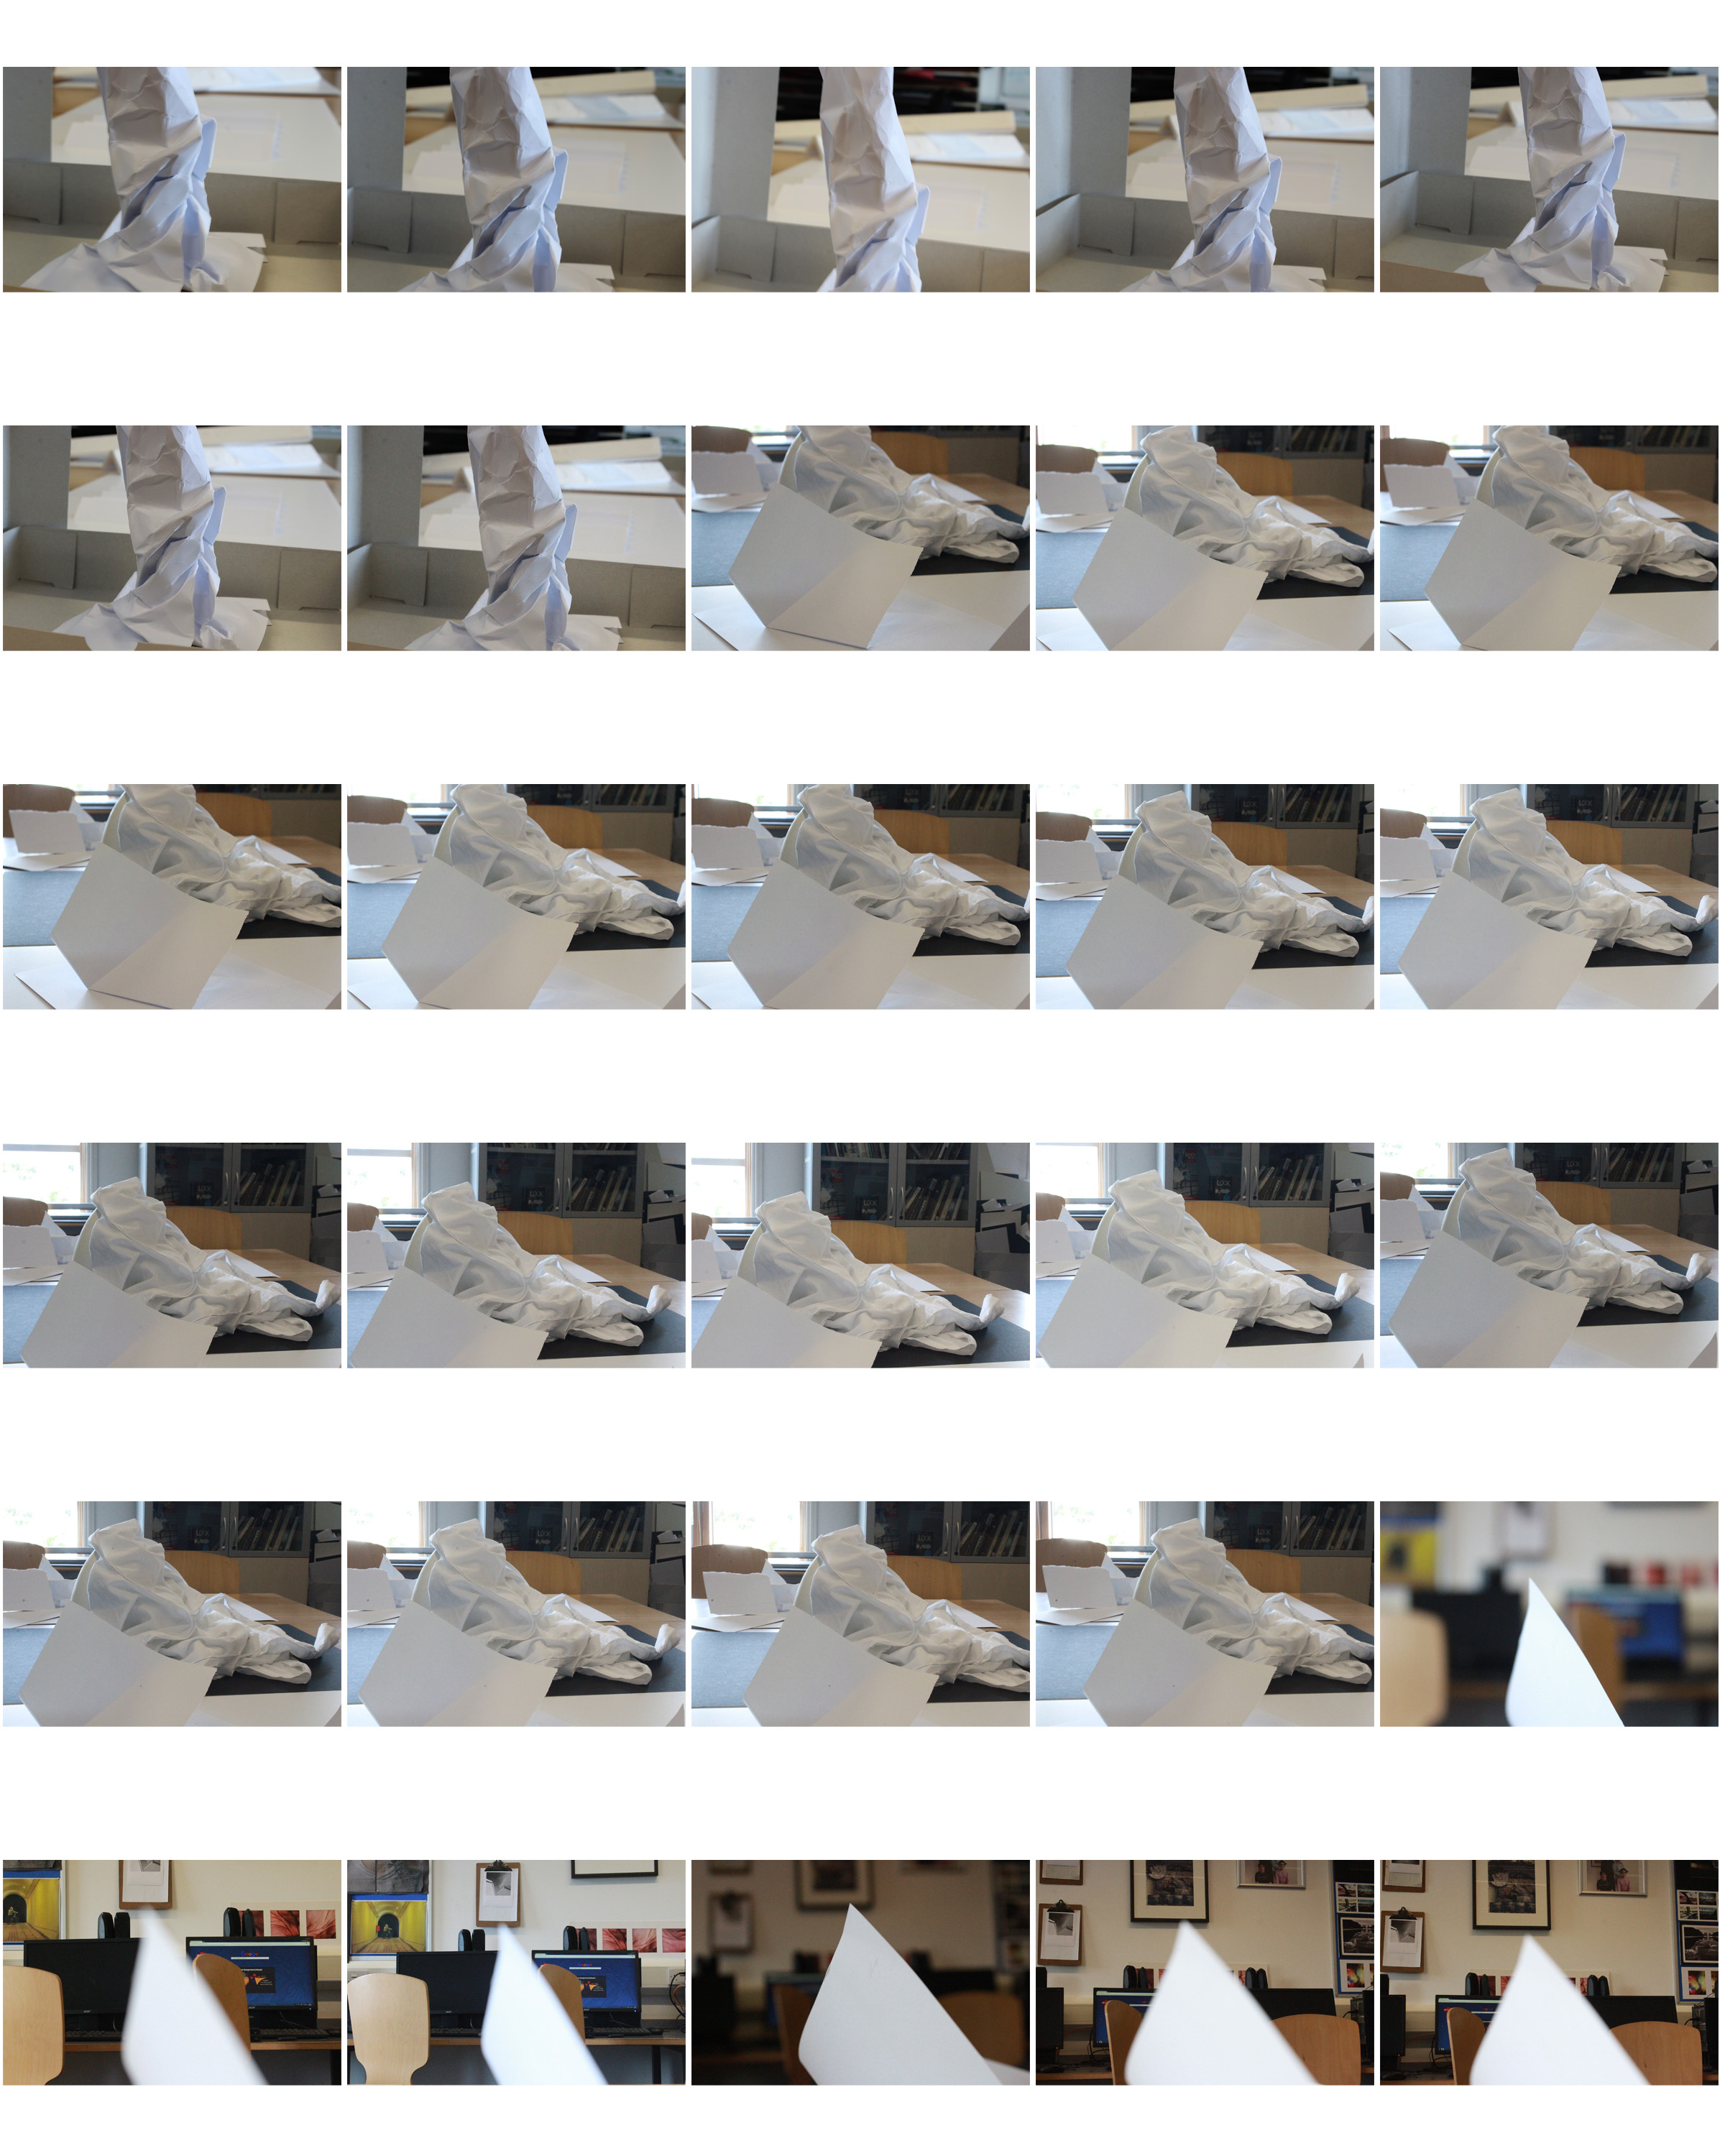
For this shoot I wanted to experiment the same shot and how it works ind developing detail, colour,and background when changing the ISO and Aperture settings.these photos devoted from 100 to 1600 doubling every time.

The ISO speed determines how sensitive the camera is to incoming light. Similar to shutter speed, it also correlates 1:1 with how much the exposure increases or decreases. However, unlike aperture and shutter speed, a lower ISO speed is almost always desirable. As a result, ISO speed is usually only increased from its minimum value if the desired aperture and shutter speed aren’t otherwise obtainable.This can cage depending to lighting or if it happens to be a very quick shutter speed to capture an action shot. With the first few images you can see the development of a lower to higher ISO level. It slowly looses the detail and becomes too exposed and is unable too capture the image; as seen before.The ghee exposure is  available to ‘film grain” seen in traditional photography.

low ISO speedLow ISO Speed
(low image noise)
high ISO speedHigh ISO Speed
(high image noise)

Secondly I focused on Aperture. Aperture is when A camera’s setting controls the area over which light can pass through your camera lens,uch like exposure and alliance of light. It is specified in terms of an f-stop values. In photographer slang, when someone says they are “stopping down” or “opening up” their lens, they are referring to increasing and decreasing the f-stop value, respectively. this is the widening snd retraction of the lens to determine the amount of access to light they wish to capture. This is the second half of the photos and the development detail and focus within the images.
Contact Sheets

what is a contact sheet?

A contact sheet is a piece of photographic paper on to which several or all of the negatives on a film have been contact-printed and sometimes from a film positive,or in the Morden day it is a way to represent and present all your work and development of visual inspiration to how you have found your final piece.Furthermore negatives are developed In a darkroom and exposed and developed piece of photographic film is placed on the emulsion side down, in contact with a piece of photographic paper, light is briefly shone through the negative and then the paper is developed  to reveal the final print.
This can clearly been seen here:


The defining characteristic of a contact print is that the resulting print is the same size as the original, rather than having been projected through an enlarger.A contact sheet is not to differ your image or create an illusion of the image,but display and emphasis the original images and similar.You are usually able to see a distinct choice in the paper within circles and marks of significance.  
Highly respected and influential photographers are called magnum photographers who produce beautiful contact sheets. 
Magnum Contact Sheets reveals how Magnum photographers have captured and edited their best shots from the 1930s to the present. The contact sheet, a direct print of a roll or sequence of negatives, is the photographer's first look and understanding around the scenario at what he or she has captured on film, and provides a uniquely intimate glimpse into their working process.It is more detailed and emphasise journalism within the development of a shoot and a conservation of the persons emotive reflection. It records each step on the route to arriving at an image—providing a rare behind-the-scenes sense of walking alongside the photographer and seeing through their eyes.


Contact sheets are part of the "decisive moment”it captures a specific moment within their shutter and then furthers to the oversize best capture and desire within their possible one in a million photo.
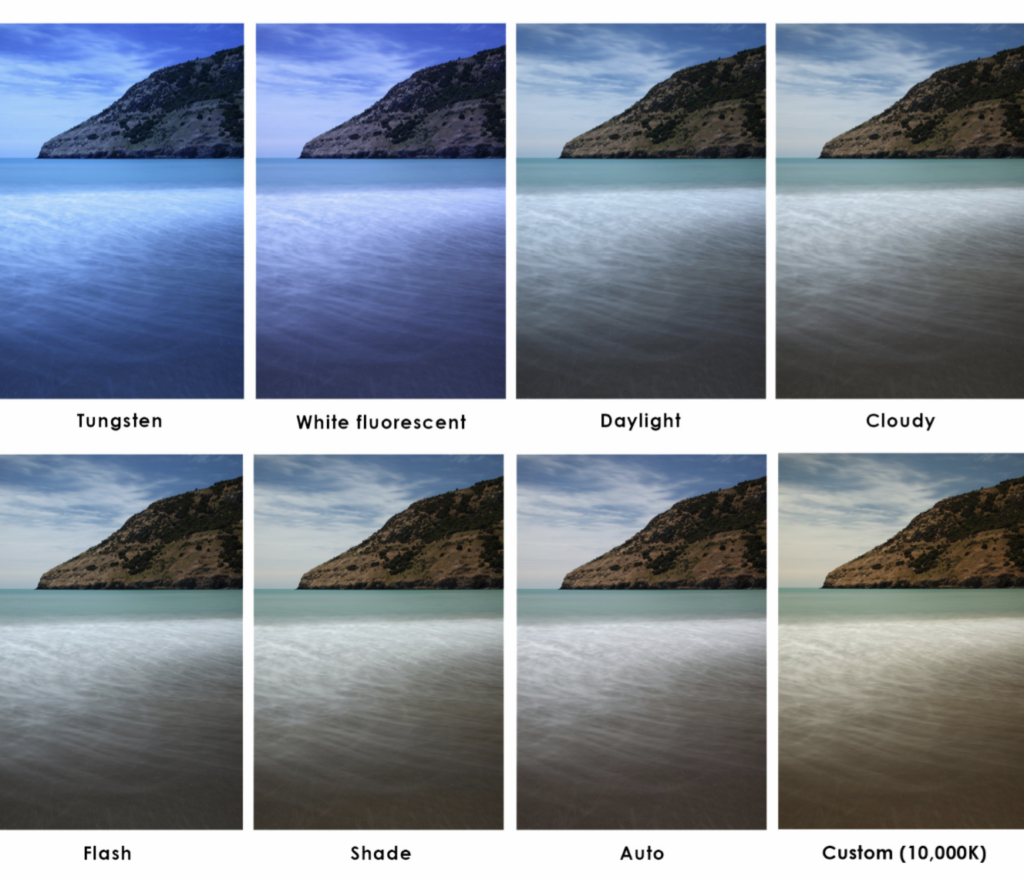
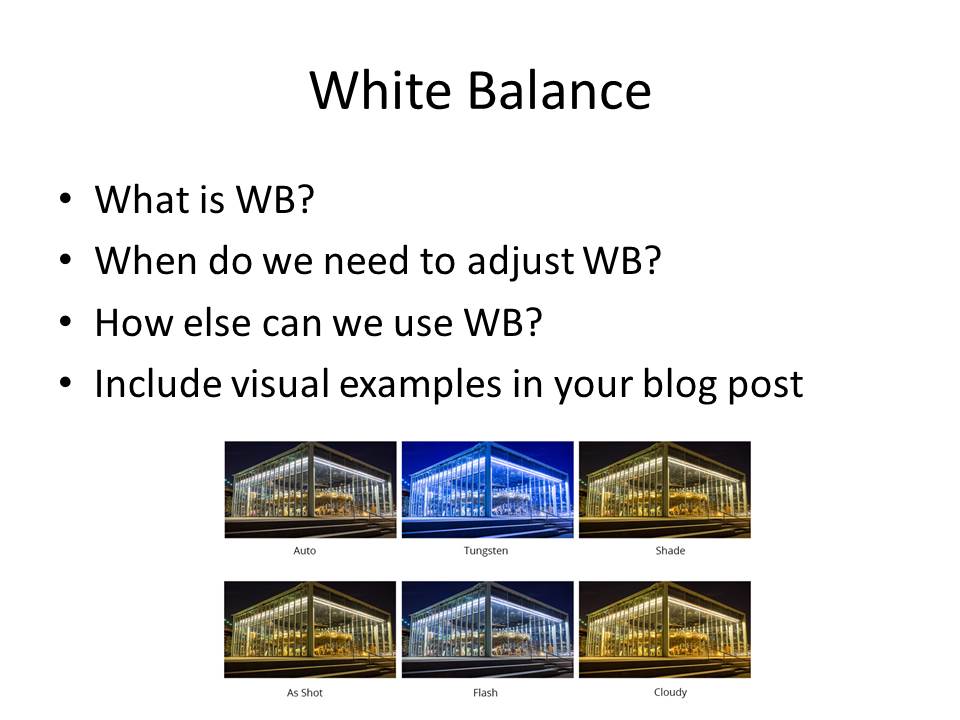
White Balance:shoot

For this shoot I  wanted to develop how the lighting differentiates due to the setting on a camera and changing the expose due to the light itself . So in turn changes the colour of tone between all the images.With my images I wanted to capture a light reflection and shadow coming in from a skylight, this form a large contrasting of shades as well as a reflection creating an effective piece.It also emphasis the amount of light and how each segment of light is reflected within each white balance setting .White balance  is the process of removing unrealistic color casts, so that objects which appear white in person are rendered white in your photo. Efficient  cameras use white balance  to take into account the “colour temperature” of a light source, which refers to the relative warmth or coolness of white light, such as seen below.

Secondly I then transported my images and edited them into a contact sheet in order to develop the more visual appealing layout also displaying the image effectively. Furthermore I save this as a Jpeg and made it into the best quality and displayed this work in the best manner suited.Lastly below you can clearly see the ways in witch to tell what setting to get the best photo from your lighting, wether its artificial or natural.


Independent Study (+ homework) Sept – Nov 2017

You are expected to take responsibility for your own learning, progress and success during A Level Photography…

  • minimum 2 hours per week
  • complete any incomplete class tasks
  • contribute your own photo-assignments + research
  • seek out opportunities to extend your learning / skill level
  • if you are absent you must check the blog daily / check emails for instructions, guidance and advice and complete in accordance with deadlines for your teaching group (these may change depending on timetable).

Task 1 (Week 1, 2, 3)

Blog posts / Sections to complete  Actions to take Assessment Complete by:
Homework Assignment 1: Take 150-250 photos that explore shape, pattern, line, repetition, symmetry, shadow, tone, curves, angles, edges Make planning  sheet

Photo Assignment

AO3 Lesson 1

Week 3

Artists references: Research the work of at least two formalist photographers eg Rodchenko / Brett Weston / Paul  Strand / Peter Keetman / Jan Groover AO1
Image Analysis: Choose 2 key images from each artist and analyse in details using the model of form-meaning-judgement-context. AO1

Task 2 Due in Lesson 1 | Week 4

Blog posts / Sections to complete Actions to take Assessment Complete by:
Homework  Assignment 2: Take 100 – 200 photos of types of things eg objects, buildings, people Make planning  sheet

Photo Assignment

AO3 Lesson 1

Week 4

Artists references: Research the work of at least two TYPOLOGIES artists eg Bechers /Sander AO1
Image Analysis: Choose 2 key images from each artist and analyse in details using the model of form-meaning-judgement-context. AO1

Task 3 Due in Lesson 1 Week 5

Homework Assignment 1: Produce 100-200 images that show a response to abstract art and photography Make planning  sheet

Photo Assignment

AO3 Lesson 1

Week 5

Experimentation : Photo safari grid, overlays, tracing paper AO2
Artist Reference : Ernst Haas and Maholy Nagy AO1
Image Analysis : Rule of Thirds and depth of field AO1

Task 4 Due in Lesson 1 Week 5

Blog posts / sections to complete Actions to take Assessment Complete by:
Homework Assignment : Take 100-200 photos of different textures and surfaces eg rust, mould, rough , smooth , contrasting surfaces Make planning  sheet

Photo Assignment

AO3 Lesson 1

Week 6

Experimentation : juxtaposing textures and surfaces AO2
Artist Reference and Image Analysis :

Frank Hallam-Day / Aaron Siskind / Keld Helmer Petersen

AO1

Task 5 Due in Lesson 1 Week 6

Blog posts / Sections to complete Actions to take Assessment Complete by:
Homework Assignment; Produce 100-200 images that explore a colour, contrasting colours or colour harmonies Make planning  sheet

Photo Assignment

AO3 Lesson 1

Week 7

Experimentation; cut, tear and shape coloured card (flat and 3-d) to photograph AO2
Artist References : Franco Fontana / Tamara Lorenz AO1

Practical Skills || Formal Analysis

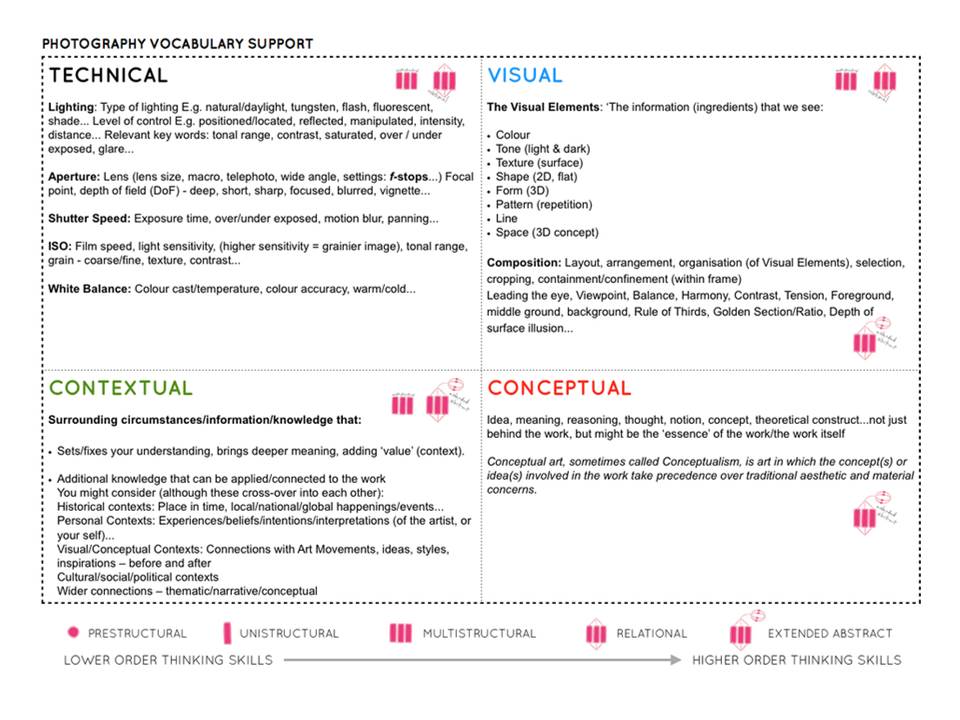
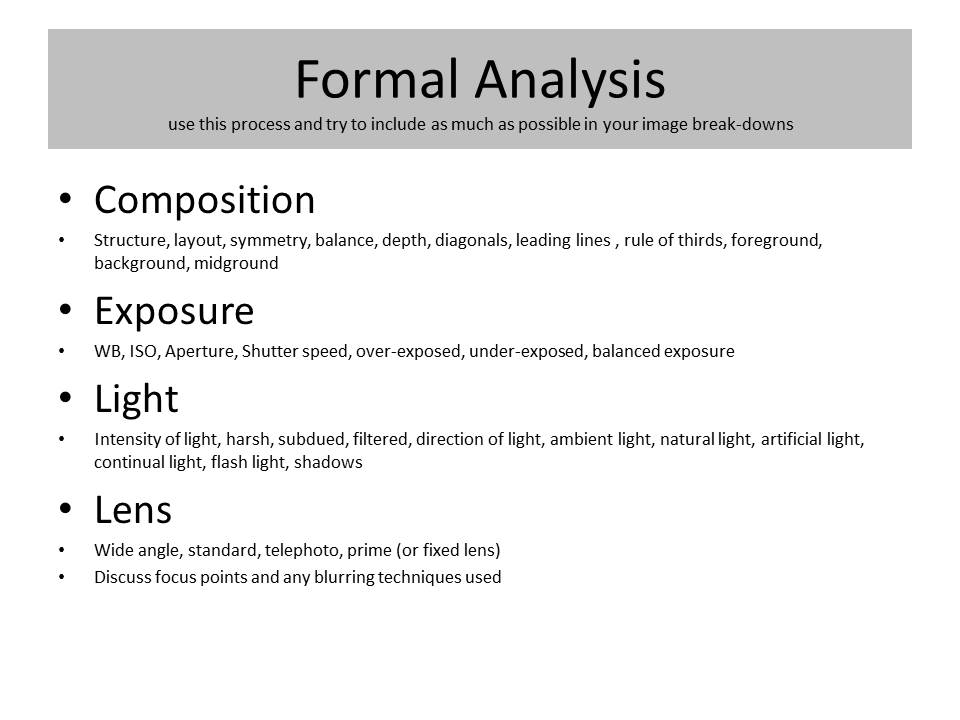
Use C.E.L.L. to help you describe and analyse images. Be prepared to discuss…

Composition : layout, structure, depth, rule of thirds, balance, symmetry, leading lines

Exposure ; over exposed, under exposed, balanced exposure

Light : Natural, artificial, harsh, soft, overhead, side etc

Lens : wide angle, telephoto, standard, macro, fish eye, focal length, focal point, depth of field, foreground, midground, background etc

Use this link to explore camera skills…

Camera Skills

And create a set of blog posts that display your creative results and understanding of…

  • camera handling skills as you learn them / explore them
  • formal analysis of 1 x key image per photo shoot
  • evaluative and reflective skills
  • the role of contact sheets


Rule Of Thirds

What Is The Rule Of Thirds?

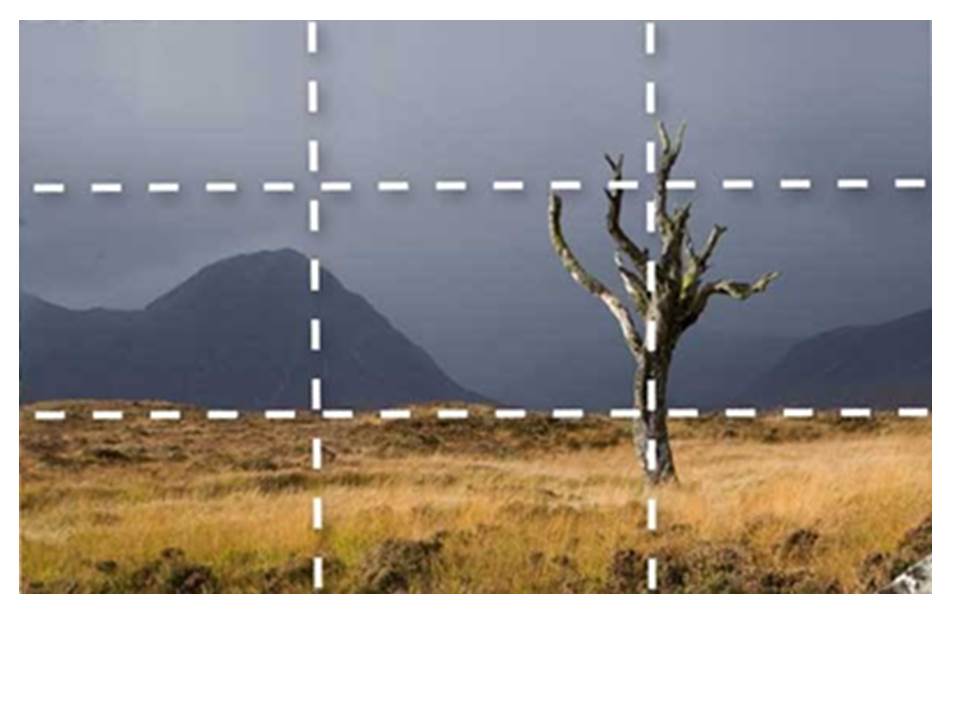
The rule of thirds is applied by aligning a subject with the guide lines and their intersection points, placing the horizon on the top or bottom line, or allowing linear features in the image to flow from section to section. The rule of thirds is used to create a visually pleasing image which is easier for the human eye to view and understand. The rule of thirds is the basic method used to help the compositions of photos.

Using The Rule Of Thirds

The rule of thirds was written by John Thomas Smith,this was written back in 1797 in order to find the perfect way in how to capture rural scenery.

The rule of thirds is applied by aligning a subject with the guide lines and their intersection points, placing the horizon on the top or bottom line, or allowing linear features in the image to flow from section to another. It can be used by using a visual of tow lines formatted at each angle on the screen or possibly within dots for slight dissidence as to where to place the main subject of the image.

Image result for rule of thirds

This image clearly has followed the rule of thirds. The horizon sits equally along the bottom horizontal line and the main subject of the cyclist is near enough on the top right cross point as well as being set on the vertical right hand side line. Furthermore, this photo has a large depth of field and in the background we can see a mountain peak is subjected to the bottom left cross section when following the rule of thirds.