
Watch the documentary on ‘Fixing the Shadows’ from BBC Genius of Photography, Episode 1.
To embed your understanding of the origins of photography and its beginnings you’ll need to produce a blog post / word / powerpoint presentation which outlines the major developments in its practice. Some will have been covered in the documentary but you may also need to research and discover further information.
Your presentation must contain information about the following and keep it in its chronological order: (Click on each of the bullet points to learn more).
Each must contain dates, text and images relevant to each bullet point above. In total aim for about 1,000 words.
Complete the presentation and publish on your blog by Friday 20th September
In addition, research at least one photographer from the list at the bottom of this blog post
Further reading to support your blog post….
Camera Obscure
Questions to consider in your research:
- What is Camera Obscura?
- Why does this make it hard to dictate the origins of photography?
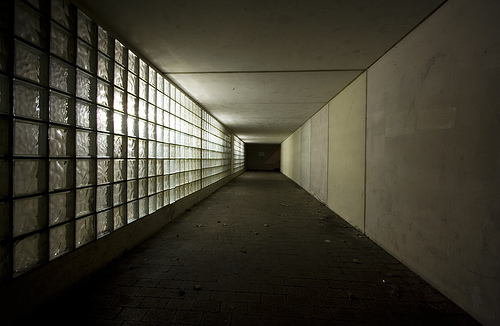
A camera obscura is the natural phenomenon in which the rays of light passing through a small hole into a dark space form an image where they strike a surface, resulting in an inverted and reversed projection of the view outside.

Because this is a natural phenomenon, it’s hard to pinpoint the exact origins of photography….
Watch this video of a camera obscura in a truck
Nicephore Niepce
Questions to consider in your research:
- Who is Nicephore Niepce in the world of photography?
- Why wasn’t he always considered the first photographer?
Nicephore NIepce was the first person who found a way to use the Camera Obscura and make the image permanent…
Original Image

Enhanced version:

It wasn’t always considered the first photograph….
Henry Fox Talbot
Questions to consider in your research:
- What is Photogenic Drawing?
- How did Talbot’s Mousetraps work?
The invention of photography, was not synonymous with the invention of the camera. Cameraless images were an important part of the story. William Henry Fox Talbot patented his Photogenic Drawing process…

Using a sheet of fine writing paper, coated with salt and brushed with a solution of silver nitrate, Talbot found that the paper would darkened in the sun. Talbot used this discovery to make precise tracings of botanical specimens: he set a pressed leaf or plant on a piece of sensitized paper, covered it with a sheet of glass, and set it in the sun. Wherever the light struck, the paper darkened, but wherever the plant blocked the light, it remained white. He called his new discovery “the art of photogenic drawing.”
As his chemistry improved, Talbot returned to the idea of photographic images made in a camera. During the “brilliant summer of 1835,” he took full advantage of the unusually abundant sunshine and placed pieces of sensitized photogenic drawing paper in miniature cameras— “mouse traps,” his wife called them—set around the grounds to record the silhouette of Lacock Abbey’s animated roofline and trees.

The mousetraps are sturdy little wooden boxes with a brass tube housing a lens at one end, and a sliding wooden panel at the other. Into the wooden panel at the back Talbot would stick a piece of normal writing paper that he had made chemically sensitive to light.

Once the paper was inserted, the camera would be placed in front of the subject being photographed and left for several hours to expose. After that, the paper inside would be carefully removed and chemically treated to bring out and then stabilise the latent negative image. If the experiment reached this point successfully, the negative was used to create positive prints by sensitising a further sheet of paper, laying the negative on top of it in a frame, and exposing it in the sun for several hours. The resulting print would then need to be fixed to stop the image from fading. Getting the right balance of chemicals and treatments for this stage of the process was one of the most vexed areas of research for the duration of early photographic experimentation.

In the month of August 1835, William Henry Fox Talbot produced the first photographic negative to have survived to this day. The subject is a window. Despite the clear connection, it is an entirely different image compared to those of his colleagues Niépce and Daguerre. Those are photographs taken from a window, while this is the photograph of a window. While the window constitutes the most immediate metaphor to refer to photography, Talbot doesnʼt use it but more simply he photographs it. He thus takes a photograph of photography.
Daguerreotype
Questions to consider in your research:
- What is a daguerreotype?
- Why was the daguerreotype not as successful as Talbot’s system?
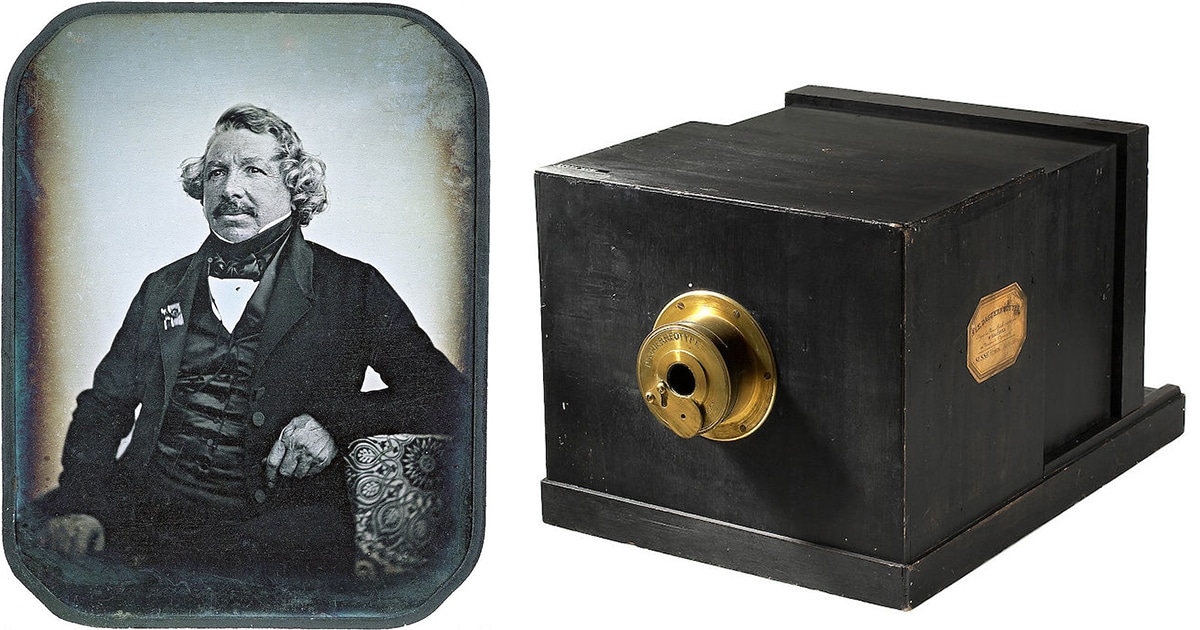
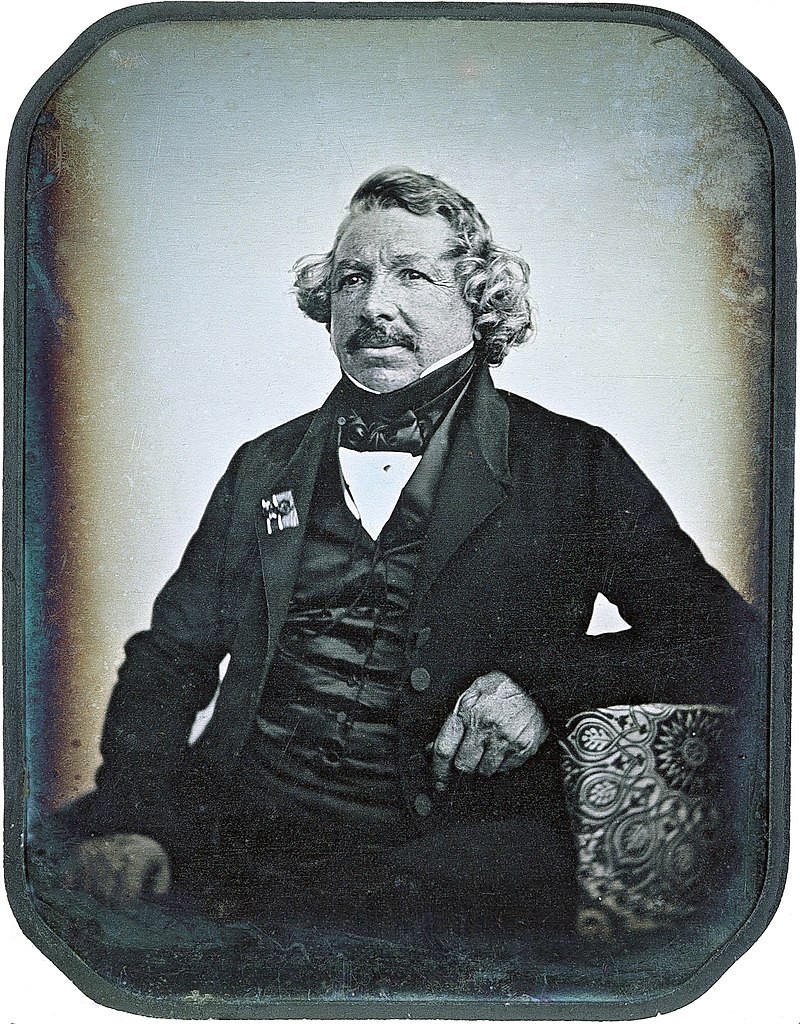
While Talbot quietly continued his experiments, he discovered that he had a rival. In January 1839, Louis Daguerre thrilled the prestigious Académie Française in Paris with news of his own method for fixing the shadows.
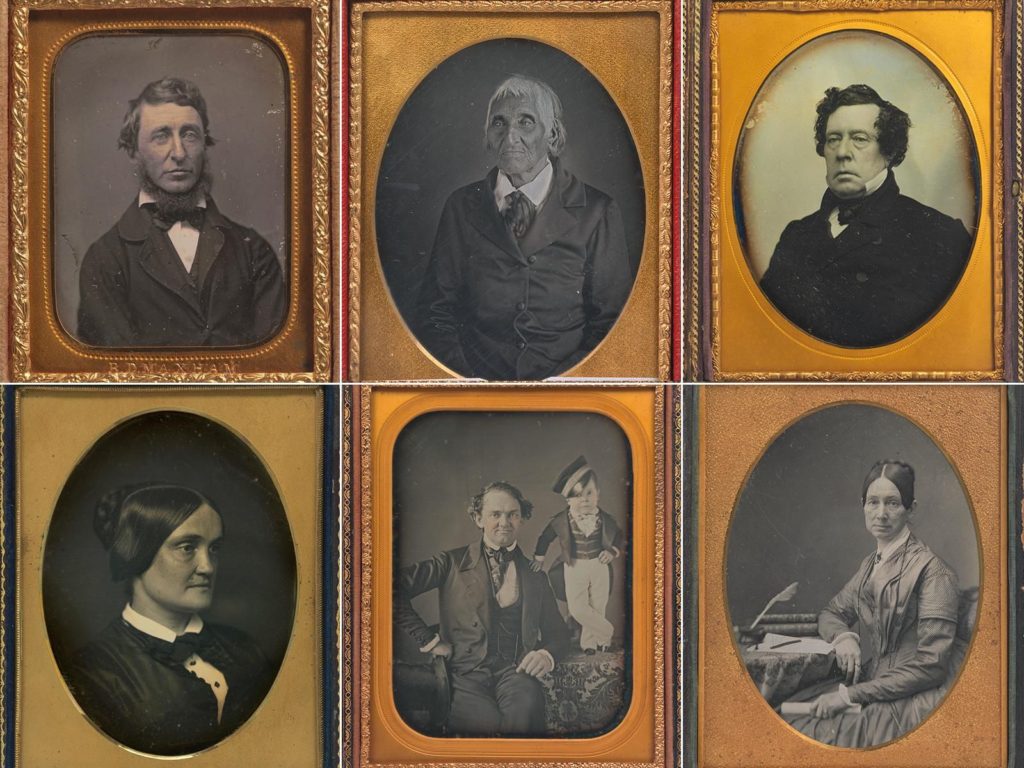
The daguerreotype was the first commercially successful photographic process (1839-1860) in the history of photography. Named after the inventor, Louis Jacques Mandé Daguerre, each daguerreotype is a unique image on a silvered copper plate.
In contrast to photographic paper, a daguerreotype is not flexible and is rather heavy. The daguerreotype is accurate, detailed and sharp. It has a mirror-like surface and is very fragile. Since the metal plate is extremely vulnerable, most daguerreotypes are presented in a special housing. Different types of housings existed: an open model, a folding case, jewelry…presented in a wooden ornate box dressed in red velvet. LD a theatre set designer
Unlike Talbot’s negative-positive process, Daguerre’s produced one-off images, like a Polaroid.
The big weakness of the dageurreotype was that you could not make multiple reproductions from the original image, and that’s where ultimately Talbot’s system came to dominate the dageurreotype.
Anna Atkins
Anna Atkins‘ British Algae: Cyanotype Impressions of 1843 is the first use of photographic images to illustrate a book. This method of tracing the shapes of objects with light on photosensitive surfaces has, from the very early days, been part of the repertoire of the photographer.
The cyanotype (from Ancient Greek: κυάνεος, kyáneos ‘dark blue’ and τύπος, týpos ‘mark, impression, type’) is a slow-reacting, economical photographic printing formulation sensitive to a limited near ultraviolet and blue light spectrum, the range 300 nm to 400 nm known as UVA radiation.[1] It produces a monochrome, blue coloured print on a range of supports, often used for art, and for reprography in the form of blueprints. For any purpose, the process usually uses two chemicals: ferric ammonium citrate or ferric ammonium oxalate, and potassium ferricyanide, and only water to develop and fix. Announced in 1842, it is still in use

Richard Maddox
Questions to consider in your research:
- What did Richard Maddox Invent?
- Why was his invention so pioneering for photography?
Richard Maddox was an English photographer and physician who invented lightweight gelatin negative plates for photography in 1871. Dry plate is a glass plate coated with a gelatin emulsion of silver bromide. It can be stored until exposure, and after exposure it can be brought back to a darkroom for development at leisure.
The advantages of the dry plate were obvious: photographers could use commercial dry plates off the shelf instead of having to prepare their own emulsions in a mobile darkroom. Negatives did not have to be developed immediately. Also, for the first time, cameras could be made small enough to be hand-held, or even concealed:
Muybridge’s famous Motion Studies
Questions to consider in your research:
- How did Muybridge work with Stanford?
- Why if Muybridge considered the precursor of cinema?
Eadweard Muybridge’s famous Motion Studies were the precursor of cinema, and the product of the wealth and the whim of the railroad baron Leland Stanford.
Born in the ancient market town of Kingston upon Thames, his restless ambitions brought him to San Francisco, a boom city, founded on gold rush wealth, and sustained by the new transcontinental railway, financed by Leland Stanford. In this thoroughly modern metropolis, Muybridge established a reputation with mammoth plate landscapes and spectacular panoramas, including an eye-boggling 360-degree view of his adopted city.
Stanford came to Muybridge because he had a rich man’s problem. A passionate racehorse breeder, he wanted to prove that a horse lifted all four feet off the ground when it trotted, something that had evaded human perception for millennia.
0n a specially whited-out section of a racetrack, Muybridge placed a row of 24 cameras with electric shutters, which would be triggered in sequence, four every second, as the horse passed by.By this means, Muybridge did more than freeze the moment. He took a scalpel to time itself.
(Solnit) Muybridge’s photographs were the first source of accurate information about the gait of a horse.It’s the beginning of this change where the camera allows human beings to see faster than our own eyes, to break down the world and to dissect motion. And it’s part of that kind of intrusion into the flow of time.
For Stanford, the project was always about horses, whereas Muybridge understood that this was potentially about everything he could find, and really create an encyclopaedia of zoological motion.

George Eastman
Questions to consider in your research:
- How did he make photography available to the masses?
- What company did he form?
Initially, Mr Eastman was working in a bank as a bank teller. He became interested in photography as he wanted to document a vacation he was planning.
But he became more interested in photography than going on vacation. He never did go. Eastman revolutionised photography by degrees…..
In 1879, London was the center of the photographic and business world. George Eastman went there to obtain a patent on his plate-coating machine. An American patent was granted the following year.
In April 1880, Eastman leased the third floor of a building on State Street in Rochester, and began to manufacture dry plates for sale.

Eastman built his business on four basic principles:
- a focus on the customer
- mass production at low cost
- worldwide distribution
- extensive advertising
As Eastman’s young company grew, it faced total collapse at least once when dry plates in the hands of dealers went bad. Eastman recalled them and replaced them with a good product. “Making good on those plates took our last dollar,” he said. “But what we had left was more important — reputation.”
“The idea gradually dawned on me,” he later said, “that what we were doing was not merely making dry plates, but that we were starting out to make photography an everyday affair.” Or as he described it more succinctly “to make the camera as convenient as the pencil.”
Eastman’s experiments were directed to the use of a lighter and more flexible support than glass. His first approach was to coat the photographic emulsion on paper and then load the paper in a roll holder. The holder was used in view cameras in place of the holders for glass plates. In 1883, he eventually announced something we now take for granted, a roll of film.

Kodak (Brownie)
The roll of film became the basis for the first Kodak camera, initially known as the “roll holder breast camera.” The term Kodak, coined for the occasion by Eastman himself, first appeared in December 1887.
With the KODAK Camera, Eastman put down the foundation for making photography available to everyone. The Brownie was a basic box camera with a single lens. It used a roll film, another innovation from Eastman Kodak. Users received the pre-loaded camera, took their photographs, and returned it to Kodak. Kodak would develop the film, print the photos, reload the camera with new film, and return it to the customer.

The dawn of colour photography
While people were amazed with the invention of photography, they didn’t understand how a process that could record all aspects of a scene with such exquisite detail could fail so dismally to record its colours. The search immediately began for a means of capturing accurately not only the form but also the colours of nature.
While scientists, photographers, businessmen and experimenters laboured, the public became impatient. Photographers, eager to give their customers what they wanted, soon took the matter, literally, into their own hands and began to add colour to their monochrome images. As the writer of A Guide to Painting Photographic Portraits noted in 1851:
When the photographer has succeeded in obtaining a good likeness, it passes into the artist’s hands, who, with skill and colour, give to it a life-like and natural appearance.

The three colour process
In 1861, a young Scottish physicist, James Clerk Maxwell, conducted an experiment to show that all colours can be made by an appropriate mixture of red, green and blue light.
Maxwell made three lantern slides of a tartan ribbon through red, green and blue filters. Using three separate magic lanterns—each equipped with a filter of the same colour the images had been made with—he then projected them onto a screen. When the three images were superimposed together on the screen, they combined to make a full-colour image which was a recognisable reproduction of the original.

Early Experiments:
While the fundamental theory may have been understood, a practical method of colour photography remained elusive.
In 1891 Gabriel Lippmann, a professor of physics at the Sorbonne, demonstrated a colour process which was based on the phenomenon of light interference—the interaction of light waves that produces the brilliant colours you see in soap bubbles. This process won Lippmann a Nobel Prize in 1908 and was marketed commercially for a short time around the turn of the 19th century.
Not long after Maxwell’s 1861 demonstration, a French physicist, Louis Ducos du Hauron, announced a method for creating colour photographs by combining coloured pigments instead of light. Three black-and-white negatives, taken through red, green and blue filters, were used to make three separately dyed images which combined to give a coloured photograph. This method forms the basis of today’s colour processes.
While this work was scientifically important, it was of limited practical value at first. Exposure times were long, and photographic materials sensitive to the whole range of the colour spectrum were not yet available.
The first properly usable and commercially successful screen process—the autochrome—was invented early in the 20th century by two French brothers, Auguste and Louis Lumière.
In 1904 they gave the first presentation of their process to the French Academy of Science, and by 1907 they had begun to produce autochrome plates commercially.


The First Digital Image:
Russell Kirsch was an American who worked a steady job at the National Bureau of Standards. in 1950, he and his colleagues developed the USA’s first operational stored-program computer, known as the Standards Eastern Automatic Computer, or SEAC.

This computer would be used for all sorts of applications. It was Russell Kirsch who first looked at the hulking machine – (which back then was considered to be a relatively slimline computer )– and had the thought, ‘Gee, y’know, we could probably load a picture into this thing.’
Kirsch and the team built their own drum scanner that would allow them to ‘trace variations of intensity over the surfaces of photographs’. With this, they were able to make the first digital scans. One of the first – possibly the very first – was an image of Russell Kirsch’s newborn son, Walden Kirsch.

Digital Photography
1969 – CCD Chips
The beating heart of a digital camera is its sensor. Fulfilling the same function as a frame of film, a sensor records the light that hits it, and sends it to the processor for the necessary translation that makes it a digital image.
At this point in the digital photography story, sensors start to enter the picture. In 1969, Willard Boyle and George Smith of Bell Labs developed something they called a charge-coupled device, which digital photographers with long memories might find more familiar if we refer to it by its more common name – a CCD. Essentially, it used a row of tiny metal-oxide-semiconductor (MOS) capacitors to store information as electrical charges (fulfilling the same function as the magnetic tape in the older cameras).
Though Boyle and Smith were mostly concerned with computing, subsequent inventors made the connection that if you were to pair this device with something photosensitive, you’ve got yourself a rudimentary camera sensor. In 1972, the first published digital colour photograph splashed on the front of Electronics magazine, taken by British-born engineer Dr Michael Tompsett.

Artist Research – Extend your work
In addition, research at least one Jersey photographer from the list below and choose one image that references some of the early photographic processes, such as: daguerreotype, calotype, salt paper prints, wet plate collodion, albumen prints, autochrome and colour transparencies as part of the origins and evolution of photography and include it in your essay.
- Henry Mullins (Photographer who worked in Jersey and using Daguerrotype)
- William Collie (one of the first to useFox Talbot’s calotype process in Jersey)
- Ernest Baudoux (worked in Jersey from 1869)
- Clarence P Ouless (became one of the most popular commercial photographers in the island in the late 1800s)
- Francis Foot –
- Charles Hugo
- Edwin Dale
Further helpful research:
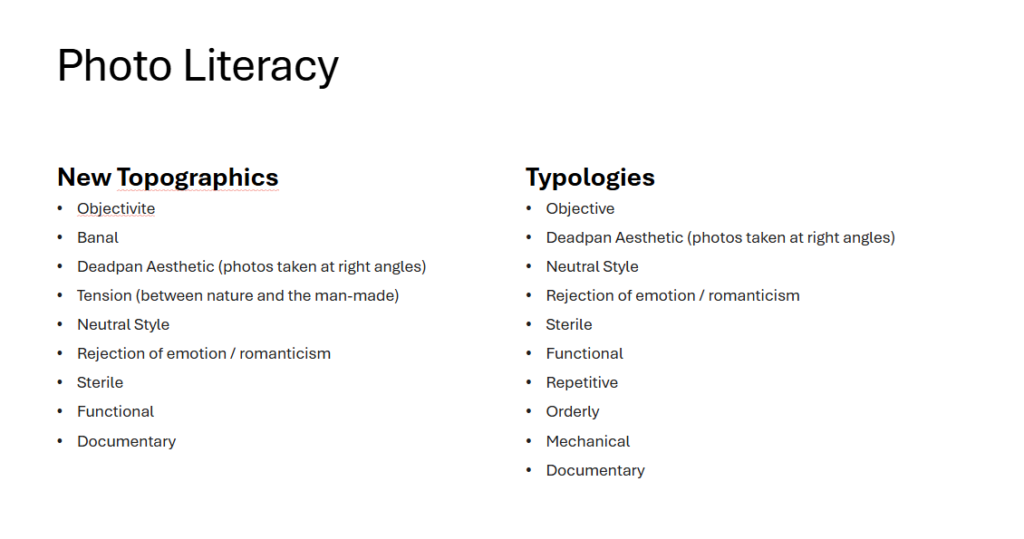
- Glossary-of-movements-genres
- Glossary-of-Key-Terms
- Archives in contemporary photography: Read text about the resurgence of archives in contemporary photography by theorist David Bate: archives-networks-and-narratives_low-res, make notes and reference it by incorporating quotes into your essay to widen different perspectives. Comment on quotes used to construct an argument that either support or disapprove your own point of view.
- Origins of Photography: Study this concept 2: Photography is the capturing of light; a camera is optional developed by PhotoPedagogy which includes a number of good examples of early photographic experiments and the camera obscura which preceded photography. It also touches on photography’s relationship with light and reality and delve into photographic theories, such as index and trace as a way of interpreting the meaning of photographs.
- ART PERIODS THROUGH TIME
Photography did not spring forth from nowhere: in the expanding capitalist culture of the late 18th and 19th centuries, some people were on the look-out for cheap mechanical means for producing images […] photography emerged experimentally from the conjuncture of three factors: i) concerns with amateur drawing and/or techniques for reproducing printed matter, ii) light-sensitive materials; iii) the use of the camera obscura
— Steve Edwards, Photography – A Very Short Introduction


