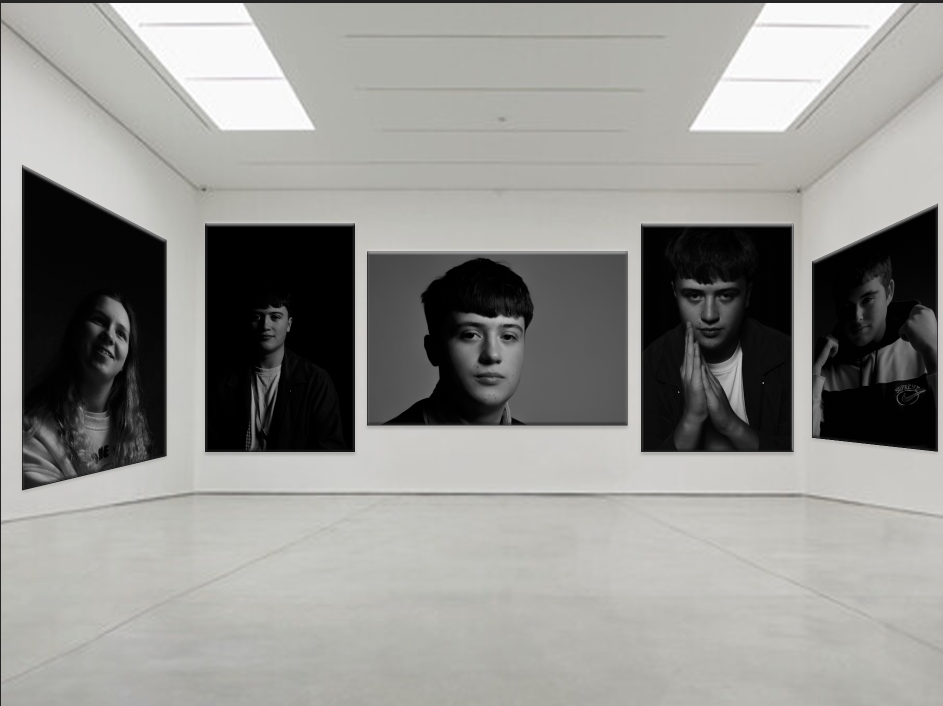
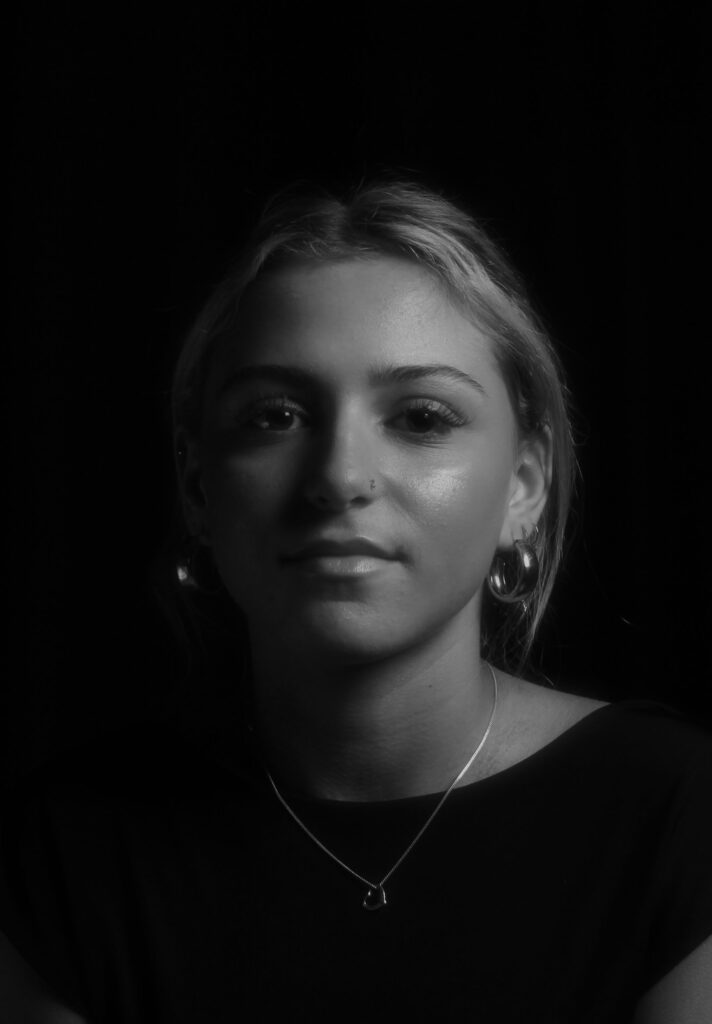
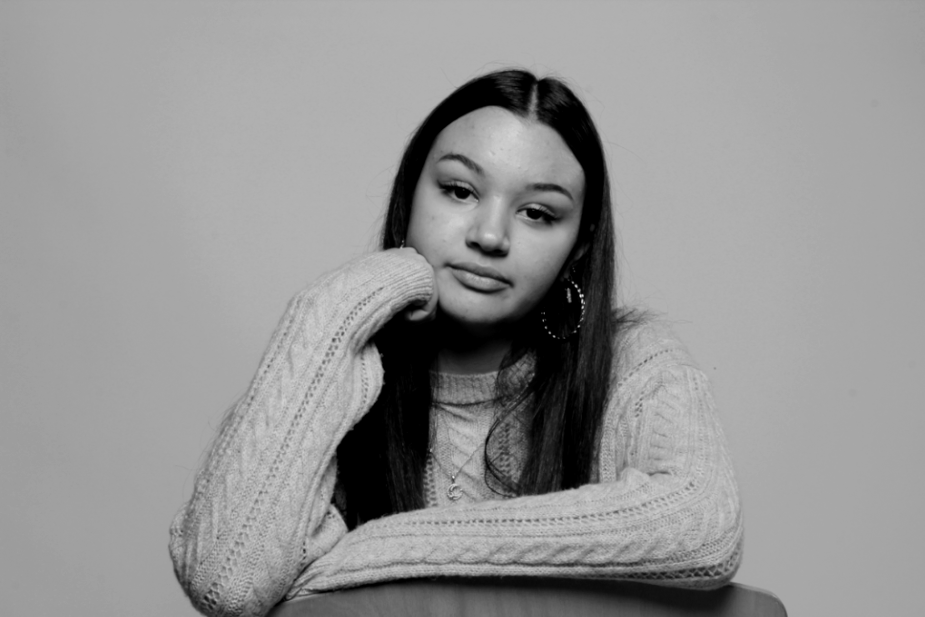
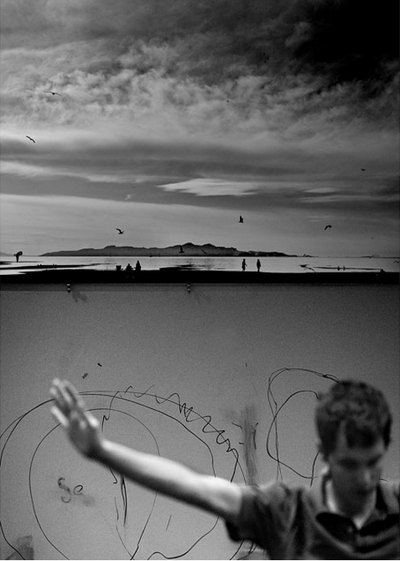
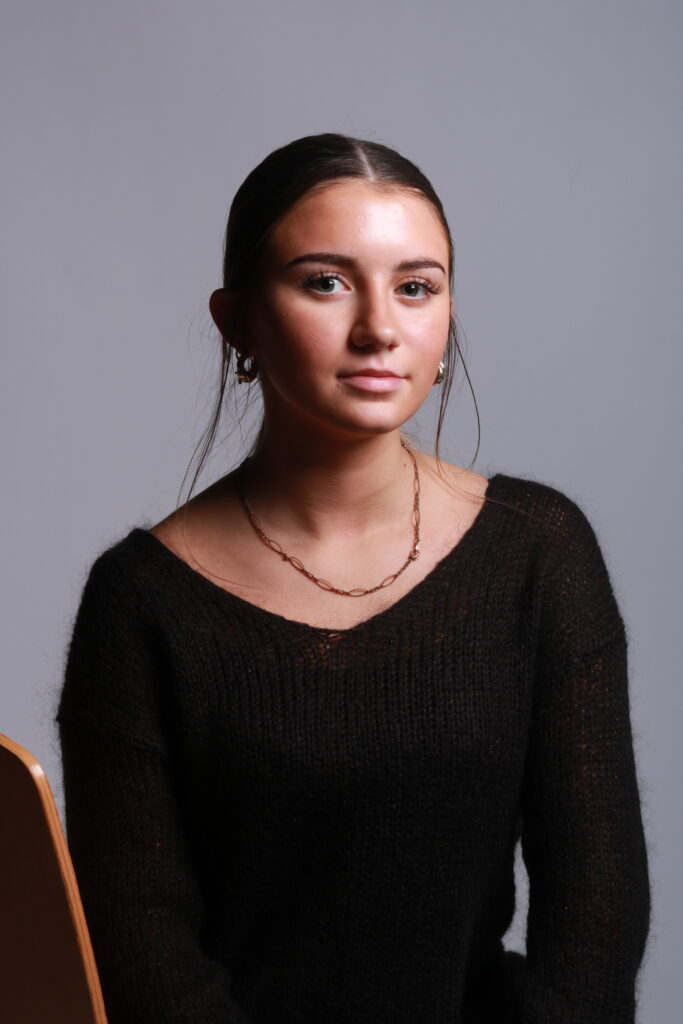
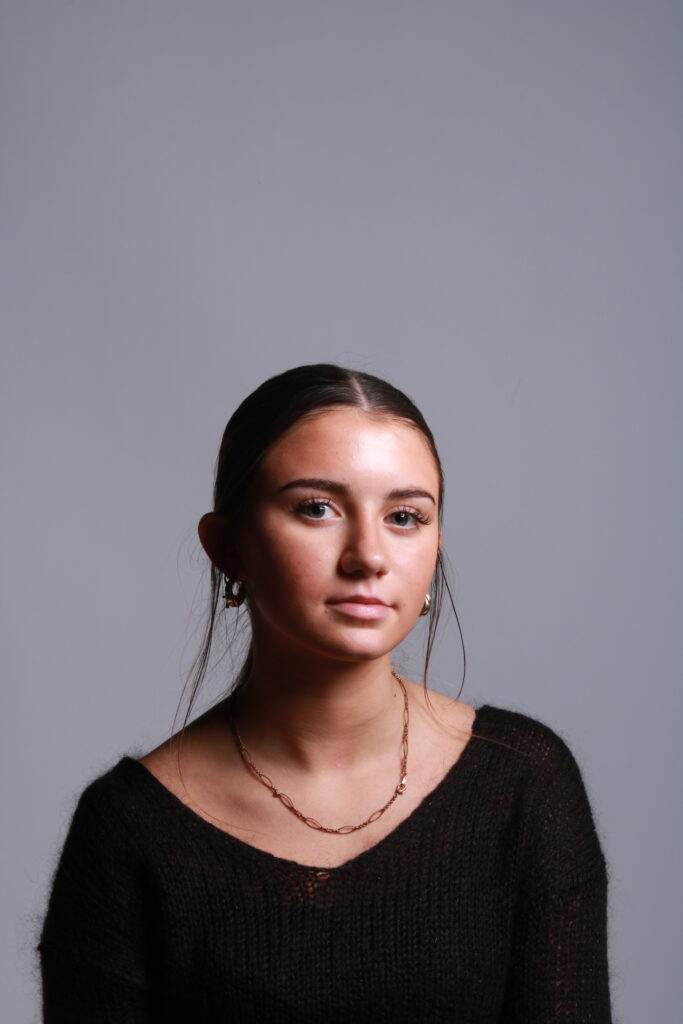
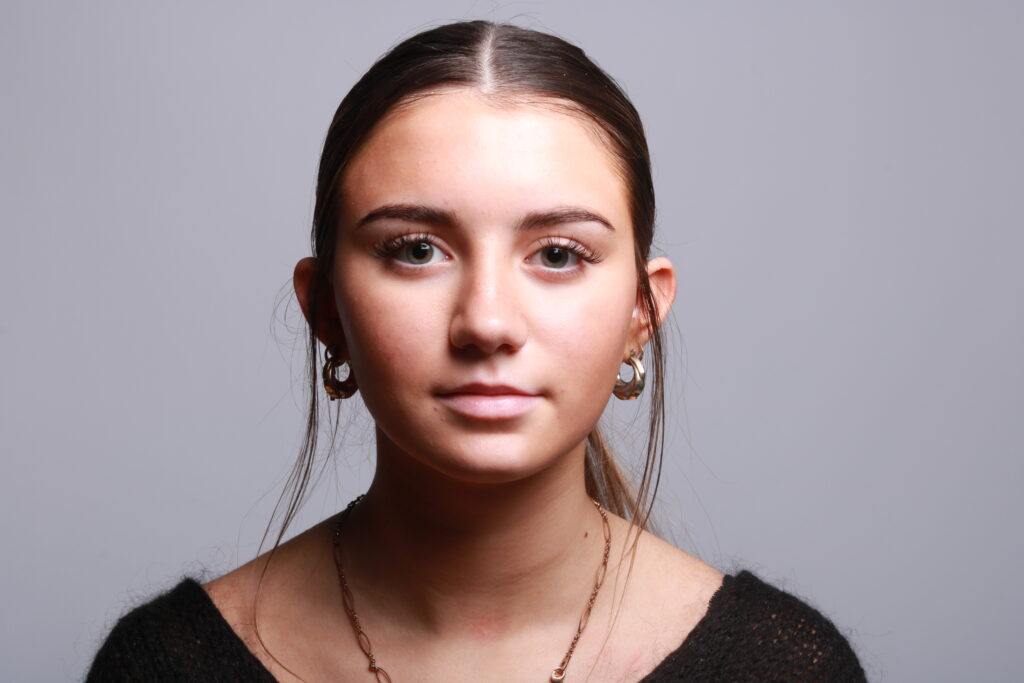
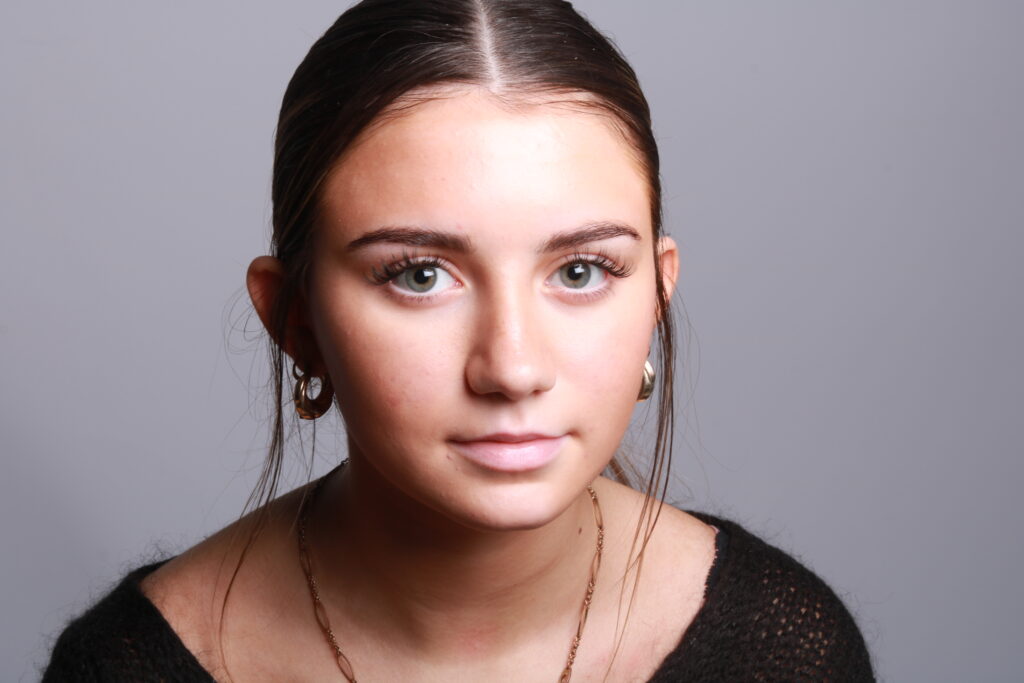
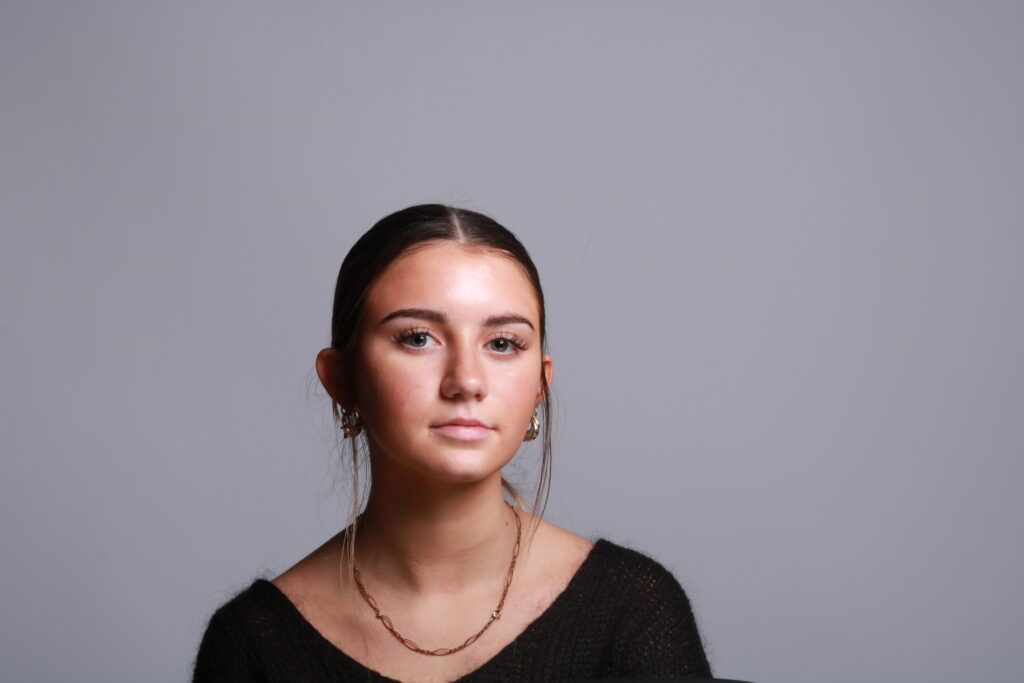
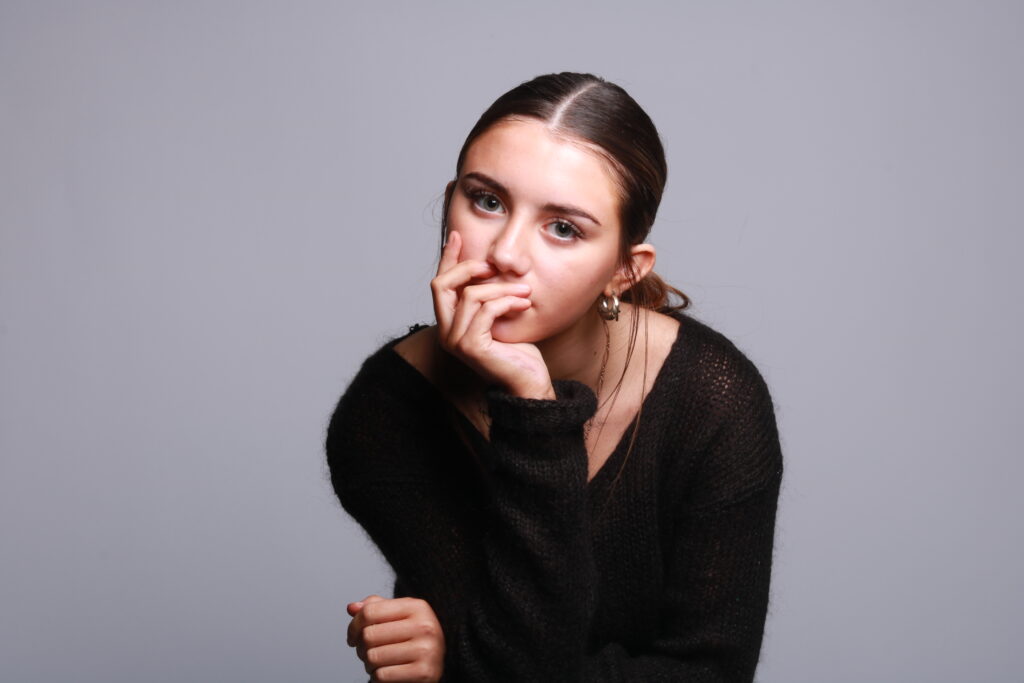
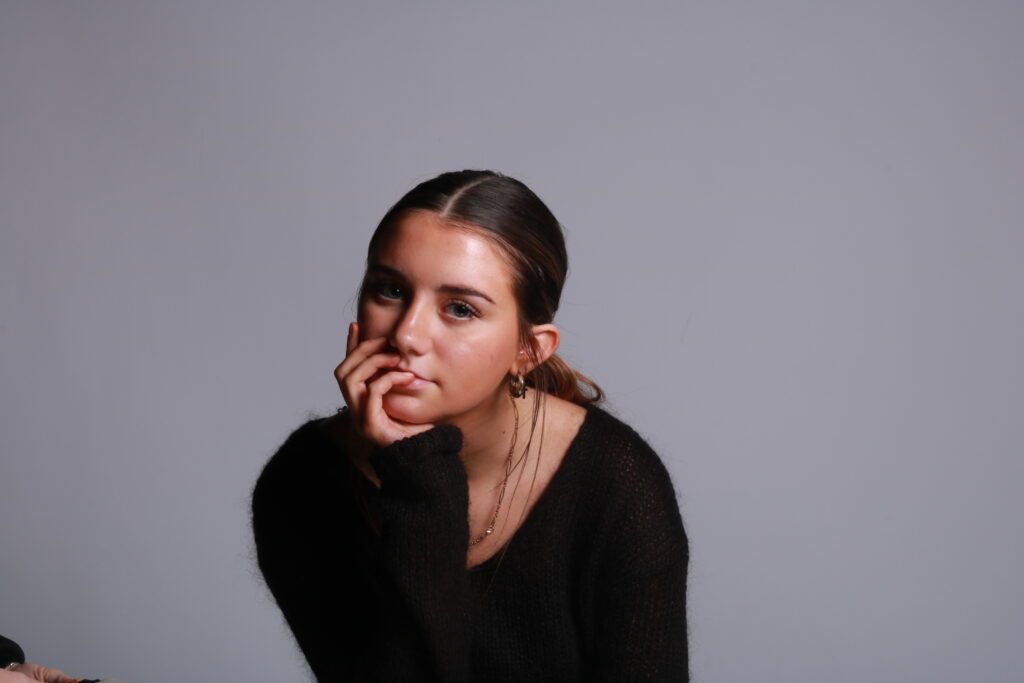
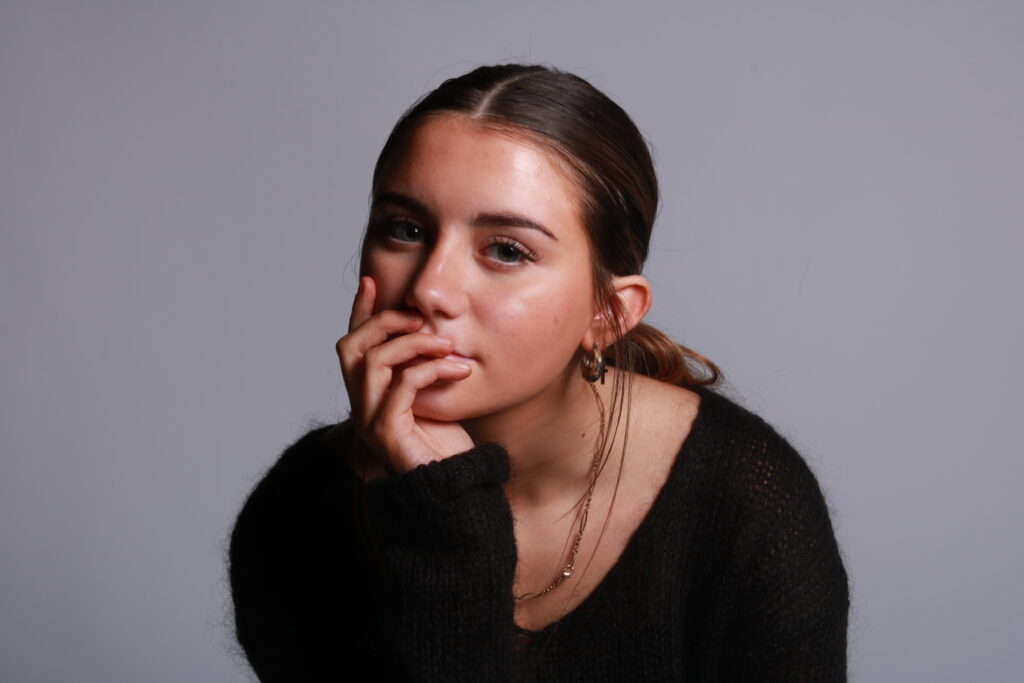
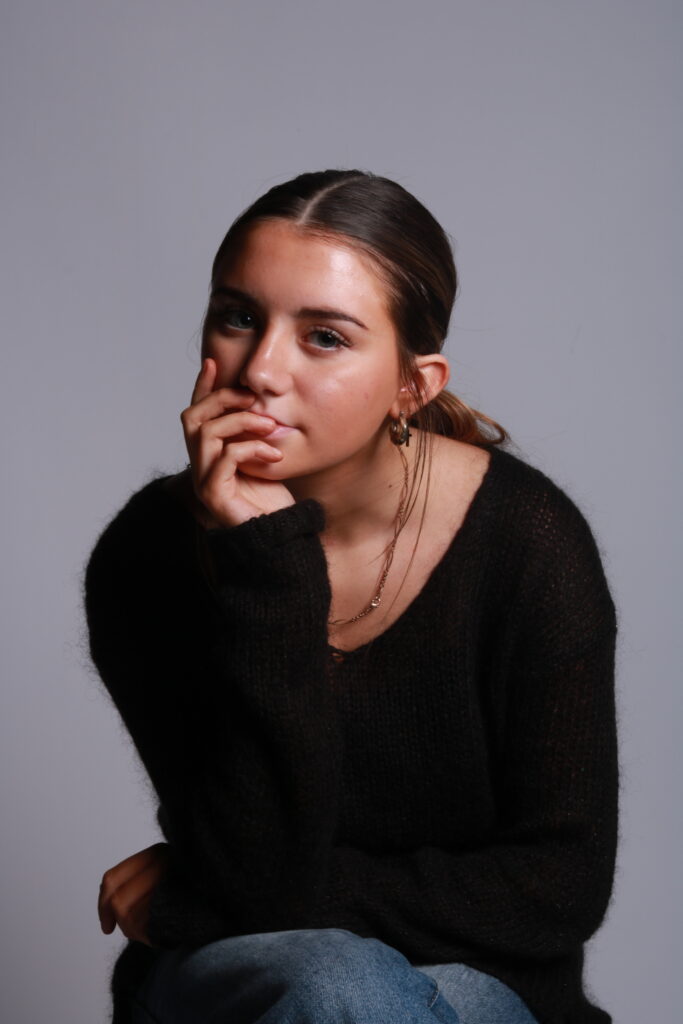
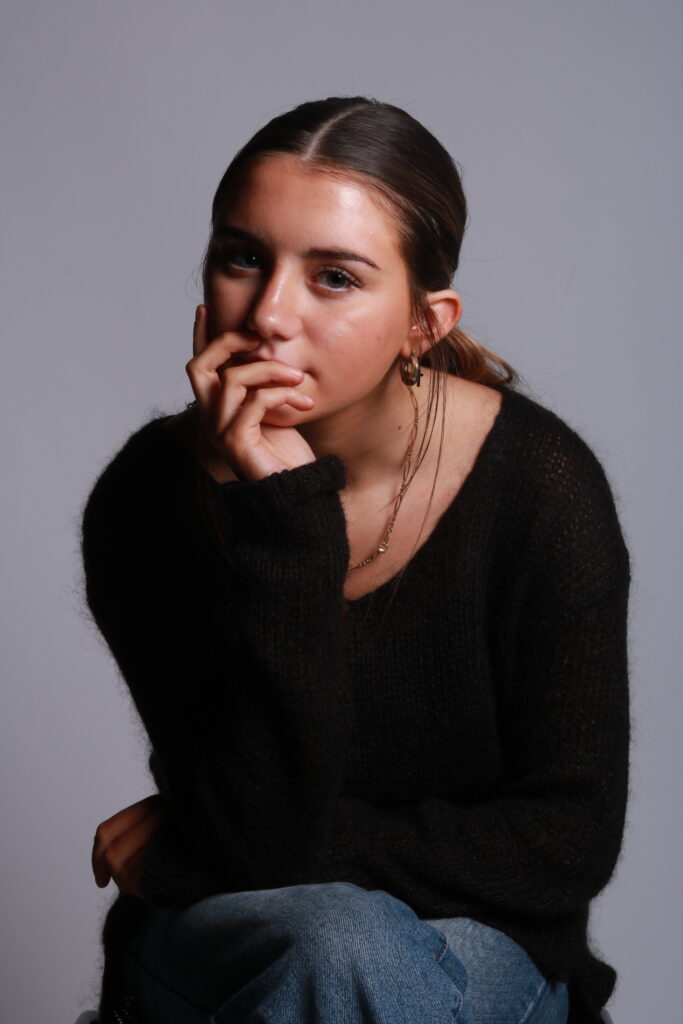
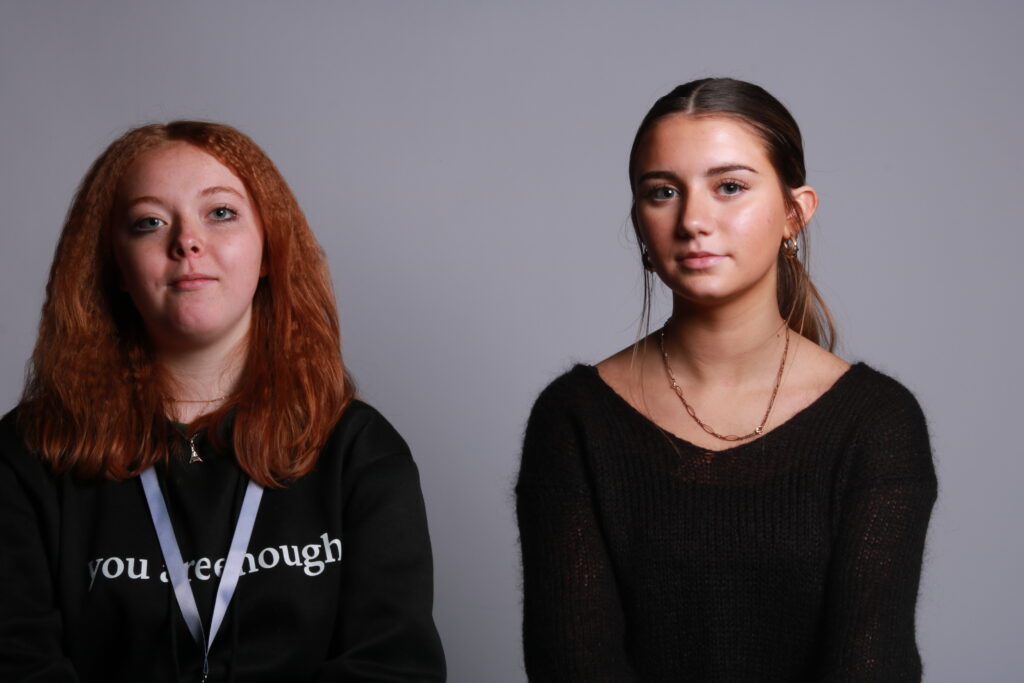
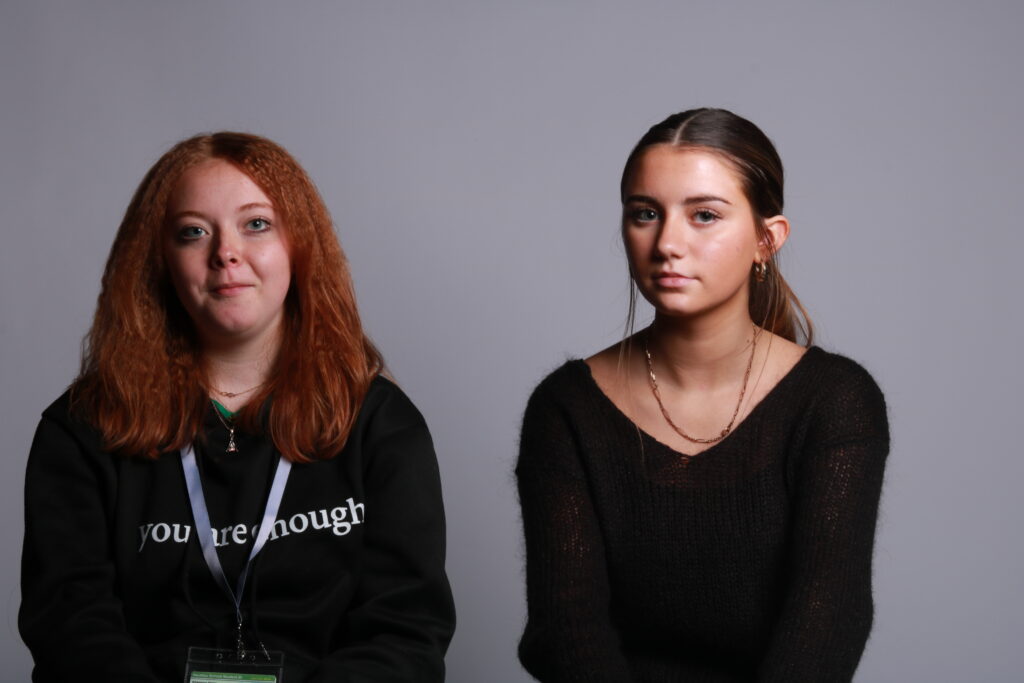
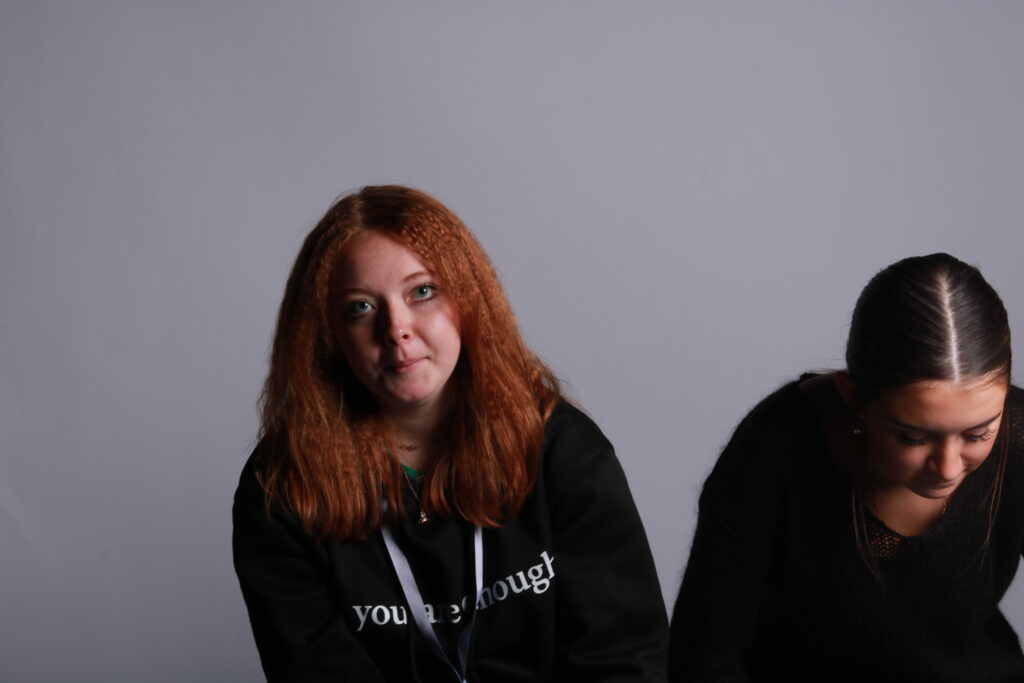
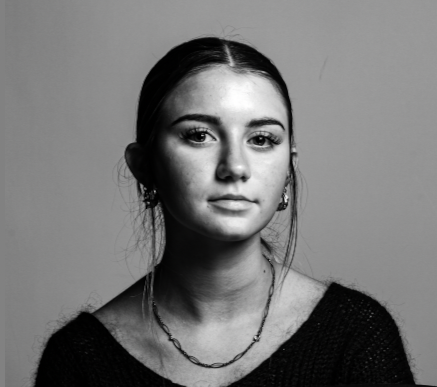
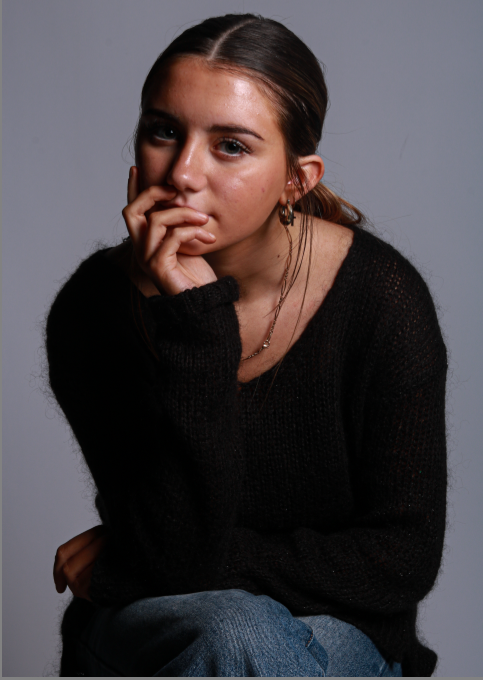
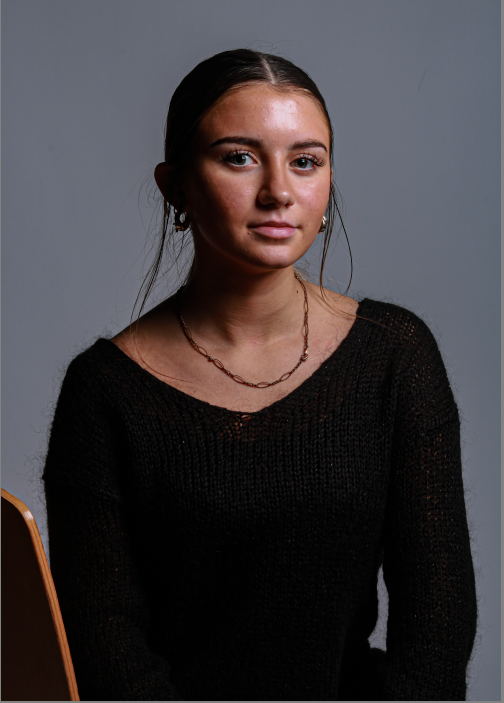
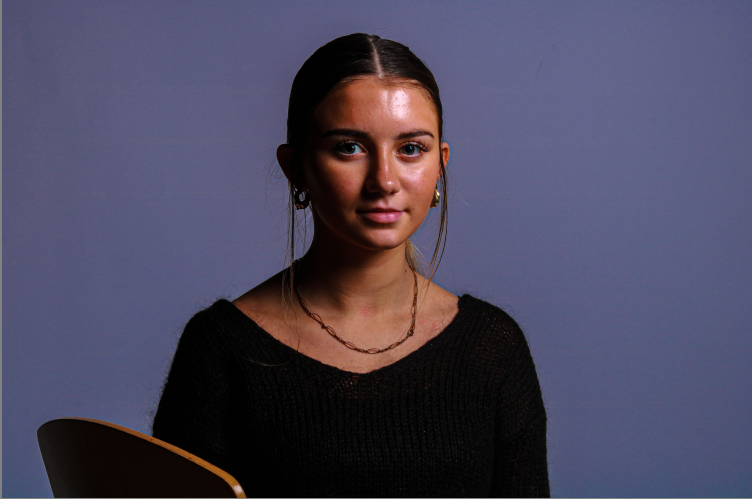
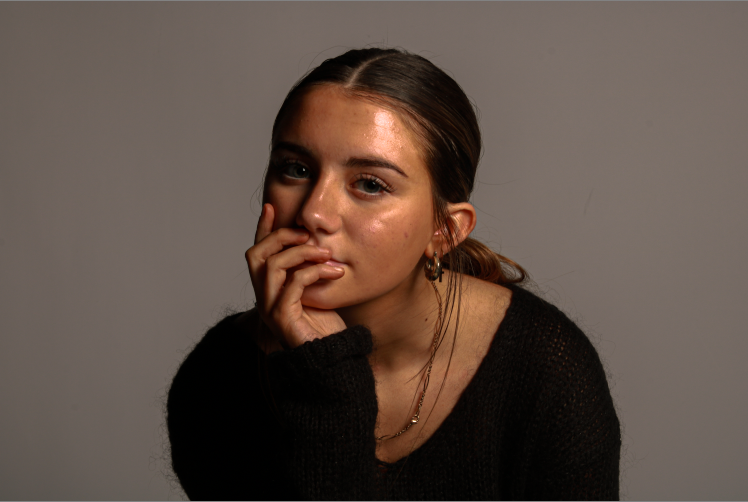
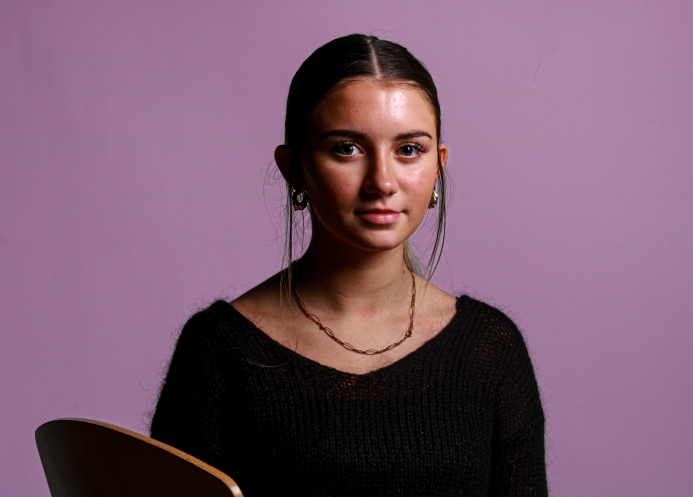
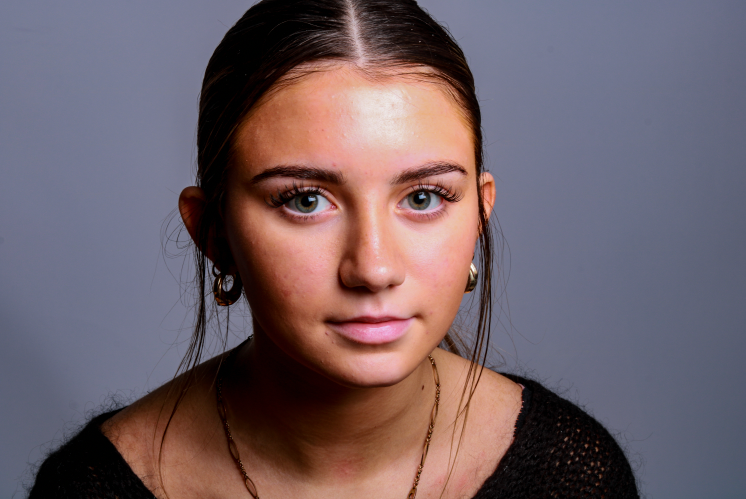
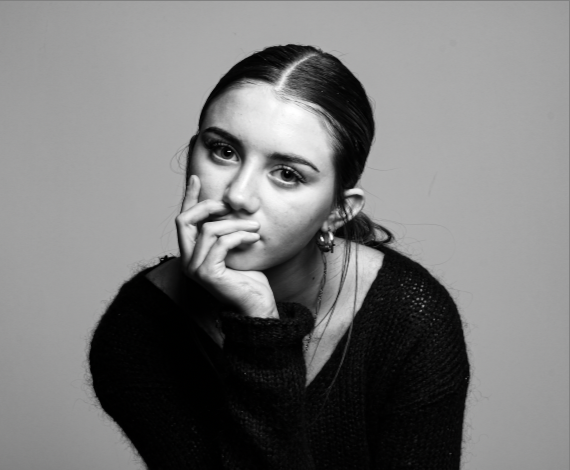
These are a few of my best and favourite edited portraits, I have presented them in a gallery form, and most are in black and white, all the ones that are presented are, because I saw it as inspiration. I also edited in colour as well and these were just the best ones in my opinion.
From this topic I have learnt a greater understanding about different lighting such as, butterfly, Rembrandt, and chiaroscuro. And even learnt more about my camera handling skills, and become more comfortable with it.
Critique
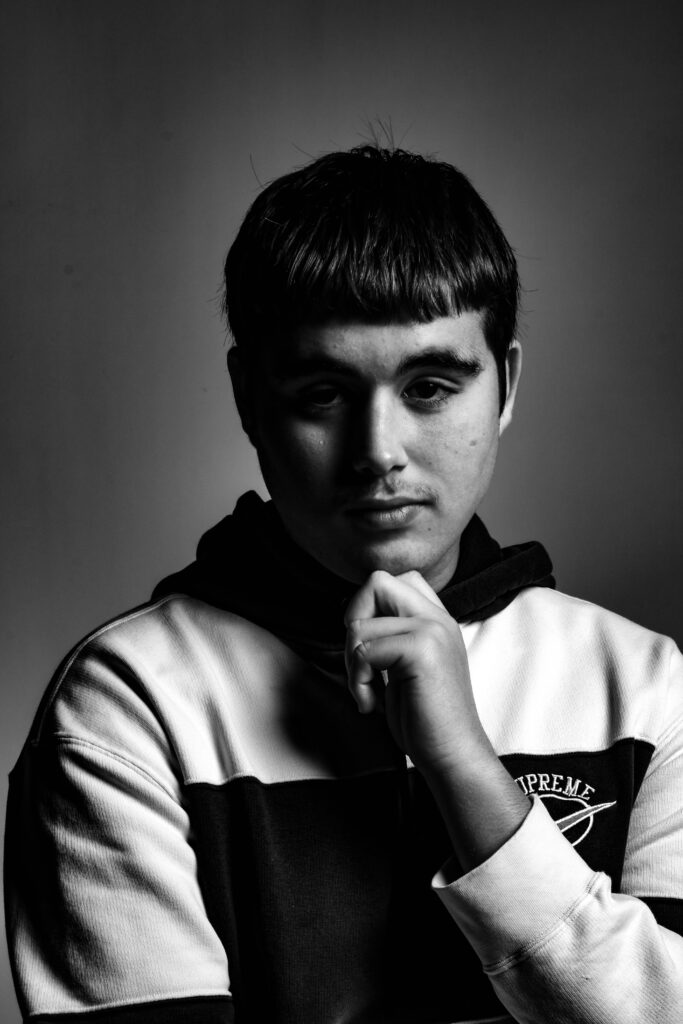
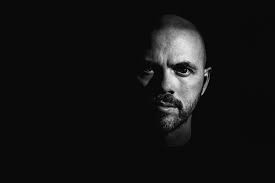
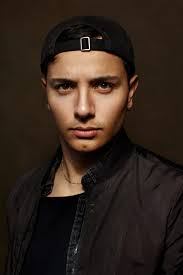
I like them all but there is room for improvement always. I think that the one in the middle of George isn’t clear enough that it is Rembrandt lighting, there is a large triangle on his cheek but it isn’t defined so if I was to retake the image I would bring the light closer to his face making the triangle smaller and clearer.
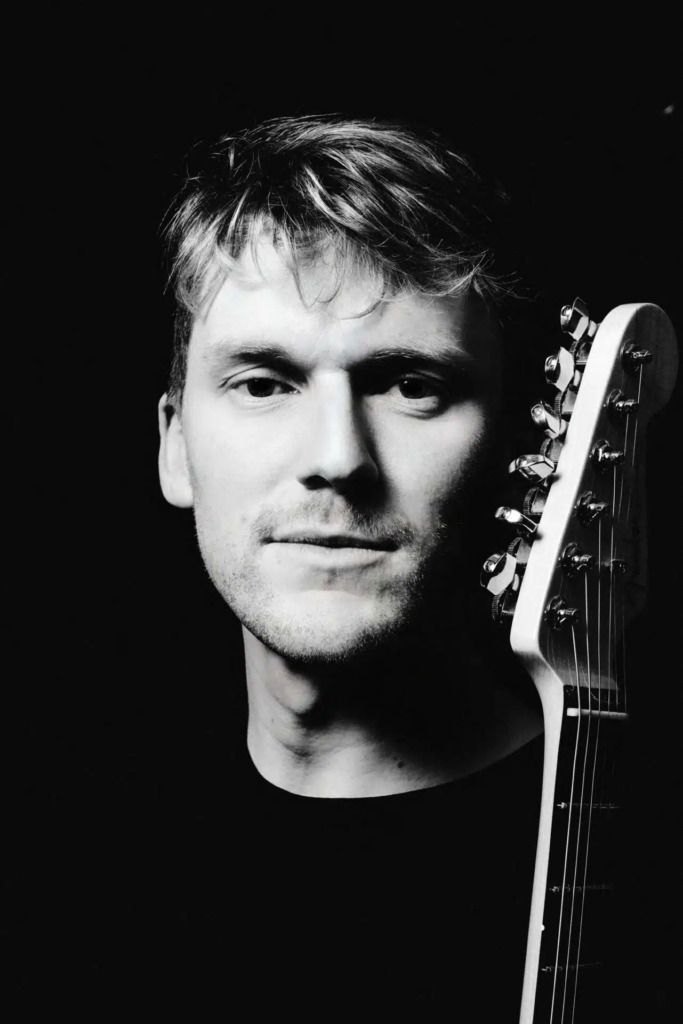
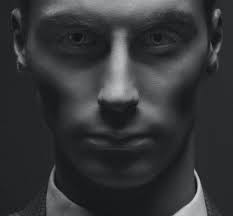
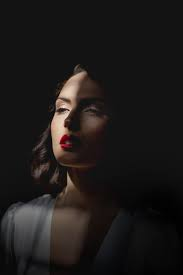
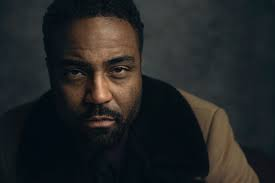
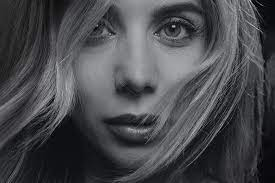
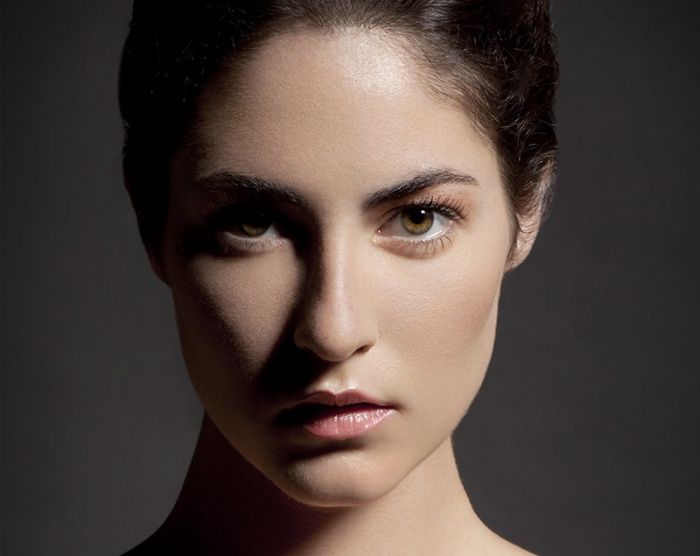
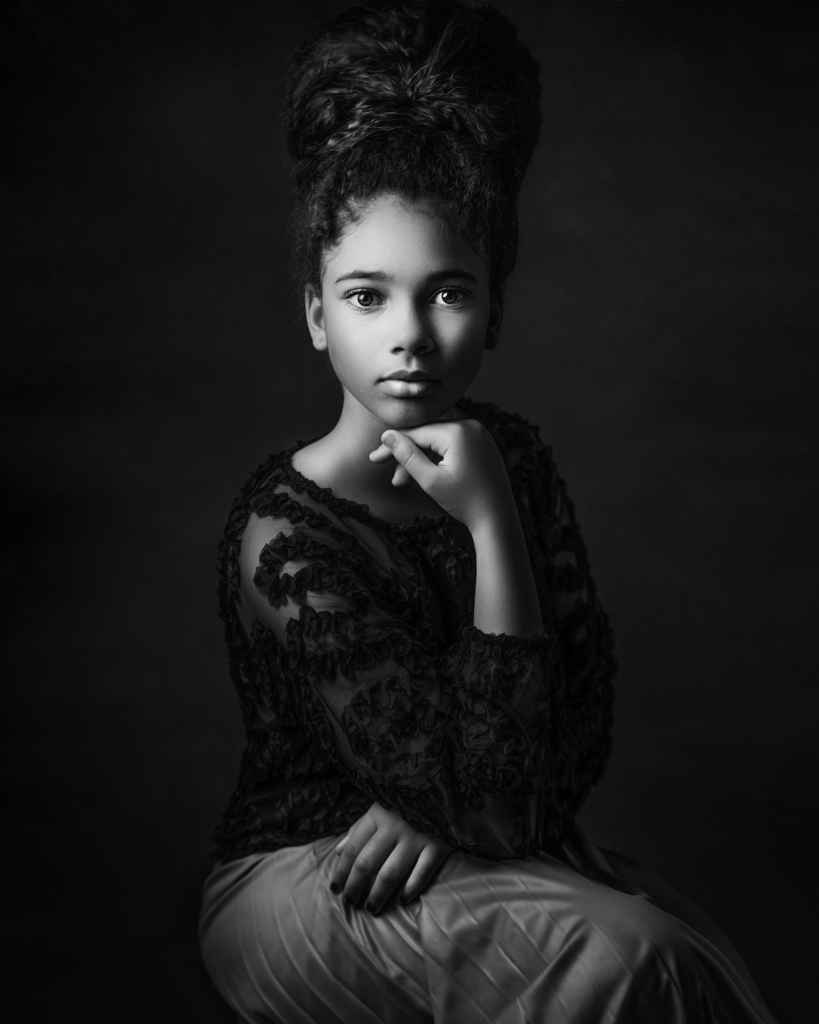
Rembrandt lighting is a style of lighting that adds dramatism and focus on the subject that uses an upside-down triangle underneath the eye of the subject.
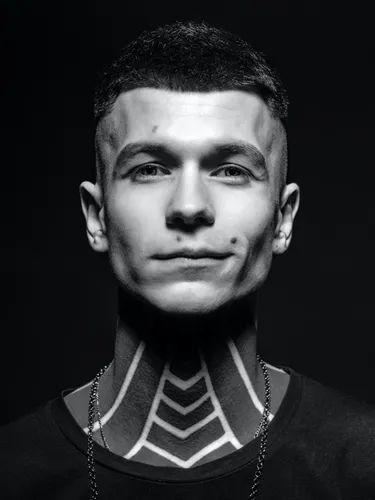
In the example above Oliver Doran used rembrandt lighting to isolate the subject and keep the attention on his face.
Rembrandt lighting is used to create shadows and contrast. It’s another method like grid lines or negative space to draw a viewers attention.
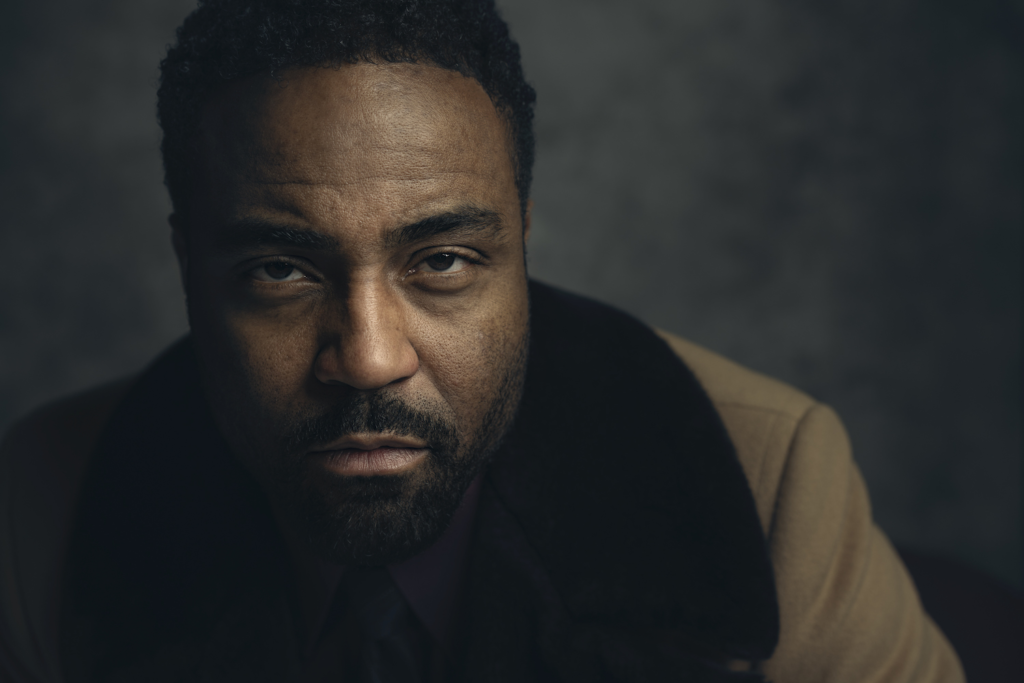
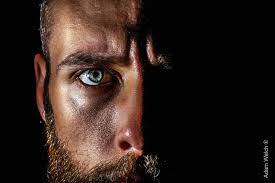
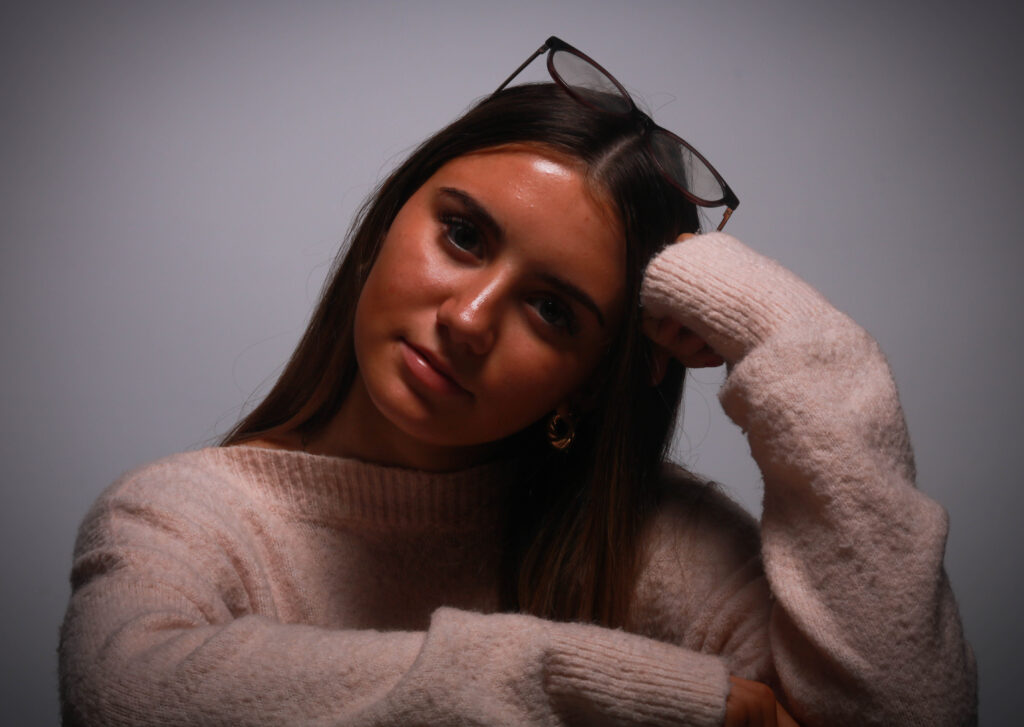
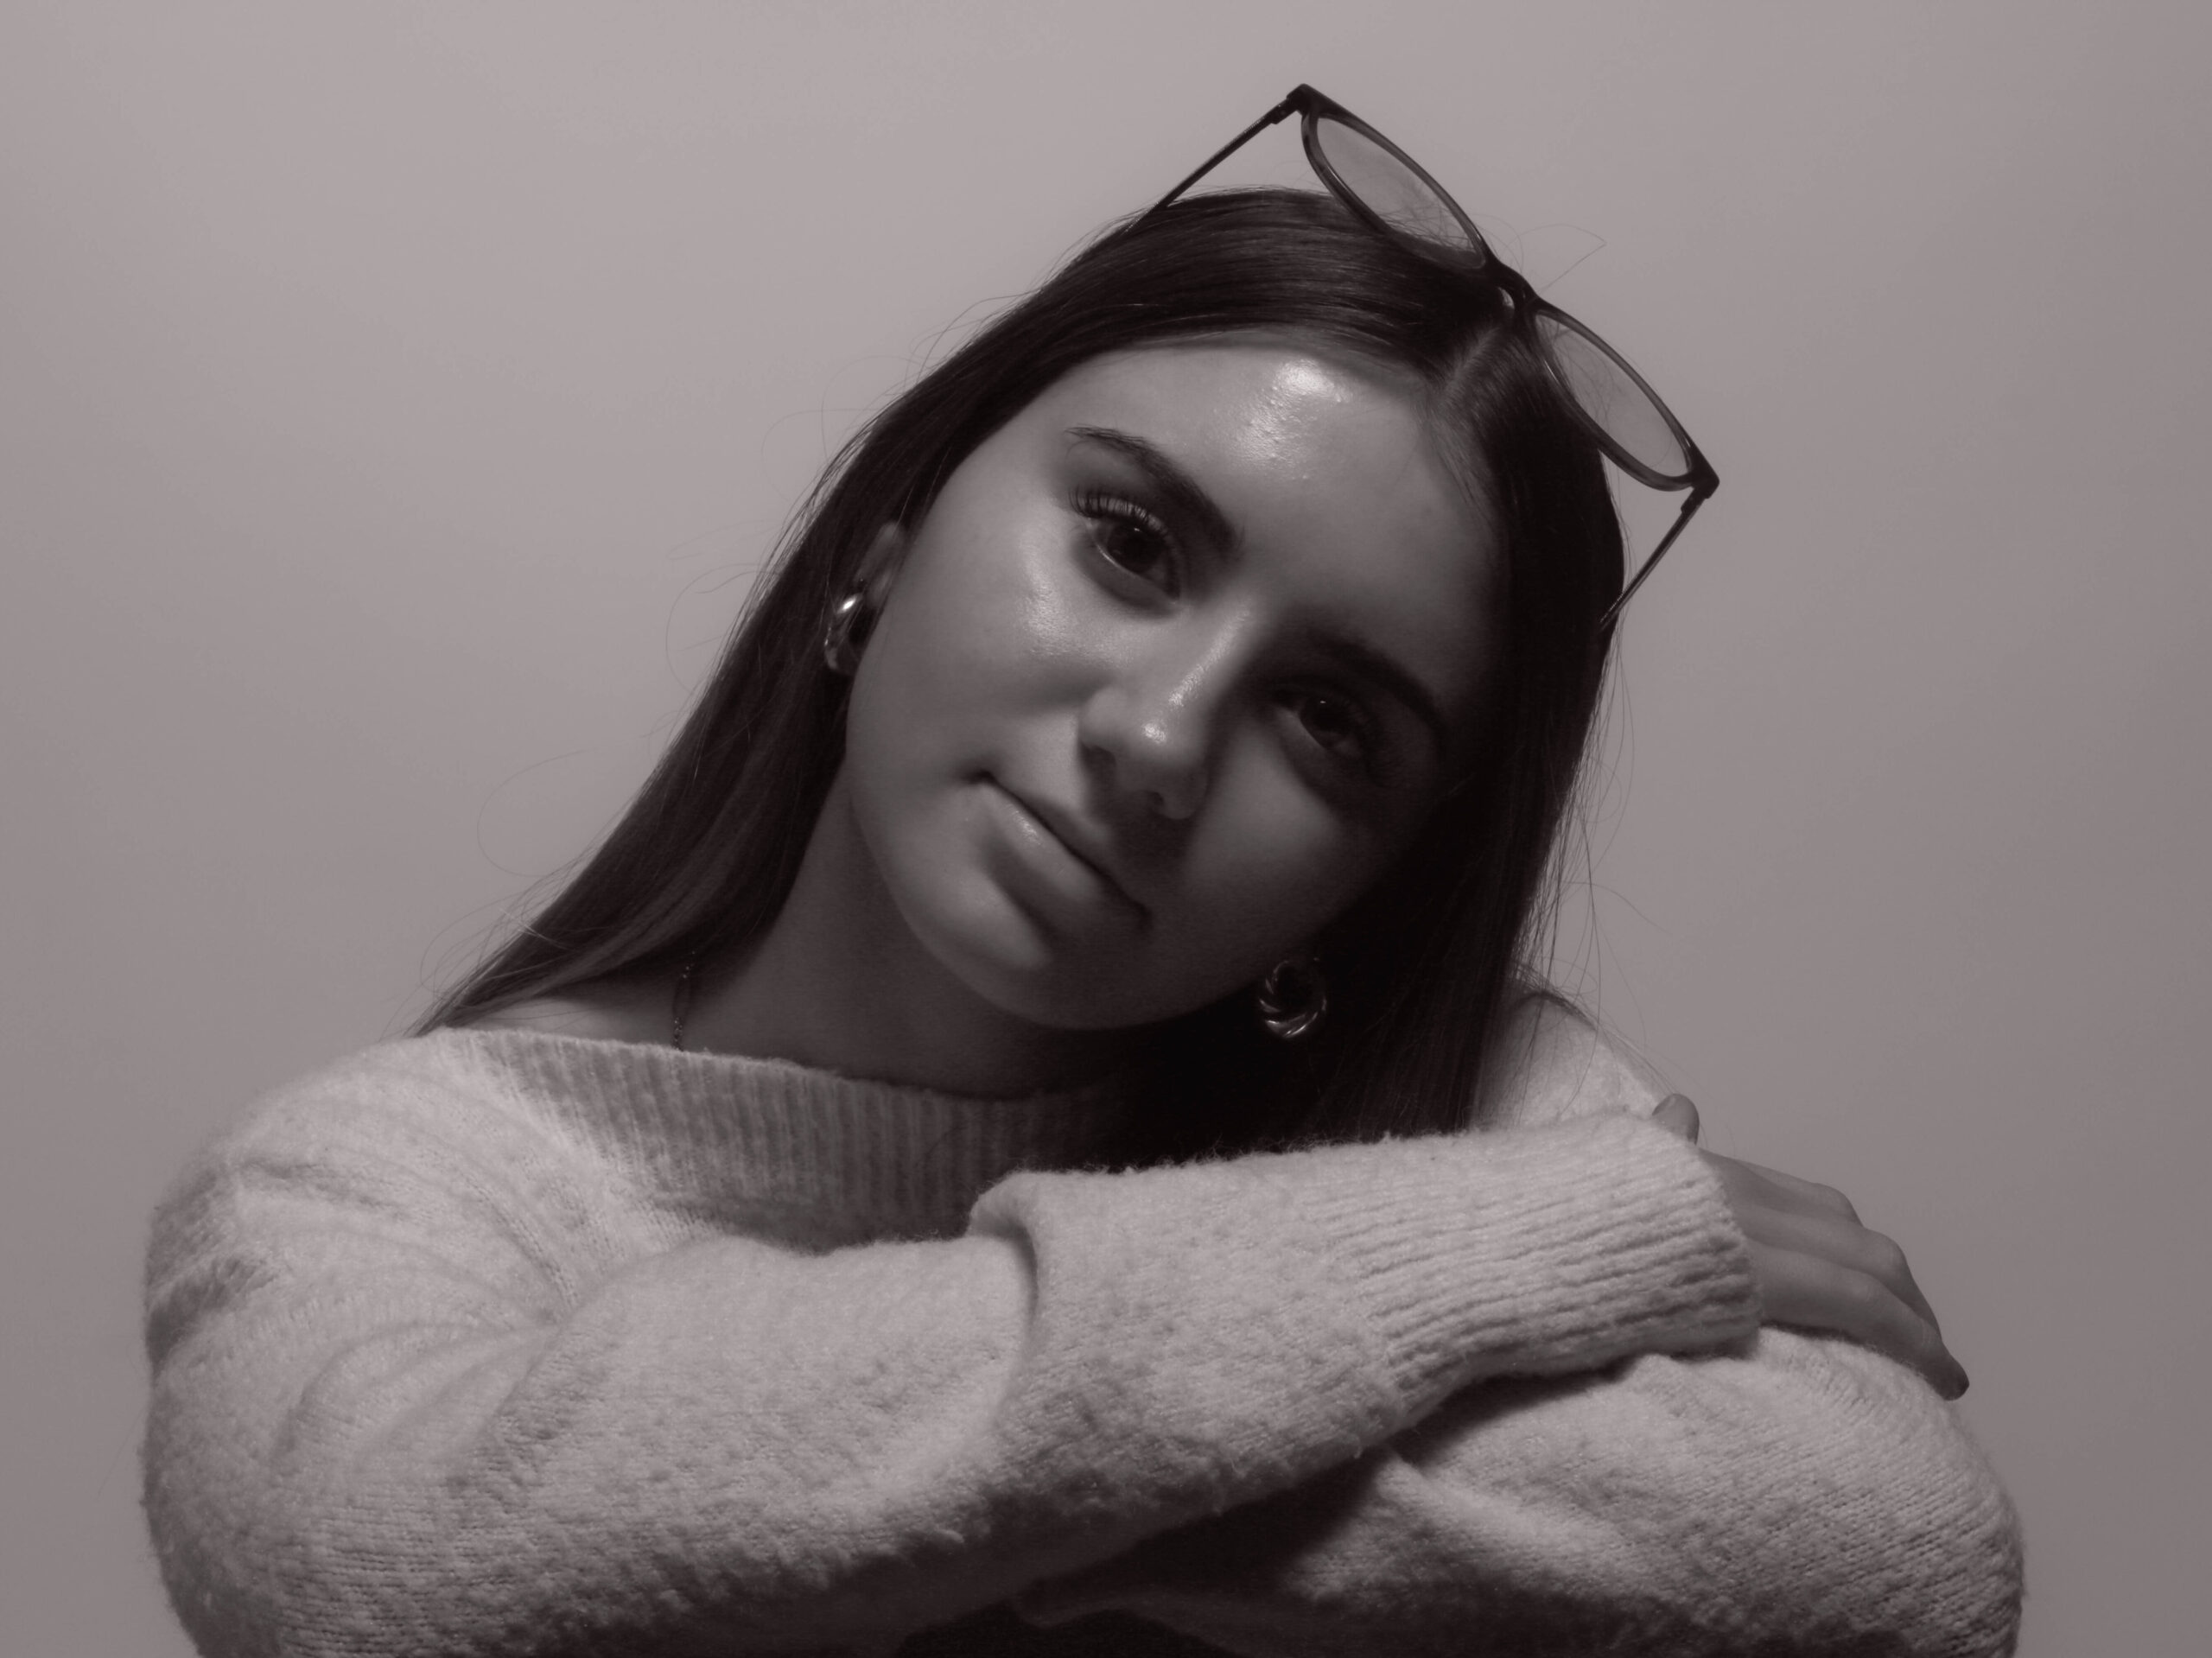
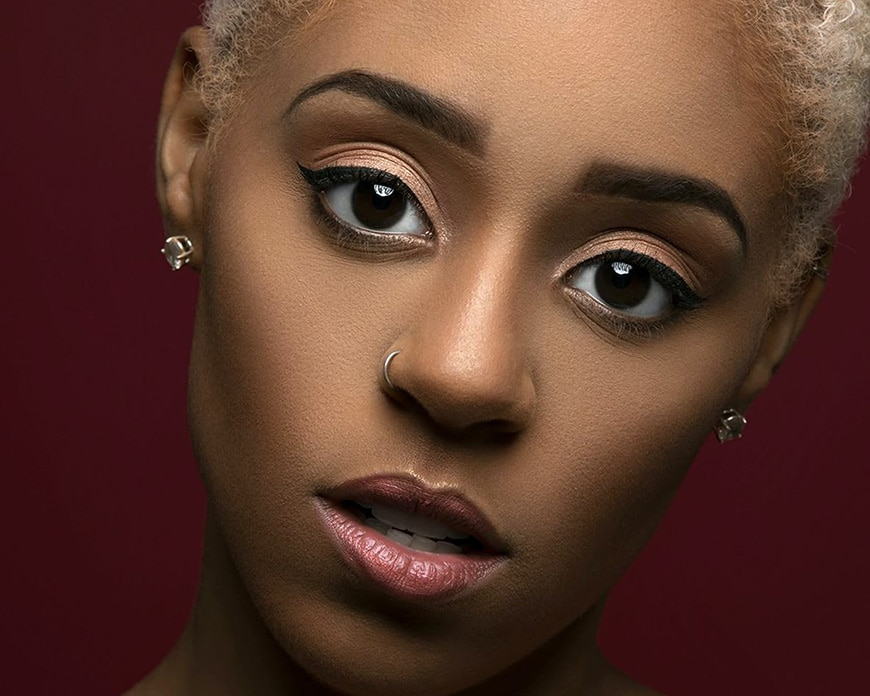
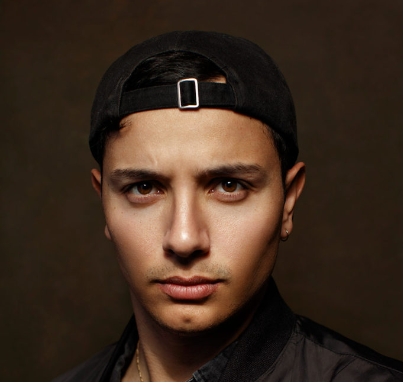
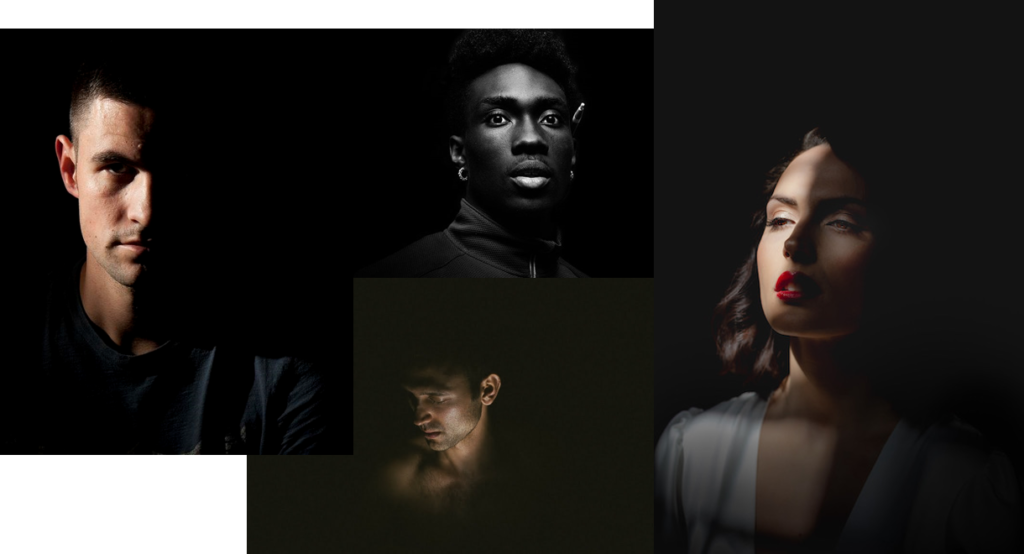
Using hard and soft lighting can also heavily affect how your final image presents itself.
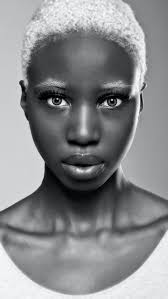
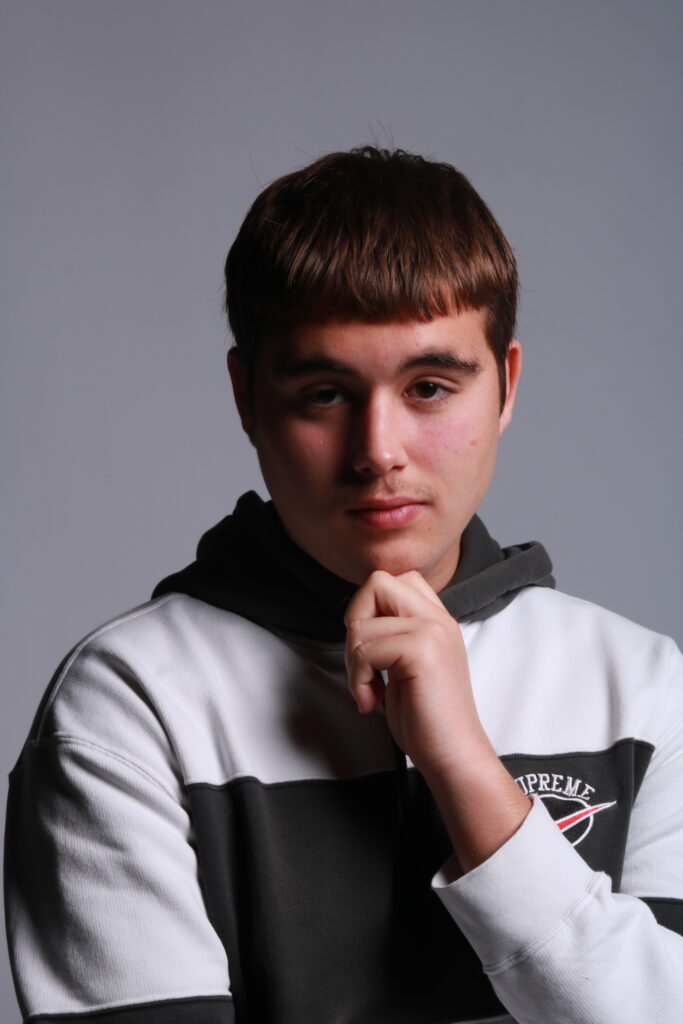
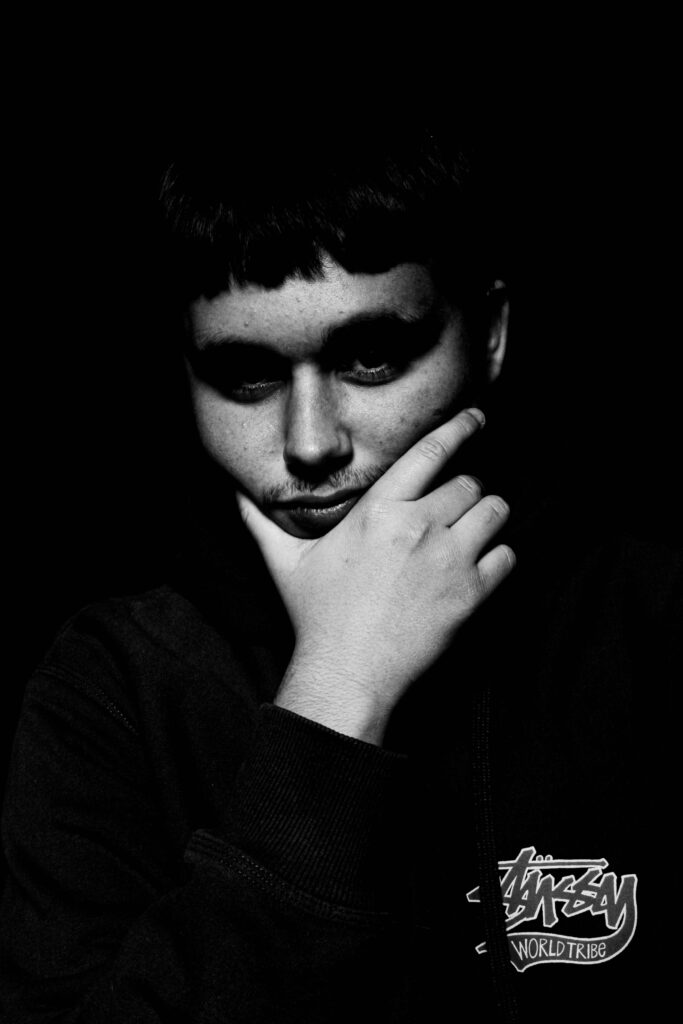
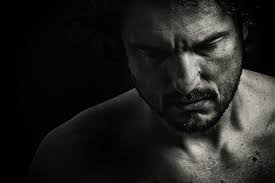
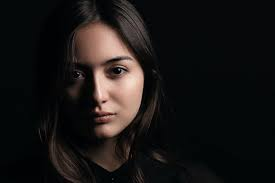
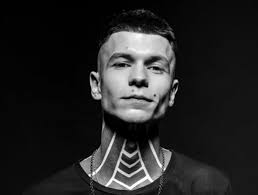
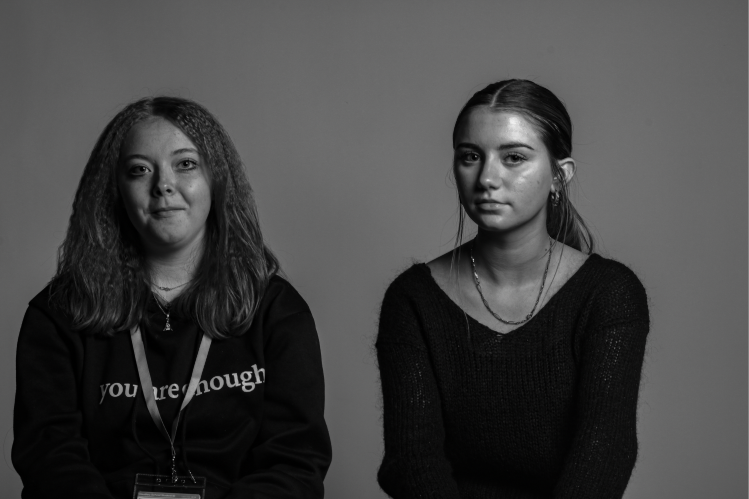
The hard lighting in this image combines with the cold lighting and creates a bolder and harsher setting.
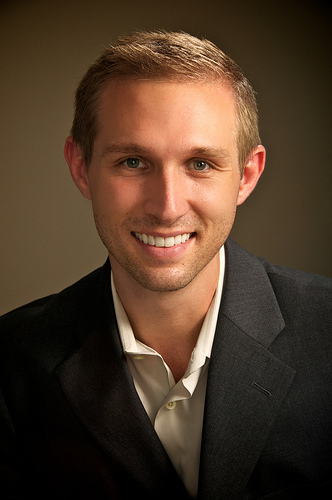
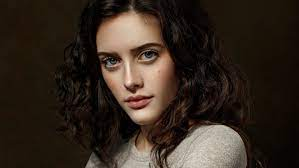
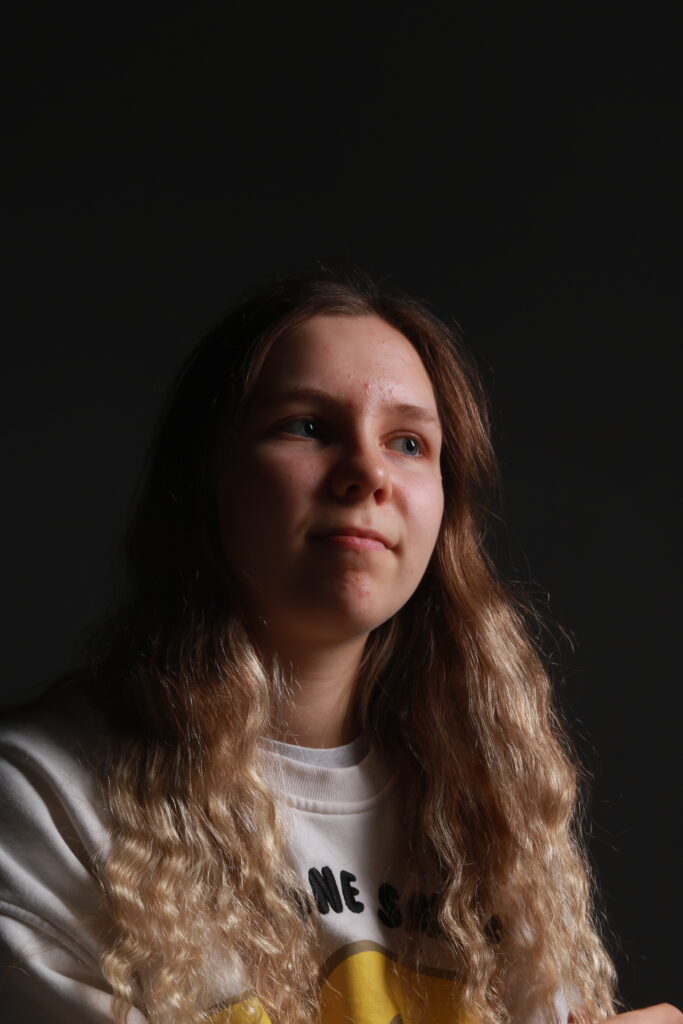
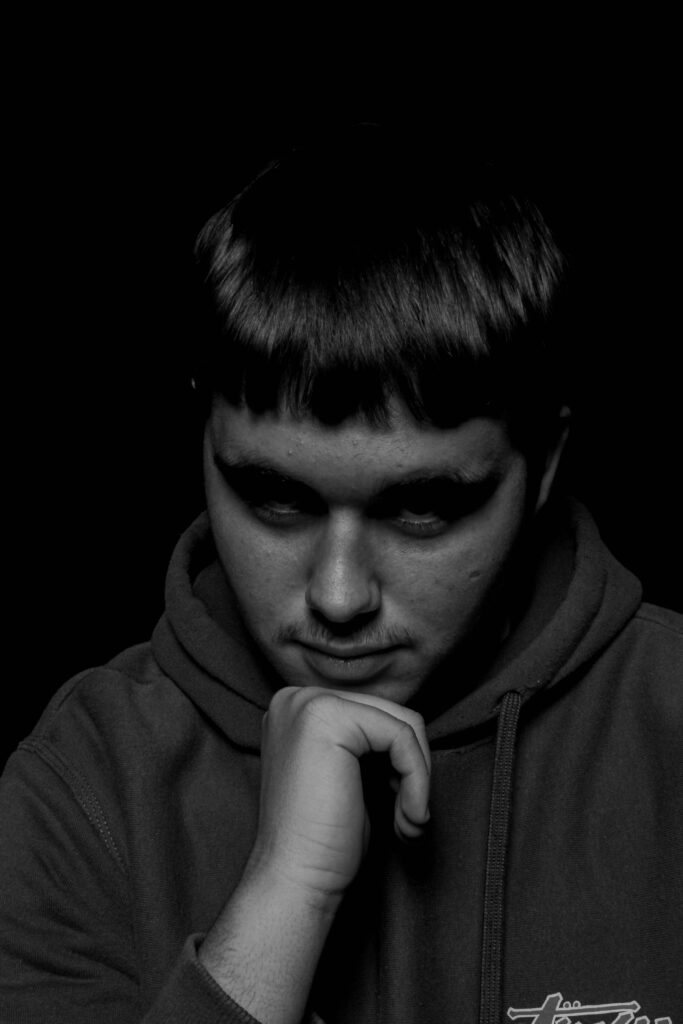
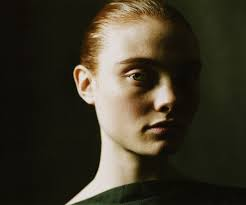
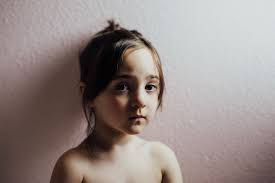
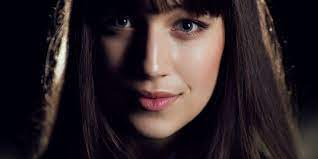
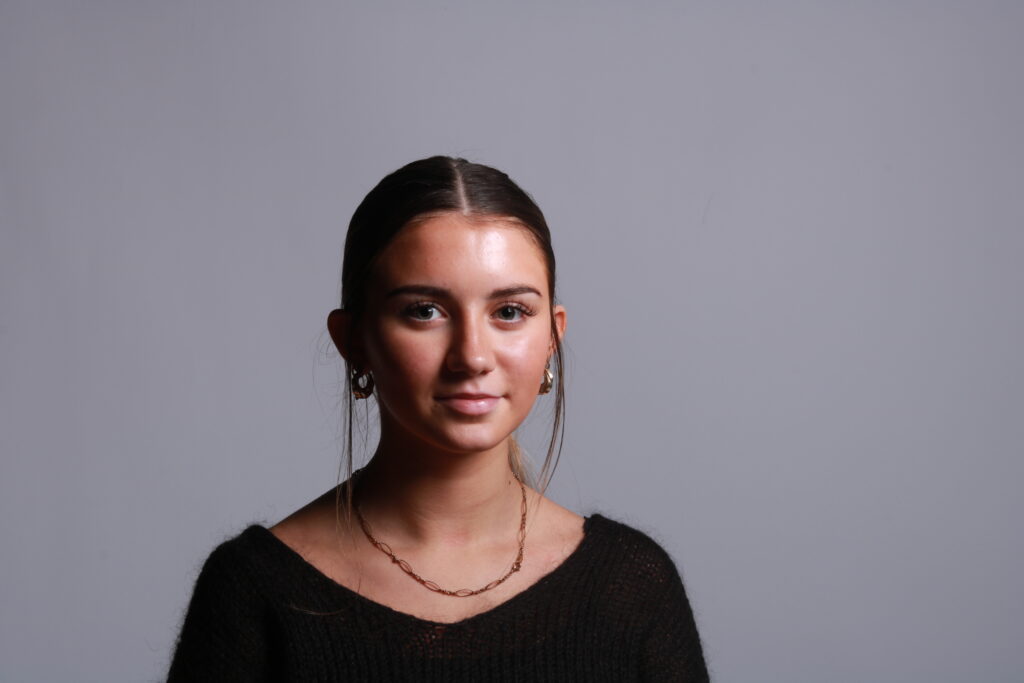
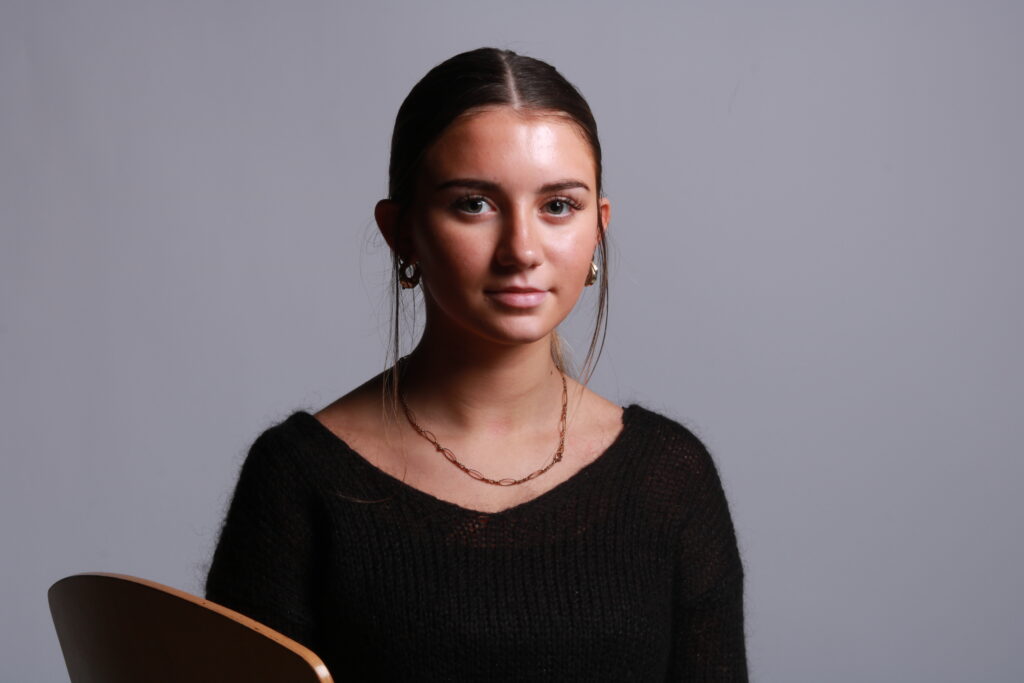
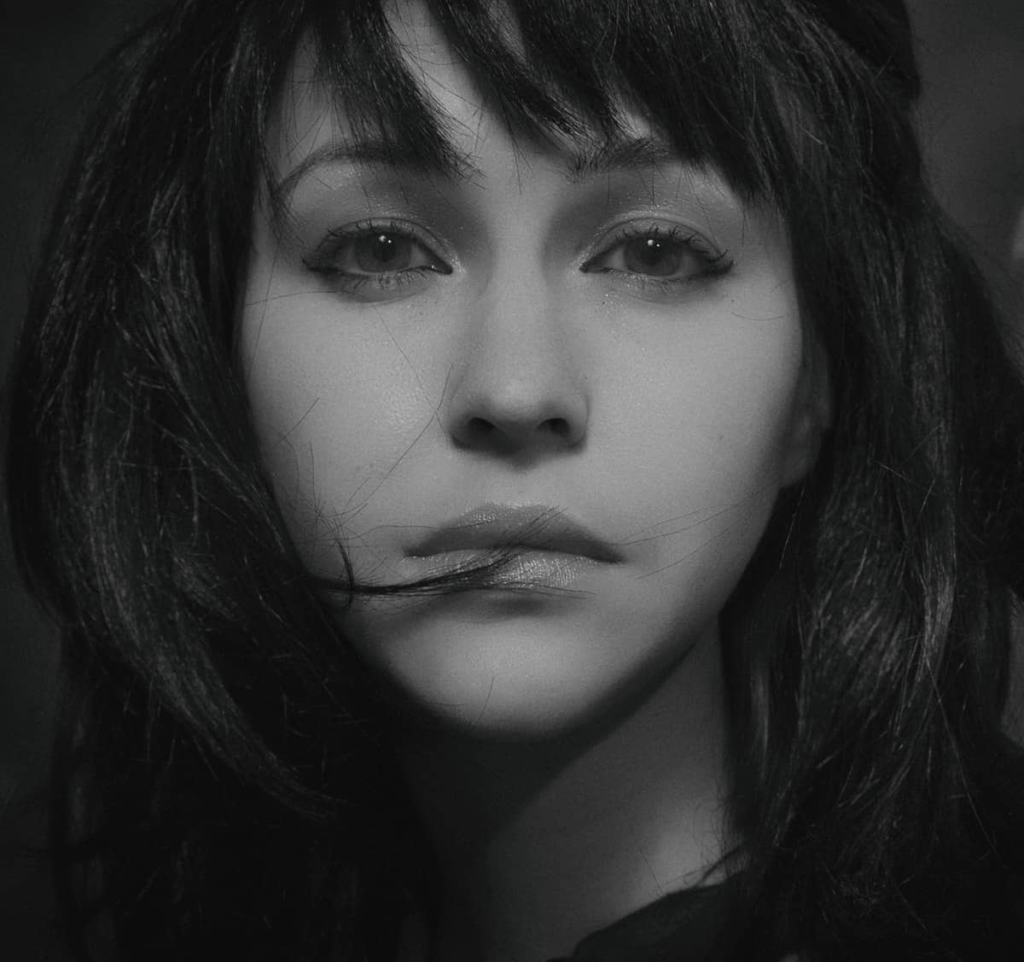
The softer lighting in this image in combination with the warm lighting and facial expression makes the image appear less serious and more gentle.
Rembrandt lighting is created by having a primary light source in a dark room tilted at 45 degrees side-on and above the subject.
A 50mm works really nicely for portraits and will give a nice depth of field if you’re shooting at a shallow aperture. But a 35mm will give you a wider point of view and is great to fit more of the body in of your subject.
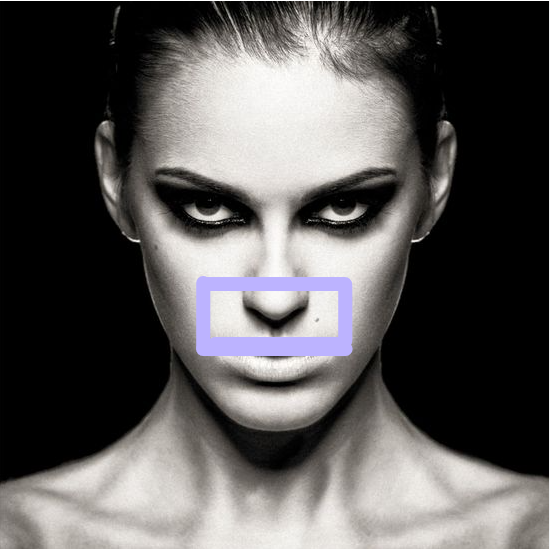
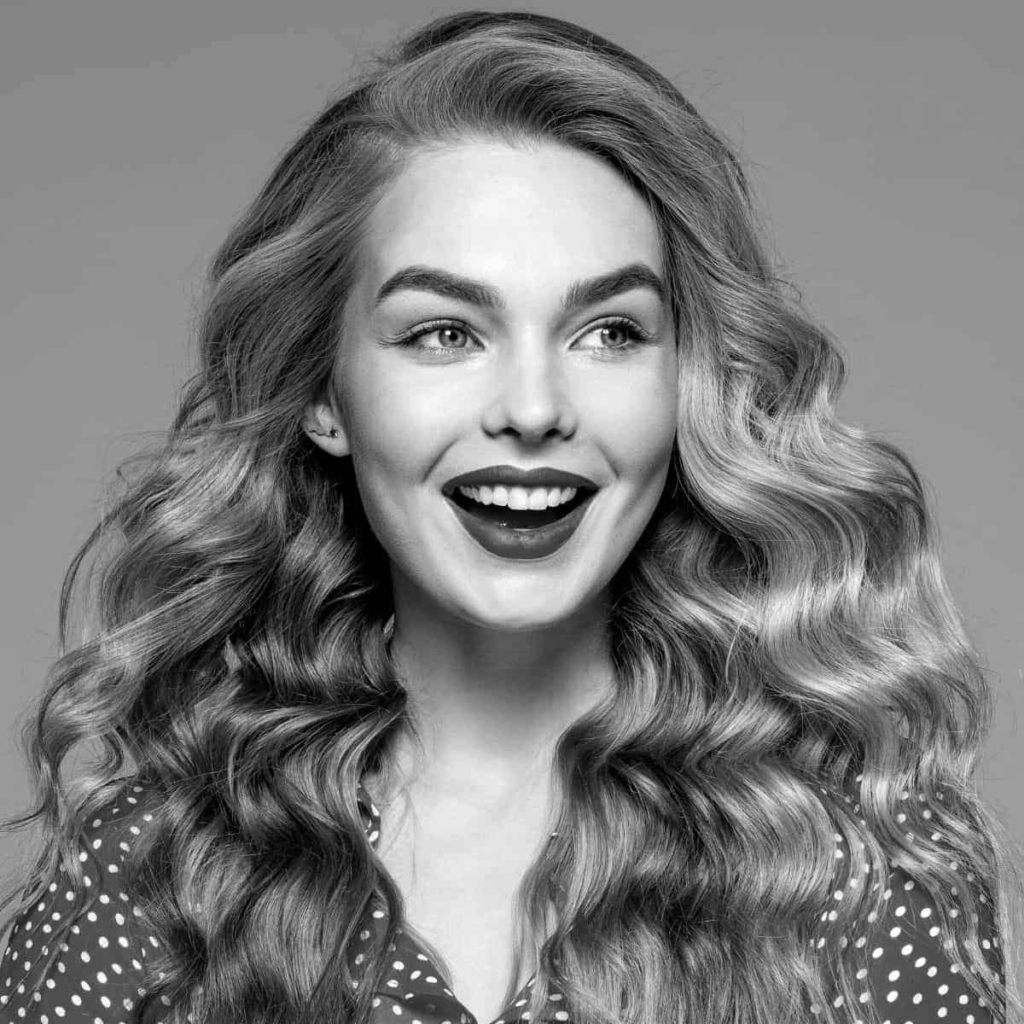
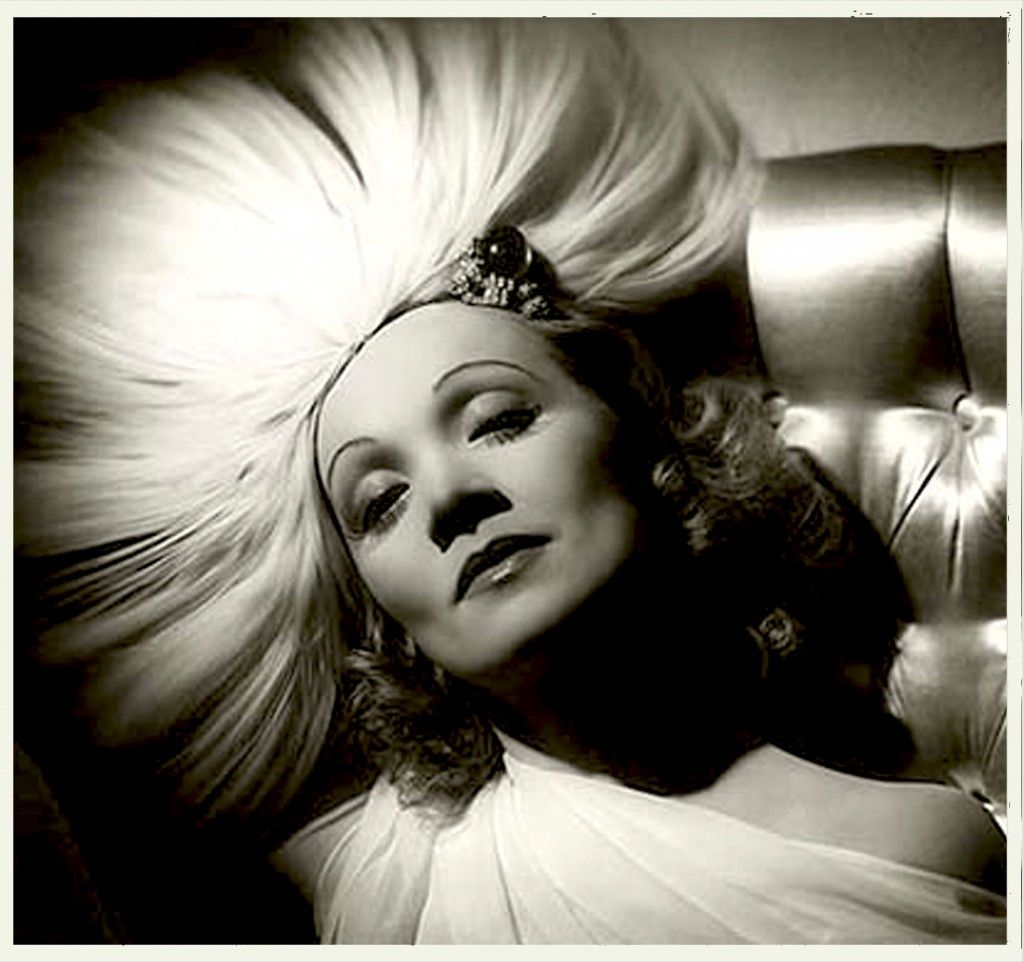
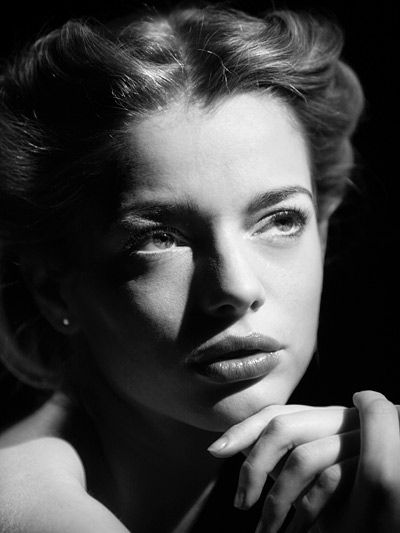
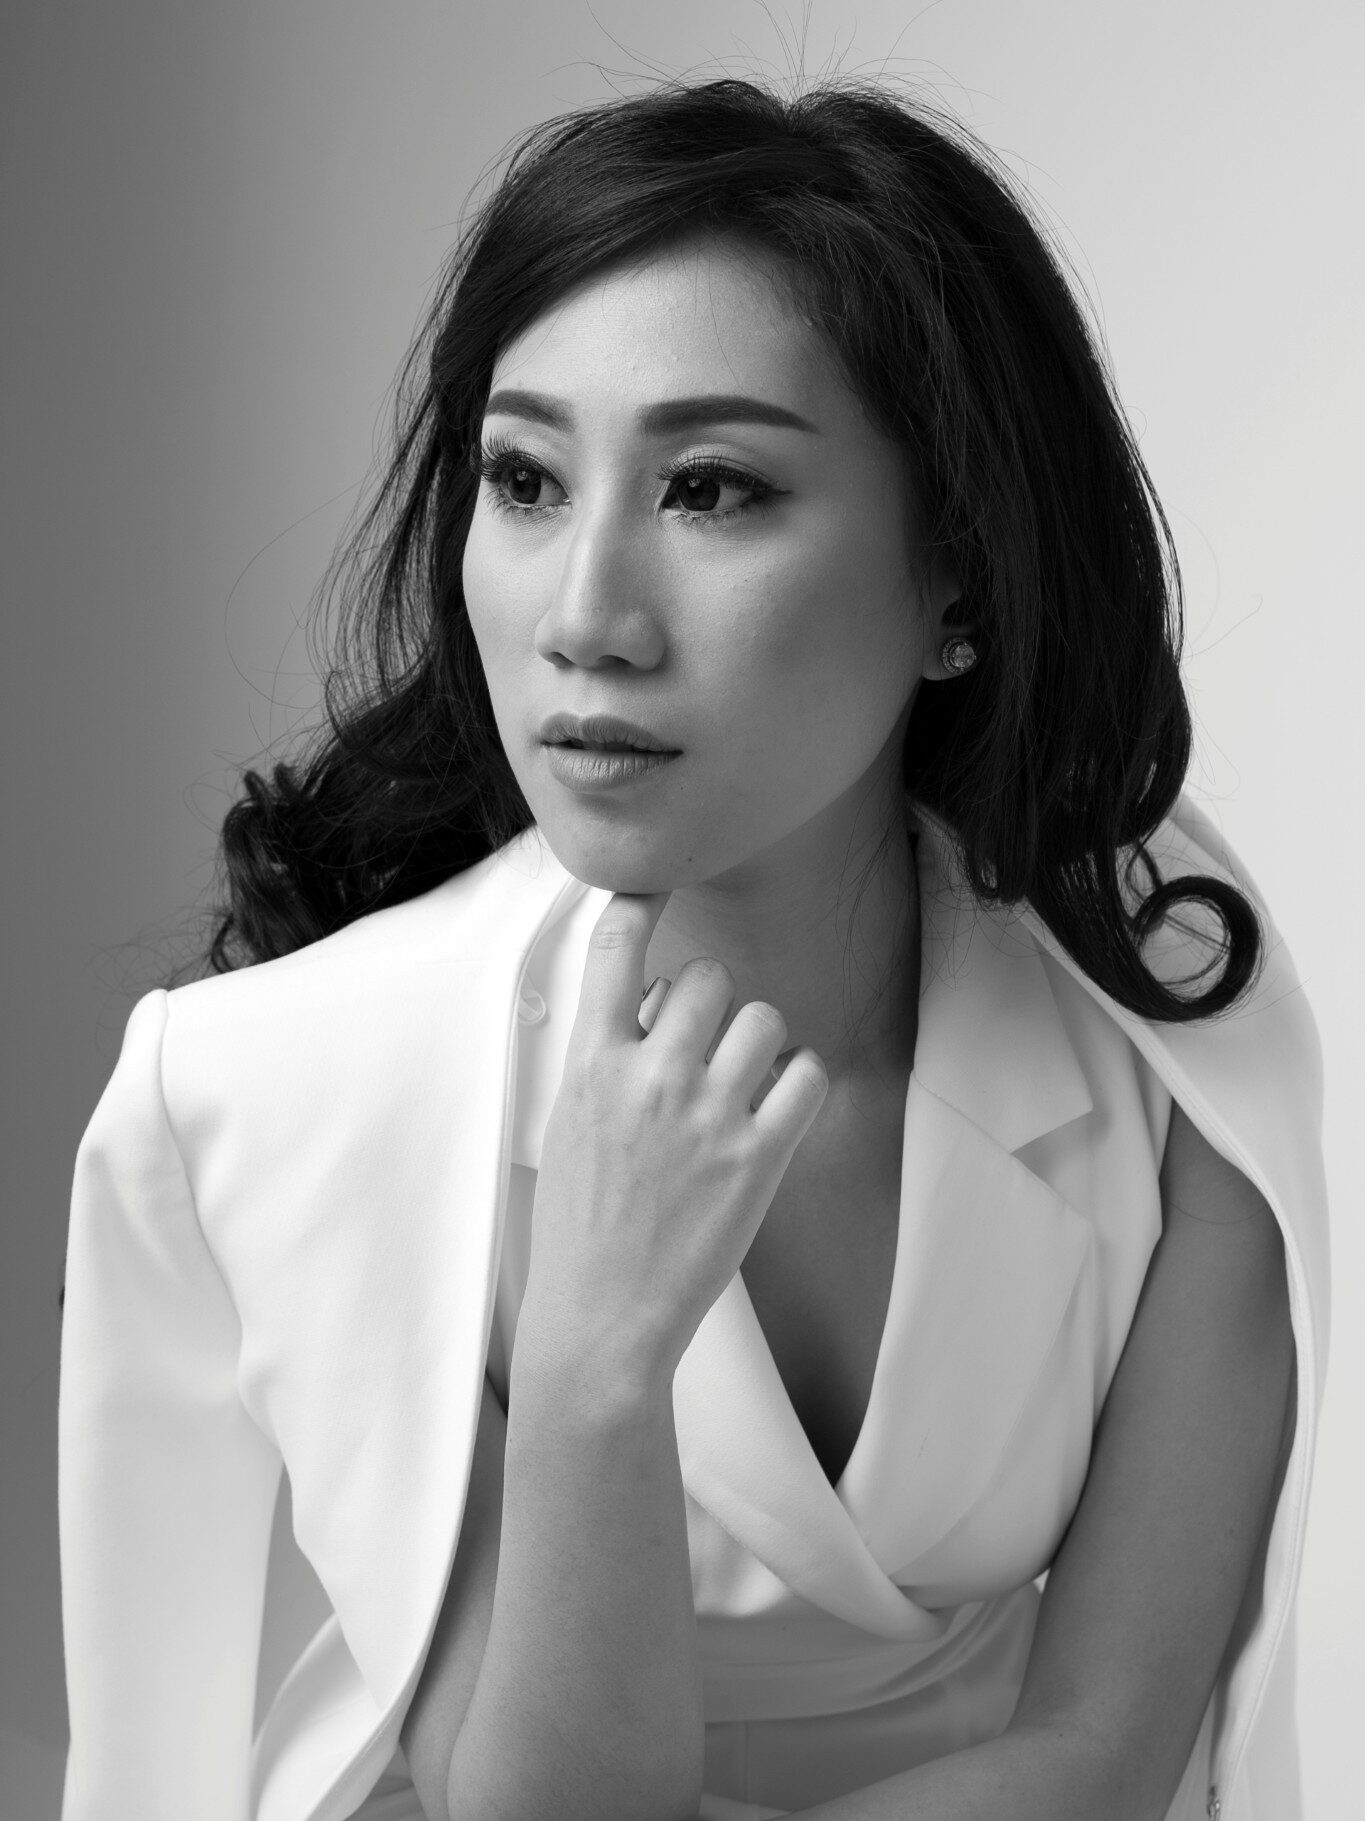
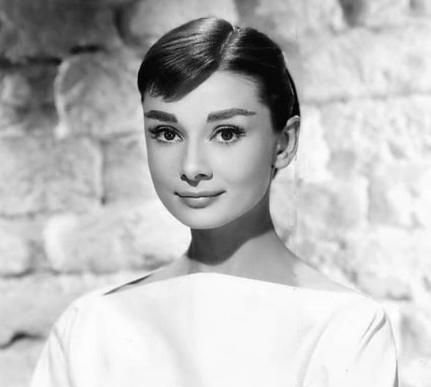
Butterfly lighting can be seen all the way back in the golden age of Hollywood. It was used mostly by Hollywood glamour photographers during the 1930s-1940s, it was used to capture the beauty of Hollywood stars such as Greta Garbo and Marlene Dietrich. Butterfly lighting creates a dramatic butterfly shaped shadow under the subjects nose. Another name for this is ‘paramount lighting’, named for the Hollywood studio and how they lit their most glamorous actresses. All that is required for a butterfly setup is a light source (preferably a soft box or umbrella) placed behind the photographer and slightly to one side. Then you can experiment with the position of the light to find the most flattering angle for your subjects face.
Examples of butterfly lighting:
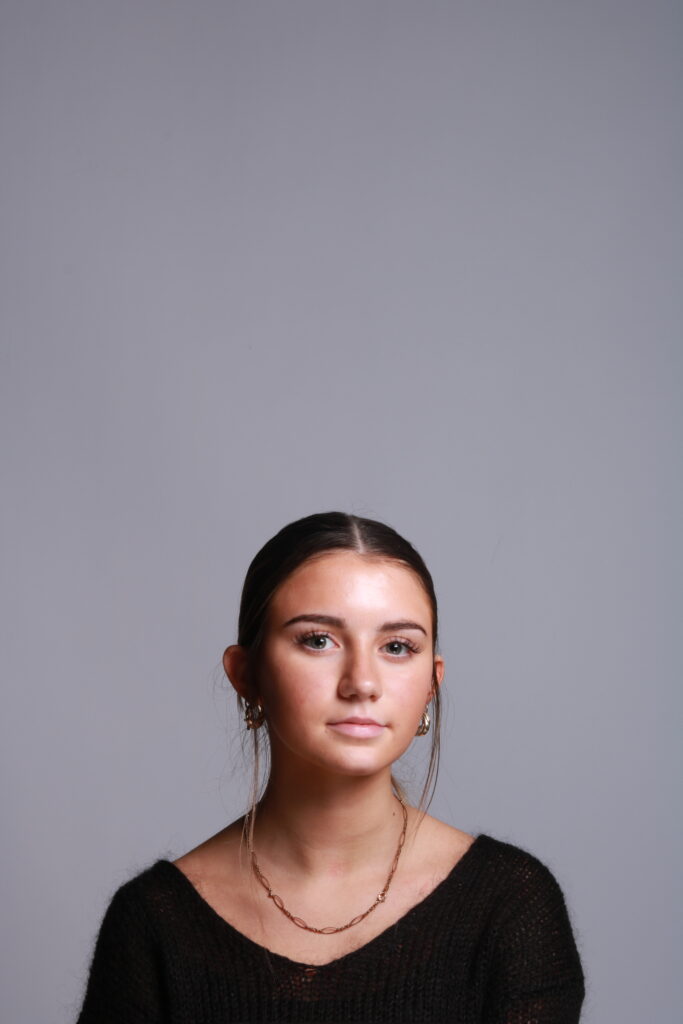
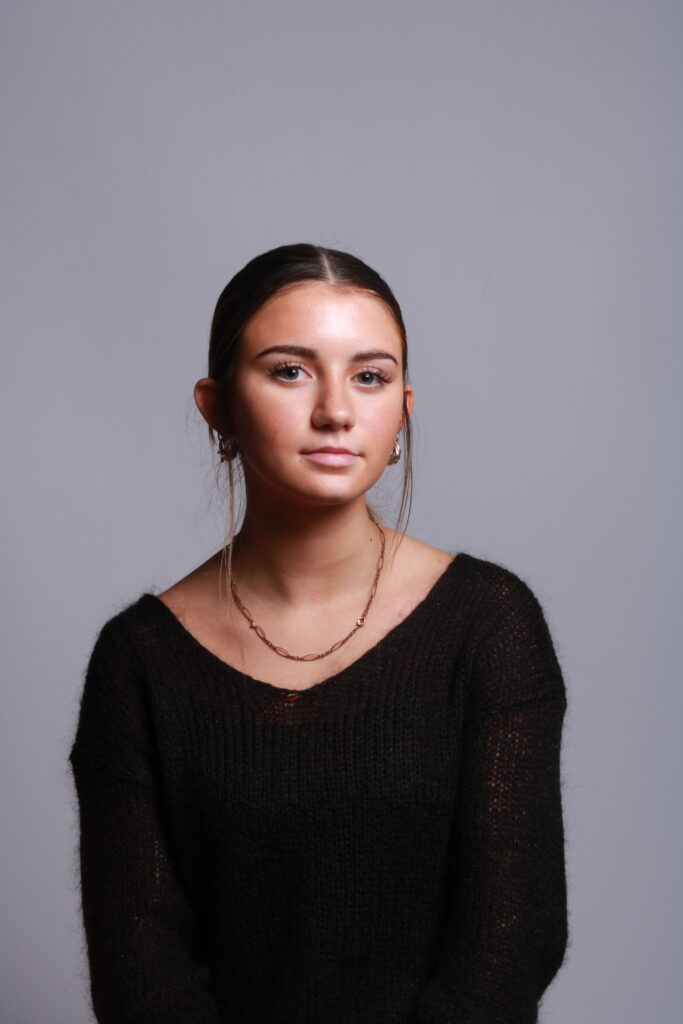
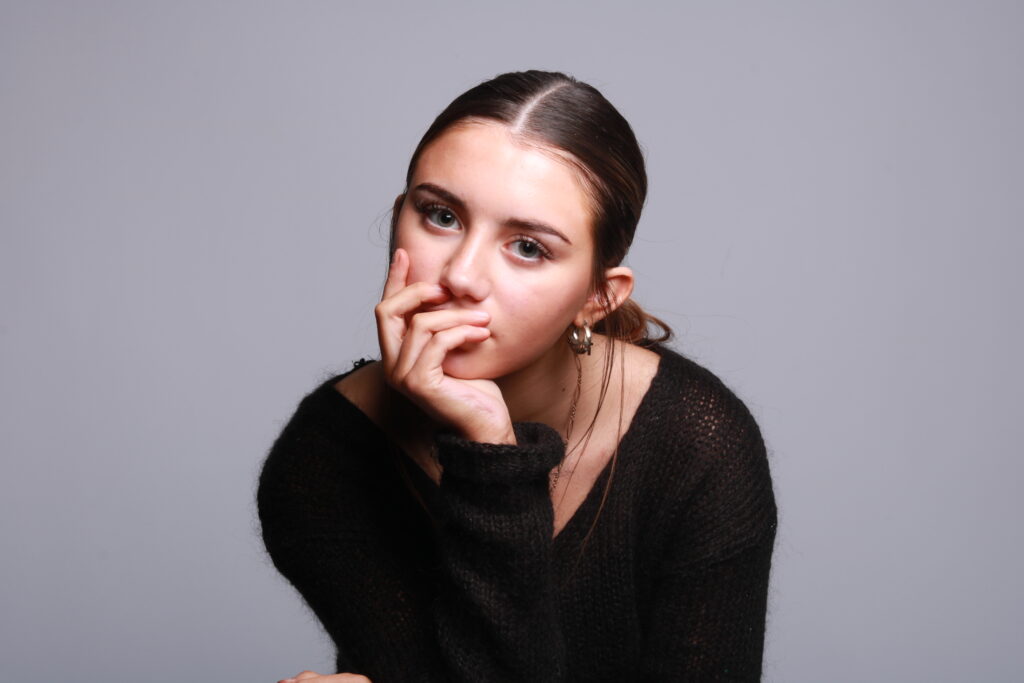
My photoshoot
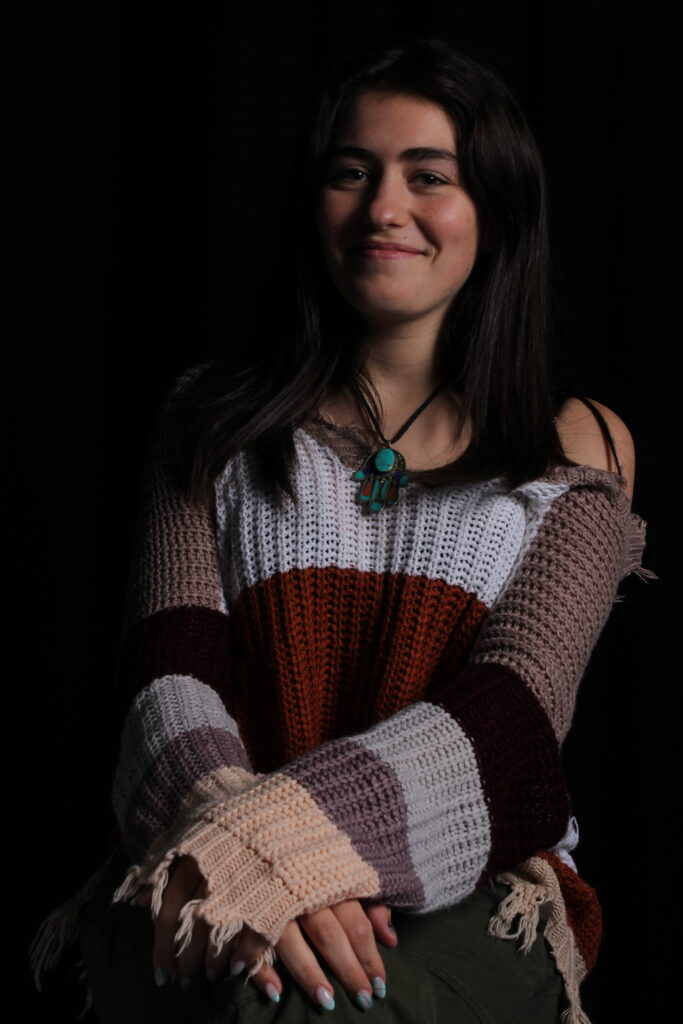
During my photoshoot I took over 100 photos all together and these are the successful butterfly lighting photos which all include the butterfly shaped shadow under the nose of the subject.
Best photos:
These photos are some of the most successful ones from my photoshoot as each of them have a clear butterfly shaped shadow under the nose.
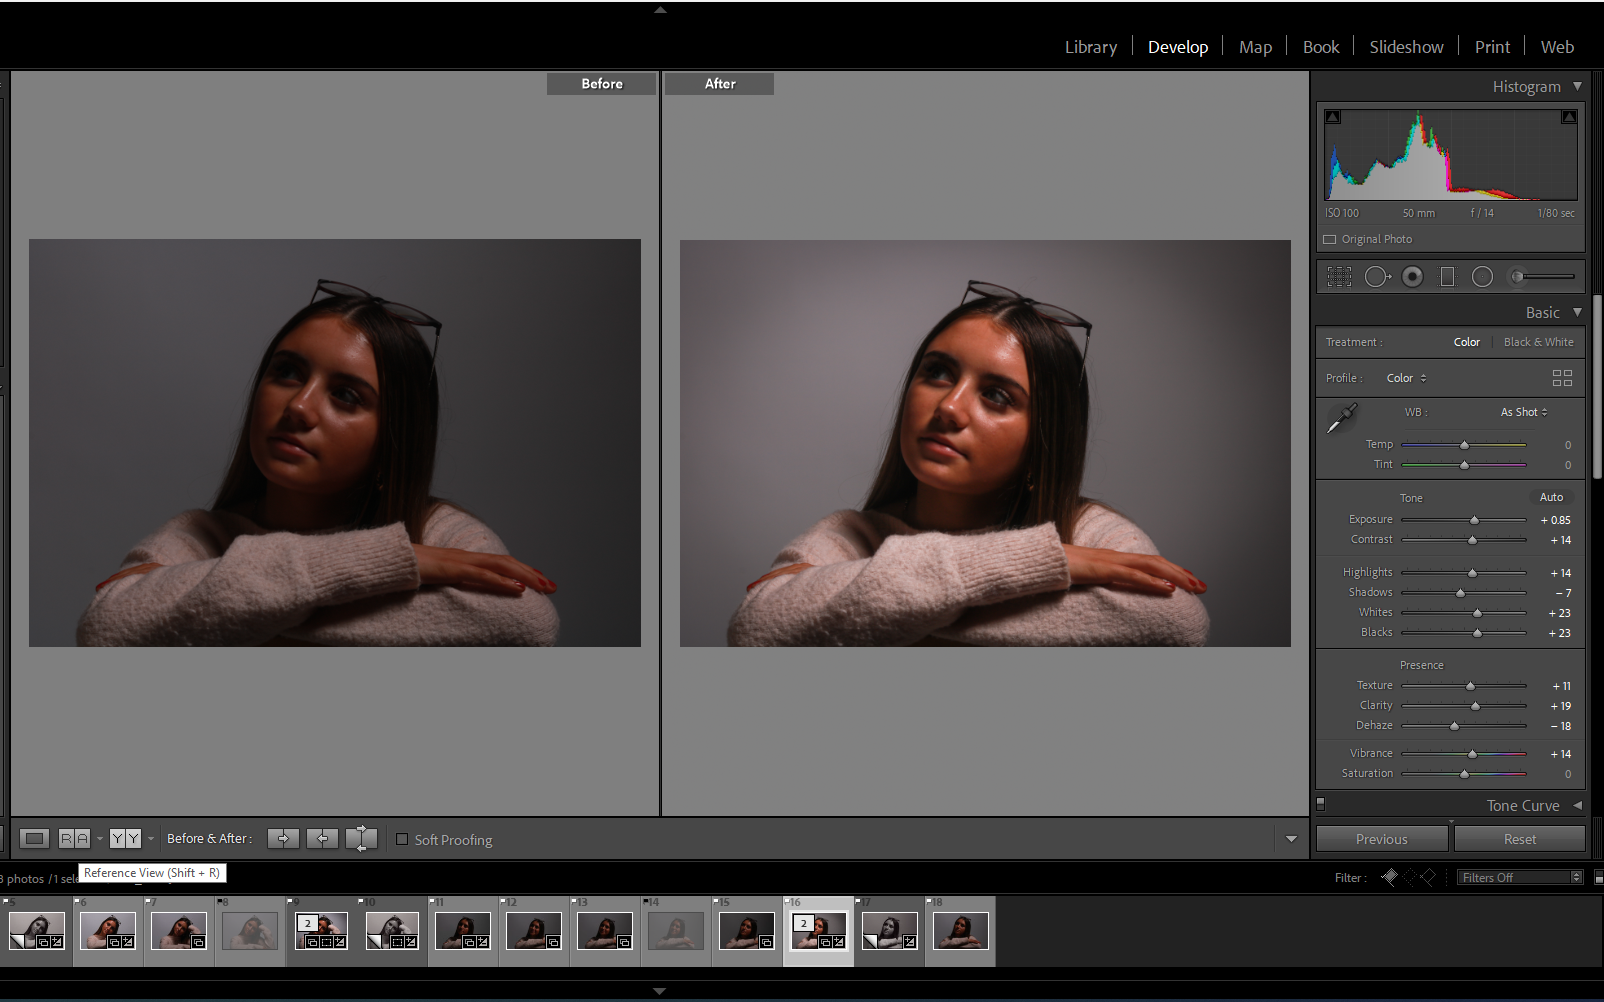
Editing:
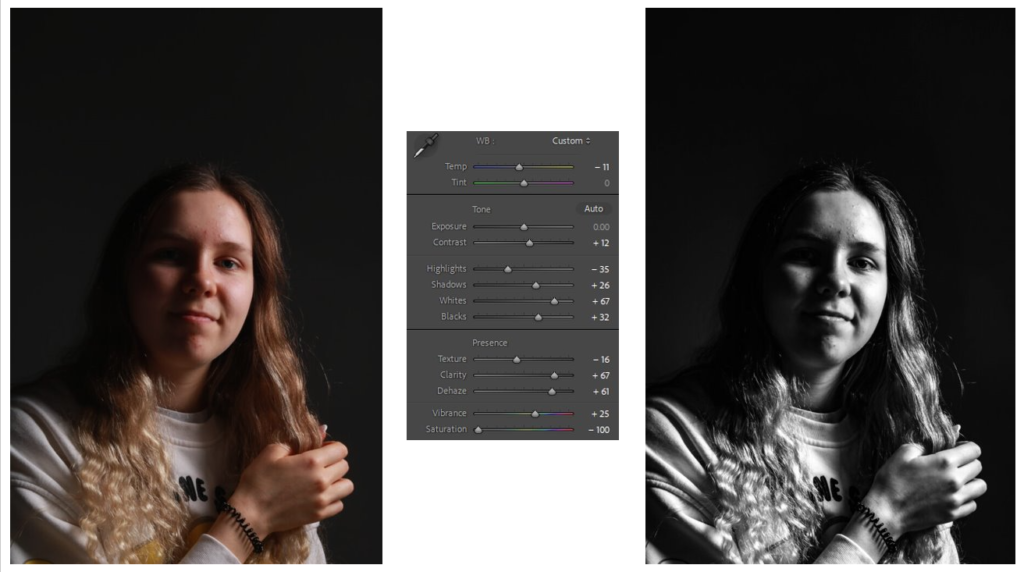
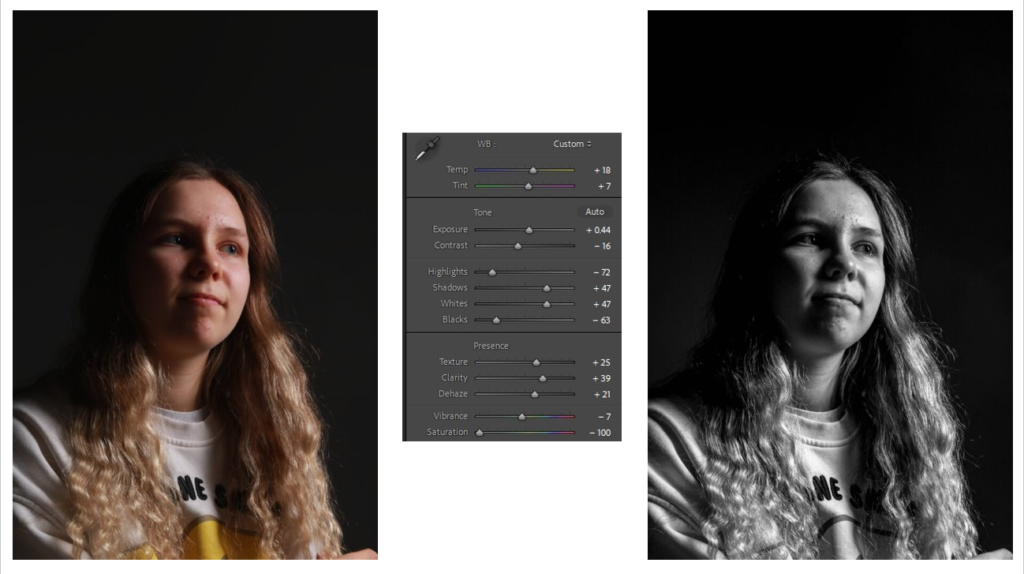
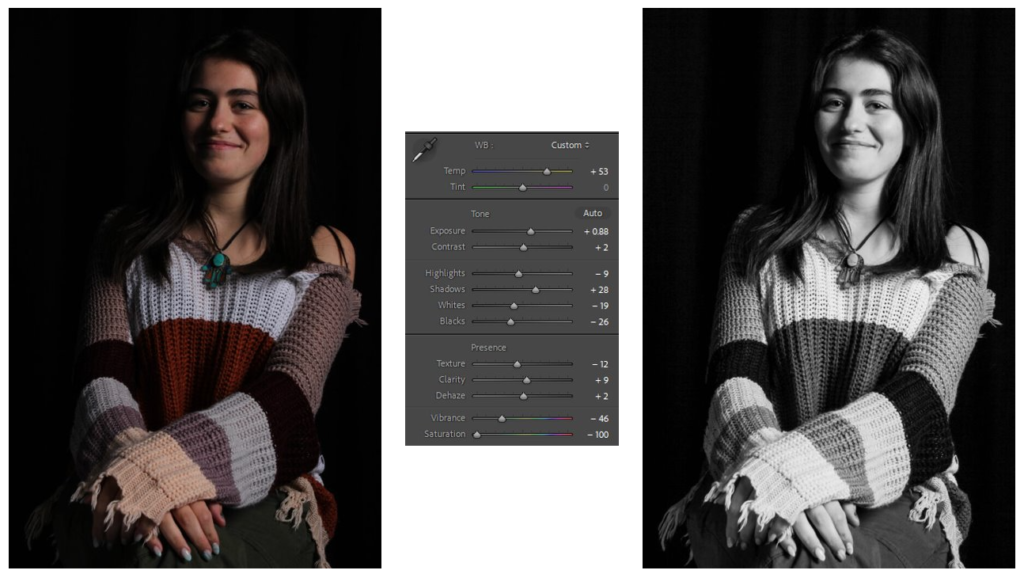
The edit before any editing is good however I am going to make it black and white to that the shadow stands out more.
After making the photo black and white by removing the saturation all the details stand out much more. I did this using picsart. The photo is also in good focus as all aspects are in focus and the background is plain making the subject stand out.
Controlled Conditions : Jan Mon 22nd, Tues 23rd, Wed 24th
Mon 22 12 C JAC in photography Room
Tues 23 12 A LJS in Photo / Media
Wed 24 12 D MVT in Photography Room
Print Folder Deadline Wed 24th Jan
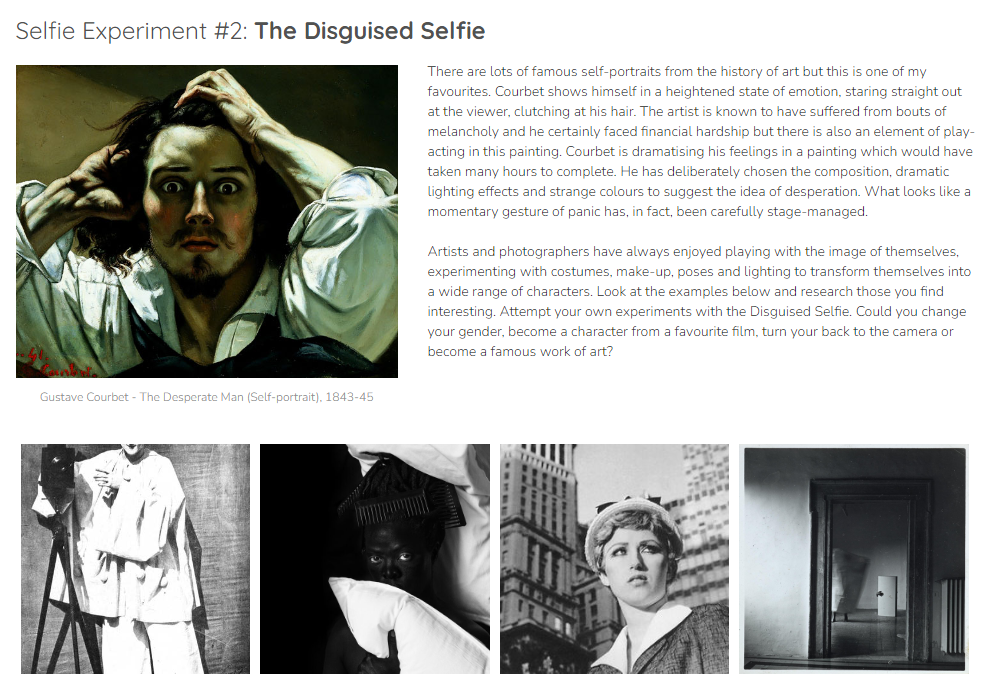
We have included a mini-unit to help you explore creative opportunities with self portraiture in photography based around themes of femininity and masculinity. We will spend time looking closely at this and discussing ideas for you to produce a number of potential outcomes that will be the culmination of your module on portraiture. We are expecting that you will continue to develop your portraiture skills and use lighting creatively both in the studio and on location outside or inside relevant to your ideas.
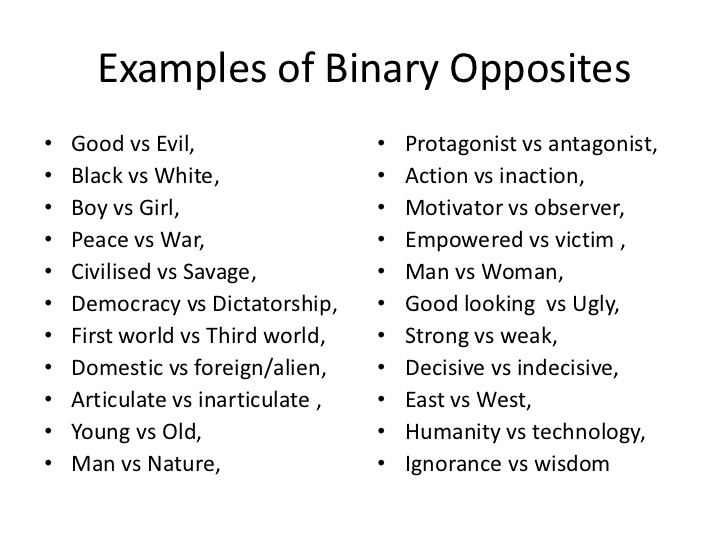
Binary opposition
The themes of ‘FEMININITY and MASCULINITY’ are a binary opposite – a pair of related terms or concepts that are opposite in meaning.
Binary opposition originated in Saussurean structuralist theory in Linquistics (scientific study of language) According to Ferdinand de Saussure, binary opposition is the system by which, in language and thought, two theoretical opposites are strictly defined and set off against one another. Using binary opposites can often be very helpful in generating ideas for a photographic project as it provides a framework – a set of boundaries to work within.
Watch this film and discuss the way in which artists tackle identity…
Blog Posts to make :
THEORY/ CONTEXT: Make a blog post and write 300-500 words expressing your view on identity politics and culture wars. How does it impact society? Describe some of the positive aspects of groups harnessing their shared identity and political views as well some of the dangers of tribalism dividing communities. Provide examples both for and against, reference sources used and include images. Try and frame the debate both within a global and local perspective.
THEMES: Define “femininity” and “masculinity” and explain how identity can be influenced by “place”, or belonging, your environment or upbringing with reference to gender identity / cultural identity / social identity / geographical identity / political identity / lack of / loss of identity / stereotypes / prejudices etc.
MINDMAP/ MOODBOARD: Add a mindmap and moodboard of ideas and trigger points.
ARTISTS REFERENCES: Choose a range of photographers that you feel explore themes of femininity, masculinity in relation to gender, identity or ‘self’ and create at least two ARTISTS CASE STUDIES (detailed analysis and interpretation) that must include Claude Cahun and then compare Cahun to your chosen artist reference (that will have an influence on your final outcomes re : MOCK EXAM)
PHOTO-ASSIGNMENT 1: Clare Rae inspired SHOOT (OPTIONAL)
PHOTO-SHOOTS: focused photoshoots exploring your ideas
EXPERIMENTATION: development of a number of final ideas
THEORY > CONTEXT
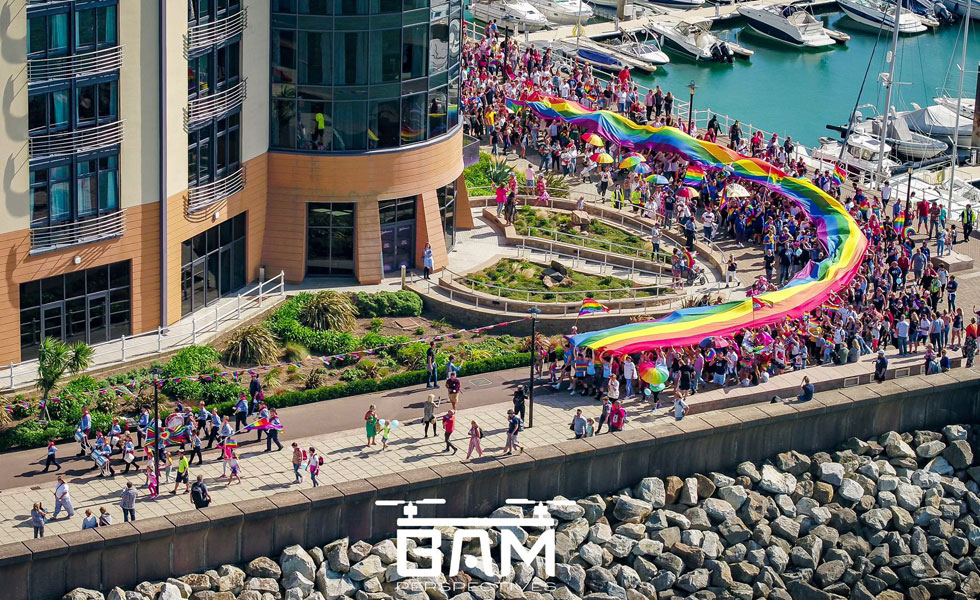
IDENTITY POLITICS is a term that describes a political approach wherein people of a particular religion, race, social background, class or other identifying factor form exclusive socio-political alliances, moving away from broad-based, coalitional politics to support and follow political movements that share a particular identifying quality with them. Its aim is to support and center the concerns, agendas, and projects of particular groups, in accord with specific social and political changes.
The term was coined by the Combahee River Collective in 1977. It took on widespread usage in the early 1980s, and in the ensuing decades has been employed in myriad cases with radically different connotations dependent upon the term’s context. It has gained currency with the emergence of social activism, manifesting in various dialogues within the feminist, American civil rights, and LGBT movements, disabled groups, as well as multiple nationalist and postcolonial organizations, for example: Black Lives Matter movement.
CI Pride 2019 in St Helier
CULTURE WARS are cultural conflicts between social groups and the struggle for dominance of their values, beliefs, and practices. It commonly refers to topics on which there is general societal disagreement and polarization in societal values is seen.
Grayson Perry’s: Big American Road Trip. Artist and social commentator Grayson Perry crosses the US, exploring its biggest fault lines, from race to class and identity, making art as he goes along. Click here to watch Episode 3 where he travels to the Midwest and finds folk bitterly divided over identity politics and hot issues like abortion and vaccination. What causes such ‘culture wars’ and how can they be overcome?
Grayson Perry. The American Dream. 2019
This map of the US reflects a battle-torn landscape where nuance, compromise and empathy are casualties in the culture war
Read article here in the Financial Times, that uses the recent debate around the removal of Winston Churchill’s statue in Parliament Square as an example of wider discussion on Britain’s colonial past and the current government’s handling of racial inequality.
The issues above should also be viewed within a much broader historical frame work on racism and colonialism.
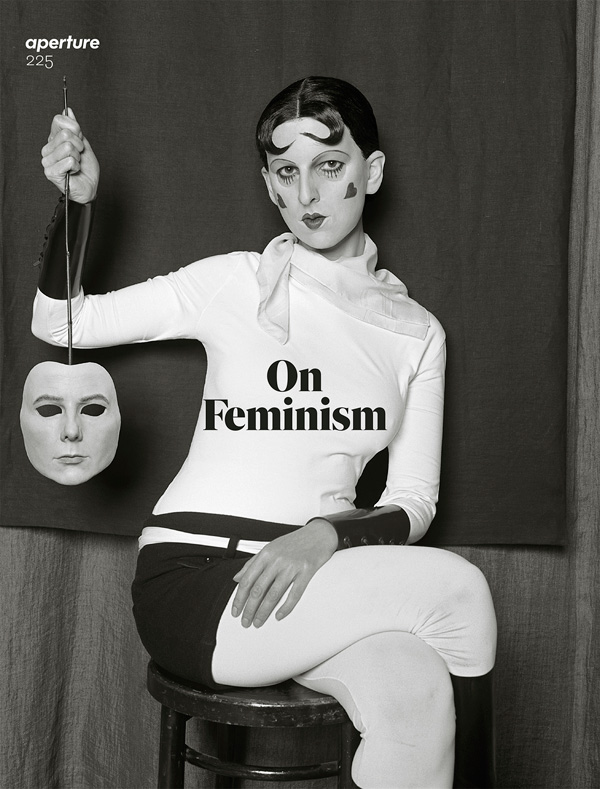
Claude Cahun
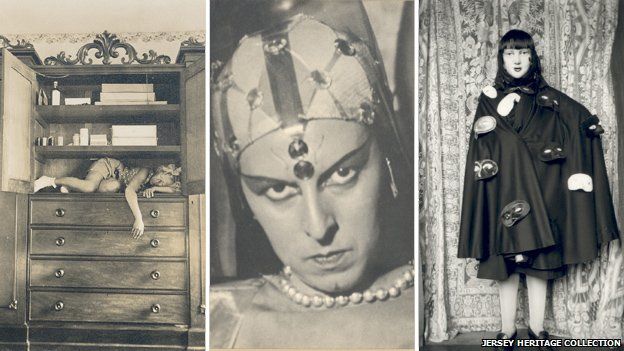
CASE STUDY: Claude Cahun, born Lucy Schwob was a French photographer, sculptor, and writer. She is best known for her self-portraits in which she assumes a variety of personas, including dandy, weight lifter, aviator, and doll. The Jersey Heritage Trust collection represents the largest repository of the artistic work of Cahun who moved to the Jersey in 1937 with her stepsister and lover Marcel Moore. She was imprisoned and sentenced to death in 1944 for activities in the resistance during the Occupation. However, Cahun survived and she was almost forgotten until the late 1980s, and much of her and Moore’s work was destroyed by the Nazis, who requisitioned their home. CaHun died in 1954 of ill health (some contribute this to her time in German captivity) and Moore killed herself in 1972. They are both buried together in St Brelade’s churchyard.
In this image, Cahun has shaved her head and is dressed in men’s clothing. She once explained: “Under this mask, another mask; I will never finish removing all these faces.”1 (Claude Cahun, Disavowals, London 2007, p.183)
Cahun was friends with many Surrealist artists and writers; André Breton once called her “one of the most curious spirits of our time.”
While many male Surrealists depicted women as objects of male desire, Cahun staged images of herself that challenge the idea of the politics of gender. Cahun was championing the idea of gender fluidity way before the hashtags of today. She was exploring her identity, not defining it. Her self-portraits often interrogates space, such as domestic interiors and Jersey landscapes using rock crevasses and granite gate
READ articles here in The Guardian and the BBC to learn more and use these texts for your essay. Link to Jersey Heritage which houses the largest collection of her work and an article written by Louise Downie in response to an exhibition in 2005, Acting Out: Claude Cahun and Marvel Moore at Jersey Museum.
In 2017 the National Portrait Gallery in London staged a major exhibition Gillian Wearing and Claude Cahun: Behind the Mask, Another Mask showing their work together for the first time. Slipping between genders and personae in their photographic self-images, Wearing and Cahun become others while inventing themselves. “We were born in different times, we have different concerns, and we come from different backgrounds. She didn’t know me, yet I know her,” Wearing says, paying homage to Cahun and acknowledging her presence. The bigger question the exhibition might ask is less how we construct identities for ourselves than what is this thing called presence?
Claude CahunGillian Wearing
In Behind The Mask, Wearing is being Cahun. Previously she has re-enacted photographs of Andy Warhol in drag, the young Diane Arbus with a camera, Robert Mapplethorpe with a skull-topped cane, hard-bitten New York crime photographer Weegee wreathed in cigar-smoke. Among these doubles, you know Wearing is in the frame somewhere, under the silicon mask and the prosthetics, the wigs and makeup and the lighting. Going through her own family albums, she has become her own mother and her father. It is a surprise she has never got lost in this hall of time-slipping mirrors, among her own self-images and the faces she has adopted. Wearing has got others to play her game, too – substituting their own adult voices with those of a child, putting on disguises while confessing their secrets on video.
Read articles in relation to exhibition here
Read articles here in Aperture and The Guardian in relation to the exhibition. Cahun has been described as a Cindy Sherman before her time. Wearing’s art undoubtedly owes something to Sherman – just as Sherman herself is indebted to artist Suzy Lake. Looking back at Cahun, Wearing is both tracing artistic influence, and paying homage to it, teasing out threads in a web of relationships crossing generations.
Cindy Sherman
Cindy Sherman, A selection of images from her film stills
Cindy Sherman works play with female stereotypes. Masquerading as a myriad of characters, Cindy Sherman (American, born 1954) invents personas and tableaus that examine the construction of identity, the nature of representation, and the artifice of photography. To create her images, she assumes the multiple roles of photographer, model, makeup artist, hairdresser, and stylist. Whether portraying a career girl, a blond bombshell, a fashion victim, a clown, or a society lady of a certain age, for over thirty-five years this relentlessly adventurous artist has created an eloquent and provocative body of work that resonates deeply in our visual culture.
Cindy Sherman reveals how dressing up in character began as a kind of performance and evolved into her earliest photographic series such as “Bus Riders” (1976), “Untitled Film Stills” (1977-1980), and the untitled rear screen projections (1980).
For an overview of Sherman’s incredible oeuvre see Museum Of Modern Art’s dedicated site made at a major survey exhibition of her work in 2012…
This exhibition surveys Sherman’s career, from her early experiments as a student in Buffalo in the mid-1970s to a recent large-scale photographic mural, presented here for the first time in the United States. Included are some of the artist’s groundbreaking works—the complete “Untitled Film Stills” (1977–80) and centerfolds (1981), plus the celebrated history portraits (1988–90)—and examples from her most important series, from her fashion work of the early 1980s to the break-through sex pictures of 1992 to her monumental 2008 society portraits.
Some of her latest images using digital montages
Sherman works in series, and each of her bodies of work is self-contained and internally coherent; yet there are themes that have recurred throughout her career. The exhibition showcases the artist’s individual series and also presents works grouped thematically around such common threads as cinema and performance; horror and the grotesque; myth, carnival, and fairy tales; and gender and class identity.
Sherman’s ground-breaking photographs have interrogated themes around representation and identity in contemporary media for over four decades. Since the early 2000s, Sherman has constructed personae with digital manipulation, capturing the fractured sense of self in modern society—a concern the artist has uniquely encapsulated from the outset of her career. As critic and curator Gabriele Schor writes on her process, ‘Sherman’s complex analysis of her face and her subtle employment of expression indicates that the working method of making up and costuming the self enables two processes: an intuitive and fluid process motivated by curiosity, and an intended process whose stimulus is conceptual and which has a ‘subject matter’.’
See and read about Cindy Sherman’s latest work here
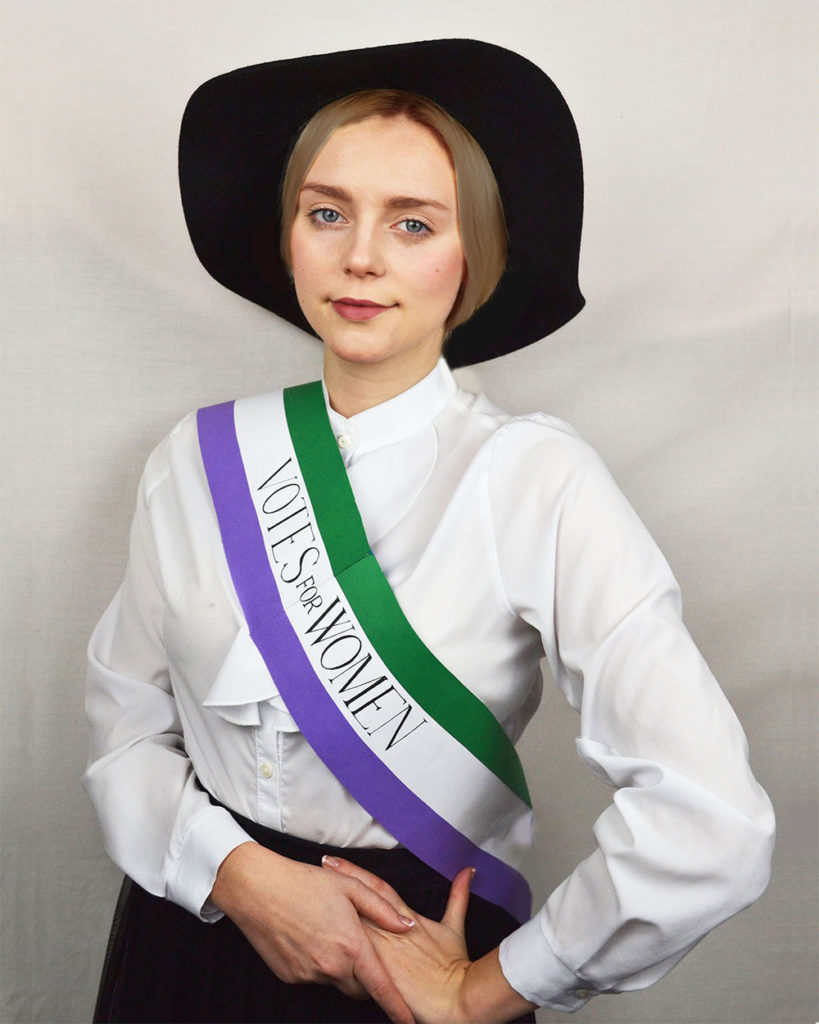
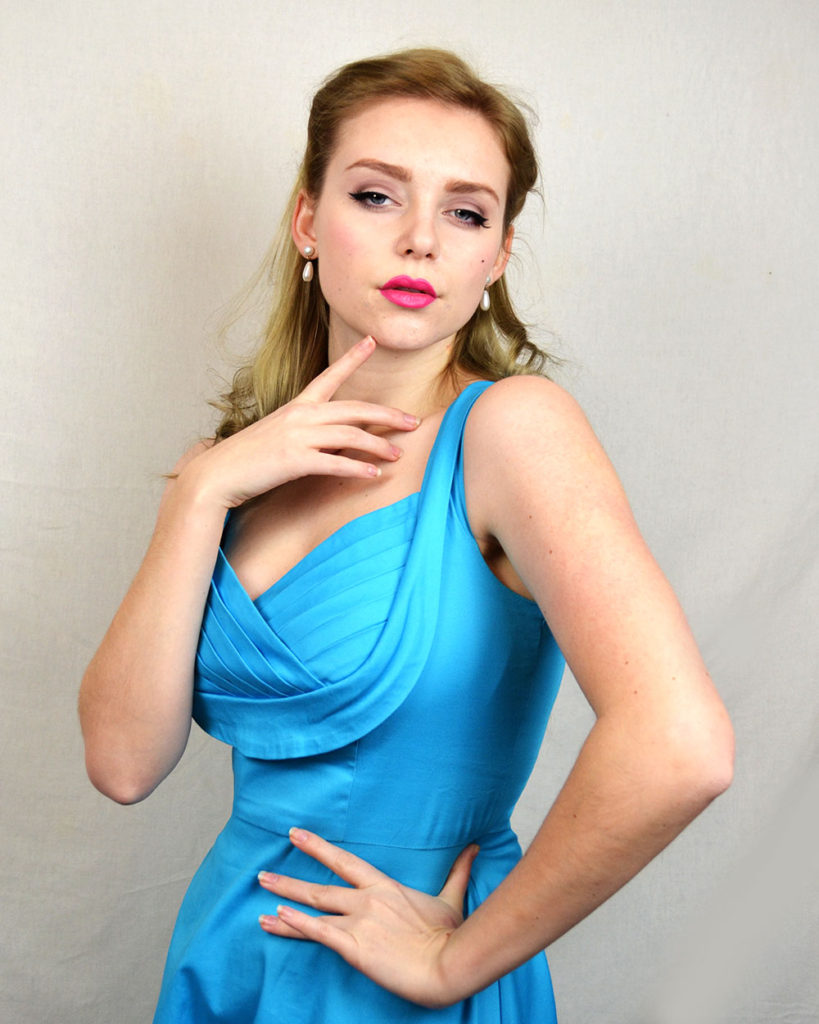
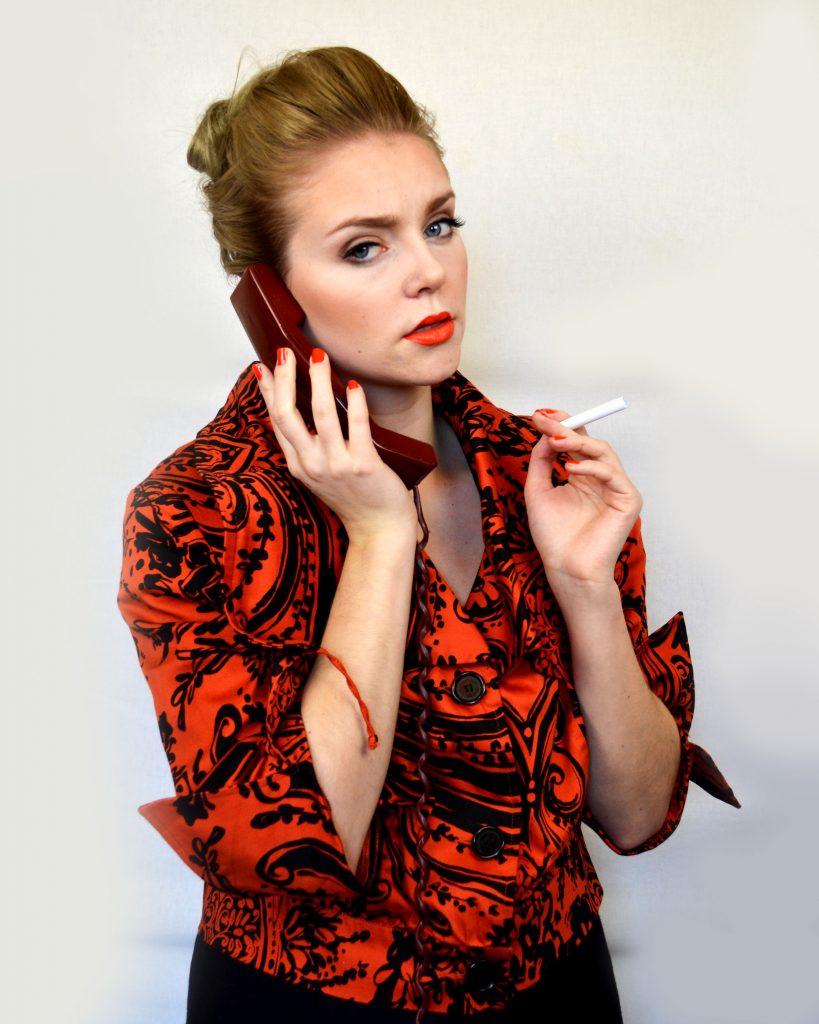
1910’s – The Suffragette1920’s – The Flapper1930’s – The Wall Street Wife1940’s – The Riveter1950’s – The Movie Star1960’s – The Super Model1970’s – The Hippie1980’s – The Business Woman1990’s – The New Wave Feminist
Here is link to Shannon’s blog showing all her research, analysis, recordings, experimentation and evaluations
Here is link to Shannon’s blog showing all her research, analysis, recordings, experimentation and evaluations.
Since her A-level studies Shannon has continued her passion for photography and has recently completed her BA (Hons) degree in Documentary Photography at University of South Wales. During her 3-year degree she developed a number of projects based around gender identities and constructions. Shannon will deliver a presentation about her practice on Wed 14 Oct, but beforehand you need to do some research about her work so you can engage with her talk and ask some relevant questions. You will need to have an in-depth knowledge of her work as you are are required to write a comparetive essay between Claude Cahun and Shannon O’donnell.
Here is a link to her website, a short biography below and examples of key works:
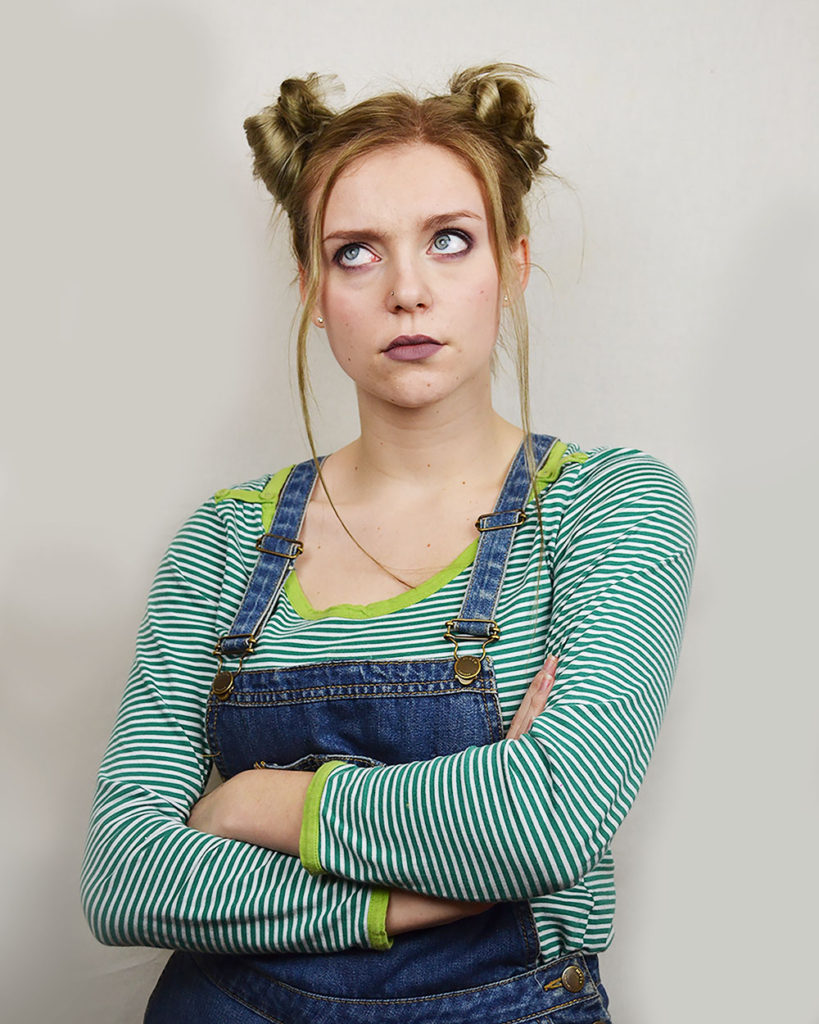
I am an artist born in Jersey, Channel Islands. Currently based in Cardiff, Wales my practice explores themes around the gendered experience with a focus on femininity and masculinity as gendered traits. Through deep research and a sociological approach my work explores the self and identity.
My fascination lies with questioning society and challenging traditional views of gender through my work. My work is informed by my personal experience and through interviewing specific demographics to help gage a sociological understanding of how gender is viewed or challenged within mainstream society.
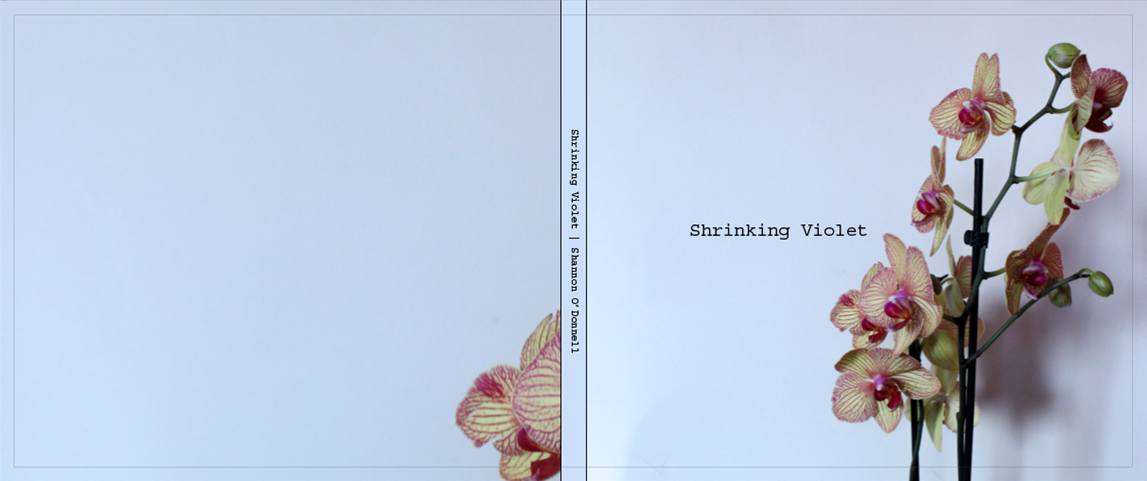
That’s Not The Way The River Flows Gender is being re-conceptualised. Our experience of gender is changing, transforming from being solely male and female, opening to a multitude of subcategories including; gender queer, non-binary, transgender and gender fluid. As we unpick the complicated narrative of gender and the generalisations that it encapsulates, we are forced to re-imagine what it is that makes us who we are and what we want or can identify as. The beginning of change starts with the self.
That’s Not The Way The River Flows (2019) is a photographic series that playfully explores masculinity and femininity through self-portraits. The work comes from stills taken from moving image of the photographer performing scenes in front of the camera. This project aims to show the inner conflicts that the photographer has with identity and the gendered experience. It reveals the pressures, stereotypes and difficulties faced with growing up in a heavily, yet subtly, gendered society and how that has impacted the acceptance and exploration of the self.
A Short Film: That’s Not The Way The River Flows A visual poem with word by me surrounding the claustrophobia of gender identity, while visuals poke fun at ideas of masculinity and femininity (2019).
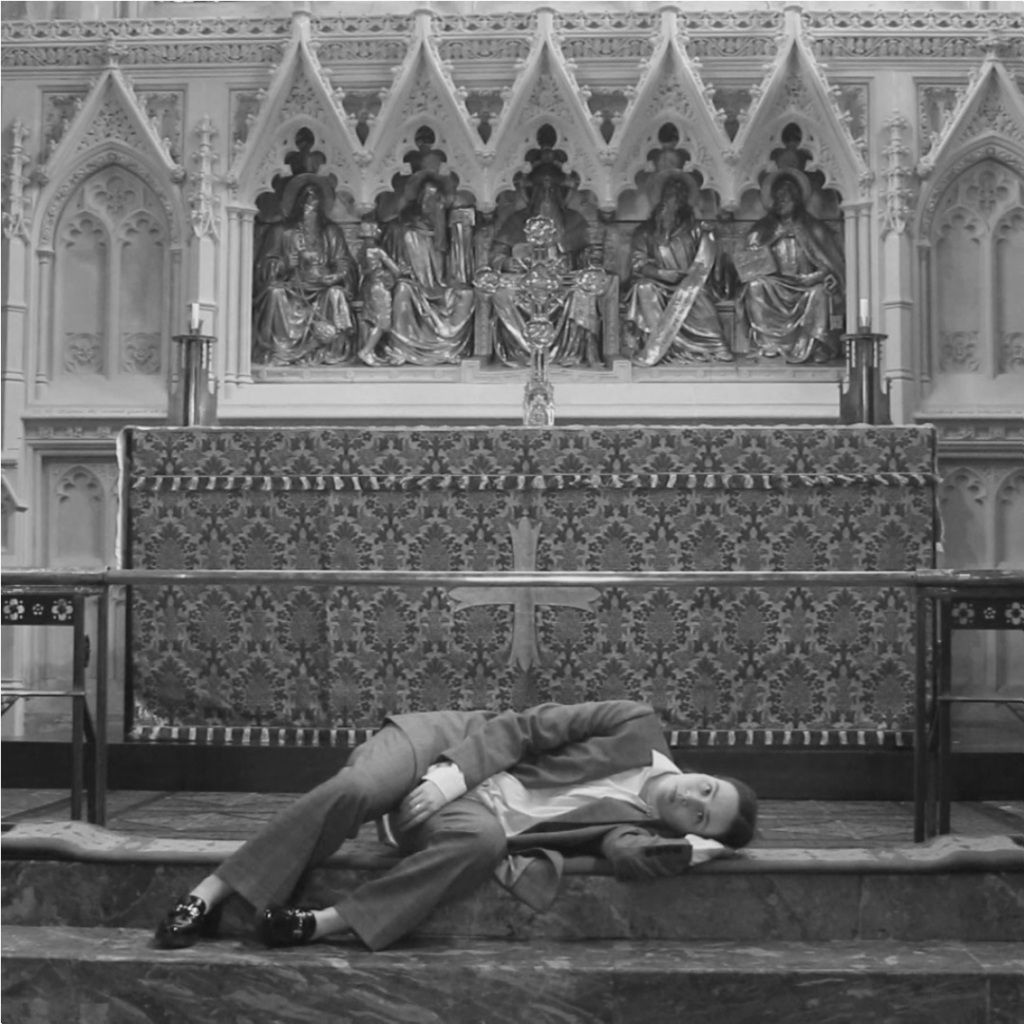
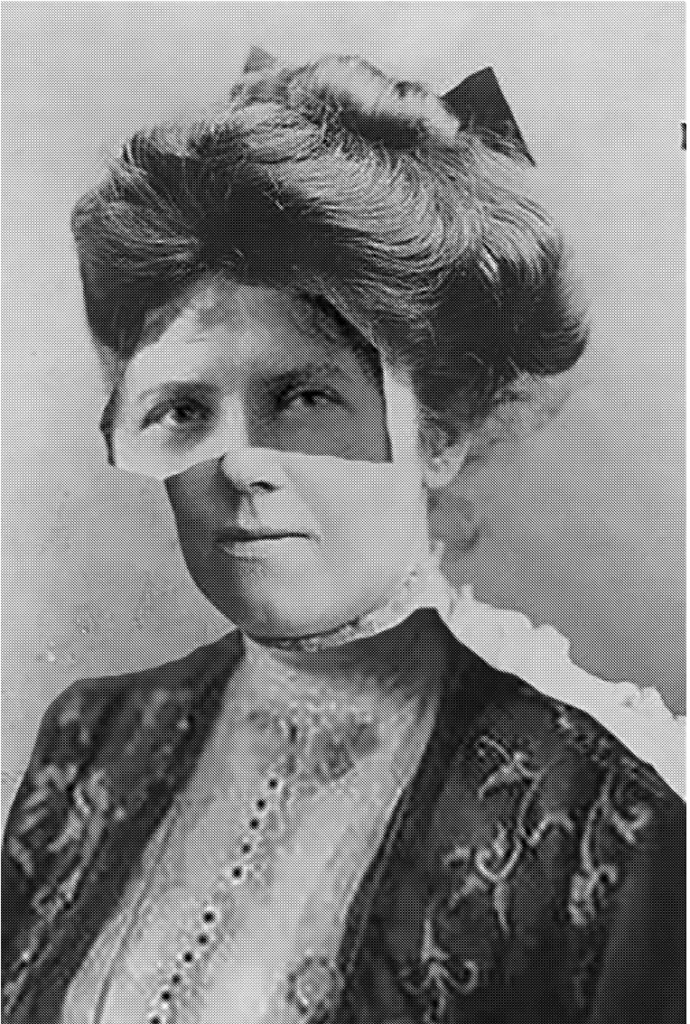
Here They Stood “Remember the dignity of your womanhood. Do not appeal, do not beg, do not grovel. Take courage, join hands, stand beside us, fight with us.” – Christabel Pankhurst
The Cat And Mouse Act, formally known as the Prisoners (Temporary Discharge for Ill-Health) Act, 1913 was formed in British Law specifically aimed at militant Suffragettes who went on hunger strike while imprisoned. The Act, passed on 25th April 1913, afforded prison guards to temporarily discharge individuals whose health was at major risk. Once in better health prisoners were informed to report back to carry out the rest of their sentence, many of whom did not conform.
The Cat And The Mice (2018) project, name derived from the Act of 1913, follows the path of Suffragettes and Suffragists alike around Cardiff in the early 1900s. It encapsulates historically significant places, now forgotten in modern city life. The project also aims to show how the efforts of those Welsh women within the Suffrage movement have allowed for contemporary women of Cardiff, specifically Riverside, the freedom to have a voice, to set up local peaceful organisations for change in the community, as well as a leading example to contemporary activists of today.
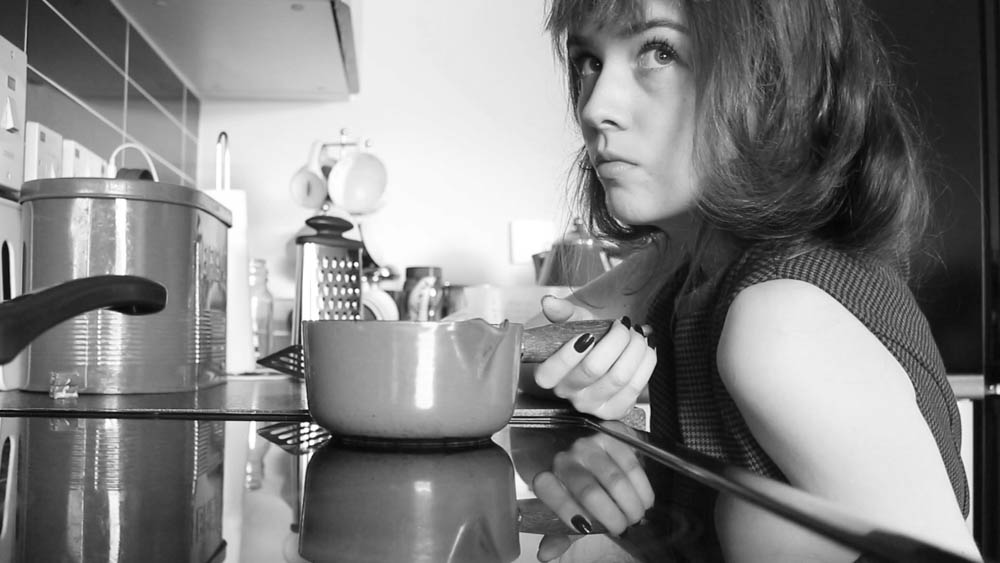
Susan’s Sleep (2018) is a short film that, when creating, became a form of therapy for me. It helped me to understand that I had a lot of unresolved trauma and for that reason and for my family I will not release the full short film but instead leave you with a trailer.
This body of work explores the traumatic experience that my family and I went through beginning on the 25th December 2016 and well into the new year. My mother was ill and on Christmas day was taken in an ambulance to the hospital as she could no longer breathe for herself. On the 27th December she was put into a medically induced coma after fighting with the NIV (Non Invasive Ventilation System). Here we spent our days by my mothers bedside in an isolated room on ICU (Intensive Care Unit). This short film is about that time in limbo, waiting each day for bad news, or any news.
By Your Bedside (2018) is a series of images that I created to compliment my short film, Susan’s Sleep. The images are quite, to reflect my own experience during the time my mother was in a coma. I went mute during this time, isolated myself and kept my emotions inside. The only time that I felt able to express myself was when I was sat by my mother’s bedside. These images convey the surreal movie-like experience I felt while waiting for my mum to wake up.
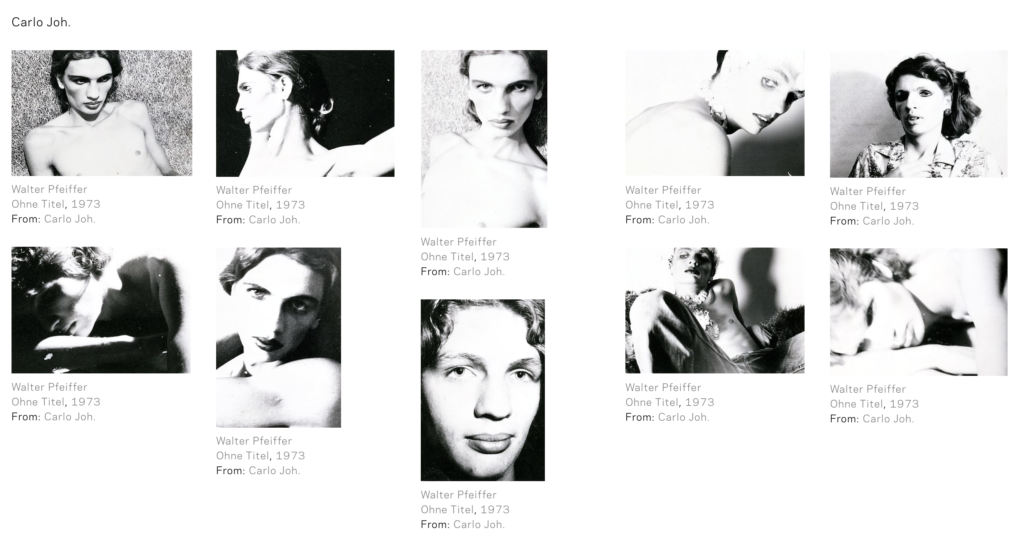
Casa Susanna: A series of polaroid portraits found at a jumble sale about 20 years after the images were originally taken in the 1960s. This was a place where men who enjoyed female dress and transgender women were able to fully be themselves without judgement. It was a kind of holiday place but with an extremely strong community that cared for one another surrounding it. Lissa Rivera. In Beautiful Boy (a chaptered series) the photographer makes images of her effeminate male partner, they have an interesting story on how he had felt so free during his time in college to dress and act as he felt confident but in the greater outside world he has reverted to sticking to the status quo and blending in as felt that he wouldn’t be accepted otherwise. Walter Pfeiffer – Carlo Joh. A collaboration between photographer and the subject where the subject brought in their own props and was involved in the creative process of how they wanted to be represented..
Clare Rae
Clare Rae, an artist from Melbourne, Australia who produces photographs and moving image works that interrogate representations of the female body via an exploration of the physical environment. Rae visited Jersey as part of the Archisle international artist-in-residence programme in 2017. She was researching the Claude Cahun archive, shooting new photography and film in Jersey, as well as running workshops.
From her research she produced a new body of work, Entre Nous: Claude Cahun and Clare Rae that was exhibited at the Centre for Contemporary Photography, Melbourne Australia 22 March – 6 May 2018, and subsequently at CCA Galleries in Jersey, UK, 7–28 September 2018.
In her series, Never standing on two feet, Rae considers Cahun’s engagement with the physical and cultural landscapes of Jersey, an aspect of her work that has received little analysis to date. Rae writes:
Like Cahun’s, my photographs depict my body in relation to place; in these instances sites of coastal geography and Jersey’s Neolithic ritual monuments. I enact a visual dialogue between the body and these environments, and test how their photographic histories impact upon contemporary engagements. Cahun used self-portraiture to subvert the dominance of the male gaze in photographic depictions of the female body in the landscape. My practice is invested in the feminist act of self-representation and I draw parallels between my performances of an expanding vocabulary of gesture and Cahun’s overtly performative images of the body expressing a multiplicity of identity. In this series, I tease out the interpretations inherent in landscape photography. I utilise gesture and the performing body to contrast and unsettle traditional representations of the female figure in the landscape.
See this blog post Photography, Performance and the Body for more details and context of the above artists work
Clare gave a artist talk contextualising her practice, covering recent projects that have engaged with notions of architecture and the body, and the role of performative photography in her work. Clare will discuss her research on these areas, specifically her interest in artists such as Claude Cahun, Francesca Woodman and Australian performance artist Jill Orr. Clare also discussed her photographic methodologies and practices, providing an analysis of her image making techniques, and final outcomes.
PHOTO-ASSIGNMENT 1: Homework
Here is the task that Clare Rae asked participants to respond to in a workshop she delivered while in Jersey in 2017.
1. Produce a self-portrait, in any style you like. Consider the history of self-portraiture, and try to create an image that alludes to, (or evades?) your identity.
2. Produce a performative photograph, considering the ideas presented on liveness, performance documentation and Cartier-Bresson’s decisive moment. ‘Captured’ vs. pre-meditated?
3. Produce a photograph that engages the body with the physical environment. Think of architecture, light, texture, and composition to create your image..
Francesca Woodman
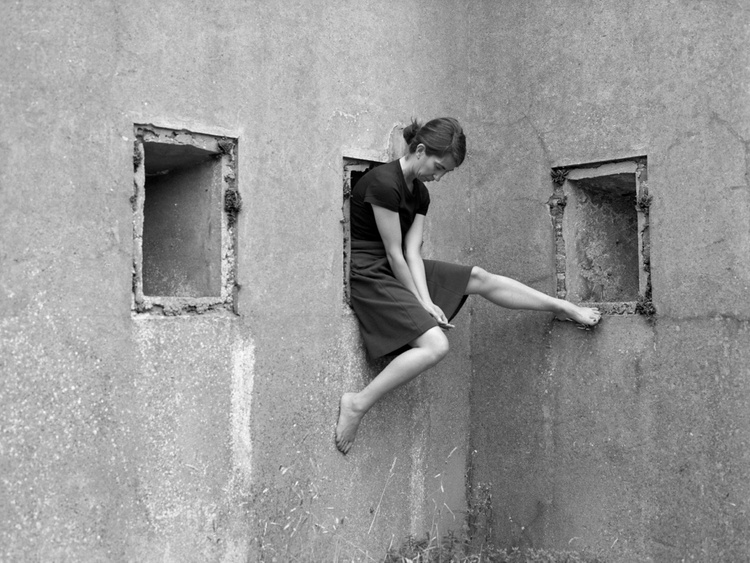
Another site of influence to Clare Rae is Francesca Woodman. At the age of thirteen Francesca Woodman took her first self-portrait. From then, up until her untimely death in 1981, aged just 22, she produced an extraordinary body of work. Comprising some 800 photographs, Woodman’s oeuvre is acclaimed for its singularity of style and range of innovative techniques. From the beginning, her body was both the subject and object in her work.
The very first photograph taken by Woodman, Self-portrait at Thirteen, 1972, shows the artist sitting at the end of a sofa in an un-indentified space, wearing an oversized jumper and jeans, arm loosely hanging on the armrest, her face obscured by a curtain of hair and the foreground blurred by sudden movement, one hand holding a cable linked to the camera. In this first image the main characteristics at the core of Woodman’s short career are clearly visible, her focus on the relationship with her body as both the object of the gaze and the acting subject behind the camera.
Woodman tested the boundaries of bodily experience in her work and her work often suggests a sense of self-displacement. Often nude except for individual body parts covered with props, sometimes wearing vintage clothing, the artist is typically sited in empty or sparsely furnished, dilapidated rooms, characterised by rough surfaces, shattered mirrors and old furniture. In some images Woodman quite literally becomes one with her surroundings, with the contours of her form blurred by movement, or blending into the background, wallpaper or floor, revealing the lack of distinction of both – between figure and ground, self and world. In others she uses her physical body literally as a framework in which to create and alter her material identity. For instance, holding a sheet of glass against her flesh, squeezing her body parts against the glass and smashing her face, breasts, hips, buttocks and stomach onto the surface from various angles, Woodman distorts her physical features making them appear grotesque.
Through fragmenting her body by hiding behind furniture, using reflective surfaces such as mirrors to conceal herself, or by simply cropping the image, she dissects the human figure emphasising isolated body parts. In her photographs Woodman reveals the body simultaneously as insistently there, yet somehow absent. This game of presence and absence argues for a kind of work that values disappearance as its very condition.
Since 1986, Woodman’s work has been exhibited widely and has been the subject of extensive critical study in the United States and Europe. Woodman is often situated alongside her contemporaries of the late 1970s such as Ana Mendieta and Hannah Wilke, yet her work also foreshadows artists such as Cindy Sherman, Sarah Lucas, Nan Goldin and Karen Finley in their subsequent dialogues with the self and reinterpretations of the female body.
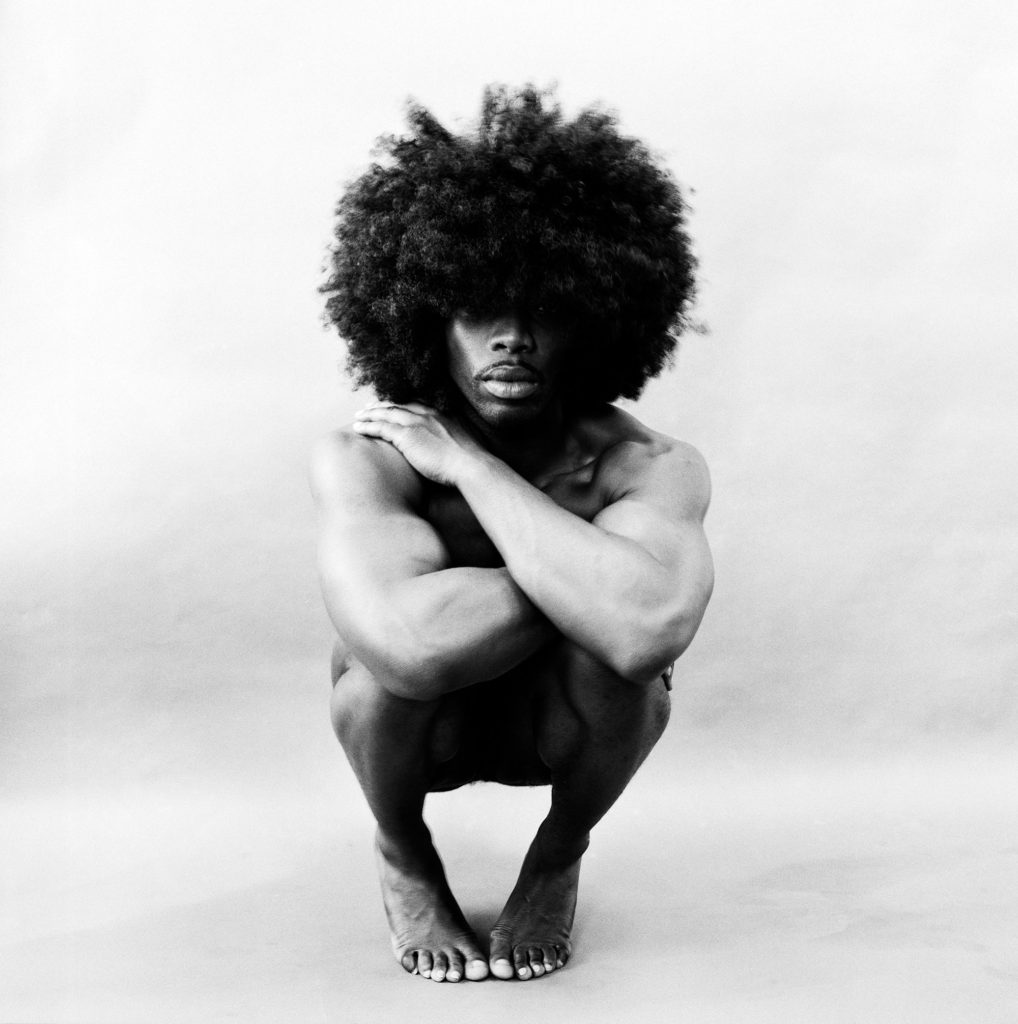
MASCULINITIES: LIBERATION THROUGH PHOTOGRAPHY Through the medium of film and photography, this major exhibition considers how masculinity has been coded, performed, and socially constructed from the 1960s to the present day. Examining depictions of masculinity from behind the lens, the exhibition brings together over 300 works by over 50 pioneering international artists, photographers and filmmakers such as Richard Avedon, Peter Hujar, Isaac Julien, Rotimi Fani-Kayode, Robert Mapplethorpe, Annette Messager and Catherine Opie to show how photography and film have been central to the way masculinities are imagined and understood in contemporary culture. The show also highlightslesser-known and younger artists – some of whom have never exhibited in the UK – including Cassils, Sam Contis, George Dureau, Elle Pérez, Paul Mpagi Sepuya, Hank Willis Thomas, Karlheinz Weinberger and Marianne Wex amongst many others. Masculinities: Liberation through Photography is part of the Barbican’s 2020 season, Inside Out, which explores the relationship between our inner lives and creativity.
In the wake of #MeToo the image of masculinity has come into sharper focus, with ideas of toxic and fragile masculinity permeating today’s society. This exhibition charts the often complex and sometimes contradictory representations of masculinities, and how they have developed and evolved over time. Touching on themes including power, patriarchy, queer identity, female perceptions of men, hypermasculine stereotypes, tenderness and the family, the exhibition shows how central photography and film have been to the way masculinities are imagined and understood in contemporary culture.
Here is a downloadable teaching resource that includes information, activities and tasks that will help you develop ideas.
Key Focus Areas and questions in relation to the exhibition and the concept: MASCULINITIES
1. What does it mean to be male?
2. What overarching themes do you associate with the words masculine, masculinities or male? What would you classify as hegemonic (ruling) masculine values or traits, particularly historically – e.g. power, leadership, strength, dominance?
3. What would you say are the assumed norms of masculinity today? Think of examples of what breaks or subverts these norms and find examples in the exhibition.
4. Compare expectations and perceptions of masculinity through time, society and place – where are we now and where have we come from? Look at the variety of masculine identities encompassed, often complex or even contradictory, shaped by culture and society. In addition, you could consider the word femininities in just the same way and compare commonalities or differences.
5. How much are we conditioned by the society or culture in which we live, in terms of our gender identities? Consider gender expectations from birth onwards – what messages do we receive about who we are or are supposed to be and accompanying notions of equality? Do you feel there is still pressure put on young boys to be a certain way or to conform to some perceived gender norm?
6. Consider too, the word liberation in the context of the title – how and if photography is a liberating force for the subjects of the camera’s gaze
7. Do you think photography such as that seen in the exhibition can help to pave the way for new attitudes and choices? Discuss using examples you find in the exhibition.
In 2018 the Barbican staged another ground breaking exhibition; ANOTHER KIND OF LIFE: PHOTOGRAPHY ON THE MARGINS. Touching on themes of countercultures, subcultures and minorities of all kinds, the show featured 20 photographers from the 1950s to present day, reflecting a more diverse complex view of the world.
Another Kind of Life followed the lives of individuals & communities on the fringes of society from America to India, Chile to Nigeria. Driven by personal and political motivations, many of the photographers sought to provide an authentic representation of the disenfranchised communities with whom they spent months, years or even decades with, often conspiring with them to construct their own identity through the camera lens.
Featuring communities of sexual experimenters, romantic rebels, outlaws, survivalists, the economically dispossessed and those who openly flout social convention, the works present the outsider as an agent of change. From street photography to portraiture, vernacular albums to documentary reportage, the show includes the Casa Susanna Collection, Paz Errazuriz, Pieter Hugo, Mary Ellen Mark, Dayanita Singh, Teresa Margolles, Katy Grannan, Phillipe Chancel, Daido Moriyama, Seiji Kurata, Igor Palmin and many others.
Narrative photography, also referred to as Tableaux photography often have an element of performing for the camera. See artists such as, Duane Michaels, Tom Hunter, Anna Gaskell, Jeff Wall, Gregory Crewdson, Philip- Lorca diCorcia, Sam Taylor Johnson (former Sam Taylor-Wood), Hannah Starkey, Tracy Moffatt, Vibeke Tandberg. Read also page 26 in exam booklet that lists other artists, Sandy Skoglund, Carrie Mae Weems, Deana Lawson and Laurie Simmons who are using photography to create complex narratives using staged events and artificial set ups. The historical context of this type of photography is Pictorialism – make sure you reference this in your research and provide examples from this period of photographic history and experimentation.
Duane Michaels: photo-stories eg. The Bogeyman, The Spirit Leaves the Body. A self-taught photographer, Duane Michals broke away from established traditions of the medium during the 1960s. His messages and poems inscribed on the photographs, and his visual stories created through multiple images, defied the principles of the reigning practitioners of the form. Indeed, Michals considers himself as much a storyteller as a photographer.
Tom Hunter: Headlines, Life and Death in Hackney Since 1997, Tom Hunter has turned his camera on his surrounding neighbourhood of Hackney, showing empathy without being polemic. He is known for a remarkable blend of political commentary, history of art and the technicalities of photography. Working to create photographs that are the result of an exaggerated link between newspaper headlines, paintings from The National Gallery’s permanent collection and Hackney lifestyle, Hunter often seems to ask more questions than he can answer visually.
Read more here about Tom Hunter’s work in The Guardian
Anna Gaskell crafts foreboding photographic tableaux of preadolescent girls that reference children’s games, literature, and psychology. She is interested in isolating dramatic moments from larger plots such as Lewis Carroll’s Alice in Wonderland, visible in two series: Wonder (1996–97) and Override (1997). In Gaskell’s style of “narrative photography,” of which Cindy Sherman is a pioneer, the image is carefully planned and staged; the scene presented is “artificial” in that it exists only to be photographed. While this may be similar to the process of filmmaking, there is an important difference. Gaskell’s photographs are not tied together by a linear thread; it is as though their events all take place simultaneously, in an ever-present. Each image’s “before” and “after” are lost, allowing possible interpretations to multiply. In untitled #9of the wonder series, a wet bar of soap has been dragged along a wooden floor. In untitled #17 it appears again, forced into a girl’s mouth, with no explanation of how or why. This suspension of time and causality lends Gaskell’s images a remarkable ambiguity that she uses to evoke a vivid and dreamlike world.
Anna Gaskell
Jeff Wall
Gregory Crewdson
Philip-Lorca diCorcia
Sam Taylor-Johnson
Tracy Moffat
Untitled – May 1997 1997 Hannah Starkey born 1971
Vibeke Tandberg
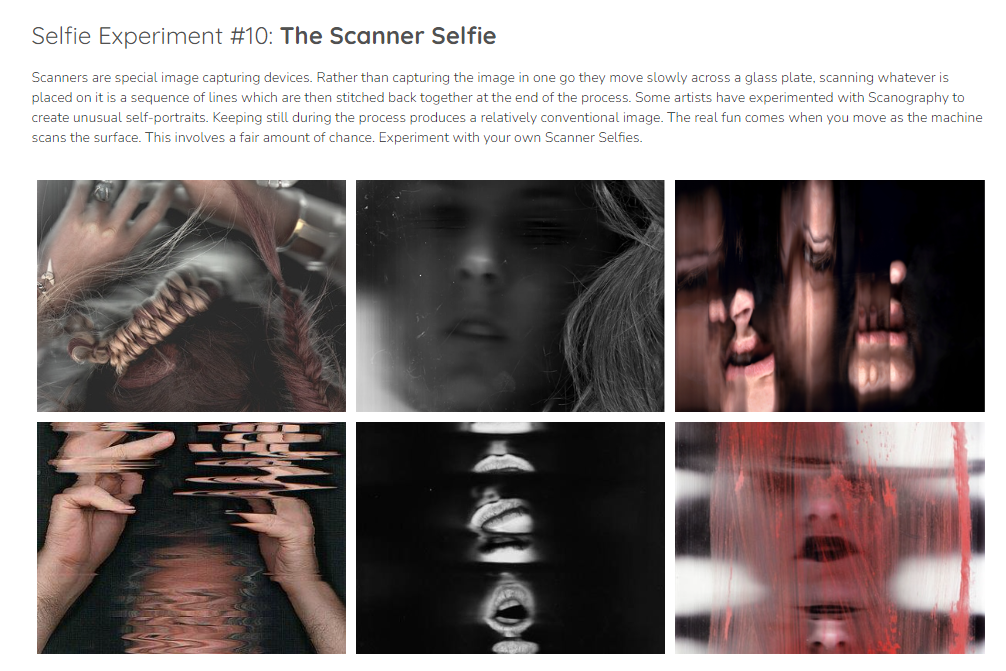
PHOTO-ASSIGNMENT 2: Selfie Experiments
Choose 3-5 of these ideas below to explore and produce a range of outcomes. Remember to create blog posts that clearly show your process and where the ideas come from…
Other possibilities
Luis Cobelo
Hans Peter Feldmann – identity, status and gender
John Coplans Self Portraits 1984Hassan Hajjaj -culture clash- Moroccan Pop ArtKensuke Koike – reconstituting found portraits to create new / possible identities
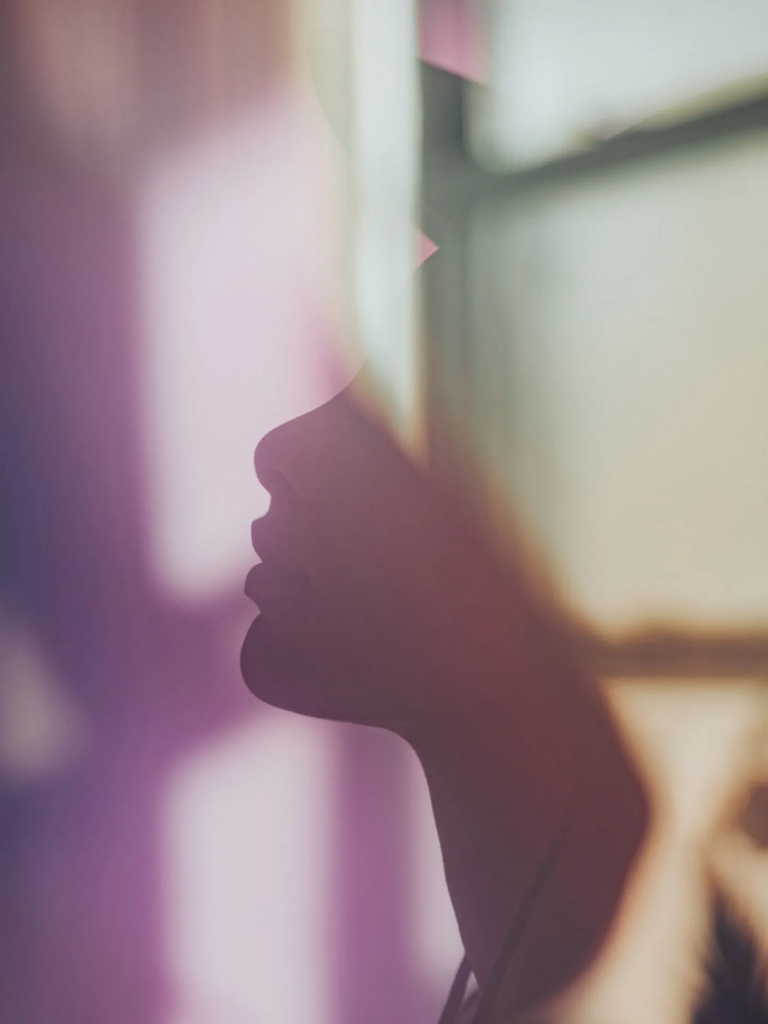
Shooting through materials
Dino Kuznik shares how he shoots through household materials like grease and broken glass…See what transparent materials or objects you have lying around and see if you can use them to throw light and create a visually compelling creative self-portrait.
Dino Kuznik
Always explore, describe and explain :
who (is in the photo / took the photo)
what (is the photo about?)
why (has the image been made / displayed / connected to other images or text)
where (was the photo taken)
how was the photo taken (technical attributes)
when (was the photo taken)
LINKS to high scoring A GRADE exemplar EXAM PROJECTS
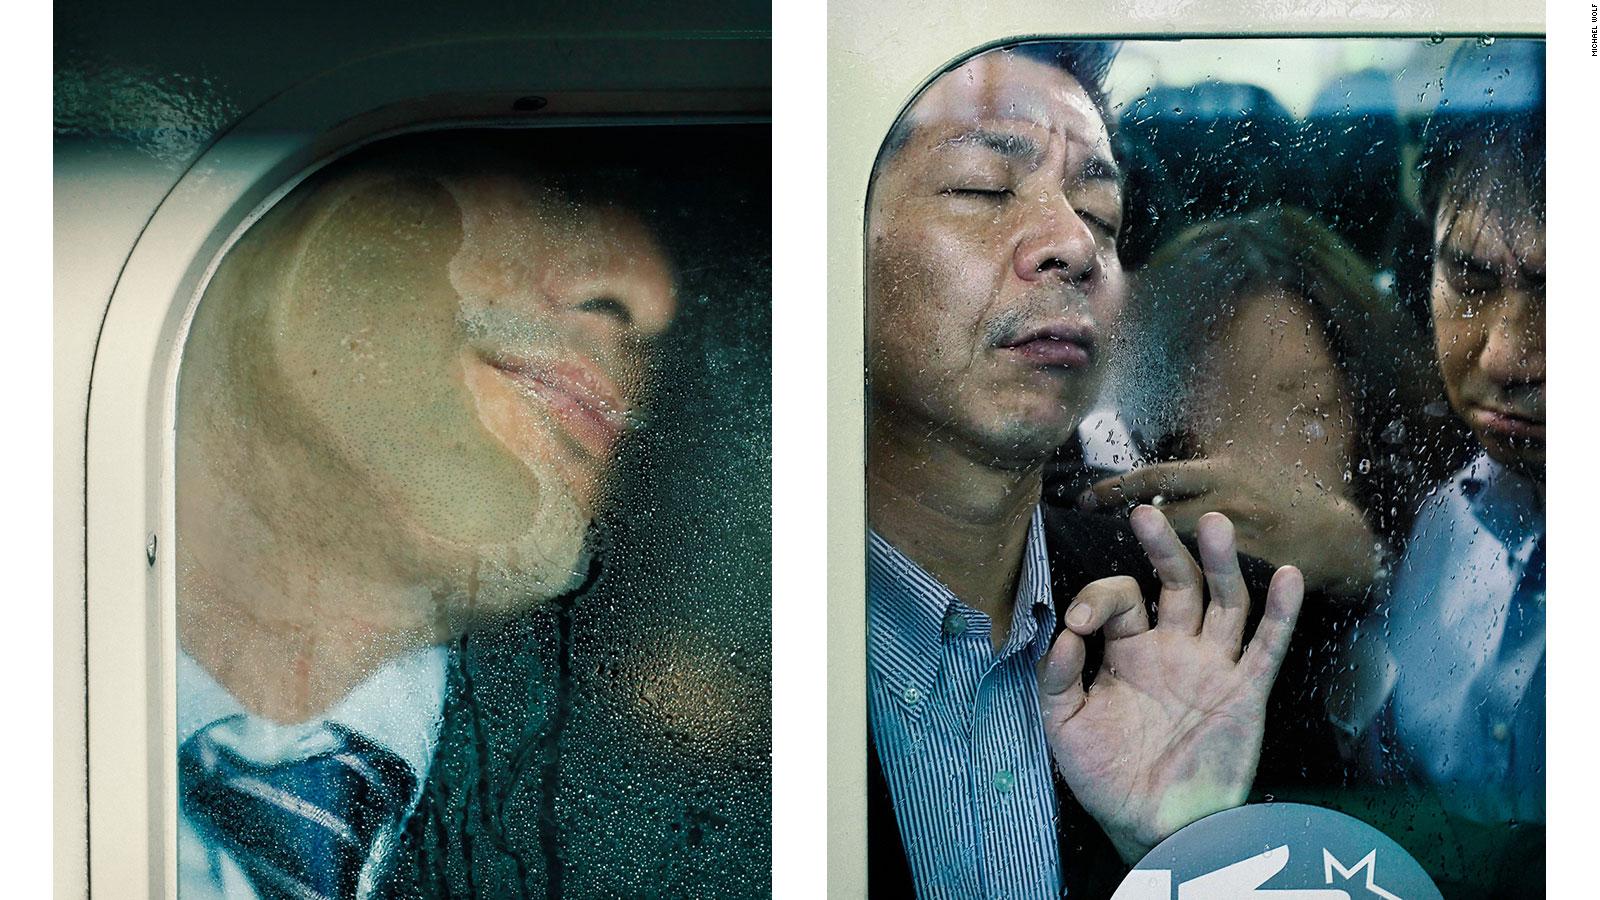
The daily grind can be a test of endurance. In Tokyo Compression, Michael Wolf recorded the extreme discomfort of Japanese commuters pressed up against windows dripping with condensation on their journeys to and from work.
In Harlem Trolley Bus, Robert Frank showed the divisions within American society in the mid-20th century. Dryden Goodwin took pictures of exhausted travellers on London night buses and wove a protective cocoon of blood capillaries around them.
Connections with film making…
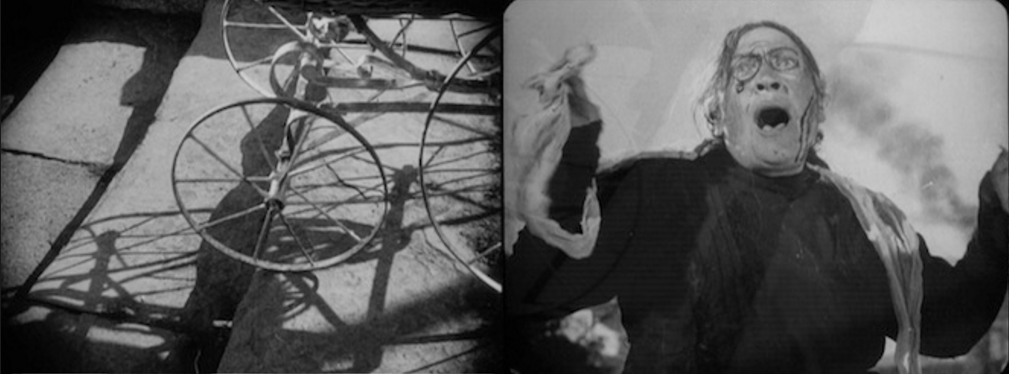
The idea for this project comes from Luke Fowler‘s series of half-frame photographs recently published in the book ‘Two-Frame Films‘. The project is intended to encourage students to concentrate on the editorial aspect of photography, the selection and juxtaposition of photographic images and how this might affect the ways in which a viewer engages with the work. Fowler is better known for his work in film but has used a half-frame camera as part of his practice. This work explores the relationship between two juxtaposed images. A half frame camera exposes two shots on each 35mm frame. A roll of 36 exposures therefore produces 72 images in pairs. The resulting diptychs are still images but reference the theory of montage, first articulated by Russian film makers in the 1920s, specifically Sergei Eisenstein
An example of two frames from Sergei Eisenstein’s film ‘Battleship Potemkin’, 1925
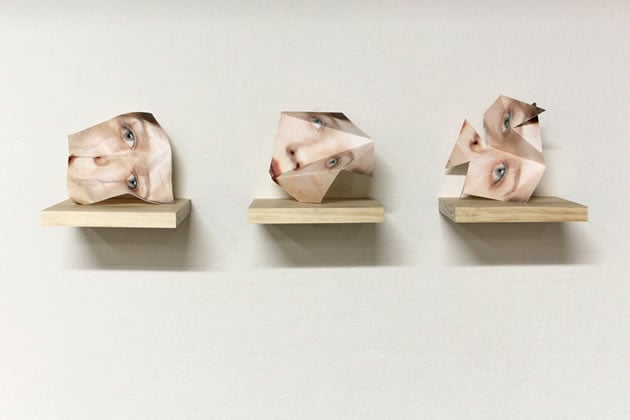
Thinking sculpturally / 3-D options
Sculptural images – using print-outs – student example
MOCK EXAM PREPARATION: Final prints by Jan 24th 3.30pm
We expect see a selection of final outcomes from various portrait tasks and assignments. Ensure that your final images are a direct response to your chosen photographer(s) and show a clear visual link
1-2 environmental portraits
3-4 studio portraits showing different lighting techniques etc.
1-2 self-portraits from Masculinity/ Femininity
Add your images to the print folder here:
M:\Radio\Departments\Photography\Students\Image Transfer\Y12 Portrait Prints Jan 2024
CONTROLLED CONDITIONS : Essentials
You will have one full day = 5 hours to complete this unit so make sure you use it productively
Complete and publish relevant blog posts as per Checklist above/ Go4School Tracking sheet and comments from teacher. BLOG SIZE images = 1000 pixels on SHORT EDGE
Produce mock versions of your final prints and describe how you wish to present them
later on…
Complete mounting all final prints and include label and velcro
Produce a virtual gallery and write an evaluation, comment on:
– How successful was your final outcomes? – Did you realise your intentions? – What references did you make to artists references – comment on technical, visual, contextual, conceptual? – Is there anything you would do differently/ change etc?
PREPARE AND SAVE IMAGES FOR PRINTING:
File Handling and printing...
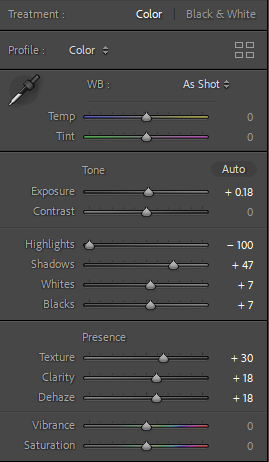
Remember when EXPORTING from Lightroom you must adjust the file size to 1000 pixels on the Short edge for “blog-friendly” images (JPEGS)
BUT…for editing and printing when EXPORTING from Lightroom you must adjust the file size to Short edge for “high resolution” images (JPEGS) like this…
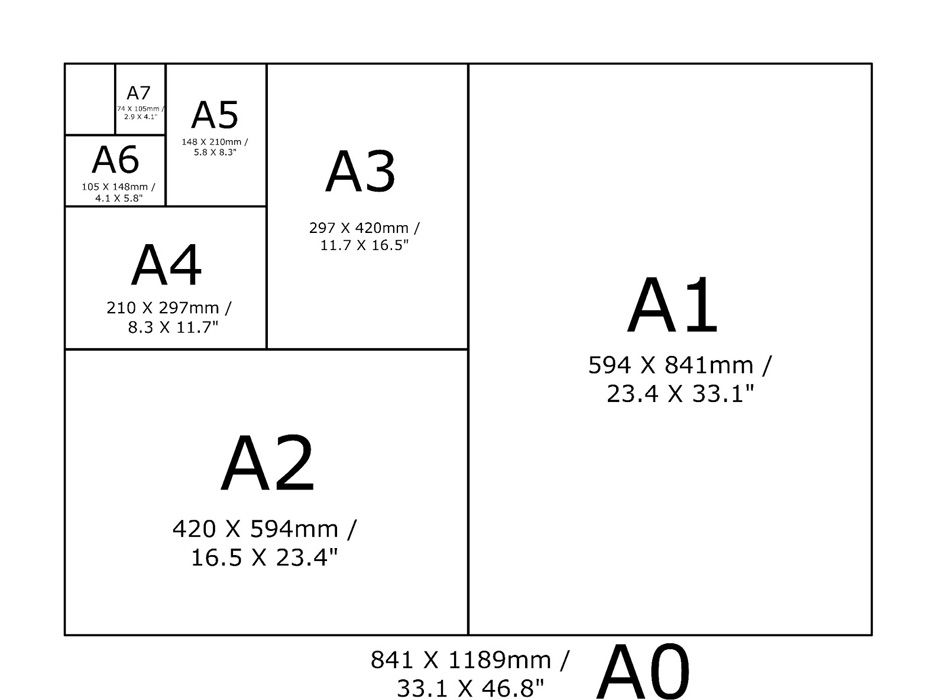
A5 Short Edge = 14.8 cm
A4 Short Edge = 21.0 cm
A3 Short Edge =29.7 cm
This will ensure you have the correct ASPECT RATIO
Ensure you label and save your file in you M :Drive and then copy across to the PRINT FOLDER / IMAGE TRANSFER
M:\Radio\Departments\Photography\Students\Image Transfer\Y12 Portrait Prints Jan 2024
For a combination of images, or square format images you use the ADOBE PHOTOSHOP > NEW DOCUMENT + PRINT PRESETS on to help arrange images on the correct size page (A3, A4, A5)
You can do this using Photoshop, Set up the page sizes as templates and import images into each template, then you can see for themselves how well they fit… but remember to add an extra 6mm for bleed (3mm on each side of the page) to the original templates. i.e. A4 = 297mm x 210 but the template size for this would be 303mm x 216mm.
Making a Virtual Gallery in Photoshop
Download an empty gallery file…then insert your images and palce them on the walls. Adjust the persepctive, size and shape using CTRL T (free transform) You can also add things like a drop shadow to make the image look more realistic…
For the 5 x weeks leading up to the Year 12 PHOTOGRAPHYCONTROLLED CONDITIONS you will need to refer to this resource pack for ideas and inspiration… “SELF -PORTRAIT and IDENTITY JAC PDF” (to find it just copy and paste the link below into the top bar of the folder icon on your screen) M:DepartmentsPhotographyStudentsResourcesPortraitureTO DO
Follow the 10 Step Process and create multiple blog posts for each unit to ensure you tackle all Assessment Objectives thoroughly :
Mood-board, definition and introduction (AO1)
Mind-map of ideas (AO1)
Artist References / Case Studies (must include image analysis) (AO1)
Photo-shoot Action Plan (AO3)
Multiple Photoshoots + contact sheets (AO3)
Image Selection, sub selection, review and refine ideas (AO2)
For my Rembrandt shoot, I believe my photos could improve by more experimentation with the positioning of the light.
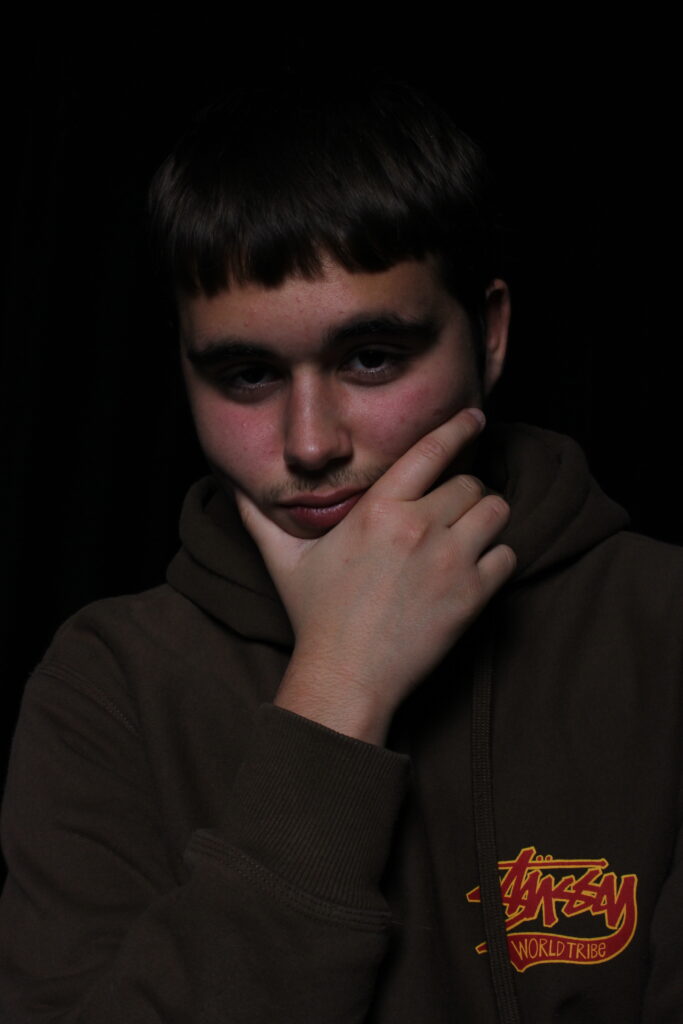
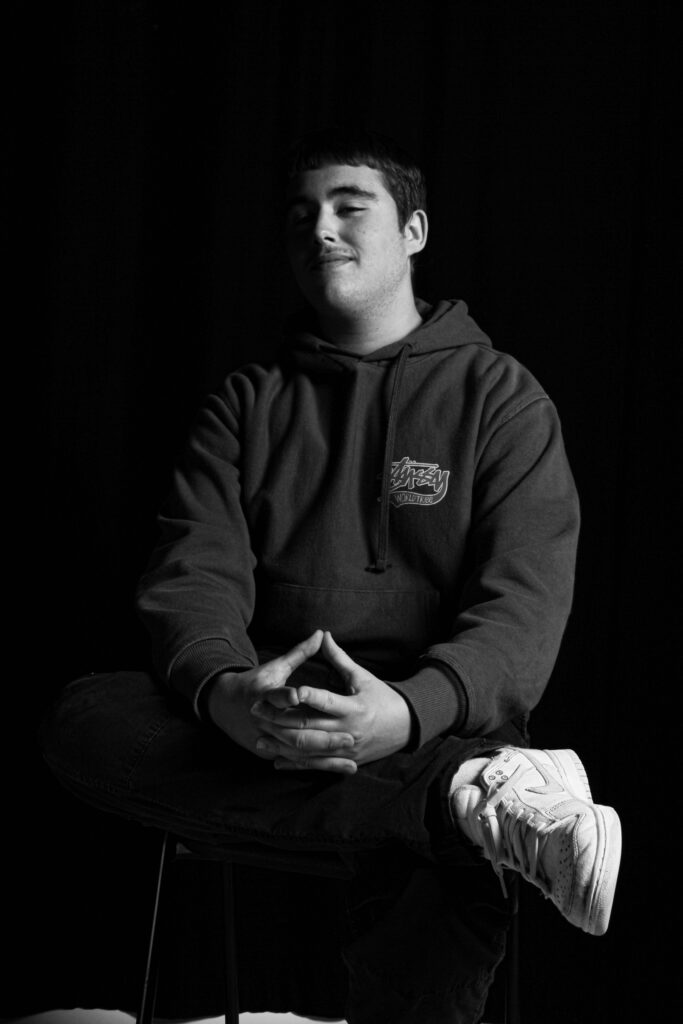
Out of the shoot, these where my best, with the recognisable light triangle on the cheek of the subject being the aim to be captured.
3 Best photos:
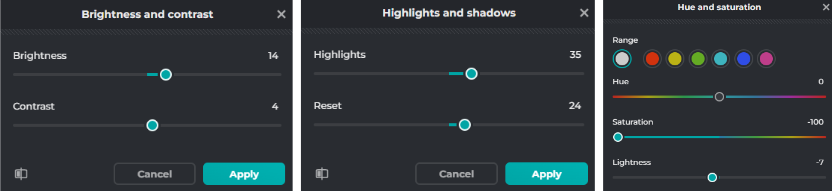
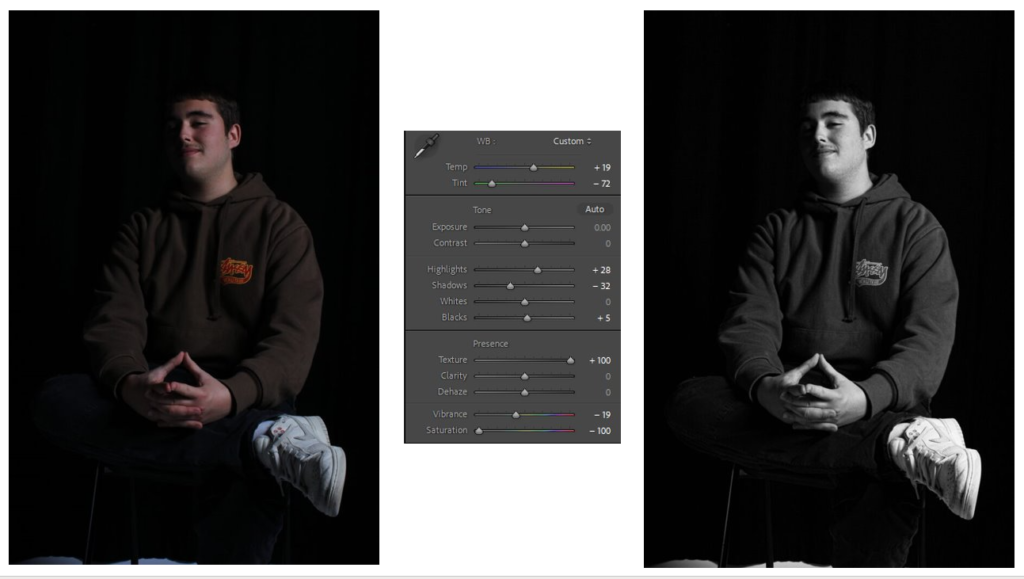
Edits:
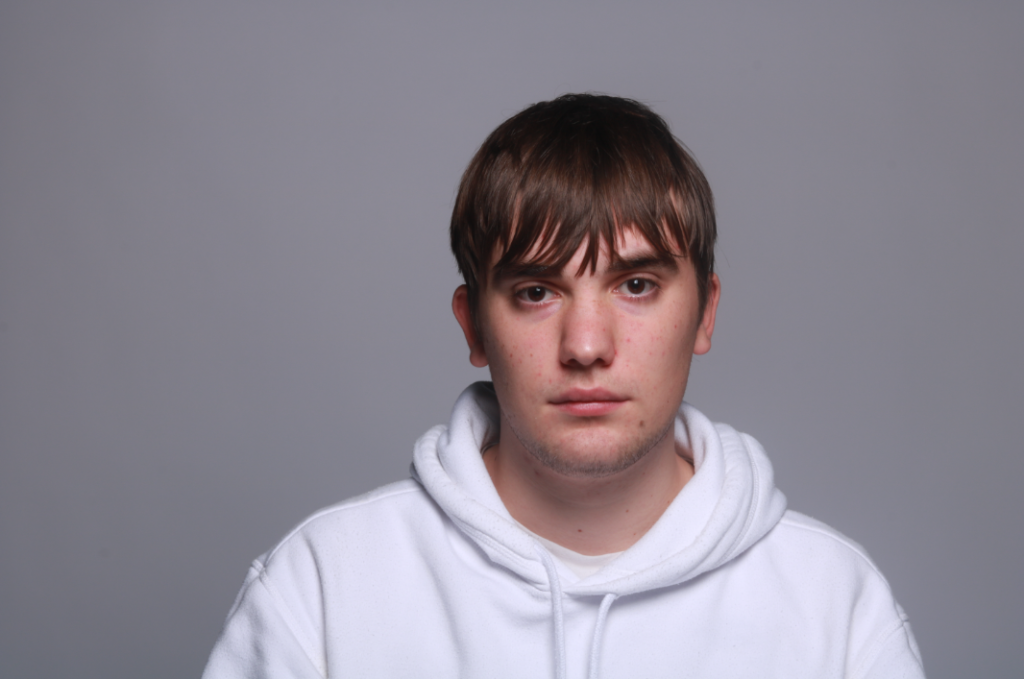
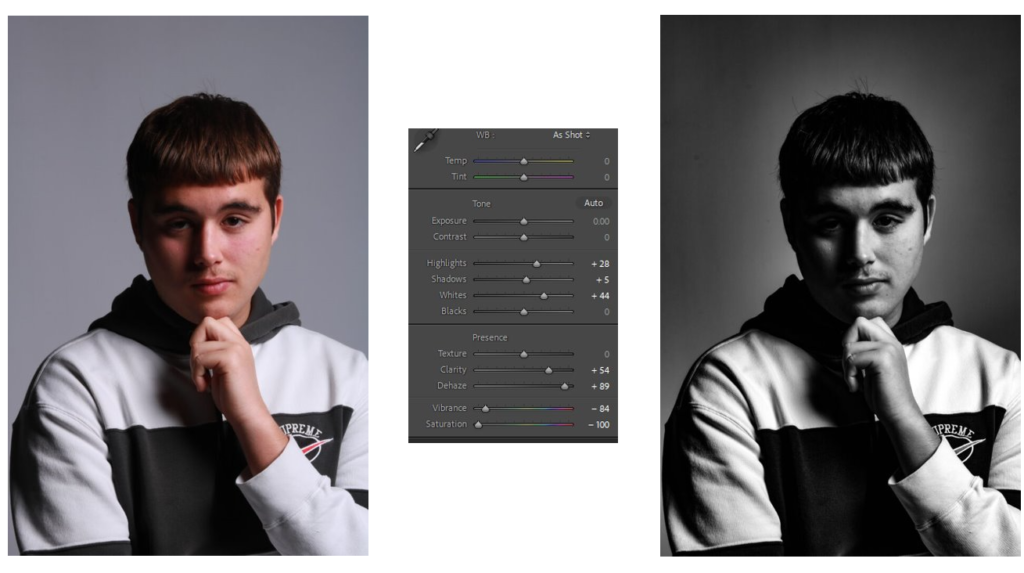
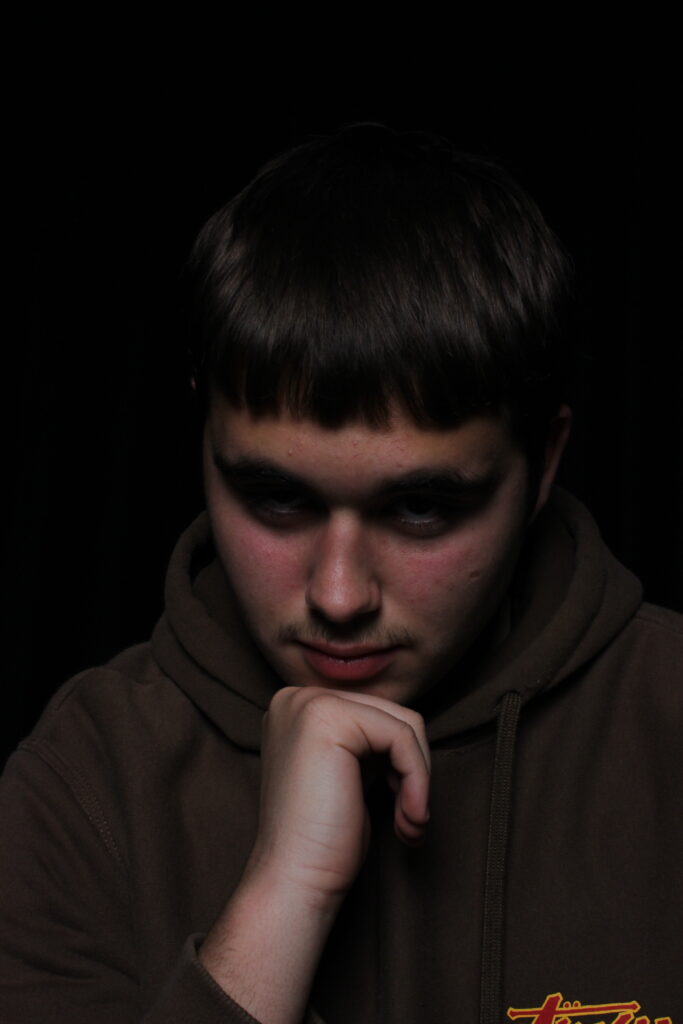
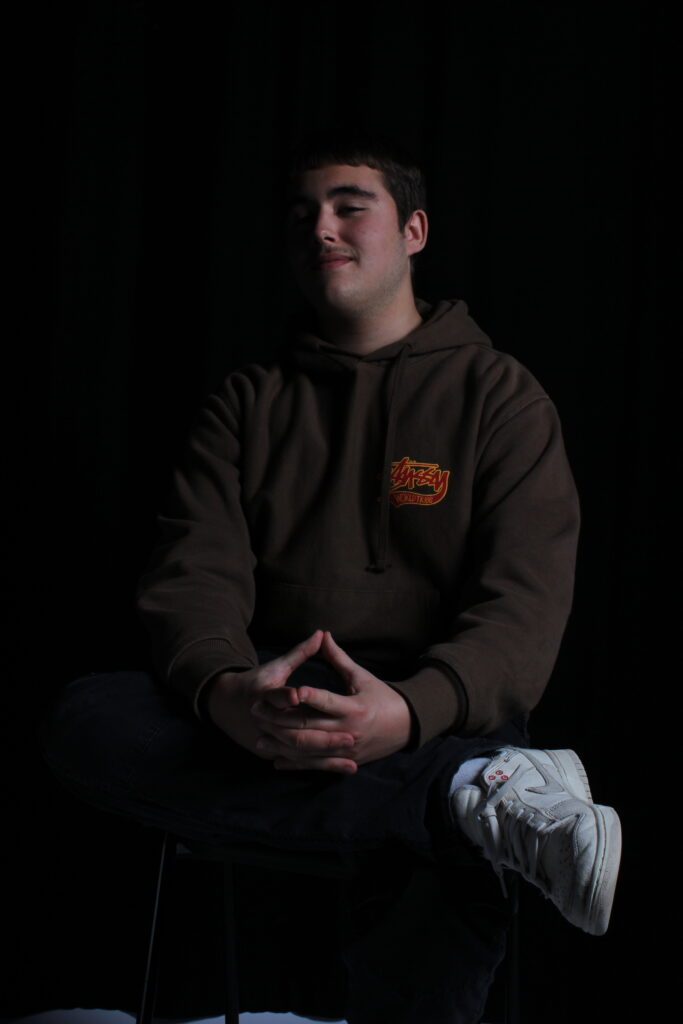
Creating a black and white effect it added more tone and contrast to the image. I liked these edits as by converting into a black and white image, its makes the subjects form look separate from the background, making this interesting 3D effect.
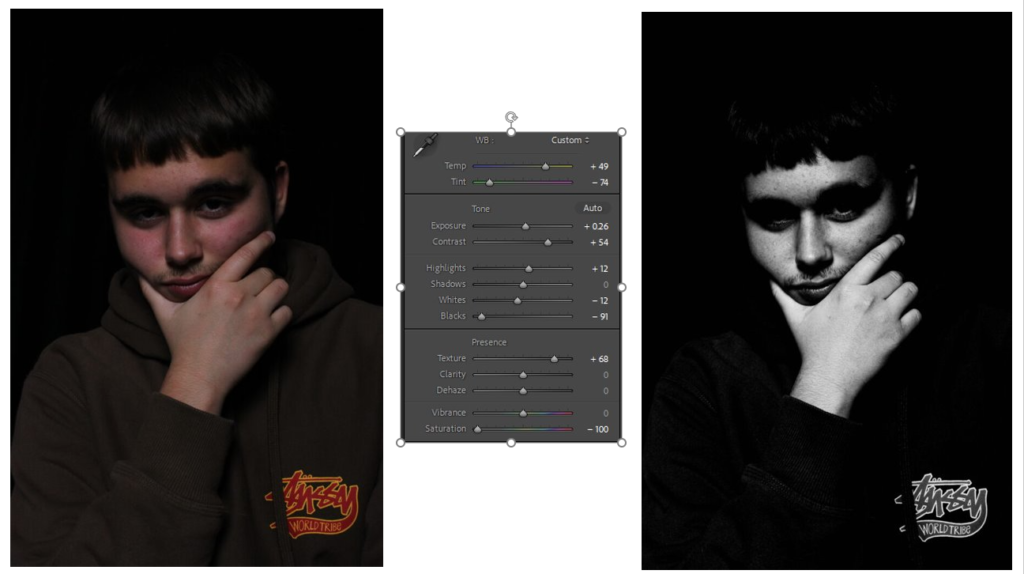
(Such as this one, the grey background separates with the contrast of his white and black hoodie. I Made this effect by altering with the saturation and adjusting different areas with the use of contrast, highlights and temperature).
(With this photo, I tried to lessen the highlights to make the light triangle more predominant, this, alongside with the use of some contrast it adds more depth and form to the image. By making the white higher it creates that strong lighting effect, ruminant of Rembrandts early use with portraits in Hollywood).
(Although the light triangle is more circular with its lines, I used texture, clarity and de hazing to create a dark toned portrait. Additionally by lowering the highlights and black aspects of the image, it allowed the bright parts of the image to create a tone shift of a different merge of shades).
Butterfly –
3 best photos:
I like how these images created the recognisable ‘butterfly’ below the subjects noses, this alongside the use of shadows surrounding them, it creates an nice composition.
For next time, I will try and create more photos with this effect as I find it, Interesting to play around with.
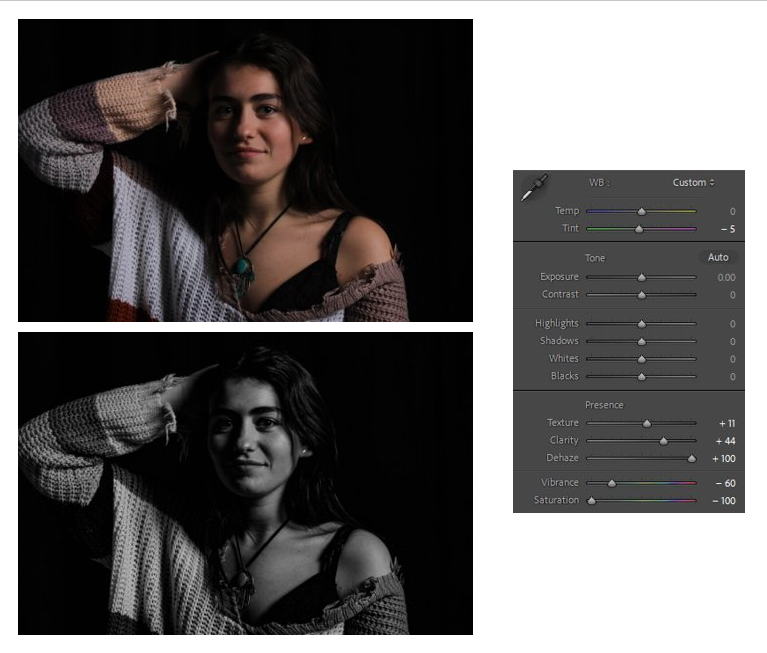
Edits:
For my Butterfly edits, I altered with texture, shadows and highlights to create a very stark trio of photos.
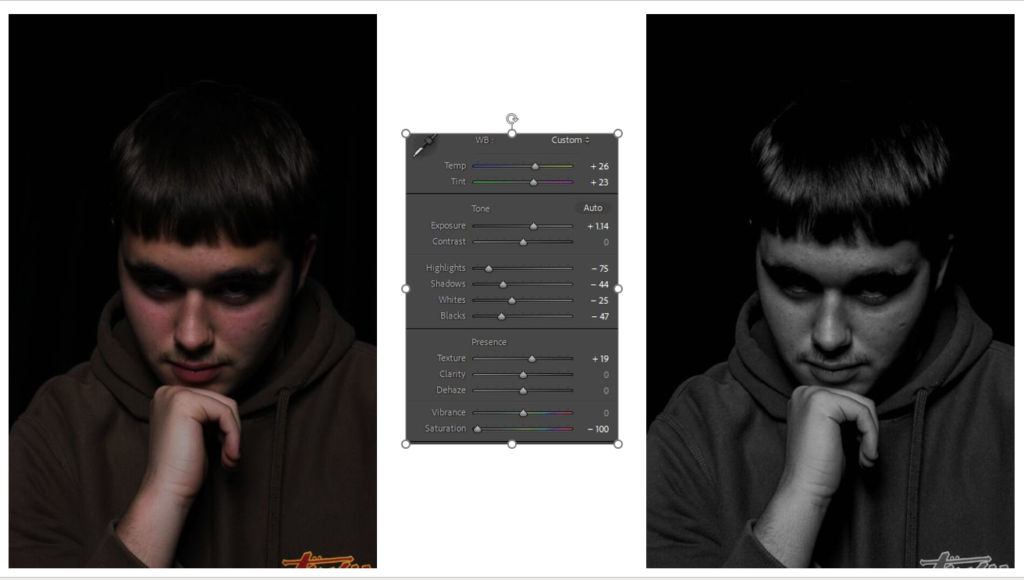
(For this image, by lowering the saturation, altering the images temperature as-well as the texture it creates a gritty but cool effect on the subject. With a sort of 2D effect, it looks as if they where painted onto a black canvas).
(With some good shadows already present, I edited further by lowering them as-well as some other elements such as highlights and the whites and blacks to generate a more matte effect on the image).
(Going for a different style, away from greyscale, I tried to make the shadows more faded by decreasing the black, and increasing the exposure, this creates a more higher toned lighting effect).
Chiaroscuro –
3 best photos:
I believe these are my best Chiaroscuro photos, I like how the light creates an interesting 3D effect, with shadows being created through creases in clothes.
For improvement, I will try to improve the brightness of the light.
Edits:
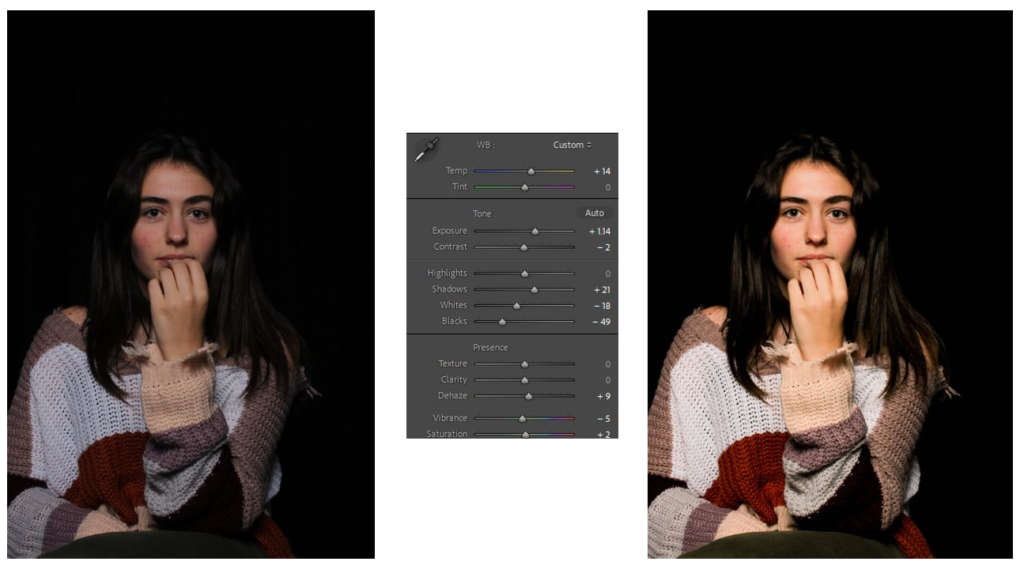
(By increasing the image temperature I was able to increase the lights brightness with this image. To create a more standout effect with the shadows).
(With the original image I found that it wasn’t bright enough, so by using a low saturation alongside a darker shadow effect the contrast of the white tones to the black makes a distinct composition).
(With the outcome of this it already fitting the aesthetic, I added only little by altering the texture, clarity and dehazing, sticking to the genre of my mainly greyscale images, I lowered the saturation).
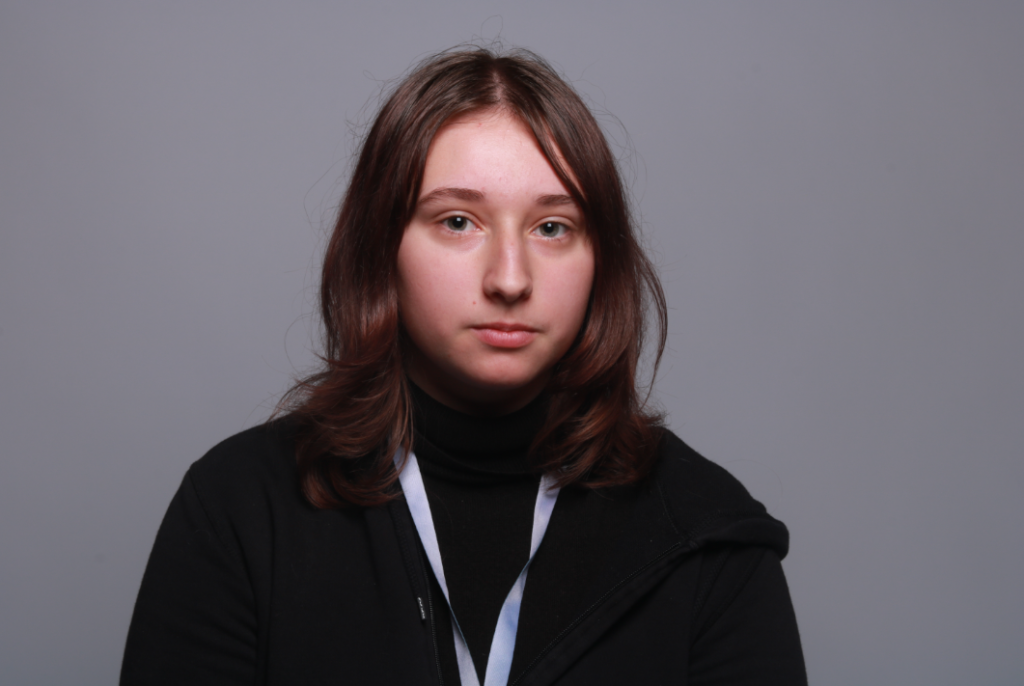
Full photos:
Rembrandt
Butterfly
Chiaroscuro
In conclusion, I like these images and believe they are a good first attempt at trying Studio lighting techniques.
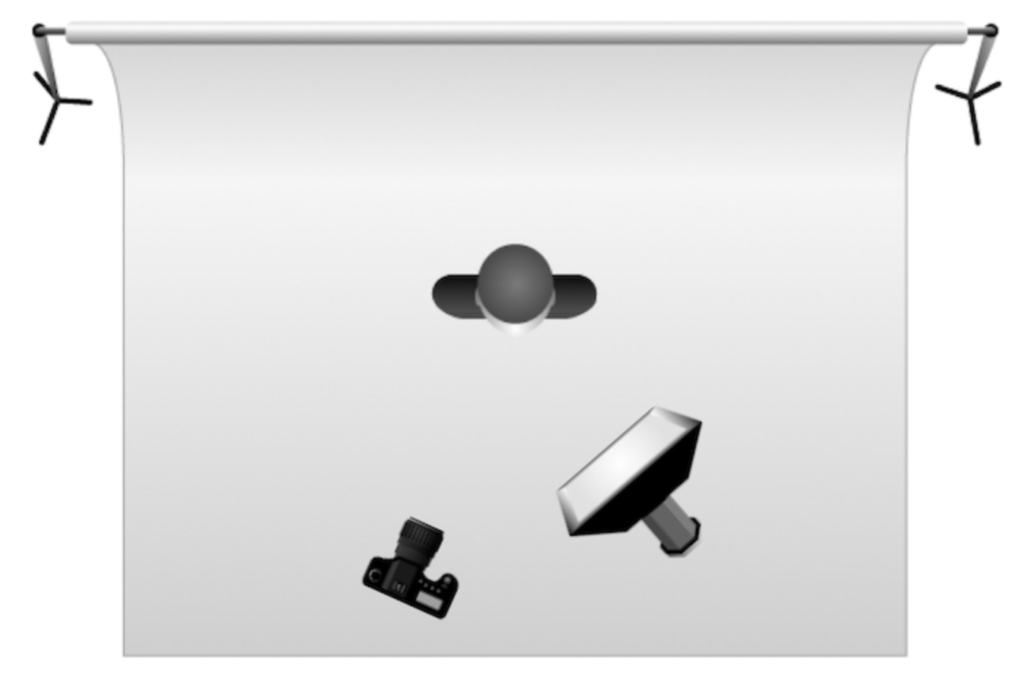
We use studio lighting because it allows us to create a variety of effects naturally, without the need for editing. Studio lighting also presents a professional look in photos, differing from the quality without studio lighting. Studio lighting does many things to a photograph like setting the mood, creating shadows and texture, providing direction and more. Using studio lighting is much easier than any other, for example, natural lighting, you can’t move the sun around and adjust the brightness like you can with most studio lighting.
1 Point Lighting
1 point lighting is a lighting set up which uses a single light source to illuminate the subject. The light is often positioned directly in front or behind the camera and can create the illusion that the subject is 2D, however, it is also often positioned at a 45 degree angle to the subject. The light used for this set up is known as the key light.
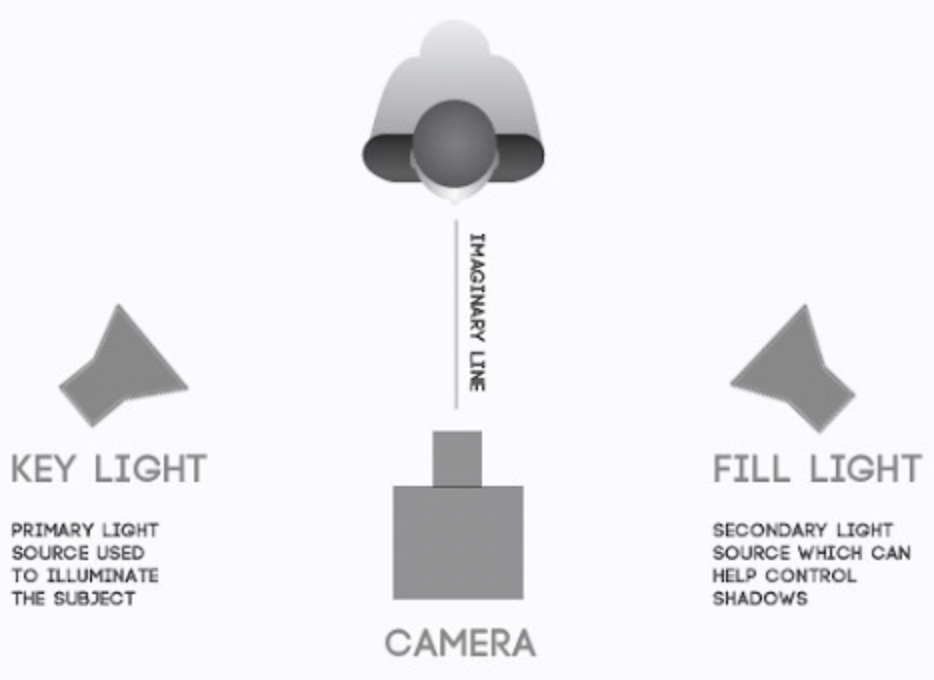
2 Point Lighting
2 point lighting consists of 2 different types of light, the key light and the fill light. The key light is placed to one side of the camera and illuminates the subject, creating shadows and the fill light is positioned directly opposite the key light to ‘fill in’ the shadows. This produces a more harmonised and authentic appearance.
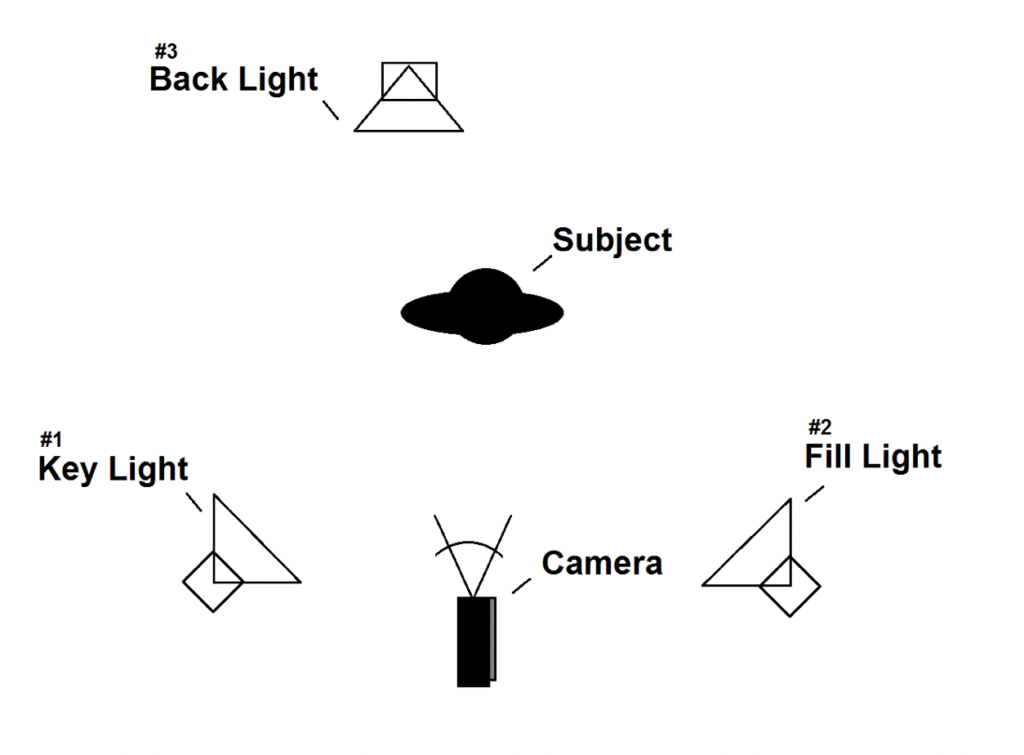
3 Point Lighting
3 point lighting involves the use of 3 lights which are strategically placed in order to create a well balanced photograph, whilst illuminating the subject. Alike 2 point lighting, 3 point lighting includes a key light and fill light, however, it also has a backlight. The backlight is placed behind the subject to illuminate the sides of the subject and make it stand out from the background, rather than blending in.
Fill Lighting
Fill lighting is used to reduce contrast between highlights and shadows in an image as well as illuminate areas which may be unlit to reveal details in the areas of the subject which may not have been seen beforehand. It’s most commonly used in portrait photography to create a more aesthetically pleasing image.
Chiaroscuro
Chiaroscuro is a word which originated in Italy, translated to lightdark and defined as a bold contrast between light and dark. Using this technique creates a 3D effect in photos and paintings through highlights and shadows, as well as create a sense of depth. The light and shadow becomes more pronounced and impactful in this technique when in black and white. Chiaroscuro is also used in photography to emphasise shapes, create a sense of volume and drama, evoke mood and suggest motion. The most used technique for taking these images are 1 point lighting with the use of a reflector and sometimes even a back light.
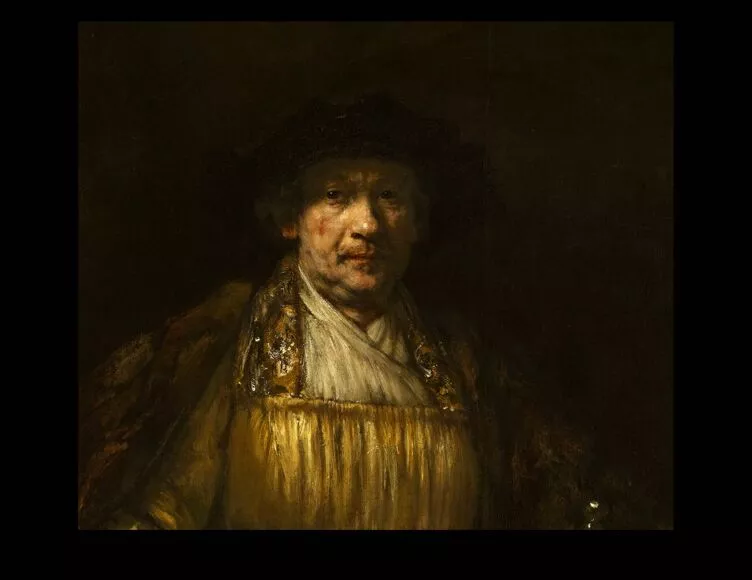
Rembrandt lighting
Rembrandt lighting is a technique named after Rembrandt Harmenszoon van Rijn, who was a great Dutch painter. This technique refers to lighting which produces an upside down triangle below the eyes of the subject. This triangle is formed by the shadow of the nose and is often opposite the key light. This technique is used to create an appealing result without the need for the use of editing.
Butterfly lighting
Butterfly lighting is a portrait technique where the light source is positioned directly in front of and above the subject to create a shadow under their nose. This technique is named ‘butterfly’ as the shadow beneath the nose resembles the wings of a butterfly. This technique reduces shadows on the subject’s face to highlight their features and it is often used for glamour shots.
Butterfly lighting is a lighting technique used by photographers where a light source such as a flash head is placed right above and ever so slightly in front ‘an exact 45-degree angle’ of the models face. This creates a small butterfly-shape made from a shadow under the nose. This technique is often used to make the model look thinner and their eyes look larger.
Creation and Development of Butterfly Lighting
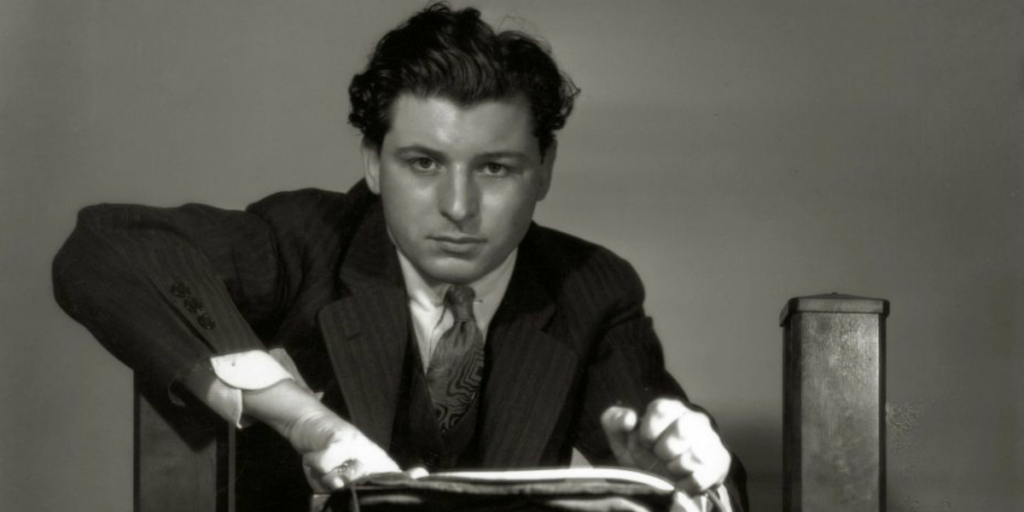
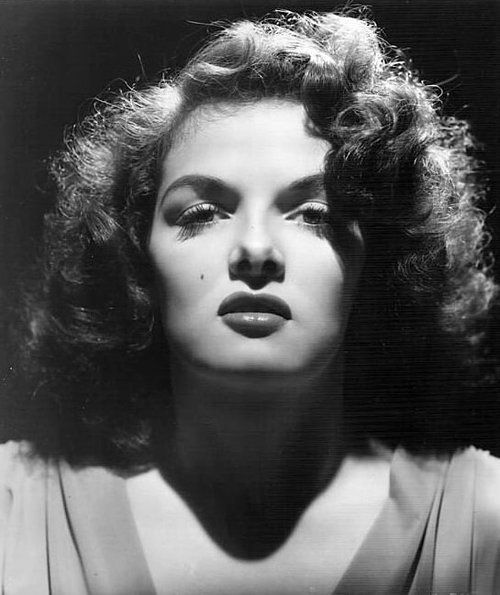
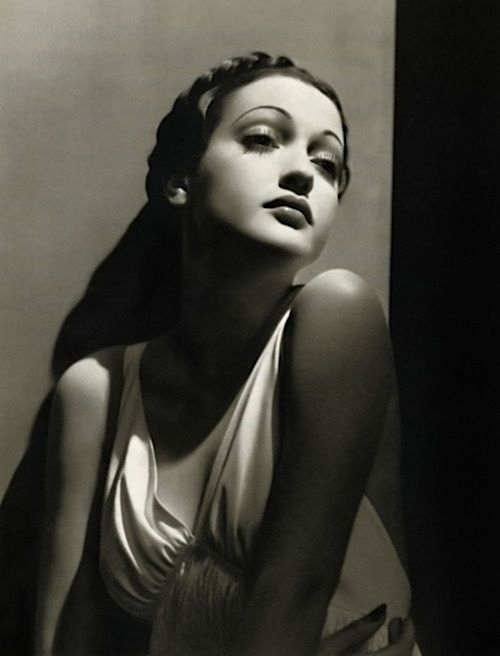
One of the most famous photographers to use butterfly lighting was George Hurrell. Hurrel used multiple sources such as precision lighting, spotlights, shadows, and hand-retouching. He made ‘romantic portraits’ these portraits then became his trademark style, this style of photographing became extremely famous and glamourous in the celebrity and movie industry. This look then became known as “Hurrell style.” Here are some examples of ‘Hurrel style’ butterfly lighting images.
My Attempt at Butterfly Lighting
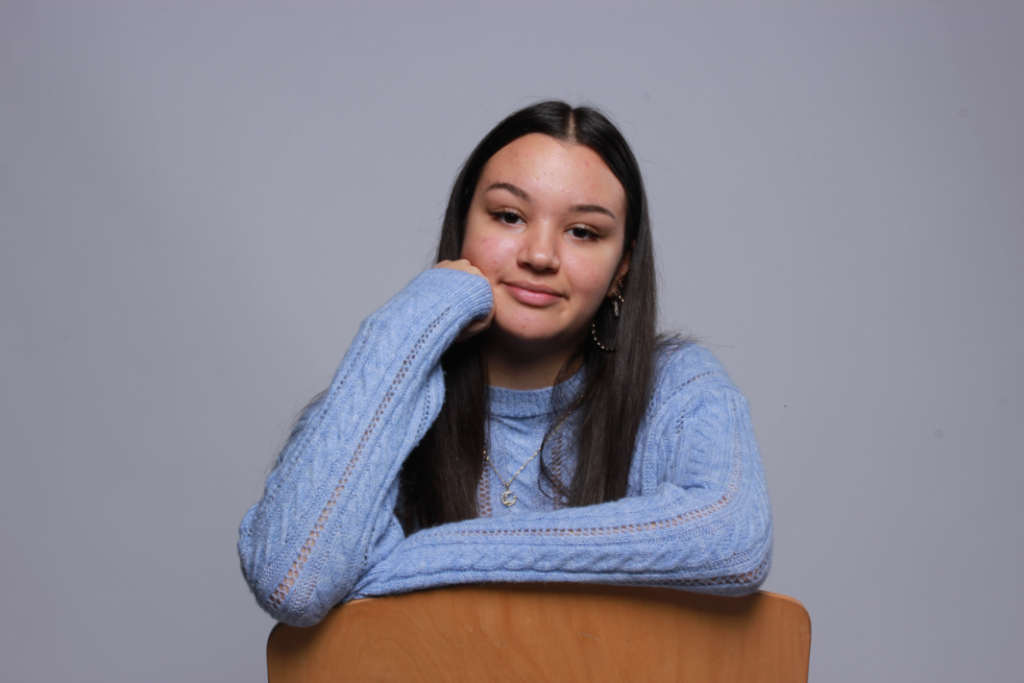
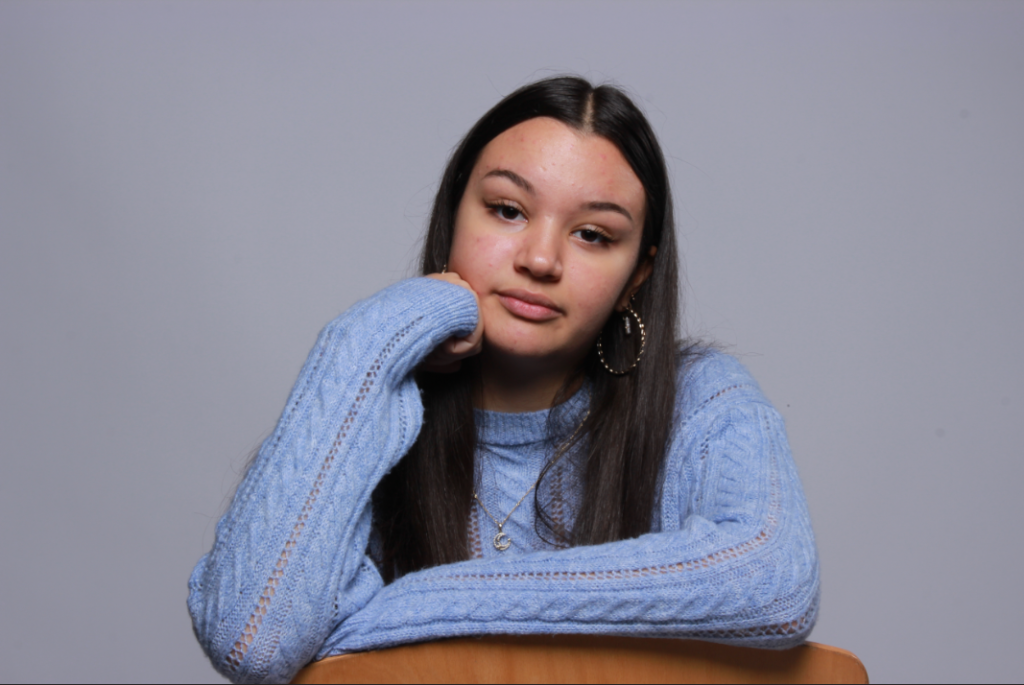
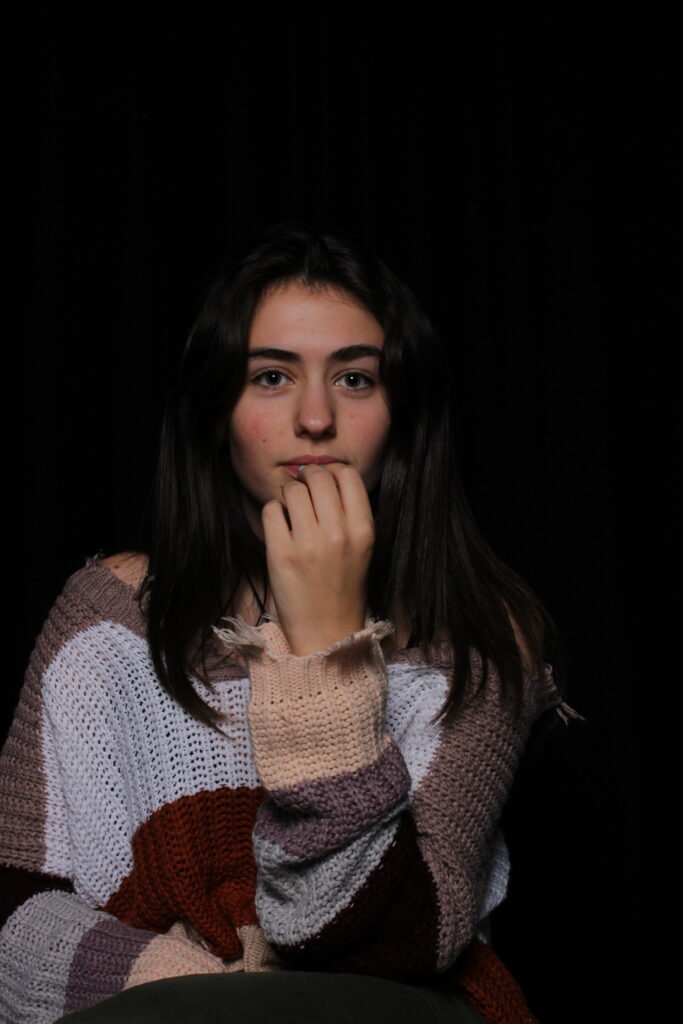
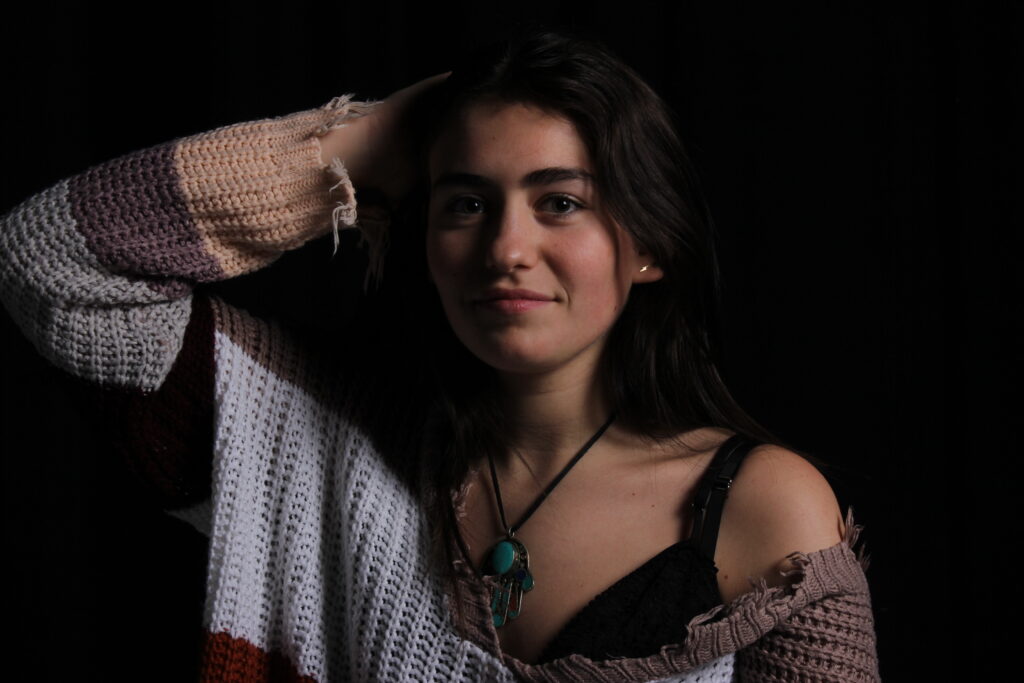
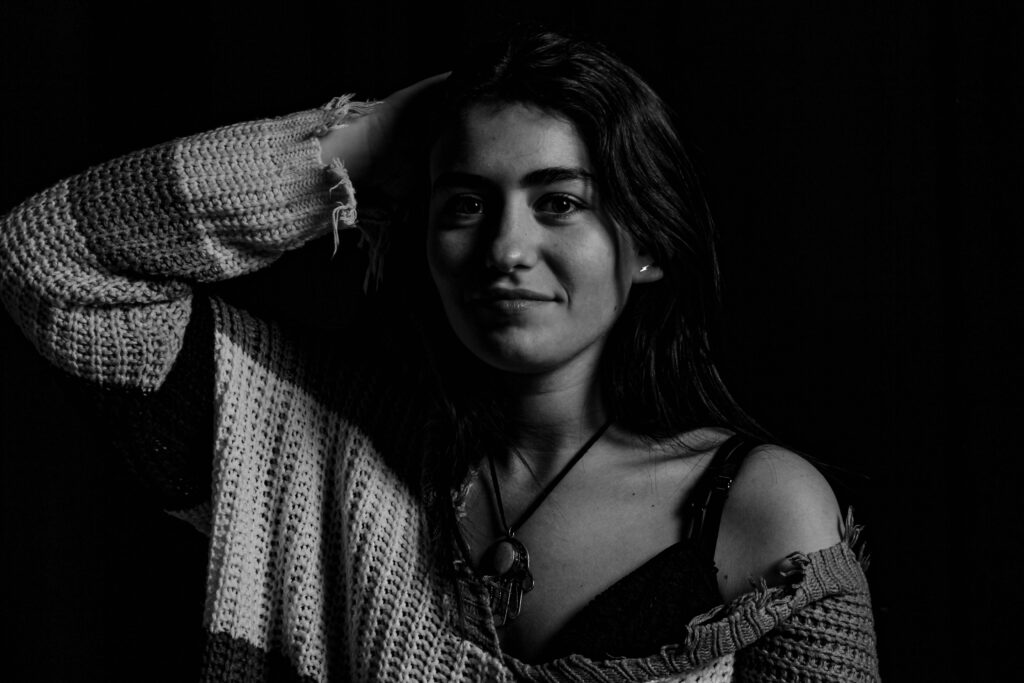
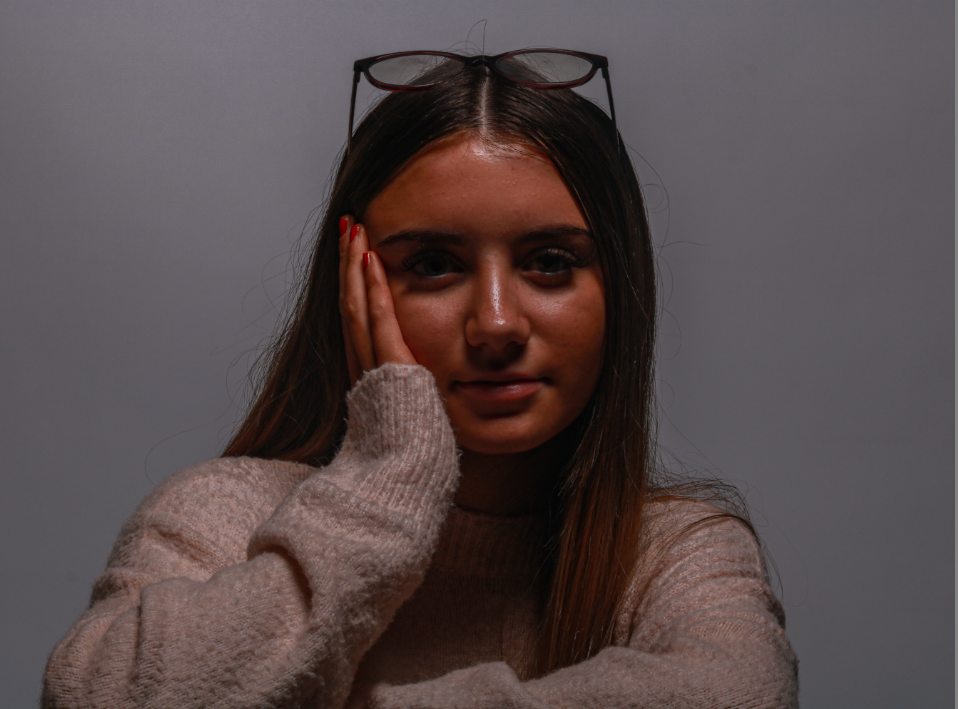
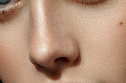
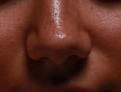
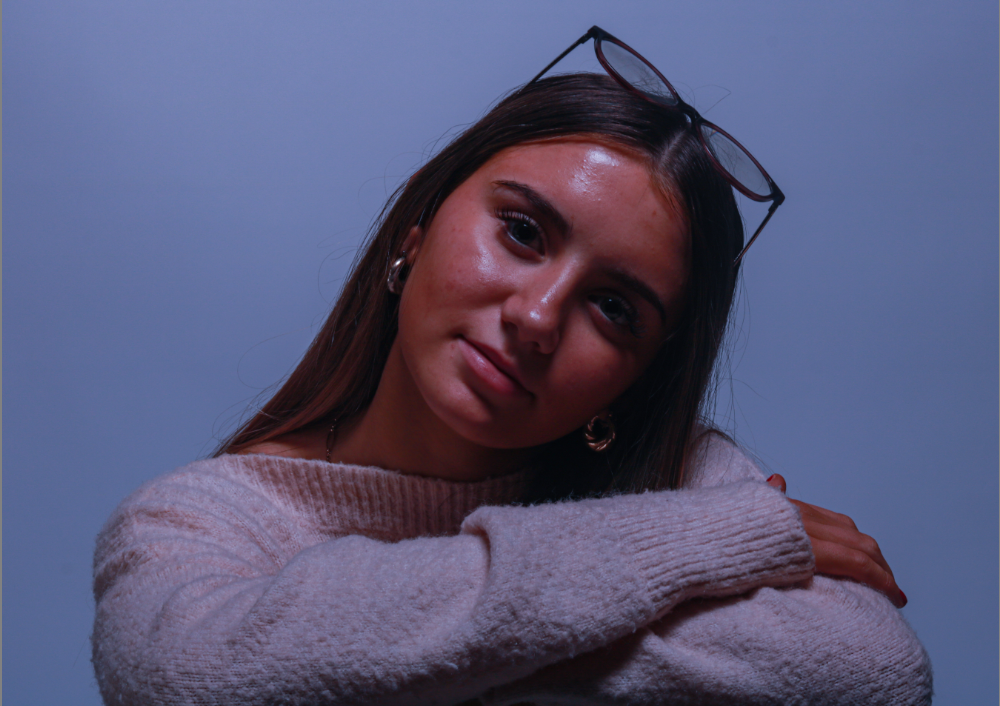
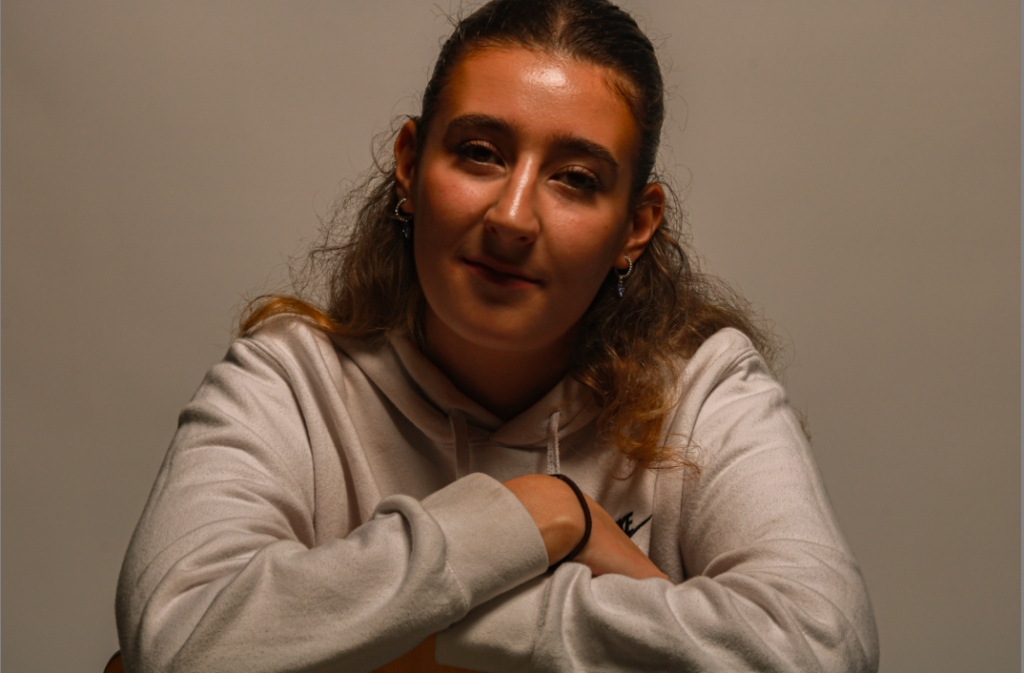
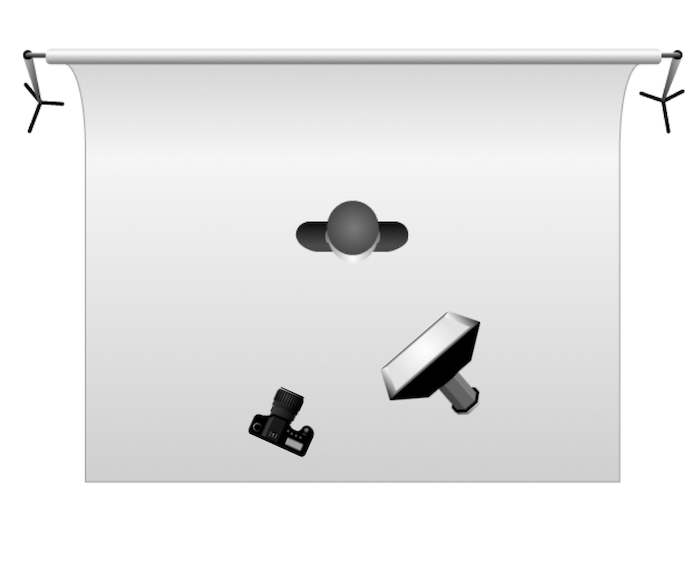
Whilst editing this 1/4 shot photo I focused on capturing butterfly lighting. In this setup, my light is placed directly in front of my model , right behind my camera. It was around one foot above my model’s face, this creates a slight shadow under her nose. This shadow is meant to represent a butterfly shape, to edit these photos I mainly focused on decreasing the highlights, increasing the texture and increasing the shadows.
EXAMPLE:
Above is a perfect example of butterfly lighting, this shadow under the lose creates a butterfly- like shape. Here are my attempts of butterfly lighting in my first photoshoot.
These are the camera settings I used for these photos, I focused on having a reasonable shutter speed, a fast shutter speed creates a shorter exposure and a slow shutter speed gives the me a longer exposure. I also made sure my aperture was not too high, if it was, too much light would be let in and my photo will look washed out.
This photo I took is high quality due to my model having a strong pose and the photo is balanced, however, my shutter speed was too high. I want the shutter to move fast and let in less light. Next time I will start with a shutter speed around 1/125 for my still portraits and increase as needed to darken your photos.
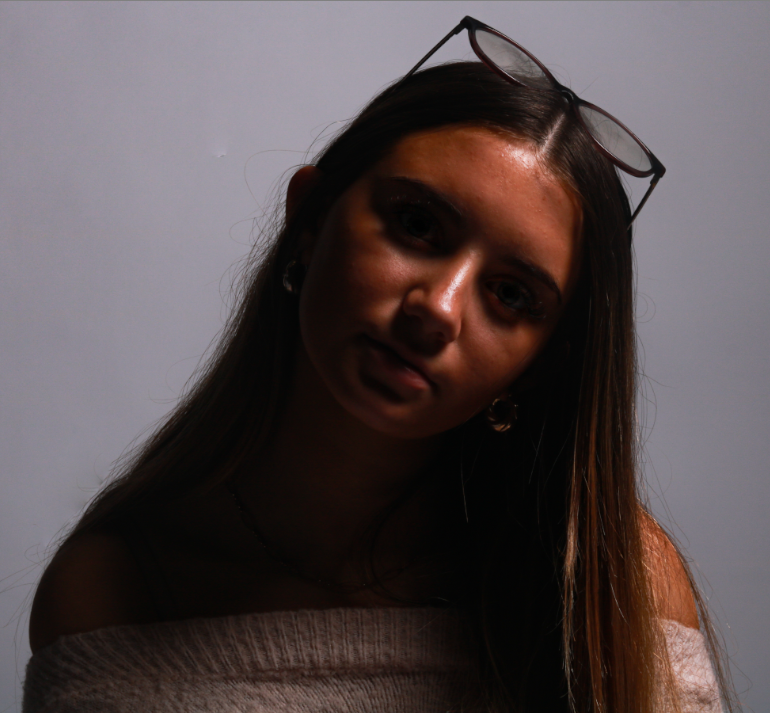
Rembrandt lighting is a way of taking a photo and creating an upside down triangle on one side of the models face just under the eye. The technique got its name from Dutch painter Rembrandt Harmenszoon van Rijn
Rembrandt
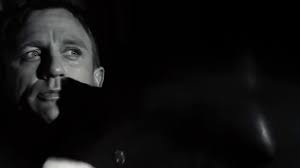
It was commonly used throughout 20th century Hollywood, often with hard light to create harsh dramatic shadows. As seen in the photo below.
It was often used for promotional pictures as by highlighting part of the face the model could either look dreamy or possibly serious. The technique is considered one of the main five studio portrait techniques.
To set up the studio for a Rembrandt photo sit the model at a 45 degree angle to the light then position the light accordingly. the model then could sit in a comfortable position unless there is a specific position the photographer is looking for.
Here are some photos that I have taken.
I brightened up the photos by bringing up the exposer slightly, same with the contrast. I used the adjustment brush to help brighten the eyes just lightly.
Rembrandt Lighting: Rembrandt lighting is a technique for portrait photography. It refers to a way of lighting a face so that an upside-down light triangle appears under the eyes of the subject.
Why is Rembrandt Lighting Used? Rembrandt lighting instantly creates shadows and contrast and with the triangle light beneath the models eye. Which is the main focal point of the image.
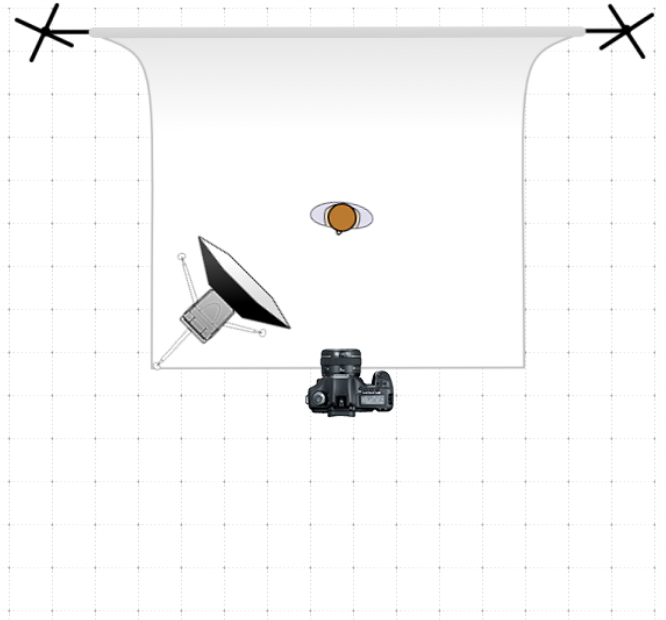
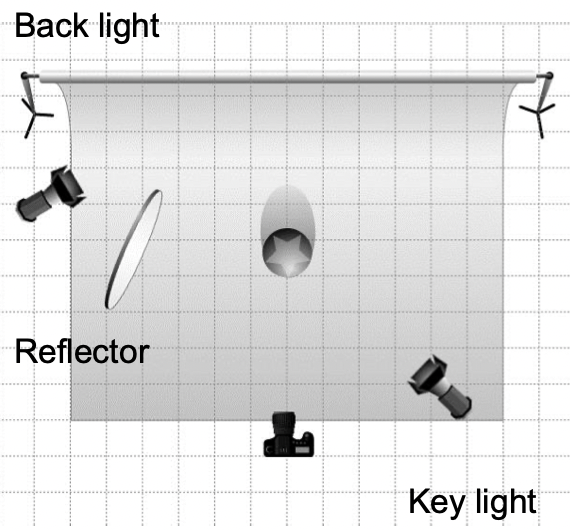
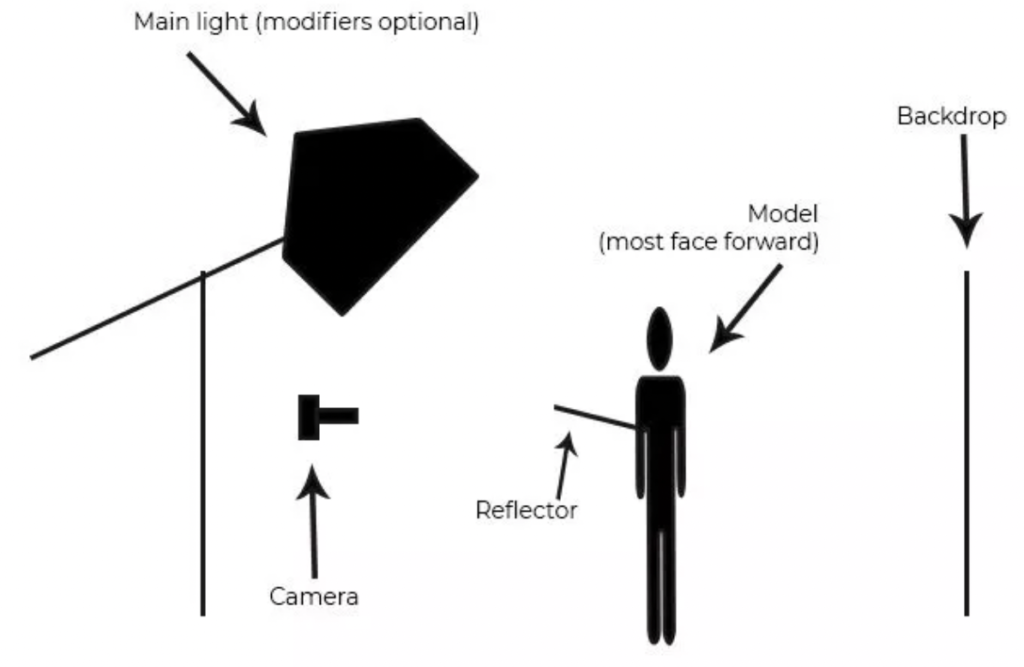
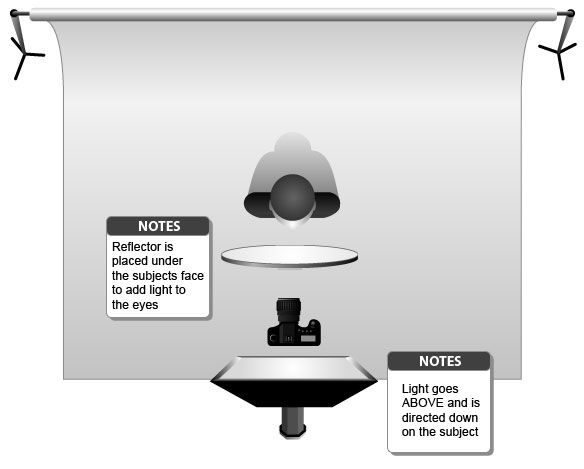
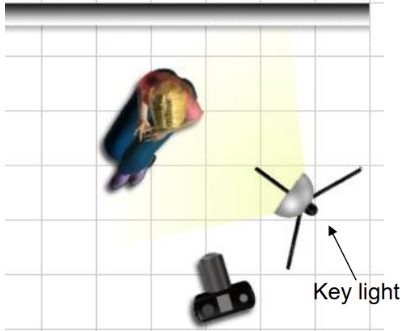
This is how you would setup your camera, light and person if you were trying to do Rembrandt lighting. Because the camera is at an angle facing the person, with the light at the opposite side, so half of the face gets shadowed but because of the angles of each object it creates a triangle underneath the persons eye depending what side each of the objects are on.
Rembrandt lighting is created by the single light source being at a 40 to 45-degree angle and higher than the subject. Use cans use both flashlights and continuous lights.
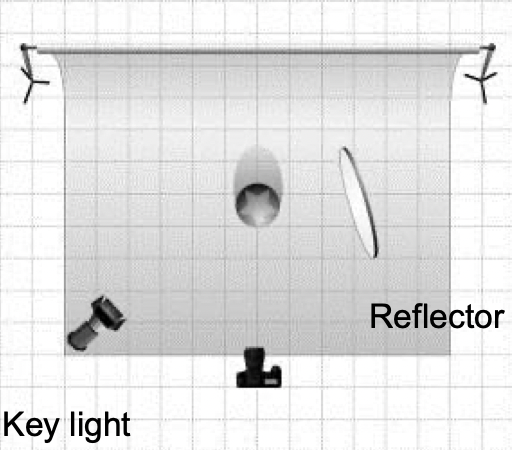
Butterfly Lighting: Butterfly lighting is a type of portrait lighting technique used primarily in a studio setting. Its name comes from the butterfly-shaped shadow that forms under the nose because the light comes from above the camera.
Why is Butterfly lighting used? It is used for taking flattering, glamorous portrait photos. The lighting is soft on the face. It forms a butterfly-shaped shadow under the subject’s nose, which is the source of the name. It is ideal for portraits as it highlights the subject’s main features, like the nose and cheekbones.
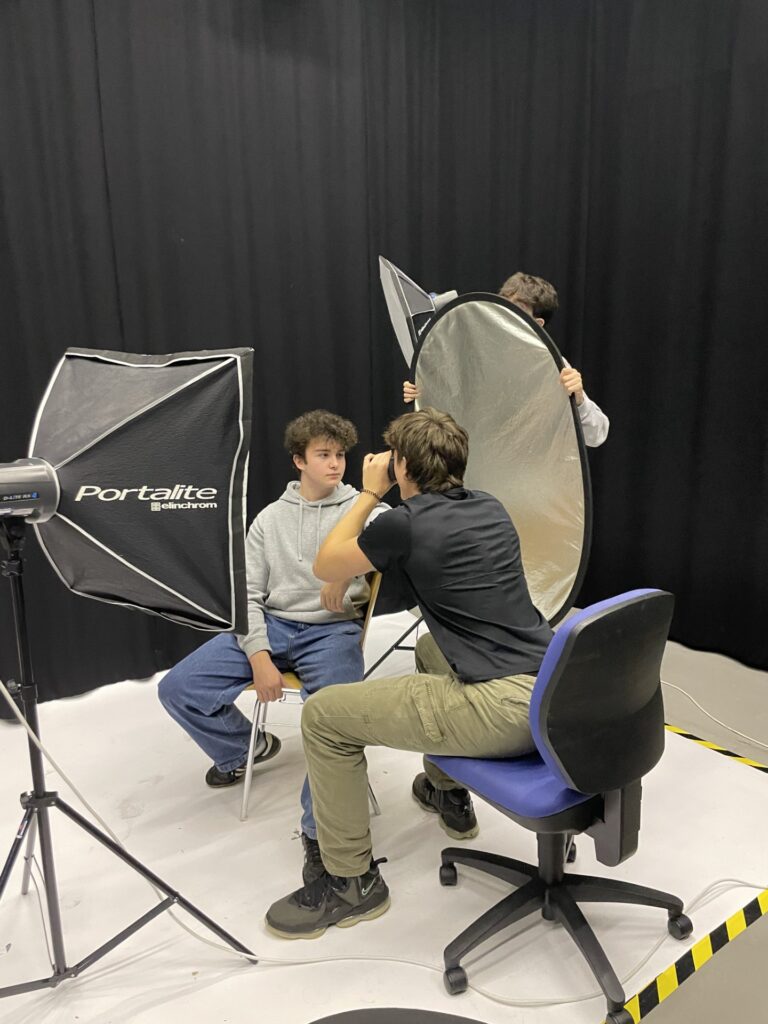
To do this setup, position the reflector under the subject’s face. Start at waist level and see how it looks. If the shadows are still strong, move it closer to the face and so on.
Chiaroscuro Lighting: Chiaroscuro refers to the way light and shadow are used to create realistic three-dimensional images on flat two-dimensional surfaces. Chiaroscuro uses the contrast between light and dark to spotlight images for dramatic effect.
In this photo of our studio setup, we were trying to use Chiaroscuro by putting the flash light directly on one side of the model, the camera facing the model straight on and in the middle and with the reflector to try get a small brighter reflection on his left side of his face.
Why is Chiaroscuro Lighting used? The effect uses light and shadow to highlight a subject and create additional depth in the background. It can be used to add shadow to make an object rise off the page, or side lighting to create a painterly effect. To create realistic three-dimensional images on flat two-dimensional surfaces.
Chiaroscuro is using one key light and a variation using a reflector that reflects light from the key light back onto the sitter.