All posts by Mr Toft

Filters

Author:
Category:

Complete all CW for MOCK EXAM

DEADLINE: MOCK EXAM!
Mon 11 Feb Class 13C
Tue 12 Feb Class 13D
Wed 13 Feb Class 13A

Interim deadline: Essay Draft Tue 5 Feb

IN PREPARATION FOR MOCK EXAM NEXT WEEK MAKE SURE THE FOLLOWING IS READY BY THE END OF THIS WEEK:

  1. You want to aim for a draft layout of your photobook before your Mock Exam day and use that day to fine tune design with teacher
  2. Complete and proof read essay by end of week so it is ready to be incorporated into book design. 
  3. Make sure you monitor and track your progress by Fri 2 Feb here  Personal-Study-Planner-Tracker-2018-19

Publish tracking sheet on the blog

AT THE END OF YOUR MOCK EXAM DAY – ALL COURSEWORK MUST BE COMPLETE

PHOTOBOOK
Final book design checked and signed off by teacher.

ESSAY
Include essay in the back of your book. Work in text columns and make sure to include illustrations of your own images and that of artists, as well as a bibliography

BLURB – ORDER BOOK
Upload book design to BLURB, log onto your account on their website, pay and order the book.

Consider spending a few extra pounds on choosing better paper, such as Premium Lustre in check-out, change colour on end paper or choose different cloth/ linen

BLOGPOST
All blog posts in relation to the above must be published, including any other posts missing from previous work modules since the beginning of A2 academic year.

FINAL PRINTS
Select your final prints from book project. They may need to be added to prints from exhibition.

Save each image in your name as a high-res image (4000 pixels) into shared PRINTING folder here M:\Departments\Photography\Students\Image Transfer\PRINTING

MOUNTING
If you complete all the above and has extra time in Mock exam begin to mount and present final prints from Zine project.

Collect AS folder from Mr Cole’s room and add mounted images to your CW folder. Make sure each print is labelled with your name and candidate number.


Lesson Wed and Thursday…

Wednesday and Thurs this week we are running AS MOCK so you are required to work independently in the following rooms:

Wed 30 Jan
Pd 1: 13 A – LRC
Pd 3: 13C – ICT 7 – MVT will be teaching this lesson
Pd 4: 13D = ICT 7

Thurs 31 Jan
Pd 2: 13A – ICT6
Pd 4: 13C – ICT 7
Pd 5: 13D – ICT2

Normal lesson Friday 1 Feb with Mr Cole!

We will be checking in and do a register so make sure you turn up for lesson and make good use of your time. Your MOCK exam is on Mon 11 Feb and Tue 12 Feb so every lesson counts!

Unless you are working on your own laptop you will not be able to work with your images in Lightroom. So we want you to focus on writing your essay.

Interim deadline for handing in a draft essay is MON 4 FEB (next week) It is essential that you complete this task on time so we have time to read it through, give feedback for you to make corrections before Mock exam.

For help with essay go to this blog post here

Essay Writing

The essay must be completed and added to your book layout.

I am in school Wed and Thurs invigilating so if you need any help with anything or want to hand in a draft essay, or even a paragraph please come and find me in our normal class room. I prefer a print out but you can publish essay on the blog or email me too.

You are also required to do final Self-Tracking of tasks, blog posts and your progress that MUST be published on the blog by the end of this week

Use this planner and fill in using trafic light system and write a comment on what you need to do to or improve work.

Personal-Study-Planner-Tracker-2018-19

Use colour codes and write comments
Green = complete
Yellow = needs improving + write a comment on how
Red = missing work/ not done

Save each slide as a JPEG and publish it on the blog

MR T

DESIGN YOUR PHOTO BOOK

Week 18 – 19 – 20: Design your Photobook & Complete Essay

Make sure you monitor and track your progress here Personal-Study-Planner-Tracker-2018-19

WE GOT THREE WEEKS LEFT IN CLASS TO COMPLETE PERSONAL STUDY and ONE MOCK EXAM DAY

In the next three week focus on beginning to edit and collect all your images, archival material and texts, including your essay needed to complete your photobook.

You want to aim for a draft layout and hand in draft version of your essay before your Mock Exam day, then use that day to fine tune design and complete essay.

DEADLINE: MOCK EXAM!
Mon 11 Feb Class 13A & 13D
Tue 12 Feb Class 13C

Wed 13 Feb: Hand-out Exam paper

1. Write a book specification and describe in detail what your book will be about in terms of narrative, concept and design.  Produce a mood-board of design ideas and consider the following:

Narrative: What is your story?
Describe in:

  • 3 words
  • A sentence
  • A paragraphs

Design: Consider the following

  • How you want your book to look and feel
  • Paper and ink
  • Format, size and orientation
  • Binding and cover
  • Title 
  • Structure and architecture
  • Design and layout
  • Editing and sequencing
  • Images and text

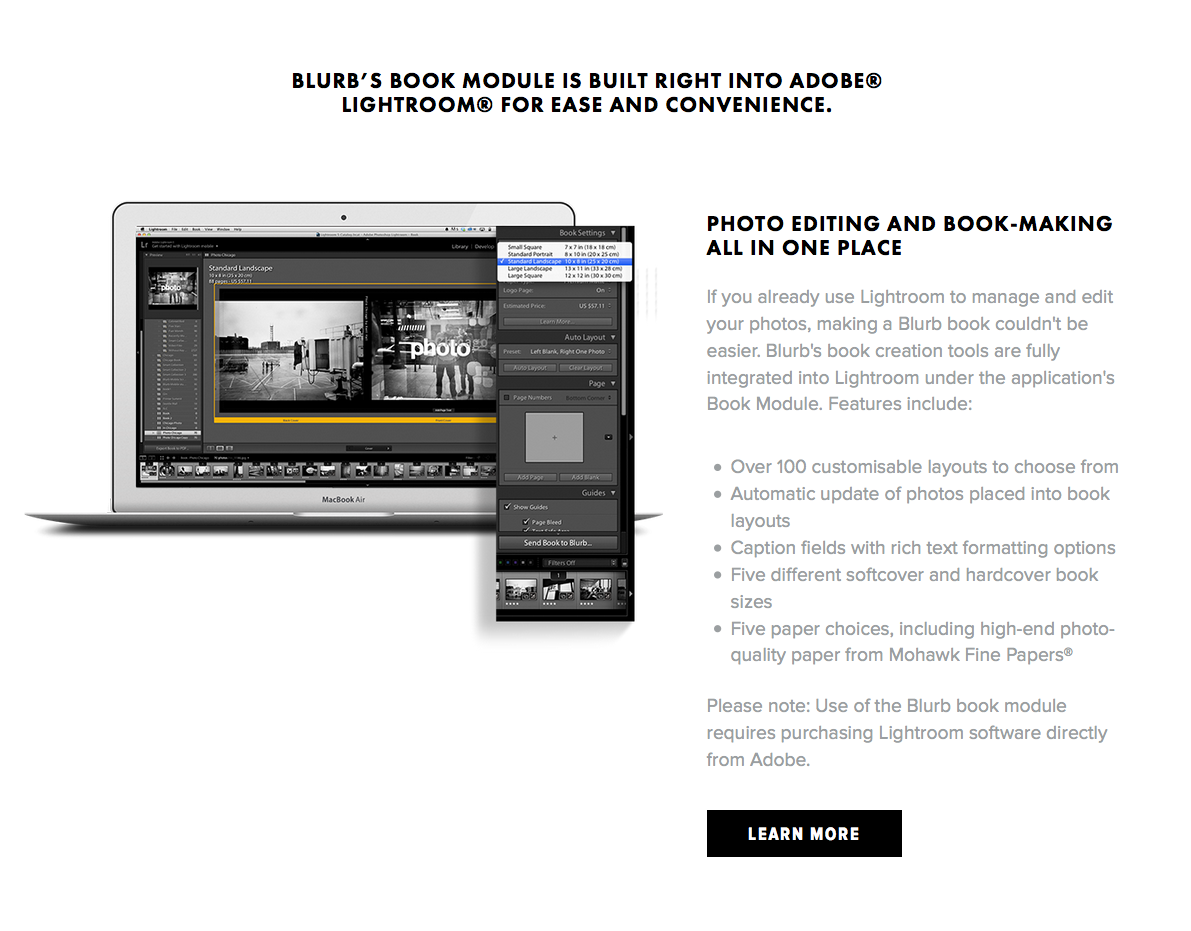
2. Create a BLURB account using your school email address. With Blurb you have different options on how you design your book:

a) Using Lightroom to design your book which is integrated with BLURB. Only for use on school computers, unless you have LR at home on your own laptop.

b) Download Bookwright via Blurb onto your own laptop and work offline at home and you can work indecently of school. Here you have full control of layout/ design features. Once completed, you upload photo book design to Blurb

c) Choose online option if you want to work directly online. Very limited layout/design options (not recommended!)

For those who wish to make their own hand-made photobook using Indesign follow the same steps as below in terms of documenting and annotating your design process.  or if you want to customize your Blurb book see me for more details on how to do it.

3. Using Lightroom make a rough selection of your 40-50 best pictures from all shoots. Make sure you have adjusted and standardised all the pictures in terms of exposure, colour balance/ B&W, contrast/brightness etc.

4. Print them out as smaller images (4 to one A4 page) on the Laserjet, cut them up in guillotine and lay them out on the big white table for editing.

5. Decide on format (landscape, portrait) size and style of your photo-book. Begin to design your photo book, considering carefully, narrative, editing, sequencing, page spreads, juxtaposition, image size, text pages, empty pages, use of archival material etc.

6. At the end of your photo book, add your illustrated essay including title, any captions (if needed), bibliography, illustrations of artists work (incl data) and images of your own responses. Think carefully about font type, size and weighting.

7. Produce screen prints of layout ideas as you progress and add to Blog for further annotation, commenting on page layout/ narrative/ sequencing/ juxtaposition of pictures.

Film/ Podcast; produce screen prints as work progress that show your editing skills/ decisions.

8. Select a set of 5-6 photographs as final outcomes and evaluate – explaining in some detail how well you realised your intentions and reflect on what you learned in your Political Landscape project.

9. Save final outcomes in our shared PRINT folder (no later than 15:00 end of your Mock exam day) in a high-resolution (4000 pixels on the long edge.) Save each images in your name i.e. first name_surname_title_1, and 2, 3 and so on.

10. Make sure all blog posts are finished including, research, analysis, experimentation, annotation and an evaluation of final outcomes.

UNDERSTANDING PHOTO BOOK

UNDERSTANDING PHOTO BOOK:
DESIGN, FORM, FUNCTION, SEQUENCING,  NARRATIVE, CONCEPT

Here is a link to the Personal-Study-Planner-Tracker-2018-19 for the remaining 5 weeks of this module.

READ these texts to better understand how to identify a narrative and understand the design process of photobook making.

Colin Pantall: Identifying the Story: Sequencing isn’t narrative

Francis Hodgson: On Photography and Storytelling

For the die-hards here are a serious blog post by Photobook critic, Joerg Colberg which consider the many aspects of photobook making:  Understanding Photobooks: The Forms an Functions of Photobooks

This article is the first in a series of five. You can find the other parts here: part 1part 2part 3part 4, part 5

Here are  a few lists of Best Photobooks 2018

Photobookstore

Lensculture

Photographic Museum of Humanity

Blog: Produce a number of posts that show evidence of the following:

1. Research a photo-book (select one you have looked at previously in your project) and describe what story/ narrative the book is telling – its subject-matter, genre, style, approach etc.

2. Who is the photographer? Why did he/she make it? (intentions/ reasons) Who is it for? (audience) How was it received? (any press, awards, legacy etc.)

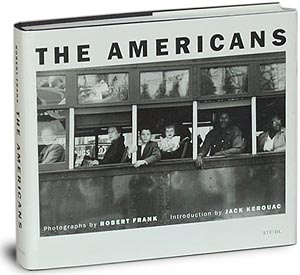
E.g Robert Frank’s “The Americans” was conceived with the help of a scholarship that allowed Frank to go on road trips across America during a two year period. He wanted to portray American society in the post-war period and his book has influenced (and still influence) many photographers since and also contributed to a new poetic style and subjective approach to documentary photography. Why?

Read an article in The Guardian by Sean O’Hagan, Photography Critic

3. Deconstruct the narrative, concept and design of the book such as:

  • Book in hand: how does it feel? Smell, sniff the paper.
  • Paper and ink: use of different paper/ textures/ colour or B&W or both.
  • Format, size and orientation: portraiture/ landscape/ square/ A5, A4, A3 / number of pages.
  • Binding, soft/hard cover. image wrap/dust jacket. saddle stitch/swiss binding/ Japanese stab-binding/ leperello
  • Cover: linen/ card. graphic/ printed image. embossed/ debossed. letterpress/ silkscreen/hot-stamping.
  • Title: literal or poetic / relevant or intriguing.
  • Narrative: what is the story/ subject-matter. How is it told?
  • Structure and architecture: how design/ repeating motifs/ or specific features develops a concept or construct a narrative.
  • Design and layout: image size on pages/ single page, double-spread/ images/ grid, fold- outs/ inserts.
  • Editing and sequencing: selection of images/ juxtaposition of photographs/ editing process.
  • Images and text: are they linked? Introduction/ essay/ statement by artists or others.  Use of captions (if any.)

Here a few examples from previous students

Photo Book Investigation (Matt Eich – I Love You I’m Leaving) – Deconstructing the Book

Viviane sassen’s photobook // Roxane

Understanding photo books- analysing a photobook

Photobook Investigation – Lobismuller

Photobook Investigation – Sugar Paper Theories

Final Result – Photo Book Research

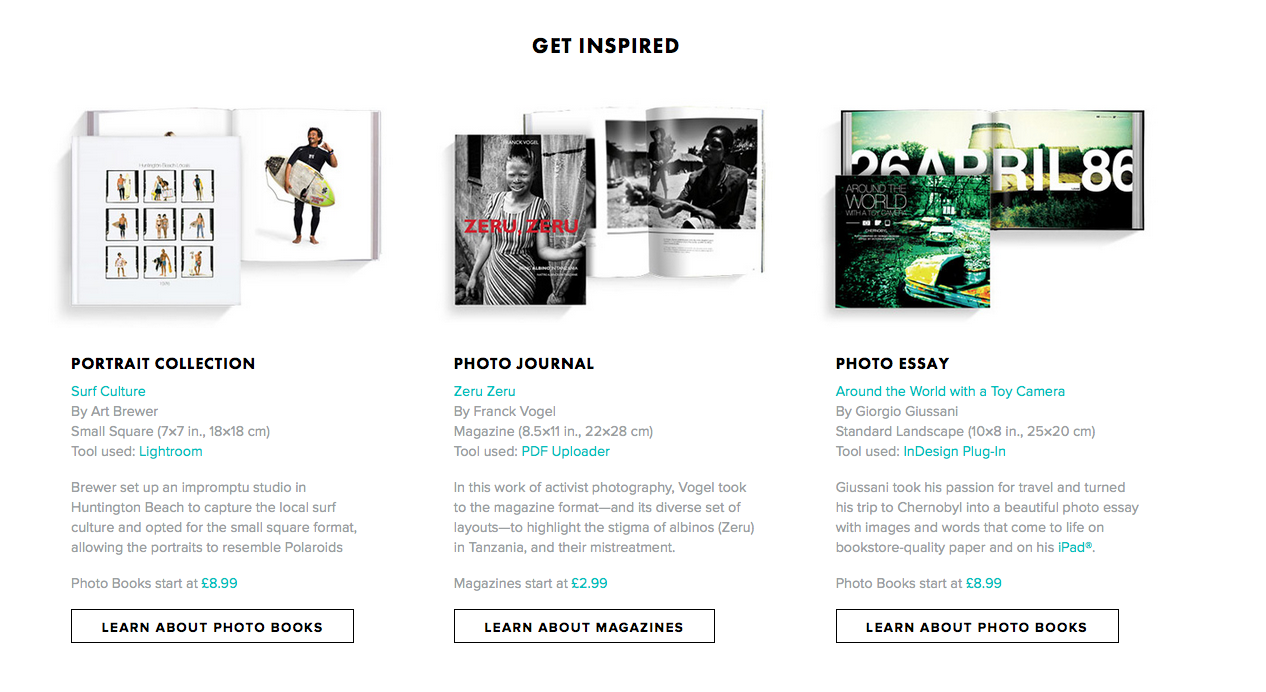
4. Look at BLURB online book making website, photo books from photographers or see previous books produced by Hautlieu students on the table in class.

5. Write a book specification and describe in detail what your book will be about in terms of narrative, concept and design.  Produce a mood-board of design ideas and consider the following:

Narrative: What is your story?
Describe in:

  • 3 words
  • A sentence
  • A paragraphs

Design: Consider the following

  • How you want your book to look and feel
  • Paper and ink
  • Format, size and orientation
  • Binding and cover
  • Title 
  • Structure and architecture
  • Design and layout
  • Editing and sequencing
  • Images and text

Create a BLURB account using your school email address. With Blurb you have different options on how you design your book:

a) Using Lightroom to design your book which is integrated with BLURB. Only for use on school computers, unless you have LR at home on your own laptop.

b) Download Bookwright via Blurb onto your own laptop and work offline at home and you can work indecently of school. Here you have full control of layout/ design features. Once completed, you upload photo book design to Blurb

c) Choose online option if you want to work directly online. Very limited layout/design options (not recommended!)

Essay Introduction/ Paragraph 1 – 45mins

In this lesson you will write a draft essay introduction following these steps:

  1. Open a new Word document > SAVE AS: Essay draft
  2. Copy essay question into Essay titleHypothesis > if you don’t have one yet, make one!
  3. Copy your essay introduction (draft) written before Xmas and use it as a template to build upon
  4. Identify 2 quotes from sources using Harvard System of Referencing.
  5. Use one quote as an opening quote: Choose a quote from either one of your photographers or critics. It has to be something that relates to your investigation.
  6. Add sources to Bibliograpphy > if by now you don’t have any sources, use  S. Sontag. On Photography Ch1
  7. Begin to write a paragraph (250-500 words) answering the following questions:
    Think about an opening that will draw your reader in e.g. you can use an opening quote that sets the scene. Or think more philosophically about the nature of photography and and feeble relationship with reality.
    You should include in your introduction an outline of your intention of your study e.g.
    What are you going to investigate.
    How does this area/ work interest you?
    What are you trying to prove/challenge, argument/ counter-argument?
    Whose work (artists/photographers) are you analysing and why?
    What historical or theoretical context is the work situated within. Include 1 or 2 quotes for or against.
    What links are there with your previous studies?
    What have you explored so far in your Coursework or what are you going to photograph?
    How did or will your work develop.
    What camera skills, techniques or digital processes in Photoshop have or are you going to experiment with?
  8. Look at an opening sentence.
  9. You got 45 mins to write a new draft and upload to the blog!

If you are satisfied that you have written an essay introduction answering the above questions then continue to write paragraph 1:

Paragraph 1 Structure (500 words) Use subheadingThis paragraph covers the first thing you said in your introduction that you would address. The first sentence introduces the main idea of the paragraphOther sentences develop the subject of the paragraph.

Content: you could look at the following

  1. Exemplify your hypothesis within a historical and theoretical context.
  2. Write about how your area of study and own work is linked to a specific art movement/ ism.
  3. Research and read key text and articles from critics, historians and artists associated with the movement/ism.
  4. Use quotes from sources to make a point, back it up with evidence or an example (a photograph), explain how the image supports the point made or how your interpretation of the work may disapprove.
  5. How does the photograph compare or contrast with others made by the same photographer, or to other images made in the same period or of the same genre by other artists.
  6. How does the photograph relate to visual representation in general, and in particularly to the history and theory of photography, arts and culture.

Include relevant examples, illustrations, details, quotations, and references showing evidence of reading, knowledge and understanding of history, theory and context!

See link to powerpoints: Pictorialism vs Realism and Modernism vs Postmodernismhere M:\Departments\Photography\Students\Resources\Personal Study

Planner: Photobook and Essay

SPRING TERM – COURSEWORK
DEADLINE MON 11 / TUE 12 FEB – MOCK EXAM

Here is a link to the Personal-Study-Planner-Tracker-2018-19 for the remaining 6 weeks

Week 16: 8  – 14 Jan
Edit images and complete essay introduction

Political Landscape: Lesson time (Mon, Tue, Thurs & Fri)
Bring images from new photo-shoots to lessons and follow these instructions

  • Save shoots in folder and import into Lightroom
  • Organisation: Create a new  Collection from each new shoot inside Collection Set: Political Landscape
  • Editing: select 8-12 images from each shoot.
  • Experimenting: Adjust images in Develop, both as Colour and B&W images appropriate to your intentions
  • Export images as JPGS (1000 pixels) and save in a folder: BLOG
  • Create a Blogpost with edited images and an evaluation; explaining what you focused on in each shoot and how you intend to develop your next photoshoot.
  • Make references to artists references, previous work, experiments, inspiration etc.
  • Prep for photobook design: Make a rough selection of your 40-50 best pictures from all shoots. Make sure you have adjusted and standardised all the pictures in terms of exposure, colour balance.

Further experimentation:

  • Export same set of images from Lightroom as TIFF (4000 pixels)
  • Experimentation: demonstrate further creativity using Photoshop to make composite/ montage/ typology/ grids/ diptych/triptych, text/ typology etc appropriate to your intentions
  • contrast, brightness and produced a duplicate a set in B&W.
  • Make sure you annotate process and techniques used and evaluate each experiment

Essay: Lesson time (Wed)

  • Complete Paragraph 1 and upload to the blog no later than Mon 14 Jan.

Future of St Helier Newspaper and Installation

Future of St Helier

Your final images/ design – choose from folders here
Then write your own evaluation / experience of  being part of  the newspaper and hoarding installation etc.

Copy and past all the below and publish as your own blog post

Hoarding Installation

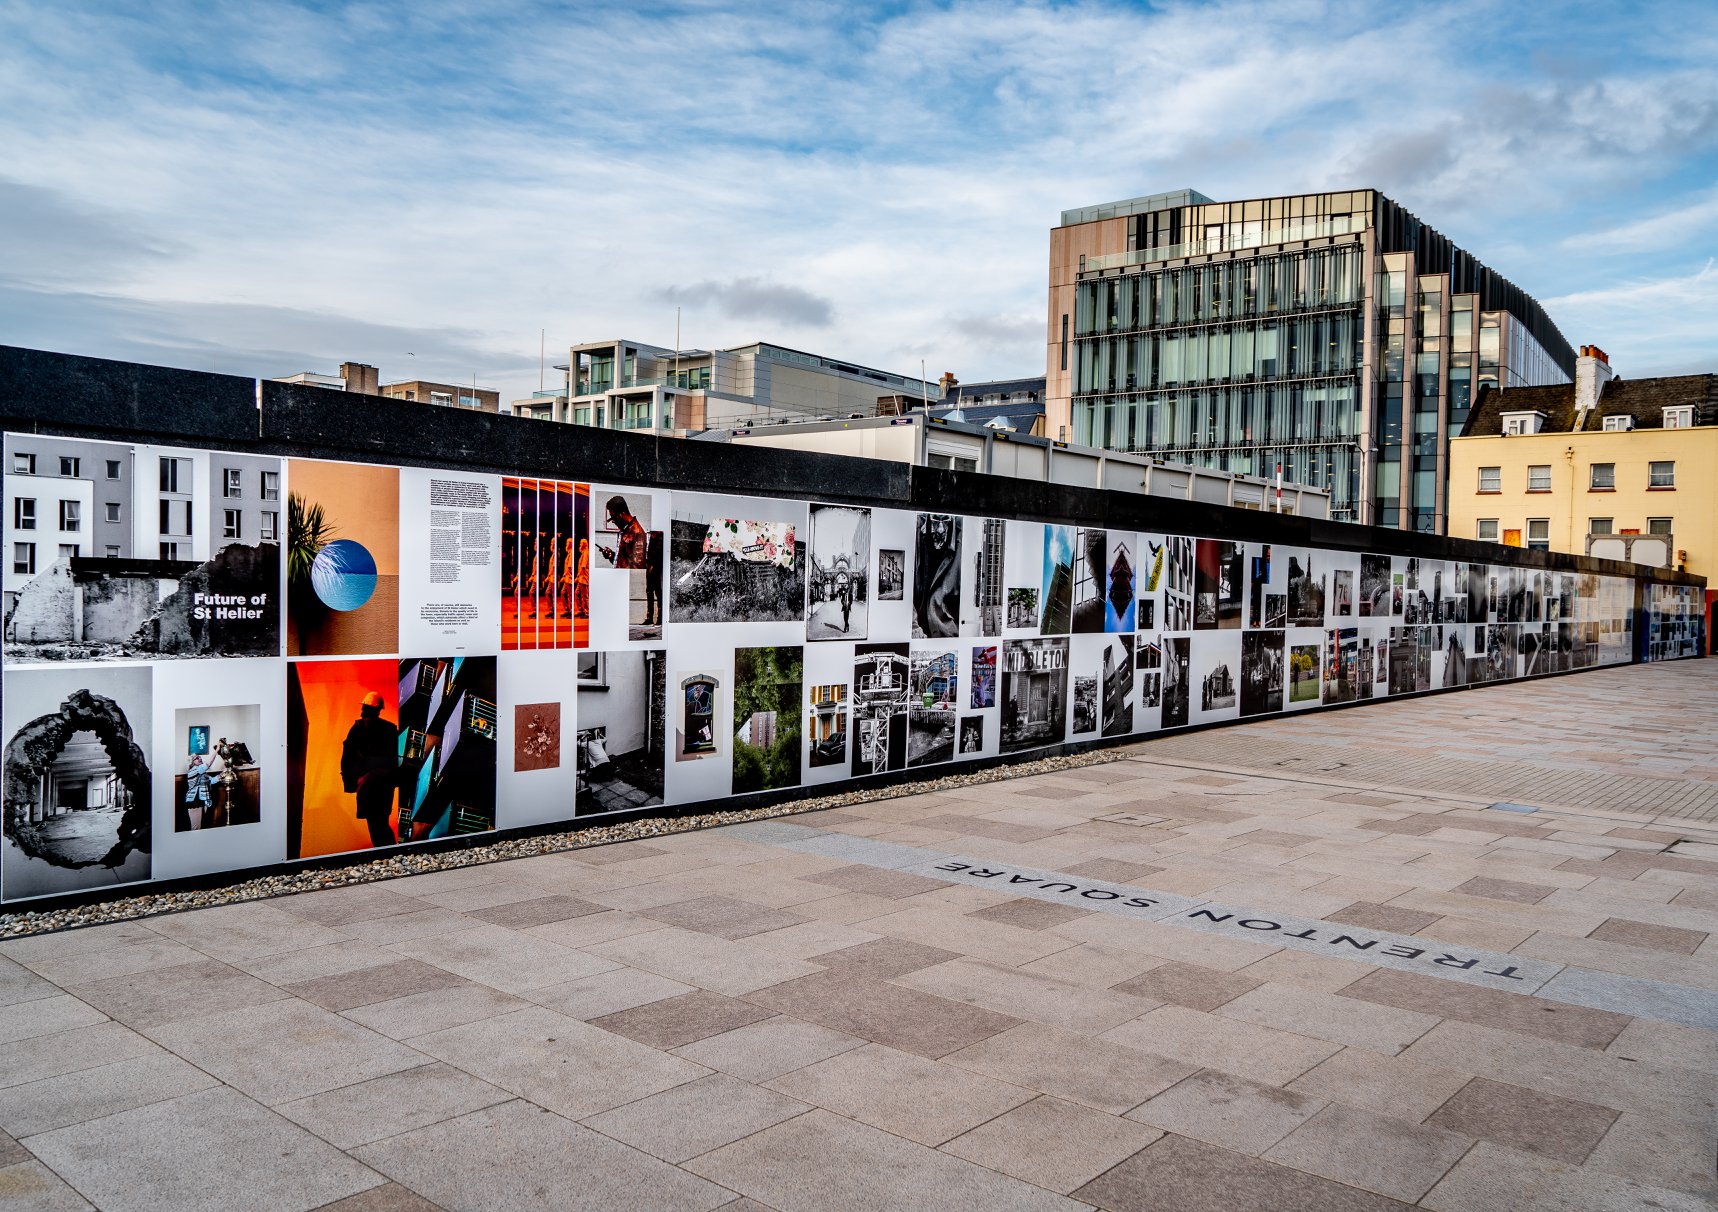
The unveiling of the Future of St Helier Hoarding at the International Finance Centre on the Esplanade in St Helier took place on Thursday 13 Dec 2018.

First published as a 52 page newspaper supplement in September by the Jersey Evening Post the work produced by A-Level Photography students at Hautlieu School have been transformed into a 34m outdoor installation as part of Masterplan Community Arts and Education Project

We were challenged with responding to specific areas, streets and neighbourhoods divided up along the urban vingtaines of St Helier and to explore through research, archives and photography the built-environment, urban living, diverse communities, town planning, land use and re-generation projects.

We thank all sponsors and collaborators for making this a successful contribution to the island’s cultural records and historic archives Jersey Development Company, Camerons Ltd, MJP Architects, Archisle, Lewis Bush, Photo-Archive Societe-Jersiaise, Kevin Pilley, States of Jersey and Connétable of St Helier, Simon Crowcroft

Earlier today we unveiled the Masterplan Future of St Helier hoarding display at the International Finance Centre. Lots of local media interest from Jersey Evening Post, ITV Channel TV and BBC Jersey who broadcasted live on radio talking to photography students at Hautlieu School, Constable of St Helier, Simon Crowcroft and sponsors Jersey Development Company, Camerons Ltd, MJP Architects about the future of the island and its capital. An excellent example of how a community arts and education project can generate a debate that affects all those who either live, work or visit St Helier.

If you are interested in our views of young people tune into BBC Radio here (listen from 3:18:30 onwards or watch the six o’clock news tonight on ITV.

https://www.bbc.co.uk/sounds/play/p06rlpdw

If you missed the news last night at ITV Channel TV you can catch up here with Hautlieu students talking (15m.12s) about their images on display at the Masterplan Future of St Helier hoarding on the International Finance Centre.

See link here

The outdoor installation on the hoarding around the construction site is a great way to engage the public in art and debates concerning the future of the island’s capital but, what we need in Jersey is a new contemporary art space that will provide a new venue to showcase art produced in the island, but equally also bring international art to Jersey for the public enjoyment of its residents and visitors alike.

The recent Culture, Arts and Heritage Strategic Review, commissioned by the Government of Jersey makes 20 new recommendations that will revitalise the island’s cultural infrastructure and achieve a wide range of social and economic objectives from tourism, to health and well being to external relations, to planning and environmental developments – in the hope that in partnership with Government it will enrich and enhance Jersey’s quality of life.

Let’s hope those in power who can make real changes to St Helier’s build environment will include such a new art space in the revised Masterplan of the Waterfront. All we need is political will and re-prioritising public funding for the arts. States of Jersey

Future of St Helier Newspaper

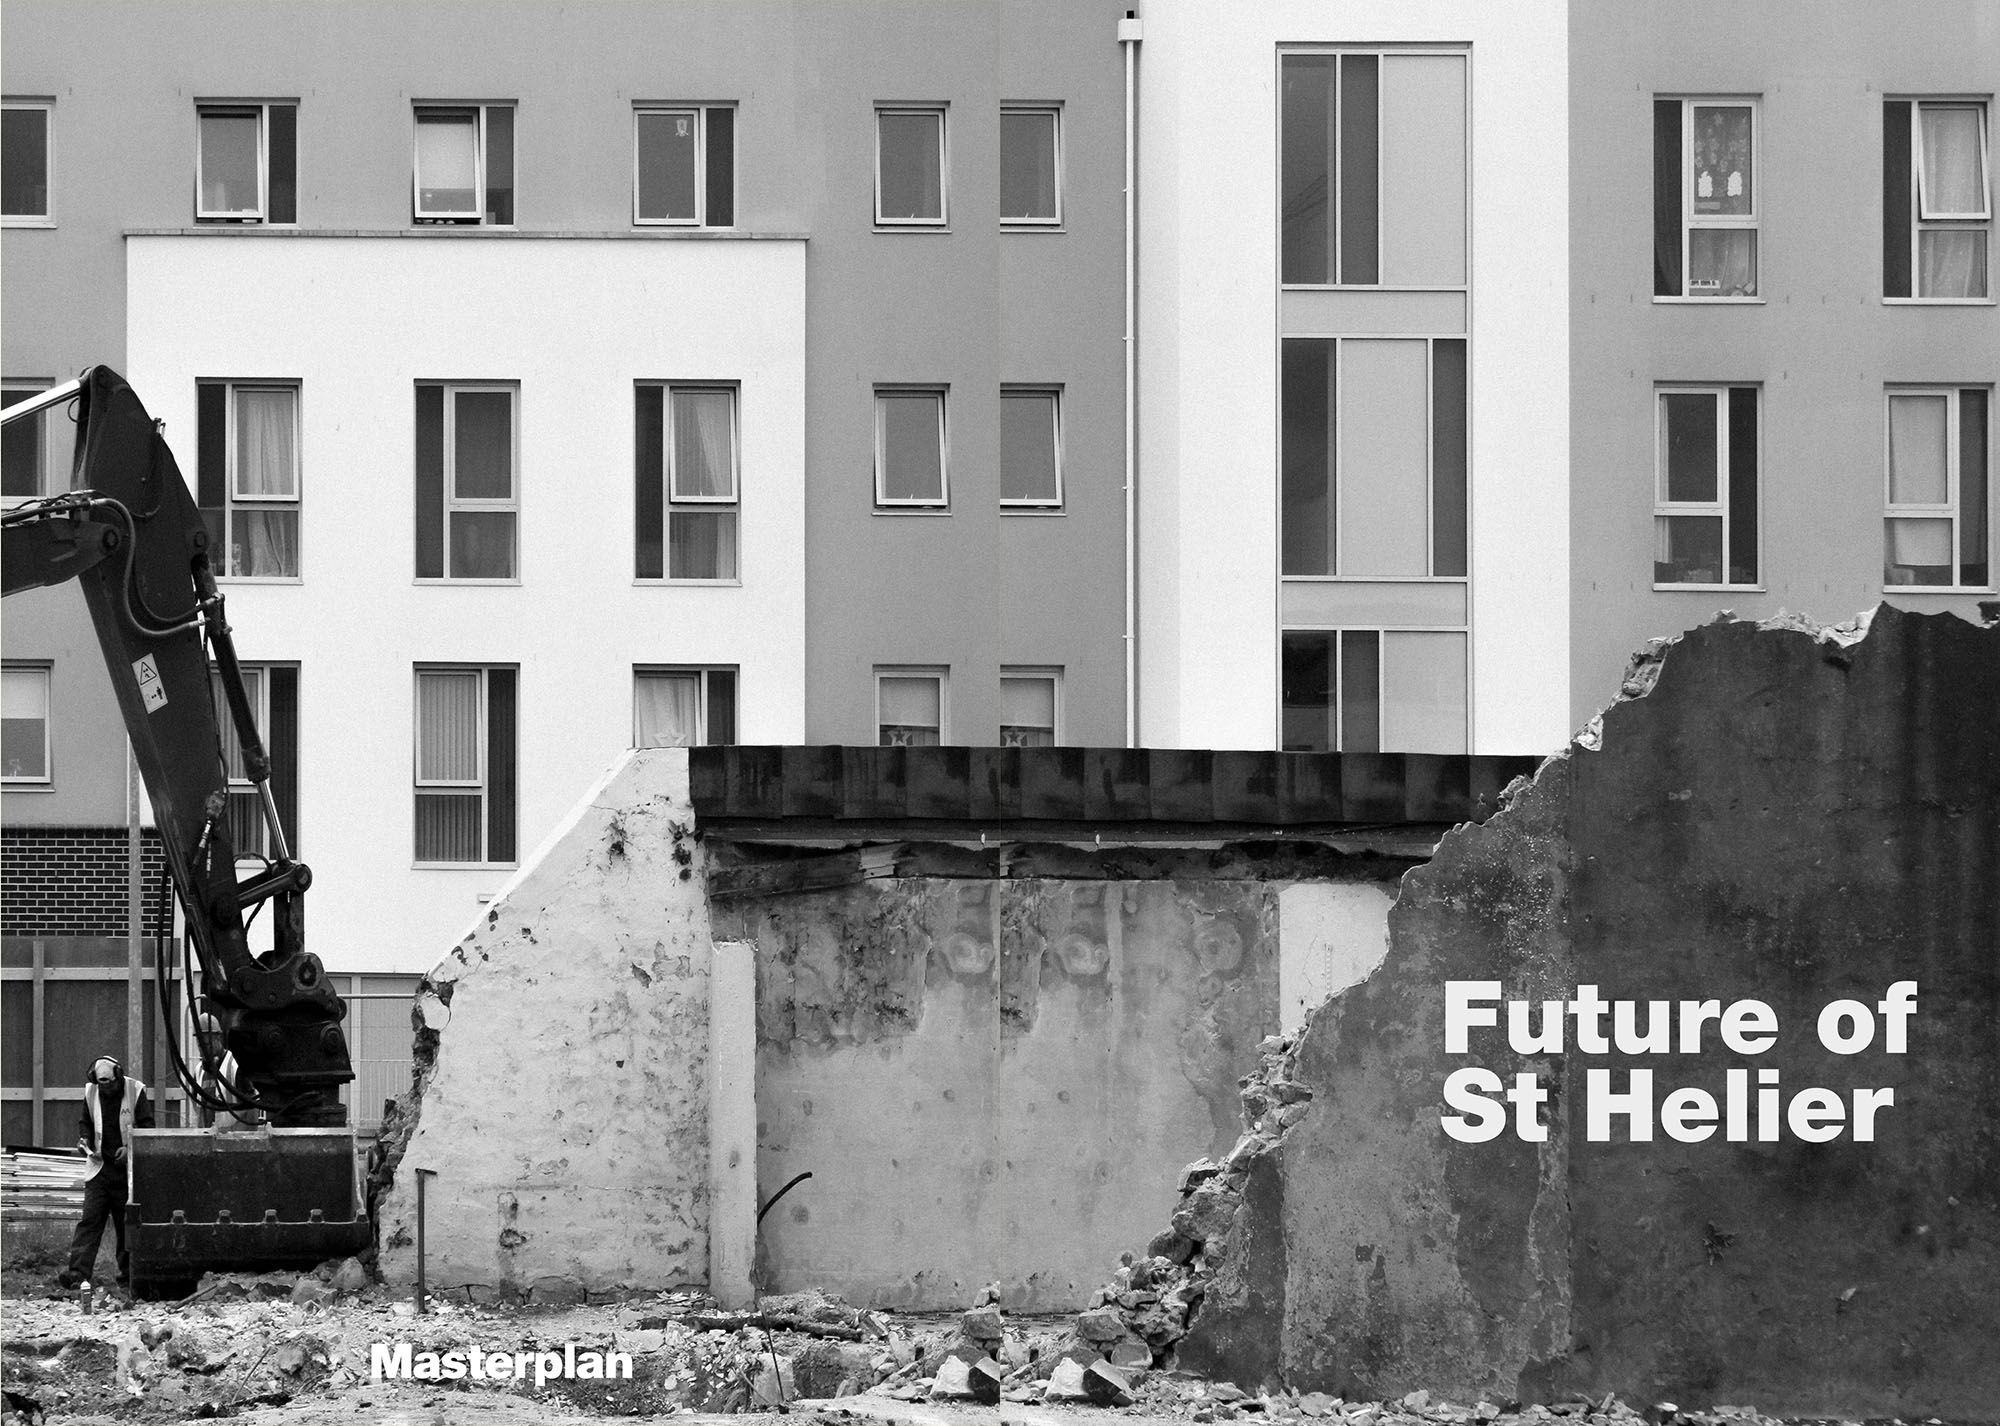
The outcome of students work was first published on Tuesday 18 September 2018 as a 52 page newspaper supplement, Future of St Helier that was printed in 14,000 copies and inserted into a daily edition of the Jersey Evening Post and distributed island wide.

Here is a video browser of our Future of St Helier supplement printed and distributed in today’s edition of the Jersey Evening Post. Hautlieu photography students were challenged with responding to specific areas, streets and neighbourhoods divided up along the urban vingtaines of St Helier and to explore through research, archives and photography the built-environment, urban living, diverse communities, town planning, land use and re-generation projects. Each student designed a page spread which was then split in half producing a fragmented image reflecting on the nature of experience and diversity of St Helier.

https://www.facebook.com/martin.toft.758/videos/10155481208570899/


Work to be completed before and during XMAS

1.POLITICAL LANDSCAPES: A blog post with a detailed plan for 3 photo-shoots to be completed during Christmas/ New Year period.

PHOTOGRAPH: It is essential that you return to school on Tue 8 Jan 2019 with new images. The Spring Term is only 5 weeks and we will begin to work on your photobook design and layout in the second week of January

2. ESSAY: You must publish your draft introduction including possible essay questions before last lesson Wed 19 Dec.

READ: Begin to do in-depth research and read texts from a variety of academic sources; books, online articles, Youtube etc (you must gain knowledge and understanding from at least 3 different sources), make notes and identify relevant quotes that you can use in your essay.

WRITE: Ideally you should try and complete a draft essay over Xmas holidays. This would allow you time to refine and make minor corrections on your return in January.

https://giphy.com/gifs/4Z1FhQBsfySOSXBgdx/media


See here for more help and guidance on essay writing:

https://hautlieucreative.co.uk/photo19al/2018/12/05/essay-writing/

USEFUL WEBSITES
Lensculture – great source for new contemporary photography from all over the world
Photographic Museum Humanity
Landscape Stories

Photography magazine and journals
Aperture Magazine  – American based publication
British Journal of Photography (BJP) – Journal on Contemporary Photography
Huck Magazine
GUP Magazine
FOAM Magazine

Blogs and podcasts for writing and talking about contemporary photographic practice:
1000 WORDS
MAGIC HOUR
A SMALL VOICE
SAINT LUCY
Conscientious Photography Magazine
COLIN PANTALL BLOG
American Suburb X
The Photobook Review

Photography Agencies and Collectives
World Press Photo – the best news photography and photojournalism
Magnum Photos – photo agency, picture stories from all over the world.
Panos Picture – photo agency
Agency VU – photo agency
INSTITUTE – photo agency
Sputnik Photos – photo collective made of Polish and East European photographers
A Fine Beginning – photo collective in Wales
Document Scotland – photo collective in Scotland
NOOR – a collective uniting a select group of highly accomplished photojournalists and documentary storytellers focusing on contemporary global issues.

Photobook makers and publishers
Aperture
MACK
Steidl
Chose Commune

Self Publish Be Happy
Dewi Lewis Publishing

Akina Books
Skinnerboox
Kehrer
Void
Witty Kiwi
Dalpine
Kodoji Press
Super Labo
Fw: Books
Editions Xavier Barrel
Morel Books

Essay Writing

Week 13 -14 -15:  5 – 19 Dec 

WE ONLY HAVE 3 and a bit WEEKS LEFT TO COMPLETE  A DRAFT of your PERSONAL STUDY ESSAY

Have a look a the  for an overview of what you need to complete this term.  Personal-Study-Planner-Tracker-2018-19

ESSAY: We will be spending 1 lesson a week every Wednesday on writing and developing your essay. However, you will need to be working on it independently outside of lesson time.

DEADLINE: Essay draft MUST be handed in Mon 4 Feb 2019.

Objective: Criteria from the Syllabus

  • Be aware of some of the methods employed by critics and historians within the history of art and photography.
  • Demonstrate a sound understanding of your chosen area of study with appropriate use of critical vocabulary. – use for image analysis
  • Investigate a wide range of work and sources
  • Develop a personal and critical inquiry.

Academic Sources:

  • Research and identify 3-5 literary sources from a variety of media such as books, journal/magazines, internet, Youtube/video .
  • Begin to read essay, texts and interviews with your chosen artists as well as commentary from critics, historians and others.
  • It’s important that you show evidence of reading and draw upon different pints of view – not only your own.
  • Take notes when you’re reading…key words, concepts, passages
  • Write down page number, author, year, title, publisher, place of publication so you can list source in a bibliography

Quotation and Referencing:

  • Use quotes to support or disprove your argument
  • Use quotes to show evidence of reading
  • Use Harvard System of Referencing…see Powerpoint: harvard system of referencing for further details on how to use it.

Essay Plan:

Make a plan that lists what you are going to write about in each paragraph – essay structure.

  • Essay question:
  • Opening quote
  • Introduction (250-500 words): What is your area study? Which artists will you be analysing and why? How will you be responding to their work and essay question?
  • Pg 1 (500 words): Historical/ theoretical context within art, photography and visual culture relevant to your area of study. Make links to art movements/ isms and some of the methods employed by critics and historian. Link to powerpoints about isms andmovements M:\Departments\Photography\Students\Resources\Personal Study
  • Pg 2 (500 words): Analyse first artist/photographer in relation to your essay question. Present and evaluate your own images and responses.
  • Pg 3 (500 words): Analyse second artist/photographer in relation to your essay question. Present and evaluate your own images and responses.
  • Conclusion (250-500 words): Draw parallels, explore differences/ similarities between artists/photographers and that of your own work that you have produced
  • Bibliography: List all relevant sources used

ESSAY STRUCTURE

See below for a possible essay structure. Further help can be found here essay structure or see link here The Royal Literay Fund

Essay questionHypothesis

Think of a hypothesis and list possible essay questions

Here is a list of  possible questions to investigate that may help you.

Opening quote: Choose a quote from either one of your photographers or critics. It has to be something that relates to your investigation

Introduction (250-500 words).
Think about an opening that will draw your reader in e.g. you can use an opening quote that sets the scene. You should include in your introduction an outline of your intention of your study e.g. what and who are you going to investigate. How does this area/ work interest you? What are you trying to prove/challenge, argument/ counter-argument? What historical or theoretical context is the work situated within. Include 1 or 2 quotes for or against. What links are there with your previous studies? What have you explored so far in your Coursework or what are you going to photograph? How did or will your work develop. What camera skills, techniques or digital processes in Photoshop have or are you going to experiment with?

Paragraph 1 Structure (500 words) Use subheadingThis paragraph covers the first thing you said in your introduction that you would address. The first sentence introduces the main idea of the paragraphOther sentences develop the subject of the paragraph.

Content: you could look at the followingexemplify your hypothesis within a historical and theoretical context.  Write about how your area of study and own work is linked to a specific art movement/ ism. Research and read key text and articles from critics, historians and artists associated with the movement/ism. Use quotes from sources to make a point, back it up with evidence or an example (a photograph), explain how the image supports the point made or how your interpretation of the work may disapprove. How does the photograph compare or contrast with others made by the same photographer, or to other images made in the same period or of the same genre by other artists. How does the photograph relate to visual representation in general, and in particularly to the history and theory of photography, arts and culture.

Include relevant examples, illustrations, details, quotations, and references showing evidence of reading, knowledge and understanding of history, theory and context!

See link to powerpoints: Pictorialism vs Realism and Modernism vs Postmodernism here M:\Departments\Photography\Students\Resources\Personal Study

Paragraph 2 Structure (500 words) Use subheading. In the first sentence or opening sentences, link the paragraph to the previous paragraph, then introduce the main idea of the new paragraph. Other sentences develop the paragraphs subject (use relevant examples, quotations, visuals to illustrate your analysis, thoughts etc)

Content: you could look at the following...Introduce your first photographer. Select key images, ideas or concepts and analyse in-depth using specific model of analysis (describe, interpret and evaluate) – refer to your hypothesis. Contextualise…what was going on in the world at the time; artistically, politically, socially, culturally. Other influences…artists, teachers, mentors etc. Personal situations or circumstances…describe key events in the artist’s life that may have influenced the work. Include examples of your own photographs, experiments or early responses and analyse, relate and link to the above. Set the scene for next paragraph.

Include relevant examples, illustrations, details, quotations, and references showing evidence of reading, knowledge and understanding of history, theory and context!

Paragraph 3 Structure (500 words) Use subheading. In the first sentence or opening sentences, link the paragraph to the previous paragraph, then introduce the main idea of the new paragraph. Other sentences develop the paragraphs subject (use relevant examples, quotations, visuals to illustrate your analysis, thoughts etc)

Content: you could look at the following…Introduce key works, ideas or concepts from your second photographer and analyse in-depth – refer to your hypothesis…Use questions in Pg 2 or add…What information has been selected by the photographer and what do you find interesting in the photograph? What do we know about the photograph’s subject? Does the photograph have an emotional or physical impact? What did the photographer intend? How has the image been used? What are the links or connections to the other photographer in Pg 2? Include examples of your own photographs and experiments as your work develop in response to the above and analyse, compare, contrast etc. Set the scene for next paragraph.

Include relevant examples, illustrations, details, quotations, and references showing evidence of reading, knowledge and understanding of history, theory and context!

Conclusion (500 words) : Write a conclusion of your essay that also includes an evaluation of your final photographic responses and experiments.

List the key points from your investigation and analysis of the photographer(s) work – refer to your hypothesis. Can you prove or Disprove your theory – include final quote(s). Has anything been left unanswered?  Do not make it a tribute! Do not introduce new material! Summarise what you have learned. How have you been influenced? Show how you have selected your final outcomes including an evaluation and how your work changed and developed alongside your investigation.

Bibliography: List all the sources that you used and only those that you have cited in your text. Where there are two or more works by one author in the same year distinguish them as 1988a, 1988b etc. Arrange literature in alphabetical order by author, or where no author is named, by the name of the museum or other organisation which produced the text. Apart from listing literature you must also list all other sources in alphabetical order e.g. websites, exhibitions, Youtube/TV/ Videos / DVD/ Music etc.

POLITICAL LANDSCAPE:

DON’T FORGET TO MAKE PHOTOGRAPHS & EXPLORE YOUR IDEAS!!

Week 13 -14 -15 + Xmas break 5 Dec – 8 Jan

Political Landscape: Lesson time (Mon, Tue, Thurs & Fri
Bring images from new photo-shoots to lessons and follow these instructions

  • Save shoots in folder and import into Lightroom
  • Organisation: Create a new  Collection from each new shoot inside Collection Set: Political Landscape
  • Editing: select 8-12 images from each shoot.
  • Experimenting: Adjust images in Develop, both as Colour and B&W images appropriate to your intentions
  • Export images as JPGS (1000 pixels) and save in a folder: BLOG
  • Create a Blogpost with edited images and an evaluation; explaining what you focused on in each shoot and how you intend to develop your next photoshoot.
  • Make references to artists references, previous work, experiments, inspiration etc.

Further experimentation:

  • Export same set of images from Lightroom as TIFF (4000 pixels)
  • Experimentation: demonstrate further creativity using Photoshop to make composite/ montage/ typology/ grids/ diptych/triptych, text/ typology etc appropriate to your intentions
  • Design: Begin to explore different layout options using Indesign and make a new zine/book. Set up new document as A5 page sizes.
  • Make sure you annotate process and techniques used and evaluate each experiment

Photo-shoots:

You must plan and produce at least another 4-5 photo-shoots in the next 2 weeks to make sure you have enough images to edit from. For example, responding to photographers subject-matter, style, form, aesthetics, specific skills, techniques, methods.

Produce a number photographic response to your investigation in POLITICAL LANDSCAPE.

Continue to review your responses and shoots and experiment with your pictures appropriate to your intentions Lightroom/Photoshop e.g. cropping, change colour balance/ b/w, brightness/ contrast, blurring/ movement, blending/ montage techniques.

Select your best experiments and pictures and include in your Personal Study for analysis and comparisons.

We will begin work on editing and designing a photobook in the new Spring term in January.

If you don’t have any content i.e. text and images you can’t make a photo book!

Presentation of work-in-progress

Prepare a 3-5 mins presentation on something that you are working on right now in your Political Landscape project. For example:

An idea
An image
A photo-shoot
An experiment
An inspiration
New research
New development

Use blog posts to present in class. As a class we will give constructive feedback on how each student can develop their work and project

Wed 5 Dec:
Craig, Charlie done!
Woolsgrove, Megan done!
Ayling-Phillip, Sky done!
Da Silva, Shanesia
Worthington, Orla complete
Fenn, Jordan done!

Thurs 6 Dec:
Evans, Jenna done!
Grindheim, Benjamin done!
Hoy, Charlton done!
Vibert, Oscar done!
Kent, Alice done!
Taylor, Ryan complete
Dias, Liana

Tue 11 Dec:
Gallery, Nicholas done
Webster, Thomas done
Rabet, Timothy done
Horgan, Conor done!
Laszniewska, Julia
Lucas, Stanley done!
Cullinane, Juliette
Jervier, Imani done!

Thurs 13 Dec:
Mulliner, Evan postponed
O’Grady, Declan postponed
Regan-Hughes, Eve done!
Runacres, Hayden done!
Waigh, Anya done!
Liron, Jay done!
Luis, Erin

Tue 18 Dec:
Le Cornu, Kobi done!
Kulig, Wiktoria
Jones, Stephanie done!
Fry, Lily-Mae done!
Haynes, Oliver
Lutkin-Clarke, Georgina