PLANNER for A2 EXAMINATIONS 2019
FINAL PRINTS DATES:
Select your final images for both EXAM and COURSEWORK (if you haven’t completed this already)
Tue 30 April 15:00
prints ready for Day 1 of Exam 7 / 8 May
Tue 7 & 8 May 15:00
prints ready for Day 2 of Exam 13 / 14 May
Mon 13 & Tue 14 May 15:00
prints ready Tue 21 May
EXAMINATION DATES:
15 hrs controlled test over 3 days
Groups 13A / 13C – 7, 13 & 21 May
Group 13D – 8, 14 & 22 May
CLASS LIST + EXTRA TIME
For those of you who have extra time – check when this has been allocated.
BLOG: End your blog with evidence of the following:
1. Show evidence of how you intend to present and display your final prints – make mock up in Photoshop – for example. a single image or diptych, triptych, predella, size A5, A4 or A3, typology-style grid, collage etc
2. If you have made a photobook – write a book specification and describe in detail what your book is about in terms of narrative, concept and design. Produce a mood-board of design ideas and consider the following:
- How you want your book to look and feel
- Paper and ink: use of different paper/ textures/ colour or B&W or both.
- Format, size and orientation: portraiture/ landscape/ square/ A5, A4, A3 / number of pages.
- Binding: soft/hard cover. Image wrap/dust jacket. Saddle stitch/swiss binding/ Japanese stab-binding/ leperello
- Cover: linen/ card. graphic/ printed image. embossed/ debossed. letterpress/ silkscreen/hot-stamping.
- Title: literal or poetic / relevant or intriguing.
- Narrative: what is the story/ subject-matter. How is it told?
- Structure and architecture: how design/ repeating motifs/ or specific features develops a concept or construct a narrative.
- Design and layout: image size on pages/ single page, double-spread/ images/ grid, fold- outs/ inserts.
- Editing and sequencing: selection of images/ juxtaposition of photographs/ editing process
- Images and text: are they linked? Introduction/ statement / use of captions (if any.)
3. Write an overall final evaluation (250-500 words) that explain in some detail the following:
- how successfully you fulfilled the EXAM brief and realised your intentions.
- links and inspiration between your final images and exam theme including artists references
- analysis of final prints/presentation in terms of composition, lighting, meaning, concept, symbolism etc.
see example here: https://hautlieucreative.co.uk/photo16a2e/author/sodonnell05/
4. Go through all your blog posts and make sure that you have completed them all to your best ability, e.g. good use of images/ illustrations, annotation of processes/ techniques used, analysis/ evaluation of images and experimentation
5. Present your final outcomes in window mounts or on foam board, label with name, candidate number, attach velcro and put in a BROWN/BEIGE/YELLOW folder.
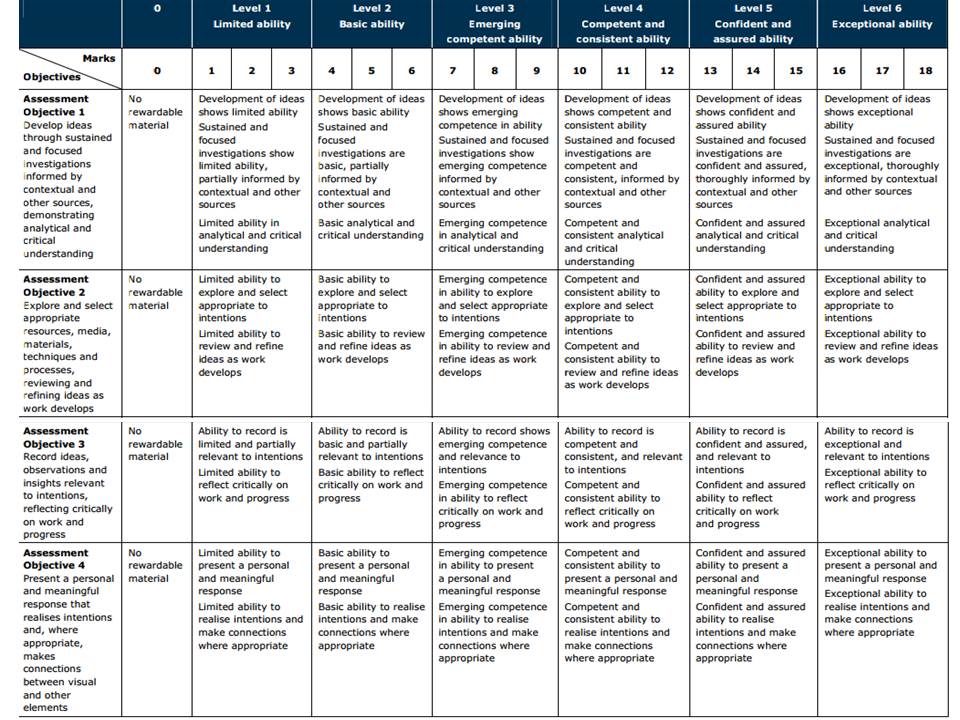
To achieve a top marks we need to see a coherent progression of quality work from start to finish following these steps:
RESEARCH > ANALYSIS > PLANNING > RECORDING > DEVELOPING > EXPERIMENTING > PRESENTING > EVALUATING

The following students have been selected for moderation:
Coursework:
Shanesia Da Silva
Jordan Fenn
Ben Grindheim
Charlton Hoy
Alice Kent
Kobi Le Cornu
Erin Luis
Declan O’Grady
Hayden Runacres
Anya Waigh
Stanley Lucas
Externally Set Assignment:
Shanesia Da Silva
Jordan Fenn
Ben Grindheim
Charlton Hoy
Alice Kent
Kobi Le Cornu
Erin Luis
Declan O’Grady
Hayden Runacres
Anya Waigh
Stanley Lucas (H)
Georgine Lutkin Clarke (L)
