. . . a simple invitation to walk within a marked boundary . . . without any definite plans other than walking and immersing ourselves in this encounter and experience. (page 47)
Essentially, we would like you think about the walk to town before we go, so therefore we want you to make some planning posts before your trip. We also want you to make an evaluation post at the end of the week.
Planning
If you look at page 38 you can see how ‘groups nominate who, what and where they wanted to explore‘ and on page 39 the group came up with a number of themes for their exploration.
As such, we would like you to think about some themes that you could explore on your walk, think about the trip as a chance to capture people in the ‘wild’ in their natural habitat, therefore answer these questions:
what do people do in the ‘wild’?
what does this activity tell us about society, humanity and individuals?
As Sarah writes on page 51 “we’re starting to use the city and what people are doing in it as a probe to enable us to speculate”
Shoot
For the actual shoot we want you to take photos in the style of environmental portraiture or street photography. From your earlier research and analysis you should be able to identify some key characteristics, but we would definitely suggest that you
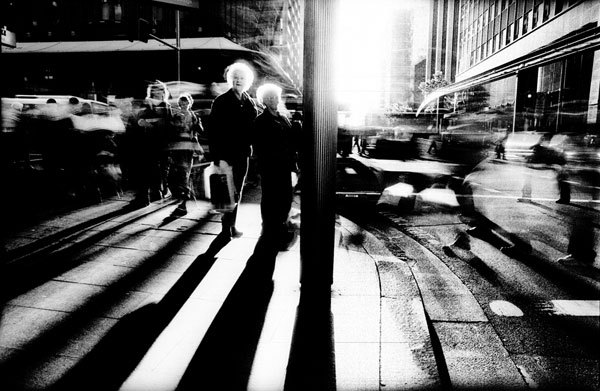
try to capture images and moments around your set theme (street photography)
try to talk to people before you take their image so that you can a good frame and a sense of intimacy (environmental portraiture)
you avoid ‘back of the head shot’, shots from too far away, shots that don’t have people in them, shots that don’t have permission or consent, shots that create a risk or are inappropriate (see policy above for guidance and advice)
Evaluation
When you have uploaded all of your images (in a contact sheets) please select 3-5 of your favourite images and provide some analysis that helps us to understand why you like them the best. We will be looking to print out and mount the best 2 (or 3) photos, so you will need to upload them to Mdrive>depts>photography>students>image transfer>PRINTING and we will arrange for them to be printed over 1/2 term.
We would also like you to provide a creative description of your walk, similar to Soile’s page43, Ann’s page 44 and David’s page 45, so have a look at them before you go.
Extension
As an extension you could look at the concept of :
Street photography is photography conducted for art or enquiry that features unmediated chance encounters and random incidents within public places. Street photography does not necessitate the presence of a street or even the urban environment. The concept of the “flaneur” or people watcher is often referred to…as is the candid portrait.
…was a French humanist photographer considered a master of candid photography, and an early user of 35 mm film. He pioneered the genre of street photography, and conceived of photography as capturing a decisive moment.
Henri Cartier-Bresson
Task / blog post 1 [ Introduction to Street Photography]
Design an introductory post to define and explain what street photography is / can be
Choose 2 x street photographers from the list below and write a short biography about them and their work
Select a key image from both photographers and analyse using a combination of the 3 types of analysis you have learned
Task / blog post 2 [How we use shutter speed and angles in street photography]
Explore the use of shutter speed to capture a range of street photographs / candid portraits (your images)
Explore the use of various angles and viewpoints (POV) to capture a range of your own street photographs in various locations
Include your contact sheet and describe and explain your process / analyse
Task / blog post 3 [Selection of successful images from Week 5]
Choose a small range of images (3-5) to edit and present
Analyse and discuss your choices…why, how, what , who etc
Compare and contrast your work to your 2 x Street Photographers
EXTENSION TASK…LOOK AT EXAMPLES OFjuxtaposition IN STREET PHOTOGRAPHY AND CREATE A POST DESCRIBING AND EXPLAINING HOW WE CAN EXPLOIT THIS TECHNIQUE
Homework Assignment STREET PHOTOGRAPHY
AIM TO TAKE 100-150 PHOTOGRAPHS
SHOW THE INFLUENCE OF AT LEAST 1 STREET PHOTOGRAPHER IN YOUR IMAGES
EXPLORE 3 DIFFERENT AREAS OF TOWN / VILLAGE / HOUSING AREA ETC
SHOW HOW YOU CAN USE SHUTTER SPEED TO CREATE different effects WITHIN STREET PHOTOGRAPHY
DEADLINE MONDAY 10TH OCTOBER 2016
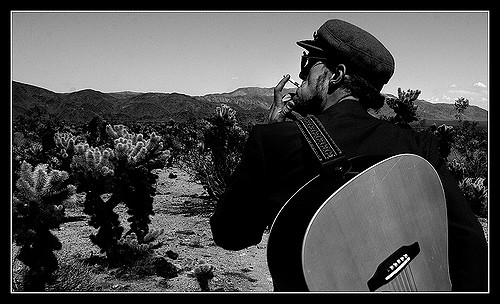
INSPIRATIONAL STREET PHOTOGRAPHERS
Trent Parke, Bruce Gilden, Diane Arbus, Robert Frank, Raghubir Singh, William Klein, Elliott Erwitt, Garry Winogrand, William Egglestone, Lee Friedlander, Martin Parr, Joel Meyerowitz, Paul Strand, Bill Brandt…but there are many more to discover and explore
Robert Frank (USA) Trolley Car, New Orleans, 1955 (From “The Americans”…a photo essayRaghubir Singh, From a Way Into India, 1995Trent Parke
Tony Ray-Jones listed the following shooting advice to himself in his personal journal:
Be more aggressive
Get more involved (talk to people)
Stay with the subject matter (be patient)
Take simpler pictures
See if everything in background relates to subject matter
Vary compositions and angles more
Be more aware of composition
Don’t take boring pictures
Get in closer (use 50mm lens or smaller)
Watch camera shake (shoot 250 sec or above)
Don’t shoot too much
Not all eye level
No middle distance
Tony Ray-Jones
Some more tips to help with your Street Photography…
During this part of the course we want you to develop some more confidence with using the manual settings of your camera, which will help you to show flair and creativity in your images.
First of all you need to just take a couple of photos, transfer them to your folder (we suggest you create a folder in your M drive as this will have the most space for you to work in).
Then you need to use a suitable programme to convert all of your thumbnails into a contact sheet, then you need to upload your contact sheet to your blog.
When you are confident with this process you can then start experimenting with your camera.
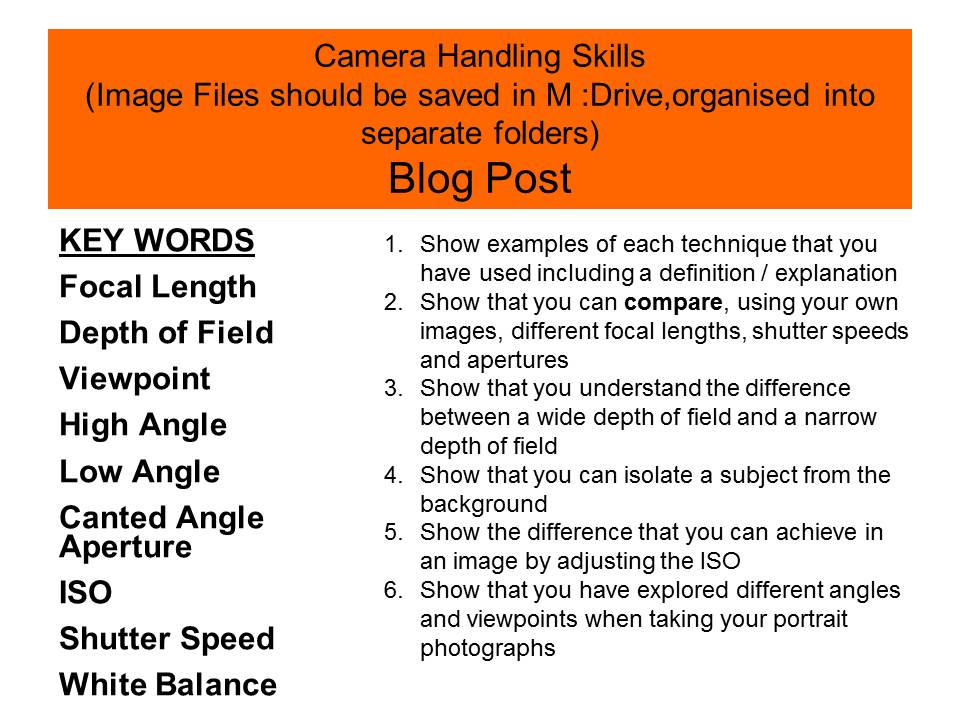
1. WHITE BALANCE
Try to understand the concept of White Balance by taking some more pictures that have the same composition and manual settings – but this time alter your white balance settings. In your analysis refer to the following terms: Colour Cast, Temperature, Kelvin Scale. As an extension task you could try setting a manual white balance and you could even try to fool the camera by setting a manual white balance with a coloured pieced of paper. Here are some resources to help.
2. ISO (International Standards Organisation)
Use A priority mode to achieve a shallow depth of field and make sure that at 400 ISO you have an even exposure (use the light meter on your camera)
Take the same picture (frame, angle, focus etc) but move through the different ISO settings.
Check your pictures and see what results you get.
Take some more pictures and adjust your Aperture setting and/or your light meter to make sure that all of the ISO settings have a reasonable exposure.
Return to the classroom.
Upload all of your photos as contact sheets
Define the term ISO and
identify the ways in which it affects your photographs
and why and when you would need to use a different ISO setting
Go back and take some more photographs in a different setting (eg outside on a sunny day) to explore and understand ISO further.
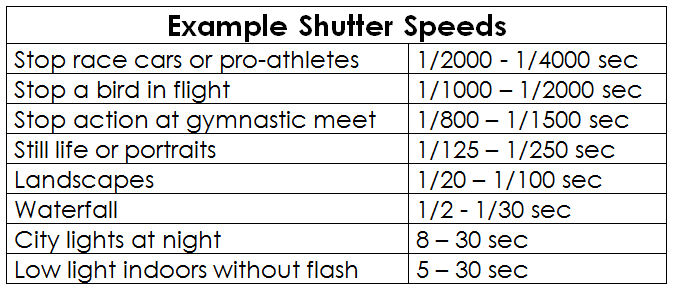
3. SHUTTER SPEED
This week we need to add one more key feature to your knowledge of manual camera settings – ‘SHUTTER SPEED’. To start with set your camera to Tv (Time Value). This means that when you adjust your camera settings, it will change your shutter speed value and adjust other values (aperture, ISO) accordingly to ensure a balanced exposure – ie not too dark / not too light (or in photography language not too overexposed or too underexposed).
First of all let’s try to work out how shutter speed affects the image. Then think about where, when and why you would want to adjust shutter speed value.
Then, undertake a task to show your own practical understanding of this task – remember to take good quality images as part of your practical task, think about light, setting, composition, NVC etc etc etc.
You need to record your own examples, so I suggest you look at this pdf to give you some ideas shutter-speeds and then look at the work of Francesca Woodman:
before you produce:
some images that record movement very slowly, so that the image is blurred, impressionistic and abstract (use a tripod to help keep your camera steady)
some images that record movement very fast, so the image is sharp, clear and in focus
some images using some specific techniques: eg ‘zoom bursts’, ‘whip pan’ or ‘time lapse’ which will show a more advanced command of the camera and the use of shutter speeds.
For each shoot:
upload all of your images as a contact sheet
use formal written language to discuss and analyse what you have done showing a sense of evaluation (what was good, bad, could be improved etc)
Include key terminology in your post
Include some images or videos about shutter speed in your post (to illustrate your ideas)
Highlight your favourite image (or couple of images)
All sets of images (at least 12 photos for each) should show your ability to take a good photograph, so pay attention to composition, exposure, framing, light, NVC, setting, balance, shape, form, colour etc etc etc.
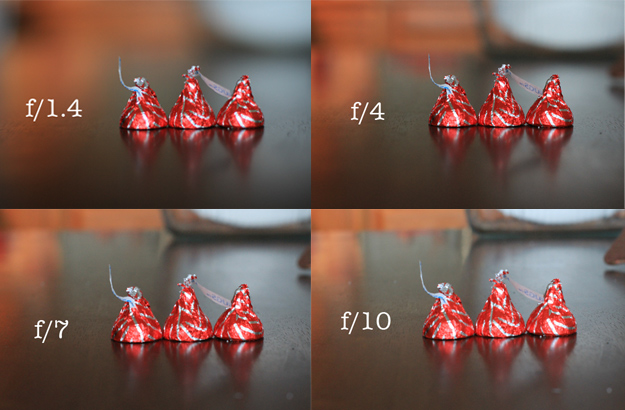
4. Aperture
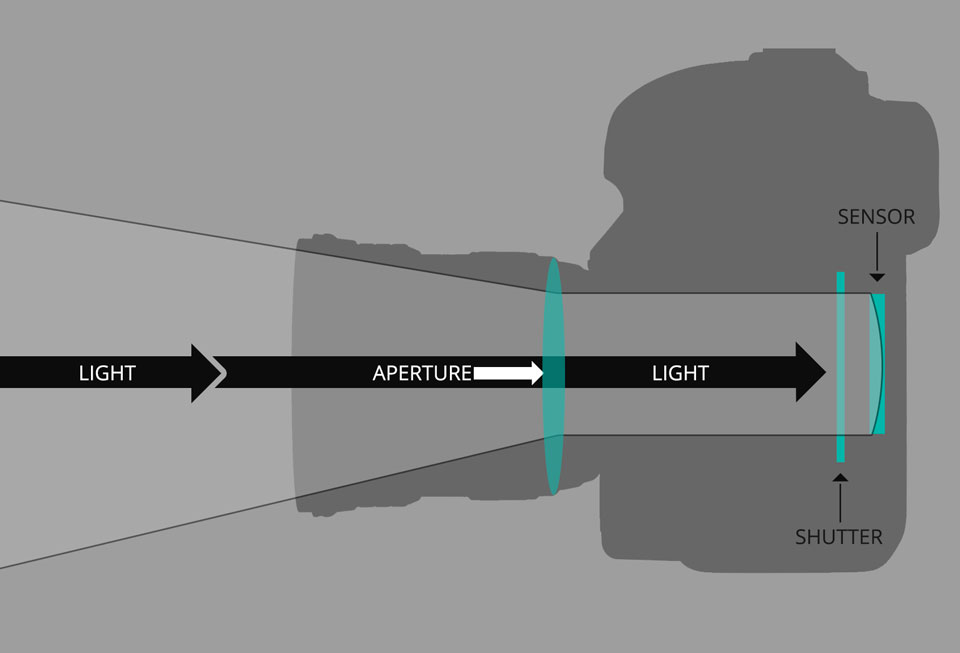
In optics, an aperture is a hole or an opening through which light travels…as shown in the diagrams below
This image clearly shows how the focus of an object and its background can be adjusted by controlling the aperture (or f-number) only…
Now your turn…
set up objects in a scene in which you maintain the same focal length, ISO, WB but adjust only the APERTURE to create a similar comparison
create a blog post to describe and explain your process and results alongside your most effective images
5. Depth of Field
A basic definition of depth of field is: the zone of acceptable sharpness within a photo that will appear in focus. In every picture there is a certain area of your image in front of, and behind the subject that will appear in focus.
APERTURE CAN / DOES AFFECT DEPTH OF FIELD
FOCAL LENGTH CAN / DOES AFFECT DEPTH OF FIELD
Depth of field can dramatically change the feel or mood of an image, and bring our attention to a particular focus point…where the subject is isolated from the background. This is known as a shallow or narrow depth of field
For example…
But we can also a apply a wide, deeper or larger depth of field by using a small aperture eg f22 or f36 to create a sense of more aspects of the image being in focus…
For example
So…to increase depth of field you should :
Narrow your aperture (larger f-number)
Move farther from the subject
Shorten focal length
and to decrease depth of field you should :
Widen your aperture (smaller f-number)
Move closer to the subject
Lengthen your focal length
With your camera try these techniques and create a blog post to document your experiments (portrait or street photography)
Define what depth of field is…add an article or video to support your understandin
insert your images so that you can compare various depths of field
describe and explain how you created the images…analyse the best ones using key terminology where possible
EXTENSION ACTIVITY…creating BOKEH effects
Bokeh is the aesthetic quality of the blur produced in the out-of-focus parts of an image produced by a lens. Bokeh has been defined as “the way the lens renders out-of-focus points of light”.
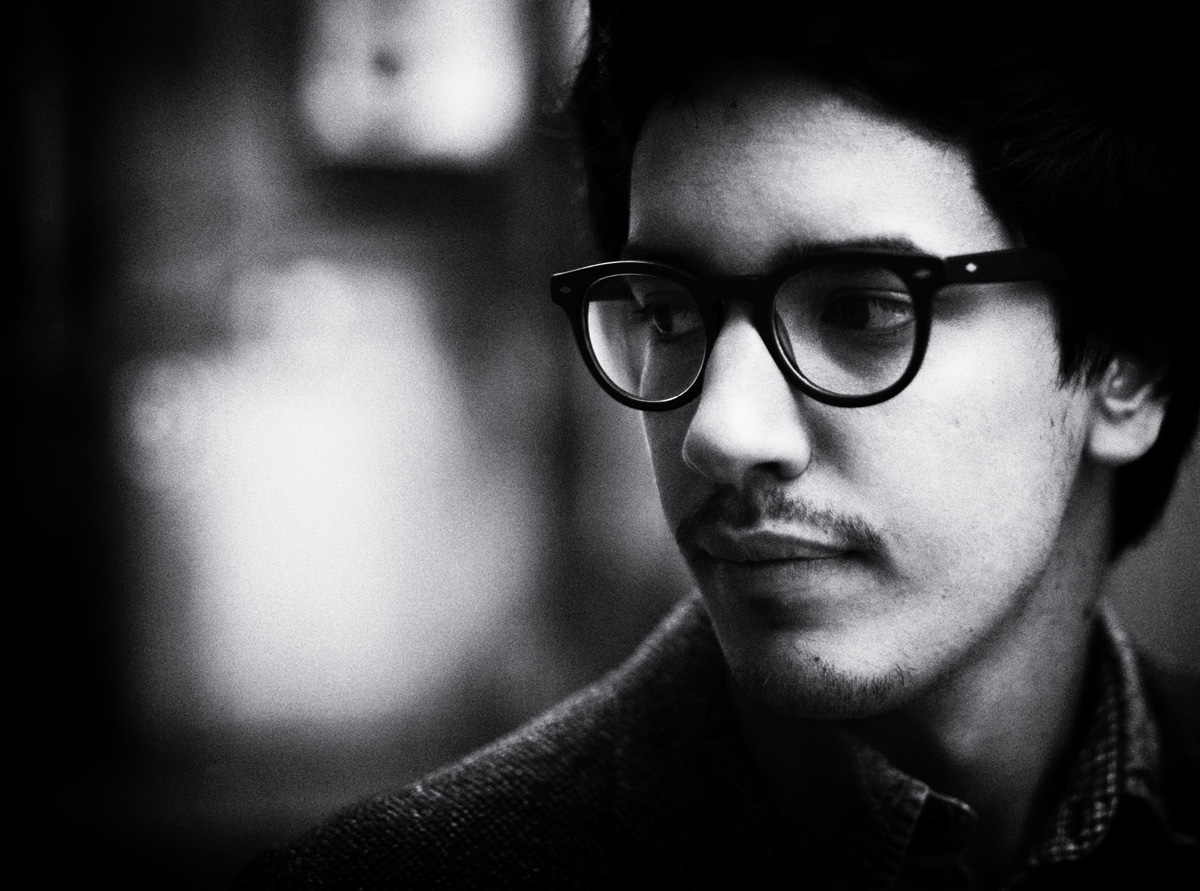
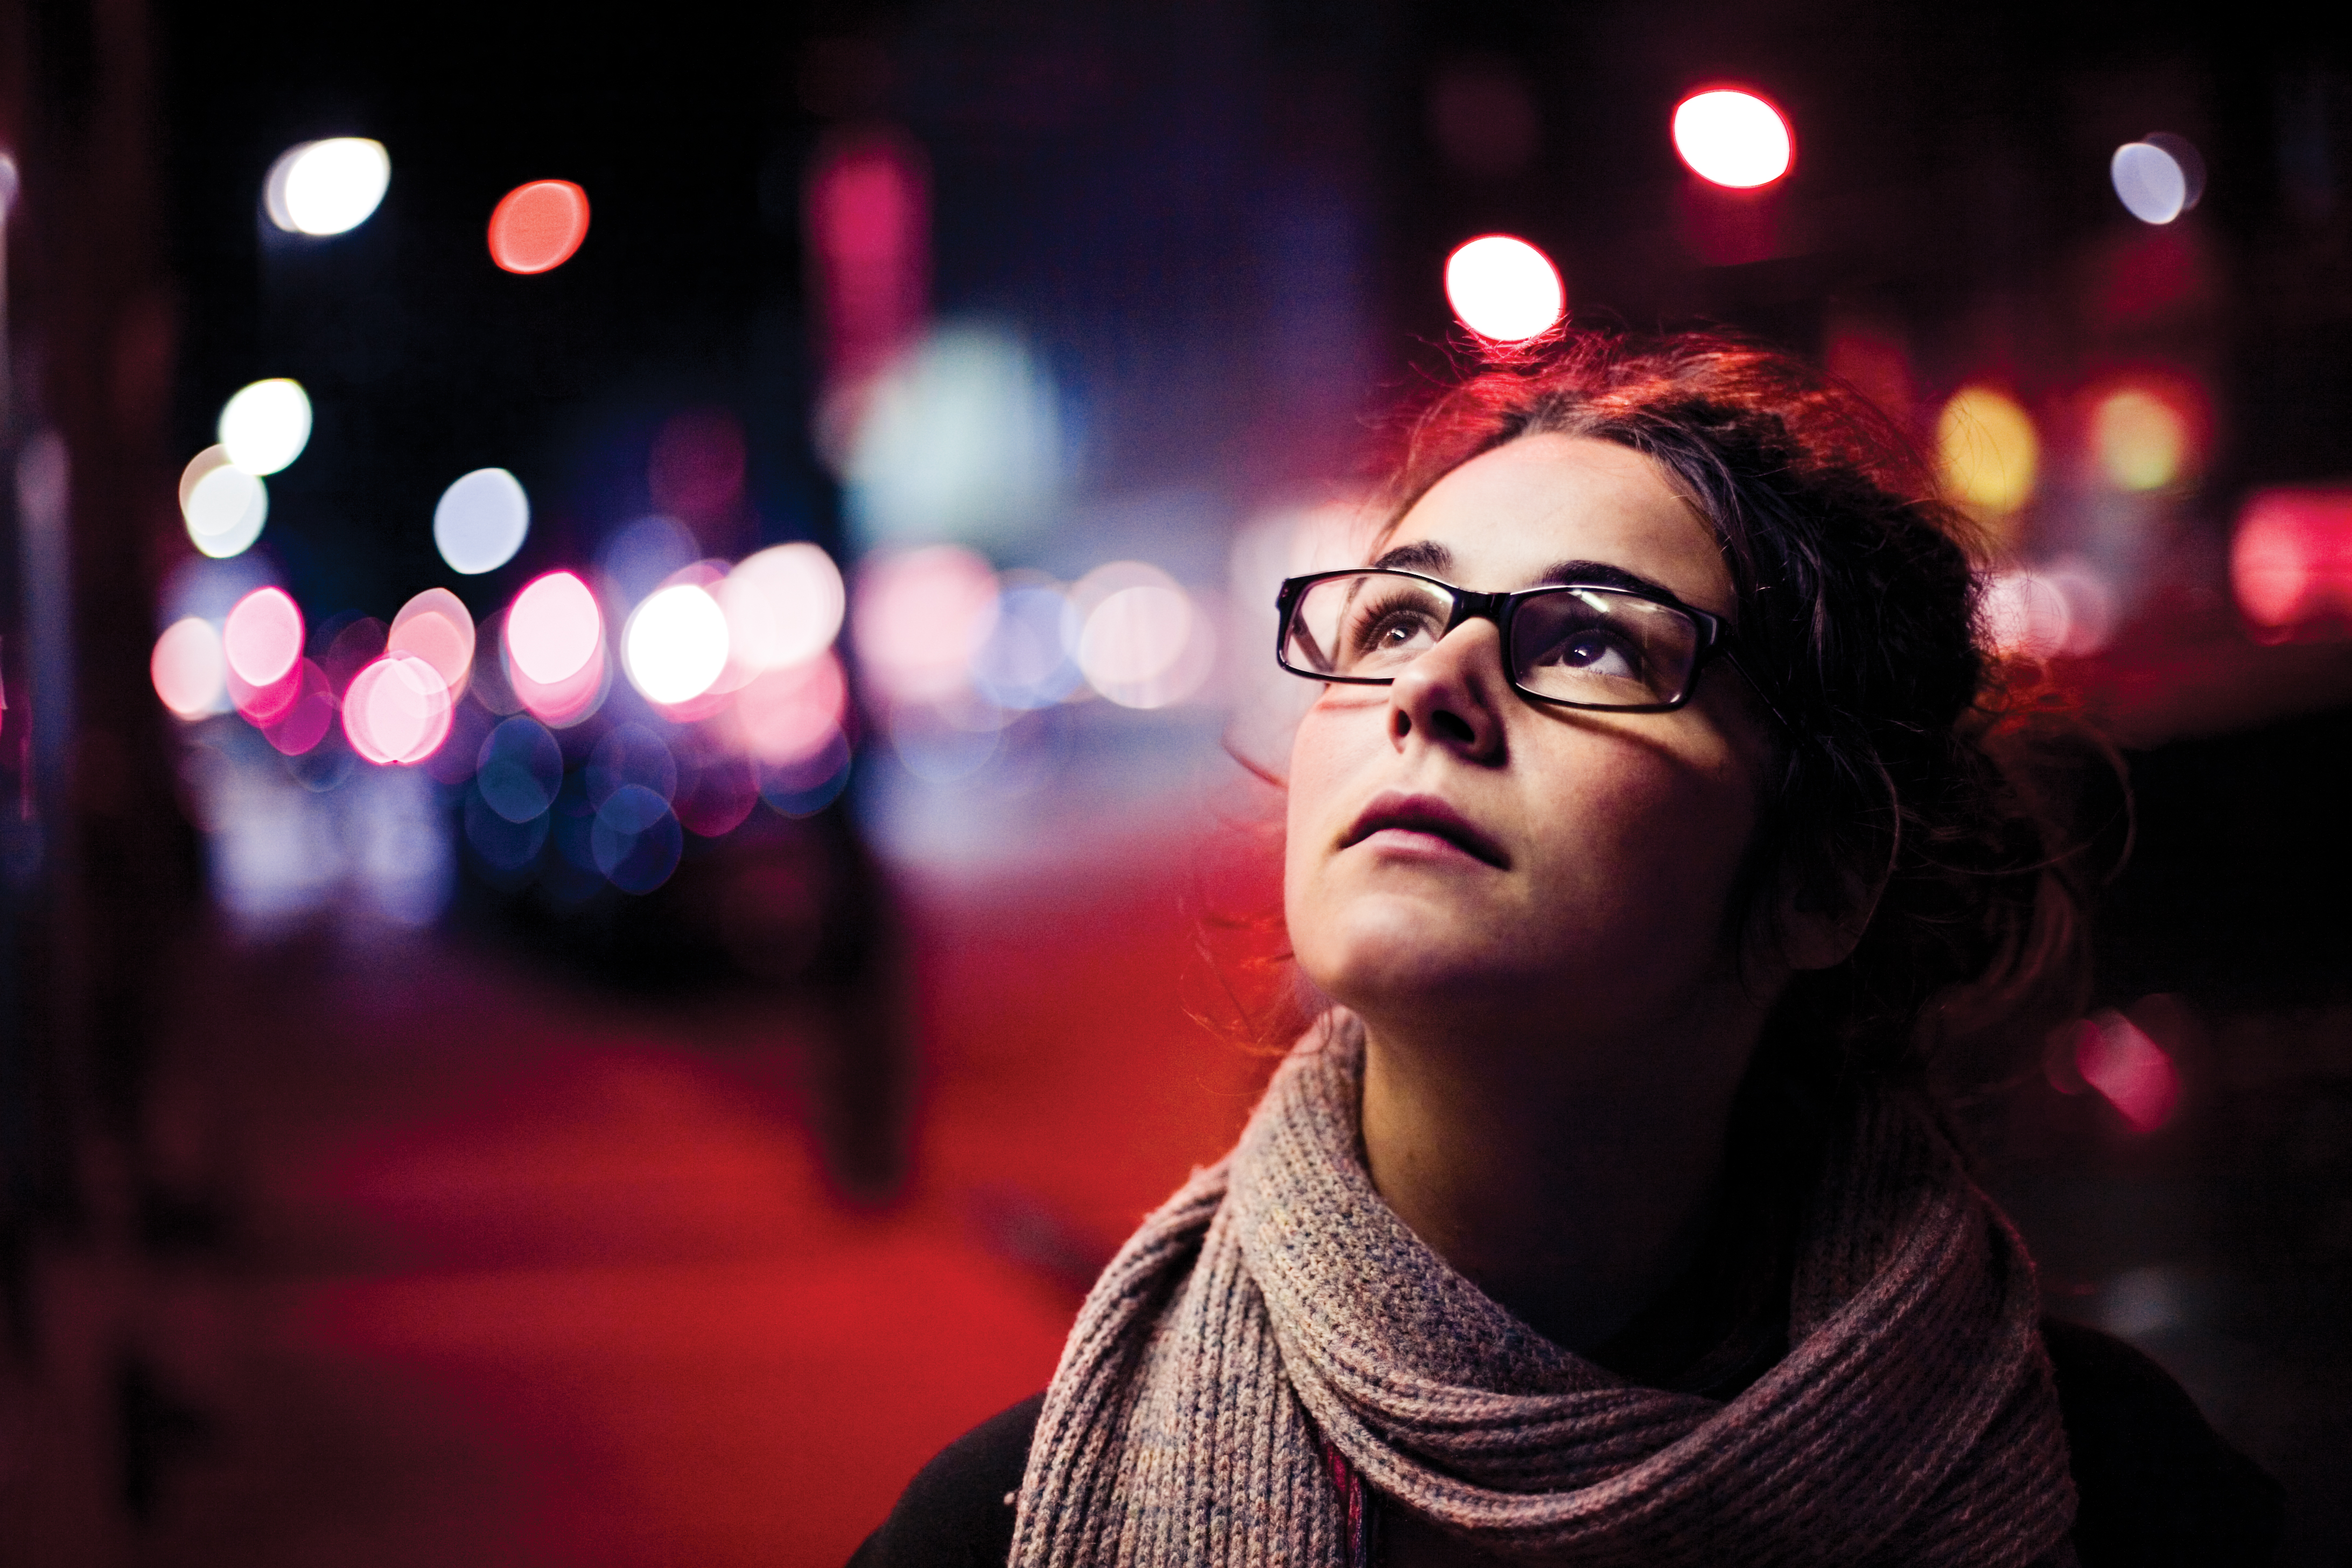
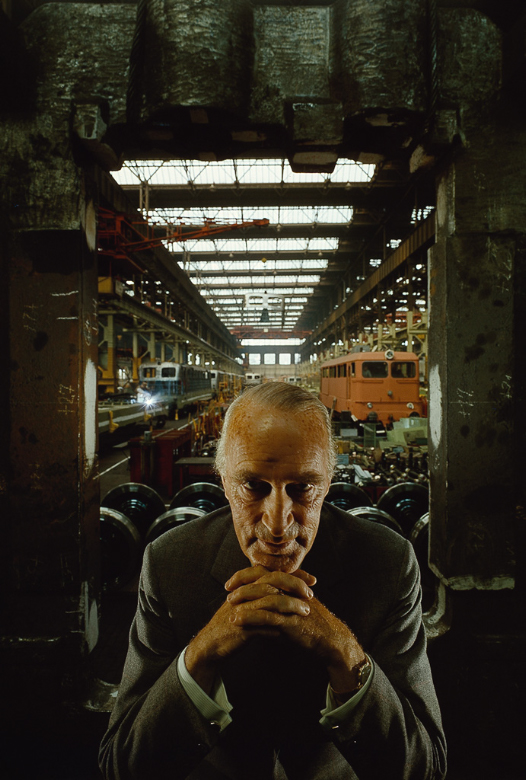
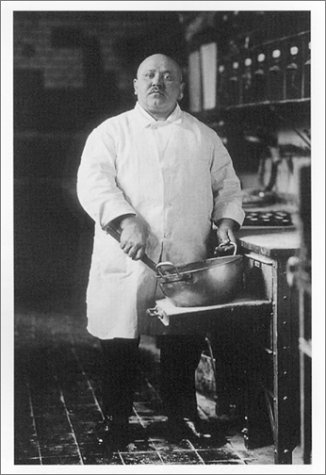
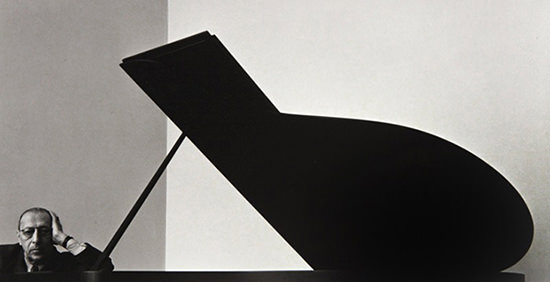
This week we will be tackling a range of skills and approaches to portrait photography…
Understanding and using various lighting techniques
Camera Handling Skills…ISO , White Balance, Aperture, Shutter Speed, depth of field and focusing the lens
Creating and publishing CONTACT SHEETS from your photoshoots
Completing 150-200 photographs for your Environmental Portrait photo-shoots…REMEMBER // YOUR DEADLINE FOR THIS is YOUR 4TH LESSON OF THE WEEK…GOOD LUCK!!!
There are useful resources in this drive for you to have a look at
M:\Departments\Photography\Students\Resources\Portraiture\TO DO
Watch these clips as an introduction to what we will be covering this week…
And please bring your own cameras to class this week…thanks!
This week you will be learning a range of new and different analytical skills, and tackling a set of practical tasks as well as completing some research about various photographers.
We will introduce you to using the blog, how to create contact sheets from your photographs and how to begin using a DSLR camera effectively…
Reminder of homework task due in for Week 3 (lesson 4)
You must take 150-200 photographs of environmental portraits
Divide this up into 2 /3 photoshoots…then create contact sheets
This must then be added as a new post to your blog,
saved and published
Title = Environmental Portraits Photoshoot (1 /2 /3)


 Trolley Car, New Orleans, 1955")