– ̗̀ H E L P F U L L I N K S ̖́-
For the Personal Investigation [X]
For the Externally Set Assignment [X]
For a preview of the finished book as part of the externally set assignment, “Untitled.” which can be viewed digitally through Blurb here [X]


Examination dates: Groups 13A and Group 13D May 2nd, 3rd and 8th.
Group 13B May 4th, 5th and 10th ~ 15 hrs controlled test over 3 days
The Theme: ‘ENVIRONMENT’
Exam Paper: A2 paper 2017 Environment-blog
Contextual References: Contextual References booklet 2017 A2
Link to PLANNER for A2 EXAMINATIONS 2017 Hautlieu ENVIRONMENT
How to start
Read the Exam Paper and Exam Planner thoroughly, especially pages 2-4 and page 7 which details specific starting points and approaches to the exam theme – make notes! Brainstorm your idea and research artists listed – look also at starting points in other disciplines e.g. Fine Art and Graphic Communication etc. Over H-term begin to gather further information, collect images, make a mood-board and mind-map, make plans and write a specification, start to take pictures and make a response to initial research. You must show evidence of the above on your blog– complete at least 4-5 blog posts.
Preparatory Supporting Studies – 6 weeks of lessons + 2 weeks Easter Break: (Blog post)
Prior to the timed examination you must produce and submit preparatory supporting studies which show why and how the supervised and timed work takes the form it does. You must produce a number of blog posts 25-30 that charts the development of your final piece from conception to completion and must show evidence of:
| Each week you are required to make a photographic response (still-images and/or moving image) that relates to the research and work that you explored in that week. Sustained investigations means taking a lot of time and effort to produce the best you can possibly do – reviewing, modifying and refining your idea and taking more pictures to build up a strong body of work with a clear sense of purpose and direction |
Timed Exam 15 hrs over three days: (Final Outcome)
This time is for you to fine tune and adjust your final photographs using creative tools in Lightroom/Photoshop and/or complete a final edit of your film or video in Premiere. Your final outcome(s) must be presented in a thoughtful, careful and professional manner demonstrating skills in presenting work in either window mounts, picture frames, foam-board, and/ or submit moving image and video based production and upload as Youtube clip to the blog.

Choose a key image from each of your chosen photographers / artists and find out as much as you can about that image and evidence the distinguishing features of the work, the concepts behind it and the context that the work is set in…
You should be on the look out for symbols, codes, conventions and metaphors that may be apparent in the work.
AO1: Develop your ideas through sustained and focused investigations informed by contextual and other sources, demonstrating analytical and critical understanding
AO2: Explore and select appropriate resources, media, materials, techniques and processes, reviewing and refining ideas as work develops
AO3: Record ideas, observations and insights relevant to intentions, reflecting critically on work and progress
AO4: Present a personal and meaningful response that realises intentions and, where appropriate, makes connections between visual and other elements
————————————————————————————-
Example : The Auschwitz Album is a perfect example of the importance of knowing the context in which photographs were taken. For instance, the picture below is an innocent picture of women standing together in front of a building. They stand together with their babies and children, and seem happy to look at the photographer who is taking the picture. There is no sign of stress, no hint of violence; most of the women are calm – all except one who looks like she is trying to comfort a baby.

Birkenau, Poland, Jewish women and children in front of Crematorium III, 05/1944
Yet, because we have the benefit of research, we know that these women are standing in front of one of the four massive extermination installations at Birkenau
In the gas chamber of this building (which is located below ground, perpendicular to where the women are standing), two thousand people at a time could be murdered. Behind the double windows of the building visible in the picture are fifteen ovens, vented through the chimney that is partly visible in the upper left-hand corner of the photo, used to turn the bodies of the unsuspecting victims (like those in the photo) into ash.
————————————————————————————-
This is a useful link to help you understand, analyse and explain photographs
http://www.photopedagogy.com/photo-literacy.html
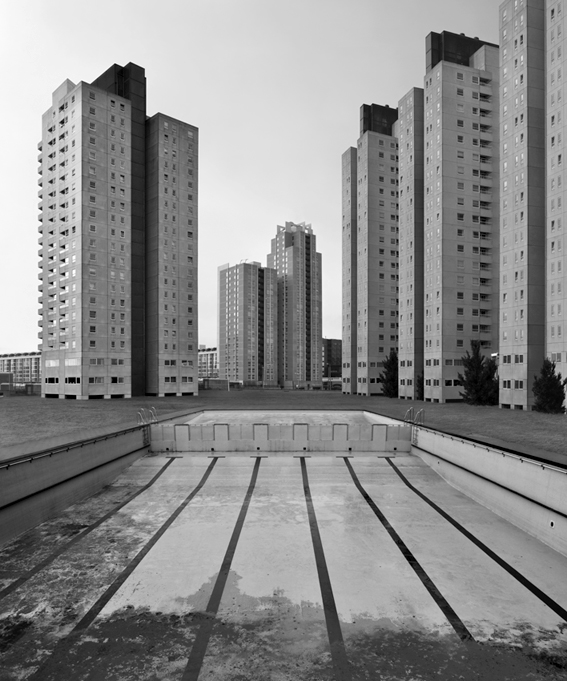
Tanja Deman // juxtaposition of changing environments // environments as temples of worship and culture //utopia // dystopia


Sculptural (photograph as object, combined with objects and ephemera or photographs as a response to a building or space ie environment)


Marlo Pascual (above)
“Pascual arranges the photos into simple, lackadaisical assemblages that she calls “props,” which rely primarily on found furniture. The images are all painfully elegant, and evoke the seductiveness of old Hollywood. In one photograph (all works untitled, 2009), a nude woman stands behind steamed glass—a scene from a movie descended from Psycho? A photograph of a set of crystal glasses is laser-cut and laid on the floor to look like it was dropped—or shattered by a single delicate stroke of a hammer. A joke about the fragility of the image, it is also a decidedly atmospheric work.”
http://www.artinamericamagazine.com/reviews/marlo-pascual/
Letha Wilson
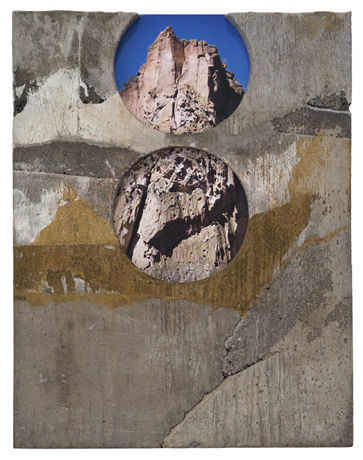
One of a number of contemporary artists who are blurring the lines between photography and other mediums, Letha Wilson makes artworks that are as much sculptures as photographs. Amalgamations of photographic images and spray paint, lumber and concrete, these hybrid objects, medium sized and mostly wall hung, occupy territory also being explored by sculptors such as Rachel Harrison and Virginia Overton. An exhibition of new pieces (all from 2012) showcased Wilson’s adventuresome way with materials.
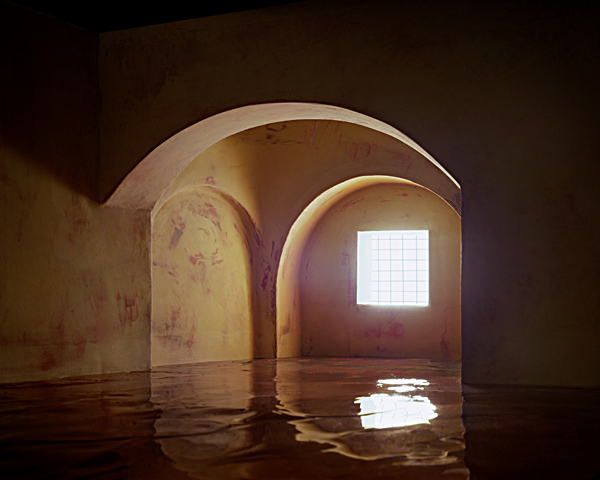
Thomas Demand
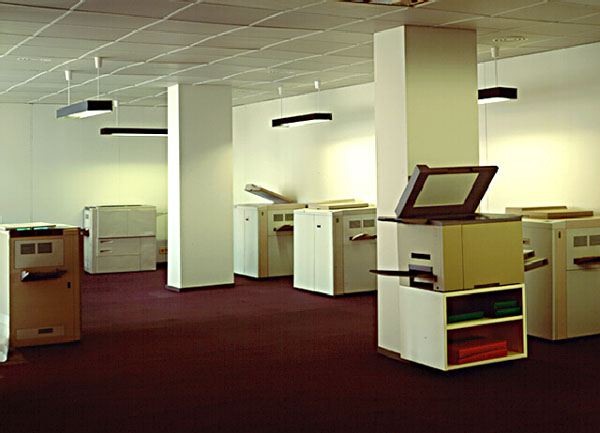
German Photographer Thomas Demand (born 1964) deals with inanimate objects and sterile interiors. He makes models of pre-photographed locations out of styrofoam, card and paper but leaves subtle signs of imperfections, then re-produces the images on a grand scale…in doing he alters the meaning and narrative attached to the environment he is re-presenting…
Laurenz Berges
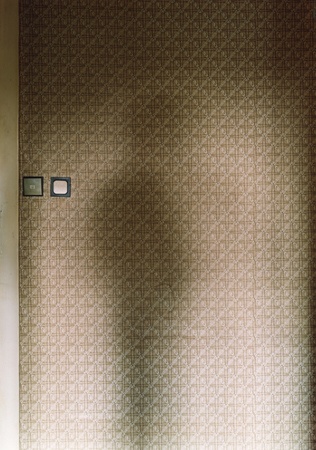
Laurenz Berges is German (Dusseldorf School) photographer. He tackles the notion of loss and removal…and often photographs both personal and shared environments. These can beintimate interiors, or extensive exteriors.
Candida Hofer
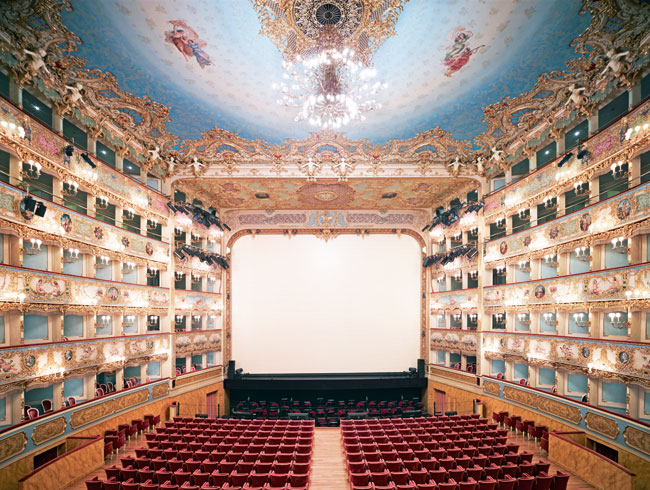
Candida Hofer was a student of Bernd and Hilla Becher in Germany in the 1970’s. Her images are a response to glorious interior environments that explore the contrast between the intention and reality of public and civic spaces…without people interacting with them.
James Casebere
James Caseberes (USA) photographs small scale models that reduce an architectural space to a fragile set of surfaces…they disrupt our belief in the solidity of man-made spaces…what happened ? what happens next ?…we are left disorientated.
Rut Blees Luxemburg
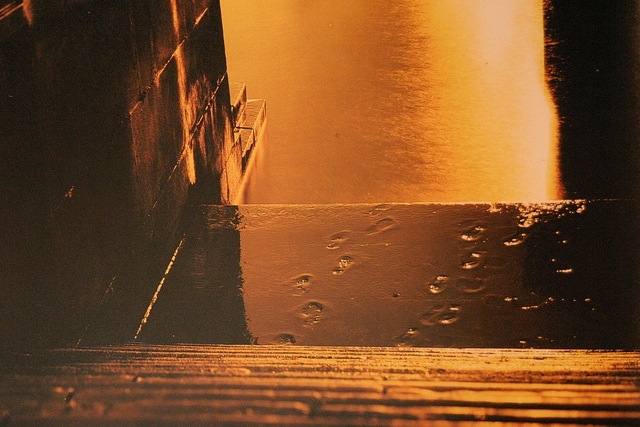
Rut Blees Luxemburg (Germany) uses amber lighting and reflections as found in 1920’s and 1930’s style flash photography…but in a thoroughly modern context.
Chris Killip
Chris Killip is a British photographer. Taken in the late 1970s and early 80s, Chris Killip‘s photographs are a study of the communities that bore the brunt of industrial decline in the North East. This was a response to the decisions of the Thatcher government at the time and explore the environments that people were integrated with in the northern working towns.
https://www.ft.com/content/abe3886c-ba34-11e5-bf7e-8a339b6f2164

METHOD
Now make a blog post that illustrates your response to these artists…and explain how and why you arrived at your final response.
Think about layering your image(s) onto acetate or glass and exploit the transparent qualities vs. opaque shapes, colours and tones
for example

Ardan Ozmenoglu
https://www.pinterest.com/pin/315040936408995781/
Method

Link Here !!!
