In the earliest days of landscape photography, technical restraints meant that photographers were bound to working with static subjects, due to long exposure times which rendered any movement blurry. This made landscapes and cityscapes prime material for their exposures.
As the technical side of photography developed and cameras became more affordable, almost anyone could become a photographer. Whilst democratizing and diversifying the craft, this also gave form to some form of elitism, as certain artists began to distance themselves from the status quo by creating their own visual movements.
As the 20th century rolled in, the art of Landscape photography was led by American photographers who had a vast and varied landscape to play with. Their influence may also have been due to the growing influence of American cultural production and the frontier myths of manifest destiny.
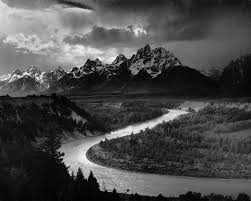
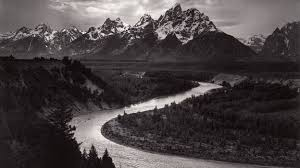
Perhaps the most famous of all Landscape photographers is the legendary Ansel Adams, a dedicated environmentalist whose love of the natural world was meant to encourage people to respect and care for their planet. His stark black and white images of rivers and canyons set the precedents for landscape photographers thereafter.
Yet, the legitimacy of landscape photography as an art has always been defined alongside its relationship to painting. As a result of its existence being challenged in the context of fine art, its trajectory has also been influenced
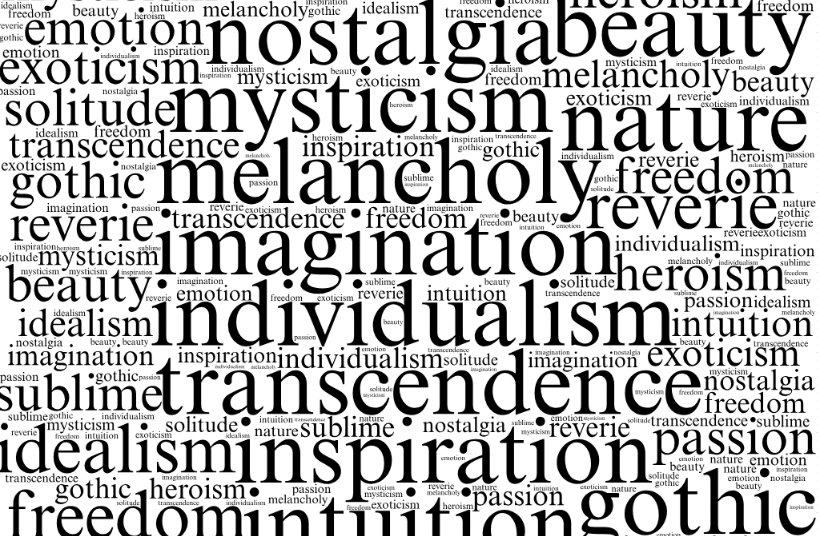
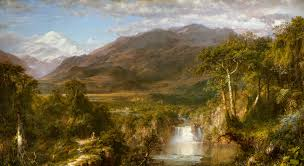
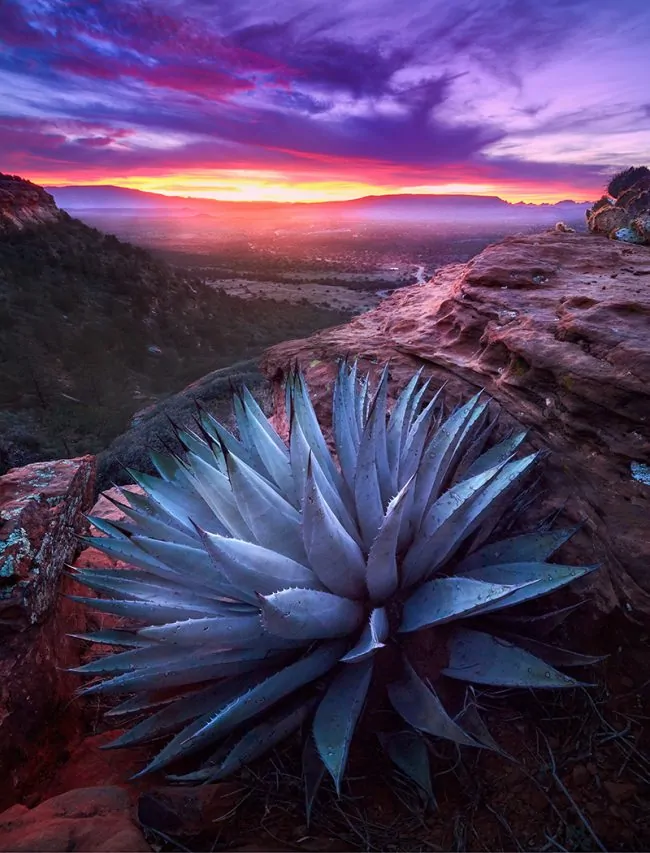
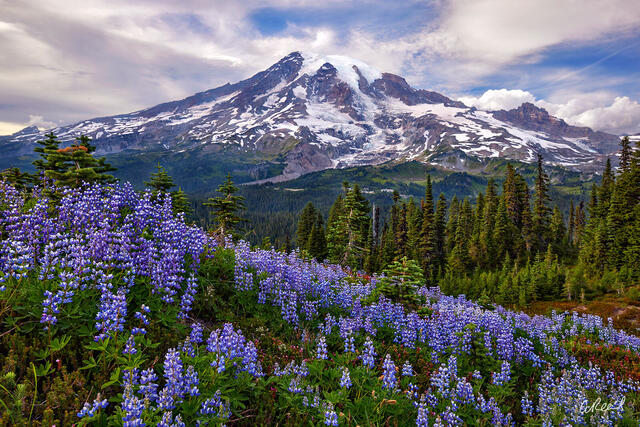
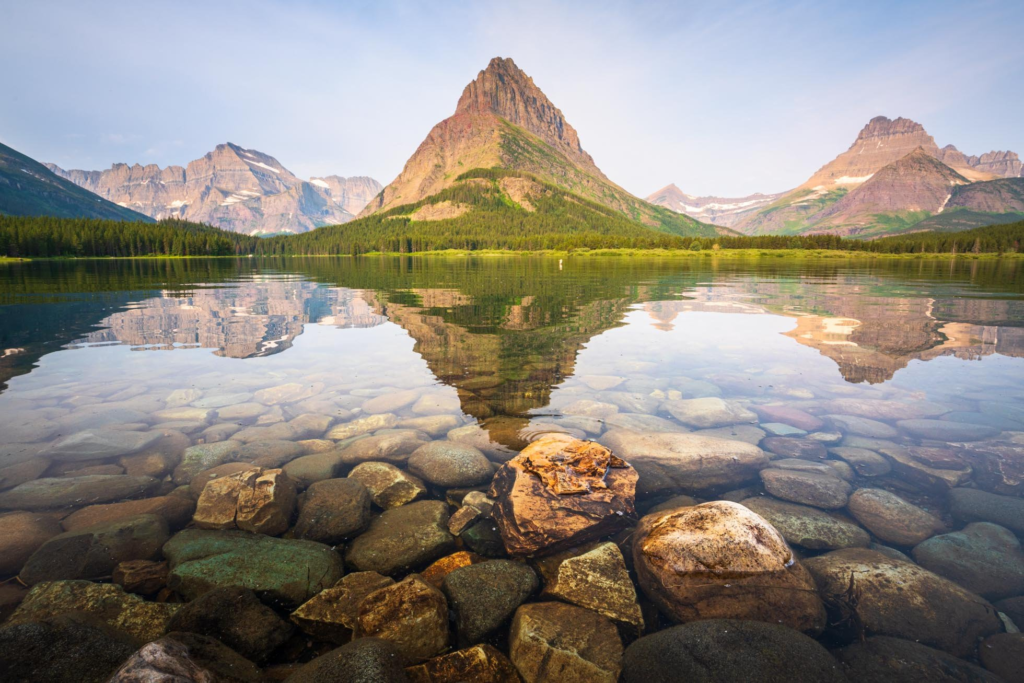
Romanticism in art and photography is about focusing on strong emotions, nature, and individual experience. It highlights beauty, imagination, and sometimes the mysterious or exotic. Think of dramatic landscapes, powerful moments, and emotional expressions. It’s less about strict realism and more about capturing the feeling of a scene. It involves romanticising certain things like nature or a certain lifestyle. For example, in photography, you might romanticise a landscape by capturing the best scenes only and perhaps putting a feeling of otherworldyness/ nostalgia. When you romanticise something, you make it seem better than it really is; in a way, everything humans think about is romanticised: the grass is always greener on the other side. An example of life being romanticised in our minds is thinking about the life of being an underground artist in New York (think Basquiat) is highly romanticised and the image of it looks really appealing/romantic, but in reality it is quite a hard life to live, and that feeling of romanticism that you get when looking at images isn’t necessarily how that person living that life might be experiencing it.
FACTS AND INFO ON ROMANTACISM
Romanticism placed particular emphasis on emotion, horror, awe, terror and apprehension. Emotion and feeling were central not only to the creation of the work, but also in how it should be read.
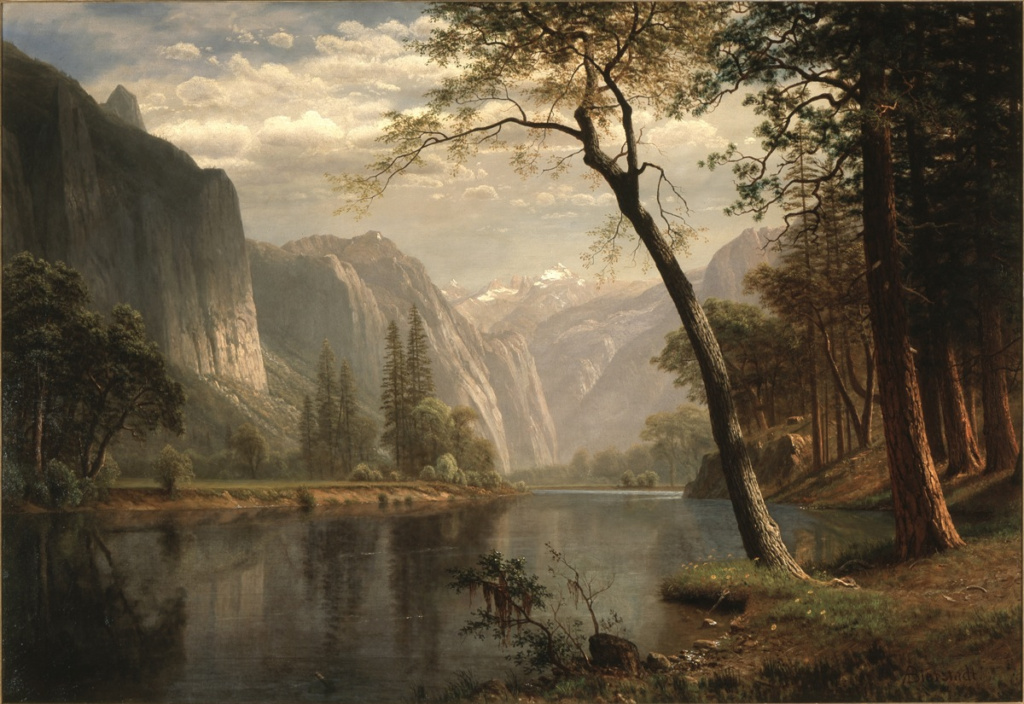
Romanticism can also have a link with landscape and nature . Landscapes became subjects in their own right and were often charged with symbolism. For romantic artists, nature is a source of inspiration and escape, a refuge from the tumult of the modern world.
WHO
: artist William Blake and the Spanish painter Francisco Goya have been given the name “fathers” of Romanticism by various scholars for their works’ emphasis on subjective vision, the power of the imagination.
WHAT
:an artistic movement marked by the emphasis on imagination and emotions
WHERE
: romantisicm started In western Europe around the 18th century at this time the artistic and cultural movement was being revived (Neoclassicism)
HOW
: With its emphasis on the imagination and emotion, Romanticism emerged as a response to the disillusionment with the Enlightenment values of reason and order in the aftermath of the French Revolution of 1789.
WHY
: Romanticism was born as a reaction against the Age of Enlightenment and the Industrial Revolution. The Romanticist movement celebrated rebellion, sensation, emotion, subjectivity, and individuality and it rejected tradition, reason, rationality, and authority.
THE IMPORTANCE OF THE BRITISH PAINTERS JMW TURNER AND JOHN CONSTABLE
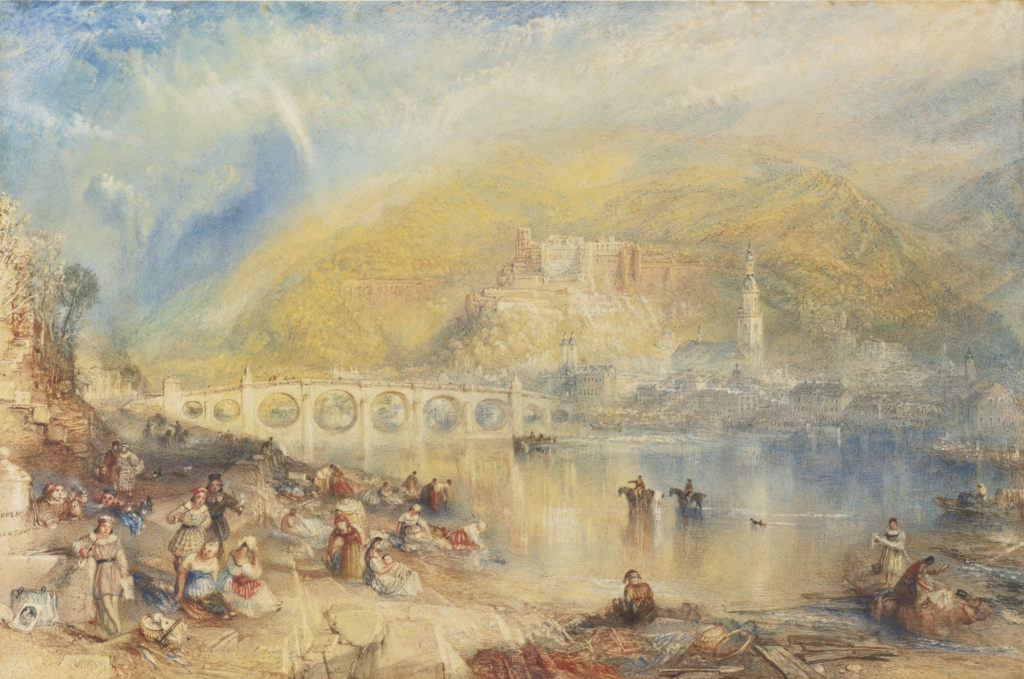
JMW TURNER
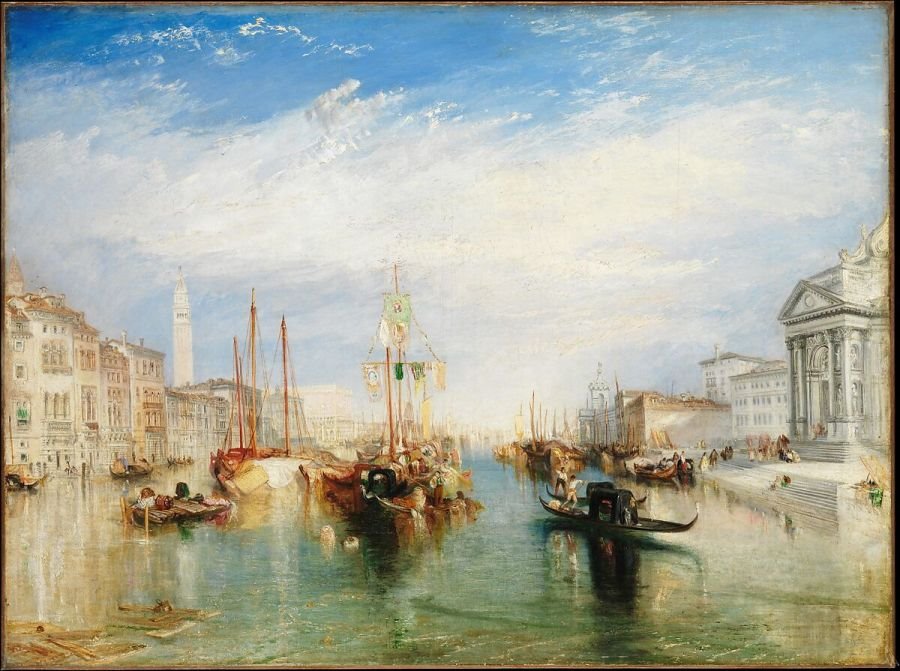
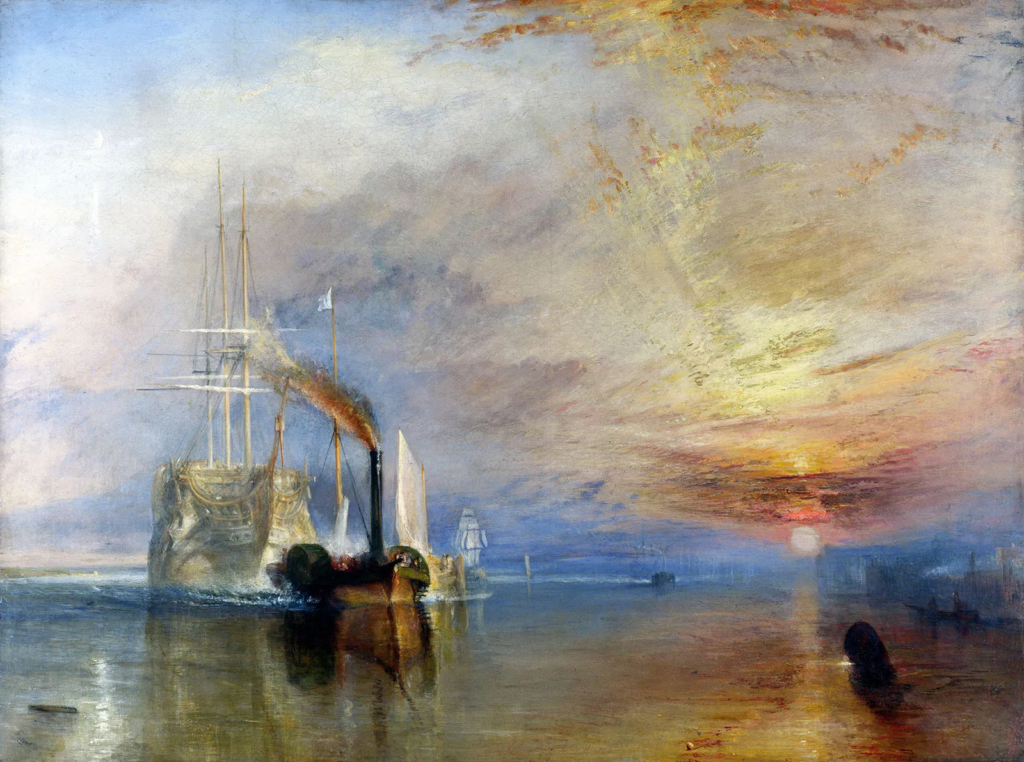
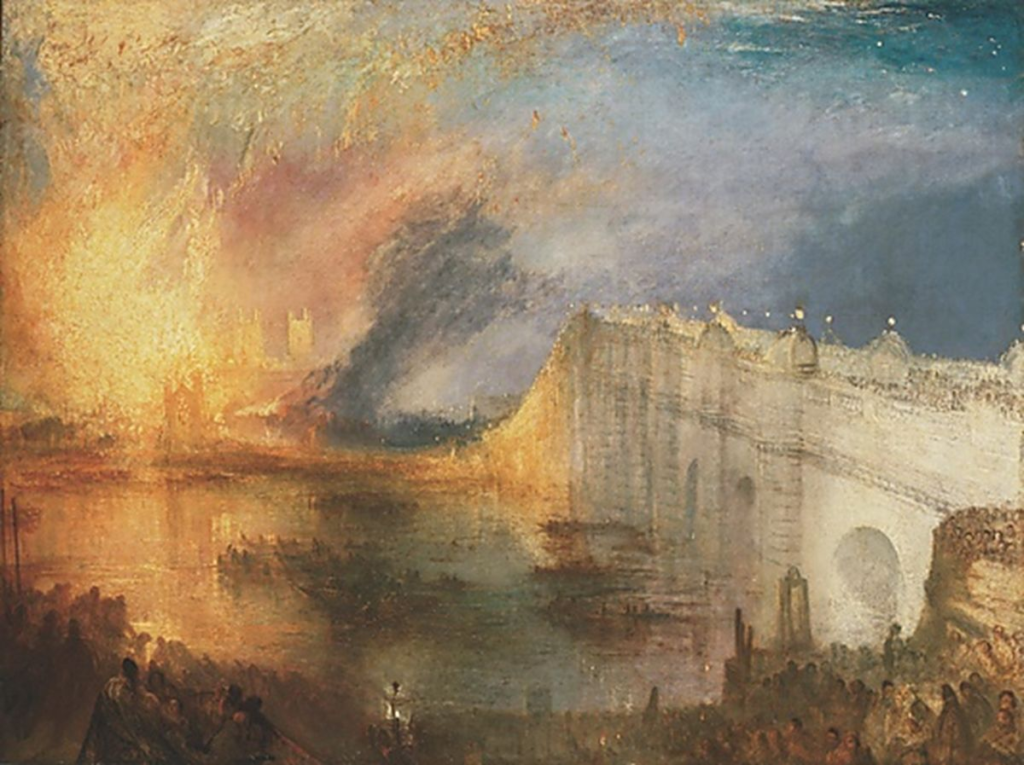
English romantic painter and water colour specialist , known for his romantic paintings that portray colourful imagery and imaginative landscapes. Joseph Mallord William born 23rd of April 1775 inspired modern art by incorporating a view of impossibility into his paintings by inviting unrealistic colouring and faded scenery to give a sense of romanticism
A line of development can be traced from his early historical landscapes that form settings for important human subjects to his later concentration on the dramatic aspects of sea and sky. Even without figures, these late works are expressions of important subjects: the relationship of man to his environment, the power of nature as manifested in the terror of the storm or the beneficence of the sun. Unmatched in his time in the range of his development, Turner was also unrivaled in the breadth of his subject matter and the searching innovation of his stylistic treatment.
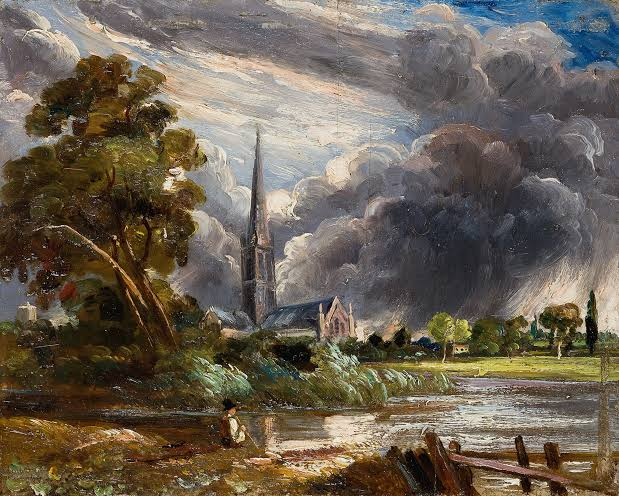
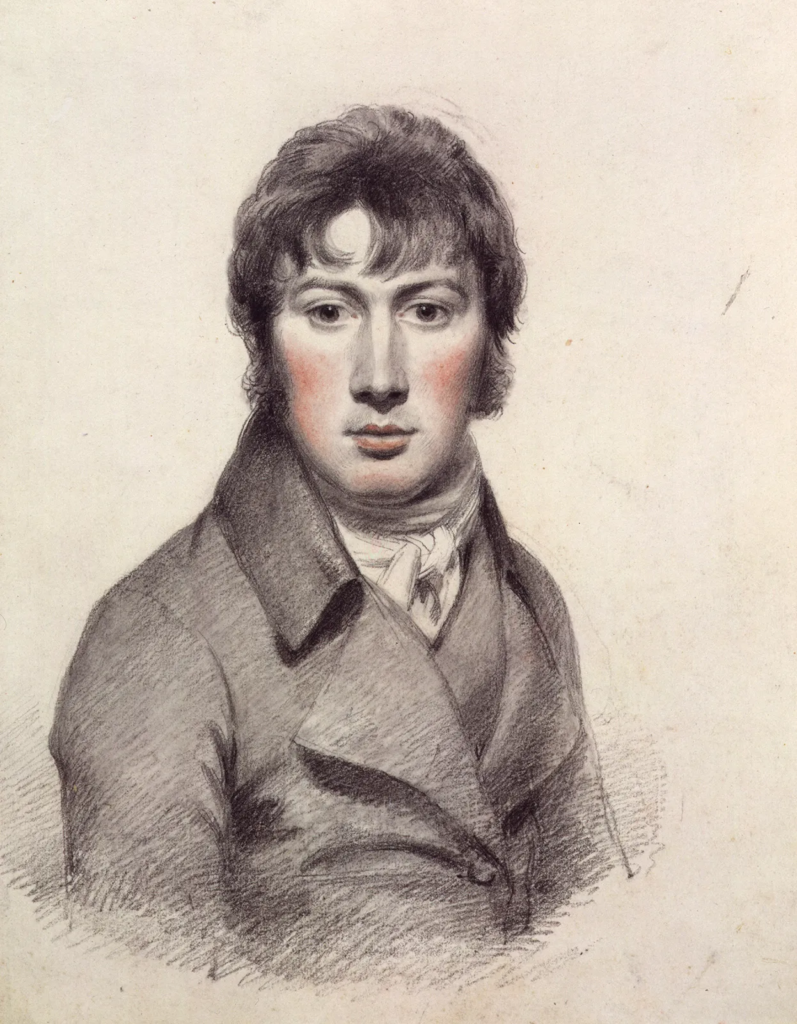
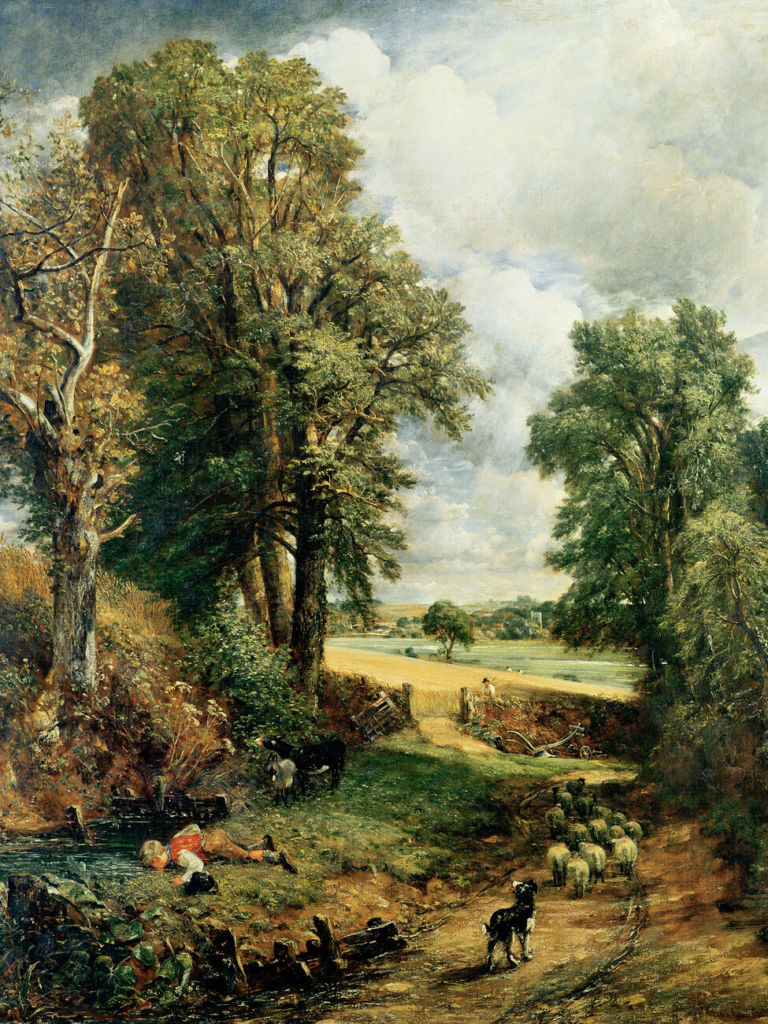
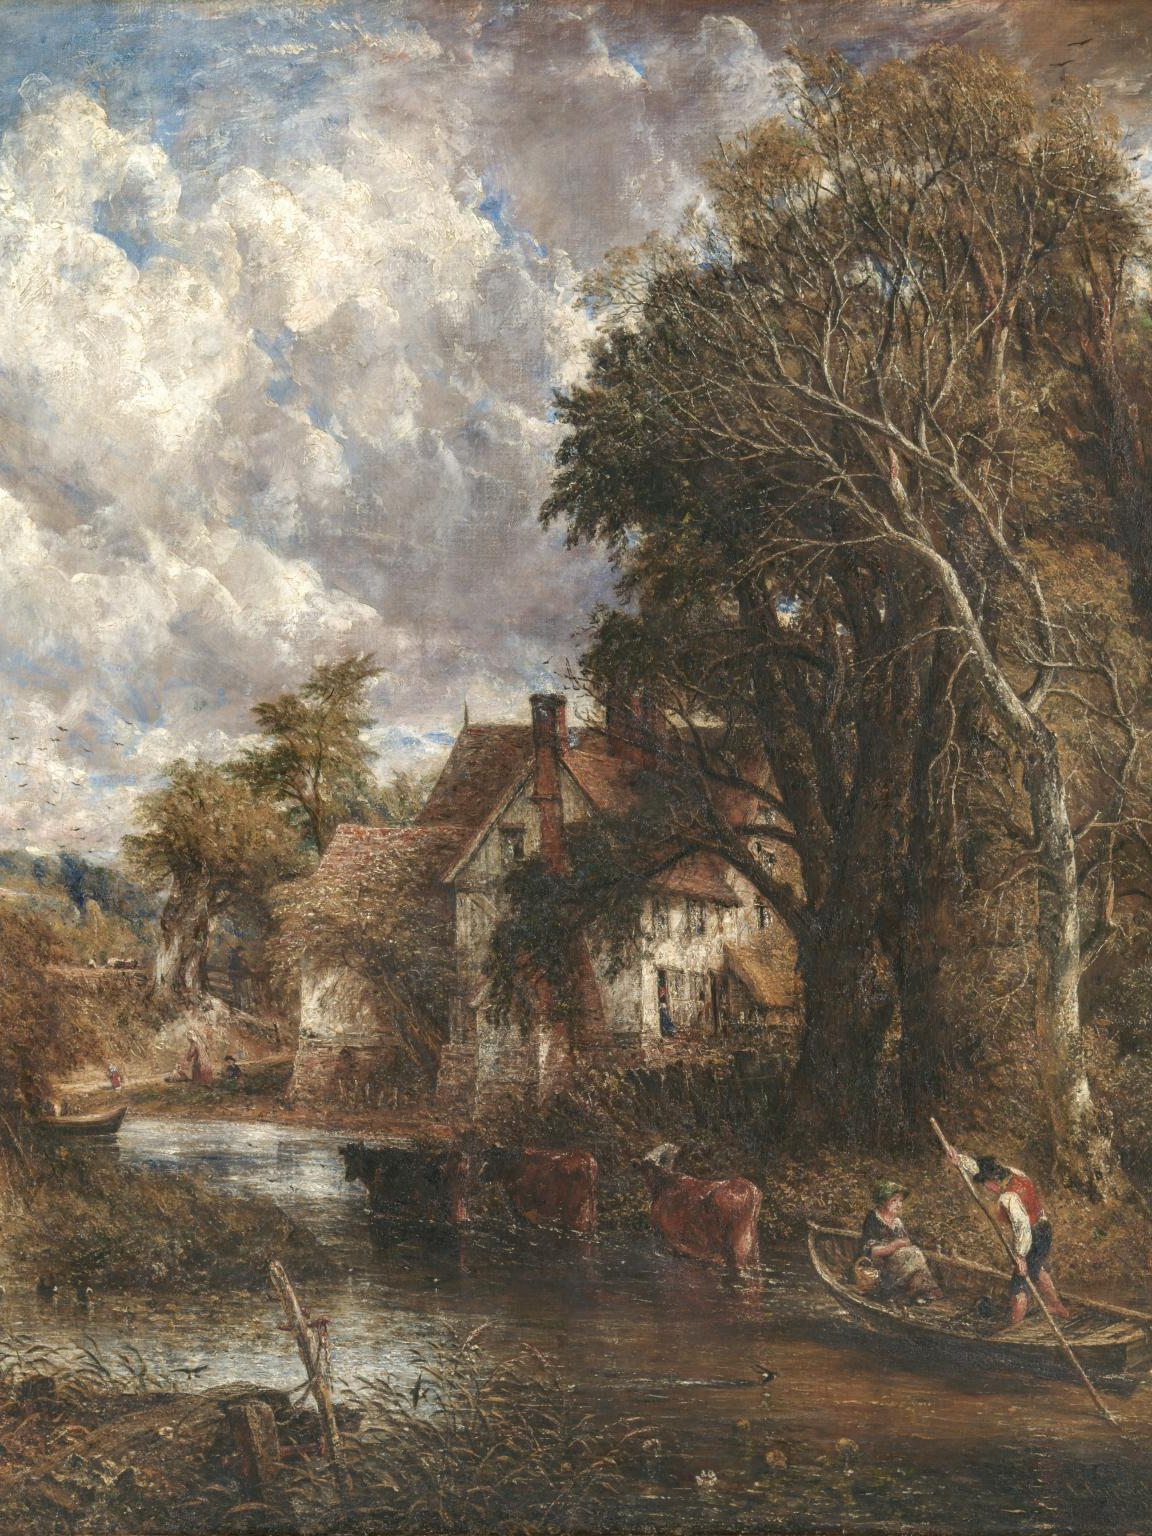
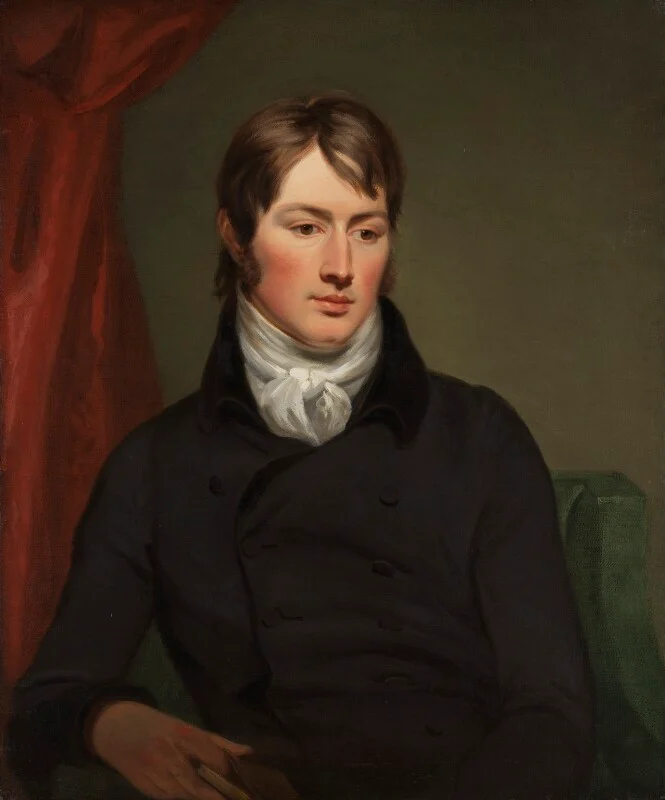
JOHN CONSTABLE
Johns landscapes represent a sometimes astonishing capacity to represent natural appearances—particularly, in his later years, the fleeting and dramatic effects of stormy skies—as well as a profound and prolonged meditation on the rural realities of a Britain undergoing a bewildering socioeconomic transformation.
John Constable
John Constable
While some have tried to relocate Constable’s landscapes within their contemporary context and have suggested that they are complex works of art with, often, a deeply political content, others have preferred to see them as embodying a quintessential “Englishness.” The fact that the argument is ongoing confirms the continuing vitality of these landscapes.
THE SUBLIME
In the critical literature, “the Romantic sublime” refers to the mind’s transcendence of a natural and/or social world that finally cannot fulfil its desire. Revealed in the moment of the sublime is that the mind is not wholly of the world, but this revelation may be triggered by a particular setting in the world.
The sublime as defined by The Tate is : “Theory developed by Edmund Burke in the mid eighteenth century, where he defined sublime art as art that refers to a greatness beyond all possibility of calculation, measurement or imitation.”
The sublime is in most creative subject areas; photography, fine art, film, writing, poetry and many more.
Why do these sorts of sublime experiences matter? For Burke, the experience matters insofar as it is the ‘strongest emotion which the mind is capable of feeling’. But for Kant and Schopenhauer, the experience is profounder still. This is how Kant describes the experience and significance of what he terms the dynamically sublime (that is, an aesthetic experience of overwhelming power):
Bold, overhanging, as it were threatening cliffs, thunder clouds towering up into the heavens … make our capacity to resist into an insignificant trifle in comparison with their power. But the sight of them only becomes all the more attractive the more fearful it is, as long as we find ourselves in safety, and we gladly call these objects sublime because they elevate the strength of our soul above its usual level, and allow us to discover within ourselves a capacity for resistance of quite another kind, which gives us the courage to measure ourselves against the apparent all-powerfulness of nature. (Emphasis added.)
A landscape is part of Earth’s surface that can be viewed at one time from one place. It consists of the geographic features that mark, or are characteristic of, a particular area. The term comes from the Dutch word landschap, the name given to paintings of the countryside. A landscape is the visible features of an area of land, its landforms, and how they integrate with natural or human-made features, often considered in terms of their aesthetic appeal.
History of landscapes
Artists have been painting the landscape since ancient times. The Greeks and Romans created wall paintings of landscapes and gardenscapes. After the fall of the Roman Empire, the tradition of depicting pure landscapes declined, and the landscape was seen only as a setting for religious and figural scenes. This tradition continued until the 16th century when artists began to view the landscape as a subject in its own right. The artistic shift seems to have corresponded to a growing interest in the natural world sparked by the Renaissance. The term “landscape” actually derives from the Dutch word landschap, which originally meant “region, tract of land” but acquired the artistic connotation, “a picture depicting scenery on land” in the early 1500s (American Heritage Dictionary, 2000). The development of the term in the Netherlands at this time was logical because the Netherlands was one of the first places that landscape had become a popular subject for painting. At this time, the rising Protestant middle class sought secular art for their homes, creating the need for new subjects to meet their tastes; landscapes helped fill this need.
Ansel Adams was a American landscape photographer and environmentalist known for his black and white of the American west.
Adams was a life-long advocate for environmental conservation and his photographic practice was deeply entwined with this advocacy. At age 14, he was given his first camera during his first visit to Yosemite national park. He developed his early photographic work as a member of the Sierra Club. He was later contracted with the United States Department of the interior to make photographs of national parks. For his work and his persistent advocacy, which helped expand the National Park system, he was awarded the Presidential Medal of Freedom in 1980.
This photograph captures Mount McKinley, the highest peak in North America, and Wonder Lake in Alaska, with the peak looming high above the lake. The photograph is known for its striking contrast and the way it evokes a sense of wildness and adventure.
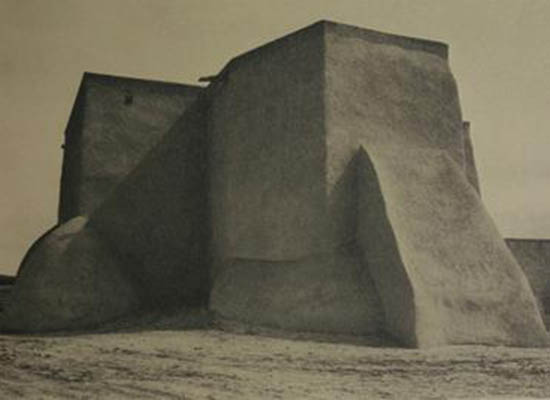
in the spring of 1929, Adams and his wife Virginia spent several months with writer Mary Austin in Santa Fe, New Mexico. It was during this trip that Adams and Austin decided to collaborate on a book about Santa Fe and the surrounding area. Austin introduced Adams to Mabel Dodge Luhan, the Santa Fe arts patron who was hosting artists of the caliber of Georgia O’Keeffe around the same time. Luhan was married to Tony Lujan, who was a member of the Taos tribal council and it was he who gave Adams permission to photograph at the Taos Pueblo.
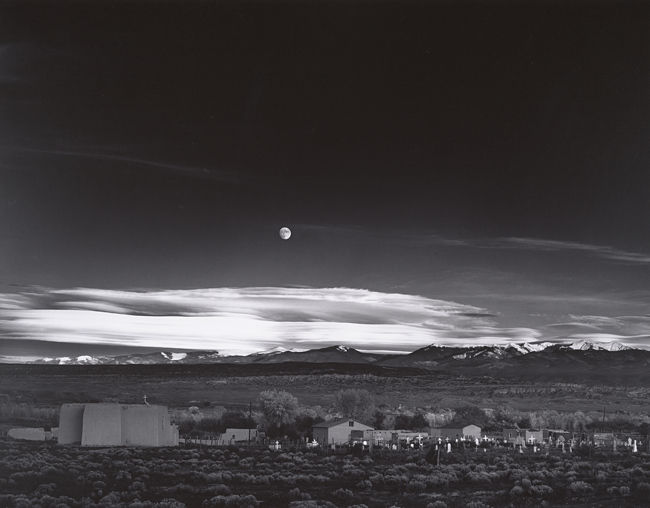
One of Adams’s most famous photographs, and one of the most iconic photographs of the modern era, Moonrise, Hernandez, New Mexico, is a dramatic image of a moon rising over the small southwest town, near Santa Fe. A scene that is momentarily both dark and light, Moonrise, shows the town’s buildings bathed in late evening light just moments before the sun will set and darkness will envelop the town. Here Adams approached photography as he would a piece of music, interpreting the negative and print like a conductor interprets a score. Adams often repeated the mantra that “a photograph is made, not taken” and in this regard, as Anne Hammond has noted, “the technical controls that Adams had perfected enabled him to realize the mortality of individual human existence confronting the eternity of the universe, the theme of life and death.”
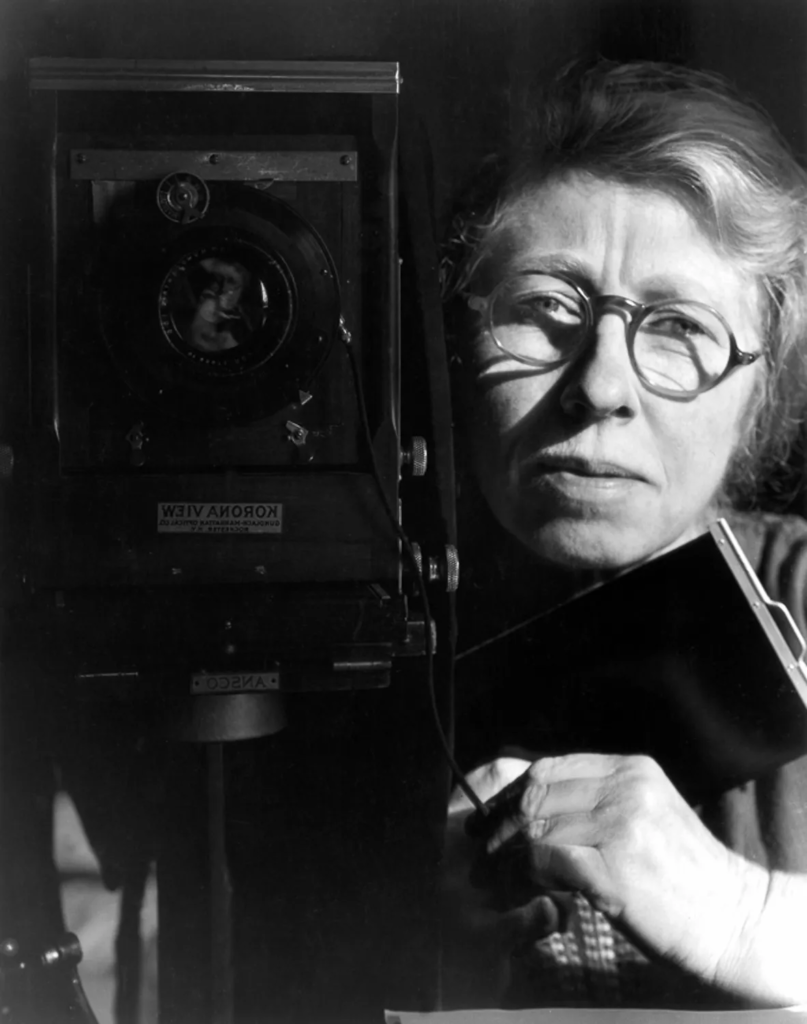
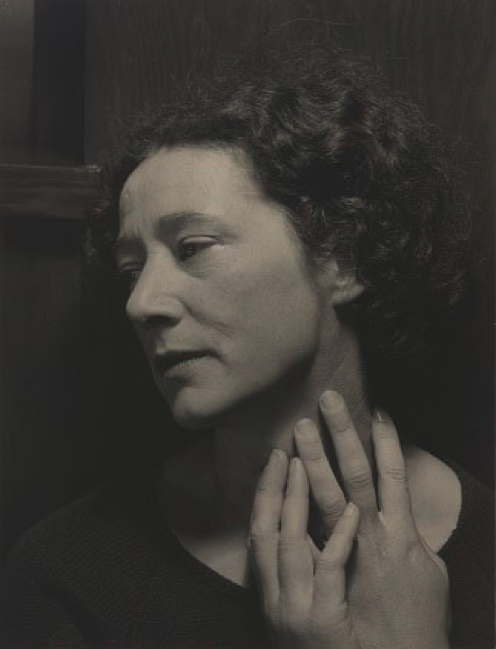
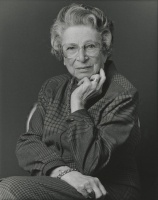
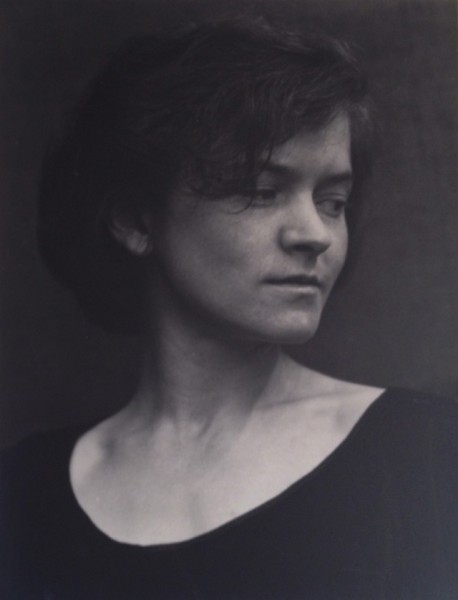
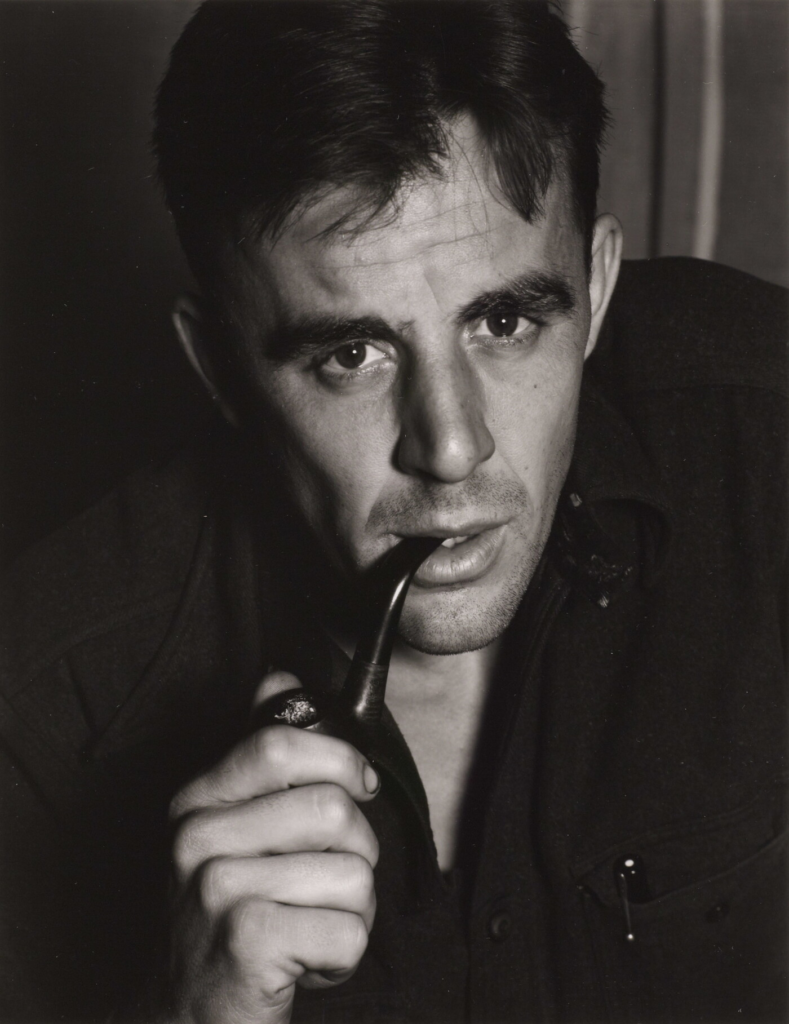
Ansel Adams was an American landscape photographer and environmentalist known for his black-and-white images of the American West. He helped found Group f/64, an association of photographers advocating “pure” photography which favoured sharp focus and the use of the full tonal range of a photograph…even creating a Zonal System to ensure that all tonal values are represented in the images. Ansel Adams was an advocate of environmental protection, national parks and creating an enduring legacy of responses to the power of nature and sublime conditions…Other members in Group f/64 included Edward Weston, but also Imogen Cunningham among other female photographers who have often been overlooked in the history of photography.
“You don’t take a photograph, you make it.” – Ansel Adams
Some of his famous work –
As you can see in the two example images above, Ansel Adams uses both the zone system and visualization in his work which is explained below.
Brief explanation –
visualisation – Visualisation is a skill that can be learned. It involves the photographer learning to create a mental image of the final photograph before shooting. It must be done in as much vivid detail and composition as possible. This creates a template for the work before it starts.
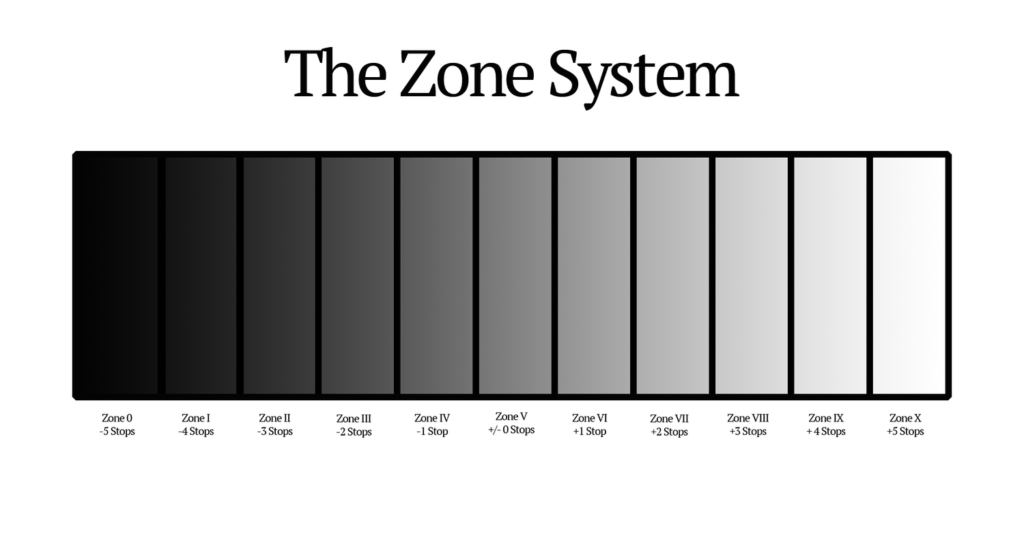
Zone system – The Zone System assigns numbers from 0 through 10 to different brightness values, with 0 representing black, 5 middle grey, and 10 pure white; these values are known as zones.
Who were f/64
During the Great Depression, the citizens of America looked towards the West and the opportunities it offered, particularly through massive public works projects. This is why it was important for individuals like Ansel Adams, Imogen Cunningham, Edward Weston, Willard Van Dyke, Henry Swift, John Paul Edwards, Brett Weston, ConsueloKanaga, Alma Lavenson, Sonya Noskowiak, and Preston Holder, who were the original f64 group members, to present it to the rest of the country in the most realistic, revealing way.[1] The first attempt in spreading their visual ideas was the 1932 exhibition of eighty of their photographs held at the M.H. de Young Memorial Museum in San Francisco which lasted six weeks and introduced stark, comprehensive imagery in a variety of topics. This is why, in fact, the group’s name derives from a small aperture setting on a large format camera, which secures great depth of field and renders a photograph evenly sharp from foreground to background.
—-
Ansel AdamsImogen CunninghamEdward Weston
Willard Van DykeHenry SwiftJohn Paul Edwards
Brett WestonConsueloKanagaAlma Lavenson
Sonya NoskowiakPreston Holder
Image analysis
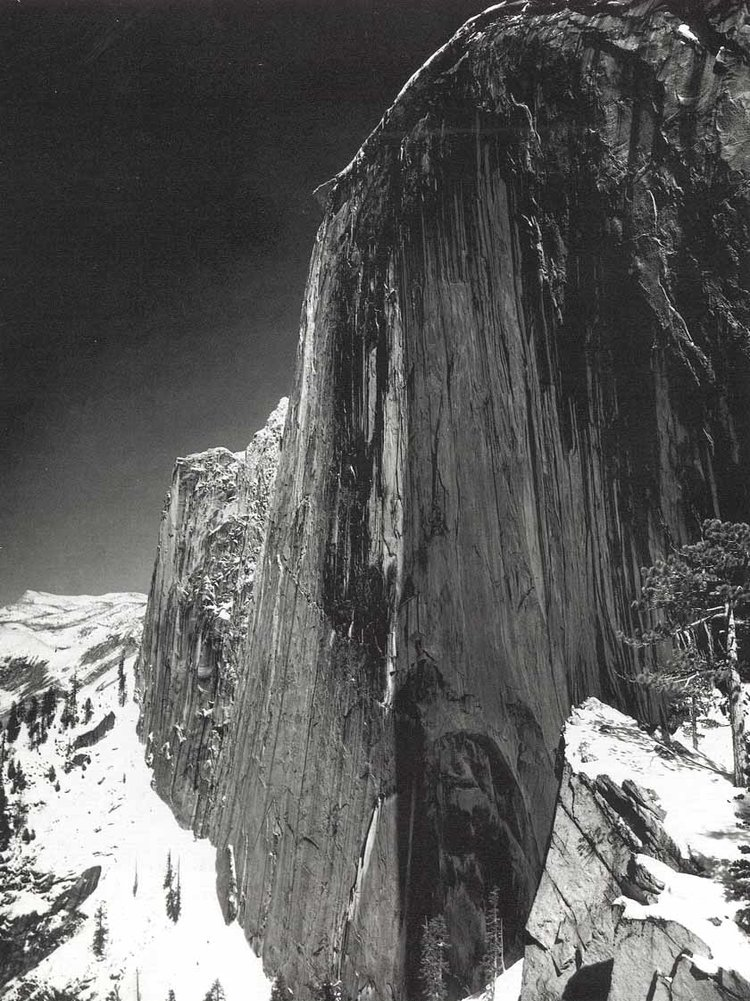
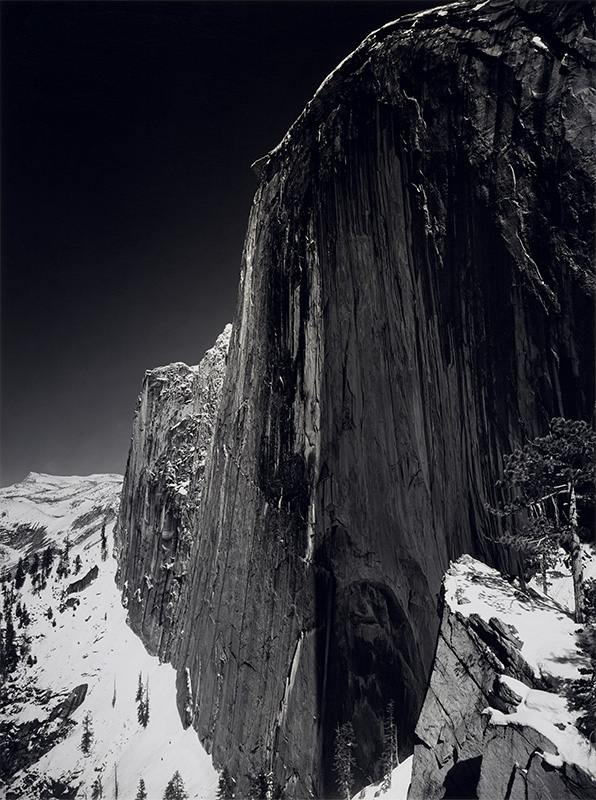
Monolith, The Face of Half Dome, 1927
Story behind the image –
On the spring morning of April 10th, 1927, Ansel Adams set out along Yosemite’s LeConte Gully to capture an image of face of Half Dome, one of Yosemite National Park’s most iconic natural features. His fiancée Virginia Best and three close friends, including fellow wilderness photographer Cedric Wright picked carefully along the steep gully in the icy shadow of nearby Grizzly Peak.
This was not Ansel’s first journey to photograph Half Dome. In fact, nearly a decade earlier, a 14-year-old Ansel had visited this very spot on a family trip to Yosemite. Eager to experiment with his brand-new Kodak Brownie camera, young Ansel snapped several pictures of Half Dome, including one upside-down image, his favourite, taken accidentally as he fell off a stump.
analysis –
In the technical aspects of this images we can see the image is taken in natural daylight where the light is shining down on the left side of the cliff face. Like all of Ansel’s images, it is taken in black and white, we also know that he used a dark red filter with his Korona camera which creates the dark shadows and contrasting bright white light, this helps the photograph to follow Ansel’s zone system rule that he uses throughout his work. The definition of the image is very sharp and has a wide depth of field that helps to focus on all areas of the image and represent the true size of the cliff face. I imagine the shutter speed of this image was quite fast as it is in sharp detail. The visual elements of this image include both texture and space which help to give the cliff face a more impressive look. Looking deeper into the images meaning I believe it represents Adams love for nature and his romanticized style he uses throughout his images do, doing this through the large scale cliff face squeezed into frame and the contrasting black an white colours which help to represent the untouched landscape.
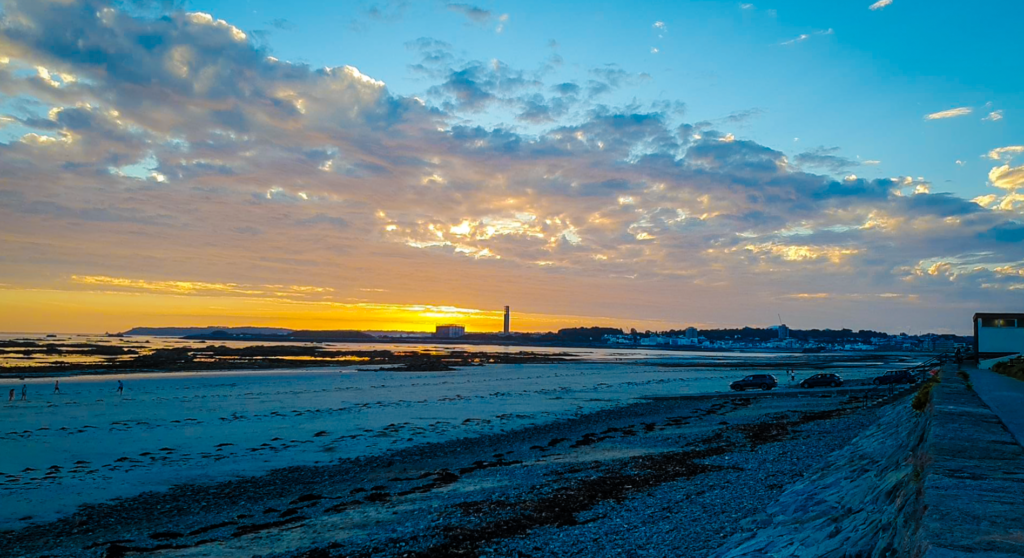
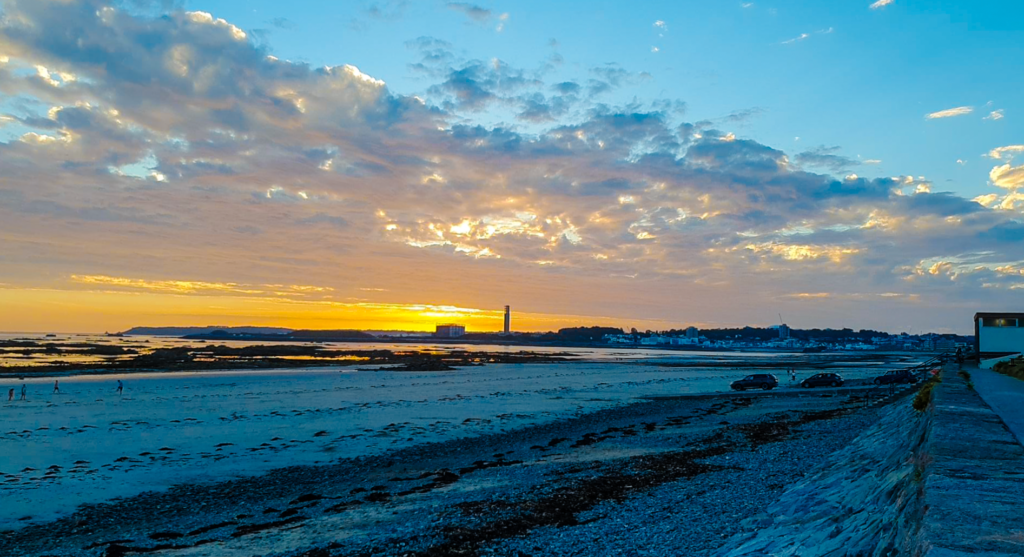
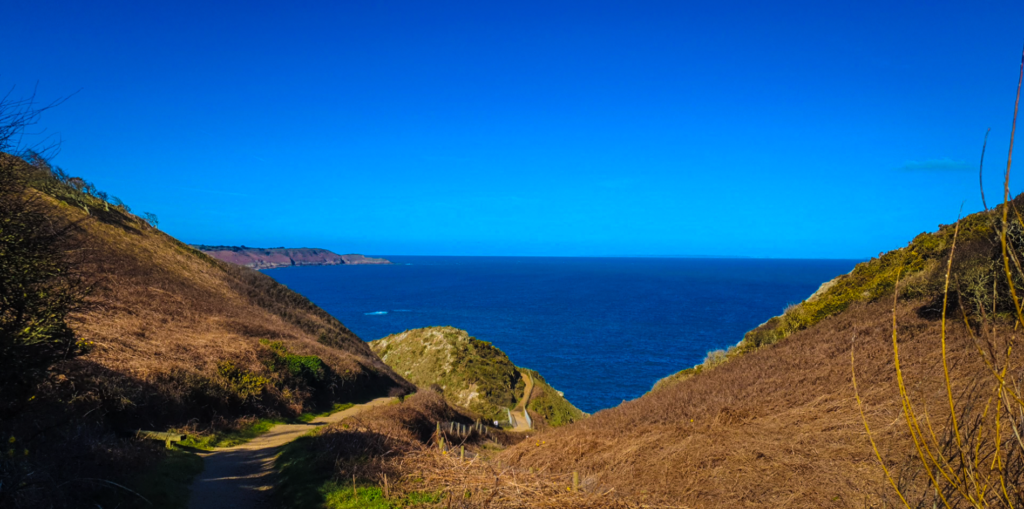
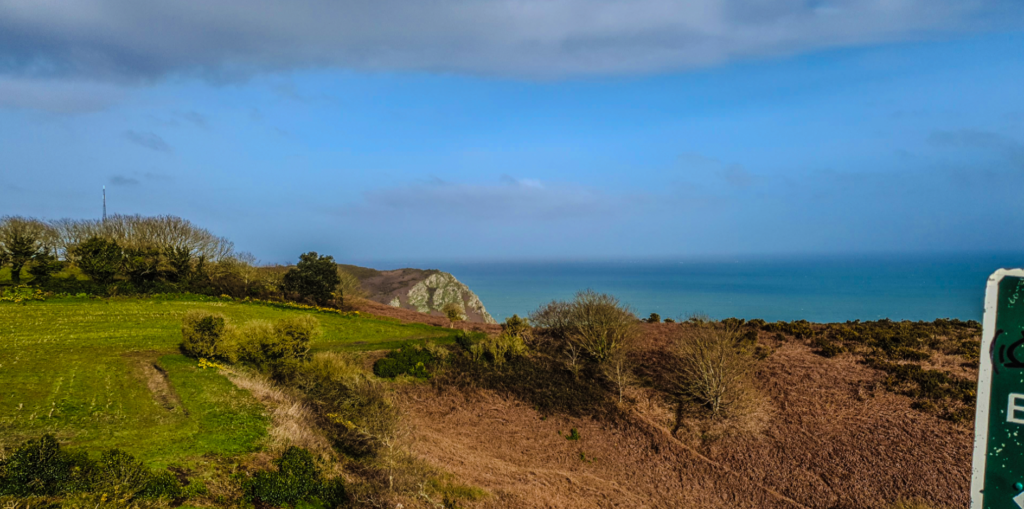
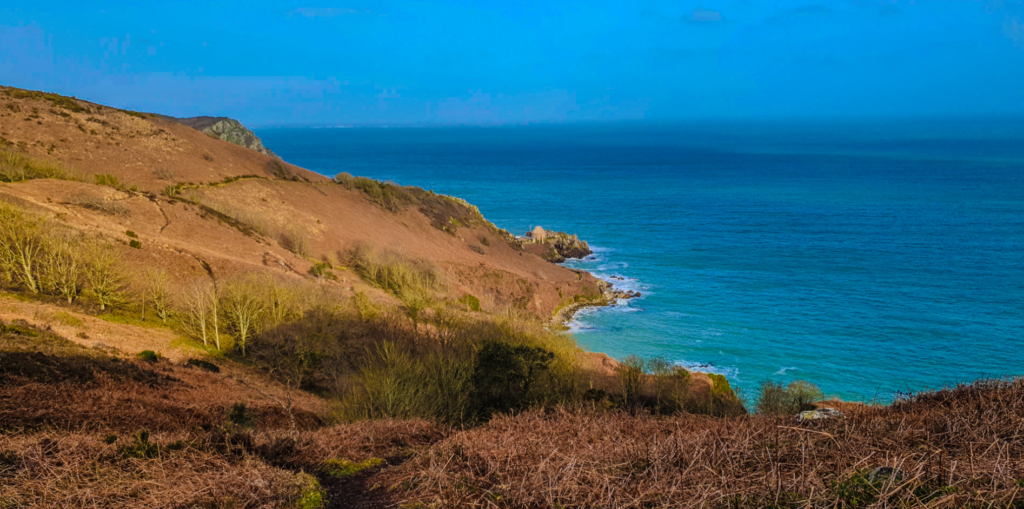
On the havre des pas walk I made sure to take multiples images from one place, starting from taking pictures on the left side and slowly taking more and more as I turned the camera towards the right. This technique is what allows you to form panoramic images which can then later be presented as physcial images or edited in photoshop in order to extend the images size and what you want to be visible in the image.
My Images:
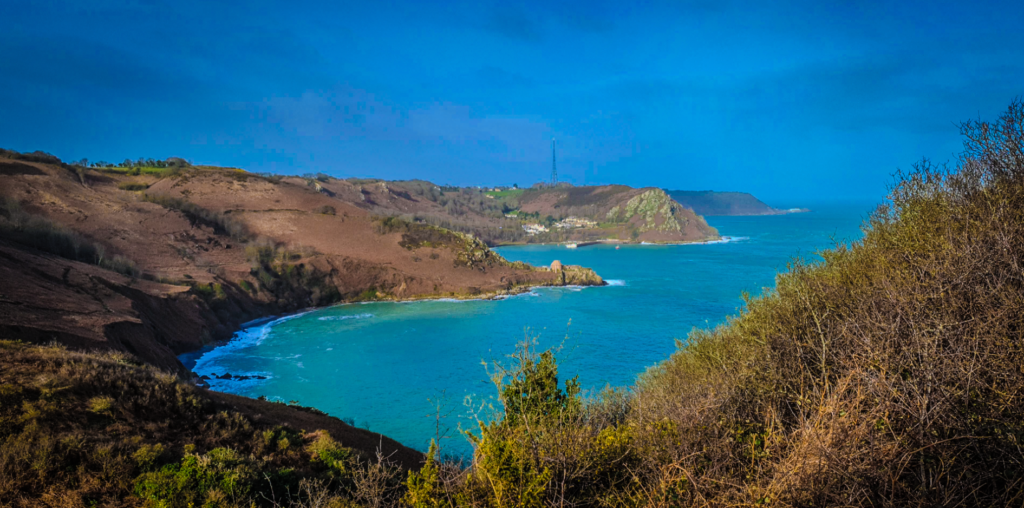
With my images I have made sure to take as many as I could while going from left to right in order to achieve a wide panoramic image. The results ended up looking great as now you are able to get a bigger picture of whats around the area but also by joining the images together it allows for the image to look even more appealing as a panoramic photo and it also allows you to capture more than one interesting area in a photo as long as its nearby.
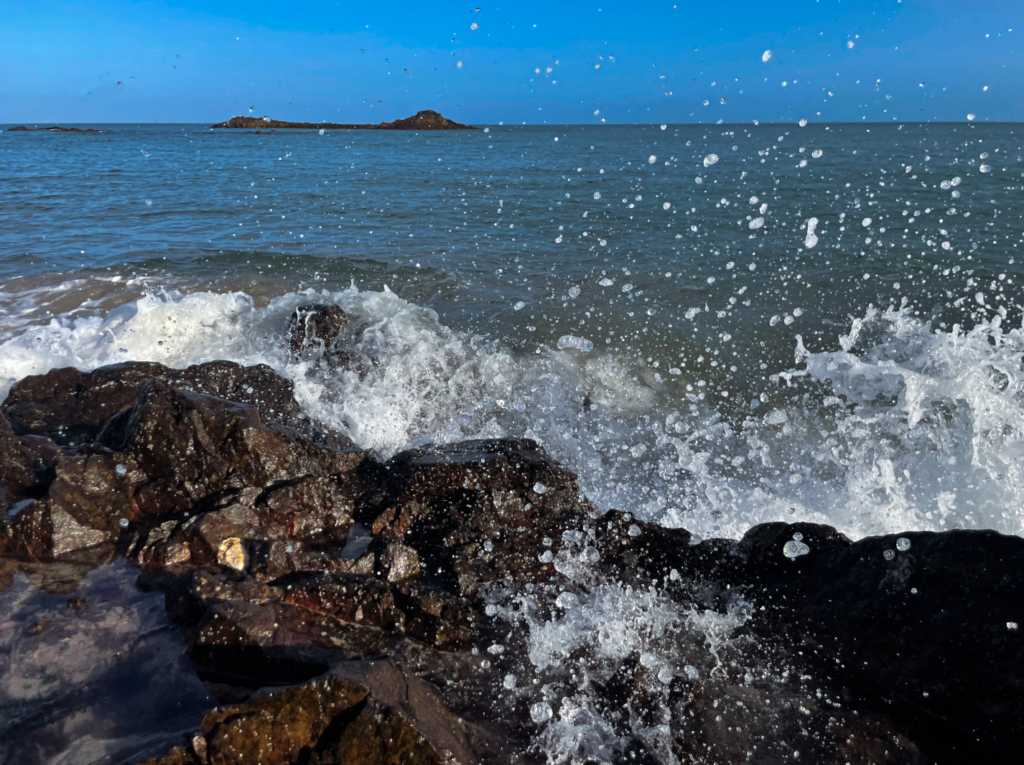
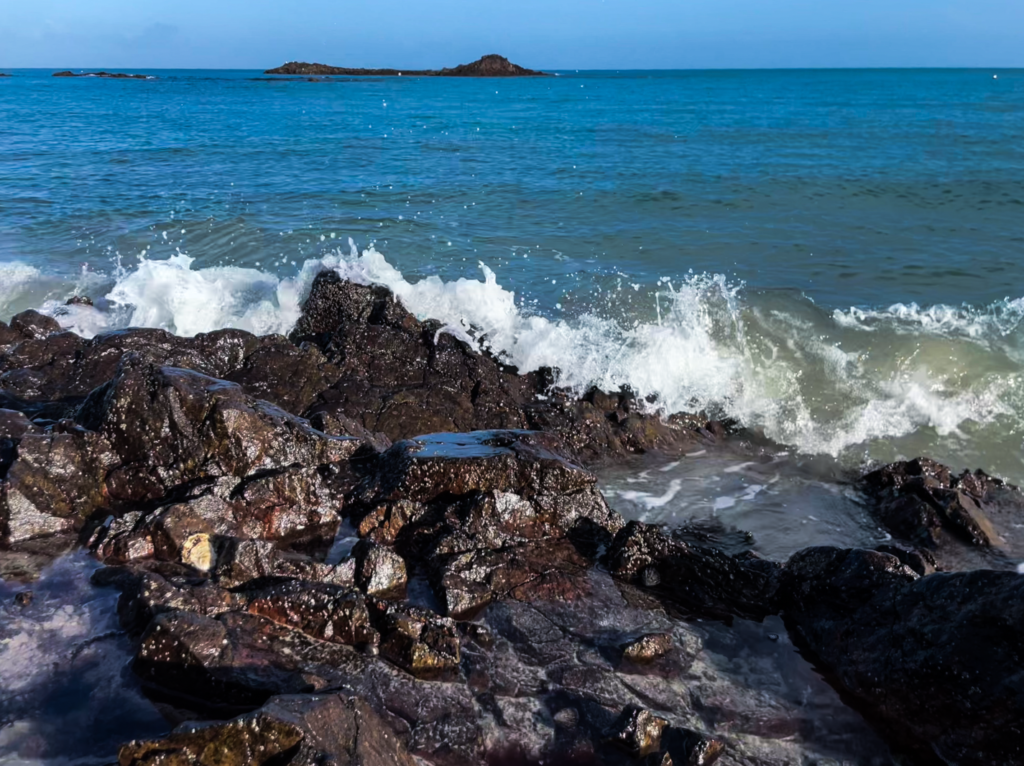
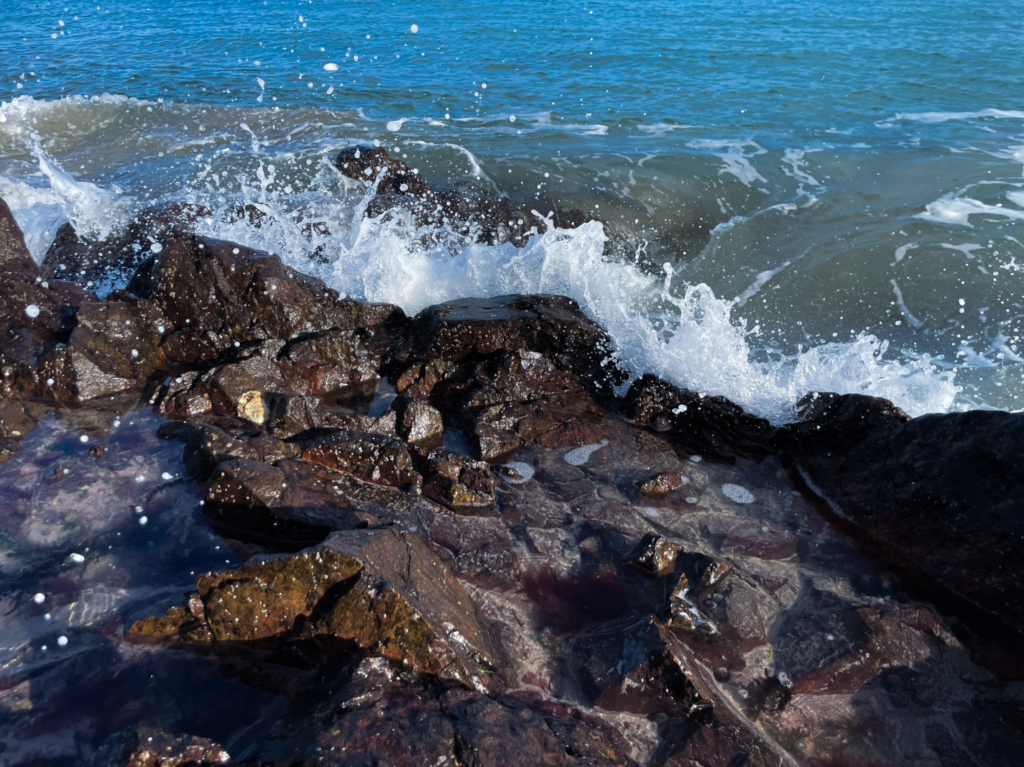
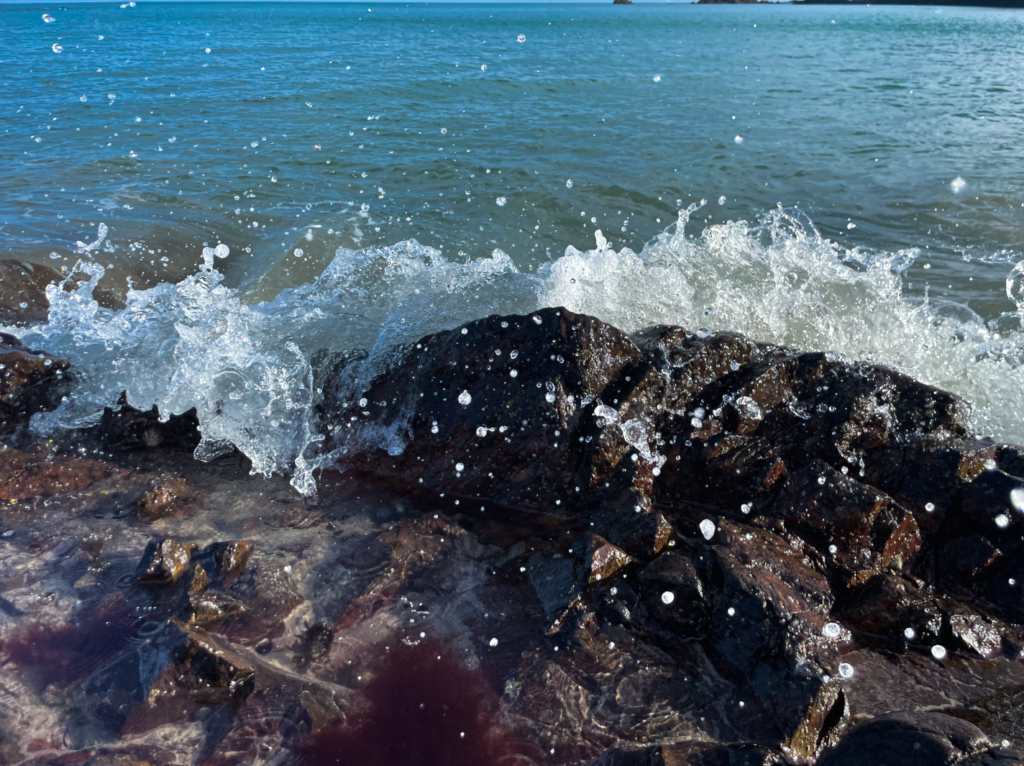
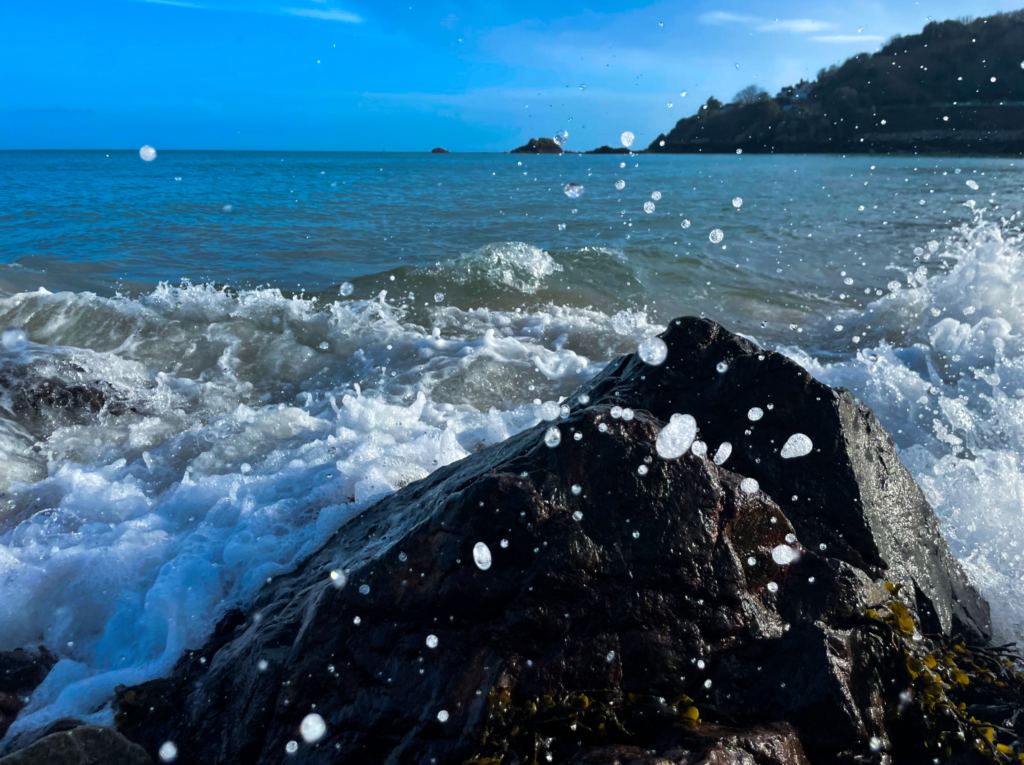
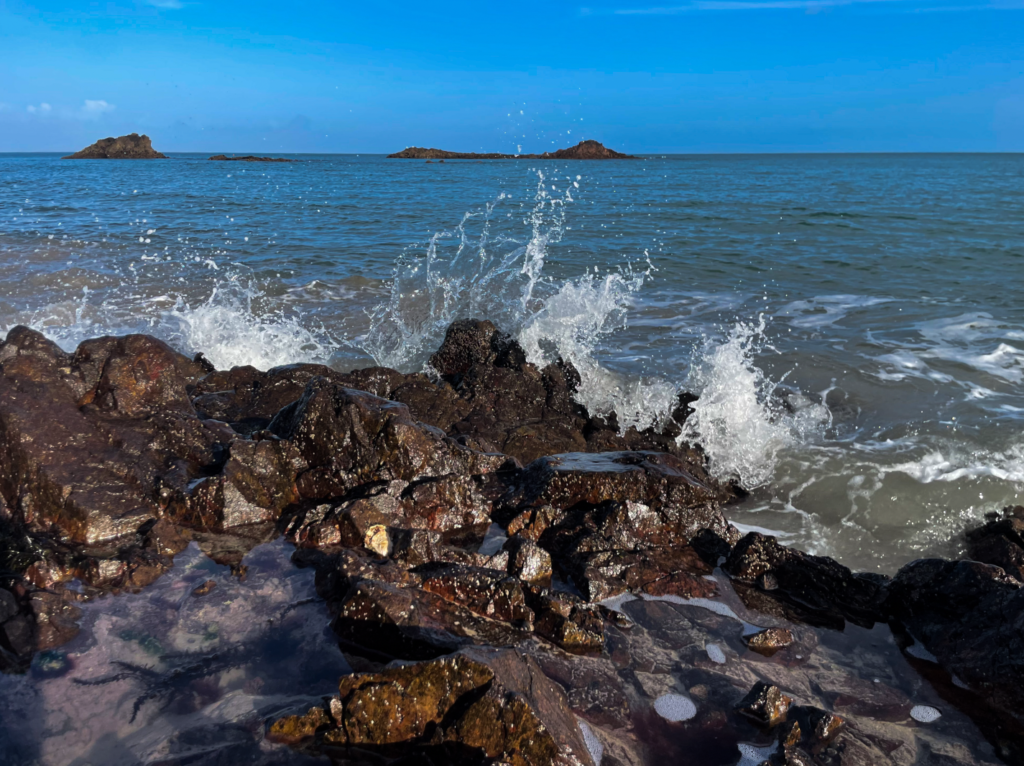
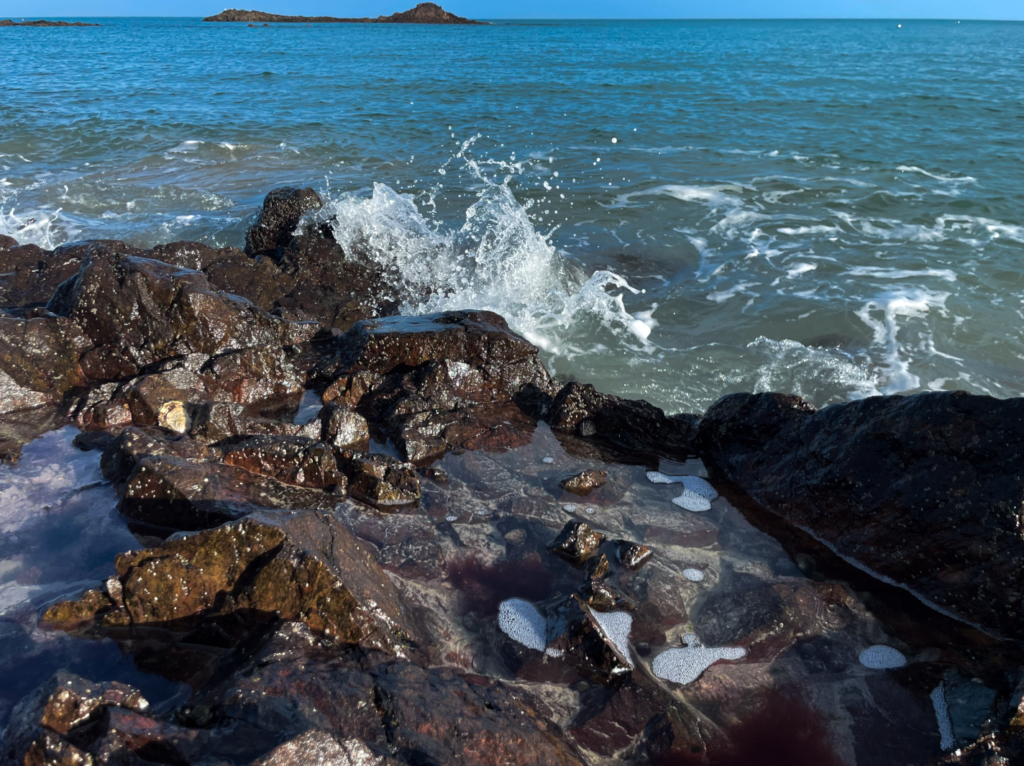
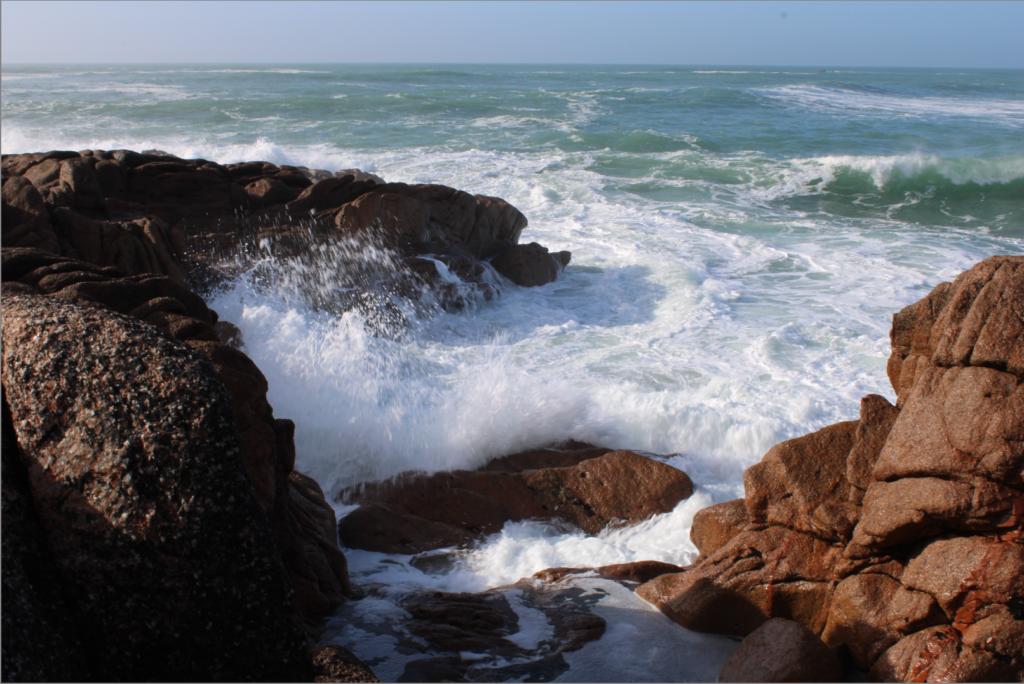
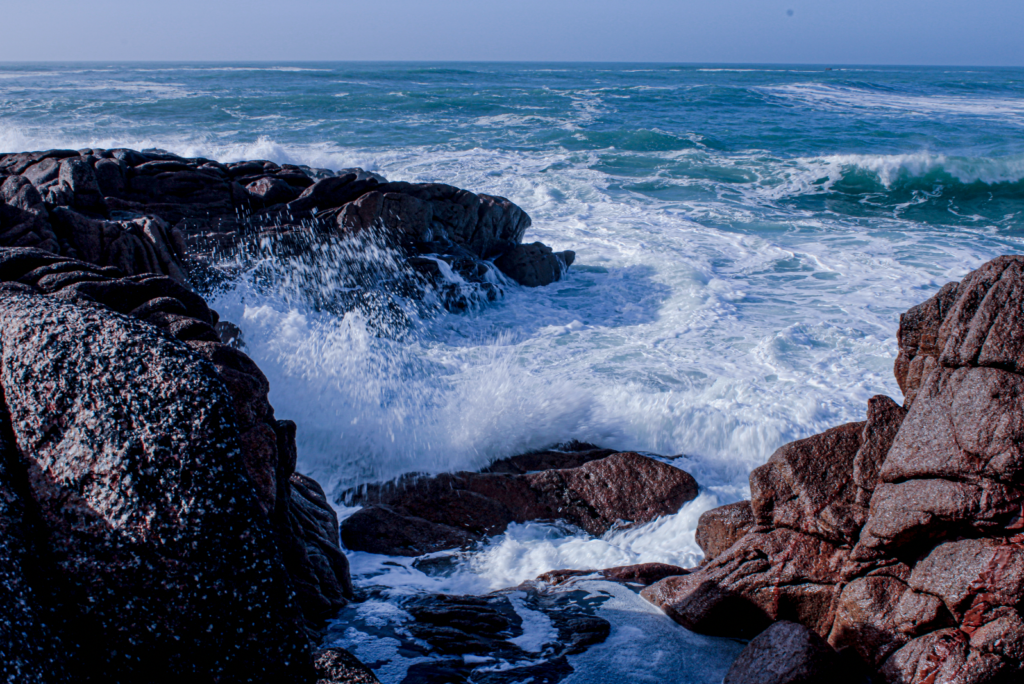
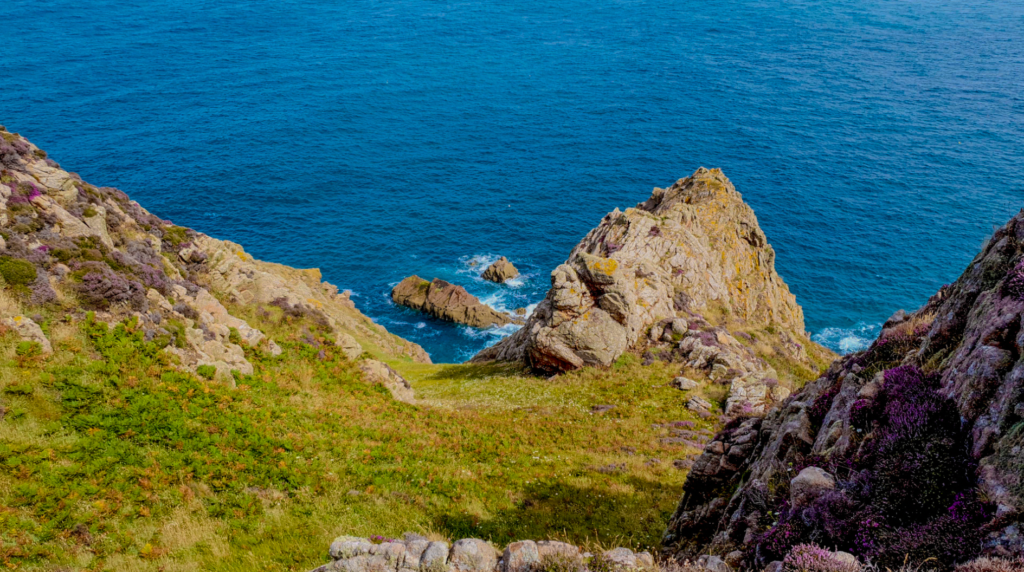
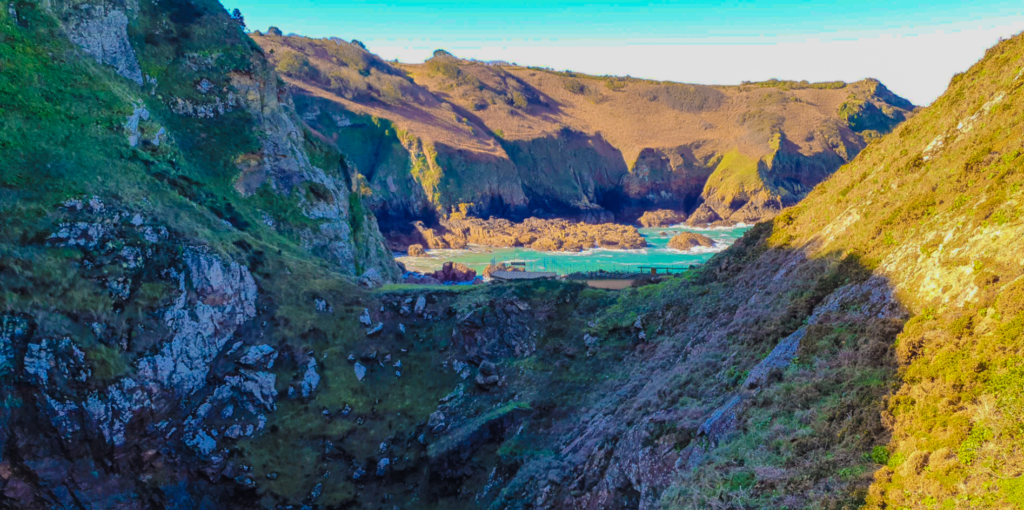
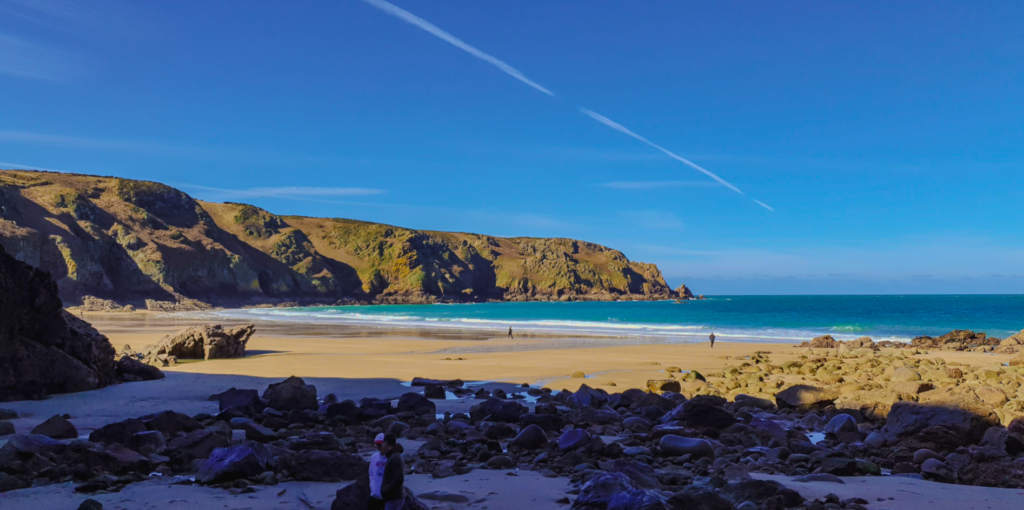
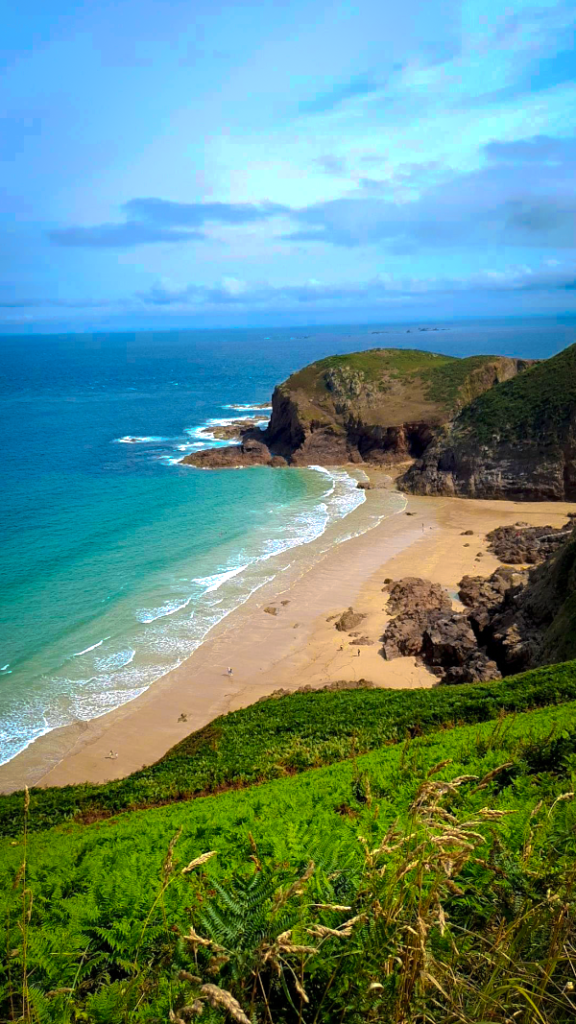
For my photoshoot focusing on romanticism, I decided to go to the beach when it was clear weather and high tide to take pictures close up of the sea against the rocks. I will go down to the shore where the tide begins to wash onto the rocks and surfaces. I plan to go on a day that is particularly windy in order for there to be large waves which I can photograph. I wanted to overall capture the dramatic moment where the water crashes against the rocks and splashes. I decided to photograph this to communicate the idea of the sublime in my pictures; shown in the moment of tension between these two forms of nature. I am going to use a fast shutter speed to capture a sharp moment of the splash so the clarity and definition of the water is effectively enhanced.
Photoshoot
Best and Edited Photos
This selection of pictures definitely turned out the best as they aligned the most with my photoshoot plan and artistic goal. The sublime can be seen clearly as the waves crash uncontrollability and unpredictably against the rocks; enhanced by the crisp shot of the movement of the water. When editing my most effective photos, I first aligned the horizon to ensure the lines did not distract from the focal point. I tweaked the saturation to brighten the blue of the sea and sky to further the contrast between them and the rocks; also making sure to keep a natural balance. Finally, I toggled the highlights and shadows in order to have a large dynamic range in my photographs; bringing in definition to each area of the image.
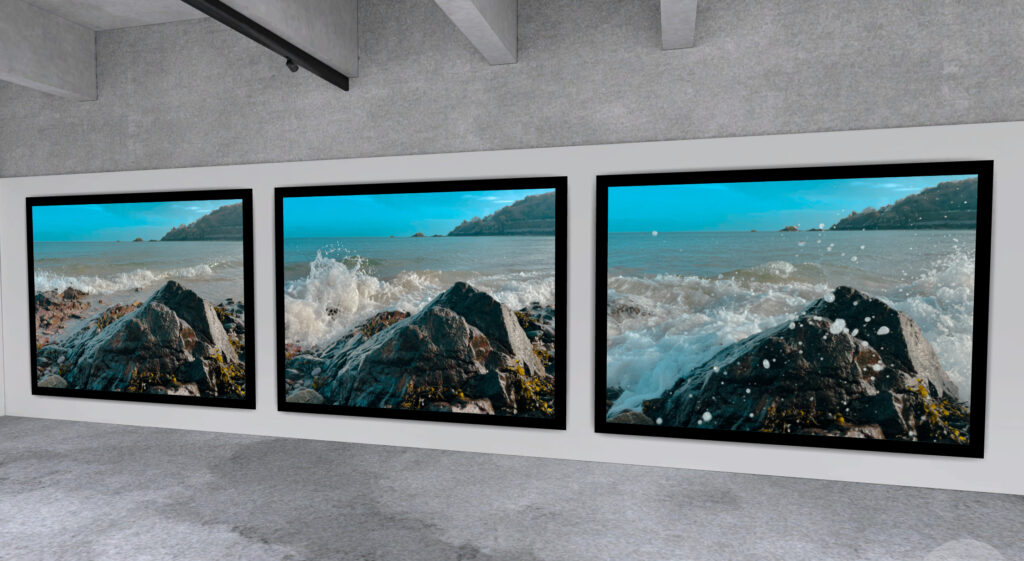
Creative Edits and Presentation
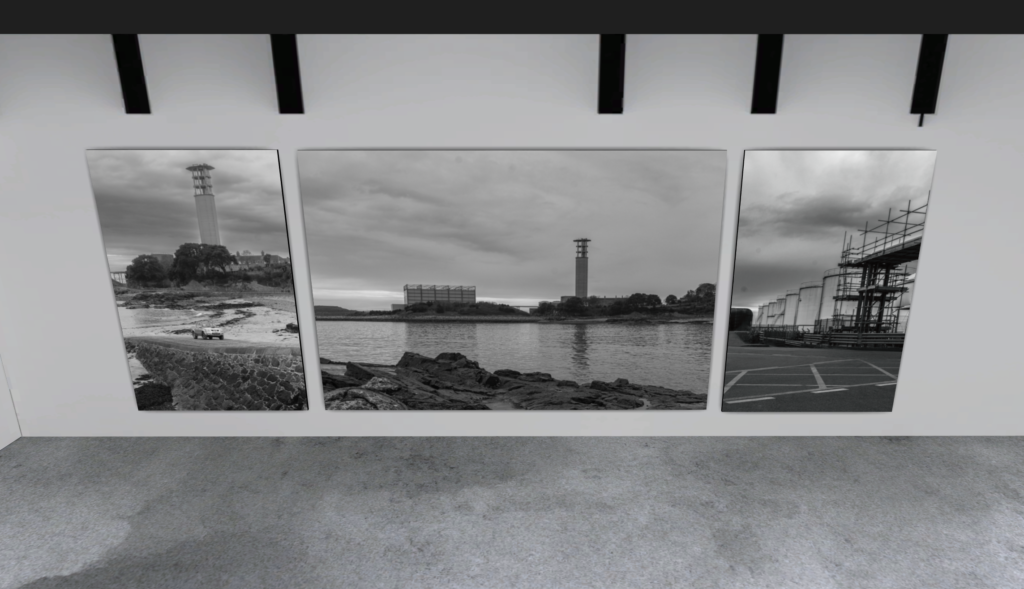
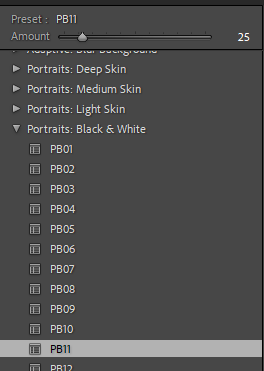
During my selection process, I discovered that I wanted to display these three images together and separately from my other strongest photographs. When taking my photos with fast shutter speed, I noticed that I was capturing different stages of the event of the splash with my camera. I thought this was interesting as it played as a storytelling of the creation of the sublime. It was alluring to see the various levels of tension which came before the visuals of a final photo; displaying the moments leading up to the splash and multiple times of a shot. I was able to communicate an almost stop motion gradual of the event. To separate this triptych of photos further from the rest, despite them having the same format in terms of composition, I edited them on Photoshop Lightroom using a few of the preset photo filters in order to achieve a golden hour tone. Wishing to display these in a horizontal line to solidify my goal of progression in nature, I imported these images onto Artsteps in my own virtual gallery where I then aligned them to be finally presented.
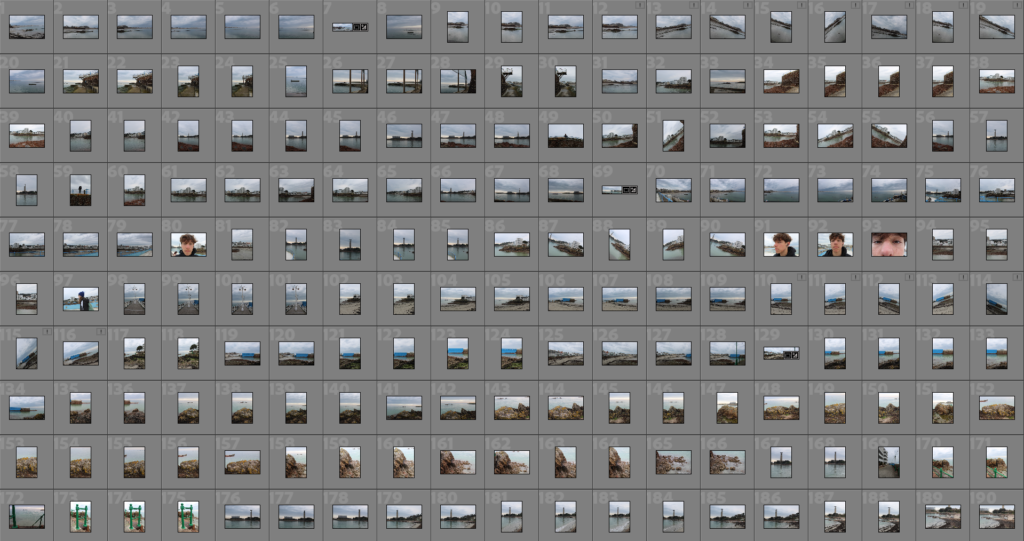
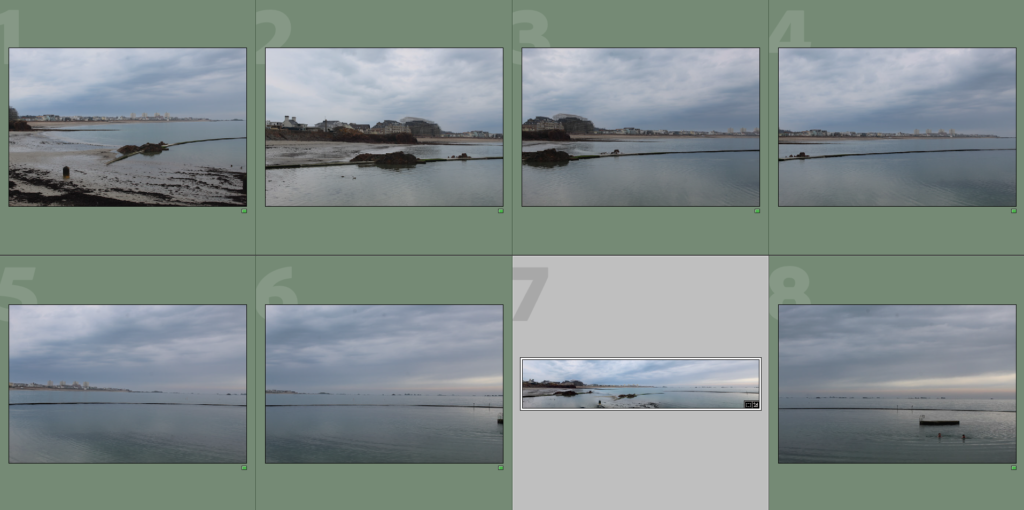
For this photoshoot, I took pictures around Havre Des Pas and the industrial recycling area with a focus on panoramas and joiners.
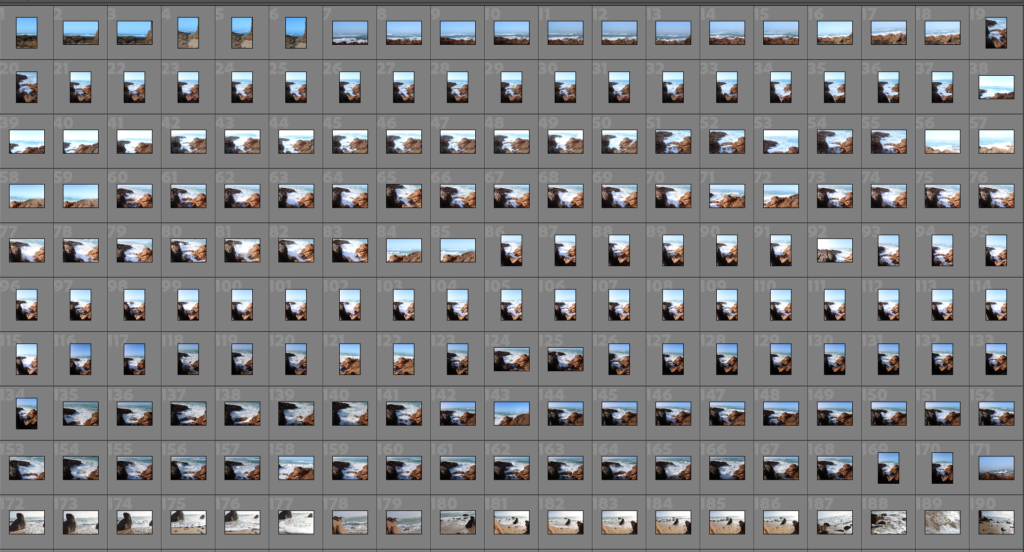
Contact Sheet
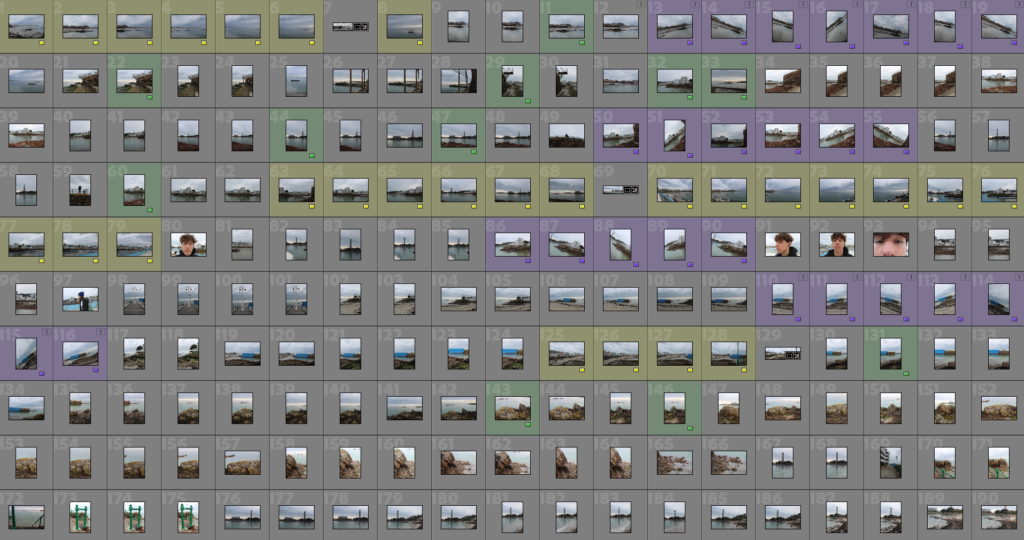
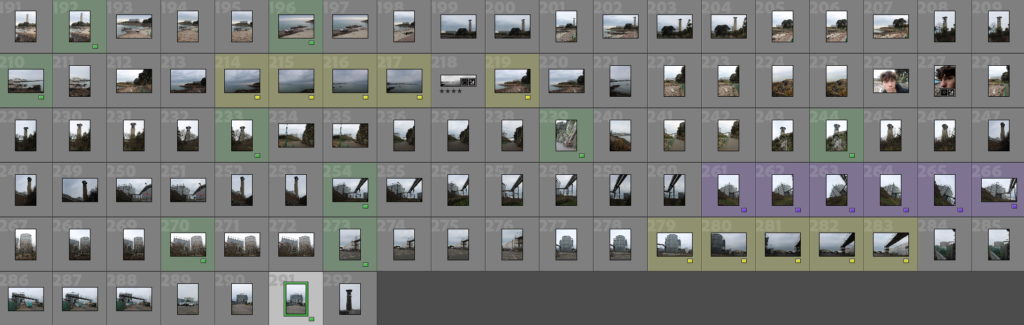
Selection Process
After importing my images, I selected my images to be used for panoramas (yellow), joiners (purple), and other images I liked (green).
Editing
Panoramas:
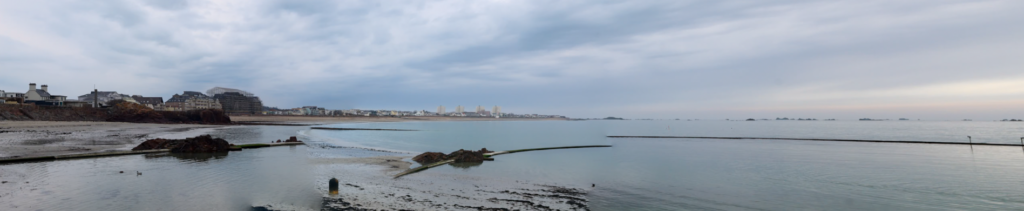
To create my panoramic images, I merged a series of image taken back-to-back of a landscape into one singular wide image using Lightroom.
I merged all the images selected in green to create my panorama
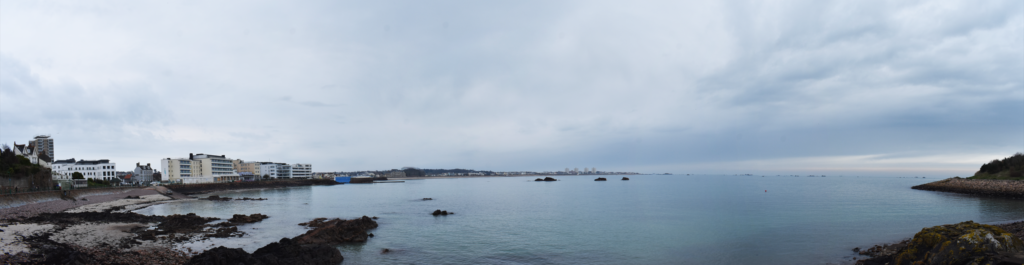
The result
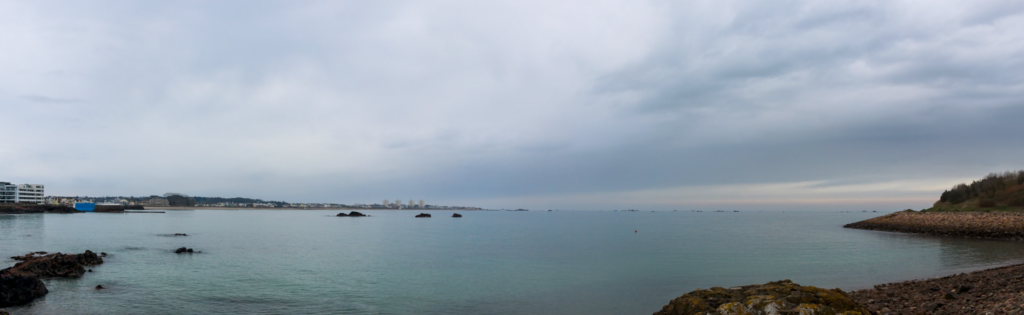
This blends all 7 images together, creating a wide panoramic shot of the left side of Havre Des Pas. I found it effective since the left side captures some buildings in the distance as well as the beach, which contrasts nicely with the right side being mostly the sea.
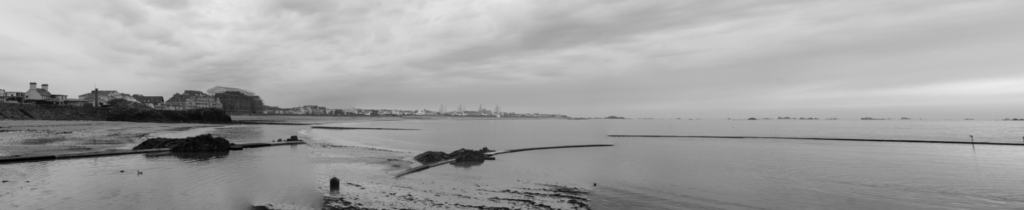
Experimenting with black and white
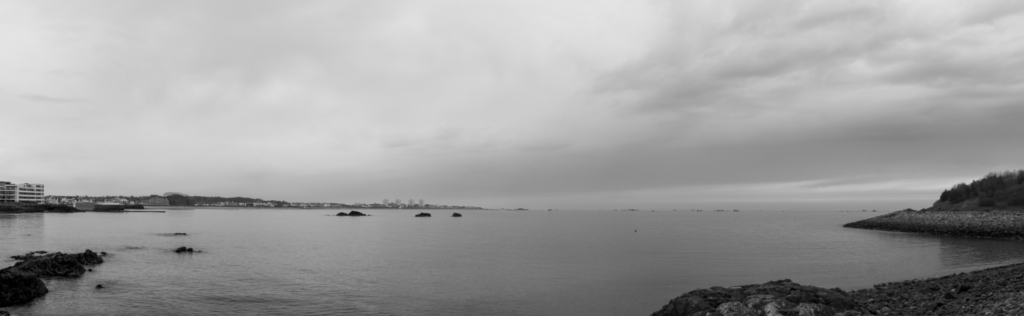
Making it black and white I can see there is visibly a lack of contrast between light and dark tones, with most of the image being the same grey colour.
Final result
I decreased the blacks and increased whites and contrast, noticeably creating more contrast between the lighter tones in the sky, midtones in the sea and darker tones in the buildings and rocks.
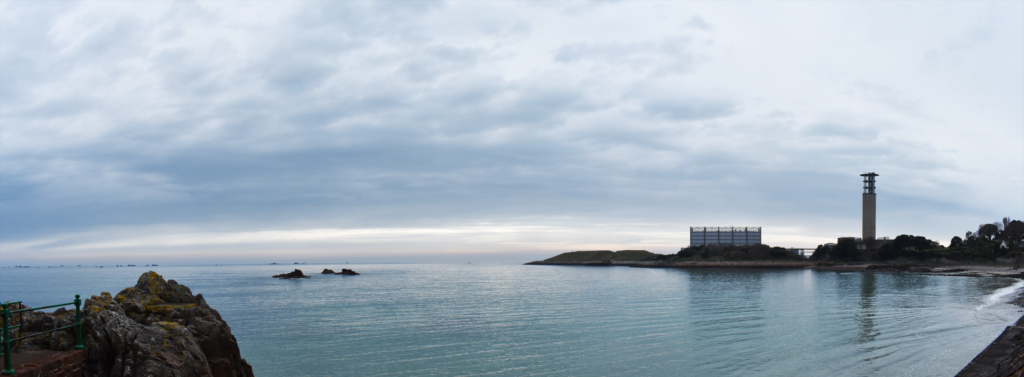
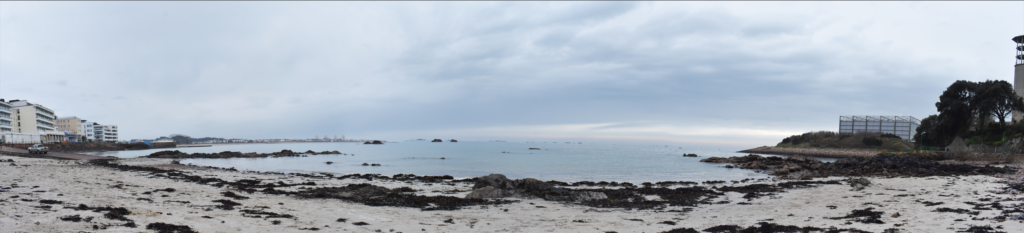
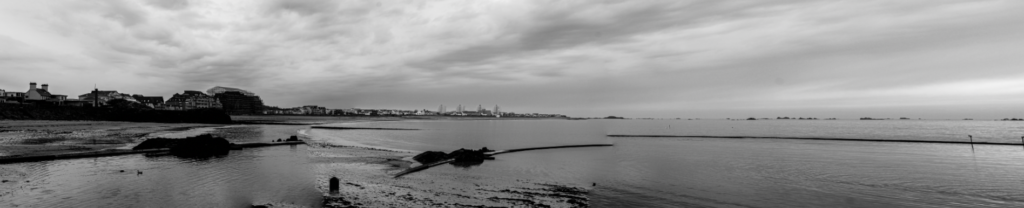
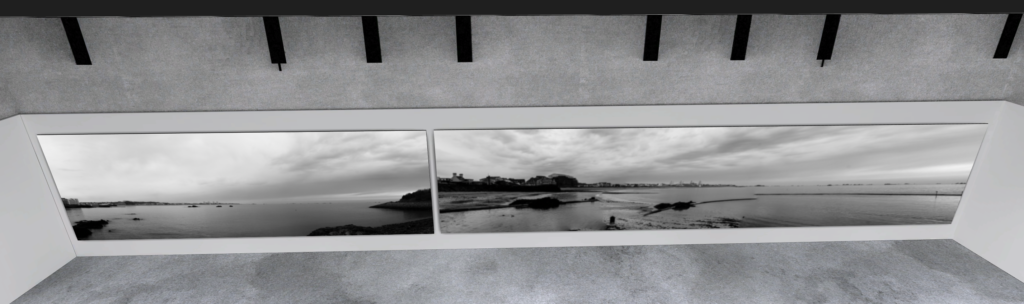
2nd panorama
Result after merging
I find this image effective with how much of it is taken up by the sky and the sea, creating a clear contrast with the rocks and buildings visible in the distance on the left as well as the rocks on the right.
Black and white
Making the images black and white shows the contrast between light and dark tones, although the contrast isn’t very obvious between the sea and the sky which takes away from the drama of the photos.
Final result
Increasing highlights and decreasing shadows, allowing for the sea to contrast more with the sky and creating a sense of drama with the darkened landscape.
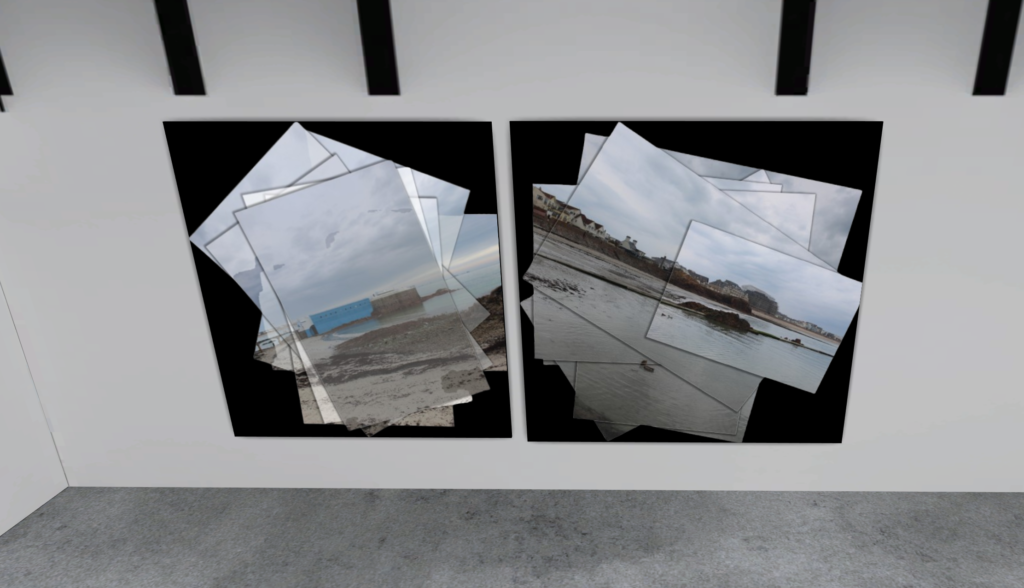
Joiners:
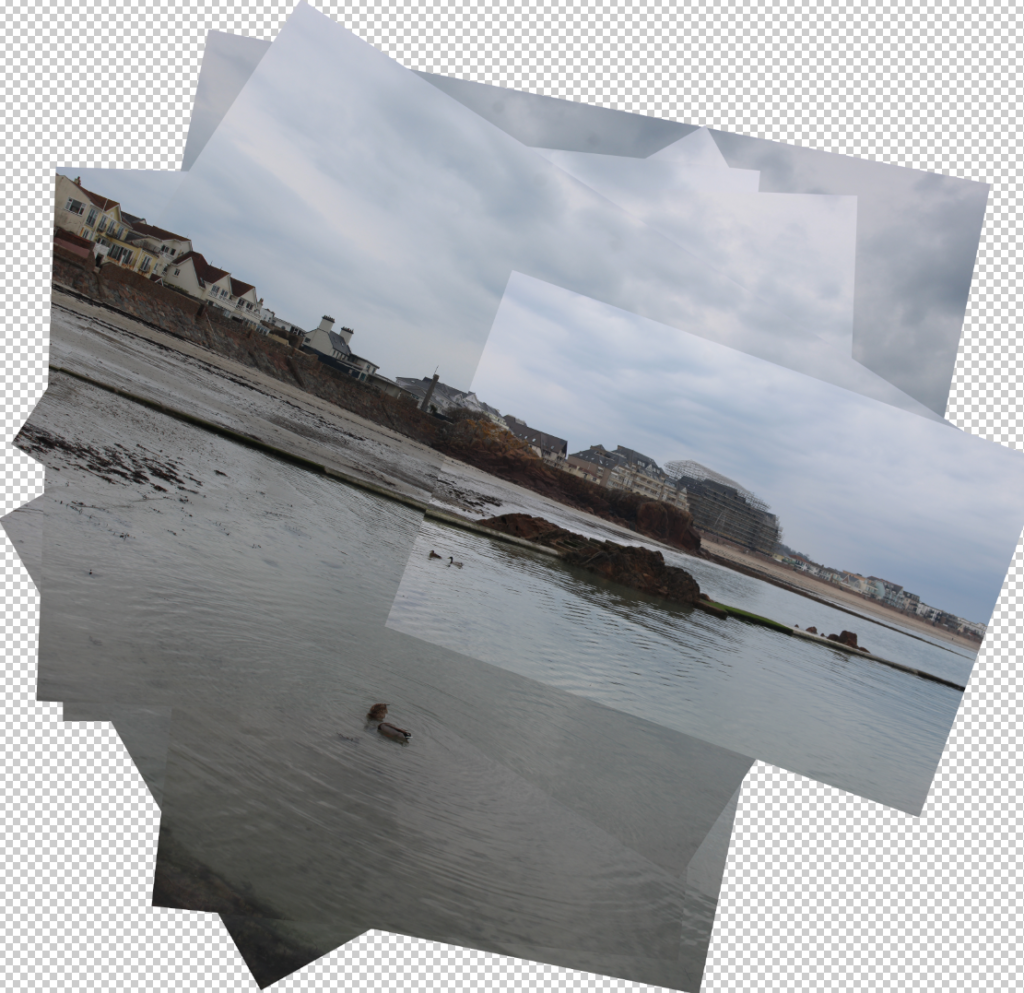
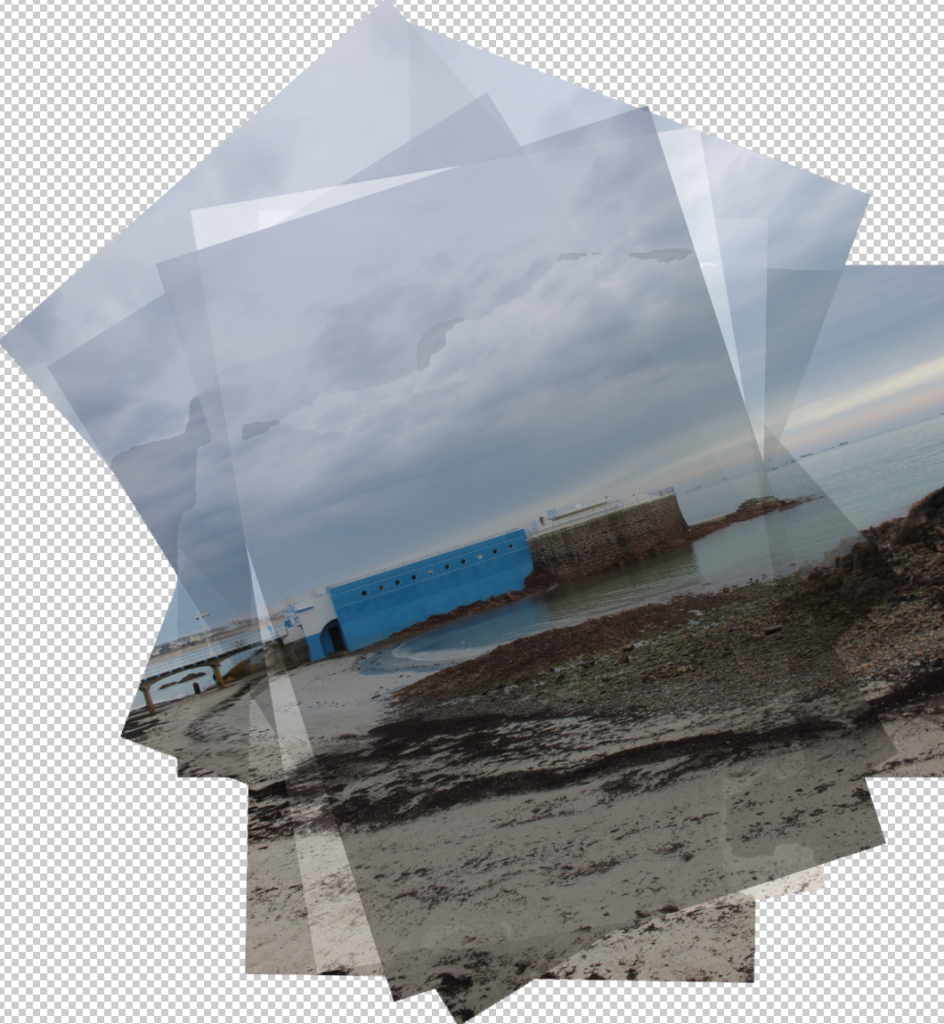
To create my joiners, I took multiple images of one landscape at different angles and merged them together in Photoshop before editing them further.
Images used to create the first joiner
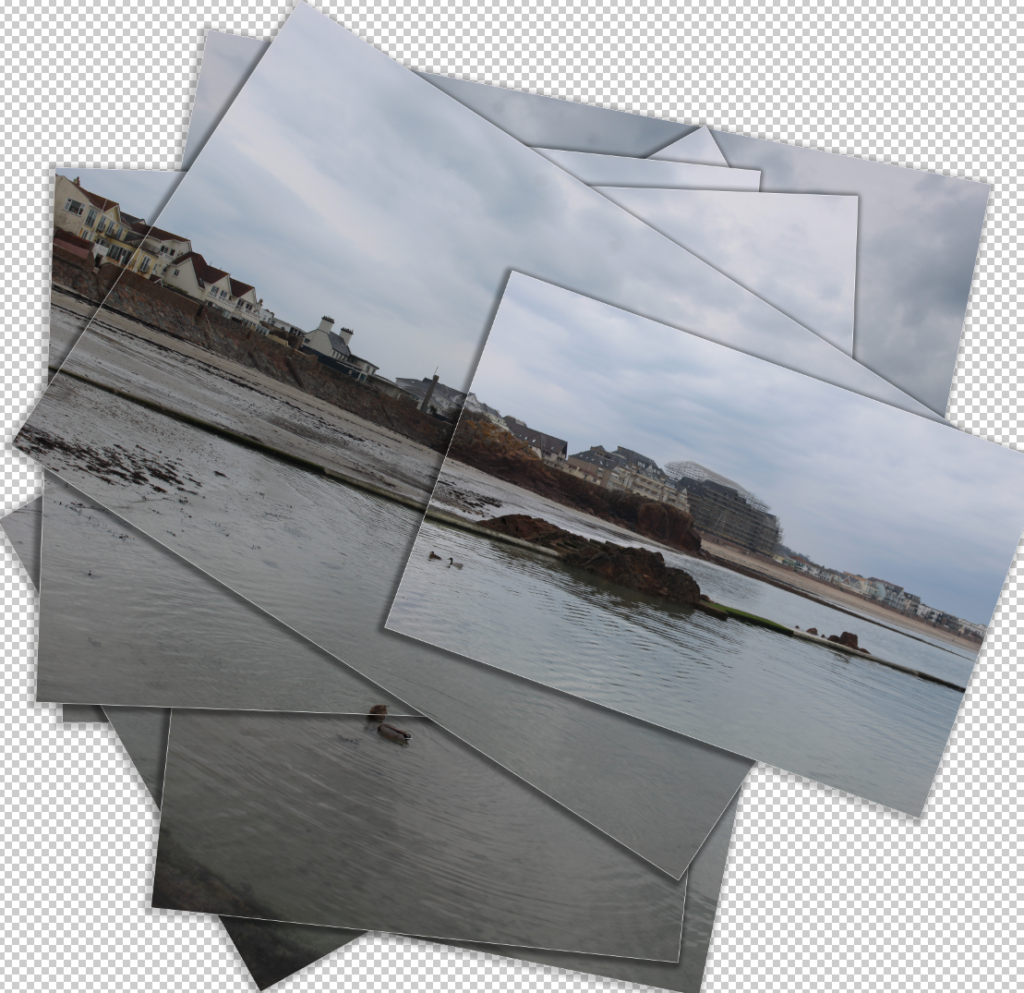
This was the initial result after merging the photos, blending all photos taken into one collage-like image.
This was the final result after applying effects to each image, adding a slight white stroke around each image and a drop shadow to create the impression each picture was printed out and stacked on top of one another to create the collage.
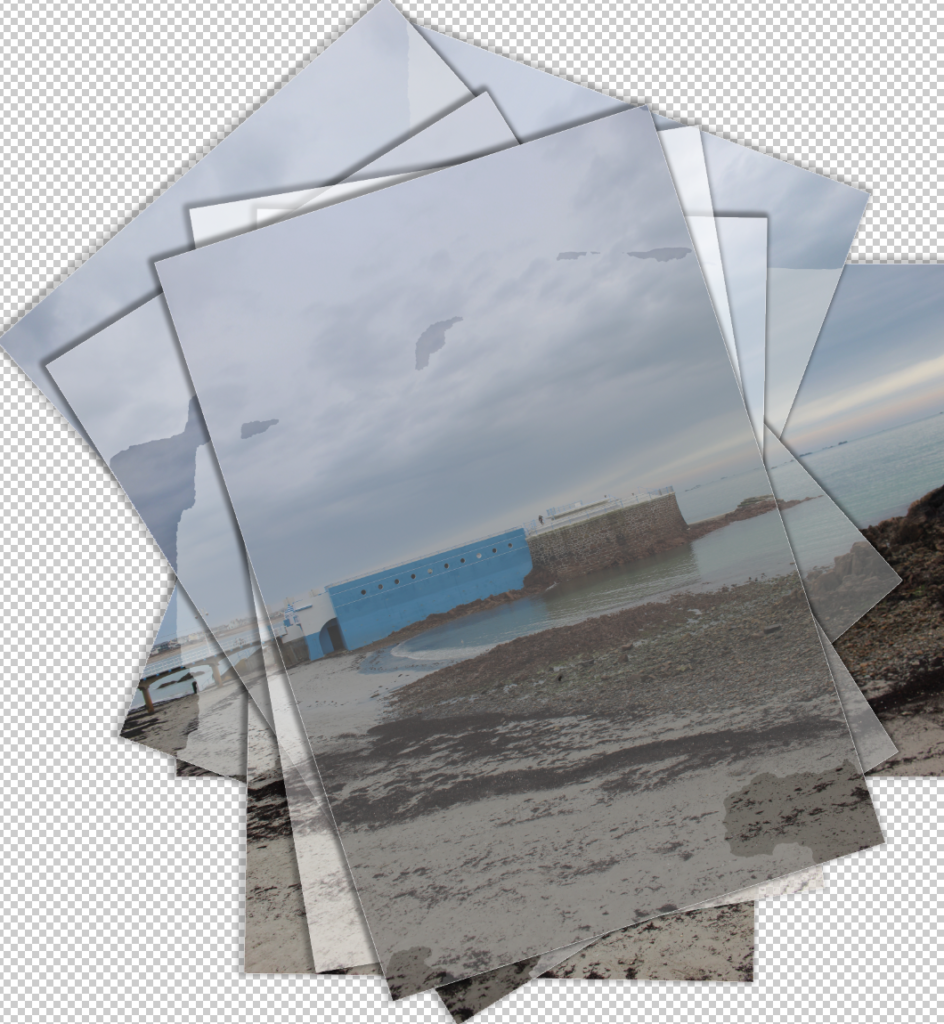
Images used to create the second joiner
The resultant collage after merging all photos, I adjusted some settings on each one individually to create slight contrast between each one and add a weathered effect to them.
Added the same effects, as well as adjusting opacity and other settings to enhance the weathered effect.
Other photos:
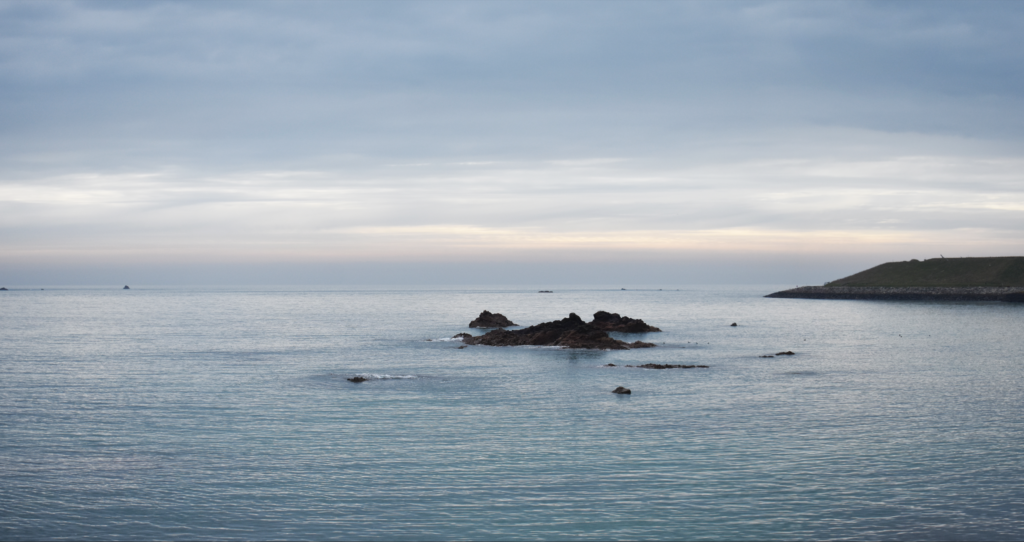
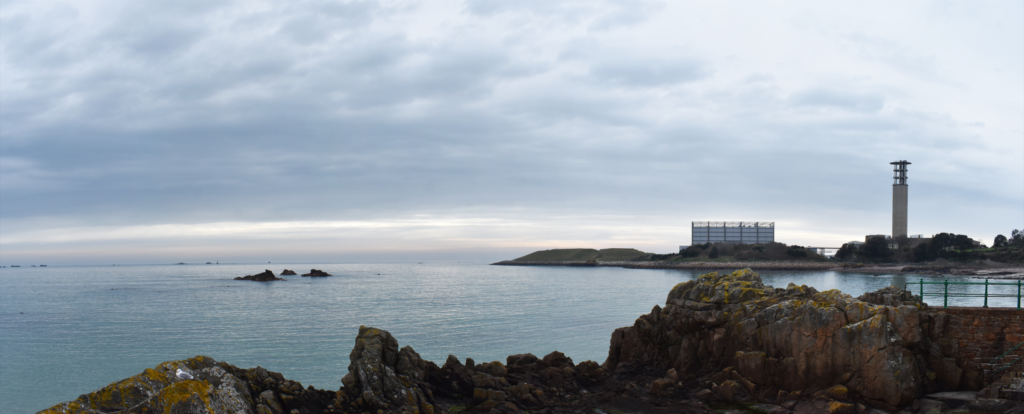
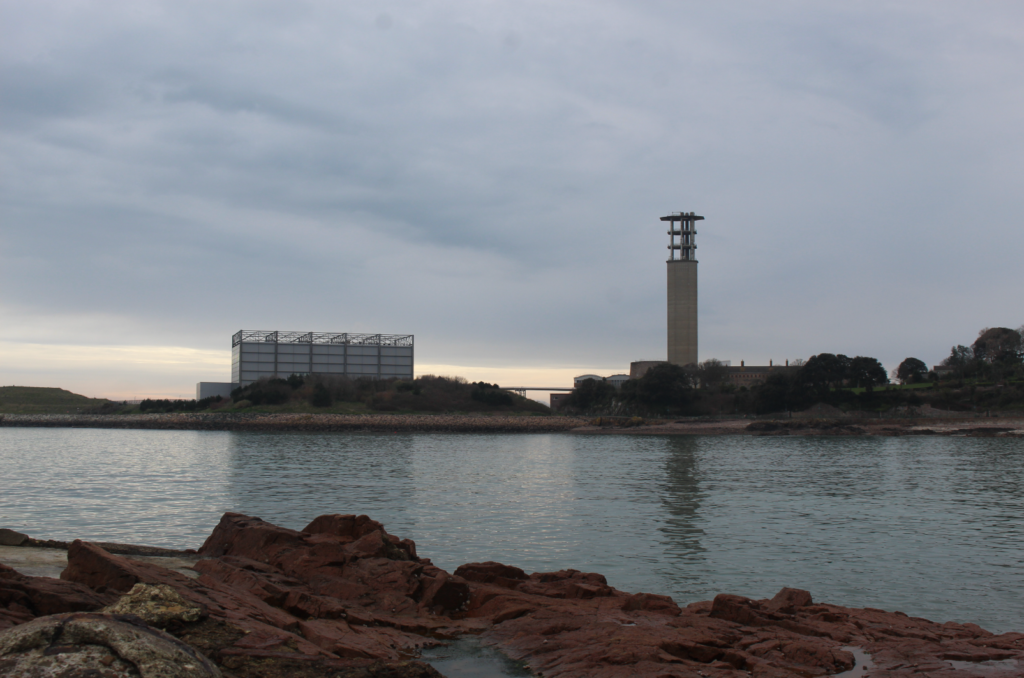
I really liked the composition of this image with the natural rocks in the foreground contrasting with the two buildings positioned on the two thirds in the distance with negative space in the sky, so I wanted to try experimenting with creating tone contrast by making it black and white.
The result after making it black and white, the rocks and landscape around the two buildings are too similar in tone so I will make further adjustments to try have a full range of tones (similar to the zone system).
Final result – decreased highlights and whites, increased exposure and contrast bringing out more contrast. Light tones at the bottom of the horizon, midtones in the sea and darker tones in the rocks/landscape in the background.
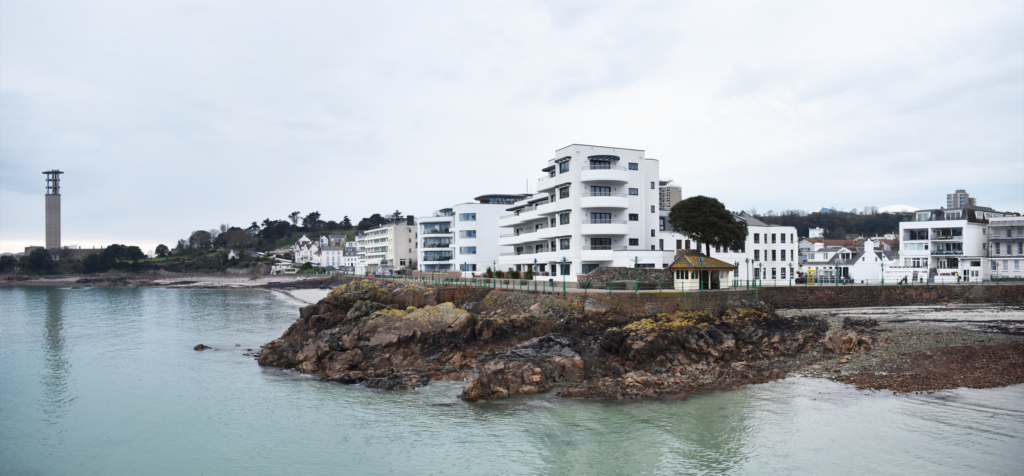
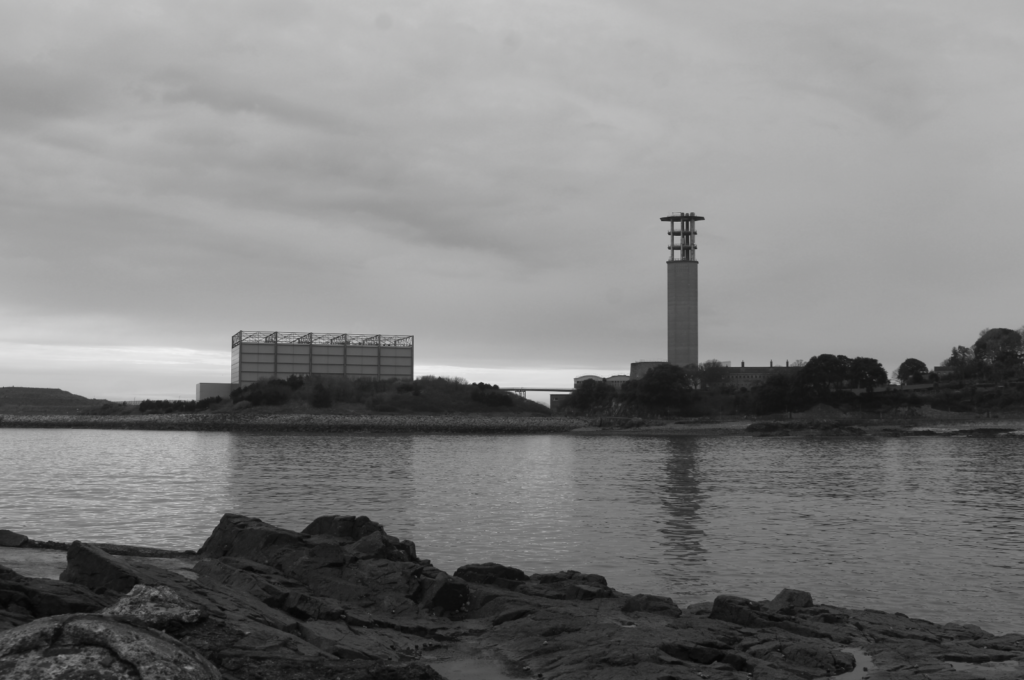
Experimenting with composition, cropping to keep the bottom half of the image focusing on natural landscape (rocks, sea) and the top half focusing on man-made buildings which contrast nicely with the sky’s negative space.
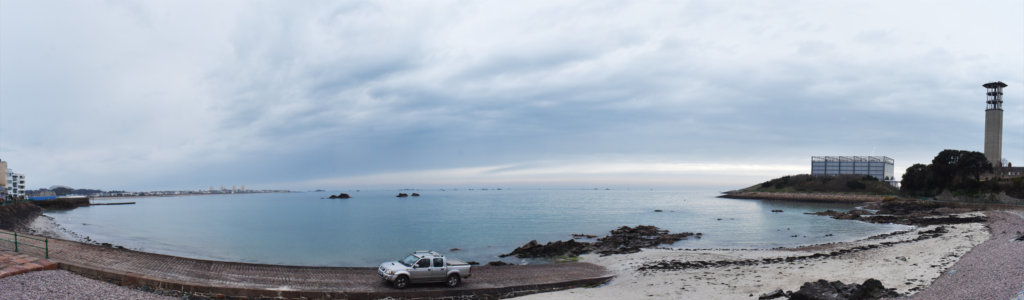
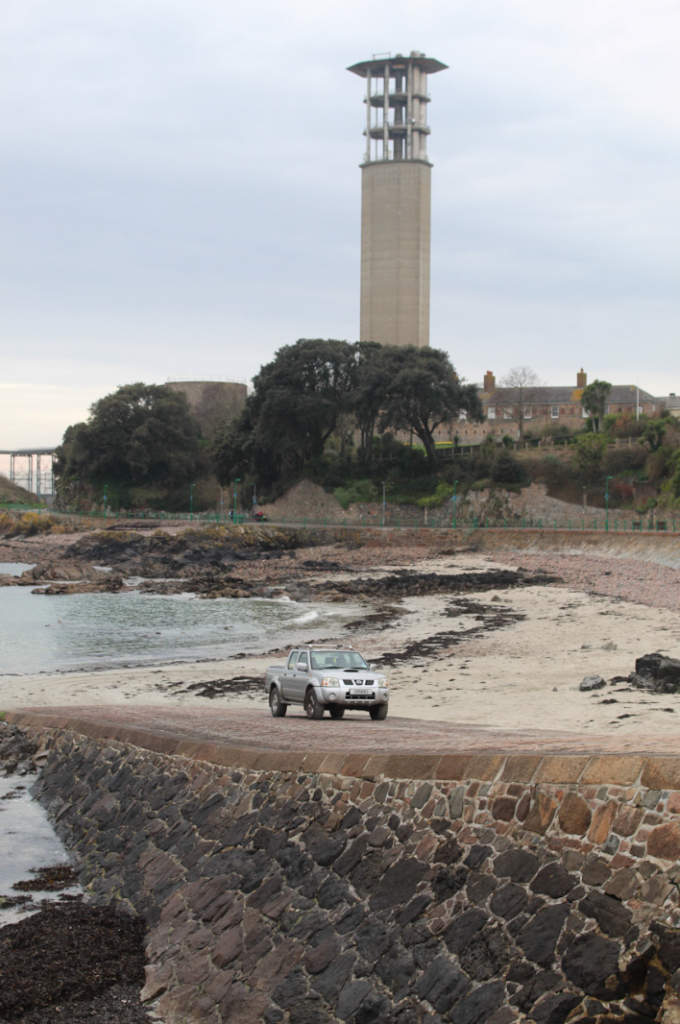
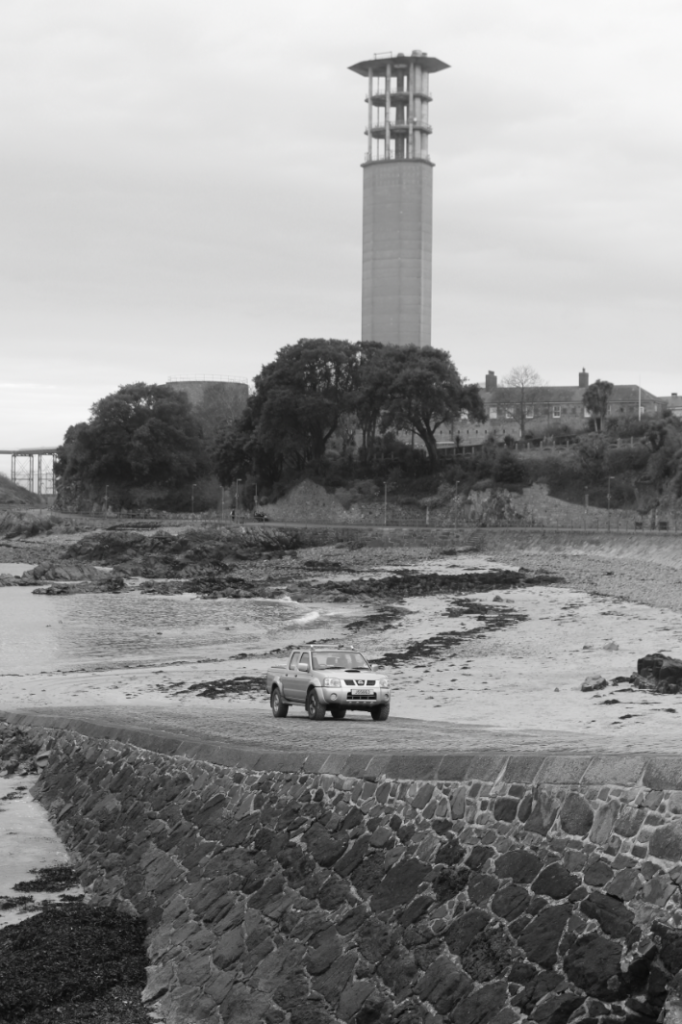
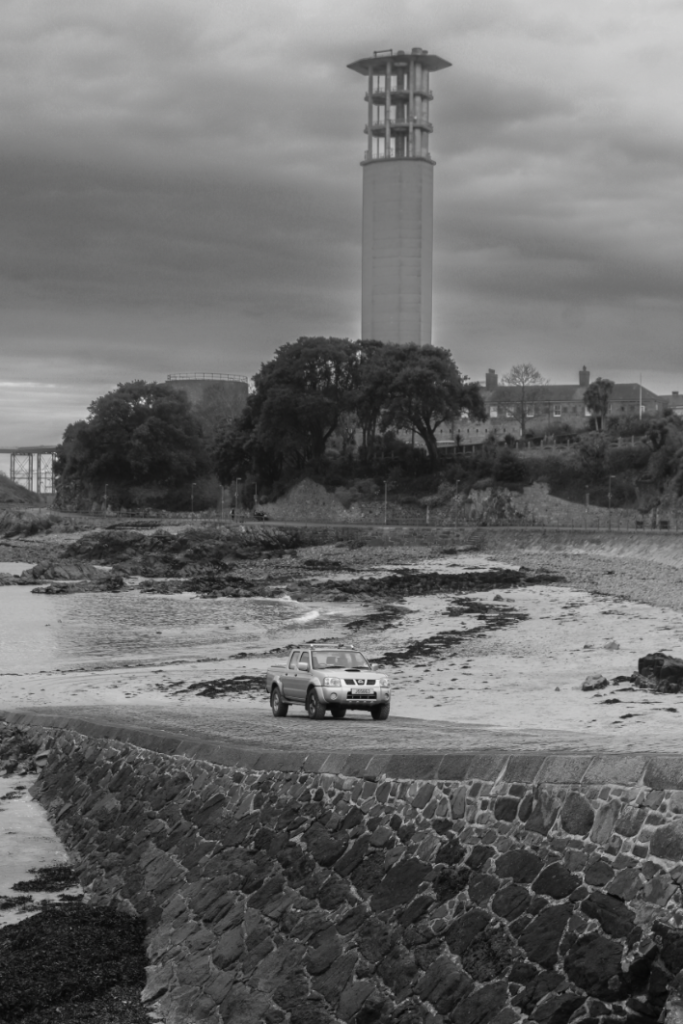
I really like the composition of this image since it clearly contrasts natural landscapes vs man-made and it almost seems like the man-made aspects are invading the natural ones, seen with the car out of its usual place parked on the beach and the tower sprouting of the trees creating a clash between these two elements.
Experimenting with black and white, and I like the drama created although I noticed there is little use of the zone system since there is very little dark tones.
Darkening the sky and rocks at the bottom by decreasing exposure and increasing clarity, enhancing contrast between light and dark tones. Lighter tones can be seen in the sand and car, midtones in the sky and tower and dark tones in the trees and rocks.
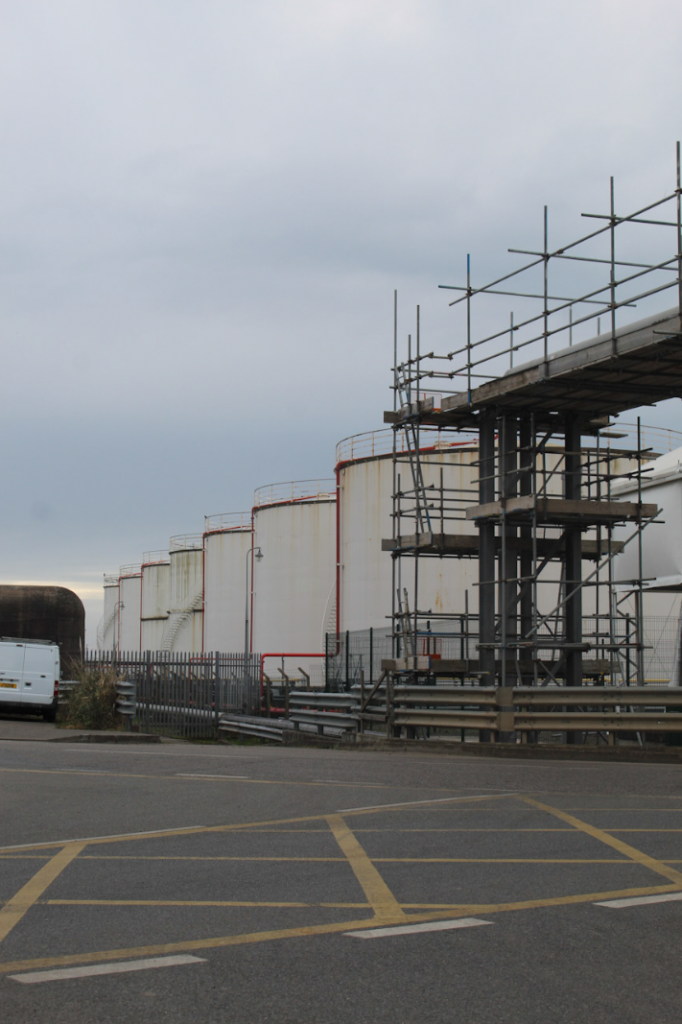
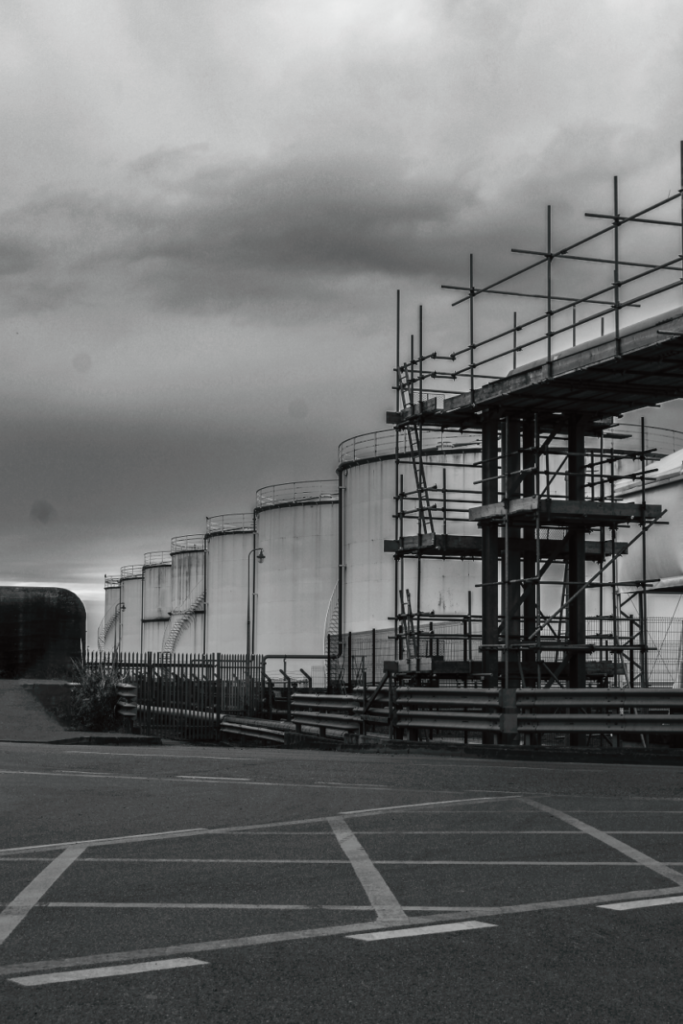
This image is inspired by the New Topographics, featuring no natural landscape and instead focusing on man-made objects. I like how there is plenty of straight lines in the image (e.g. paint on the floor, scaffolding, fences) since it clearly shows how most of the image is man-made.
Experimenting with black and white in the style of the New Topographics.
Enhancing contrast and increasing drama by adjusting clarity, exposure and contrast as well as removing the van since it stuck out noticeably compared to the rest of the image. Final result creates a gloomy atmosphere whilst maintaining an effective range of dark and light tones.
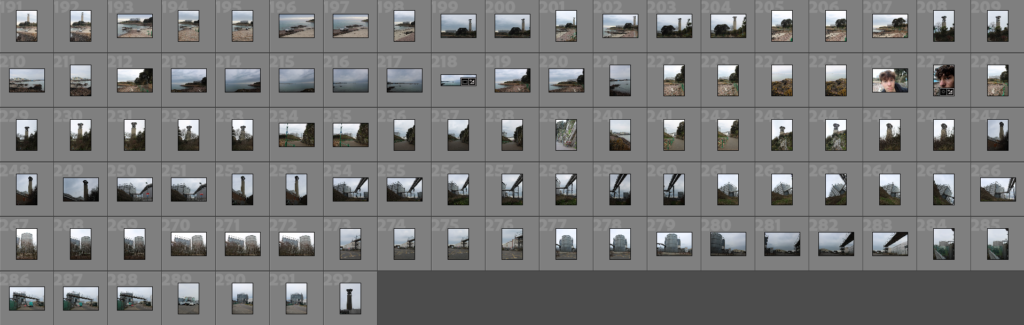
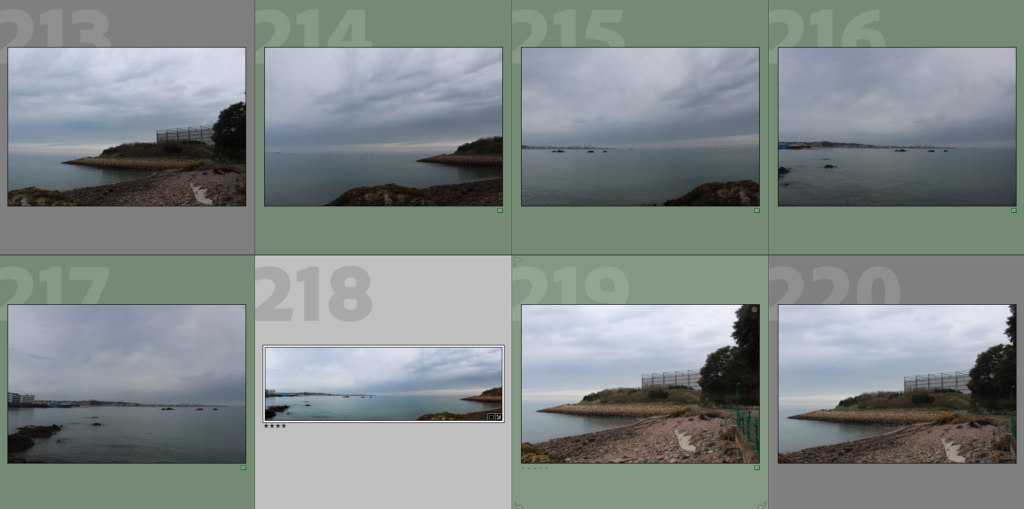
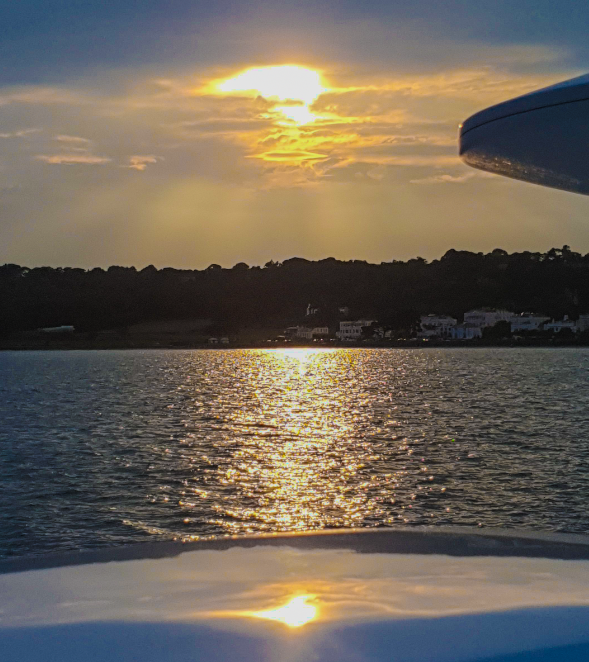
This photoshoot was about capturing the sublime at Corbiere Lighthouse.
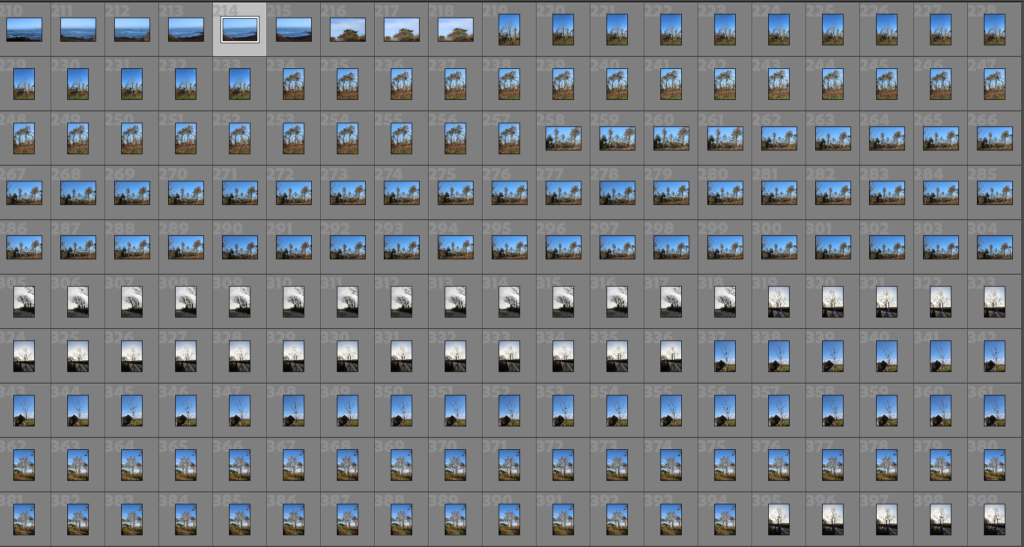
Contact Sheet 2
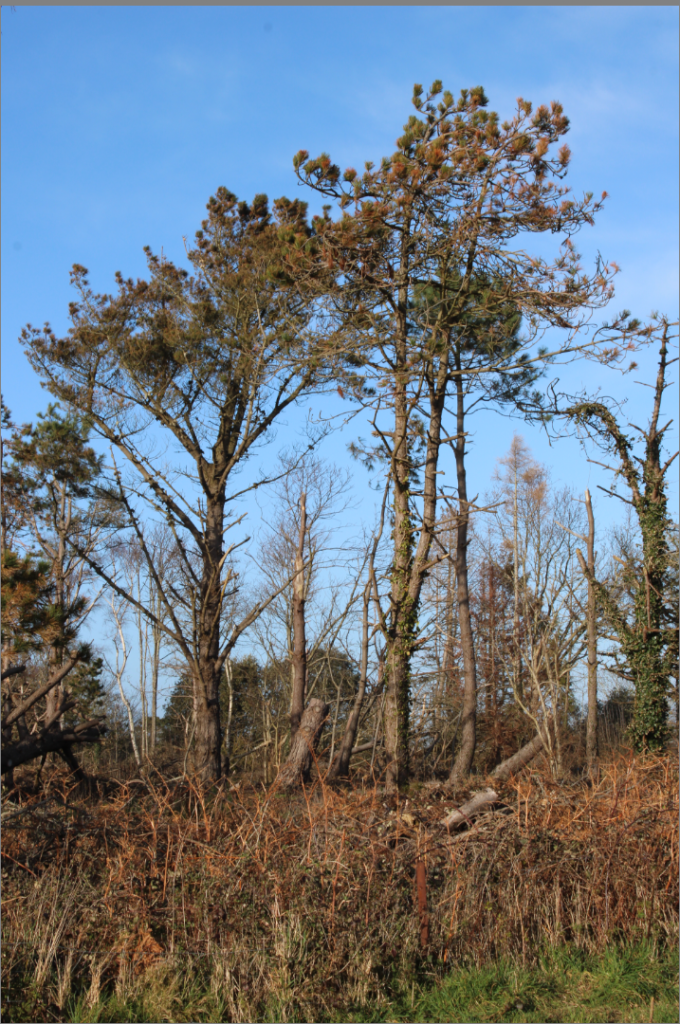
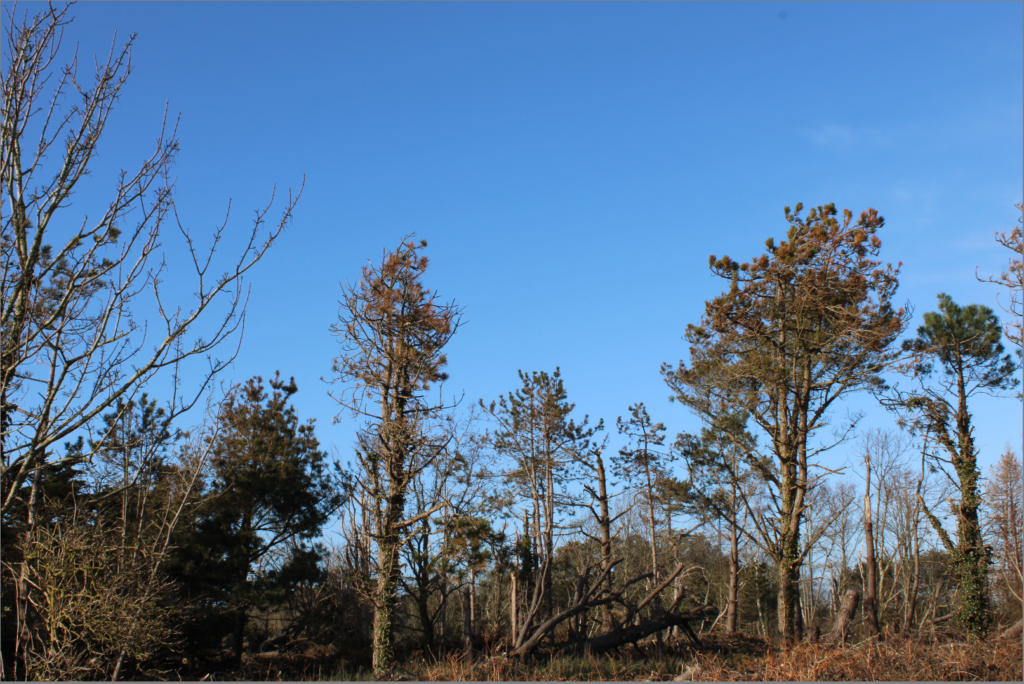
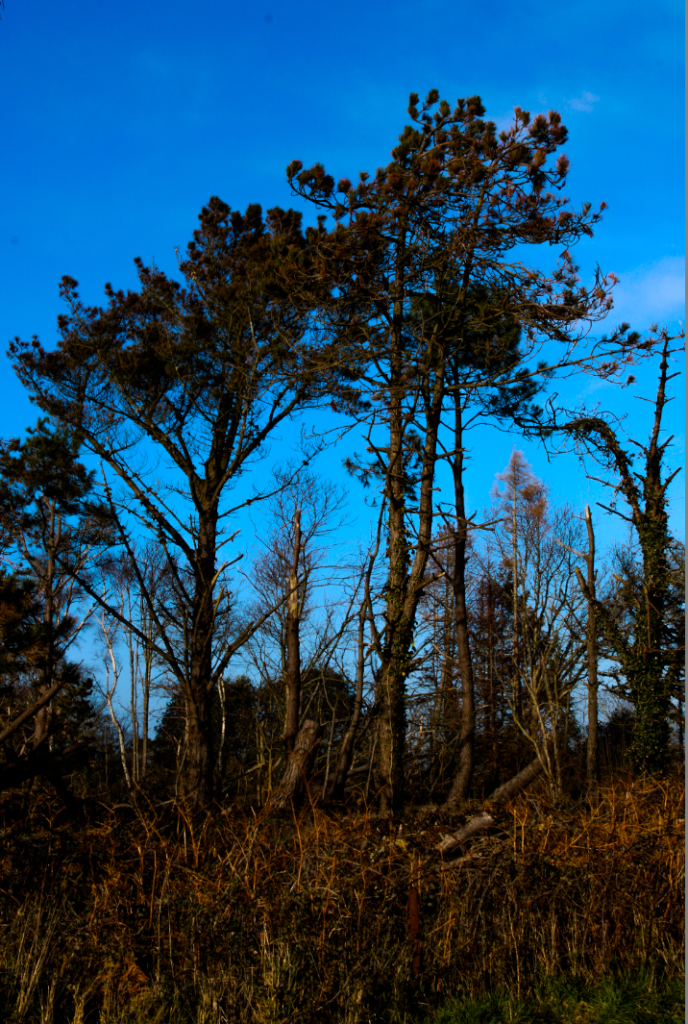
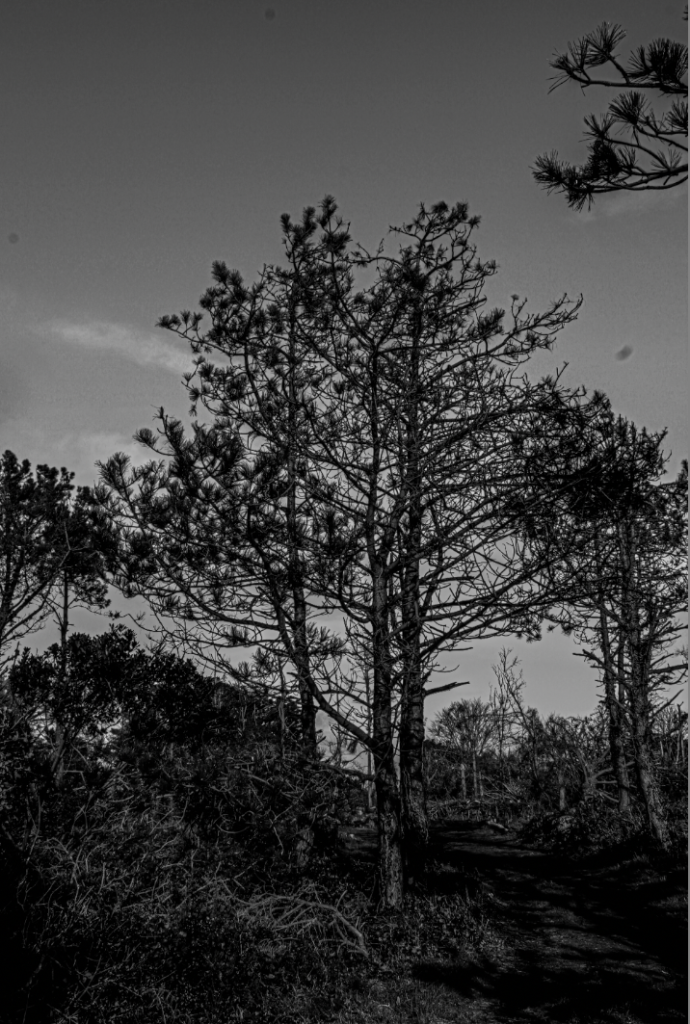
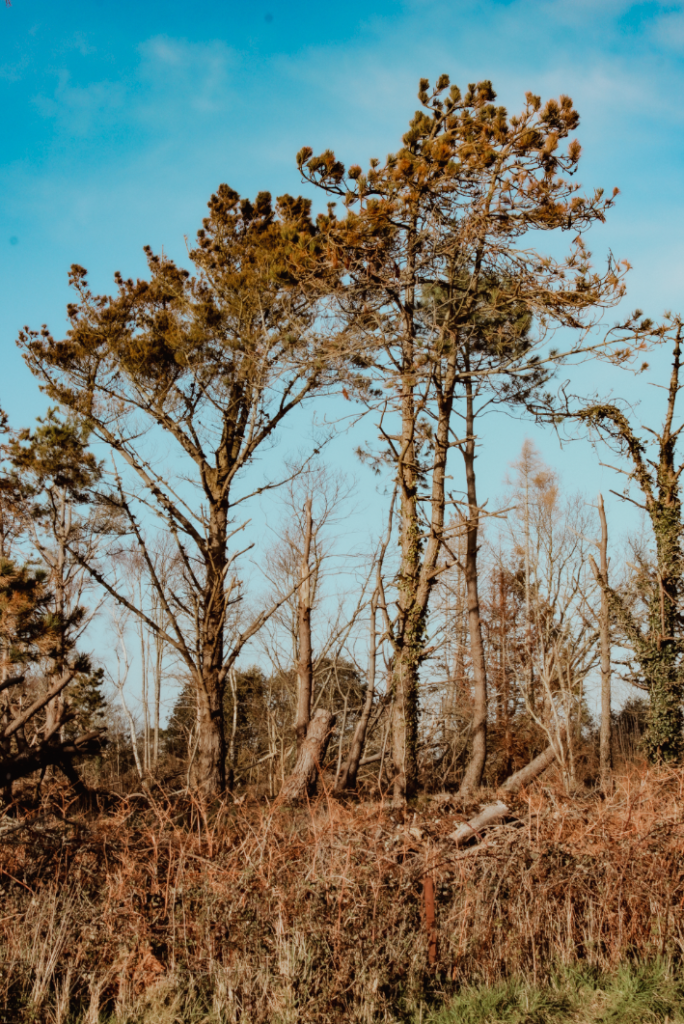
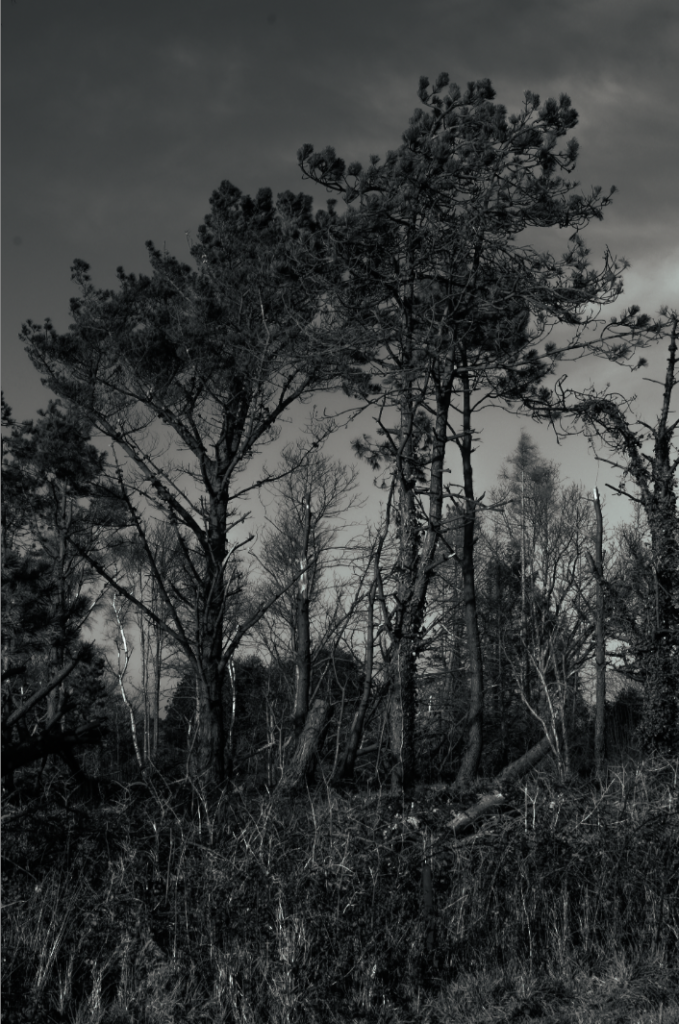
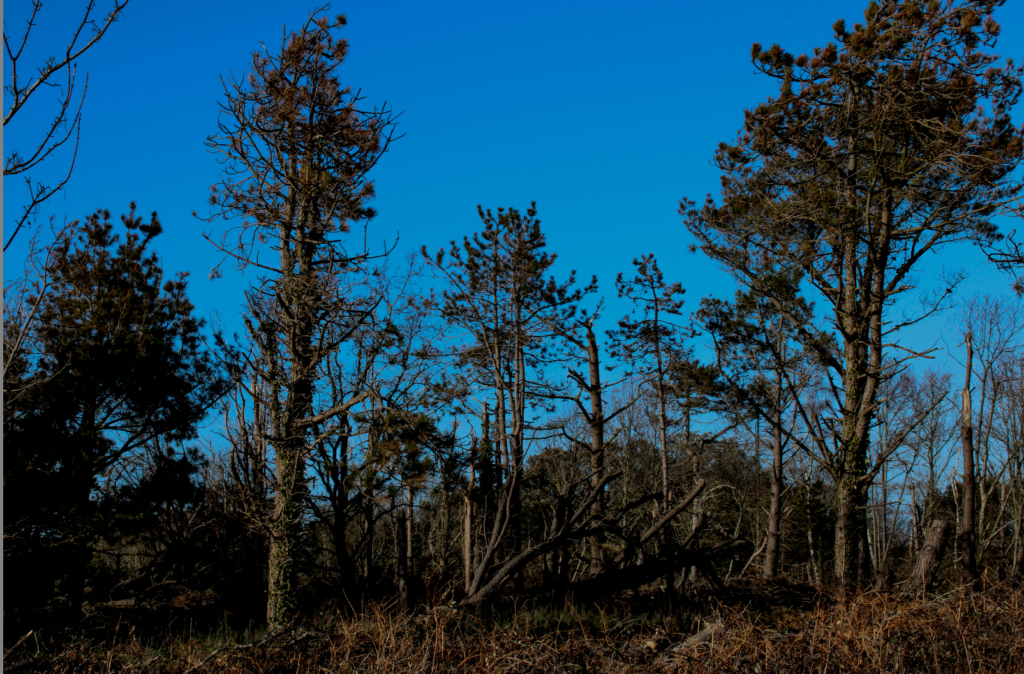
This photoshoot was about taking photos of trees that where part of the storm damage.
In my both photoshoots combined I took a total of 405 images.
Image Selection
The images that I have selected to edit each have a wide range of light and dark tones as well as compositions which will create a depth and drama that I will experiment with to see how editing can amplify this (e.g. to see if making the images black and white effectively uses the Zone System).
Editing
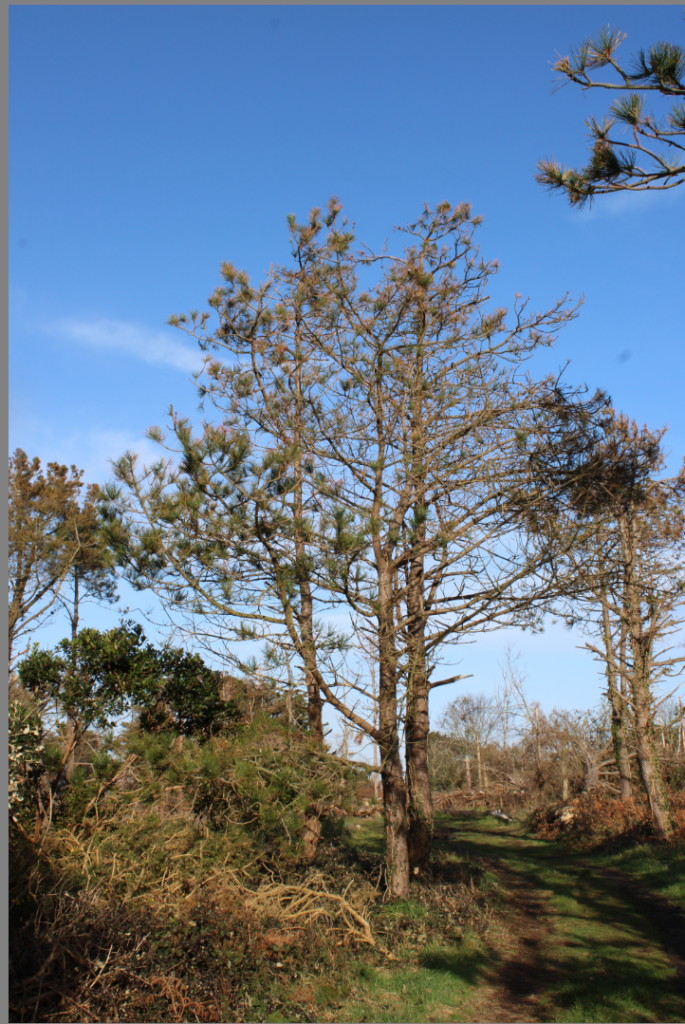
Image N01
This is the original image.
This the edited image, with an increase of contrast.
This is how I edited my image, with the settings above.
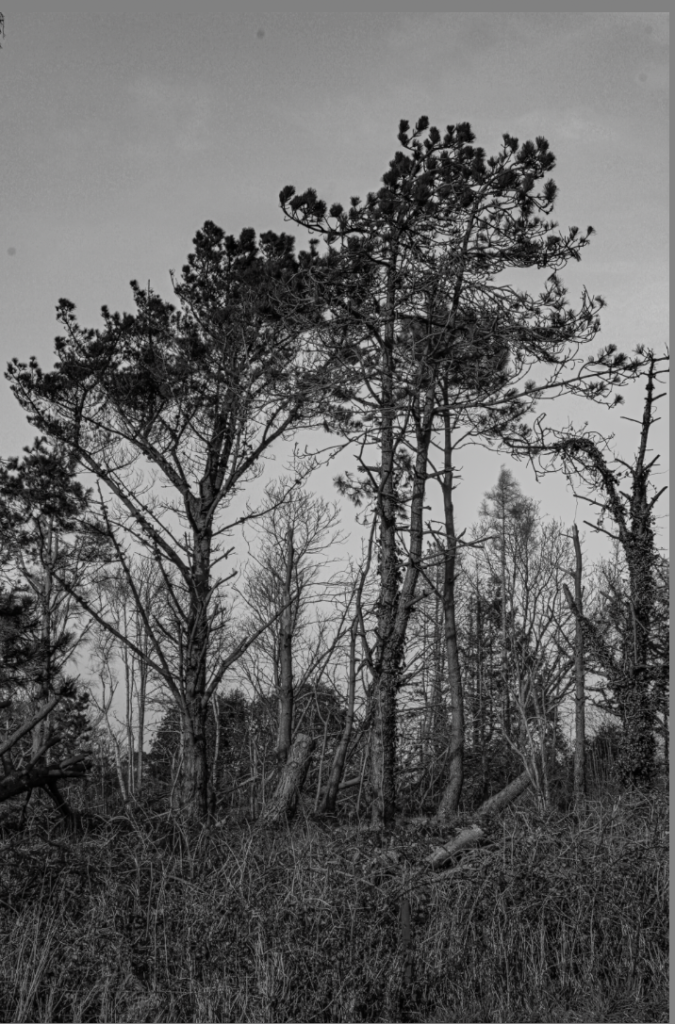
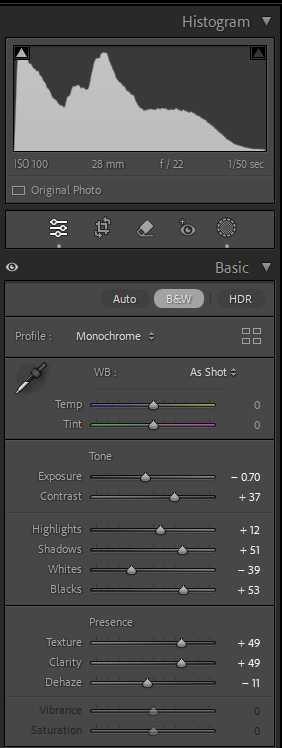
Black and White Image
This Black and White image with the elements of the zone system present.
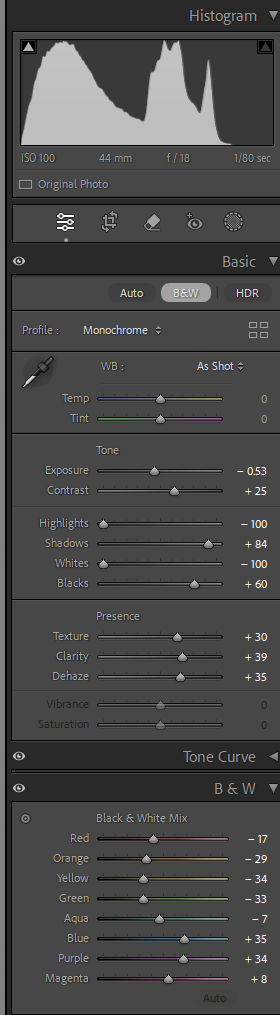
These are the settings above I used to achieve this Black and White, which will incorporate the zone system.
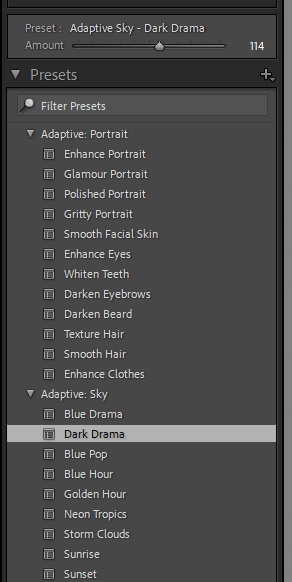
This is the filter I used to create this image.
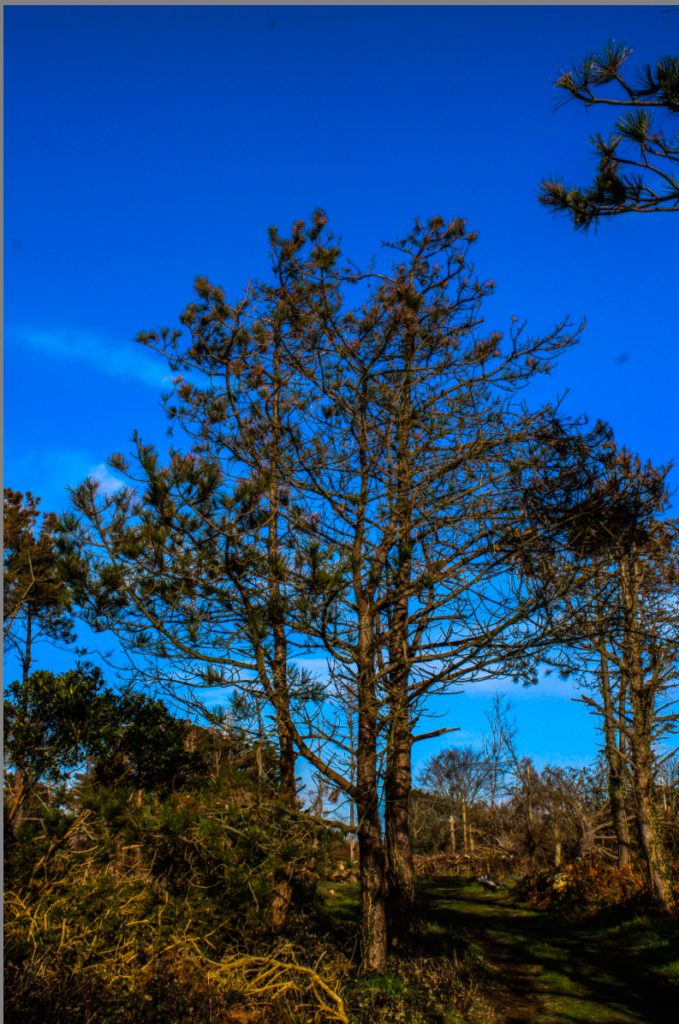
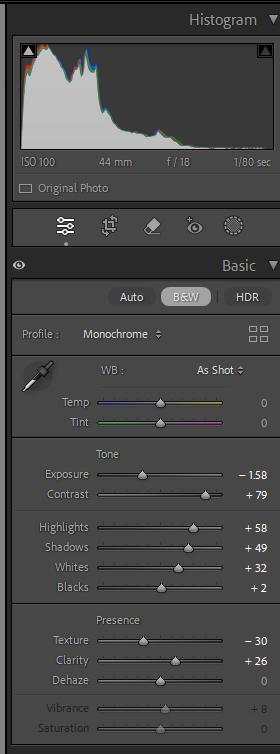
Image N02
This is the original image.
This is the edited image.
These are the settings above I used to achieve this image above. This includes increasing the contrast, so there is a difference present and decreasing the exposure so the image wasn’t to light or dark.
Black and White Image
This is my edited image.
These are the exact settings I used to edit this image. I deceased the highlights so the photo was well balanced for the black and white tone to be present.
This is the filter I used to add more drama to my image.
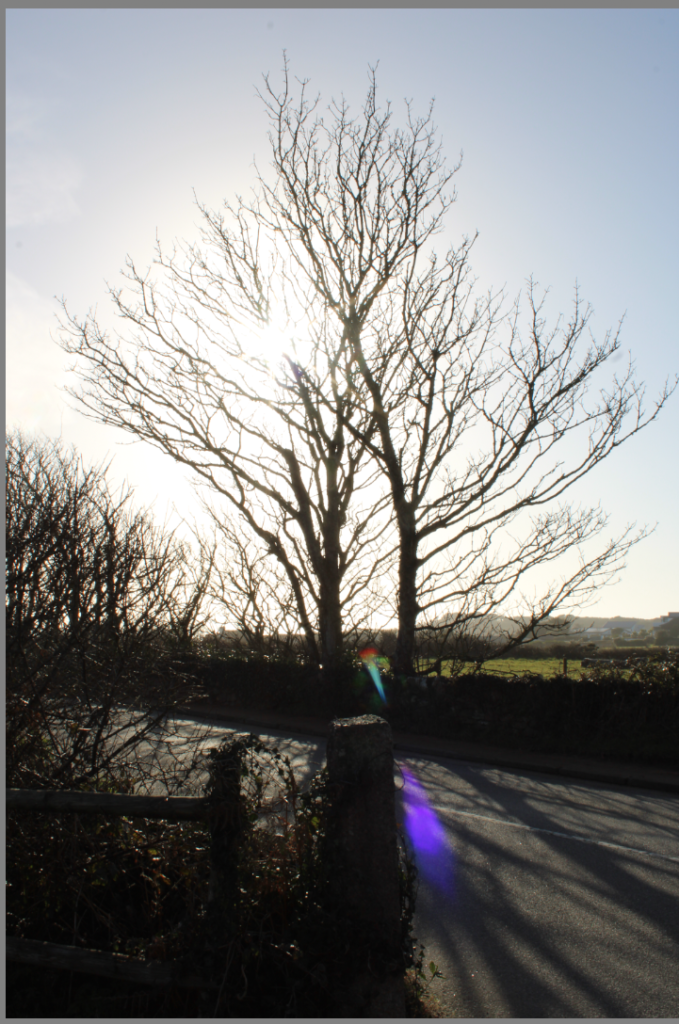
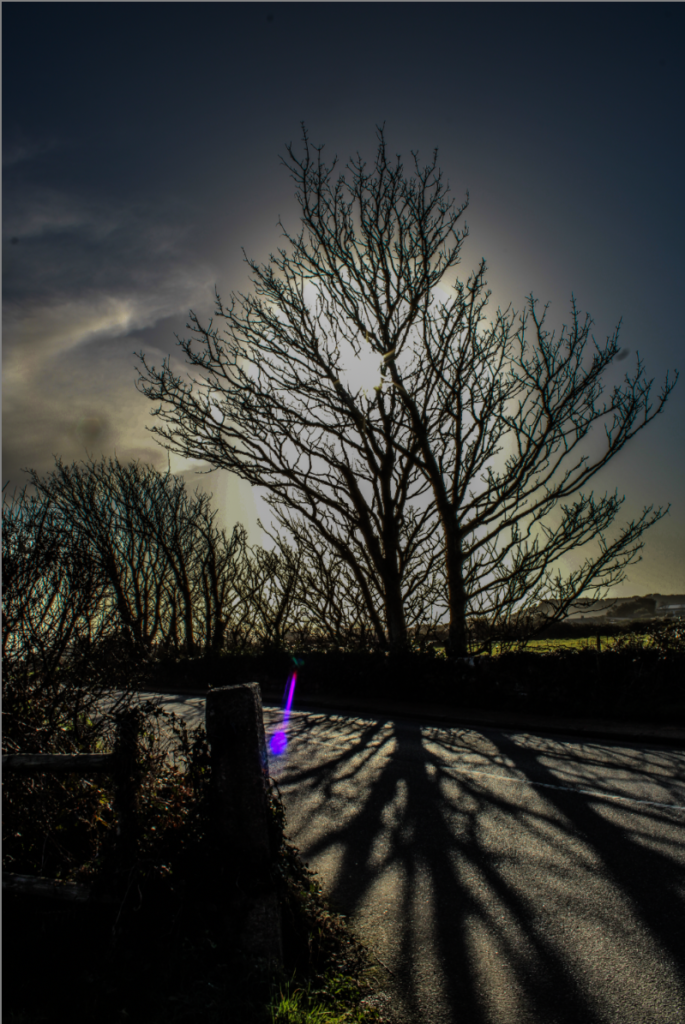
Image N03
This is the original image.
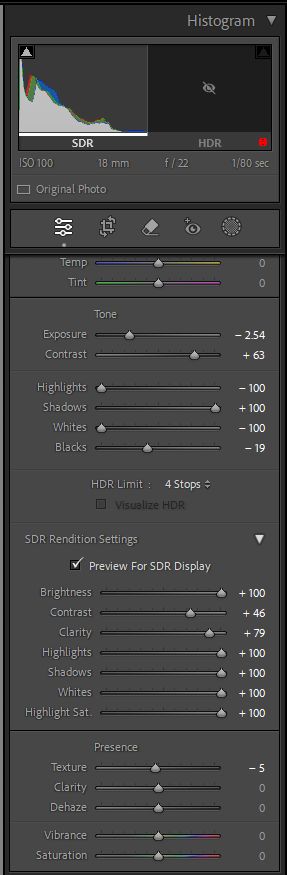
This the edited image. In this image, I have created shadows onto the road, this will make the tree to appear enlarged.
I have made the sun appear more vibrant which is behind the tree, this is why the tree has reflected onto the road.
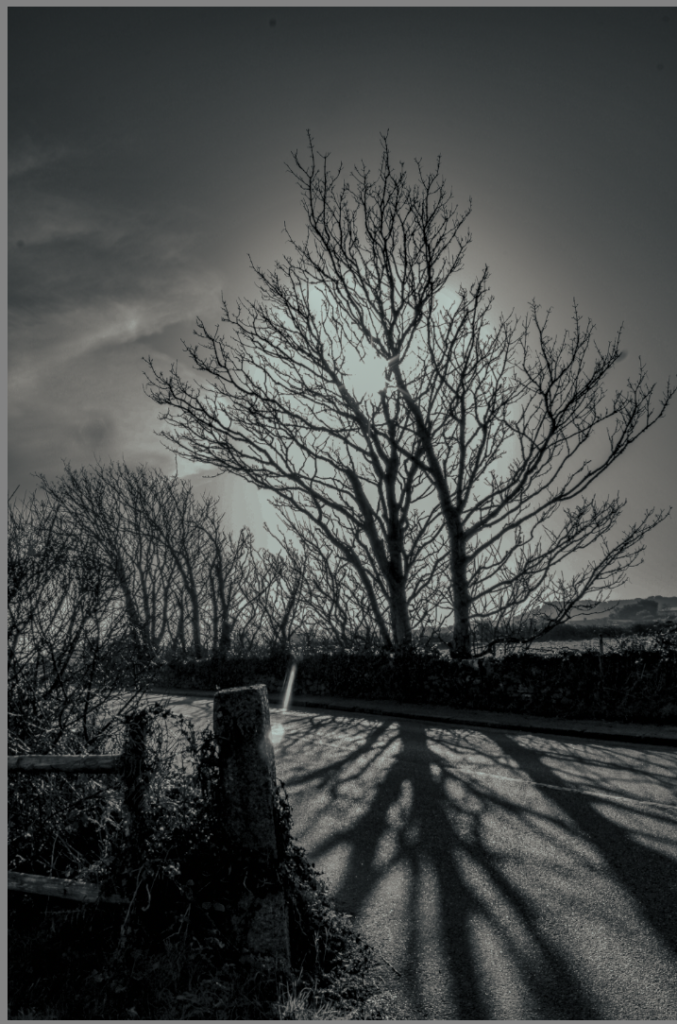
Black And White Image
This is the edited black and white image.
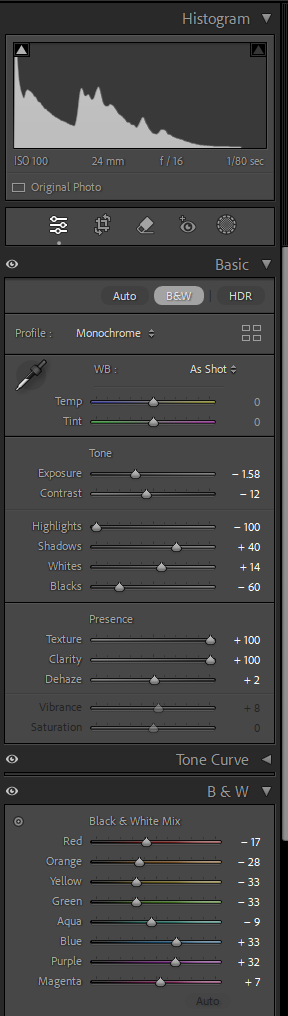
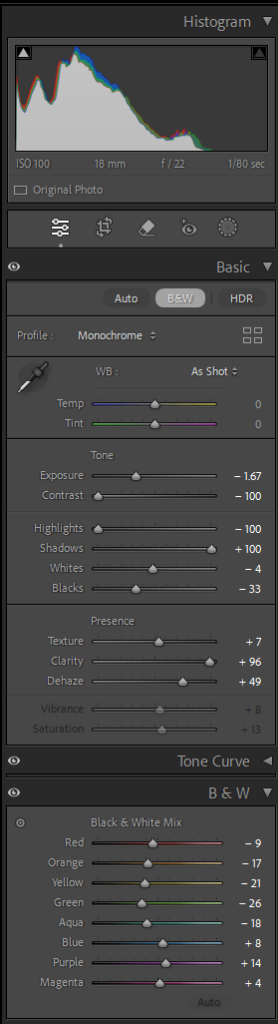
These are the settings, I used to edit this image into Black and White.
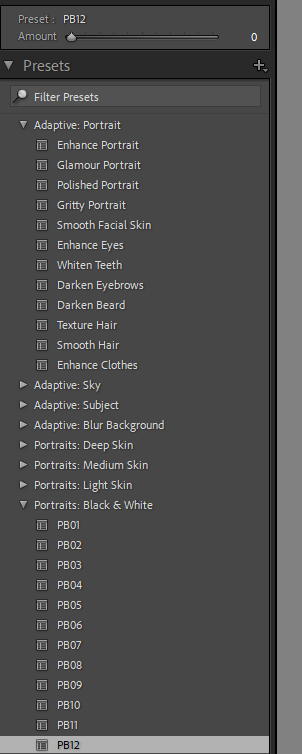
This is the filter I used to edit this image.
Image N04
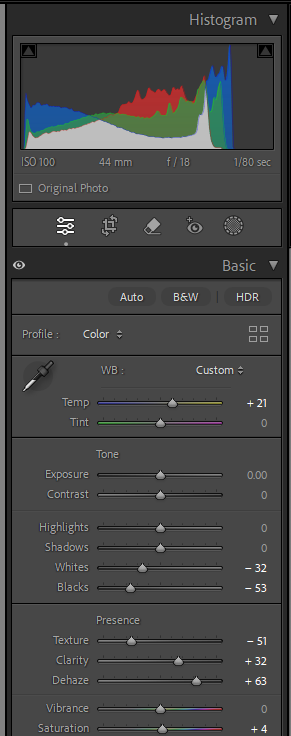
This is the original image before editing.
This is the edited Image.
These are the settings I used to edit this image. I decreased the temperature so there could be more blue, present in the image.
Black and White Edit
This is the edited black and white image.
These are the settings I used to edit this image.
This is the filter I used.
Image N05
This is the original image.
This is the edited Image.
These are the settings I used, to edit this image.
This is the filter I used to contribute to this image.
Black and White Image
This is the edited black and white image.
These are the settings I used to achieve this image.
This is the filter I used.
Image N06
This is the original image.
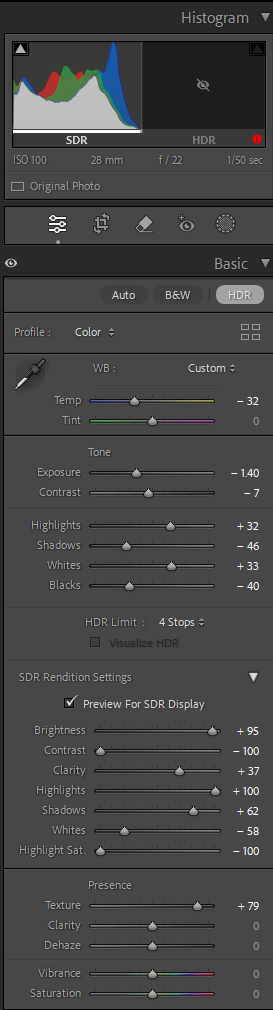
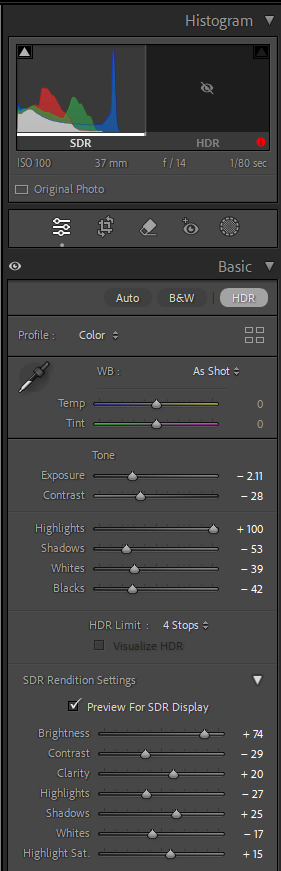
This is the edited image.
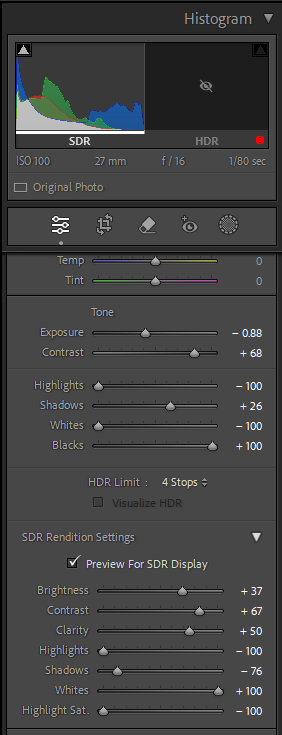
These are the settings I used to edit this image. I used HDR to achieve a dark blue sky in the background.
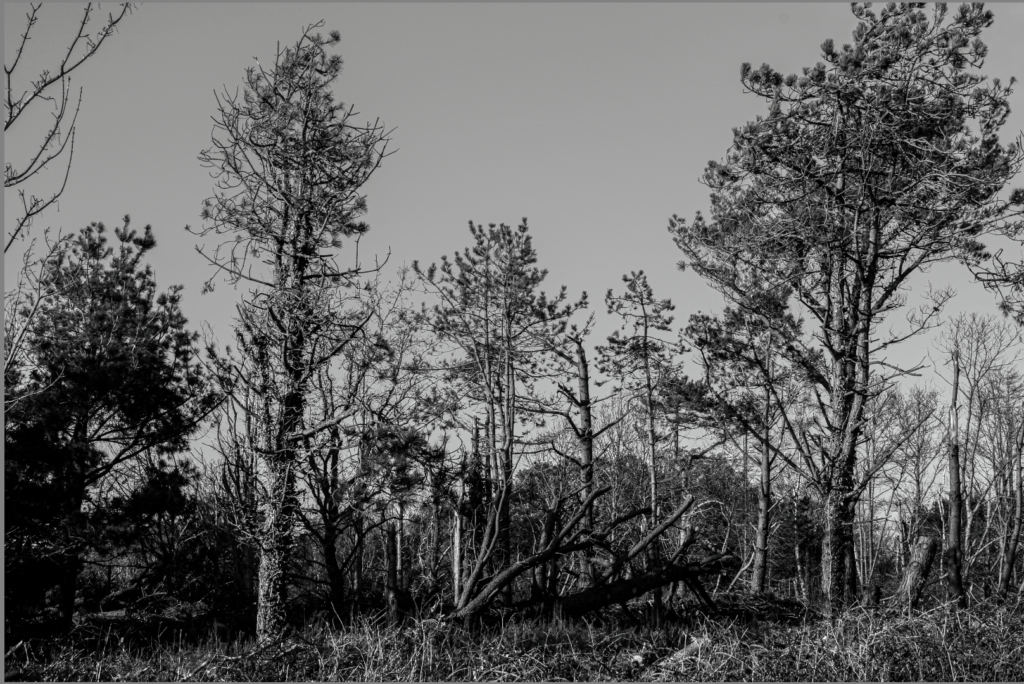
Black and White Image
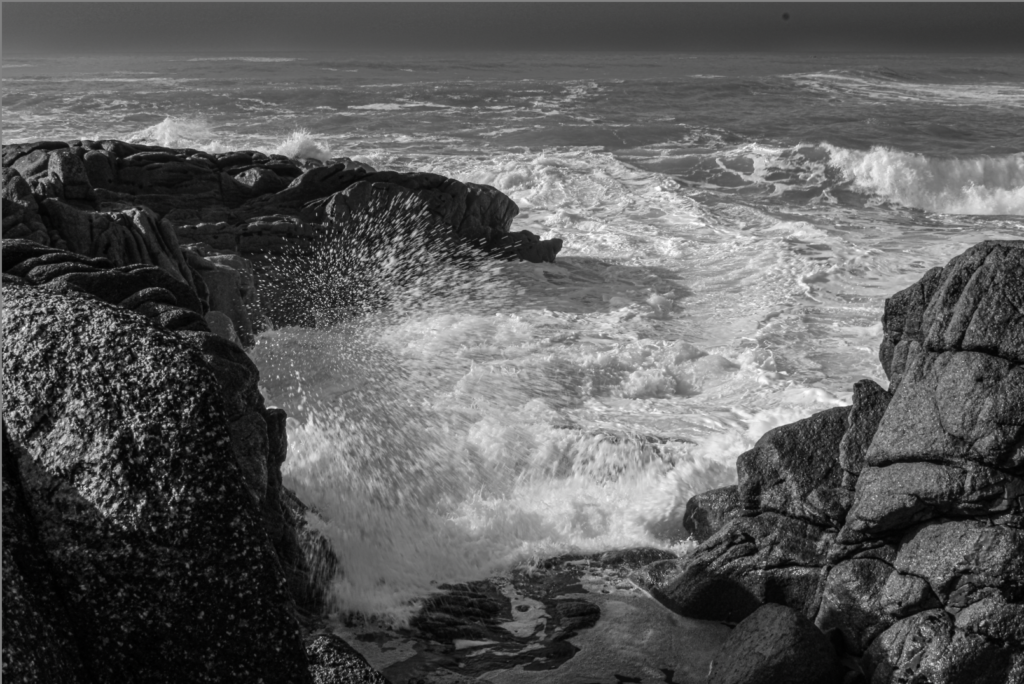
This is the edited image.
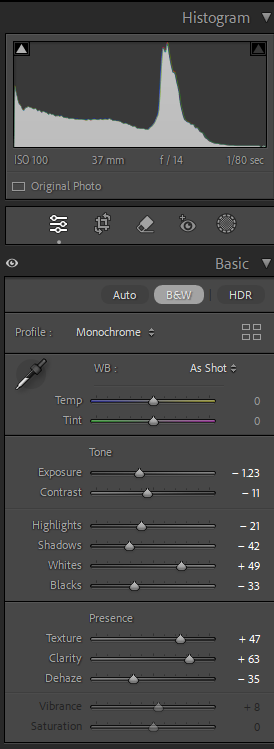
These are the settings I used to achieve this black and white image.
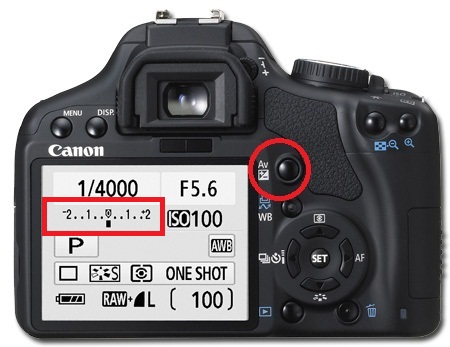
Exposure Bracketing: when you bracket your shots you take exactly the same picture of your subject at several different exposures. One that is slightly under-exposed (negative exposure), and the second one slightly over-exposed (positive exposure)
Exposure Condensation: is how you manually set the exposure for each photo. It can quickly adjust how light or how dark your exposure will be using these controls
Start with 1 stop variations. So, take a shot at -1 on the exposure compensation dial, then turn the dial so it reads -2 and then -3. Repeat, this time overexposing at +1, +2, and +3. You may not use all these images in the final HDR but it’s good to have the data just in case
AEB:
Automatic Exposure Bracketing is when the camera automatically takes three or more shots, each at a different exposure.
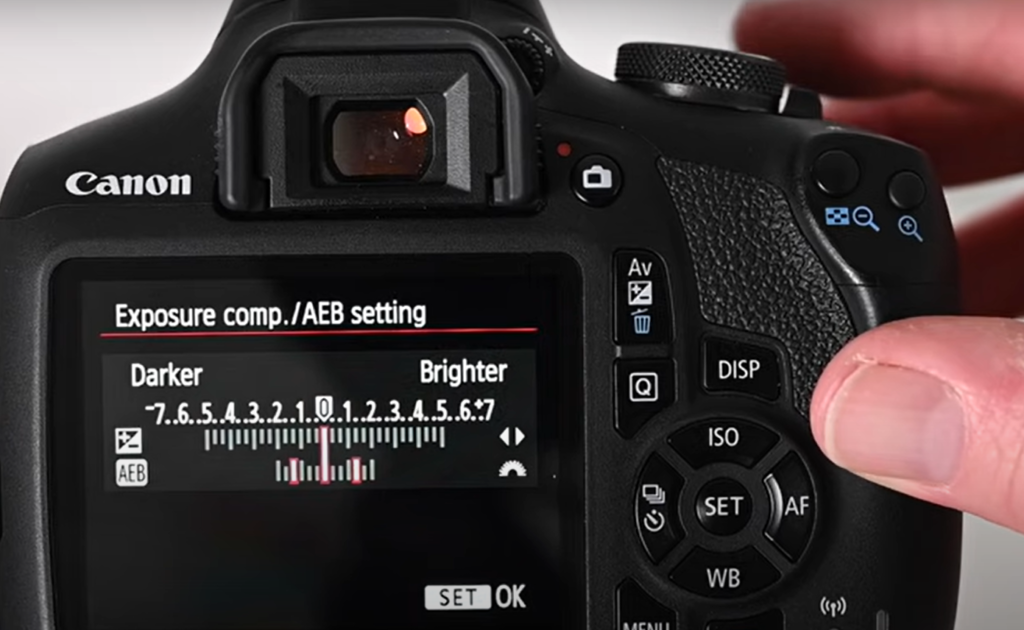
Or set the amount of “bracketing” like this…
In the menu, select the second tab and go to ‘Expo. Comp. /AEB
Use the dial on the top of the camera to set the range of exposure you want to capture with your 2nd and 3rd photo
After you have set the exposure range, you will see two extra marks on the exposure metre…
Now take 3 photos and your camera will automatically change the exposure for each one.
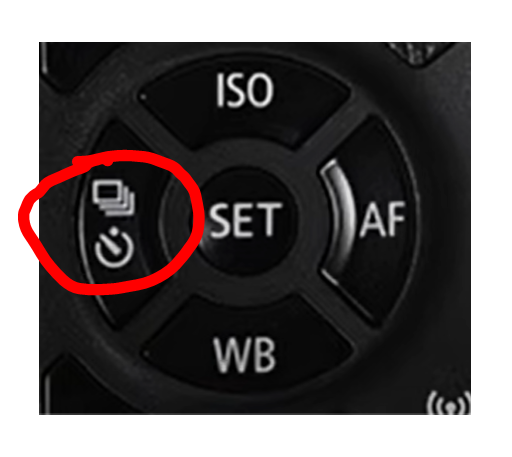
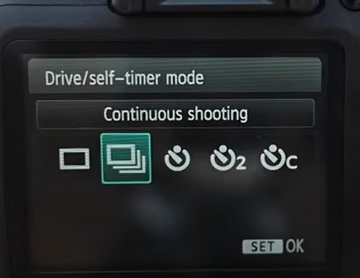
TIP: You can also set the camera to continuous shooting, to take 3 photos in close succession – all you need to do is hold the shutter button down.
HDR Photos: is a technique that helps you get details in the brightest and darkest parts of your photographs. It can be achieved by taking multiple bracket images and blend them together to create a single beautifully exposed photograph with a full dynamic range of tone.
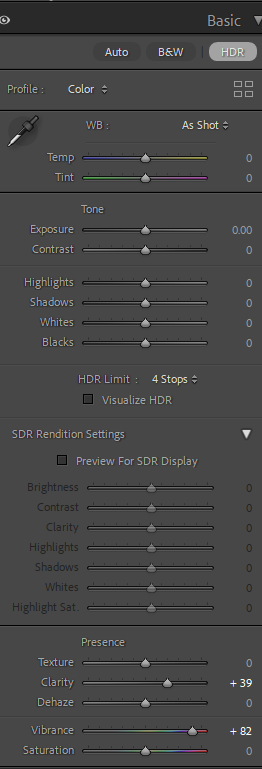
To achieve the following Images, I edited the Vignette, Exposure Bracketing, HDR and Vibrancy
Of course I couldn’t use the same settings for all my Landscape Photos. E.g. using the same Vibrancy setting to make the image too colourful or adding a Vignette to a slightly brighter image which blends in quite well creating a fading effect and using the same Vignette on a different image that is darker wont make it stand out as much.