Texture/ Paper Experiments

Jerry Reed

Jerry Reed is an English photographer who claims his objective is to sustain the interest of the viewer through his photographs. He focuses heavily on a contrast in the shadows from the light on the paper, giving a very two-toned effect.

The series is based on paper sculptures meticulously crafted by Reed, explorations in architectural forms and spatial relationships.
In his series, “Paper Work”, Jerry Reed’s B&W photographs of close-up paper arrangements become abstract designs through careful directional lighting.  His constructions are sensually textured, elegant studies of form and tonality.

Paper experiment photoshoot

This is my contact sheet for all of my paper experiment photos. I tried to use different shapes and sizes of scrunched up paper to create different textures. I used the studio to take these pictures using the ring lights at different angles. The only thing i kind of struggled with taking these photos is the aperture and what ISO to use for my photos.

My Favourite Photos

Edited (before and after)

The photo on the left is a photo that I had taken in the studio using scrunched up paper and a stretched out scrunched paper to create a design and texture. I then moved the photo to Lightroom so I could edit it. I cropped the photo into a triangular shape and added a white background for contrast. I also changed the colour scheme and zoomed in on one of the scrunched up pieces of paper to create the effect of a rose. This is one of my best pieces.

Adobe Lightroom

Purpose Of Lightroom

Adobe Lightroom is a photo editing and storage application available through the Adobe Creative Cloud. This program allows users to quickly and easily edit their photographs with tools to alter contrast, balance colour, and change brightness on mobile devices immediately after taking the picture.

Catalogue

When I had first opened Lightroom, I had to create a personal catalogue that I named after my name and it was saved in the video data drive.

This is where everything for my images in Lightroom are stored.

Importing Images

After creating my catalogue, I had to import some of my own images into Lightroom. I did this by pressing the ‘Import’ button in the left-hand corner.

Collections

I then had to create a collection which would store all of my shutter speed experiment photos. This helps as it will be much easier to find all of my edited shutter speed photos and I can store all of my photos into separate collections so they are all sorted out and easier to find.

Selection

After creating a collection with all my photos in it, I had the option to rate all of my photos in different ways. I was able to flag my selected images, by either using the X key (bad) or the P key (good), these could be filtered out by pressed the flagged button to see which ones you chose for good. Another option was rating all the photos out of 5 stars.

(Images with white flags are the ones I chose for good with ratings underneath)

Develop Mode

Develop mode is used when needing to do very specific editing on only one image, this is different to library mode as it would only allow you to make small adjustments to more than one image.

At the bottom of the screen there is an option to see your photo before and after you make changes to it. This could help me identify what still needs to be changed and what I should keep the same to make the photo better.

As you can see in my before and after photos, I had changed my photo to a black and white scheme. Develop mode includes many pre-sets which are used to make fast edits of your photos or you can just edit the photos manually with the tabs on the right-hand side.

Contact Sheets

This is my contact sheet which has all of my photos from my shutter speed experiment.

William Klein

William Klein was an American-born French photographer and filmmaker noted for his ironic approach to both media and his extensive use of unusual photographic techniques in the context of photojournalism and fashion photography. He was well-known for his unique contact sheets where he drew over and colour coded images to identify and group them, showing his thought process behind his pictures and clearly identifying what he considered his strongest work.

Texture

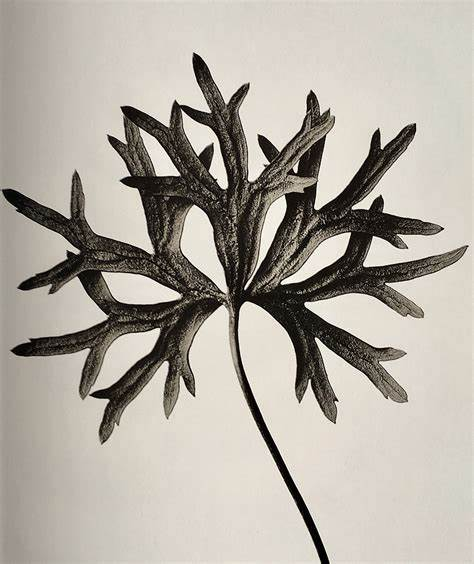
We use texture in an image to add visual interest and different patterns to the image, it adds levels to the image and helps represent shadows and light in different ways, this ties in with many different types of photography which I will represent in this post.

Jerry Reed is an English photographer who claims it is his goal to keep the viewers attention and interest through his images. The image you can see above is part of his paperwork series one. You can see he achieves his goal of enticing the viewer through texture created by layers and shadows in his image.

some more of his images

As you can see in the image above I have taken a wide range of photos with different ISO aperture and shutter speed and different lighting conditions along with this to get the best results.

Here are some images that I selected –

ISO 100, 27 mm, f/ 7.1, 1/15 sec
ISO 100, 27mm, f/ 7.1, 1/4 sec

ISO 100, 27mm, f/ 7.1, 1/4 sec
ISO 200, 27mm, f/ 4.0, 1/60 sec

As you can see I have used varied light and camera conditions to create images with texture, I took inspiration from Jerry Reeds images using the varied and unique texture that is created by something simple such as a piece of paper. I will now edit the images and represent them next.

as you can see above I used P and X to flag my images to filter out the bad ones from the ok and good ones, next I rated these images 4 or 5 stars as 4 being ok ones and 5 being good ones, finally I gave them the colour yellow or green, green being the best and yellow being good. I will now edit these images that I selected and present them bellow.

ISO 100, 27 mm, f/ 7.1, 1/15 sec
ISO 100, 27mm, f/ 7.1, 1/4 sec
ISO 200, 27mm, f/ 4.0, 1/60 sec

Photoshoot: Paper Balls ISO

I decided to focus my photoshoot and take the black an white tone aspect to my photos as the light shows a strong contrast between the two colours. I also chose to take the pictures in natural and artificial light to see the difference it makes to the shot. Furthermore, I took pictures in front of a black and white background to see how the paper ball would contrast with a different background.

Original Photos:

ISO – 100
ISO – 250
ISO – 1600

Edited Photos:

I started by upping the highlights (+40) and maxing the shadows so the white would standout from the black as it was a big contrast. I then upped the whites (+25) and blacks (+42) to help the large contrast. I added some clarity and texture so the crevices could be visible.
I started with cropping the image. I then upped the exposure (+0.70), and fully upped the contrast to show the dark shadows of the paper ball. I also lowered the highlights (-81) so the dark colours would stand out. Lastly, I upped the texture (+16) and clarity (+42) so you would be able to see the image clearly.
I started by converting the image to black & white so the shadows and highlights would stand out. I then turned the exposure down (-2.37) so the white colour would allow the creases to be visible. I upped the contrast (+40) to help as well. Next I maxed the texture, upped the clarity (+14) and upped the dehaze (+86) so the creases and folds would look crisp.

Technical:

Visual:

Contextual:

Artist Research

Paul Jackson is a specialist in origami and the folded arts. He was one of the pioneers of folding/origami as Fine Art lots oh his work has been put in galleries and museums.  He has also curated several ground-breaking exhibitions of origami, undertaken many commercial commissions for print, screen-based media, festivals and more, and has been a consultant for companies such as Siemens, Nike, Tetra-Pak and Tata.

I took the inspiration from the origami and decided to make a white paper crane. I did this because I would be able to play around with the colour of it in Adobe Lightroom. I also chose to create a landscape with torn paper. This is because the torn area gives the photo good texture and I worked with different lighting to see how that would effect the shadows.

I then went through the pictures and decided which ones I liked best

Original Photos:

ISO – 100
ISO – 800
ISO – 100
ISO – 100

Edited Photos:

I started by upping the exposure (+3.07) to make the image brighter. After I maxed out (+!00) the contrast to give it more depth. I slightly added some temperature (+14) to give it it’s ‘sandy’ colour. I decreased the highlights (-63) to lessen the white light on the top. I then added texture (+68) to give it the ‘sandy’ look, this is because my idea was to make it seem as if you were on a beach. Lastly, I upped the clarity to give it more shadows and texture.
I lowered the exposure (-1.32) to give it a darker look and make the shadows darker. I upped the texture (+93) so the ripped edges would be more defined and roughen up the shadows to make them look rigid. Then, I upped the clarity (+37) to give the ripped edges some shadows. Lastly, I decided to convert the image to black and white.
I ended up just maxing the texture (+100) to make the image less blurred as the image had a lot going on already I wouldn’t be able to do much more without it looking strange.
I started by decreasing the exposure (-0.61) to make it look darker and have the paper crane stand out from the background. I then maxed out the texture (+100) to make the edges of the crane crisp and tidy and emphasise the creases. Lastly, I decided to up the clarity (+21) just to give the background more depth.

Technical:

Visual:

Contextual:

paper experiment

we did a experiment with the ISO (sensitivity to light) using paper as our subject, we used a range of ISO’s to be able to clearly see a difference between the photos.

This photo has a low ISO, we also used a dark see through piece of plastic to give us a brownish tint to the photo which we did for these next two photos as well as we found it to be aesthetically pleasing.

This photo has a medium ISO, you can clearly see the subject

This photo has a high ISO, this has caused the subject to become overexposed

This photo we decided to put a red see through plastic sheet half over the spotlight, leaving half of the light how it was and the other half red, this gave us a really unique image

I really liked this photo and had the idea to try and make it look like the French flag so I went to experiment in light room and gave it a go, here is my outcome:

Textures/paper photography

I started by just scrunching up paper and trying to make interesting shadows and shapes:

this was the first photoshoot, I scrunched paper in different shapes and moving the lights around to the light and shadows were different.

these were my two favourite favourite pictures there isn’t much difference other than one being more zoomed in than the other.

This was the picture I ended up choosing to edit and work with because there is a lot a texture coming from the paper and think she shadow made an interesting shape, there is also a lot of dark and bright spots which I like to have in my images.

I made the image black and white, I kept the exposure and the contrast the same, however I lowered the highlights, shadows and whites and added a bit of more black.

Jerry Reed

Jerry Reed is an English photographer who claims his objects is to sustain the interest of he viewer through his photographs. He focuses heavily on a contrast in the shadows from the light on the paper, giving a very two-toned. Jerry transition from commercial studio photographer to conceptual fine artist required changing what his images were of what they were about. During this process the was guided by his extensive knowledge of art history- painting, sculpture and photography.

work inspired by Jerry Reed

for this photoshoot I used more structured paper and photographed it in different angles and ISO and lighting.

these were my favourite pictures, the ones that have better quality and are more interesting.

I then labelled it green or yellow to get closer to the best one.

In my opinion the is my best photograph I think the shadows make the image really interesting and give the image have more texture

Editing

This is how edited my picture, I really enjoy seeing black and white photos when the image has a lot of shadows like this one, I this it makes the image have more personality and makes it more interesting it also creates a mood its quite dark and abstract which I like.

photoshoot 2 in the style of jerry reed

In this photoshoot I liked more the pictures that were taken using a red light I like how the unfocused is in the right places.

these were my favourite pictures that I took, the more interesting ones and I like how they don’t look like they were made from paper.

these were the 4 pictures which I liked more I this the shapes are interesting the light is well positioned next step is to choose my 2 favourite ones so then I can edit them.

These were my favourite ones I think they kind of look like rose petals I really like that.

Editing

I edited this image by making it darker, my idea mas to make the image not look like it was made from paper and make it look more abstract , creative and interesting. Like I said before I like how this image looks like rose petals and I think editing it made made idea look better.

In this image I edited it almost like the one above, I wanted to make some parts at the front darker and then the part where the light hits the most lighter so it gives that effect of depth.

Experimenting with photoshop

I used photoshop to make this and I used an tutorial on the blog to do this. The name of this effect is Kaleidoscope​ Effect Which is basically using the same image ad stuck it together to make an interesting effect.

An artist that works with this effect is Amanda Buck she takes pictures of nature and

ISO

We will most likely see results like this from an example I have found on the internet of ISO –

what you can see above is something known as visual noise or white noise, this can be created by a high ISO in an image making it less visually appealing.

I will take picture with ISO in both light and dark conditions to represented which can be seen below.

100 – as you can see with the first one the lower ISO works better in lighted conditions and created a visible clear image.
800 – in the higher ISO we can see that the light is brighter and the image quality as degraded, this image is still visible but less clear.
2200 – this image is very low quality and we can clearly see that in a lighted environment the higher ISO has created a very unclear and less visible image.
6400 – we can see that this image is not visible and not clear representing that we should not use a high ISO in a lighted condition.
6400 – as you can see in the image above it was taken in a dark environment with a high ISO, I decided to take a picture of something with lights on it to represent that it was the same image, you can see that this image is high quality and easy to see.
100 – this image is exactly the same as the one above but it has been taken with a much lower ISO of 100, from this we can see how ISO takes affect in a dark environment.

as you can see above I used P and X to flag my images to filter out the bad ones from the ok and good ones, next I rated these images 4 or 5 stars as 4 being ok ones and 5 being good ones, finally I gave them the colour yellow or green, green being the best and yellow being good. I will now edit these images that I selected and present them bellow.

conclusion

from the images I have taken I can prove what I said in the beginning and represent how ISO effects an image. on top of this I found out that also upping the shutter speed on the camera will also increase the brightness of the image while still keeping high quality in a dark environment. This perfectly represents how you must use all 3 ( ISO, shutter speed and aperture ) to produce a high slandered image.

in conclusion this task has taught me a lot of key skills and has shown me how ISO effects the image.

Shutter Speed

Shutter speed is the speed in which the shutter of the camera closes.

Fast Shutter speed

  • Shorter exposure
  • Lets in less light
  • No motion blur
Fast shutter speed image

Slow Shutter speed

  • Longer exposure
  • Lets in more light
  • Motion blur
Slow shutter speed image- motion blur
The difference between fast and slow shutter speed

Eadward Muybridge- fast shutter speed

Eadweard Muybridge was a groundbreaking photographer who made a name for himself in the late 1800s with his studies of motion. His biggest achievement was using high-speed photography to capture how animals and people move, which was pretty revolutionary at the time.

One of his most iconic works is The Horse in Motion, where he documented a horse running through a sequence of images. This not only highlighted how the horse moved but also prompted fascinating questions about the nature of movement itself.

Muybridge’s techniques opened up new doors for photographers. He proved that photography wasn’t just about snapping still shots, it could also capture movement and explore how things actually move. His work also impacted sport science, biomechanics and animation.

In summary, Muybridge’s clever use of shutter speed and his technique of capturing movement in a series really shook things up in photography.

Harold Edgerton- fast shutter speed

Harold Edgerton was an American engineer and photographer famous for his groundbreaking work in high-speed photography. He created techniques and gear that let him capture super fast events, allowing him to freeze motion like never before.

Edgerton created the electronic flash, or strobe light, which let him produce a quick burst of light. This was key because it allowed him to freeze motion in an instant, making it possible to snap photos of fast-moving things like bullets, dancers, and falling objects.

He used super short exposure times to reduce motion blur. By syncing the strobe light with the camera’s shutter, he could get exposure times in the microsecond range. This allowed him to capture details that you wouldn’t normally see.

By mastering shutter speed and lighting tricks, Edgerton really took photography to the next level, showing off the beauty and intricacies of motion like never before. His work opened up new paths for both science and art.

Hiroshi Sugimoto- slow shutter speed

Hiroshi Sugimoto is a famous Japanese photographer and artist known for his awesome and thought-provoking work. He often explores cool themes like time, memory, and how we see things in his photos. One of his popular series is “Theatres,” where he takes long-exposure shots of old movie theatres, really capturing the vibe of light and shadow.

Hiroshi Sugimoto plays around with slow shutter speeds in his long-exposure photography. This technique lets him capture moving light and shadow over a longer time, giving his images a cool sense of time and movement all in one shot.

In his “Theatres” series, for example, he keeps the shutter open long enough to let the projector’s light hit the screen while the rest of the theatre stays dark. This creates dreamy images that mix stillness with a sense of motion, making you think about time and memory.

In his “Seascapes,” the slow shutter speeds smooth out the water, creating peaceful, almost abstract landscapes that feel really calm and timeless. Overall, his approach with slow shutter speeds adds a lot of depth and a unique vibe to his work.

Francesca Woodman

Francesca Woodman was an American photographer known for her haunting, dreamy black-and-white shots. She often used herself as the subject and explored themes like identity, femininity, and the passage of time. Her work really captures feelings of vulnerability and has a unique vibe.

Francesca Woodman often played with slow shutter speeds in her photos to create a sense of movement and a dreamy vibe. This technique let her blur parts of her body or the background, giving her images a magical quality. By capturing herself in motion, she highlighted fleeting moments and the passage of time, which really adds to the emotional punch of her work.

In a lot of her shots, the long exposure creates ghostly effects, since she’d move around or let the light linger in the frame. This not only brings attention to her presence but also adds a layer of vulnerability and depth. The mix of sharp and blurry elements in her photos makes you think about identity and existence, giving her work that haunting, personal touch.

My experiments with shutter speed:

Studio

Outside

Fixing the shadows

A camera obscura consists of a dark box, tent or room with a small hole in one side or the top. with light from an external scene through the hole and strikes a surface inside, the scene is reproduced but inverted and reversed with colour and perspective preserved. Although camera obscura is old and we have developed more high-tech cameras the concept of camera obscura is still used by photographers world wide

These images are an example of how camera obscura works

Nicephore Niepce

Joseph Nicephore Niepce was a French inventor and one of the earliest pioneers of photography. Niepce used his heliography process which was an early photographic process producing a photoengraving image on a metal plate coated with an asphalt preparation to capture the first photograph, but his pioneering work was soon overshowed by the invention of daguerreotype.

Daguerreotype is a direct-positive process, creating a highly detailed image on a sheet of copper plated with a thin coat of silver without the use of a negative. the process required great care. The process required great care. The silver plated copper plate had first to be cleaned and polished until the surface looked like a mirror

Louis Daguerre

Louis was a painter and a stage director. He was a student of Degotis, who was a creator of stage setting at the Paris opera, where he started at the age of 16.

while Daguerre works exhibited in the art shows that he never really had huge success, from 1817-1822 his work was shown at the opera brought him unanimous praise from critics and from the public, he displayed original creativity with his light effects, creating moon rises or moving suns that remained in peoples memories.

Daguerre was developing hislighting talents, acquired during his years as a set designer at the Opera and the Ambigu, to change the mood of a same scene. This created such an illusion of reality that the Diorama became a huge success. Later on, the two partners adapted to these huge sets the principle of showing the optical views either with front or back lighting. In this case the scene watched with a dim lighting, whence a night effect that could be accentuated by painting to the back of the view a decor with the purpose of masking some parts of the image creating new shadows corresponding to night. Going from one to the other lighting, the same scene would progressively change from day to night.

Daguerreotype

The daguerreotype is a direct-positive process, creating a highly detailed image on a sheet of copper plated with a thin coat of silver without the use of a negative. The process required great care. The silver-plated copper plate had to be cleaned and polished until the surface looked like a mirror

Henry Fox Talbot

Whilst on honeymoon in Italy with his wife Constance, Talbot tried to draw a picture of Lake Como using a camera Lucida. A camera Lucida is a drawing aid which uses a prism to allow the artist to simultaneously see the landscape before him or her and the drawing paper. Talbot was frustrated with the outcome of his drawing, especially in comparison to Constance’s accomplished artwork, and wished that the image made by the camera Lucida could be fixed in a more mechanical and accurate way.

Richard Maddox

Richard Maddox was an English photographer and physician who invented lightweight gelatin negative plates for photography in 1871. Dry plate is a glass plate coated with a gelatin emulsion of silver bromide. It can be stored until exposure, and after exposure it can be brought back to a darkroom for development at leisure.

The advantages of the dry plate were obvious: photographers could use commercial dry plates off the shelf instead of having to prepare their own emulsions in a mobile darkroom. Negatives did not have to be developed immediately. Also, for the first time, cameras could be made small enough to be hand-held, or even concealed: further research created fast exposure times, which led to ‘snapshot’ photography (and the ‘Kodak’ camera with roll film), ultimately paving the way for cinematography.

George Eastman

When Eastman was 23, a colleague suggested that he take a camera on an upcoming vacation. Eastman bought a photographic outfit, and although he never made the journey, he became fully engrossed in photography. However, the weight, awkwardness, and cost of the equipment required to take and develop photographs soon led Eastman to seek improvements. He spent three years in his mother’s kitchen experimenting with gelatine emulsions, and by 1880, he had invented and patented a dry-plate coating machine.

In 1881, with the financial backing of Rochester businessman Henry Strong, Eastman formed the Eastman Dry Plate Company (reincorporated as the Eastman Dry Plate and Film Company in 1884 and as Eastman Kodak Company in 1892). With a series of innovations, the company created easy-to-use cameras that made photography widely accessible, established the practice of professional photofinishing, and developed a flexible film that was a critical contribution to the launch of the motion picture industry.

Kodak Brownie

The Kodak “Brownie” camera made its debut at the turn of the twentieth century and sold for one dollar. One hundred thousand of them were purchased during the first year alone. The Brownie helped to put photography into the hands of amateurs and allowed the middle class to take their own “snapshots” as well.

Eastman Kodak introduced the new Brownie dollar box camera in 1900; the release was supported by a major advertising campaign. The name “Brownie” was chosen primarily because of the popularity of a children’s book of cartoons of the same name, and partly because the camera was initially manufactured for Eastman by Frank Brownell of Rochester, New York.

Digital Photography

Digital photography is the process of capturing images electronically rather than by analog methods such as film or instant Polaroid’s. A digital image is captured to a solid state sensor containing an array of photodetectors or pixels. The digital images are then stored as a type of computer file* that can be processed, edited and corrected using software such as Adobe Photoshop.

Digital imaging, whether stills or video, encompasses capturing, storing, and manipulating images through electronic devices like cameras and smartphones. Unlike traditional film photography or video, digital for both mediums relies on sensors to convert light into digital data. 

Shutter Speed and Movement

What is Shutter Speed?

Shutter Speed is the length of time your cameras shutter stays open, which also determines how much light the sensor is exposed to. The longer the shutter is open then the longer the light will have to hit the sensor and brighten the image, The shorter the shutter is open then the shorter the time the light will hit the sensor which could result in darker images. Shutter speed is part of the exposure triangle which is the three factors that determine the exposure of a image.

By adjusting and controlling your shutter speed it can determine how sharp or blurry your moving image is. By taking images with a fast shutter speed you can capture a moving image and it will essentially be frozen in place so you end up getting a clean and sharp photo of your subject. By taking images with a slow shutter speed you end up getting images of your moving subject being blurry.

Examples

By using a fast shutter speed it makes your moving subject freeze in place in your image so you end up getting images like these below.

All photos used in the examples are not mine

We can see with this image that the bird that is flying as well as the water in the air were able to be suspended in place in the photo as it was using a high shutter speed while also maintaining the sharpness and clarity of the image as we are able to see image in great detail.
With this image we are able to see the process of the bubble being popped. Due to the fast shutter speed we are able to see the bubble in great detail and the process of it being popped mid air which would typically be a quick process that we wouldn’t be able to view like this in person.

With this image we are able to see the glass shatter which would usually happen at a very fast rate but thanks to the fast shutter speed we are able to see many shards of glass fly throughout the image, and thanks to the high shutter speed we are able to see this sharply which allows us to see most of the shards with high detail.

If you use a slow shutter speed it can end up making the subject of your photo look blurry and can create some amazing effects like these images below.

All photos used in the examples are not mine

As we can see in this image the cars that are driving along the roads are moving quick which makes them appear as these lines across the road, this use of slow shutter speed makes the image look unique and fabulous to look at.
In this image we can see another use of slow shutter speed where we can see the cars moving down, due to the slow shutter speed it gives the cars that motion blur effect which makes it appear blurry.
In this image we are able to see the train tracks and due to the speed of the train and the slow shutter speed we can see that the train appears as these colourful lines across the track which makes the picture look amazing.

Francesca Woodman

Francesca Woodman experimented with slow shutter speed and was able to create an amazing series of photos. Her photographs were taken at her parents farmhouse in the countryside of Florence Italy where they would spend their summers. The European culture and art had a huge influence on her work. The influence of surrealist art in the photographs of Man Ray and Claude Cahun can be seen in the themes and style used in her photographs. Her ideas and skills were developed at the Rhode island school of design. Her photographs was important and had an influence for American artists. Especially since in the 1970s the status of photography wasn’t really as big as paintings and sculptures. However in 1981, Francesca Woodman ended up taking her life at the age of 22

Her images below:

My Photos

Thanks to the low shutter speed (2 Seconds used) I was able to create light trails using flashlights and led lights which in return made some interesting and spectacular photos.