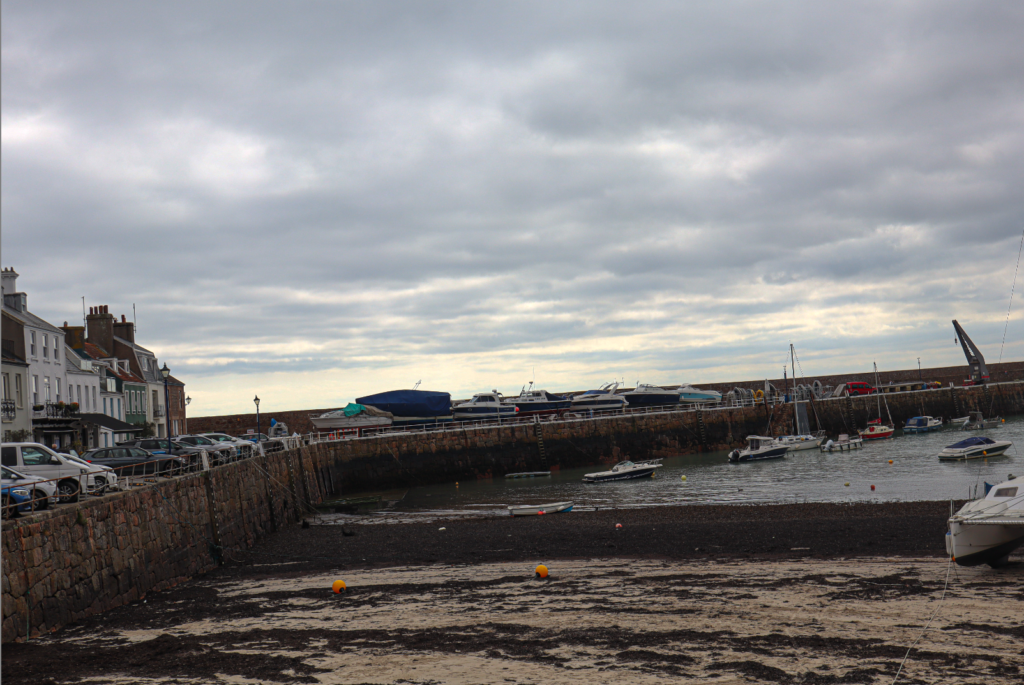
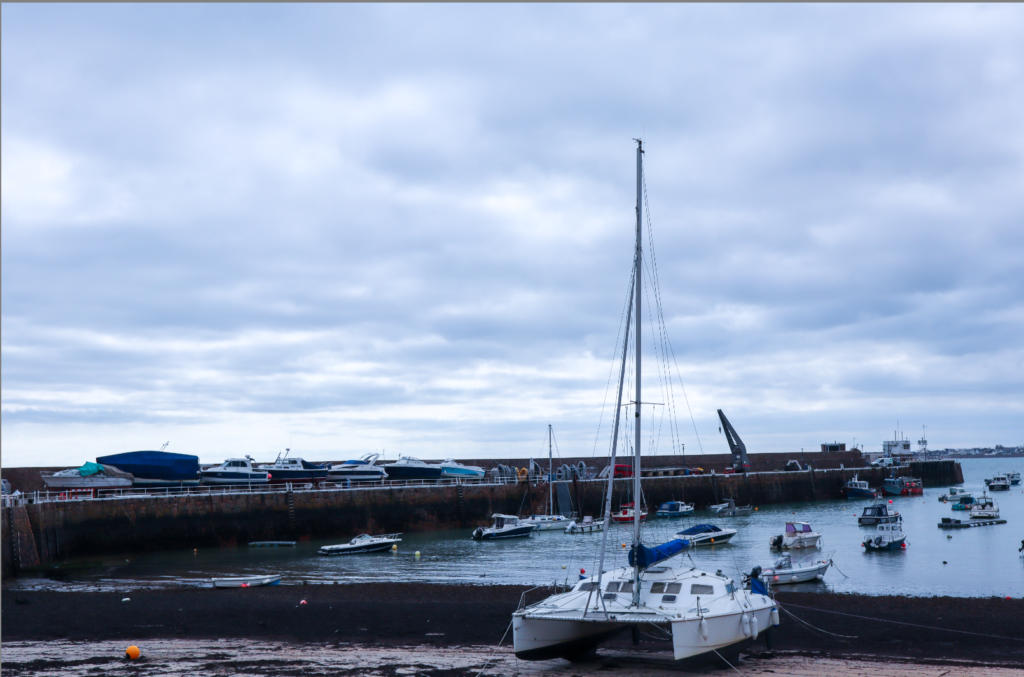
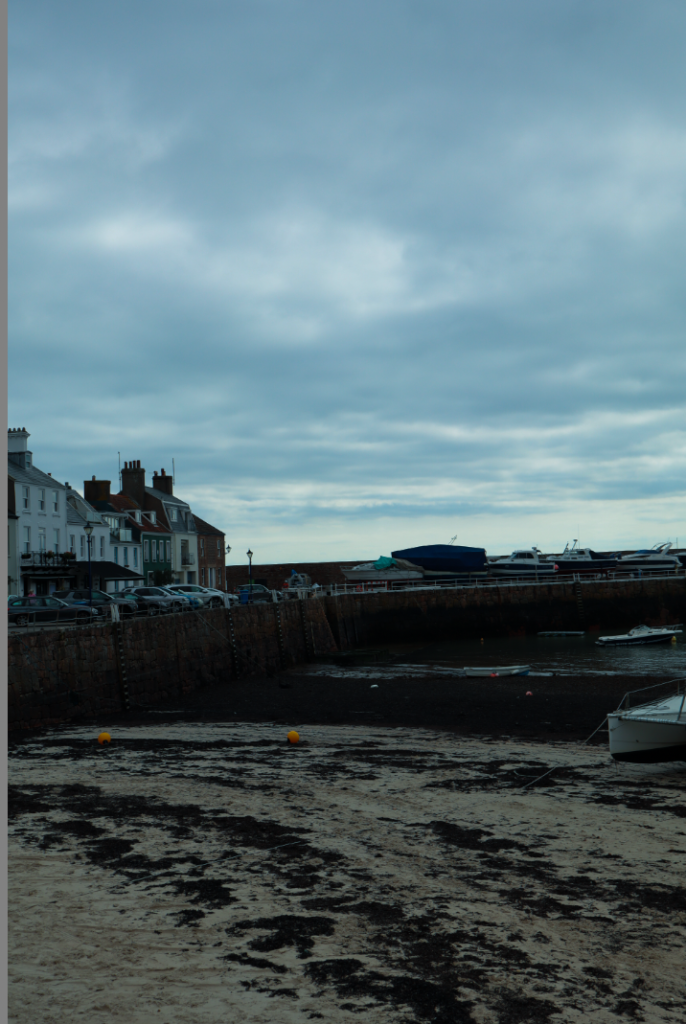
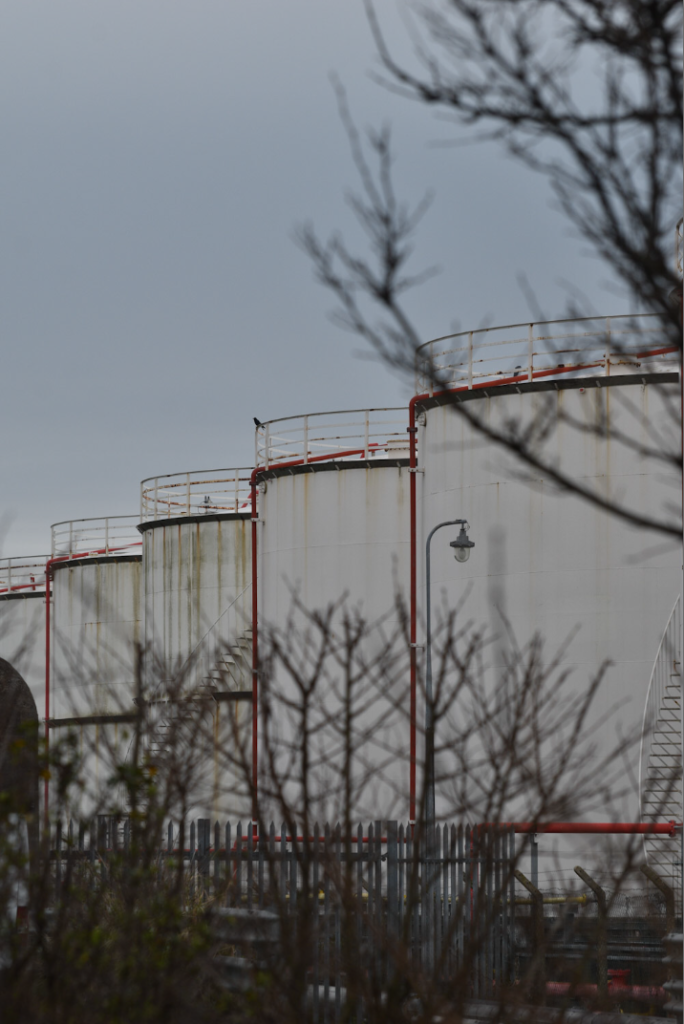
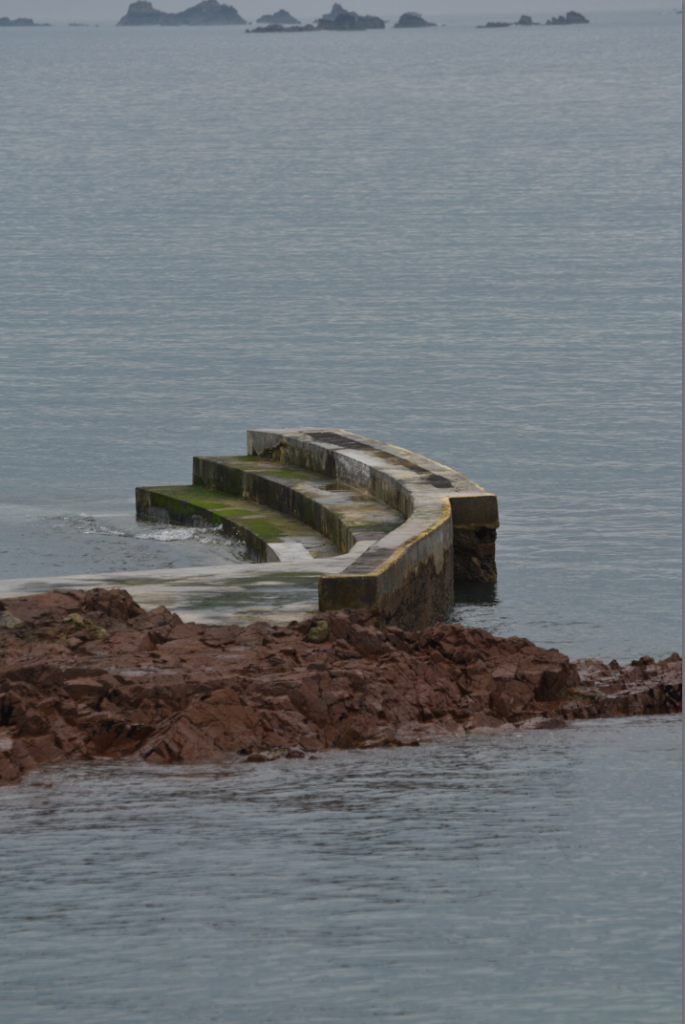
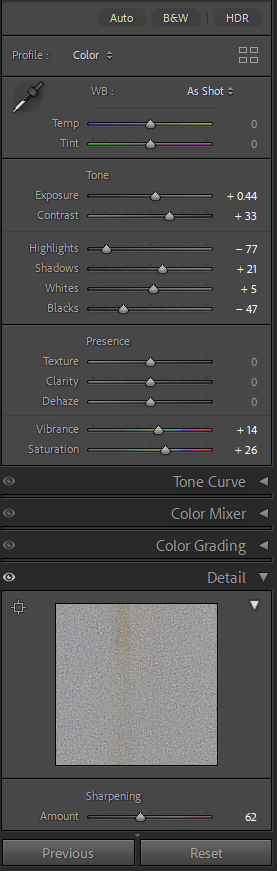
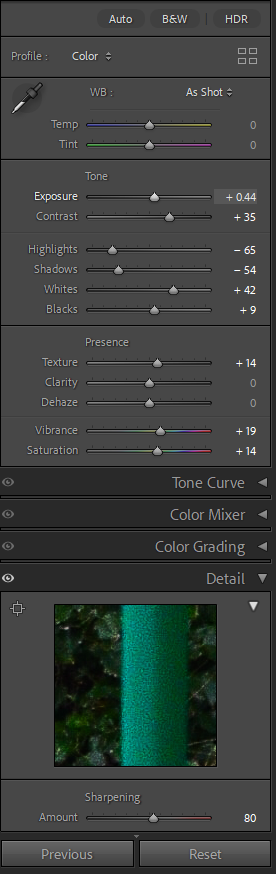
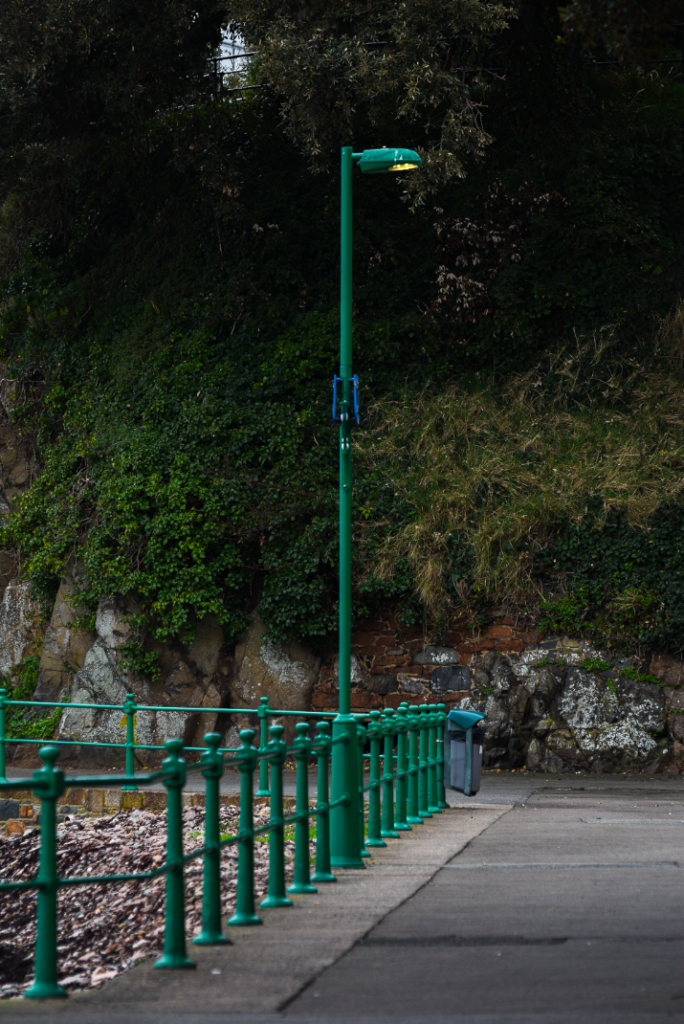
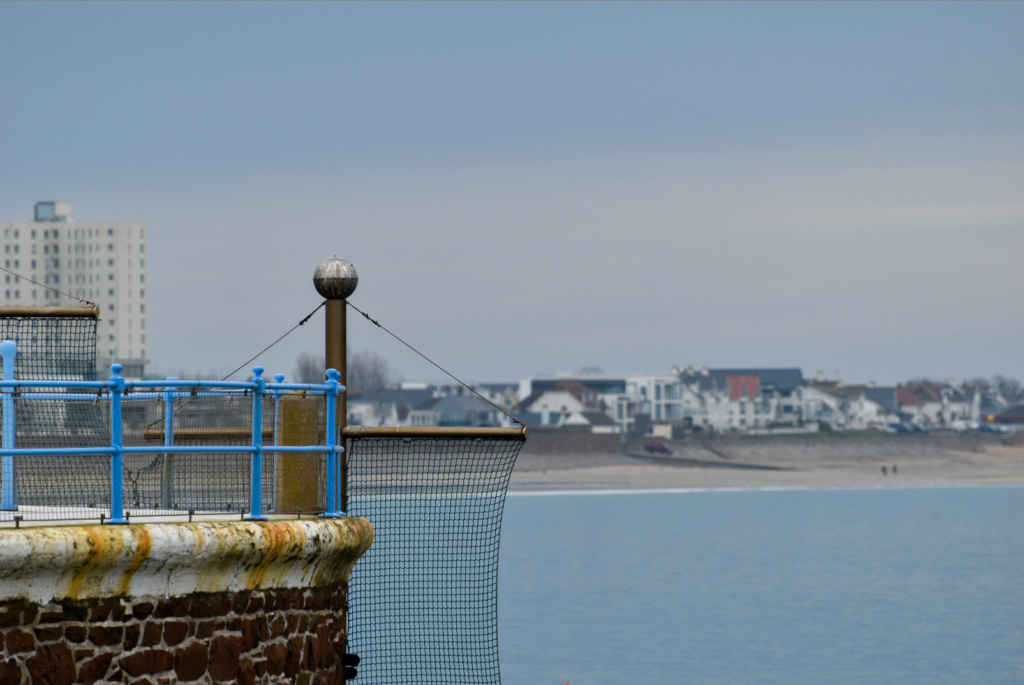
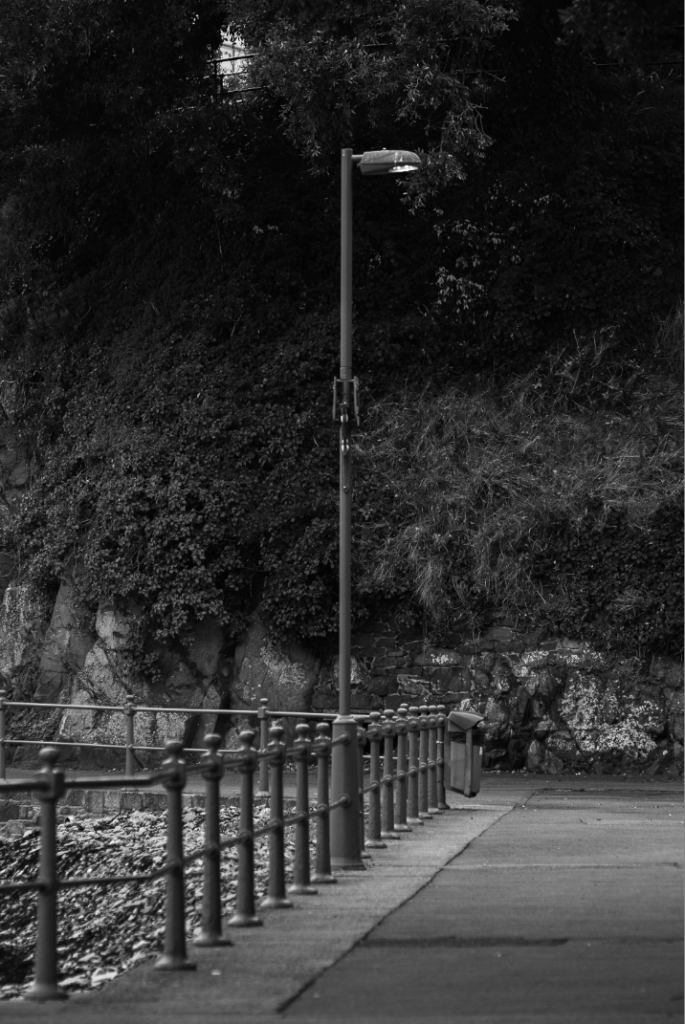
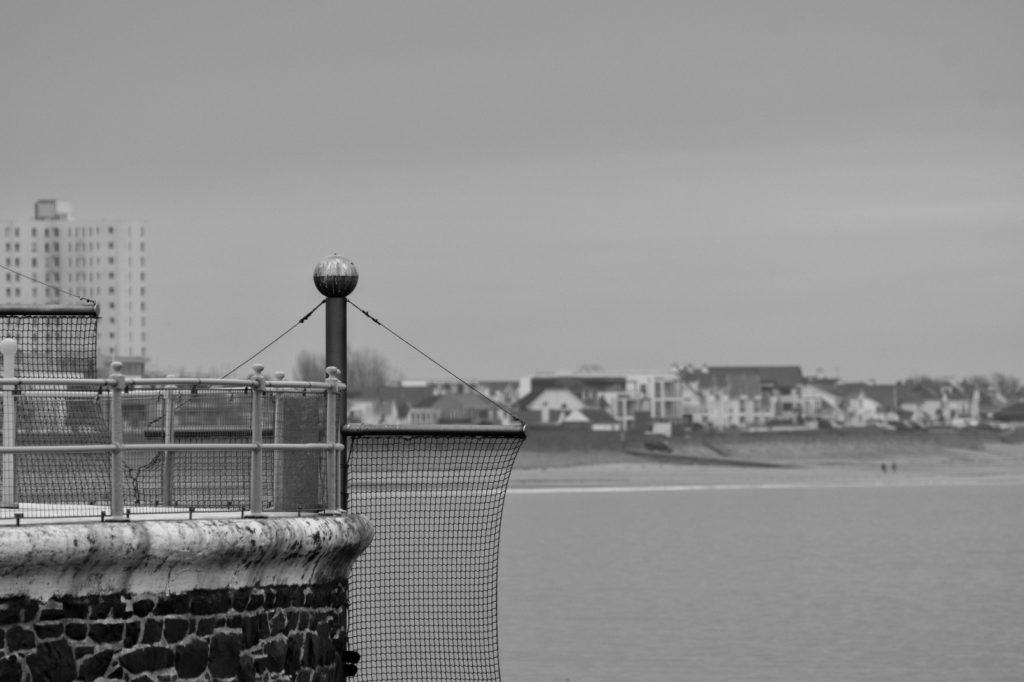
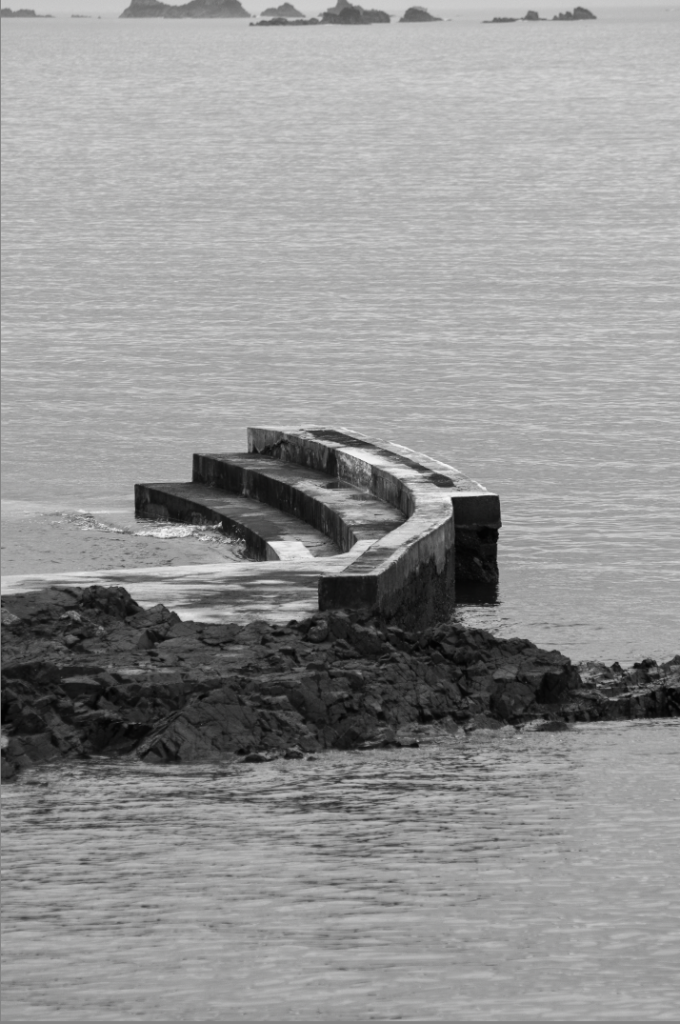
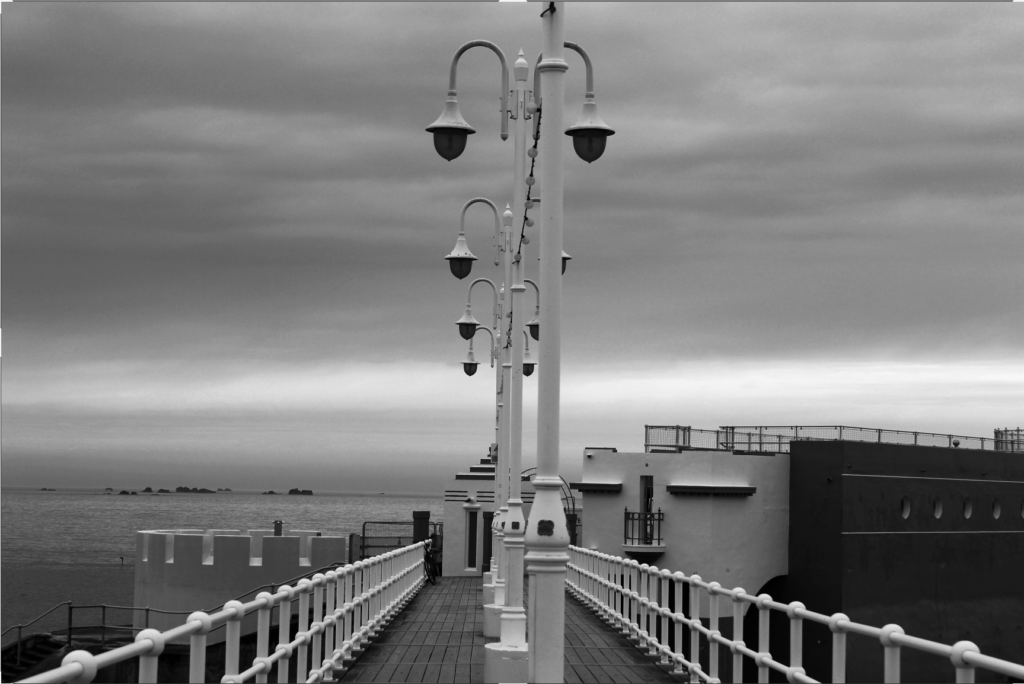
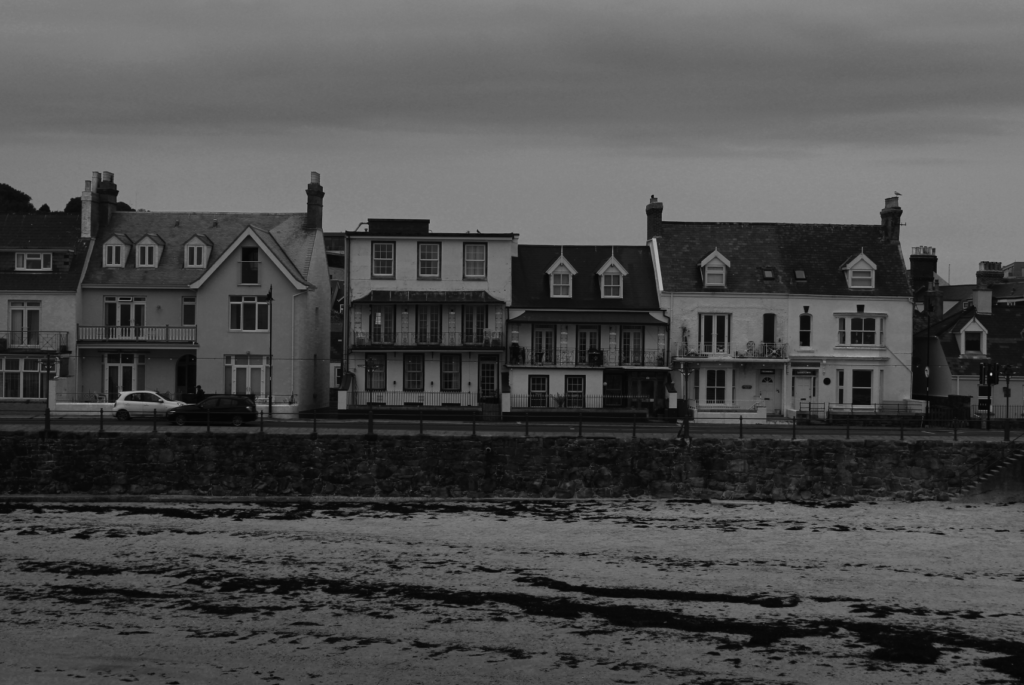
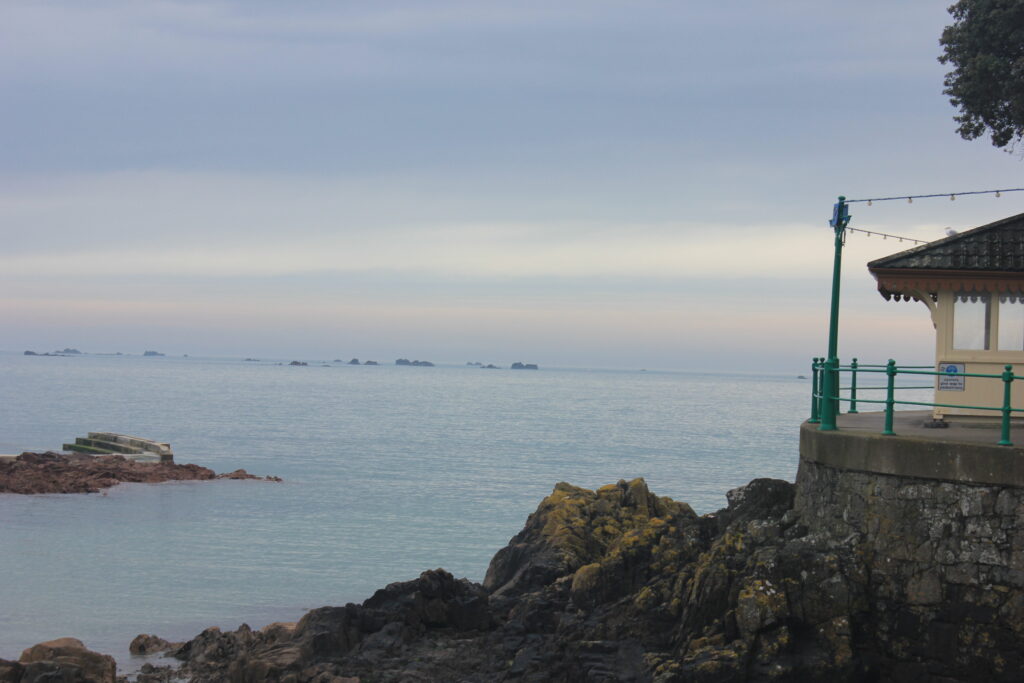
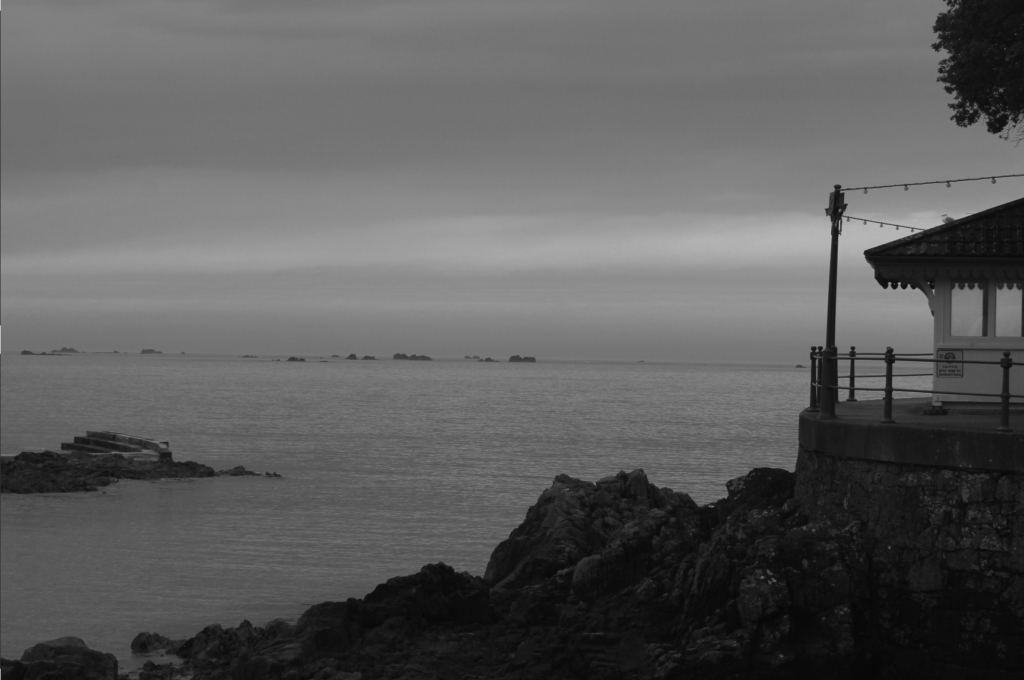
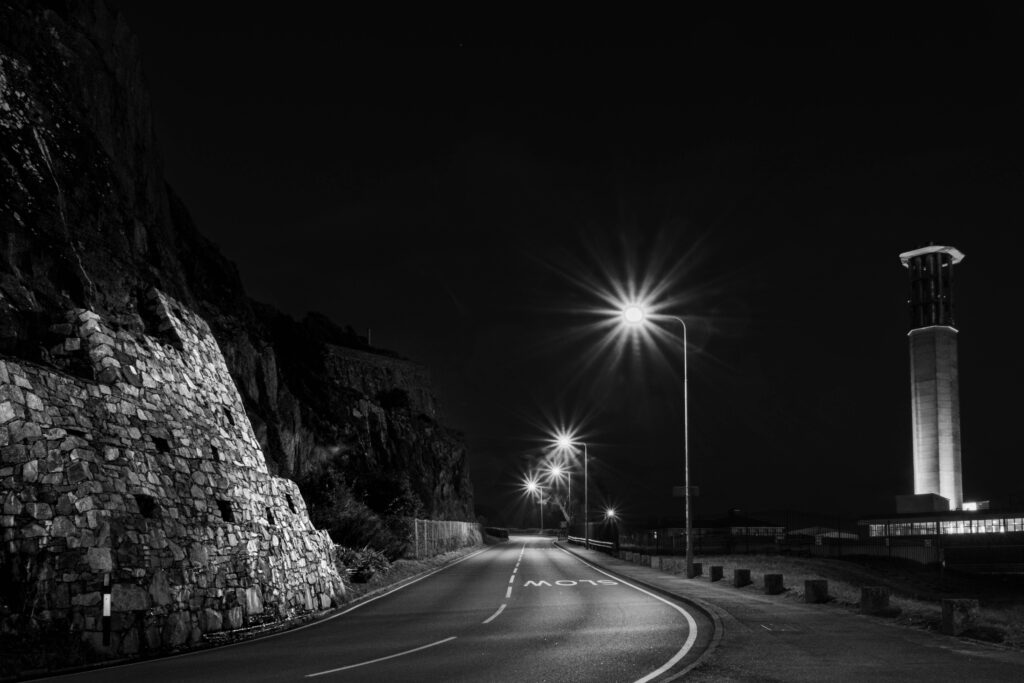
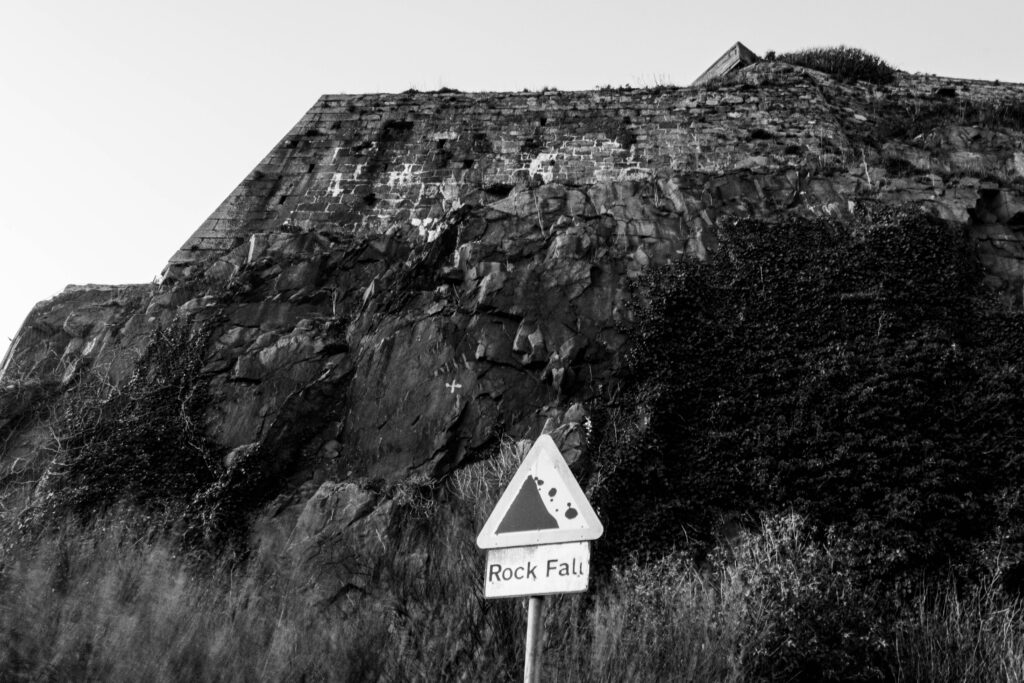
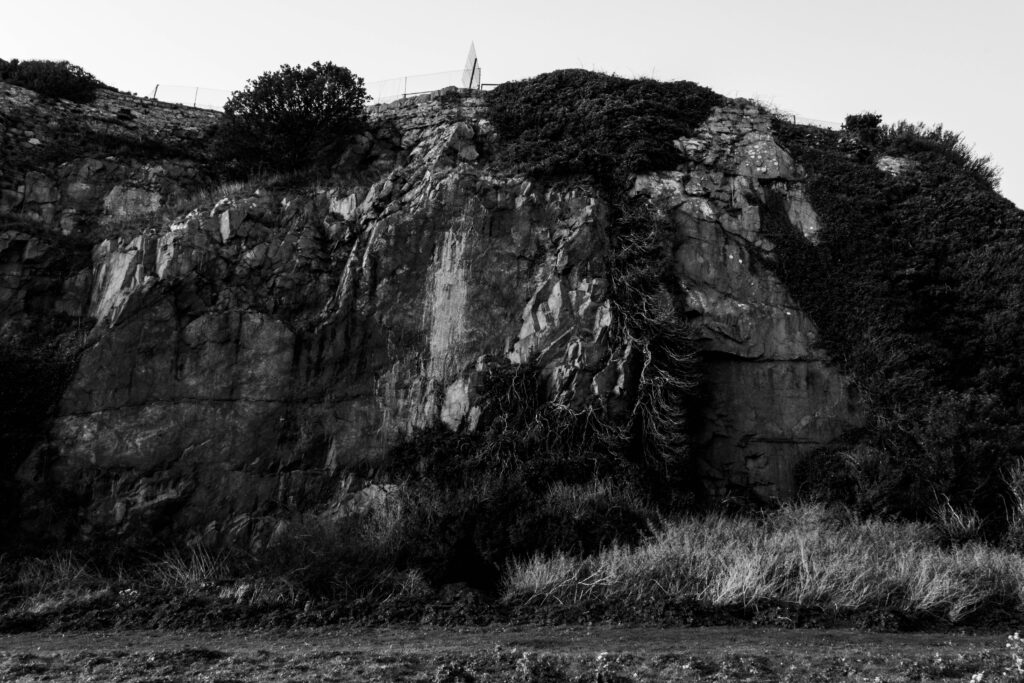
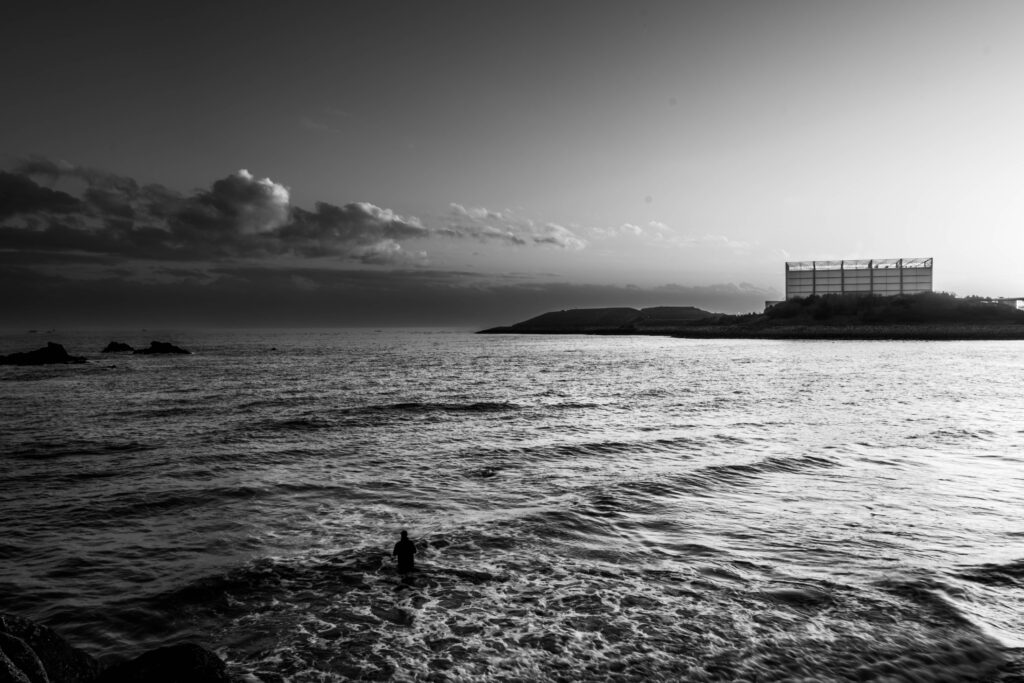
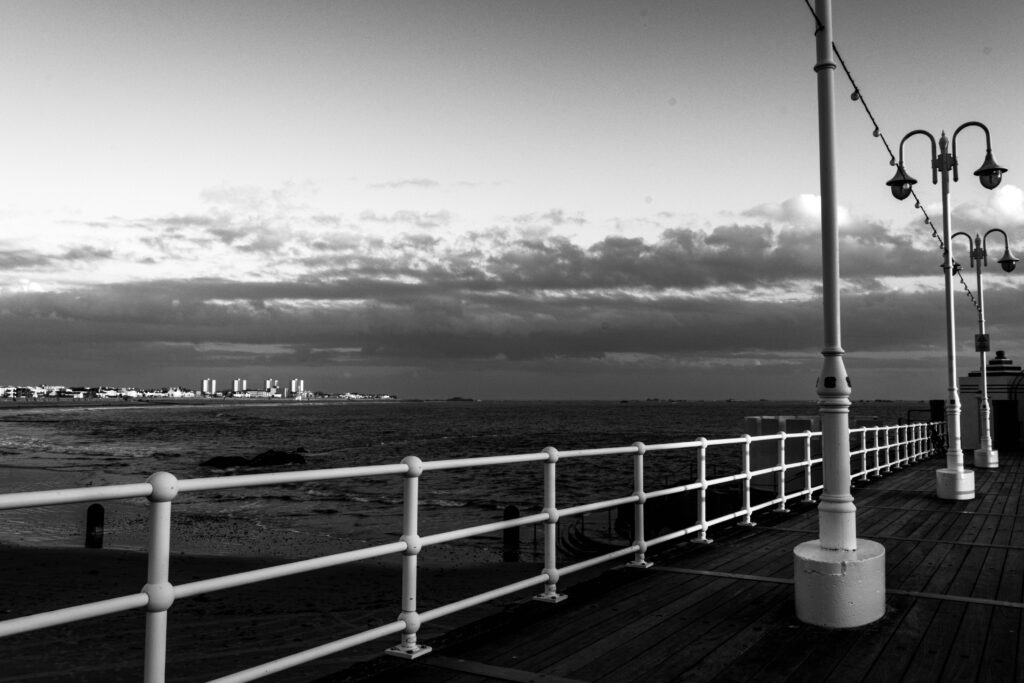
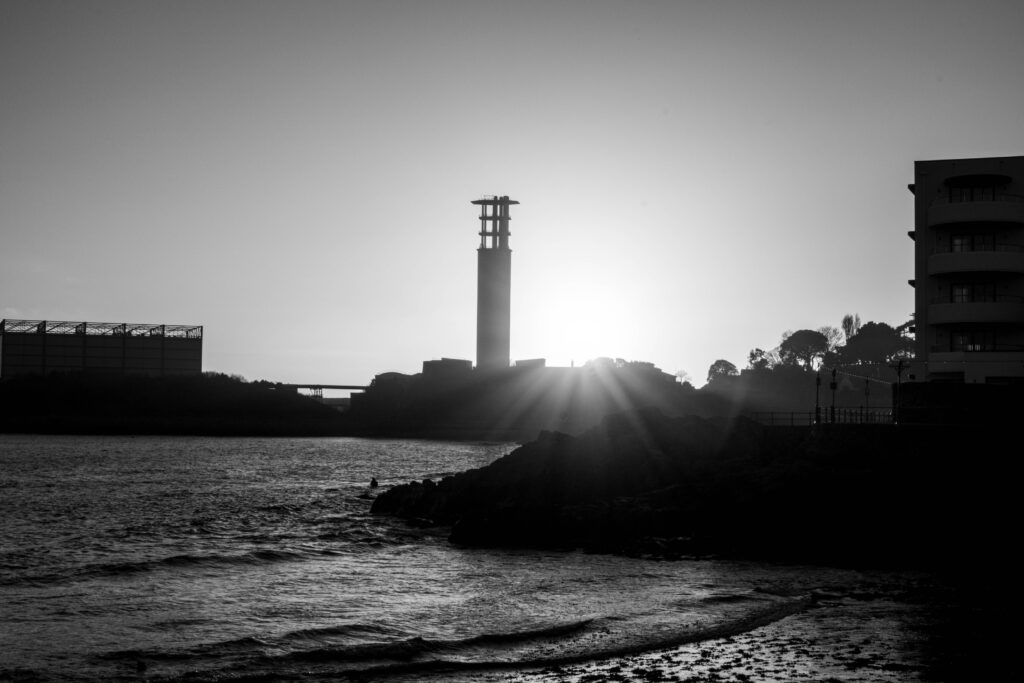
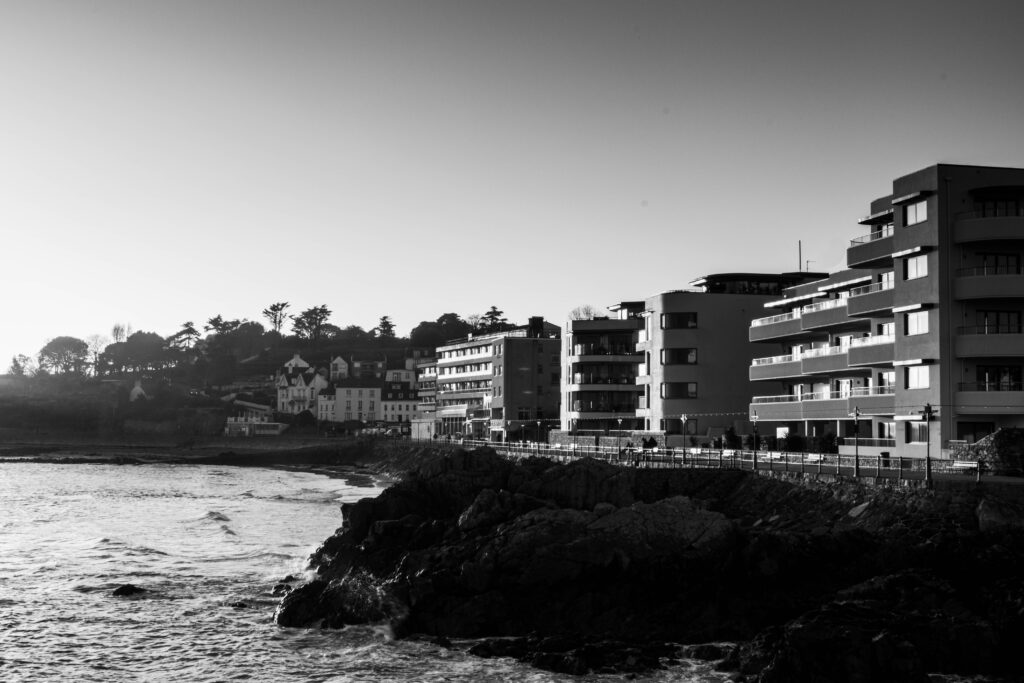
To take these images I went down to Gorey Pier and took some images of the scenery and the man made structures . This photoshoot was a way to show the comparison of nature in juxtaposition to man-made structures.
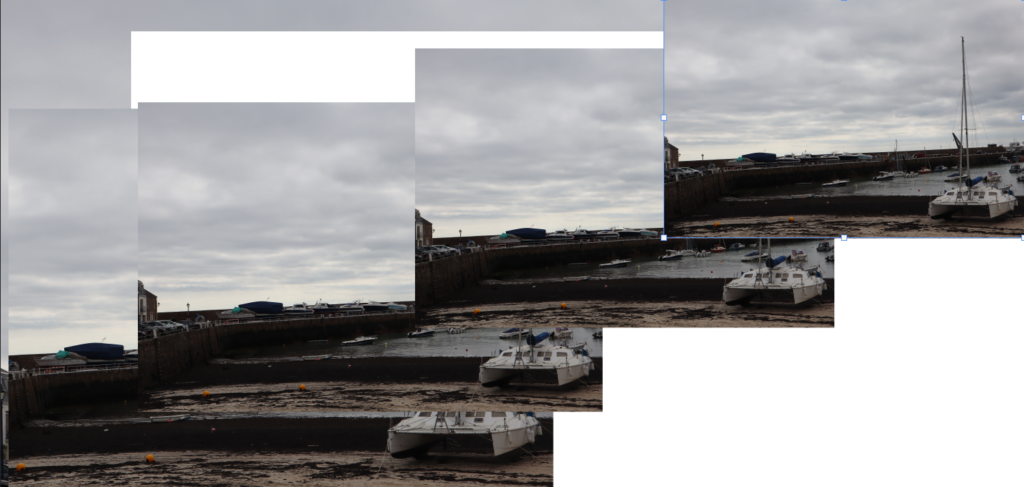
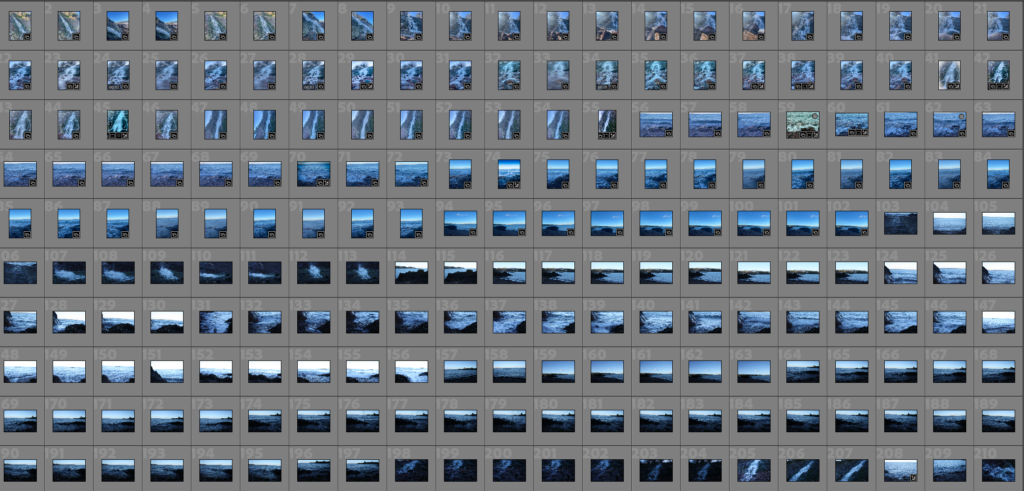
Contact Sheet
Edited Images
These are the images I used to make my joiner photo. These are the edited versions of the images I used.
Joiner
For this joiner. I used photoshop, since I could do it manually.
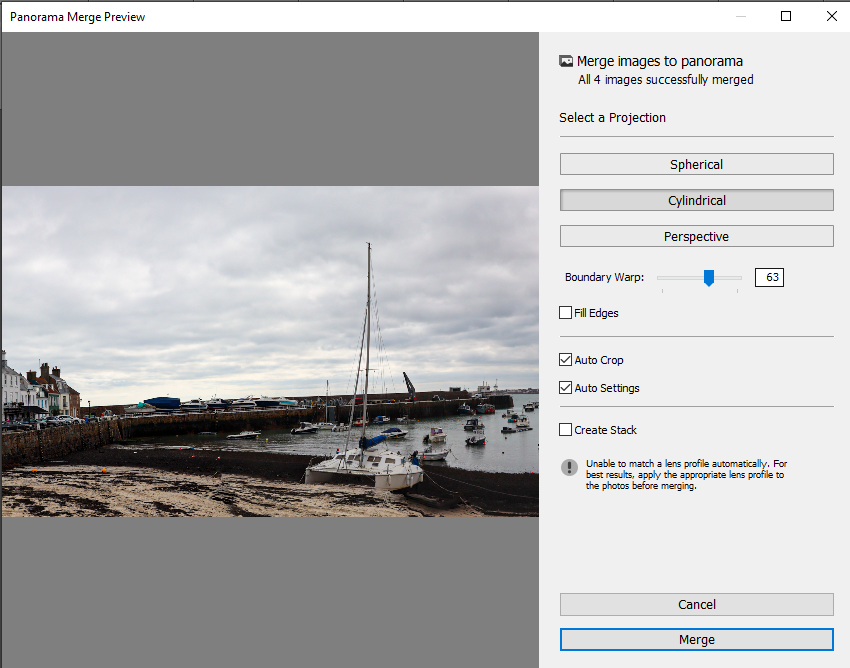
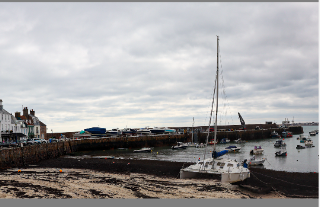
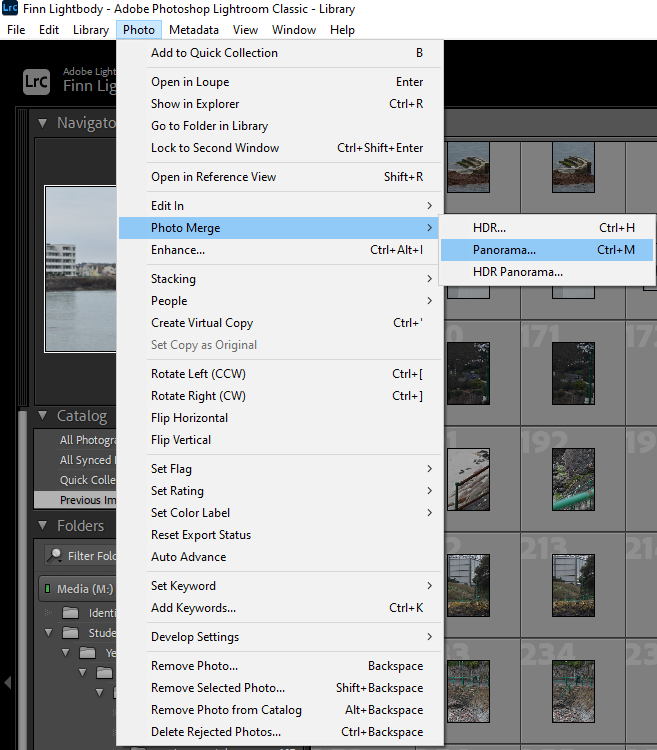
Panorama
This is how I edited to make a panorama.
This is my panorama , but I filled the edges and made it spherical.
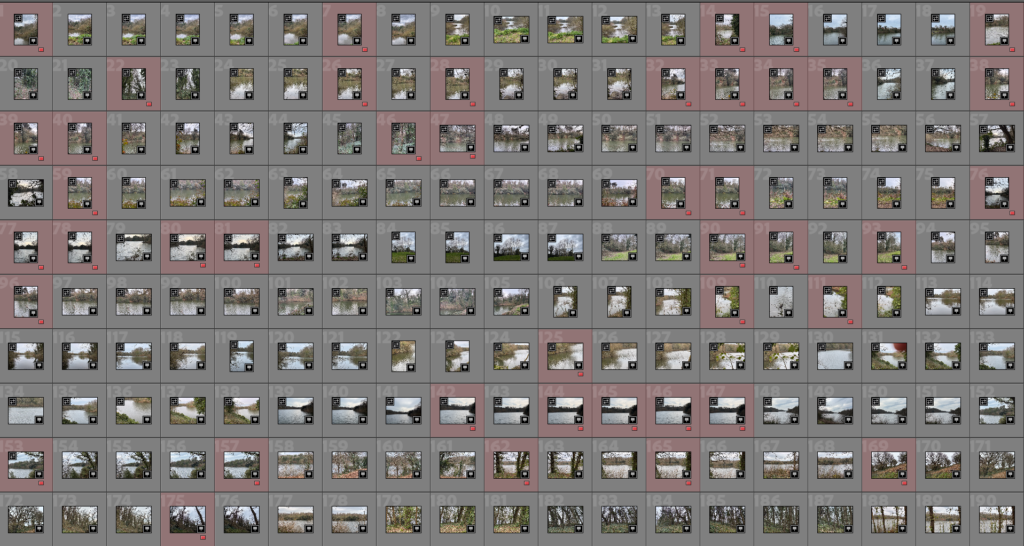
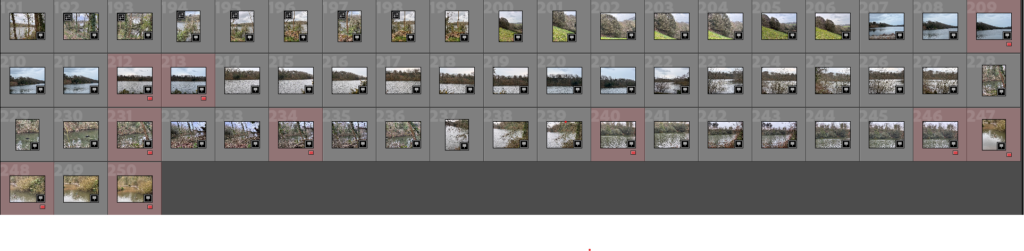
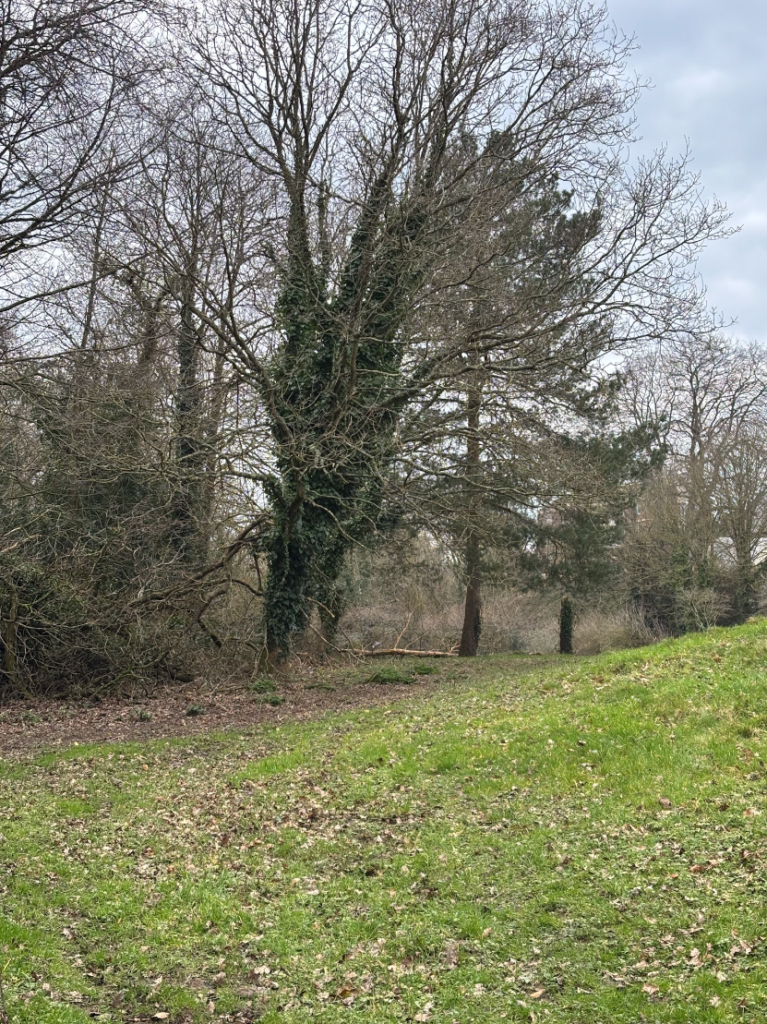
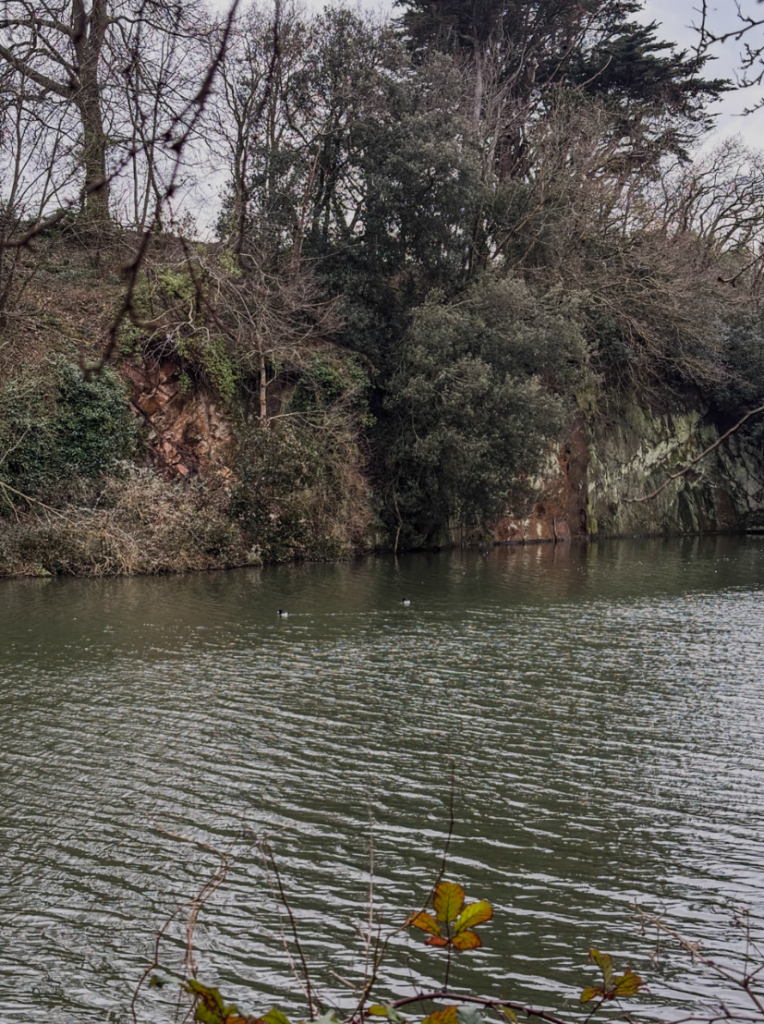
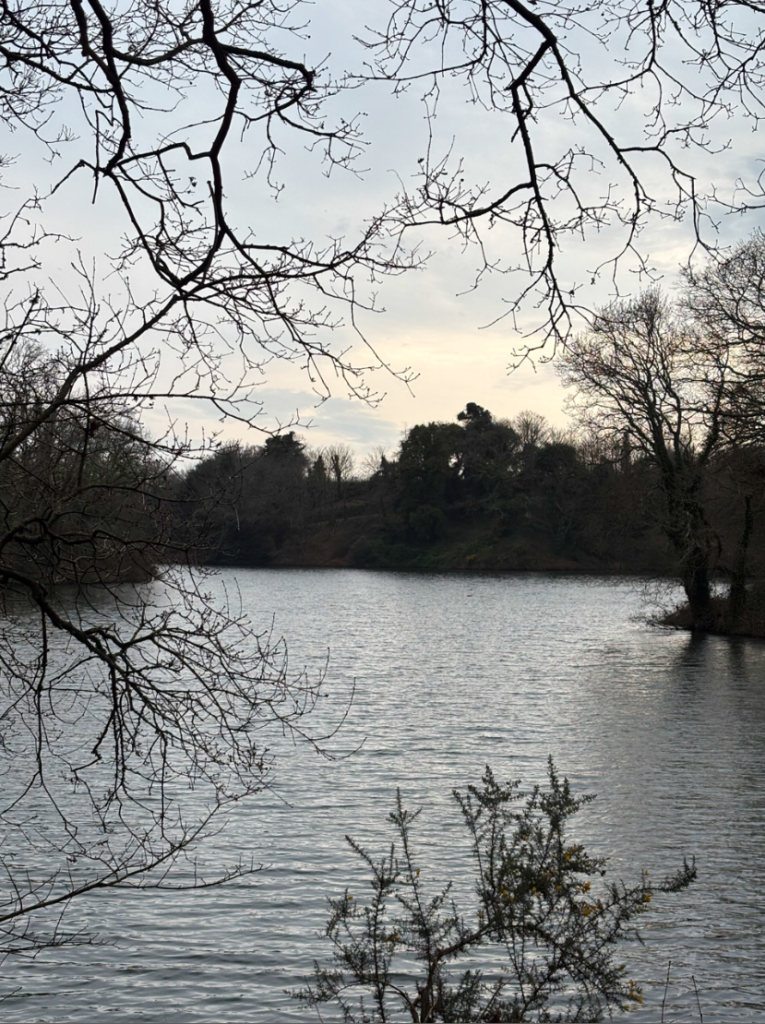
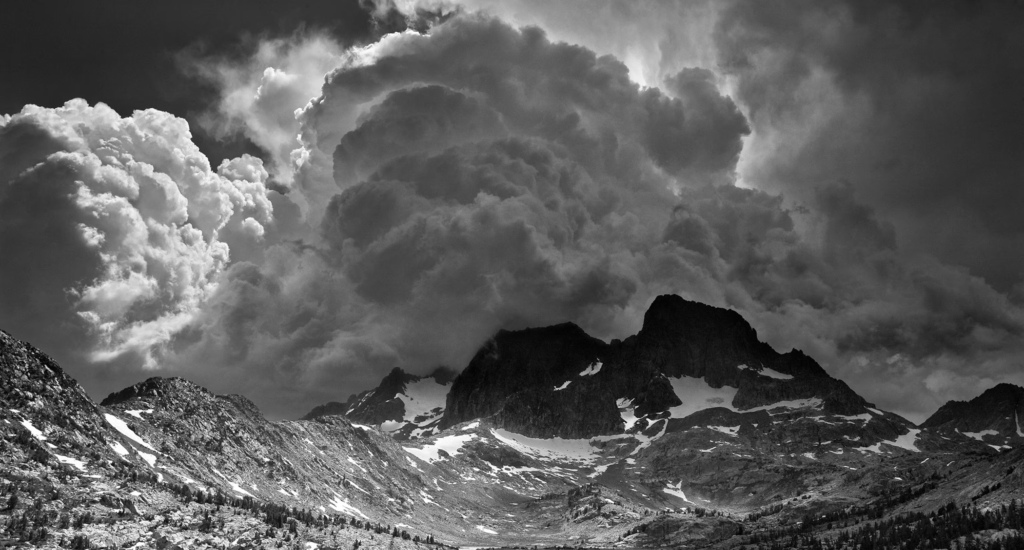
I got the chance to try and recreate the feel of Romanticism through landscape photography. While I was at the reservoir, I took around 250 photos, making sure to cover different areas of the place. I really focused on capturing the natural beauty, so I avoided including any buildings or man-made structures in the shots. This made it tricky at times because there were parts of the reservoir that I just couldn’t photograph without having something modern in the frame, like a bridge or a trail. It was a bit frustrating, but it made me think more about where I was shooting and what I was capturing. I had to be picky and really find those spots where nature felt untouched.
My best shots:
After going through all the pictures, I picked the ones I thought had the most potential for editing. At first, I chose 53 photos, but I’m planning to narrow it down even further. I’ll aim to end up with 3 to 5 solid shots that I can really focus on editing and polishing. The goal is to pick the ones that best capture the feel I’m going for without overcomplicating things. I’m looking for the images that will really pop after some editing.
I’ve since cut it down to 11 photos, which gives me a more manageable selection to work with. I also color-coded them to help me keep track of which ones I think are the best for editing. It just makes it easier to visually see which ones I like the most. I’m aiming to refine these even more and really bring out the details that could make them look even better.
Now, I’ve settled on 3 photos that I think are the strongest. I’ve marked them green to show they stand out the most and have the most potential for editing and color grading. These 3 are the ones I’ll focus on, making sure they’re as sharp and vibrant as possible. Once I get these right, I’ll be happy with the final result.
These final 3 photos represent the shots I feel best capture the essence of the landscape I wanted to portray. After carefully reviewing and narrowing down my collection, I chose these because they stand out the most in terms of composition, lighting, and how well they convey the natural beauty of the reservoir. Each one has its own unique qualities, from the way the light plays across the water to the dramatic contrast between the elements of nature. I believe these images have the most potential for editing, and I’m excited to take them through the process to really enhance their impact. These will be the key photos that help showcase the Romanticism-inspired vision I’ve been working towards.
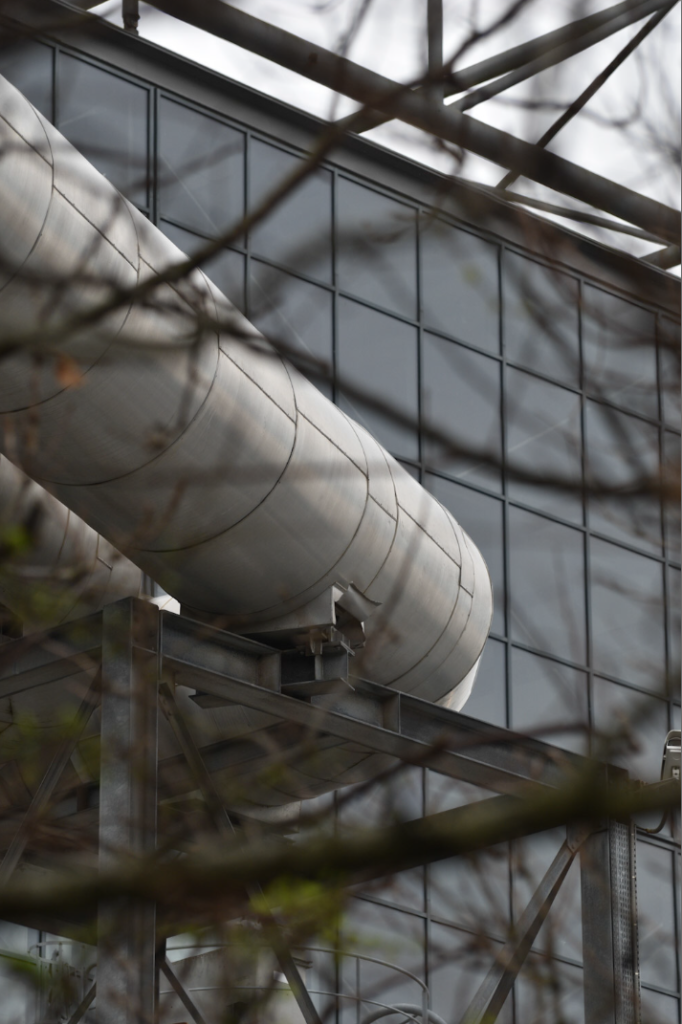
Recently me and my class did a whole class photo walk around Harve Depas, I collected a total of 391 images, this included photos to use for a panorama, landscapes but also some urban landscapes.
Artist analysis
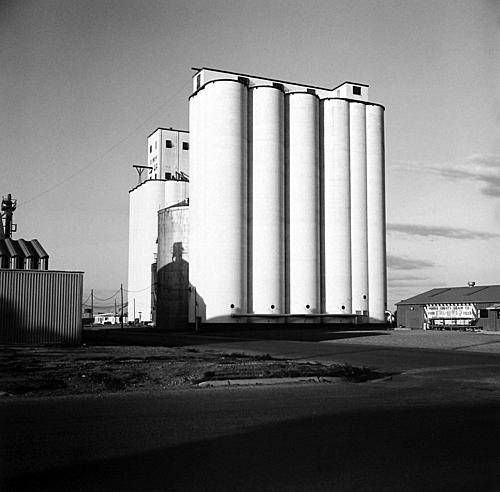
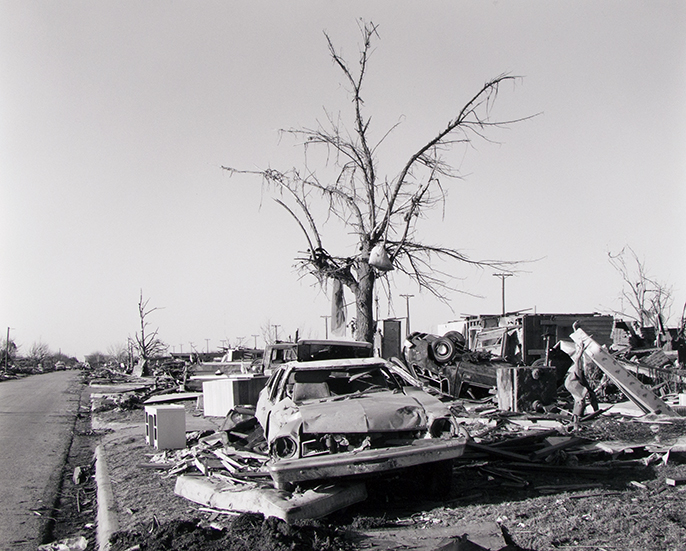
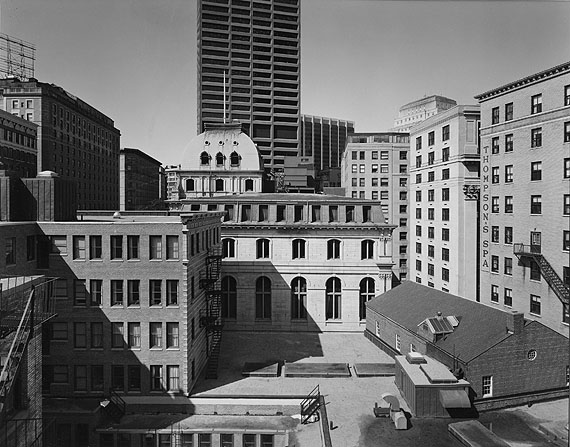
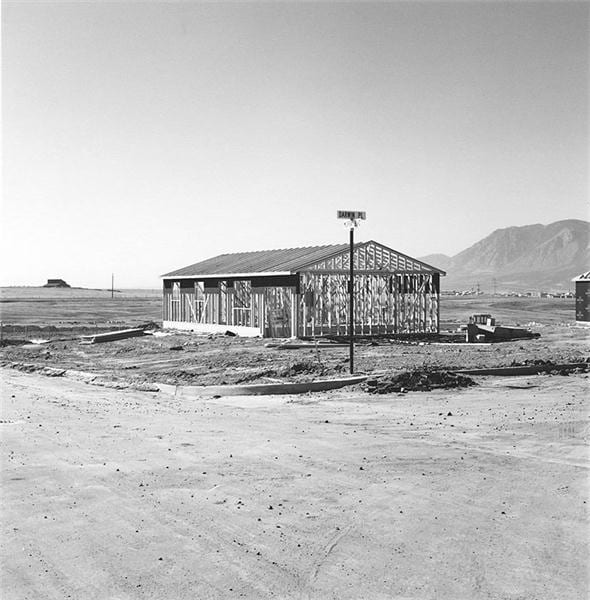
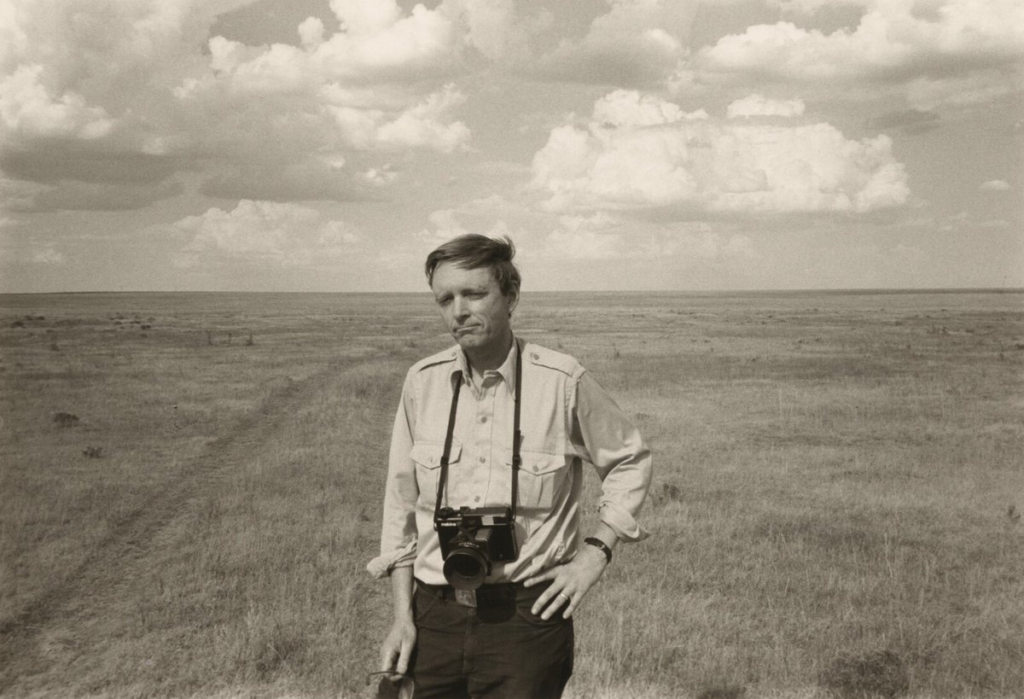
Frank Gohlke
Frank Gohlke, born on April 3, 1942, is a prominent American landscape photographer. He has received two Guggenheim fellowships, two fellowships from the National Endowment for the Arts, and a Fulbright Scholar Grant. His photography is part of many prestigious collections, including those at the Museum of Modern Art in New York, the Metropolitan Museum of Art, and the Art Institute of Chicago. Gohlke was among ten photographers chosen for the influential 1975 exhibition “New Topographics: Photographs of a Man-Altered Landscape,” held at the International Museum of Photography at George Eastman House, which is now known as the George Eastman Museum. Over his nearly fifty-year career, Gohlke has captured images of grain elevators in the American Midwest, the destruction caused by a tornado in his hometown of Wichita Falls, Texas, the transformation of the landscape around Mount St. Helens after its 1980 eruption, agricultural scenes in central France, and the wild apple forests in Kazakhstan.
Some of his photos
Photo analysis
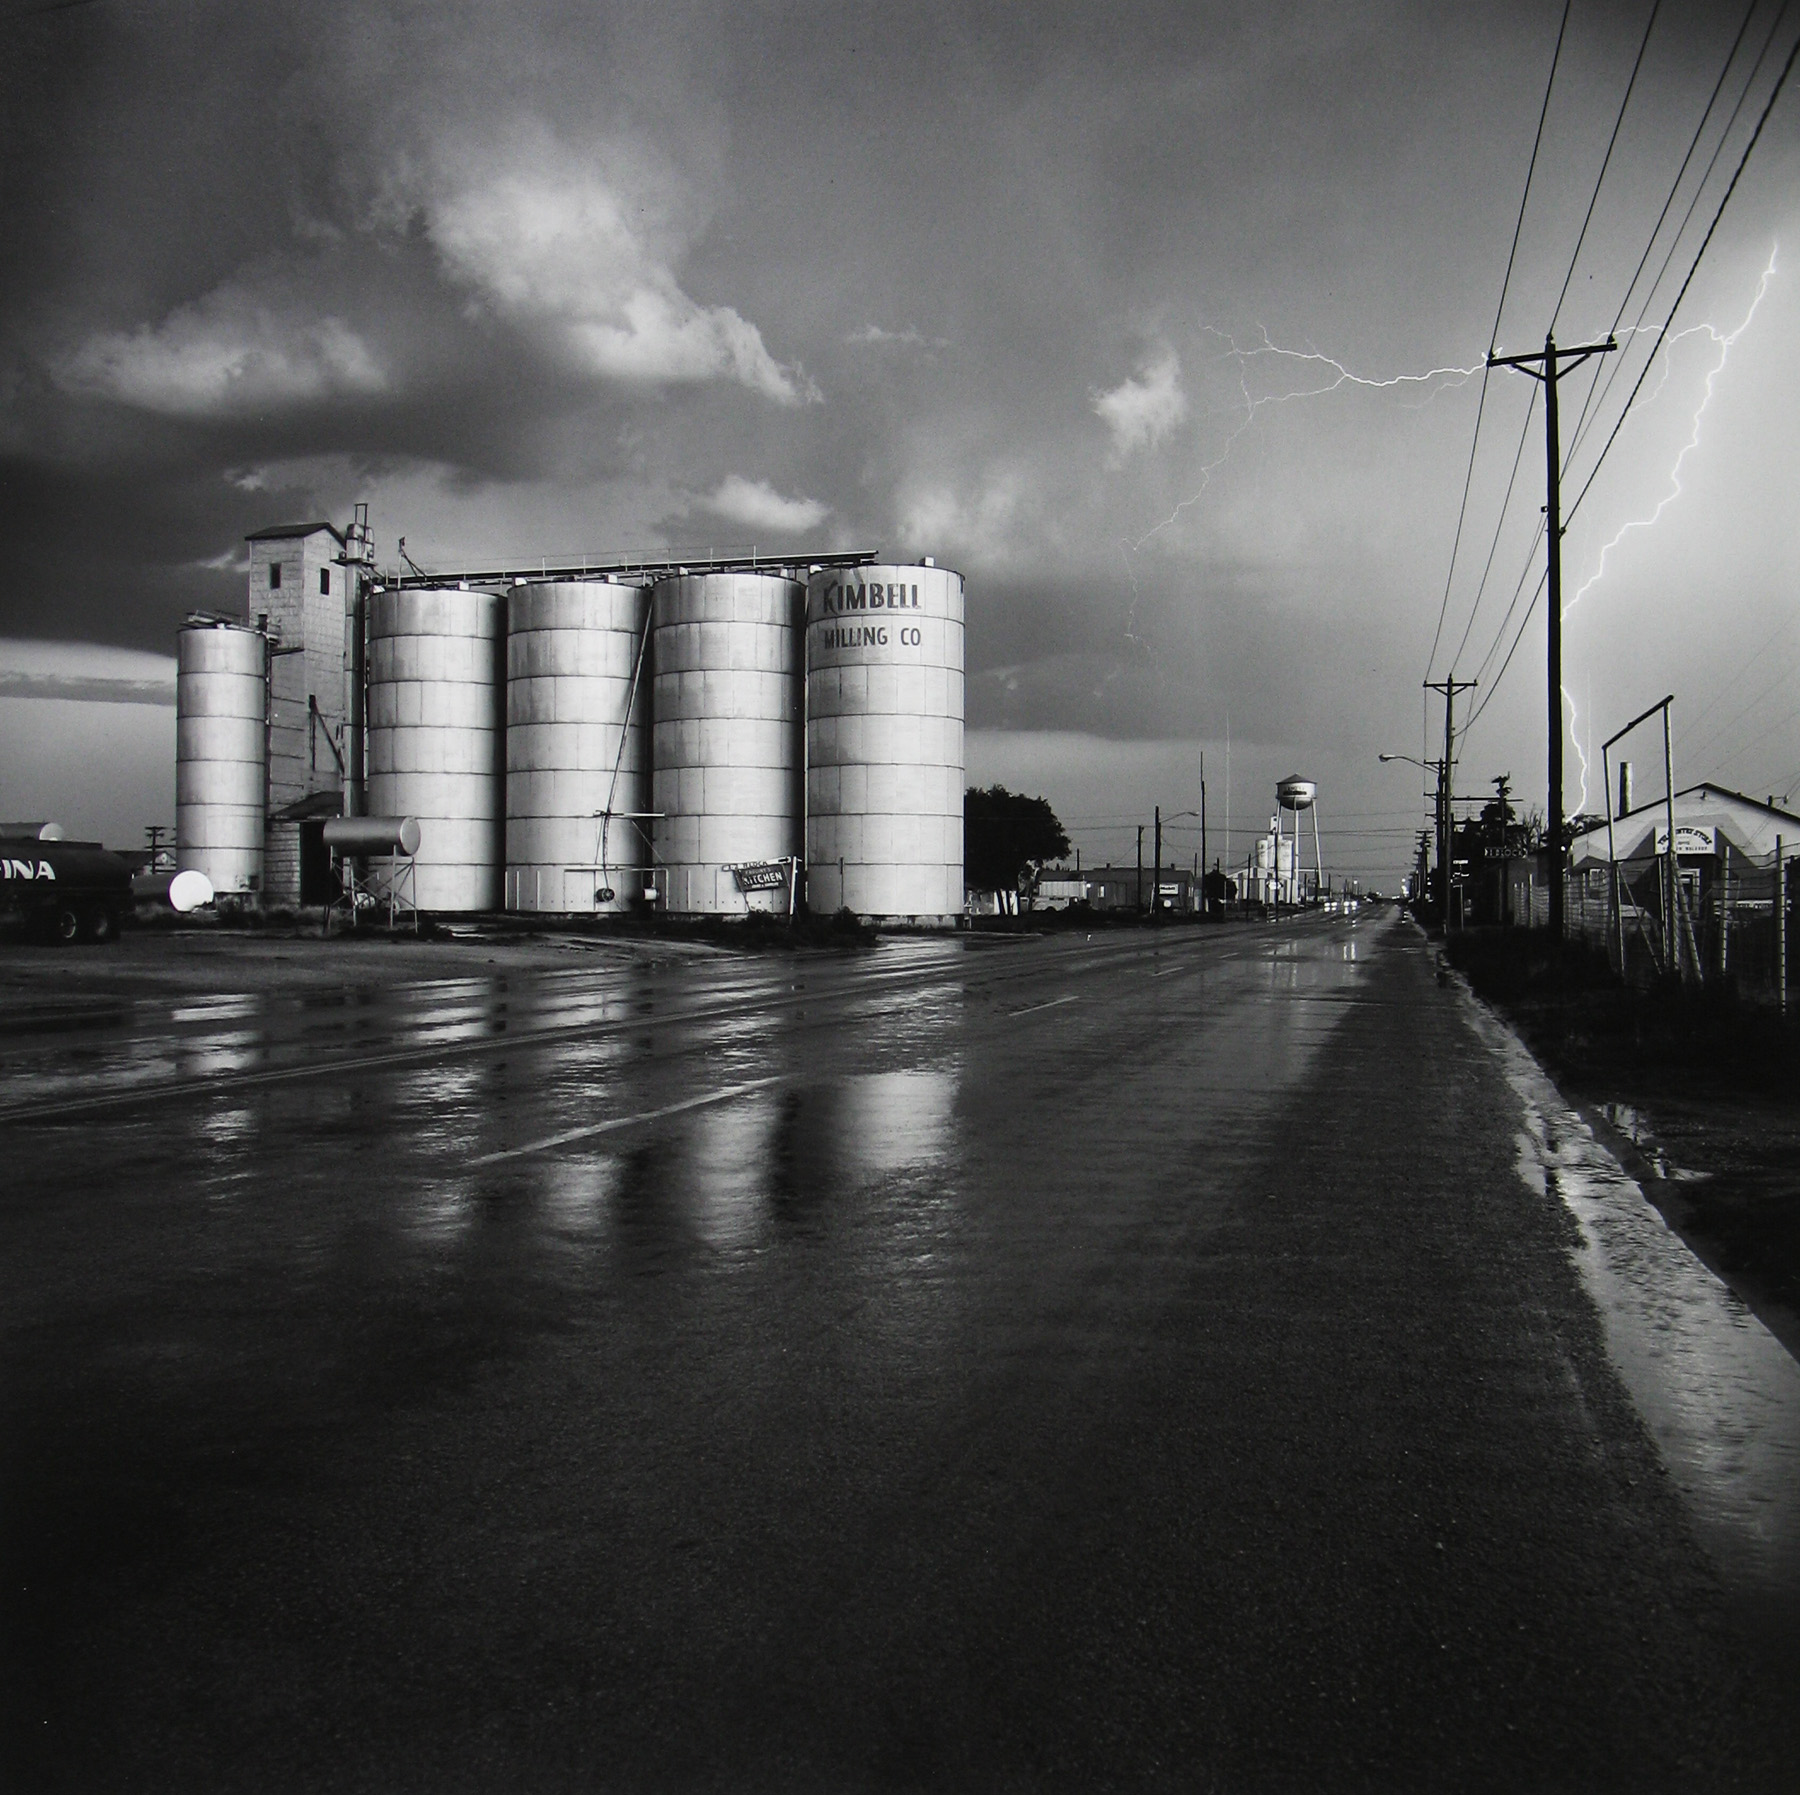
Technical – The lighting in this image is most likely natural light, its gloomy dark and cold setting, there isn’t any shadows due to the cloudy sky. The aperture was most likely a high number, something like f/32, I can tell this because everything is in focus while still being a wide angle shot.
Visual – In the foreground of this photo there is some silos, they reflect nicely off the wet road they sit on. Moreover the powerlines make good leading lines towards the vanishing point of the image which is down the end of the road, this is also where the viewers eyes are drawn to.
Contextual/ Conceptual – Grain Elevator and Lightning Flash, Lamesa, Texas, 1975.
Contact sheet
Selection process
Panoramas
I took a range of photos which I merged into one to create a panorama
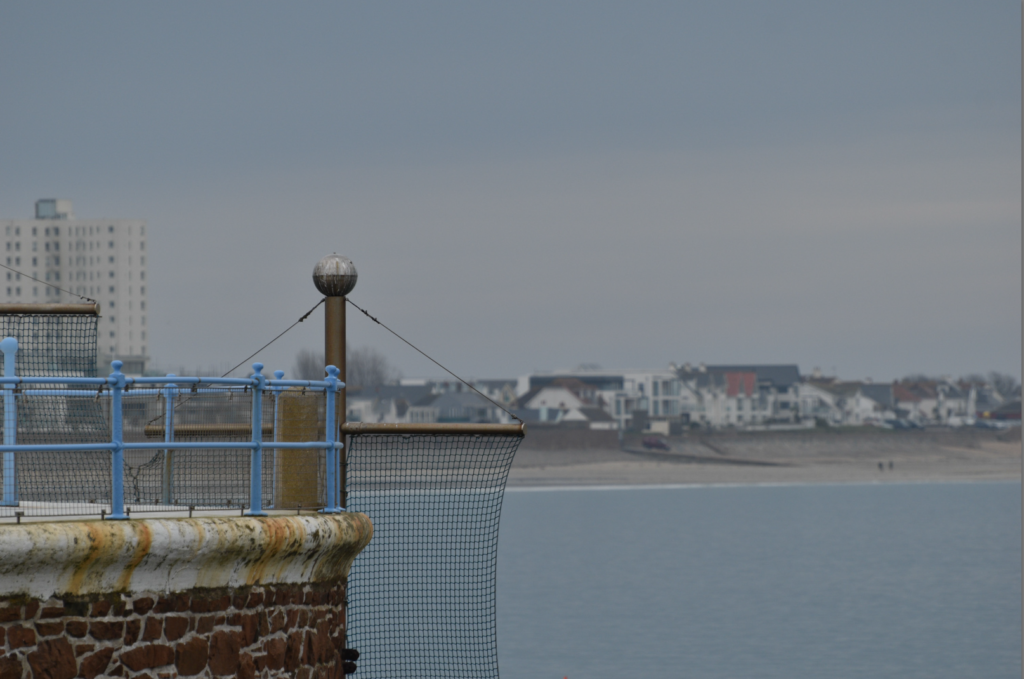
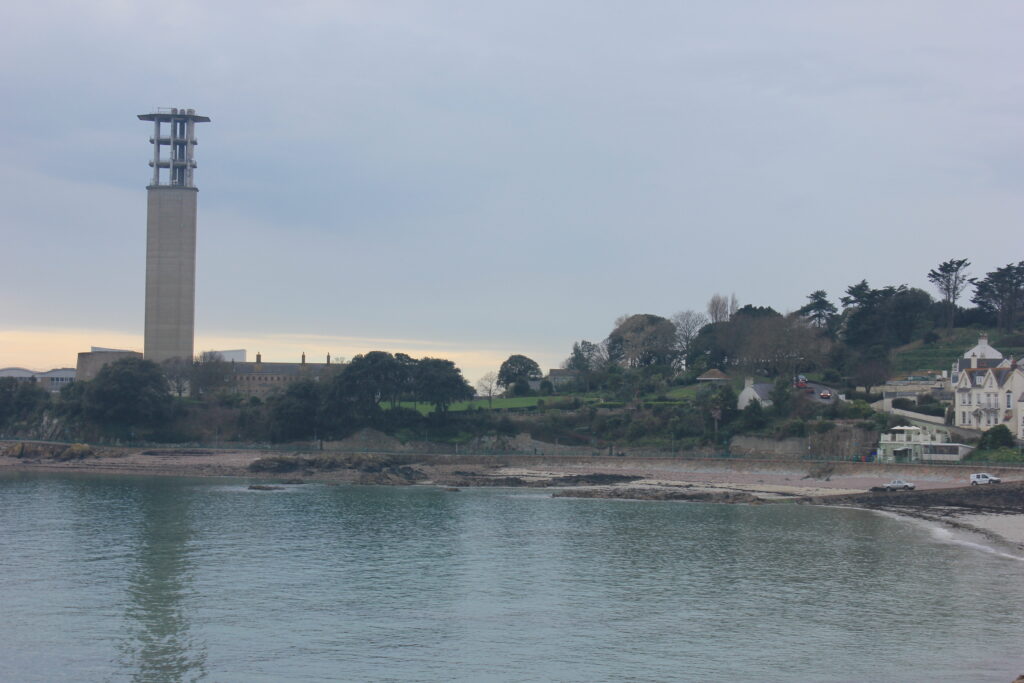
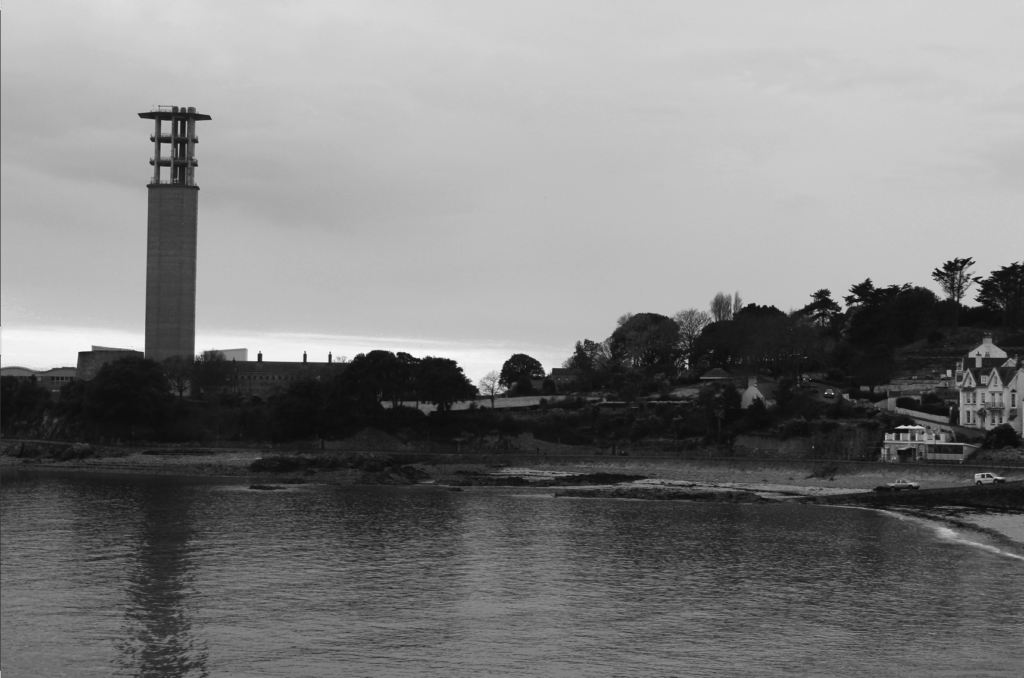
in this photo there is the reflection of lines of the tower and the trees making a repetitive pattern on the sea.
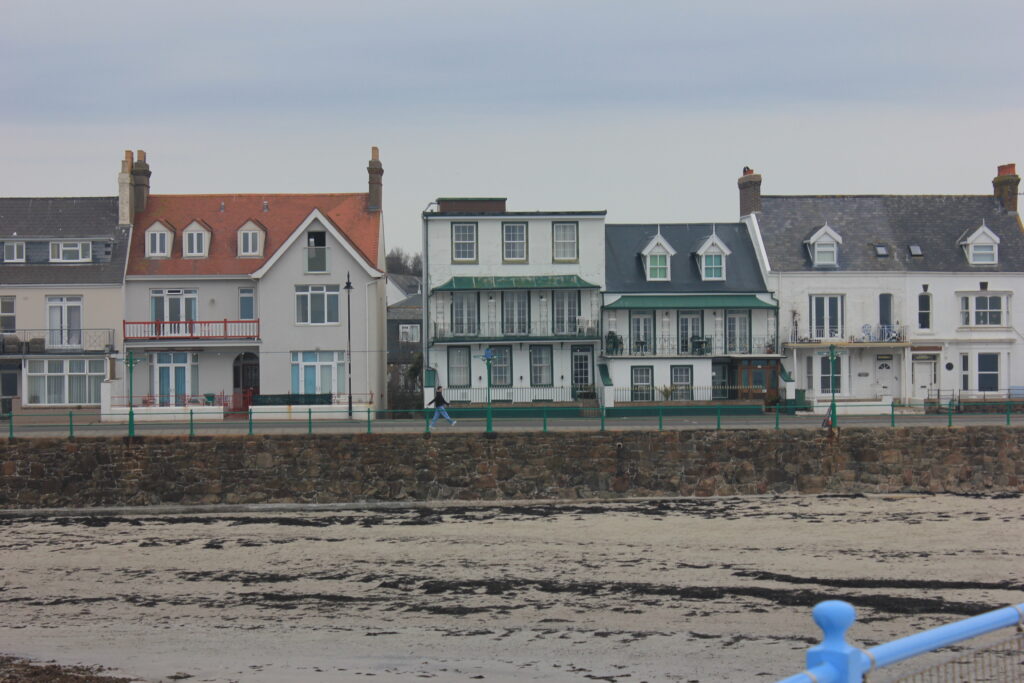
These are my photos from Harve des par, I’ve edited all of them to make them black and white therefore they all look the same this way my photos look neat and organised.
Photo evaluation:
The lighting in all these photos is natural as it was during the day time however I have changed the photos from natural to black and white as it still shows good tones between the light and dark areas.
“Topographic” refers to the features of a surface, like mountains, valleys, rivers, and hills. It shows the shape, size and details of the land in a specific area, most of the time it’s done on an map but our goal when taking topographic photos is to capture features in there full detail.
New Topographics was a term created by William Jenkins in 1975 to describe a group of American photographers (such as Robert Adams, Hilla Becher and Lewis Baltz) whose pictures had a similar aesthetic.
The photographs were all images of non-idealized landscapes, a mundane American town and repetitive suburban areas, anonymous “strip” malls, one and two-story structures along highways, liminal urban areas each bearing witness to a potential social critique.
Here are some image examples:
Here is a photo from Robert Adams titled“Enriched Emulsion”
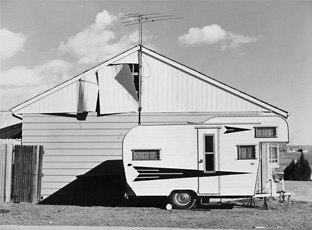
Here is a photo by Lewis Baltz titled “Absence Of Style”
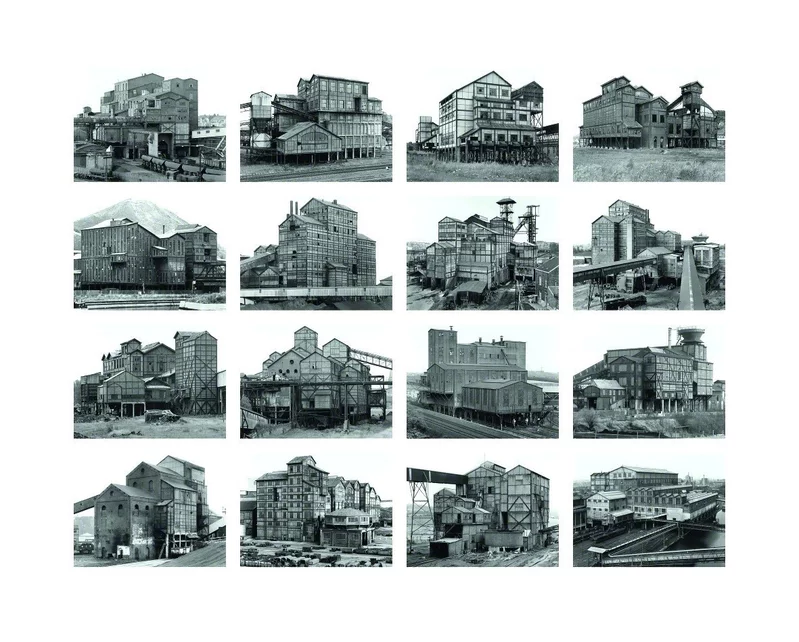
Here is a collection of photos by Hilla Becher titled “Preparation Plants”
New topographic was a term coined by William Jenkins in 1975 to describe a group of American photographers (such as Robert Adams and Lewis Baltz) whose pictures had a similar banal aesthetic, in that they were formal, mostly black and white prints of the urban landscape.
Many of the photographers associated with new topographics including Robert Adams Lewis Baltz, Nicholas Nixon and Bernd and Hiller Becher were inspired by the man-made, selecting subject matter that was matter-of-fact. Parking lots, suburban housing and warehouses were all depicted with a beautiful stark austerity, almost in the way early photographers documented the natural landscape. An exhibition at the International Museum of Photography in Rochester, New York featuring these photographers also revealed the growing unease about how the natural landscape was being eroded by industrial development.
What is new Topographics a reaction to?
The stark, beautifully printed images of the mundane but oddly fascinating topography was both a reflection of the increasingly suburbanised world around them, and a reaction to the tyranny of idealised landscape photography that elevated the natural and the elemental.
New Topographics: Photographs of a Man-Altered Landscape is co-organized by the Center for Creative Photography, The University of Arizona, and the George Eastman House International Museum of Photography and Film. Support for the San Francisco presentation is provided by The Bernard Osher Foundation.
Historical context:
Inflation and labor unrest. The country’s main economic concern in the immediate post-war years was inflation. …
The baby boom and suburbia. Making up for lost time, millions of returning veterans soon married and started families…
Isolation and splitting of the family unit, pharmaceuticals and mental health problems
Vast distances, road networks and mobility
Common Themes and Concepts of New Topographics
Their photographs depicted the built environment, suburban sprawl, industrial structures, and the mundane aspects of daily life, that were taking place in the American landscape of the post- War 2, with a sense of objectivity and an almost scientific detachment.
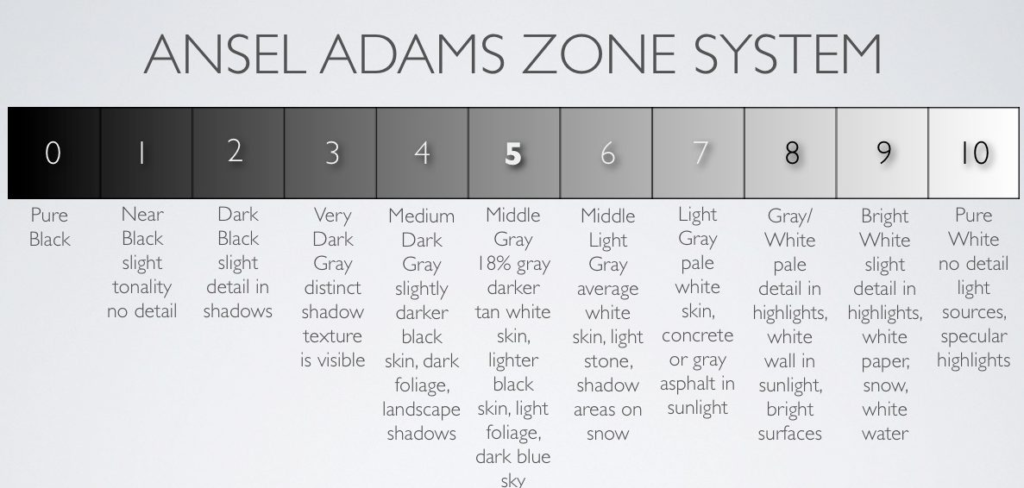
Ansel Adams was an American landscape photographer and environmentalist, widely known for his black and white images of the American West. He was a co-founder of Group f/64, an association of photographers advocating for “pure” photography. This approach emphasized sharp focus, a full tonal range, and precise attention to detail. To achieve this, Adams developed the Zone System, a technique designed to ensure all tonal values were represented in an image ; from pure black to pure white, with 11 shades of Gray in between.
Beyond his contributions to photography, Adams was a passionate advocate for environmental conservation. His work in national parks helped to highlight the beauty and power of nature, reinforcing the importance of preservation for future generations.
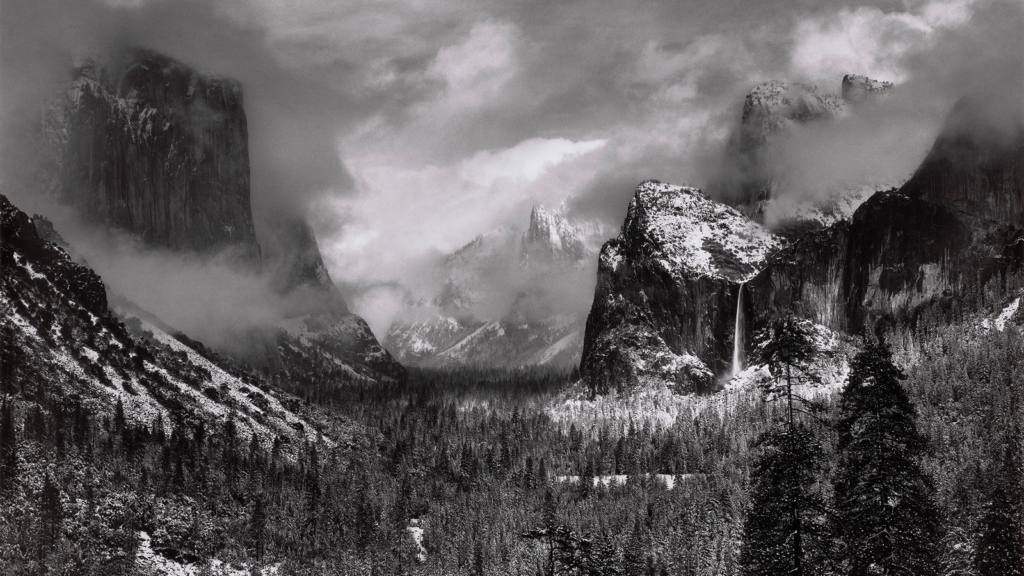
His Photography
Ansel Adams’ photographic style is characterized by its sharp focus, exceptional detail, and dramatic use of light and shadow. He sought to capture the grandeur and beauty of the natural world, emphasizing the importance of preserving these pristine landscapes.
One of Adams’ key compositional techniques was to position the horizon about two-thirds up the frame. This choice placed emphasis on the landscape rather than the sky, enhancing the sense of scale and drama in his photographs.
Ansel Adams Photography Mood Board
Ansel Adams Photo analysis
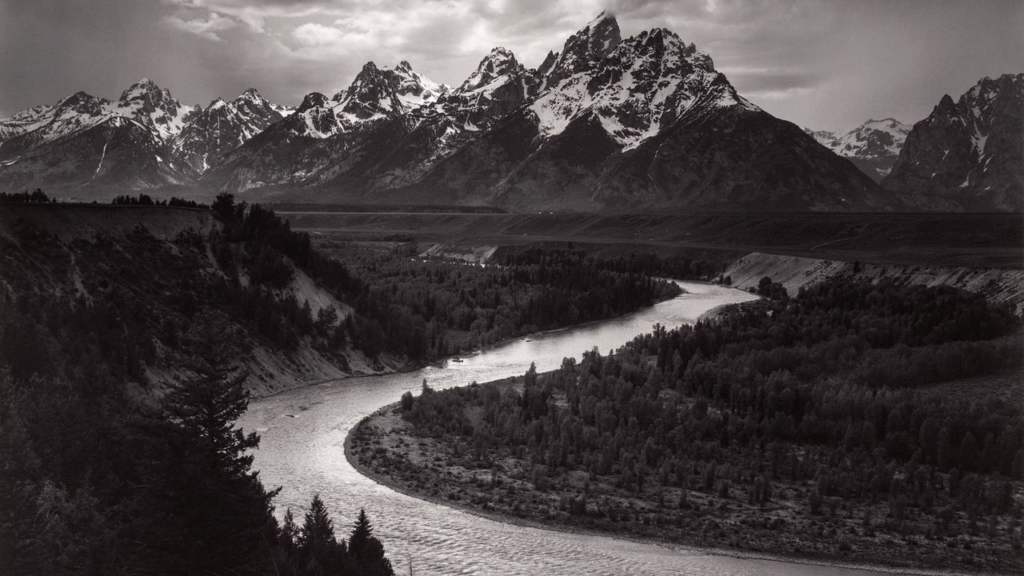
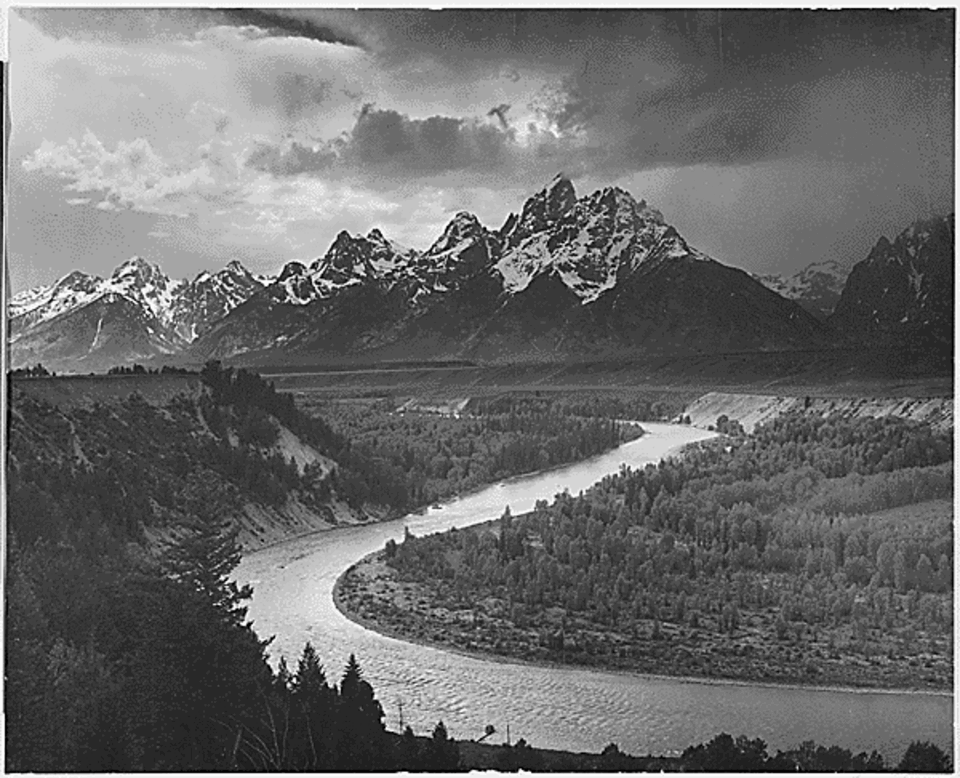
The Tetons – Snake River
Technical Analysis
Lighting: The image features natural lighting, with strong contrasts between highlights and shadows. The light emphasizes the rugged texture of the mountains and the flowing river.
Aperture: Likely a small aperture (high f/stop), ensuring deep depth of field so that everything from the foreground to the distant mountains appears sharp and clear.
Shutter Speed: Given the clarity of the image, a fast shutter speed was likely used to prevent motion blur in the river and trees. likely above 1/200.
ISO: Likely low ISO to maintain fine detail and minimize grain, enhancing the crispness of the photograph. ( eg 100 iso)
White Balance: The black-and-white palette emphasizes tonal contrast rather than colour .
Visual Analysis
Colour & Tone: The monochrome scheme highlights the tonal range, from deep blacks in the trees to bright whites in the clouds. Which can be linked back to Ansel Adams zonal system.
Texture & Shape: The rough textures of the mountains contrast with the smooth curves of the river.
Pattern & Line: The winding Snake River creates a leading line, guiding the viewer’s eye through the landscape and into the mountains.
Composition: The river serves as a strong focal point, creating depth and movement in the image. The placement of the mountains follows the Rule of Thirds, while the sky and clouds add visual weight to the upper part of the image.
Contextual Analysis
Historical Context: Taken in 1942, this image is part of Adams’ work for the National Park Service, promoting conservation and appreciation of America’s natural beauty. It was also a period when photography was being used to document and preserve landscapes.
Personal Context: Ansel Adams was deeply committed to environmental conservation. His work played a role in shaping public perception of national parks, influencing conservation efforts.
Visual/Conceptual Contexts: This image aligns with the traditions of early landscape photography but elevates it through Adams’ mastery of composition and darkroom techniques. His use of the Zone System ensured precise control over contrast.
Cultural/Social/Political Contexts: The image embodies the American ideal of untouched wilderness, reinforcing the significance of national parks. At the time, the U.S. was involved in World War II, and Adams’ work offered a sense of peace and national pride.
Conceptual Analysis
Meaning & Idea: The photograph captures the scale and majesty of nature, emphasizing the power and beauty of the American landscape.
Theoretical Construct: Adams’ work is rooted in the philosophy of environmentalism and the idea that nature should be preserved and appreciated. His approach contrasts with the New Topographics movement, which documented human-altered landscapes in a more detached manner.
Early Life
One of Adams’ earliest memories was witnessing the devastation of the 1906 San Francisco earthquake. At just four years old, he was thrown face-first into a garden wall by an aftershock, leaving him with a broken nose that remained crooked for the rest of his life.
In 1907, his family moved to a home near Seacliff, just south of the Presidio Army Base, with a striking view of the Golden Gate and the Marin Headlands. As a child, Adams was hyperactive, frequently ill, and prone to hypochondria. He had few friends but found solace in nature. He spent much of his time exploring Lobos Creek, Baker Beach, and the rugged coastline of Lands End; an area notorious for shipwrecks and landslides. These early experiences in the natural world would later influence his lifelong passion for landscape photography and conservation.
Comparison of Ansel Adams and Edward Weston
Ansel Adams and Edward Weston were both pioneers of American photography, yet their artistic approaches, techniques, and subject matter were distinctly different. The Photo Literacy Matrix provides insight into their contrasting styles through the uses of technique, composition, subject, and their philosophy.
Influence and Approach to Nature
Adams on Weston’s Influence:
“I can’t tell you how swell it was to return to the freshness, the simplicity and natural strength of your photography … I am convinced that the only real security lies with a certain communion with the things of the natural world.” -Letter from Edward Weston to Ansel Adams, 1936.
While both photographers were deeply inspired by nature, Weston’s approach was more intimate and abstract, focusing on form and texture. Adams, on the other hand, sought to capture vast landscapes with unparalleled precision. This letter reflects Adams’ appreciation for Weston’s minimalist style and direct relationship with nature.
Adams on His Own Technique (Zone System)
“I developed the Zone System as a way to create consistency and accuracy in the photographic process. It was about controlling exposure and development to produce the exact tonal range I wanted. I wanted the photographs to be as precise as possible.” -Ansel Adams
Adams’ Zone System was a highly technical method, allowing photographers to control exposure and tonal values with scientific precision. In contrast, Weston was more intuitive, relying on his eye and emotional response rather than strict technical guidelines.
Weston on Adams’ Work
“There is a grandeur in Adams’ work, an extraordinary definition, but it is more than that – it is the clarity with which he sees, the care with which he interprets, and the immense patience with which he waits for the perfect light.” – Edward Weston
Weston admired Adams’ meticulous craftsmanship, patience, and ability to capture nature’s grandeur. This highlights the contrast between Adams’ structured approach and Weston’s more spontaneous, emotional engagement with his subjects.
Critical Perspectives on Adams and Weston
“Ansel Adams captured the majesty of the American West with unparalleled clarity and precision, while Edward Weston’s work transcends documentary, transforming simple forms into complex works of art that explore the depths of human experience.” -Photography Critic
This comparison underscores Adams’ reputation for technical excellence and breath-taking landscapes, while Weston is celebrated for his abstract, intimate compositions that evoke deeper artistic and emotional responses.
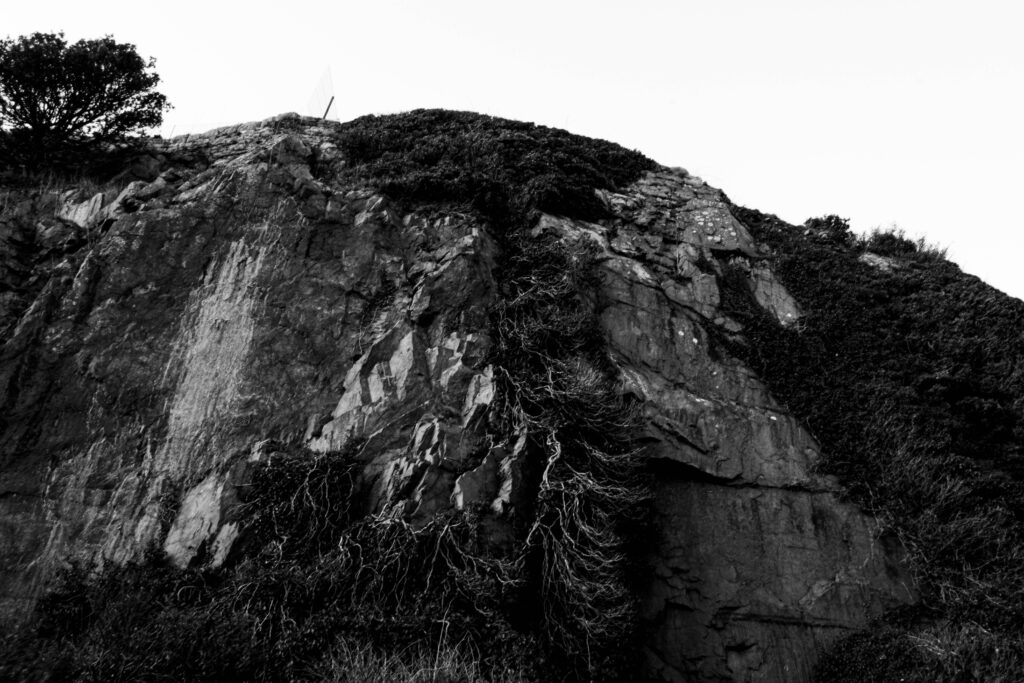
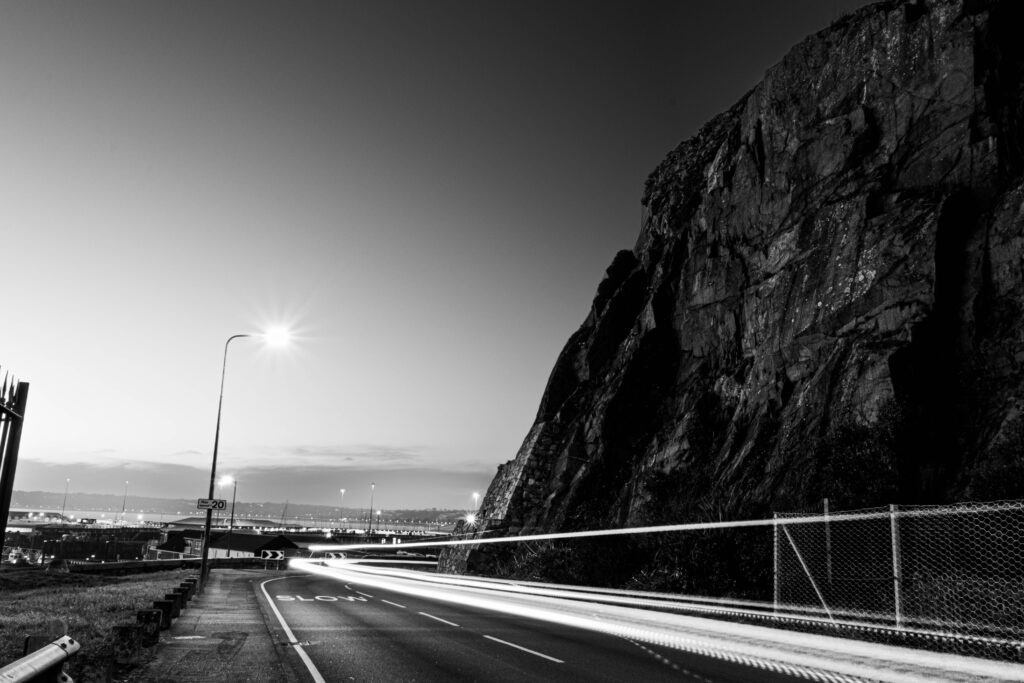
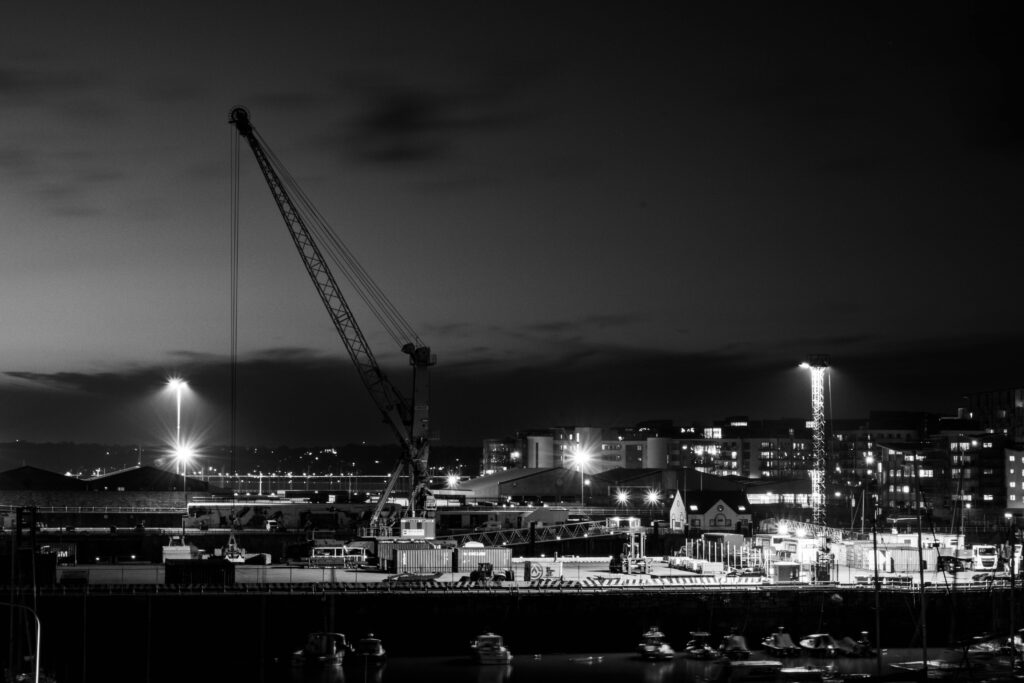
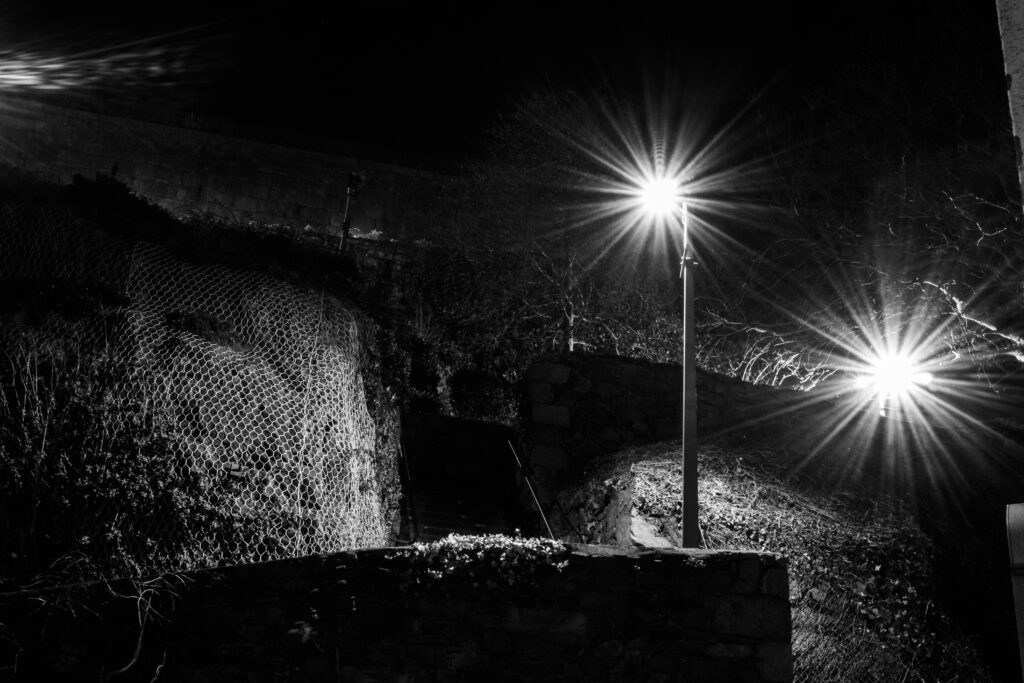
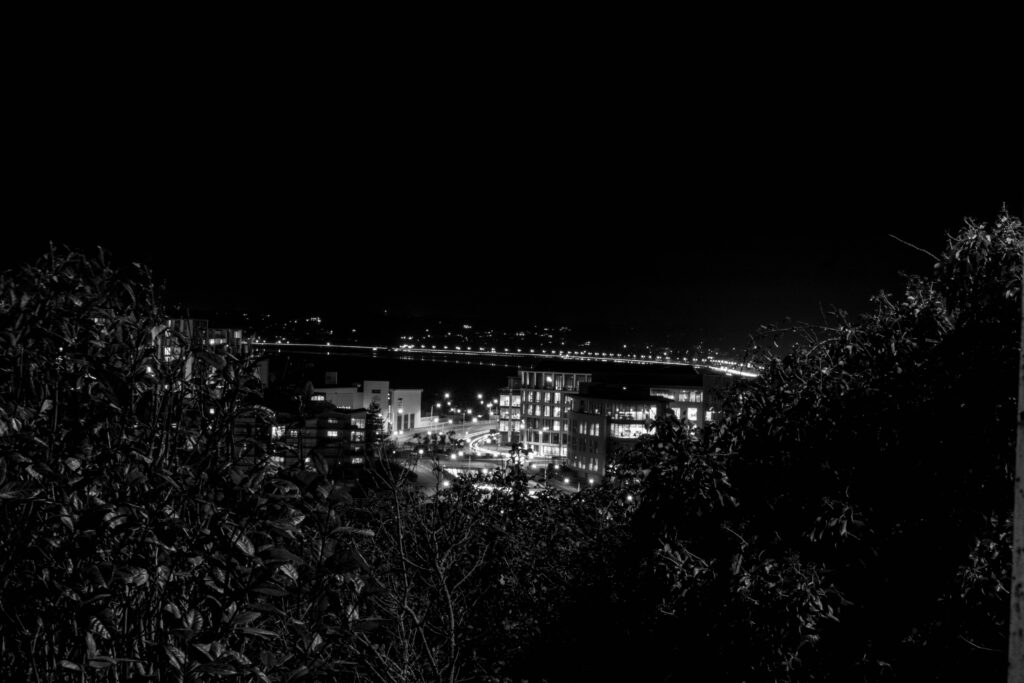
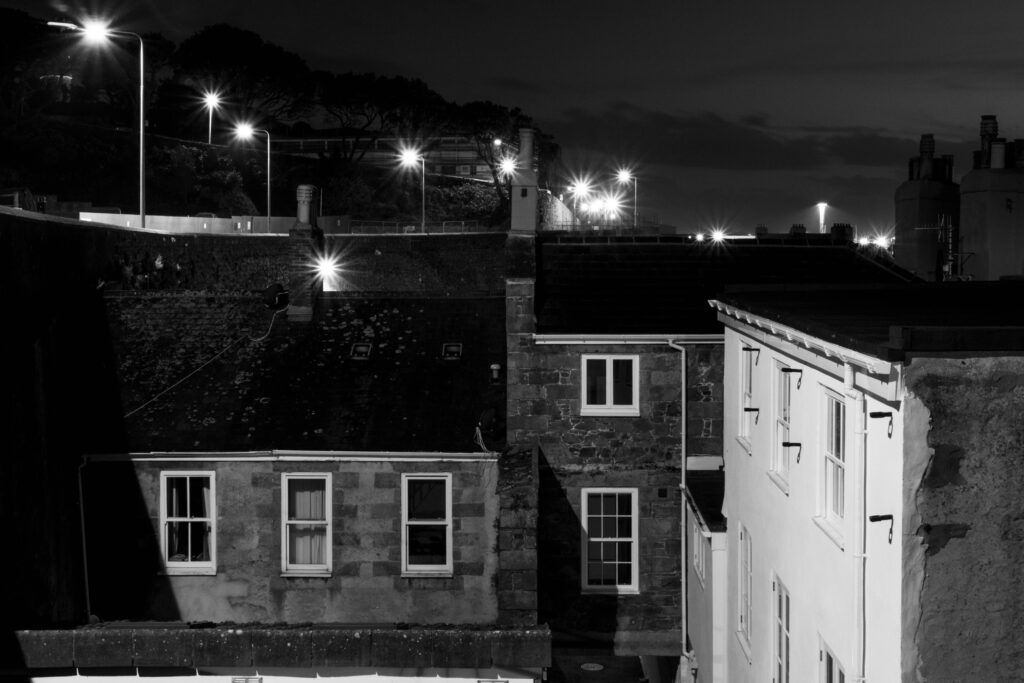
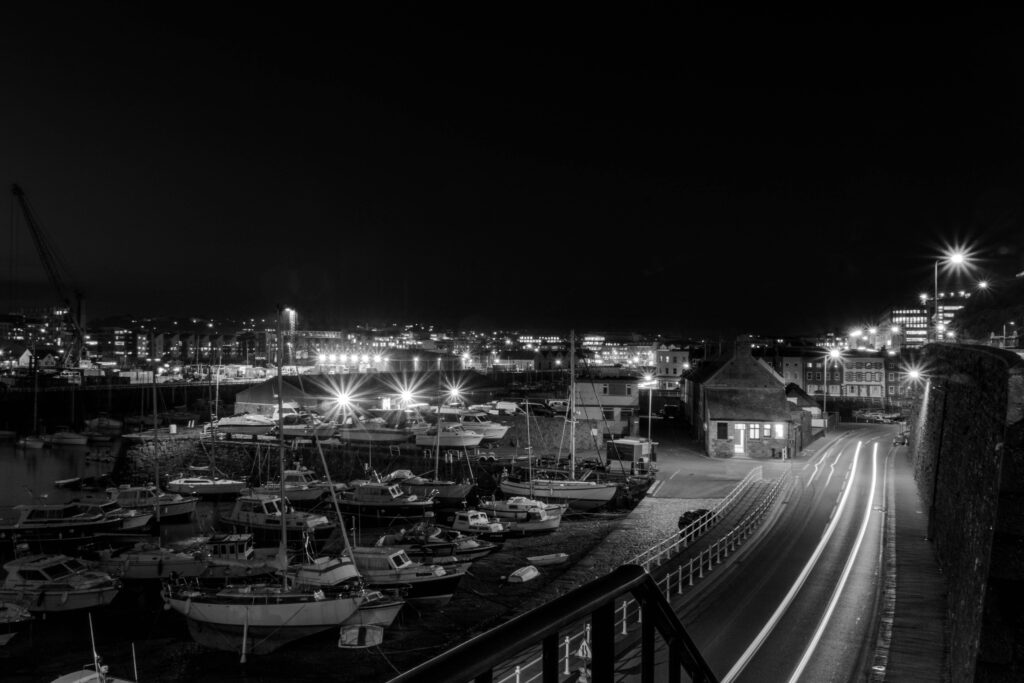
ANSEL ADAMS PHOTOSHOOT
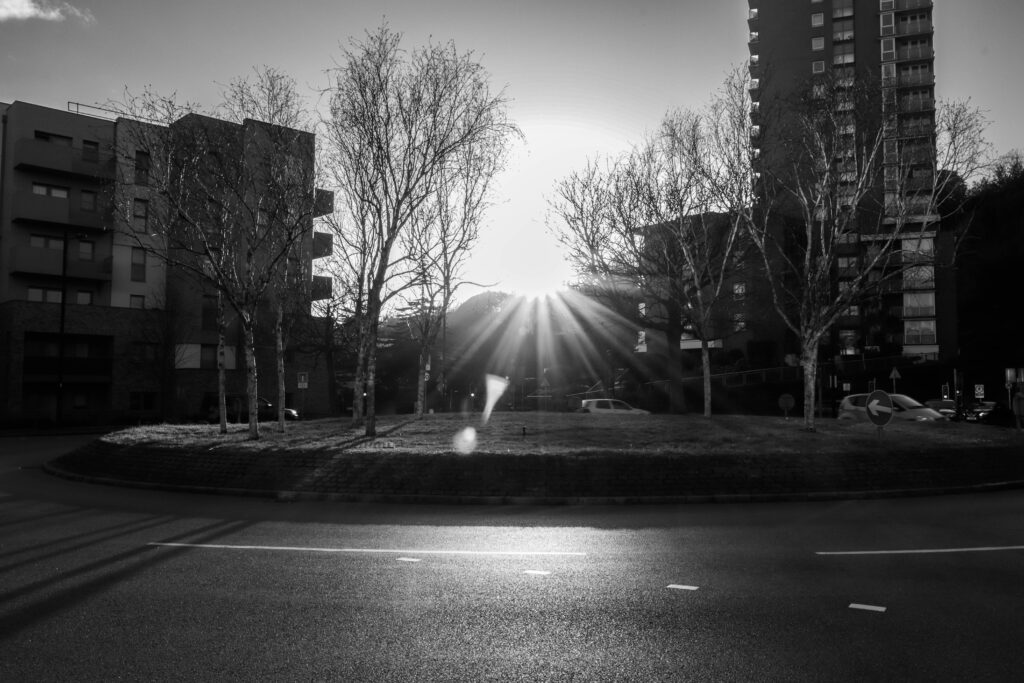
Ollie Fus ~ ” Cliff Edge” Fort Regent South coast Jersey.Ollie Fus~ ” Leading Lights” Fort Regent South Coast JerseyOllie Fus~ ” Harbour” Jersey Harbour South Coast JerseyOllie Fus~ ” Steep” Fort Regent Stairs Jersey.Ollie Fus ~ “steeper” Fort Regent Stairs Jersey.Ollie Fus~ ” Lookout” Fort regent Jersey.Ollie Fus~ ” Monochrome Homes” St Helier Jersey.Ollie Fus~ ” BoatLight” St Helier Harbour JerseyOllie Fus~ ” Road beside the tower” St Helier Jersey Ollie Fus~ “freefall” St Helier JerseyOllie Fus ” Lost” St Helier JerseyOllie Fus~ “Fort” Fort Regent JerseyOllie Fus ” Seaman” havre de pas Jersey Ollie Fus~ “Outbound” Havre De pas JerseyOllie Fus~ “Darkhouse” Havre De Pas JerseyOllie Fus~ ” Crest Side” Havre De Pas Jersey Ollie Fus~ ” Roundabout” St Helier Jersey
New topographics was a term created by William Jenkins in 1975 to describe a group of American photographers (such as Robert Adams and Lewis Baltz) whose pictures had a similar banal aesthetic, in that they were formal, mostly black and white prints of the urban landscape and could sometimes be used to show the contrast between nature and the urban landscape.
Key features of the new topographics
photographs depicted the built-up environment, suburban areas, industrial structures and the mundane aspects of daily life, that were taking place in the American landscape.
Key artists of the new topographics
Many of the photographers associated with new topographics including Robert Adams, Lewis Baltz, Nicholas Nixon and Bernd and Hiller Becher who were inspired by the man-made side of the world.
What was the new topographics a reaction to?
The new topographics were a reaction to the realized change from nature to urban landscapes and reflecting juxtaposition between them, they were shown as mundane but oddly fascinating images and was a reflection of the increasingly suburbanised world around them.
Case study – Stephan Shore
Who was he –
Technical –
– well lit, outside, natural lighting / outside
– shot on large format field camera
– sharp image overall while moving objects like cars are blurry
Visual –
– pavement used as line leading up to natural environment (mountains)
– Chevron signs pointing and leading to mountains
– colours shown in signs photographed represent America / American flag
– lots of different shapes, geometric
– space used with the sky taking up the majority of the image
Contextual –
– Artist in movement reflecting how new of a country is compared to old European ones
– Post world-war 2
– Taken in LA in 1975
Conceptual –
– Contrast between built up area and mountains in the background shows change in movements
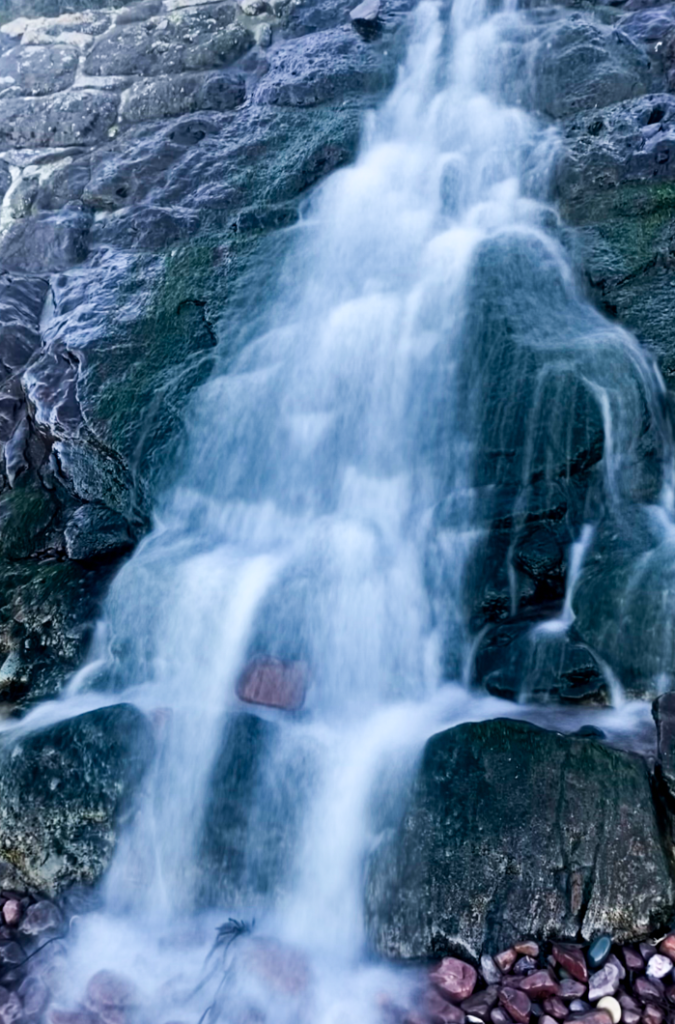
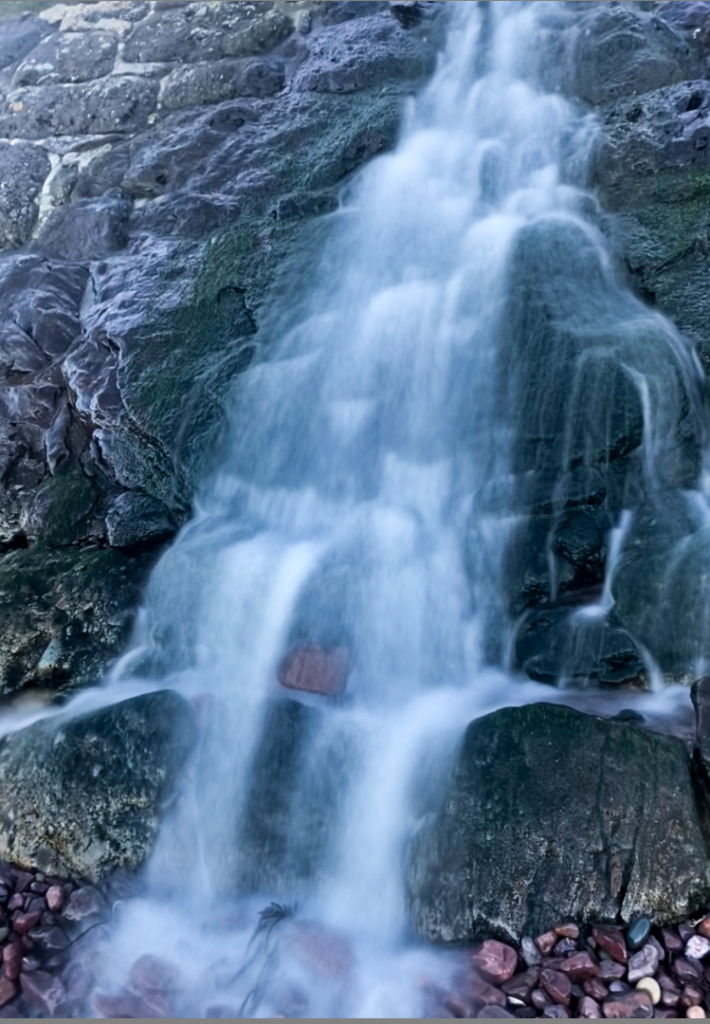
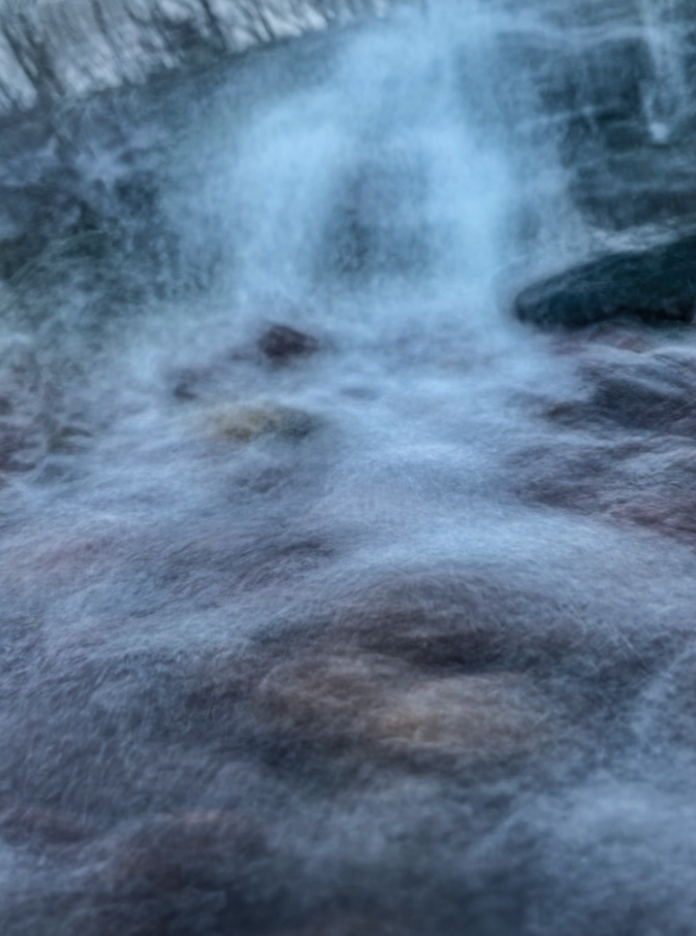
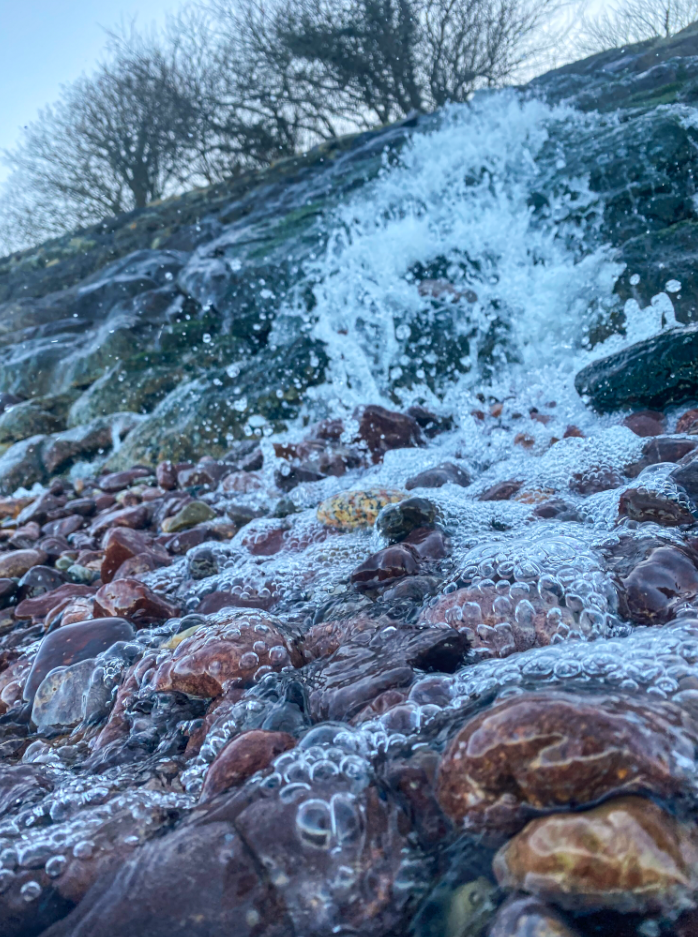
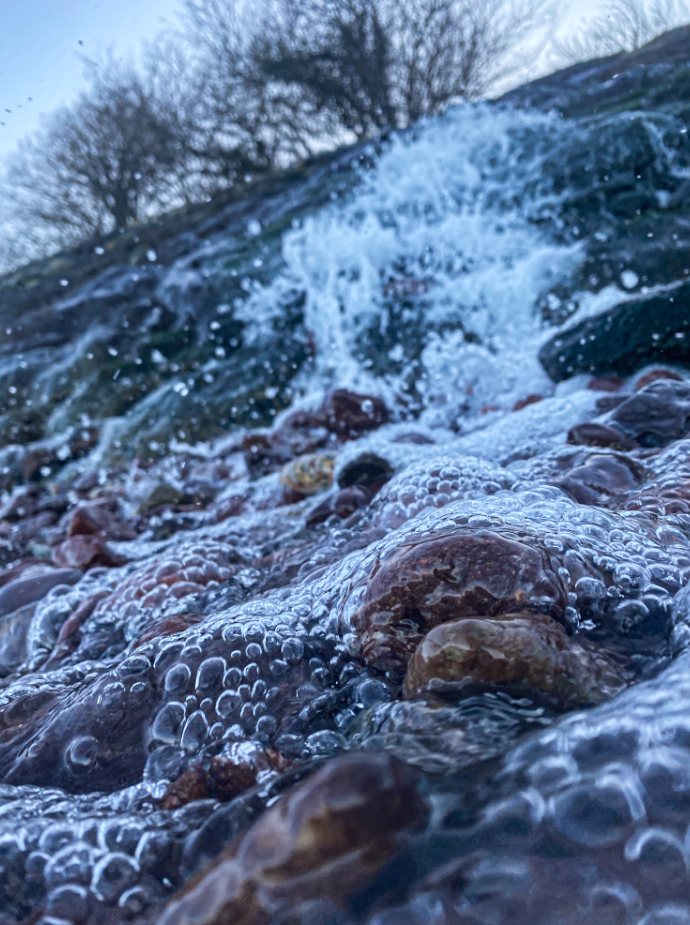
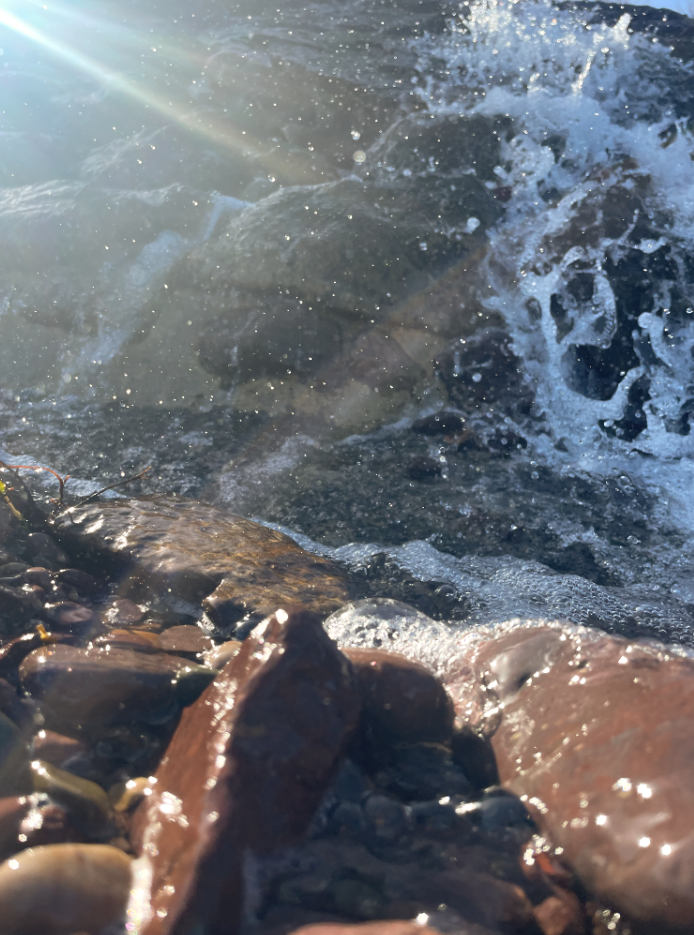
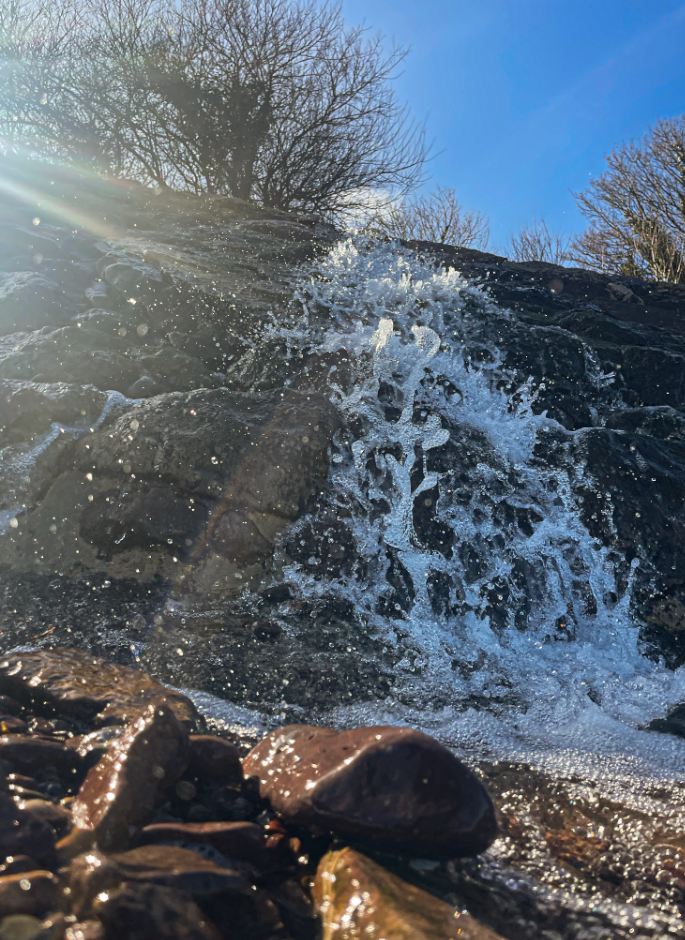
In this Photoshoot I explored the movement of water at the beach, focusing on how it constantly shifts and changes. I looked at composition, using the flow of the waves and the patterns in the water to create dynamic images. Perspective and scale were important in showing the contrast between the vastness of the sea and the smaller details, like the way water moves around rocks.
Light played a key role in my images, as I captured how it affected the colours, shadows, and tonal value of the water throughout my images. I also focused on texture capturing the the smooth and rough parts of the water. This photoshoot allowed me to explore the way water interacts with its surroundings, creating images that capture the movement of the water.
Contact Sheet
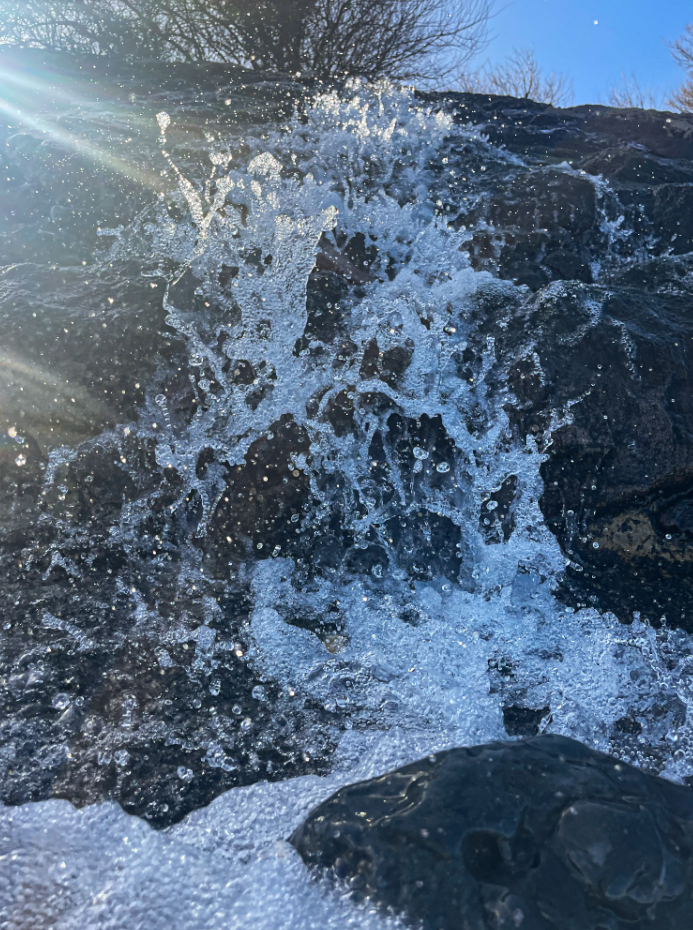
Long Exposure
Some of my long exposure images turned out like this one (blurred) but I quite like how the misty water erupts over the rocks, it creates a sense of eeriness but in a way it’s also peaceful.
Short Exposure
I took images of the same flow of water with a short exposure to contrast the long exposure images. Which allowed me present the movement of water in different ways.
I positioned the camera down low, pointing upwards towards the waterfall so the rocks are in focus which captures how the water bubbles and moves around them.
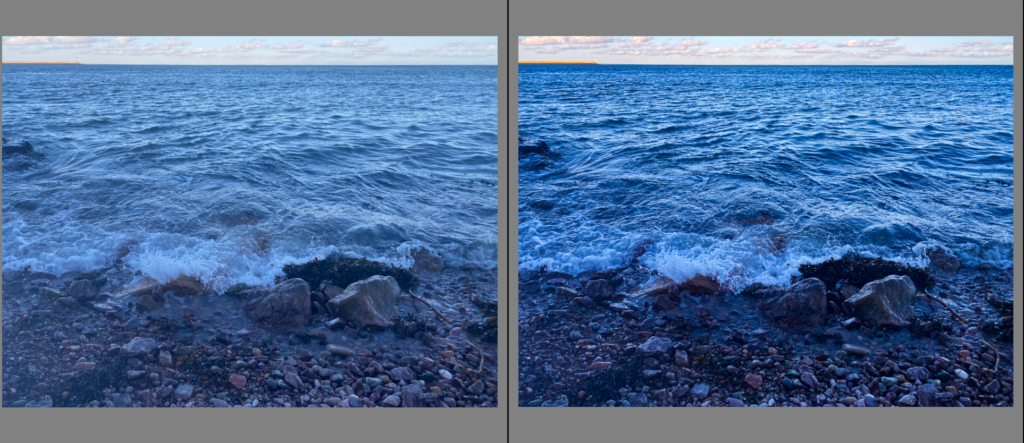
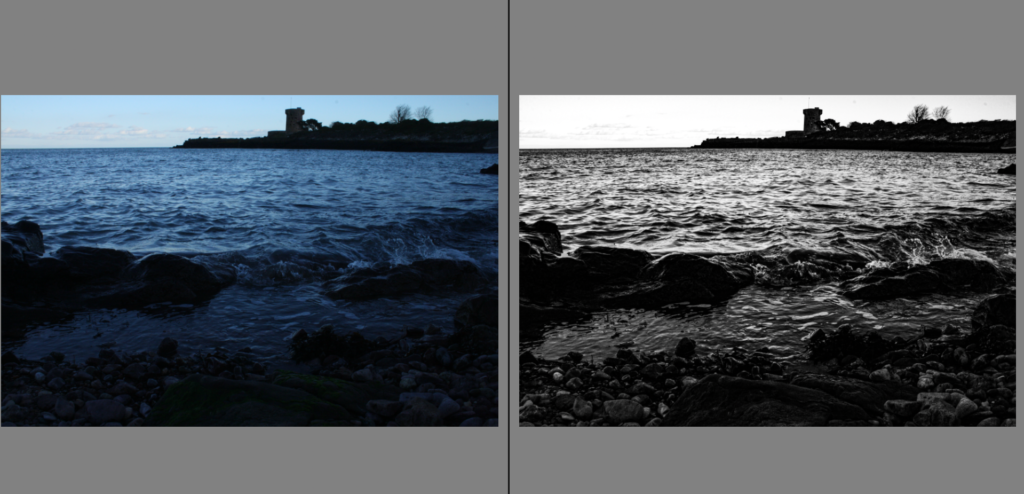
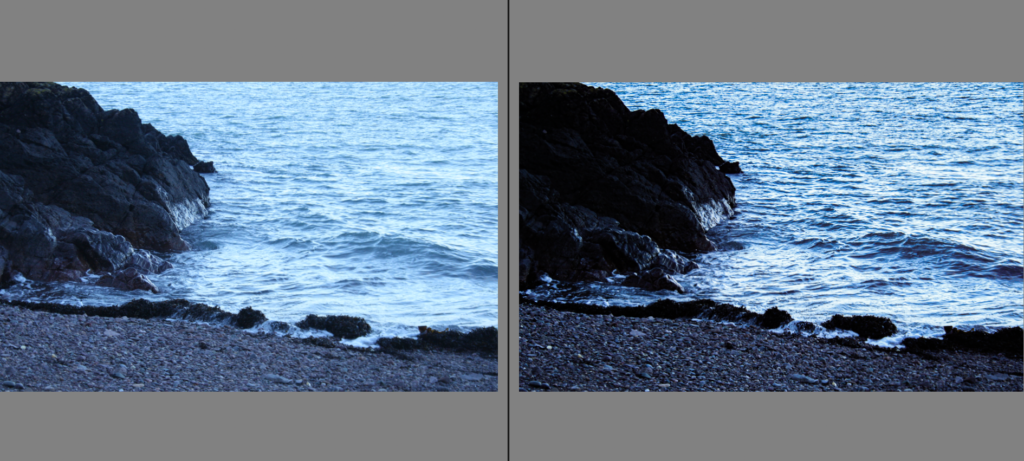
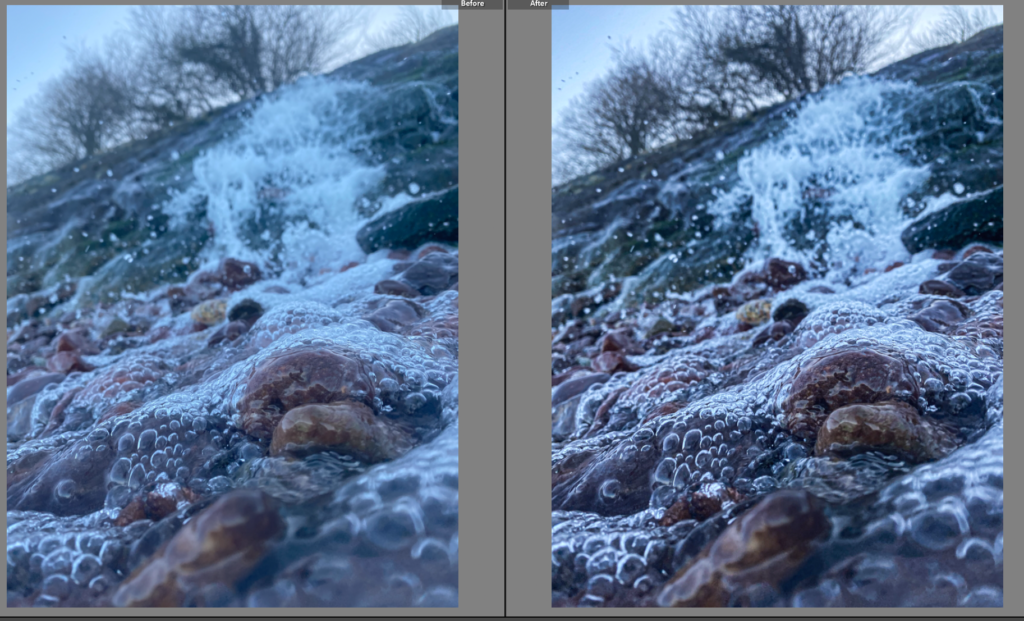
Editing Before and After
Here I adjusted the contrast, shadows, highlights and dehaze in order to dramatize the movement of the water.
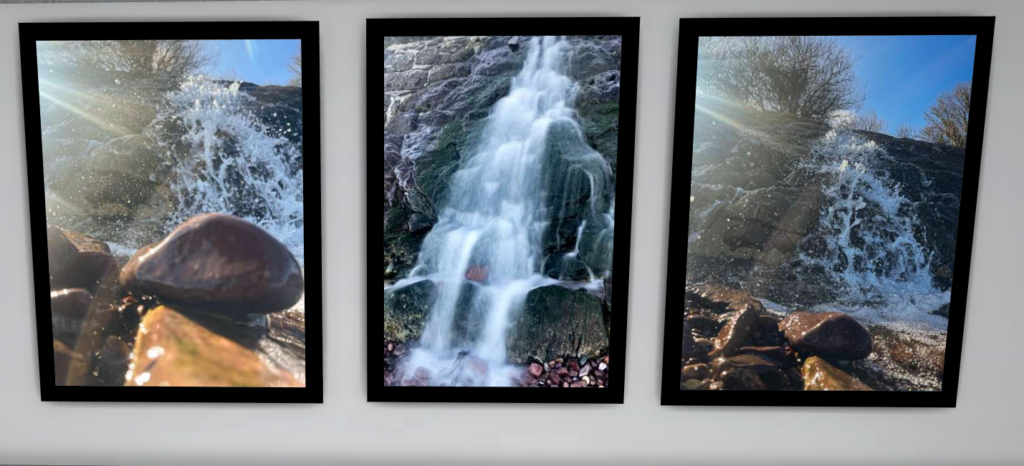
Final Images- Presented in Art Steps
I chose these 3 Images as they include both long and short exposure and they are taken from various perspectives which represent my aim for this photoshoot, which was to explore the movement of water.
Landscape photography used to be about capturing nature at its most dramatic and untouched. But in 1975, a group of photographers took a different approach. Instead of photographing mountains and forests, they focused on suburbs, industrial sites, and parking lots, everyday places shaped by people. This style became known as New Topographics and changed the way we think about landscapes.
Where Did New Topographics Come From?
The term New Topographics came from a 1975 exhibition at the International Museum of Photography in Rochester, New York. Curated by William Jenkins, the show featured photographers like Robert Adams, Lewis Baltz, Bernd and Hilla Becher, and Nicholas Nixon, who all photographed human-altered landscapes in a neutral, documentary style.
Their images weren’t meant to be beautiful or dramatic. They were often black and white, simple, and straightforward, just showing the way things were, without adding emotion or judgment.
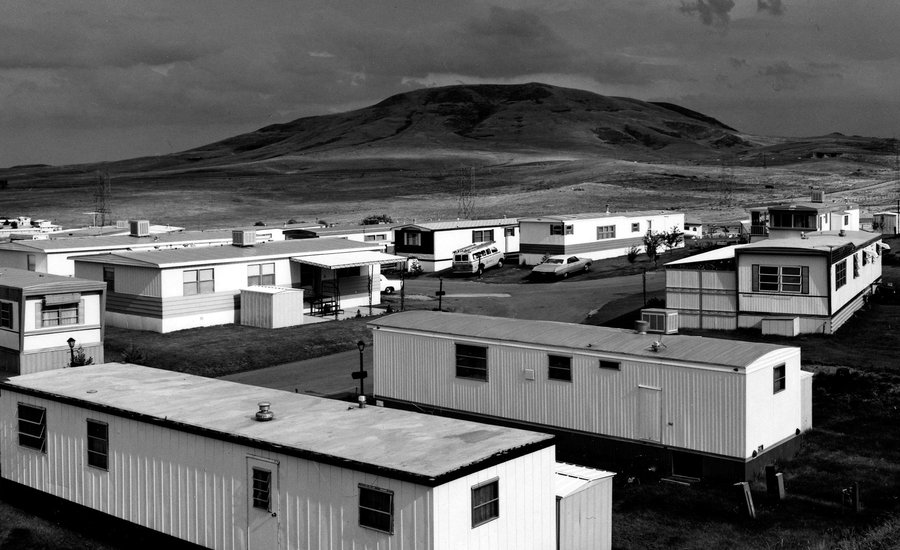
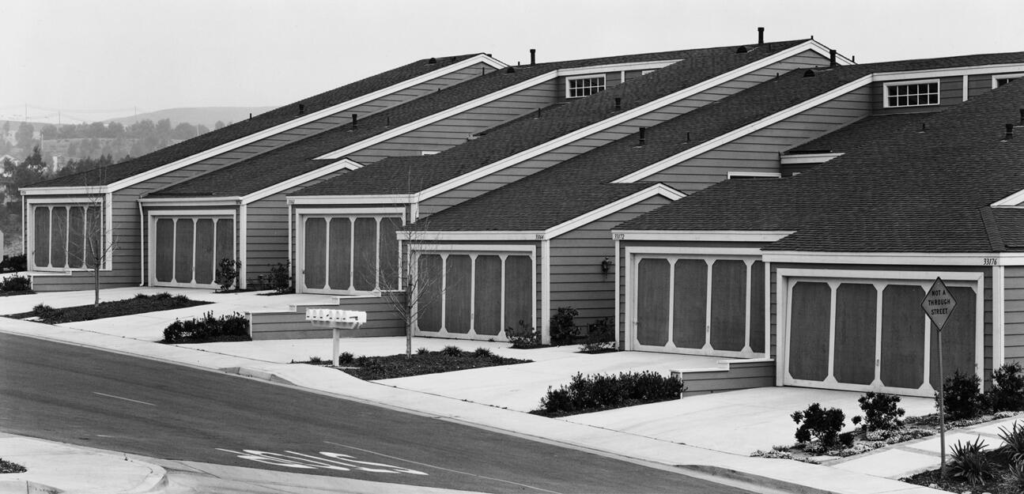
Robert adams
One of the most influential photographers in the New Topographics movement was Robert Adams. His work focused on the rapid urbanization of the American West, particularly in Colorado. Adams documented how new housing developments, roads, and industry transformed the once-open landscapes.
His photos often present stark contrasts between nature and human expansion. In images like Colorado Springs, Colorado, 1968, Adams captures rows of identical houses against vast, empty skies. The uniformity and repetition of these structures highlight the loss of individuality and natural beauty in the push for economic growth.
Adams’ work isn’t entirely pessimistic, though. While his images show environmental change and urban sprawl, they also find quiet beauty in the ordinary. His compositions are carefully framed, making even mundane subjects, like highways or suburban fences, visually striking. His photography encourages us to look at familiar places differently, questioning how we shape and experience the world around us.
Image Analysis
Robert Adams’ Colorado Springs, Colorado, 1968:
Technical
Camera and Film: Adams likely used a medium or large-format camera, which gives a lot of detail and depth to the image.
Exposure and Lighting: The lighting looks natural, with soft shadows and clear highlights. It feels like it was taken in the late afternoon, with a balanced exposure showing both light and dark areas clearly.
Composition: The photo is well thought out, with elements like the land, sky, and possibly some buildings placed carefully. The horizon line is low, making the sky feel vast.
Visual
Tone and Contrast: Since it’s black-and-white, the contrasts between dark and light are important. The stark contrast gives the photo a clean, sharp look that adds to the feeling of openness.
Subject Matter: The focus is on wide, open spaces, often with very little human presence. Any human-made structures are small, showing how nature dominates the scene.
Space: There’s a lot of empty space, making it feel wide and open. This can give a sense of loneliness or isolation.
Contextual
Historical Moment: The photo was taken in 1968, during a time when cities were rapidly growing, and suburban sprawl was taking over. This fits into Adams’ focus on how human development was starting to change the natural landscape.
Environmental Impact: Adams is known for photographing the American West, especially focusing on how urbanization and development were affecting the environment.
Adams’ Perspective: He loved the American West and wanted to capture it before it was changed forever. In the late ’60s, he started showing the effects of that change, highlighting the quiet, sometimes sad consequences of human growth.
Conceptual
Nature vs. Civilization: The photo highlights the tension between the open land and the human structures that are slowly taking over it. It’s a reminder of how much nature is being altered by development.
Solitude: The wide, empty spaces give a feeling of loneliness. The smallness of human figures or buildings in the scene makes you think about how we’re just one part of a much bigger, more powerful world.
Critique of Development: Adams is kind of questioning the idea of constant growth and progress. The photo feels like a commentary on how human development might be coming at the cost of something beautiful.
What Was New Topographics a Reaction To?
Before this movement, landscape photography often romanticized nature, ignoring how people had changed the environment. New Topographics photographers challenged that idea, documenting the way human expansion had reshaped the landscape.
Historical Context
It was also a response to what was happening in post-war America. After World War II, there was a housing boom, highways expanded, and shopping malls took over open land. Cities grew fast, and suburbs spread further out. These photographers were capturing that shift.
At the same time, environmental issues were becoming more noticeable. Industrial development and urban sprawl were raising concerns about pollution and overdevelopment. While these photographers didn’t make direct political statements, their images highlighted the impact of human progress on the landscape.
Why It Matters
The 1970s was a time of big changes. The economy was shifting, inflation was rising, and protests for civil rights, women’s rights, and against the Vietnam War were shaping society. The landscapes captured by New Topographics photographers reflected this moment, a world where expansion, progress, and loss were happening all at once.
Their images still feel relevant today. Urban sprawl, industrialization, and environmental change haven’t slowed down. This style of photography makes us look at these spaces differently, not as background scenery but as part of the world we’ve built.
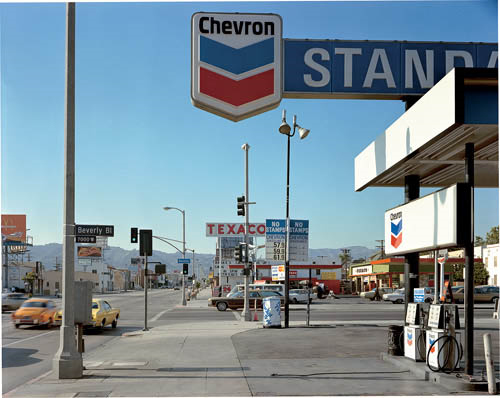
Stephen Shore, Beverly Boulevard and La Brea Avenue, Los Angeles, California, June 21, 1975, chromogenic colour print
Foreground vs background | Dominant features
Composition | low horizon line | Square format
Perspective and detail / cluttering
Wide depth of field | Large Format Camera
Colour | impact and relevance
Nationalism vs mobility vs isolation
Social commentary | The American Dream ?
An appreciation of the formal elements : line, shape, form, texture, pattern, tone etc
Description:
Technical:
Stephen Shore’s photo of Beverly Boulevard and La Brea Avenue captures the harsh daylight of midday, where the sun is directly overhead, creating sharp shadows that give the scene a lot of depth and texture. The use of a large-format camera makes everything in the shot super detailed, from the cars on the street to the buildings and the trees. The chromogenic color print brings out the vivid colors, making even the smallest things stand out. The result is a super clear, almost crisp image that feels both real and slightly heightened, like you’re seeing the everyday world in a new way.
Visual:
The composition is all about the urban environment. You see a long stretch of road and low buildings, and there’s a sense of space that feels wide and open. The way the elements of the photo are arranged follows the rule of thirds to some degree, but it’s not strict. There’s a flow to the image, with the street and the buildings pulling your eye toward the horizon. The lines of the road and the edges of the buildings lead you into the distance, creating a sense of depth. The square format of the photo makes everything feel balanced, and the whole scene seems a bit compressed, like it’s all being funneled toward one point, adding to the feeling of space in the image.
Contextual:
This photo was taken in Los Angeles in 1975, a time when the city was all about cars and expansion. The image shows the effects of urbanization, with lots of streets, billboards, and cars, symbols of a rapidly industrializing America. The bright colors, reds, blues, and whites, could be nods to the American flag and what those colors represent in terms of national identity. The scene is a bit isolating, even though it’s a busy street, you don’t see much interaction between people. Instead, it’s all about the car culture and consumerism that defined the time. It feels like Shore is commenting on how progress and technology shape our lives, for better or worse, and how that can sometimes disconnect us from nature.
Conceptual:
The image is more than just a snapshot of Los Angeles, it’s a reflection on what America was going through at the time. The street seems to go on forever, pointing toward a future that’s all about roads and infrastructure. There’s this pull between the ideal of the open road and the reality of urban sprawl. The photo isn’t romanticizing the city but is more about observing it as it is, big, fast, and sometimes a little isolating. The cars and the billboards show the busy, consumer-driven culture, but the image also makes you think about where all this progress is taking us. It’s like the road stretches out, but does it lead to something meaningful or just more of the same?