New Topographics began in 1975 after the American war describing the photography style of a group of American photographers who took photos capturing human relationship between manmade and natural landscapes. The style of photography looks to present unromanticised and almost ugly depictions of the landscape to criticise the development of architecture and comment of the contextual going ons of the time such as after the war there was a spike in baby’s being born called the baby boom as fertility rates went up in many countries and numbers of people settling and having children also increased.
This style of photography often does not include humans within the photos and challenge the boundaries of beauty within landscapes. The group of eight photographers selected by William Jenkins, an art and photography critic. Each photographer produced 10 prints each and consisted of Robert Adams, Lewis Baltz, Joe Deal, Frank Gohlke, Nicholas Nixon, John Schott, Stephen Shore, and Henry Wessel, Jr. Along with a German couple, Bernd and Hilla Becher. The images were displayed in a small exhibition at The George Eastman House.
Robert Adams
Robert Adams was born on May 8th in 1937 in New Jersey. During his early life his family moved around often before settling in Wheat Ridge, Colorado in 1952. Growing up he had many health problems such as many allergies and asthma he also contracted polio at age 12 but was able to recover. Despite this Adams enjoyed sports hiking and walking in nature and spending time with his family. He was also a part of the boy scouts and worked in national parks and spent time reading and visiting art museums with his sister.
In 1955 Adams attended the University of Colorado but then went on to transfer to the University of Redlands and received a BA in English before attending the University of Southern California and graduated with a PhD in English language.
He first began his photography career in 1963 where he bought his first camera and began to study how to use a camera and learnt photographic technique from a photographer living in the area . in 1970 he began working full time as a photographer after the Museum of Modern Art bought 4 of his prints.
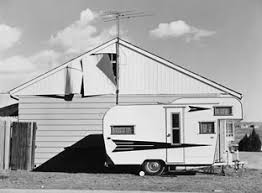
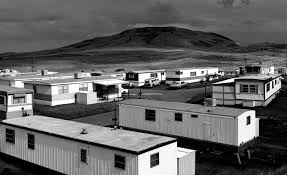
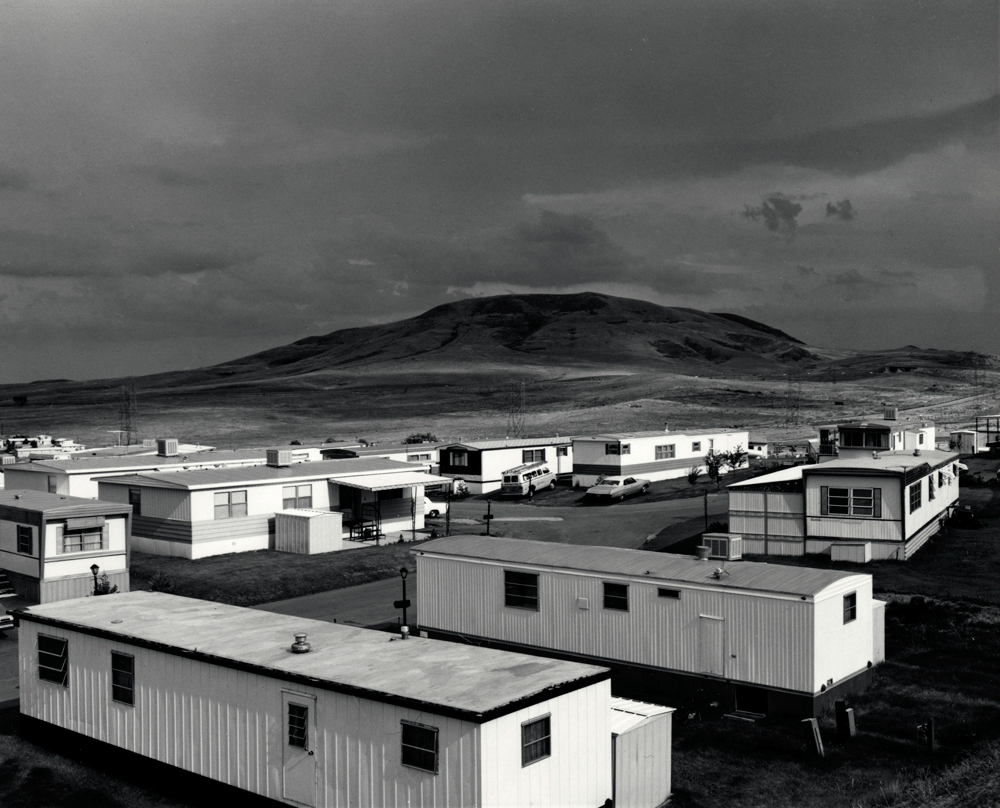
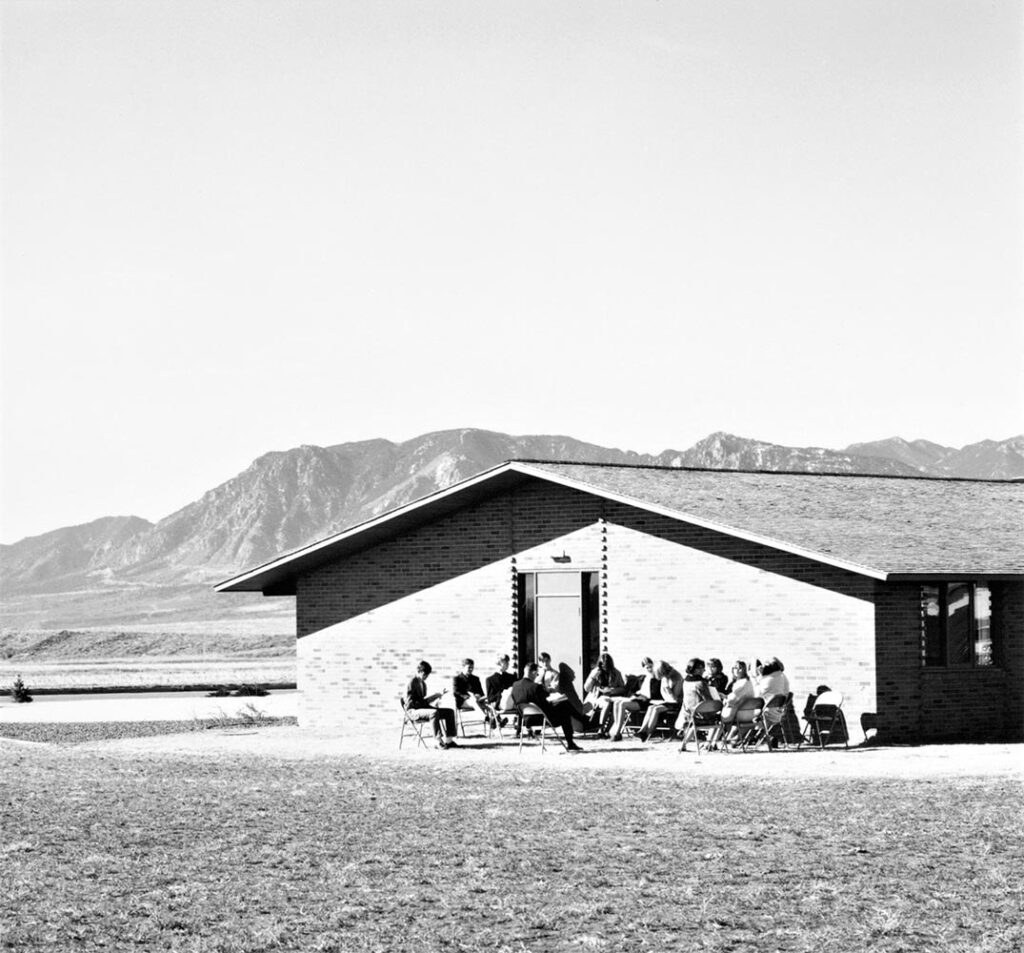
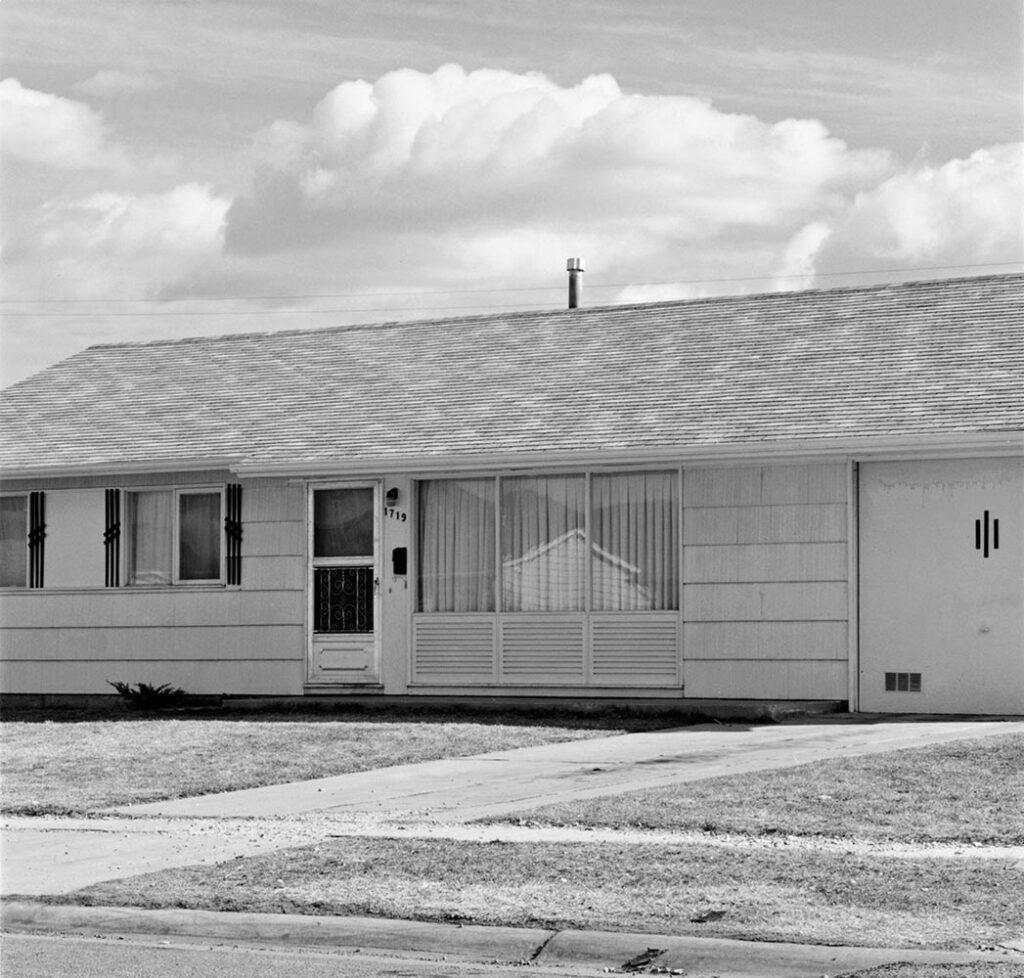
The lighting is natural daylight as the image is taken outside from what looks to be up on a hill. The photographer has framed the horizon line using the rule of thirds so that the buildings take up two thirds of the image. The mountain/hill is in the background however is more centered to still bring viewers attention to it despite it not being in the foreground.
Visual
The image is in black and white showing how Adams sees the place as boring and barren. However, there is many different variant tones of light and dark throughout. The shape of the blocky square shapes of the caravans contrast the smooth round shape of the hill/mountain and draws the viewer’s eye to the modernism of the time clashing with the environment. The mix of leading lines crossing over one another of how the road is pointing right and the caravans are pointing left shows how he sees the town as a mess and as a wrong place to be.
Contextual
Taken in the 19th century. During this time in America it was after WW2 and though America was not suffering with rebuilding the city there were many deaths of young men fighting
Conceptual
He was trying to bring truth to the idealistic misconception of the American dream and how the crisis of mental health and the poor quality of life of the civilians was being ignored by the government and was still encouraging people to move away to very rural areas. He attempted to make the people understand the nationalism propaganda they were being fed was not the truth. As well as discouraging the uglier architecture built in natural surrounding landscapes which in his opinion was ruining views and American landscapes.
Lewis Baltz
Born in Newport Beach, California on the 12th of September 1945 Lewis Baltz’ passion for photography began when he was just 11 years old with his first camera being a 35mm focusing camera. He described seeing photography as “Magic” when he first began, in an interview with David Campany. Influenced by famous artists such as Edward Weston and Wright Morris. He was most known for his works of black and white images of suburban landscapes as he tried to resist against industrialisation the false presentation of the “American Dream”. In 1975 his work was displayed in the original New Topographics exhibition mentioned previously in this post. At age 26 in 1971 he graduated from the San Francisco Art Institution after attending to avoid military service in Vietnam and had his first solo exhibition in the same year presented at Leo Castelli Gallery in New York. Two years later received his MFA from Claremont Graduate School. He taught photography at multiple schools including Yale and the Art Academy of Helsinki. He was motivated by American politics of the time as funding was cut from the arts by figures such as Ronald Reagan and George Bush. Baltz began creating works to criticise and bring focus to how the seeable and physical world was reflecting what was happening daily and the powers guiding them in their country as scenery began to become bland and shallow. He also explored how new technologies were being misused especially types such as security cameras and CCTV. He left America for France in 1989 and continued travelling extensively. Following this he changed his photography style from black and white to coloured stating it was a shift from looking at the past to the future as well as
My Lewis Baltz Inspired Images
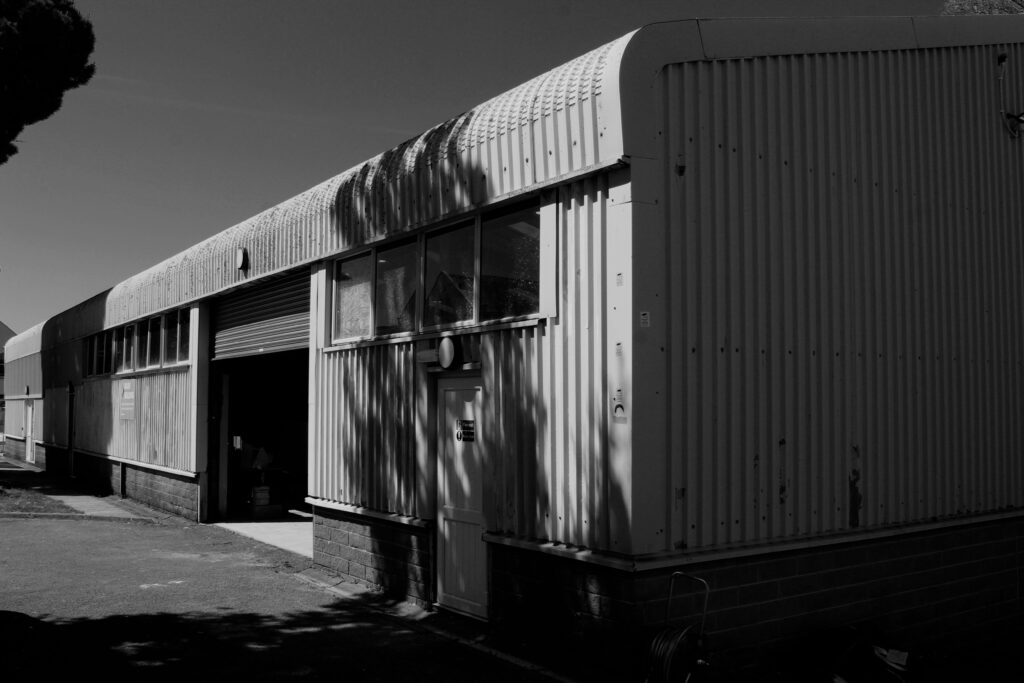
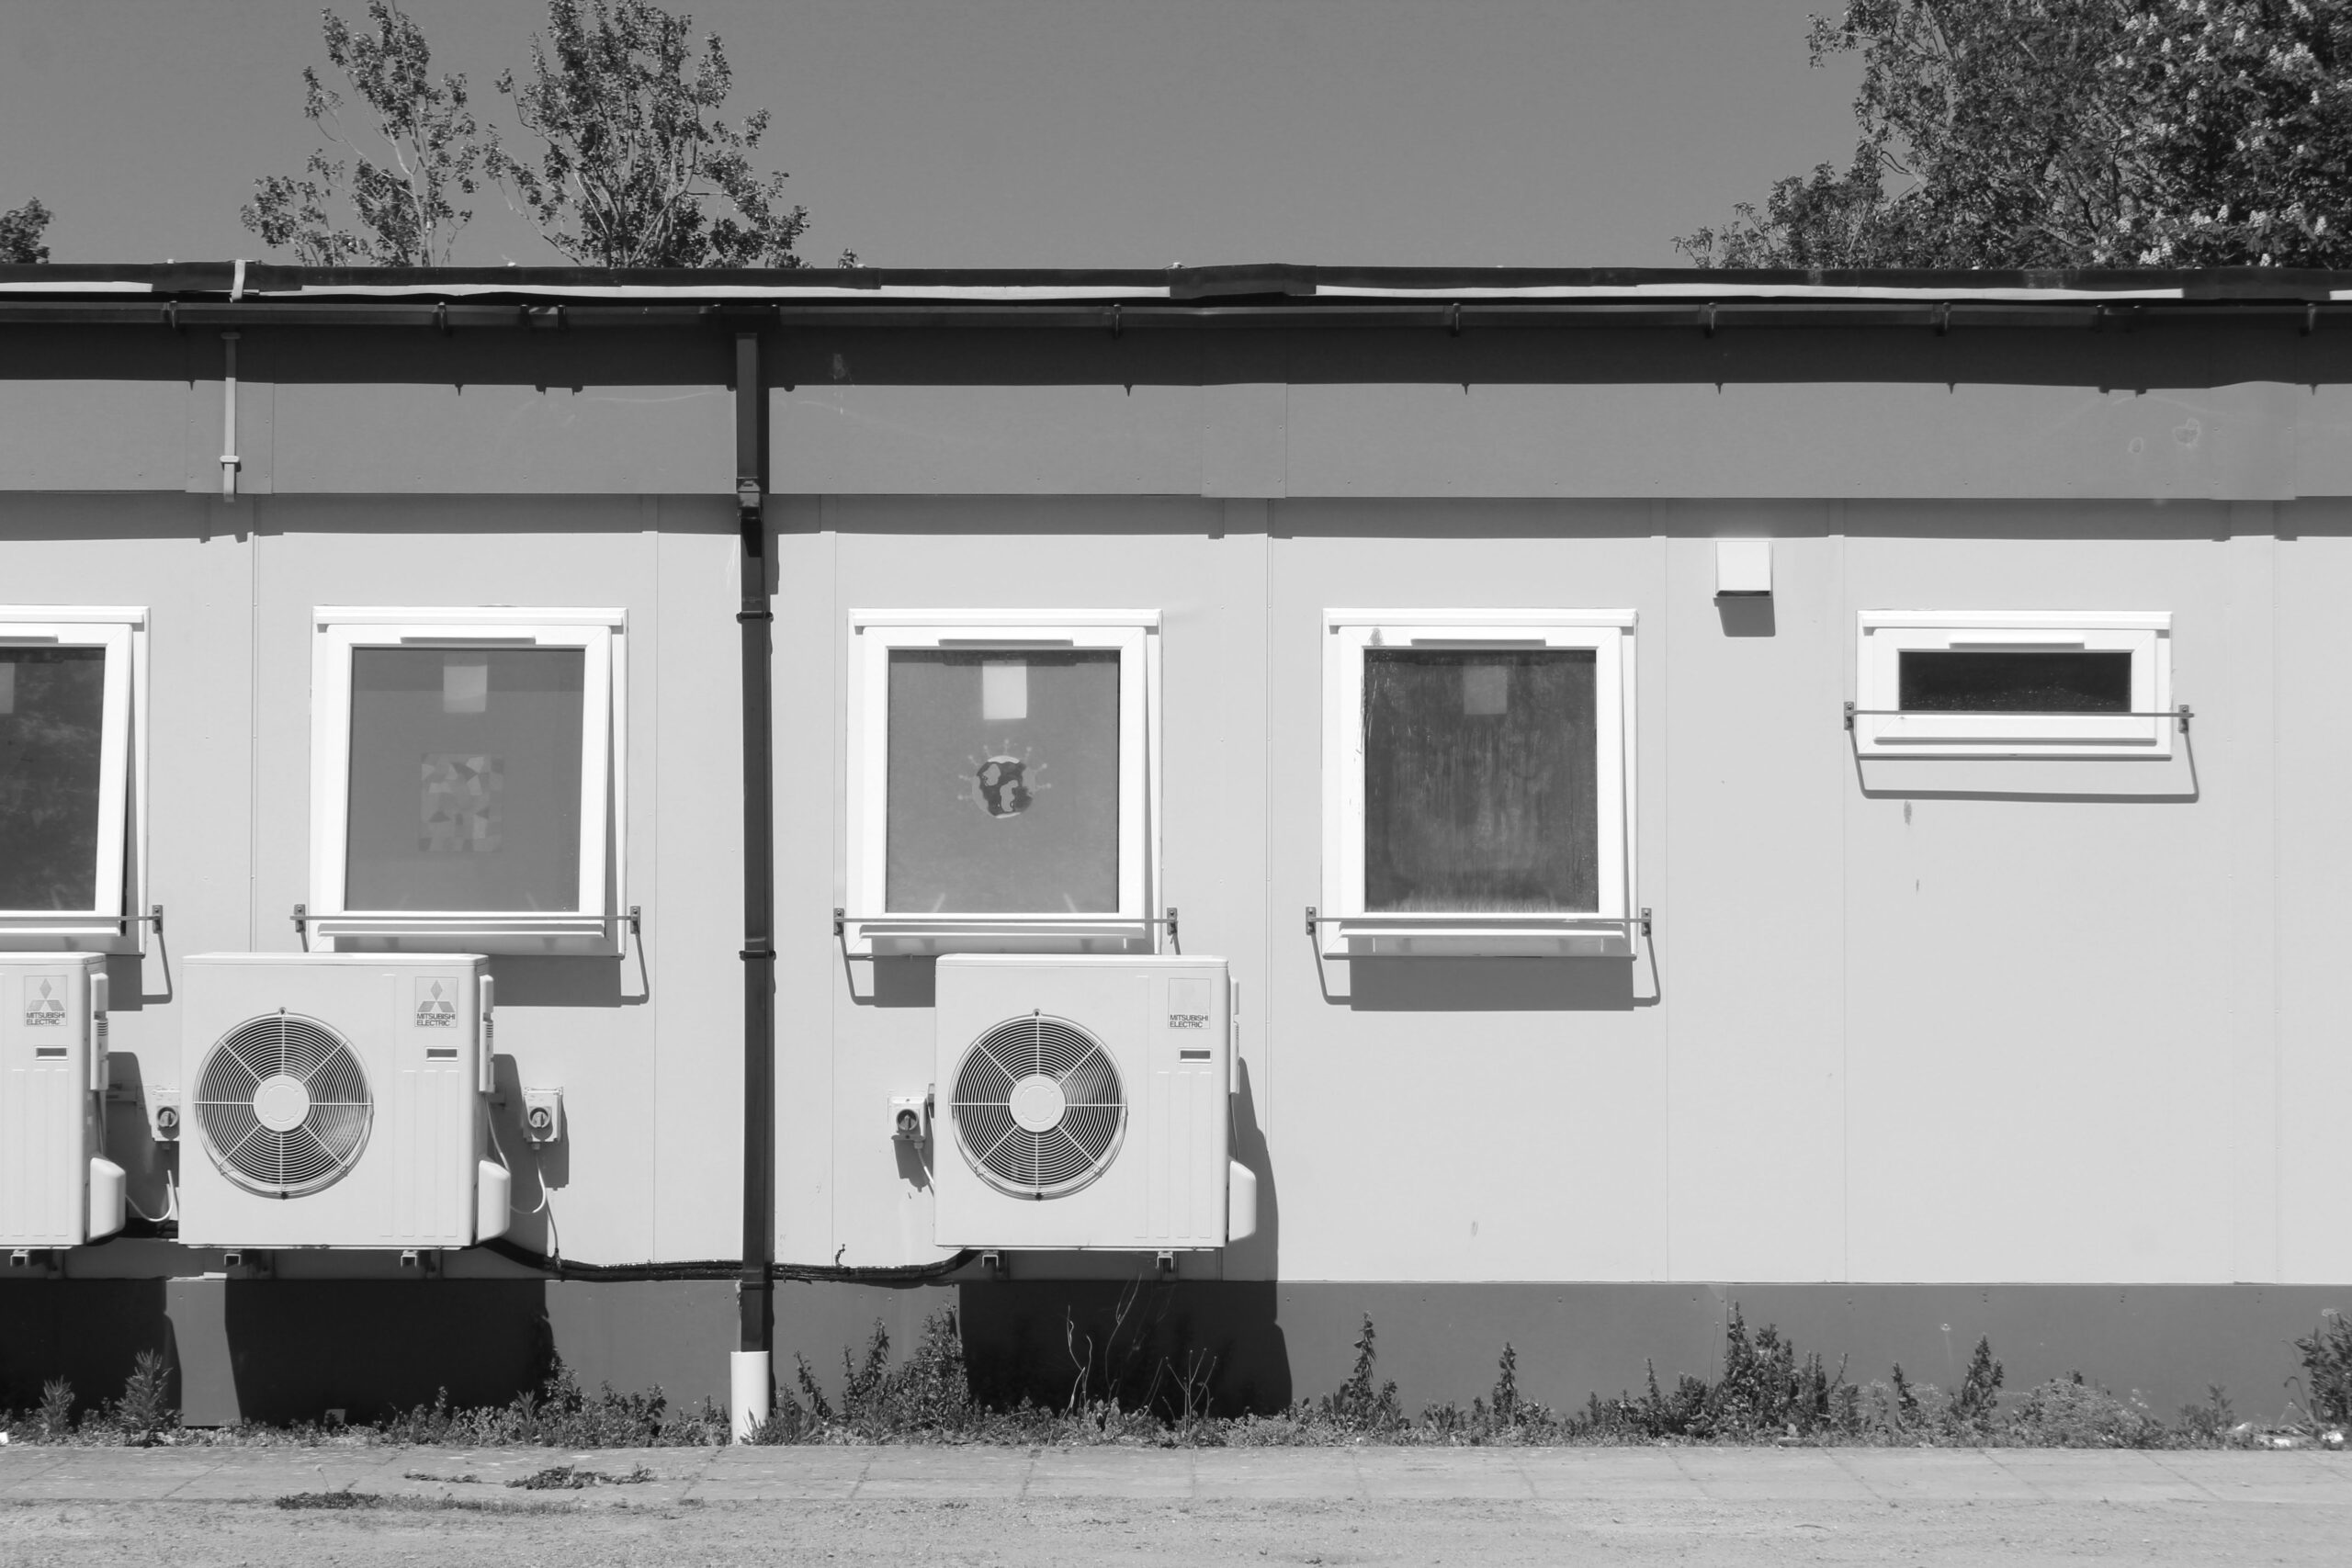
LEWIS BALTZ WORKMY WORK
Compare and contrast
There is similarities in our work for example the use of repetitive square patterns throughout. Such as the geometric angles of in Lewis Baltz work of the metal carriers and the windows in my work and the square fan on the outside of the buildings. They’re also similar in the black and white tones of them however Lewis Baltz has a more vintage purple tinge to it which could be due to the inkjet he’s used to print compared to my computer generated B&W. A difference in the images is images are mostly comprised of the man made subjects however my work has nature in the background in small proportions such as the branches in the background and though Baltz has the sky in his I don’t know if it was intended or if he just wanted a plain grey background. Another aspect which is similar is there isn’t much texture in either image as the buildings are quite flat and plain. The layout is also more or less the same with both of us using the rule of thirds with the placement of the squares being on one side of the image, mine on the left side and Baltz on the right as well as the horizontal lines across the images. Also the depth of field is similar with similar distance in the foreground to the subject.
Stephen Shore
Born October 1947 Shore is from a Jewish family who ran a handbag company living in New York. At 6 years old he was gifted his first Kodak dark room set from a family member. From there Shore was self taught and studied photography through books until age 4 when his work was bought by the Museum of Modern Art NY. At age 18 Shore began working at Andy Warhol’s studio where he’d spend his time for the next two years. Shore also had a solo exhibition at The Metropolitan Museum of Art in 1971. It was in the 1970’s where Stephen Shore gained his title as a major colour photographer all of his images were shot using a large format camera and used kodacolor-X giving a high colour quality. Shore eventually published his book Uncommon Places in 1982.
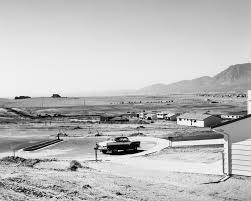
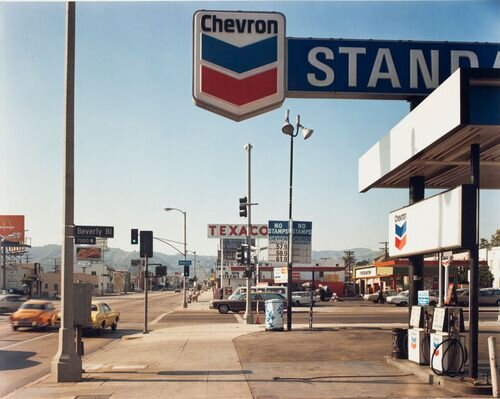
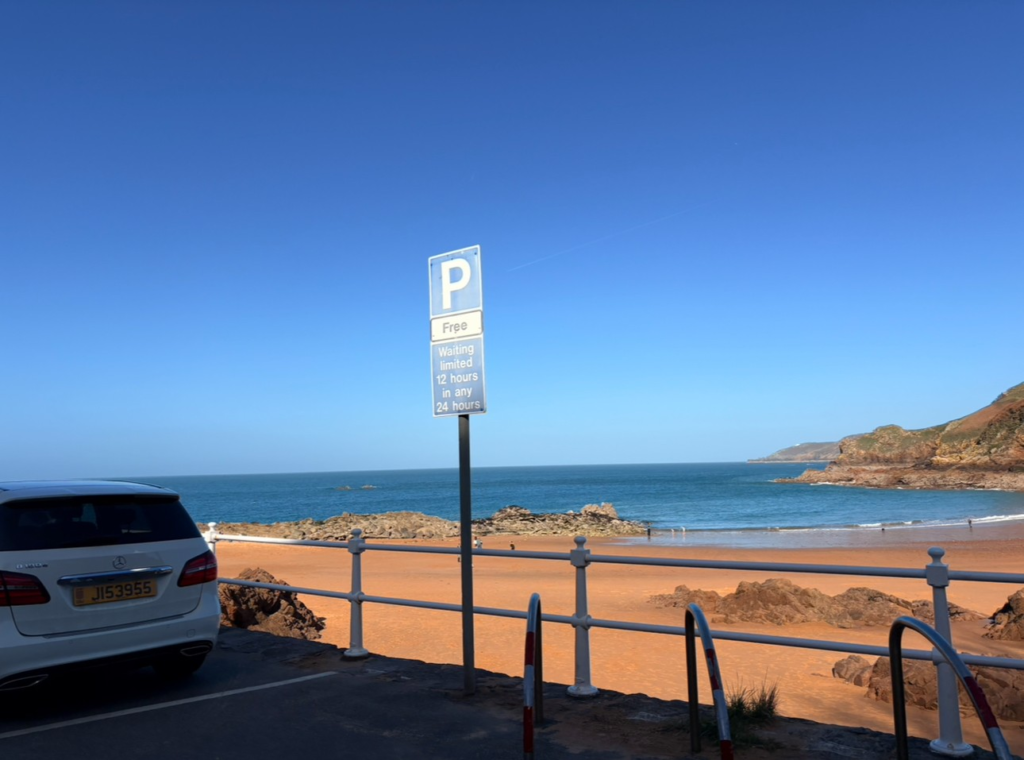
The lighting is natural daylight. Shore used many different types of cameras such as 35mm hand held cameras and then switched to a 4X5″ view camera and then a 8×10 format camera.
Visual
The use of capturing the red white and blue colours are to represent the american flag colours. The photo is taken at eye level to show what the day to day surroundings of an American citizen would look like. The use of different leading lines such as the pavement pointing to the mountains in the distance.
Contextual
Shore was mostly self taught however was influenced by Andy Warhol through his time working with him. The state of America of the mid 1970’s and how many were struggling with mental health along with the economic state of the country being poor with inflation and government spendings on the Vietnam war along with the 1973 Oil crisis which could be why Stephen Shore chose a petrol station as his photographic subject.
Conceptual
Stephen Shore wants to comment on the landscape of the time but also the state of America of the mid 1970’s as previously explained. The leading lines drawing the viewer to the mountains in the back conceptually means that that is what the true landscape should look like instead of the endless stretching concrete. He does this to show humanities effect on the environment.
‘This movement, known as the New Topographics, represented a significant shift in the way we view the world around us. It focused on the “man-altered landscape,” revealing the intersection of humanity and nature in a unique and thought-provoking way.’
Artists That Follow Topographics:
Robert Adams
Lewis Baltz
Stephen Shore
Bernd and Hilla Becher
It began in the late 1060s and early 1970s where those photographers decided to use their artistic vision to take images of places that wouldn’t be considered ‘picturesque’ and considered overlooked and unattractive.
All these photographers prefered subjects that were suburban like: housing, warehouses parking lots etc. They saw those places as ‘beautiful’ as it was something that had been created on the natural land. They took images known as ‘new topographics’ in order to preserve what once wasn’t man made.
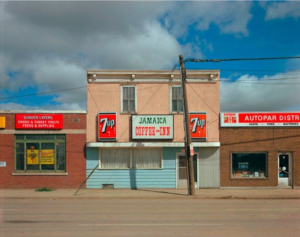
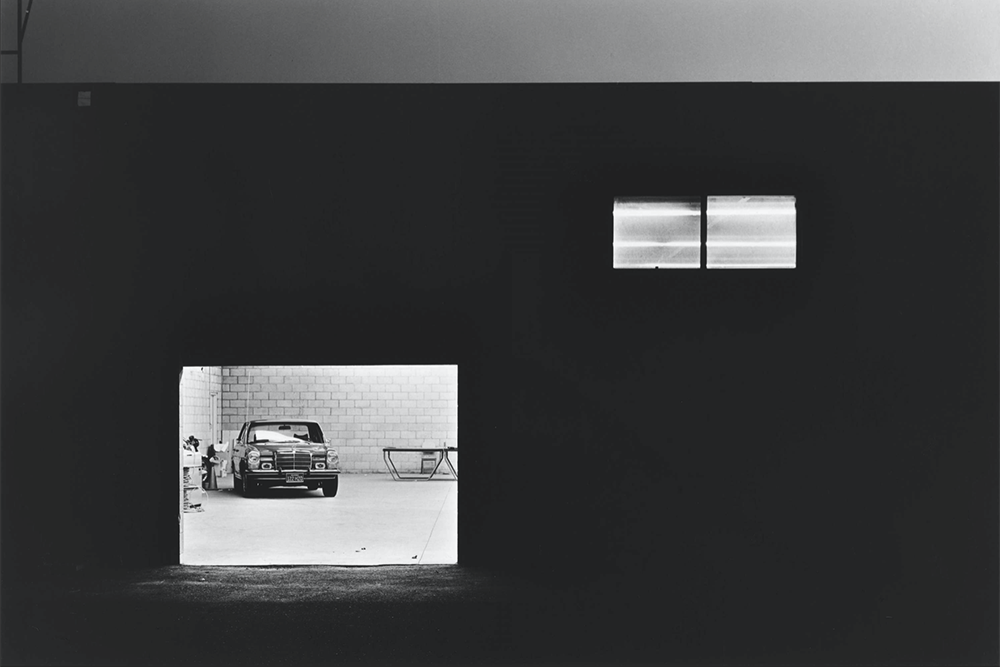
Lewis Baltz, The new Industrial Parks near Irvine California, 1974
Lewis Baltz had a collection called ‘New Industrial Parks Near Irvine, California’ where he photographed almost uncanny images of alone car parks. In doing this he planned everything that went into it from the different lighting to composition and detail.
Lewis Baltz, The new Industrial Parks near Irvine California, 1974Lewis Baltz, The new Industrial Parks near Irvine California, 1974
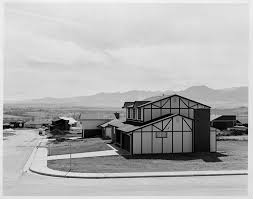
Robert Adams, Newly occupied tract houses Colorado Springs, 1968
Robert Adams mainly focused on urban and suburban areas in Colorado in doing this, he created a collection called ‘The New West’. Adams’ pictures were described as precise and fastidious justice some of the mortal and venial sins that we have committed against our land in recent decades. The places he takes images of are very casually built, and will therefore acquire character soon enough.
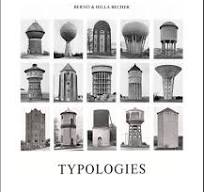
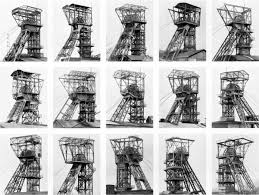
Typologies in photography are series of images that show a group of similar objects, buildings, or scenes in a consistent, repetitive way. Each photo follows the same style or setup, helping viewers easily compare the similarities and differences between subjects. It’s all about noticing the small details you might usually overlook.
Typologies make everyday things feel unique. By photographing similar subjects side-by-side, photographers show patterns, differences, and stories we might not see otherwise. Typologies can highlight social, cultural, or environmental themes too. They encourage viewers to slow down and really look.
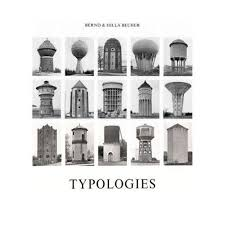
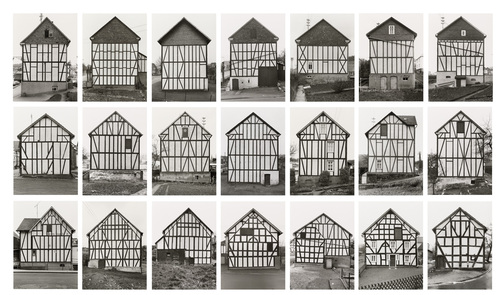
Typologies became famous through German photographers Bernd and Hilla Becher. Starting in the 1950s, they photographed industrial structures like water towers, coal bunkers, and gas tanks. They used a very deadpan style: plain backgrounds, even lighting, and no fancy angles. Their work inspired a whole new way of thinking about photography.
Artist reference:
Bernd and Hilla Becher are considered pioneers of typological photography. They met at art school and started working together in the late 1950s. Their goal was to document disappearing industrial architecture across Europe and North America. They photographed structures like water towers, blast furnaces, and silos with a strict, consistent style. Every image was black and white, taken from a similar angle, and presented in grids to highlight small variations. Their influence can still be seen today in modern documentary and conceptual photography.
Typology plan:
I will have to choose something repeatable like doors, shop fronts, trees, or street signs. This will allow me to accurately represent the main idea of typologies.
To recreate these photos shown, i will have to use the same framing, lighting, and angles for every photo. This will give it an effect that the photos do have similarity in them whilst also being unique in the process.
I will then edit these photos and crop them to allow assortment into grids that make up the typologies. I could even go out of my way to make them black and white to better represent my work in the way of Bernd and Hilla Becher.
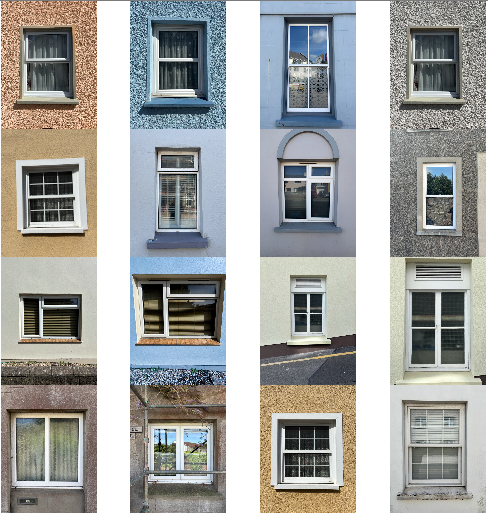
Typology Photos:
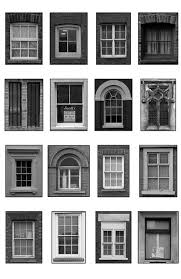
These photos are only one of the small photoshoots i’m going to be doing for typologies, this photoshoot focuses on windows, with there being a difference in photos but also a type of similarity between them.
A photographic typology is a single photograph or more commonly a body of photographic work, that shares a high level of consistency. This consistency is usually found within the subjects, environment, photographic process, and presentation or direction of the subject.
What is the method or approach by photographers who use typology?
Through the methodical photography and presentation of a specific subject or theme, a typological photographer makes a space that invites a viewer to simultaneously identify both consistencies and distinctions in a series, building up a more nuanced whole. The typology is a genre built on differences and correlations.
The Bechers
The term ‘Typology’ was first used to describe a style of photography when Bernd and Hilla Becher began documenting dilapidated German industrial architecture in 1959. The couple described their subjects as ‘buildings where anonymity is accepted to be the style’.
How did Hilla and Bernd Becher become a duo?
They began collaborating together in 1959 after meeting at the Kunstakademie Düsseldorf in 1957. Bernd originally studied painting and then typography, whereas Hilla had trained as a commercial photographer. After two years collaborating together, they married.
What camera did Bernd and Hilla Becher use?
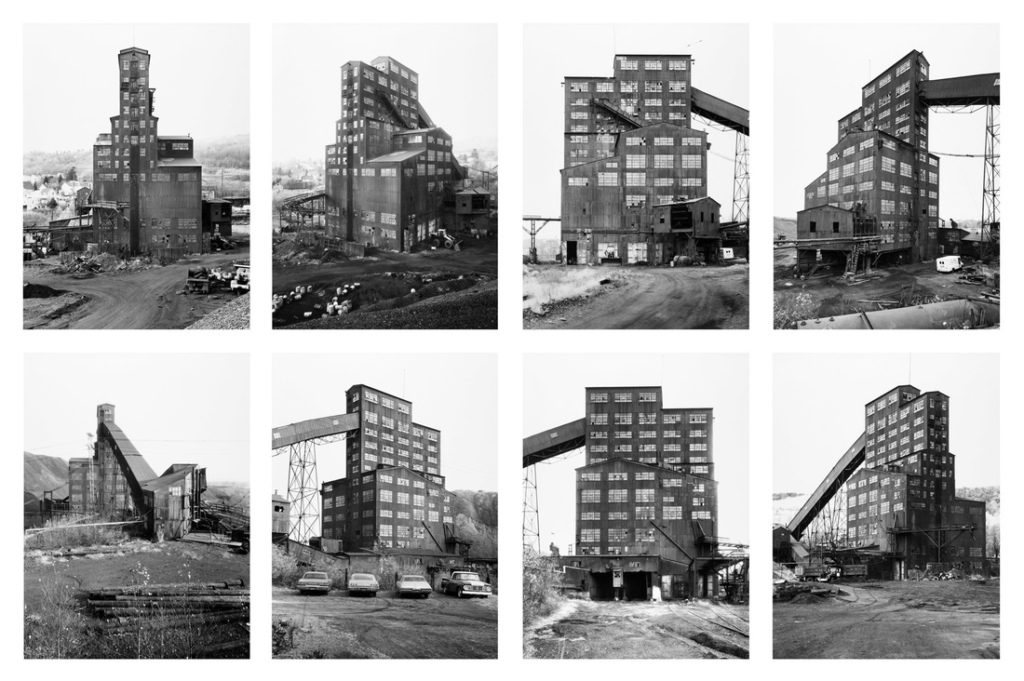
Together, the Bechers first photographed with a 6x9cm camera and then (after 1961) mostly with a large format Plaubel Peco 13×18-centimeter (5×7-inch) monorail camera. They photographed these buildings from a number of different angles, but always with a straightforward “objective” point of view.
What inspired them to begin to record images of Germany’s industrial landscape?
They were fascinated by the similar shapes in which certain buildings were designed. After collating thousands of pictures of individual structures, they noticed that the various edifices – of cooling towers, gas tanks and coal bunkers, for instance – shared many distinctive formal qualities.
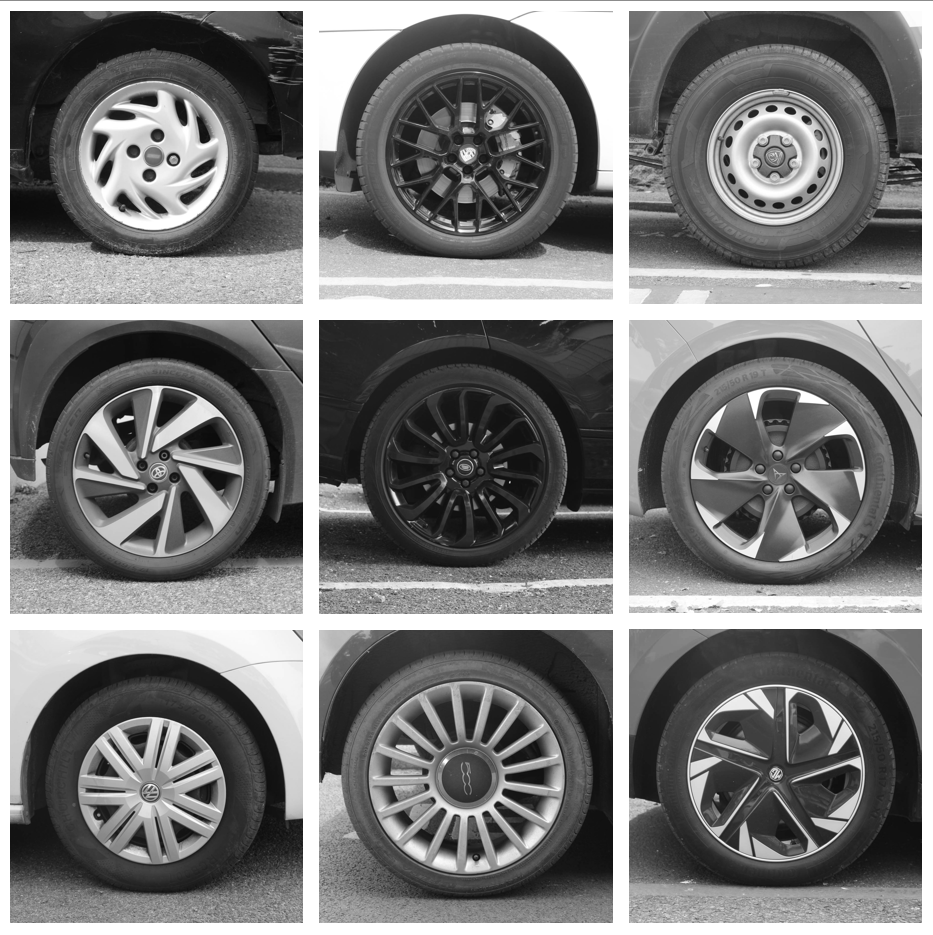
My images
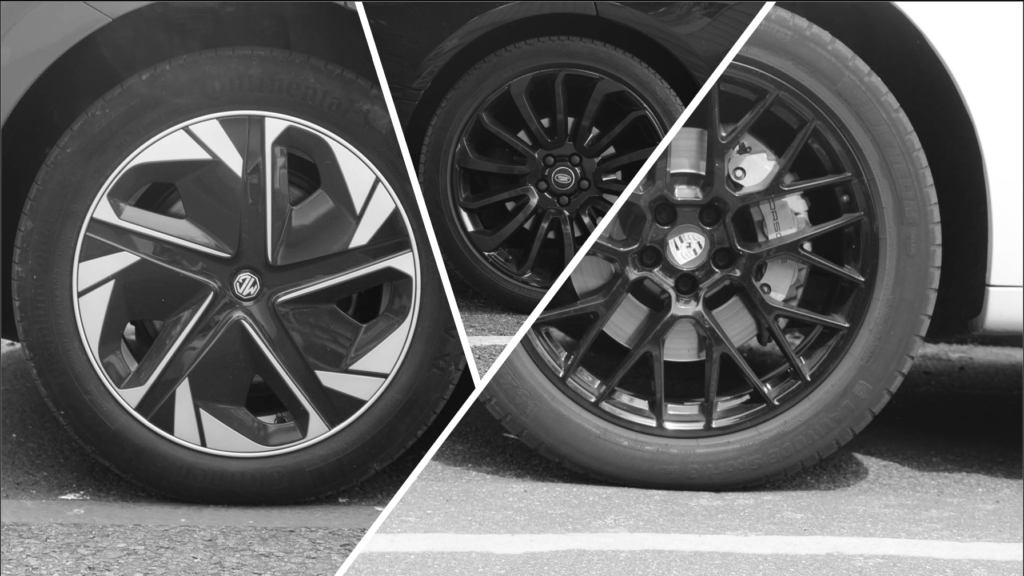
I decided to use the idea of car wheels for my typologies. I went around and took multiple photos of random wheels that i found. I then put them all into black and white and cropped them all to a square.
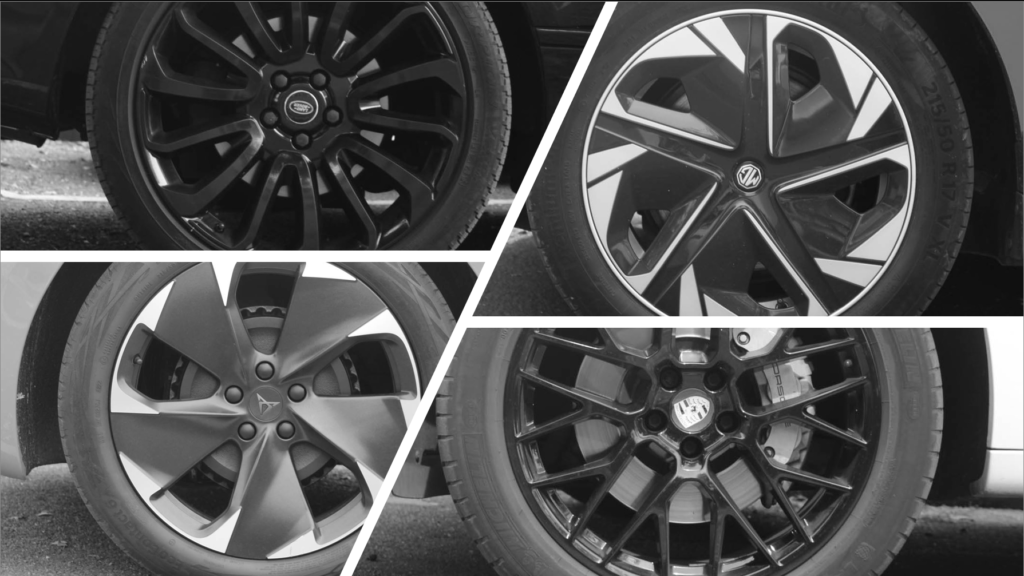
I also decided to try and set them out in different, more creative ways.
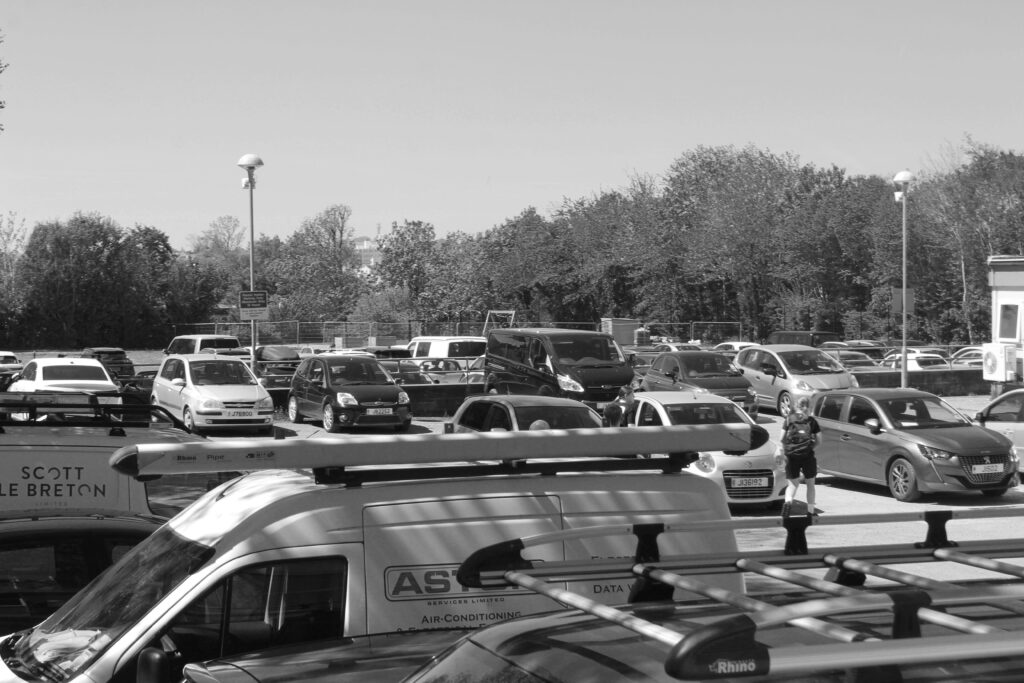
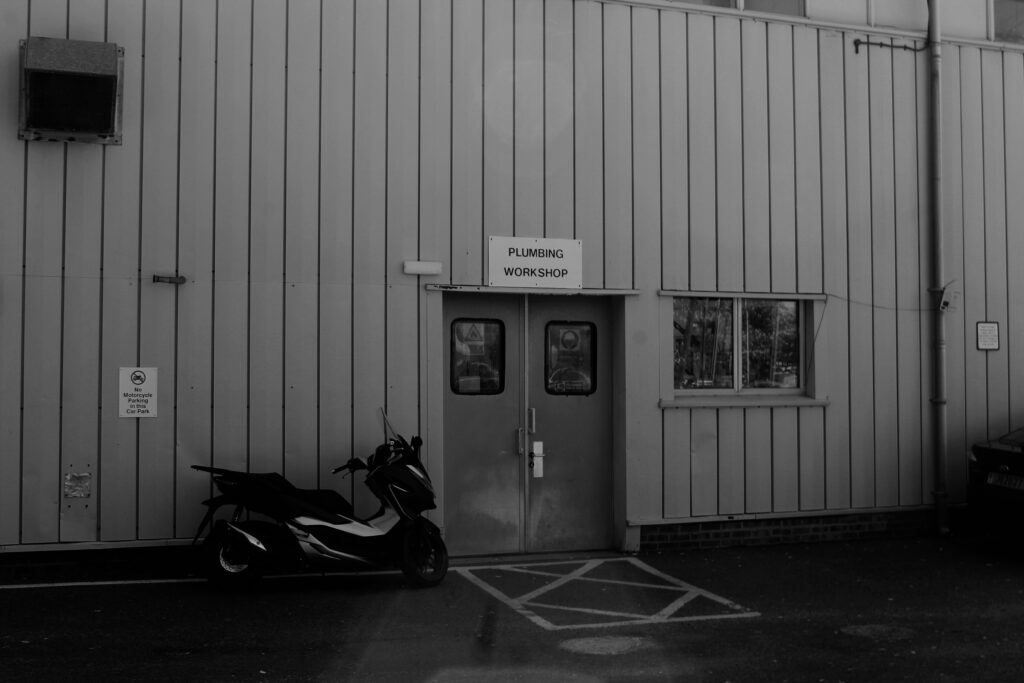
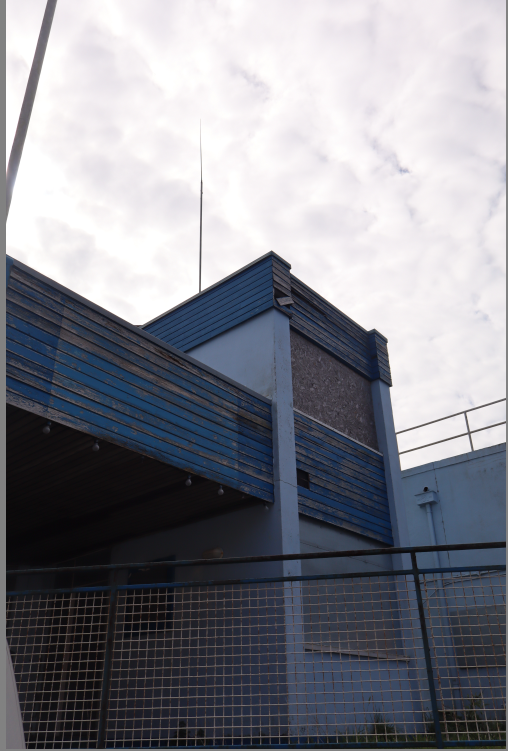
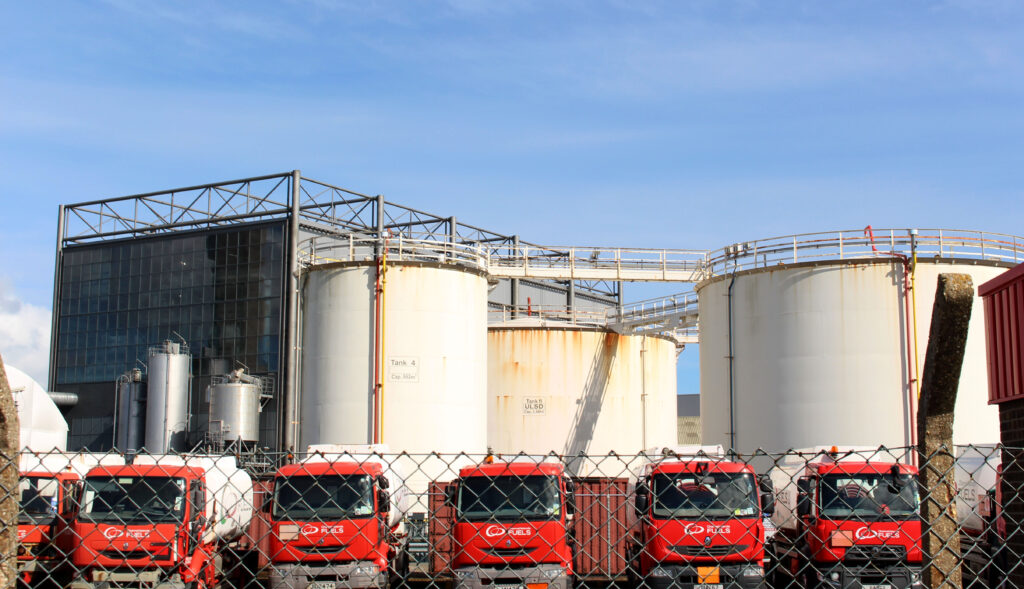
For this photoshoot, I went to the old sea cadet unit for some images and for the rest I went to La Collette industrial estate so I could capture Hilla and Bernd Becher typologies ideas.
Image Selection
These are the six images I have picked for my typologies photoshoot to edit. I like these images because they have industrial value which links to Hilla and Bernd Becher.
Image N01
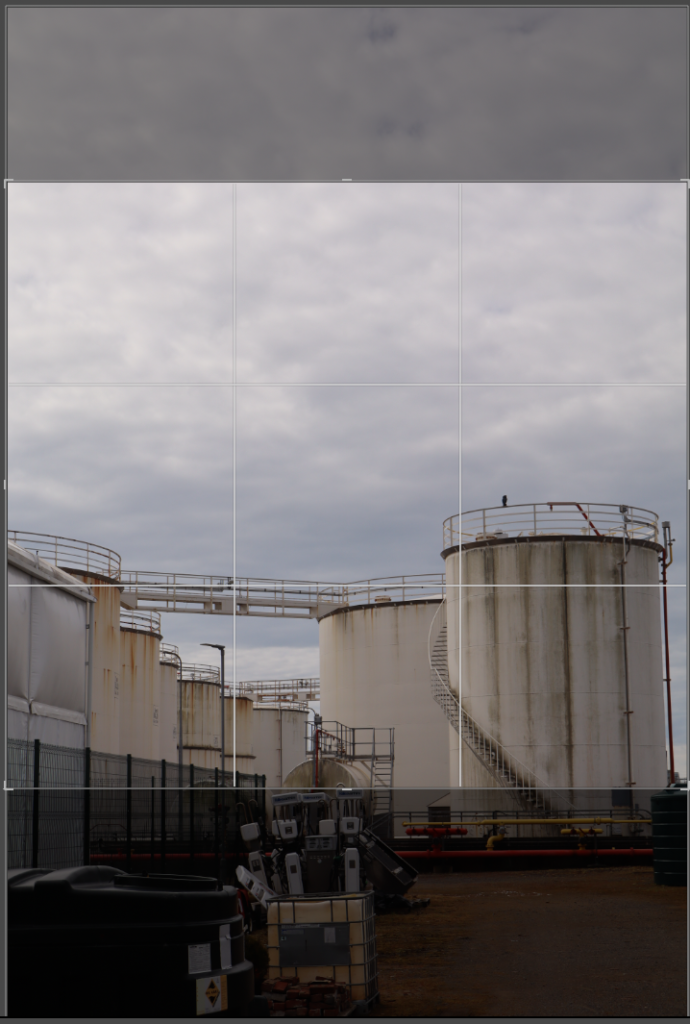
This is the image I’m going to edit.
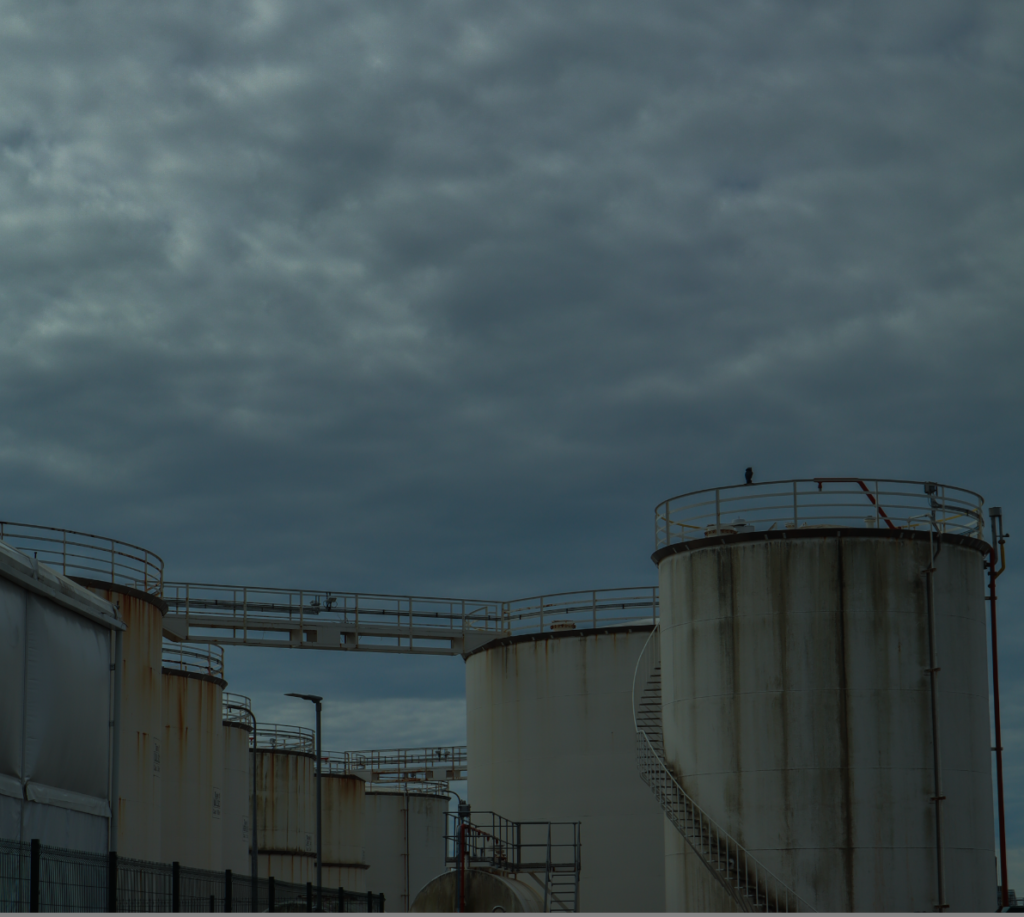
This is the edited image.
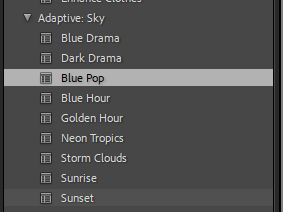
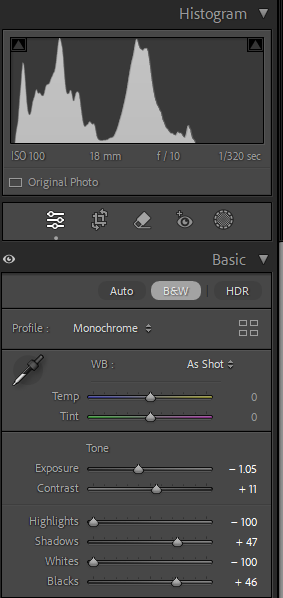
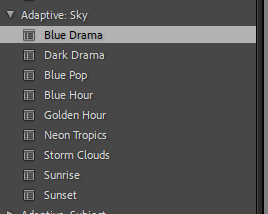
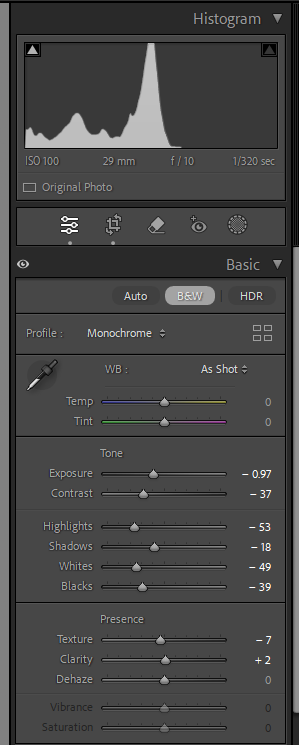
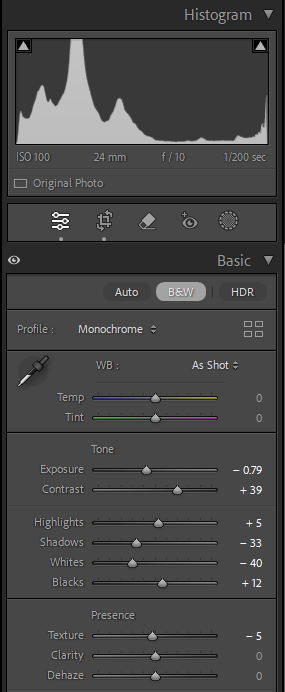
This is the filter I used to edit the image.
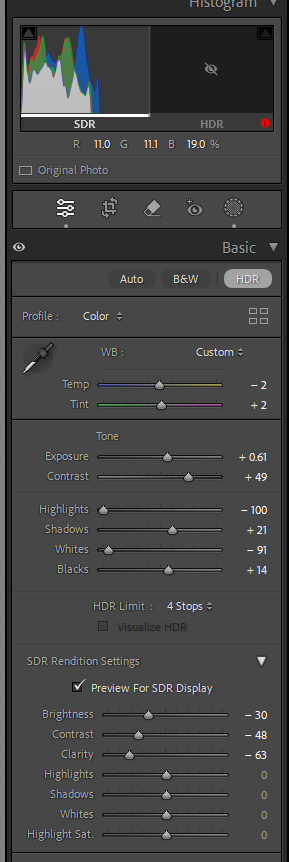
This is how I edited this image.
Black and White
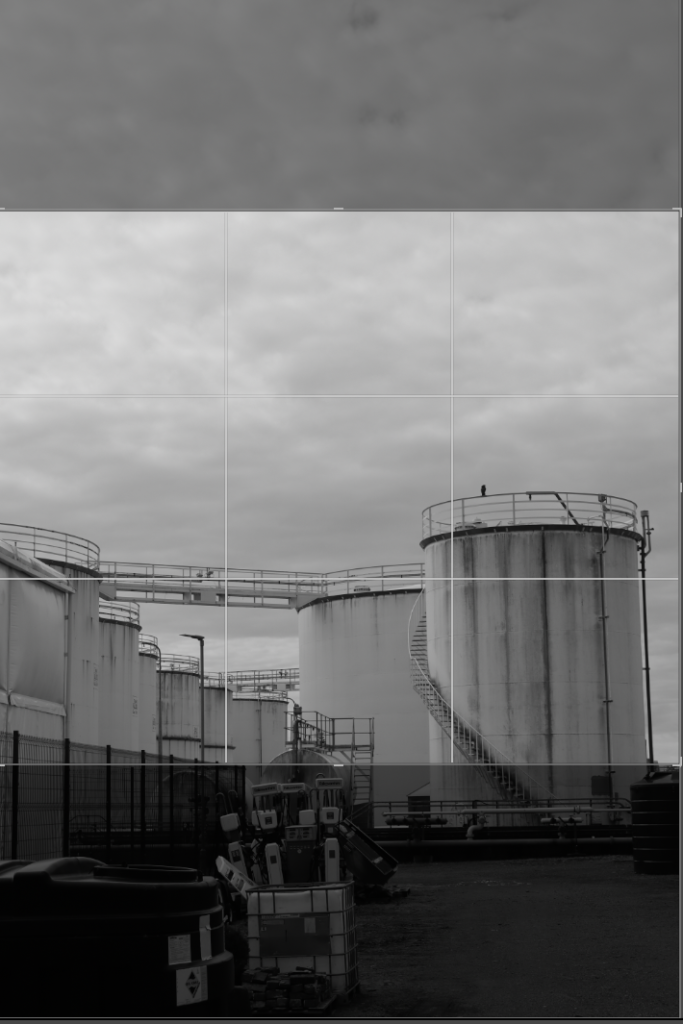
This is black and white image I have edited.
This is how I edited my black and white image.
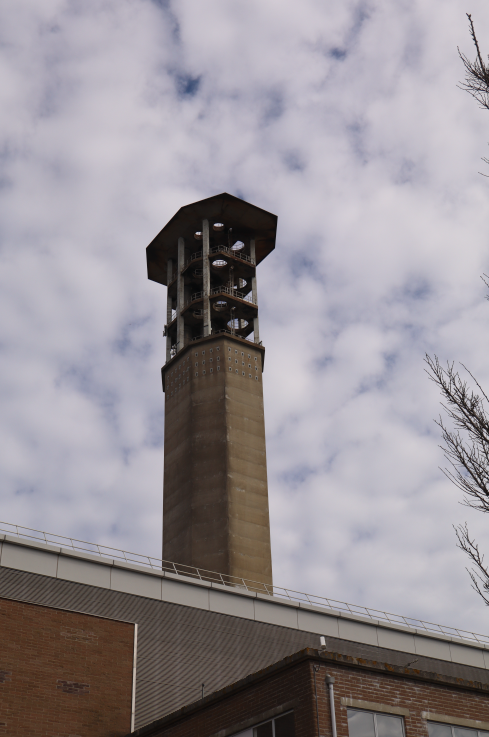
Image N02
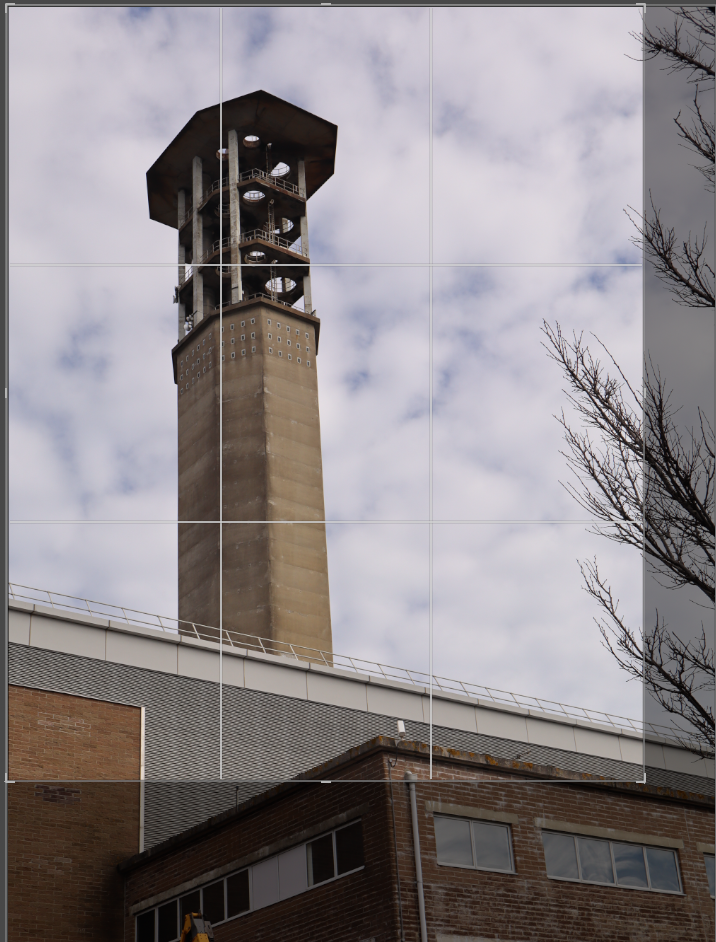
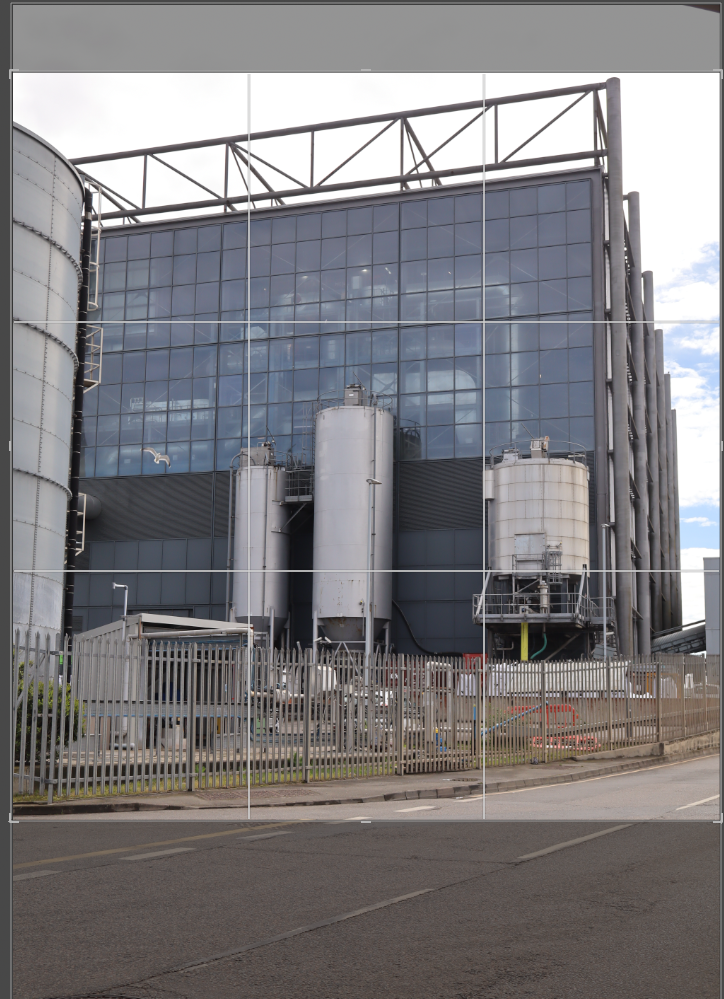
This is the image I want to edit.
I have cropped the image because it was unequal and wasn’t matching the rule of thirds.
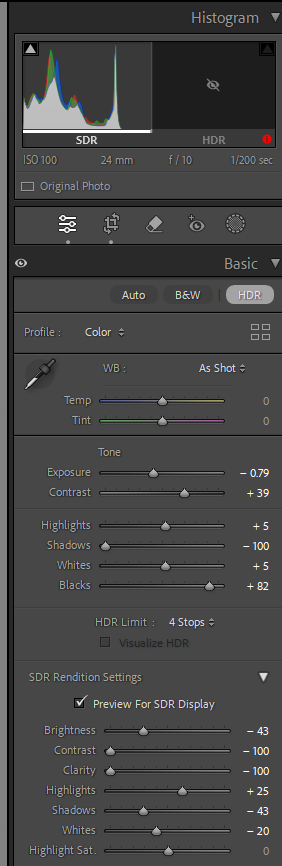
This is the filter I’ve used to create this image.
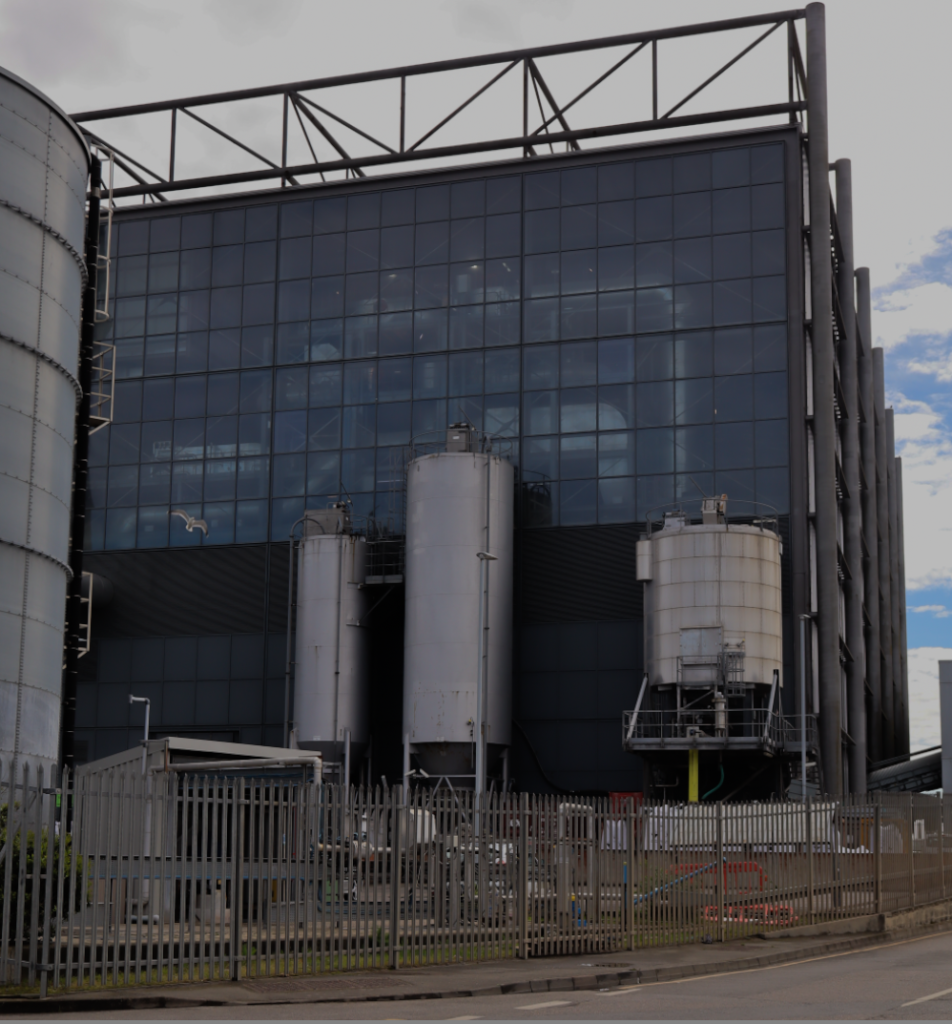
This is the image I’ve edited.
This is how I’ve edited my image.
Black and White
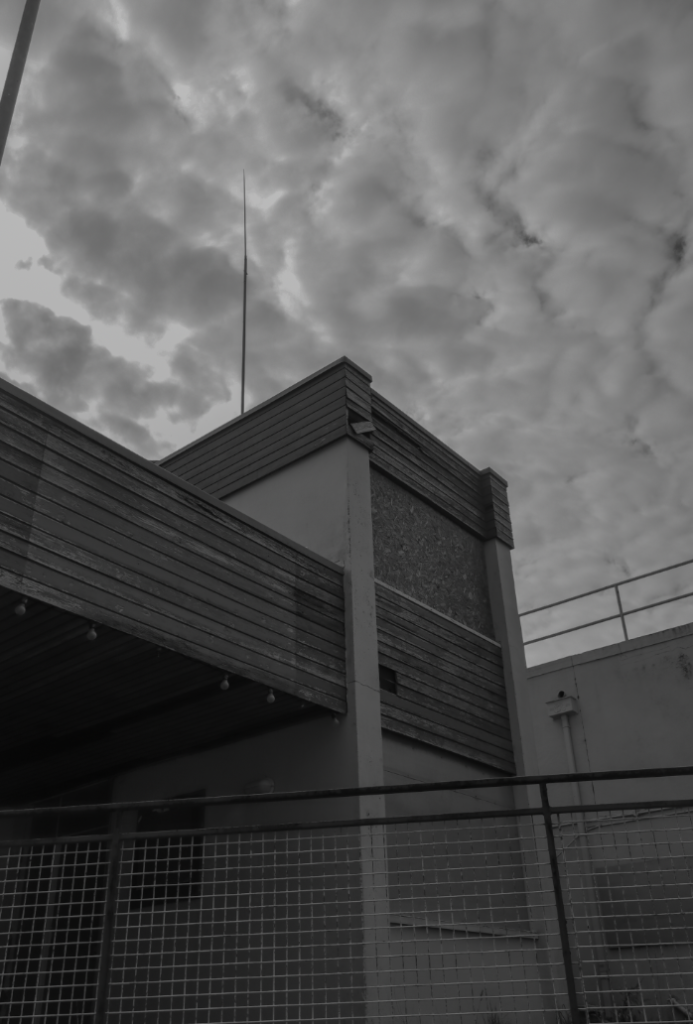
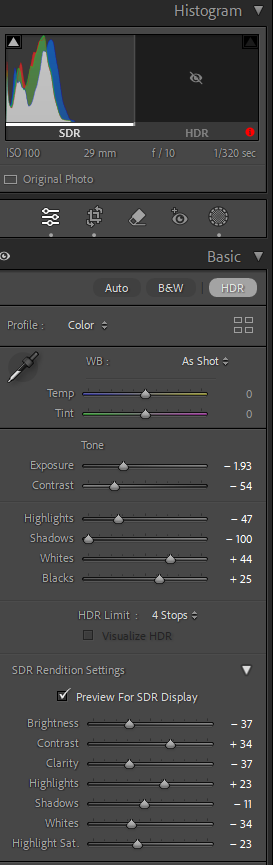
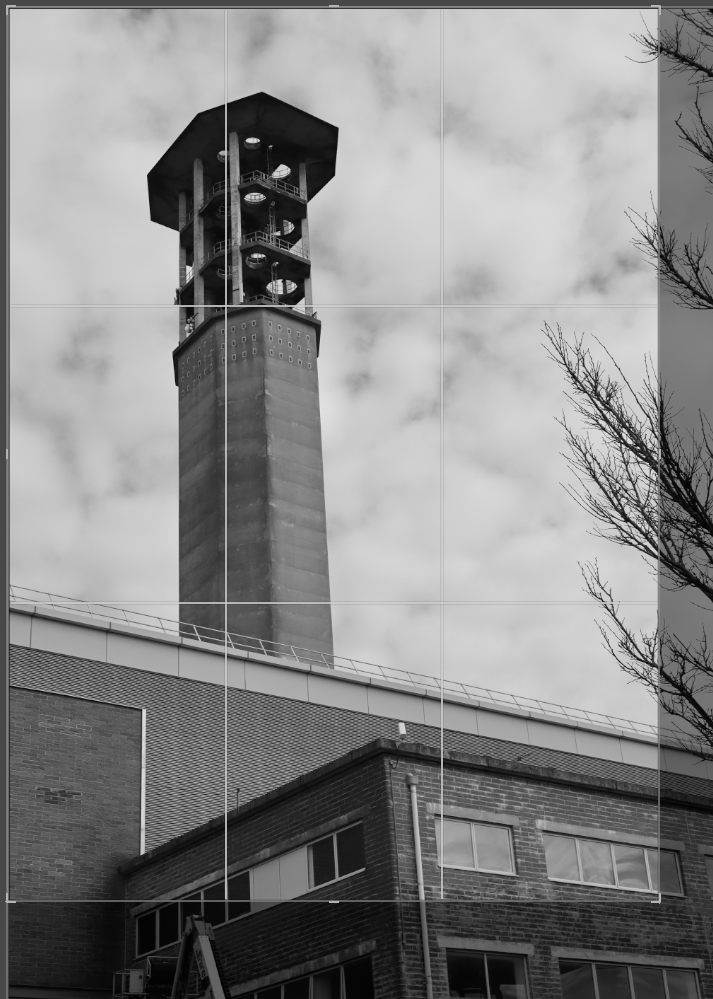
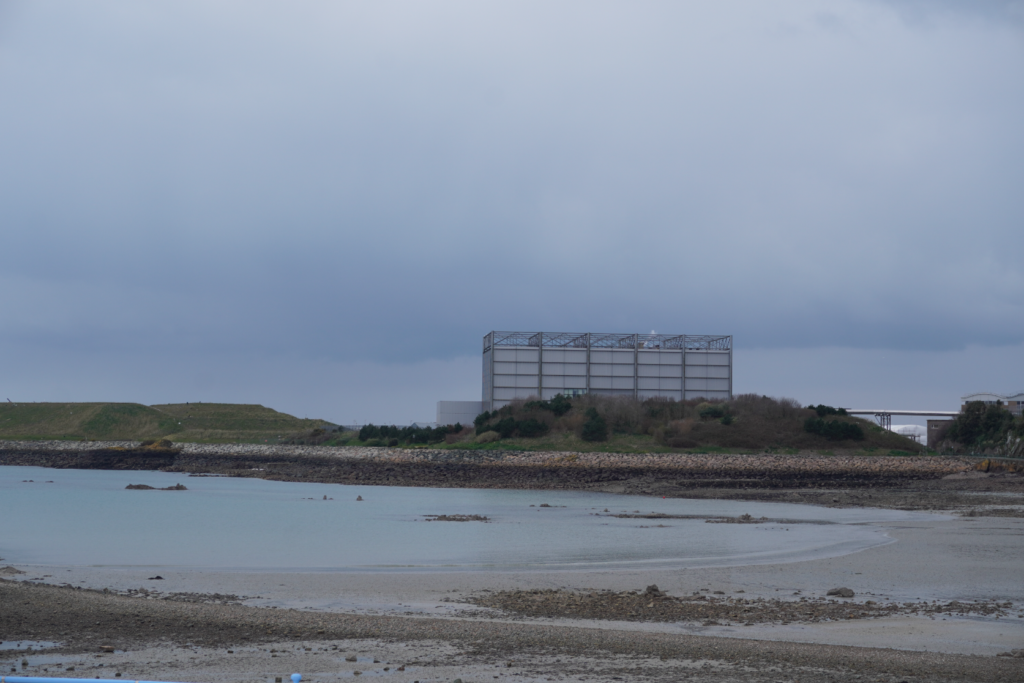
This is being cropped due to much negative space in the foreground.
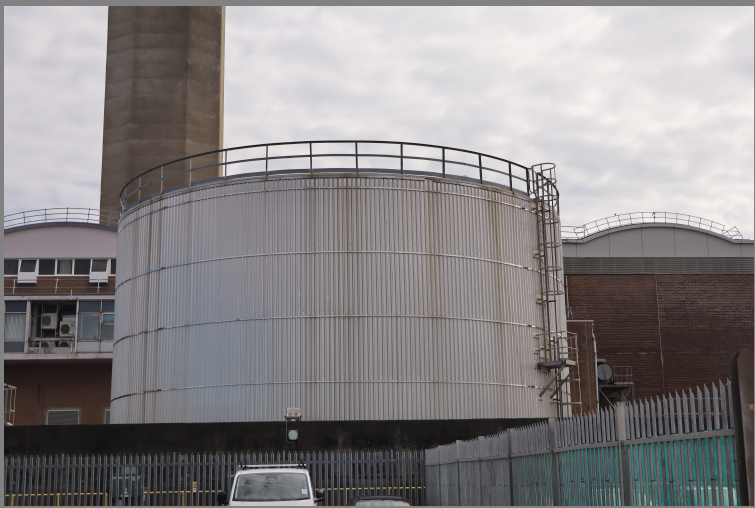
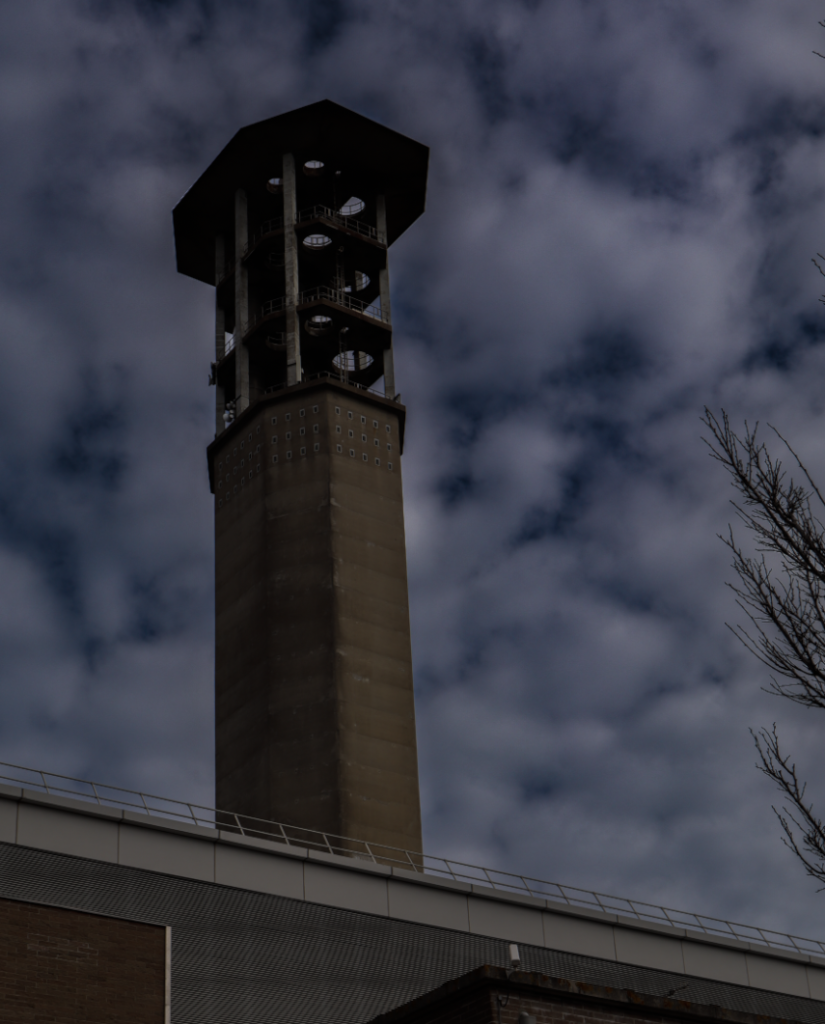
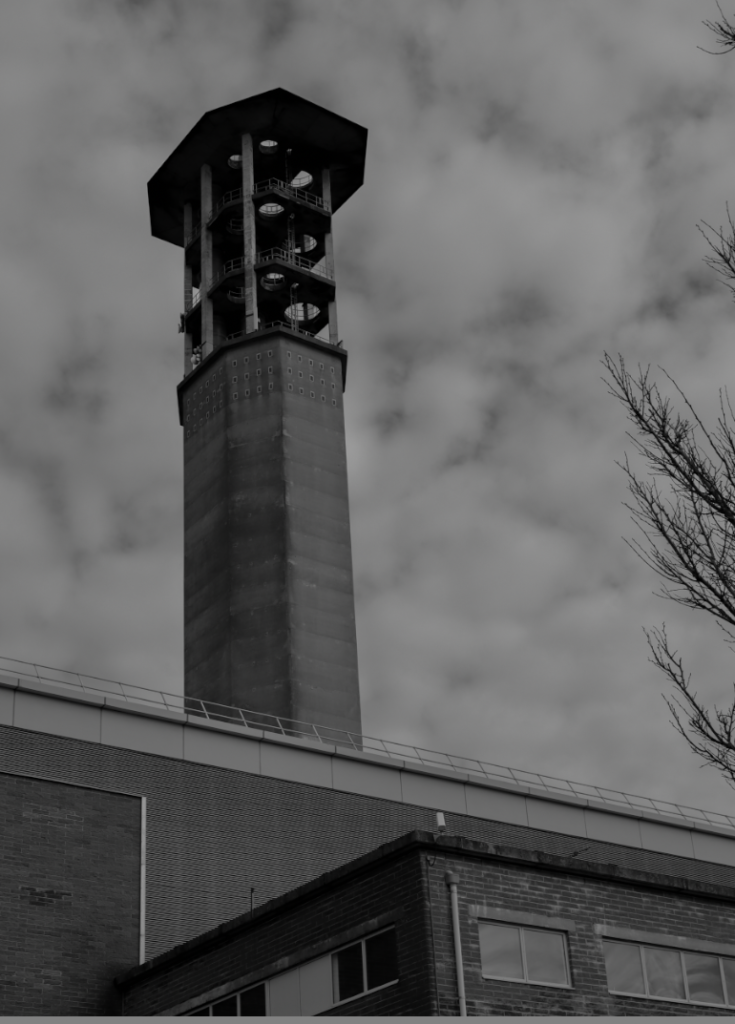
This is the final edited image, this image didn’t need a filter since white has stood out in the sky and makes the incinerator look tall and towering.
This is how I edited my image.
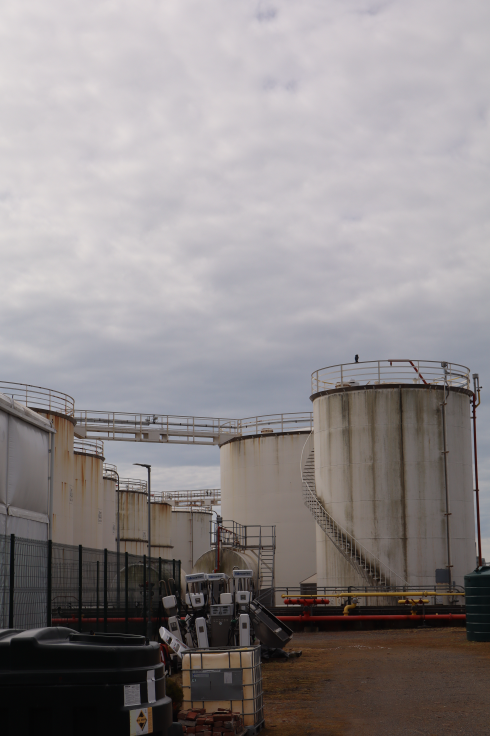
Image N03
This is the image I want to edit.
I have cropped this image due to lots of the foreground being exposed.
This is the edited image.
This is how I’ve edited my image.
Black and White
This is the edited black and white image.
this is how I edited my image.
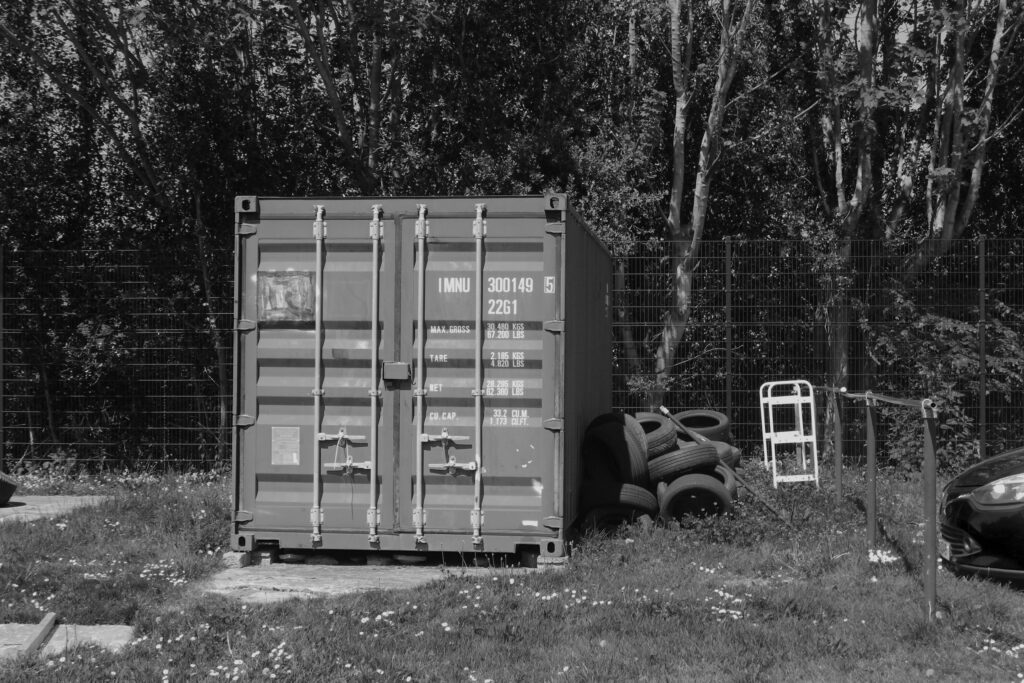
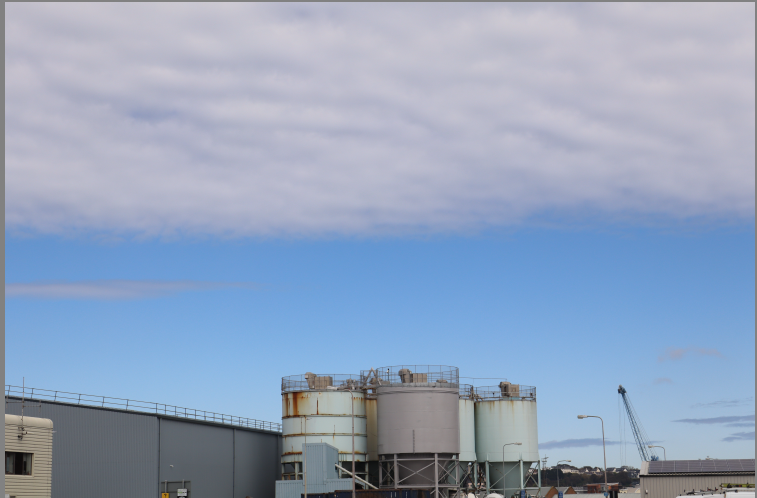
Image N04
This is the image I want to edit.
This is being cropped due to lots of negative space in the background and the foreground.
This is the edited image.
Black and White
This is the cropped image.
I have darkened the mage to bring out the rust on the container.
This is how I edited my image
Image N05
This is the image I want to edit.
This is the cropped image due to unequal symmetry in both halves of the image.
This is the edited image.
This is how I edited my image.
Black and White
This is the final image with further editing.
This is the filter I have used.
This is how I edited my image.
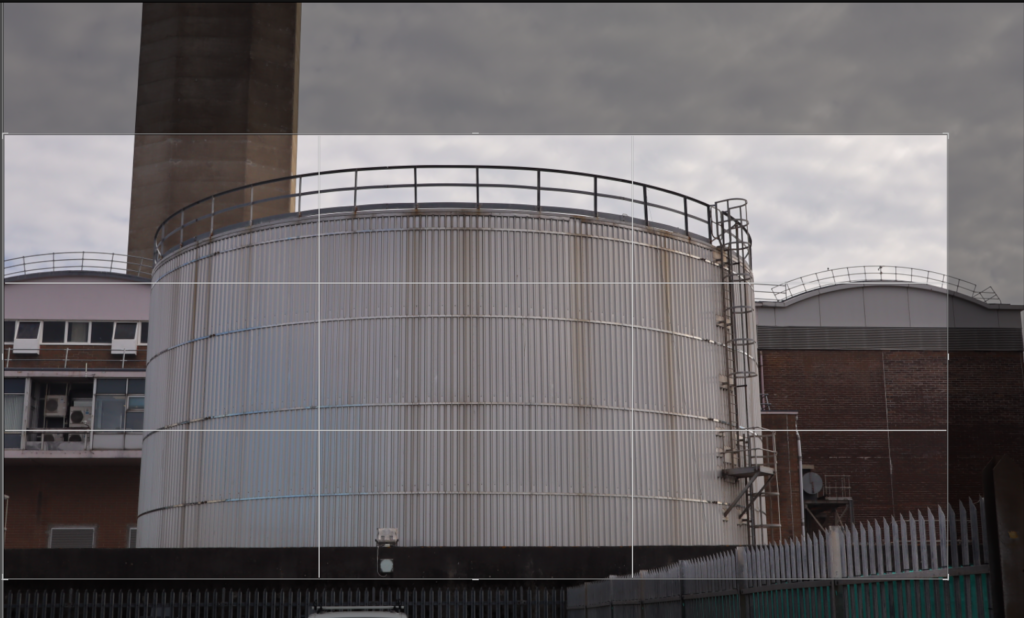
Image N06
This is the image I want to edit.
This is the cropped image. Its been cropped because it want the container centred so it follows the rule of thirds.
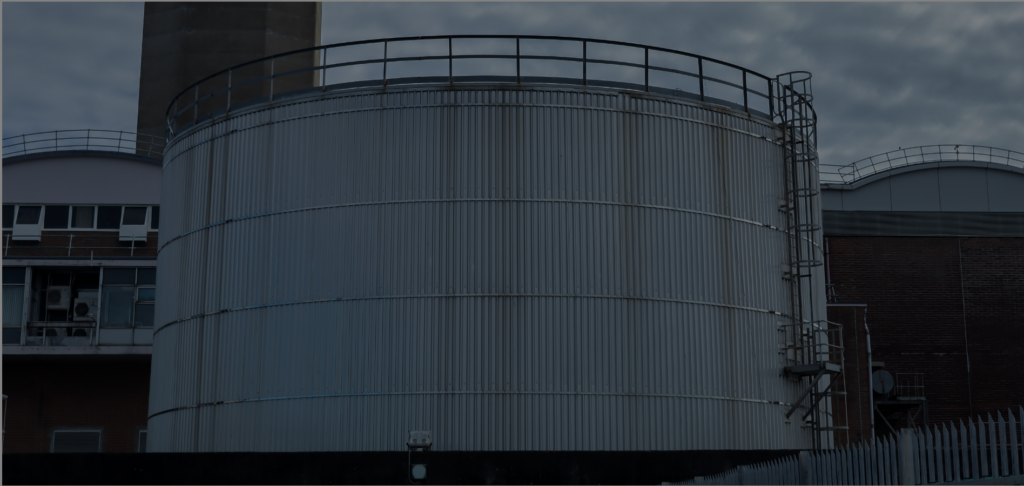
This is the edited image.
This is how I edited my image.
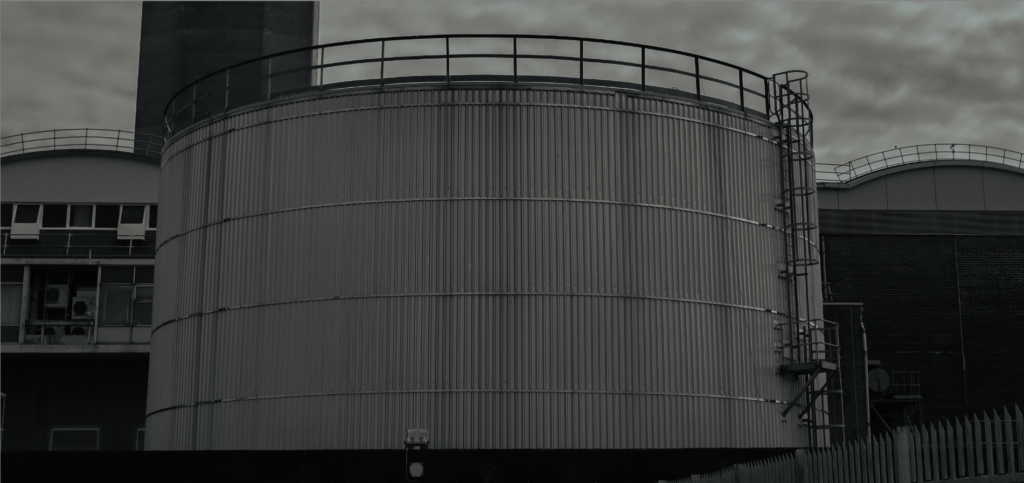
Black and White
This is the final image.
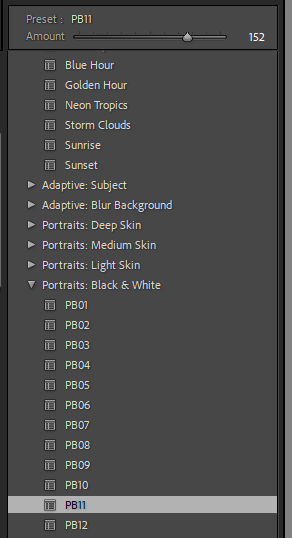
I have used this filter because it gives a lovely industrial effect and it really brings out the pattern on the container.
This is how I edited my image.
Final Images
I like these images because they give off industrial vibes and they link with Hilla and Bernd Becher typologies collection.
In photography, landscapes refer to images that capture the beauty of natural or urban environments. This genre focuses on wide, scenic views such as mountains, forests, coastlines, or city skylines. Landscape photography often aims to convey a sense of place, mood, or atmosphere, using elements like light, weather, and composition to create impactful visuals. Photographers typically use wide-angle lenses and techniques that keep the entire scene in sharp focus, highlighting the depth and scale of the surroundings.
When did it start to become popular?
Landscape photography began gaining popularity in the mid-19th century, around the 1850s to 1860s, with the development of early photographic processes like the daguerreotype and wet plate collodion. It became especially prominent during the exploration of the American West, when photographers like Carleton Watkins and Ansel Adams later helped establish landscape photography as both an art form and a tool for conservation. By the early 20th century, it had grown into a respected genre, admired for its ability to capture the grandeur and emotion of the natural world.
What prompted the rise of Landscape Art during the late 18th / 19th century?
The rise of Landscape Art in the late 18th and 19th centuries was driven by a mix of cultural and societal shifts. During the Enlightenment, there was a growing fascination with nature, influenced by thinkers like Rousseau who saw it as pure and unspoiled. This paved the way for Romanticism, which embraced emotion and the sublime in nature, with artists like J.M.W. Turner and Caspar David Friedrich creating dramatic, awe-inspiring landscapes. At the same time, the Industrial Revolution caused rapid urbanization, and the countryside became idealized as a symbol of a simpler, more natural life, prompting artists to capture rural landscapes as a contrast to industrialization.
John Constable
John Constable (1776–1837) was an English landscape painter renowned for his depictions of the English countryside, particularly the area around his home in Suffolk, which became known as “Constable Country.” While he is primarily celebrated as a painter, there is no historical record of him working as a photographer, as photography had not yet been invented during his lifetime.
Constable was good of capturing natural light, atmosphere, and movement in his paintings, often working air to study the effects of changing weather and seasons. His most famous works include The Hay Wain (1821), Dedham Vale (1802), and Salisbury Cathedral from the Meadows (1831). His technique of using loose, expressive brushstrokes and his dedication to painting nature as he saw it were highly influential, especially on the later Impressionists.
Although he struggled to achieve commercial success during his lifetime, Constable’s work gained recognition in France, where his naturalistic approach inspired the Barbizon School and later artists such as Claude Monet. Today, he is considered one of Britain’s greatest landscape painters, whose art continues to captivate audiences with its deep appreciation for nature and rural life.
A panoramic/joiner image is showing a FOV (field of view) approximating, or greater than, that of the human eye – about 160° by 75°, it generally has a aspect ratio of 2:1 or larger, the image being at least twice as wide as it is high. The resulting images take the form of a wide strip.
1. Josef Hoflehner
An Austrian photographer known for large-scale, minimalist panoramic landscapes and seascapes, he usually did them in black and white.
2. David Hockney
David specialised as a painter, he used photography to create panoramic collages, capturing scenes from multiple angles and putting them together, his work is conceptual rather than traditional panoramic.
3. Ken Duncan
An Australian landscape photographer known for his panoramic images of the Australian outback and other landscapes.
4. Thomas Struth
Known for panoramic museum interiors and cityscapes.
5. Michael Reichmann
A Canadian photographer who was an early advocate of digital panoramic photography.
6. Andreas Gursky
While not always working in a traditional panoramic format, his ultra-large-scale images often span enormous horizontal spaces and can be considered panoramic.
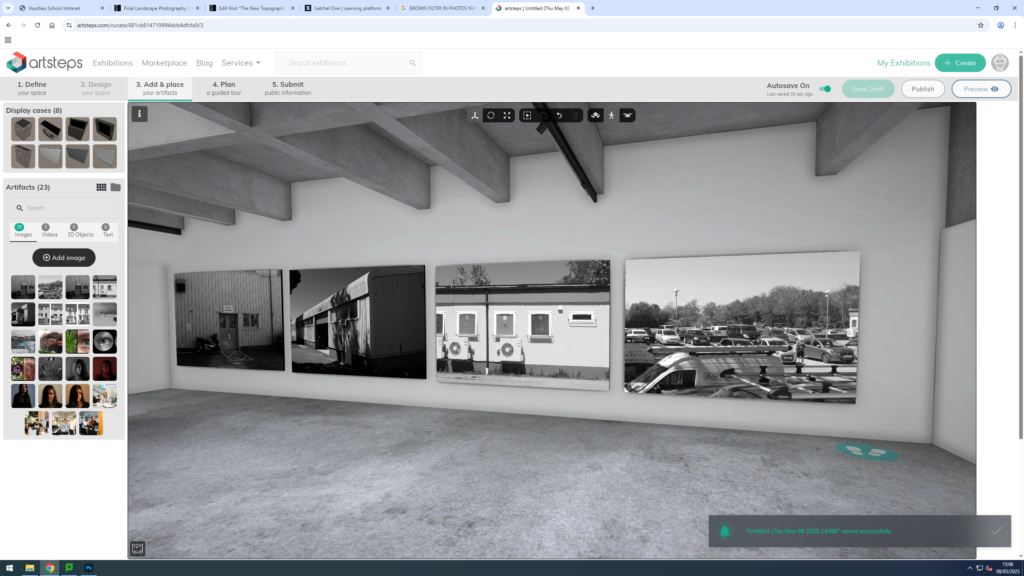
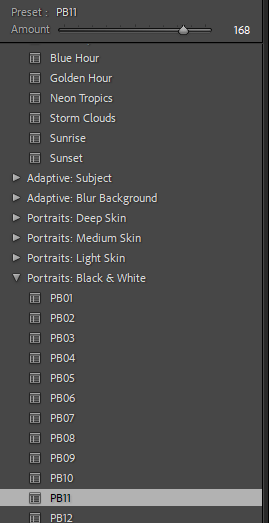
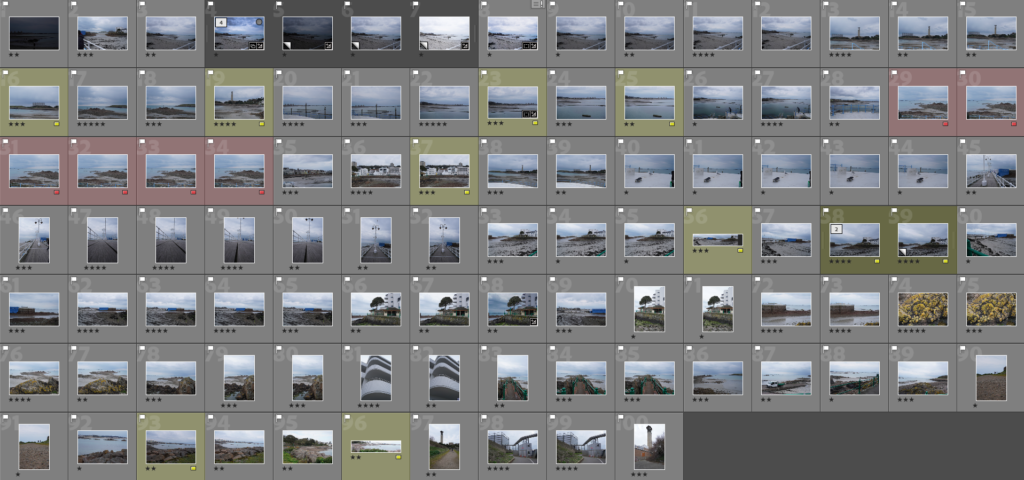
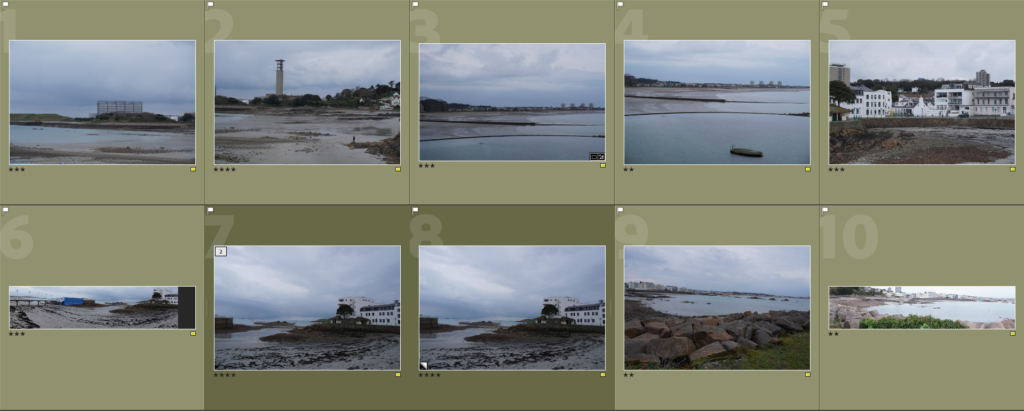
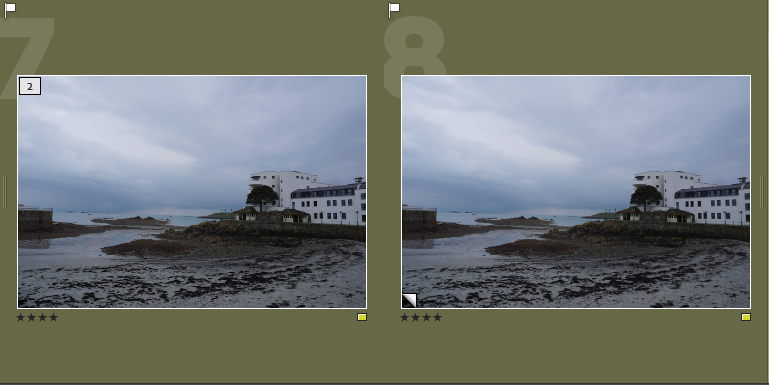
I decided to colour code them yellow to be able to tell them apart from the rest of the photos. With this I was able to find images in which I would be able to make my own panoramic images. To help me I’ll be creating a virtual copy so they’ll be differentiated from the original photo.
Seen like this.
Original Images
Editing
123
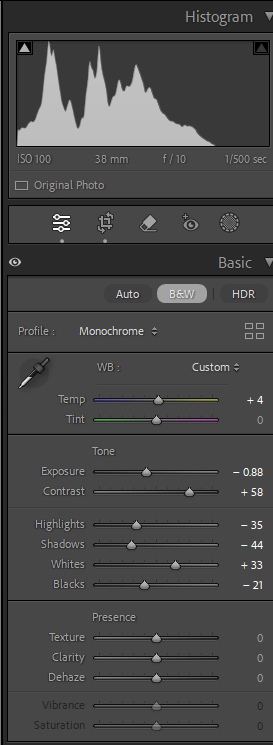
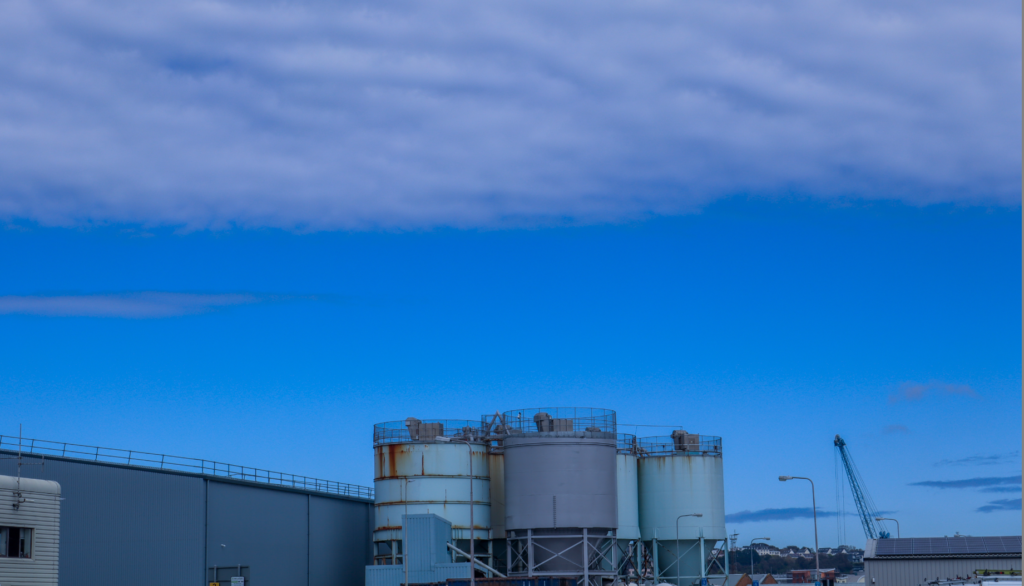
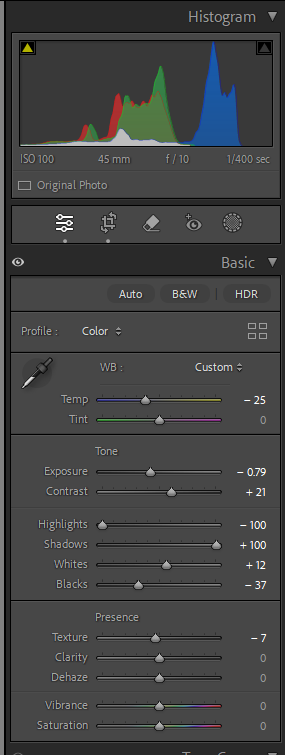
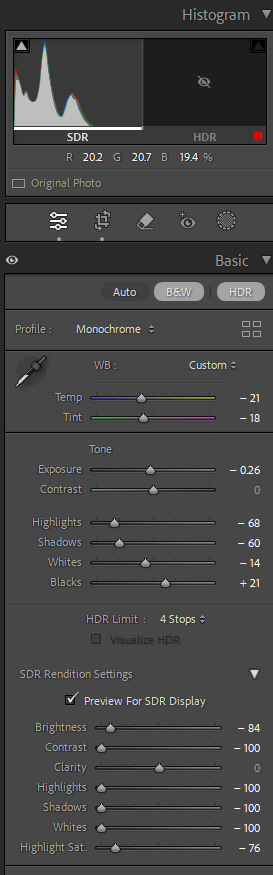
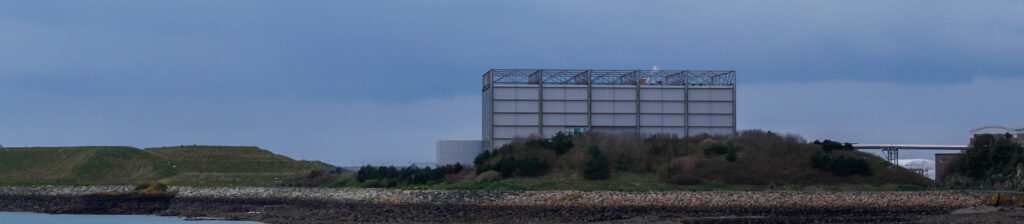
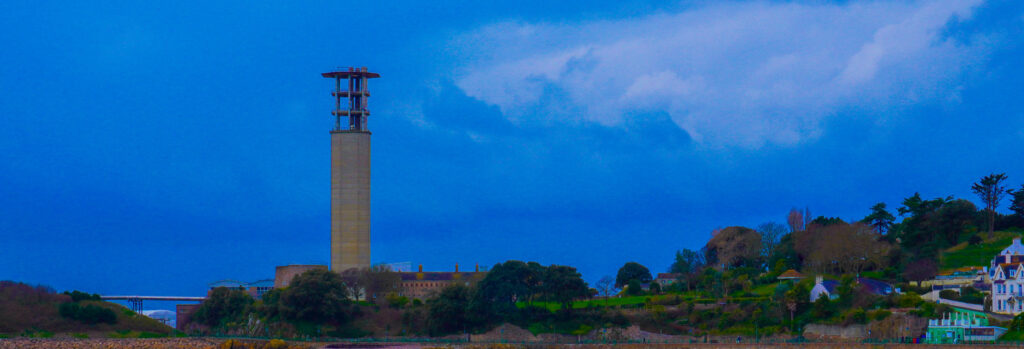
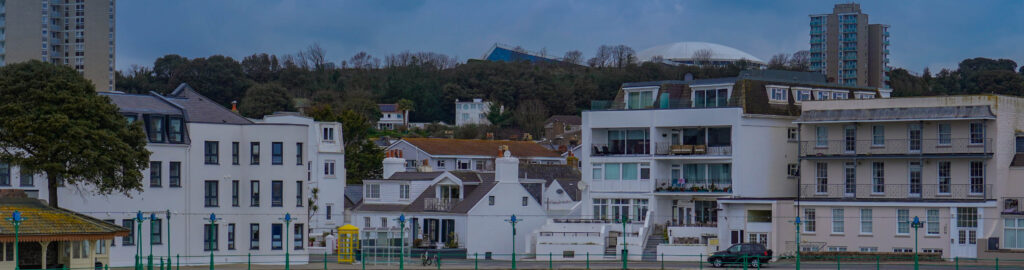
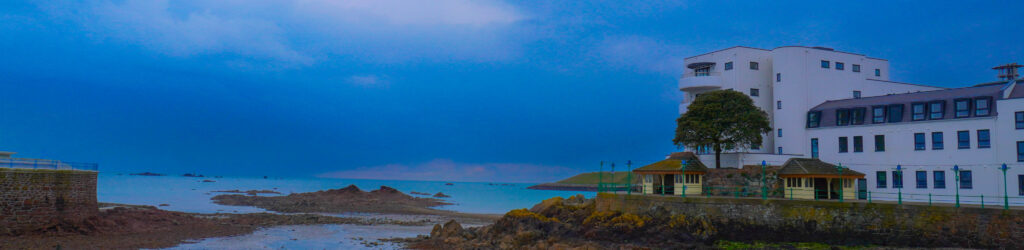
I chose to create an edited ‘natural’ version of the image, I did this because before the picture looked dull so in doing this, I enhanced the sky and upped the brightness.
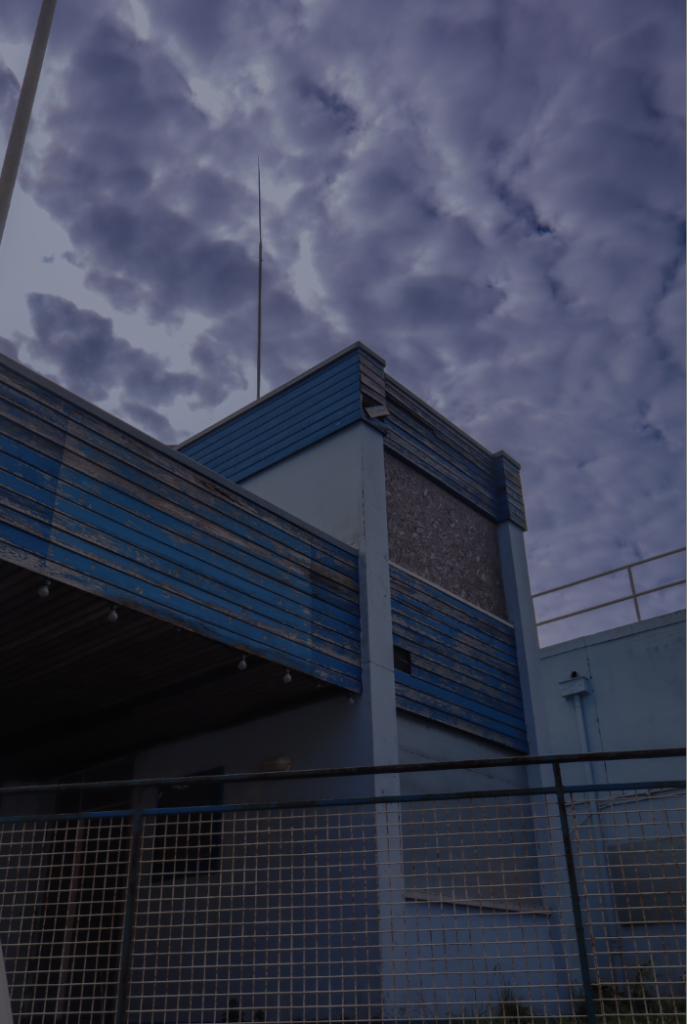
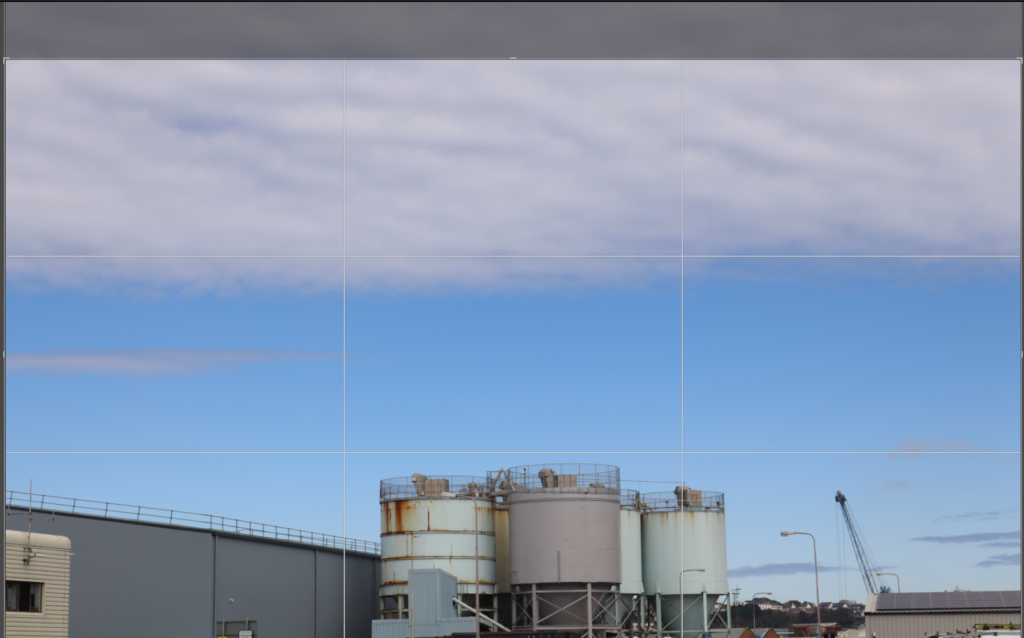
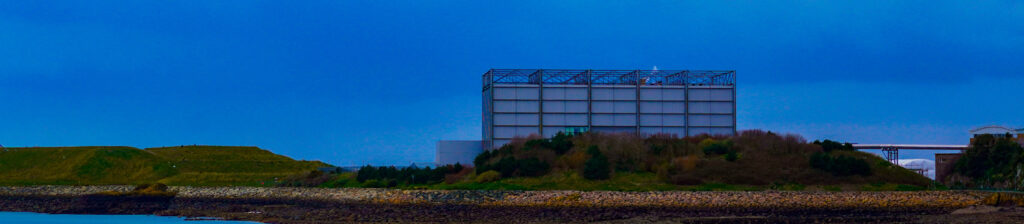
For this image I decided to create a full saturated version to show a HDR effect. This also helps me see a creative outlook on the images even though they’re just panoramics.
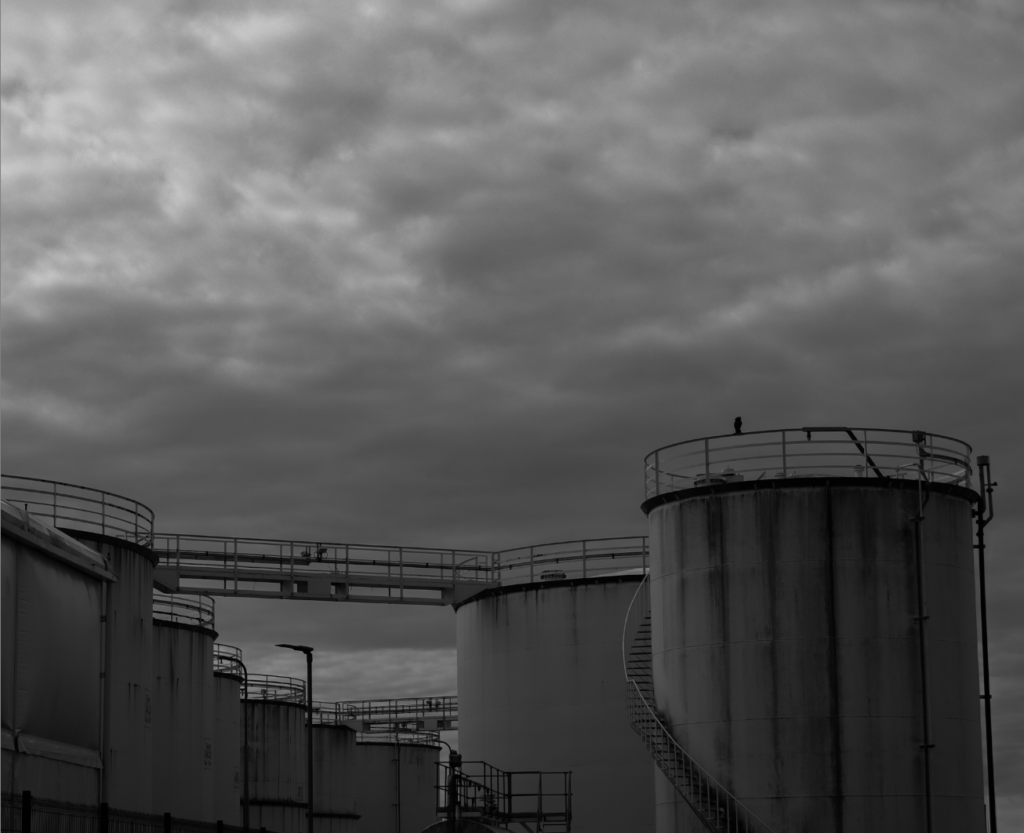
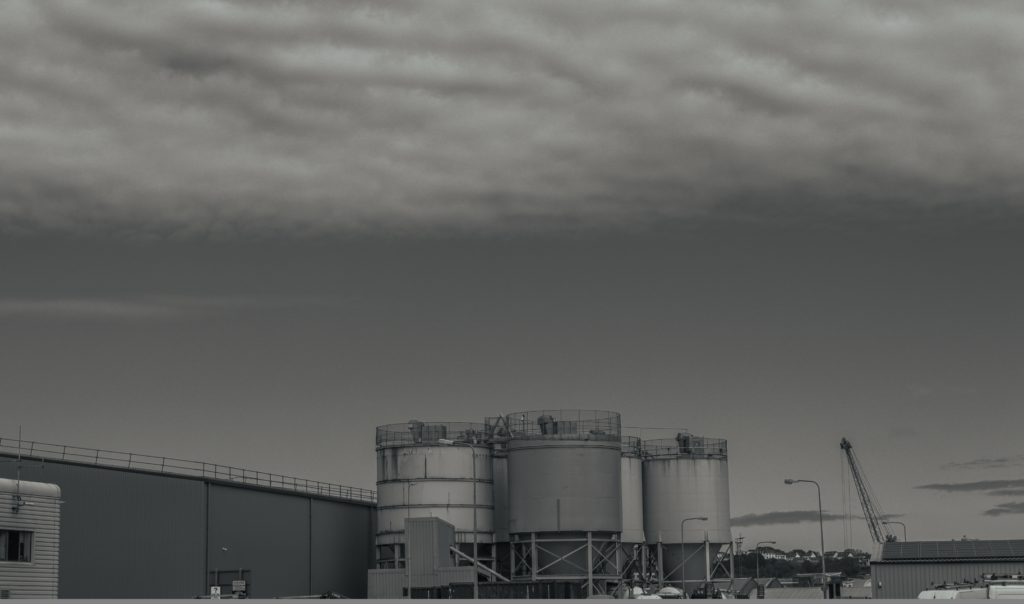
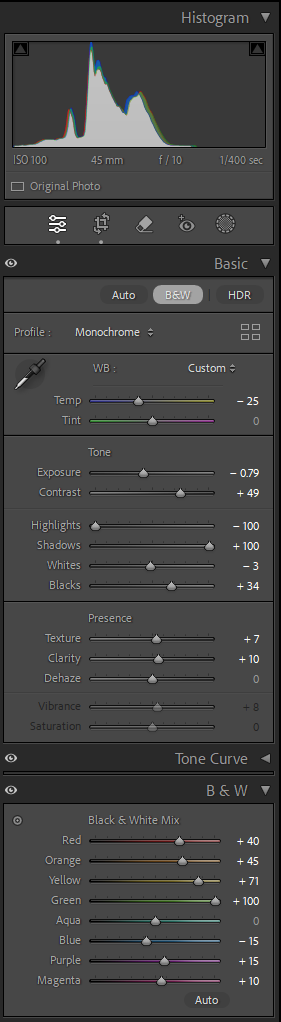
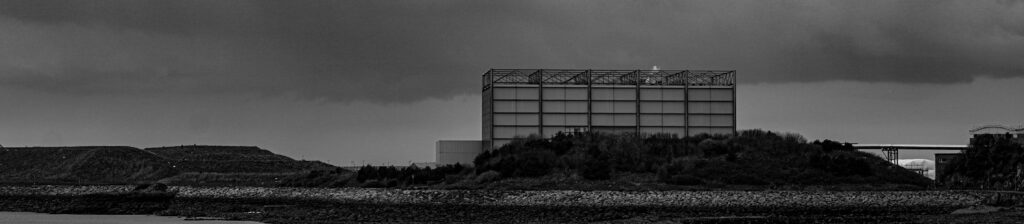
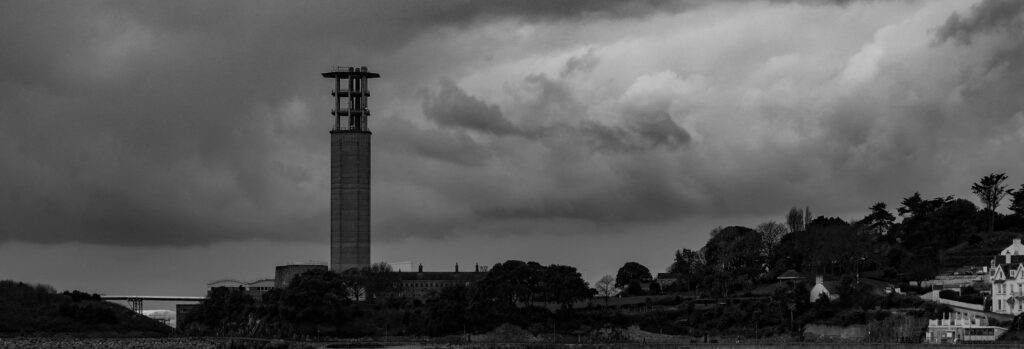
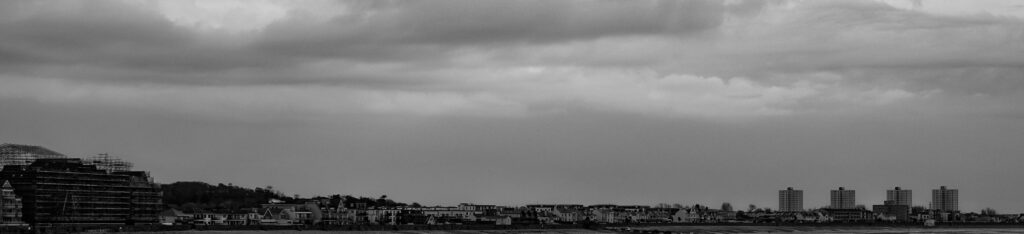
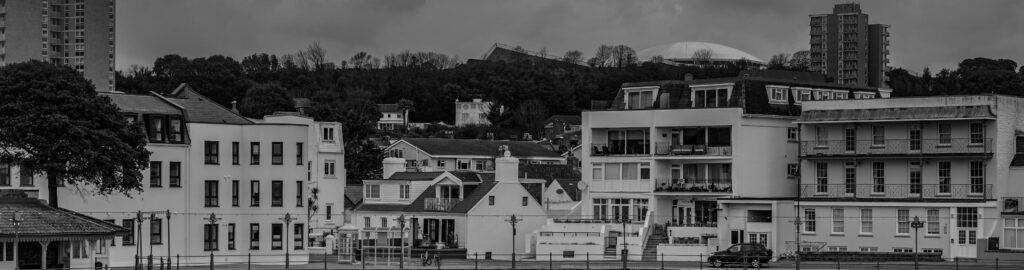
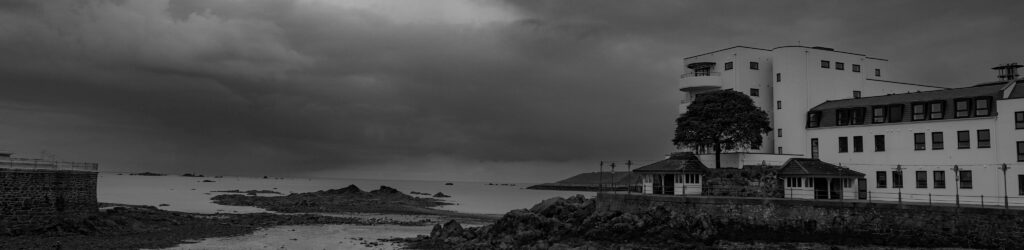
I put the last image in black and white to create a juxtaposition between the first two images. In doing this, I had to enhance the image and deepen the contrast so the sky would be more dramatic against the man-made landscape.
123
I decided to increase the dehazing to give the sky a more dramatic look. This helped me create a contrast between the natural sky and the man-made horizon. In the over saturated image, I managed to make the sky seem unnatural by making it super blue and having the clouds more enhanced. I did the same thing for the black and white version enhancing the sky even more to create a juxtapositional tonal range which is clearly shown in the clouds also referring back to Ansel Adams zone system to help.
123
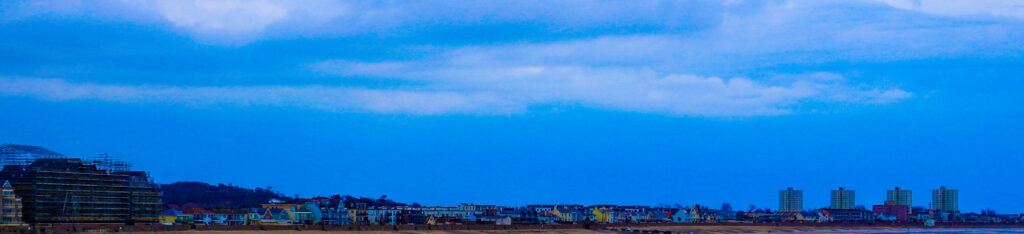
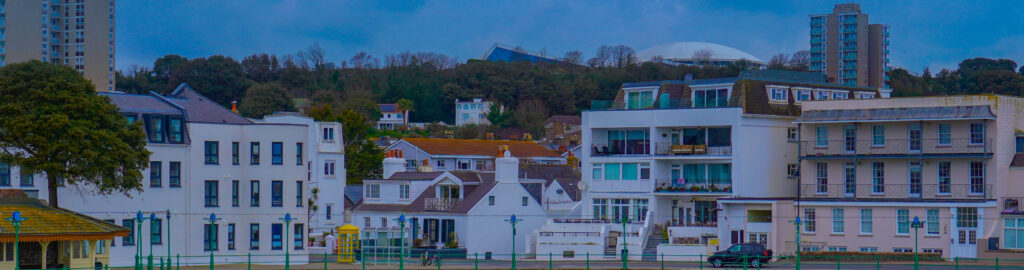
I chose to create an overly saturated version of all images as it expands my creativity and shows an almost childlike imagination of a ‘bright’ and ‘colourful’ life. The 2 picture especially creates what I imagine as you’re able to clearly see the vibrant colours of the skyline e.g. the yellows, red and oranges.
123
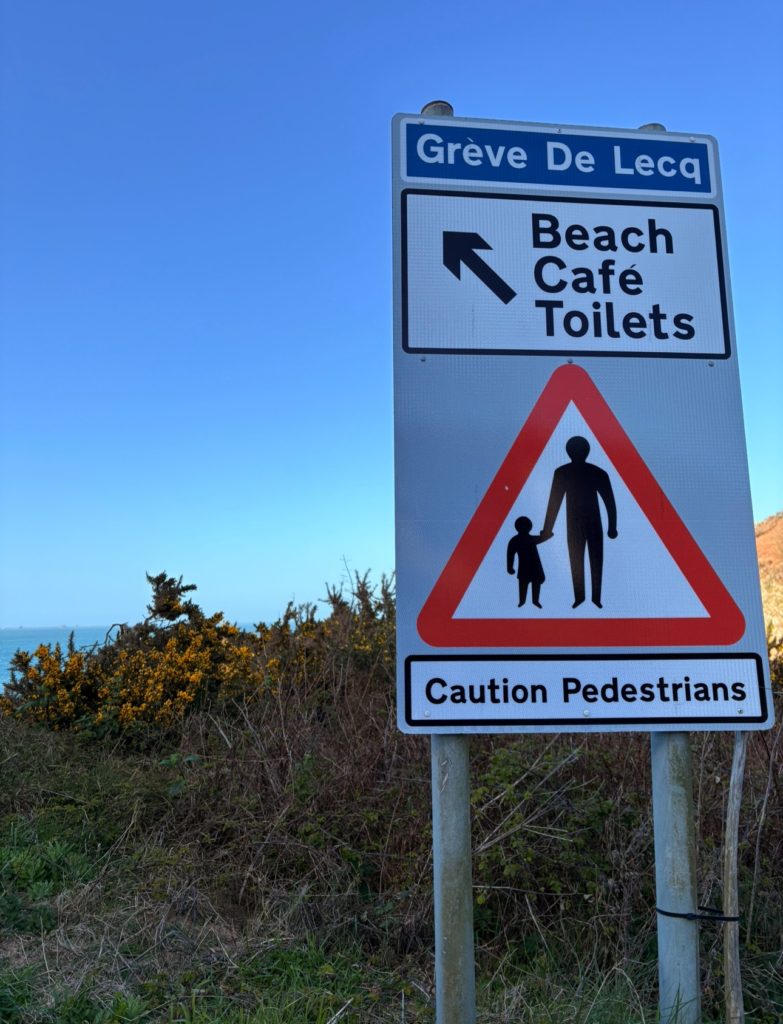
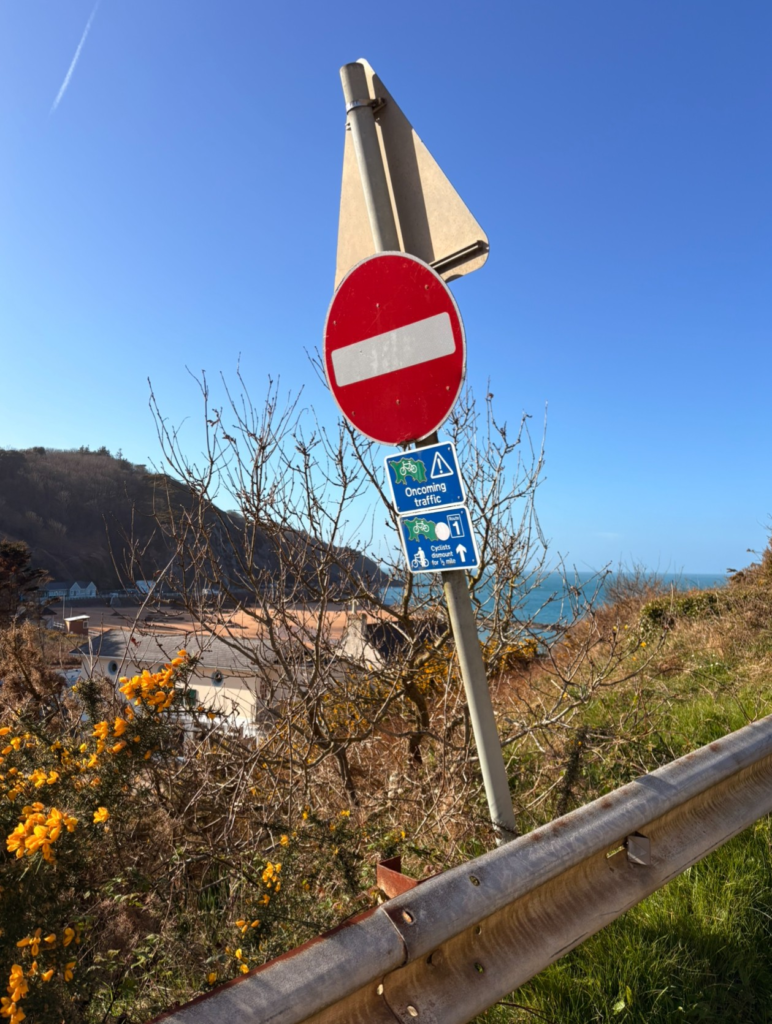
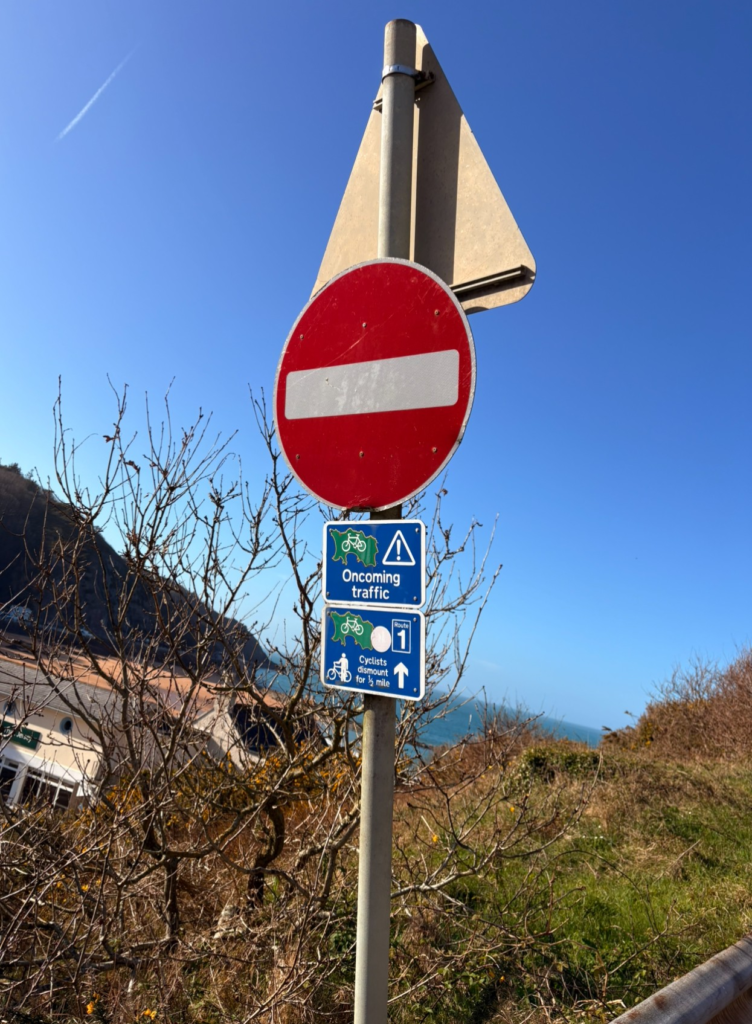
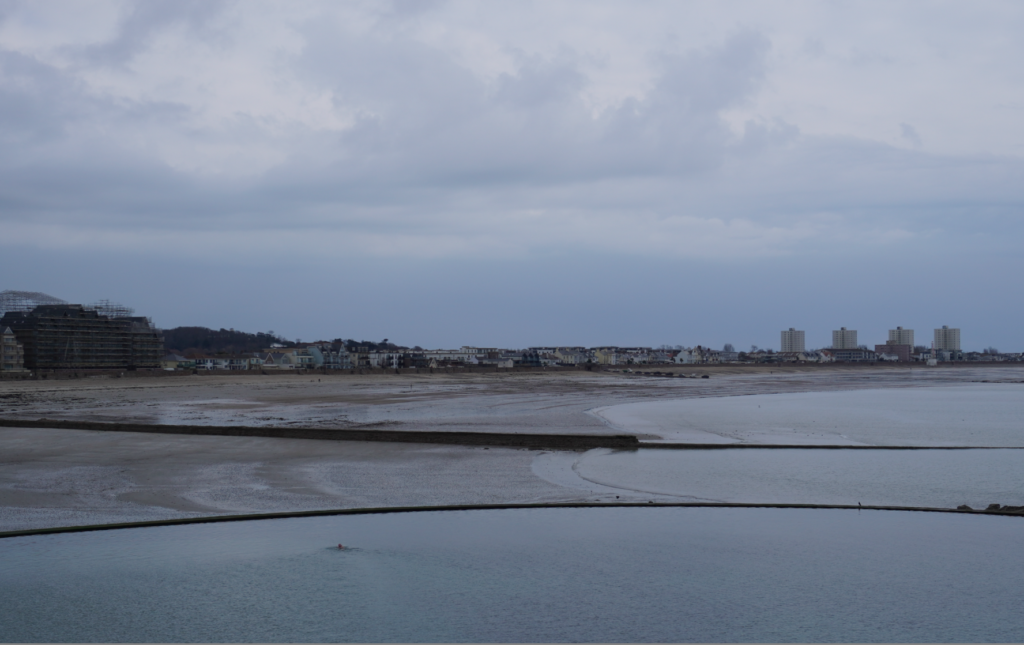
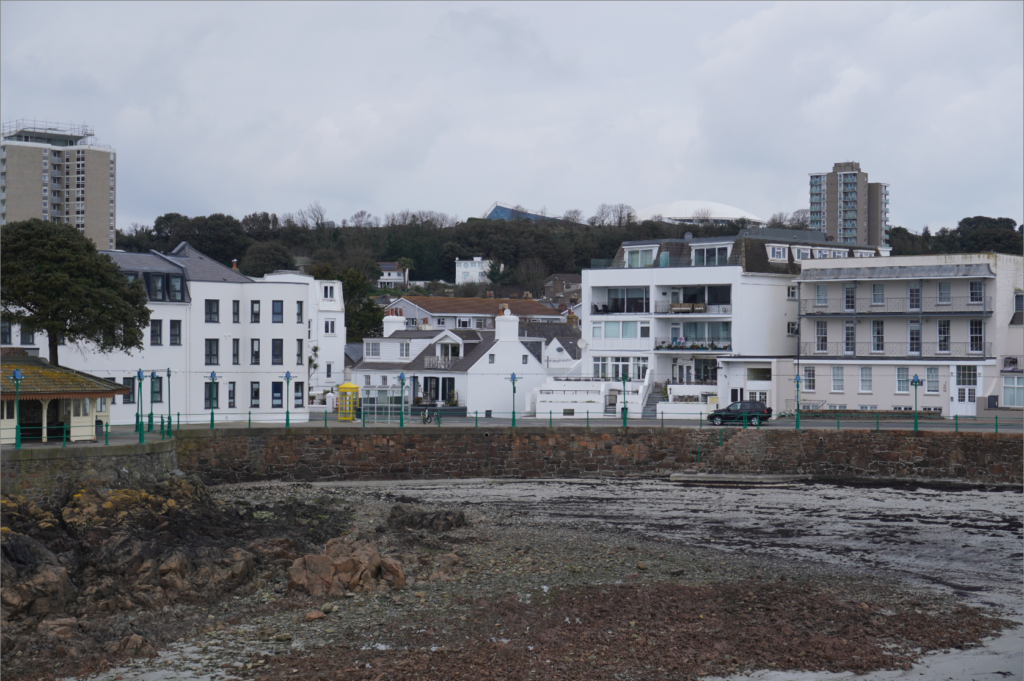
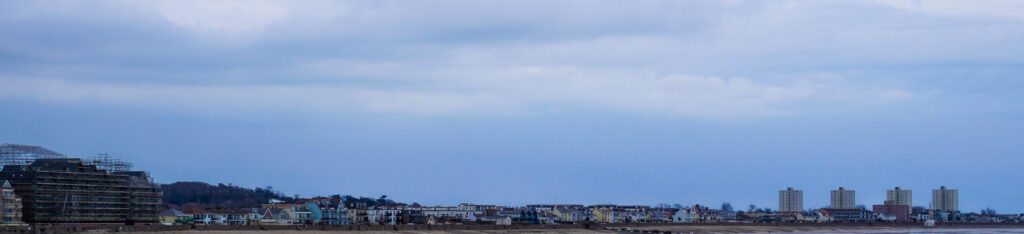
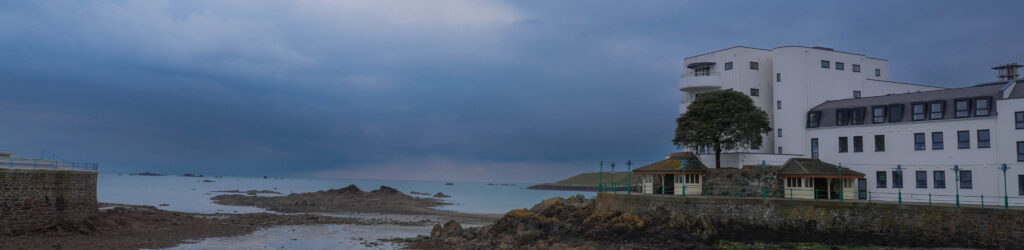
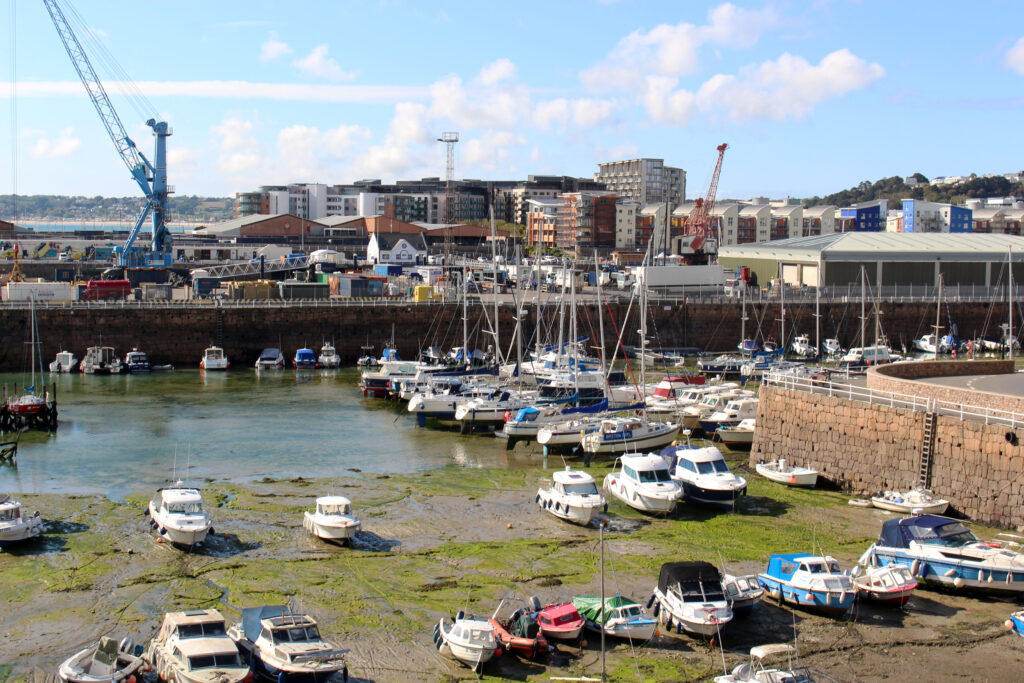
These photos show Jersey for how it is as there are a variety of building which show the newer created ones and the older ones. This also shows the man-made land of Jersey as its cluttered with many building, benches, lamp posts etc. The vibrancy of image 1 shows its natural colour way with a little editing, this shows that colour plays a big part of photography because if it were dull colours the image wouldn’t of ‘popped’ as much.
123
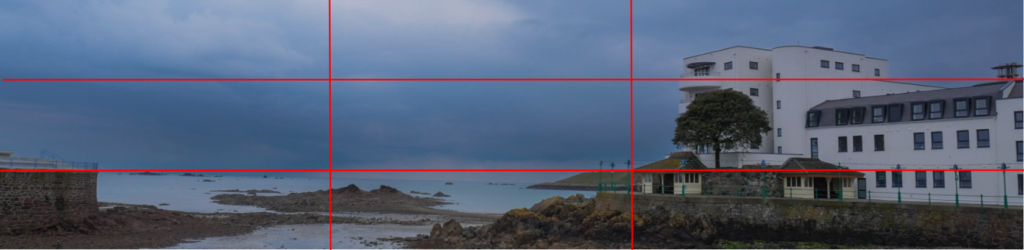
Lastly, I used the rule of thirds to show the contrast between natural land and man-made buildings. I enhanced the sky using a mask to give it a different tone to the rest of the photo, I’d also say I used a dead pan approach when taking this picture because I am eye level to the skyline.
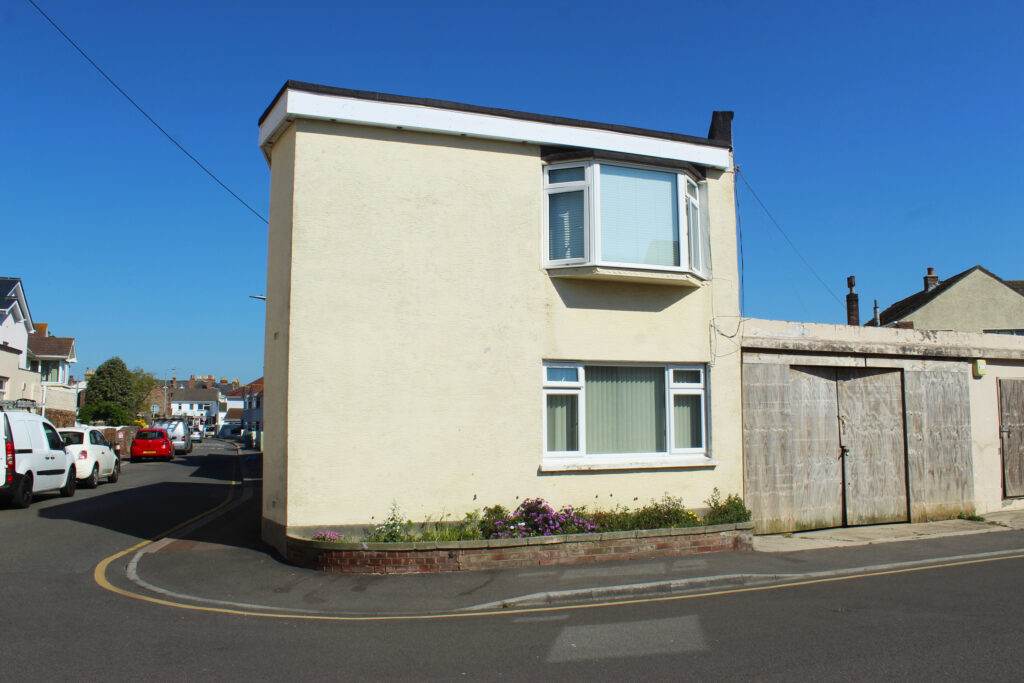
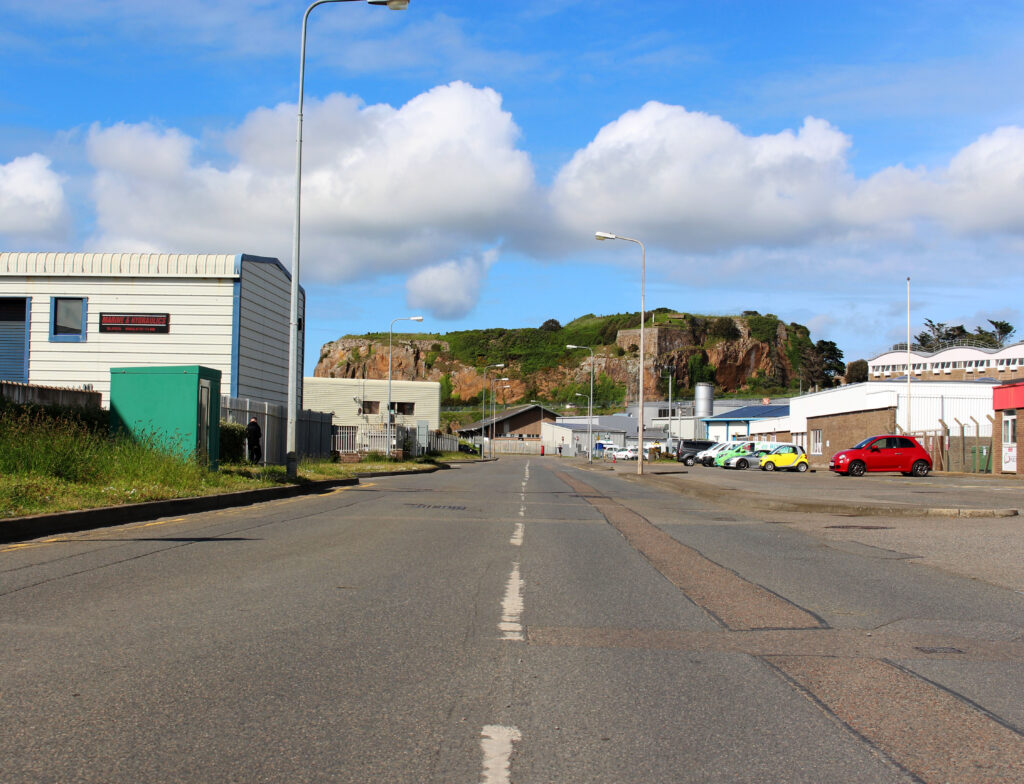
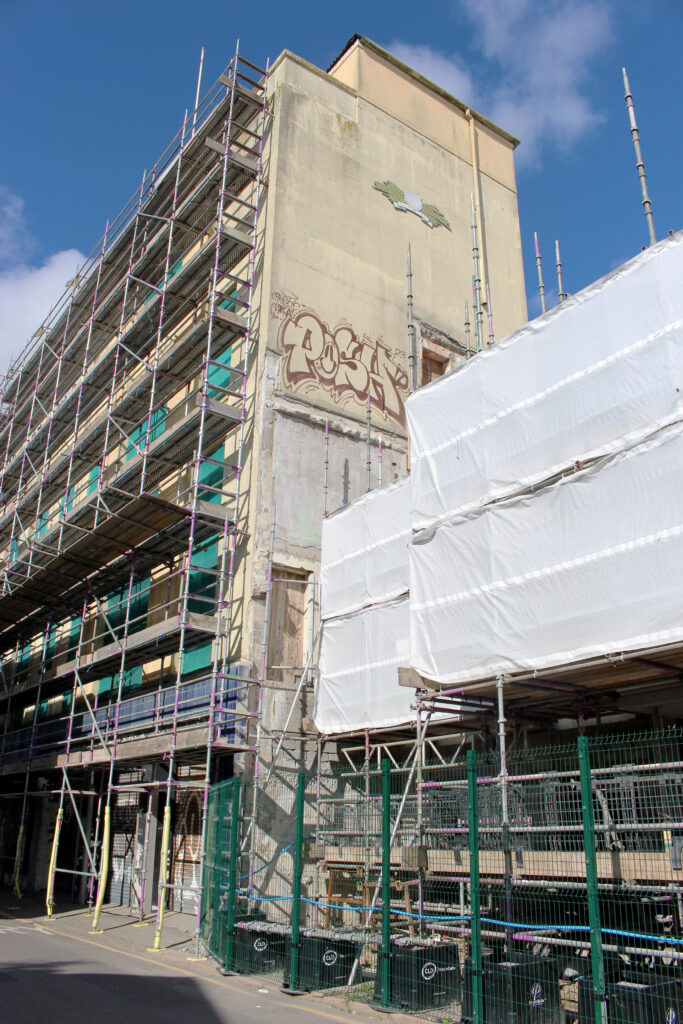
I am planning to take photos to achieve the industrial side of Jersey as many of the New Topographics are highly based around that. I am aiming to take photos of various locations such as Pier Road Carpark, La Collette, and The Old.. These are similar locations that I can find that link closely to the New Topographics in Jersey,
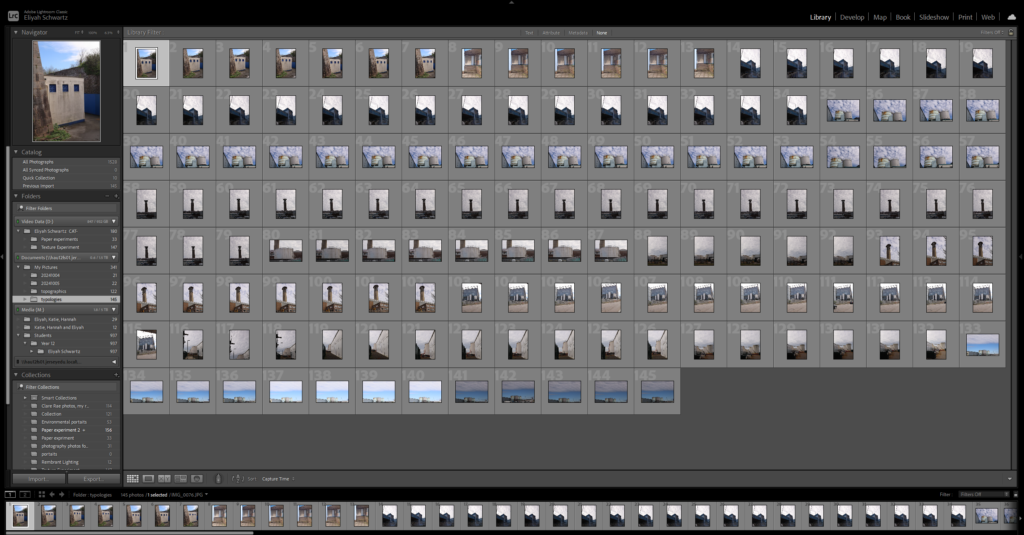
Image Selection
I carefully went through each individual image and colour coded them red, yellow and green to help highlight the best images when I edit them in photoshop. This is convenient as it minimises time-loss from searching through each image to select my favourites. As I went through these photos, I noticed a reoccurring pattern where the images were not clear as I moved the camera before I took the image, leading to a imprecise image.
Best Images
The following images are my best images for this photoshoot, as I used Lightroom to select them and I uploaded each one to Photoshop. Once I uploaded them, I enhanced the levels and brightness of each image as I felt they would look dull otherwise. Some of the images I decided to make black and white, since the New Topographics had photos only in black and white, so I wanted to have that similarity in some of them. I also managed to include a photo of the street like Stephen Shore did in his images, as that was a key part of his photography.
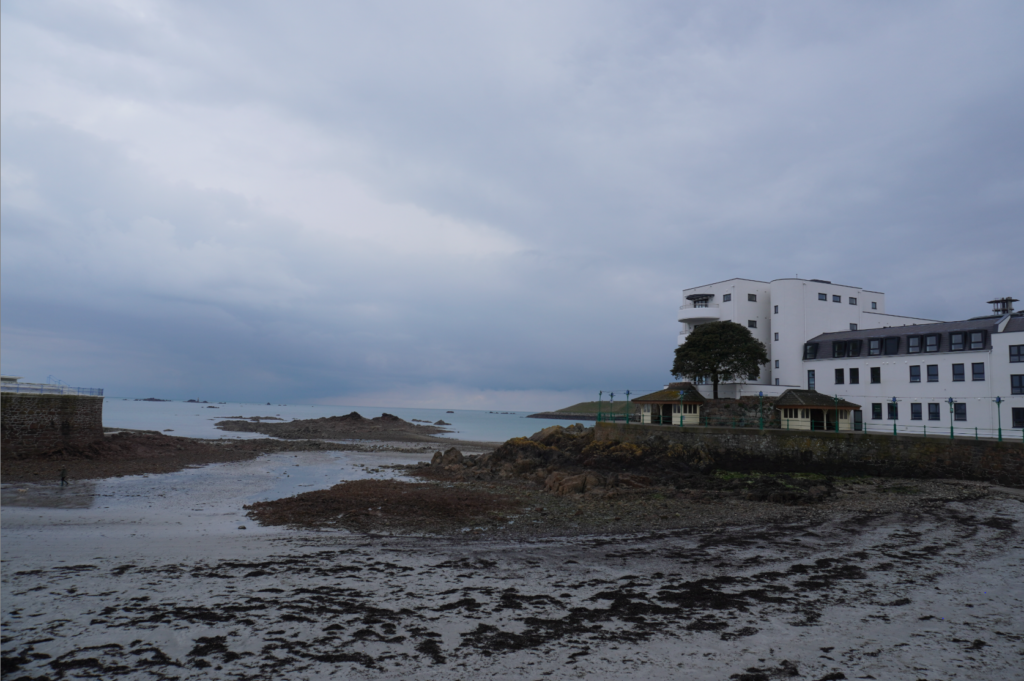
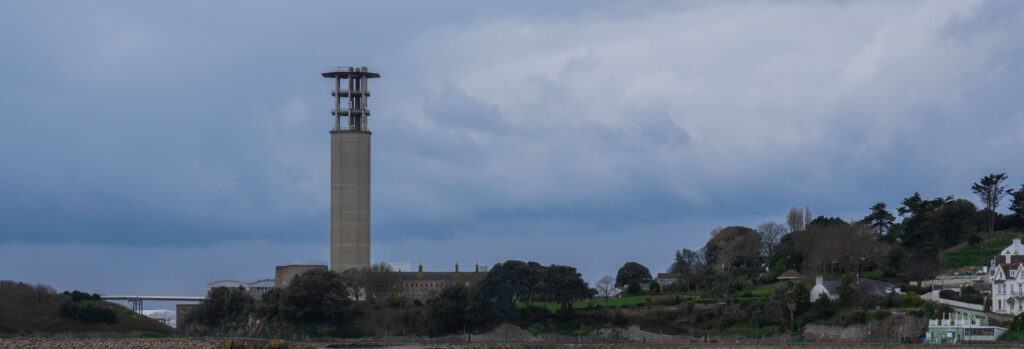
This last image reminded me of a New Topographic image, as the photo looks plain and generic, like a lot of the images. I also edited this in monochrome colours, to replicate those photos. They also used a dead-pan aesthetic, with a rejection of emotion so I ensured that I did the same, since there is no emotion happening.


