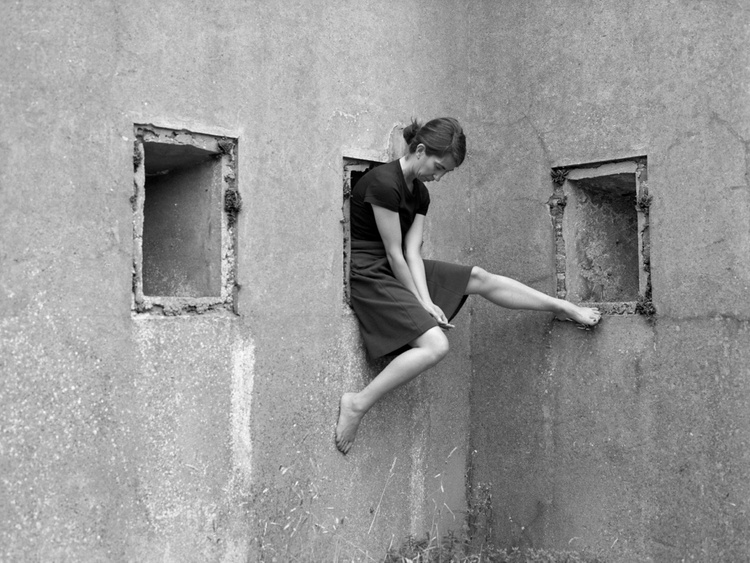
CONCEPTUAL: A conceptual approach to image-making means that you have pre-planned or pre-conceived a concept of how you wish to make photographs, rather than responding spontaneously to things around you on a photo-walk. These concepts could be staged images responding to a specific narrative or story you wish to explore. Other performance based artists are engaging their bodies with the physical landscape and documenting these encounters using photography or video. The performances could be self-portraiture or using models to act out a choreographed scene.
Clare Rae, an artist from Melbourne, Australia who produces photographs and moving image works that interrogate representations of the female body via an exploration of the physical environment. Rae visited Jersey as part of the Archisle international artist-in-residence programme in 2017. She was researching the Claude Cahun archive, shooting new photography and film in Jersey, as well as running workshops.
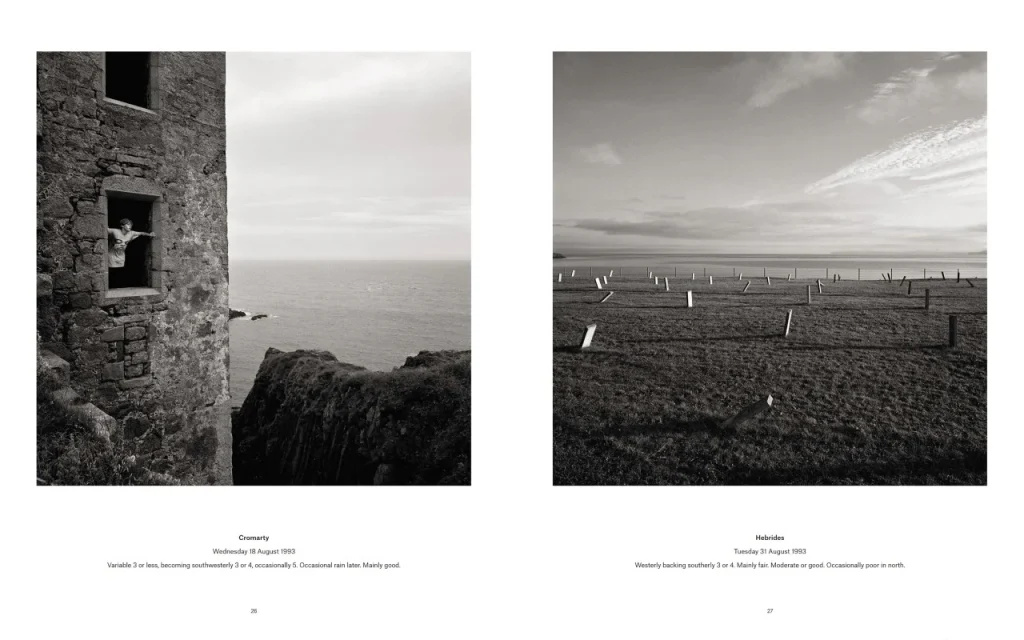
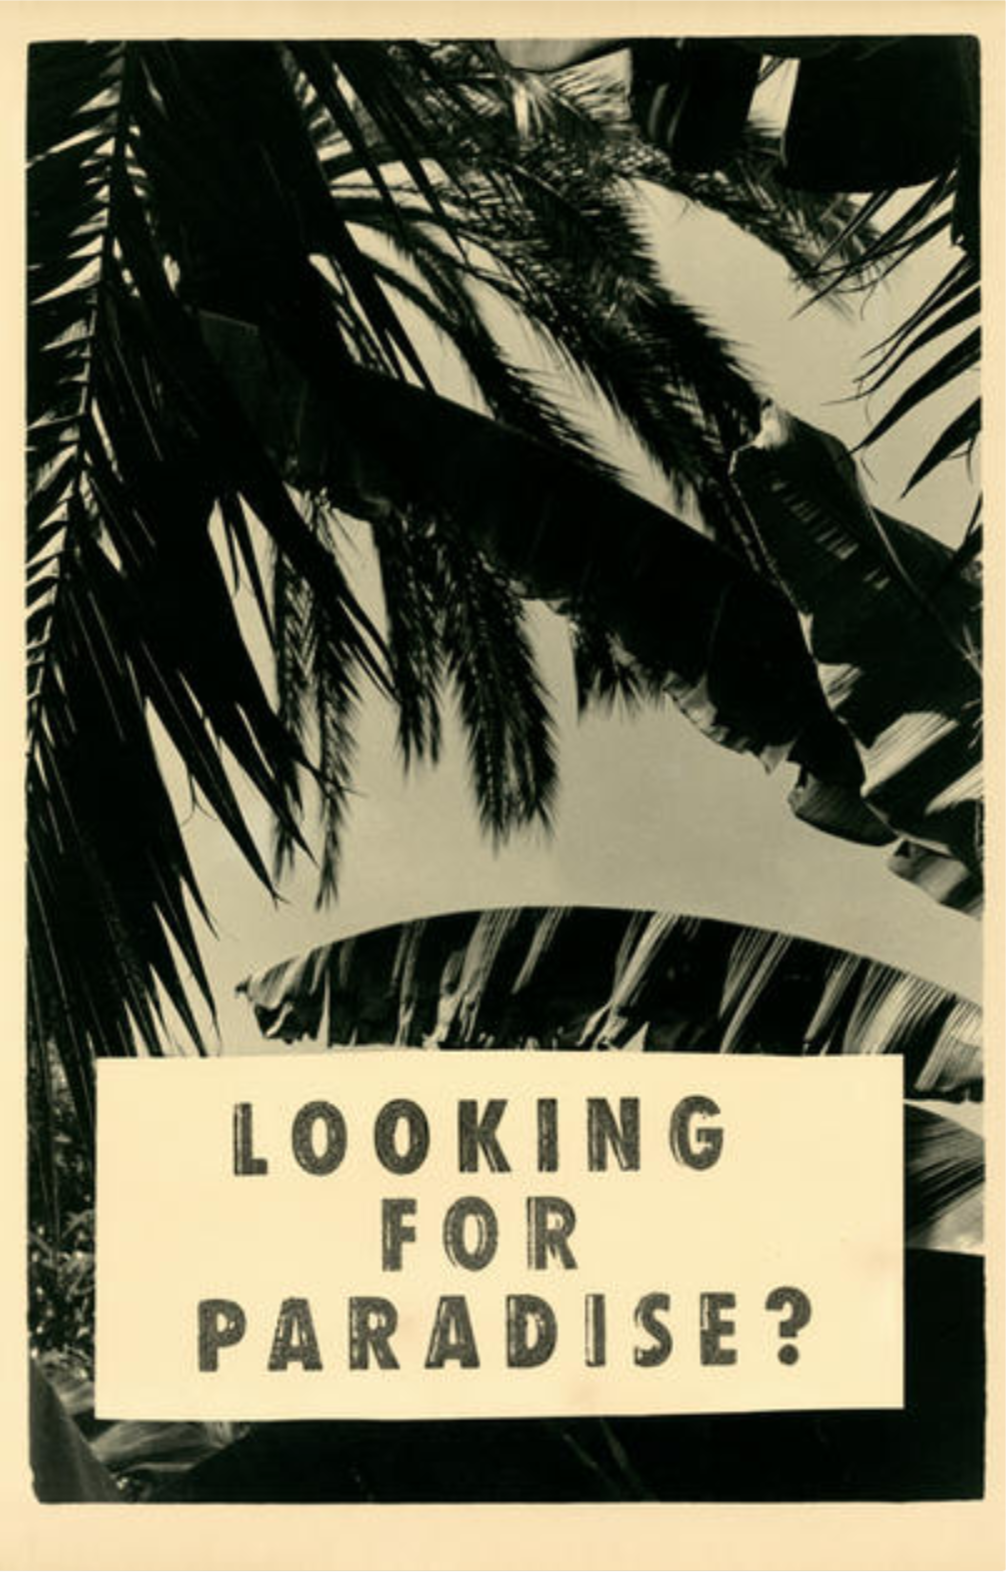
I Extend My Arms 1931 or 1932 Claude Cahun 1894-1954 Purchased 2007 http://www.tate.org.uk/art/work/P79319
From her research she produced a new body of work, Entre Nous (between us): Claude Cahun and Clare Rae that was exhibited at the Centre for Contemporary Photography, Melbourne Australia 22 March – 6 May 2018, and subsequently at CCA Galleries in Jersey, UK, 7–28 September 2018.
In her series, Never standing on two feet, Rae considers Cahun’s engagement with the physical and cultural landscapes of Jersey, an aspect of her work that has received little analysis to date. Rae writes:
Like Cahun’s, my photographs depict my body in relation to place; in these instances sites of coastal geography and Jersey’s Neolithic ritual monuments. I enact a visual dialogue between the body and these environments, and test how their photographic histories impact upon contemporary engagements. Cahun used self-portraiture to subvert the dominance of the male gaze in photographic depictions of the female body in the landscape. My practice is invested in the feminist act of self-representation and I draw parallels between my performances of an expanding vocabulary of gesture and Cahun’s overtly performative images of the body expressing a multiplicity of identity. In this series, I tease out the interpretations inherent in landscape photography. I utilise gesture and the performing body to contrast and unsettle traditional representations of the female figure in the landscape.
See this blog post Photography, Performance and the Body for more details and context of the above artists work
Clare gave a artist talk contextualising her practice, covering recent projects that have engaged with notions of architecture and the body, and the role of performative photography in her work. Clare will discuss her research on these areas, specifically her interest in artists such as Claude Cahun, Francesca Woodman and Australian performance artist Jill Orr. Clare also discussed her photographic methodologies and practices, providing an analysis of her image making techniques, and final outcomes.
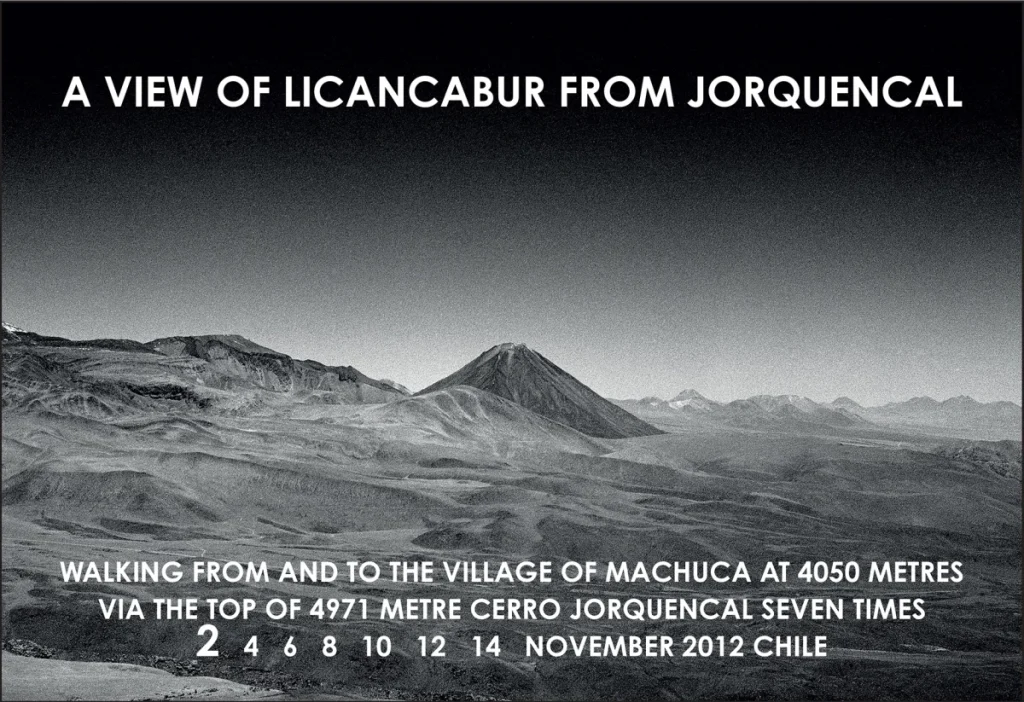
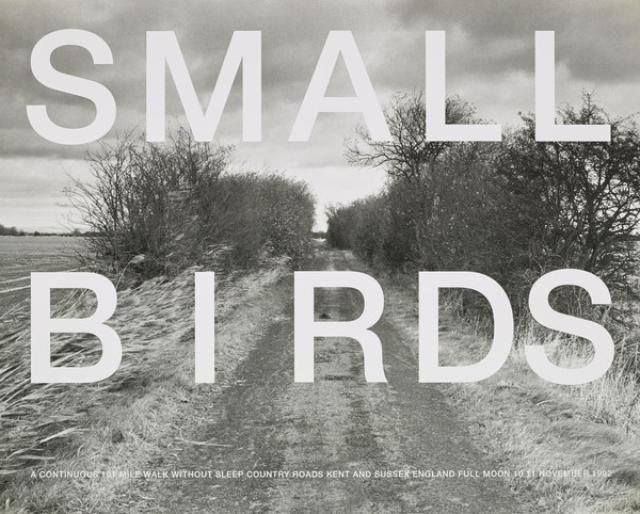
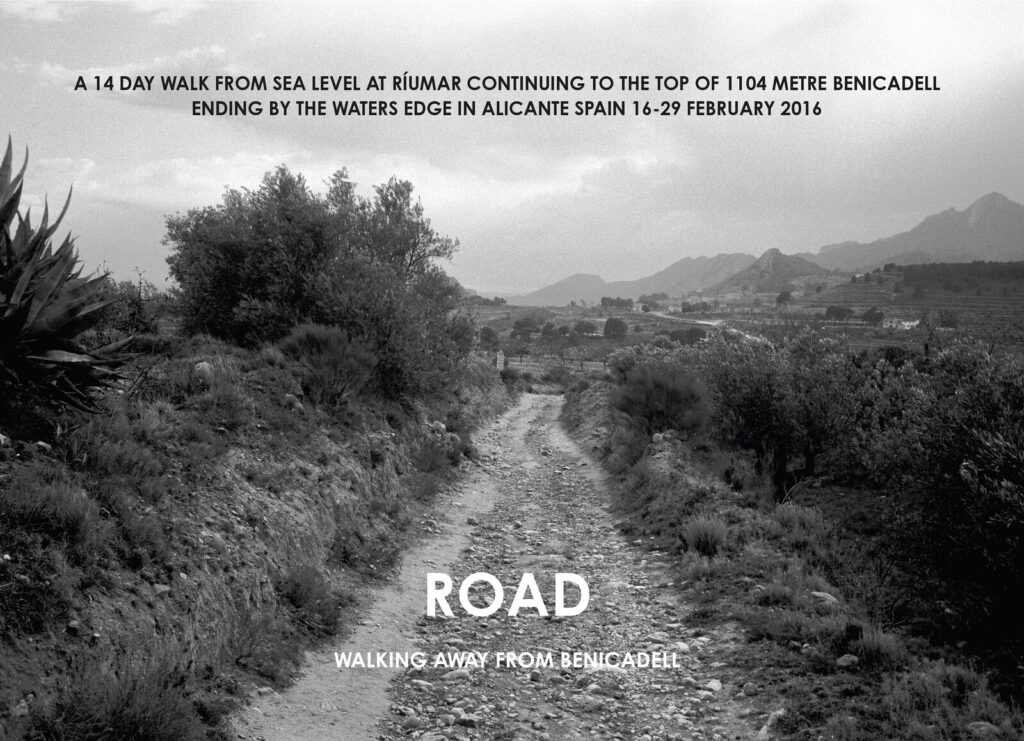
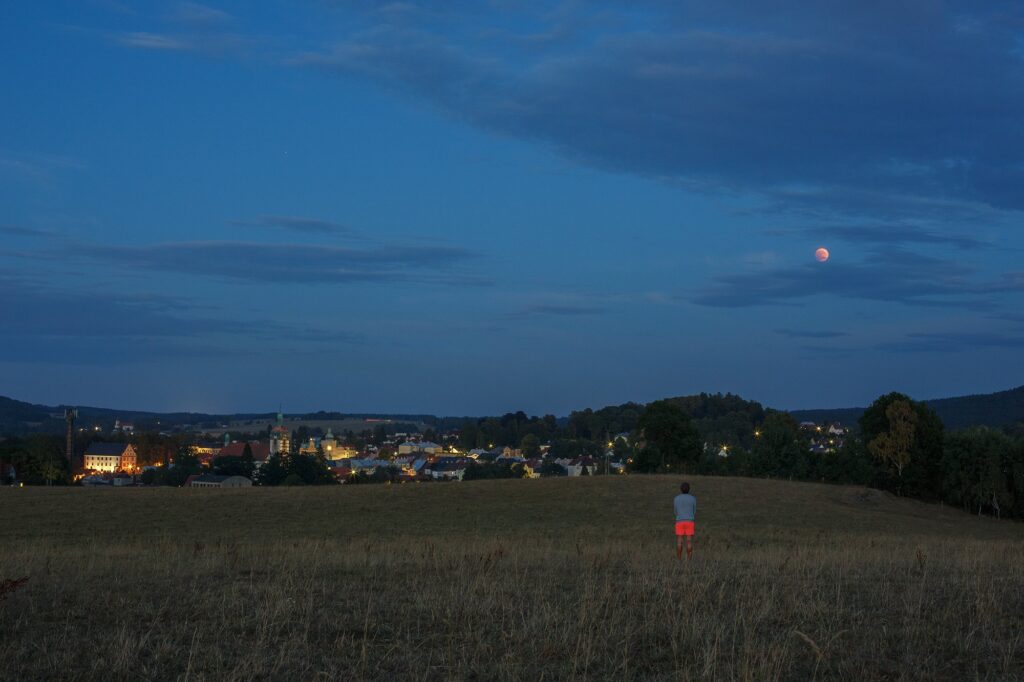
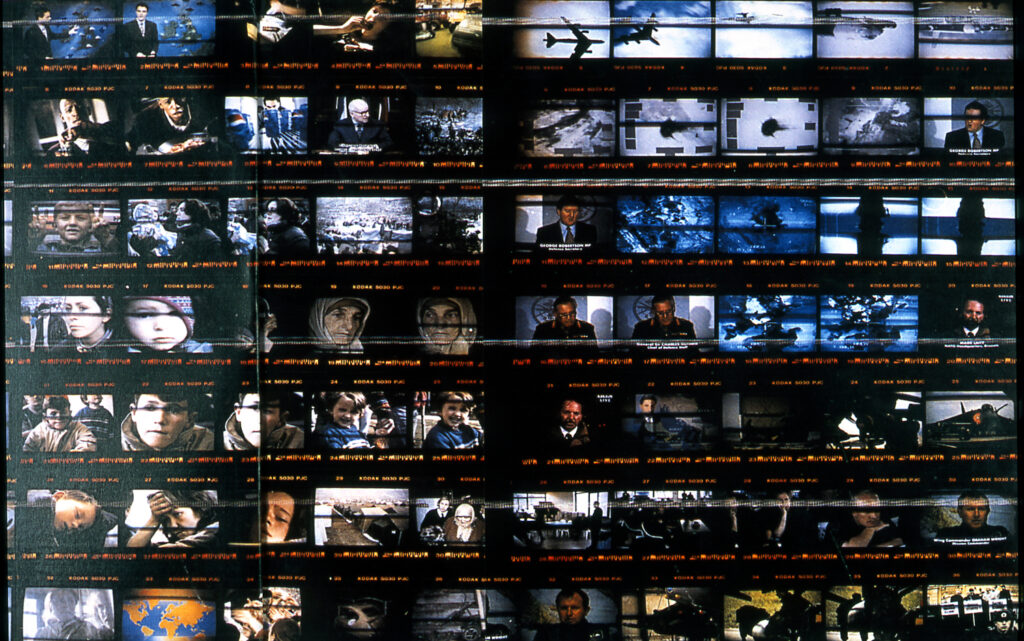
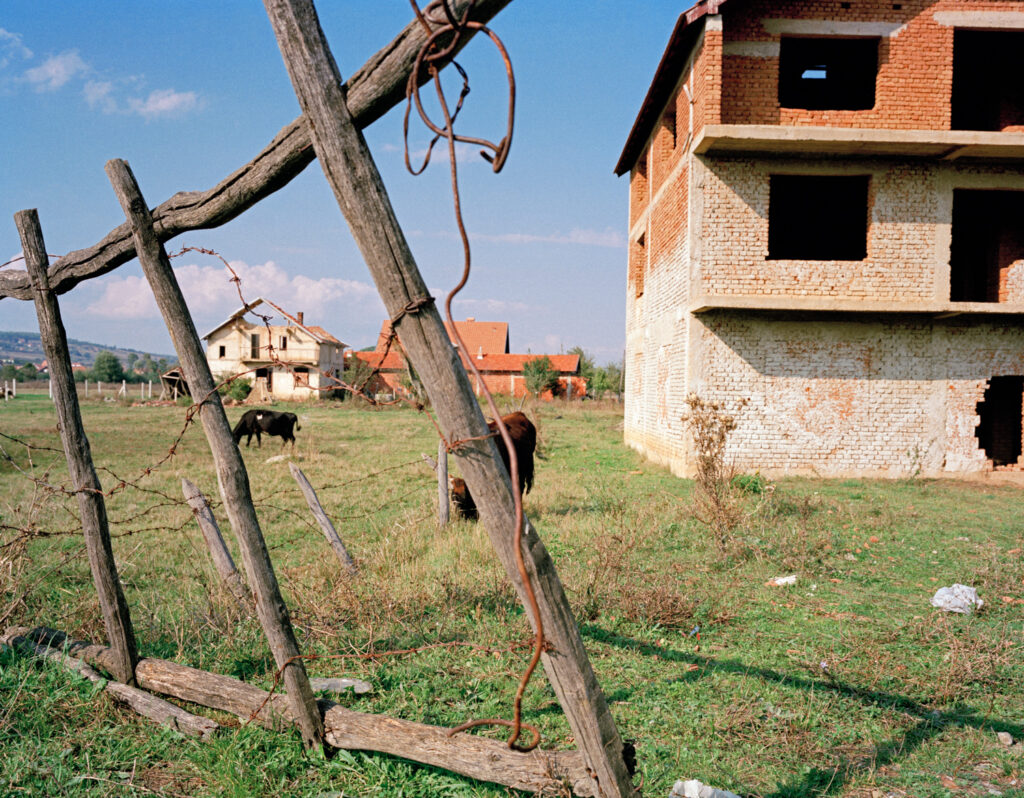
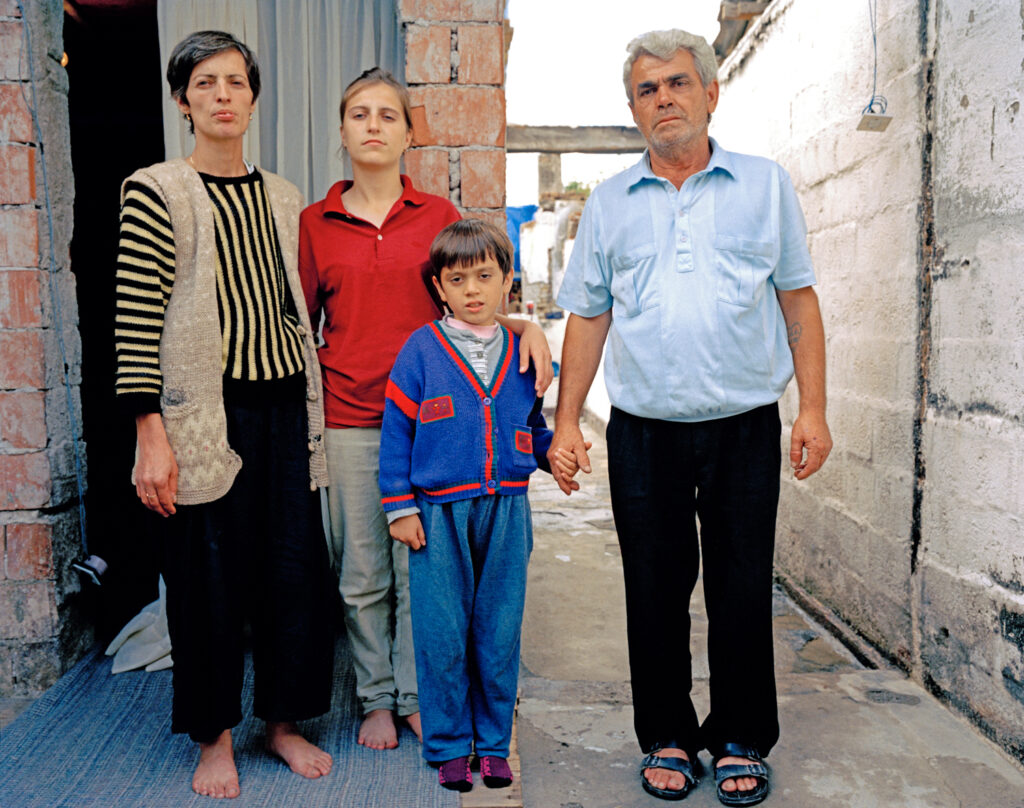
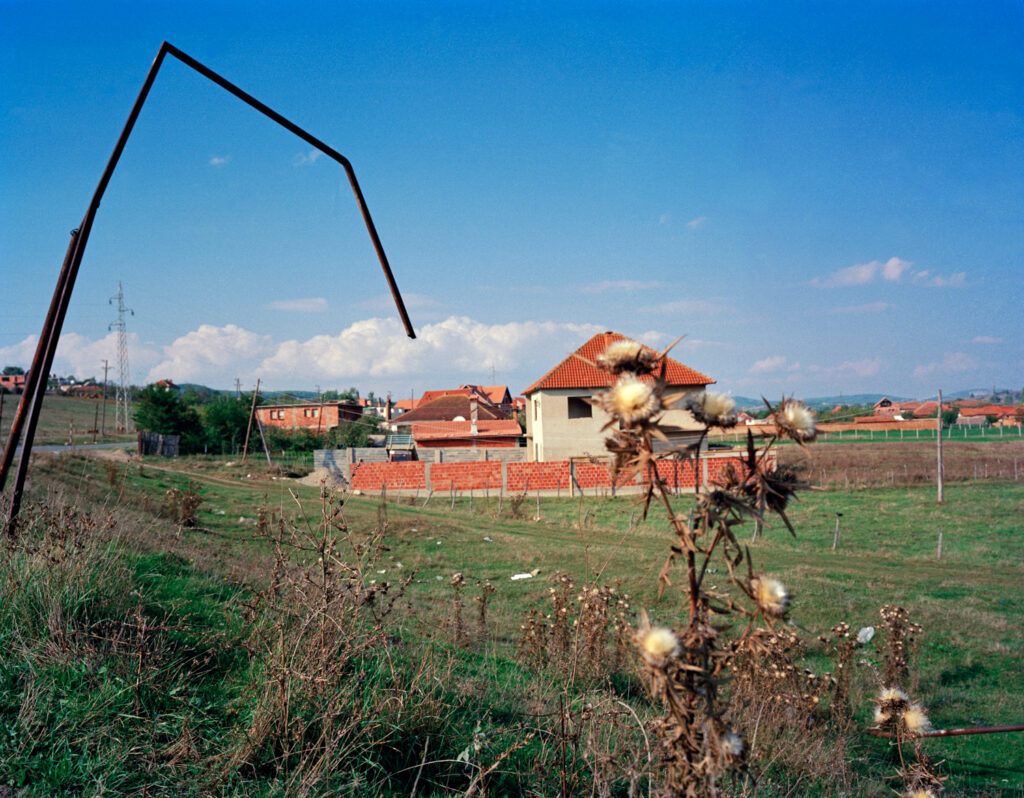
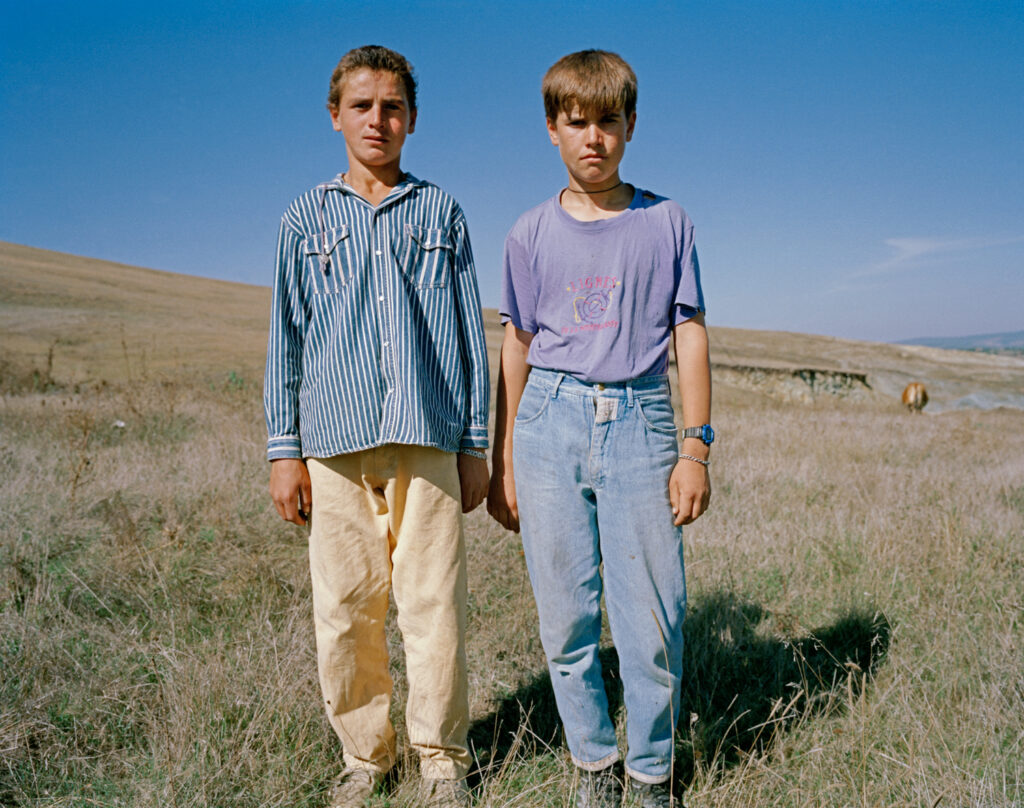
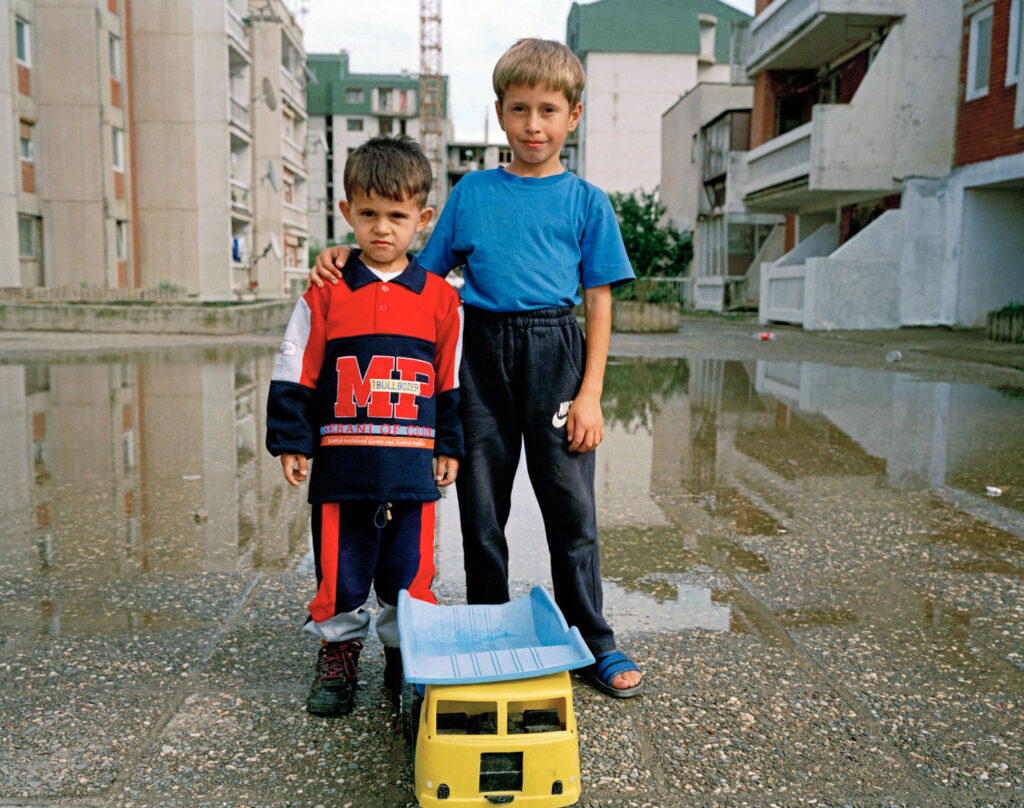
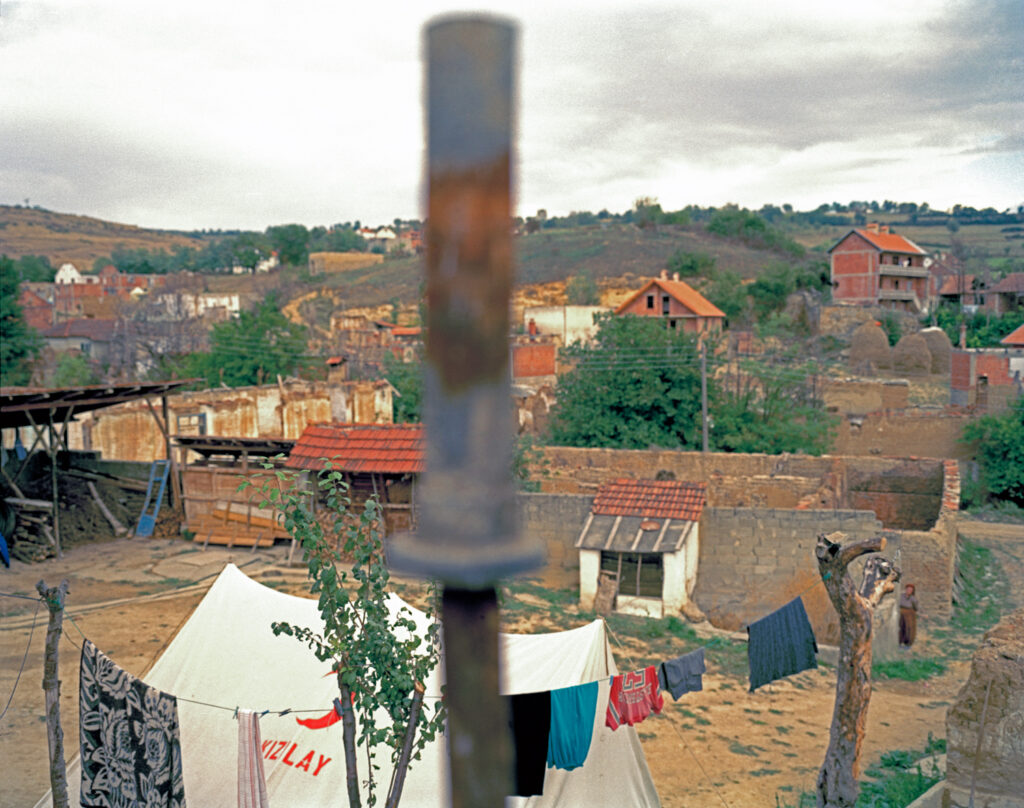
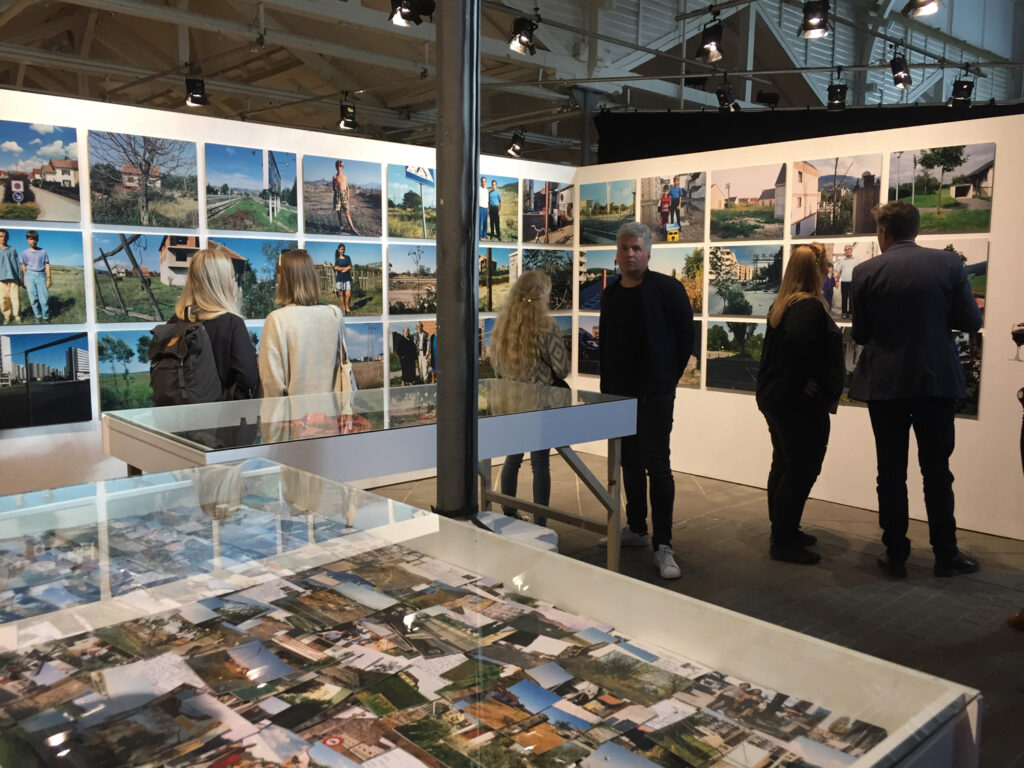
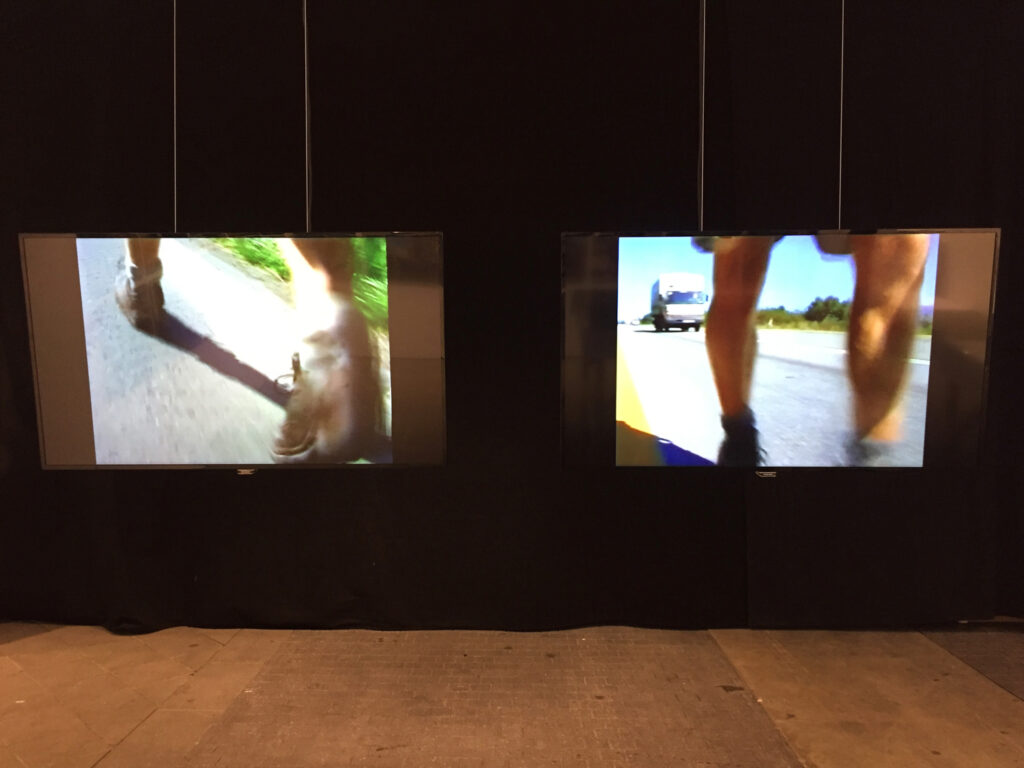
Martin Toft: INTERVENTIONS – A walk across Europe to Kosovo
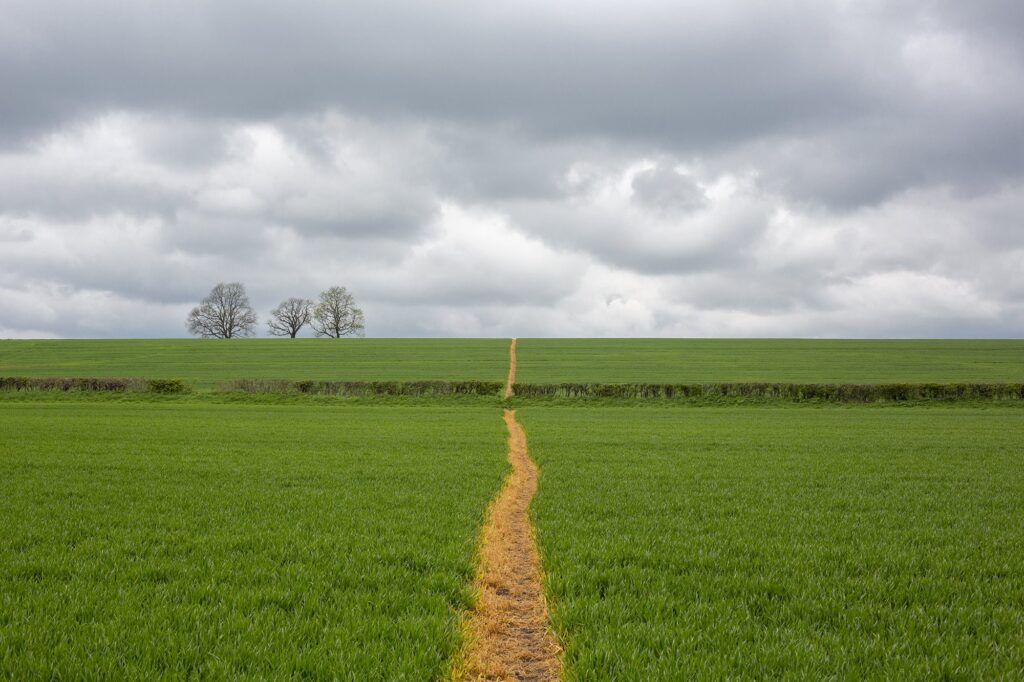
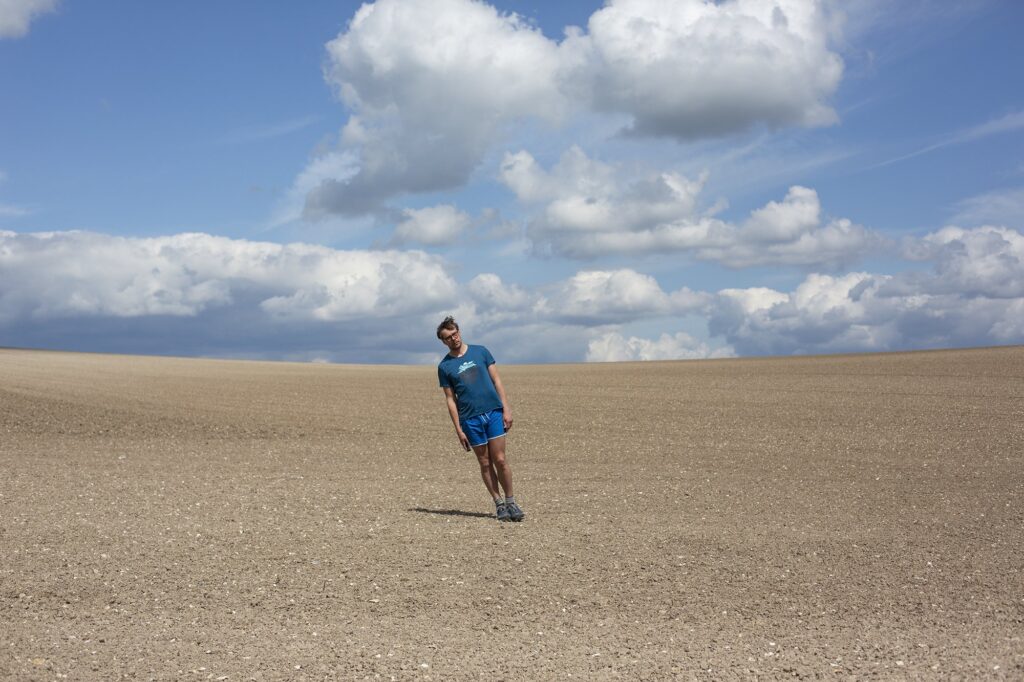
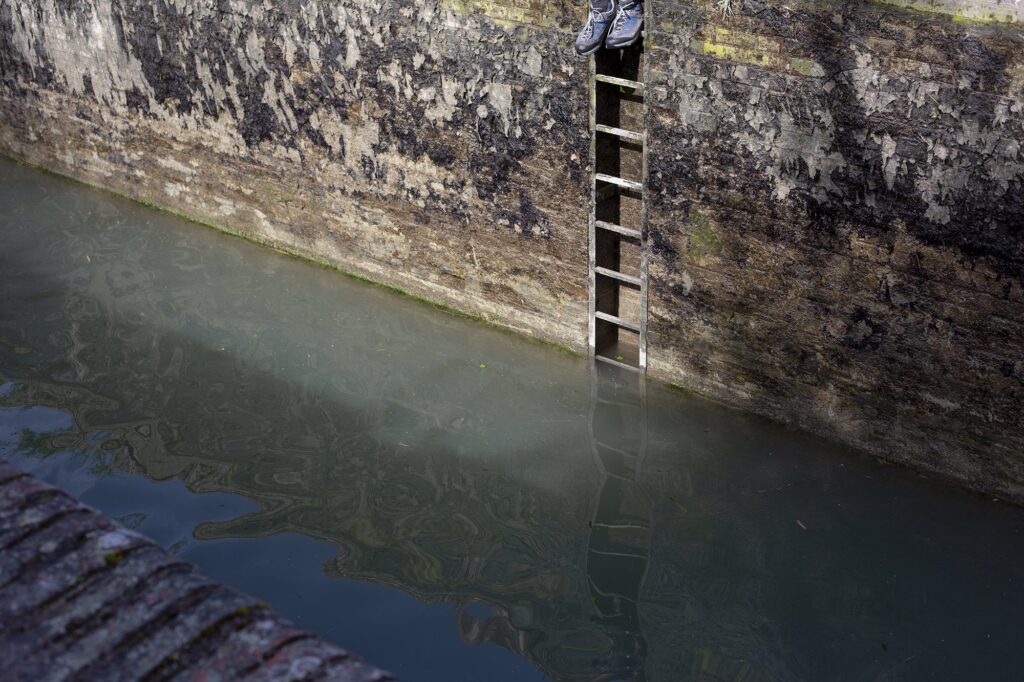
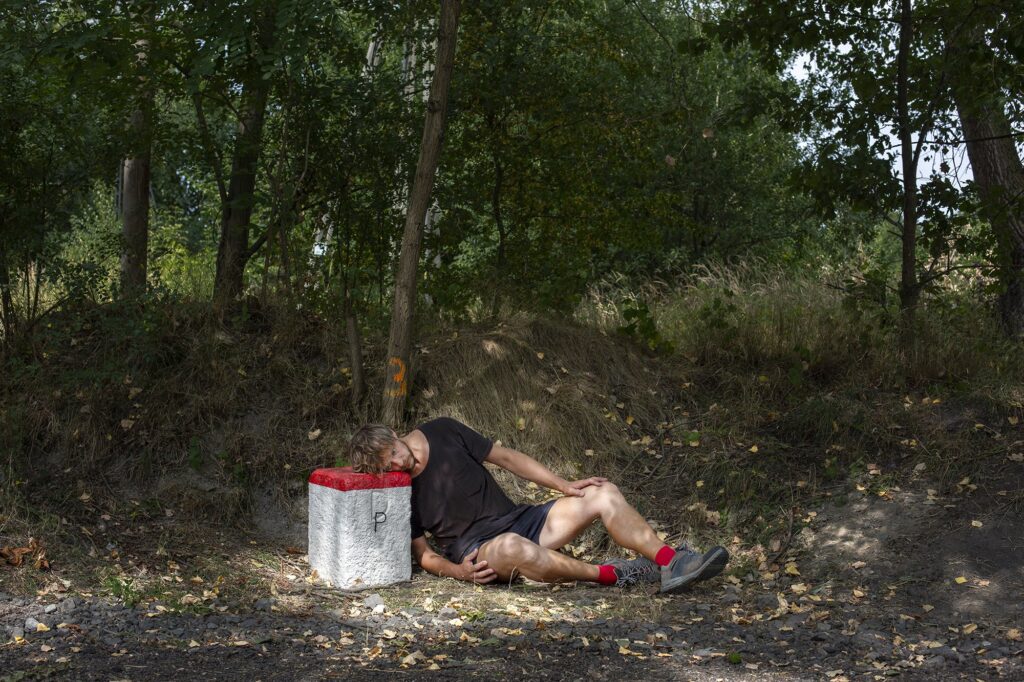
INTERVENTIONS was conceived under the influence of war in Europe when NATO decided to intervene in the conflict in the Balkan in 1999. I was watching news bulletins on TV most nights and witnessed both the ethnic cleansing by Milosevic’ troops and the bombing by air by NATO forces. In the guise of a landscape painter (plein air) I began walking through Europe putting myself in the picture as a frontman; my own subjective broadcaster, interpreter and adventurer. I wanted to challenge the artist’s social function and explore people’s perception of art and its possibilities of creating a dialogue for peace. My idiosyncratic performance during 78 days across the European landscape is an inquiry into distance – the journey itself. It is the existence of the journey, and not the essence of the destination. Kosovo is not the subject of my work but a mere stop to my journey. My position is akin to that of a passer-by constantly trying to situate himself in a moving environment. Each intervention is another fragment of the story that is being invented and a challenge to the narrative and economic structure of Western representation.
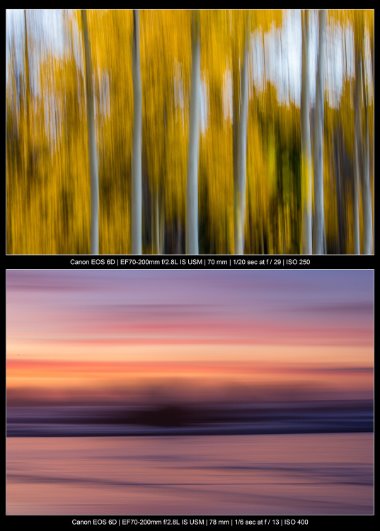
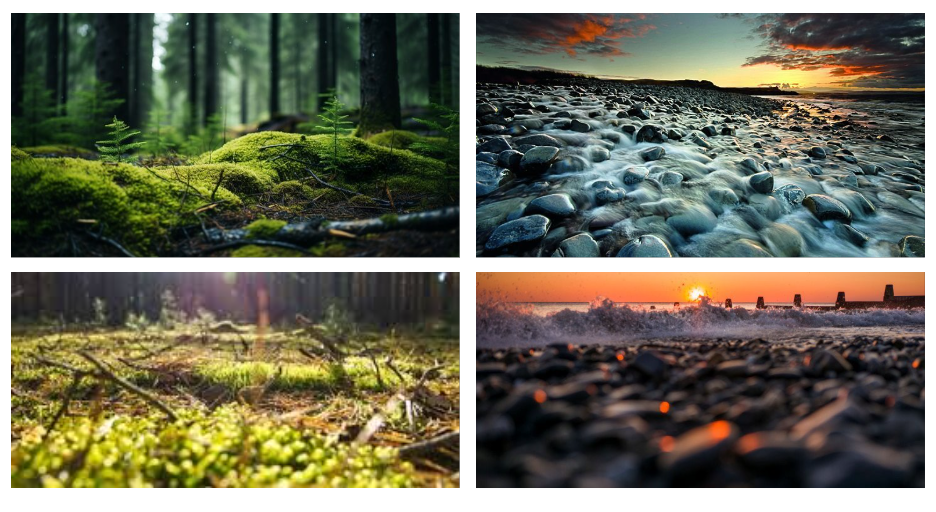
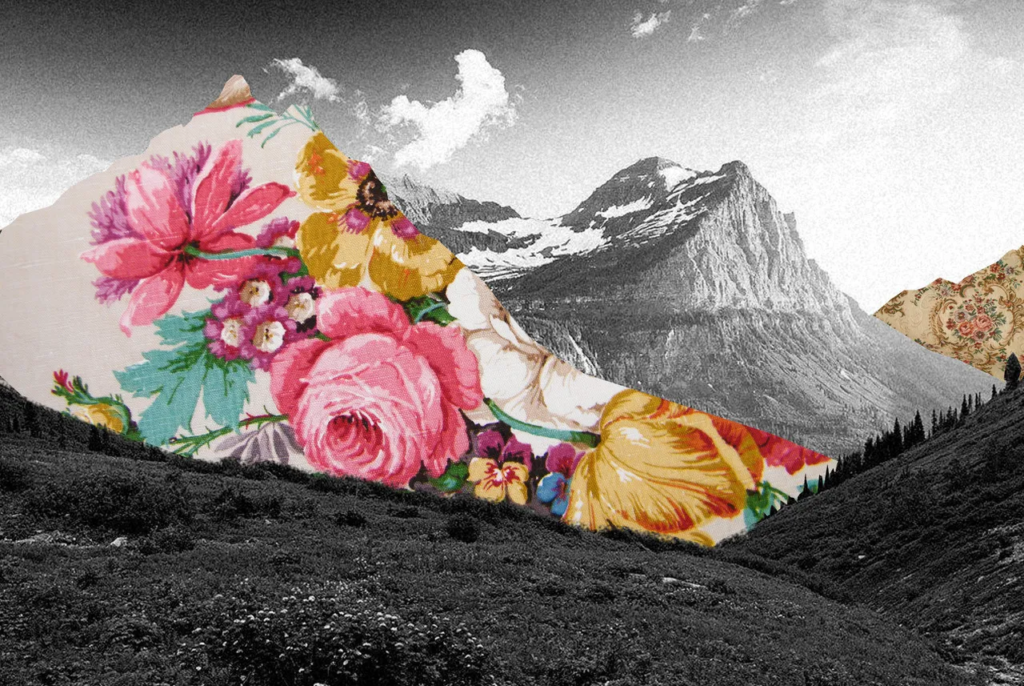
ABSTRACTION: Visually you could develop a set of images based on imagery that explore abstraction using photographic techniques, such as macro/ close-up photography, blur/ distortion experimenting with slow shutter-speeds/ ICM (intentional camera movement) or deliberate ‘out of focus’ techniques. Other techniques, such as Hockney ‘joiners’, panoramics or any form of photo-collaging/ montaging can be explored both in-camera and in post-production. Typologies of plant studies or found objects on the beach could also be explored – see work by Karl Blosfeldt, Mandy Barker, or Penelope Umbrico.
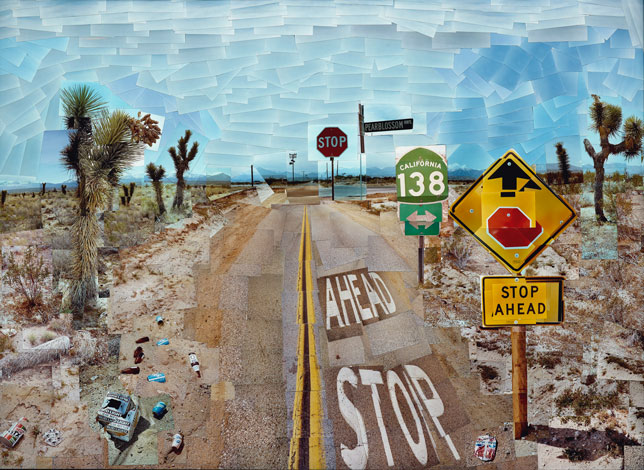
Pearblossom Highway is a piece of art created by the British artist David Hockney. It depicts a view of an American Highway. It is a collage compiled from over 700 separate photographs.
The artist himself describes his work as a drawing as opposed to a photographic piece. He has stated that this is because it is a layered composition representing many different viewpoints as opposed to a single, flat photograph. Read more here about Hockney’s Pearblossom.
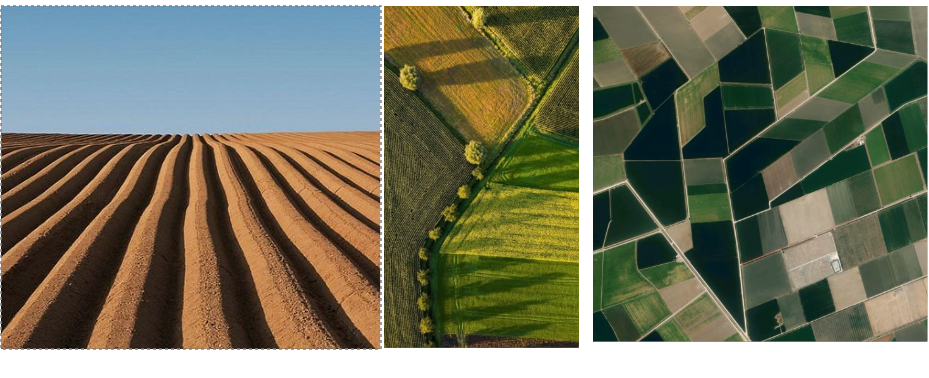
TYPOLOGIES
Karl Blossfeldt: Art Forms of Nature
Karl Blossfeldt is best known for his precise photographs of plants; however, he began his career as a sculptor. Never formally trained in photography, Blossfeldt made many of his photographs with a camera that he altered to photograph plant surfaces with unprecedented magnification. His pictures achieved notoriety among the artistic avant-garde with the support of gallerist Karl Nierendorf, who mounted a solo show of the pictures paired with African sculptures at his gallery in 1926 and, subsequently, produced the first edition of Blossdeldt’s monograph Urformen der Kunst (Art forms in nature), in 1928. The clarity, precision, and apparent lack of mediation of his pictures, along with their presentation as analogues for essential forms in art and architecture, won him acclaim from the champions of New Vision photography. His work was a central feature of important exhibitions, including Fotografie der Gegenwart and Film und Foto, both in 1929.
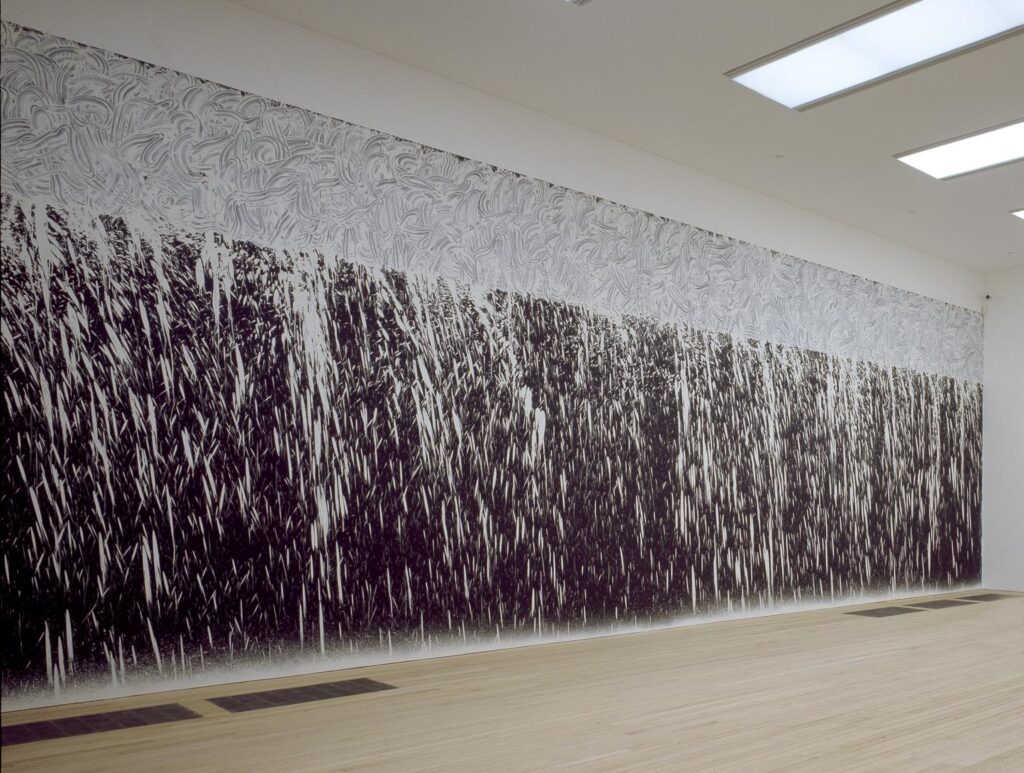
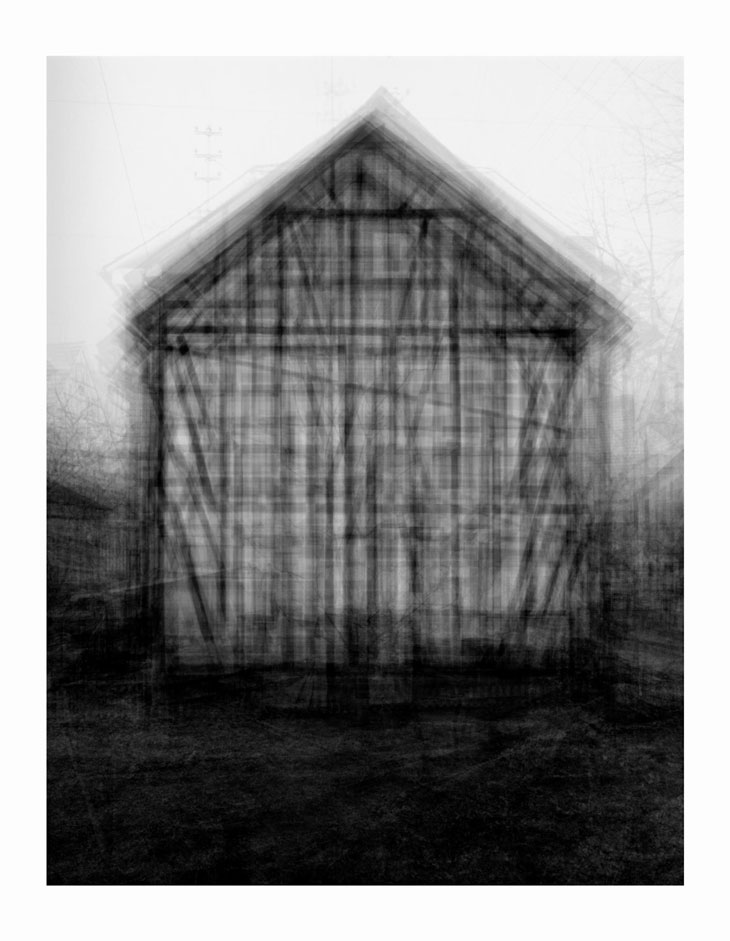
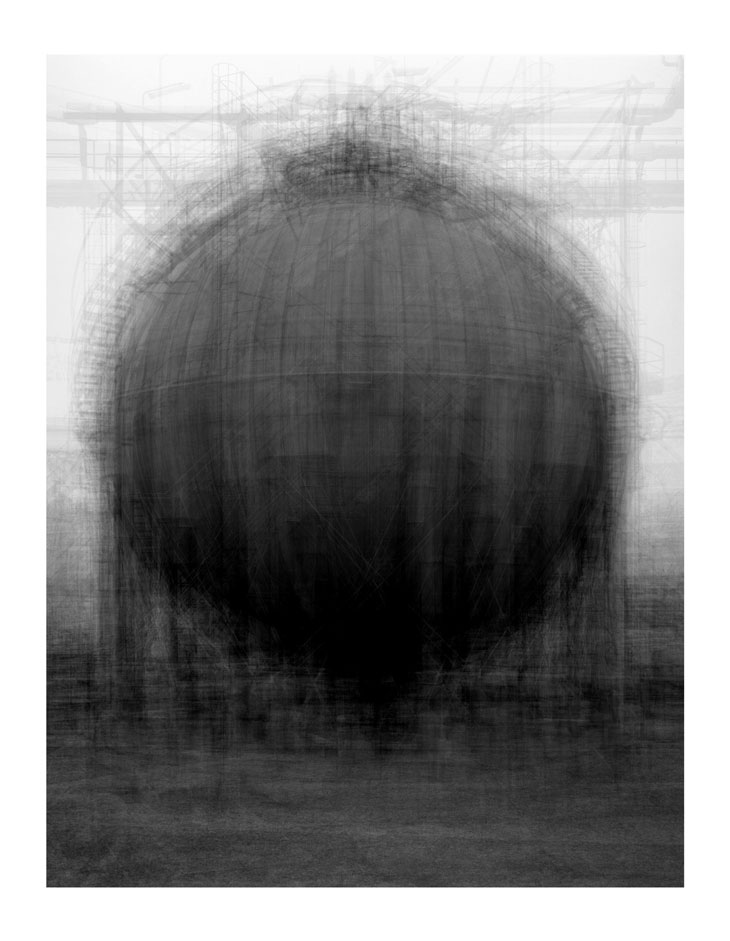
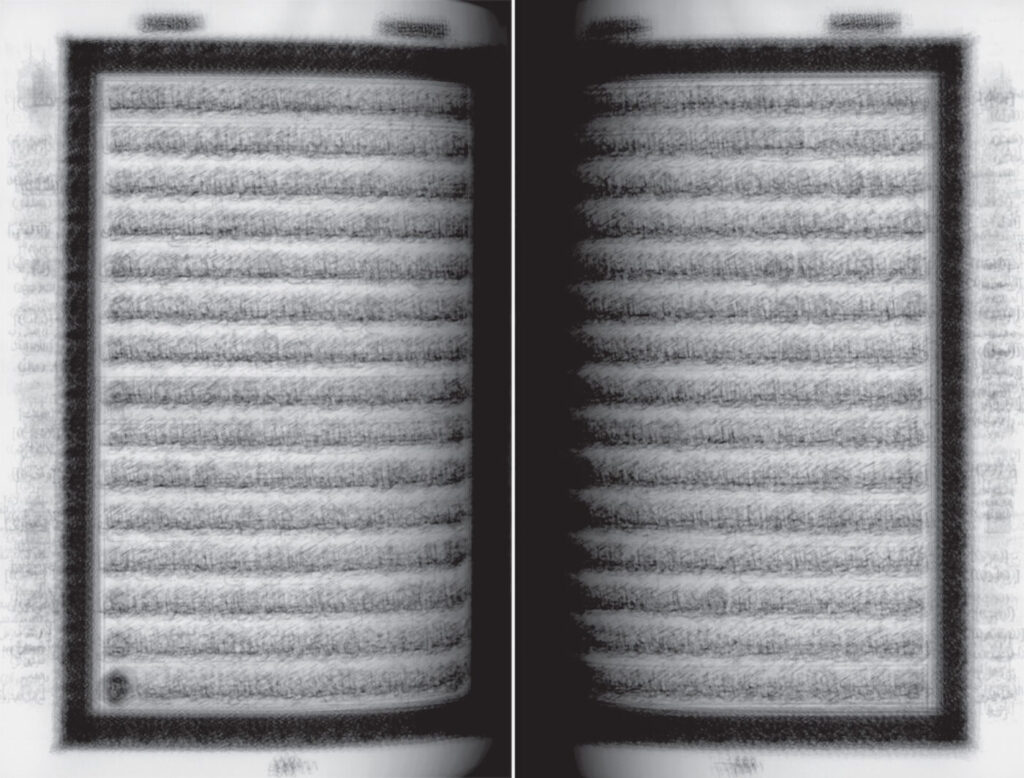
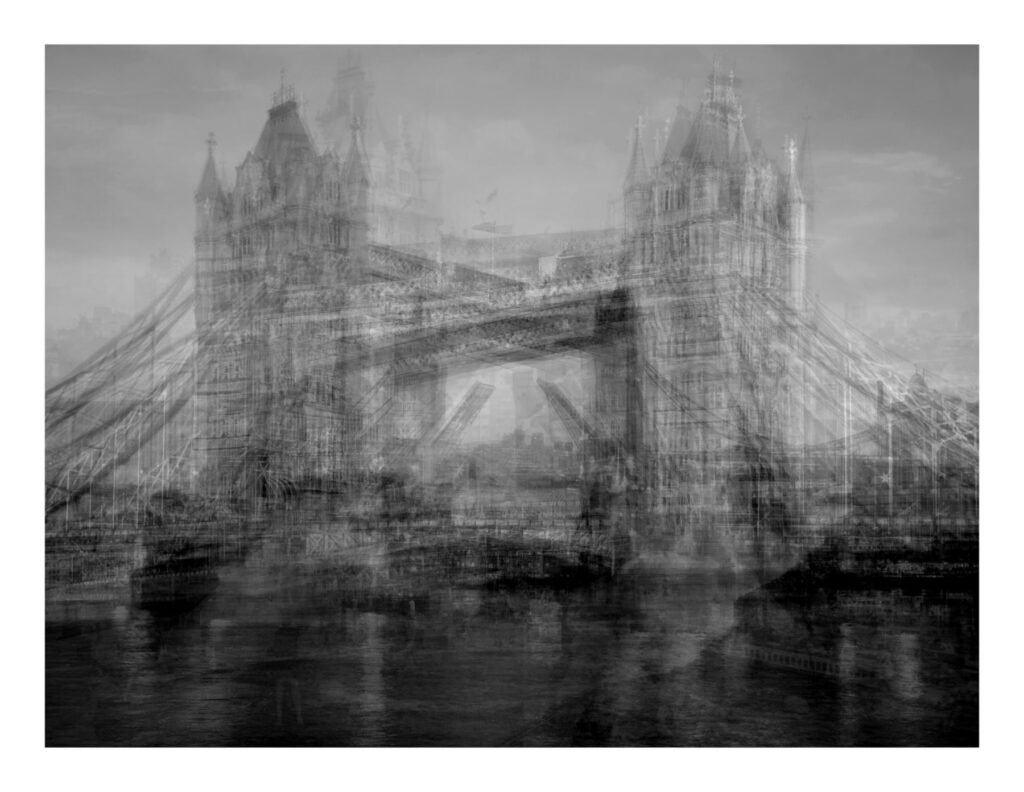
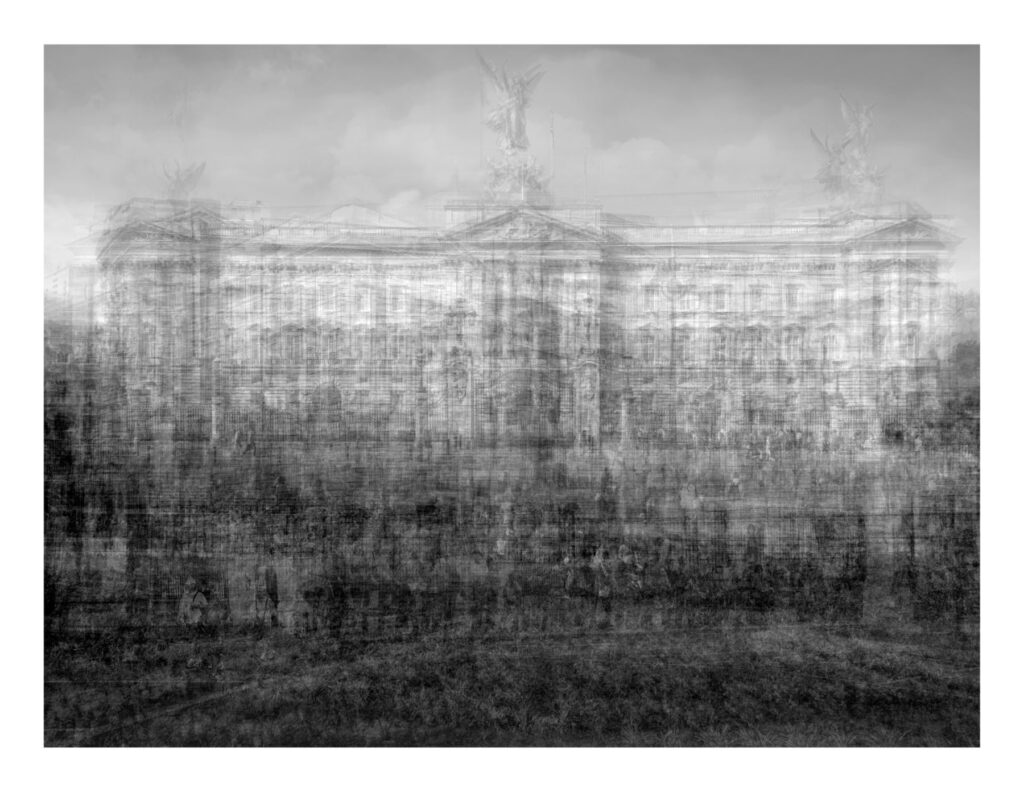
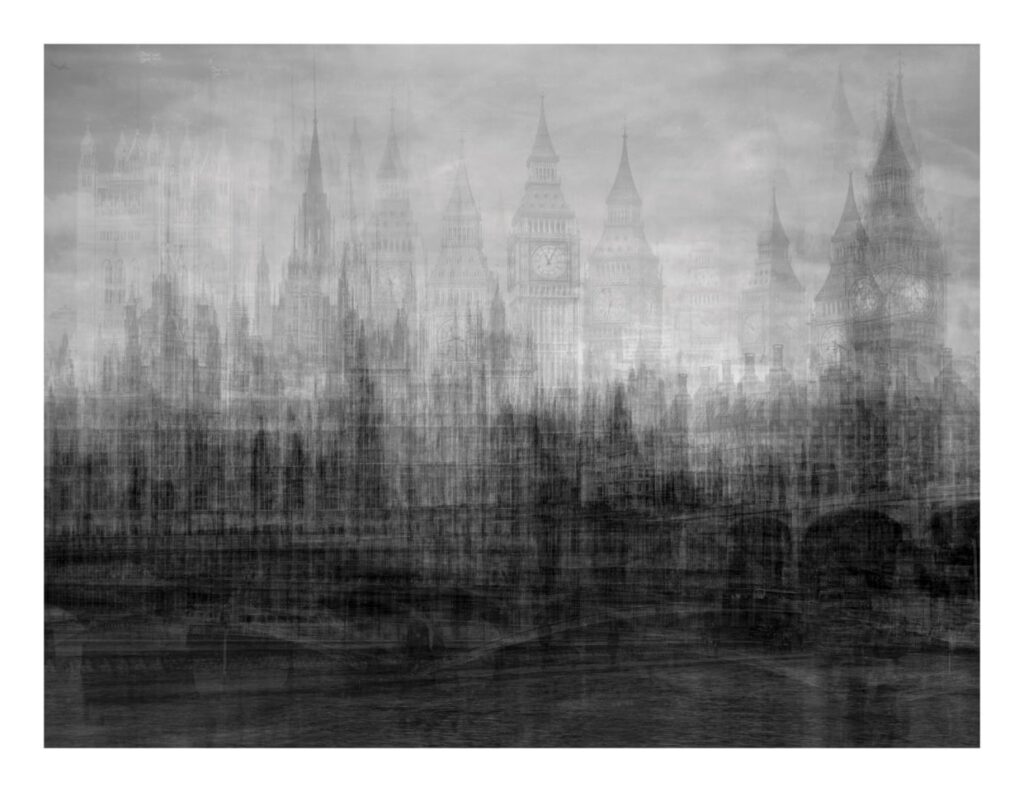
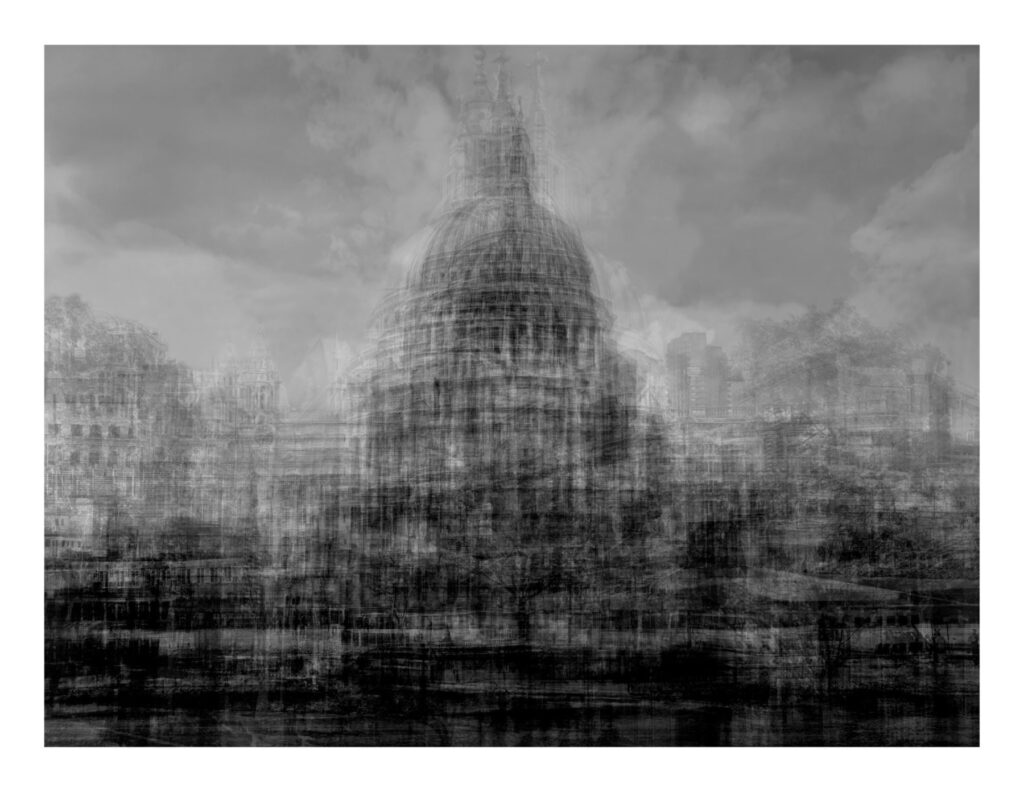
Idris Khan: Drawing on diverse cultural sources including literature, history, art, music and religion, Khan has developed a unique narrative involving densely layered imagery that inhabits the space between abstraction and figuration and speaks to the themes of history, cumulative experience and the metaphysical collapse of time into single moments.
Idris Khan every… Bernd and Hilla Becher Prison Type Gasholder, 2004
Idris Khan….Every page of the Holy Quran
Read a review here of a recent exhibition, Seasons Turn: A Review of “Idris Khan: Repeat After Me” at Milwaukee Art Museum.
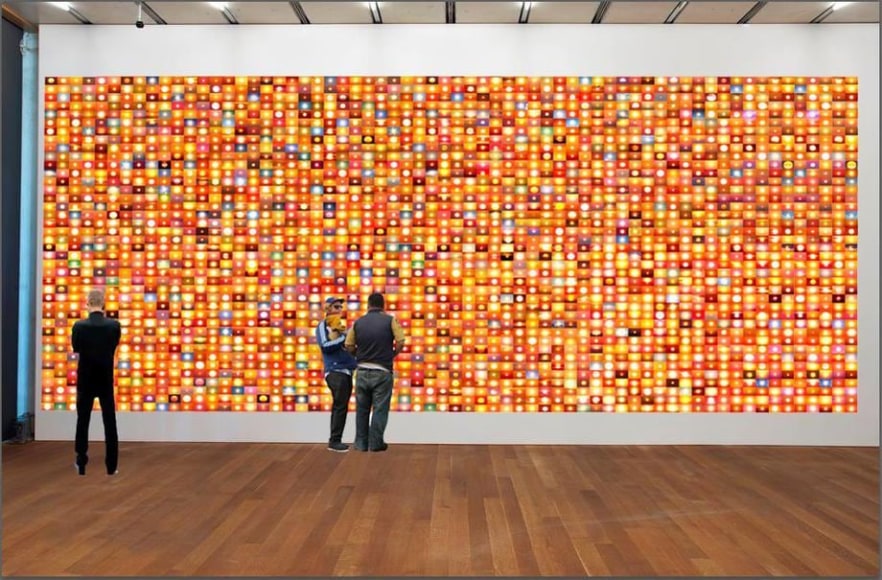
Penelope Umbrico
2,303,057 Suns from Sunsets from Flickr (Partial) 09/25/07 , 2007, detail of 2300 4×6 machine c-prints, installation at Gallery of Modern Art, Brisbane, Australia
Penelope Umbrico offers a radical reinterpretation of everyday consumer and vernacular images. Umbrico works “within the virtual world of consumer marketing and social media, traveling through the relentless flow of seductive images, objects, and information that surrounds us, searching for decisive moments—but in these worlds, decisive moments are cultural absurdities.”
Umbrico finds these moments in the pages of consumer product mail-order catalogs, travel and leisure brochures; and websites like Craigslist, EBay, and Flickr. Identifying image typologies—candy-colored horizons and sunsets, books used as props—brings the farcical, surreal nature of consumerism to new light.
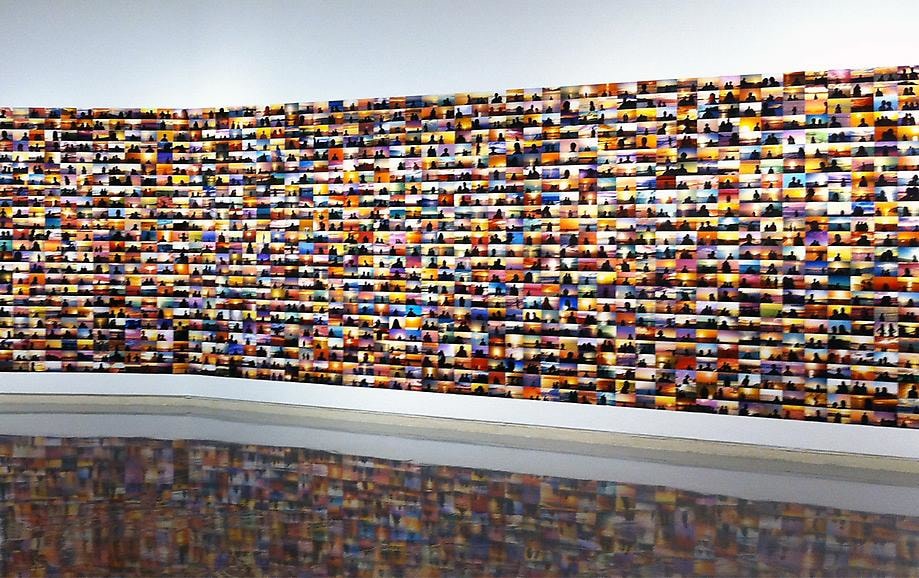
Sunset Portraits from 11,063,296 Flickr Sunsets on July 17, 2012, 2012, detail of installation for Daegu Biennial, Korea
Mandy Barker: Mandy Barker is an international award-winning photographic artist whose work involving marine plastic debris for 15 years, has received global recognition. Working with scientists she aims to raise awareness about plastic pollution in the world’s oceans, highlighting the harmful affect on marine life, climate change and ultimately ourselves – leading the viewer to take action.
The series PENALTY aims to create awareness about the issue of marine pollution by focusing attention on the football as a single plastic object and global symbol that could reach an international audience. The project involved the collaboration with members of the public from around the world after a call via social media for people to collect and post footballs they found in the sea or on the shoreline.
In total 992 marine debris balls were recovered from the world’s oceans in just 4 months. 769 footballs and pieces of, with 223 other types of balls were collected from 41 different countries and islands and from 144 different beaches, by 89 members of the public.
BEYOND DRIFTING: IMPERFECTLY KNOWN ANIMALS:
BEYOND DRIFTING: IMPERFECTLY KNOWN ANIMALS: Plankton form a diverse group of microscopic marine organisms living in the water column, not able to swim against the current they exist in a drifting, floating state. In this series unique ‘specimens’ of this animal species relate to the pioneering discoveries made by John Vaughan Thompson in Cobh, Cork harbour during the 1800’s.
Presented as microscopic samples, objects of marine plastic debris, recovered from the same location, mimic Thompson’s early scientific discoveries of plankton. The work represents the degradation and contamination of plastic particles in the natural environment, by creating the perception of past scientific studies, when organisms where free from plastic. Enveloping black space evokes the deep oceans beneath. Presenting new ‘specimens’ created from recovered debris, serves as a metaphor to the ubiquity of plastic and the anthropocene, encapsulating in miniature the much larger problem of an imperfect world.
PHOTOGRAPHS OF BRITISH ALGAE: CYANOTYPE IMPERFECTIONS
“In 2012, I found a piece of material in a rock pool that changed my life. Mistaking this moving piece of cloth for seaweed, started the recovery of synthetic clothing from around the coastline of Britain for the next ten years”.
PHOTOGRAPHS OF BRITISH ALGAE: CYANOTYPE IMPERFECTIONS: Two hundred and two ‘specimens’ of clothing and garments recovered from one hundred and twenty-one beaches mimic different species of marine algae, with the intention to raise awareness about the over consumption of synthetic plastic clothing also referred to as ‘fast fashion’, which is currently having the greatest impact on global climate change.
After seeing an original copy of the book, ‘Photographs of British Algae, Volume 1’ by Anna Atkins, at The Royal Society in London, Barker was captivated by its detail and significance, and for the way it changed how we looked at science in 1800’s, but more importantly for the possibility to re-create similar work that could engage how we look at science in connection with a present-day critical issue.
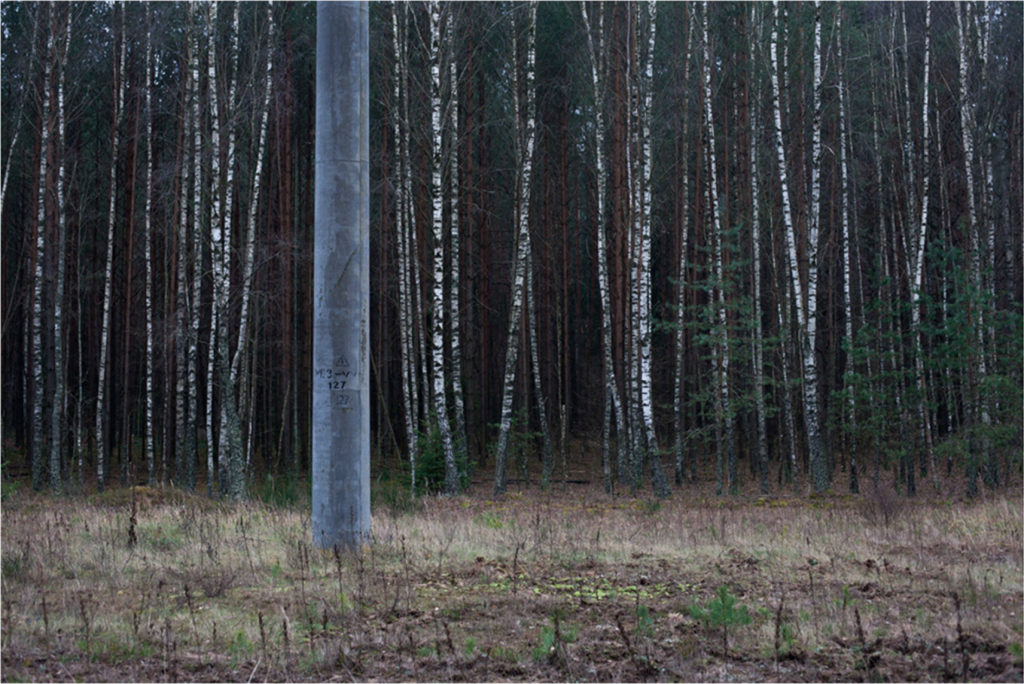
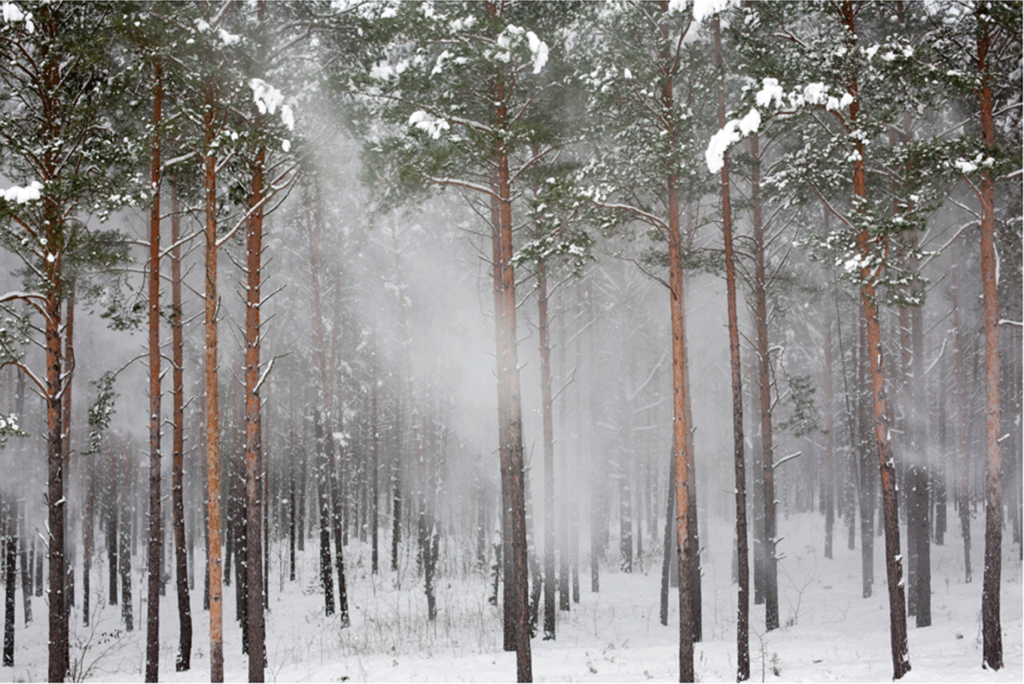
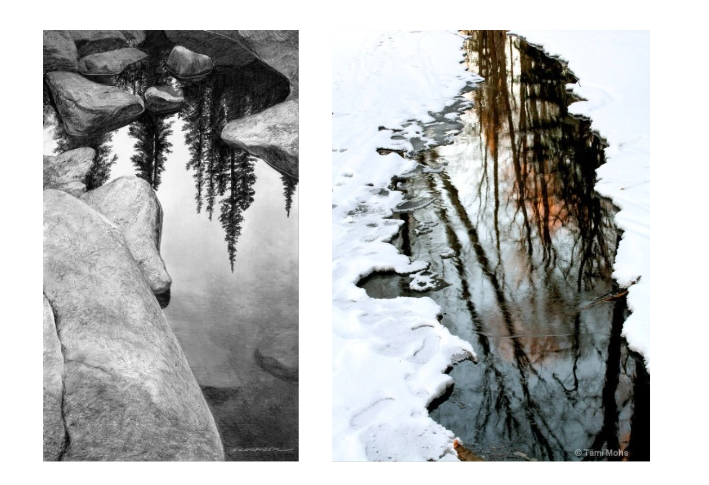
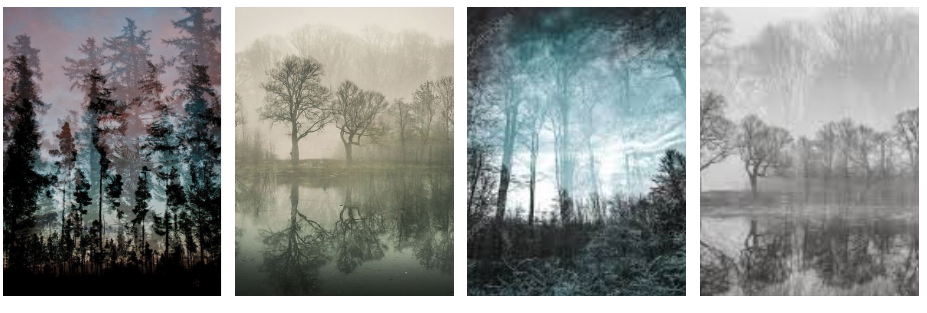
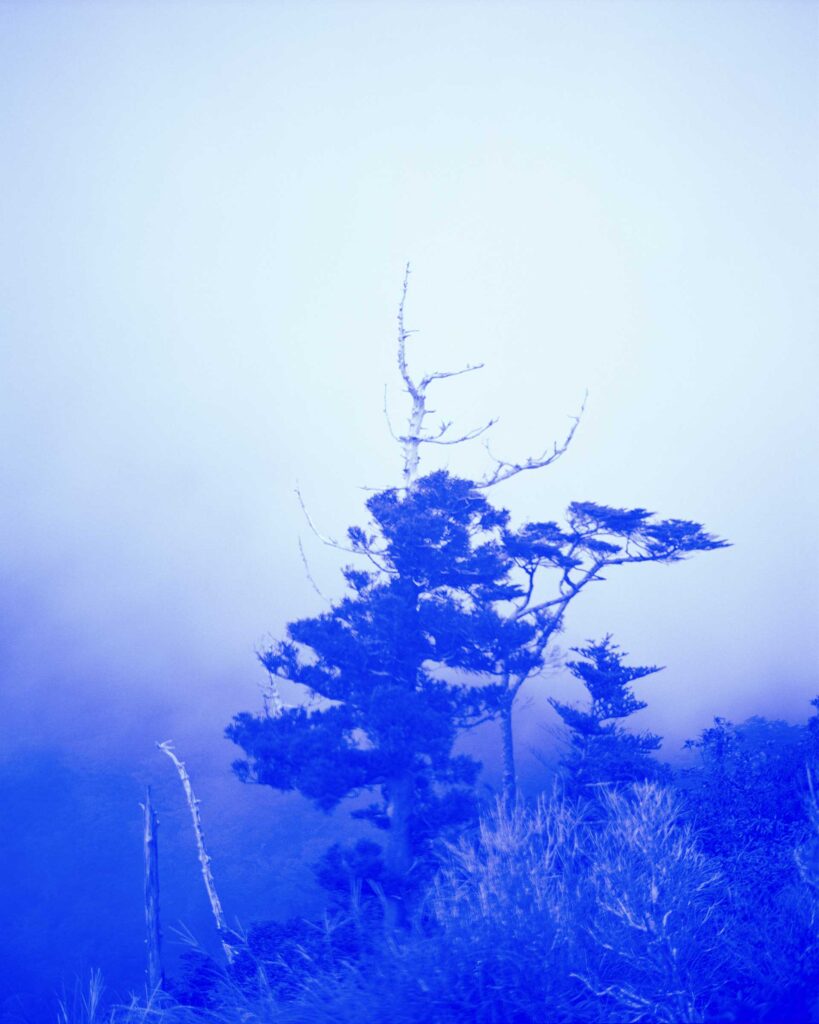
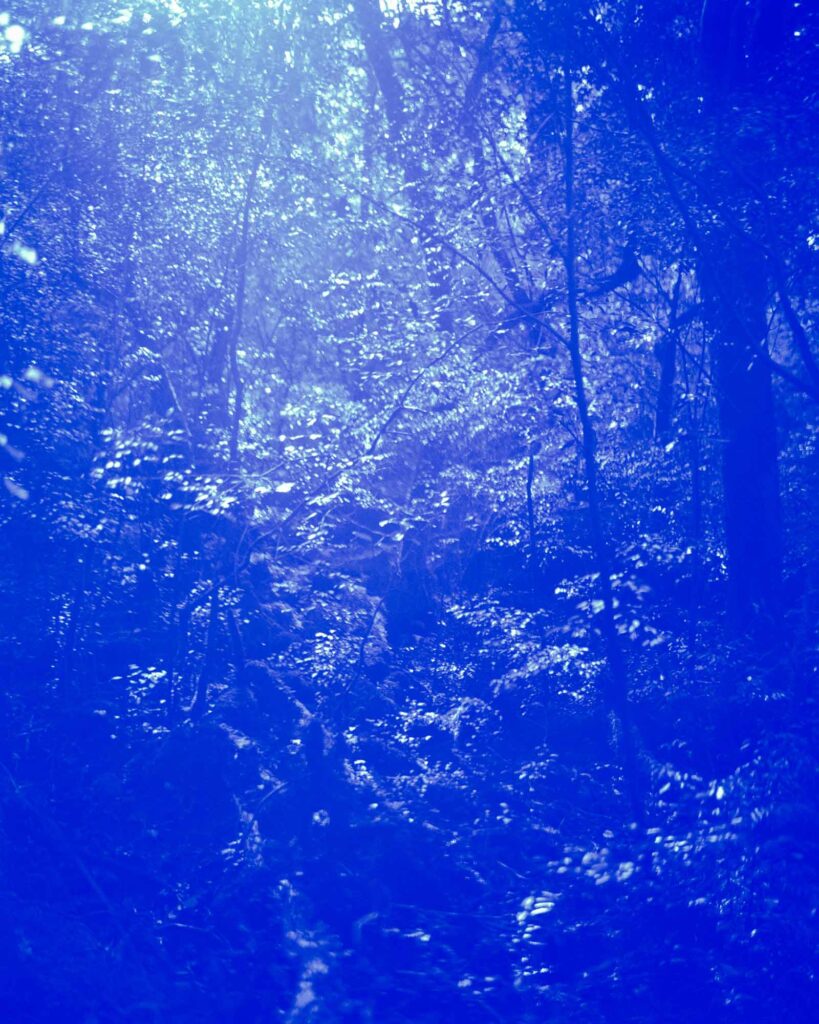
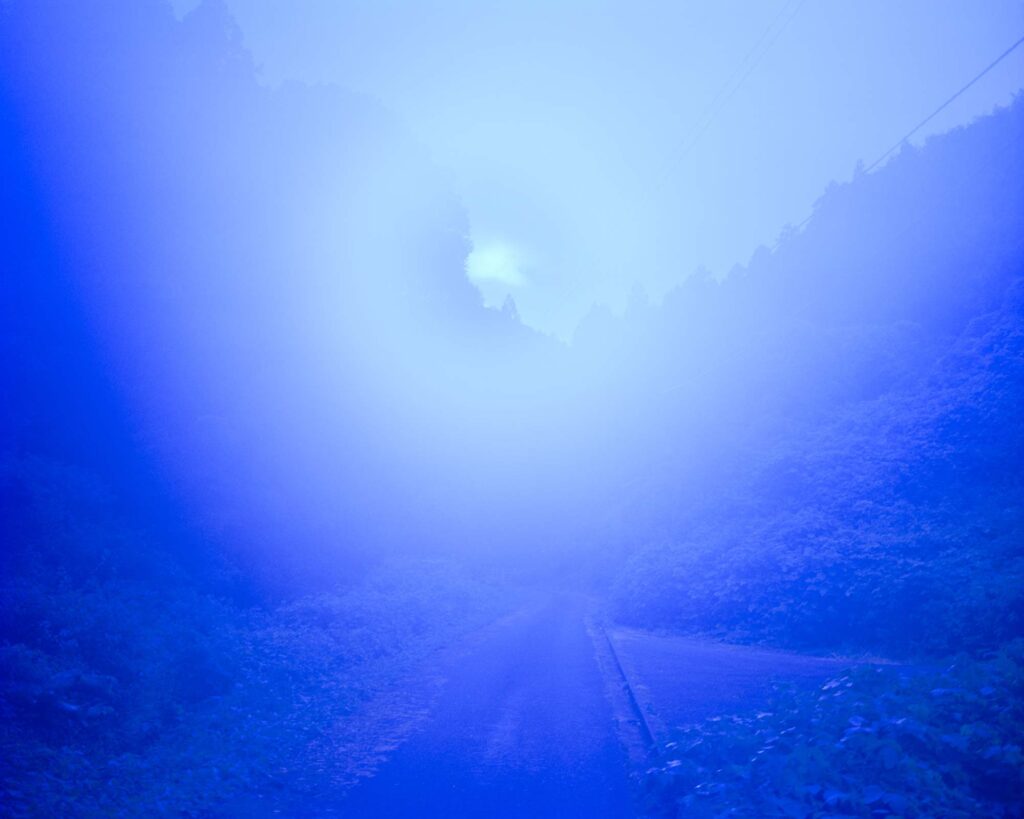
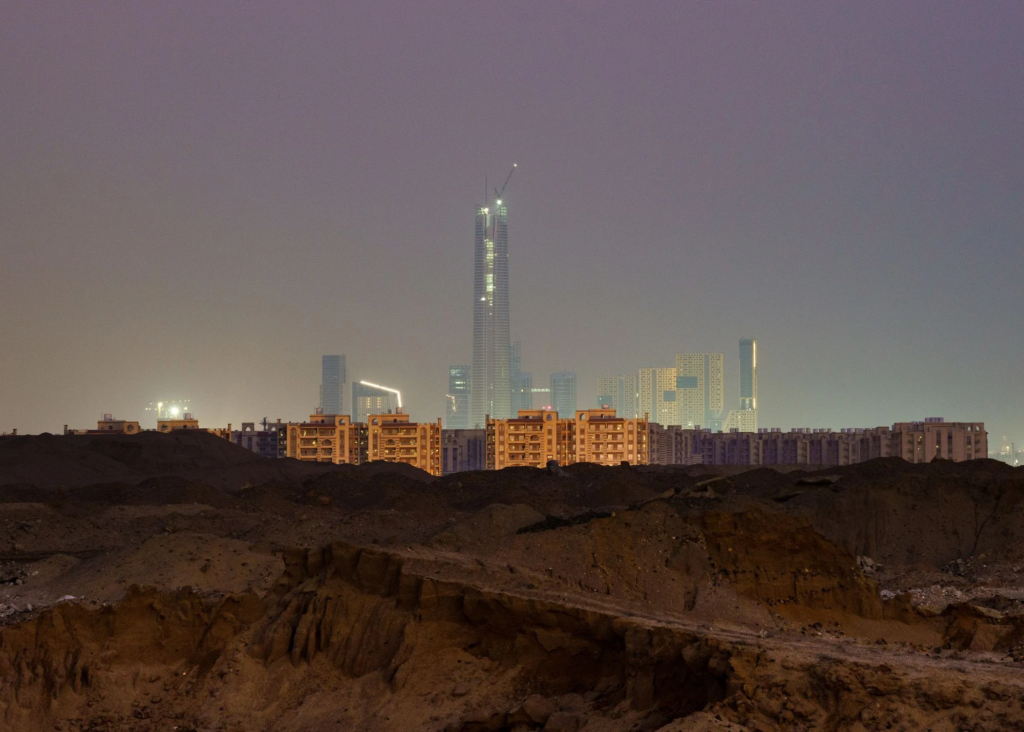
Aomori: “It is peculiar how forests have such an affect on us,” observes Jersey-born photographer Alexander Mourant of his latest project Aomori, which was shot in Japan’s ancestral forests. “As temporal dimensions crumble, objectivity leaves us. We are found in a still, oneiric state, contemplating our own accumulation of experience.”
“Aomori, meaning ‘blue forest’ in Japanese, is a synthesis of two existential ideas – the forest and the nature of blue,” explains Mourant. “Together they create a place of high intensity, a place which questions our relationship to time, colour and self.”
“Aomori addresses the most intangible colour, blue,” Mourant says. “For an artist, an intimate investigation of one individual subject can lead to limitless fields on intertwining narratives and unseen connections. There is so much in the colour blue.”
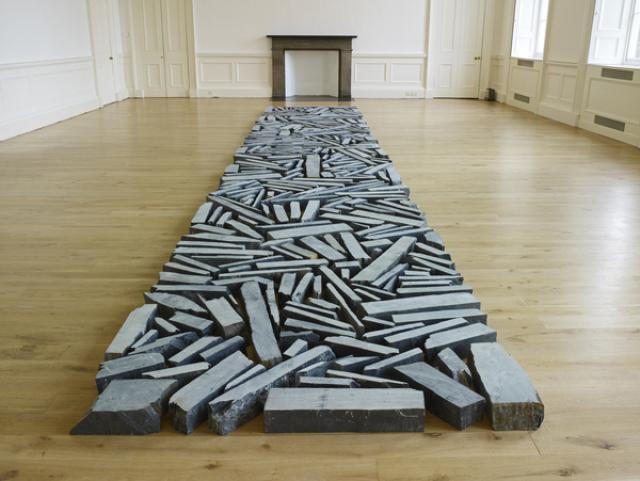
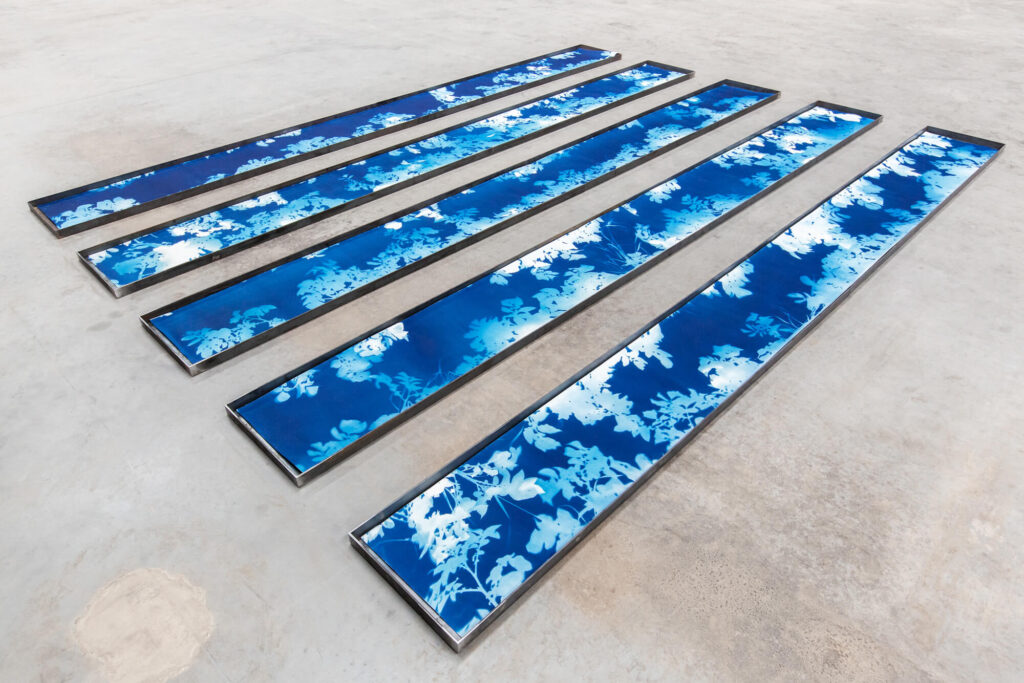
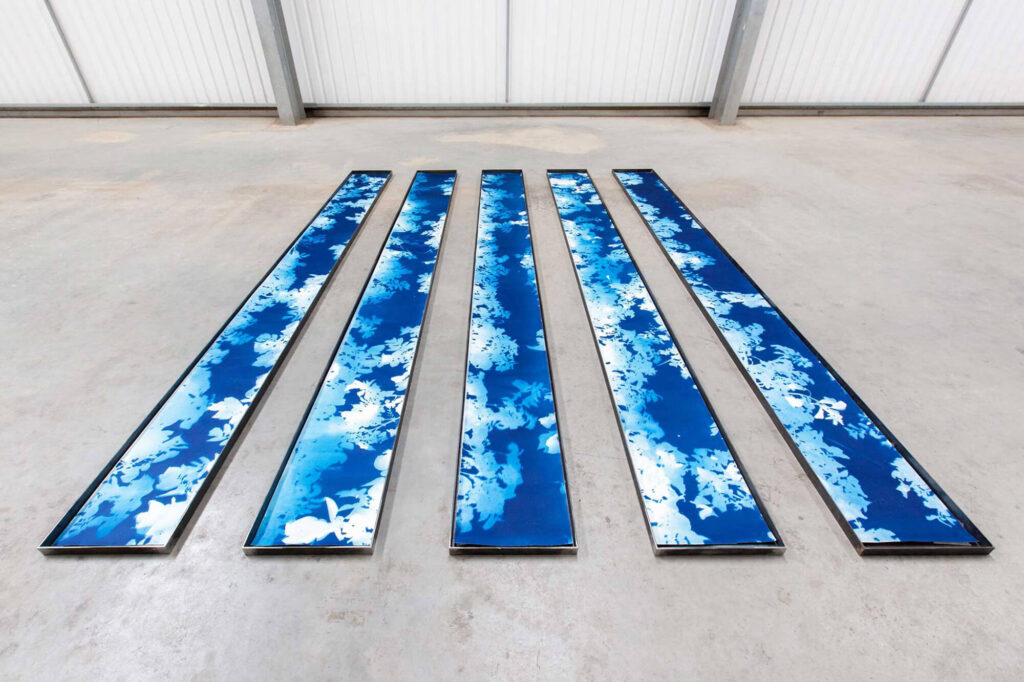
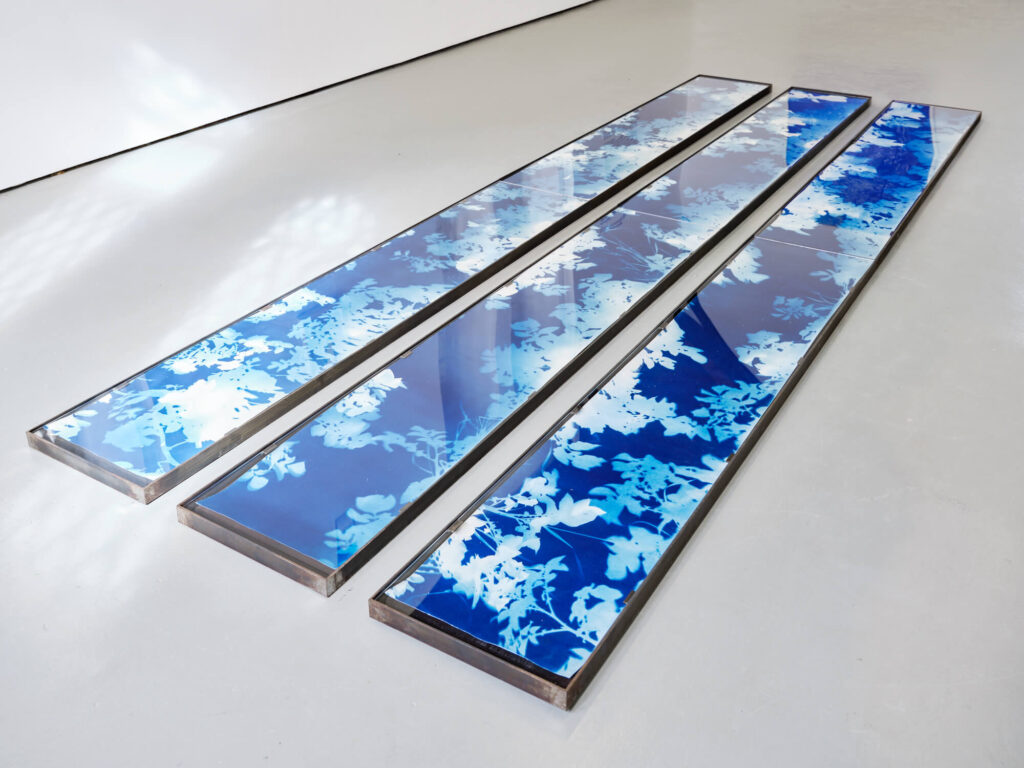
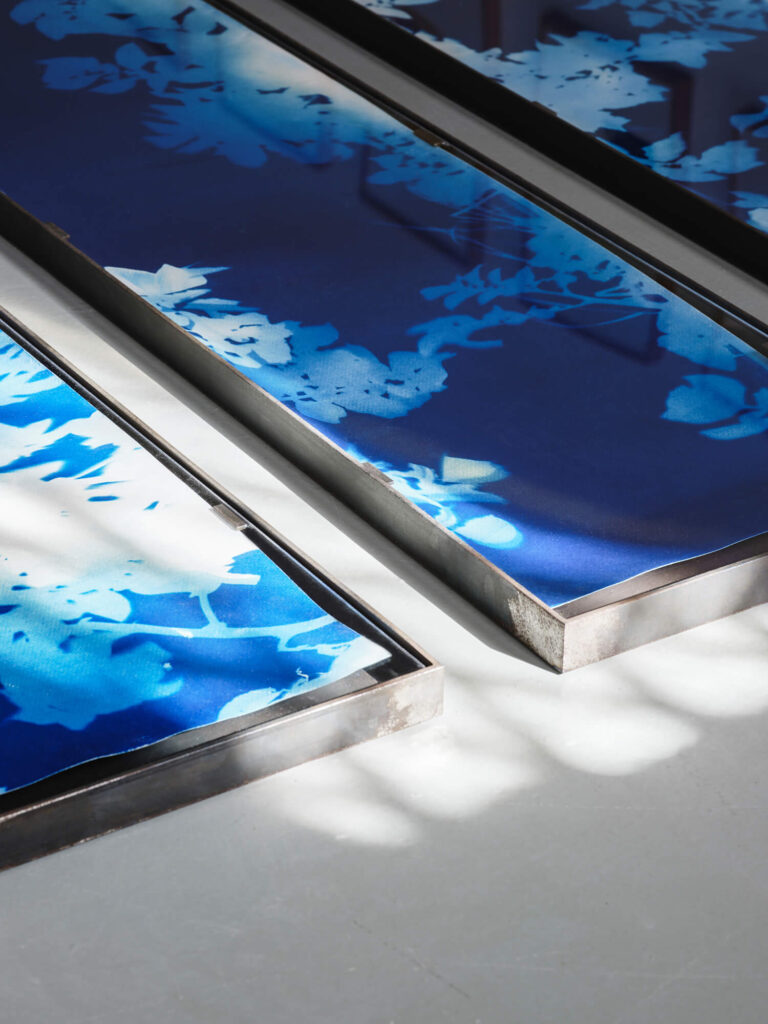
Five Sketches Running for Two Hundred and Ten Seconds or Five Furrows, 2020
Dimensions: 5: 398cm x 39cm prints 5: 400cm x 40cm x 5cm steel trays Artwork scale: 400cm x 260cm Cyanotype, photogram, watercolour paper Unique
Anna Atkins was an English botanist and photographer. She is often considered the first person to publish a book illustrated with photographic images, British Algae. Photographs of British Algae was published in fascicles beginning in 1843 and is a landmark in the history of photography. Using specimens she collected herself or received from other amateur scientists, Atkins made the plates by placing wet algae directly on light-sensitized paper and exposing the paper to sunlight. Her nineteenth-century cyanotypes used light exposure and a simple chemical process to create impressively detailed blueprints of botanical specimens.
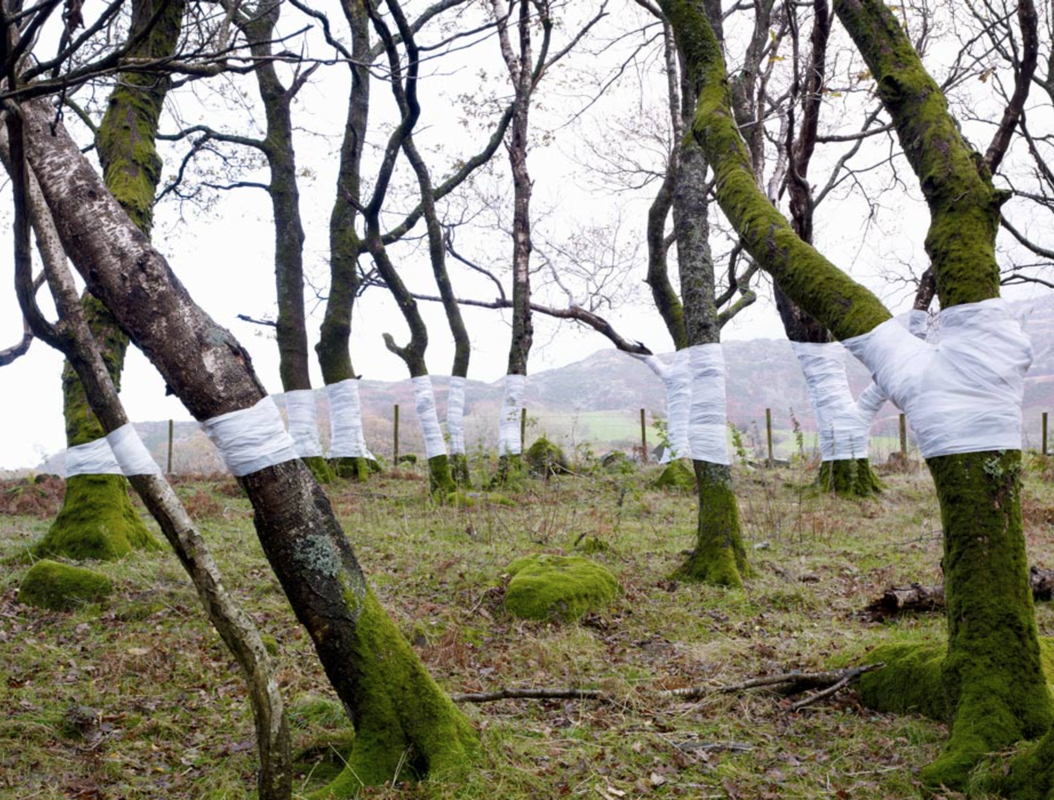
See how contemporary artist, Tom Pope has responded to Anna Atkins plant studies and work with cyanotypes, uncovering her family links with plantation economy in the Caribbean and slave ownership during British colonial history in his ongoing research and performative work, Almost Nothing But Blue Ground
Wolfgang Tillmans is a German photographer. His artistic work is based on an irrepressible curiosity, intensive preparatory research and continual engagement with the technical and aesthetic potential of the medium of photography. His visual language is characterized by a close observation that opens up a deeply humane approach to our surroundings. Familiarity and empathy, friendship, community and closeness can be seen and felt in his pictures.
Tillmans’ is also a prolific photobook maker and has made many (40+). One of his most celebrated is Concorde which was published by Walther König, Cologne. The photographs were taken at a number of sites in and around London, including close to the perimeter fence at Heathrow airport. consists of images of the Concorde flying over Tillmann’s home in west London. Study his series here at Tate Modern which has also been exhibited in various museums as an installation.
NARRATIVE: Explore a subject or theme in-depth (see below) that engages with the St Ouen’s Bay’s area of natural environment, military heritage or social history. Or, reflect on childhood or contemporary memories of going to the beach, surfing or ‘hanging out’ with family and friends that may be autobiographical or fictional (staged).
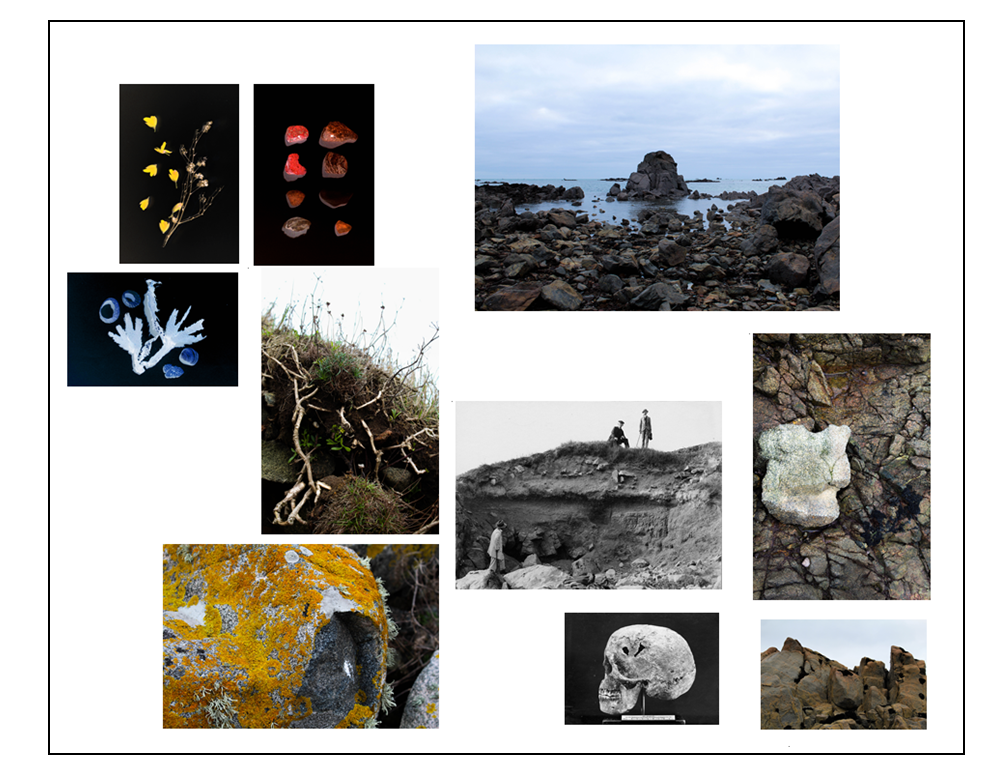
Here is a selection of previous Personal Study projects by A-level photography students exploring a natural area and landscape or Jersey and/ or exploring themes around the Occupation history or folklore or Jersey legends.
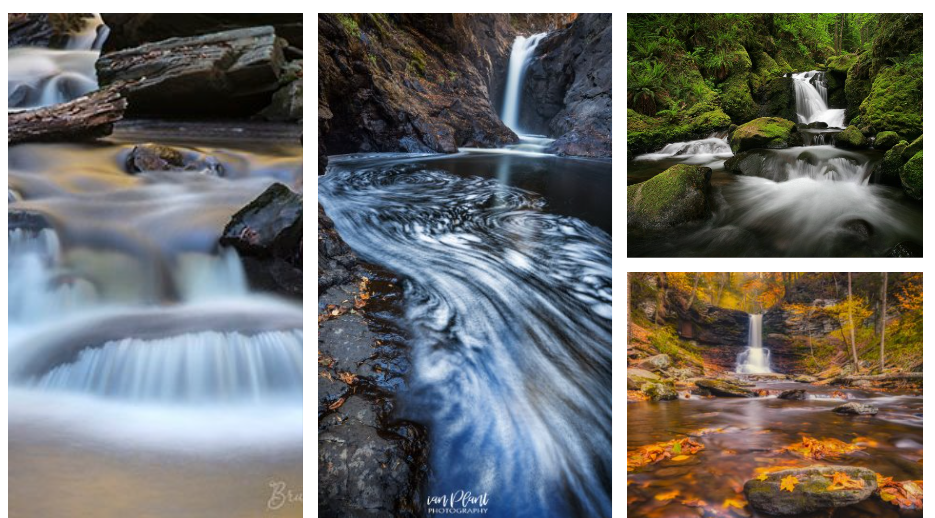
My photobook explore the area of Bouley Bay. Overall, I want to capture the activity, views, and close ups of key feature such as rocks, shells, heritage, the hill climb, and the bay. I could also look into the history of the bay and the Jersey Folklore, involving the Black Dog. It is important to me as I grew up in that area, and have many memories of it. And I hope to capture it in the same way in which remember it. I wish to develop my project by exploring the bay and collecting lots of objects to photograph in a studio, and also to take long exposure, aerial, and underwater of the bay, as I have been inspired by many photographers, such as, Martin J Patterson (@ mjplandscapes on Instagram), Jaun Munoz (@ drjuanmdc on Instagram), and David Aguilar (@ davidaguilar_photo). Read more on his BLOG
Megan Woolsgrove and her project on Green Island: La Motte Here is an online link to her photobook: La Motte: Walking through Landscapes and Archives. Go to her blog here for more context, research, artists references, experimentation etc.
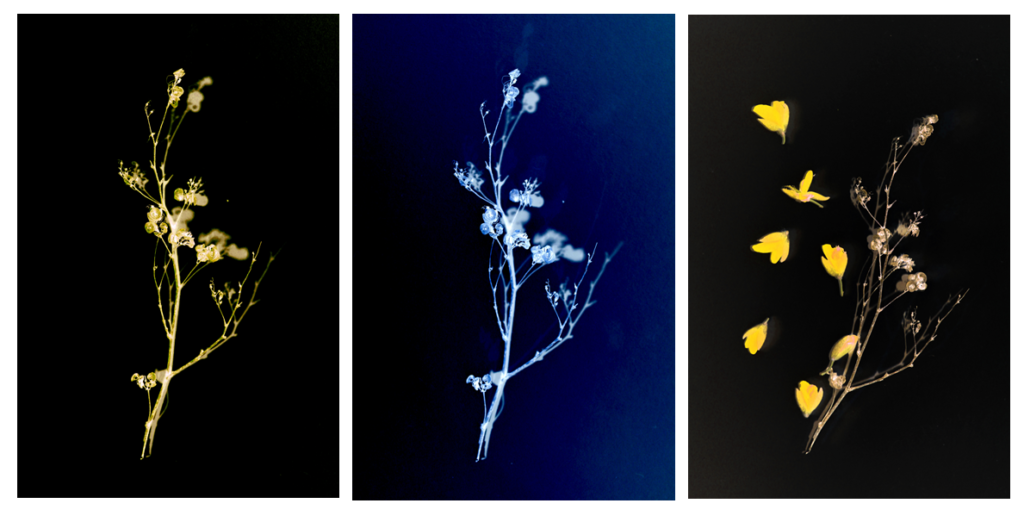
Inspiration was Anna Atkins photobook: Photographs of British Algae: Cyanotype Impressions 1843-53
The first book to be photographically printed and illustrated, Photographs of British Algae was published in fascicles beginning in 1843 and is a landmark in the history of photography. Using specimens she collected herself or received from other amateur scientists, Atkins made the plates by placing wet algae directly on light-sensitized paper and exposing the paper to sunlight. In the 1840s, the study of algae was just beginning to be systematized in Britain, and Atkins based her nomenclature on William Harvey’s unillustrated Manual of British Algae (1841), labelling each plate in her own hand. Read more here
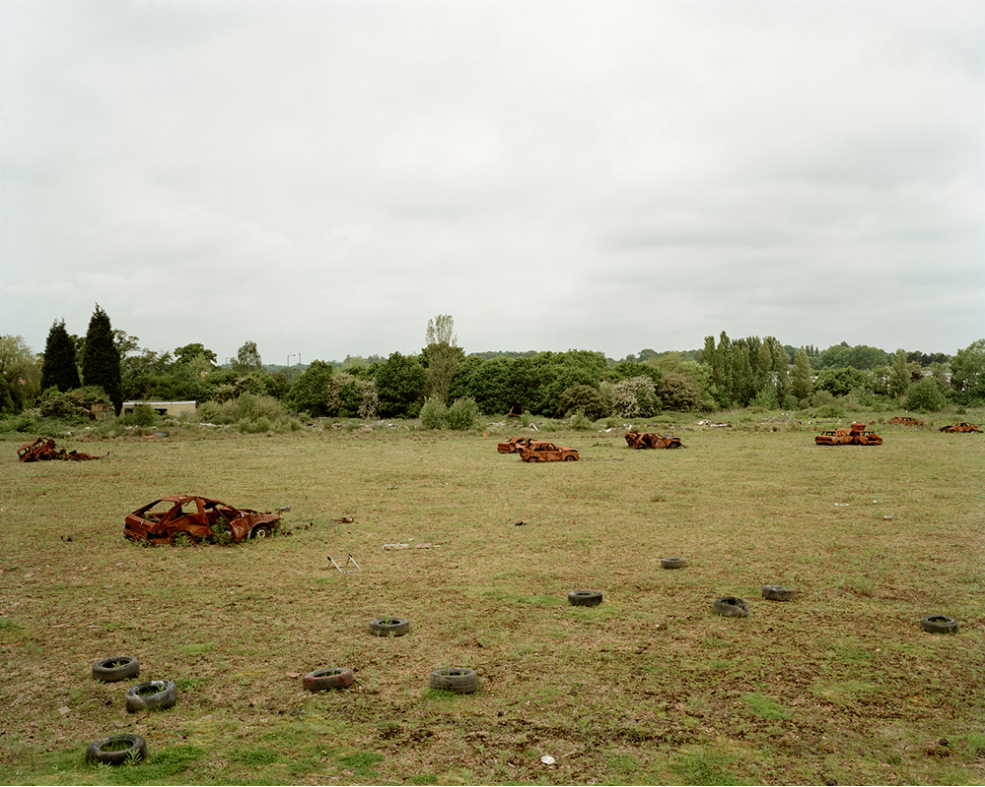
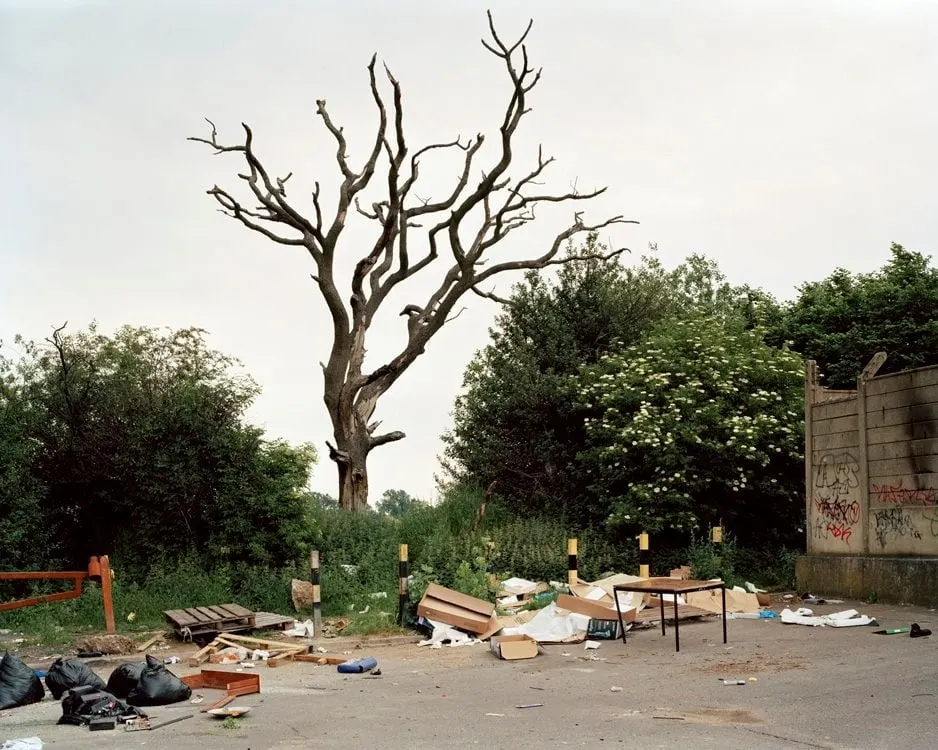
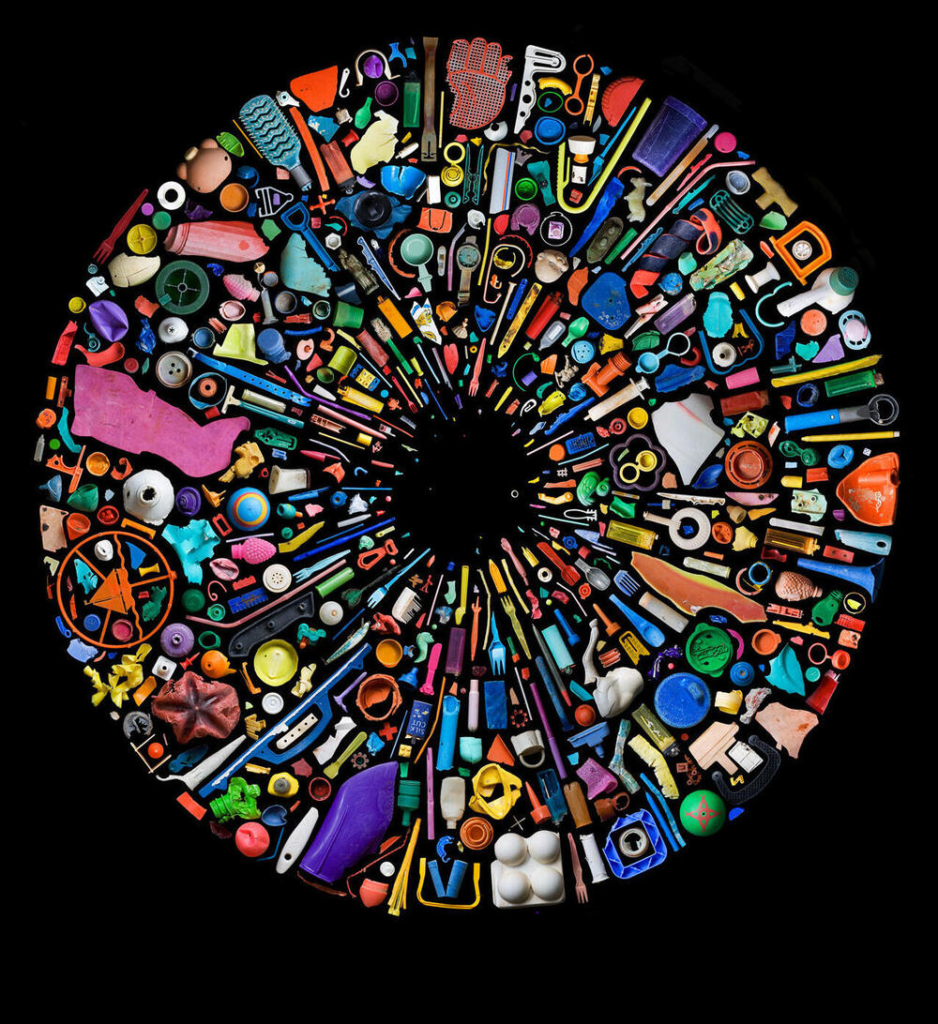
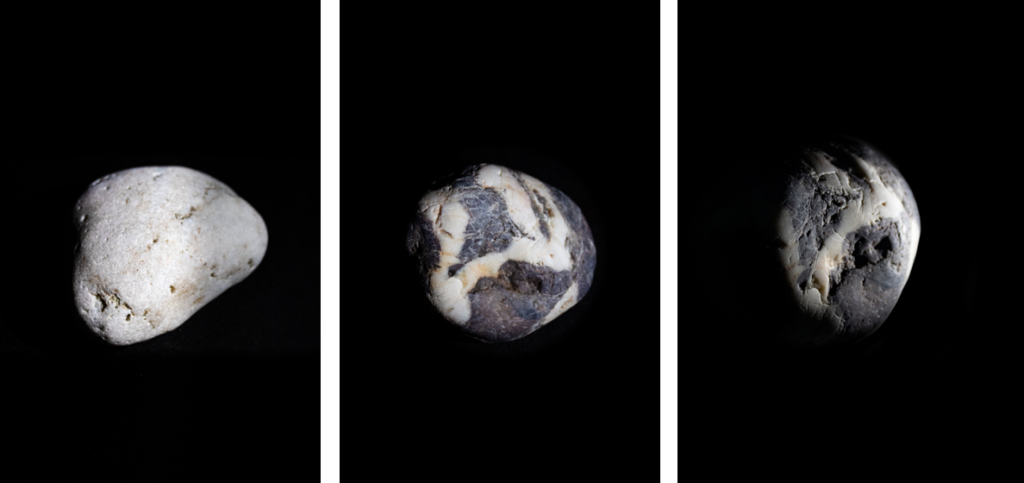
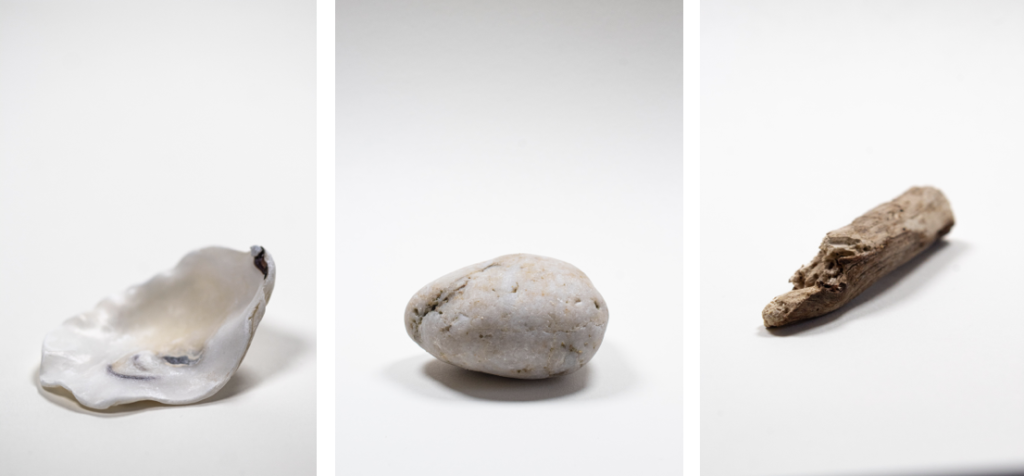
Nicholas Gallery: Waste
I summed the topic of my project in one word being ‘Waste’ as it reflects the three concepts behind my work:
The ‘Waste’ featured in the images
The action behind humans throwing away the things they do not consider important.
The consequences of disposing items to ‘Waste’ away.
I repeated the same pattern of images throughout the book, to give an organised aesthetic. The circle images are placed alongside their close-up comparisons to show the detail in the items depicted. I chose to make many of my images full scale, as they all have dark backgrounds. Black is used in a minimalistic style to emphasize the items, as well as being associated with darkness and negativity to reflect the topic of pollution. Link to Nick’s Blog
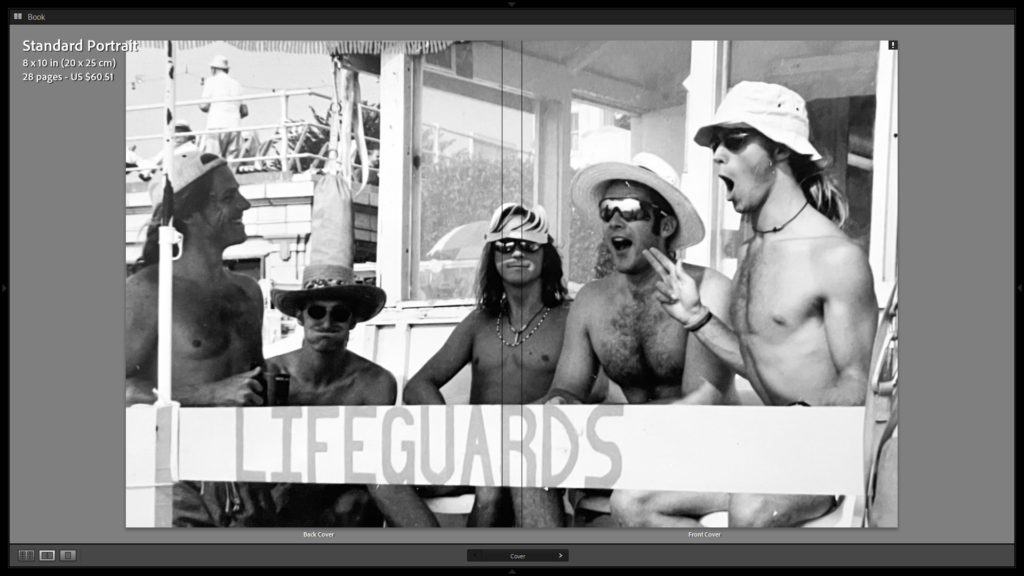
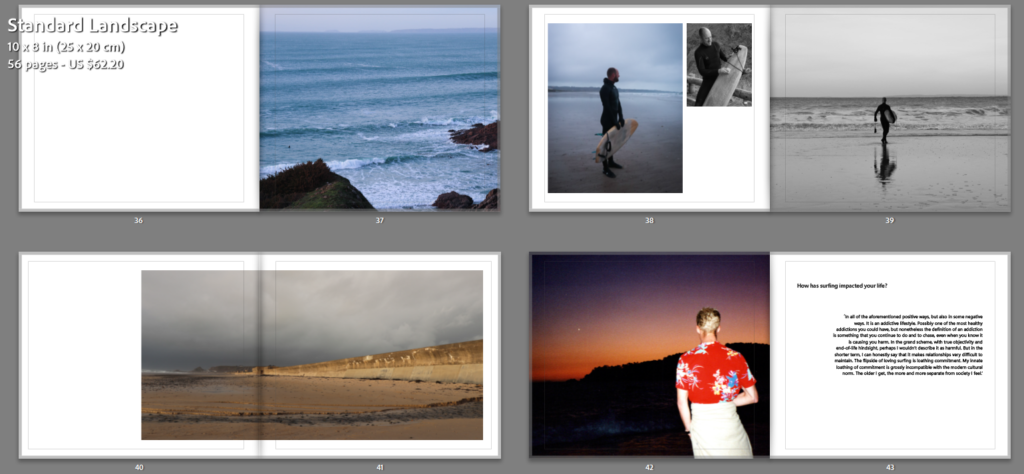
Finn McGreevy: Untitled
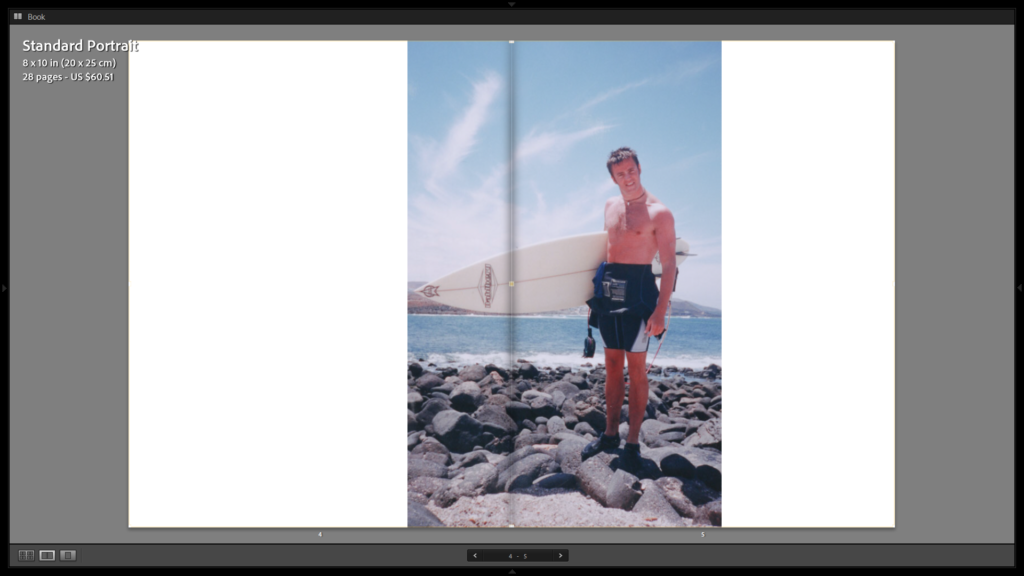
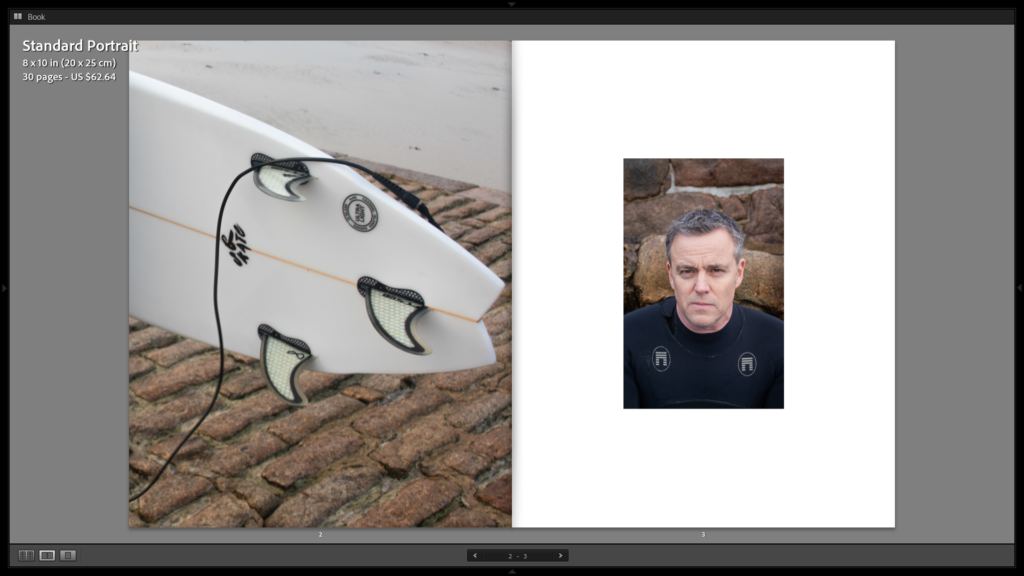
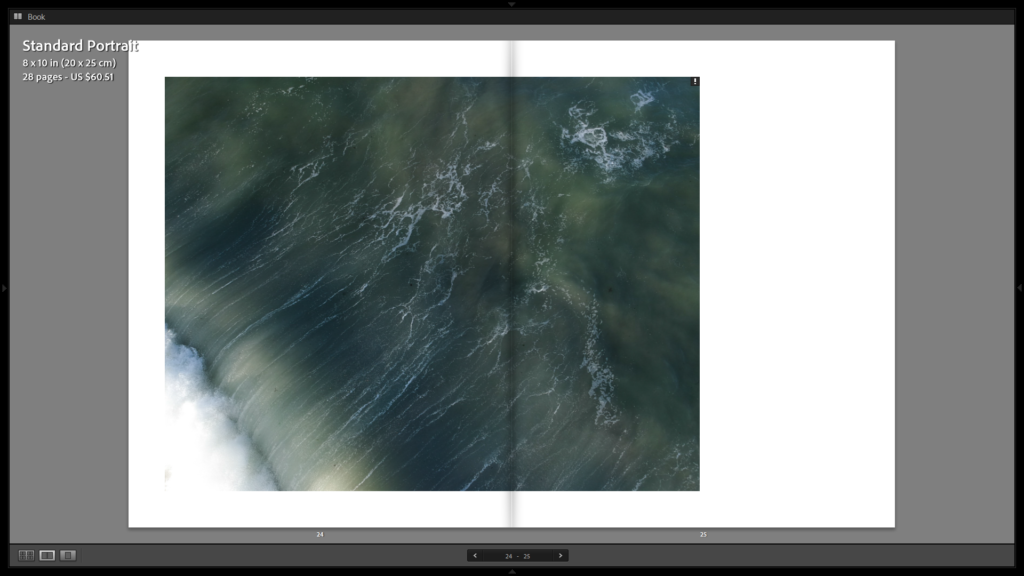
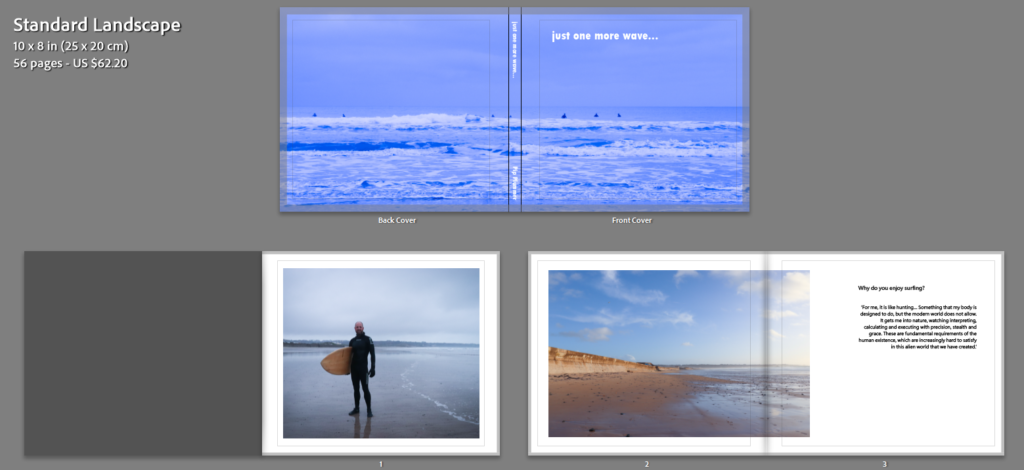
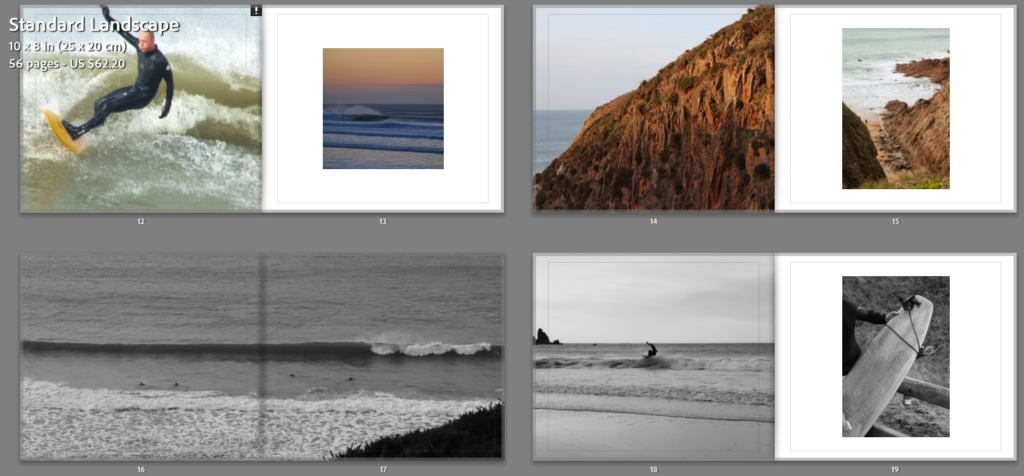
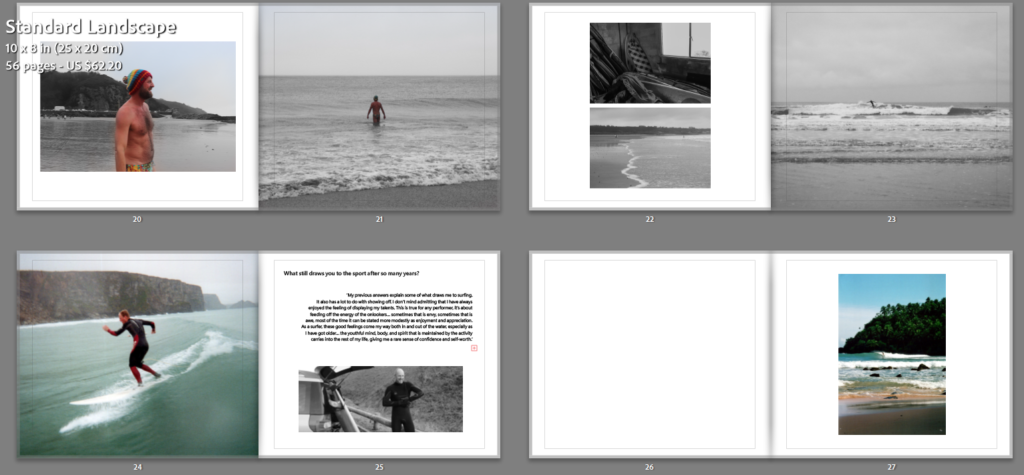
An exploration into my father’s connection to the ocean. My photo story will consist of a combination of archive and new imagery aiding me to document the past life of my father in photo form. The story will have a focus on my dad and his attachment to the sea. Imagery differing in age will be used to give viewers a deeper understanding into this relationship and how his love for the sea has shaped relationships among my family. Explore more here on his Blog
I want to explore the story of my dad’s long and continued relationship with the sea and surfing. I will focus on how it has impacted his life and relationships as a whole, as well as my own life as his daughter. This subject is important to me because it is essentially the reason I am here, because my parents met when my mum learned to surf and my dad was her instructor. For this reason, my whole family has been involved with the sport ever since and it affects my life every day. I plan to ask my dad questions about how he started surfing, what draws him to it everyday, and how he feels about the sport. I will also use archived images from family albums from my dad’s life in Newquay as a young surfer and then from my parent’s history together.
Within my work, I aim to explore history through my photography. Due to my strong interest into the Second World War, I feel as if my knowledge on the subject will make an interesting documentative personal study. Creating a recreated depiction of the men stationed at Corbiere, I will base my images through the personal accounts some of these soldiers gave from CIOS (Channel Islands Occupation Societe) annual reviews. Having personal access to the Bunkers they where physically in, written accounts from the men themselves and uniforms they would have worn, I feel this is a good stepping stone into how this project can be creatively and effectively made. I would like to do this to explore our islands history and share it with others who either aren’t aware or want to know more about our islands history. By covering the Occupiers side, I aim to tell an often untold story about their emotions and lives amongst the trapped islanders. See more on his blog here
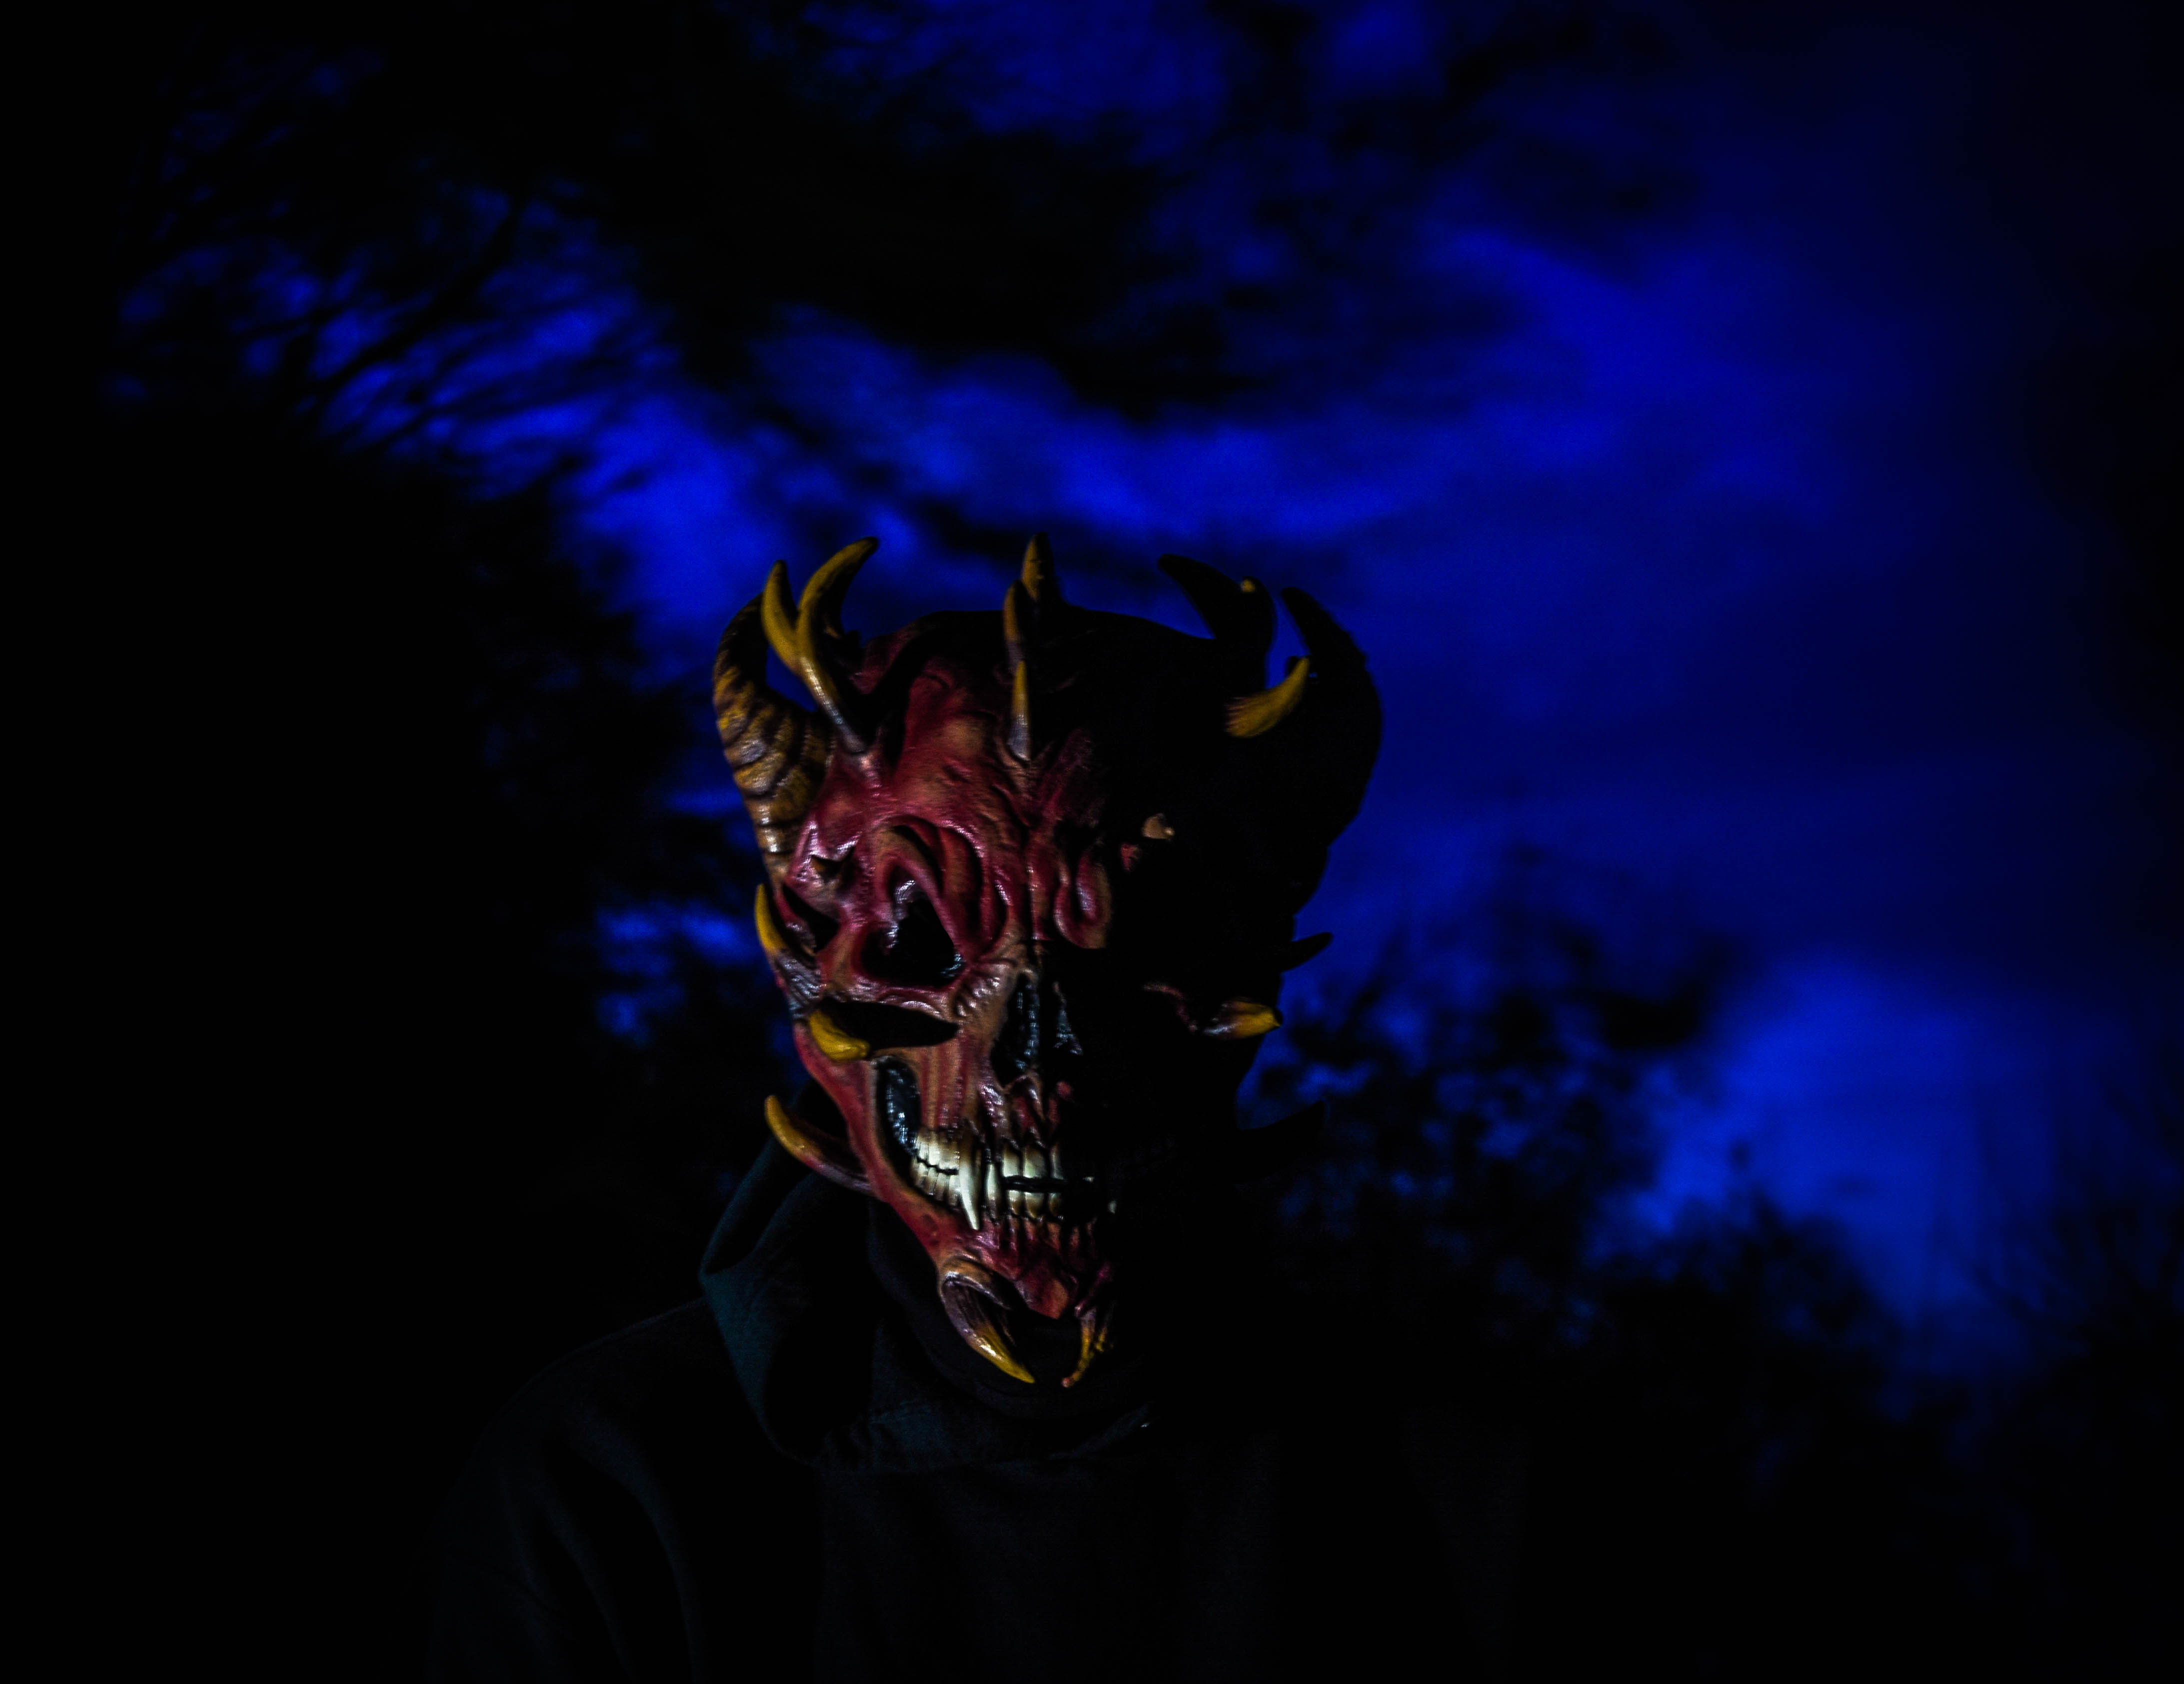
Beliefs and superstitions revolving around mythical characters in Jersey, Channel Island are common. The ancient lanes overhung with vegetation look almost like dark tunnels leading into the unknown. Unexplained ruins dotted around the coast add to the air of mystery and Island people with a long and proud history have many stories to tell which have been passed down from generation to generation. In this photo book I have explored three of Jerseys most famous and well-known legends, portraying each one with a series of environmental portraits, studio shots and landscape photographs. The first legend tells the story of the poor Bride of Waterworks Valley, the second shows the demonic presence down at Devil’s Hole and the third looks into the many tales of Witchcraft in Jersey. This project is my response to the provided themes of ‘truth, fantasy and fiction’, as well as the beautiful depictions of myths created by other photographers. My aim for this photo book was to recreate some of our islands most interesting history using beautiful and insightful visuals. By doing this I hope to bring these legends back to life in this colourful yet ominous series.
I had some general design ideas that I wanted to implement throughout my picture stories:
clear establishing shot with supporting images;
bold title that links to images;
a body of text and potentially captions, but mostly pictures;
explore different themes such as: street/café culture, solitary figures and unity (families, couples etc).
Initial Page Layout Ideas:
Picture Story 1:
To start I added some background pictures I had taken of St Malo and reduced the opacity so they wouldn’t take up focus/be significant in telling the picture story, but instead would just fill the empty space.
Then added a title with drop shadow to make it stand out, and placed it off centre since I wanted my pictures to be the main storytelling point and have less text (leaning more towards visual than literal storytelling).
I then adding some supporting environmental portraits around the page, showing the streets and cafe culture of St Malo.
This was the finalised version before adding text, with a landscape shot of a empty street to contrast with the other images and another cafe – by this point, I added drop shadow and a thin white border to all images and liked the effect, but didn’t like the idea of having a title with a caption underneath it and then another bit of negative space for another caption, so I instead opted to fill out on space fully with the title and have a small caption relating to all images in the other.
The final product, which has a caption in a column relating it to typical newspaper styles – the final adjustment I decided to make from here was to make the title more similar to the caption by arranging it as a column.
Complete picture story #1.
Picture Story 2:
Black background with a title (translates to solitary figures of St Malo).
Re-arranged title and placed establishing shot with a slight white border, all images will be edited slightly to have grain and a vignette for a vintage feel.
Second image, the negative space in the bottom left will be left for a caption introducing my theme.
Caption added, left side of the picture story complete.
Layout idea (with placeholder images), where I will have descriptive captions under the two images on the top right and then another caption to go alongside the picture on the bottom of the right half.
Finalised images added in, I like the layout and photos used so after adding captions and another block of text it will be done.
Title put in italics, and added my name to fill the space as well as a small line to separate it from the title to keep visual clarity.
Feedback/criticism from peers – after reading the suggestions, I decided to keep my ideas as they are since adding extra images isn’t possible without downscaling images, although the feedback on my gaps and the establishing shots will be taken into consideration and I will try adjust the current layout slightly.
Brought the images on the bottom down slightly so the gap between the establishing shot and the image below is equal to the gap between the establishing shot and image to the right, and the gap between the edge of the page is the same for every image. Also added supporting captions for the two images on the top right to fill in the empty space, and planned to fill in the last bit in the bottom right with another caption.
Experimenting with adding an extra image instead and really liked the layout, so I will keep it this way and rewrite the small caption between all the pictures.
Fine tuned the body of text and image layouts, as well as changing the caption going with the four images for a quote that matches the theme of my story.
Final version; edited the name so there’s more emphasis on the title and to avoid confusion between the name and title.
Completed picture story #2.
Picture Story 3:
Initial layout idea was simple, establishing shot on top left, and observed portraits in the top right and bottom right with a title and caption in the bottom left.
Extra images, slightly adjusted layout.
Black background + white borders around images.
Title and name added, I noticed they seem too big so I will shrink them and potentially re-arrange the layout slightly to be able to fit a caption in the remaining empty space + to keep visual clarity and appeal.
Refined version, more negative space present to maintain visual appeal.
Finalised version with a caption.
Picture Story 4:
Starting with a png of a subject from one of my images – I am planning to focus more on graphics than simple layouts and text for this story.
Made the png not black and white since I want images in colour to match the colourful graphic background (the French flag), also added a title.
Re-arranged the graphics so they aren’t slanted since this was too difficult to work text and images around, added detail shot of a street in St Malo in the top right and a supporting body of text.
Added pictures and readjusted layout slightly + changed picture in top right to use that image as the establishing shot.
Refinements – changed the body of text on the right to not be capitalised and aligned differently so it’s more informal, capitalised the title and increased the size slightly.
Changed the establishing shot to better align with the theme and story.
Re-did the png on the left since there were too many jagged edges and it didn’t look great in the first iteration, also changed the red to be more accurate to the red of the French flag.
Finished Picture Stories + Evaluation
#1:
I like the layout of this picture story as well as the pictures used since there is a clear story being told which also corresponds with the title and caption – however, the two different background images used worsen readability and overall visual appeal, and I also wasn’t really happy with the awkward positioning, font and drop shadow for the title.
#2:
I really liked the layout of this one, the left half with the title and smaller name as well as the positioning of the two pictures and caption create a very formal newspaper-like style, and also contrast nicely with the more visual storytelling style of the right half with the 4 pictures of solitary figures and a quote. If I had to make any changes I would experiment with different layouts, maybe trying less images and more text on the right to keep the newspaper-like theme consistent throughout.
#3:
I also liked the layout of this story, with the title name and caption all in one corner leaving room for the rest of the board to just be purely visual storytelling – however, if I had to make changes, I would use a different establishing shot since the empty street and café it shows clashes with the theme, and I would also change the colours and visual style since it is too similar to the previous ones.
#4:
I found the different visual and graphic approach I took to be extremely effective, and I also liked the layout with the woman on the left contrasting with the body of text on the right while still maintaining space in the middle for other images – I also like how there is a clear theme of tourism, as the woman on the left can be assumed to be the character in the story part of a tourist group (like the one seen in the establishing shot), and the other images represent what she would see walking through the streets of the old walled town.
picture stories are generally made up of between 3 and 15 pictures depending on the depth of the story but they will include most if not all of the individual pictures mentioned below. There are 6 or 7 individual types of pictures that should be both visually strong and informative in their own right but put together make a flowing dynamic narrative.
Establishing Shot – a wide or extreme wide shot that introduces a new scene, setting, and context for the viewer
Person at Work – is focusing on a persons work or hobbie
Relationship Shot – a relation ship between people
Detail shot – Showing in detail what the people in the photo wear. Detailed of what kind of attitude they need to adapt in this job.
Environmental Portrait – a person in a certain field photographed in thee place of work
Formal Portrait – when the person is told what to do, such as look this direction
Observed Portrait – when someone is in there natural environment, with no interruptions from camera
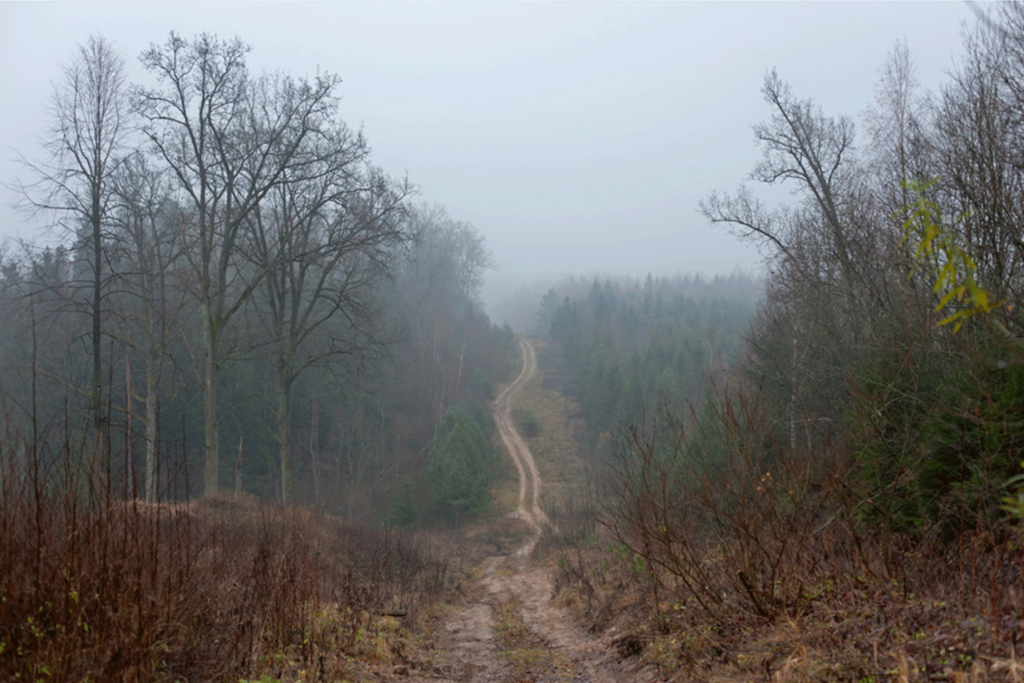
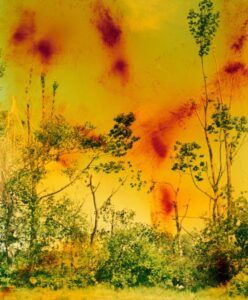
Whilst in South of France, I took photographs of the rural landscapes around me. I chose to capture most of my photos during the golden hour to enhance the romantic characteristics.
Because the sun was setting, the foreground of the photos were often underexposed. I intend to edit the photos to enhance the detail and exposure in the darker foreground, while maintaining the dramatic sky in the background.
Many of the photos capture the horizon in the centre of the frame. This creates a sense of balance in the photos. In some of the photos, you can see the telegraph poles which give a sense of intrusive industrialisation on the natural beauty.
Some photos have a pathway acting as a leading line, which emphasises a sense of perspective, as well as journey through changing times.
Contact Sheet:
Selection of strongest photos:
These are my original images un-edited that I think are the best as they capture key parts of photography the most.
The Establishing Shot is the main part of the picture story because it serves to define the context in which the other pictures have been located. It describes where and sometimes when the event took place. It can also describe mood and other information such as how large the event is how many people were involved, the weather.
Person at Work
This is an example of a person at work.
One of the main points here (as well as the other pictures) is communication with your subject. Talking to the person doing the job will not only tell you exactly what they are doing but also when the best time or ‘decisive moment’ will be to take the picture. More importantly, talking will relax both you and the subject enabling you to capture more natural looking pictures.
Relationship Shot
This is a relationship shot.
This means a relationship between two or more people. It could be one of love, hate, passion, or just simple affection, supportive or one of rejection, teaching and learning and superior.
Detail shot
This is an example of a detail shot.
The detail shot is very useful in many stories to emphasise a point or subject area. It also adds ‘pace’ to your story which will be discussed later. A detail shot doesn’t have to be a minute macro picture but just something that concentrates on something in particular to open up the story. They can be a good chance to shoot something in an abstract way that gets the viewer thinking about what he is looking at. It adds a new dimension to the story. Some very successful picture stories are made up solely of detail abstracts.
Environmental Portrait
This is an environmental portrait.
This is similar to the formal portrait in that the subject often knows he is being photographed but a lot more emphasis is placed on location. Portrait in the subjects workplace or a picture that reveals a lot more about the person due to the surroundings he is photographed in. A pilot next to aircraft or in the cockpit
Formal Portrait
This is a formal portrait
The subject is totally under your control. You decide lighting, posture, distance etc but in a way that still permits the personality of the subject to come through. A good relationship with the subject is helpful here.
Observed Portrait
This is an observed portrait.
This when the subject is not as aware of having his picture taken. A more candid approach to get that natural relaxed feeling to the picture. There is a lot of crossover between the different portrait styles to you could have an observed/environmental portrait or even an observed/formal portrait taken during a moment when the subject maybe not aware your taking pictures. Again, there are no set rules in portraiture.
Cartier-Bresson is a observational photographer and William Klein is a confrontational photographer.
William Klein always makes his prints in his study room (a dark room) this helps him keep everything to a high standard.
1. Describe the difference in their approach to image-making in the streets.
Henri Cartier-Bresson
Calm and quiet style.
Focused on capturing the perfect moment (called the “decisive moment”).
Stayed invisible, didn’t disturb the scene.
Loved clean, balanced compositions.
Used a standard lens and shot from a distance.
His photos feel poetic and thoughtful.
William Klein
Loud and bold style.
Liked chaos and energy, didn’t wait for perfect moments.
Got very close to people, sometimes provoking them.
Didn’t care about perfect composition — liked blur, grain, and messy frames.
Used a wide-angle lens for dramatic effects.
His photos feel raw, wild, and edgy.
2. Choose one key image from each and compare looking at: TECHNICAL (camera settings), VISUAL (composition), CONTEXTUAL (artistic, cultural, historical and personal differences), CONCEPTUAL (idea, concept, meaning)
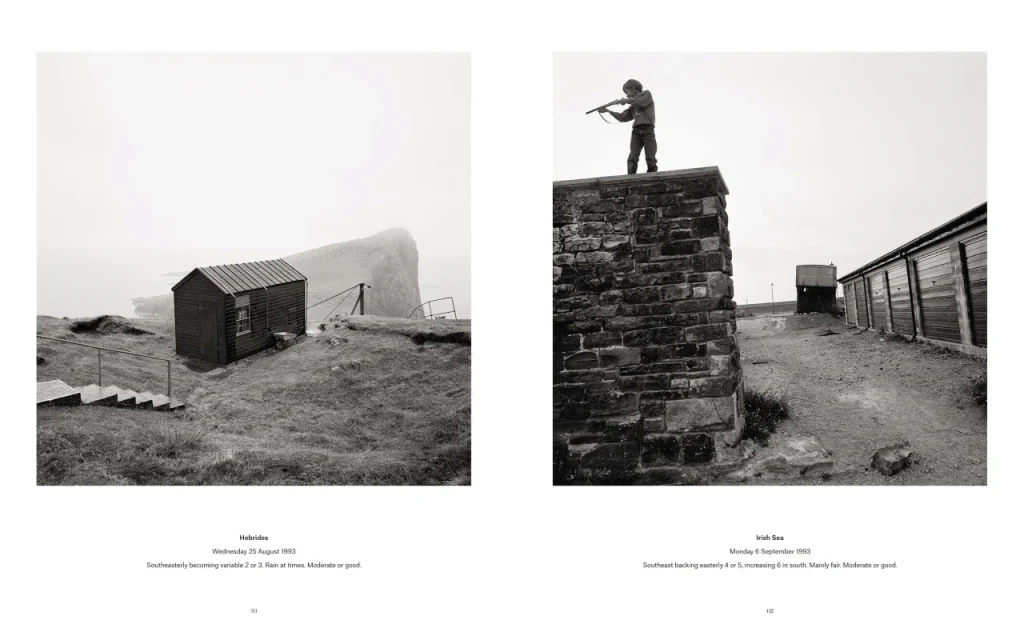
William Klein – Boy + Gun
TECHNICAL Klein used a 35mm film camera with a wide-angle lens, which let him get very close to his subjects. The photo is black and white, grainy, and high contrast—probably shot with fast film in natural light. The sharpness and lighting give it a raw, gritty look. Klein didn’t care about traditional photography rules; he liked imperfections and spontaneous shots.
VISUAL The image shows a young boy pointing a toy gun directly at the camera, his face twisted in a fake snarl. He takes up most of the frame, making the moment feel intense and uncomfortable. In the background, another boy is smiling, which adds a strange contrast. The photo feels bold, dramatic, and almost chaotic, which reflects the energy of the street.
CONTEXTUAL This was taken in 1950s New York—a time of post-war change, rising urban violence, and Cold War fear. Toy guns were normal, but the image also hints at how violence becomes part of play and identity. Klein was born in New York but lived in Paris, so he had both an insider and outsider view of the city. His work focused on real, raw street life, especially in working-class and minority areas, which were often ignored by mainstream media.
CONCEPTUAL At its core, this photo explores the mix of innocence and aggression. The boy is playing, but also acting out something darker—copying the adult world around him. By pointing the gun at the viewer, it makes us feel involved—maybe even guilty. It’s about how kids learn power, how the city shapes people, and how we look at others through photography.
Henri Cartier Bresson – Jumping The Puddle
TECHNICAL Cartier-Bresson used a small Leica 35mm film camera, which let him move quickly and quietly. The photo is black and white, taken using natural light with a fast shutter speed to freeze the man mid-air. There’s no cropping—he composed everything in-camera, showing his focus on perfect timing and framing.
VISUAL The photo captures a man leaping over a puddle, just before his heel touches the water. His reflection is visible below him, creating a mirror-like effect. In the background, you see a poster of a dancer, adding a poetic contrast between the two moments. The composition feels perfectly balanced, and the timing is precise—this is what Cartier-Bresson called “the decisive moment.”
CONTEXTUAL Taken in Paris in the early 1930s, this photo shows everyday life with beauty and elegance. At the time, street photography was still new, and Cartier-Bresson helped shape it into an art form. He believed in capturing real life without interfering or staging anything. This was part of a wider cultural shift in art, focusing more on realism and ordinary people.
CONCEPTUAL The photo is about timing, movement, and chance. It freezes a split-second that might normally go unnoticed. There’s also a feeling of freedom and lightness in the jump, even though the setting is quite plain. It shows how something small and ordinary—like jumping over a puddle—can become poetic if seen at just the right moment.
3. Add your own responses to making observational and confrontational images and evaluate in relation to what you have learned about the two different approaches.
After doing this research I learned that I now prefer confrontational images due to the more up close feel and more natural realness to it due to the unawareness and distance between the photographer and the subject, whilst observational feels don’t have this same feel due to the distance of the photo.
A picture story is a story told mainly through pictures or images. It shows what happens step-by-step using drawings or photos, sometimes with just a few words or sentences. It helps people understand the story by looking at the pictures.
The type of image types commonly used in them are:
Person at work
A person at work shot is where you capture someone doing something, this could be someone typing on a computer at there office job all the way to someone riding a skateboard down the street.
Here is an example from the JEP (Jersey Evening Post):
2. Relationship shot
A relationship shot is off people in a relationship/dating or is two or more people being together and doing something.
Here is an example taken from the JEP:
3. Establishing shot
The establishing shot is one of the core foundations of visual storytelling. Typically, it is a long shot and often the first shot of a scene. It helps the audience understand where the following sequence will take place and the thematic elements they can expect from the scene.
Here is an example from the JEP:
4. Detail shot
A detail shot is used to tell the story of the situation by focusing on a relatively small portion of it. Details shots also can be images that, through compositional techniques, draw attention to a specific detail of a subject that might otherwise have gone unnoticed.
Here is an example from the JEP:
5. Environmental portrait
An environmental portrait is similar to the formal portrait in that the subject often knows he is being photographed but a lot more emphasis is placed on location. For example a portrait in the subjects workplace or a picture that reveals a lot more about the person due to the surroundings he is photographed in. A pilot next to aircraft or in the cockpit etc…
Here is an example taken from the JEP:
6. Formal portrait
A formal portrait is when the subject is totally under your control. You decide lighting, posture, distance etc but in a way that still permits the personality of the subject to come through. A good relationship with the subject is helpful here.
Here is an example from the JEP:
7. Observed portrait
This when the subject is not as aware of having his picture taken. A more candid approach to get that natural relaxed feeling to the picture. There is a lot of crossover between the different portrait styles to you could have an observed/environmental portrait or even an observed/formal portrait taken during a moment when the subject maybe not aware your taking pictures.
A photo story is more than just photos in an album, digital or otherwise. It’s more than just a photo book, though a photo book can be used to tell a photo story.
Draft one
This is how my first picture story started I wanted to do something with all the colours to create a contrast I played around with making the text the same colour as the images I used like the red writing of at Malo with the image of the lady with her dog on the red chairs while she’s wearing a red dress. I then used the photo of the boy in blue top next to the blue background and wrote the date in blue then lastly I used yellow writing for the yellow chairs at the restaurant. This was just me figuring out how I was gonna lay it out so there is still a lot of white spaces left.
Final piece
I didn’t take any other screen shots of me testing other ways but this is the final piece I added writing and a few more images. I think the photo in the top right fits really well as its a noisy colourful photo which goes with the vibe I was trying to create.
2nd picture story final piece
For my second picture story I didn’t save any progress images of my trial and errors but I have my final image.
3rd picture story draft
I changes this one around a few times I didn’t take many photo of my progress on this one I have this screen grab of what was maybe gonna be m y final piece but then I ended up changing it again to this.
3rd picture story final piece
I changed the background to be more opaque so that the images are clearer to see but I still have the background showing. I then also put a colour behind the text so it would stand out more.


