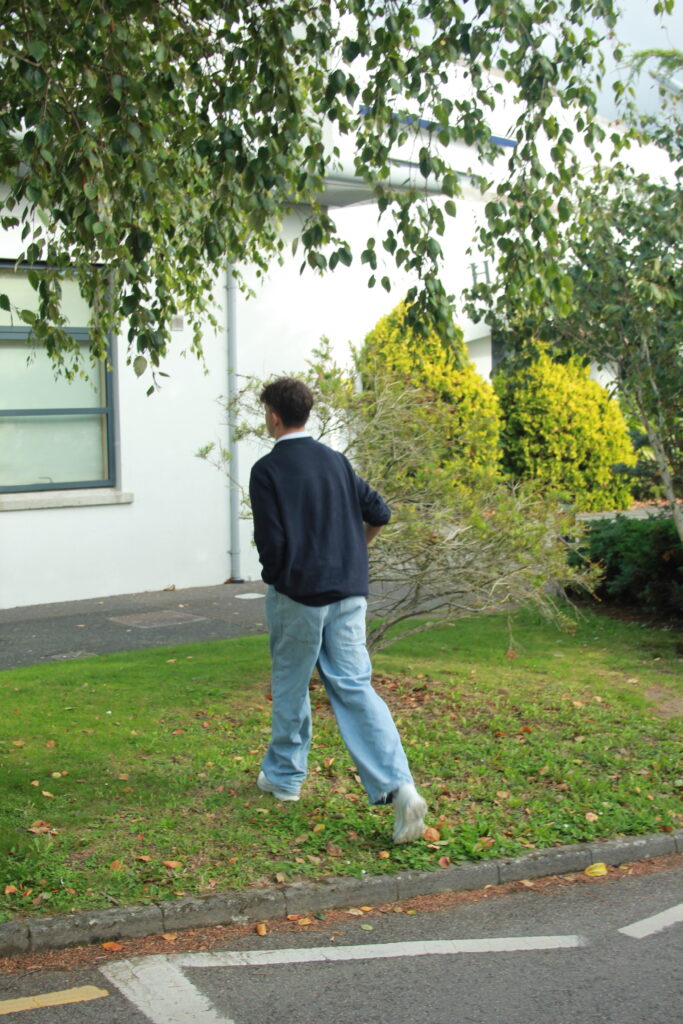
All posts by Vincent Lees

Filters

Author:
Category:

Formal Elements

Lines

Lines are common in photographs. They are all around us, and every photo has lines. These lines often connect different points within the image. Sometimes, lines come into the photo from outside the frame or lead out of it. The type and direction of lines in your image can convey meaning. Vertical and horizontal lines suggest stability or a still feel. Horizontal lines can show distance, while vertical lines can represent height, balance, and strength. Diagonal lines create a more active scene.
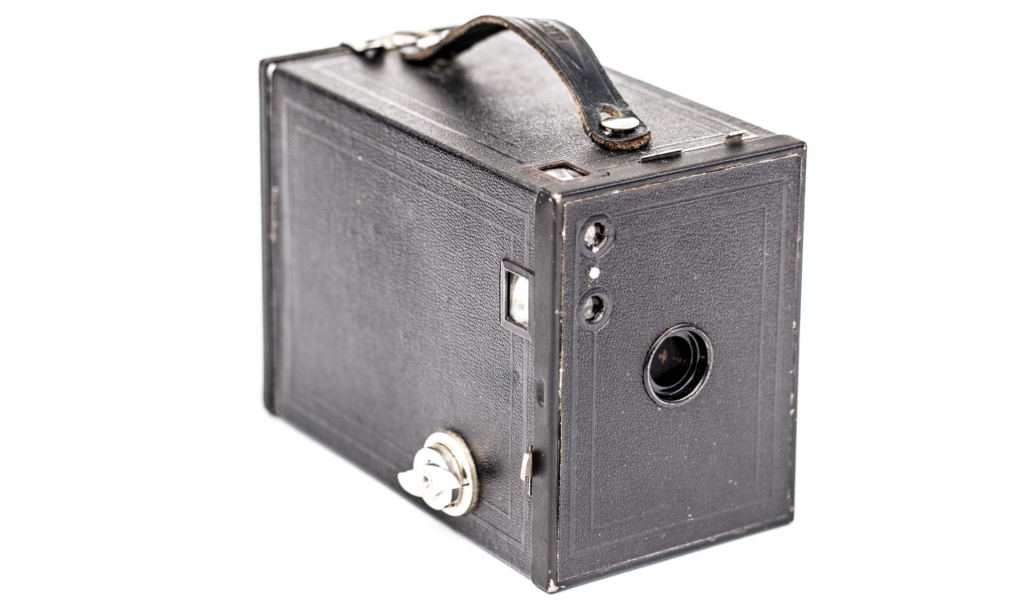
Shape

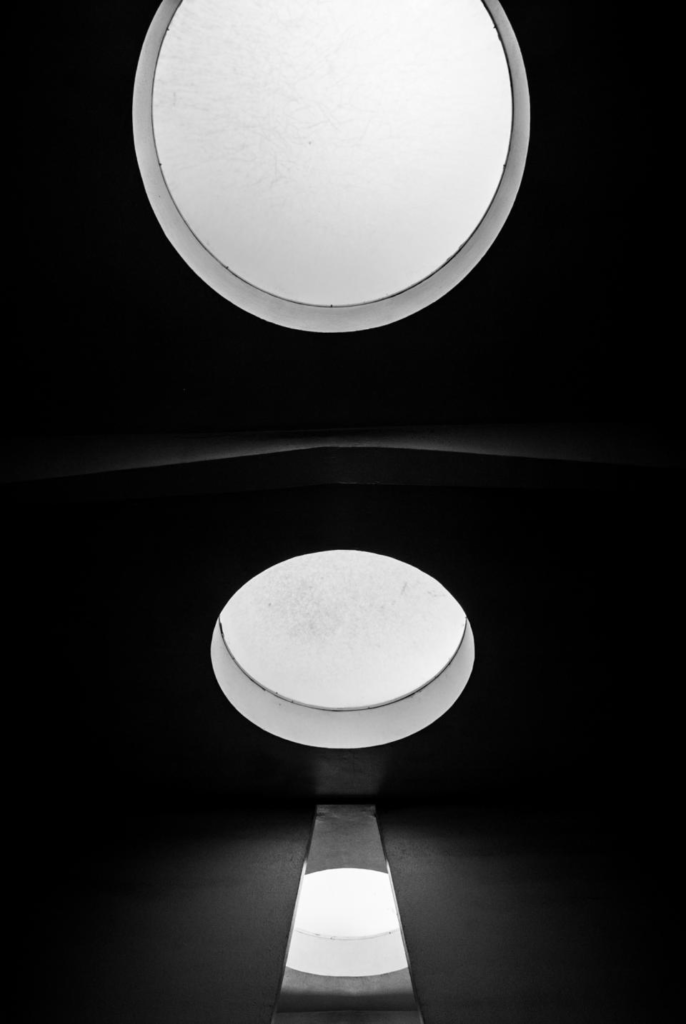
In a photograph, a silhouette represents the simplest form of a shape, lacking any details like texture or color. Because it stands out sharply against its background, a silhouette is very noticeable. Shapes are typically defined by lines that either intersect or enclose them. They can also be identified by their brightness or darkness compared to their surroundings. Differences in color, texture, and pattern around a shape can help distinguish it further. Additionally, shapes can be defined by other shapes around them, like the arrow in a well-known shipping company’s logo. The area that contains a shape is known as positive space, while the area outside it is called negative space sometimes, the negative space can create its own shape.

Space

Adding space in your photos helps create a sense of scale and depth. It gives your main subject some breathing room, letting viewers focus on the key elements of the scene. This is especially helpful in outdoor photography, where you might want to highlight the size of features like mountains or lakes. However, you can use space effectively with almost any type of photography.
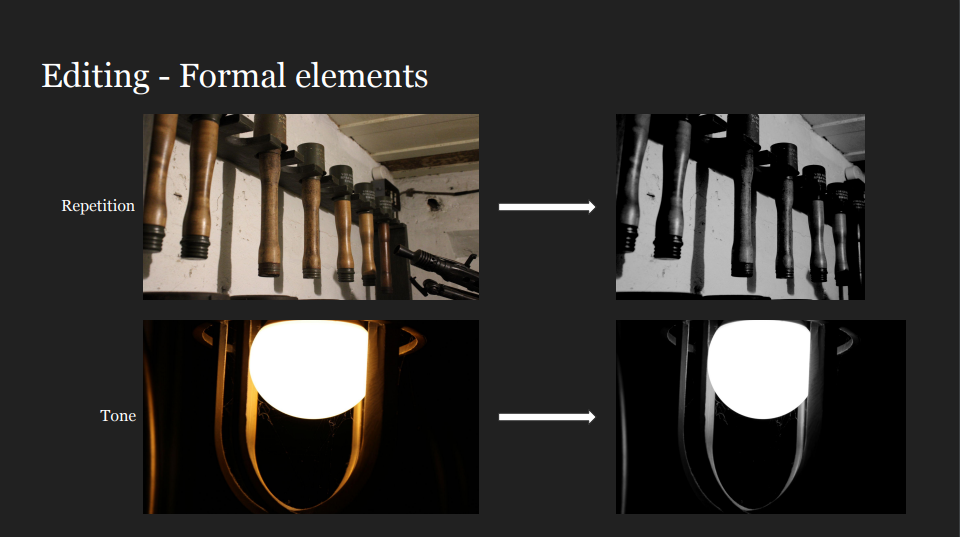
Repetition

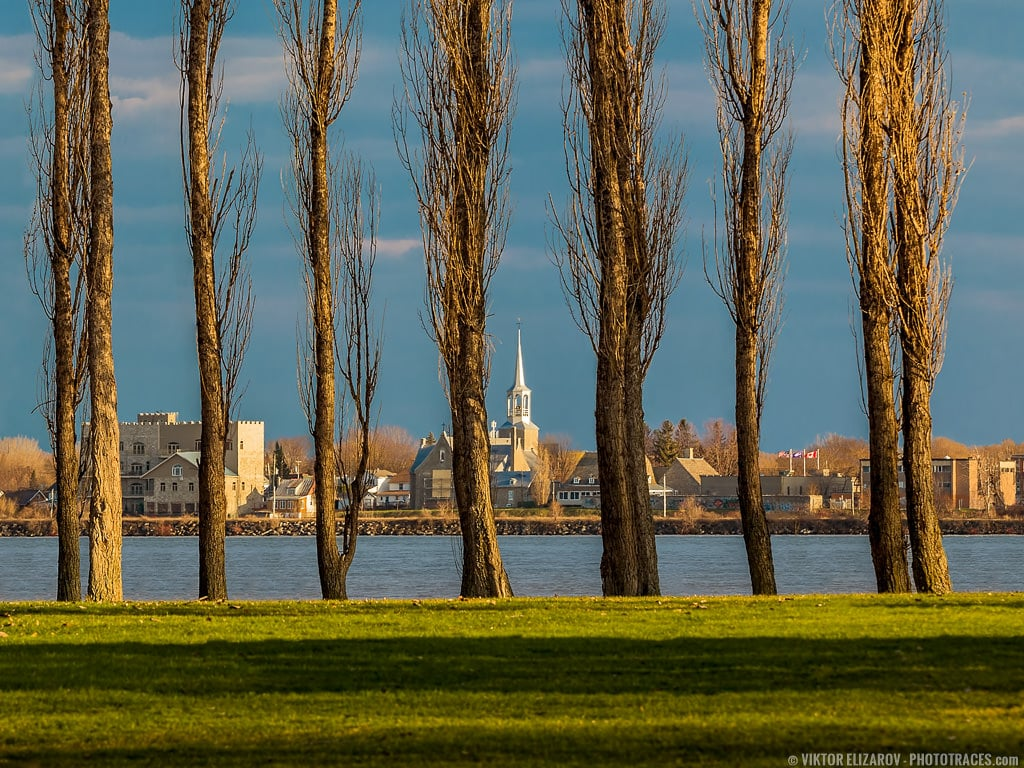
Repetition in photography is the technique of using similar elements, patterns, or themes in a composition to create a sense of rhythm and balance. This can include repeatedly using lines, shapes, colors, textures, or other visual elements to achieve consistency. Examples of repetition in photography could be a row of trees, a series of arches, a field of sunflowers, or a group of people dressed alike. By repeating these elements, the photographer helps guide the viewer’s eye across the image, establishing a visual rhythm.
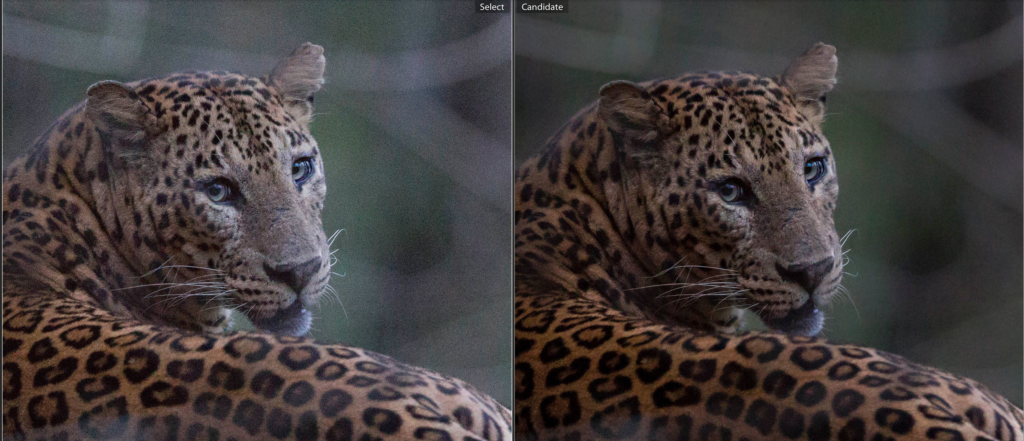
Texture

Adding texture to your composition can enhance your image and connect the viewer to it, especially in macro photography. You can find textures in various surfaces and environments. To highlight these textures, try different lighting setups and depth of field options. For instance, use flat light and position the camera directly in front of a weathered wall to emphasize its surface. But also, backlighting can reveal details in sand dunes, a shallow depth of field can showcase intricate materials, and a long exposure can create a smooth effect on flowing water.
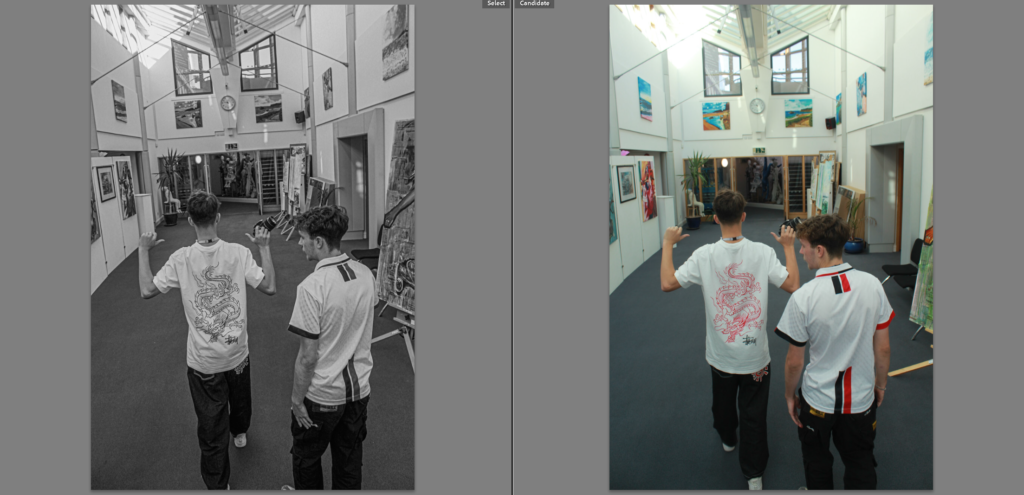
Colour

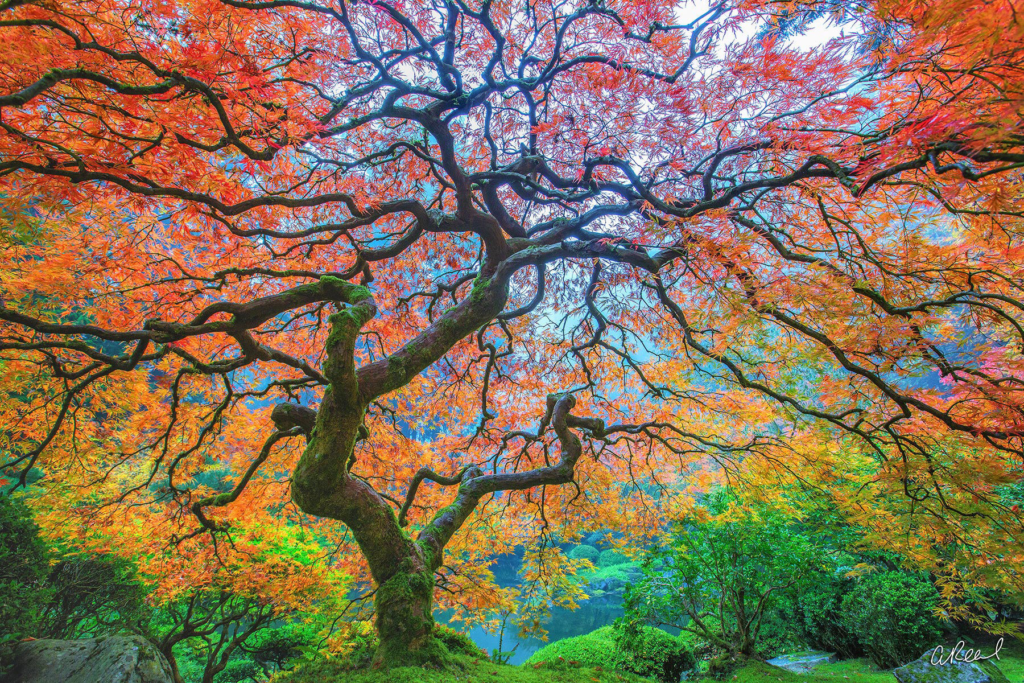
One of the most essential formal elements in visual imagery is undoubtedly colour. The use of colour, whether it appears as a solid block or as a harmonious grouping of similar shades, has the potential to create a particularly strong and memorable impact on the viewer. Different colours are not just aesthetically pleasing, they also hold significant power in terms of expression, allowing them to resonate with those who view with the image.
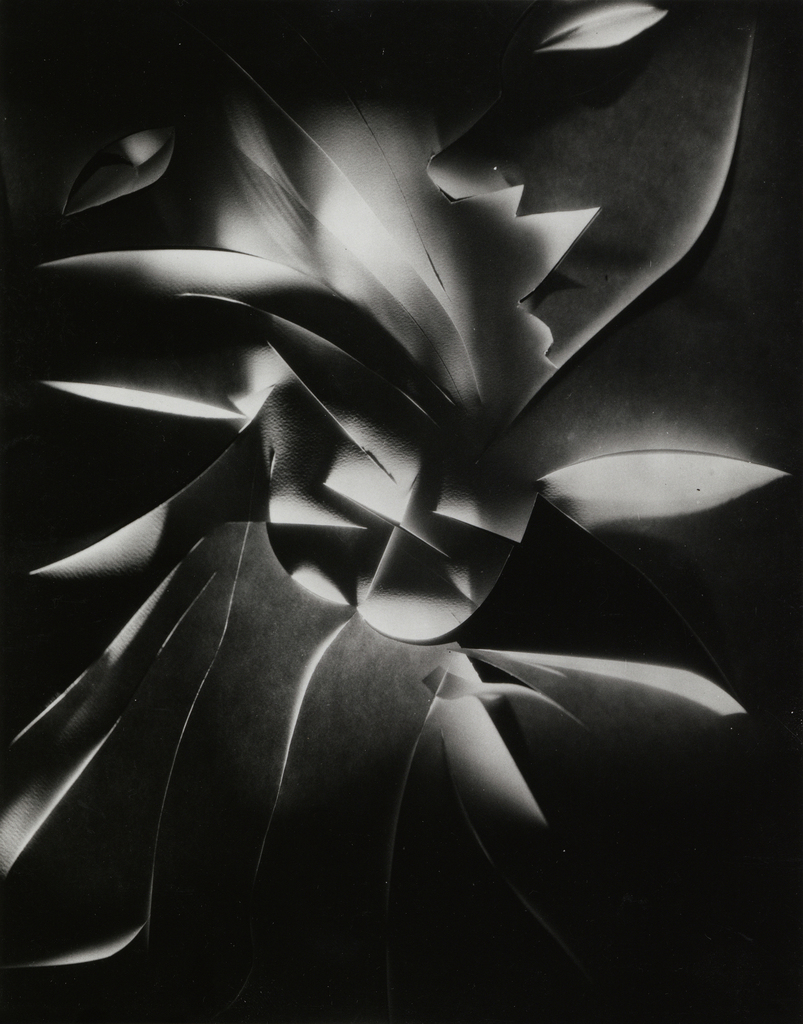
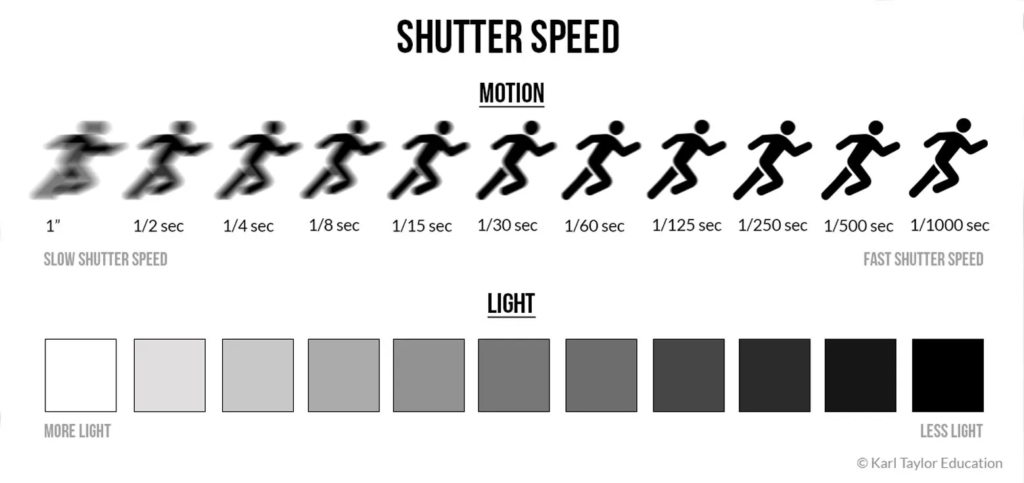
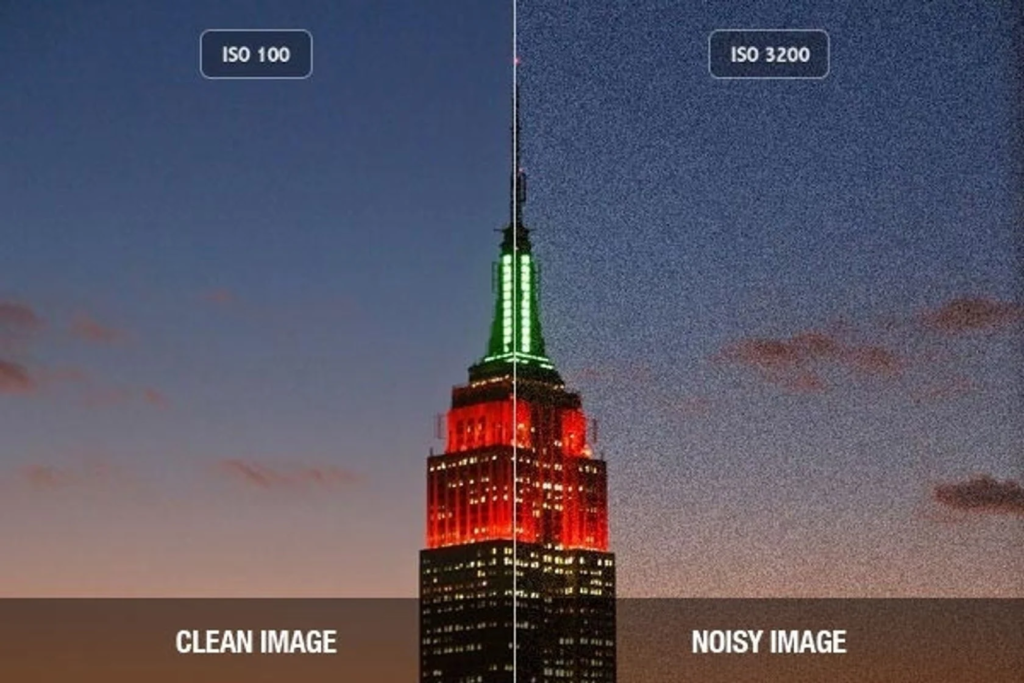
Value/Tone

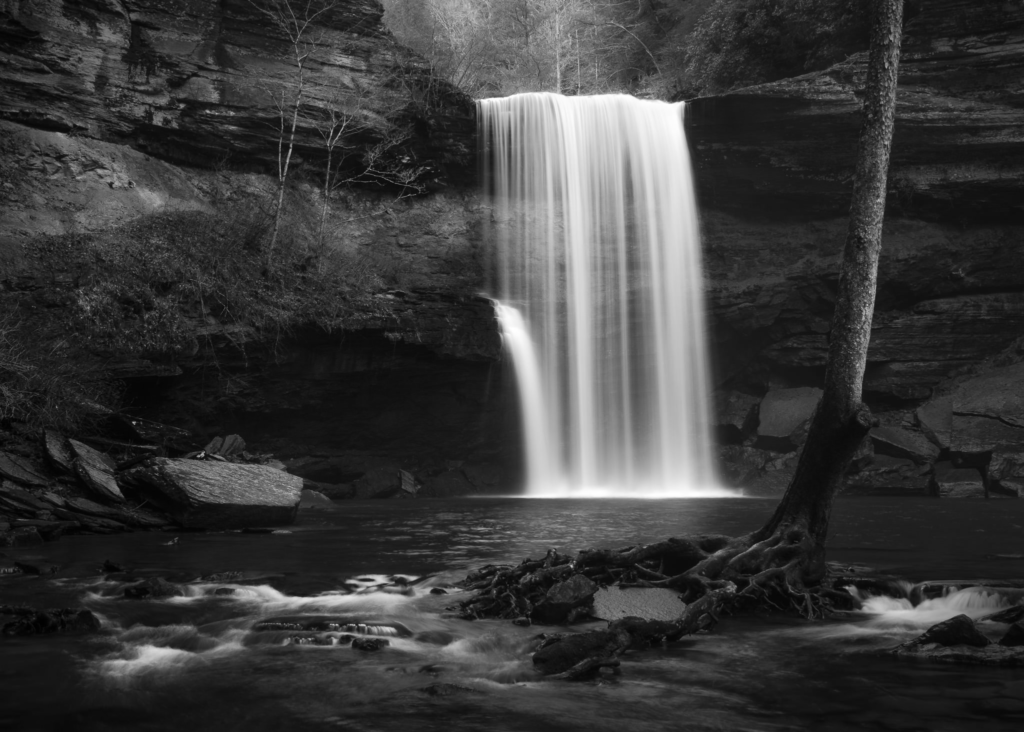
Tone of your image is also very important in terms of formal elements, in which focusing on using contrast and the balance of light and dark areas. Tone is especially important in black and white photography, as it helps direct the viewer’s attention in the absence of color.

Texture

Francis Bruguière

Bruguiere had a pretty impressive career, shooting for famous magazines like Vogue and Vanity Fair. He got into photographic abstraction and even made some cool cut paper designs, which really leveled up his art. In 1928, he showed his work at the der Strum gallery in Berlin and got a lot of praise. That same year, he moved to London, where he started playing around with light, which became a big part of his style. In 1930, he teamed up with Oswell Blakeston to create Light Rhythms, England’s first abstract film, inspired by his light experiments. Later on, he wanted a more laid-back lifestyle, so he moved to Northamptonshire and kept creating art until he passed away.

My response to Francis Bruguière:

These are all the photographs I’ve taken that focus on paper photography and my interpretation of Francis Bruguiere’s work. To organize these images, I created a color-coding system. Green indicates photos that meet a pretty good standard, meaning they are clear and well lit, which enhances their quality. Yellow signifies images that aren’t quite as good but still have editing potential. These yellow-coded photos may have issues like being slightly out of focus or poorly lit. I believe both the green and yellow photos are still useful and can be improved through editing to highlight their best features.

Paper editing:

For editing, I used the develop tab to explore the black and white presets. There were many options, and I chose a sepia filter for some images. I also adjusted the exposure to create a darker look in certain photos, making the shadows more noticeable. I made slight changes to the contrast as well to emphasize the dark areas and enhance the shadows. These adjustments improved the visual impact of each photo and contributed to the mood I wanted to achieve.

Adobe Lightroom

Add evidence / screenshots of the following:

These are my photos that I think were good enough to be flagged. After they were flagged, I rated them on scale from 1-5. This allowed me to assess the quality of of the pictures and help understand what differentiates and bad photo from a good one. These are a frame of reference to contacts sheets and how they are used by photographer to pick the best and most relevant work to their ideas

Edited Image:

To edit this image, I changed it to black and white and messed around with this setting that changed the grain, this made the photo and the subjects in the photo seems like they have more detail as the stand out more. I also changed the contrast and brightness to make the blacks and whites stand more out.

Comparing Images:

This is a comparison of the edited photo and the original, this gives a clear view of how the photo changed and how I could of done this. You then are able to analyse all the differences in each photo like for example you can tell that the image of the left seems more sharp and precise as a result of the edit techniques I used.

Contact sheets:

This is a contact sheet on some of the photos I did, this shows a clear example of the photo shoots I did for shutter speed and for apperture.

Shutter Speed

What is it?

In photography, the shutter speed or the exposure time is the length of time that the digital sensor inside the camera is exposed to light when taking a photograph. The amount of light that reaches the film or image sensor is proportional to the exposure time. 1/500 of a second will let half as much light in as 1/250. This gives the effect of either a fast or slow shutter speed, enabling photographers to experiment more with the type of photography they do.

Slow Shutter Speed

This is when the time of the shutter speed is longer to allow more light to be captured, this as a result makes the image less sharper and more lighter. it also often refers to a larger fraction of a second, such as ½ or ¼. Slow shutter speeds can capture movement and introduce blur, usually for slower moving subjects. Long shutter speeds are typically around one second or longer. This gives a example like this:

Medium Shutter Speed

This is when the shutter speed is in between a slow and high shutter speed as is around a shutter speed such as 1/250 to 1/30 sec. This is a middle ground, this mean the image is neither too bright or too dark but still gives the effect of a blurring/moving image, for example a medium shutter speed is used to blur a person running or animal giving the impressions of fast movement.

Fast Shutter Speed

Fast shutter speed is when you take a photo to 1/500th to 1/4000th of a second, This gives the image a sort of stuck in time effect with minimal or no blur at all. Fast shutter speed is often used to capture rapid moving objects or animals, this is so you get a clean image of a subject that would otherwise be blurred. But when you are using fast shutter speed the photo will be dark and lacking contrast. If you need a high shutter speed then you can compensate it with the aperture or if you don’t want to change that then you can increase the ISO value.

How the images were achieved

For the first image of slow shutter speed, I went outside the school and took pictures of cars going past. With the use of a slower shutter speed it made the cars look almost like a blur while the background stayed clear. This gave the illusion of the car going faster than it was. In the second picture it a gives and cool effect via the medium shutter speed, this is because only the legs are blurry but still not too blurry, this gives the idea of movement but only minimal. And with the third and final image it was just quite simple and shows a clear example of Freddie walking, but as it was a fast shutter speed, you are unable to see any type of blur even though he is moving.

ISO

What is ISO? How does it affect your camera?

ISO controls the amount of light your camera lets in, and therefore how dark or light your photos will be and how sensitive your camera sensor is to light. The higher the ISO number, the higher your camera’s sensitivity, and the less light you need to take a picture. The trade off is that higher ISOs can lead to degraded image quality and cause your photos to be grainy or “noisy.”

What does a high ISO / low ISO mean? What effect can this have on your photos? What is meant by visual noise?

The higher the ISO number, the less light is needed and the more grainy a image is. The lower the ISO number, the more light is needed to properly expose the image, this makes the image smother and more detailed but is darker. The higher the ISO number, the higher your camera’s sensitivity, and the less light you need to take a picture. The trade-off is that higher ISOs can lead to degraded image quality and cause your photos to be grainy. The higher the ISO, the more amplification your sensor needs, and the more noise you will see in your image.

When might you want to use a high ISO?

High ISO is generally well suited to low-light situations, especially when a fast shutter speed or a narrow lens aperture is essential to achieving a creative goal. Using a higher ISO setting for hand-held street photography at night allows one to use fast shutter speeds to create bright, sharp images.

Exploring the effects of ISO

As you can see in these photos, there is a clear difference between which image is lighter and darker, this is determined by the amount of ISO used. In the top photo I used a lower ISO, in which made the photo a lot darker and more accurate to how light it really was in the studio. In the bottom photo I used a moderately high ISO, this is because I didn’t want the image to be too bright but still wanted to add more detail and to see what was in the actual image. Also if you look close enough you can see the grain that I mentioned in the blog. I could prevent this to make a more clearer image by decreasing the shutter speed, but with this I would have to keep the camera steady to reduce blur.

Final images:

Fixing the Shadows

Camera Obscura

The camera obscura is a device that is sort of an early version of a camera. It works on the principle of letting light through a small hole, therefore projecting everything upside-down outside on a surface inside a dark room. People figured out this trick as far back as ancient times, first mentions coming from the Chinese and Greek. It wasn’t until the Renaissance, however, that it really hit its stride with the help of artists and scientists who used the device to study the way light and perspective function. For many centuries, it was an essential tool for artists and scientists alike, and eventually some of its concepts would be used to create photography as it stands today.

Nicephore Niepce

Nicéphore Niépce is generally considered an early pioneer in photography who invented the first photography procedure that worked. He captured what has come to be considered the world’s first permanent photo, View from the Window at Le Gras, using a photography method called heliography. Until recent times, however, Niépce was not widely credited as the first photographer. His work was then overtaken by Louis Daguerre, who perfected the process and made it famous with the daguerreotype. For this reason, Daguerre was considered the major developer of photography, while the role of Niépce was brought out fully only much later.

Henry Fox Talbot

Henry Fox Talbot perfected the early photographic process known as Photogenic Drawing, where he placed an object directly onto light-sensitive paper and exposing to sunlight created a silhouette or “drawing” of that subject. This was an important step in photography’s development since now multiple prints could be realized. Talbot also used small wooden cameras small enough to hold in one’s hand-whom he referred to as “mousetraps.”. These cameras incorporated a lens that focused the light onto the light sensitive paper inside to create a negative image. He could put the negative on another sheet of paper and make positive copies, a technique which would set the stage for modern photography.

Daguerreotype

Daguerreotype was a process invented in 1839 by Louis Daguerre. In this process, pre treated polished silver coated copper plate was exposed to iodine vapours to make it photosensitive and then to light followed by development in mercury fumes. This would give highly detailed but unique images on a reflective surface. This yielded an extremely sharp image but with a great limitation. Each photograph was unique and unrepeatable, the process being cumbersome and hazardous since it incorporated mercury. Henry Fox Talbot’s system incorporated negatives in combination with Photogenic Drawing to allow for multiple copies of an image, Talbot’s method was thereby more practical and adaptable for wide use.

Richard Maddox

Richard Maddox was an English photographer who invented the dry plate process in 1871. Before his invention, photographers used wet plates that had to be prepared and exposed while still wet, which was cumbersome and time-consuming. Maddox’s dry plates were coated with a gelatin emulsion that could be stored for longer periods and didn’t require immediate development. This innovation made photography much more practical, as it allowed photographers to prepare their plates in advance and develop them later, greatly increasing flexibility and convenience. Maddox’s dry plate process was a major leap forward for photography, paving the way for the development of modern photographic films and making photography more accessible and efficient for both professionals and amateurs.

George Eastman

George Eastman changed photography by making the photo camera accessible to all. Before his improvements, photography was rather complicated and required very expensive equipment. Eastman managed to change that with his invention of the Kodak camera in the year 1888. Such a camera was easy to use; it was preloaded with films and allowed people to take their photos and then send the entire camera to Kodak for developing and printing. This slogan coined the “You press the button, we do the rest” approach, making photography easy and within the economic reach of the general masses. In this process, he established a company known as Eastman Kodak Company, which soon emerged as a multinational photographer company and played a very important role in popularizing photography as one of the characteristics of everyday life.

Kodak (Brownie)

The Kodak Brownie was a popular series of cameras introduced by the Eastman Kodak Company, founded by George Eastman. The Brownie cameras were affordable, simple to use, and played a significant role in popularizing photography among the general public. They were designed for amateur photographers and allowed people to capture moments easily. The Brownie cameras used roll film, making photography more accessible and enjoyable for a wide audience. The simplicity and affordability of the Brownie cameras contributed to the democratization of photography as a hobby and art form. 

Digitial Photography

Digital Photography is a modern method of capturing images using electronic sensors to record light. It became popular in the late 20th century as technology advanced. Instead of film, digital cameras store images as electronic data. When a photo is taken, the sensor converts light into digital information, which is then stored on a memory card. This digital data can be easily transferred to a computer for viewing, editing, and sharing. Digital photography revolutionized the way we take and interact with images, offering instant feedback and the ability to manipulate photos easily.

Focus Control and Aperture

The low f-stop value like this will isolate the foreground subject from the background. This means it has a wider aperture and a smaller depth of field. The shutter speed is so fast that the motion in the shot looks like it’s frozen in time.

Shutter speed1/4000

Aperture2.8

ISO setting6400

Because of the slow shutter speed in this image, it not only makes moving things seems more blurry but also makes the image brighter. In this case the image in not brighter as the ISO setting is quite low, this makes the image seem more clearer and is darker.

Shutter speed: 1/3

Aperture: 22

ISO setting: 400

Depth of field determines which parts of your photo are in focus and aperture lets you control that depth of field. Adjusting the focus can lead to sharper images, or, if handled in a specific way, create depth of field and emphasize just one part of an image while blurring everything behind it. to do this is by usually turning a focus ring on the lens. Adjusting the focus yourself is called manual focus. It can be advantageous to use it in a few different situations. But in most situations autofocus is incredibly convenient as well, it does have its downsides though. the control of aperture itself can be adjusted to let in more or less light. A small aperture lets in less light and leads to a darker image, while a larger one can flood the sensors with light.