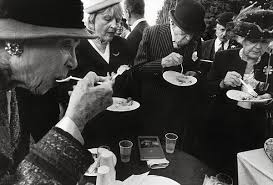
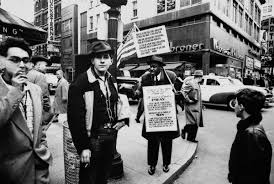
Observational – Henri Cartier Bresson. The approach of observationalism focuses on capturing moments as they naturally unfold – while actively avoiding interrupting this moment. Henri Cartier Bresson pioneered this style of street photography – capturing what he called the decisive moment; framing a perfect composition and waiting for the subjects to align perfectly with said composition.
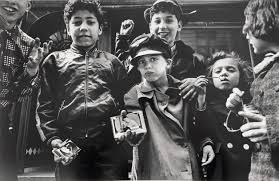
Confrontational – William Klein. This method is about provoking with reactions and engaging with the subjects. Klein is a prime example using close up, dynamic raw images. This method takes strength to use because it can be awkward or scary to do – you have to be very outgoing and confident to just shove a camera in peoples faces.
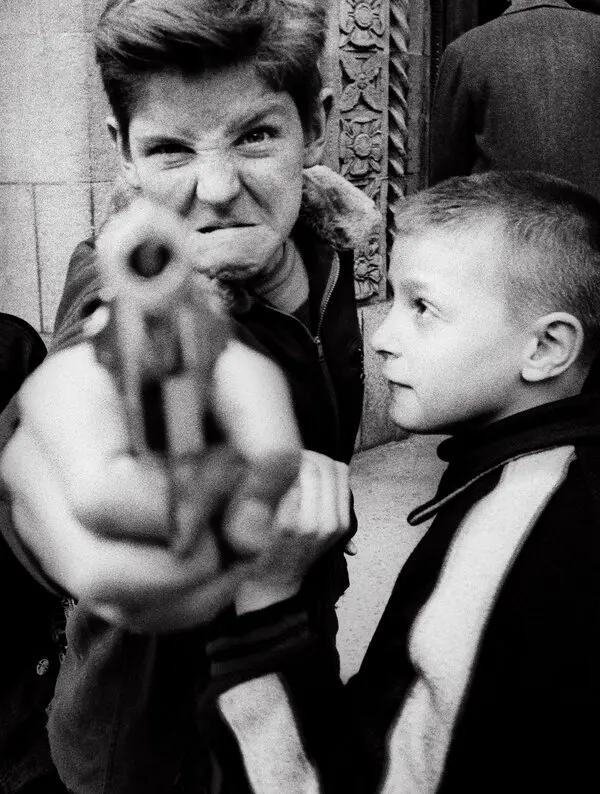
William Klein
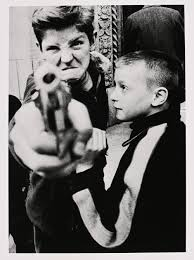
The mise-en-scene presents a young boy with an angry face pointing a gun at the photographer – this photo has a direct mode of address and almost feels threatening. Contrasting is a younger boy look innocently and curiously at the gun wielder.
As far as the technical aspects go, the image is black and white, and has really high levels of contrast – the boys skin is blown out with little detail and their clothes are a deep black. We cant really tell from which direction the light is coming from, but it is natural. The shutter speed is definitely high – at least above 1/250. I can tell this because it is definitely a snapshot of a fast moving scene – the boy wouldn’t have held this pose for too long. The aperture is probably f/5.6, the gun is out of focus but the boys and the background are all crisp. I think the ISO would be relatively high to to the high amounts of grain associated with both a high ISO and the process of shooting on a film camera.
Conceptually, after taking this photo he mentioned he felt he was photographing himself – the two young boys felt like different parts of himself – one side is angry and aggressive and the other is calm collected, naïve and curious. This could represent his street persona when he’s being all aggressive taking photos rapidly up close to people – confrontational, vs when he’s off the job and being with family.
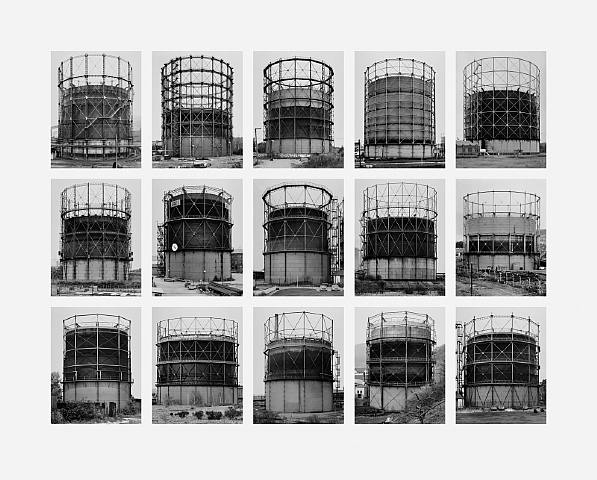
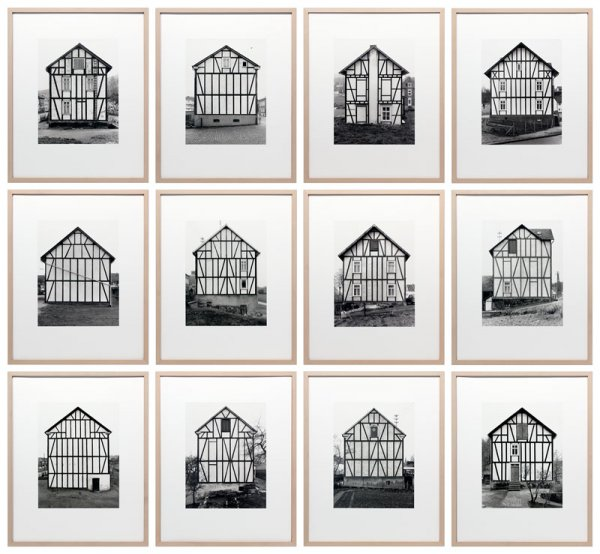
Hila Blecher and Karl Blossfeldt first met in the 1950s when they were both studying at Dusseldorf Art Academy. They began taking photos together and over time their professional relationship turned into a personal one.
They wanted to preserve the architecture of this industrial landscape because they were slowly disappearing and being knocked down. They wanted to record it for history. They were using a large format camera which means that the technology was a lot slower than modern DSLR’s and you can only make one picture at a time.
Hila Becher came up with the concept by looking at other disciplines like biology and psychology books. She looked at Karl Blossfeldt and came up with the idea of comparing one thing to another. They decided to do this with buildings and they organised the photographs into unique patterns which helped them to decide how to make those grids. They would wait for overcast days so the light would match that of which was in the other images, so the photos only focus on the subject which was the building.
Their images are inspired by being the reverse of romanticism. A german photographer who influenced them is August Sander – he had a series called ‘People of the 20th Century’ which was a shoot that systematically documented people from different social classes. They are not romanticising anything, rather they are collecting data – shooting stuff as it really is.
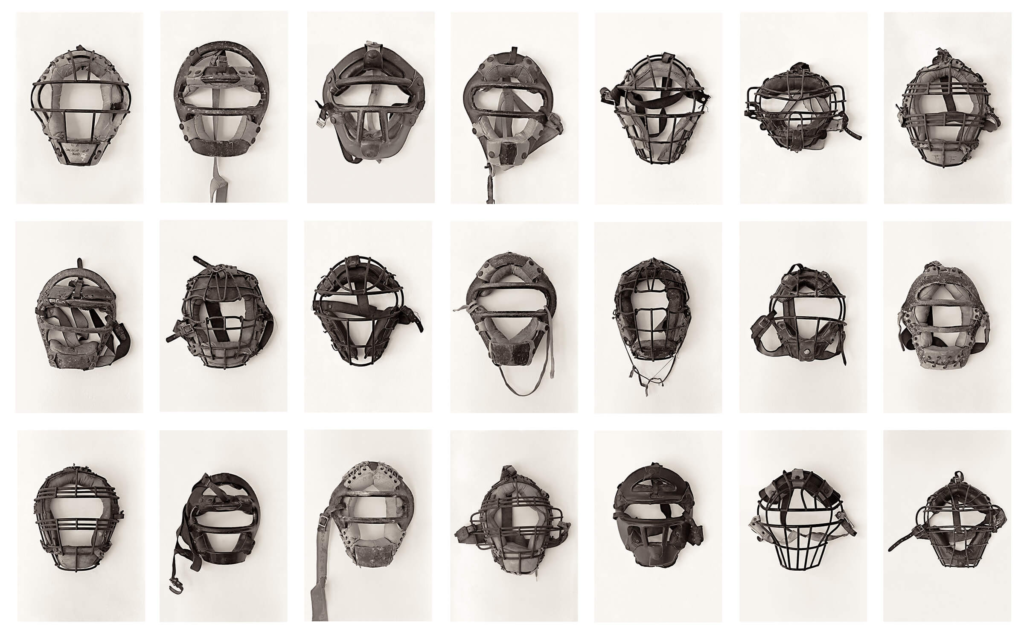
Typologies is almost scientific – like collecting data towards a cause. Shooting photos of the same thing over and over again can almost be considered therapeutic, and you start to notice the subtle differences between the objects of interests.
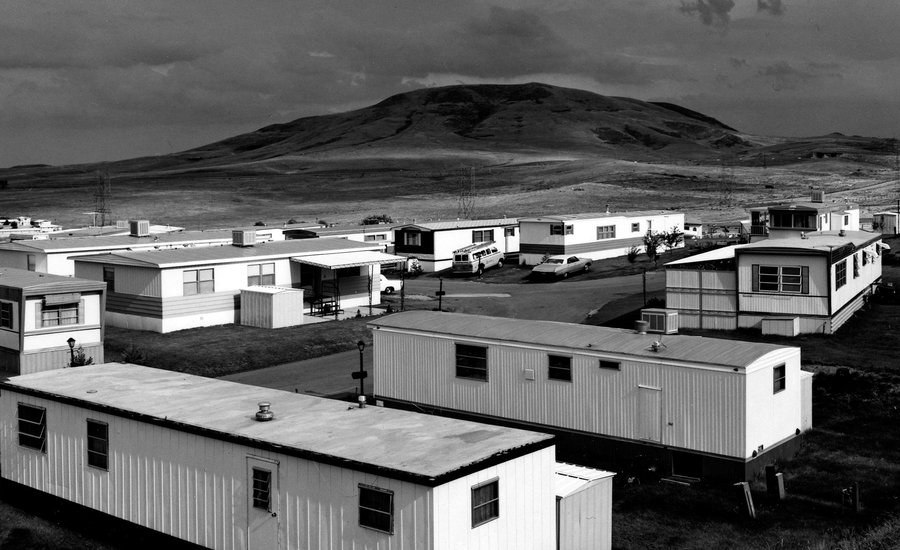
New topographics is a genre of contemporary photography that came from a ground-breaking exhibition at the International Museum of Photography. New topographics documents a man-altered landscape. The term was coined by the curator of the exhibition William Jenkins. The exhibition was the start of a pardigm shift in the classic, standard approach to landscape photography.
Photographic Characteristics
New Topographics has a strange empty feeling attached to the photos – as it’s often empty human constructions contrasted with nature. It also has a kind of simplistic beauty and minimalism. Often the photos can look a bit ugly and lonely but there is a beauty in that. The photos have a neutrality and don’t fit an obvious style – theyre often very bland. The photos stereotypically avoid the traditional techniques used to add emotion to image like over the top lighting. The photos have a heavy emphasis on the human impact on natural environment, capturing the unique interplay between humans and environment – an often destructive and dominating interplay on mans’ side – it highlights how humans have intervened with nature and shaped a new landscape – for the good or for the bad. The aim was to strip away romanticism and to remove artistic emotion.
Key Photographers
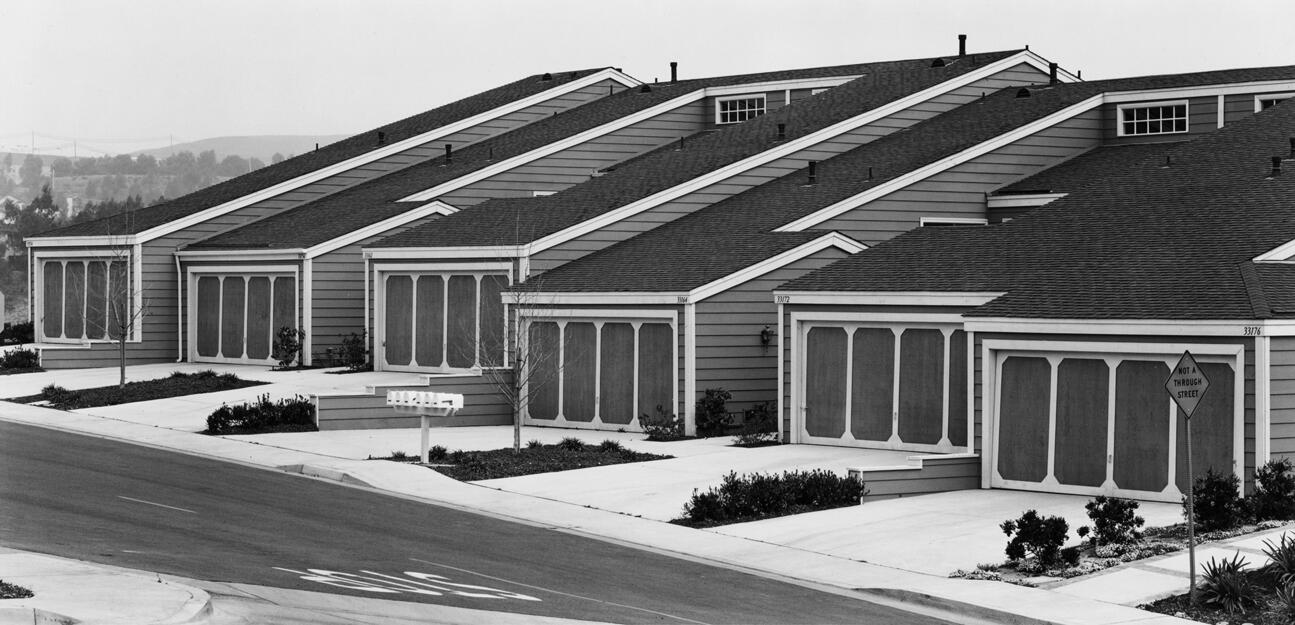
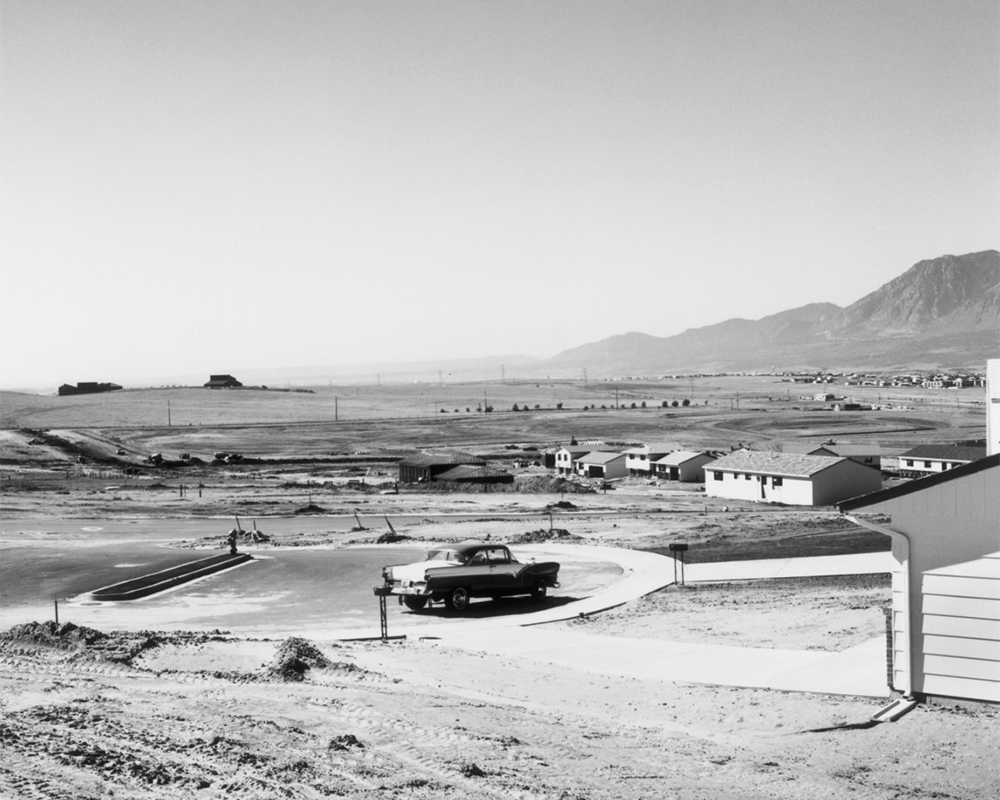
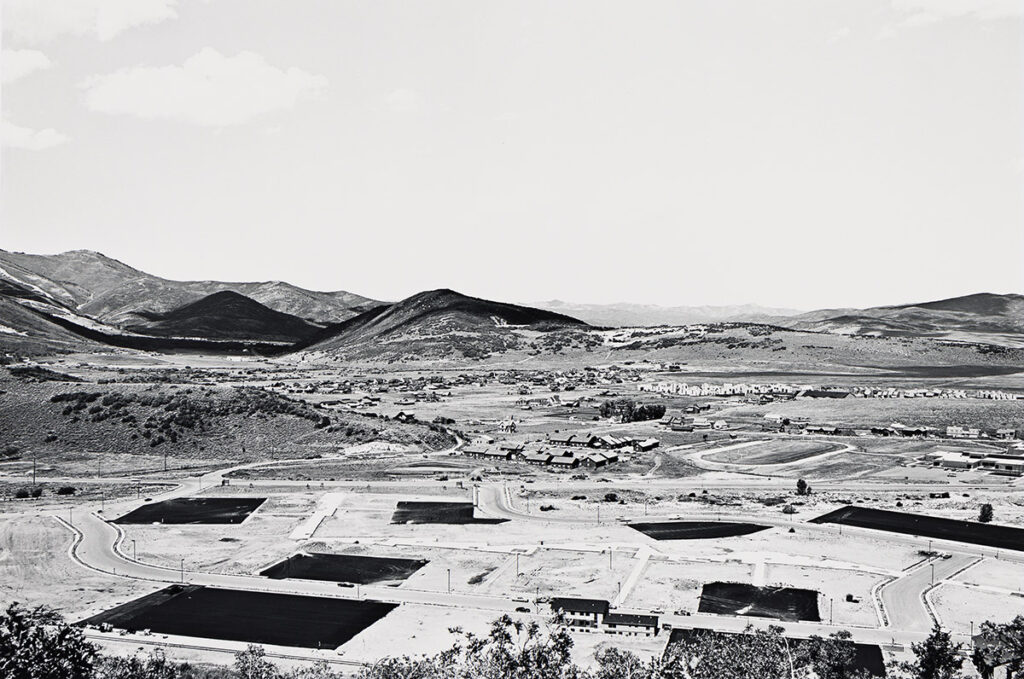
Robert Adams (1928-1997)
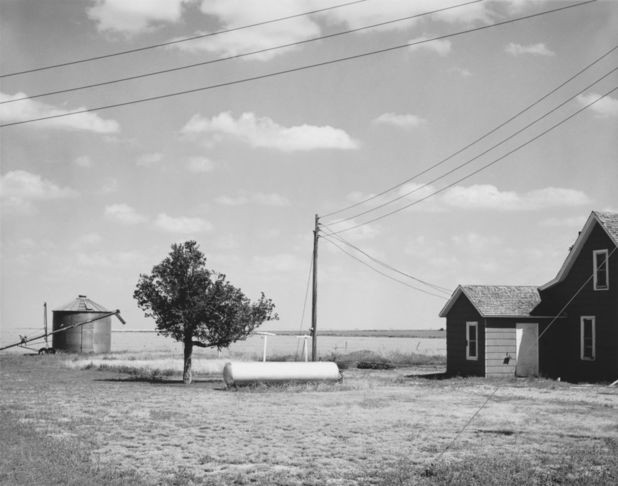
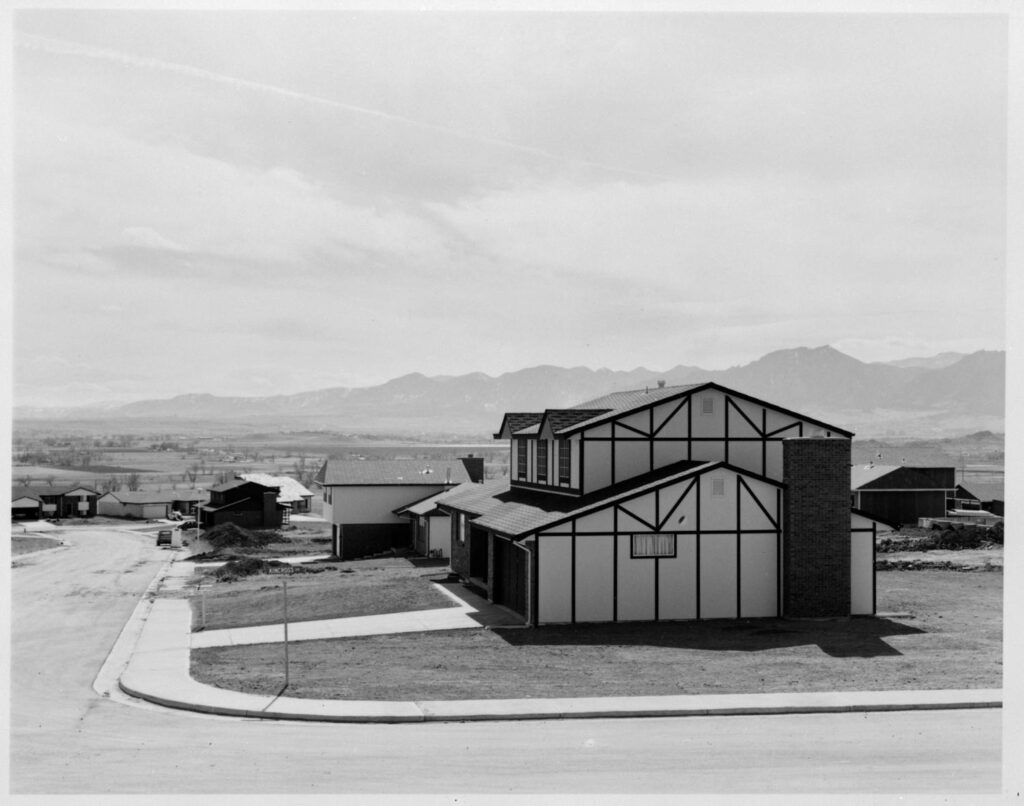
Adams was known for documenting the transformation of the west – a lot of his work was based in Colorado. His works tries to explore the strange realtionship between urban developments and natural beauty. His images are a stylish critique of the way humans are taking away from natural landscapes by adding their own commercialised property qand developments. His photos are clean and minimalistic, and they used not much contrast between tones – a very subtle style. His photos are often of human built structures, with hints of the receding nature in the background. Conceptually, Robert Adams are making a clear comment on the relationship between natural landscapes and aggressive human development.
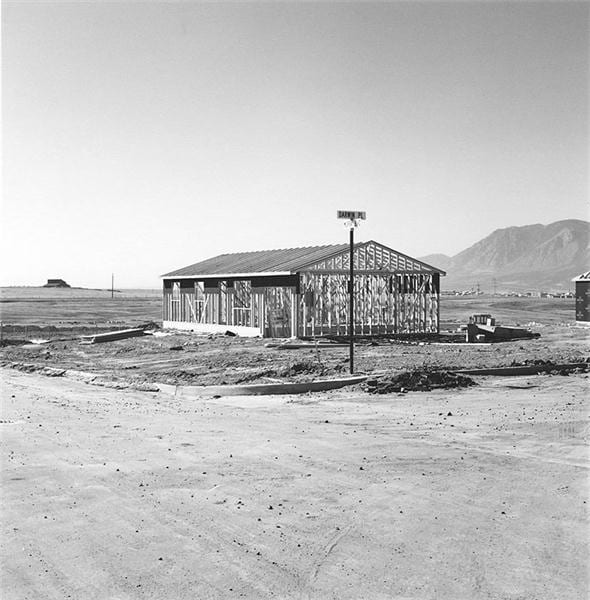
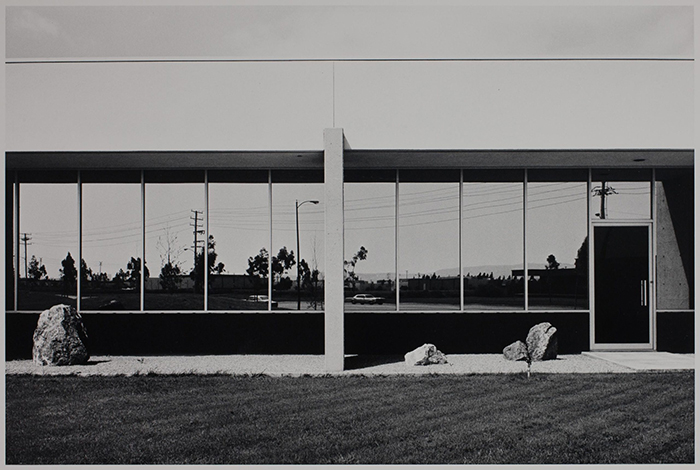
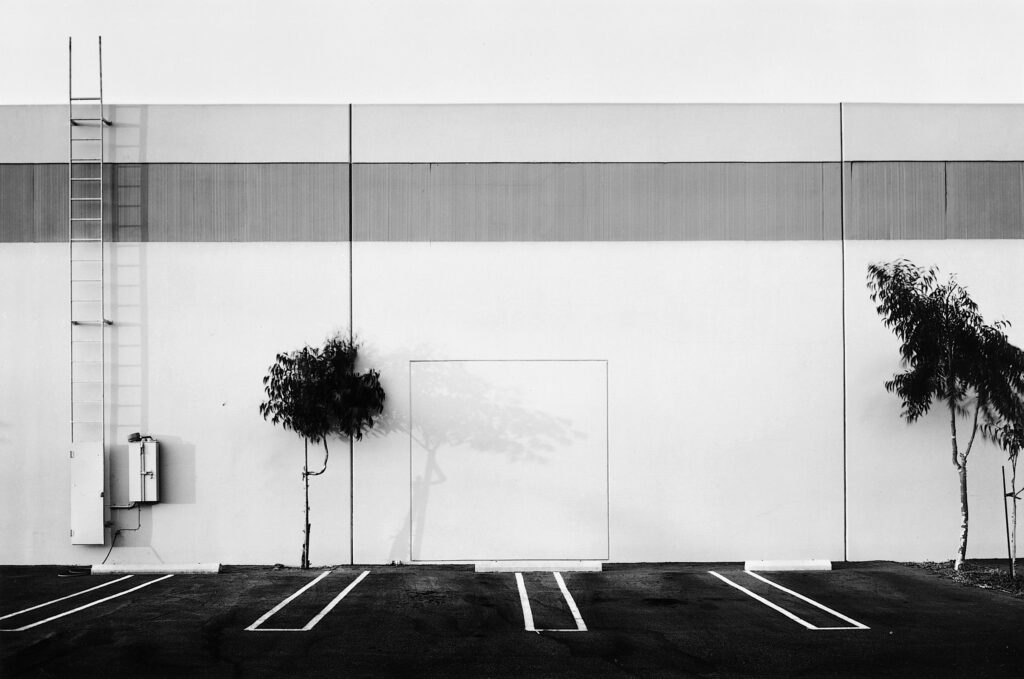
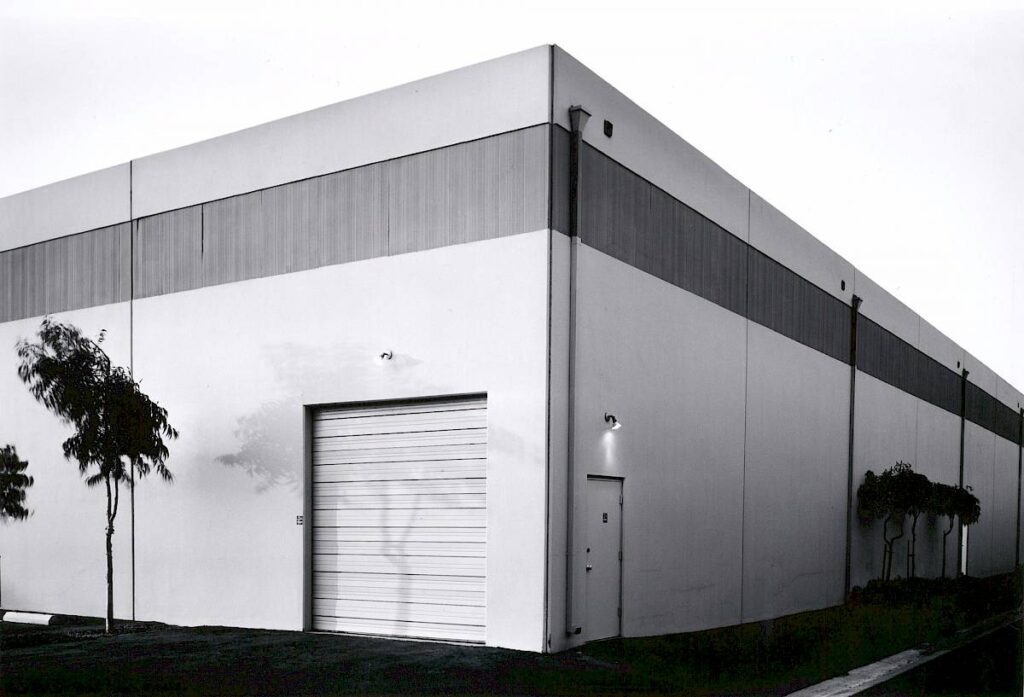
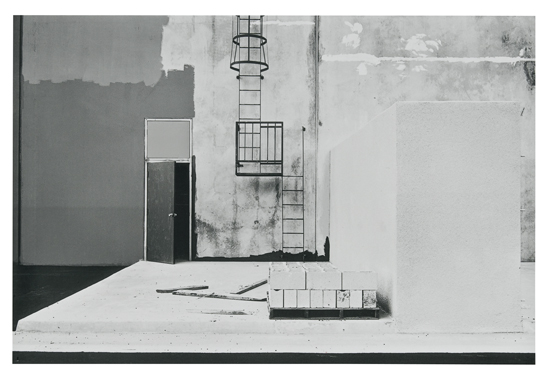
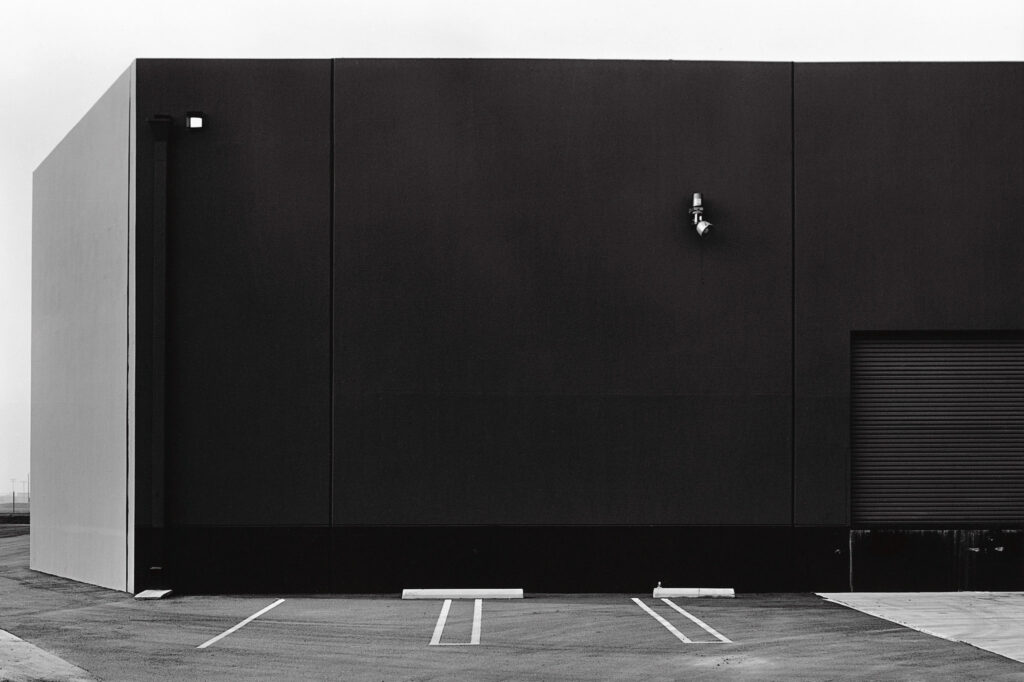
Lewis Baltz (1945–2014)
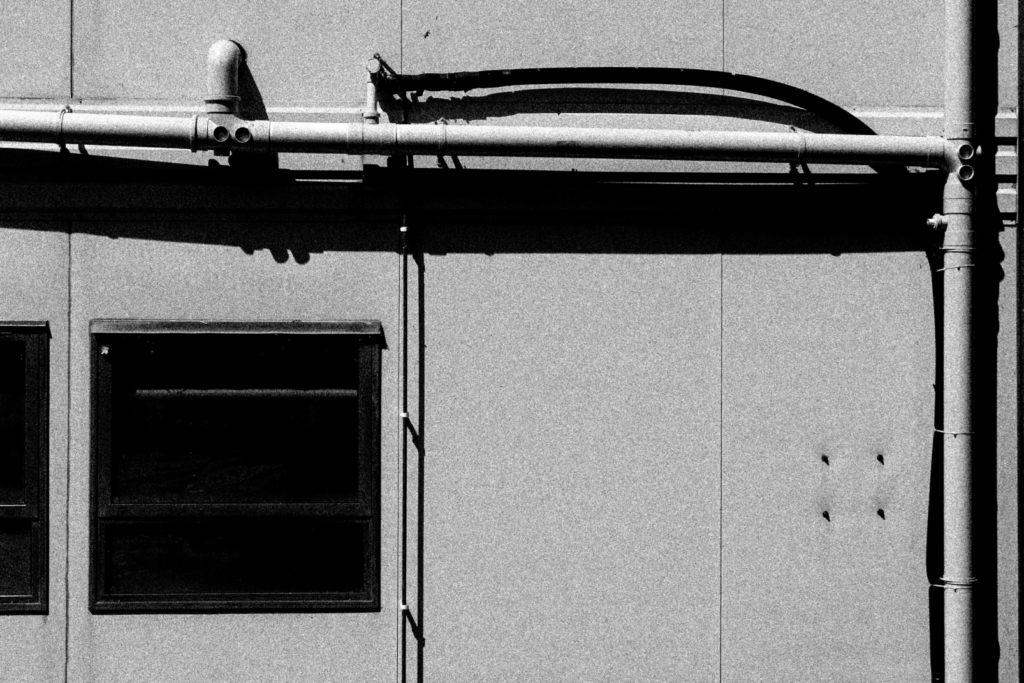
Lewis Baltz focused more on subsurban development, industrial parks and warehouses/factories. His photography was an attempt to reflect how impersonal these spaces are when industrialised. The composition of his photos is geometric, start, and are very simple – to the point of being abstract. They are empty – devoid of people, which he did to emphasize the cold industrialisation of these areas. His work changed how people saw industrial buildings, critiquing the impact they have on peoples emotions and the impact on the surrounding environment.
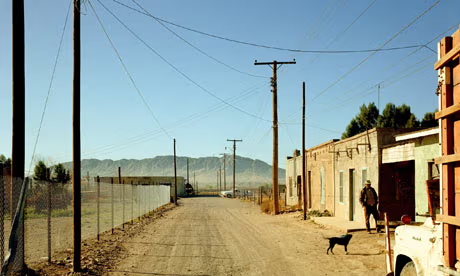
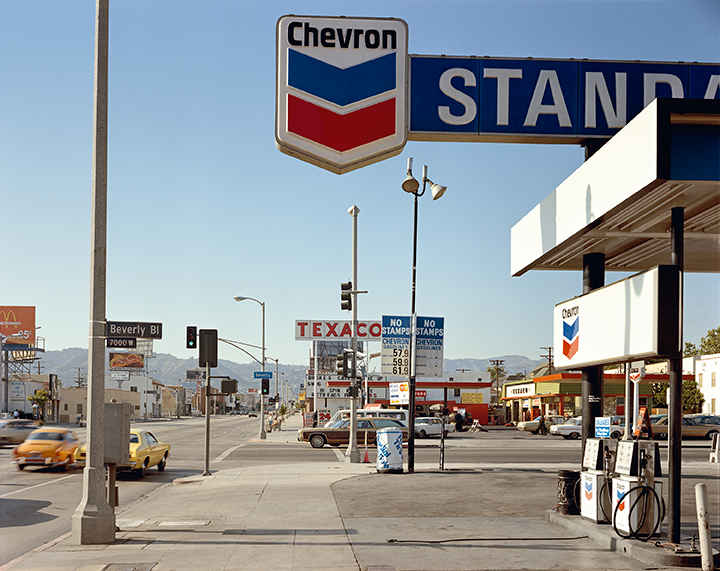
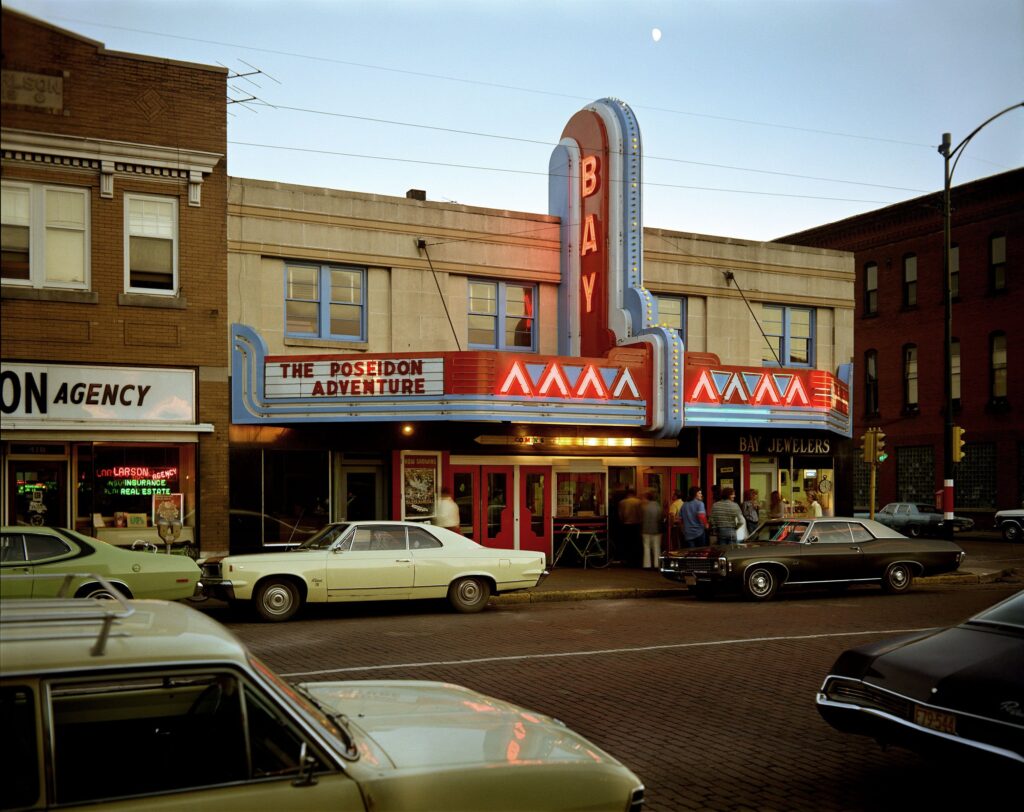
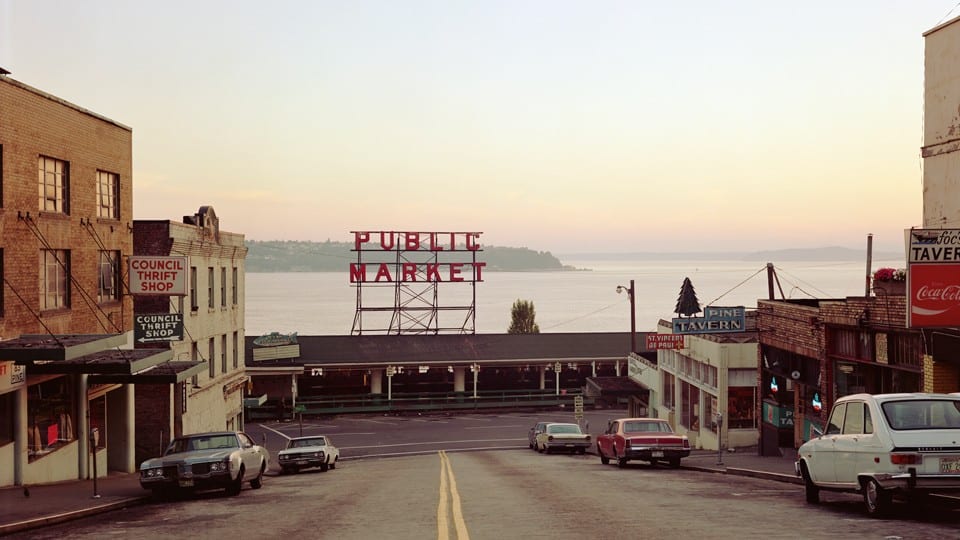
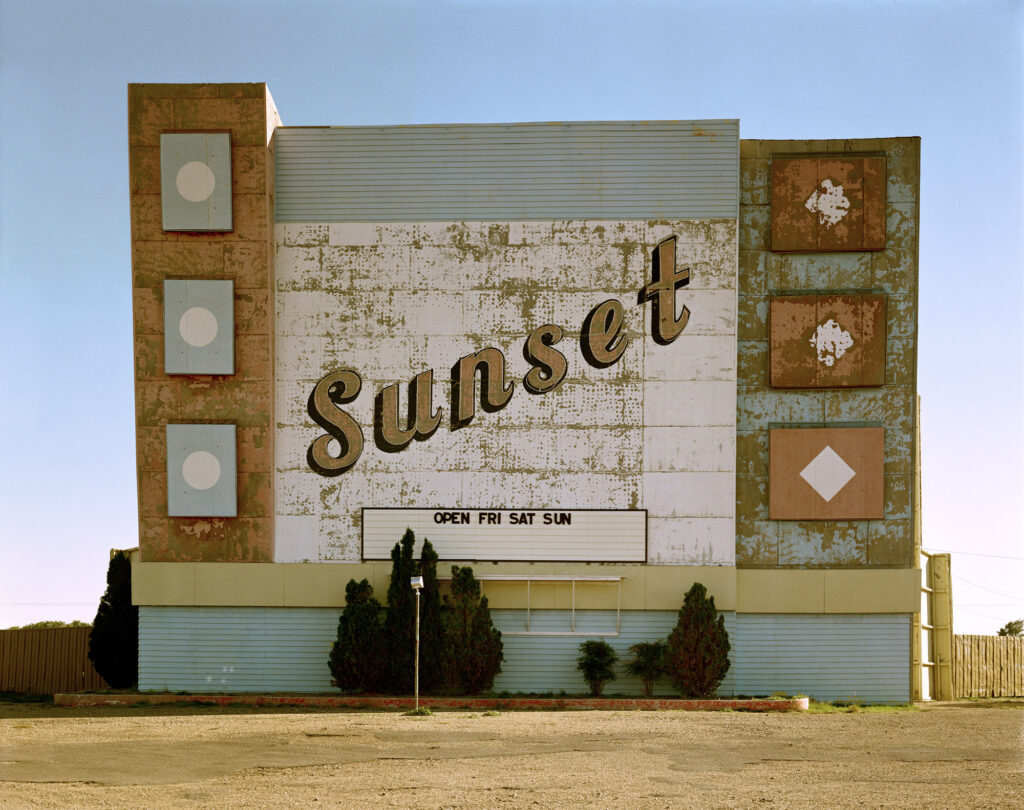
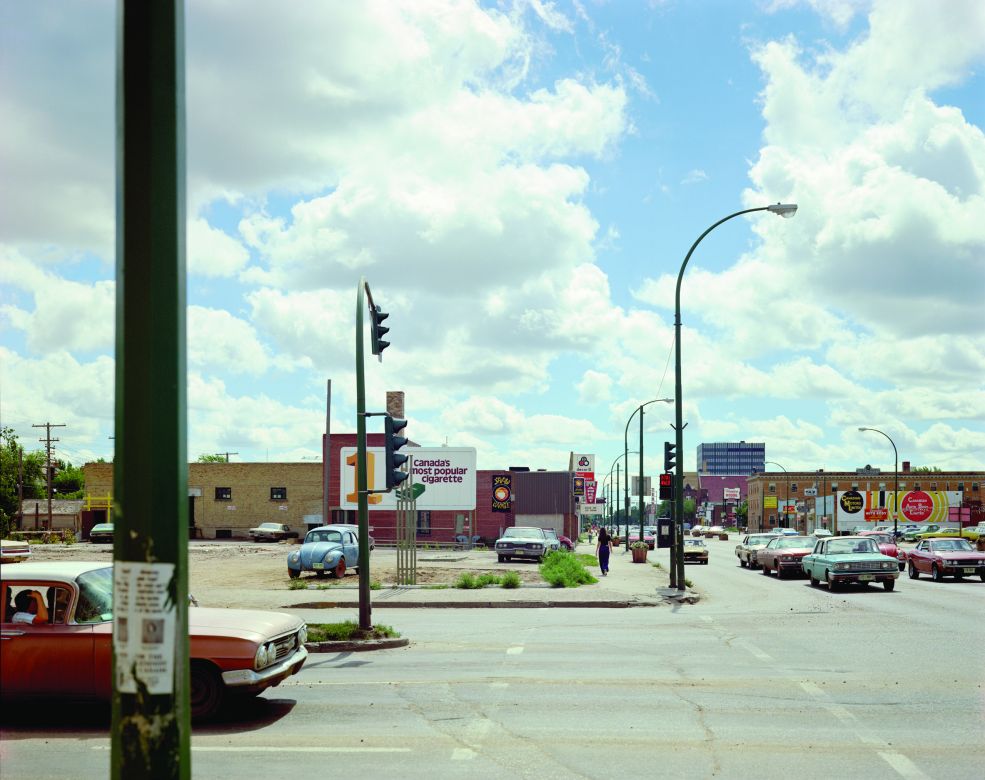
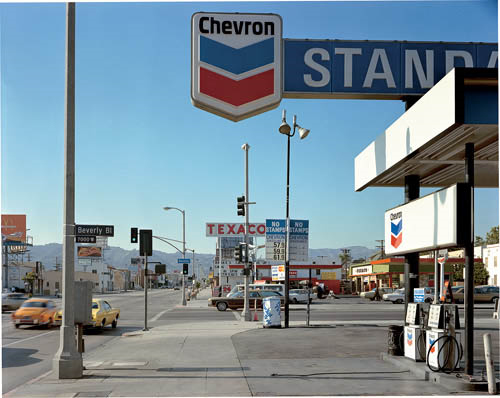
Stephen Shore (1947)
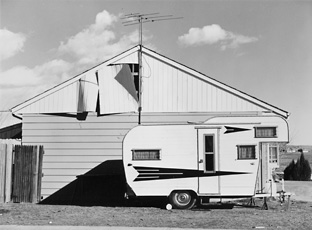
Stephen shore is a documentary photographer who documented daily life in the USA – classic diners to random, quiet and idyllic suburban streets. He was one of the pioneers of colour photography – which was a bold move because black and white was considered the standard professional medium. He was known for his great level of attention to detail, vibrant colours, and compositions consisting of strong perspectives. He used large format film cameras which gave him a great control over capturing tiny, intricate details in what would seem to be a mundane scene.
Analysis
Technical
The lighting in this image is natural and bright – a sunny day. There is a high amount of contrast and the colours are vibrant. The saturation is very high and the colours have a tone that you can was shot on film. The aperture was clearly very high as we can see there is an infinitely deep depth of field. The shutter speed would not be super fast, at least lower than f/200 – I can tell this because the orange car on the left has motion blur. The ASA was probably as low as possible – maybe 100. It was a bright sunny day and he would’ve wanted to reduce grain as much as possible to retain clarity. The white balance is pretty neutral, in scenes like this you would typically expect to see a warm tone however this image is well balanced.
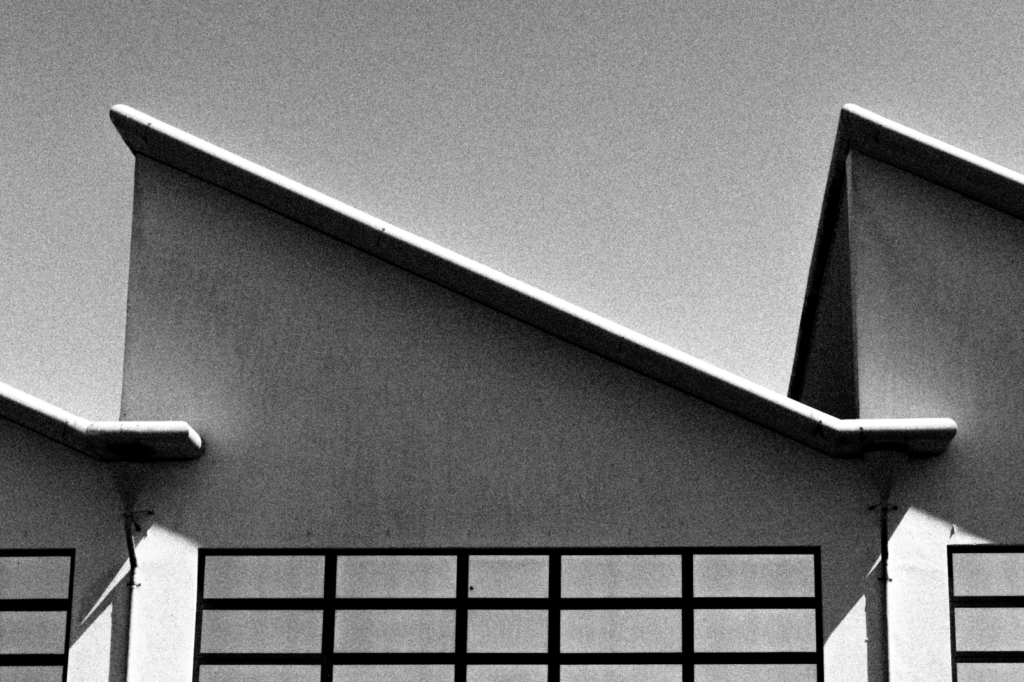
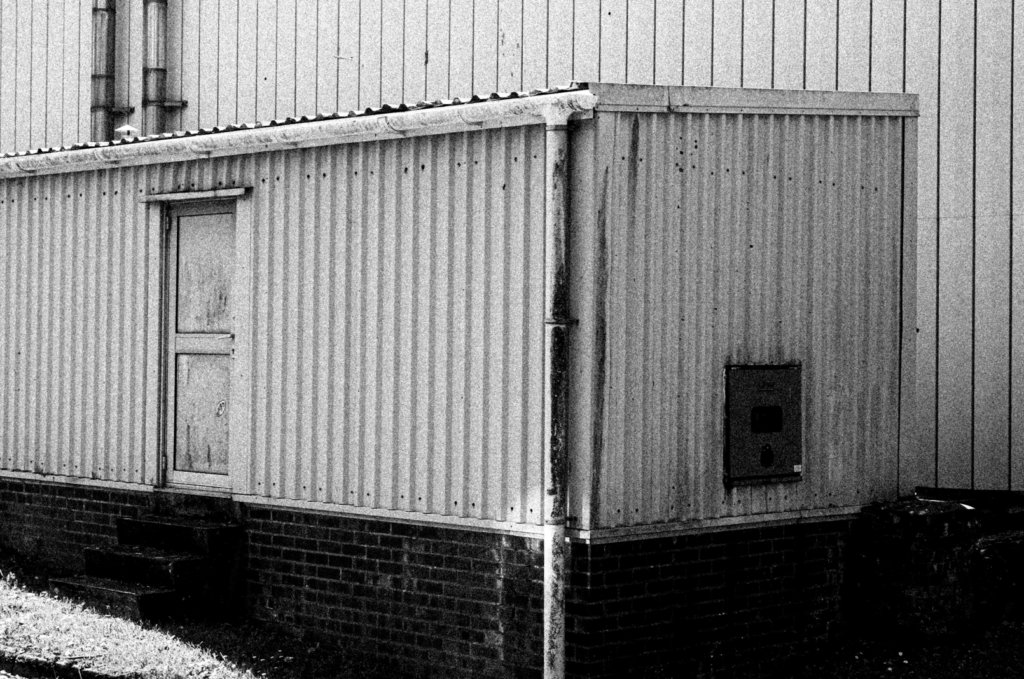
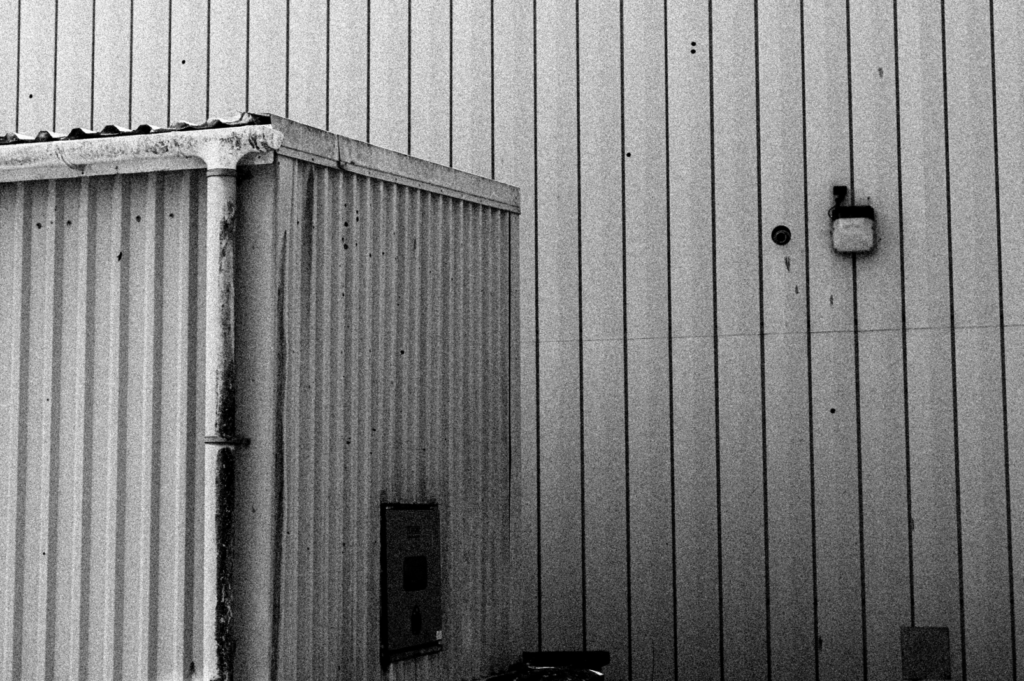
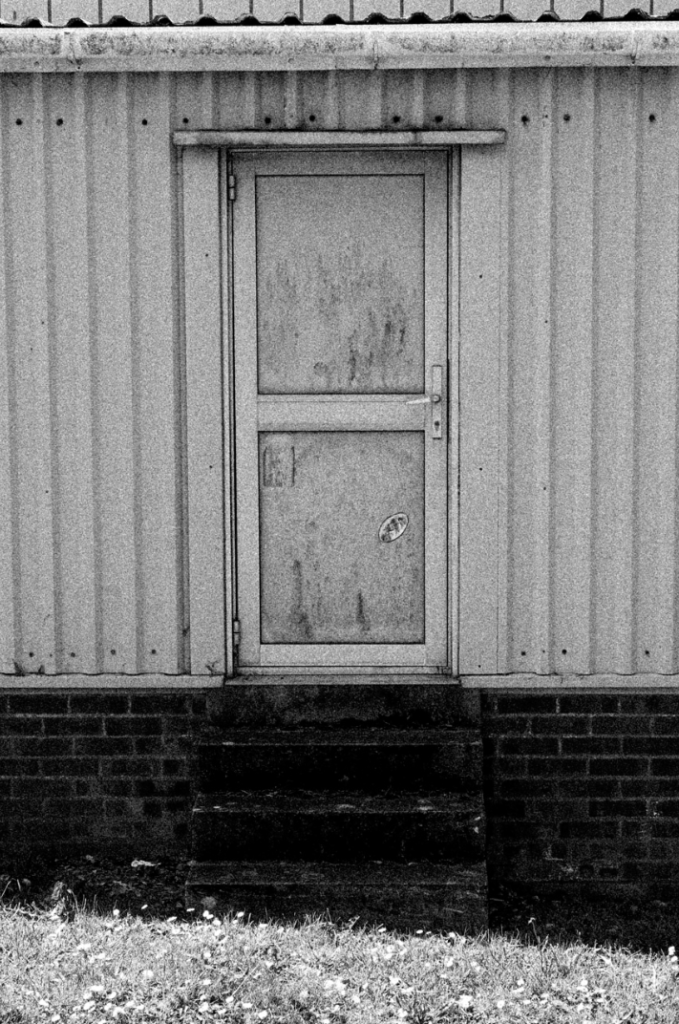
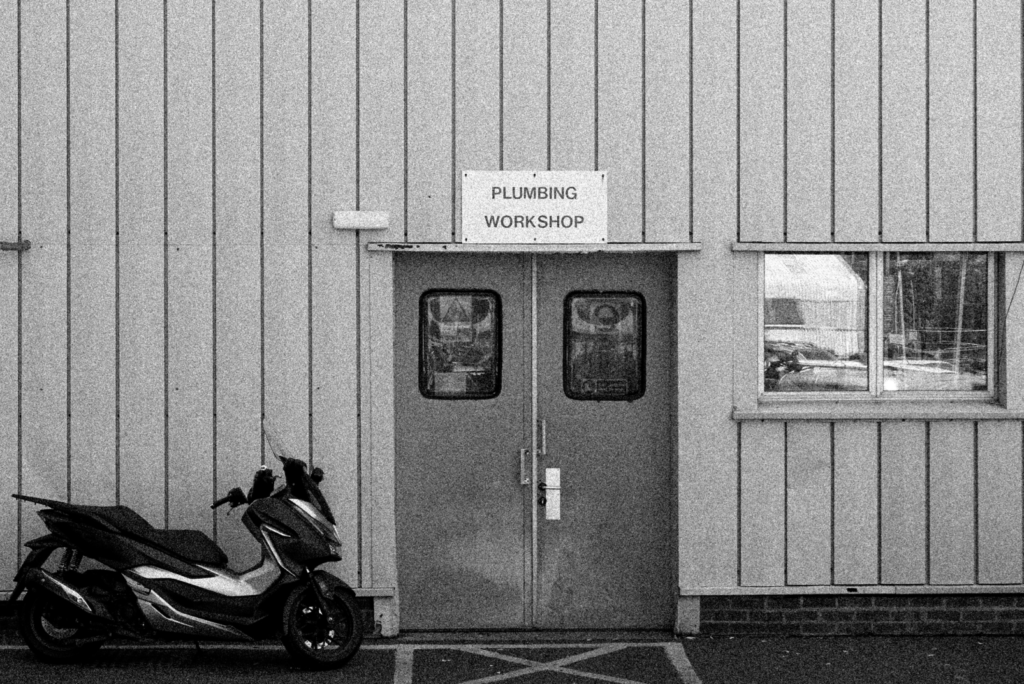
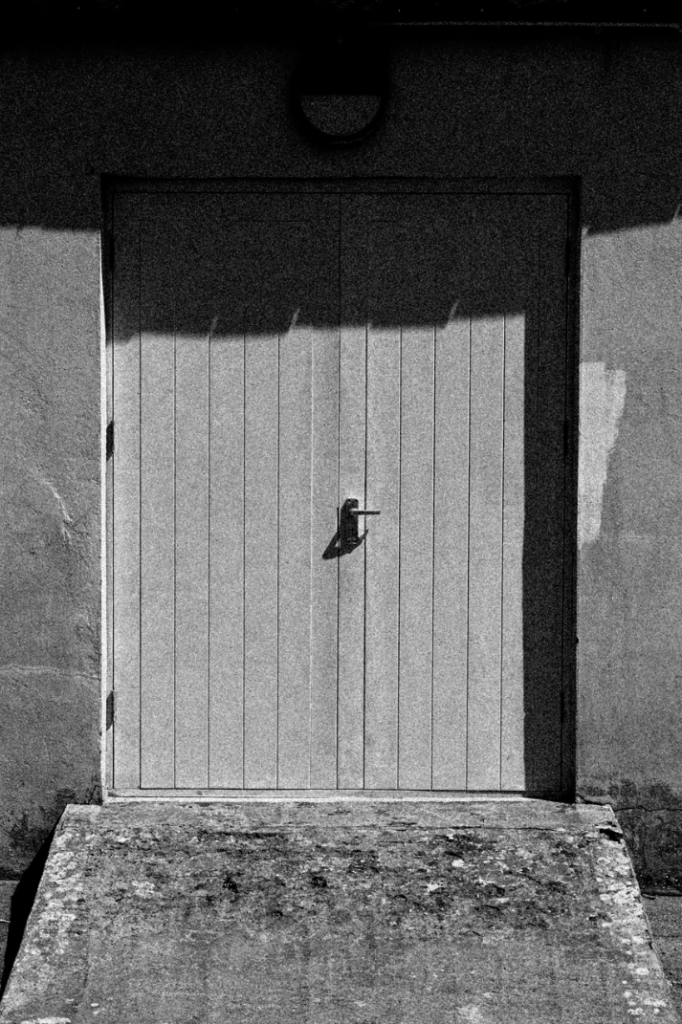
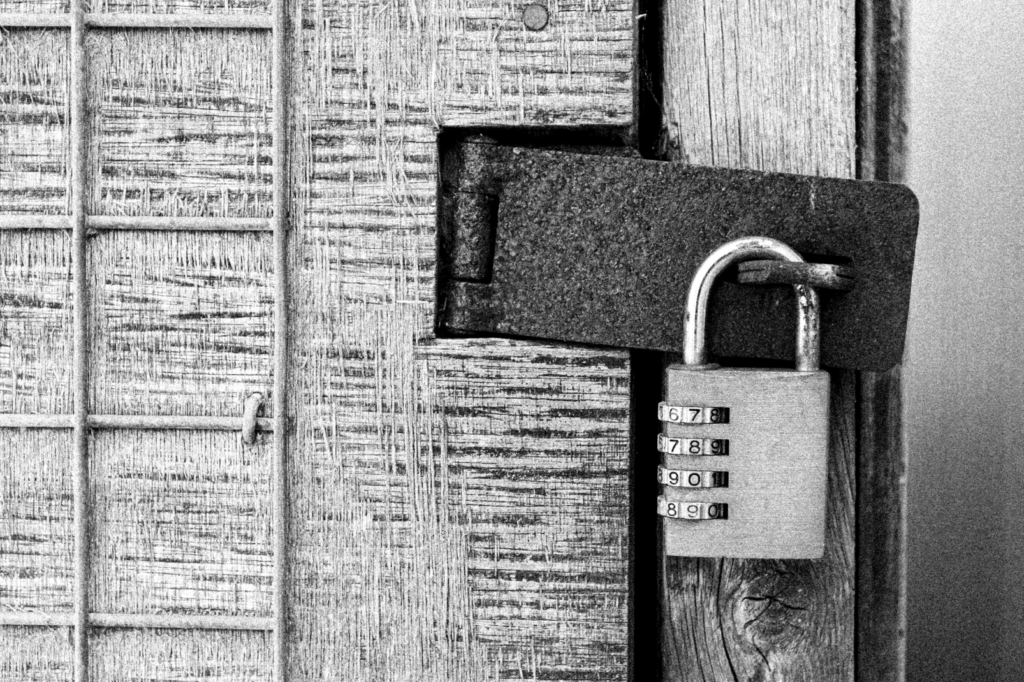
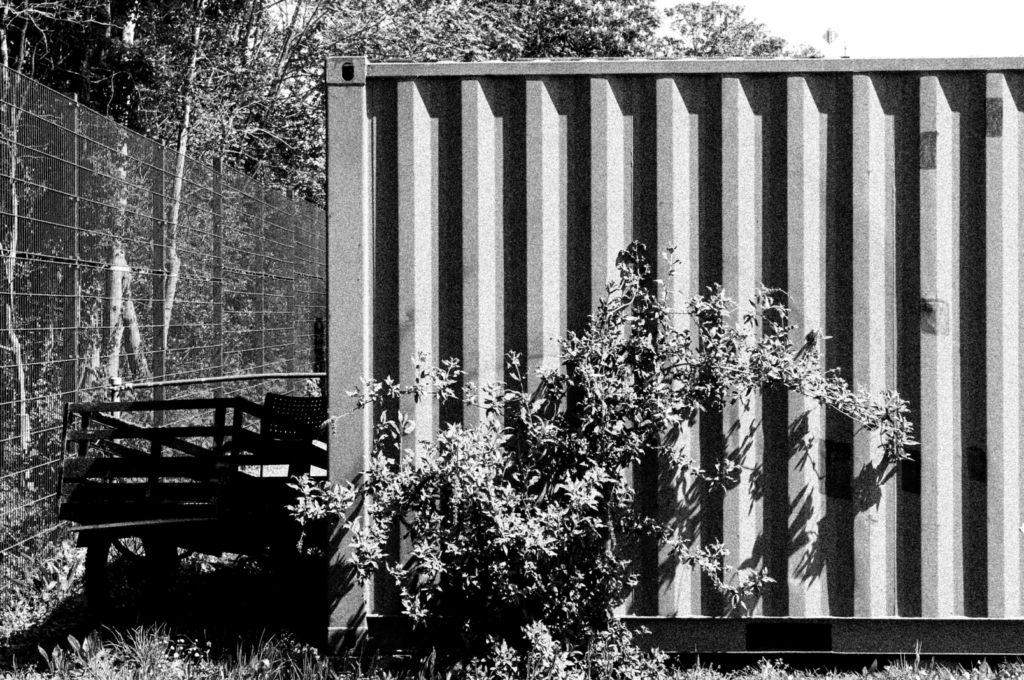
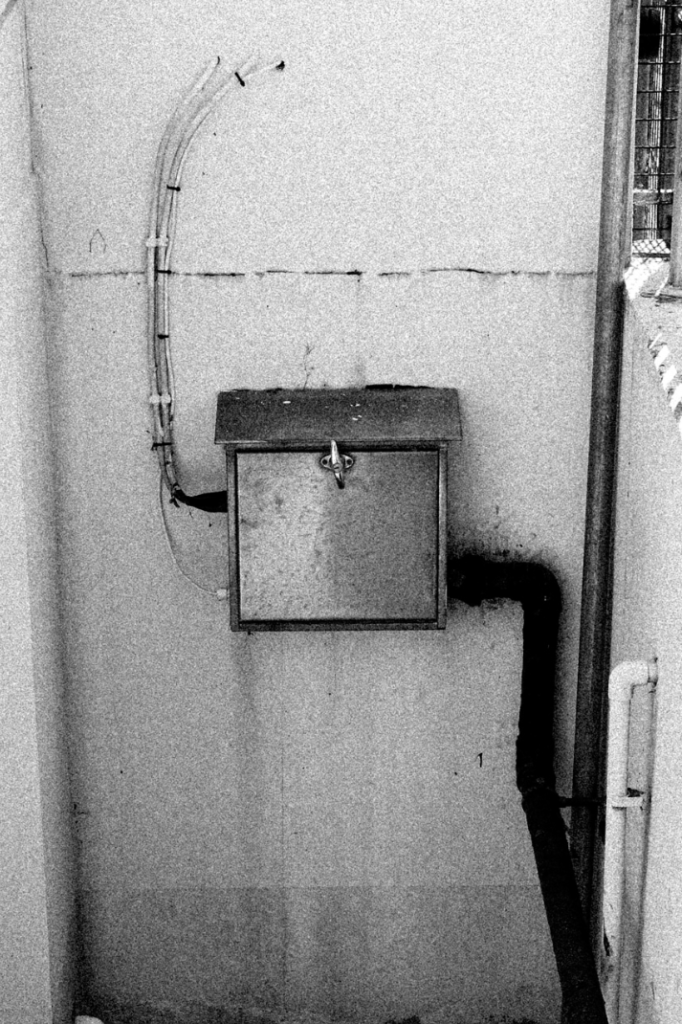
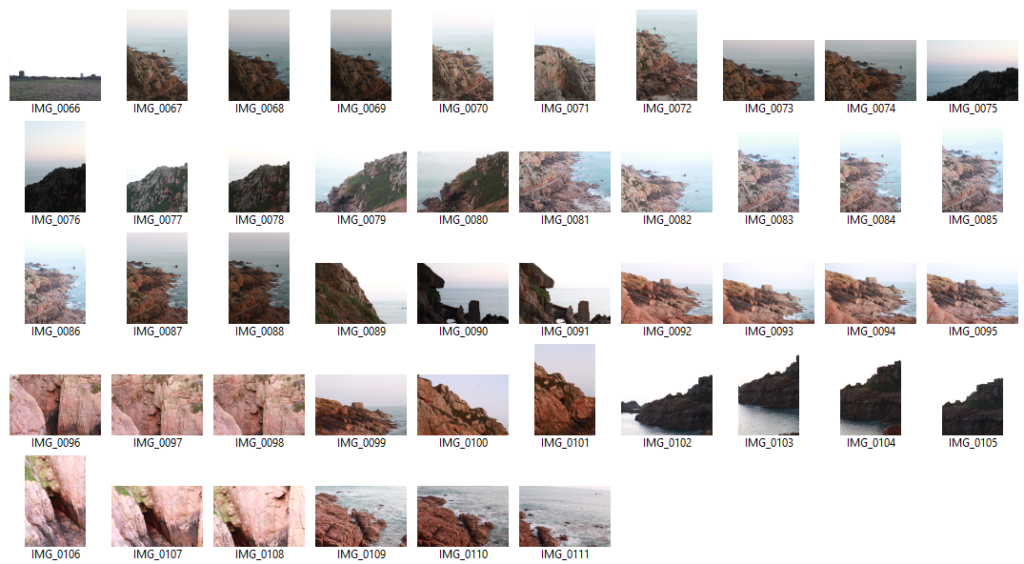
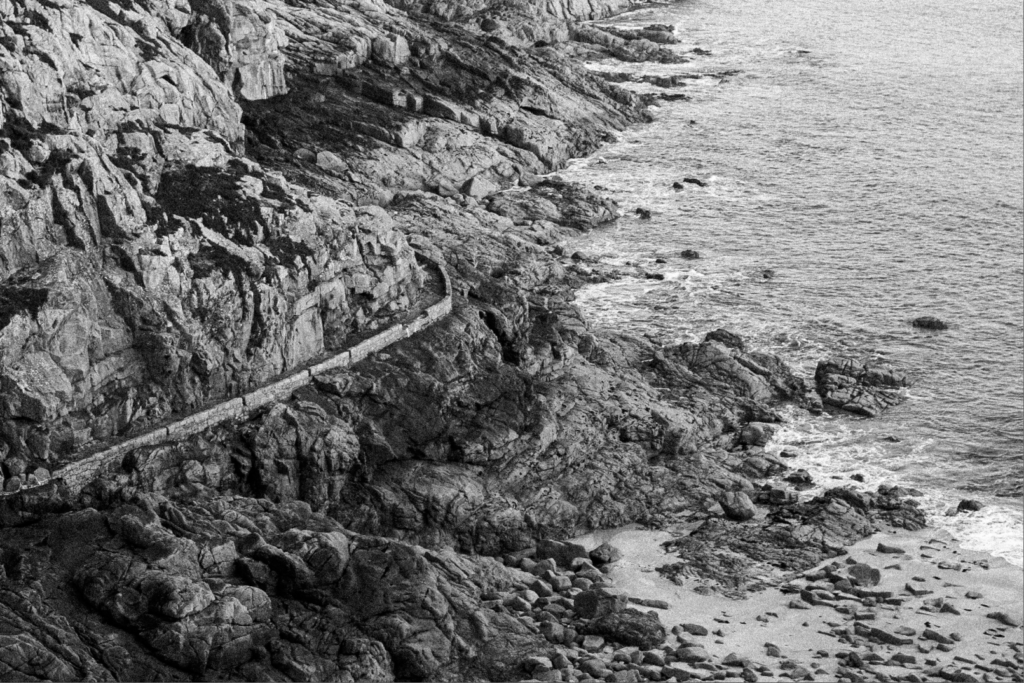
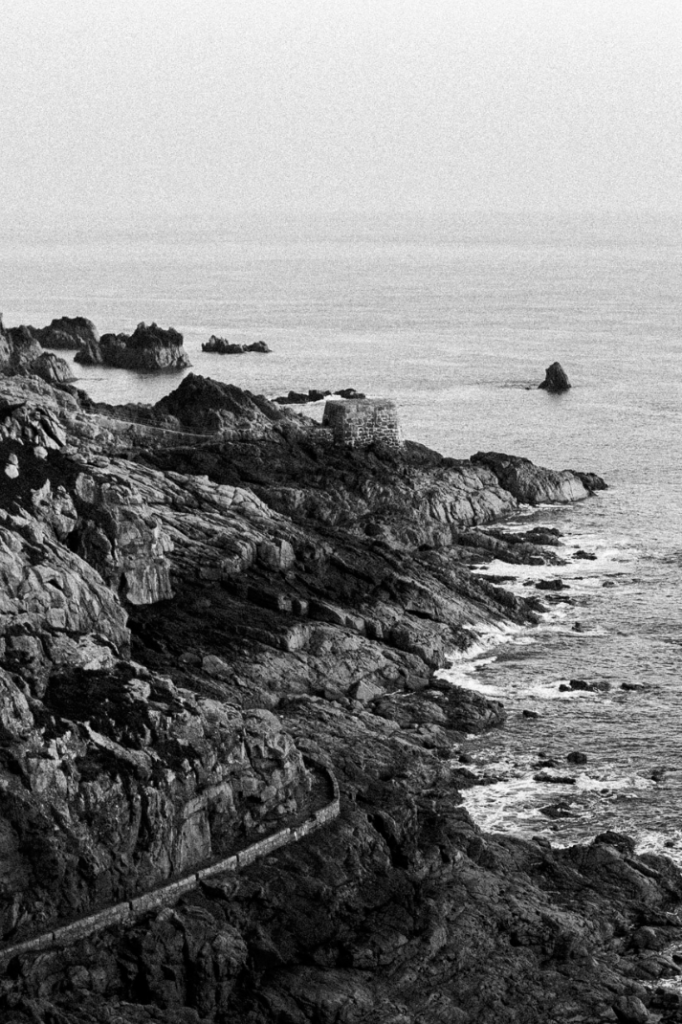
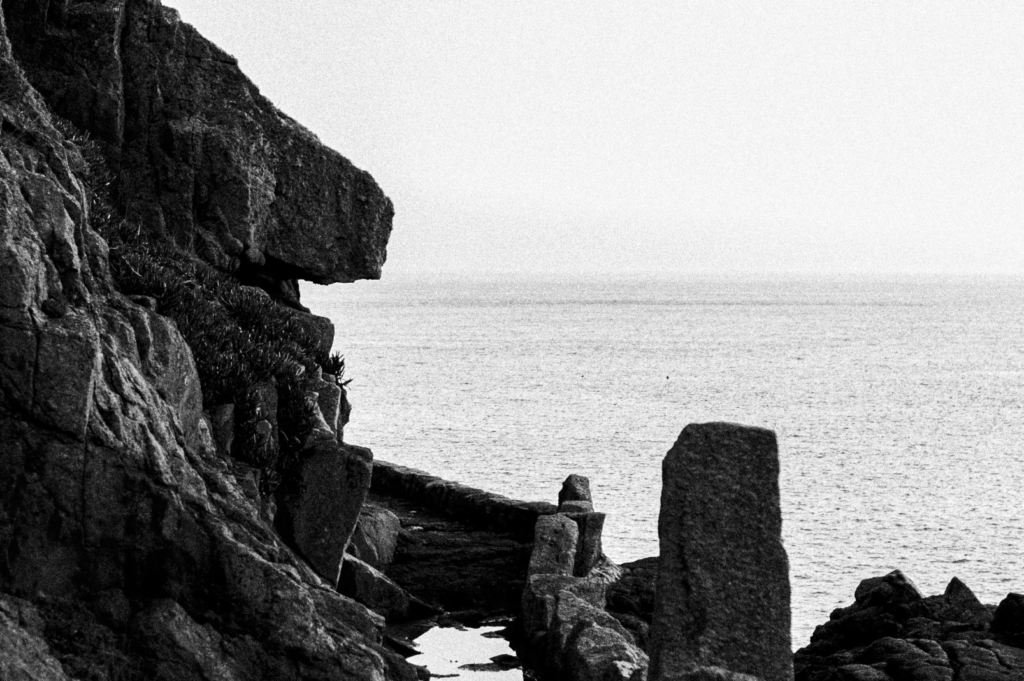
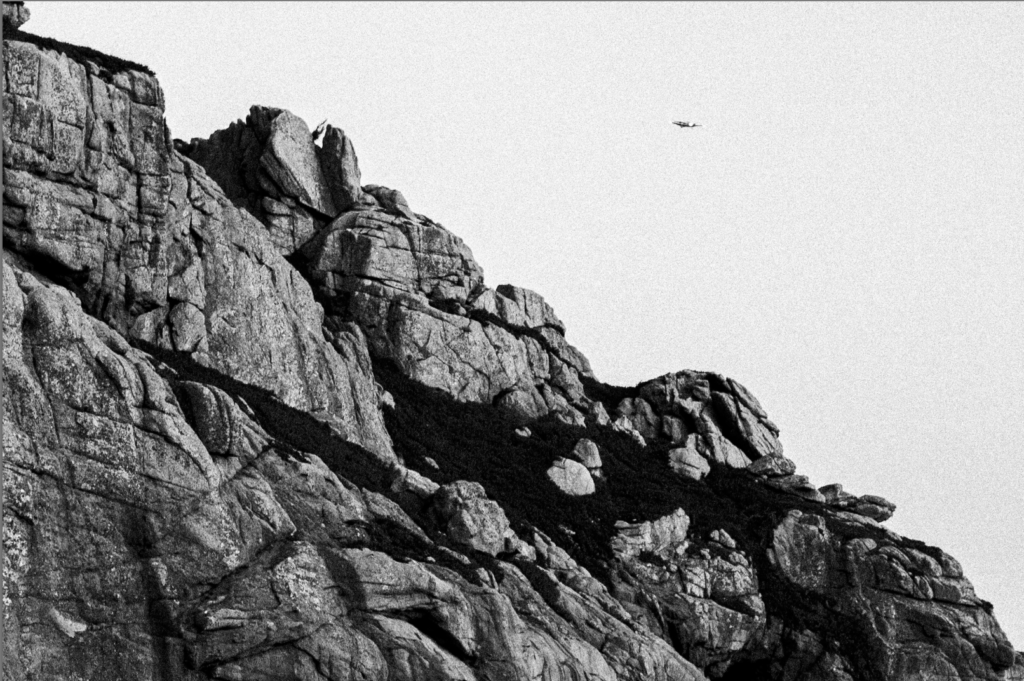
To edit these photos I put a grainy black and white filter on them to add an element of timelessness to the photos. I wanted to capture how the area I explored had very different zones – from places that were run down and old – and new shiny places like the image in the top left image.
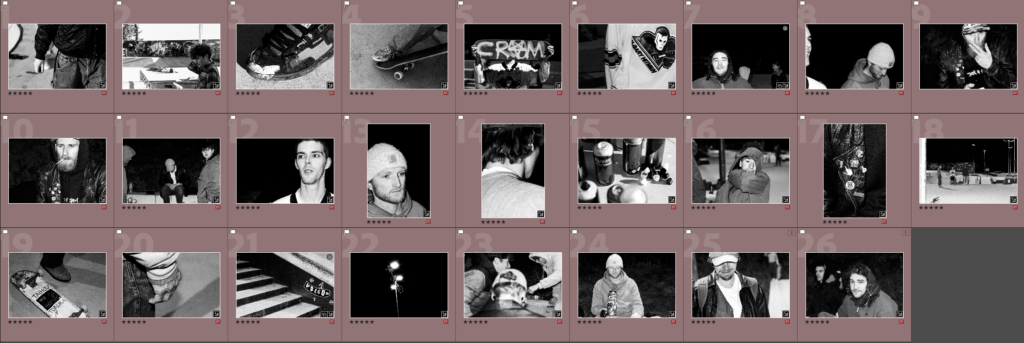
The photos that are selected are all the ones that are worth further editing.
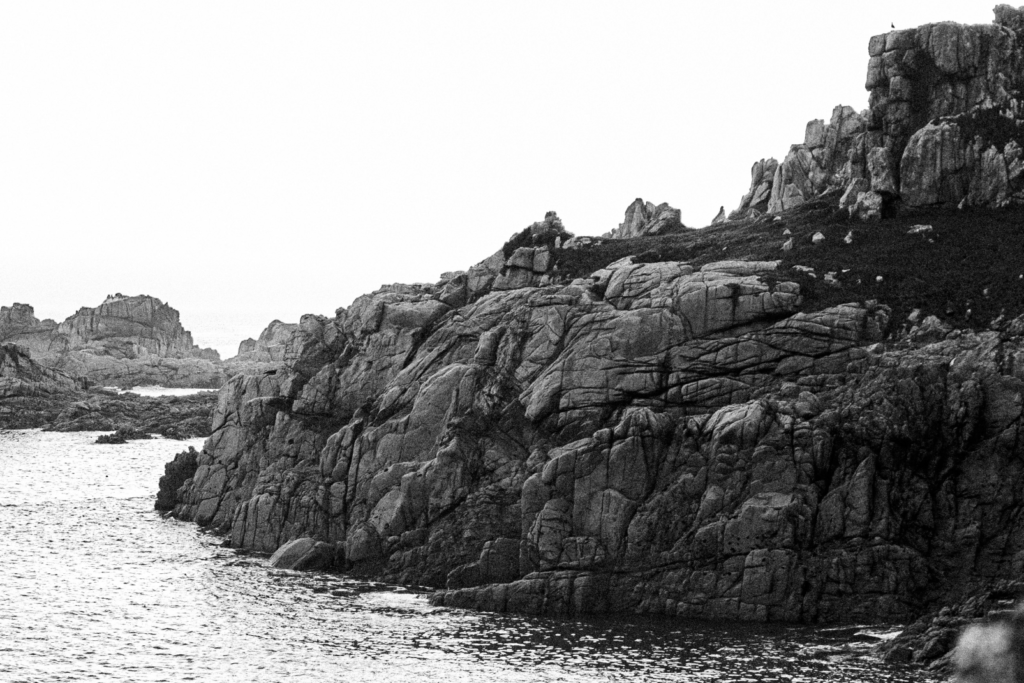
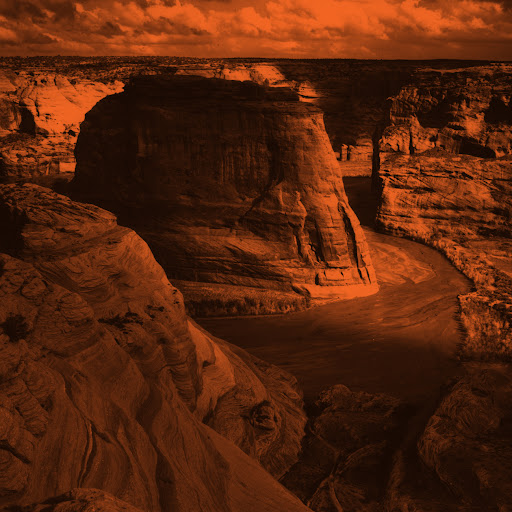
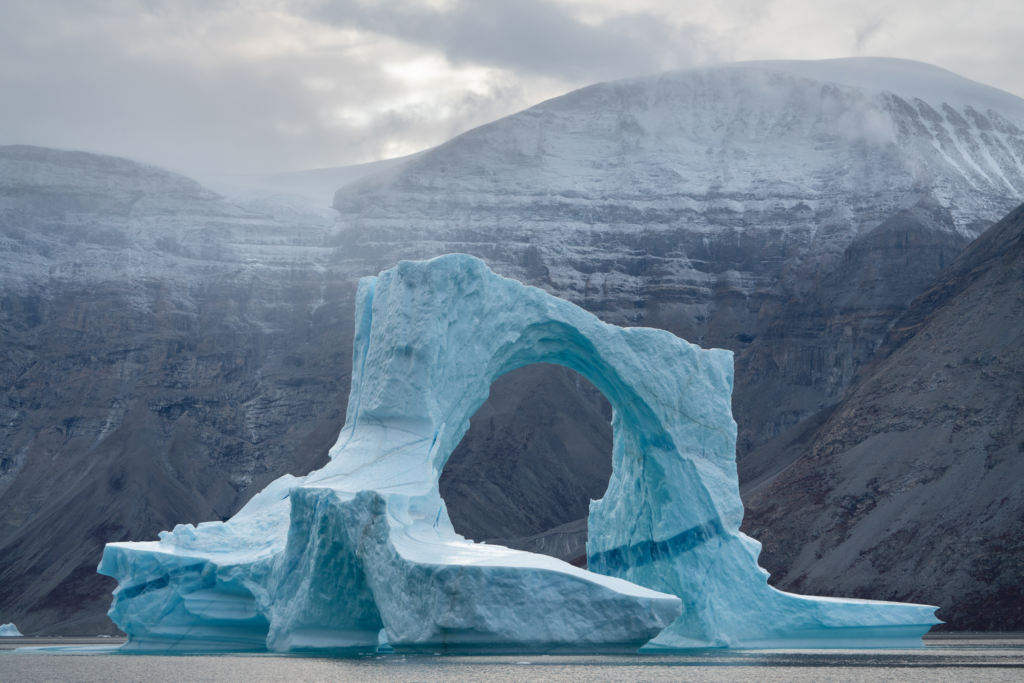
These photos are similar to Ansel Adams because of the formal elements used. Ansel Adams’ photos were all about formality. For example the high levels of contrast and high tonal range that I have captured is similar to his photos. There is a lot of texture in the photos – the rocks and the sea are providing these natural shapes and forms not found in manmade architecture. I have deliberately used a high depth of field by setting the aperture to 16 or above, which is not only reminiscent of his images but also allows the camera to capture detail on all different ‘layers’ of the photos. This creates an effect where none of the image is out of focus. I also tried to keep my shutter speed over 1/250 so there was no camera motion blur and so the sea was crisp and frozen in time.
The place where I took these photos is what is known as an SSE in jersey which means “Site of Special Interest”. This means the area has some particular qualities or wildlife that the Jersey government wants to protect and preserve. I think that is a very good thing as we can see, throughout the rest of the island there is other beautiful landscapes like this that non-local millionaires buy and build massive, ugly houses on – that they don’t even live in most of the time, just for the sake of paying less tax. Sites being SSE’s protects it from this. I did this photoshoot with the intent of supporting this cause as I think massive development on rural landscapes ruins the environment and is actually extremely sad. I aimed to capture the beauty of these places to support this and show people why these places need to be protected.
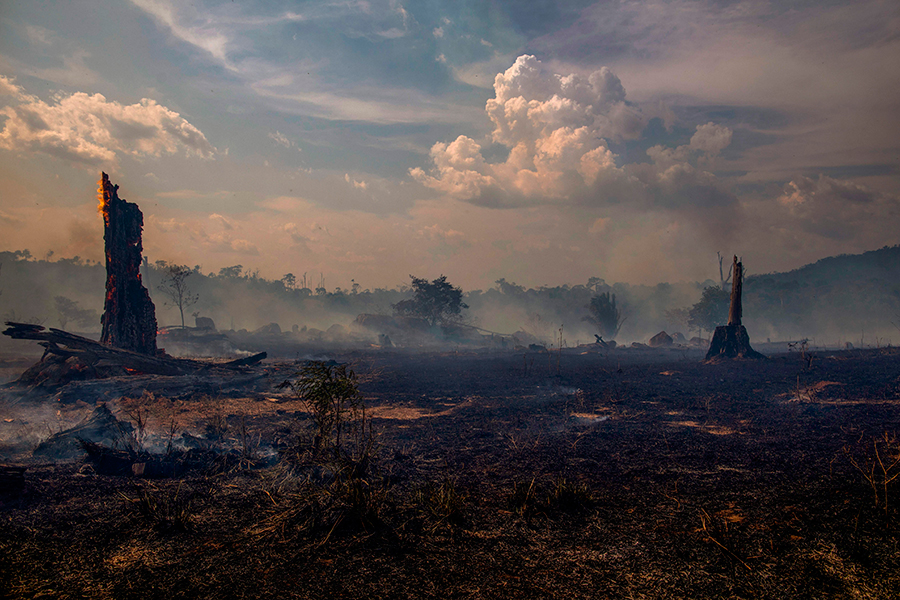
Landscape photography has its roots in, like many other forms and genres of photography, art. Specifically, the romanticism movement of art that began around the start of the industrial revolution – as a sort of rejection and rebellion against the billowing smoke and ugly buildings. The romanticism movement focuses on the beauty of nature and scenery, and this is where landscape photography began.
The first landscape photo was taken around 1826, by an inventor.
Ansel Adams was a pioneer in landscape photography, taking photos of vast american landscapes.
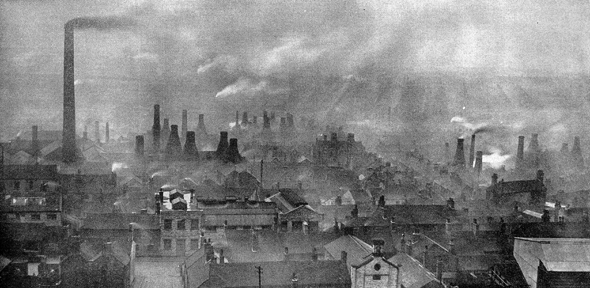
Whilst photographers were taking photos of nature scenery, another type of person was inspired by the industrial revolution, seeing vast structures as inspiring and not ugly, and this was generally the beginning of urban landscape photography.
Countryside Daguerreotypes – these were some of the earliest types of landscape photos taken and were taken by american and french photography.
Western Panoramas – American photographers had a vast natural landscape to photoshoot, so they began to photograph their own landscape.
City photography – suddenly images of the city started to appear – despite the difficulties of city photography due to long exposure shots being necessary, and photos would get blurred.
City portraiture – as tech improved, film became more sensitive and photos of hustling bustling cities became possible.
Industrial revolution – contrasting romanticism, early photographs of the grand industrial buildings began to emerge.
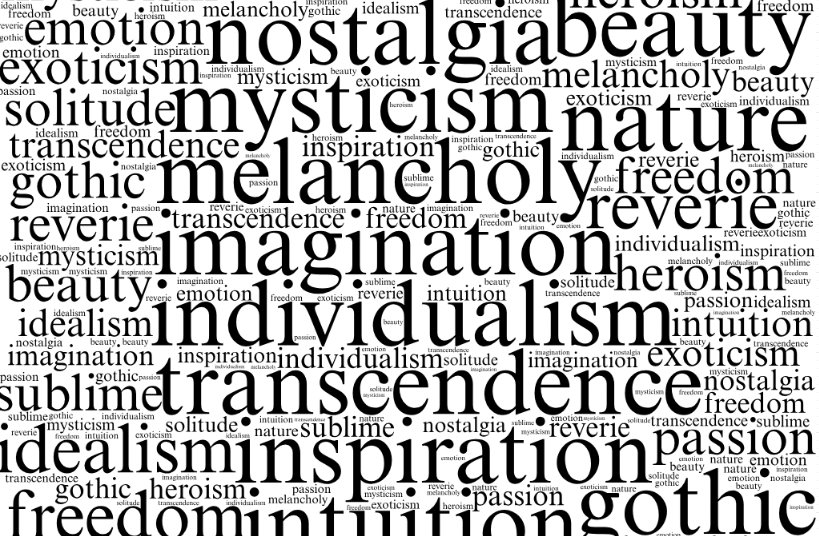
Romanticism in art and photography is about focusing on strong emotions, nature, and individual experience. It highlights beauty, imagination, and sometimes the mysterious or exotic. Think of dramatic landscapes, powerful moments, and emotional expressions. It’s less about strict realism and more about capturing the feeling of a scene. It involves romanticising certain things like nature or a certain lifestyle. For example, in photography, you might romanticise a landscape by capturing the best scenes only and perhaps putting a feeling of otherworldiness/ nostalgia. When you romanticise something, you make it seem better than it really is; in a way, everything humans think about is romanticised: the grass is always greener on the other side. An example of life being romanticised in our minds is thinking about the life of being an underground artist in New York (think Basquiat) is highly romanticised and the image of it looks really appealing/romantic, but in reality it is quite a hard life to live, and that feeling of romanticism that you get when looking at images isn’t necessarily how that person living that life might be experiencing it.
Romanticism placed particular emphasis on emotion, horror, awe, terror and apprehension. Emotion and feeling were central not only to the creation of the work, but also in how it should be read. Romanticism is meant to invoke strong feelings and really glorify the scenes of which it captures.
Romanticism can also have a link with landscape and nature . Landscapes became subjects in their own right and were often charged with symbolism. For romantic artists, nature is a source of inspiration and escape, a refuge from the tumult of the modern world. Landscape is often a key focus of romanticist artists because the nature the photos contain is often raw and places people don’t see very often – creating that feeling of longing for a different path or a different feeling towards life.
Who: artist William Blake and the Spanish painter Francisco Goya have been given the name “fathers” of Romanticism by various scholars for their works’ emphasis on subjective vision, the power of the imagination.
What: an artistic movement marked by the emphasis on imagination and emotions
Where: romanticism started In western Europe around the 18th century at this time the artistic and cultural movement was being revived (Neoclassicism)
How: With its emphasis on the imagination and emotion, Romanticism emerged as a response to the disillusionment with the Enlightenment values of reason and order in the aftermath of the French Revolution of 1789.
Why: Romanticism was born as a reaction against the Age of Enlightenment and the Industrial Revolution. The Romanticist movement celebrated rebellion, sensation, emotion, subjectivity, and individuality and it rejected tradition, reason, rationality, and authority.
English romantic painter and water colour specialist , known for his romantic paintings that portray colourful imagery and imaginative landscapes. Joseph Mallord William born 23rd of April 1775 inspired modern art by incorporating a view of impossibility into his paintings by inviting unrealistic colouring and faded scenery to give a sense of romanticism
The Sublime
In the critical literature, “the Romantic sublime” refers to the mind’s transcendence of a natural and/or social world that finally cannot fulfil its desire. Revealed in the moment of the sublime is that the mind is not wholly of the world, but this revelation may be triggered by a particular setting in the world.
The sublime as defined by The Tate is : “Theory developed by Edmund Burke in the mid eighteenth century, where he defined sublime art as art that refers to a greatness beyond all possibility of calculation, measurement or imitation.”
The sublime is in most creative subject areas; photography, fine art, film, writing, poetry and many more.
MY PHOTOSHOOT
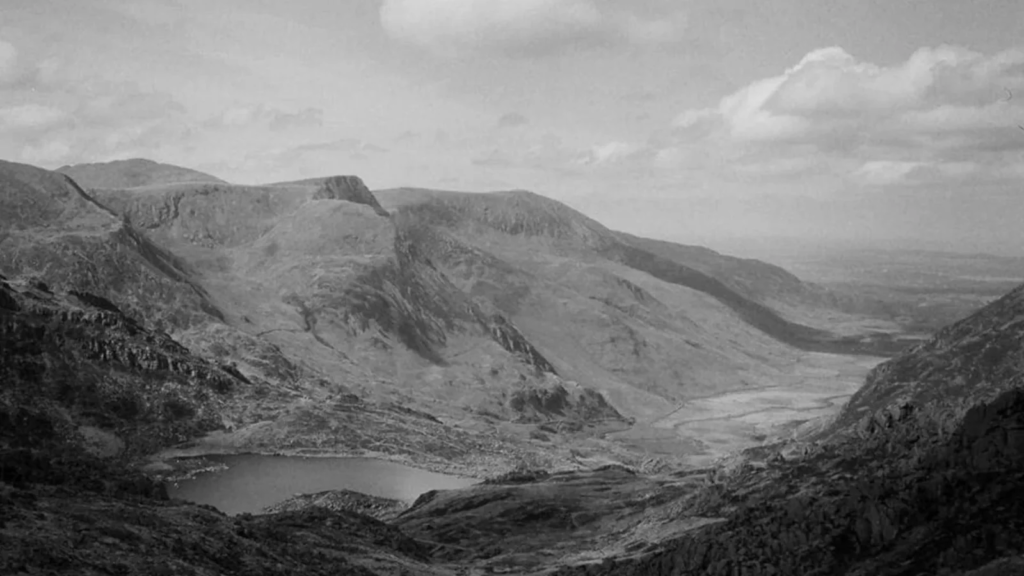
In the French alps I went to take photos
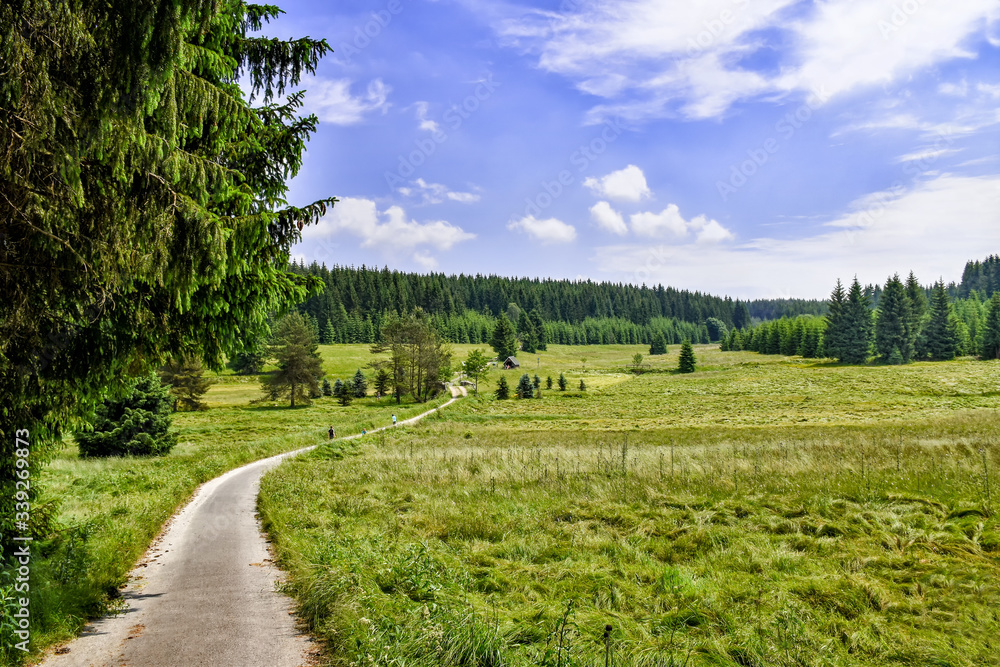
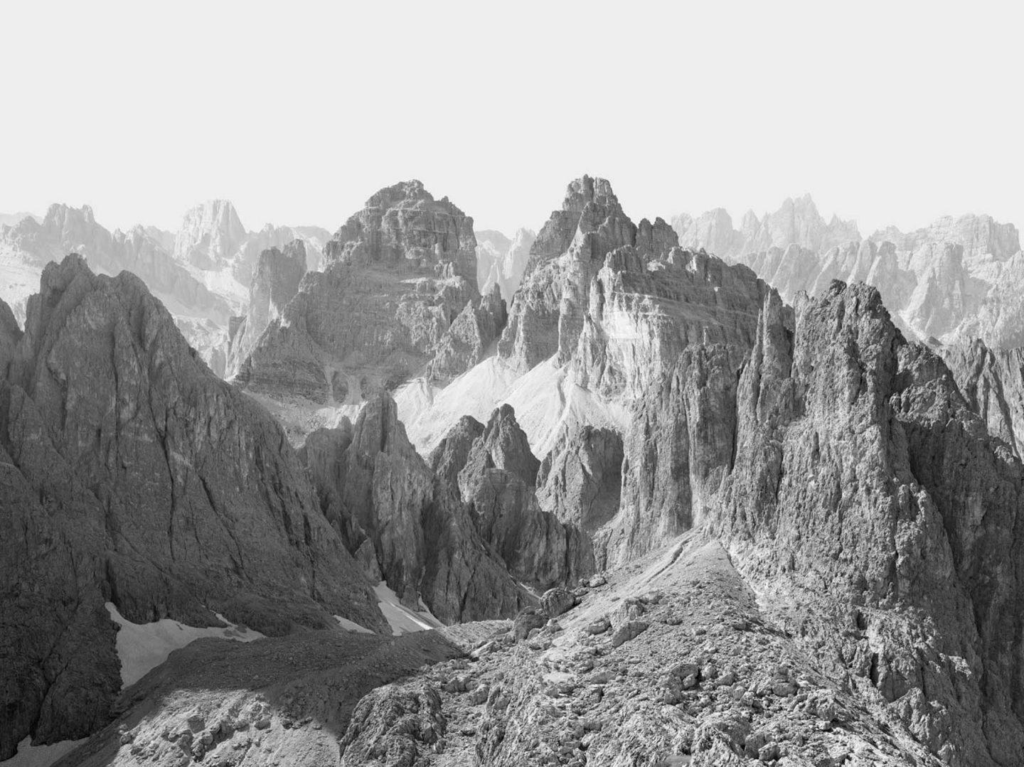
I wanted to create a very moody feel to these images which is why I waited for a day when the clouds were low and were at all different levels between my and trees and those behind. This creates a lot more atmosphere and adds way more depth, emotion and has more elements of romanticism – emotion. These photos feel like a sad rainy day to me. Or maybe that’s just me projecting.
Ansel Adams is a landscape photographer and environmentalist, grew up amid the sand dunes of the golden gate. He takes photos of cliffs and vast open landscapes. When he was young the aftershock of an earthquake broke his nose. He took a big majority of his famous photos in the ‘John Muir Trail’. He grew recognition as a photographer in the 1930s, due to his beautiful photos and sheer commitment to the profession. He is now a world famous photographer who many say is one of the greats. He died on the 22nd of April, 1984.
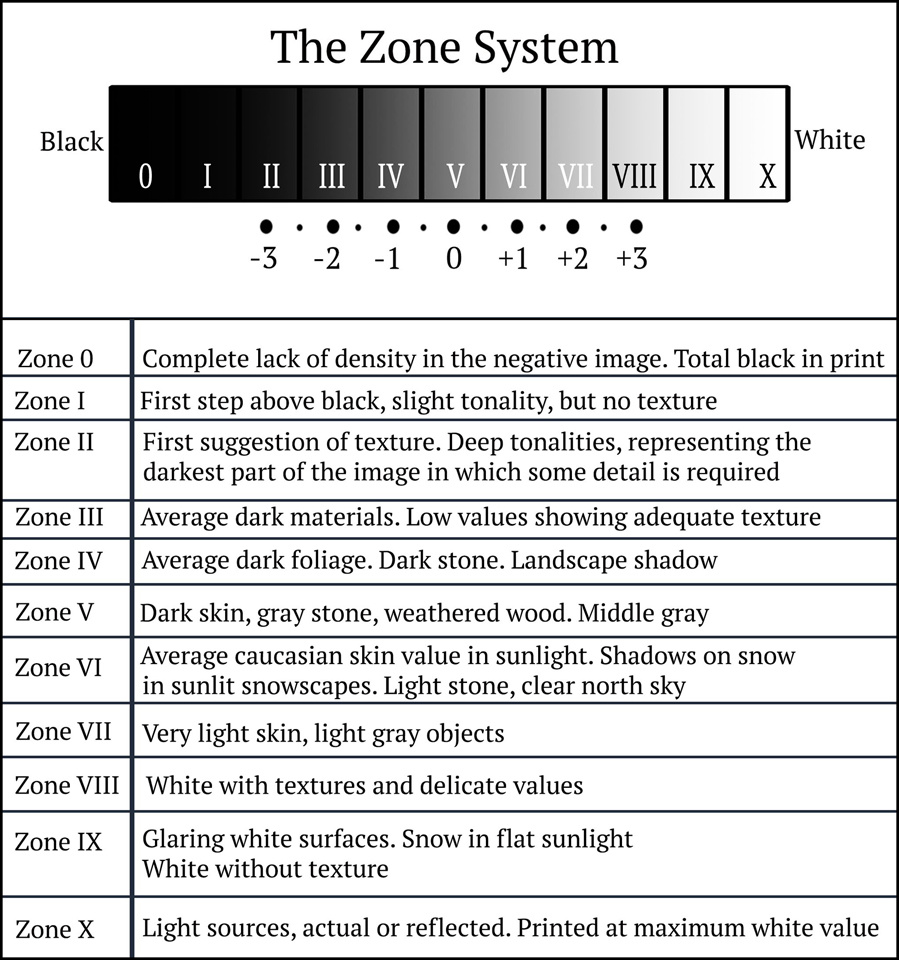
Adams, along with Fred Archer, developed what is known as the zone system. The zone system is a method of relating and controlling exposure to the film, and development. This technique is copied very often, but not many people have mastered it.
F/64 was a group of west coast photographers including Ansel Adams. The group was founded in 1932. The name refers to the aperture in the camera being very small which made a very deep depth of field and the highest possible sharpness in the photos – the name relates to the groups philosophy. The group advocated for what they called “straight photography” which was pretty much photos which the deepest depth of field, the sharpest possible, a very rich tonal range and a sharp focus – without manipulation. The group was aiming to create a movement away from pictorialism. Pictorialism was the soft, painting style photography that was used by many early 20th century photographers. As a group they generally focused on natural landscapes, using national parks to achieve this (Yosemite etc).
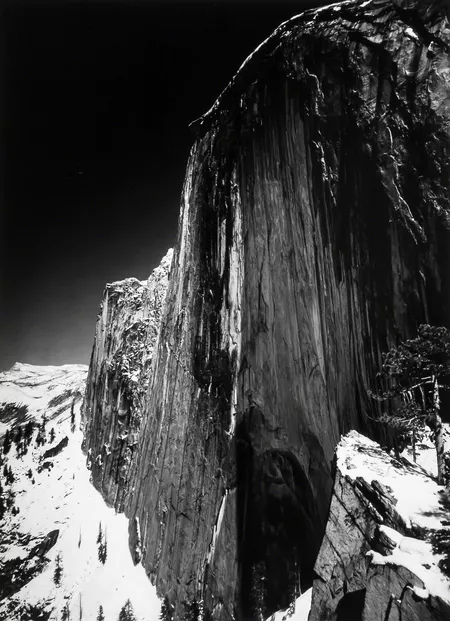
Ansel Adams took photos because he wanted to capture what he saw. Originally, he took photos documenting his travels and his expeditions but he thought they lacked the soul and the power that he really saw in the scene. He developed a technique called visualisation to capture what his minds eye saw. The first time he did this, he used a strong red filter to darken the sky and create an unprecedented mood and atmosphere in his images. Photos with this much tonal range and such deliberate exposure had never been seen before.
The photo I just mentioned. (red filter)
I personally love his photography, it is inspiring and makes me feel small seeing the vast landscapes filled with huge mountains and wide, running rivers. The contrast is amazing, and the focal points really stand out. His photos have inspired me to look at the Jersey cliffs and think about how I can make my photos look like his, in regards of contrast, lighting and the vastness of his scenes. His photos often mainly consist of dark tones, often silhouettes, and it makes the scene look powerful, like there could likely be a thunderstorm, although it was likely sunny. Often the only midtones visible in his photos are in the sky. To conclude, his work really stands out to me.
Image Analysis
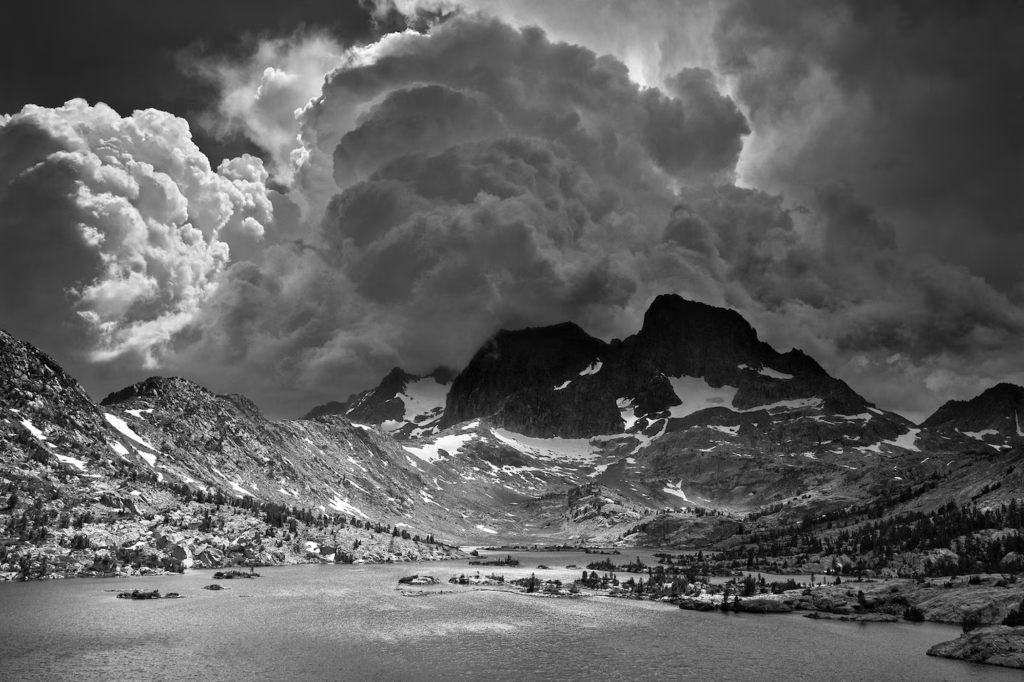
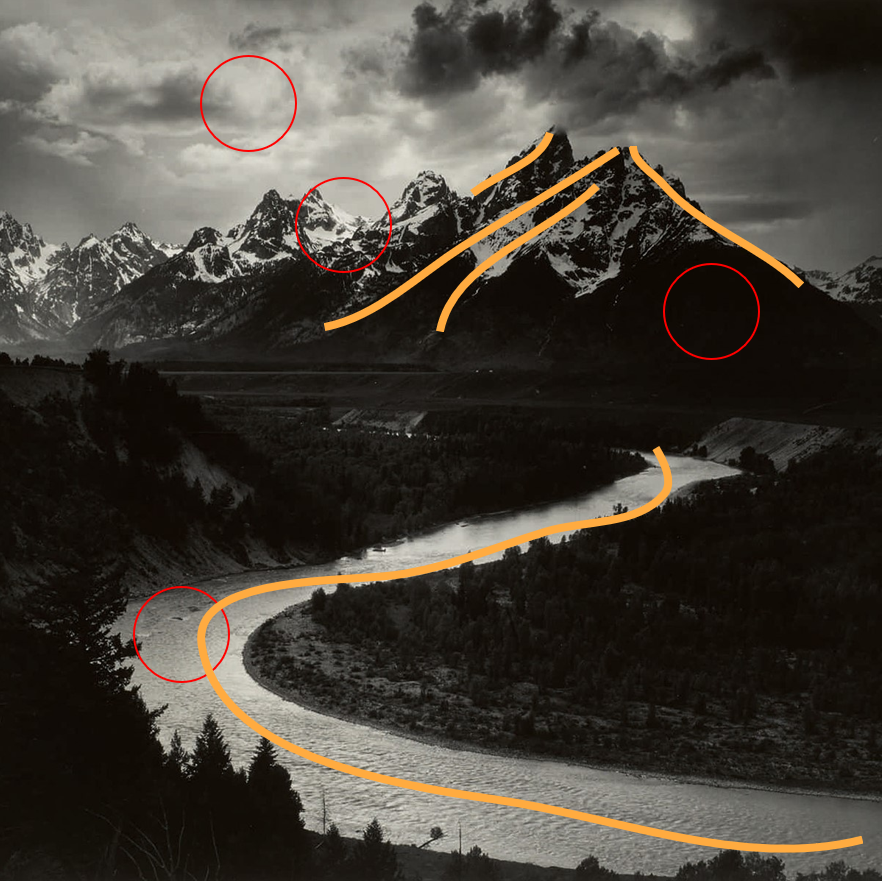
This is a film photo of a wide river leaving to a tall, snowy mountain range. The genre of this style of photography is landscape. The mise-en-scene presents the sky, filled with dark, dense and contrasting clouds sitting above some snowy mountains. The mountains are often a solid black, perfectly contrasting the snow. Below this, is a river that leads to the mountains. The colour/tone in this image very dark and ominous. For example, if you look at the base of the mountains, or the trees to left of the image, there is hardly any texture visible. However, contrasting this is the river and the sky, which both have mid and light tones to oppose the extremely dark tones of the rest of the image, and stand out. The photographer (Ansel Adams), has clearly used leading lines, which you can see: the river clearly snakes up to the mountain range. The mountain range’s edges also lead up to the highest peak. The use of light in this image is quite varied ranging from dark, to mid, to light. I have circled the most extremes of these points of light. The depth of field is very deep, the whole image is in focus.
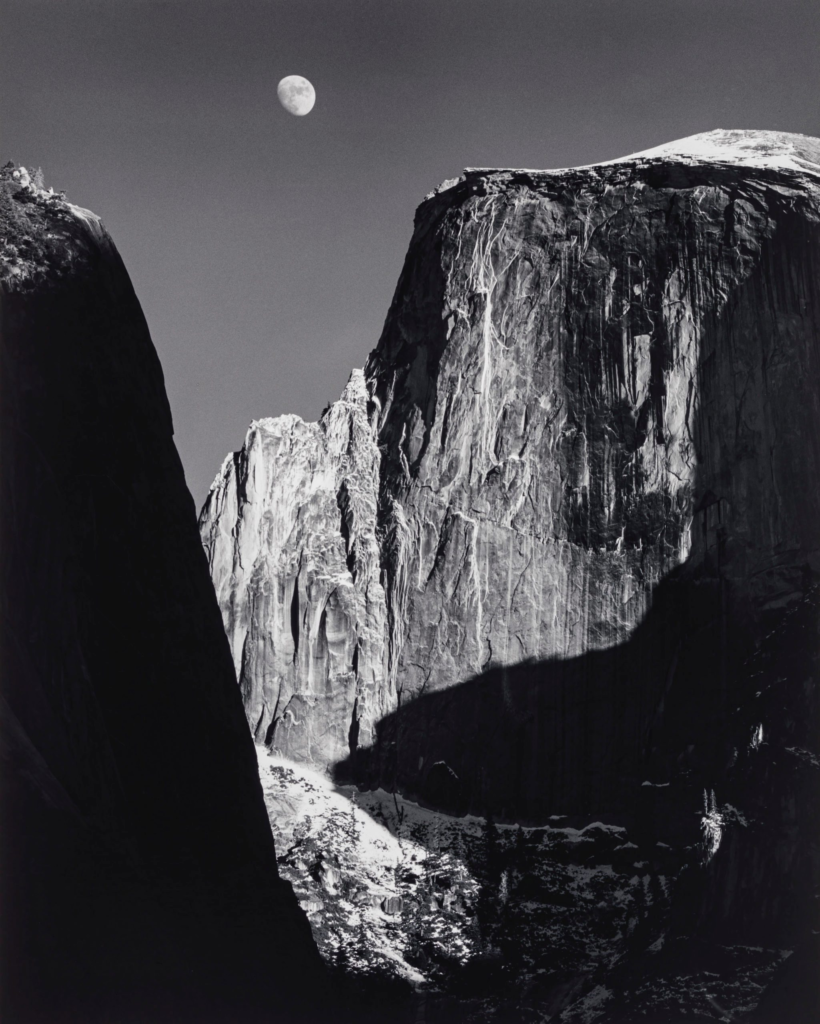
This image using lighting with a very high amount of contrast – very deep blacks and very bright whites; the photo has a very big tonal range. The deep blacks present in the mountains provide strong negative space that almost frames the moon and the lit part of the image. The aperture was likely very high like f/22 because of the very wide depth of field. I would believe that Ansel Adams used his visualisation technique and zone system in order to achieve the high contrast and deep blacks – he probably used a colour filter. The ASA was definitely as low as possible to minimise grain, but since it was film it was likely quite tricky to decide which roll to bring on the trip – or he brought lots of rolls and decided for each shot. The amount of texture is astoundingly high because of the high levels of contrast he managed to achieve. There are lots of harsh lines in the image – like the cliff to the left that is solid black contrasts very solidly against the sky and the other quite bright cliff.
He probably wanted to capture the image with quite an air of mystery – the cliff on the left and the shadows on the right almost shroud the cliff in the middle and the moon. He probably felt a sense of awe and tried his best to capture that – capturing the size of the cliff and the detail on the moon. This was likely one of the first photographs that was thought out so clearly and captured so deliberately.
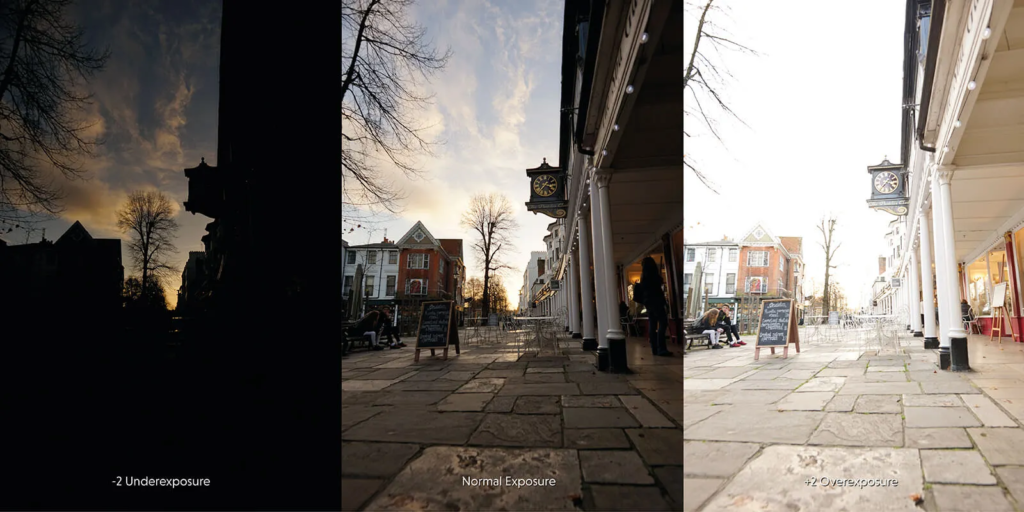
Exposure Bracketing
Exposure bracketing is a method of taking photos where you take three photos of the same scene. You use three different levels of exposure
Underexposed
Correctly exposed
Overexposed
This method allows for a very high dynamic range as you merge the three images and the part of each image that is best exposed will be the most prominent in the image. This method is normally how vivid, perfectly exposed images are created.
A visual example
The type of image it can create
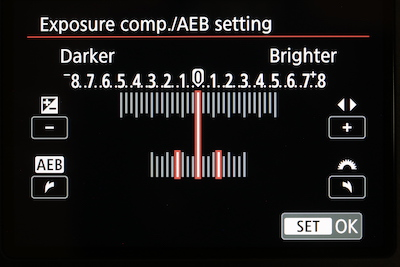
Some modern digital cameras have AEB (Auto Exposure Bracketing). This feature basically does it all for you, taking three photos with different levels of exposure. Its usually a setting that you have to turn on.
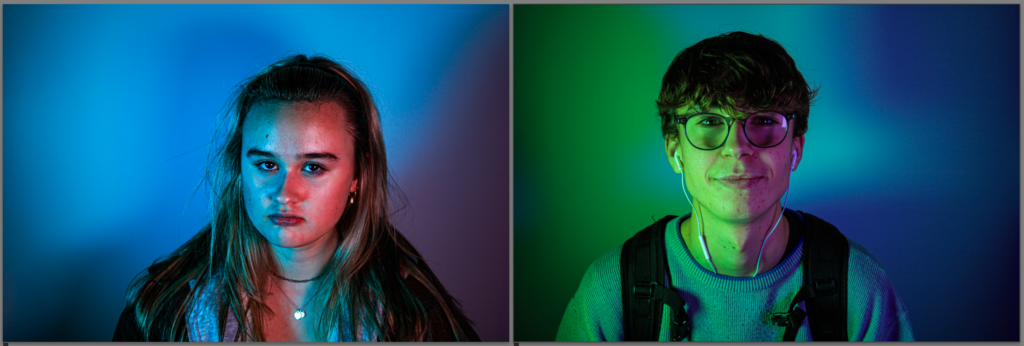
For the studio portraiture I think my favourite outcomes are the coloured lighting ones, they have a fun feel to them and I like the way all the detail on the face stands out.
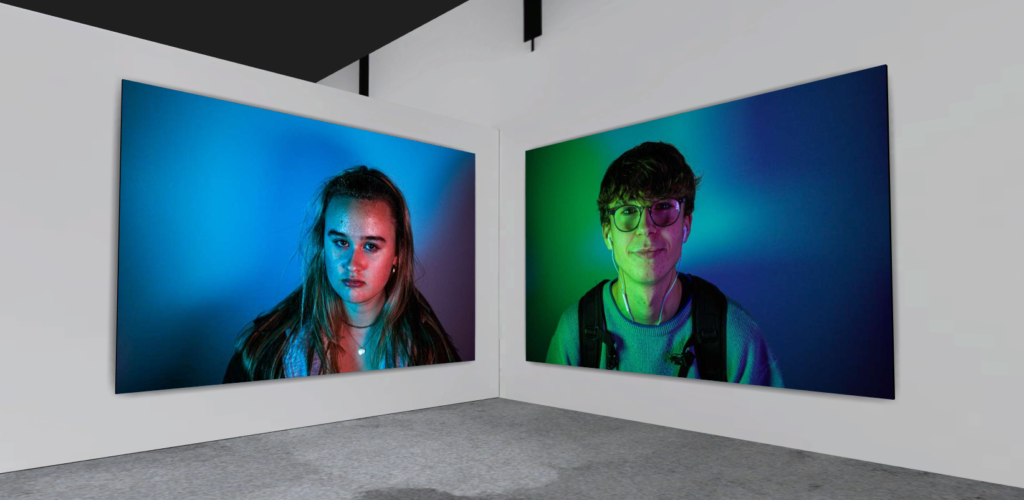
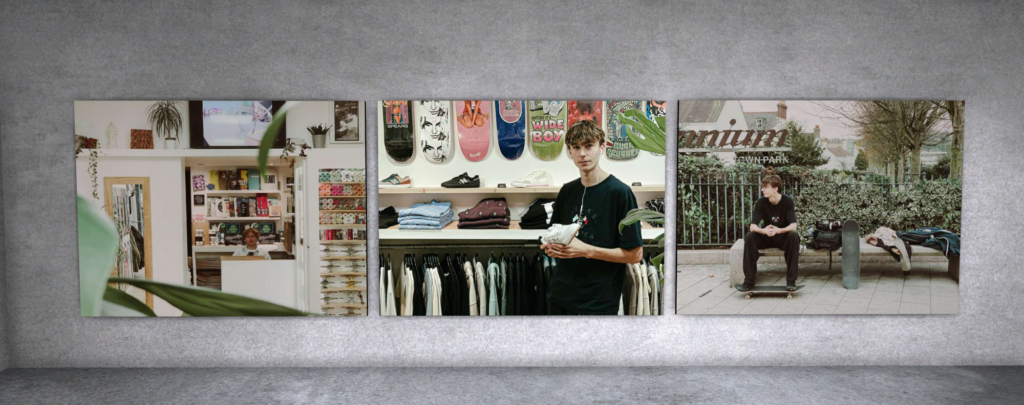
Here they are in a virtual gallery.
These photos will look nice together because they both share a common shade of blue, and also have a contrasting red and green next to each other. The high amount of detail on the skin in the photos I think looks really visually effective and high quality.
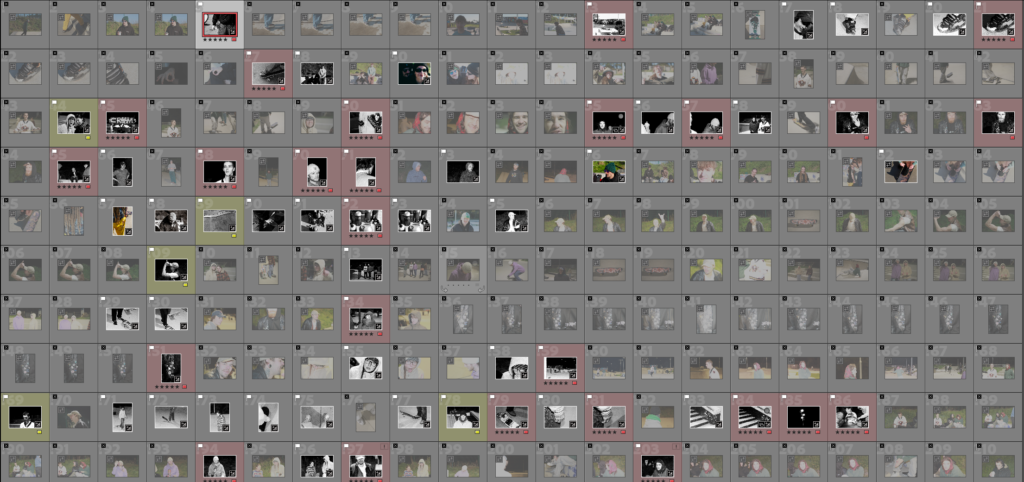
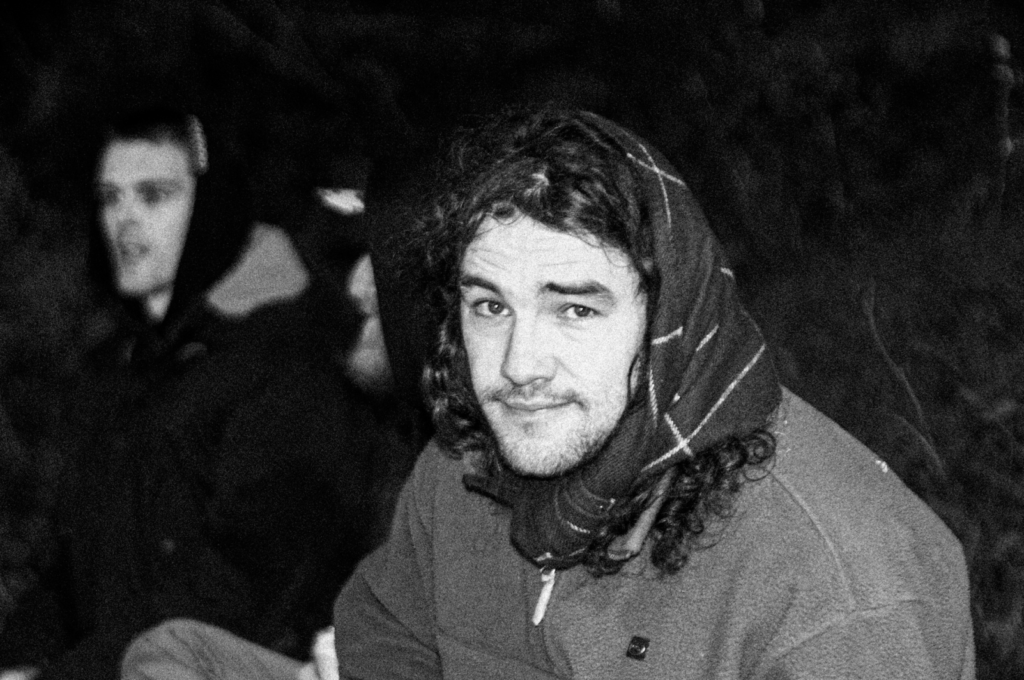
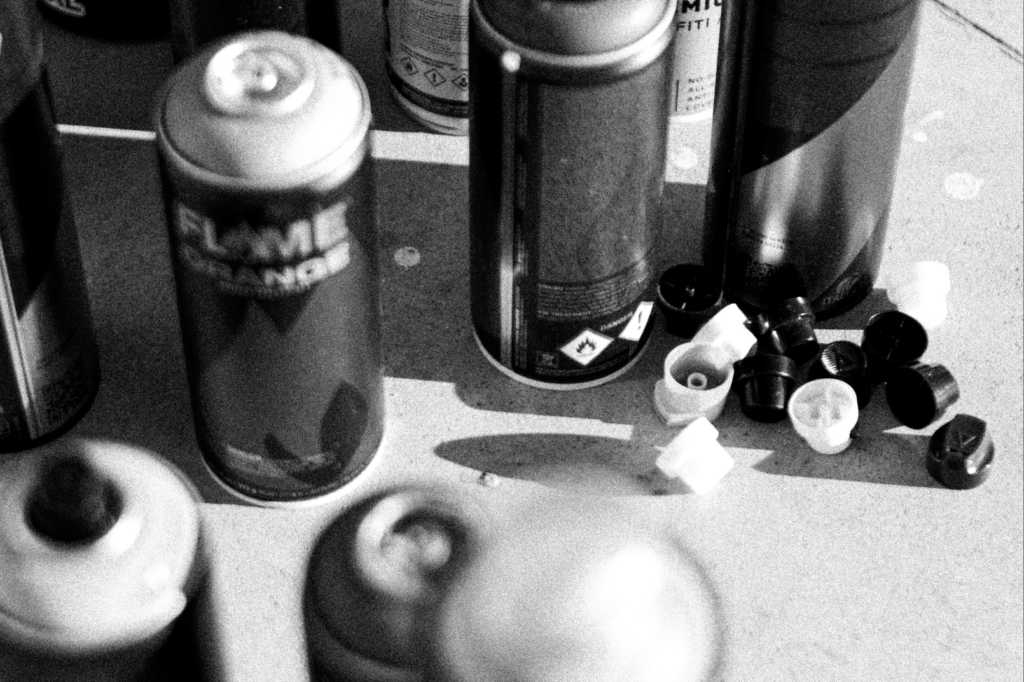
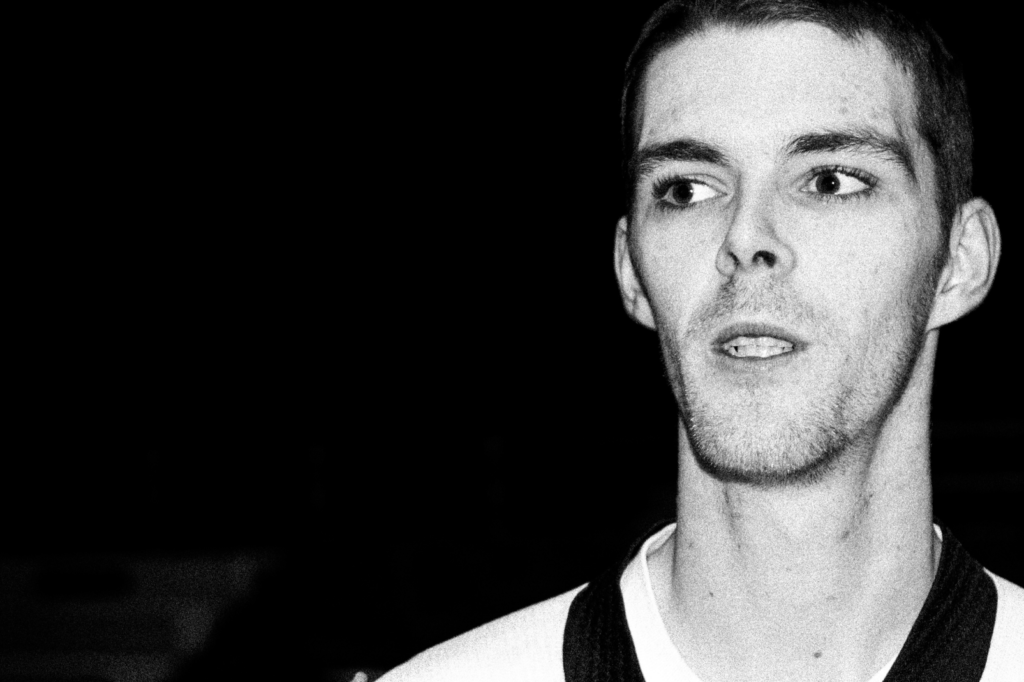
These were all 212 photo that I took. I then narrowed it down to the better images – the sharpest ones that capture the best facial expressions or momentsThis is the list of selected photosI then further narrowed it down the best of the best images. Despite this being portraiture photography, I have also photographed small details like shoes, belts, trousers, lights, the setting, to further tell the story and portray the identity of the identity.
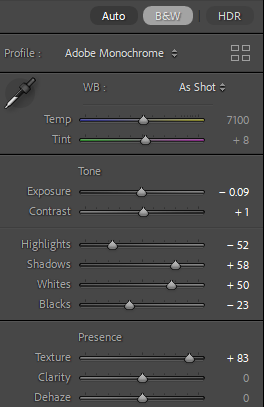
I then did the appropriate adjustments on each image.
I tried to add contrast to all the ones that needed them to match the contrast that the B&W filter gave some of the others. I turned the exposure and highlights down in a lot of them because the flash made some of them overexposed. I also turned up the shadows in a lot of them for more contrast.
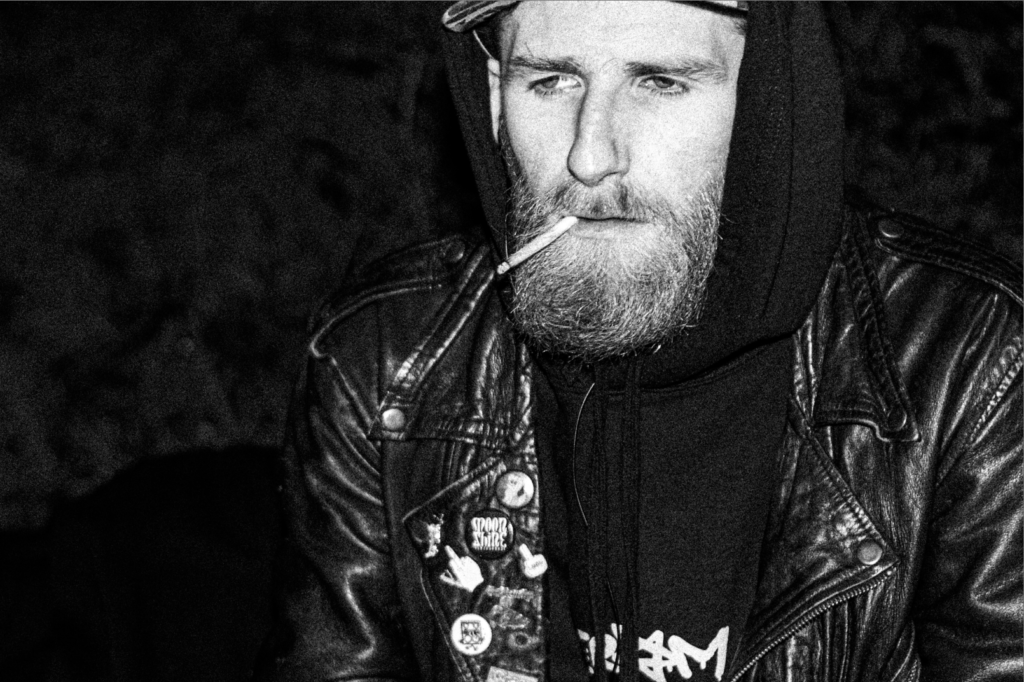
Final Images
Bigger Versions
My plan now is to create a zine of all these photos as I think that is the best way to tell a story with photos – since they are all edited the same way I think they’ll look really great as a well thought out and put together set.
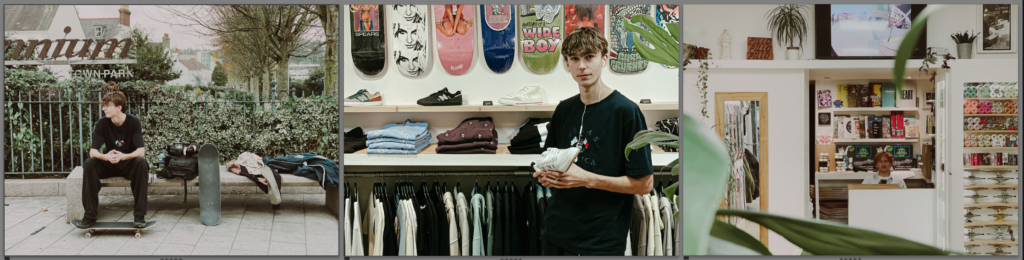
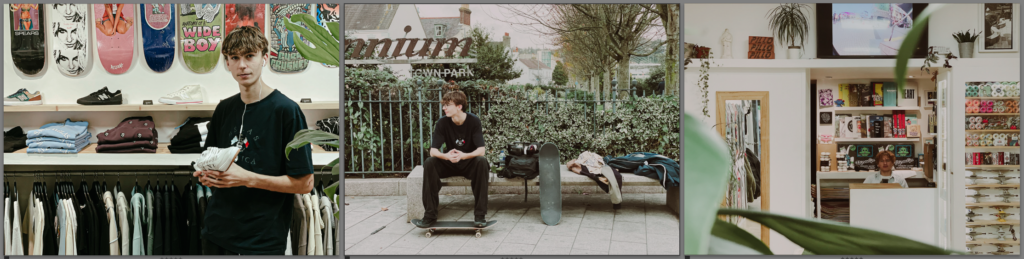
I’ve got three really effective images in my environmental portraiture, and for the final piece I’m going to have them as a triptych, A5 and all one on top of the other. I think this is the best way to layout these images as they speak for themselves.
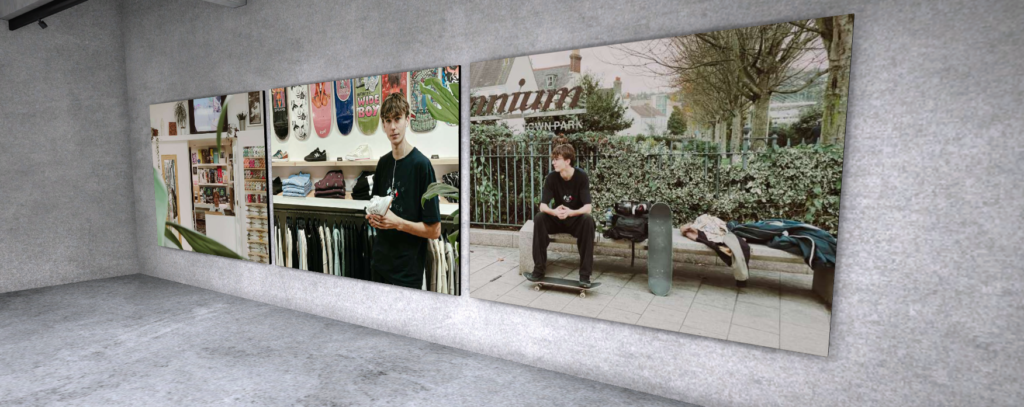
Another way of laying them out.
Evaluation:
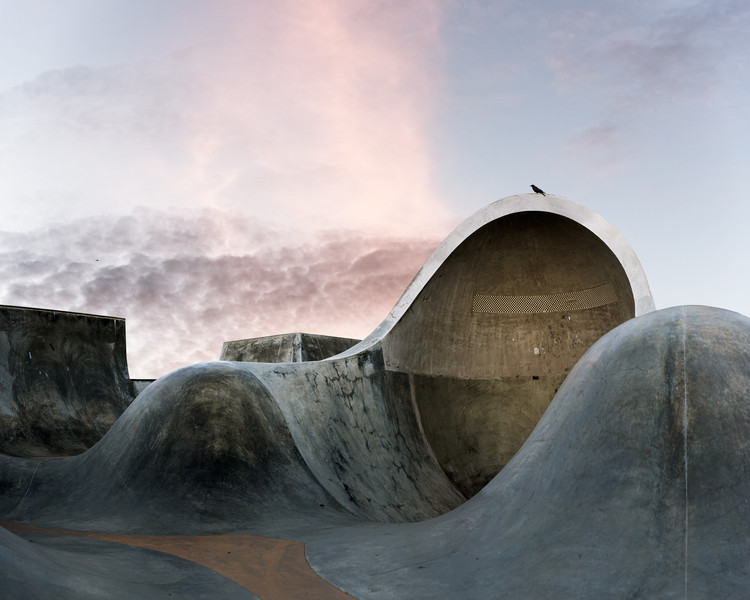
The photos have a nice vintage effect to them and go together quite nostalgically. They almost have a dulled down saturation which resembles film. They are quite simple images that just capture a random moment of skateboarders just hanging out quite serenely.