IDENTITY POLITICS is a phrase that describes a political approach where in people of a particular religion, race, social background and class or other identifying factor form special socio-political alliances. It makes the distinct experiences and challenges faced by these groups and advocates for policies and practices that address their specific needs and rights.
The term was coined by the Combahee River Collective in 1977. It took on widespread usage in the early 1980s, and in the ensuing decades has been employed in myriad cases with radically different connotations dependent upon the term’s context.
It has gained currency with the emergence of social activism, manifesting in many dialogues within the feminist , American civil rights , and LGBT movements , disabled groups, as well as multiple nationalist and postcolonial organizations, for example: Black Lives Matter movement.
How does Identity Politics link to Culture Wars?
CULTURE WARS are cultural conflicts between social groups and the battle for dominance of their values, beliefs, and practices. It commonly refers to topics on which there is general social disagreement and polarization in societal values is seen.
A “culture war” will signal much more than a disagreement. It will describe an impression of conflict between two irreconcilable worldviews in what is “fundamentally right and wrong about the world we live in” (1991).
This term is commonly used to describe contemporary politics in western democracies with issues such as abortion, homosexuality ,transgender rights, pornography, multiculturalism, racial viewpoints and different cultural conflicts based on values, morality , and lifestyle being stated as the major political cleavage.
What are some of the positives associated with Identity politics?
Identity politics will help centre the experiences of those as they will view as they will be facing some systemic oppression so that society can get better understanding the interplay of different forms of demographic-based oppression and ensure that no one group is disproportionately or affected by political actions.
Dangers of Tribalism
Tribalism is defined as “behavior and attitudes that stem from strong loyalty to one’s own tribe or social group.”
The definition of as “a social division in a traditional society consisting of families or communities linked by social, economic, religious, or blood ties, with a common culture and dialect, typically having a recognized leader.” When we listen to the word tribe, we may think of Native Americans, but in modern usage the term can also refer to people who share common ideas and allegiances.
Tribalism
Tribalism can have extremely negative consequences when it is used to eliminate individuals or groups or to banish their rights, status, and/or independence. These negative impacts of tribalism are often sustained by competition and the perception of a very common threat. They will promote fear, anxiety, and prejudice, all of which make us more susceptible to fake news, propaganda, and conflict. Tribalism can take lots of forms in our modern society. One example of tribalism is individuals’ strong connections with sports teams. These partnership are frequently built on regional identities and approved through the use of symbols. We often see deep connection between fans of a specific team who classify strongly with each other and against fans of opposing teams.
Creative Portraits are what types of things will surround the photograph and its only a single shot.
Double/Multi-Exposures
Double/Multi-Exposures is creating an illusion by layering images (Section of images), which are over the top of each other. This may be achieved by using the correct camera settings ,or using Adobe Photoshop also by creating layers and then using BLENDING OPTIONS and opacity control, by getting rid parts of layers to then reveal other parts of the image.
Examples of DOUBLE/MULTI-EXPOSURE PHOTOS
Above there are some examples of double/multi-exposure photos , these photos were taken from many different artists.
Artist Reference
A famous Man Ray Photo
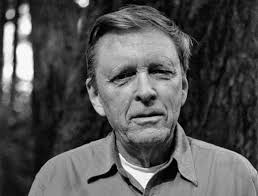
Technical- The lighting in this image is a natural lighting due to no lights reflecting on the photo. The aperture was likely quite large with a low f/stop number. This is because the man is in focus but the background isn’t in focus . Moreover the shutter speed was most likely quite quick, I can tell this because there is not a lot of motion blur and the man is in focus, I think it is something like 1/120 or 1/250. The ISO is most probably low, something like 100 or 200. Due to no visual noise and it doesn’t have a degrading quality.
Visual- There is no colour due to it being black and white, however its quite a light tone due to the bright and natural lighting. The man has rough, old skin which brings a large amount of texture to this photo and furthermore because of the multi- exposure due to two face being reflected in the photo. This image appears 3D. The rule of thirds is followed in this image, this is apparent because his eyes and head are in the centre and most of his body is not present in the image.
Man Ray
Man Ray was a visual artist and he spent most of his time in Paris, France. He was an important contributor to the Dada and the surrealist moments. He was also a painter. He was Born: August 27, 1890, Philadelphia, Pennsylvania ,United States and Died: November 18, 1976 (age 86 years),6th arrondissement of Paris.
Examples Of His Work
My Double Exposure Photos
Contact Sheet
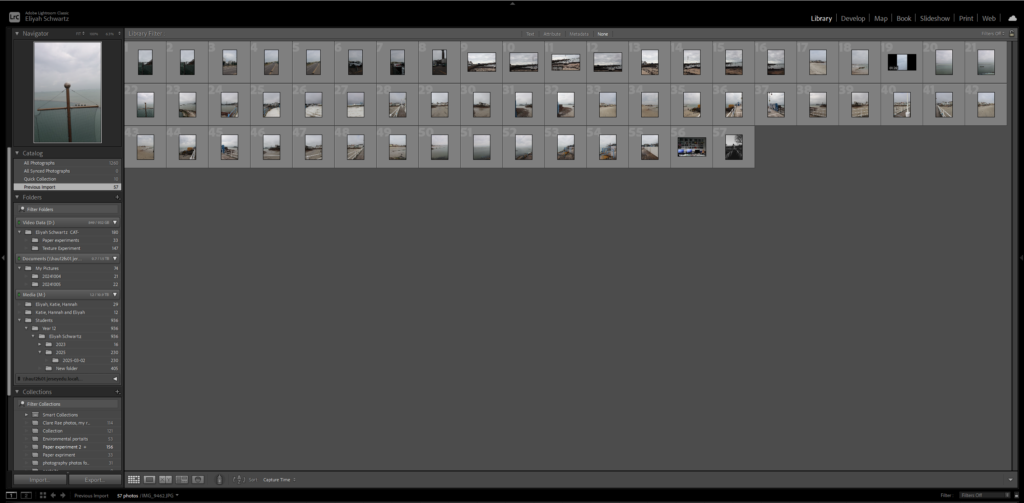
This my contact sheet for my double exposure photographs.
Image Selection
Above you can see above I used P and X to flag my images to filter out my worst ones from the ok and good ones, next I rated these images 4 or 5 stars as 4 being ok ones and 5 being good ones, finally I gave them the colour yellow or green, green being the best and yellow being good.
My Double Exposure Photos
This photo didn’t need to be cropped on the sides due to equal negative space on each side this will create a balanced photo. On the top and the bottom it needed to be cropped due to having unequal negative space. To complete this photo three layers very needed to complete the background. In two of the layers I have reduced the opacity to make a shadow of the portrait. By reducing the opacity it removes most of the photo, so it will become a shadow. That is what has happened in my photo. This is a part of Man Ray’s work which adds opacity, shadows and lots of double exposure.
By being cropped, there is equal negative space on the top and the bottom of the photo.
This photo used has used six layers. If less layers were used I don’t think this photo would work out. I have reduced the opacity to 32 percent, this is why the photo has a blurred effect in the foreground. This photo has gave me inspiration from Man Ray, I love the way he gave a distorted effect to his photos.
In the background, I have some stars that you can slightly see. To make the stars in the background I have made a slight shadow so these stars can be clear.
This is the same photo as above, I have cropped it due to both sides having to much negative space ,which will create an unbalanced photo. I have also cropped the photo because I want the subject to be centred in the foreground of the photo.
Juxtaposition
Juxtaposition is placing two images together to show contrast or similarities. An example of a Juxtaposition is matching colours of your clothing to something out in the wilderness an example of an artist doing this is Nikita Pirtogov.
Artist Reference
Nikita Pirtogov
Nikita Pirogov is a photographer, artist and a poet who was born in Leningrad, USSR, in 1989. He studied in RGISI (Saint-Petersburg, Russia) and has got an MFA from IED Madrid (Madrid, Spain). His works were exhibited in Russia, Italy, France, The Netherlands, Denmark, Latvia, Slovakia, Portugal, USA, Brazil, China, Cambodia, Fiji and South Korea and are in the collections of State Russian Museum in Saint-Petersburg, Russia and Gallery Image in Aarhus, Denmark.
Examples of Nikita Portogov’s work
These photos are an example of juxtaposition due to the photographer matching colours with the subjects clothing, hair and the background. These photos are opposites of each other.
My Juxtaposition Photos
Lightened Black
These photos where edited in Lightroom using the filters BW11 and 05,this is how I achieved these final images.
Photo-Montage
Photo-montage is the process and the result of making composite photograph by cutting , gluing, rearranging and overlapping images to create new images.
Artist Reference
John Stezaker
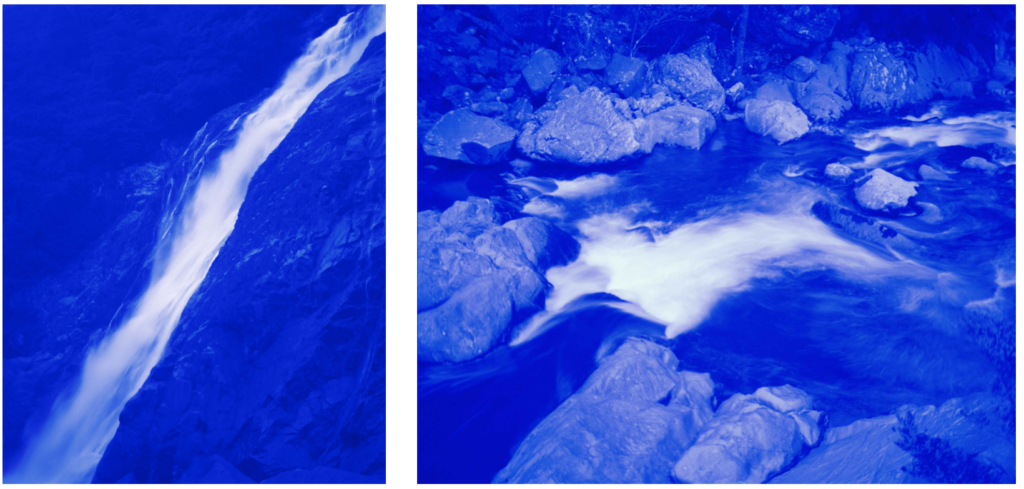
Is a British artist who is thrilled by the amount of images. Taking classic movie stills, vintage postcards and book illustrations, Stezaker makes collages to give ancient images a original meaning. By adjusting, inverting and taking-apart separate pictures together to create unique new works of art, Stezaker explores the subversive force of found images. Stezaker’s famous Mask series fuses the profiles of glamorous sitters with caves, hamlets, or waterfalls, making for images of dark beauty.
This photo is one of John Stezaker’s most famous photos .It is called Mask XIV and it was created in 2006.This work follows a simple format: Stezaker covers an old and ancient publicity portrait of a film star with a postcard. The postcard is becoming the mask over the face, It opens a window into another space. This images will give different interpretations of people faces. The scene in the postcard could is reflecting the peace and tranquillity of the setting.
Above, His ‘Dark Star’ series is popular publicly portraits into cut-out silhouettes, creating an important presence in the place of the absent celebrity. Stezaker’s way of giving old images a modern place in life it will reach its height in the found images of hisThird Person Archive: the artist has removed elegant , haunting figures from the margins of out-of-date travel illustrations. Presented as images on their own, they now take the centre stage of our attention.
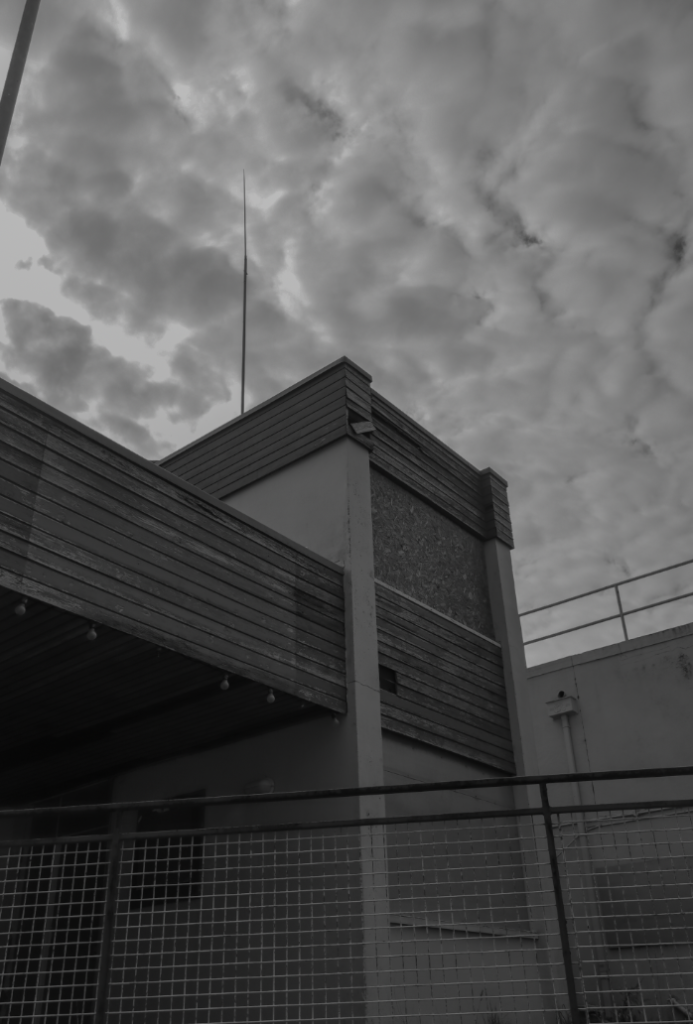
Examples of John Stezaker’s Work
My Photomontage Photos
Contact sheet
This is my contact sheet for my Photomontage Images.
Image Selection
Above you can see above I used P and X to flag my images to filter out my worst ones from the ok and good ones, next I rated these images 4 or 5 stars as 4 being ok ones and 5 being good ones, finally I gave them the colour yellow
This is the original photo without being cropped. Below is the same photo but cropped. To complete and finalise this photo four layers were needed for this in the background , otherwise it wouldn’t be as effective because less layers would make an empty photo. In all four layers I have kept the opacity the same. I have had some inspiration from John Stezaker because I love the way he uses photomontage in his photos.
This is the same photo as above, I have cropped it due to both sides having to much negative space ,which will create an unbalanced photo. I have also cropped the photo because I want the subject to be centred in the foreground of the photo.
This photo above gave me inspiration from John Stezakars work. I have done this photo in light instead of dark. The original photo done by John Stezakar’s was done in the dark. My favourite photo of his is called Mask XIV, which was photographed in 2006. I love this photo because it includes the beautiful beach in the foreground then a portrait in the background of the photo. This work follows a simple format with a portrait and a photo of a beach. The picture becomes a mask over the face. Alternatively, by replacing eyes with a beach creates tranquillity and peace. This photo will need to be cropped due to negative space on either side.
This is the cropped photo. By cropping it the subject is much more centred than it was before.
El Lissitsky
EL Lissitsky was a Jewish-Russian artist and photographer , active as a printmaker, painter, illustrator, designer, photographer, and architect. He was Born: November 23, 1890 Pochinok, Russia. He died December 30, 1941 (age 51 years), Moscow, Russia. He is known for using Geomertic shapes and negative space.
An Example Of One Of His Photos
Suprematism is famous art movement, focused on basic geometric forms, such as circles, squares, lines, and rectangles, painted in a limited range of colors. It was founded by Kazimir Malevich in Russia, around 1913, and announced in Malevich’s 1915 exhibition, The Last Futurist Exhibition of Paintings 0.10, in St. Petersburg, where he, alongside 13 other artists, exhibited 36 works in a similar style. The term suprematism refers to an abstract art based upon “the supremacy of pure artistic feeling” rather than on visual depiction of objects.
My Process For My Photo
This is the process I had to go through to create my photo below. In total I had to make 7 layers to create this photo.
I also used this bar to see how dark I wanted my photo .You can pick many different filters till you pick one that matches your theme.
My Final Photo
I added a target on the shoulder in the photo because it got inspiration from El Lissitsky and it makes the photo more interesting and it adds more detail to his photo.
Above you can see above I used P and X to flag my images to filter out my worst ones from the ok and good ones, next I rated these images 4 or 5 stars as 4 being ok ones and 5 being good ones, finally I gave them the colour yellow or green, green being the best and yellow being good.
Image Editing
This is one example of Rembrandt lighting due to a triangle present under the left cheek, Which resembles Rembrandt lighting. In this photo there is an intense shadow. On the right of the image you can see all I have done is makes some slight adjustments to the texture and contrast and many other things like that.
This is the same image cropped due to lots of negative space on the left side, which will create an unbalanced photo and I decided to crop the image to centre the subject a bit more.
This is the same photo that has been cropped and slightly edited to enhance the Rembrandt lighting more. By being edited the image looks much more clearer.
Contact Sheet
This is my contact sheet for Rembrandt lighting.
Image Selection
Above you can see above I used P and X to flag my images to filter out my worst ones from the ok and good ones, next I rated these images 4 or 5 stars as 4 being ok ones and 5 being good ones, finally I gave them the colour yellow or green, green being the best and yellow being good.
Original Image
This is one example of Rembrandt lighting due to a triangle present under the left cheek, Which resembles Rembrandt lighting. In this photo there is an intense shadow. On the right of the image you can see all I have done is makes some slight adjustments to the texture and other things like that.
Black and White Image
This is the same image cropped due to lots of negative space on the left side, which will create an unbalanced photo and Next you can see I decided to crop the image to centre the subject a bit more.
This is the final black and white image. This is the same photo that has been cropped and slightly edited to enhance the Rembrandt lighting slightly more. By being edited the image looks much more clearer and concise .
Butterfly Lighting
Contact Sheet
Image Selection
Above you can see above I used P and X to flag my images to filter out my worst ones from the ok and good ones, next I rated these images 4 or 5 stars as 4 being ok ones and 5 being good ones, finally I gave them the colour yellow or green, green being the best and yellow being good.
Image Editing
I have done some slight editing to enhance the contrast, texture ,whites and black.
Next ,I’ve decide to crop the image to decrease the negative space on either side , so the photo can looked balanced . I have also cropped the image make the subject more centred.
Final Outcome
Black and White
This is the same image cropped due to lots of negative space on the left side, which will create an unbalanced photo. Next you can see I decided to crop the image to centre the subject a bit more.
Final Photo with an Evaluation
This is the final black and white image. This is the same photo that has been cropped and slightly edited to enhance the butterfly lighting slightly more. The butterfly lighting is present under the frame of her glasses . By being edited the image looks much more clearer and concise .
Spilt Lighting
Image Editing
In this photo, I have some slight editing. I have edited the texture, highlights, black and the shadows.
I have cropped the image due to there being to much negative space on the left side .I have done this because it might ruin the photo and the photo will be unbalanced. I also cropped it to ,make the subject much more centred.
Studio lighting refers to how a light source, artificial or natural, lights up the scene, subject and object that is being photographed.
Why do we use studio lighting?
We use studio lighting because its an essential tool for photographers to brighten up their images and videos.
What is the difference between 1-2-3 point lighting?
One point lighting is where only one light is involved when the photo is taken. One point light will give off light equally in every direction, similar to a light bulb as all rays will come from a single point.
Two point lighting is used is an essential lighting technique used in film and photography that consists the use of two light sources to brightenup a subject. This setup makes depth and dimension, enhancing the visual appeal by adding shadows and highlights that will define shapes.
Three-point lighting is a classic method for lighting up a subject in a scene with light sources from three noticeable positions. The three types of lights are key light, fill light, and backlight. Key light is the most intense light source in the three-point lighting setup. Three point lighting gives off a three-dimensional look.
Key Light
What it provides: Generally the key light is the common source of light and its placed at an angle to the subject to create texture, depth, and contrast. It highlights the form and dimension of on-screen subjects and allow cinematographers to manage the atmosphere of a scene.
Positioning: The key light is generally placed at a 45 degree angle to the person, it has to be only above eye level and to one side.
Effect: Using a soft and flattering key light it will make some more distributed shadows, conveying a gentle, pleasant and natural feel. On the other hand, a hard key light generates sharp, acute and well-defined shadows, which can be used to create a more sudden or stylized portrait.
Fill Light
What it provides: The purpose of a fill light is to brighten up the parts of the subject that the main light wont be able to reach.
Positioning: If your main light source is trailing behind your subject, then place the fill light forward of your subject. If your main light source is to the side of your subject, then place your fill light to the side of your subject as well.
Effect: Balancing the overall brightness of a scene, specifically in areas with shadows or low light contrast. Its main function is to soften and weaken the shadows and get rid of the firmness of the key light. This results in a more engaging and balanced visual.
Back light
What it provides: Backlight is light that hits an actor or subject by trailing behind, typically its higher than the subject than its exposing. Backlighting an object or actor from the background creates more depth, texture and shape to any subject.
Positioning: Place the camera in the direction and insight of the subject and position your subject in a way so that the backlight is directly trailing behind the subject.
Effect: This will create a light spill effect, where the light seems to spill from behind the framework of your subject.
Rembrandt Lighting
What is Rembrandt Lighting?
This type of portrait photography is named after Rembrandt Harmenszoon van Rijn, A great Dutch painter. It points out a way of lighting on a face so it is an upside-down light triangle which will occur underneath the eyes of the subject. It can be achieved using one light and a reflector or two lights, which is very popular because it is able to produce images which will appear both natural and fascinating, with minimal of equipment.
Example of Rembrandt Lighting Photo
Why should you use Rembrandt lighting ?
Rembrandt Lighting should be used because it makes the subject or the object the main focus of the image by producing a lit up face and a very dark background, in doing this the eye of the subject or object of the image is the first thing that you will see offering a unique view point of the image. Using this style of inventive writing is something that will make the portrait that you have taken stick out while still being something that you wouldn’t normally expect from what people usually predict.
Who was Rembrandt?
Rembrandt (born July 15, 1606, Leiden, Netherlands—died October 4, 1669, Amsterdam) was a Dutch painter, he was a very intelligent, brilliant and capable artist and was well known for being able to catch people emotions in his portraits, he was also well known because of the use of shadows in his work.
How To Create A Rembrandt Lighting Set Up
Light: Lighting styles are decisive by the positioning of the light source. Rembrandt lighting is created by the single light source coming in at a 40 to 45-degree angle and larger than the subject. Use cans use both lights and continuous lights.
Lens: Use a 35mm or 50mm focal length, if the space is at a premium – or if you’re looking at adding more of the subject than just the head and shoulders. A 50mm works perfectly for portraits and will give a great depth of field if you’re shooting at a shallow aperture. But a 35mm will give you a wider point of view and is great to fit more of the body in of your subject or the object.
Camera settings (continuous lighting) Tripod Manual exposure mode White balance ISO: 400-1600 – depending on how many light sources are used Exposure: Manual 1/60-1/125 shutter-speed > f/4-f/8 aperture Focal length: 50mm portrait lens
Rembrandt Lighting Mood Board
This is my collection of photos I have gathered on Rembrandt Lighting.
Chiaroscuro Lighting
What Is Chiaroscuro Lighting?
Chiaroscuro Lighting is an Italian lighting technique that stands for Light Dark in English , its a very high contrast lighting technique that needs to use a low key lighting set up, it needs to have a single light source to generate a dark background with its subjects and objects.
Why should you use it?
Chiaroscuro Lighting should be used as it will provides an abstract contrast that will draw attention to the subject or object and to build a dark , shadowy background, doing this can include a more unique look to the images that you take to boost the atmosphere and can will create three dimensional look to the image.
Who Created This Type Of Lighting?
Chiaroscuro lighting was developed by Leonardo Da Vinci, Caravaggio, Vermeer, and Rembrandt. It is a trademark quality in the works of their Renaissance period and art movement but is well known today for its role foe being key in the film noir sub-genre of movies through low-key photography.
How To Create A Chiaroscuro Lighting Set Up
To create Chiaroscuro in photography you need to:
Chiaroscuro in photography: Chiaroscuro using one key light and to use a variety using a reflector that reflects light from the key light back onto the sitter.
This is my collection of photos I have gathered on Chiaroscuro Lighting.
Butterfly Lighting
What Is Butterfly Lighting?
Butterfly lighting is an element of studio lighting that is usually used within portraiture photography, as the name suggests the lighting used forms a butterfly shape underneath the nose of the subject of the image. This is because the light comes from above the camera and you face will create a shadow.
Why Should You Use Butterfly Lighting?
You should use butterfly lighting because it will create a narrow face. It also produces a soft, flattering illumination that will minimize imperfections on the subject’s face. This type of lighting is a unique type of lighting due to creating a different atmospheres in images we usually see.
Who Created Butterfly Lighting?
Butterfly lighting was not created by one specific person but it was rather developed over time in Hollywood back in the 1930’s, it was mainly used on a person called Marlene Dietrich who was massive Hollywood star around that time.
Butterfly Lighting Set Up
Lighting: Butterfly lighting will need a key light that can be a flash or continuous. If continuous, it can be artificial or natural. In other words, you can use strobes, speed lights, LEDs or even the sun.
A butterfly lighting effect refers to the setup and not to the quality of light – it can be soft or hard light depending on what you want your photo looking like.
Butterfly Lighting Mood Board
These are pictures I have gathered to make a Butterfly Lighting Mood Board.
As you can see above I took 50 images from the camera of my sister and my mum. I took lots so I could experiment and pick my best photos and the one I wanted to use for my final piece. I then continued to take many of photos of my sister and my mum with many different camera settings and different lighting conditions to achieve the ideal result I wanted.
Photos I didn’t like
I didn’t like this photo due to lots of visual noise that has been taking part and will give the photo a degraded quality. This photo was taken at an ISO of 400. It also has a wide aperture of 7.1 and has a shutter speed of 1/6.
I also didn’t like this photo due to how dark it is and you can also barley see it. This is what happens when you don’t have enough light in your room, in the camera or in the photo. It gives no proper final image. It was also taken at a shutter speed of 1/80.
Lastly, I also didn’t like this photo due to extra light from the flash it has made the photo go extra fuzzy and made it to create a degrading quality. It also didn’t match the theme is was going for.
Selection Process
As you can see above I pressed P to keep the images I wanted to use for my final photos. I used X to get rid of the images i didn’t wanted to use for the future. Then I gave a rating for the images, they all had a rating out of 5.The images with 4 and 5 stars are the images I wanted to use for my final photos. The photos I didn’t like I rated 1-3 stars. Finally I gave them the colour yellow or green, green being the best and yellow being average . Red was for very bad photos. I will edit the images so I can present final photos.
Editing My Best Images
These are my three best images that have been edited.
This image started with more negative space on the left than on the right. To create a more balanced outcome, I cropped the image as above.
When cropping, I made sure to maintain an equal photo
For this image I also wanted to enhance the contrast and tone, to exaggerate the texture.
This image had lots of negative space on the left rather than the right. For the image to be more balanced I had to crop it to get the best result.
When cropping I mad sure that the photo was balanced on both sides, so the photo would look aesthetically pleasing to the eye and make people want ton look at it .
Also, I enhanced clarity and the dehaze setting on Lightroom to get the image to look like this.
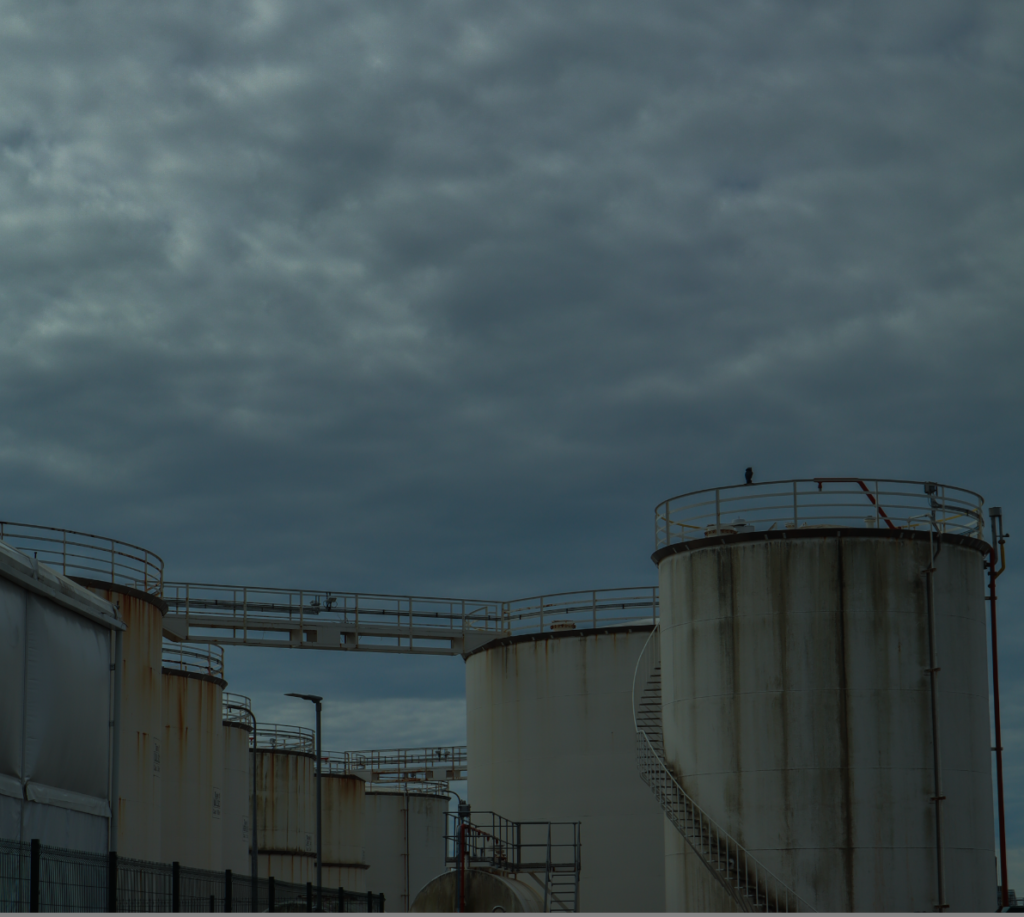
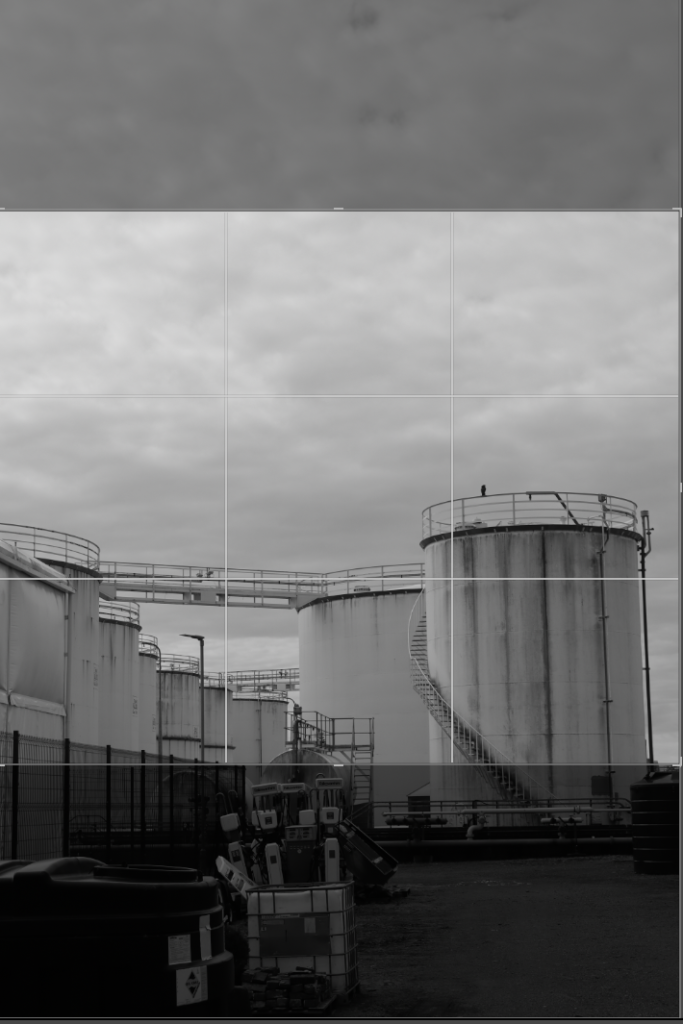
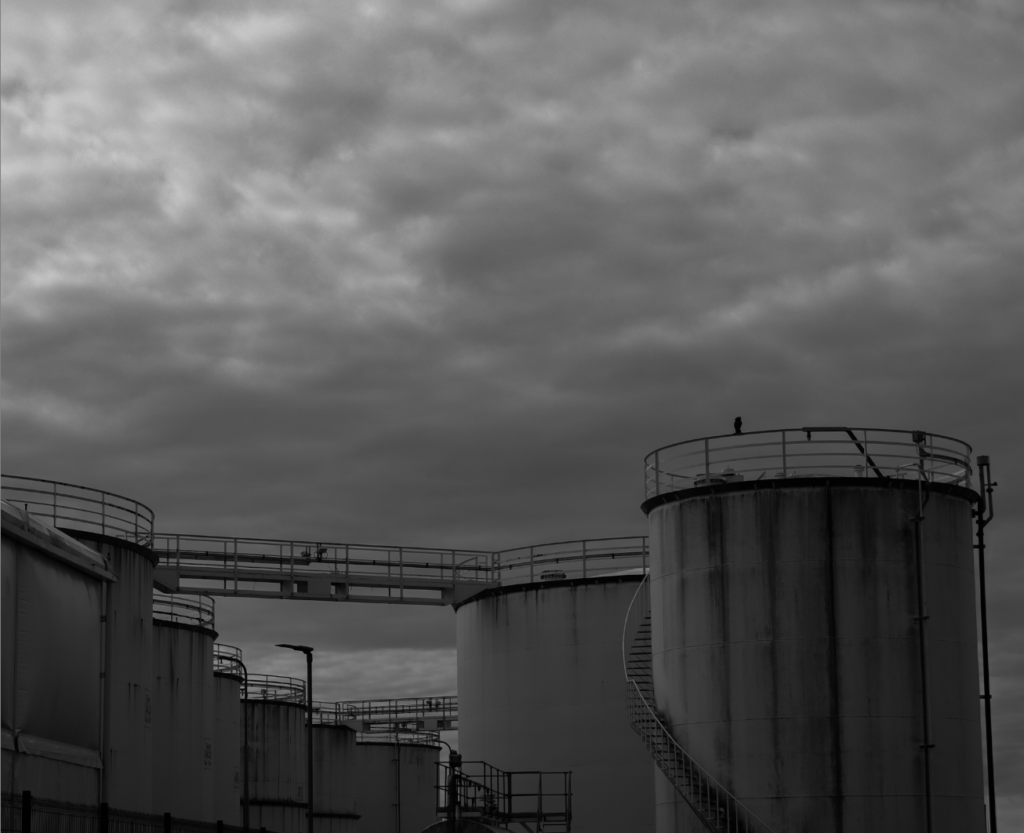
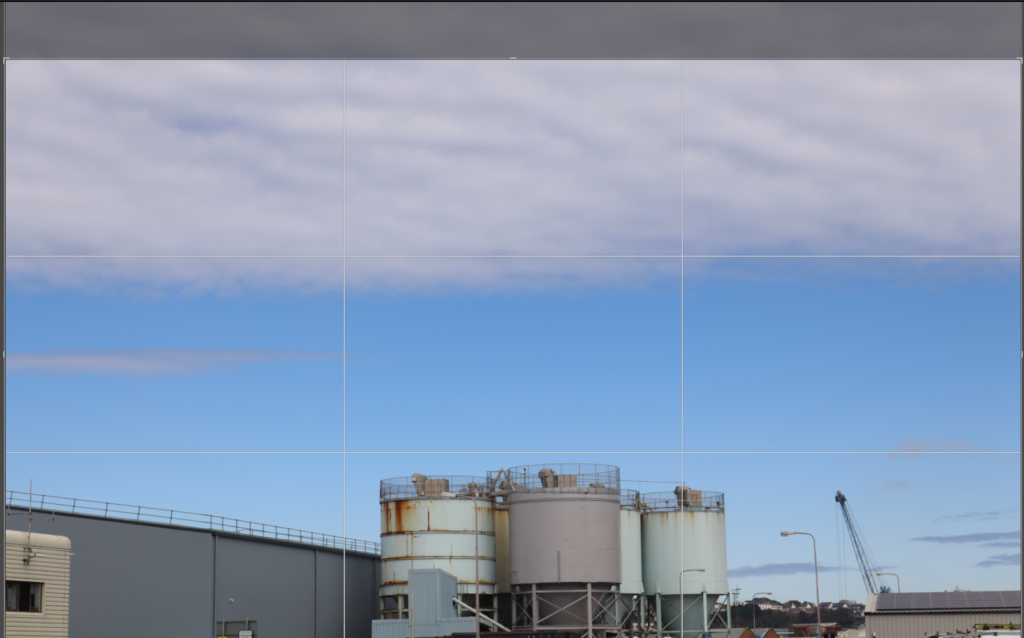
In this image I had to get rid of most of the negative space on the left side on the photo rather than the right. I also got rid of negative space at the top and the bottom of the photo. To get the best result this photo need to be cropped.
As I was cropping this photo I need to make sure that the photo was balanced and proportional , so the photo looks pleasing to the eye.
For this image I also had to enhance the contrast and tone, to exaggerate the texture. I also enhanced the shutter speed.
Black and White Final Images
These are my final images edited
In this photo I had to slightly crop it due to the sides of the photo not being balanced . If I hadn’t cropped the photo, the photo would look unbalanced and there would be too much negative on the background of the photo.
After being cropped the photo looks more visually appealing to look at.
For this image I also had to enhance the dehaze, clarity and the texture setting to achieve this type of image.
For the filter I used the style; Cinematic to create this type of photo.
This isn’t a white photo but i managed to brighten it up since it was dark. To brighten it up is used two filters called BW7 and F6 these filters are from Lightroom.
In this photo I had to slightly crop it due to the sides of the photo not being proportional. If I hadn’t cropped the photo, the photo would look unbalanced and there would be too much negative on the background of the photo.
After being cropped the photo looks more visually pleasing and nice to look at.
For this image I also had to enhance the contrast, exposure ,dehaze, clarity and tone to exaggerate the texture.
This isn’t a white photo but I managed to brighten it up since it was dark. To brighten it up is used three filters called BW07,FT06 and SP05 these filters are from Lightroom.
In this photo I had to slightly crop it due to the sides of the photo not being proportional. If I hadn’t cropped the photo, the photo would look unbalanced and there would be too much negative on the background of the photo.
After being cropped the photo looks more visually pleasing and nice to look at.
For this image I also had to enhance the exposure ,dehaze, clarity and tone to exaggerate the texture.
Editing Photos into a Black Filter
In this photo I had to slightly crop it due to the sides of the photo not being proportional. If I hadn’t cropped the photo, the photo would look unbalanced and there would be too much negative on the background of the photo.
After being cropped the photo looks more visually pleasing and nice to look at.
For this image I also had to enhance the dehaze, clarity and tone to exaggerate the texture.
In this photo I used the filter called BW11 this filter darkened the photo a bit, this is what a aimed for.
In this photo I used a black and white filter called BW09, this darkened my photo, this is what I achieved due to using this filter.
In this photo I had to slightly crop it due to the sides of the photo not being proportional. If I hadn’t cropped the photo, the photo would look unbalanced and there would be too much negative on the background of the photo.
After being cropped the photo looks more visually pleasing and nice to look at.
For this image I also had to enhance the highlights and the shadows to enhance the clarity on this photo.
In this photo I used a filter called BW11, this has made this image both light and dark, this has balanced out the highlights and shadows, so it means that the foreground is more in focus.
In this photo I had to slightly crop it due to the sides of the photo not being proportional. If I hadn’t cropped the photo, the photo would look unbalanced and there would be too much negative on the background of the photo.
For this image I also had to enhance the highlights and the shadows to enhance the clarity on this photo.
My Final 4 Photos With Analysis
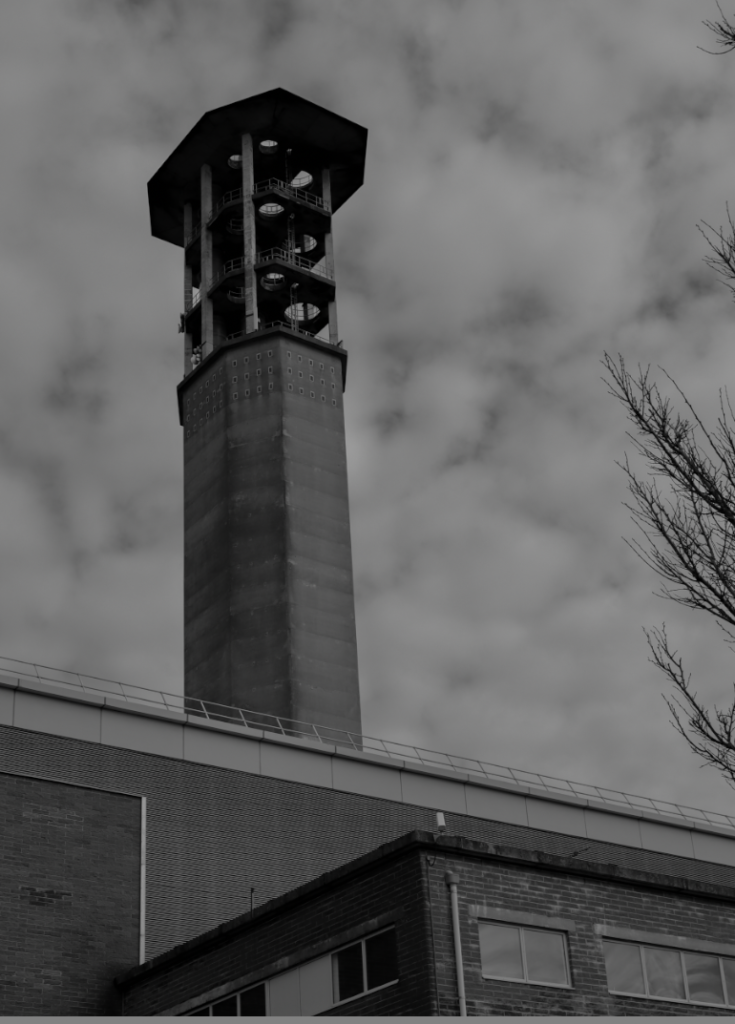
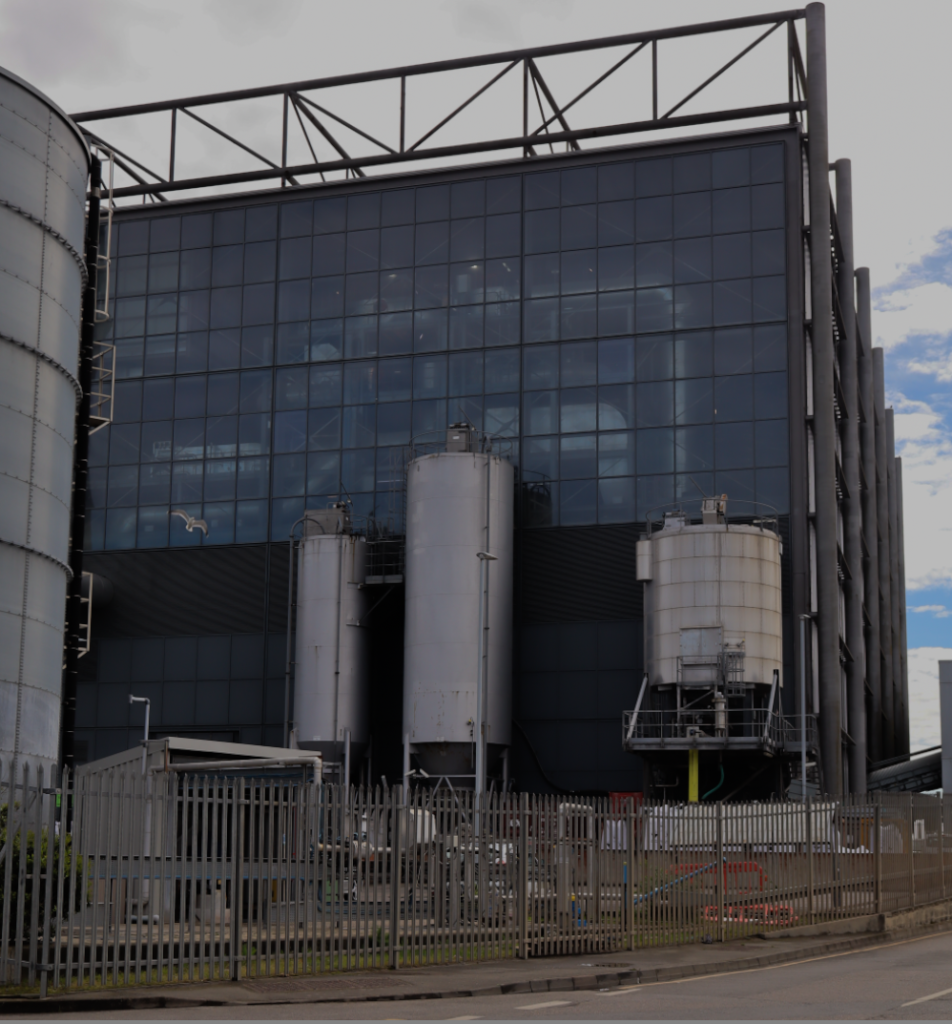
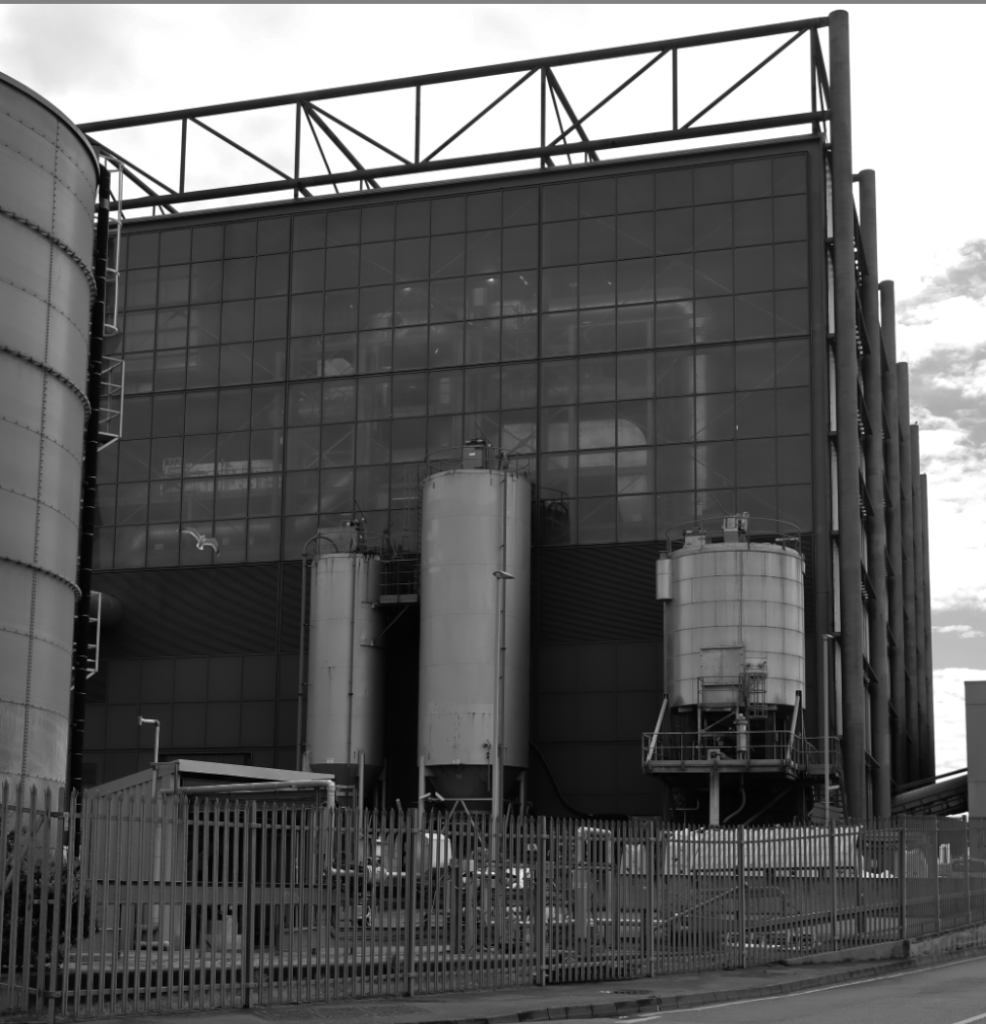
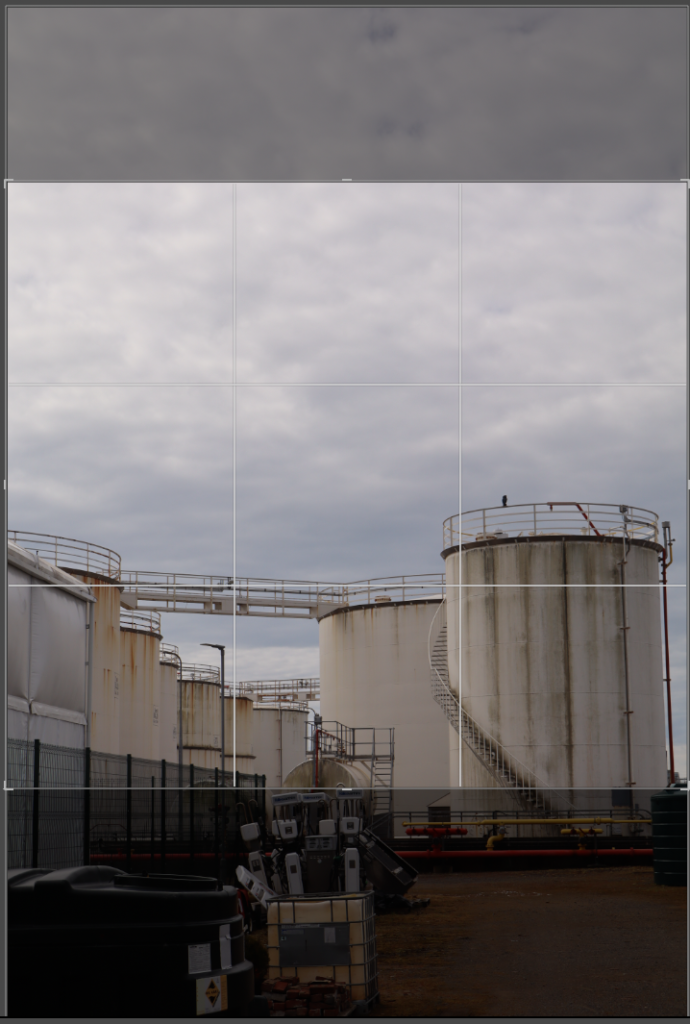
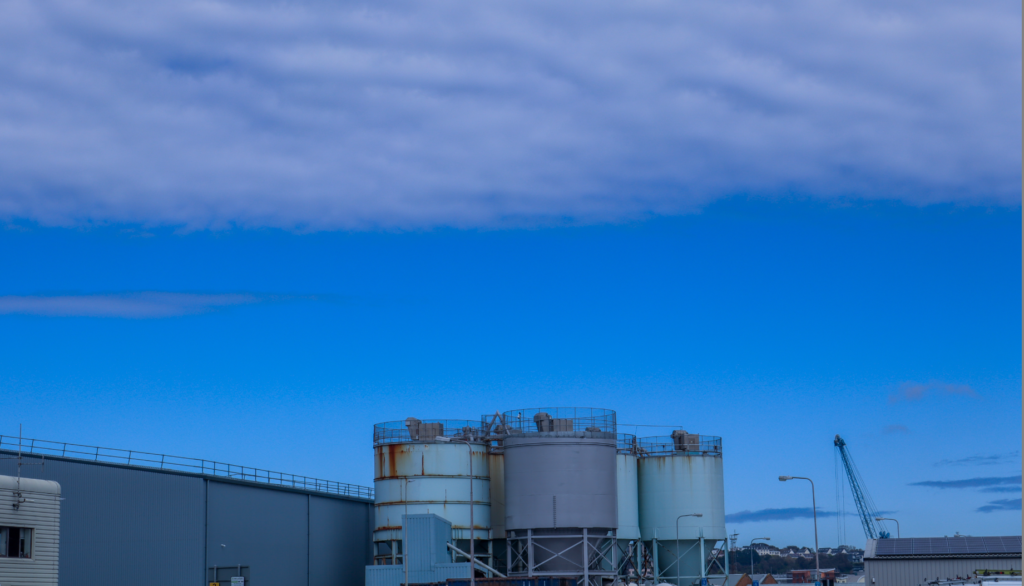
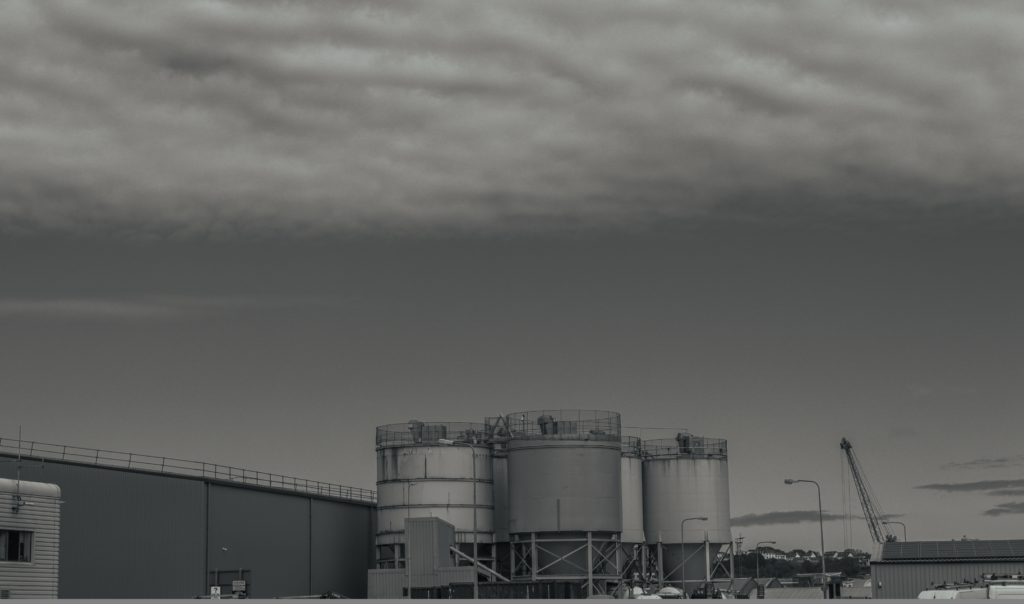
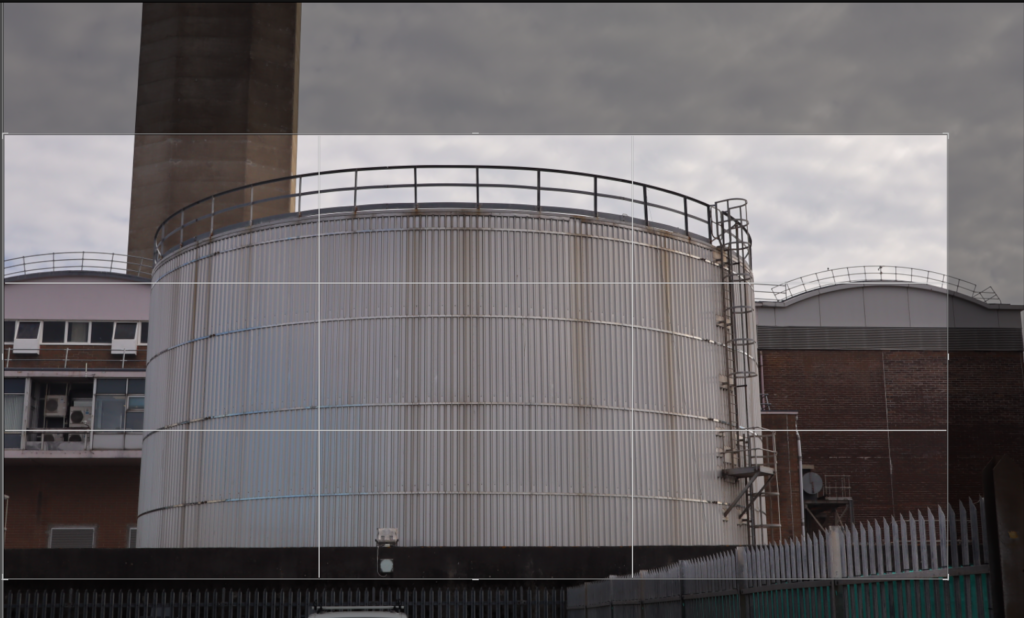
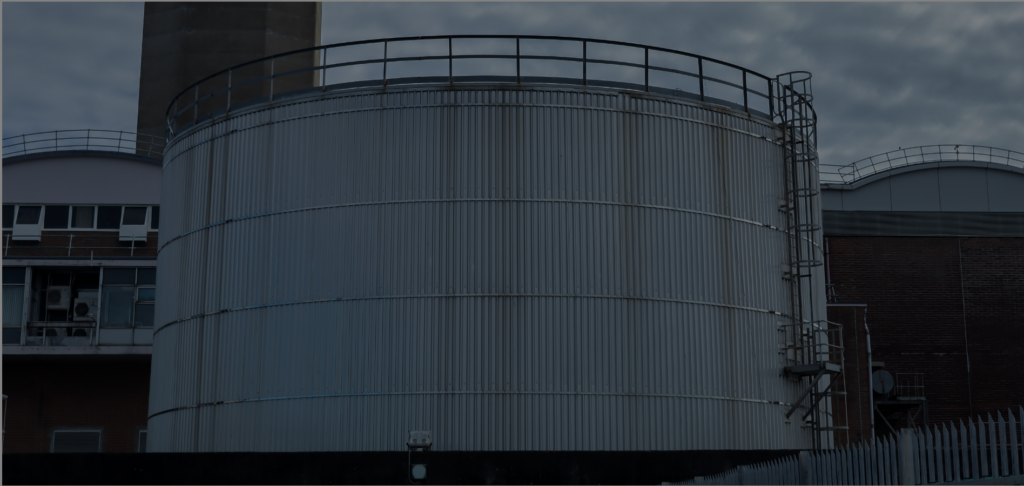
These are my final 4 photos due to a mixture of a light and dark tone. By having a light tone it makes the photo produced have a sharp with a strong contrast. By having a dark tone many photographs seem to have less impact and less visual vibration. By having some straight lines in the photos it means these lines have geometric quality and also have centre of attention. . The images that I took had lots of negative space around it so I had to crop it to make the photos balanced on each side.
Arnold Abner Newman was an American photographer, known for his “environmental portraits” of artists and politicians. He was also known for his composed abstract and still life images. Newman was born : March 3, 1918, New York , United States and Died: June 6, 2006 (age 88 years), New York, United States.
Photo Analysis
Visual
The person is the main focal point. Krupp is in-between the concrete pillars which create a cold and outdated effect, he is placed in the centre so the photo will create a line of symmetry. Krupp is leaning forward with hands which are interlocked in-between each other. Interlocking hands means that Krupp is connected to the place in the photo. Krupp shows lots of eye contact which creates a feeling of intimidation towards us, which also makes us scared and not want to go near him. Eye contact also shows a high level of confidence. The background of this photo is in an industrial environment, which shows that Krupp is in charge or owns the environment that he is in. Leading lines make the photo look balanced and proportional and position Krupp very central due where the lines start and finish.
Technical
The lighting may be artificial due to many different light that may be used and also due to the intensity of the light. Also the lights will create a powerful contrast on the sitters face. Which will make him more mysterious and darkening his gaze. The aperture is placed at a medium due to the amount of light the will want in the photo. This ha a very sharp foreground due to having a low ISO which makes the image look a lot clearer. Is placed at a medium aperture- very sharp foreground, slightly softer background . Able to identify environmental details, which means that easy to see. The Shutter speed- is quite a fast because Newman wanted to capture a very specific moment while the subject is in focus and also creates a balanced exposure. The angle is exactly eye level with the sitter which means we are immediately drawn tot him and also feels like we are extremely close to him.
Contextual
Alfred Krupp is the only subject in this photo which means he’s the main character. An Industrialist who ran war factories manufactured arms for the Nazi assault on Europe. Using slave labour from the concentration camps, is where the prisoners of war were literarily worked to death. The majority of the men and boys who perished were Jewish and Krupp holds a particular grudge amongst there people.Arnold Newman was Jewish of origin. Krupp was reluctant to agree for the photo to be taken but he eventually agreed. He didn’t want the photo taken by Newman due to him being Jewish, Krupp disliked the Jews. When deciding what to do with the shot , Newman asked Krupp to lean forward slightly, when he did he interlocked his fingers together tightly under his chin. The light hit the face completely and when Newman saw this effect he said ‘That he felt the hair stand up on the back of his neck’. This image became one of the most famous images of Newman’s Career.
Conceptual
When Krupp saw the picture he was said to have been furious due to the artist being Jewish. For Newman this was a little bit of revenge for him. The photo captures Krupp in a serious, sincere and a menacing light. The flow of the photo brought Krupp out from the shadows and allowed Newman to share his envy for his man with the world.
August Sander
August Sander (1876–1964) was a German photographer , which was well known for his work documenting and capturing German community in the early 20th century.
August Sander’s photography is powerful for its organised approach to gathering people and securing a wide range of individuals from different parts of life in Germany, often attention on class, occupation, and social role.
Social and Class Structures: Sander’s portraits weren’t just about capturing the physical appearance of his subjects. They were important roles that people played within the larger framework of a community . He saw his work as a way to show the complexities of class, identity, and occupation, often seeing how social status and profession were reflected in a person’s appearance and lifestyle.
He gave respect to the people he photographed, regardless of their social standing and state . His photography gives a message that a sense of equality among the subjects in the photographs. He wanted to truly show the reality of life in Germany, from lower class life to high class.
Legacy
Sander’s most memorable series was , People of the 20th Century, was never fully accomplished in his lifetime, and much of his work remained unpublished during his career. However, the project has since been regarded as one of the most important photographic tasks of the 20th century.
Typologies
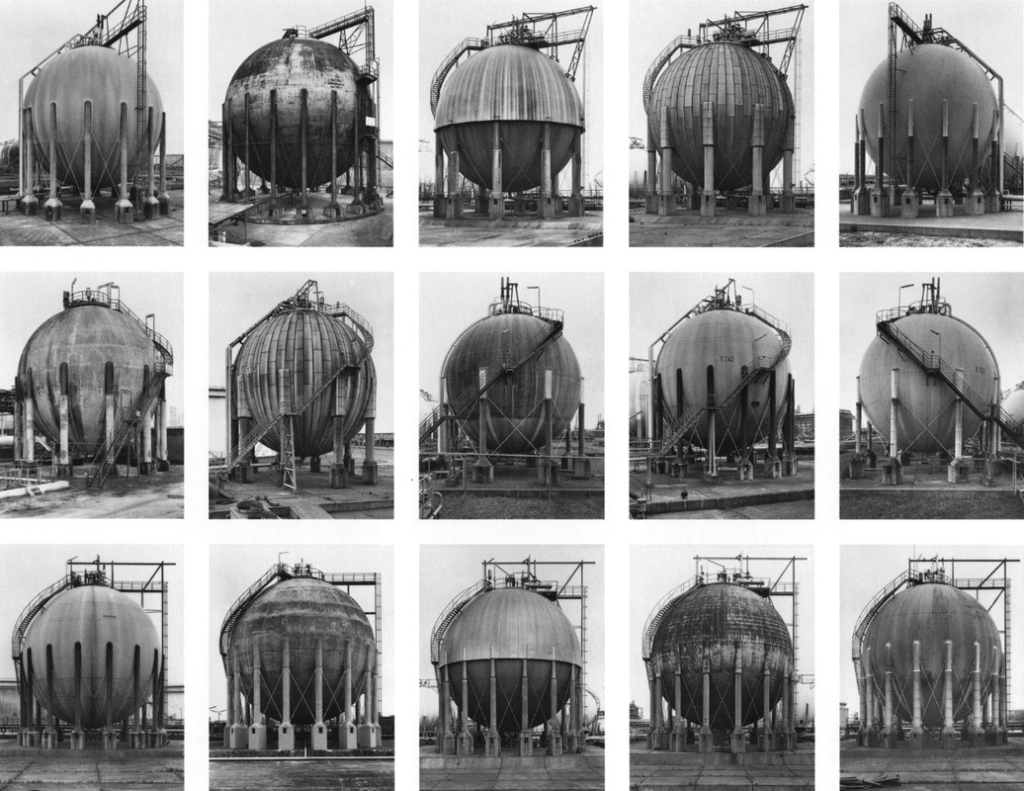
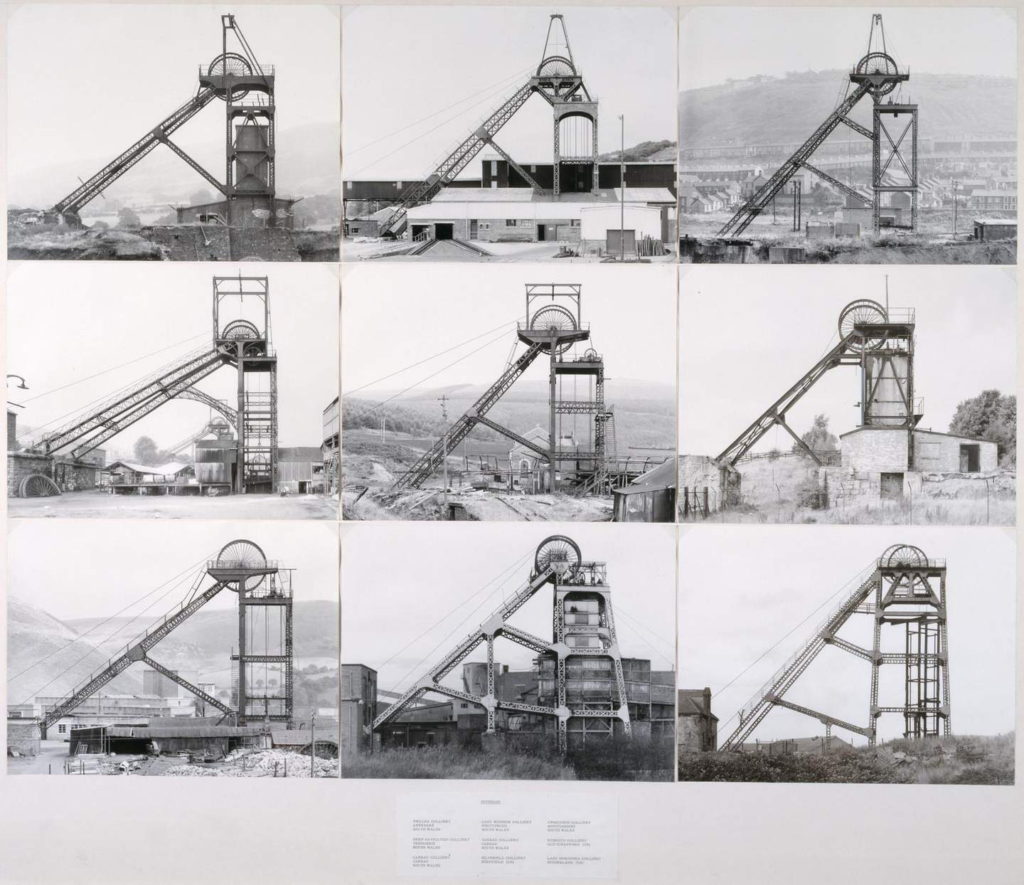
A photographic typology is a study of “types”. That is, a photographic series that prioritizes “collecting” rather than single or one image. It’s a powerful method of photography that can be used to reshape the way we see the world around us.
The concept of Photographic Typologies gets its origins from August Sander’s 1929 portrait series from Face of Our Time, which captured the diverse social fabric of Germany between the two World Wars. Sander’s intent was to capture a cross-section of a community in Germany —its various types, classes, and the relationships that are linked them. He recognized that displaying his portraits as a collective series revealed much more meaning than displaying them individually. Unfortunately, his photography had such significance and power that just four years after its creation, the Nazi regime had the photographic plates which were demolished and then the book was banned.
A typology in photography is a study of “types” , which is a collection of images put together to gather a meaning, rather than individual and isolated shots. This approach shifts the focus to “collecting” and categorizing, and has become a method for reshaping and how we think about the world around us . The term “typology” itself gotten exposure in photography in 1959, when the German artists Bernd and Hilla Becher began documenting the industrial architecture of Germany that was disappearing quickly . The Becher’s described their subjects as buildings where anonymity is the new style. Their objective was to document a fading landscape, and in doing so, typologies not only captured a moment in time but also invited viewers to reflect on the photographs in the broader context of history and community of Germany.
August Sanders Photography Analysis
TECHNICAL ASPECTS
Due to the black and white format and filter on this photograph , it is hard to see what lighting was used. However, upon further inspection I can able to conclude that the source of light could be natural, coming from a window in the middle of the day , This is because if you look into the metal bowl grasped by the chef, the lighting seems to be in the shape of a distorted rectangle, which closely comes from a window. Additionally , due to the lighting being softly diffused, and not having a hard tone and definition within the subject/ where the projection is giving heavy and contrasting shadows upon the subjects body and face ( Similar to how artificial light would create a hard light with little diffusion) It is fair to say that the lighting is natural due to it having very similar characteristics to it. Finally, due to the angle of the reflection on his head compared to the angle of the light on the bowl, we can also conclude that there many windows positioned to the right of the subject and in the foreground of the photo ( due many light sources within the reflections) , all working together to make the scene of lighting and the atmosphere.
The tonal range in this shot (the range of tones in-between the darkest and brightest areas of an image that are caught by your camera.) which is wide as they are clearly many points within the image with pure black and pure white , along with lots of shades of grey in-between, This in return creates a lot of contrast within the image which will highlight the key features of the subjects body and outline. Additionally its easy to tell that this image is perfectly exposed, because the detail is still clear and nothing is too dark or too bright, cutting out the glare within the shot, from reflections.
APERTURE
The Aperture Used to create this shot is most likely quite low in the ranges of f2-4.He used a low aperture to capture a great shallow depth of field. Low apertures are ideal foe capturing portraits , as seen in the photograph with the chef, the subject (chef) is in focus which is the foreground, whereas his background is out of focus.
SHUTTER SPEED
With the Low aperture , I predicted there will be a fast shutter speed that was in use in order to capture the amount of light being let in through the lens. ( at least 1/200th of a second handheld or 1/15th of a second on a tripod.)A tripod was used to keep the camera still while in use . What supports my prediction is that there is no minimal motion blur, Meaning either the subject stood very still or at a high shutter speed was used to capture the moment in time without any blur.
ISO
The ISO used to take this photo was most likely quite low, as there is no visible grain or a degrading quality present in the photo and the image is very clear , additionally the image itself is extremely dark meaning a low ISO must have been used, which makes sense as the low aperture already lets in plenty of light into the camera , meaning that the light sensitivity of the camera wouldn’t need to be high, around 100-200 was probably used.
Subjects – I will take photos of my sister and my mum in the same environments.
For this I will take photos of my mum and my sister so both of them will feel connected.
Mum- Holding a ukulele
Sister – Kicking a ball, reading a book and roller-skating.
Poses
Will be quite natural and will be of their type of hobby. They will pose with a natural and stern face.
Gaze
I intend of all of my subjects to be look at the camera.
composition
I will experiment to with lots of different types of composition such as the rule of thirds .
Aperture
I will use most of the aperture numbers on the camera to get a wide range of experimentation and photos to show.
Framing
I will be using full body,1/2 and some headshot photos and I will crop but I wont use a tighter crop because I want the environment behind to have a visible picture. Examples are shown below.
Oriental
In my environmental portraits I will make a majority of landscape phots so is able to capture the environment and i will also incorporate some portrait photos.
Francis Joseph Bruguière was an American photographer. He was born on October 15, 1879, San Francisco, California, United States and he died on May 8, 1945 (age 65 years), Middleton Cheney, United Kingdom.
Photos of his work.
My Paper Photoshoot
Contact Sheet
As you can see above I took 24 images from the camera of some different angles and shape of the paper until I found the one that I wanted to use, I then continued to take many of photos of one one type of paper style I liked with different camera settings and different lighting conditions to achieve the ideal result I wanted.
Photos I Didn’t Like
I didn’t like this photo due too lots of darkness, with having lots of darkness means it wont attract people to look at them and like them. It also gives no proper final image. This photo taken with a shutter speed of 1/800 of a second and an aperture of 4.
I didn’t like this photo due the balance of the photo on both sides. the left side has more negative space rather than the right side. There is no rule of 3rds present in this photo. This photo has a shutter speed of 1/100.
Lastly, I didn’t like this photo because of due to being blurry, which also gives it a degrading quality. This photo had an aperture of 25 which means not a lot of light has been let through to create a perfect image. It also had a shutter speed of 1/5, which is low.
Selection Process
As you can see above I pressed P to keep the images I wanted to use for my final photos. I used X to get rid of the images i didn’t wanted to use for the future. Then I gave a rating for the images, they all had a rating out of 5. With a rating of 5/5 means they are my best images that I love. The images with 4 and 5 stars are the images I wanted to use for my final photos. The photos I didn’t like I rated 1-3 stars. With a rating 1-3/5 means these where the photos I hated. Finally I gave them the colour yellow or green, green being the best and yellow being average . Red was for very bad photos. I will edit the images so I can present final photos.
Editing my Best Images
These are my three best images that have been edited.
This photo had to get rid of some of the negative space due to be being unbalanced on the foreground and the in the background. This means the photo is not equally distributed on each side that is the reason I had to crop it. I originally started with lots of negative space in background, rather than the foreground.
When cropping, I made sure the photo was balanced on each side from the background to the foreground.
I put the texture on this photo 100 to enhance the material of the paper.
In this image I had to crop a bit of the photo due to the sides of the photo not being proportional. If I hadn’t cropped the photo, the photo would look unbalanced and there would be too much negative space on the left side side of the photo rather than the right side of the photo.
After being cropped the photo looks more visually pleasing.
The space in the photo appeared very big to begin with but after I cropped it the space has decreased, so you can’t see the whole of the photo.
In this photo I had to crop lots of it due to the sides of the photo not being proportional and not being balanced enough. If I hadn’t cropped the photo, the photo would look unbalanced and there would be too much negative space on the left side rather than the right side of the photo.
After being cropped the photo looks more aesthetically pleasing and good to look at.
For this image it had two main textures which is the black card underneath to being smooth and the white paper being rough due to being cut out.
Photos Edited Into A White Filter
My Edited Photos into a White Filter.
In this photo I had to slightly crop it due to the sides of the photo not being proportional. If I hadn’t cropped the photo, the photo would look unbalanced and there would be too much negative space on the background of the photo.
The space in the photo appeared very big to begin with but after I cropped it the space has decreased, so you can’t see the whole of the photo.
The image appears to have a range of textures from the black card underneath to being smooth and the white paper being rough due to being cut out.
This photo had to be slightly cropped it due to the sides of the photo not being proportional and balanced . If I hadn’t cropped the photo, the photo would look unbalanced and there would be too much negative space on the background and the foreground of the photo.
The space in the photo appeared very big to begin with but after I cropped it the space has decreased, so you can’t see the whole of the photo.
The image appears to have a texture of the white paper being rough due to being cut out. Another texture in this photo is white card underneath which is smooth to touch.
This photo had to be slightly cropped it due to the sides of the photo not being proportional and balanced . If I hadn’t cropped the photo, the photo would look unbalanced and there would be too much negative space on the background and the foreground of the photo.
The image appears to have a texture of the white paper being rough due to being cut out. Another texture in this photo is white card underneath which is smooth to touch.
The white filter I used on this photo is BW09 which is on Lightroom. In this photo is also enhanced shadows and the texture.
Photos Edited Into A Black Filter
My Edited Photos into Black
This photo had to be slightly cropped it due to the sides of the photo not being proportional and balanced . If I hadn’t cropped the photo, the photo would look unbalanced and there would be too much negative space on the background and the foreground of the photo.
The space in the photo appeared very big to begin with but after I cropped it the space has decreased, so you can’t see the whole of the photo.
The image appears to have a texture of the white paper being rough due to being cut out. Another texture in this photo is white card underneath which is smooth to touch. Also on this photo the paper appears to have a bit of a fuzzy texture due to +100 on the dehaze setting on Lightroom, this makes it have an interesting texture.
This photo had to be slightly cropped it due to the sides of the photo not being proportional and balanced . If I hadn’t cropped the photo, the photo would look unbalanced and there would be too much negative space on the background and the foreground of the photo.
The space in the photo appeared very big to begin with but after I cropped it the space has decreased, so you can’t see the whole of the photo.
The black filter I used on this photo is BW12 which is on Lightroom. In this photo is also enhanced shadows and the texture. It has also made the paper shadows pop out more and to be more present.
This photo had to be slightly cropped it due to the sides of the photo not being proportional and balanced . If I hadn’t cropped the photo, the photo would look unbalanced and there would be too much negative space on the background and the foreground of the photo.
After being cropped the photo looks more visually pleasing.
The space in the photo appeared very big to begin with but after I cropped it the space has decreased, so you can’t see the whole of the photo.
The black filter on Lightroom I used on this photo is BW11 which is located on Lightroom. In this photo is also enhanced shadows and the texture. It has also made the paper shadows pop out more and to be more present.
My Final 6 Photos
These photos are my favourite 6 photos, I have created. At the start I started with 12 photos then narrowed it down to 6 final photos. These photos have a mix of colour and black and white. By having colourful photos artists will use the desired mood and it will enhance their feelings. Also by using black and white the photographer will find it a way of concentrating on the viewer’s attention of a particular subject and also the photographer will feel it is more emotive. By having some straight lines in the photos it means these lines have geometric quality and also have centre of attention. The texture on all of these photos means that the paper looks quite rough to touch and feel. The images that I took had lots of negative space around it so I had to crop it to make the photos balanced on each side.
Art Steps Photos
I think Art Steps is a great way to showcase your photos on a display.
Texture in photography means the visual quality of the surface of an object, disclosed through variances in shape, tone and colour depth.
Edward Weston
Edward Weston (1886–1958) was an American photographer who played vital role in the development of modern photography. He generated pictures of landscapes and objects in black-and-white, transforming them into current images that were ahead of the time he was in time. He used his professional photographic skills that were wide-ranging, but he was well known to many as a professional of black-and-white images.
Texture was important to Weston. Using large format cameras, he took pictures of objects and landscapes that had shape, tone and colour depth which are key for a good texture photo. His use of lighting and contrast brought out every exquisite detail, giving his photographs a textured but almost three-dimensional quality. The focus on texture made bland, regular objects abstract and atheistically pleasing.
Above are examples of Edward Weston’s work
I took inspiration from the use of composition and shadows from what would otherwise be a normal every day object and turn it into something abstract and atheistically pleasing.
My Texture Photoshoot
Contact Sheet
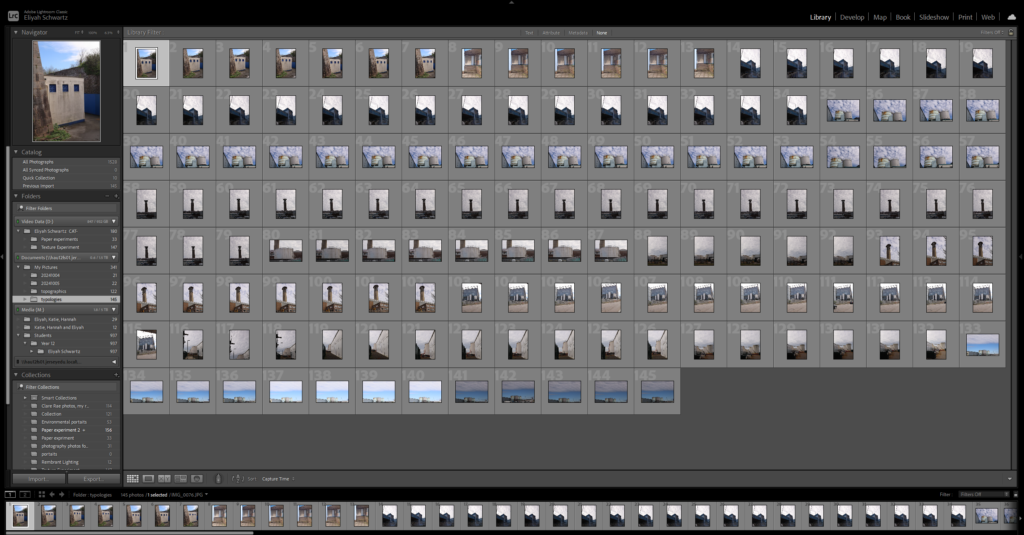
As you can see above I took 147 images from the camera of some objects until I found the one that I wanted to use, I then continued to take many of photos of one object with different camera settings and different lighting conditions to achieve the ideal result I wanted.
Photos I didn’t like
I didn’t like this photo due to some visual noise that was taking part which gives this photo a degraded quality. This photo was taken at an ISO of 400. It also has a wide aperture of 3.5.
I didn’t like this photo due too much visual noise and really bad degrading quality. Taken at an ISO of 6400. It also didn’t match the theme is was going for.
Lastly, I also didn’t liken this photo due too being too dark. This is what happens when you don’t have enough light in your room, in the camera or in the photo. It gives no proper final image.
Selection Process
As you can see above I pressed P to keep the images I wanted to use for my final photos. I used X to get rid of the images i didn’t wanted to use for the future. Then I gave a rating for the images, they all had a rating out of 5.The images with 4 and 5 stars are the images I wanted to use for my final photos. The photos I didn’t like I rated 1-3 stars. Finally I gave them the colour yellow or green, green being the best and yellow being average . Red was for very bad photos. I will edit the images so I can present final photos.
Editing My Best Images:
These are my three best images that have been edited.
This image started with more negative space on the left than on the right. To create a more balanced outcome, I cropped the image as above.
When cropping, I made sure to maintain the line that runs from the bottom left corner of the photo, to the top right.
For this image I also enhance the contrast and tone, to exaggerate the texture.
This image had lots of negative space on the right rather than the left. For the image to be more balanced I had to crop it to get the best result.
When cropping I mad sure that the photo was balanced on both sides, so the photo would look aesthetically pleasing to the eye.
Also, for this image I made sure to to zoom into the texture to go for the best results.
In this image I had to get rid of most of the negative space on the left side on the photo rather than the right. To get the best result this photo need to be cropped.
As I was cropping this photo I need to make sure that the photo was balanced, so the photo looks pleasing to the eye.
For this image I also had to enhance the contrast and tone, to exaggerate the texture.
Black and White Final Images
These are the photos edited
This photo had to get rid of some of the negative space due to be being unbalanced either side. This means the photo is not equally distributed on each side that is the reason I had to crop it. I originally started with negative space left than on the right.
When cropping, I made sure to keep the line that runs from the bottom left corner of the photo, to the top right.
I enhanced texture to see the material on the coat.
In this photo I had to slightly crop it due to the sides of the photo not being proportional. If I hadn’t cropped the photo, the photo would look unbalanced and there would be too much negative on the foreground of the photo.
After being cropped the photo looks more visually pleasing.
For this image I also had to enhance the contrast and tone, to exaggerate the texture.
In this photo I had to slightly crop it due to the sides of the photo not being proportional. If I hadn’t cropped the photo, the photo would look unbalanced and there would be too much negative on the background of the photo.
After being cropped the photo looks more visually pleasing.
For this image I also had to enhance the contrast and tone, to exaggerate the texture.
Photos Edited Into A White Filter
Edited Photos
In this photo I had to slightly crop it due to the sides of the photo not being proportional. If I hadn’t cropped the photo, the photo would look unbalanced and there would be too much negative on the background of the photo.
After being cropped the photo looks more visually pleasing.
For this image I also had to enhance the contrast and tone, to exaggerate the texture.
This image is in white, so it has no proper colour. This photo has been edited with a white filter on adobe Lightroom.
In this photo I had to slightly crop it due to the sides of the photo not being proportional. If I hadn’t cropped the photo, the photo would look unbalanced and there would be too much negative on the background of the photo.
After being cropped the photo looks more visually pleasing and nice to look at.
For this image I also had to enhance the contrast, exposure ,dehaze, clarity and tone to exaggerate the texture.
As you can see above there are 6 photos edited on Adobe Lightroom. They are both edited in Black and White with a filter . By using black and white it influenced me to chose an Artist like Edward Weston. By doing this it made me think that the most simple colours in the world can make very interesting photos. I think I did this task successfully by these photos being abstract and aesthetically pleasing.
My Final 6 Photos
These are my final 6 photos due to a mixture of a light and dark tone. By having a light tone it makes the photo produced have a sharp with a strong contrast. By having a dark tone many photographs seem to have less impact and less visual vibration. By having some straight lines in the photos it means these lines have geometric quality and also have centre of attention. The texture on all of these photos means that the coat looks quite rough to touch and feel. The images that I took had lots of negative space around it so I had to crop it to make the photos balanced on each side.
ISO is a number that represents how sensitive your camera sensor is to light. Also controls the amount of light your camera lets in, and therefore how dark or light your photos will be. ISO stands for International Organization for Standardization.
How Does It Affect Your Camera?
Controls the amount of light your camera will let in, and therefore your photos will be light or dark.
What does a low/high ISO mean?
A lower ISO value means less sensitivity to light, and the more light you will need to take the photo. While a higher ISO means more sensitivity, and the less light you need to take a picture.It’s one of the element in the photography’s exposure triangle — along with aperture and shutter speed — and plays an important role in the quality of your photos.
If you use a High ISO it can degraded image quality and cause your photos to be grainy or “noisy.”
High VS Low ISO
It’s good to be on a low ISO to avoid noise and a degrading quality in the image.
ISO chart
Low Light Situations
In low light situations, it is often crucial to raise the ISO in order to get a clear picture. The huge problem with raising the ISO, though, is that it introduces ‘noise’ into the image , which can make it appear grainy.
If you are taking a picture in excellent light conditions, you will want to keep the ISO low in order to dodge introducing noise into the image.
How to Adjust ISO On A Camera
To adjust ISO on the camera you will need to press the ISO button and will you need to use the swivel at the top to rotate it so it will go into a lower ISO or a higher ISO.
Edward Weston
Edward Henry Weston was an American photographer. He has been called “one of the most inventive and dominant American photographers” and “one of the masters of 20th century photography.” Weston was inventive due to the types of photos he would take. Weston was born in March 24th 1886 and died January 1, 1958. He was 71 years old.
Cabbage Leaf 1931 which is pictured below.
My work of High ISO VS low ISO
High ISO Photos
Above is the information of the photo that has been taken at a high ISO. The ISO was set to 6400, it was set to this so I could achieve a grainy and degrading effect to show the difference between a High ISO an A Low ISO.
Another High ISO Photo
Above is the information of the photo that was taken at a High ISO. The ISO was set too 6400 it was set to this so I could achieve a noisy and grainy effect, like it is above.
Low ISO Photos
Above is the information of a photo taken at a Low ISO. The ISO was set to 200 it was set like this to achieve a clear picture that you can see properly without lots of noise produced.
Another Low ISO Photo
Above is the information about the photo that was taken at a Low ISO. The ISO was set too 200 to achieve a crystal clear image that is easy to see rather than being made with a degrading quality.