Ansel Adams was an American landscape photographer and conservationist. He was mainly known for his monochrome images of national parks. Adams was a life-long advocate of environmental conservation, It was at age 14 when Adams was given his first camera during his first ever visit to Yosemite Park, he later developed his earlier work as a member of the Sierra Club. He was later contacted by the United States Department of Interior to take pictures of the national parks for which he was later awarded the Presidential Medal of Freedom in 1980.
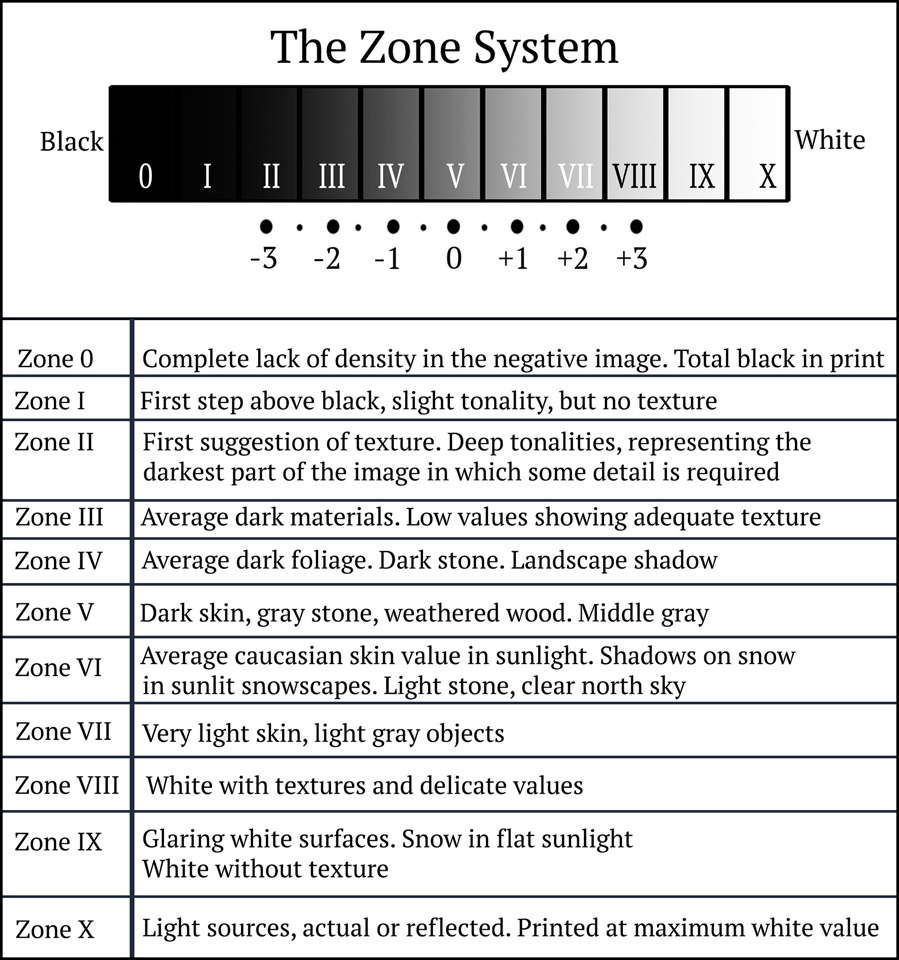
Adams and Fred Archer were the inventors of a thing called the zone system, which is a method of achieving the wanted image through technical understanding of the tonal range in the image. The zone technique is what helped photographers in that time determine the optimal film exposure and development. ” The Zone System provides photographers with a systematic method of precisely defining the relationship between the way they visualize the photographic subject and the final results. ” – Quotation marks pasted from Wikipedia.
F/64
Adams was one of the seven founders of the group f/64 which founded in in the San Francisco Bay Area in the American 20th century which was an association which was advocating for ” pure ” photography which was a style of photography which favoured the sharp focus and the use of full tonal range without the image, as well as a carefully framed image.
The group mainly formed in opposition to the pictorialist movement which was dominant for the majority of the early 20th century. Whereas the f/64 group wanted to encourage a modernist take to photography which focused on precisely exposed images and natural forms.
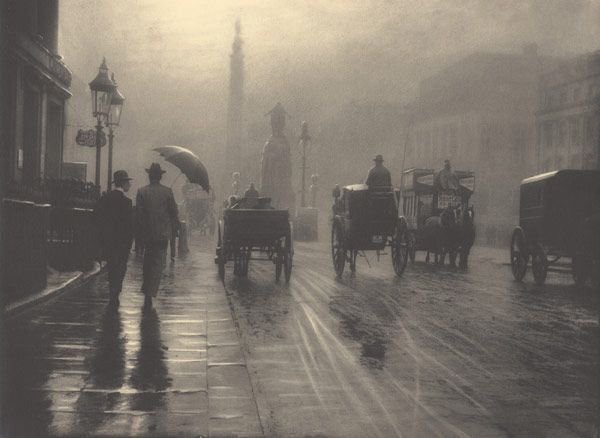
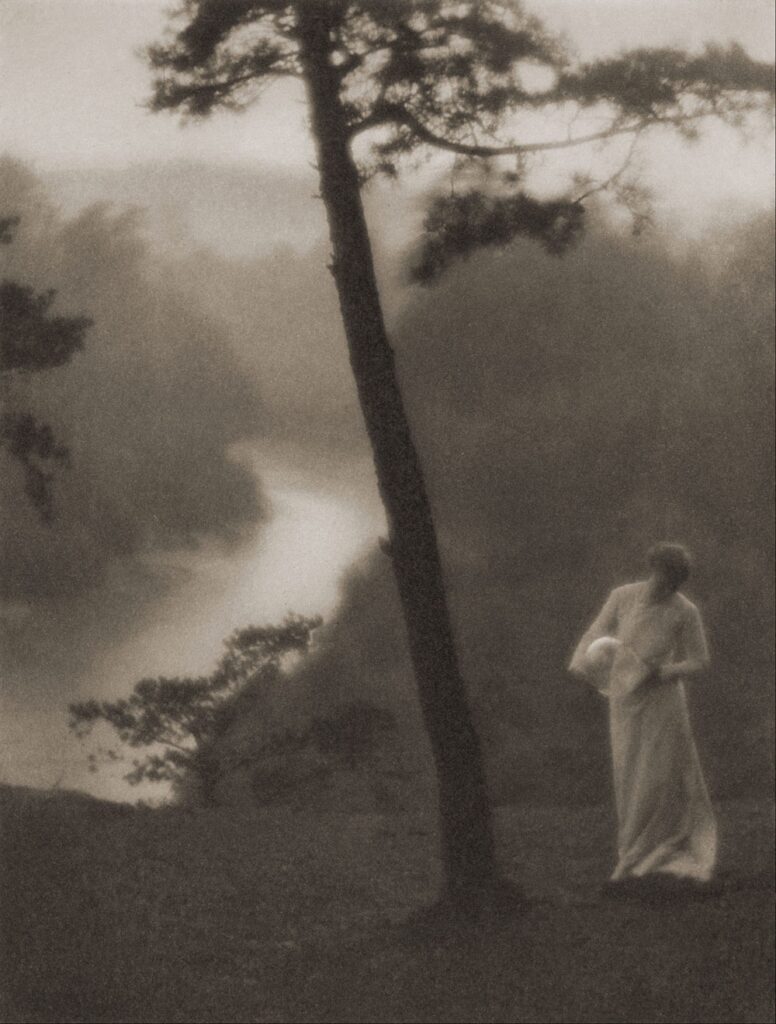
examples of the pictorialist movement:
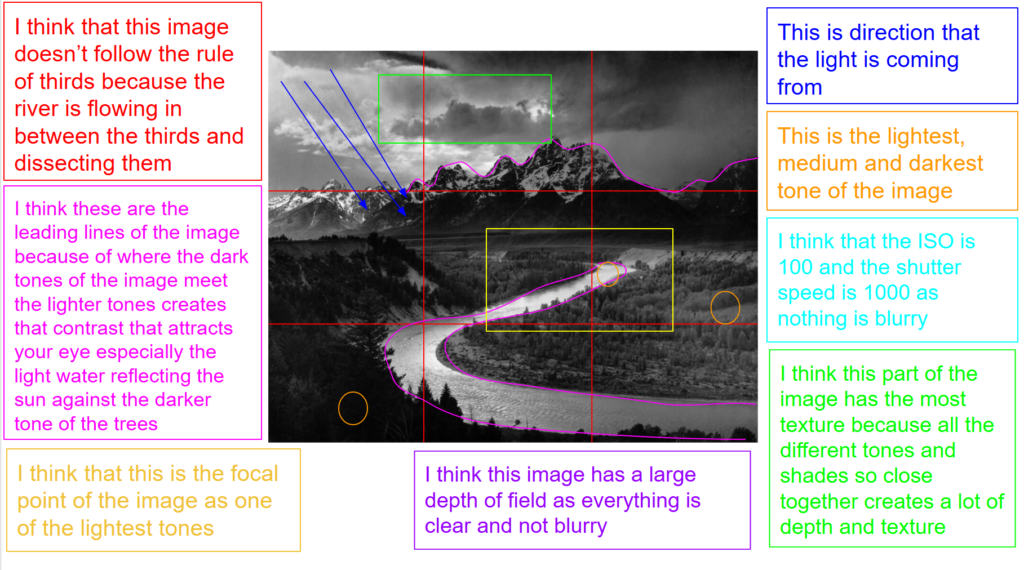
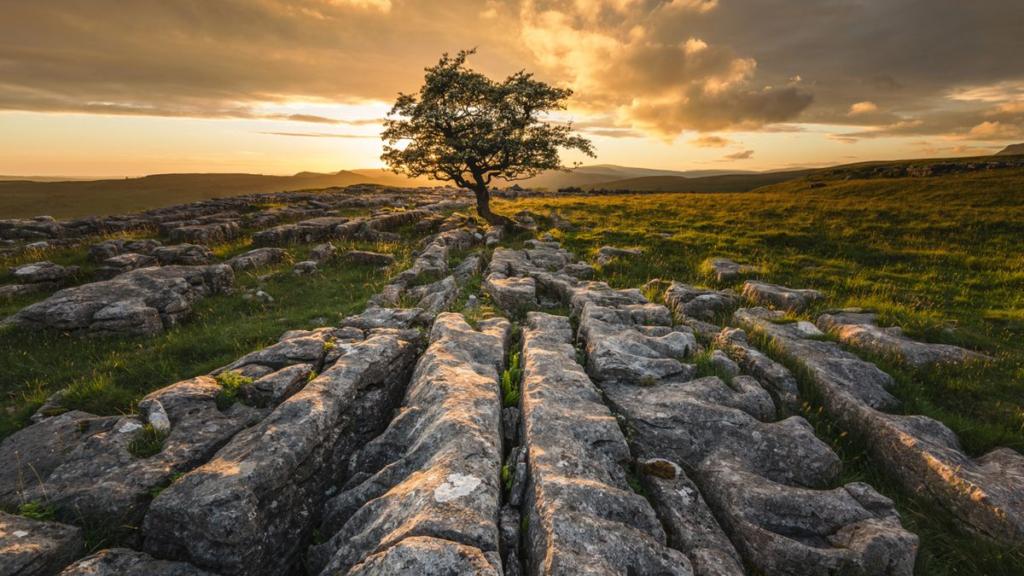
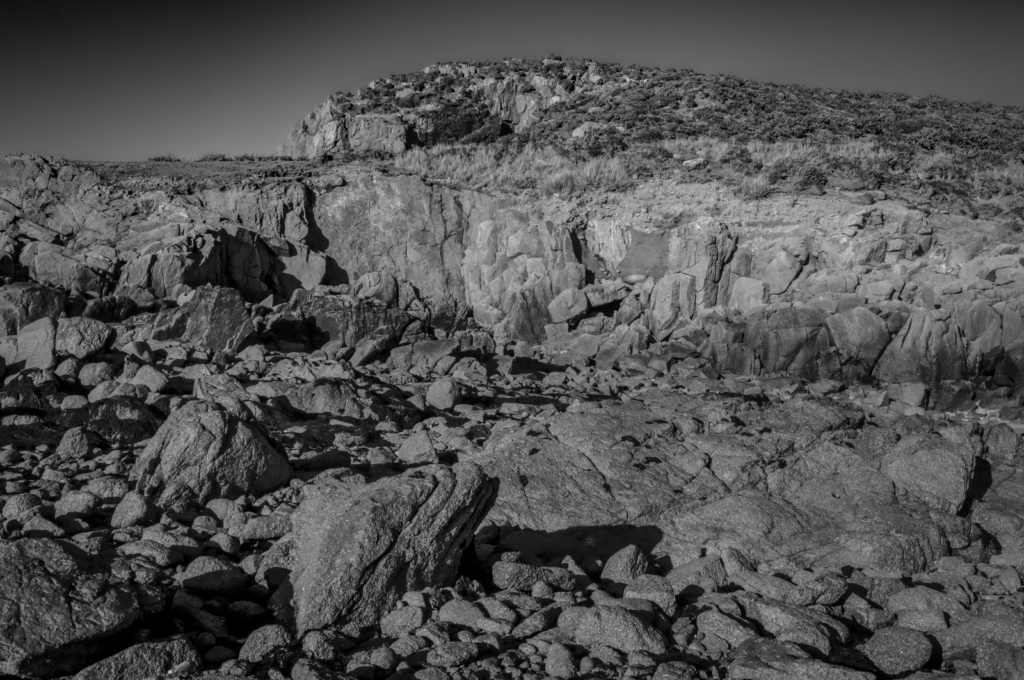
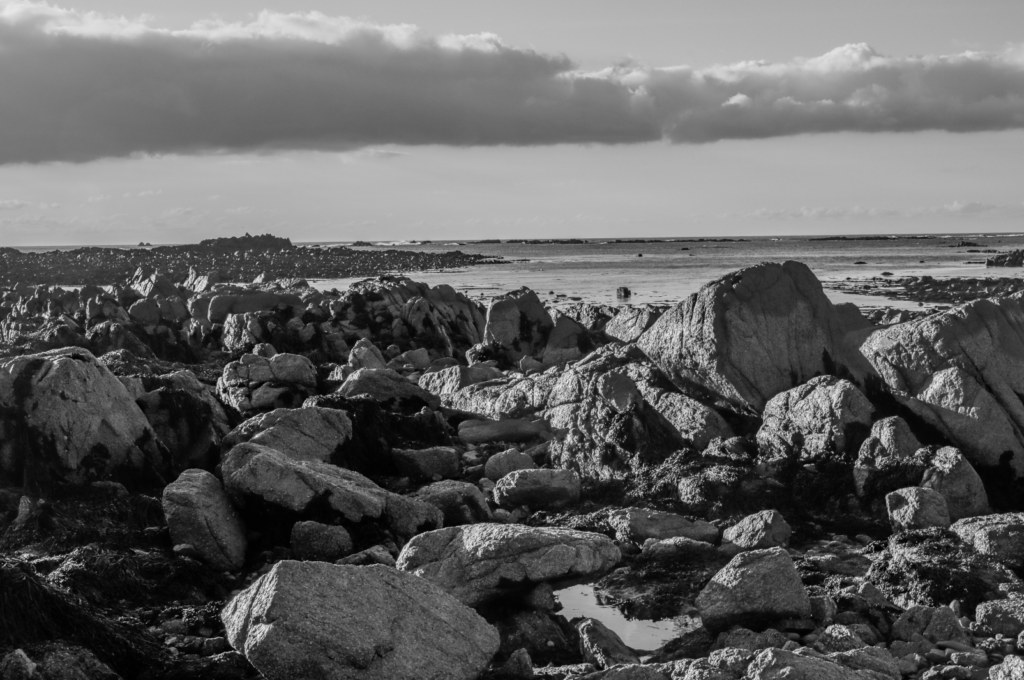
Adam Analysis
Technical
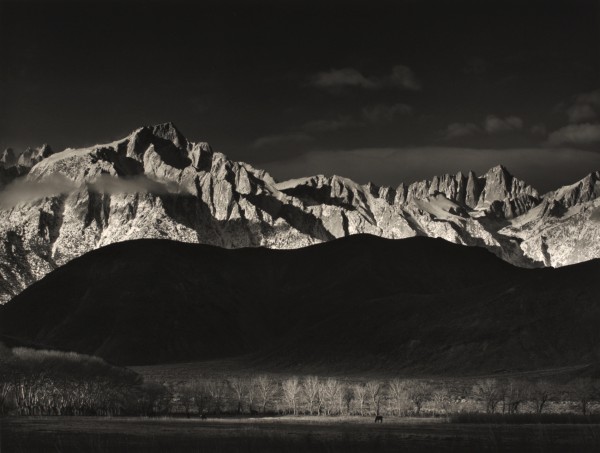
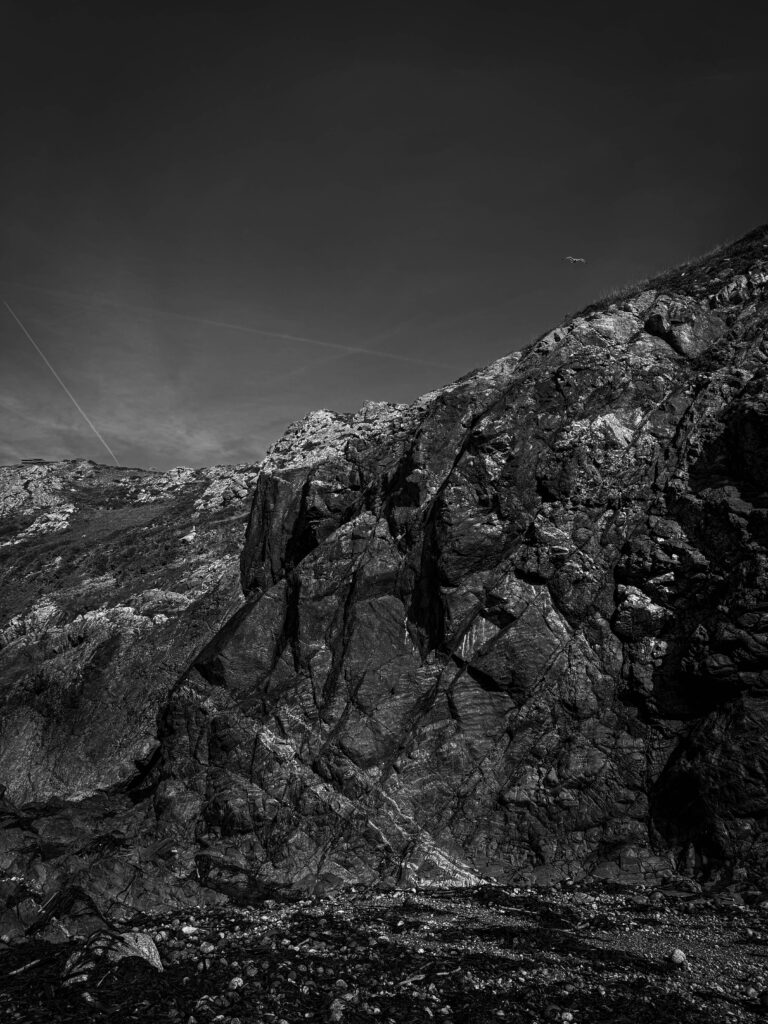
the type of lighting in this image is harsh natural lighting, with high contrast. As well as the image having a sharp focus. I think the aperture of this image is f/32 as everything is in focus and crisp and nothing in the image is blurry. I think the ISO is 100 due to the clarity of the tones and the good tonal range of the image, you can tell this due to the contrast of the lightest tone in comparison to the darkest tone.
Mise-en-scene
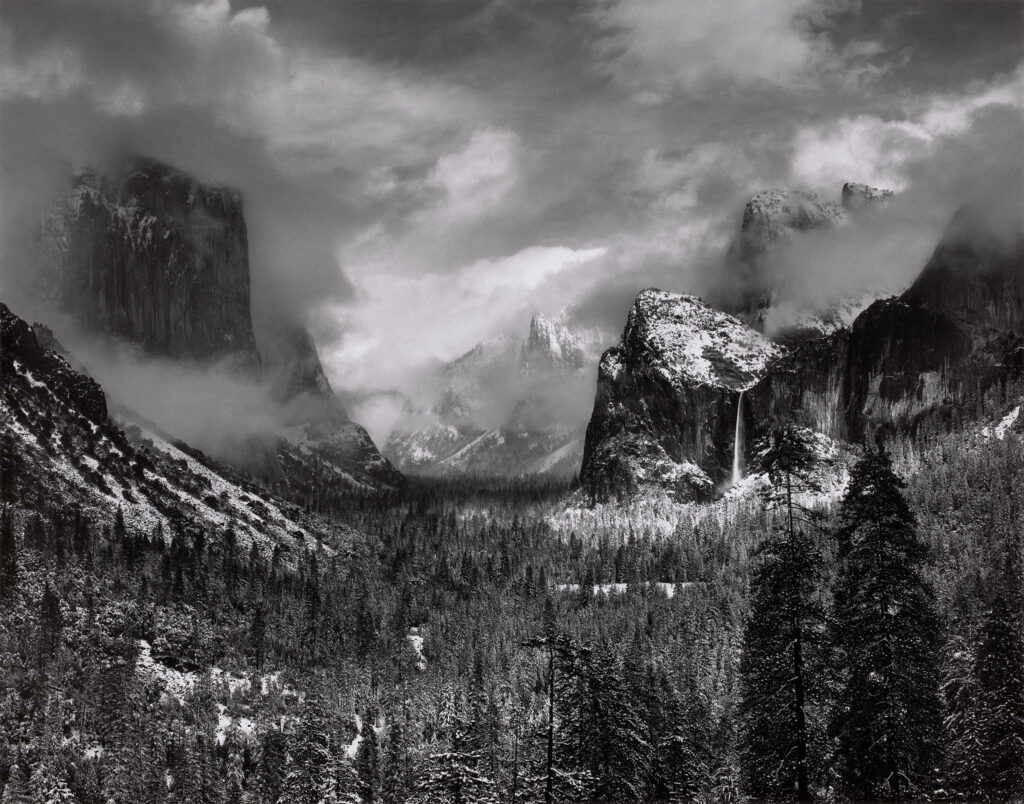
This is image is taken using a film camera and the genre of this photography is landscape.
The mise-en-scene presents the Tetons mountains and the snake river cascading down the middle of the image. The tone of this image has a good range due to the zoning system, however there are some darker spots for example a lot of the forest and a few parts of the mountains. The use of light in this image is harsh, however, it is natural lighting as they are in the Yosemite park. The focus distance is long as the mountains and the river is far away and the depth of field is large as everything is in focus. The leading lines of the images would be the lightness of where the sunlight is hitting the bend of the river the and top of the mountains that are being hit by the light draw your eye along the image.
I believe the ISO is 100 as everything is in as most of the image is in focus however the background is blurred and grainy. I believe that the shutter speed is 1000 as everything is clear.
Photoshoot
Edited Images
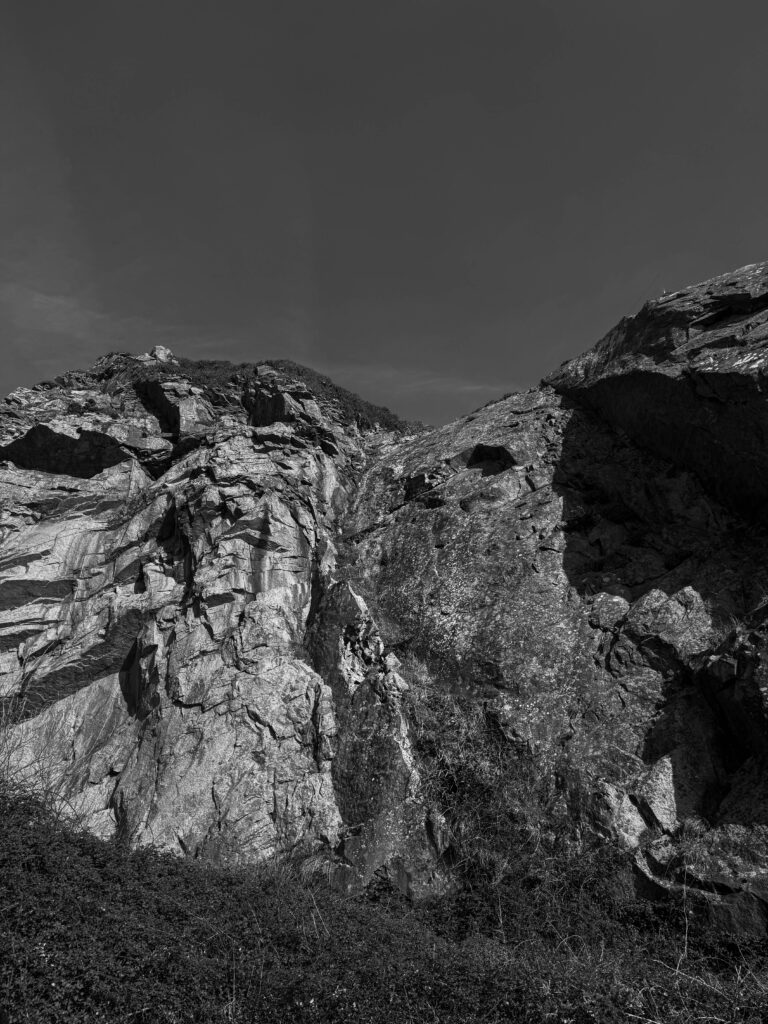
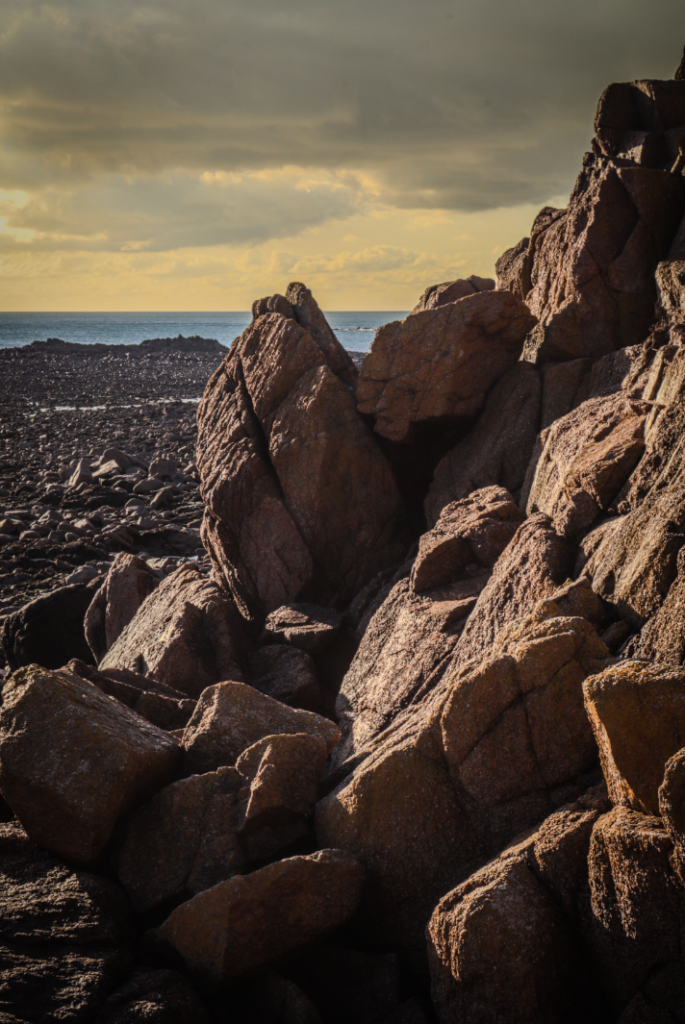
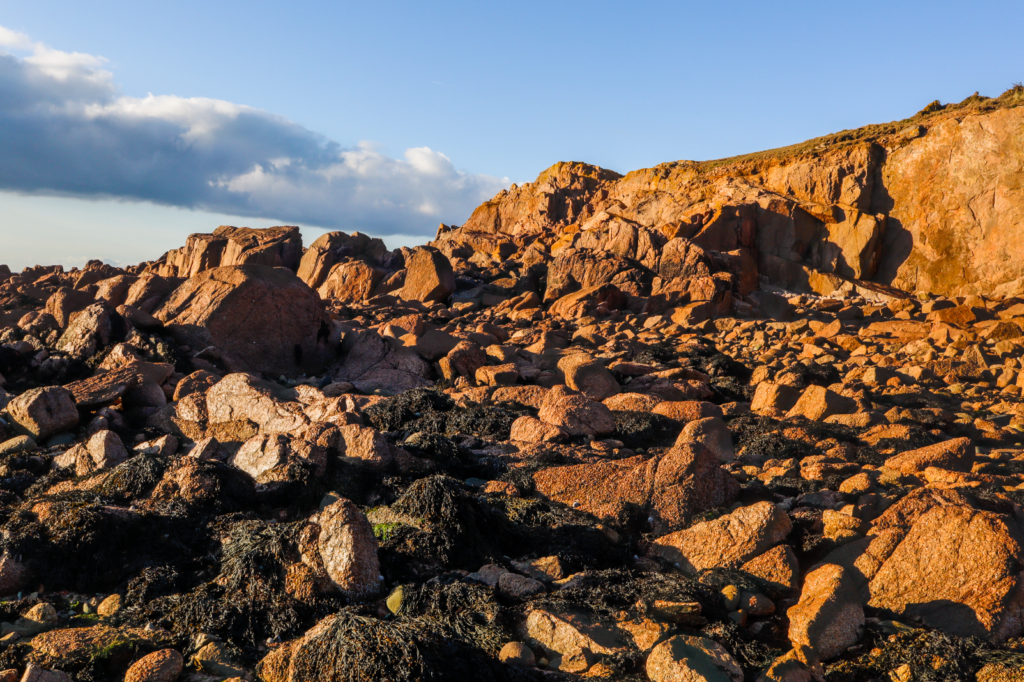
Personally I really like this image because I like the way that the singular rock is the main subject of the image and against the light colour of the sky it looks really nice.
One thing that I have done to edit this image is I created a mask and placed it over a section of the rocks on the left and edited it separately compared to the rest of the image because the way that I edited the whole image made that one area look too dark so I added the mask to be able to lighten it up.
As well as I added vignette to all of the images I took for Ansel Adams to give it an older feel.
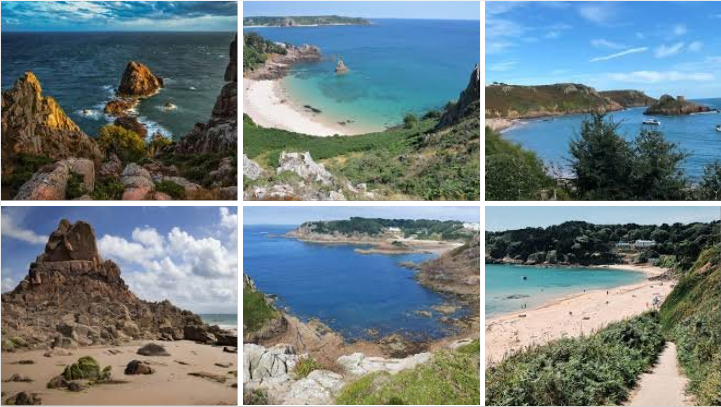
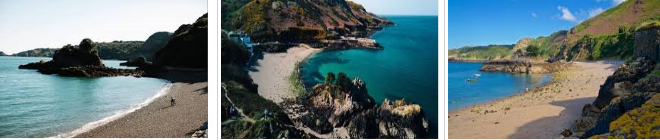
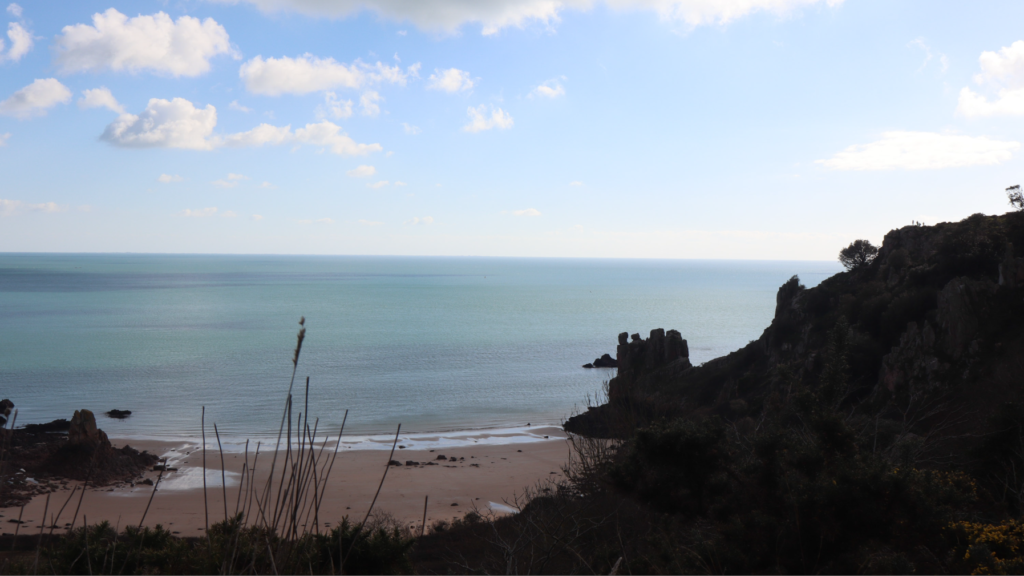
these could be two possible beaches I could take photos in inspired by Ansel Adams
as u can see in the photo examples, I would take photos from these sorts of angles from on top or on the beach taking photos of the big rocks.
photoshoot – Beauport
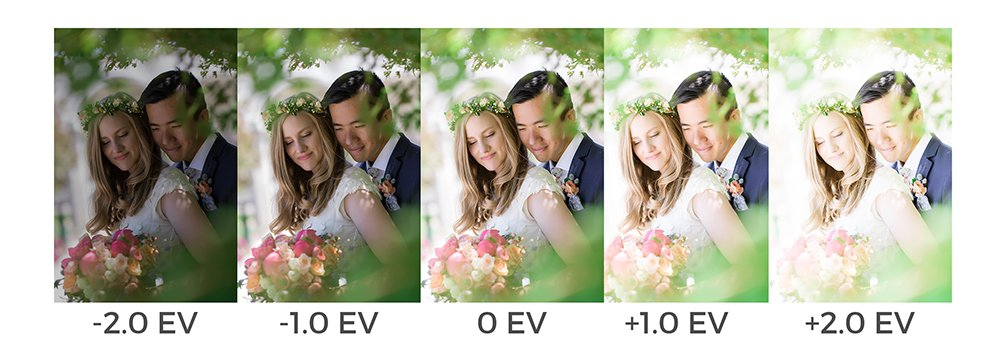
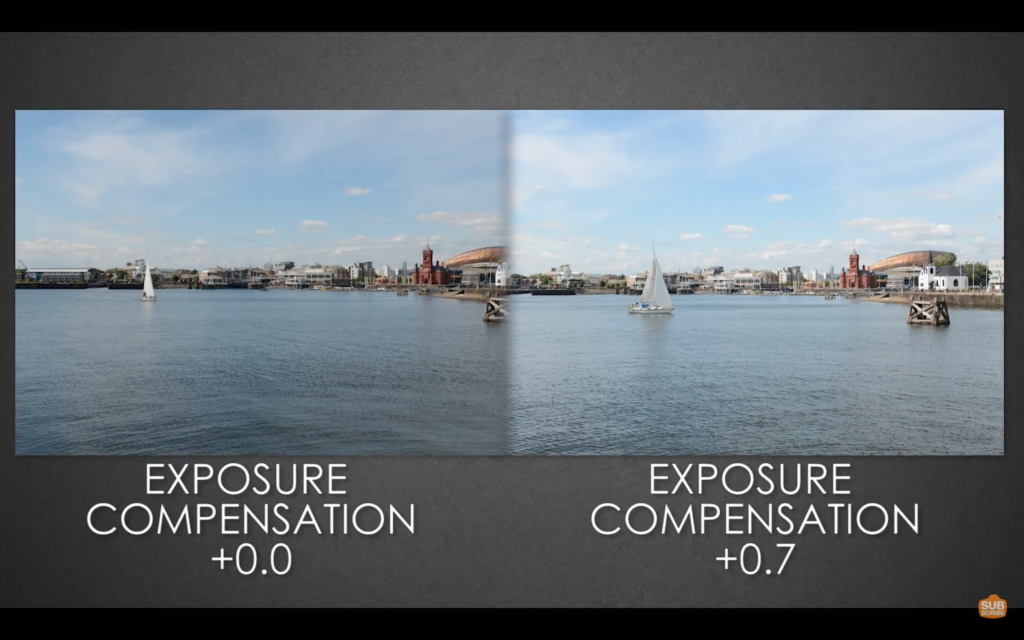
exposure compensation –
within all of these photos iv tried using exposure compensation, which took 3 photos at a time with 3 different exposers low exposure, middle and high exposure.
best raw photos –
experimentation –
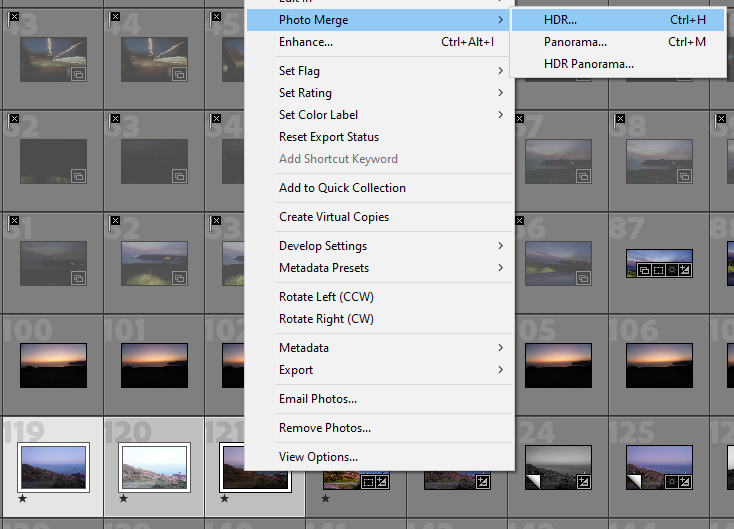
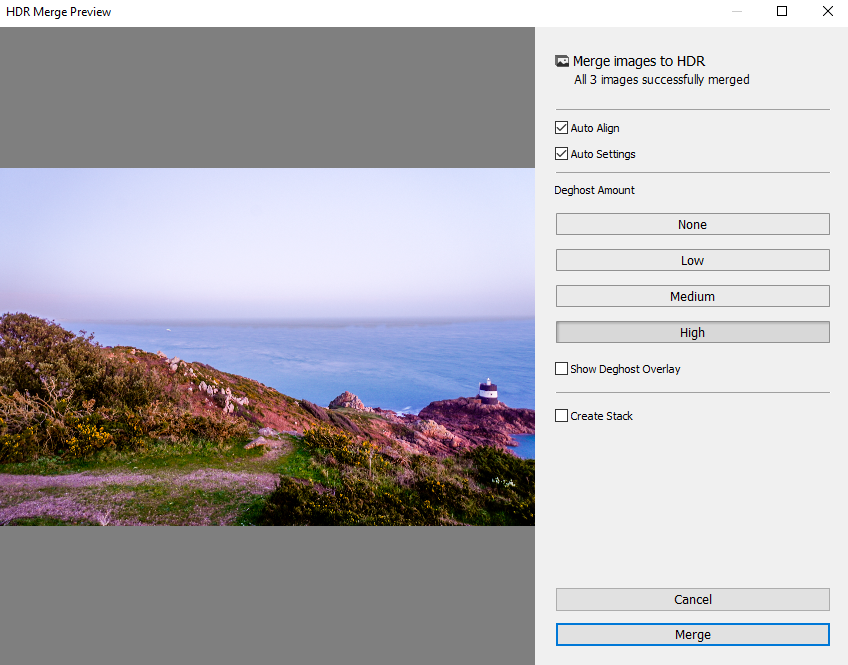
from this image I edited it using HDR merge and the edits also, plus some more but in different styles such as black and white.
merged image –
from any of my edited images such as this one I have used exposure compensation, which I merged the 3 different exposures, and before I did this I changed it to black and white preset. from doing this it made an balanced exposure overall that u can see more details within the under exposed areas. But still leaving some completely back areas to make is seem like there is more drama within the image, I did this by increasing the contrast.
experimental edits –
best edits –
final photos –
visual gallery –
the final phots have been places next top my other final photos from my first photoshoot
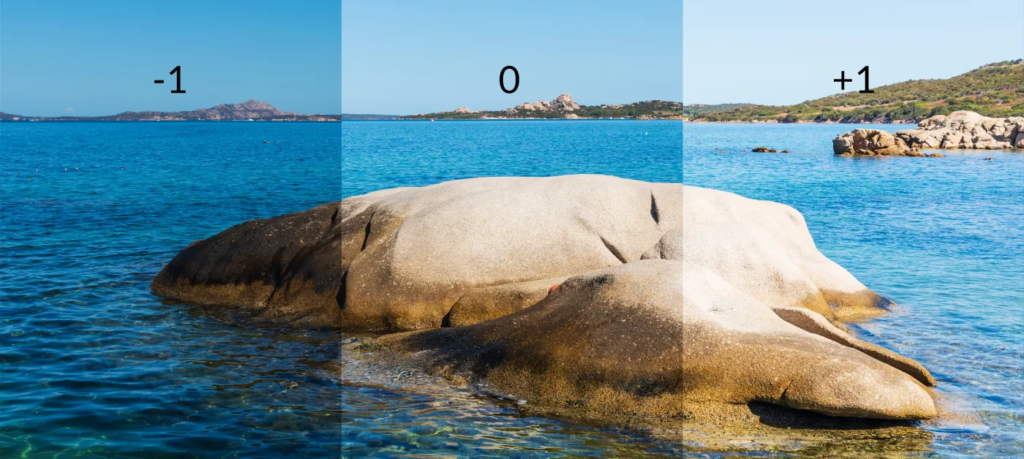
Exposure bracketing is a photographic technique where multiple shots of the same scene are taken at different exposure settings to capture the full tonal range and merge them during post-processing
from google
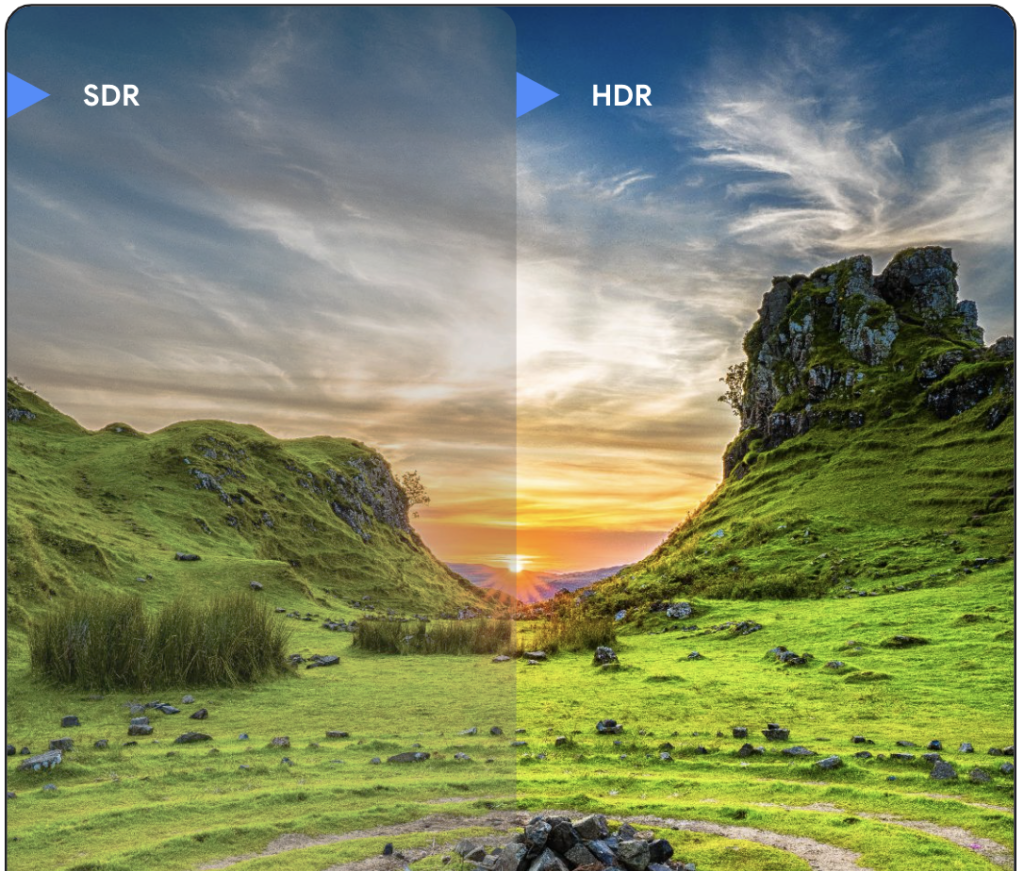
HDR (high dynamic range) capture is a technique that creates high dynamic range images by taking and combining multiple exposures of the same subject matter at different exposures.
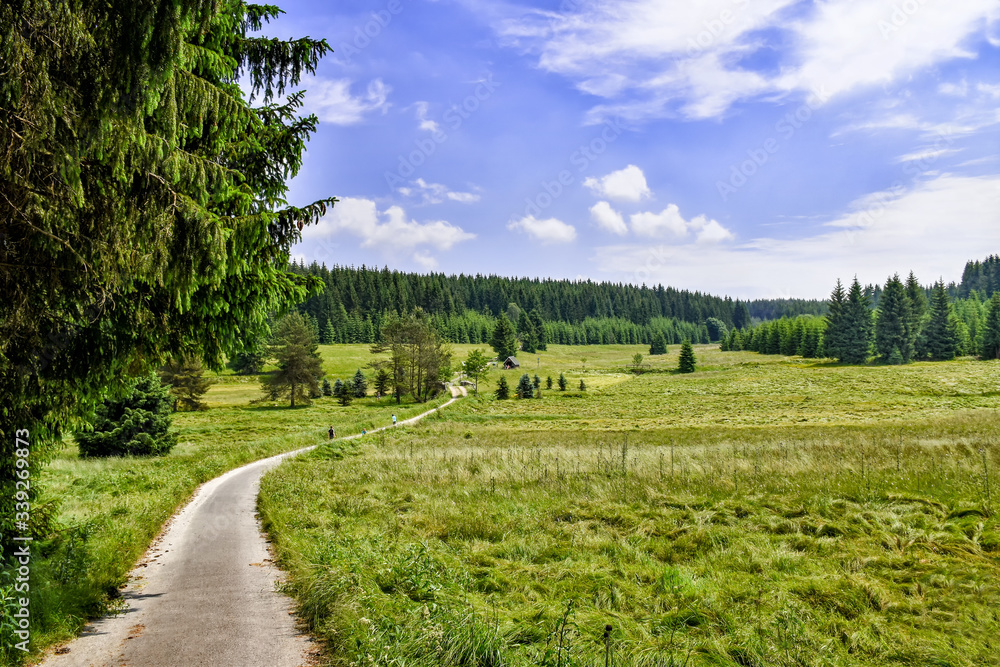
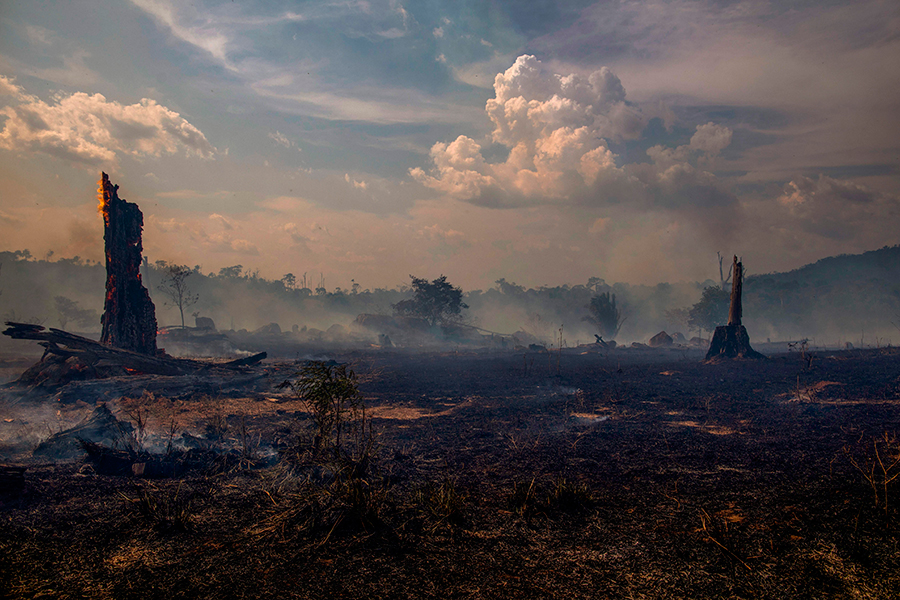
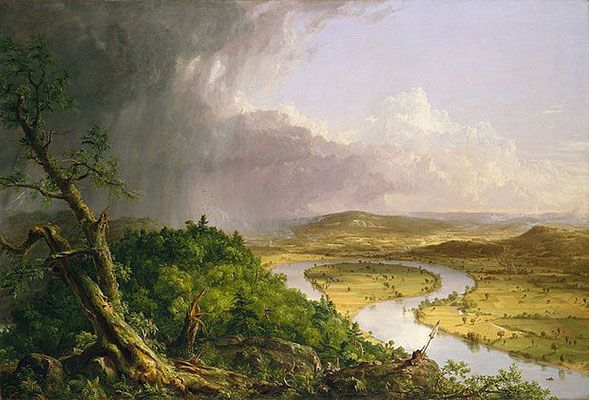
Landscape photography has its roots in, like many other forms and genres of photography, art. Specifically, the romanticism movement of art that began around the start of the industrial revolution – as a sort of rejection and rebellion against the billowing smoke and ugly buildings. The romanticism movement focuses on the beauty of nature and scenery, and this is where landscape photography began.
The first landscape photo was taken around 1826, by an inventor.
Ansel Adams was a pioneer in landscape photography, taking photos of vast american landscapes.
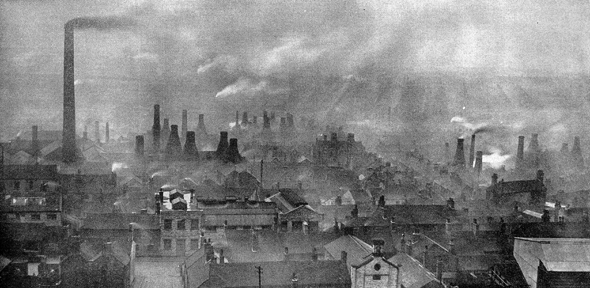
Whilst photographers were taking photos of nature scenery, another type of person was inspired by the industrial revolution, seeing vast structures as inspiring and not ugly, and this was generally the beginning of urban landscape photography.
Countryside Daguerreotypes – these were some of the earliest types of landscape photos taken and were taken by american and french photography.
Western Panoramas – American photographers had a vast natural landscape to photoshoot, so they began to photograph their own landscape.
City photography – suddenly images of the city started to appear – despite the difficulties of city photography due to long exposure shots being necessary, and photos would get blurred.
City portraiture – as tech improved, film became more sensitive and photos of hustling bustling cities became possible.
Industrial revolution – contrasting romanticism, early photographs of the grand industrial buildings began to emerge.
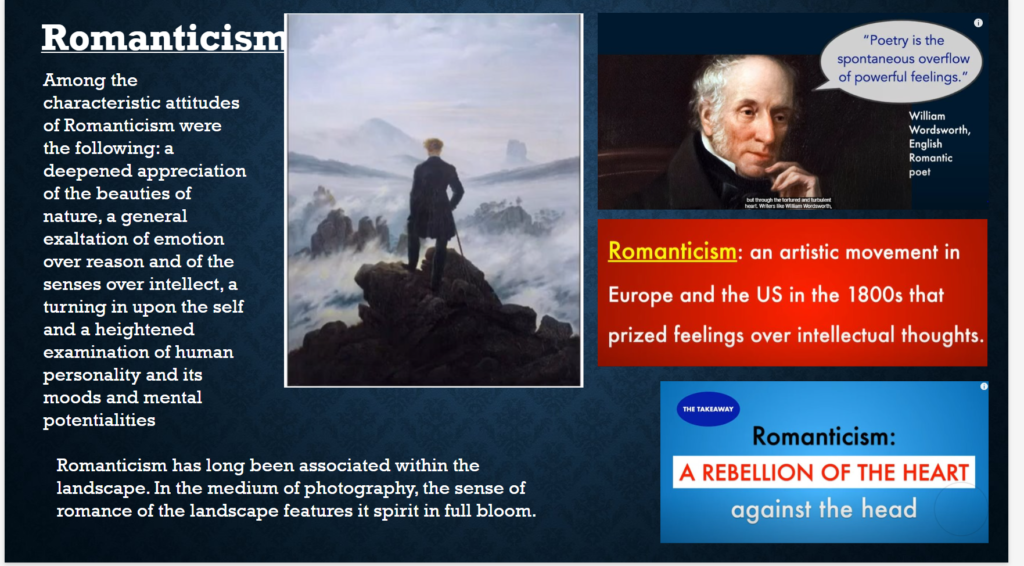
Romanticism in art and photography is about focusing on strong emotions, nature, and individual experience. It highlights beauty, imagination, and sometimes the mysterious or exotic. Think of dramatic landscapes, powerful moments, and emotional expressions. It’s less about strict realism and more about capturing the feeling of a scene. It involves romanticising certain things like nature or a certain lifestyle. For example, in photography, you might romanticise a landscape by capturing the best scenes only and perhaps putting a feeling of otherworldiness/ nostalgia. When you romanticise something, you make it seem better than it really is; in a way, everything humans think about is romanticised: the grass is always greener on the other side. An example of life being romanticised in our minds is thinking about the life of being an underground artist in New York (think Basquiat) is highly romanticised and the image of it looks really appealing/romantic, but in reality it is quite a hard life to live, and that feeling of romanticism that you get when looking at images isn’t necessarily how that person living that life might be experiencing it.
Romanticism placed particular emphasis on emotion, horror, awe, terror and apprehension. Emotion and feeling were central not only to the creation of the work, but also in how it should be read. Romanticism is meant to invoke strong feelings and really glorify the scenes of which it captures.
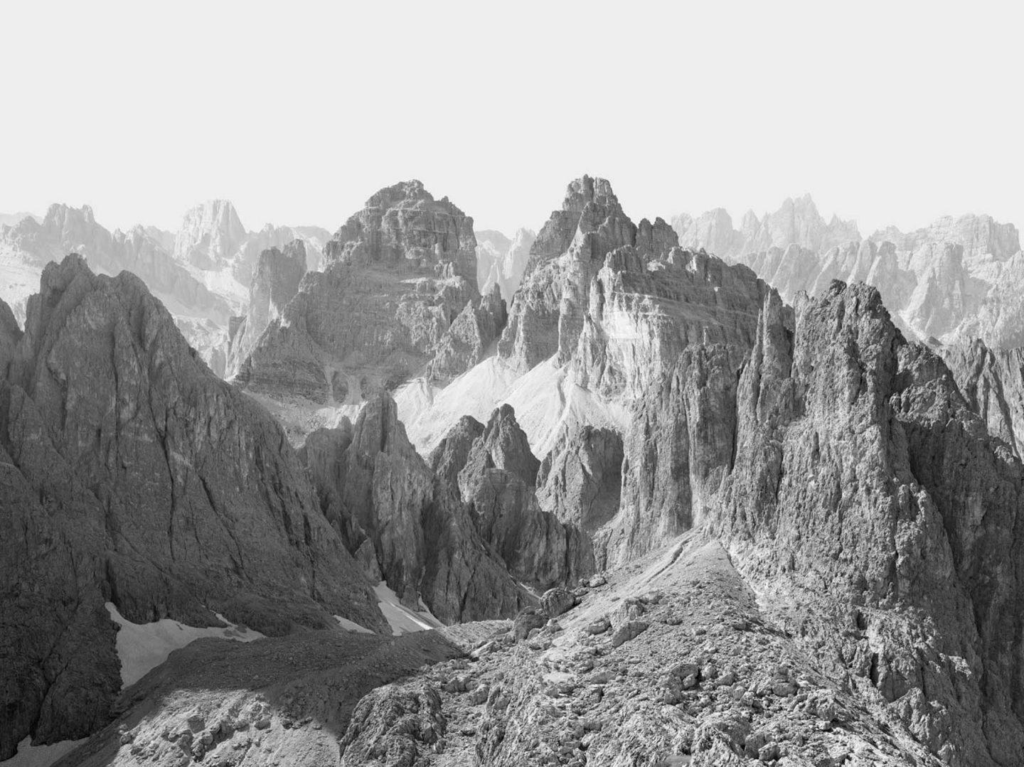
Romanticism can also have a link with landscape and nature . Landscapes became subjects in their own right and were often charged with symbolism. For romantic artists, nature is a source of inspiration and escape, a refuge from the tumult of the modern world. Landscape is often a key focus of romanticist artists because the nature the photos contain is often raw and places people don’t see very often – creating that feeling of longing for a different path or a different feeling towards life.
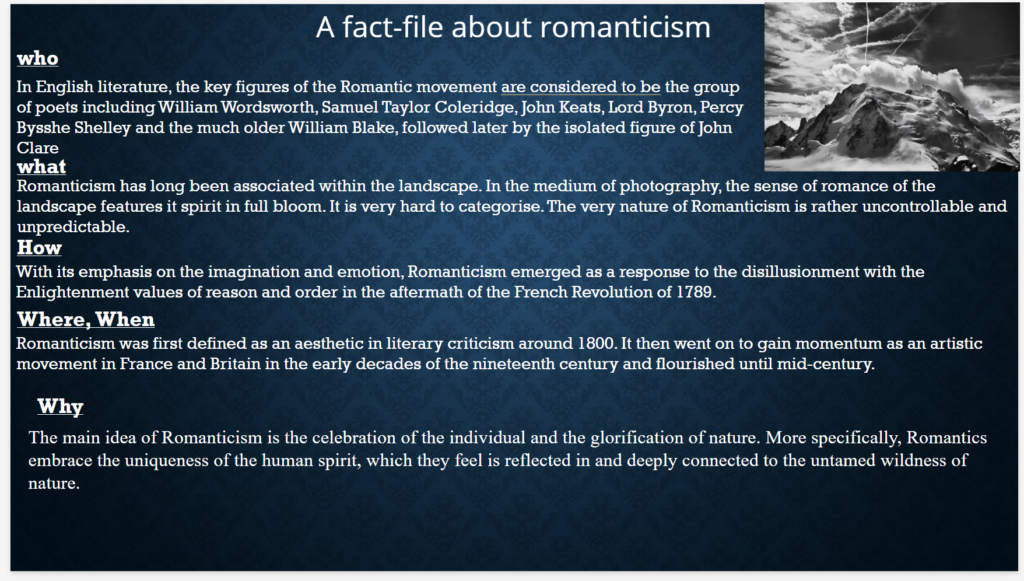
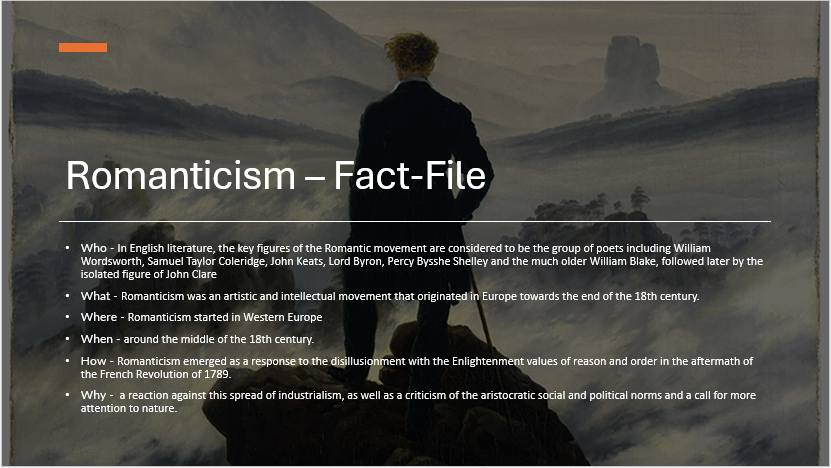
Who: artist William Blake and the Spanish painter Francisco Goya have been given the name “fathers” of Romanticism by various scholars for their works’ emphasis on subjective vision, the power of the imagination.
What: an artistic movement marked by the emphasis on imagination and emotions
Where: romanticism started In western Europe around the 18th century at this time the artistic and cultural movement was being revived (Neoclassicism)
How: With its emphasis on the imagination and emotion, Romanticism emerged as a response to the disillusionment with the Enlightenment values of reason and order in the aftermath of the French Revolution of 1789.
Why: Romanticism was born as a reaction against the Age of Enlightenment and the Industrial Revolution. The Romanticist movement celebrated rebellion, sensation, emotion, subjectivity, and individuality and it rejected tradition, reason, rationality, and authority.
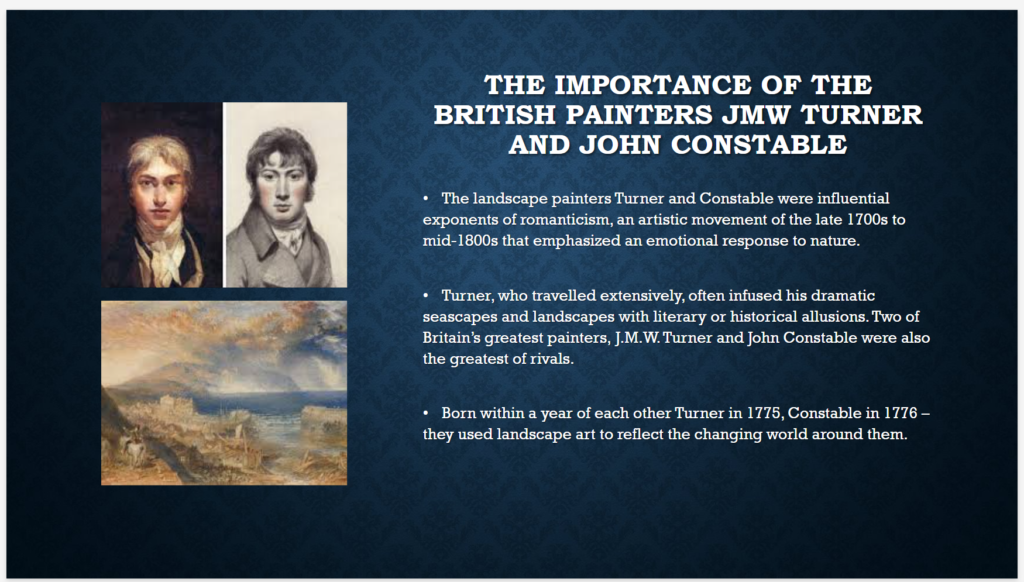
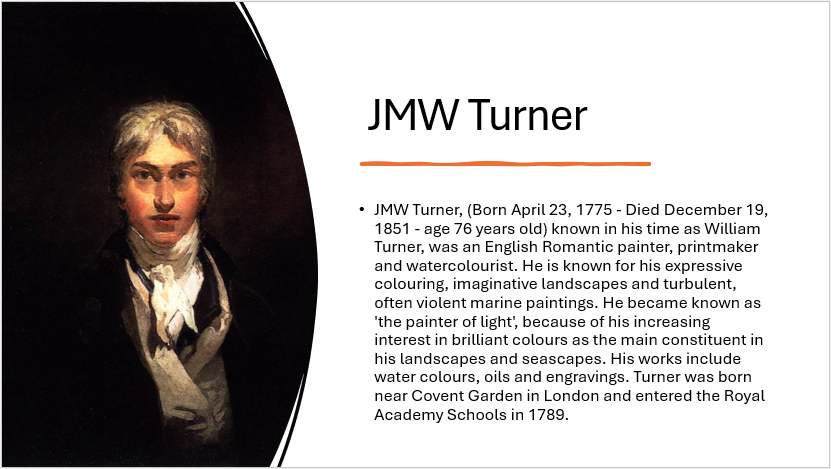
English romantic painter and water colour specialist , known for his romantic paintings that portray colourful imagery and imaginative landscapes. Joseph Mallord William born 23rd of April 1775 inspired modern art by incorporating a view of impossibility into his paintings by inviting unrealistic colouring and faded scenery to give a sense of romanticism
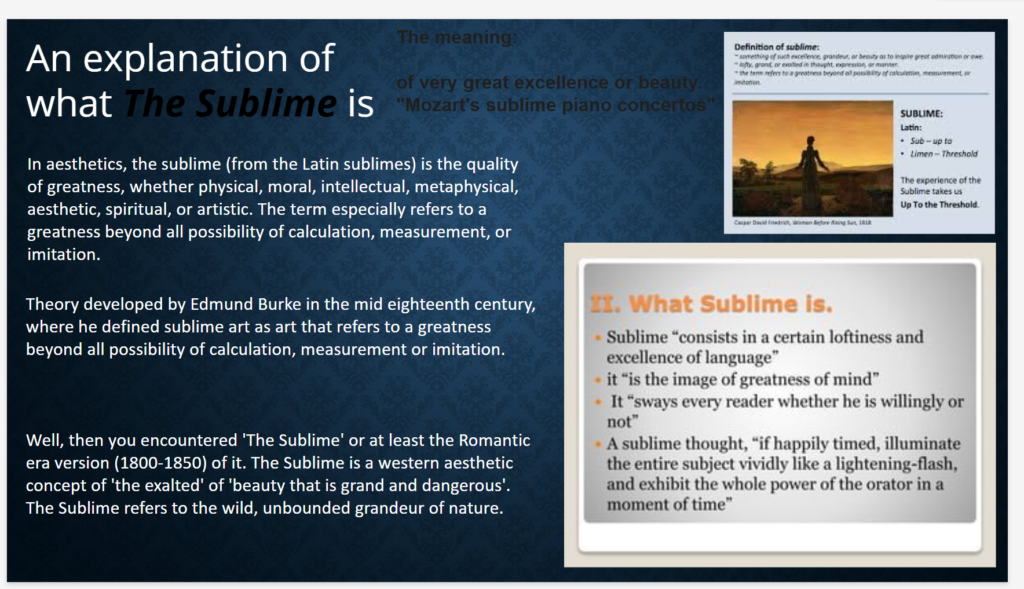
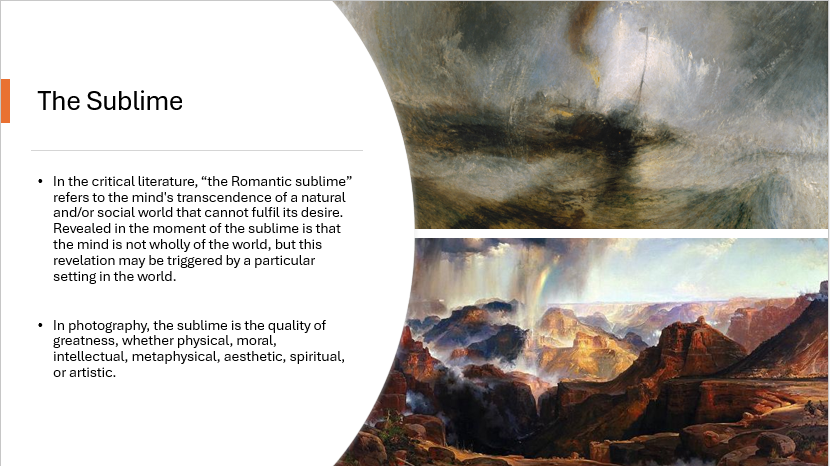
The Sublime
In the critical literature, “the Romantic sublime” refers to the mind’s transcendence of a natural and/or social world that finally cannot fulfil its desire. Revealed in the moment of the sublime is that the mind is not wholly of the world, but this revelation may be triggered by a particular setting in the world.
The sublime as defined by The Tate is : “Theory developed by Edmund Burke in the mid eighteenth century, where he defined sublime art as art that refers to a greatness beyond all possibility of calculation, measurement or imitation.”
The sublime is in most creative subject areas; photography, fine art, film, writing, poetry and many more.
Romanticism was an artistic, literary, and a smart movement that emerged in the late 18th century as a reaction against the Enlightenment’s focus on reason and logic. Instead, it emphasized emotion, individualism, and the power of nature, often portraying dramatic landscapes, heroic figures, and the sublime. Romantic artists and writers celebrated intense feelings, imagination, and the supernatural, frequently drawing inspiration from folklore, medieval history, and myths.
What is the Sublime?
The sublime is a concept in art, literature, and philosophy that refers to an overwhelming sense of awe, beauty, and even terror, often inspired by nature or grand, powerful experiences. It is something vast, intense, or beyond human comprehension, evoking deep emotions that can be both thrilling and unsettling.
Philosophers like Edmund Burke and Immanuel Kant explored the idea of the sublime, distinguishing it from mere beauty. Burke, for example, described it as something that inspires both admiration and fear—like towering mountains, violent storms, or the infinite night sky. In Romanticism, the sublime was a key theme, seen in the dramatic landscapes of Caspar David Friedrich, the wild seascapes of J.M.W. Turner, and the poetry of Percy Bysshe Shelley and William Wordsworth, who often depicted nature’s power and mystery.
How did the industrial revolution have an impact on Romanticism?
The Industrial Revolution had a profound impact on Romanticism, shaping its themes and attitudes as a reaction against rapid industrialization, urbanization, and mechanization. As factories spread, cities grew, and nature was increasingly altered by human hands, many Romantic artists, writers, and thinkers saw industrial progress as a threat to individuality, nature, and traditional ways of life.
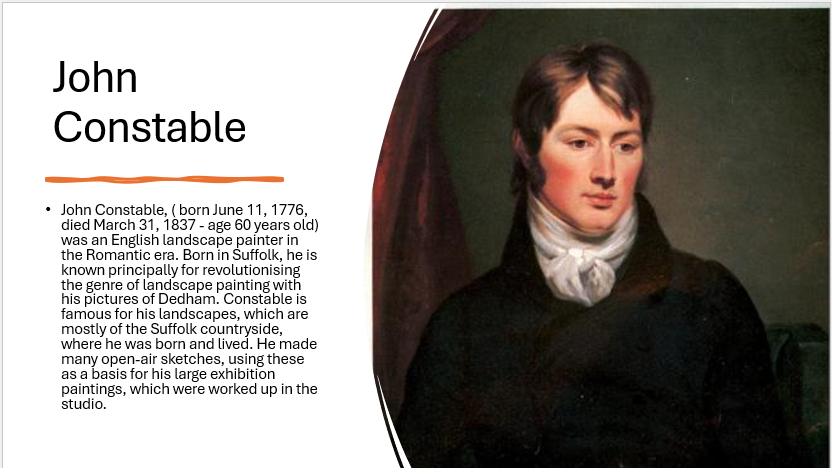
One major effect was the Romantic idealization of nature. As landscapes were transformed by factories, pollution, and deforestation, Romantics like William Wordsworth and J.M.W. Turner celebrated the untouched beauty of nature, emphasizing its power and emotional depth. They viewed the natural world as a source of spiritual renewal, in contrast to the grime and chaos of industrial cities.
The movement also championed emotion, imagination, and the individual in response to the Industrial Revolution’s emphasis on reason, efficiency, and mass production. Many Romantics saw industrialization as dehumanizing, reducing people to mere workers in a mechanical system. This led to an admiration of solitary, rebellious figures—like the Byronic hero—and a nostalgia for the past, particularly medieval times, when life was seen as more organic and connected to nature.
Exposure compensation basically helps you override automatic exposure adjustments your camera makes in situations with uneven light distribution, filters, non-standard processing, or underexposure or overexposure. It lets you take control of your image’s brightness by manually increasing or decreasing exposure.
Exposure Bracketing
when you bracket your shots you take exactly the same picture of your subject at several different exposures. This technique gives you a range of options to choose from when you’re editing. As a result, it’s much less likely that you’ll end up with a badly underexposed or overexposed photo.
HDR photos
HDR (high dynamic range) helps you get great shots in high-contrast situations. The iPhone camera takes several photos in rapid succession at different exposures and blends them together to bring more highlight and shadow detail to your photos.
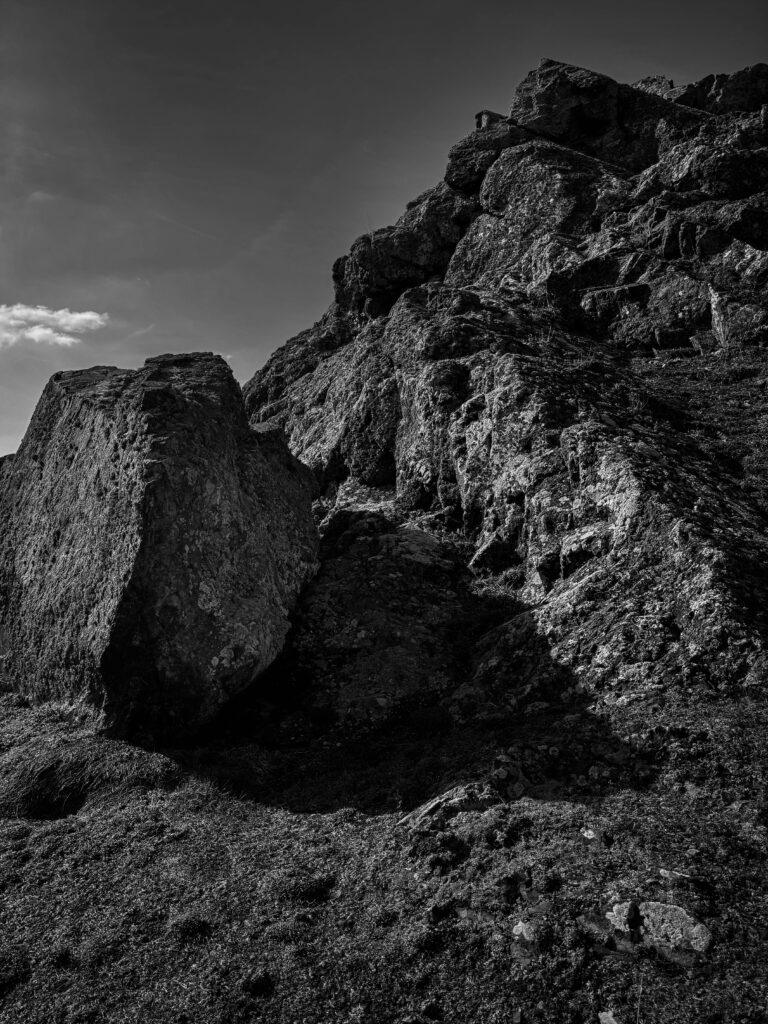
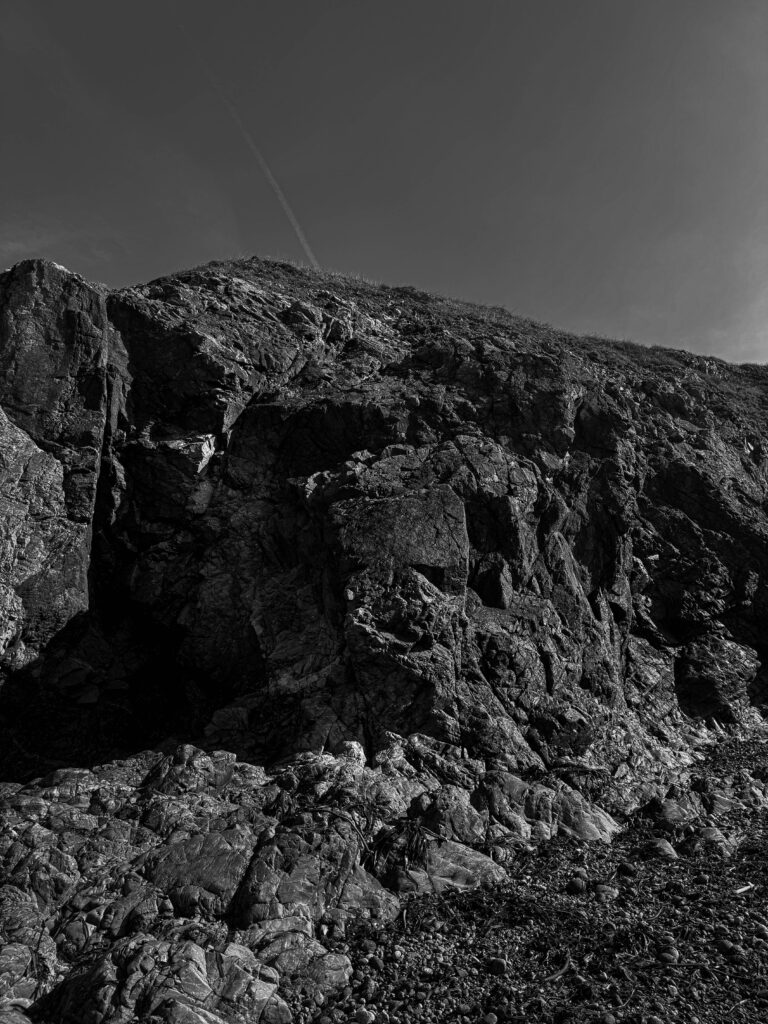
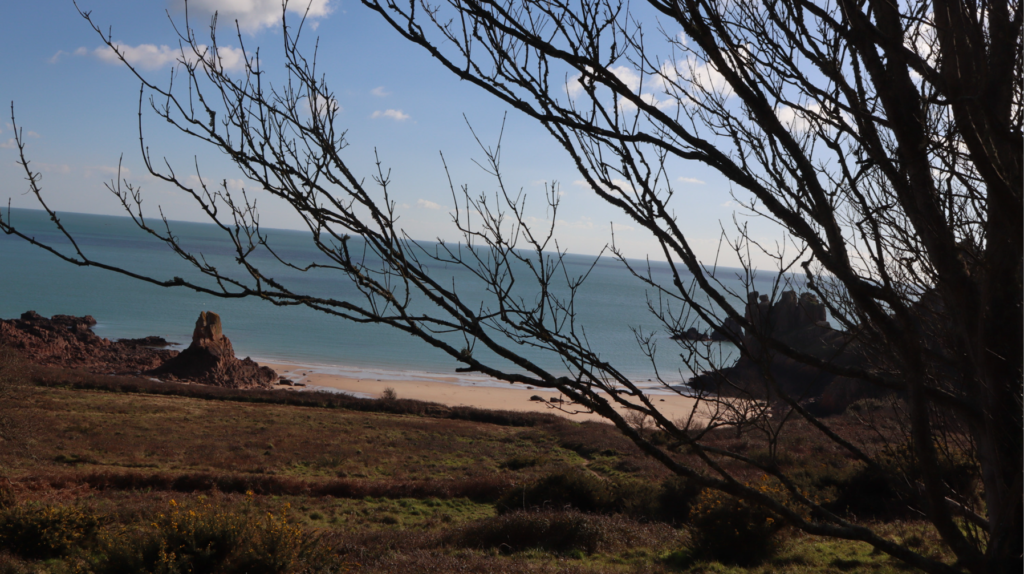
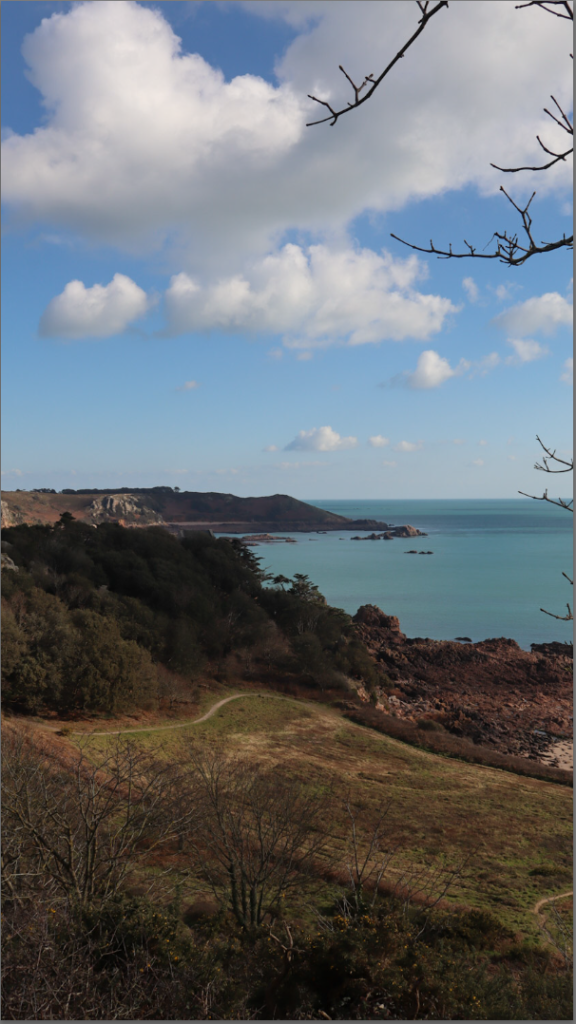
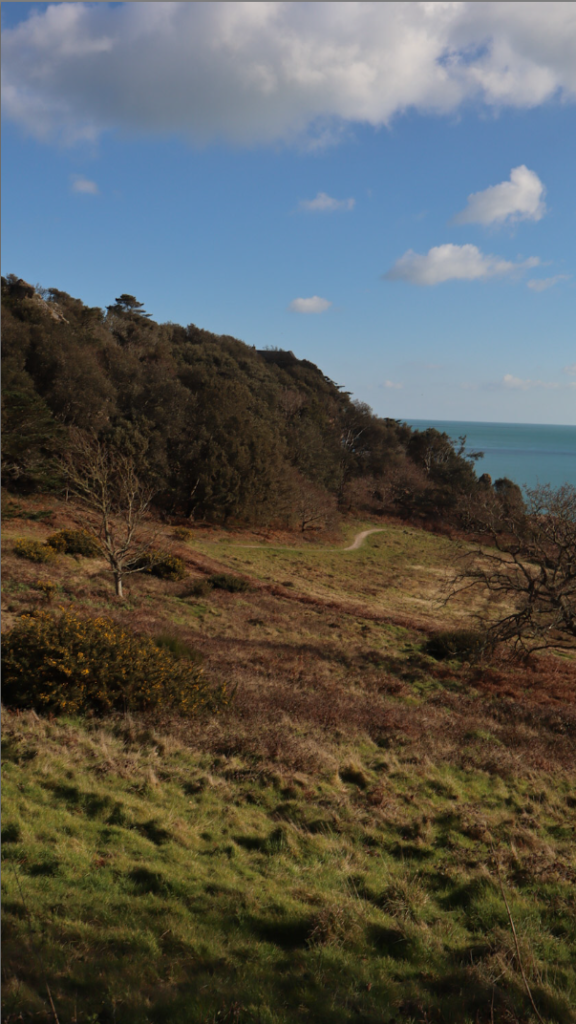
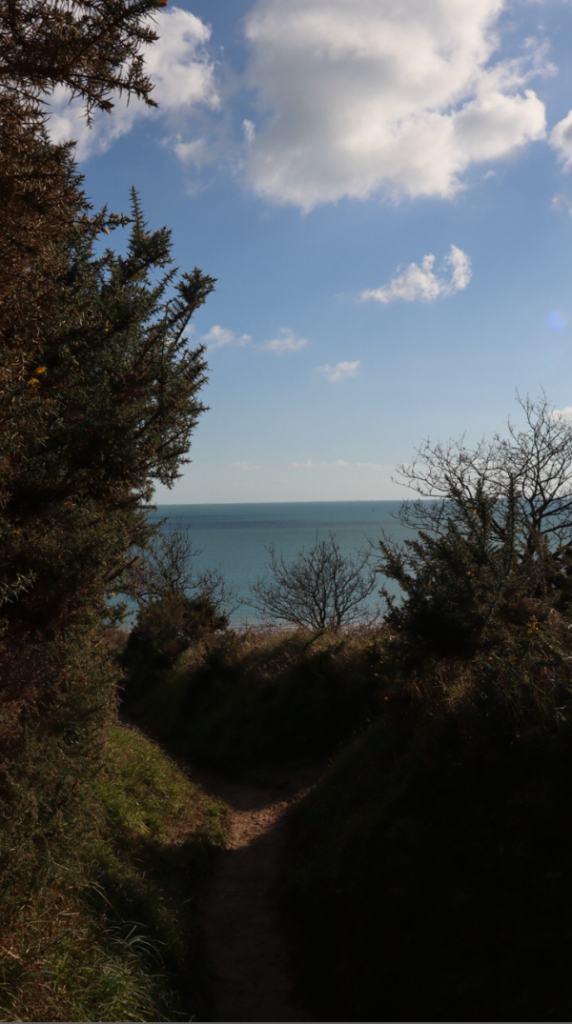
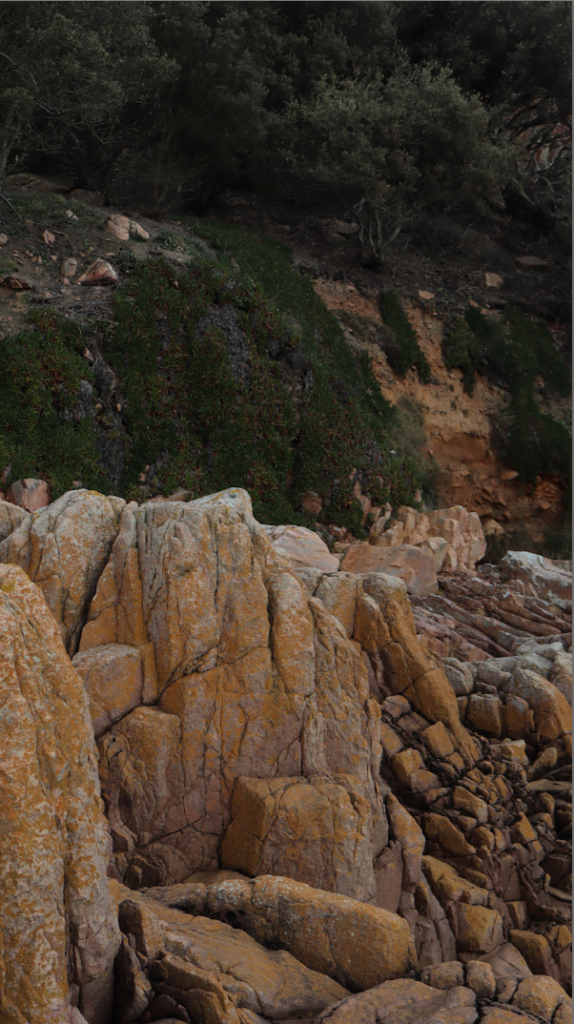
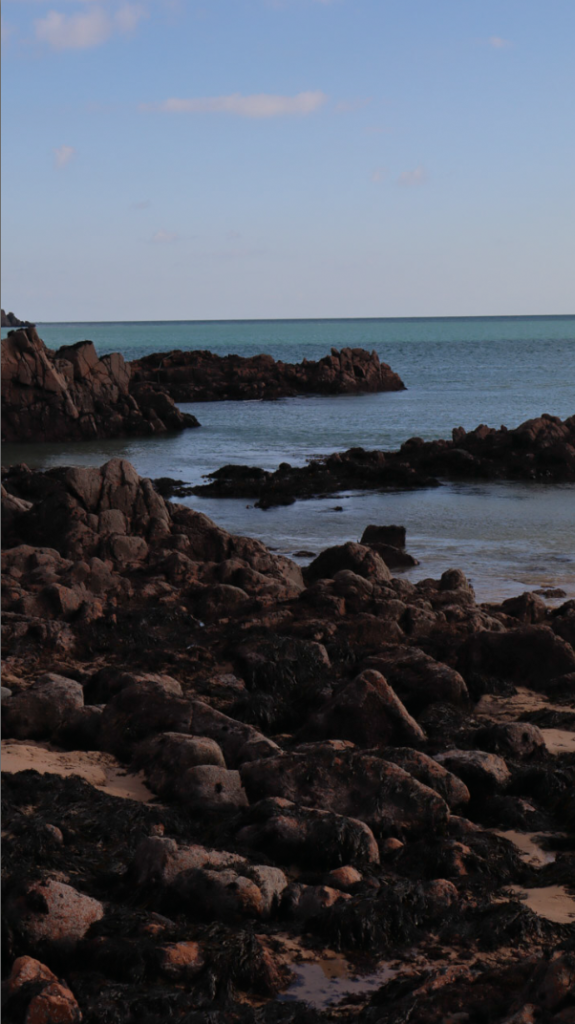
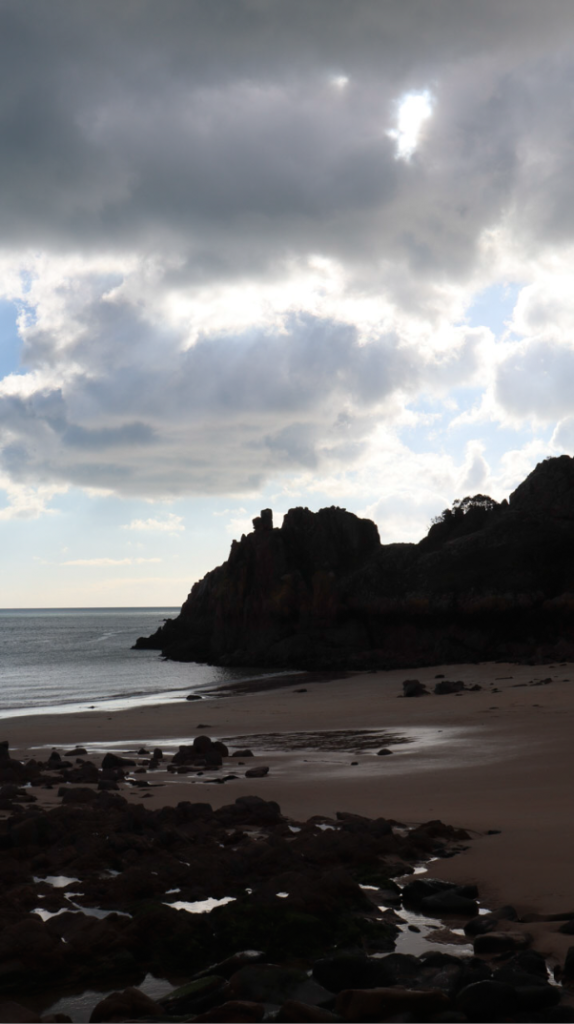
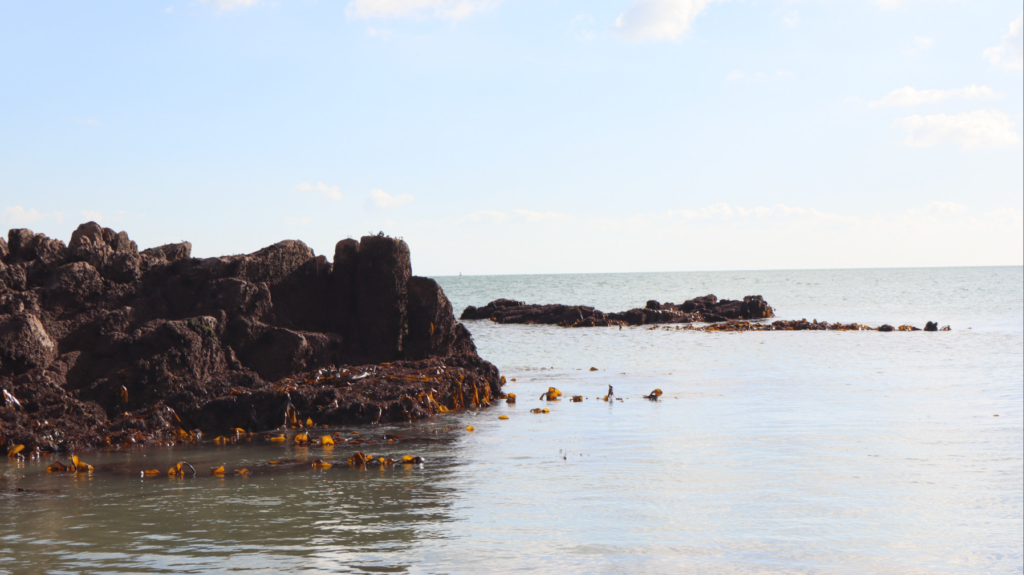
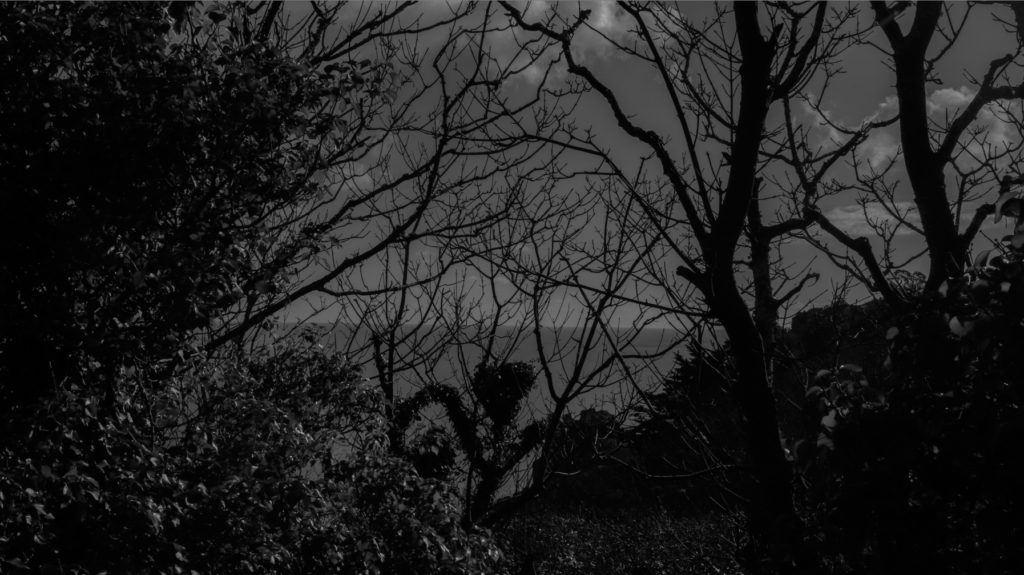
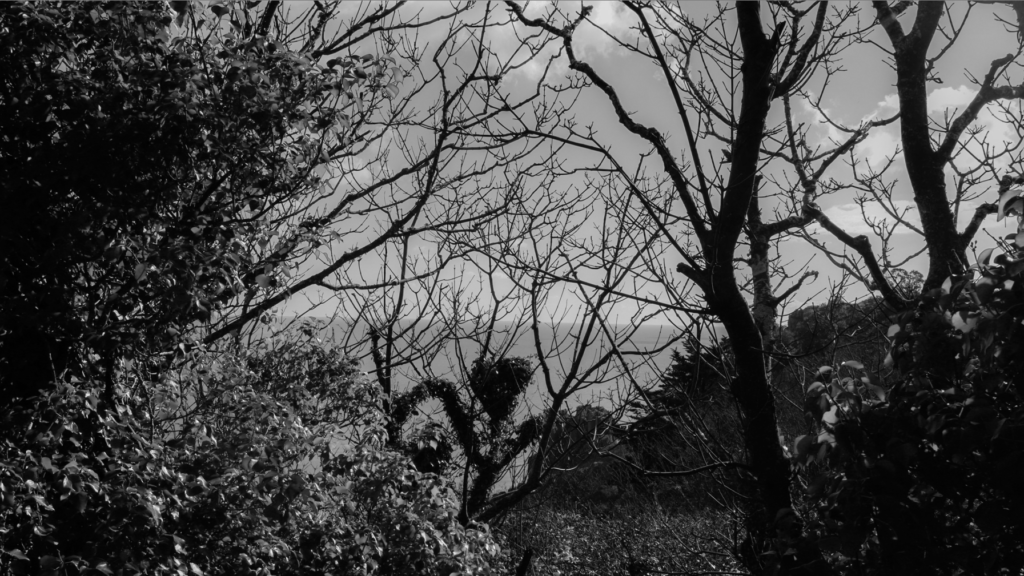
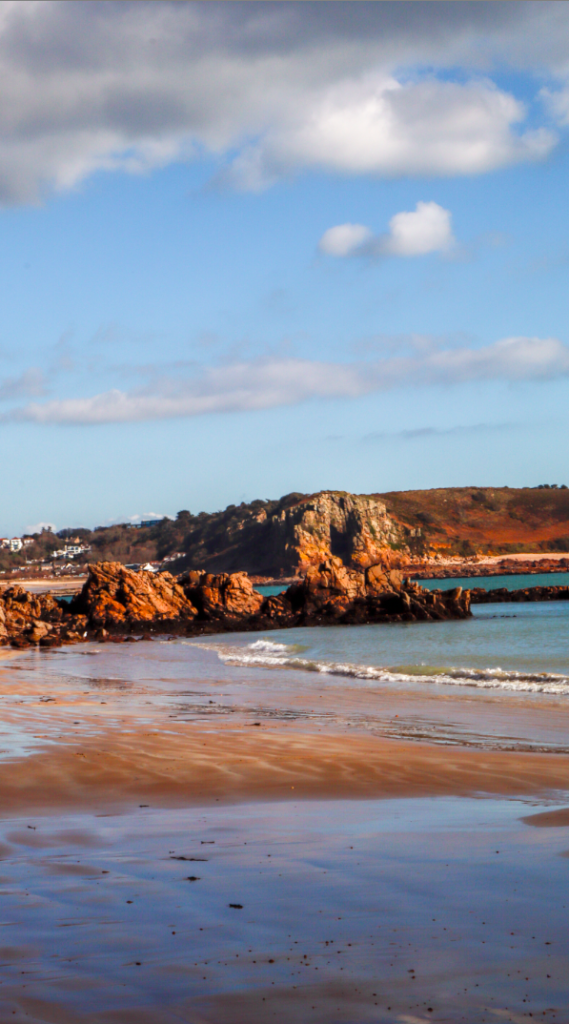
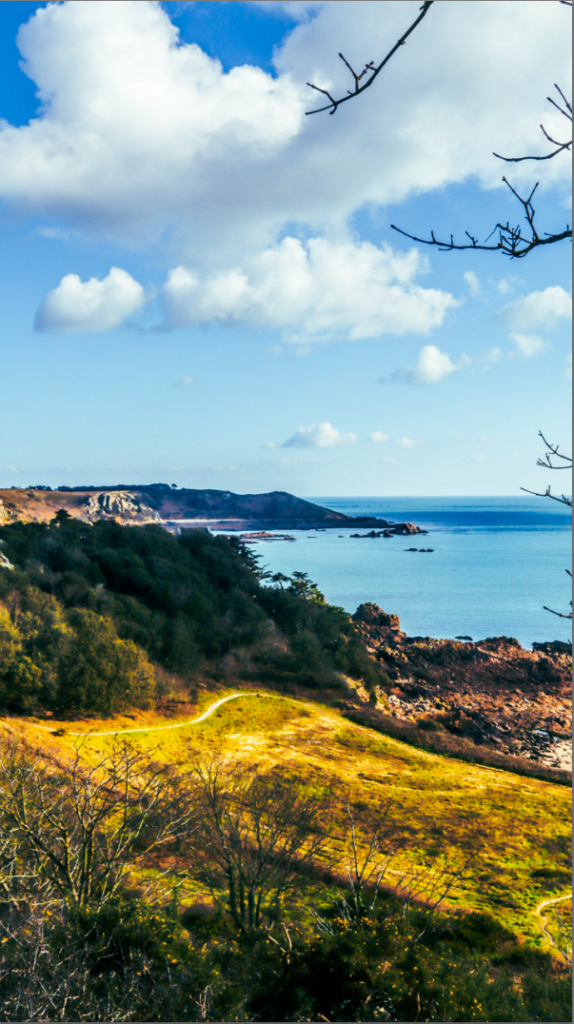
I took my photos on and around Petit Port beach, as well as near the Corbiere cliffsides to try and replicate the style of Ansel Adams.
Settings – I aimed to use high aperture values to try keep as much of the image in focus and detailed as possible, similarly to group f/64. I also kept ISO to a minimum to avoid visual noise and was able to use shutter speed values of around 1/50 and 1/60 since it was very sunny.
Angles/Perspective – I used Ansel Adams’ visualisation method to visualise an image before I took the photograph to see how it would turn out, and using this I was able to have the camera’s perspective focus on rocks, cliffsides and water since these contrast nicely with each other as well as creating shadows which work well with HDR/exposure bracketing and would create lots of drama when experimenting with black and white in editing. I also aimed to have the sky take up roughly the top third of the image, creating further contrast as well as adding some negative space and drama so the entire image isn’t cluttered with excessive detail.
Timings – I went late afternoon/early evening so the sunlight would be at it’s peak in order for me to be able to capture effective images with a wide range of shadows for exposure bracketing, as well as enabling me to experiment with slightly more atmospheric images with the sunset.
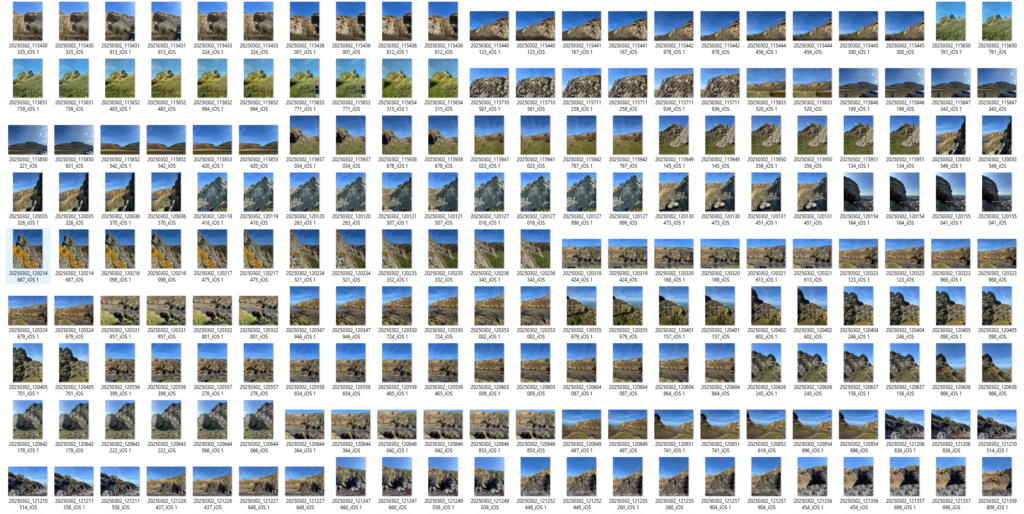
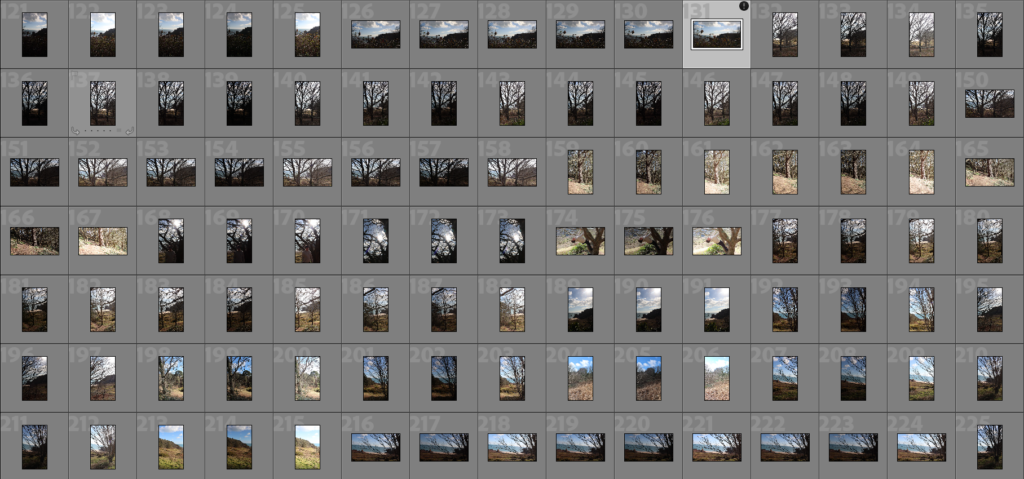
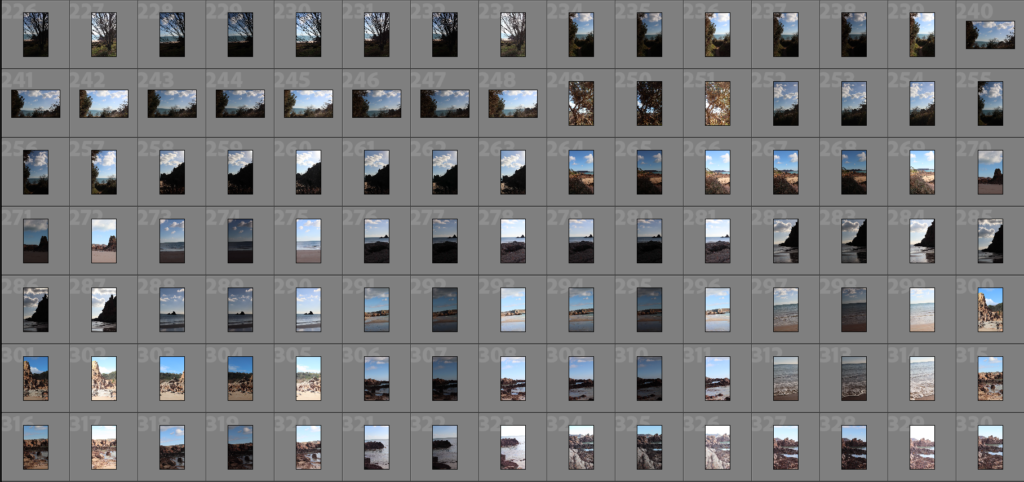
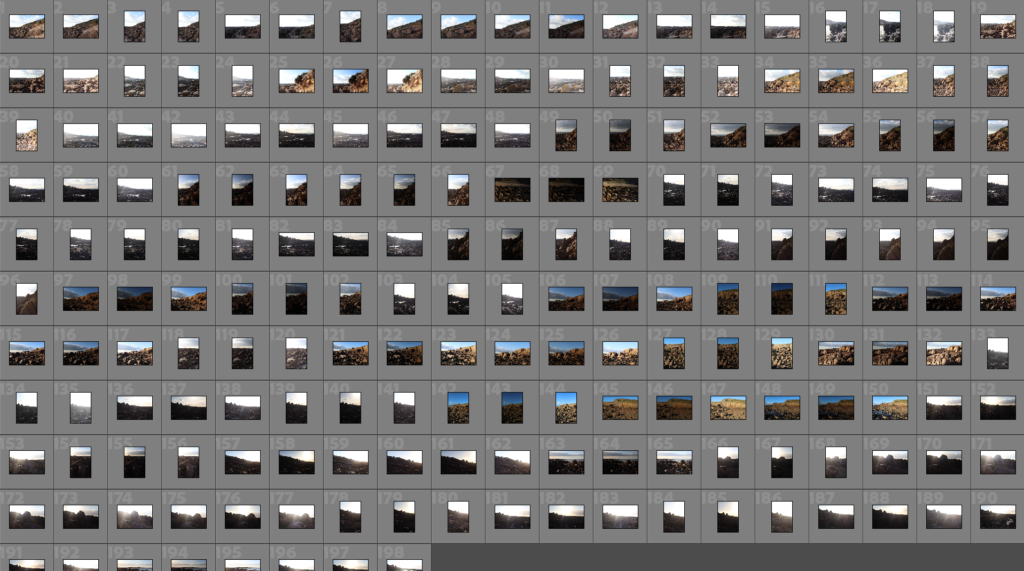
Contact Sheet
Final results after photoshoot – 198 photos total
Selection
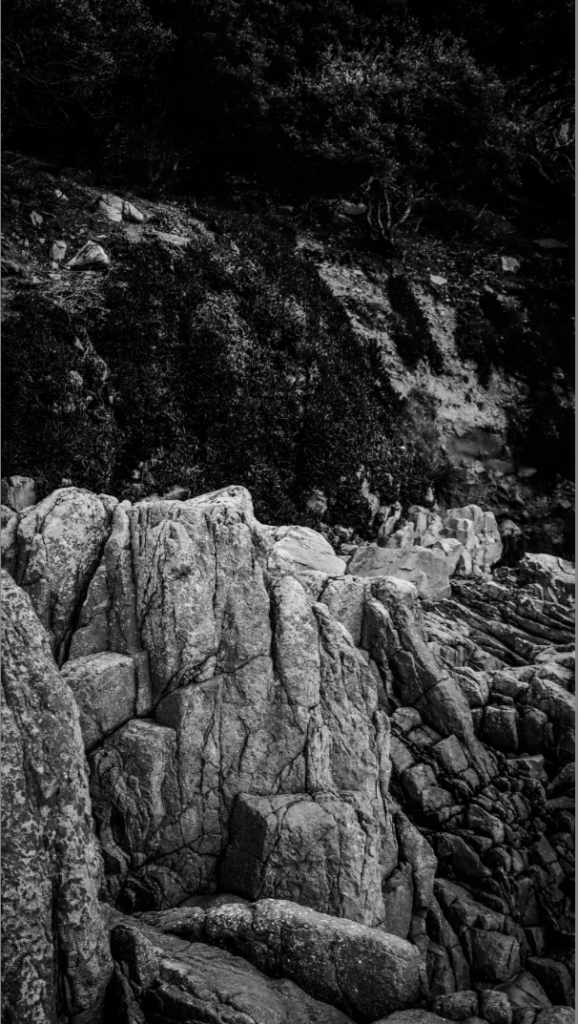
During my selection process, I aimed to choose images that had a sense of drama and would present a range of dark and light tones when edited to be black and white. I also aimed to select images with lots of shadows to allow exposure bracketing to bring out details.
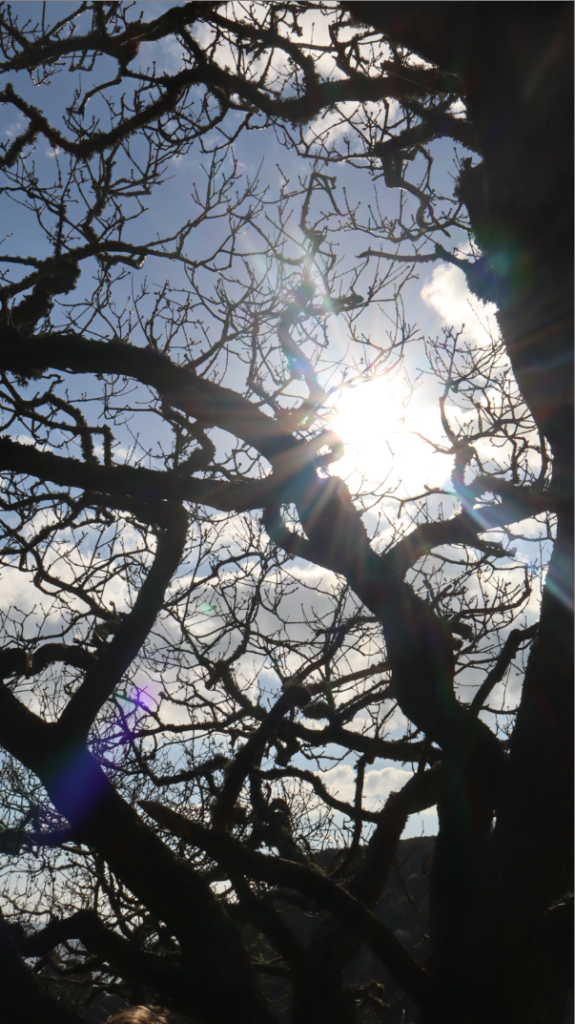
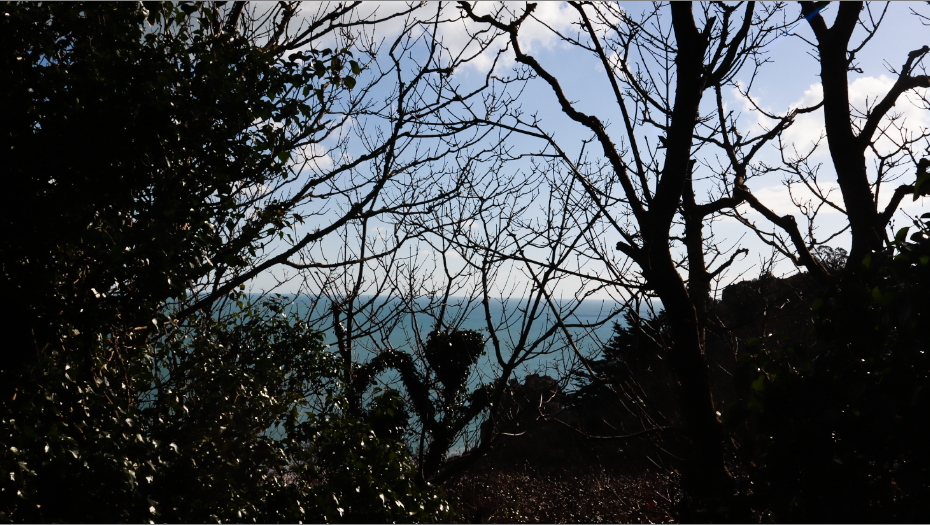
Some of my selected photos:
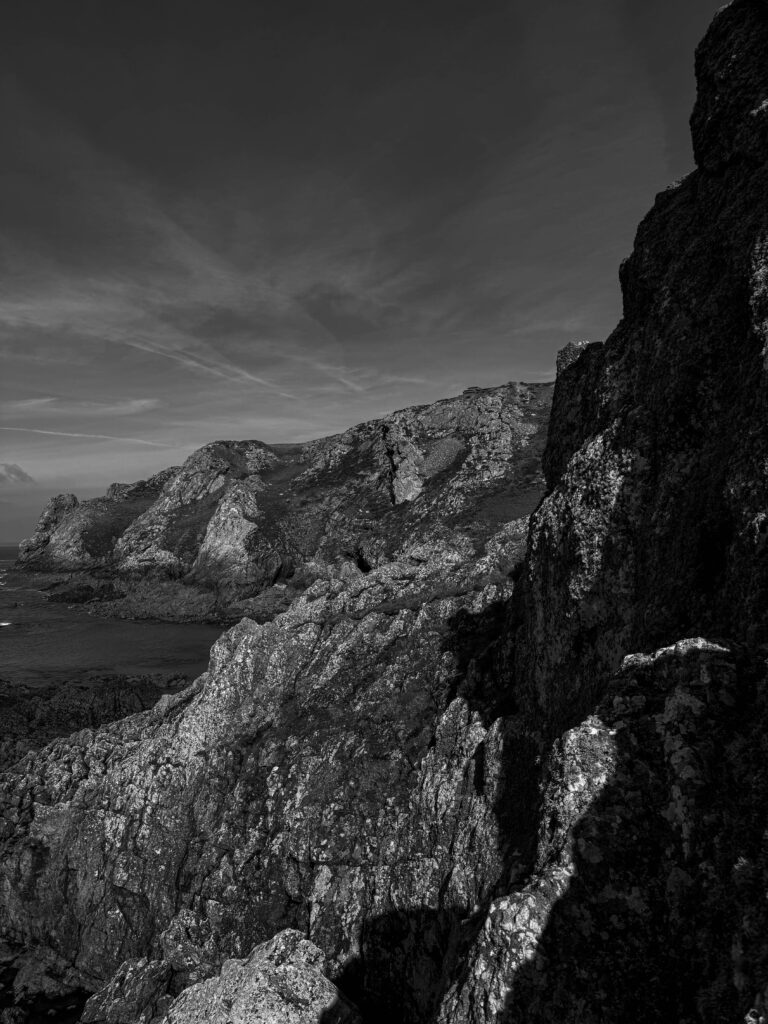
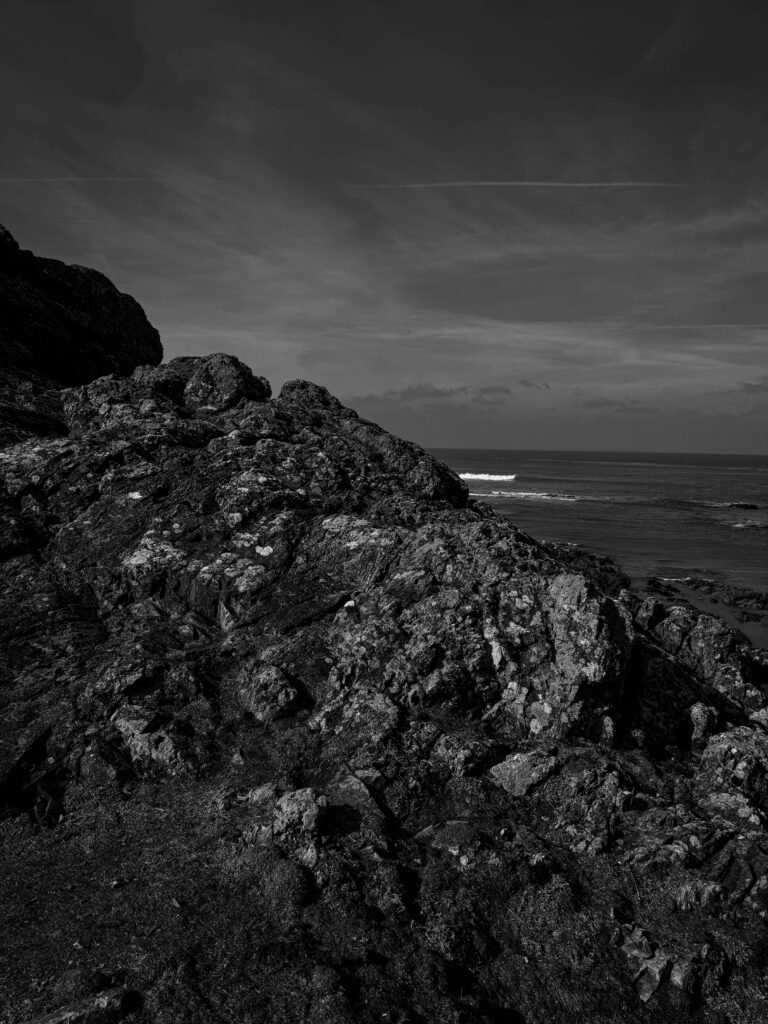
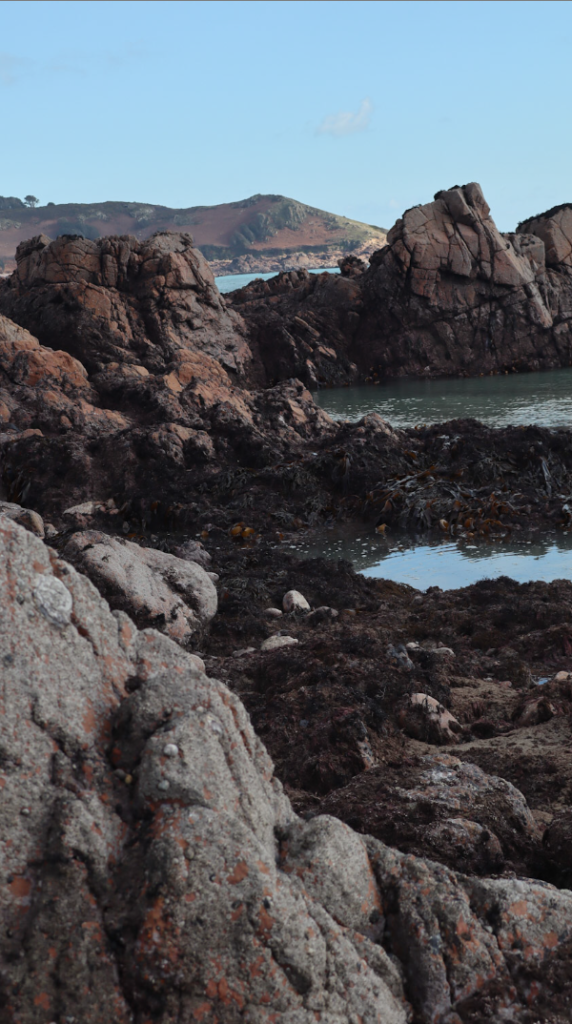
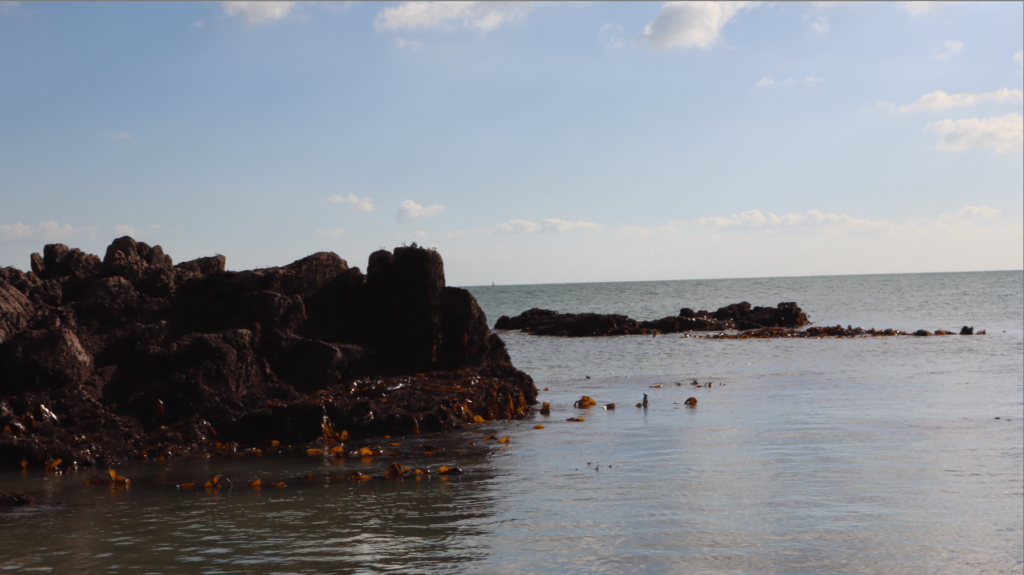
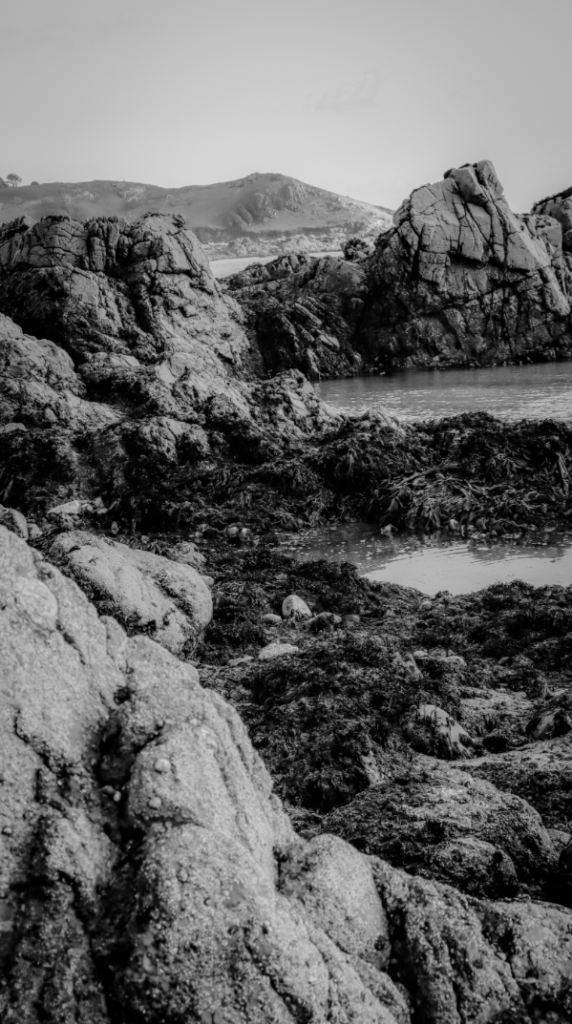
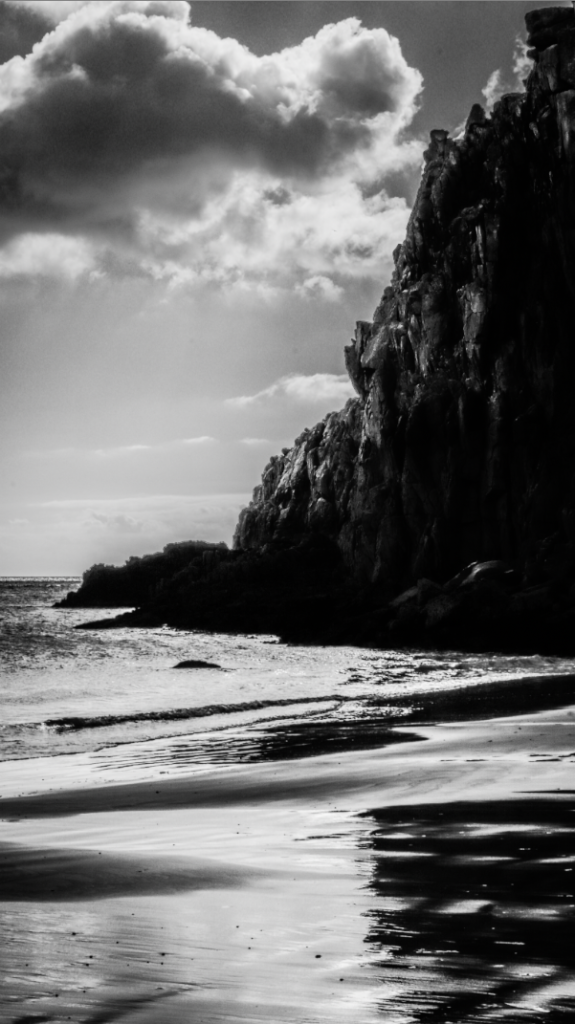
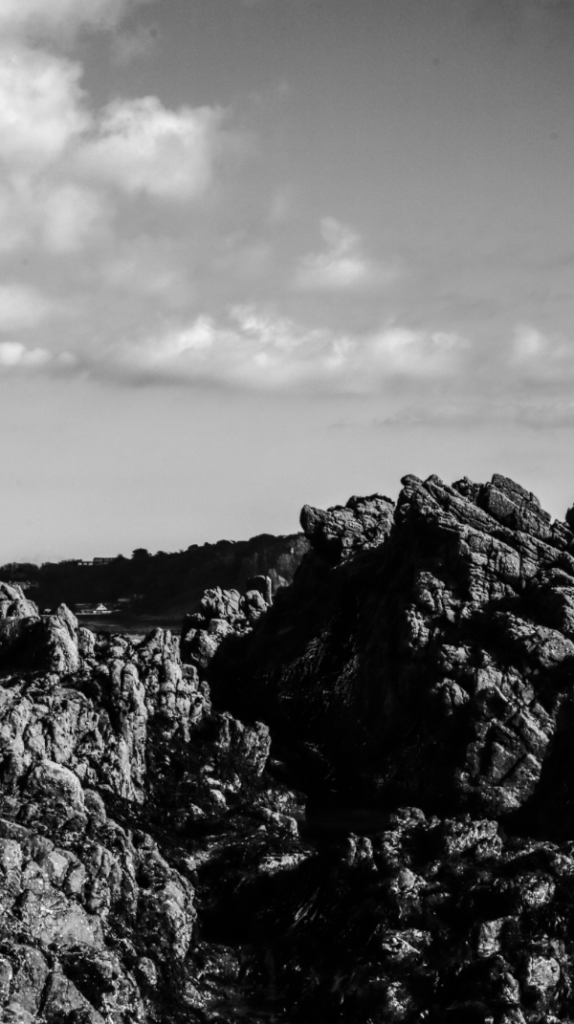
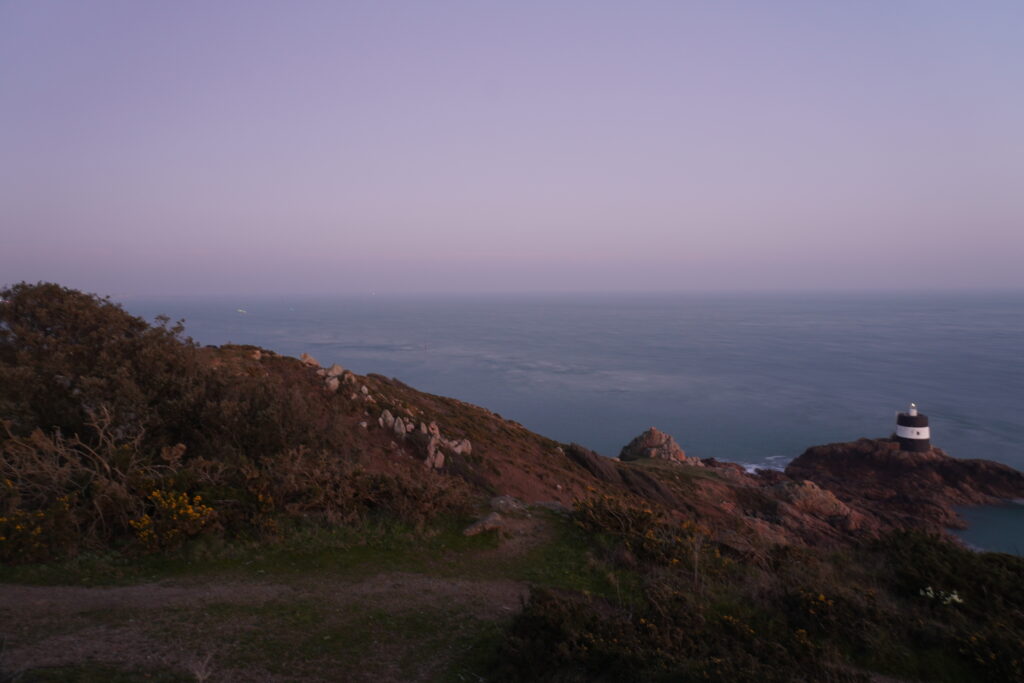
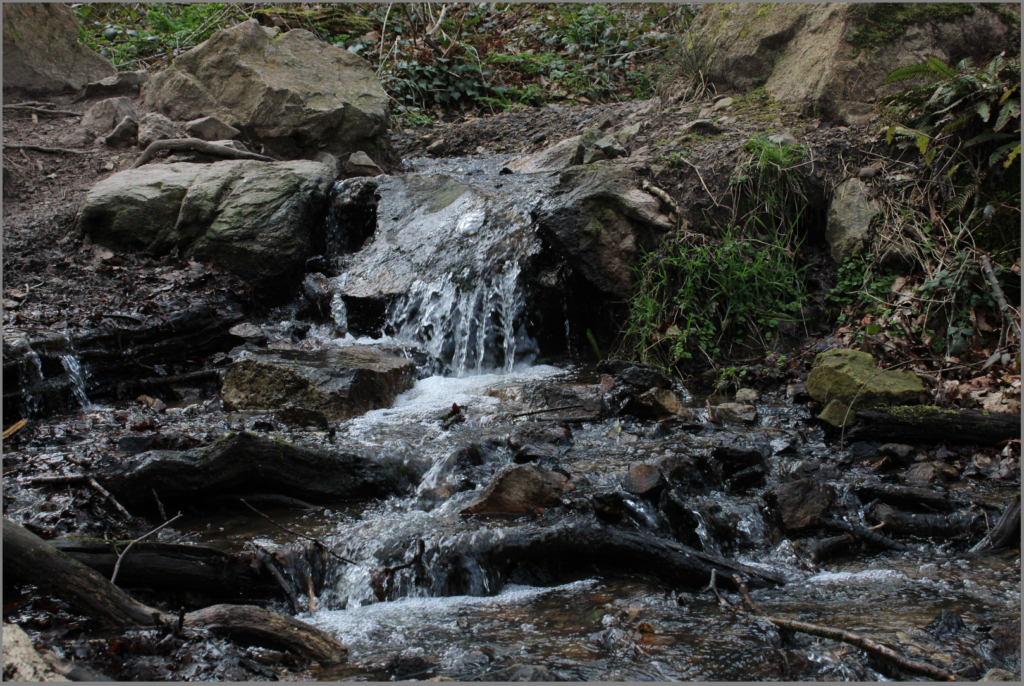
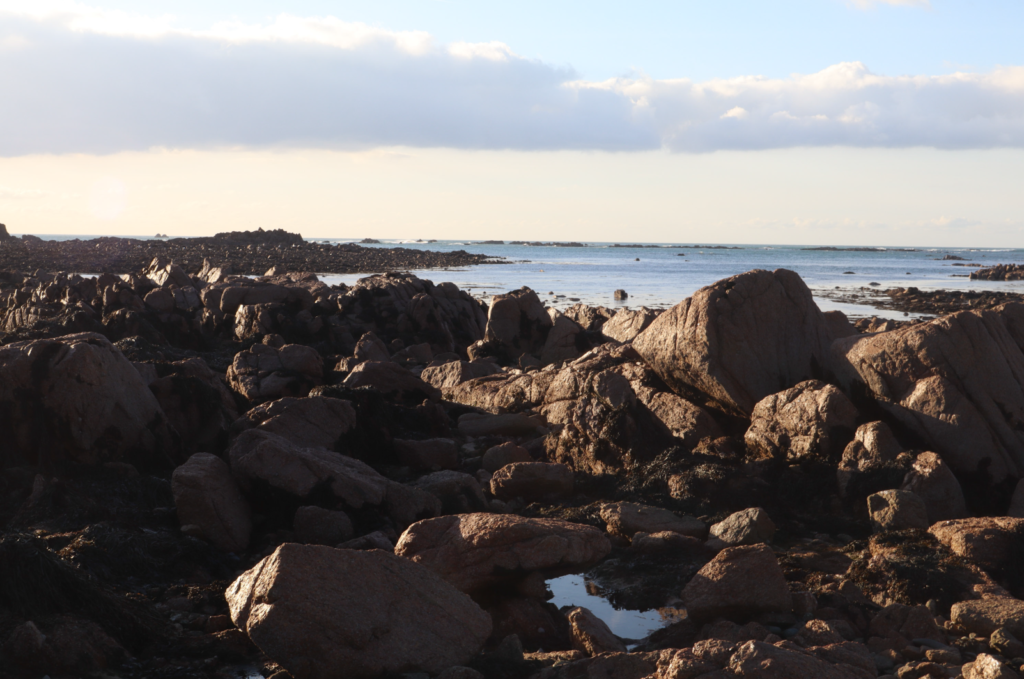
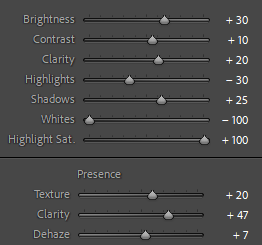
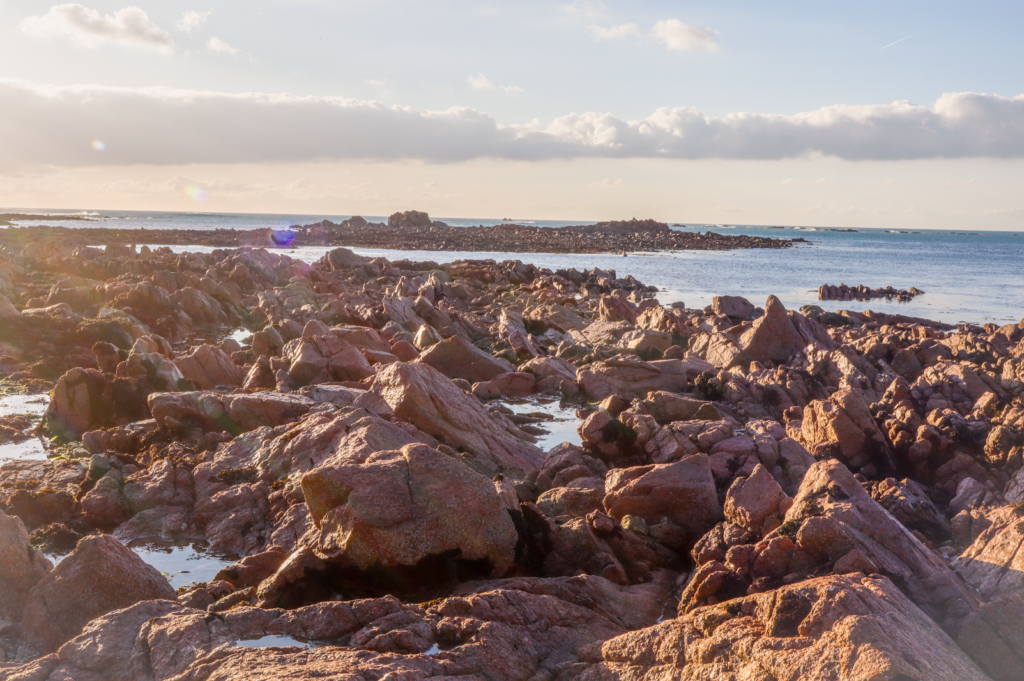
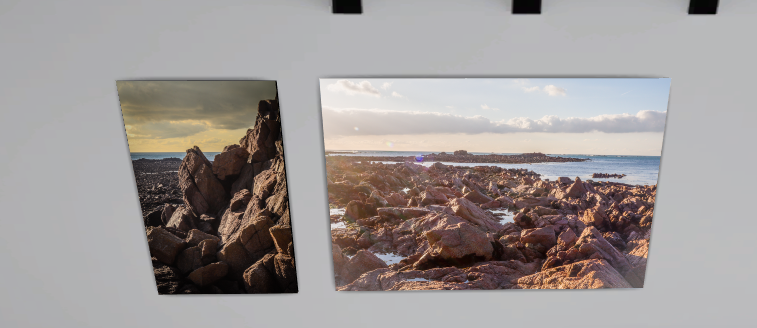
I selected this image since I thought using HDR would bring out lots of detail in the shadows and create an interesting landscape with balanced exposure, similarly to the style of Ansel Adams. I also liked the composition, with darker shadows on the rocks on the left and more sunlight illuminating the rocks on the right as well as the sky being positioned about 2/3 up the image.
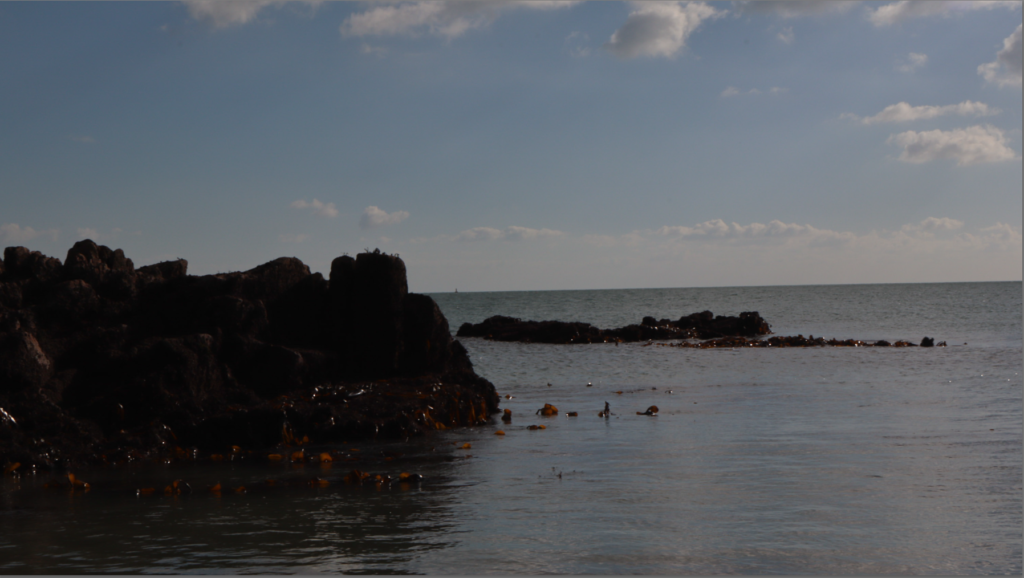
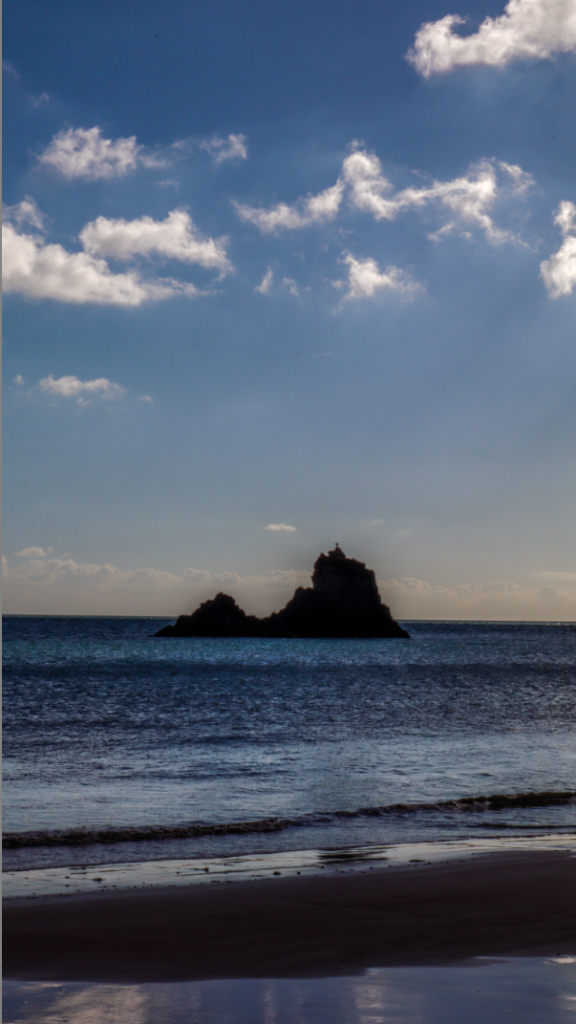
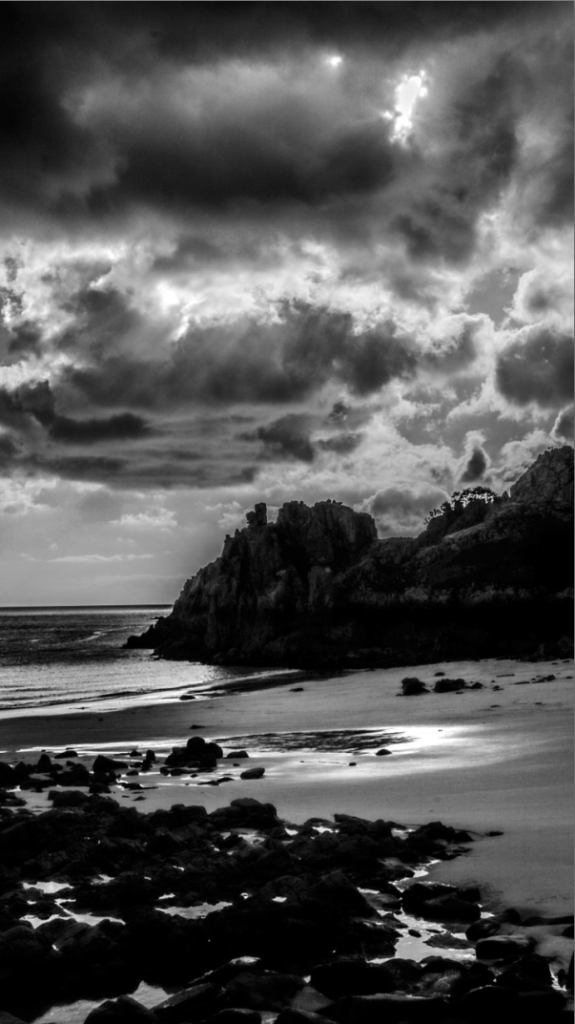
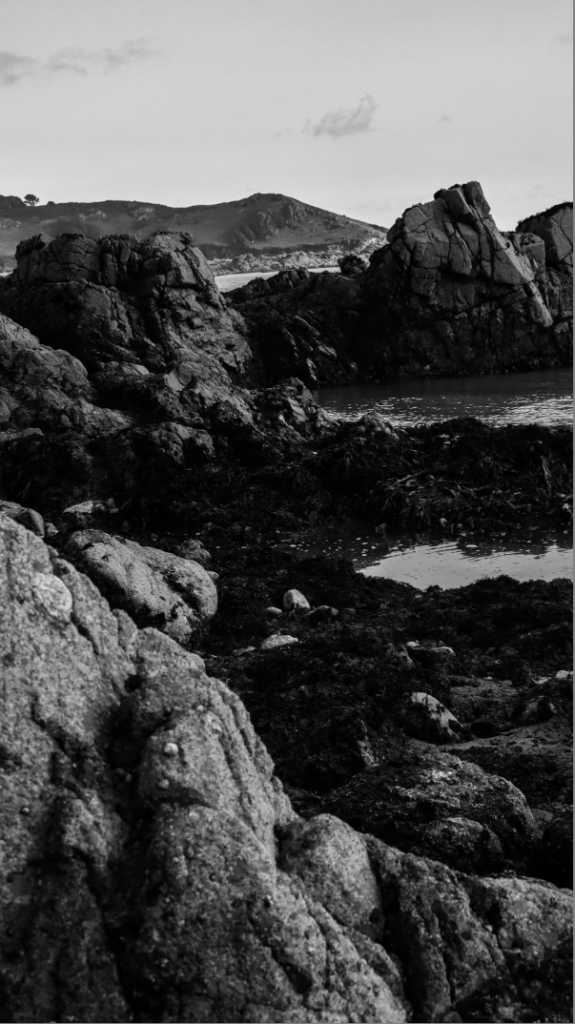
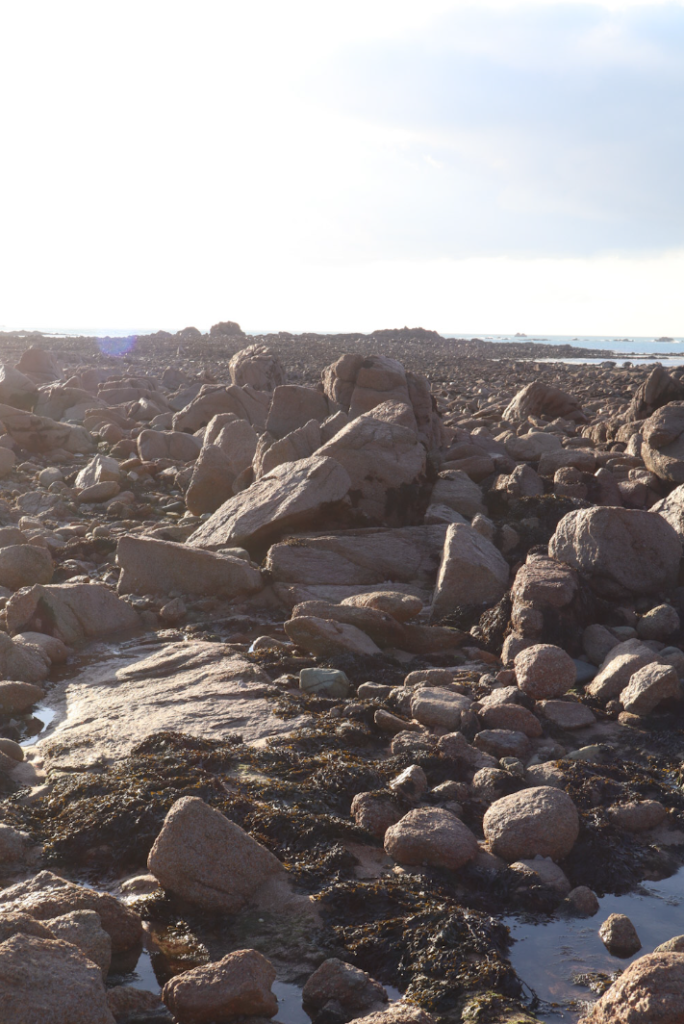
I chose this image because I like the light reflecting of the water in the bottom of the picture, as well as the balance of shadows and illumination throughout the rocks. Although the sky is bleached out due to the sun, I will try and use HDR and masking in Lightroom to adjust the sky to add more detail to the sky as well as contrasting it from the foreground.
Editing/Experimentation
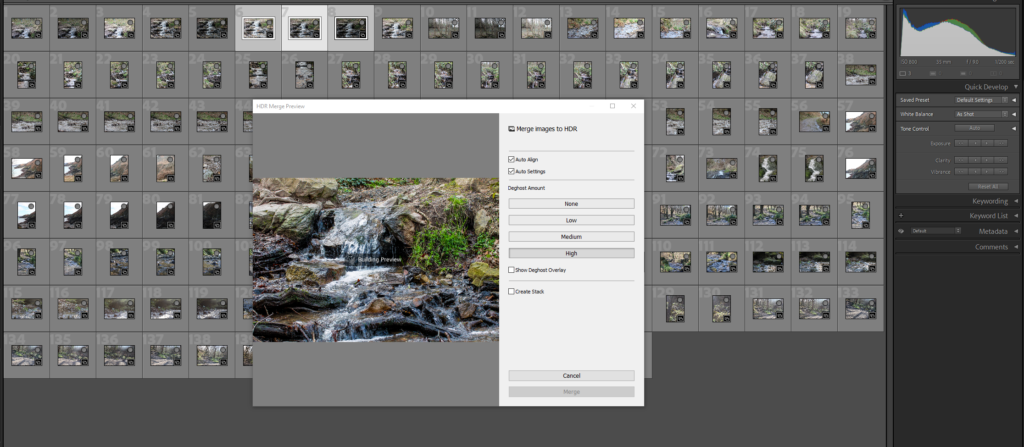
I opened this photo in Lightroom and went into develop mode to use the HDR editing, merging 3 versions of the same image at different exposures to capture detail in less exposed areas.
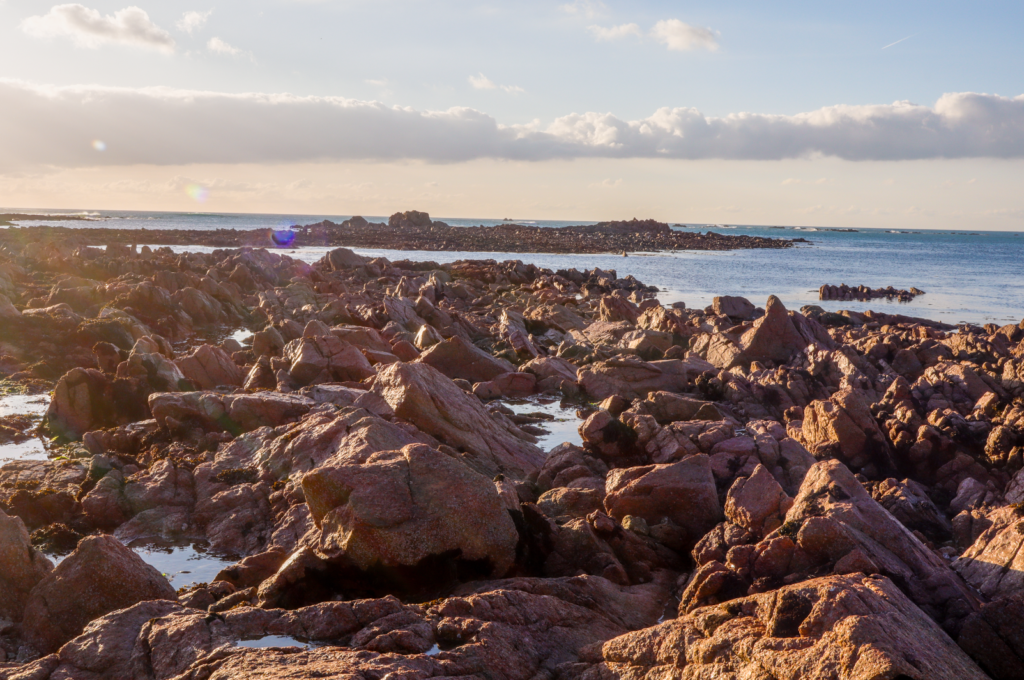
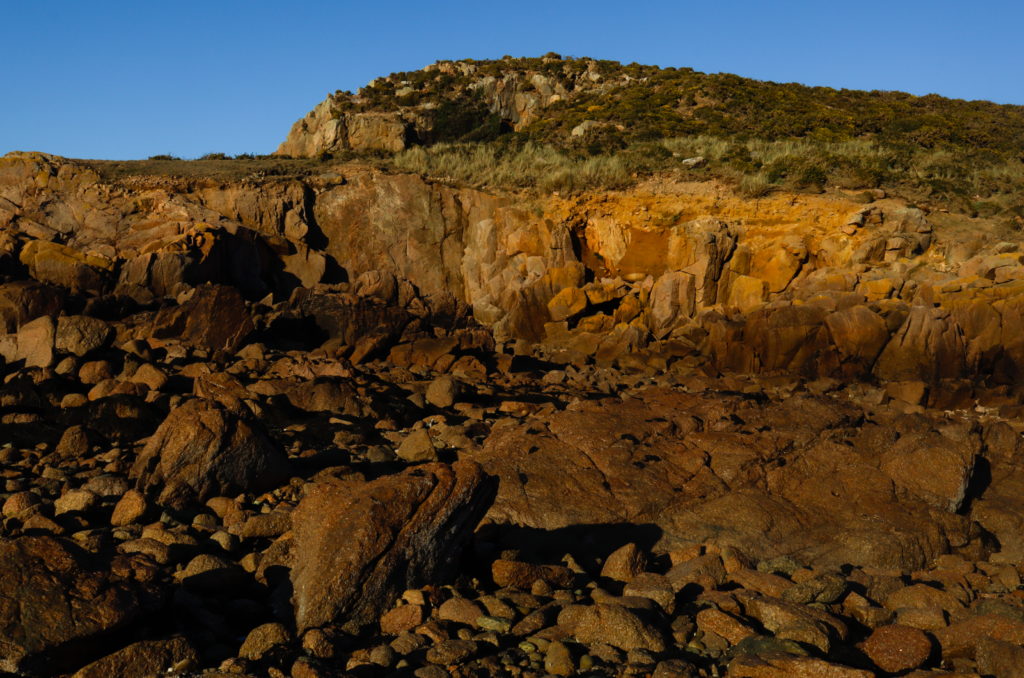
To achieve this effect, I used the golden hour preset, added some dark post-crop vignetting and used the settings above. This adds a nice colour contrast between the orange sky and blue sea, whilst still maintaining good enough exposure to make out details in shadows and have a range of tones from light to dark.
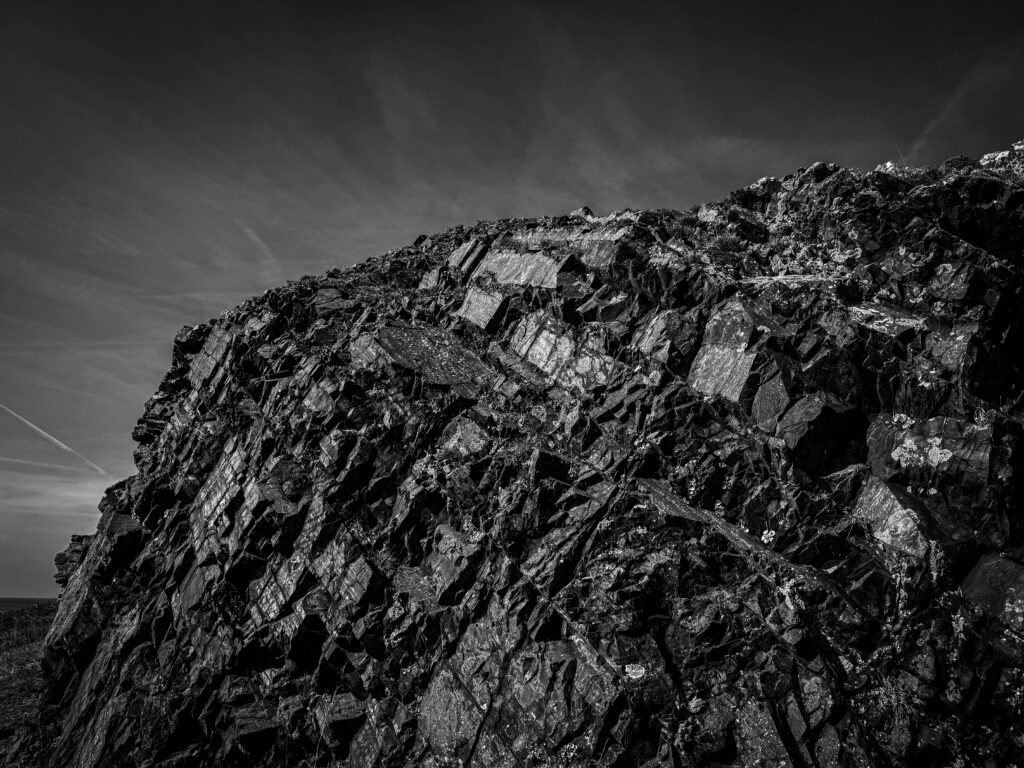
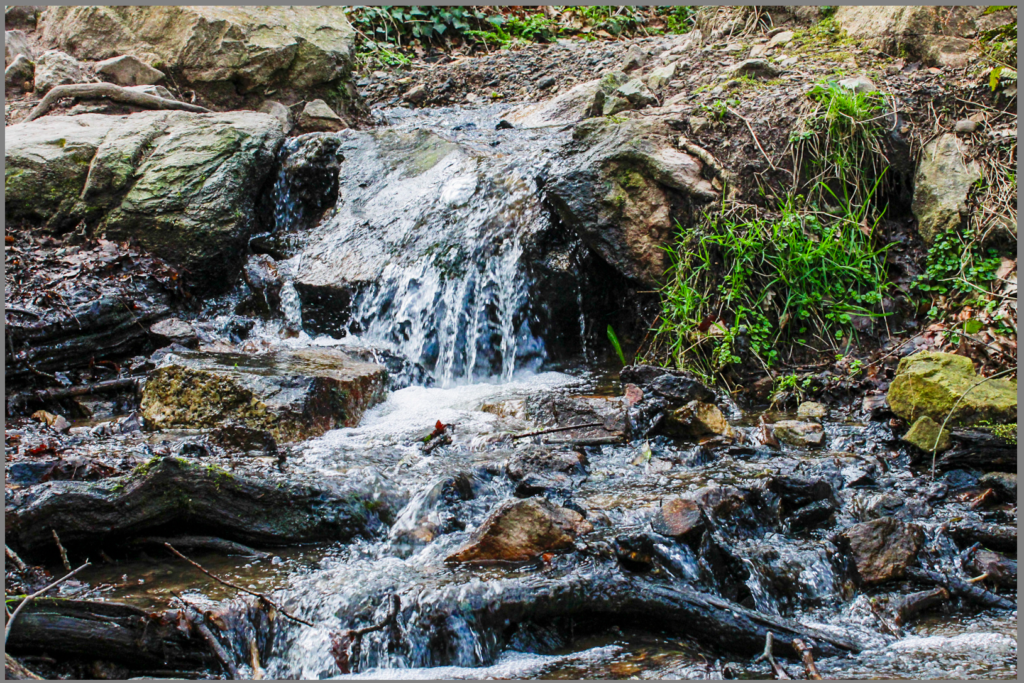
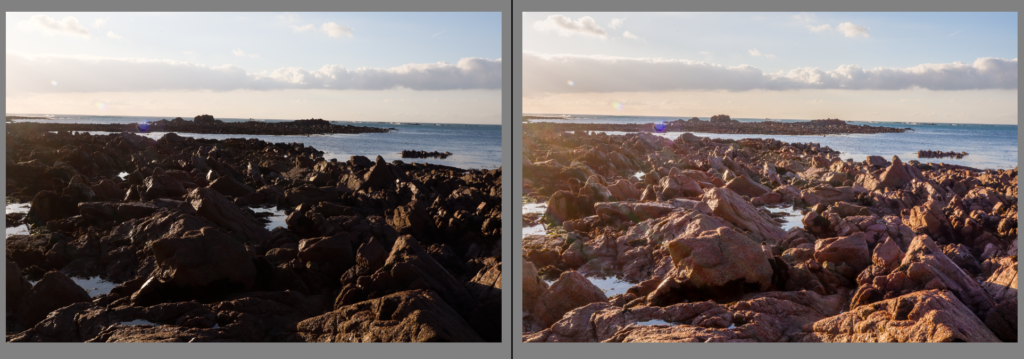
This image was created using HDR photo merge and then decreasing highlights and increasing shadows. The natural light casted onto the rocks creates an effective contrast between the light and shadows on the rocks, as well as complimenting the lighter tones in the sky with the darker tones in the sea nicely.
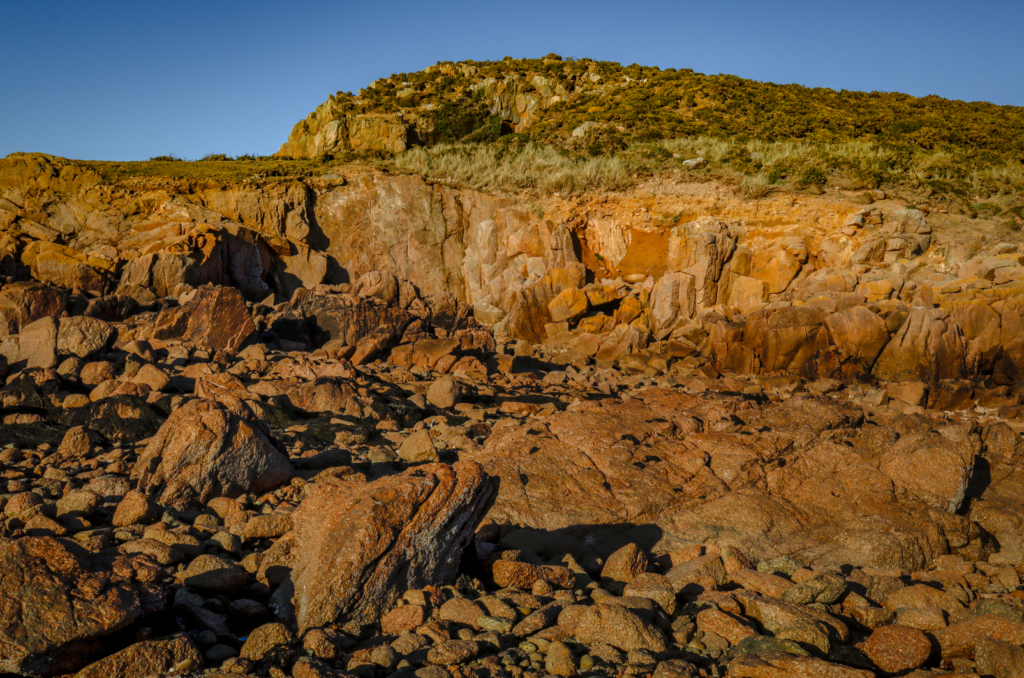
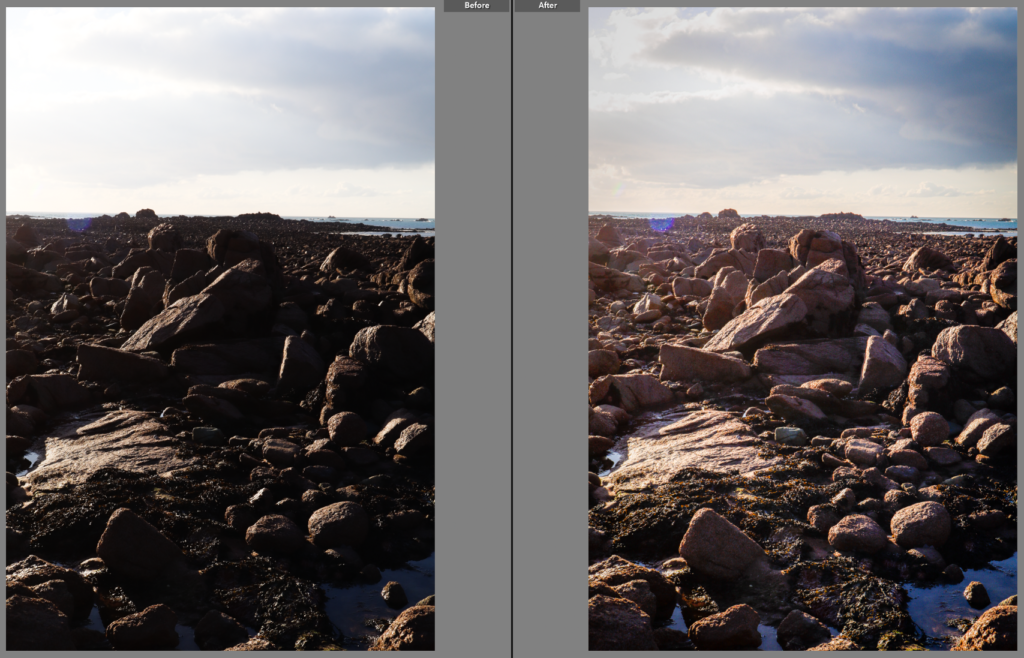
Before vs After
Finally, I added some slight vignette and increased the clarity and decreased the dehaze. The final result maintains good exposure on all parts of the image which when combined with the use of a high aperture brings out every detail in the image.
For this image I first HDR photo merged it, and noticed overall it was quite underexposed.
I then increased the exposure and decreased the highlights to bring more details as well as making the photo more visible.
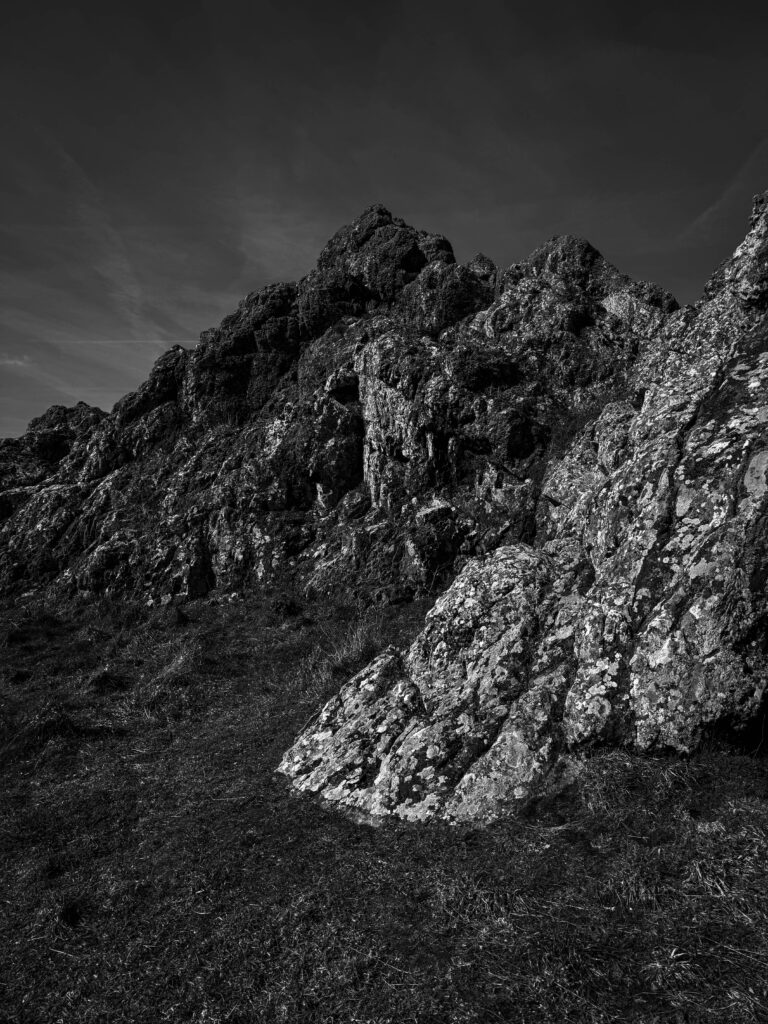
Experimenting with black and white but I don’t like how the sky looks, so I used the masking tool in Lightroom to adjust it and make it contrast more visibly with the lighter tones of the cliff.
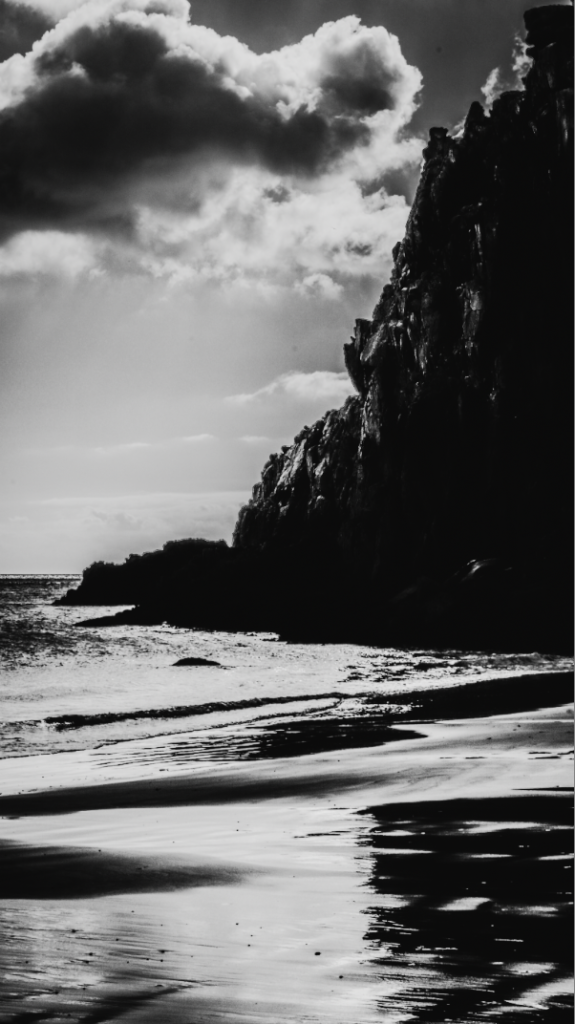
Final product, effectively exposed to maintain detail throughout the image as well as having the sky be darker to create a sense of drama.
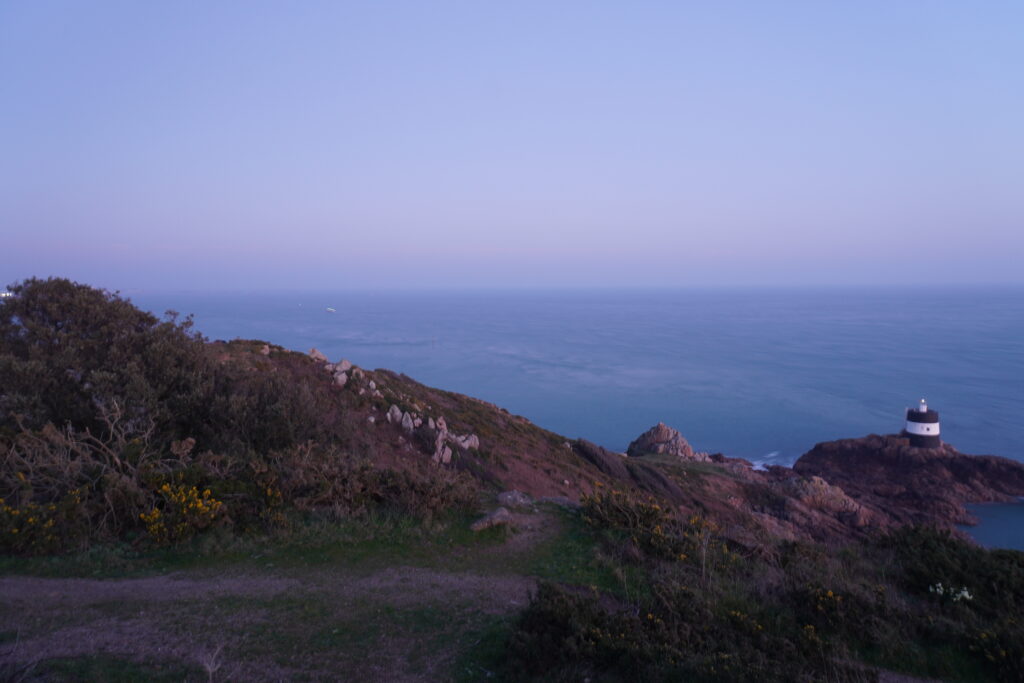
Before vs after HDR. Noticeably more exposed with more details visible in shadows, creating more drama and taking more influence from the style of Ansel Adams.
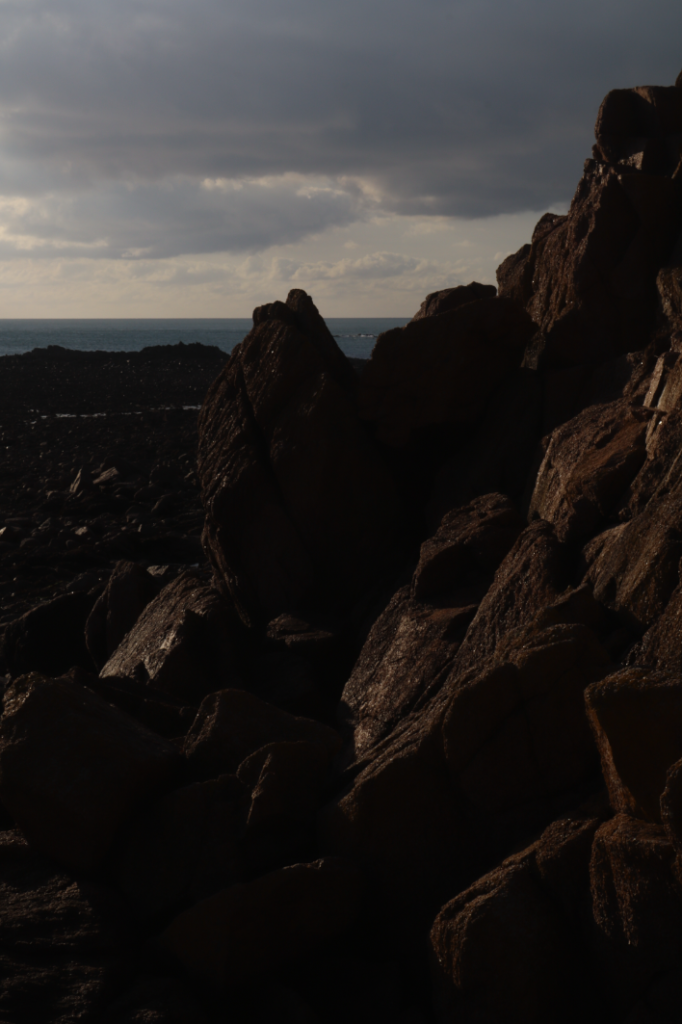
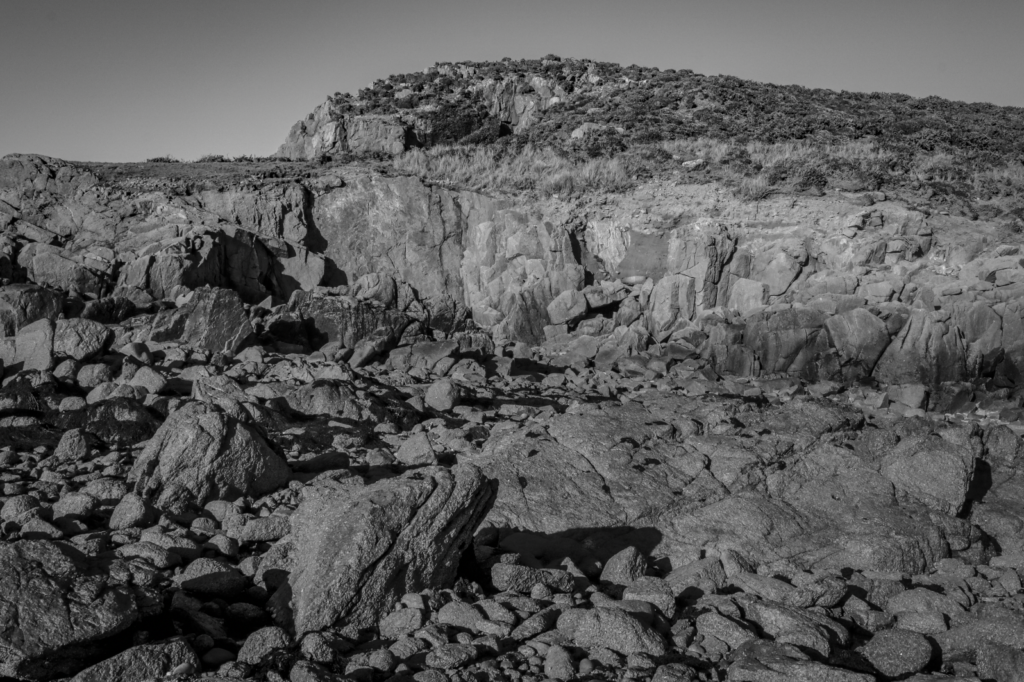
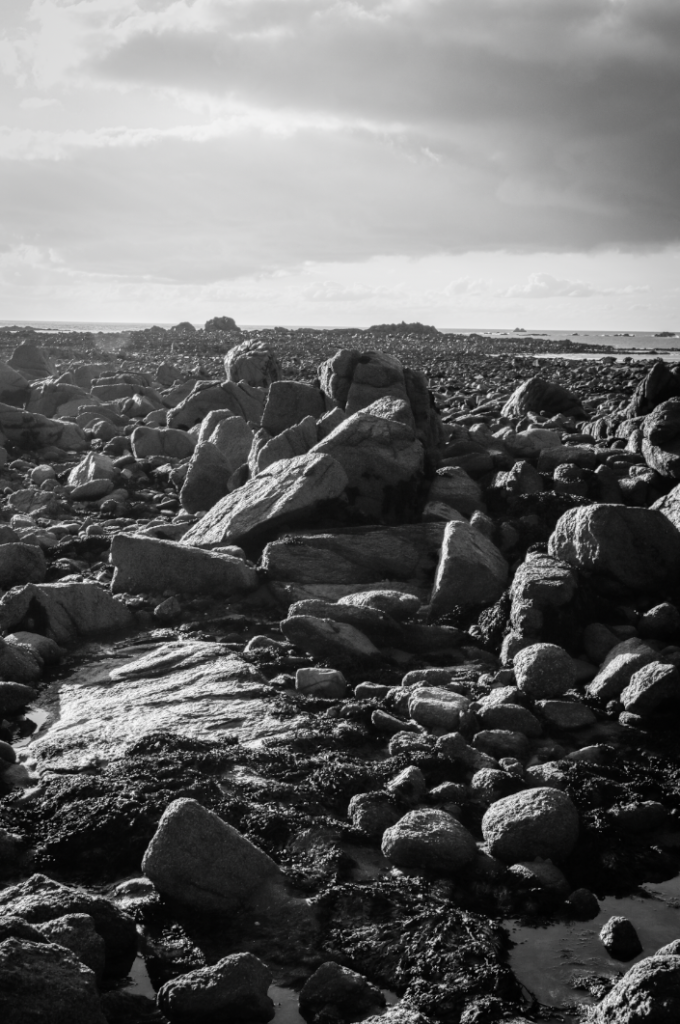
Experimenting with black and white, very effective in bringing out the tonal difference throughout the rocks and creating drama although I don’t like the colour of the sky.
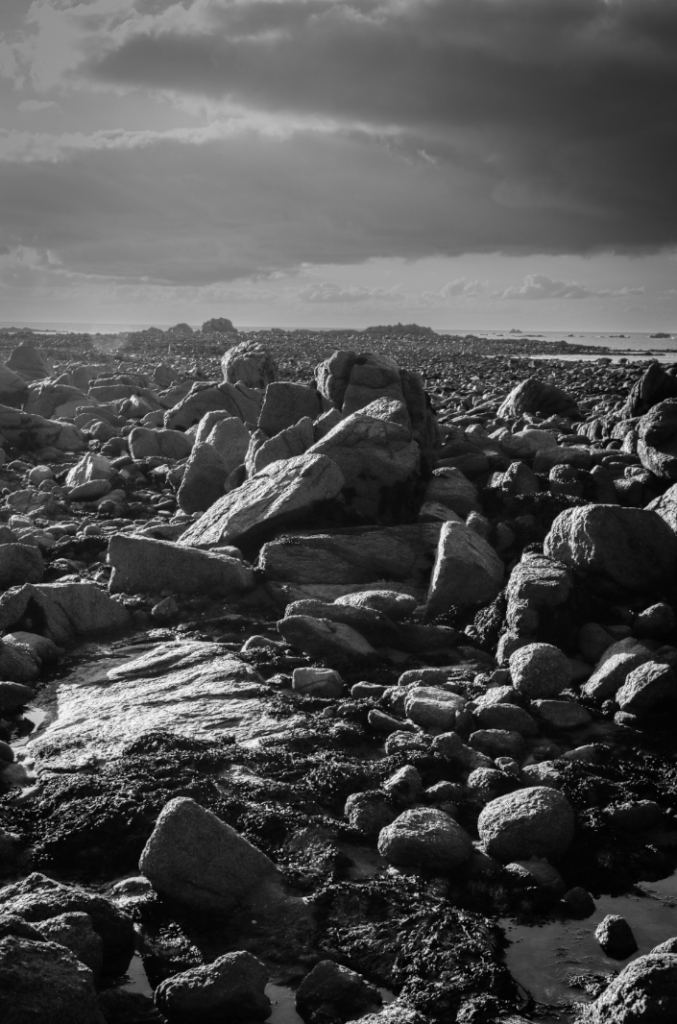
Darkening the sky since it was too light and stood out, now creating more balanced contrasts between light and dark tones. Final image has a greater sense of drama.
Original HDR image, with adjustment of exposure and shadows to further bring out detail in areas not very well-illuminated by the sun.
Black and white variation, effective with lighter tones noticeable in the clouds and sky, midtones on some of the illuminated parts of the rocks and dark tones in the shadows created on some rocks from the sun.
Exposure increased on the sky to make lighter tones more noticeable, as well as decreasing highlights and shadows and increasing contrast to bring out darker tones in the clouds.
Initial version of the image using HDR, I like it since the vibrance of the rocks exposed by sunlight contrast nicely with the shadows mainly on the left of the image as well as the sky.
When made black and white, I liked the drama created but noticed detail was lost in the shadows so I will increase shadows/exposure to restore this.
Increased shadows, next I tried to manipulate the sky to make it contrast more nicely with the cliffside and the rocks.
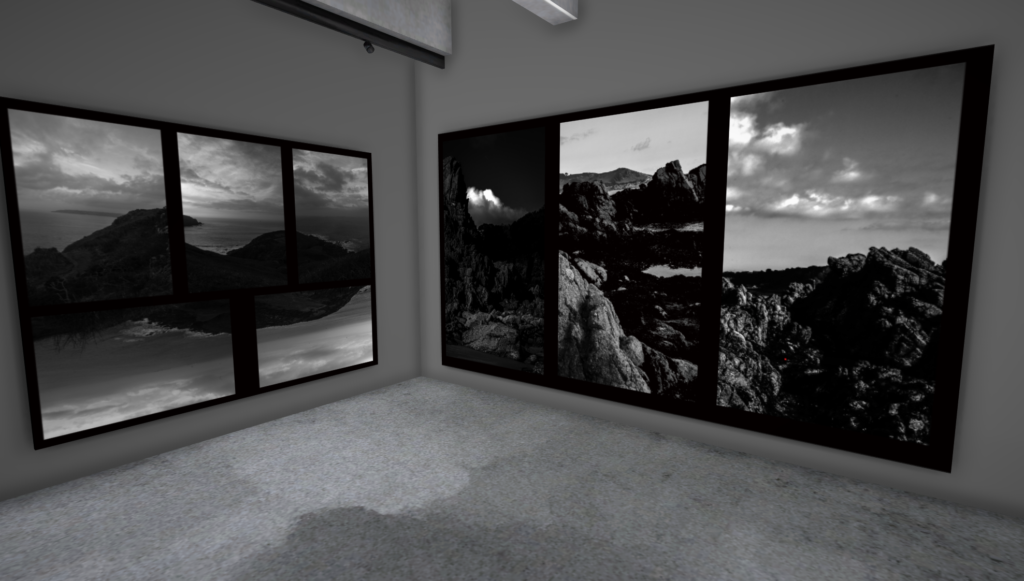
Presentation in ArtSteps
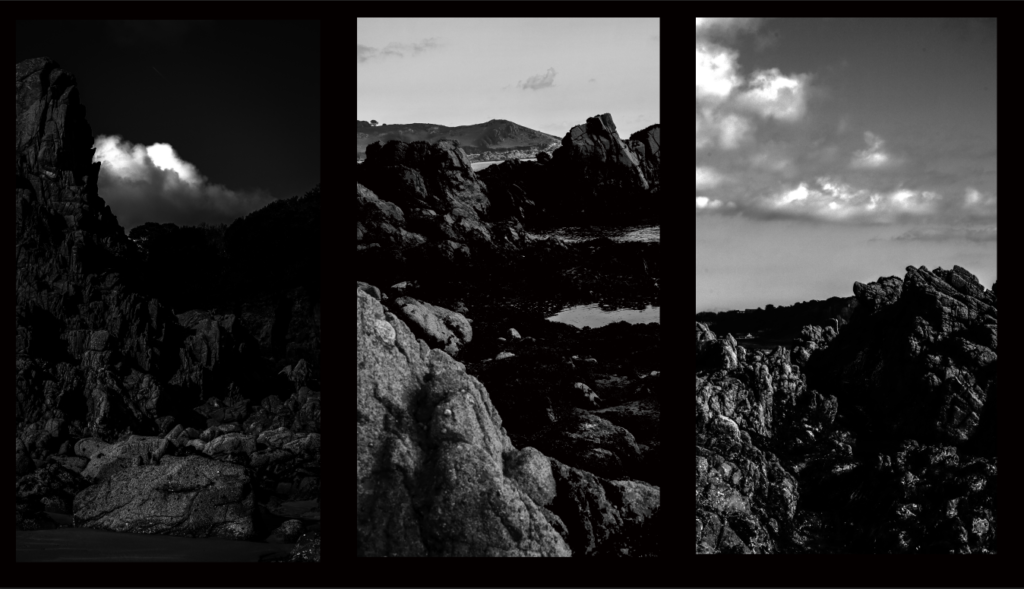
I chose to present all the black and white images together since they all are of similar subjects/landscapes, and this combined with the light and dark tones of each image group them all together effectively, enhancing the drama and atmosphere created by each individual photo. The other two are presented in a diptych, with the darker sky and shadows of the first image contrasting with the lighter tones and sky of the second image, which I found very effective since these two images are creating different atmospheres allowing for this presentation to amplify this contrast.
Photoshoot Evaluation
Overall, I found my photos to be effective in presenting a range of tones as well as creating drama while maintaining Ansel Adams’ style of high aperture values and keeping everything well enough exposed to allow every detail to be visible. Editing also allowed for me to create HDR photos and experiment with black and white, helping me achieve my intention behind each image as well as helping to reinforce the atmosphere each individual image is trying to create.
Comparison Against Ansel Adams
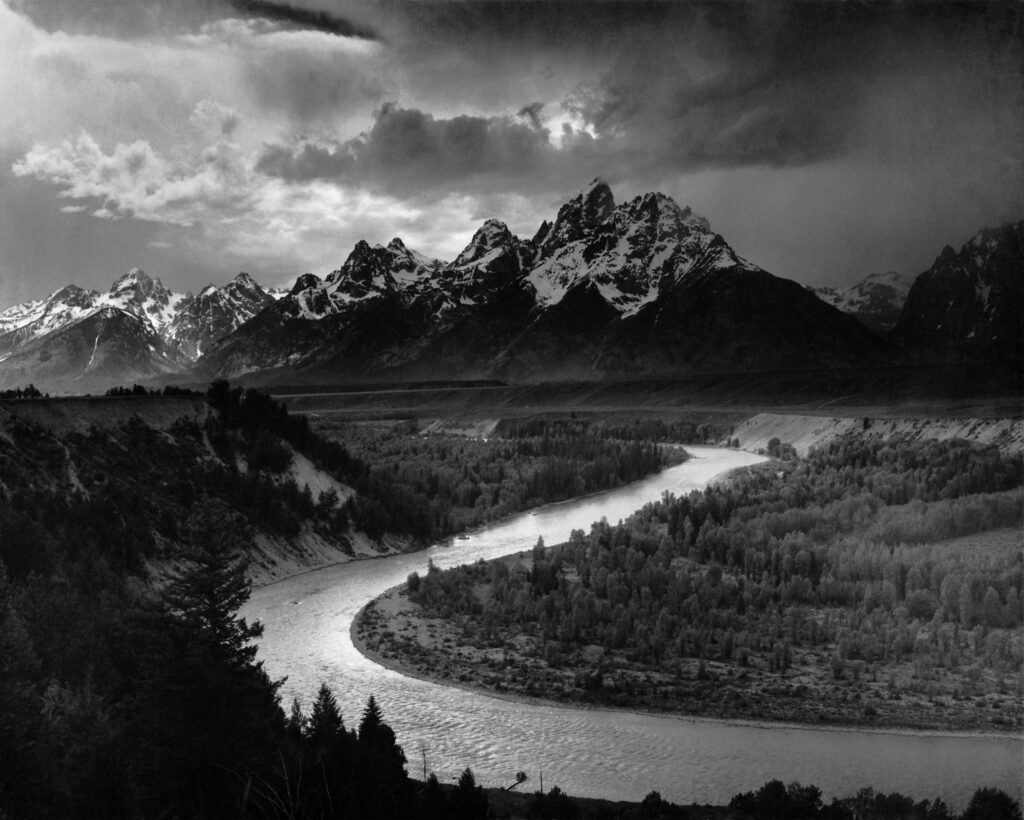
Technical – Both photos were taken outdoors, and thus all of the lighting is natural – both also use a high aperture to create a large depth of field and keep every detail in focus. Finally, there is a visible use of the zone system to have a wide range of different tones from light to dark (also helping to add more drama to the image), so I think I have successfully replicated Ansel Adams’ style.
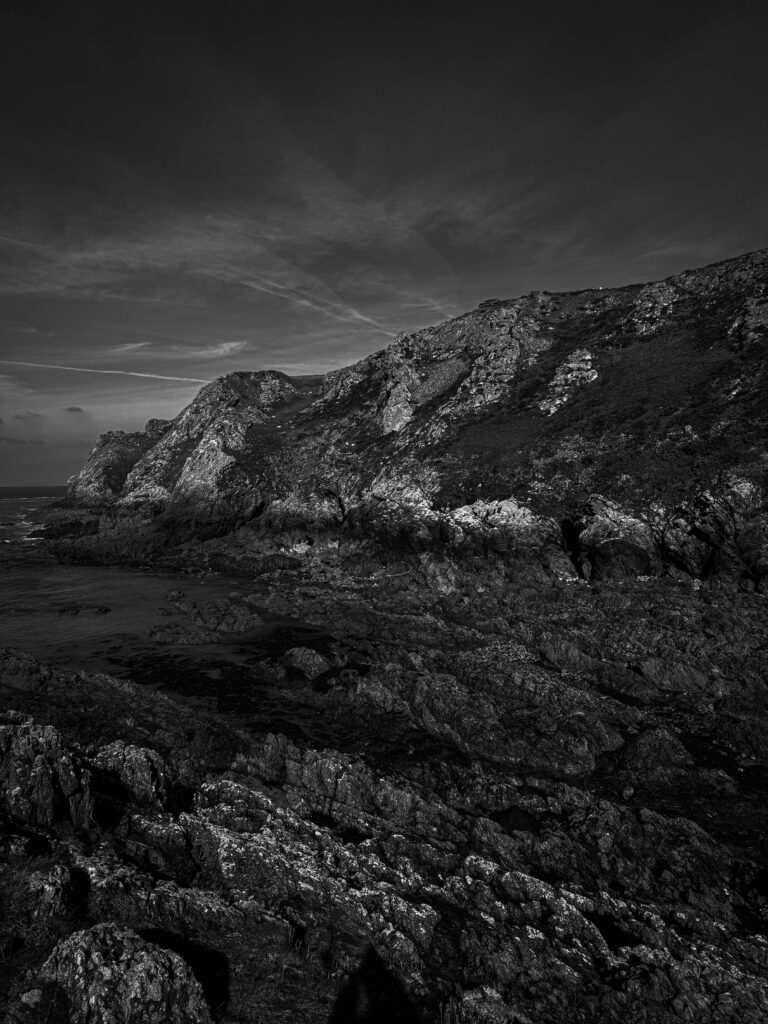
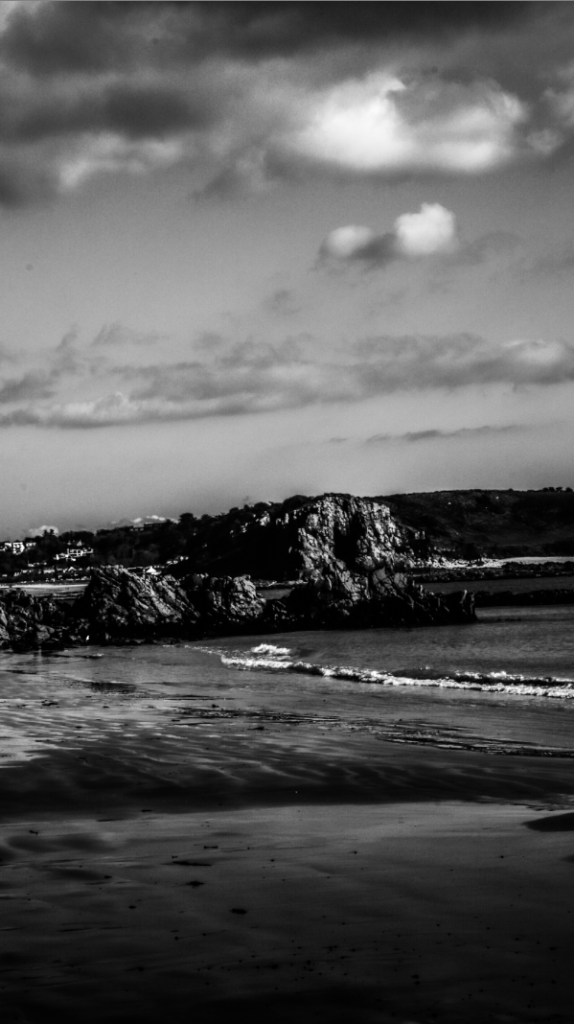
Visual – Ansel Adams’ image was taken from high up in a mountain range, capturing another mountain range in the distance as well as the river and landscape below all of which uses the zone system to create visible contrast between light and dark tones. My image contains a similar range of light and dark tones, although the sky has been darkened slightly since I found it to be a bit bleached out so it doesn’t have as many lighter tones although the scene itself still has a sense of drama similarly to Adams’ photo.
Conceptual – The idea behind Ansel Adams’ photography was to use high apertures to maintain noticeable detail in every area of the image, showing off the beauty of nature (linking to his work as an environmentalist) and to have a wide range of tones in each image, creating drama. I think both his image and mine make effective use of these techniques.
Exposure compensation helps you override automatic exposure adjustments your camera makes in situations with uneven light distribution, filters, non-standard processing, or underexposure or overexposure. It lets you take control of your image’s brightness by manually increasing or decreasing exposure.
Exposure Bracketing
Exposure bracketing is a technique where, instead of taking a single photo, you take three (or more) that are all exposed slightly differently; normally one is correctly exposed, one slightly underexposed, and one slightly overexposed.
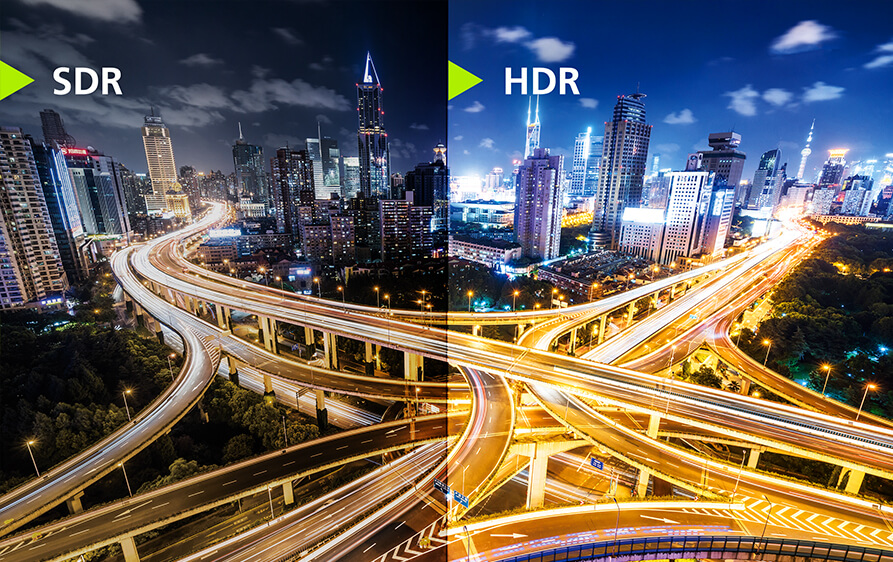
HDR Photos
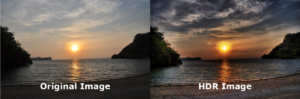
HDR stands for High Dynamic Range and refers to a technique that expresses details in content in both very bright and very dark scenes. It offers a more natural and realistic picture output even with a widened range of contrast.
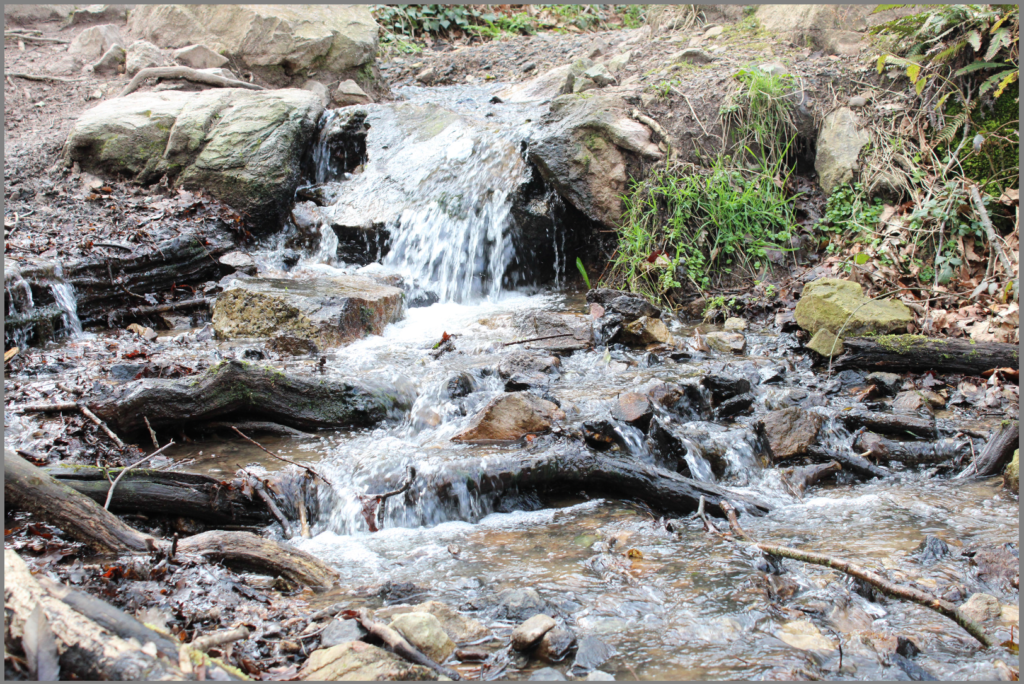
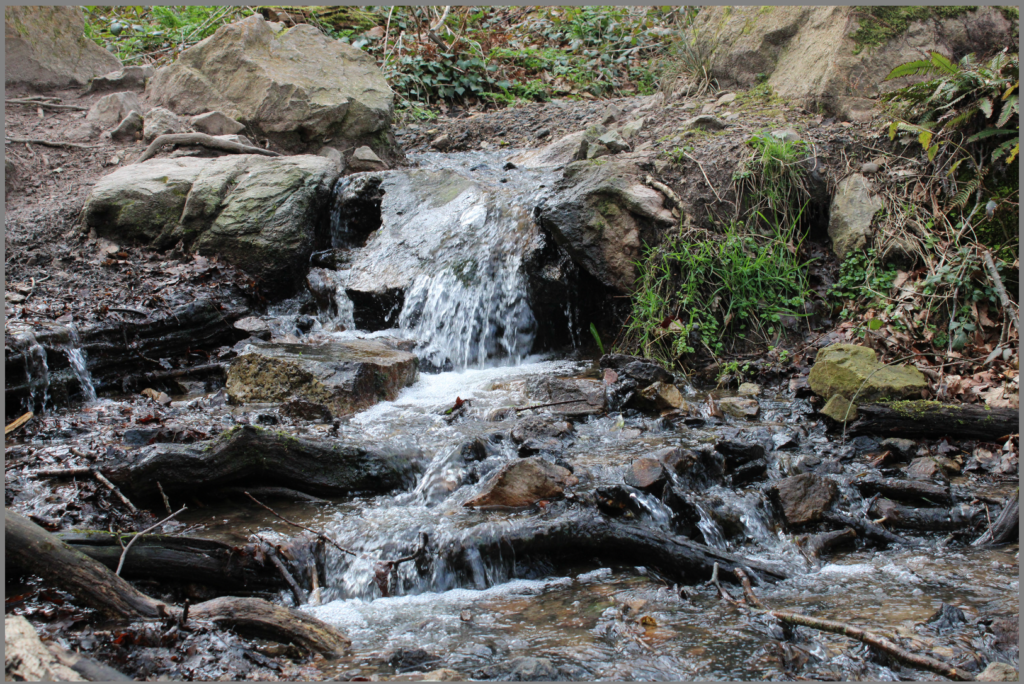
Example HDR Images
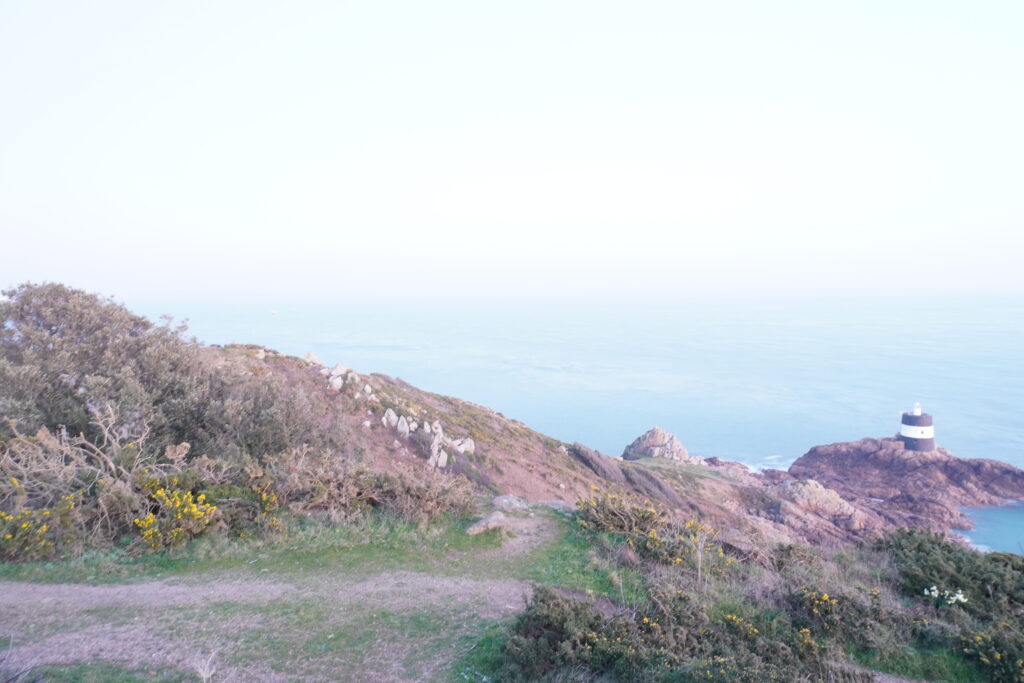
Image 1
The 3 images above were the images taken to create the final HDR product. The first one is -1 underexposed, the second is balanced and the third is +1 overexposed.
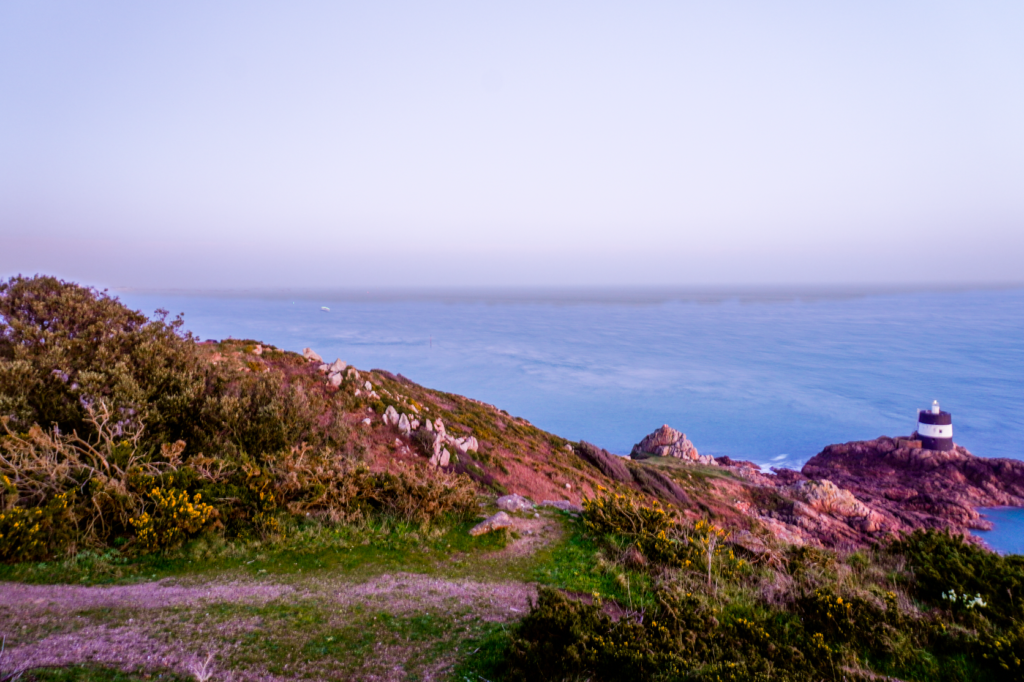
This was the final product produced after merging all 3 images, with a few automatic adjustments applied to exposure and contrast.
Image 2
The 3 individual images used to create the HDR version.
Final result, with better visibility of details in less exposed areas.