Introduction
in this project we will be using many different lighting portraiture techniques to learn about the different techniques that can be done with a camera, light and a studio.
Artist reference Nadav Kander
Nadav Kander was a London based photographer that focused on portraiture, , artist and director, known for his portraiture and landscapes. Kander has produced a number of books and had his work exhibited widely. He received an Honorary Fellowship from the royal photographic society in 2015, and won the prix pricet award. I like Nadav Kanders work because of the way he uses his models and mixes in the light
visual:
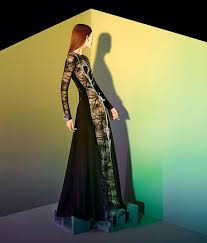
This image is taken by Nadav Kandar he is using a mdoel in it. who is standing on bricks in the middle of the infinity white background, she is standing and curving her back, there is yellow and green gel lights in this photo and the shadow in the back is showing off the model
technical:
the lighting in this photo is white towards the bottom and then gel lights towards the top around the models face. Kandar is using a high aperture in this photo and the whole photo is in focus meaning that Kandar used a sharp focus. i think this photo was taken from around the stomach of the model which then contributes to the viewers being able to see the whole body.
Split lighting
Split lighting is a lighting technique that lights up half of a subject’s face while leaving the other half in a shadow, essentially “splitting” the face. This splitting effect is achieved by a light source that is perpendicular to the subject illuminating directly from one specific side.
Normally, the key light is placed high and to one side at the front, and the fill light or a reflector is placed half-height and on the other side at the front, set to about half the power of the key light, with the subject, if facing at an angle to the camera, with the key light illuminating the far side of the face. The key in Rembrandt lighting is creating the triangle or diamond shape of light underneath the eye. One side of the face is lit well from the main light source while the other side of the face uses the interaction of shadows and light, also known as chiaroscuro , to create this geometric form on the face. The triangle should be no longer than the nose and no wider than the eye. This technique may be achieved subtly or very dramatically by altering the distance between subject and lights and relative strengths of main and fill lights.
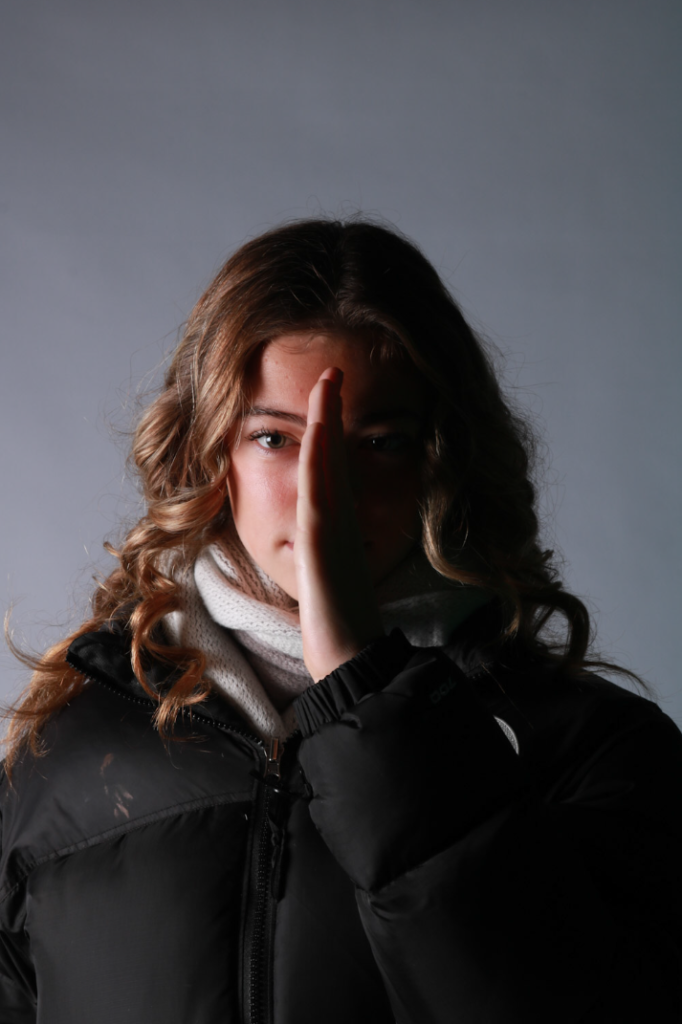
this is my attempt of split lighting my model in the photo did a pose to show the split with in the lighting to show the difference with the lights, I couldn’t edit these photos because of a problem in Lightroom but even without editing this photo came out nicely
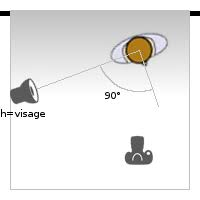
For this lighting technique you shine a light at half of your models face and it highlights one side of the models face, you can also angle the light so it shines at the reflector and then by using the reflector the background will be dark and the other side will be lighter and if you use a white infinite background it will be darker.
Gel lighting
In the realm of photography and cinematography, lighting gels are thin, transparent, coloured materials, typically made from polyester or polycarbonate. They’re primarily used to alter the colour and quality of light in a scene. When we say ‘gels,’ we’re referring to these sheets of magic that can drastically transform an image or video by modifying the light source’s colour.
The use of gels traces back to the early days of theatre and stage performances, long before they found their place in cinema and photography. Originally, gels were made from Gelatin (hence the name), which was dyed various colours. As technology advanced, more durable materials replaced Gelatin, and gels became a staple tool for photographers and cinematographers alike.
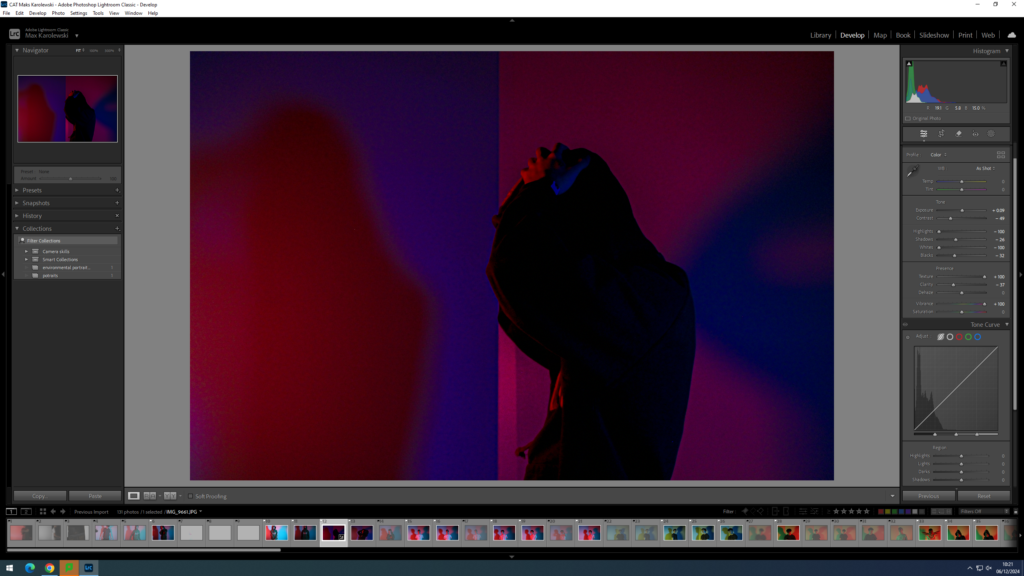
this is my attempt of using gel lightings i made one side blue and the other side red, this photo came out good i also edited it to make the colours a bit more vibrant. I think this is my best photo because one side the shadow is red with a blue background and the other side is a blue shadow with a re background which is making the photo more detailed.
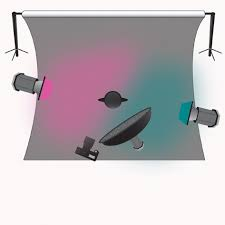
for gel lighting technique you get two lights and put a gel sheet with a colour of choice and then one side of the model will be red for example and the other side will be blue and the shadows will be opposite.
Butterfly lighting
Butterfly lighting is a lighting pattern used in portrait photography where the key light is placed above and pointing down on the subject’s face. This creates a dramatic shadow under the nose and chin that looks like a butterfly. It’s also called ‘Paramount lighting,’ named for the Hollywood studio and how they lit their most glamorous and beautiful actresses.
Butterfly lighting is perfect for portrait photography. It is one of the most flattering lighting techniques for sculpting facial features. Here’s a quick tutorial on butterfly lighting photography and how it works.
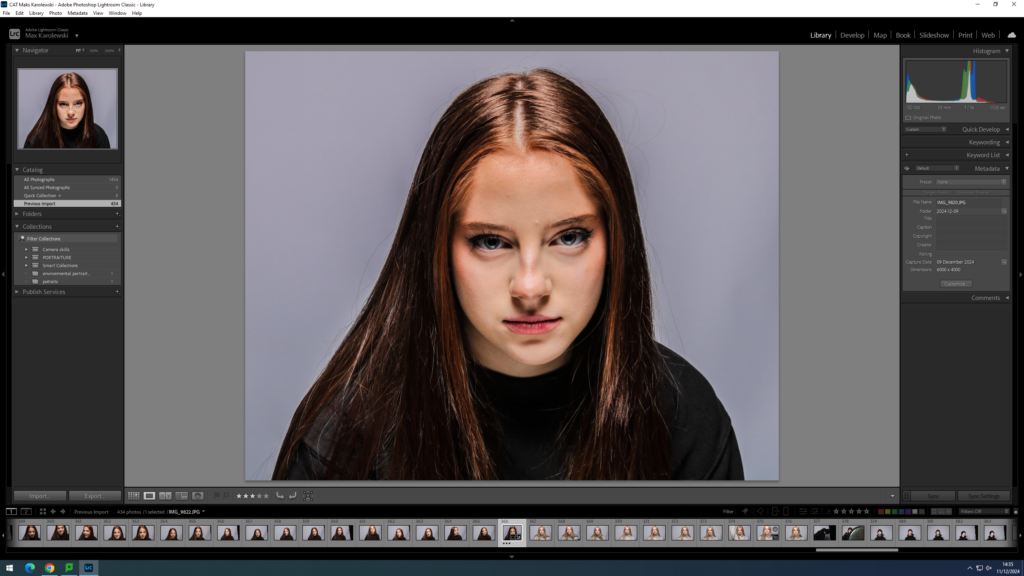
This is my best photo of using the butterfly lighting technique i edited this photo. I think this photo came out well because the butterfly lighting under the nose is very visible and the model in this photo is doing a passport styled photo.
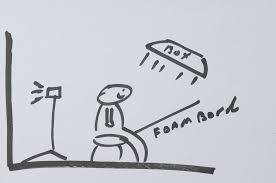
This is how butterfly lighting works you get a light above the person you are photographing and then you get a reflector under the person and it reflects the light to the persons head
Rembrandt lighting
Rembrandt lighting is a standard lighting technique that is used in studio portrait photography it is also used in contrast with butterfly It can be achieved using one light and a reflector, or two lights, and is popular because it is capable of producing images which appear both natural and compelling with a minimum of equipment. Rembrandt lighting is characterized by an illuminated triangle (also called “Rembrandt pat) under the eye of the subject on the less illuminated side of the face. It is named for the Dutch painter Rembrandt, who occasionally used this type of lighting
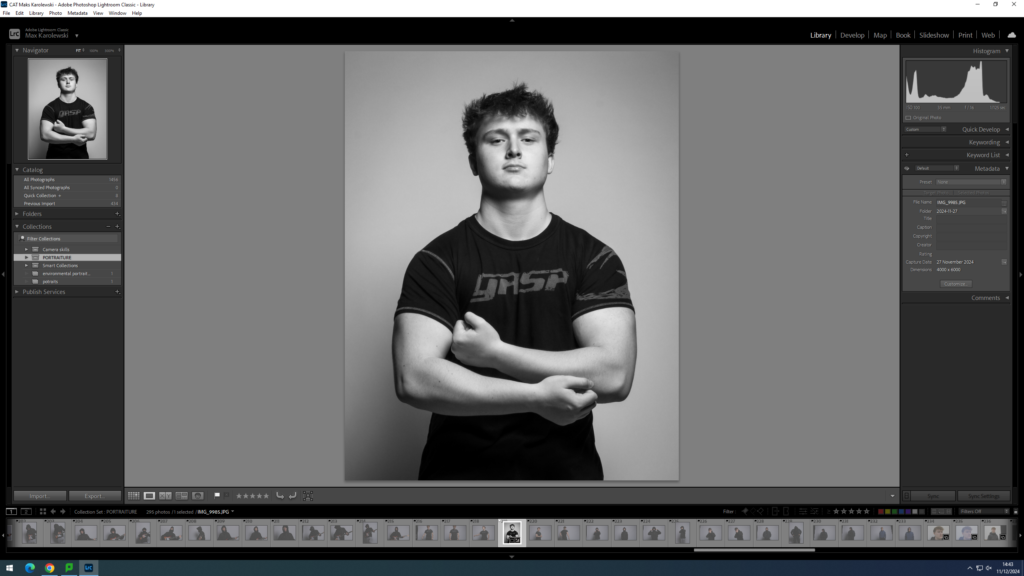
i think this is the best photo of Rembrandt lighting i did because i tried a different type of editing and it came out very well, i like this style of editing because its black and white but you can still see the shadow.
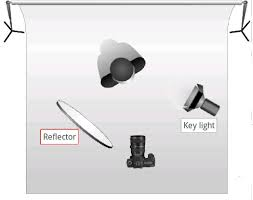
This is a diagram of the Rembrandt lighting technique the reflector reflects the key light back into the model and it comes out with nice shadows upon the model.
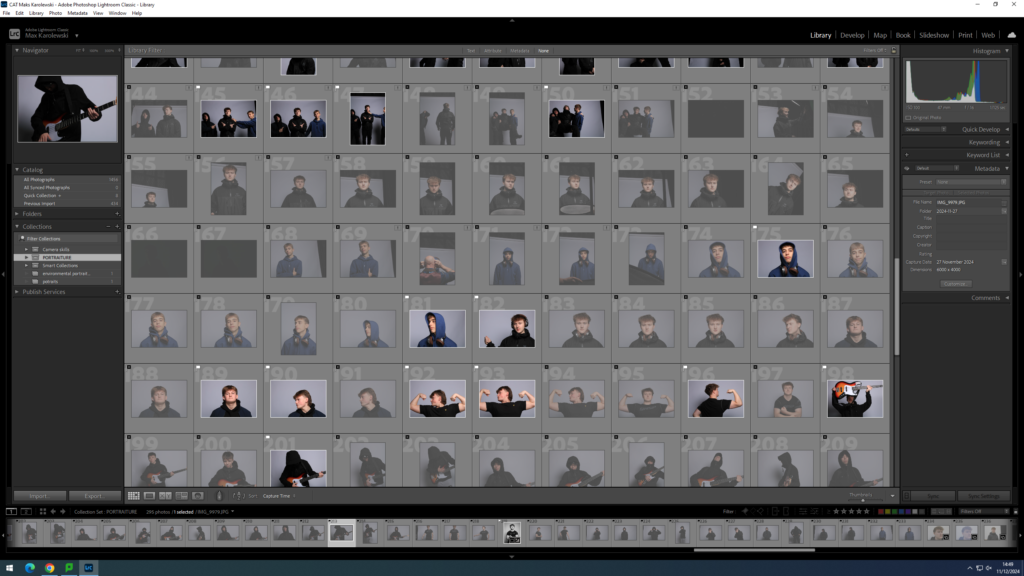
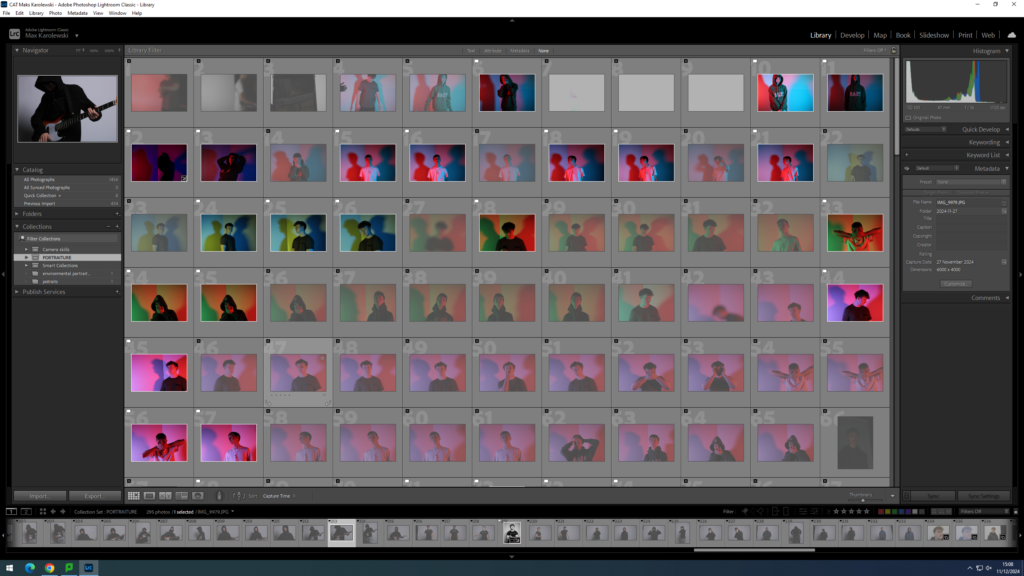
from all the photos I flagged the photos that are good and then unflagged the ones that I didn’t want to use, from all the photos i marked as a pass I chose the ones that I liked the most
Honey Comb
A lighting honeycomb grid is a specialized accessory used in photography to control and manipulate the direction of light. It typically consists of a grid of cells or hexagons that attach to a light modifier such as a reflector or softbox. The purpose of the honeycomb grid is to narrow down the spread of light, allowing photographers to focus and guide the illumination precisely where they want it. By using a honeycomb grid, photographers can avoid light spillage, create more defined shadows, and enhance the overall impact of their images. This tool is particularly valuable in portrait photography and other scenarios where controlled and directional lighting is essential for achieving specific visual effects.
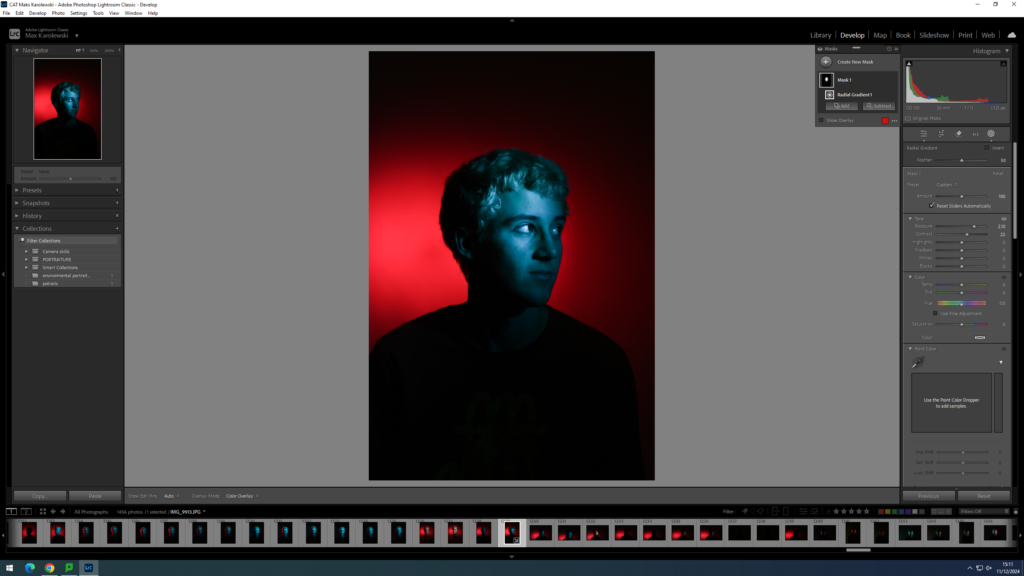
This is the best honey comb photo I got I mixed it with some gels as well. The red spotlight behind is my favourite thing in this photo as it describes the photo a lot. Also the light on the face is like a spotlight.
Conclusion
In conclusion I think that this project was entertaining and it shows the different possible techniques that can be done, but in my opinion the gel lighting was the best ones I done because we can get many different outcomes and it wont always be the same, on the other hand I also think split lighting was good because the way the light reflected was different to other ways and it was also fun to do.

