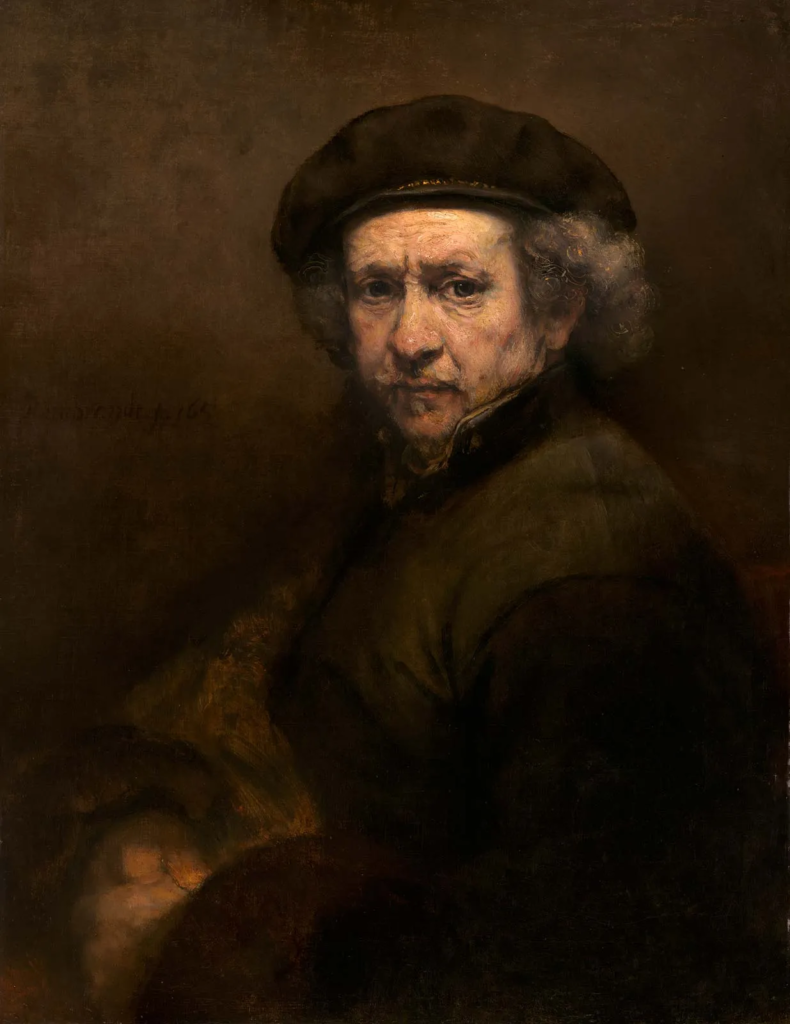
“Rembrandt lighting” is a lighting technique used alongside “Butterfly lighting” it is distinct by an illuminated triangle and can be achieved by using one or two lights alongside a reflector.
I ended up going to the studio again and took some more Rembrandt photos in different styles of lighting.
Rembrandt was a Dutch painter

He was known for his amazing ability to show human feelings in his art. He used light and shadow in a unique way that made his paintings look real and full of life.
Born in the Netherlands, Rembrandt started drawing and painting at a young age. He later moved to Amsterdam, where he became a popular artist, painting portraits for wealthy people. But unlike other artists, Rembrandt showed people as they really were, not just how they wanted to be seen.
He also painted himself many times, showing how he changed as he got older — from a young, confident man to an older, wiser person who had faced hard times. These self-portraits are still seen as some of the most honest in art history.
Even when he went through struggles with money and personal loss, Rembrandt never stopped creating. His later works are seen as some of his best, showing deep understanding and emotion. Today, he is remembered as one of the greatest artists of all time, known for capturing the true human experience.
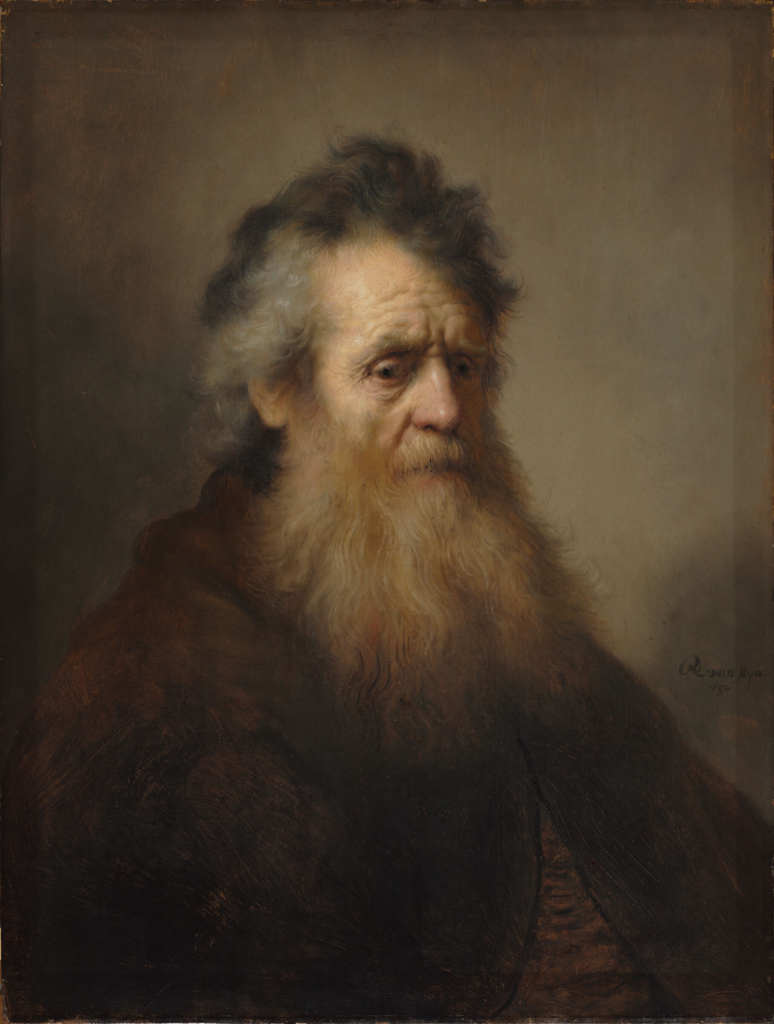
Portrait of an old man

Portrait of an Old Man is a famous painting by Rembrandt, made around 1654. It shows an old man with a calm, thoughtful look. He has a long white beard, wrinkled skin, and wears a simple robe and cap, making him look wise and peaceful.
Rembrandt used light and shadow to make the man’s face stand out. Soft light shines on his face, showing every wrinkle and detail, while the background stays dark. This makes the man feel real and present, almost like he’s sitting right in front of you.
No one knows for sure who the man is. Some people think he wasn’t a real person but just someone Rembrandt painted to show age and wisdom.
Today, this painting is seen as one of Rembrandt’s best. People love how he captured the man’s age, experience, and quiet strength, making it a powerful example of how art can show the beauty of being human.
My photos
I ended up going to the studio to attempt Rembrandt lighting myself
Here are all my raw photos

I then edited some of my best photos in Lightroom and photoshop.

You must focus on consistent and creative progress, with an expected level of knowledge and understanding too.
!!Don’t forget to publish a minimum of 1 x blog post per week!!
This is the 10 step process that you need to follow:
Mood-board, Mind-map of ideas (AO1)definition and introduction (AO1)
Statement of Intent / proposal
Artist References / Case Studies (must include image analysis) (AO1)
Photo-shoot Action Plan (AO3)
Multiple Photoshoots + contact sheets (AO3)
Image Selection, sub selection, review and refine ideas (AO2)
Image Editing/ manipulation / experimentation (AO2)
Presentation of final outcomes (AO4)
Compare and contrast your work to your artist reference(AO1)
Evaluation and Critique (AO1+AO4)