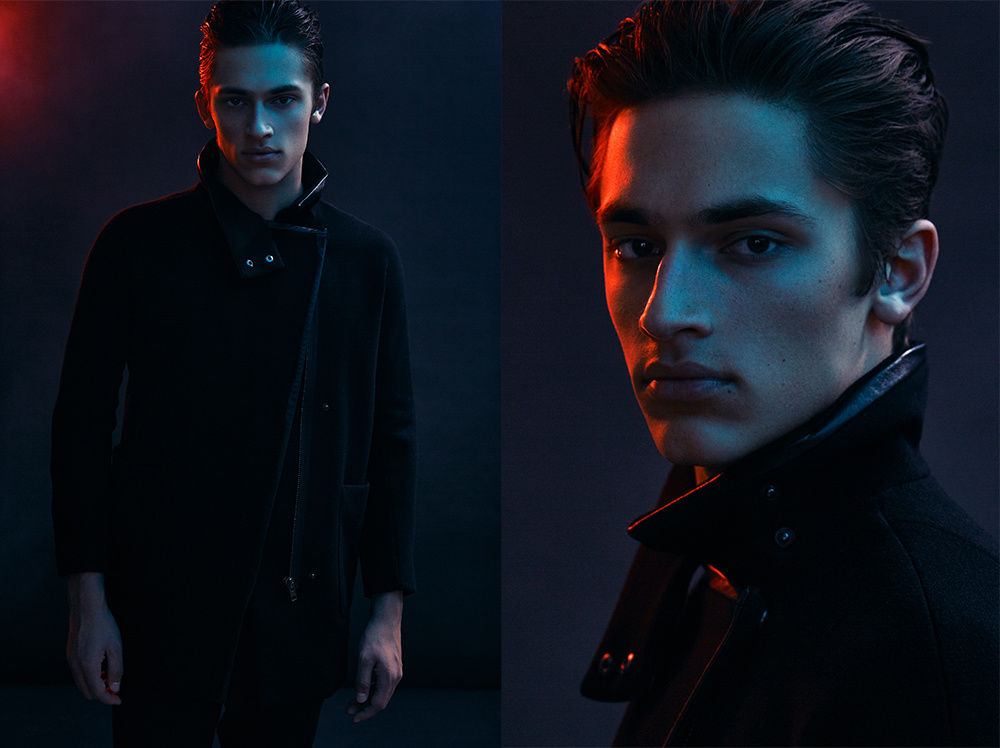
What is Studio Lighting?
Studio Lighting is artificial light that is used to light up the environment you want to take photos of. This can be used in a range of techniques to create different types of unique images.
People use Studio Lighting to get a range of special effects that can be applied to the subject, some of the effects are named Rembrandt lighting, Butterfly lighting and Chiaroscuro. Each effect involves manipulating the studio lighting to create a balance of light and shadows against the subjects face.
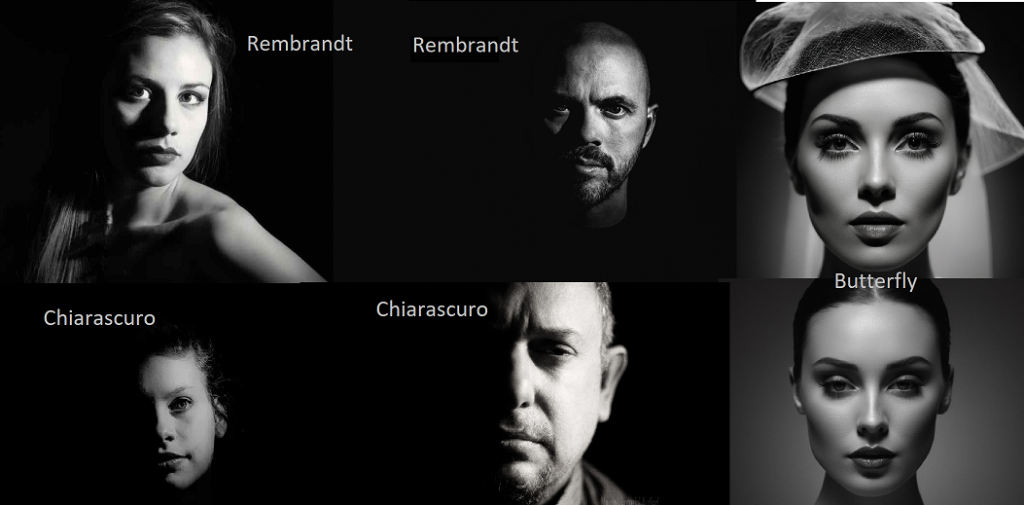
Types of studio lighting
Continuous lighting
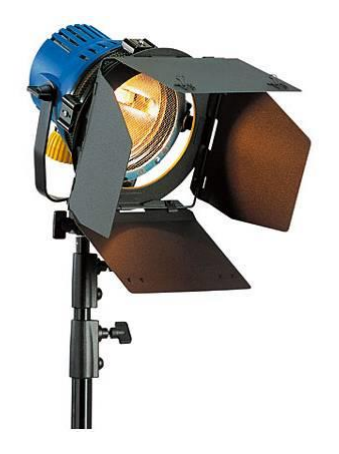
Continuous lighting produces a low level of actual light compared to a studio light, its a warmer orange coloured light compared to other studio lights which are less warmer in colour (less orange). If you use this type of lighting you need to make sure to adjust your white balance for tungsten setting so the image comes out to its best quality.
Flash lighting
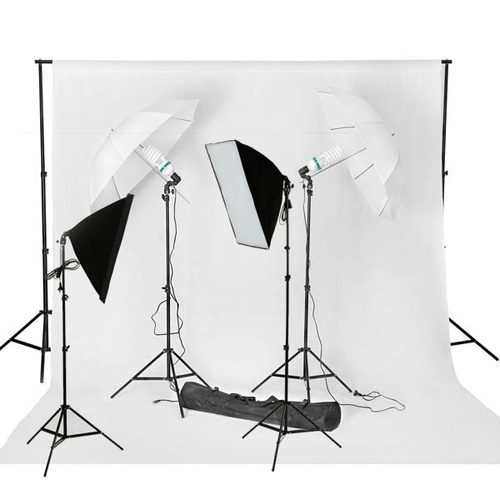
Flashlight lights have attachments like umbrellas or a soft box which is used to diffuse the light. They are usually linked to the camera so when the user captures an image the flash should immediately flash the light onto the subject. By also using flash lighting it allows for more deeper shadows to be created into the image which allows for more dramatic images which also allows for specific features to be highlighted. Additionally you could use the flash on the camera however it wont produce the effect that your probably aiming for compared to a studio light flash.
Lighting points
Lighting points are how many lights are being used in the image, so if you have one lighting point your using one light to capture your images and if you have two lighting points then you have two lights to capture your image and the same can be said to the three lighting points also.
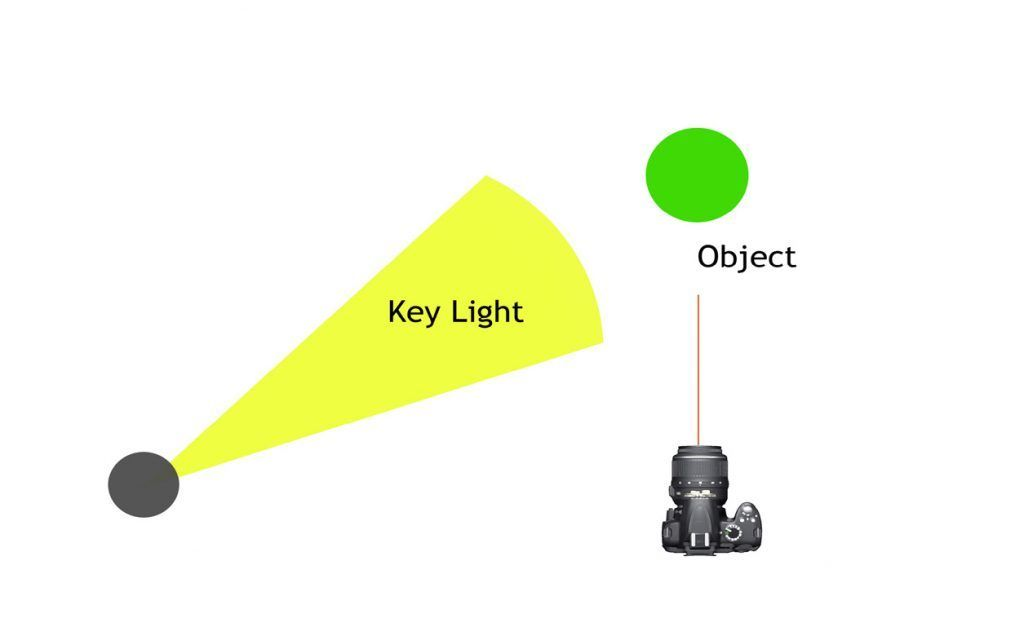
1 Point Lighting Setup
With a 1 Point Lighting Setup the light is usually placed 45 degrees from the side of the camera and 45 degrees up from the subject which allows for the strongest image to be created of the subject.
2 Point Lighting Setup
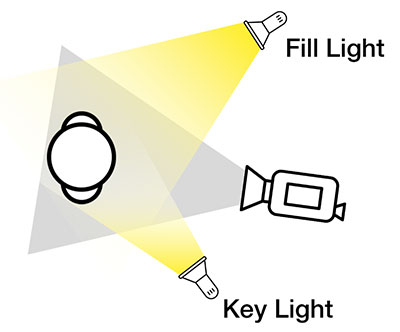
With a 2 Point Lighting Setup you setup both lights facing the subject at a 45 degree angle with one angled up and one angled down. The goal of this lighting setup is to eliminate shadows from under the subjects nose and cheeks.
3 Point Lighting Setup
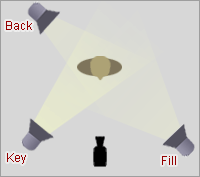
With a 3 Point Lighting Setup you setup two of the lights (The Key Light and Fill Light) so they are facing 45 degrees from the subject similar to the 2 Point Lighting Setup however the third light (Back Light) is placed behind the subject. By using Three sources of light it allows for more control of the shadows casted on the subject, highlights and the overall contrast. Its one of the best and well known lighting setups as it allows for total control of the environment and also allows for you to shape how you want your subject to be viewed as.
Fill Lighting
Fill Lighting is used to fill in any shadows that the key light may create, it is usually placed in front of the subject but on the opposite side of the key lighting. It is primarily used on a 3 Point Lighting Setup. Fill lighting can be useful for revealing more details of a subject that were hidden due to the shadow of the key light.
Coloured Gels
Coloured Gels is a transparent coloured material that is attached on to the red-head lights which can modify the temperature and the feel of the image which is useful if you want to find a type of lighting to suit the subject your taking a picture of or if you want to make your picture look unique or standout more.
It is used for multiple different purposes such as to colour light and for colour correction and it is used in not only just photography but in videography and theatre as well.
