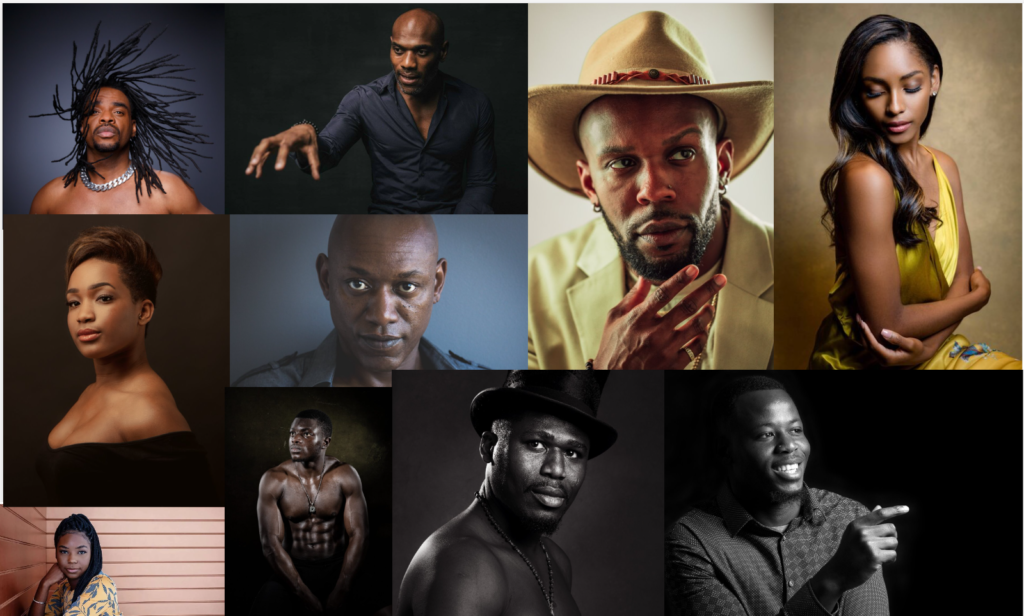
Mood Board
Studio Lighting
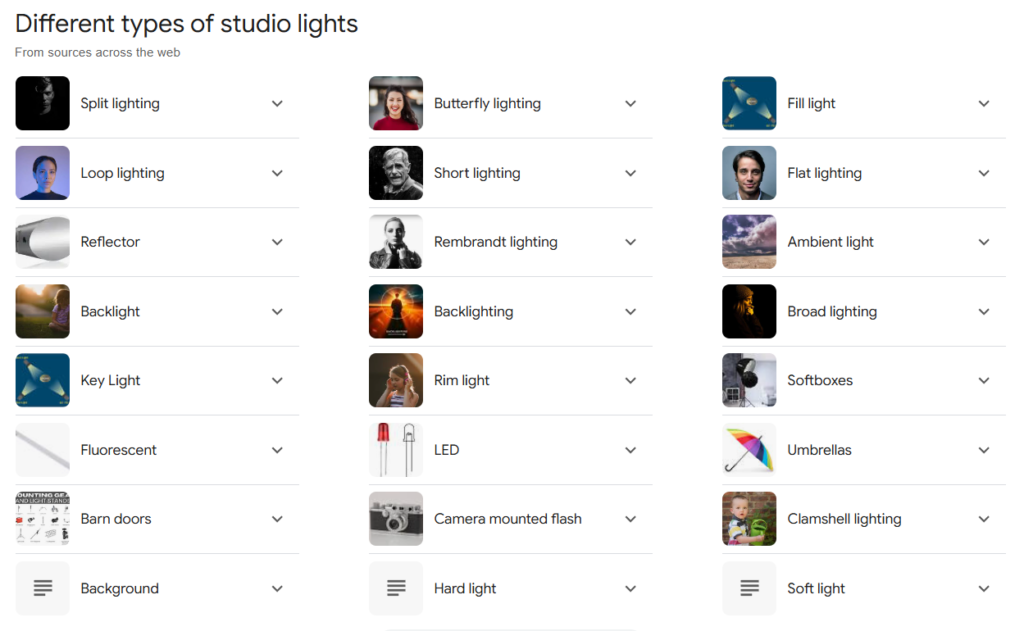
Here are three examples of lighting in more detail
Top Lighting, Bottom Lighting, Side Lighting, Front Lighting, Back Lighting
Top lighting is when the source of light is above the object being shot.
Bottom lighting is when it is below the object being pointed up.
Side lighting is when it is to either side of the object lighting up one side of the face.
Front lighting is when the light is at the front being pointed straight at 90 degrees.
Back lighting is when the source of light is behind the object you are shooting shining through the face.
1. Key Light
- What it provides: The Key Light is the main source of illumination in the scene. It’s typically the strongest light and is placed at an angle to the subject to create depth, texture, and contrast. It defines the overall look and mood of the scene.
- Positioning: The Key Light is often placed at about a 45-degree angle to the subject, slightly above eye level, and to one side (either left or right).
- Effect: The Key Light creates shadows and highlights on the subject, shaping their features and adding drama or contrast. The direction and intensity of the Key Light largely control the mood of the shot (e.g., soft lighting for a gentle mood, hard lighting for a more dramatic or intense look).
2. Fill Light
- What it provides: The Fill Light is used to soften the shadows created by the Key Light. It doesn’t create its own shadows but fills in the areas of the subject that would otherwise be dark or underexposed.
- Positioning: The Fill Light is usually placed opposite to the Key Light, often at a lower intensity. It may also be positioned close to the camera to light the subject from a more neutral angle, reducing harsh shadows while maintaining some contrast.
- Effect: The Fill Light ensures that the subject’s features are visible in the shadow areas, preventing the shot from looking too contrast-heavy or having overly dark regions. The amount of Fill Light can be adjusted to achieve the desired balance of shadow and detail.
3. Back Light
- What it provides: The Back Light is placed behind the subject, often at a high angle, to illuminate the subject from the rear. It’s used to separate the subject from the background and add a sense of depth and dimension to the scene.
- Positioning: The Back Light is usually placed opposite the camera, behind the subject, and sometimes slightly elevated, depending on the effect desired. It can also be called a Rim Light if it’s used to highlight the edges of the subject, or a Hair Light if it’s specifically used to light the hair.
- Effect: The Back Light creates a rim or halo around the subject, which can help define the subject’s silhouette and give the subject more visual separation from the background. It adds contrast and depth, preventing the subject from looking flat. In portraiture, it can also create a nice glow around the subject’s hair or shoulders.
Rembrandt Lighting
What it is:
Rembrandt Lighting is a classic lighting setup that creates a distinctive triangle of light on the subject’s cheek, often on the shadowed side of the face. It is named after the Dutch painter Rembrandt van Rijn, who famously used this lighting technique in his portrait paintings to create a dramatic yet natural look.
Butterfly Lighting
What it is:
Butterfly Lighting is named for the butterfly-shaped shadow that is cast under the subject’s nose when the light is positioned directly above the subject’s face. It’s a glamorous and high-fashion lighting style that was popularized by Hollywood portrait photographers in the 1930s.
Chiaroscuro
What it is:
Chiaroscuro is an Italian term that means “light-dark” and refers to the technique of using strong contrasts between light and dark to create a dramatic, three-dimensional effect. This technique has its roots in painting, especially in the works of artists like Caravaggio, who mastered the use of light and shadow to create a sense of depth and volume in his subjects.
Fill Lighting
Fill lighting is a key lighting technique used to soften and balance the shadows created by the key light in a lighting setup. While the key light is the primary source of illumination, creating contrast and defining the subject’s form, fill light serves to reduce the intensity of those shadows without eliminating them entirely. This allows for a more natural, balanced look in the image or scene, ensuring that important details in shadowed areas are visible without compromising the dramatic effect created by the key light.
Purpose of Fill Lighting:
- Softens Shadows: The primary purpose of fill light is to soften or “fill in” the dark areas (shadows) created by the key light, reducing contrast in a way that maintains a more even exposure across the subject.
- Balance Exposure: Fill light helps ensure that no areas of the subject are too underexposed (i.e., too dark), which can be especially important for preserving detail in portraits and ensuring the subject’s features are clearly visible.
- Control Mood and Contrast: By adjusting the strength of the fill light, you can control the overall contrast in the image. A stronger fill light will result in a flatter image with fewer shadows, while a weaker fill will maintain more dramatic shadow areas.
- Preserve Depth and Dimension: While fill light softens shadows, it doesn’t remove them entirely, allowing for some sense of depth and three-dimensionality in the shot.
Artist Reference 1
Rankin
John Rankin Waddell (Rankin) is a British photographer and director who has photographed, amongst other subjects, Björk, Kate Moss, Madonna, David Bowie and Queen Elizabeth II.

The London Evening Standard described Rankin’s fashion and portrait photography style as “high-gloss, highly sexed and hyper-perfect”. He has directed music videos, documentaries, a feature film, short films and commercials. He is renowned for revolutionising visual culture.
Rankin charges around £500 per shoot. He lets customers pose in front of the lens, solo or with a friend and takes there photos. After the shoot they will receive a digital version of their final portrait and an A4 authenticated print.

This is one of his photos which I really love. He has put the photo in black and white which I think is really effective as it helps emphasise and highlight all the different tones whilst keeping it simple. The lighting in this photo is well thought about her whole face is lit up and you can clearly see she is happy. However, the sides of her face are a bit darker which could mean he is using front lighting where the light is pointed straight at her face. I also really like how her hands are placed the one close to the camera adds a 3D perspective and looks really cool.
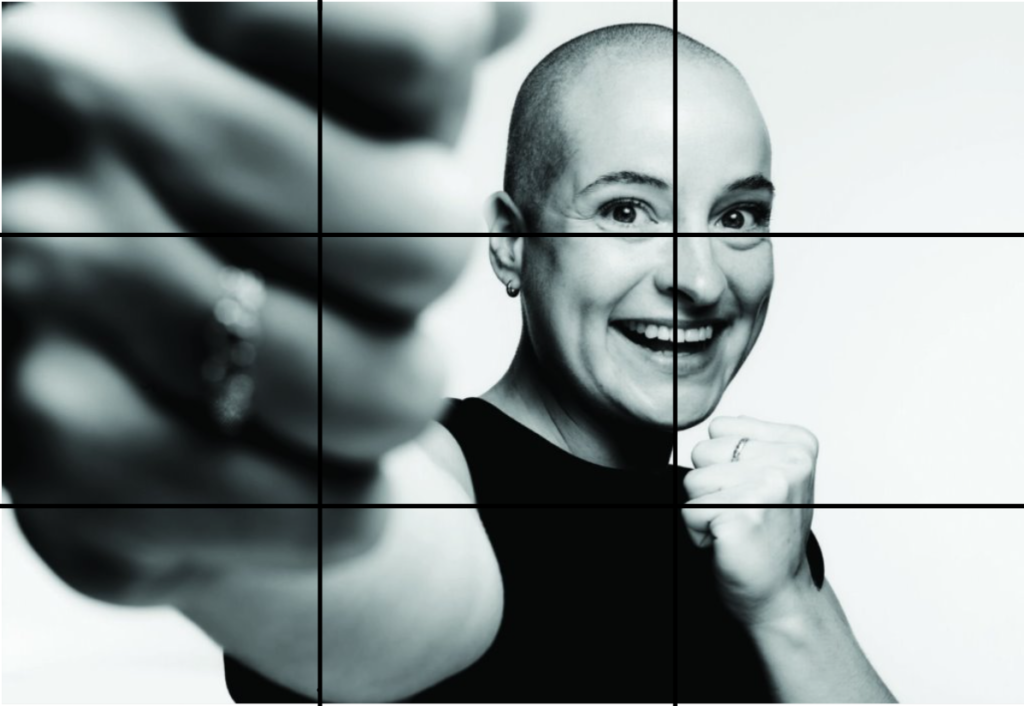
As you can see I drew lines on the image and realised that Rankin also uses the rule of thirds in this image as her face sits on the line.
Photoshoot
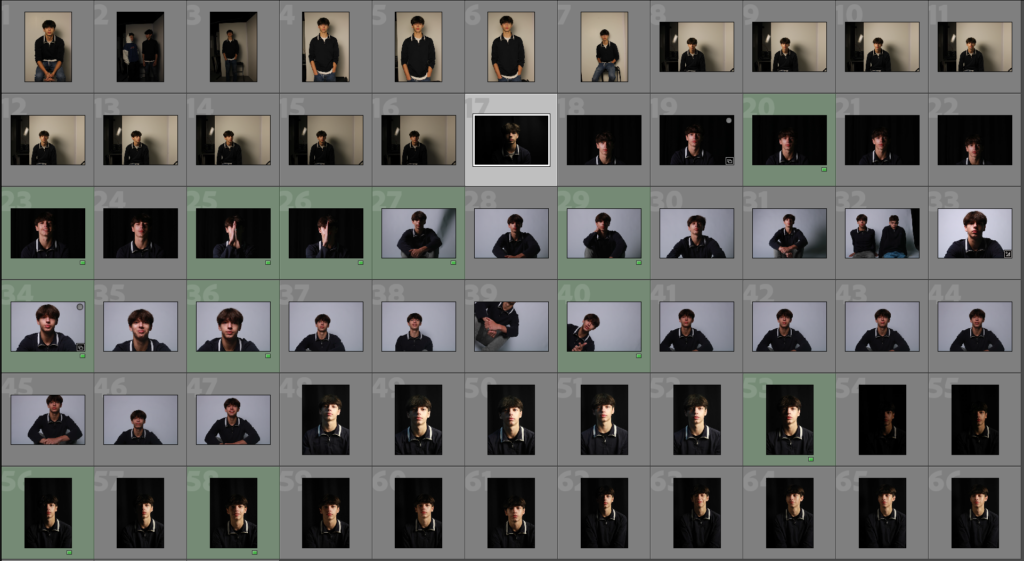
Rembrandt Lighting
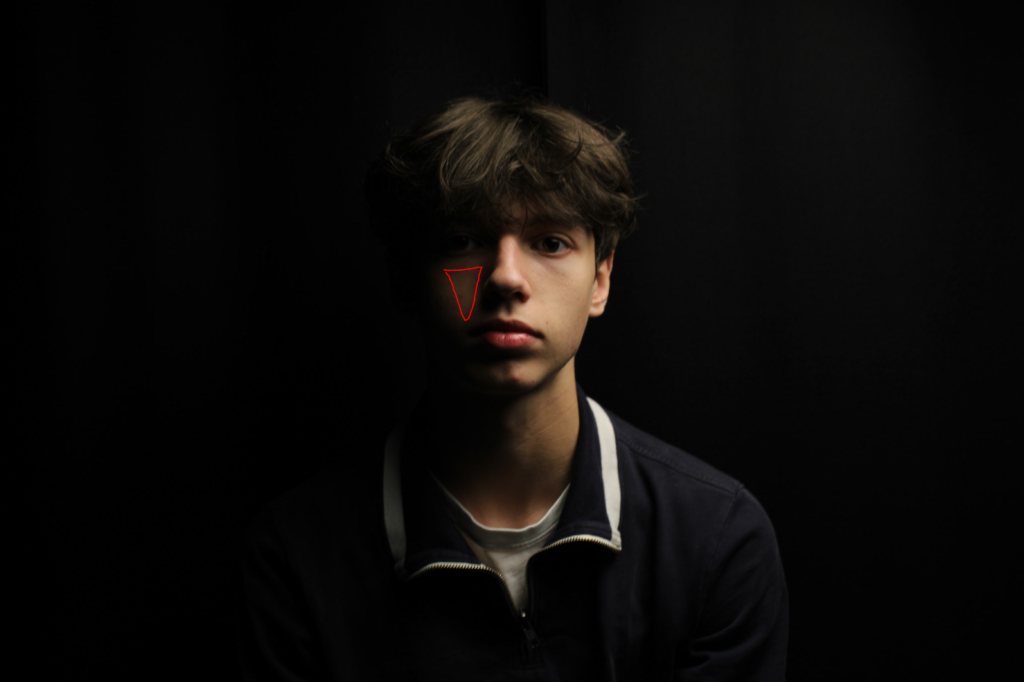
This lighting is created when the light is shining at a 45 degree angle across the models face. The lighting creates a triangle just below the eye as you can see I have highlighted this triangle.
Butterfly Lighting
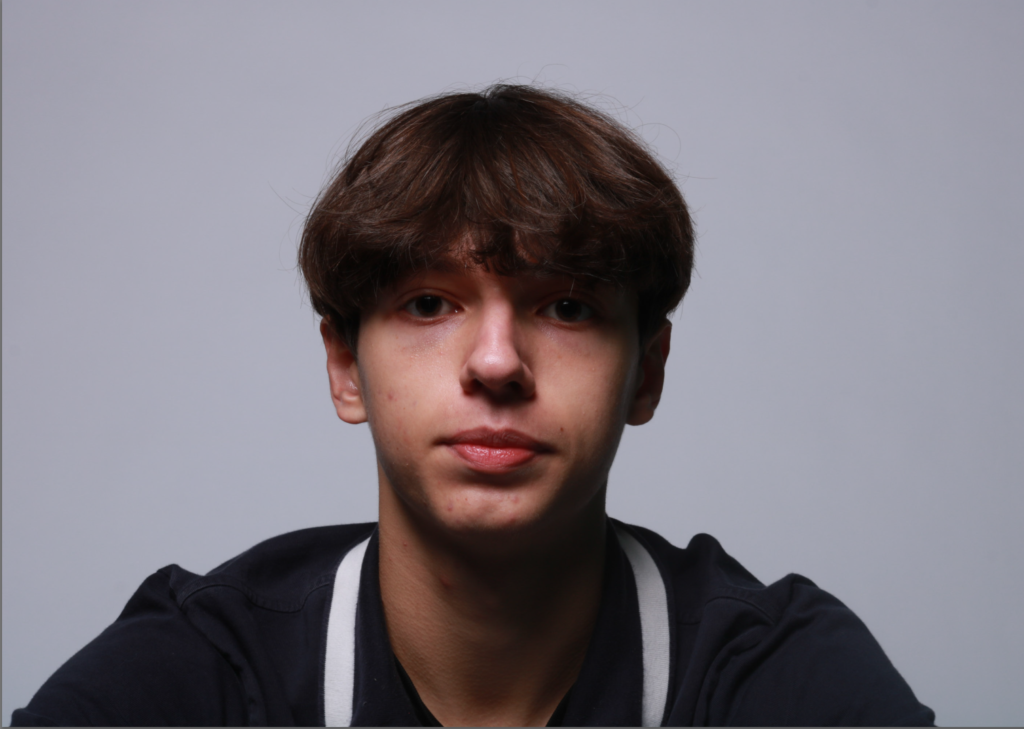
with this lighting the shadow is formed under the nose. It is achieved by shining the light directly down on the models face from above.
Chiaroscuro
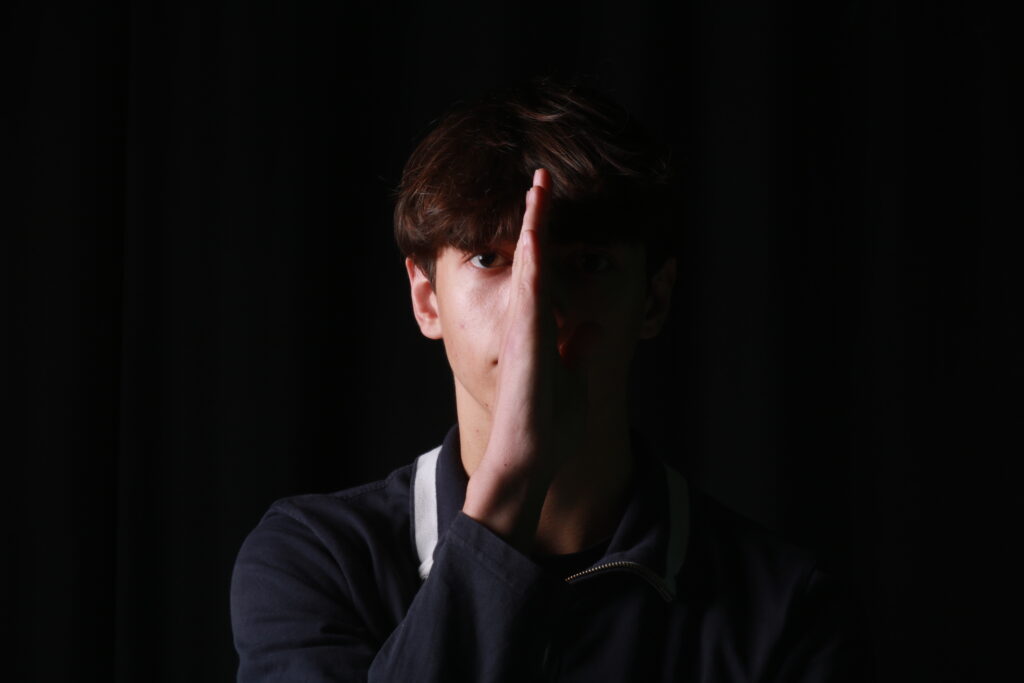
This lighting is half light half dark. it can be achieved by shining the light at a 90 degree angle to the face so half his face is lit up and the other half is getting no light.
Fill lighting
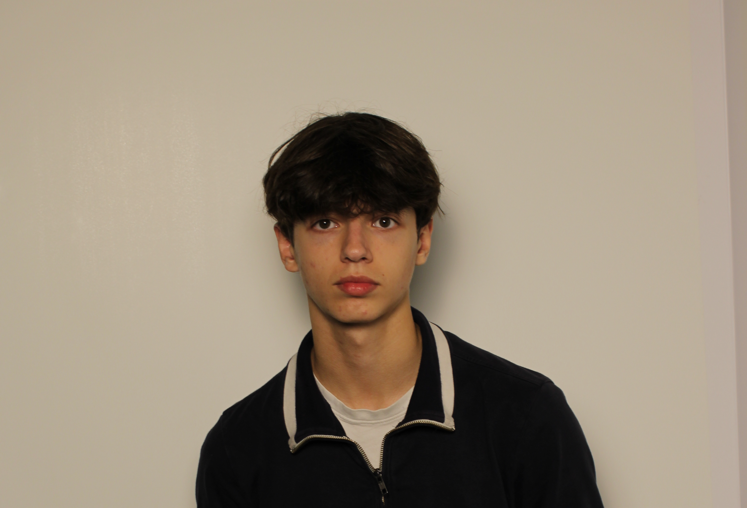
Fill lighting is a key lighting technique used to soften and balance the shadows created by the key light. This allows for a more natural, balanced look in the image

Evidence of consistent and creative progress, with an expected level of knowledge and understanding too. Keep working hard and keep trying different approaches…be curious and push your ideas further each time !