Texture in photography refers to the quality of the surface of an image. It conveys depth and detail in each image you take. The textures can be emphasised through the lighting and focus which can enhance the surfaces to appear more smooth, rough, and hard.
This texture photoshoot includes different textures I could find in nature, including objects like bark, mushrooms, leaves, moss, twigs, rocks, and wood chips. I decided to take these images as I thought it was a creative way to present texture in objects around us.
Artist Research
Ernesto Ruiz
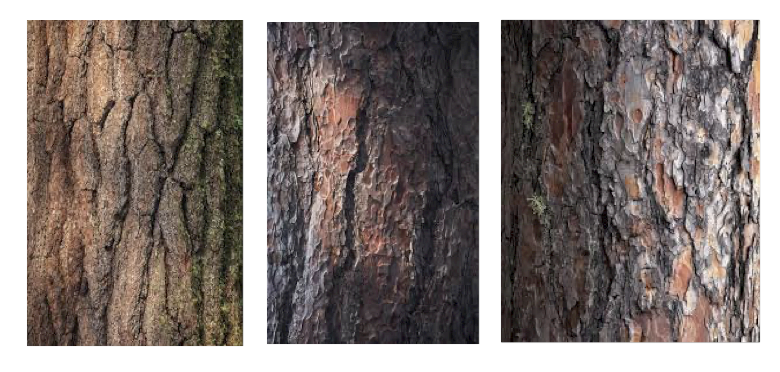
Ernesto was born and raised in Puerto Rico and moved to Minnesota to study and learn more about architecture, where he discovered his passion for photography. In his photos, there is a strong sense of natural light used to shine on mainly the centre of the images. This encourages the viewer to focus on the centre, where the most details are. The space surrounding the image is very compacted, which produces a busy focus for the viewer.The colours featured in these images are enhanced, but still the same shades of bark you would expect to see. Ruiz captures texture well by zooming into his images from straight ahead, which enables us to see the outlines of bark.
Photoshoot Plan
To do this photoshoot, I will need to go out to a park and take images of the natural surroundings, such as bark to replicate Ruiz’s work. I will also take photos of other natural objects I find, but my main priority is taking images of bark from the trees. In order to do this photoshoot, I need to make sure the lighting is bright and that I zoom in to get the effects of the bark like he does.
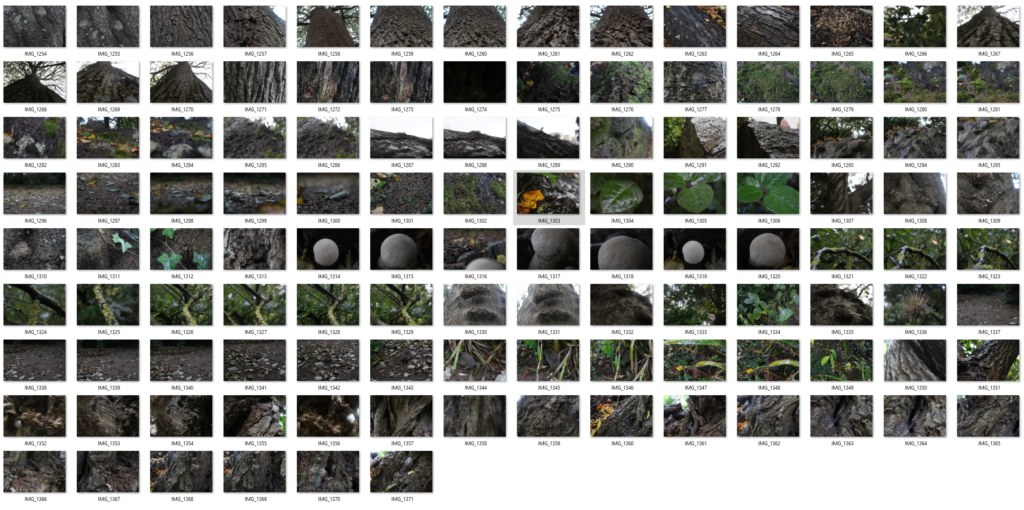
Contact Sheet
Best Photos
I imported all of my texture images onto Lightroom and individually highlighted each one to make it more clear. As you can see, there is a range of images that I selected that I would like to use (green). This colour coded method helps me to identify which images to use on photoshop more effectively as it takes less time since I don’t have to go through each one to select a good image.
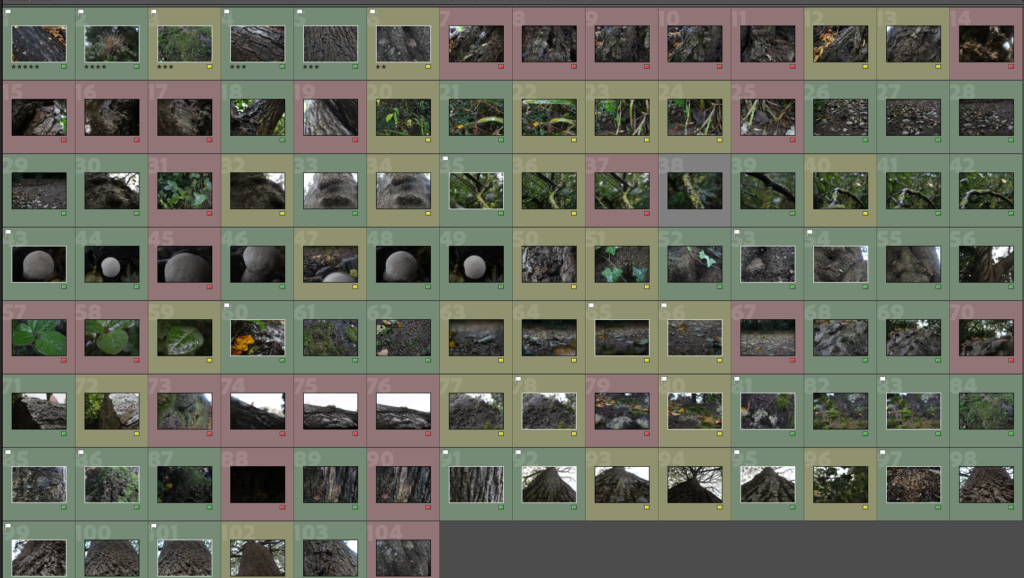
After discovering my favourite images, I went into photoshop to edit the best photos I have and make edits of them to present as my final piece.
Reflection on the photoshoot:
A lot of these images I really like, as they represent texture in various ways. However, towards the end of the photoshoot, it began to rain, which meant that the camera lens had raindrops on it. This made a lot of my end images look blurry which made it difficult to get the accurate representation of the texture.
Editing
To improve my images, I concluded that I would upload the green selected ones from Lightroom into Photoshop so I was able to edit them. By doing this, it allows me to be able to present my work in the best form as they need to be edited in order for them to be presented. For my three edits, I marked the images I liked best and wanted to up level them by changing the hue and saturation, making a mirror image, and circles in my work as shown below.
Edit 1 – Hue/saturation
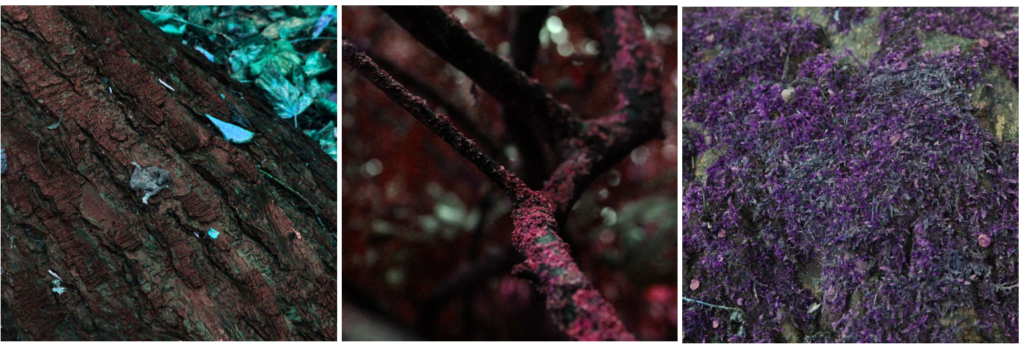
For this edit, I decided to enhance the colours to create a unique and attention-grabbing effect, by making the colours unusual to what they would actually be.
I did this by first cropping my images, then pressing ‘image’ then ‘adjustments’ then ‘hue/saturation’ to play around and change the colours so they still look somewhat natural.
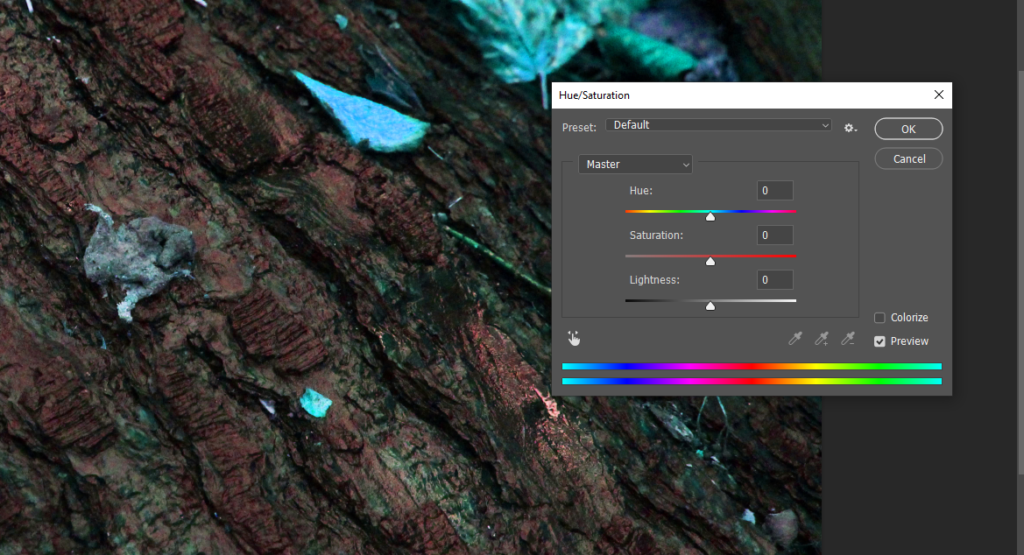
Below is my final product of this edit, and as you can see they all fit nicely together. I decided to do three images in one piece as it gives you an idea of the edit I am creating, and the overall theme of it (which is the use of the different colours).
Edit 2 – Mirror Image
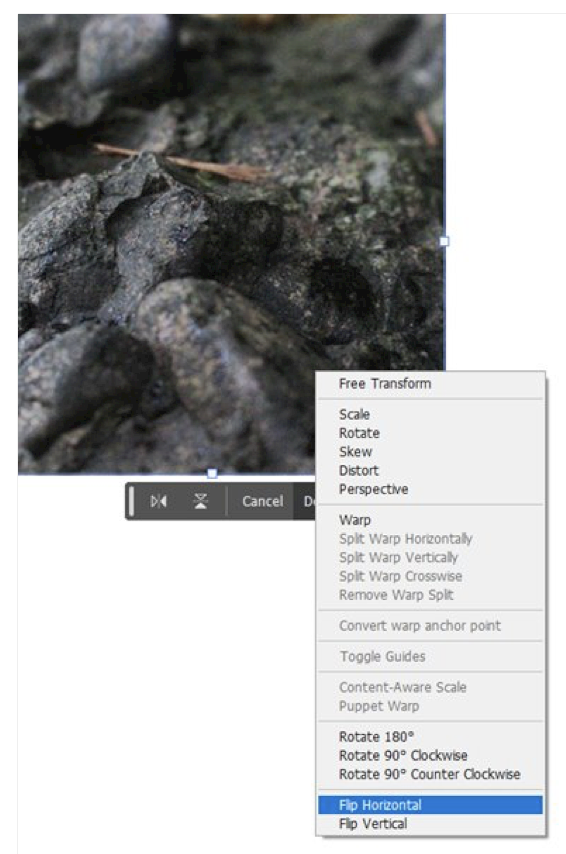
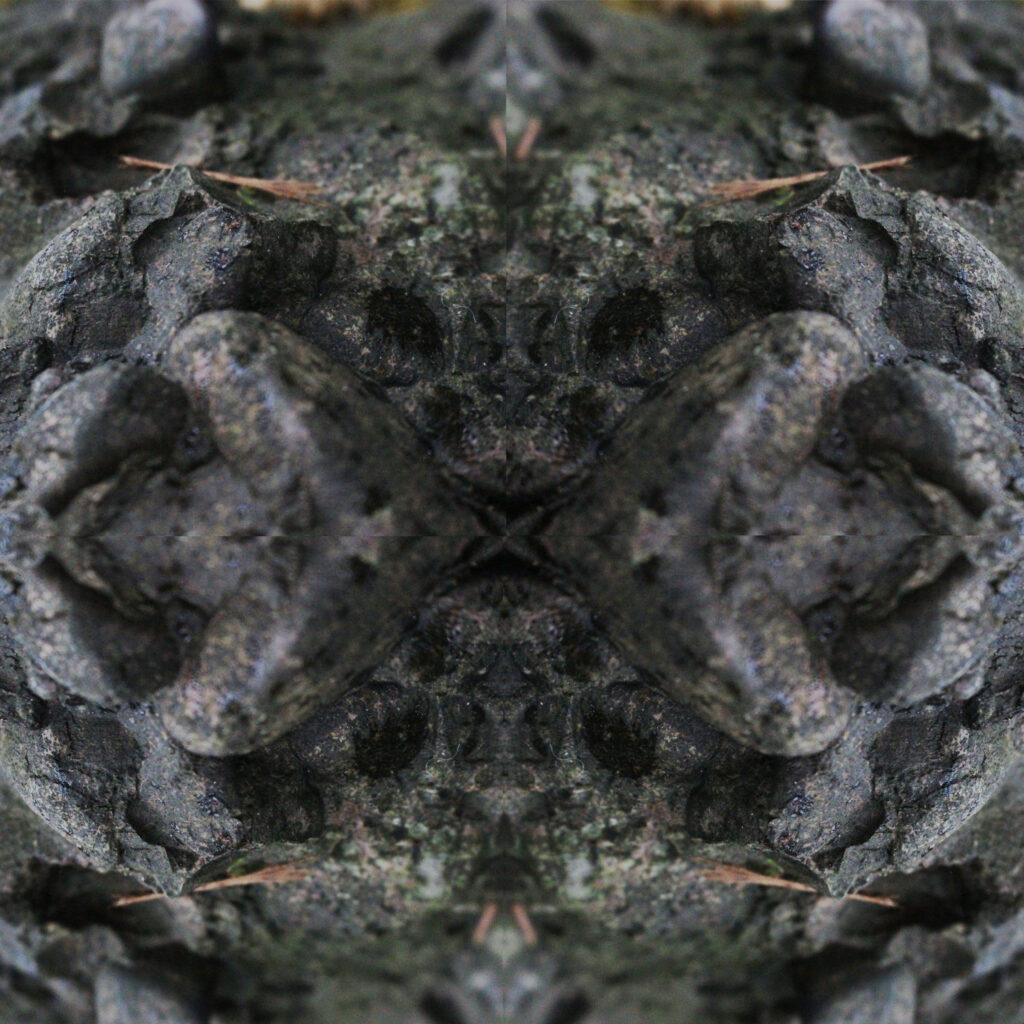
My second edit is the mirror image, where your image is reflected on the other side to make an intriguing pattern from your photograph. I began by opening my image and adding a background layer so I could flip the image both horizontally and vertically as you can see below.
After achieving this, I repeated these steps 2 more times to have the finished look. I cropped the image to ensure the background wasn’t in my edit. This image generates patterns that weren’t originally in the image, so it attracts the viewer as each edit you do of this will look completely unalike.
Edit 3 – Circles
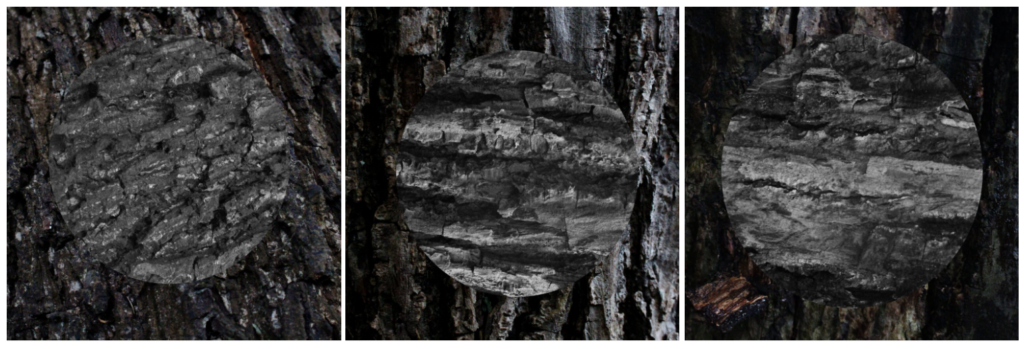
For my last edit, I cropped each image to become a square shape, and engraved a large circle in each of the images. Once I achieved that, I rotated the circles so they were facing different directions to the original image, and then edited the circle to become a monochrome tone. This helps catch the viewers attention as the change of direction through the lines creates a saddened tone paired with the dark colours. Then, I edited the background to match the vibe and made it a darker tone. By doing this, I created a dark tone to the images overall.
Final Piece:
For my final piece, I decided to go with my third edit, as I feel as though it resinated with the artist the most in terms of him taking images of bark. It is also a creative design to present, as it has elements of line, texture and pattern which are all included in the formal elements.

Art Gallery
Lastly, I uploaded my final images to the art gallery which enables you to walk around and view your photography work like it is in a gallery. I spaced these images out to individualise them but still have the effect of them being united as similar pieces.

Evaluation
Overall, I believe my work somewhat connects to Ruiz’s work as he takes images of the bark from close up like I did. Unlike him, I shifted my work to monochrome colours to highlight the details scattered throughout the bark trees, whereas he kept the colours shown and did not edit it like mine. I also took other images of the natural textures, but mainly focused on the bark trees. To improve my work I would stick to his style and make the colours more warm toned without making it black and white, and zoom in more to really capture the small outlines in the bark like he does.

JAC 3 NOV there is more evidence of consistent confidence in your work now, but i think some of your blog posts are in the wrong order
Keep up this flow and momentum and i am sure we will see more quality coming through!