
Mon 24th March – April Fri 4th April 2025
Blog Posts to Make:
- The New Topographics Overview
- The New Topographics Artist Reference and Image Analysis
- The New Topographics Photoshoot and Outcome (Havre Des Pas Photo Walk)
- Typologies overview (more information if you scroll down the blog:
- Typologies Artist Reference: Complete a case study for Bernd and Hilla Becher (Research who they are and analyse their typology photos).
- After Easter: Upload your Typologies Photoshoot – edits and final images
- After Easter: Upload your second New Topographics Photoshoot – edits and final photos
- After Easter (optional): Upload any other photoshoots you completed as part of your Easter Homework
URBAN AND INDUSTRIAL LANDSCAPES
Over the next two weeks you will be looking at producing blog posts and responding photographically to:
- New Topographics
- Urban Landscapes
- Industrial Landscapes
- Camera Skills – vantage points/ Typologies (dead-pan aesthetic)


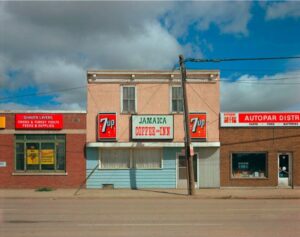
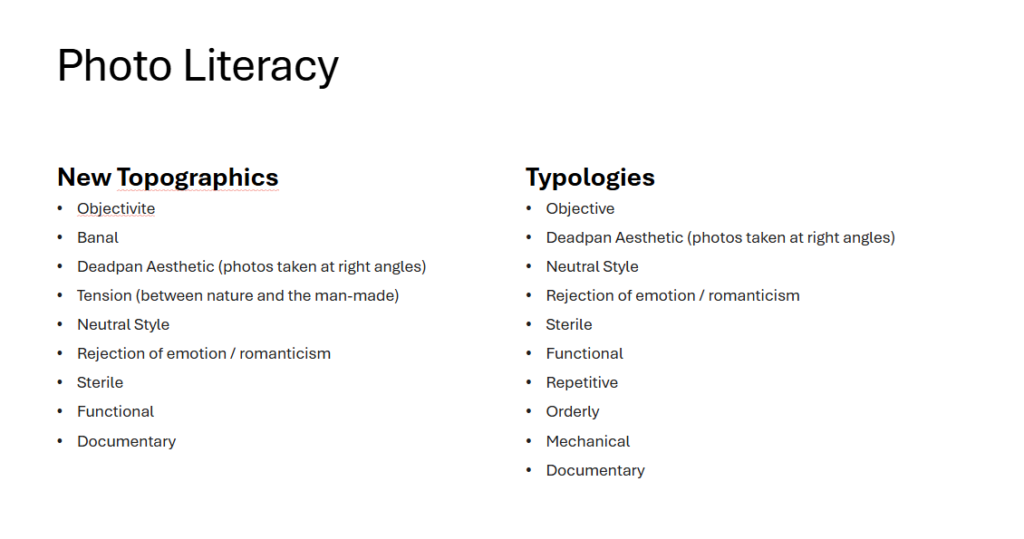
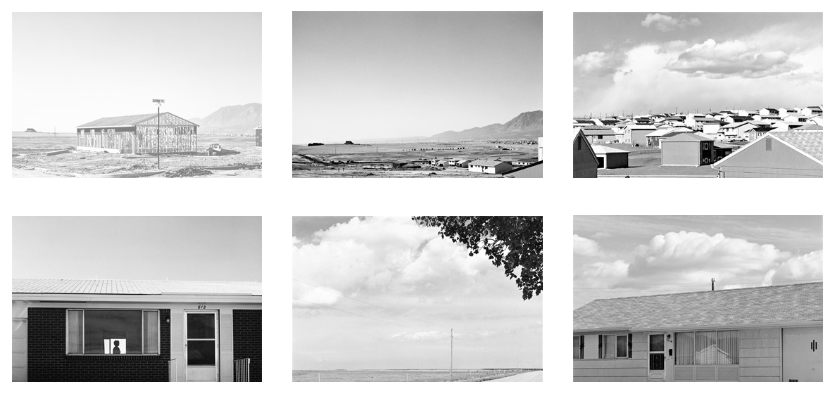
The New Topographics
The New Topographics focused on man-altered landscapes
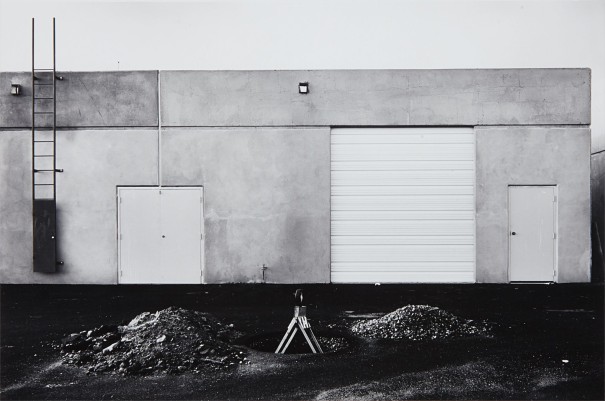
New Topographics was a term coined by William Jenkins in 1975 to describe a group of American photographers (such as Robert Adams and Lewis Baltz) whose pictures had a similar banal aesthetic, in that they were formal, mostly black and white prints of the urban landscape…
The beginning of the death of “The American Dream”
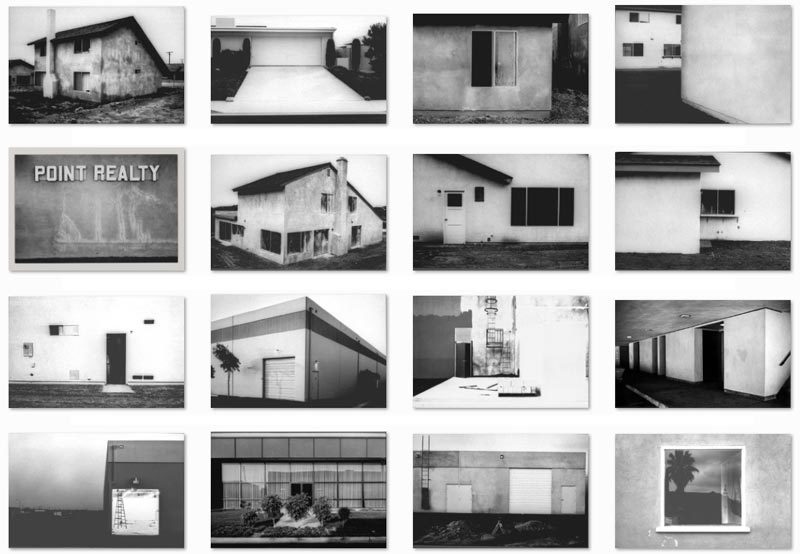
Many of the photographers associated with The New Topographics including Robert Adams, Lewis Baltz, Nicholas Nixon and Bernd and Hiller Becher, were inspired by the man-made…selecting subject matter that was matter-of-fact.
New Topographics was partly inspired by the likes of Albert Renger Patszch and the notion of The New Objectivity and was a rejection of pictorialist or even romanticised landscapes
Parking lots, suburban housing and warehouses were all depicted with a beautiful stark austerity, almost in the way early photographers documented the natural landscape. An exhibition at the International Museum of Photography in Rochester, New York featuring these photographers also revealed the growing unease about how the natural landscape was being eroded by industrial development.
What was the New Topographics a reaction to?
The stark, beautifully printed images of the mundane but oddly fascinating topography was both a reflection of the increasingly suburbanised world around them, and a reaction to the tyranny of idealised landscape photography that elevated the natural and the elemental…
Historical Context : Post-war America struggled with
- Inflation and labor unrest. The country’s main economic concern in the immediate post-war years was inflation. …
- The baby boom and suburbia. Making up for lost time, millions of returning veterans soon married and started families…
- Isolation and splitting of the family unit, pharmaceuticals and mental health problems
- Vast distances, road networks and mobility
The New Topographics were to have a decisive influence on later photographers including those artists who became known as the Düsseldorf School of Photography.
Research a selection of the photographers associated with New Topographics and respond with…
Links to help with researching of Topographic Photographers:
Respond with:
- similar imagery from your own photo-shoots / image library
- analytical comparisons and contrasts
- a presentation of final images
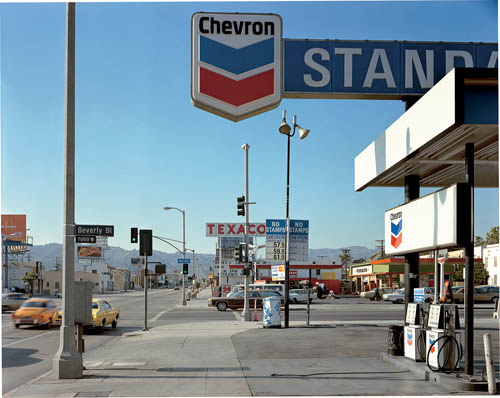
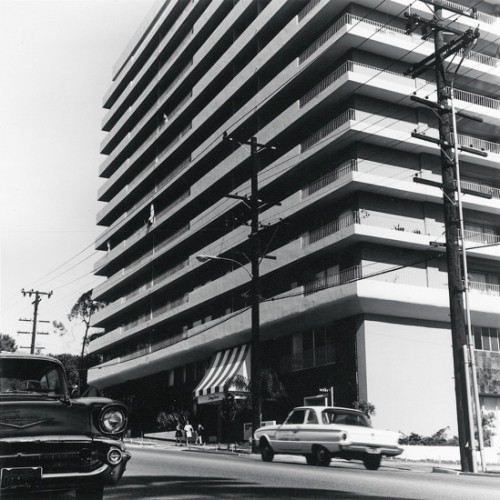
CASE STUDY: Stephen Shore, Beverly Boulevard and La Brea Avenue, Los Angeles, California, June 21, 1975, chromogenic colour print
Analysis and discussion… starting points and key features of The New Topographics
- Foreground vs background | Dominant features
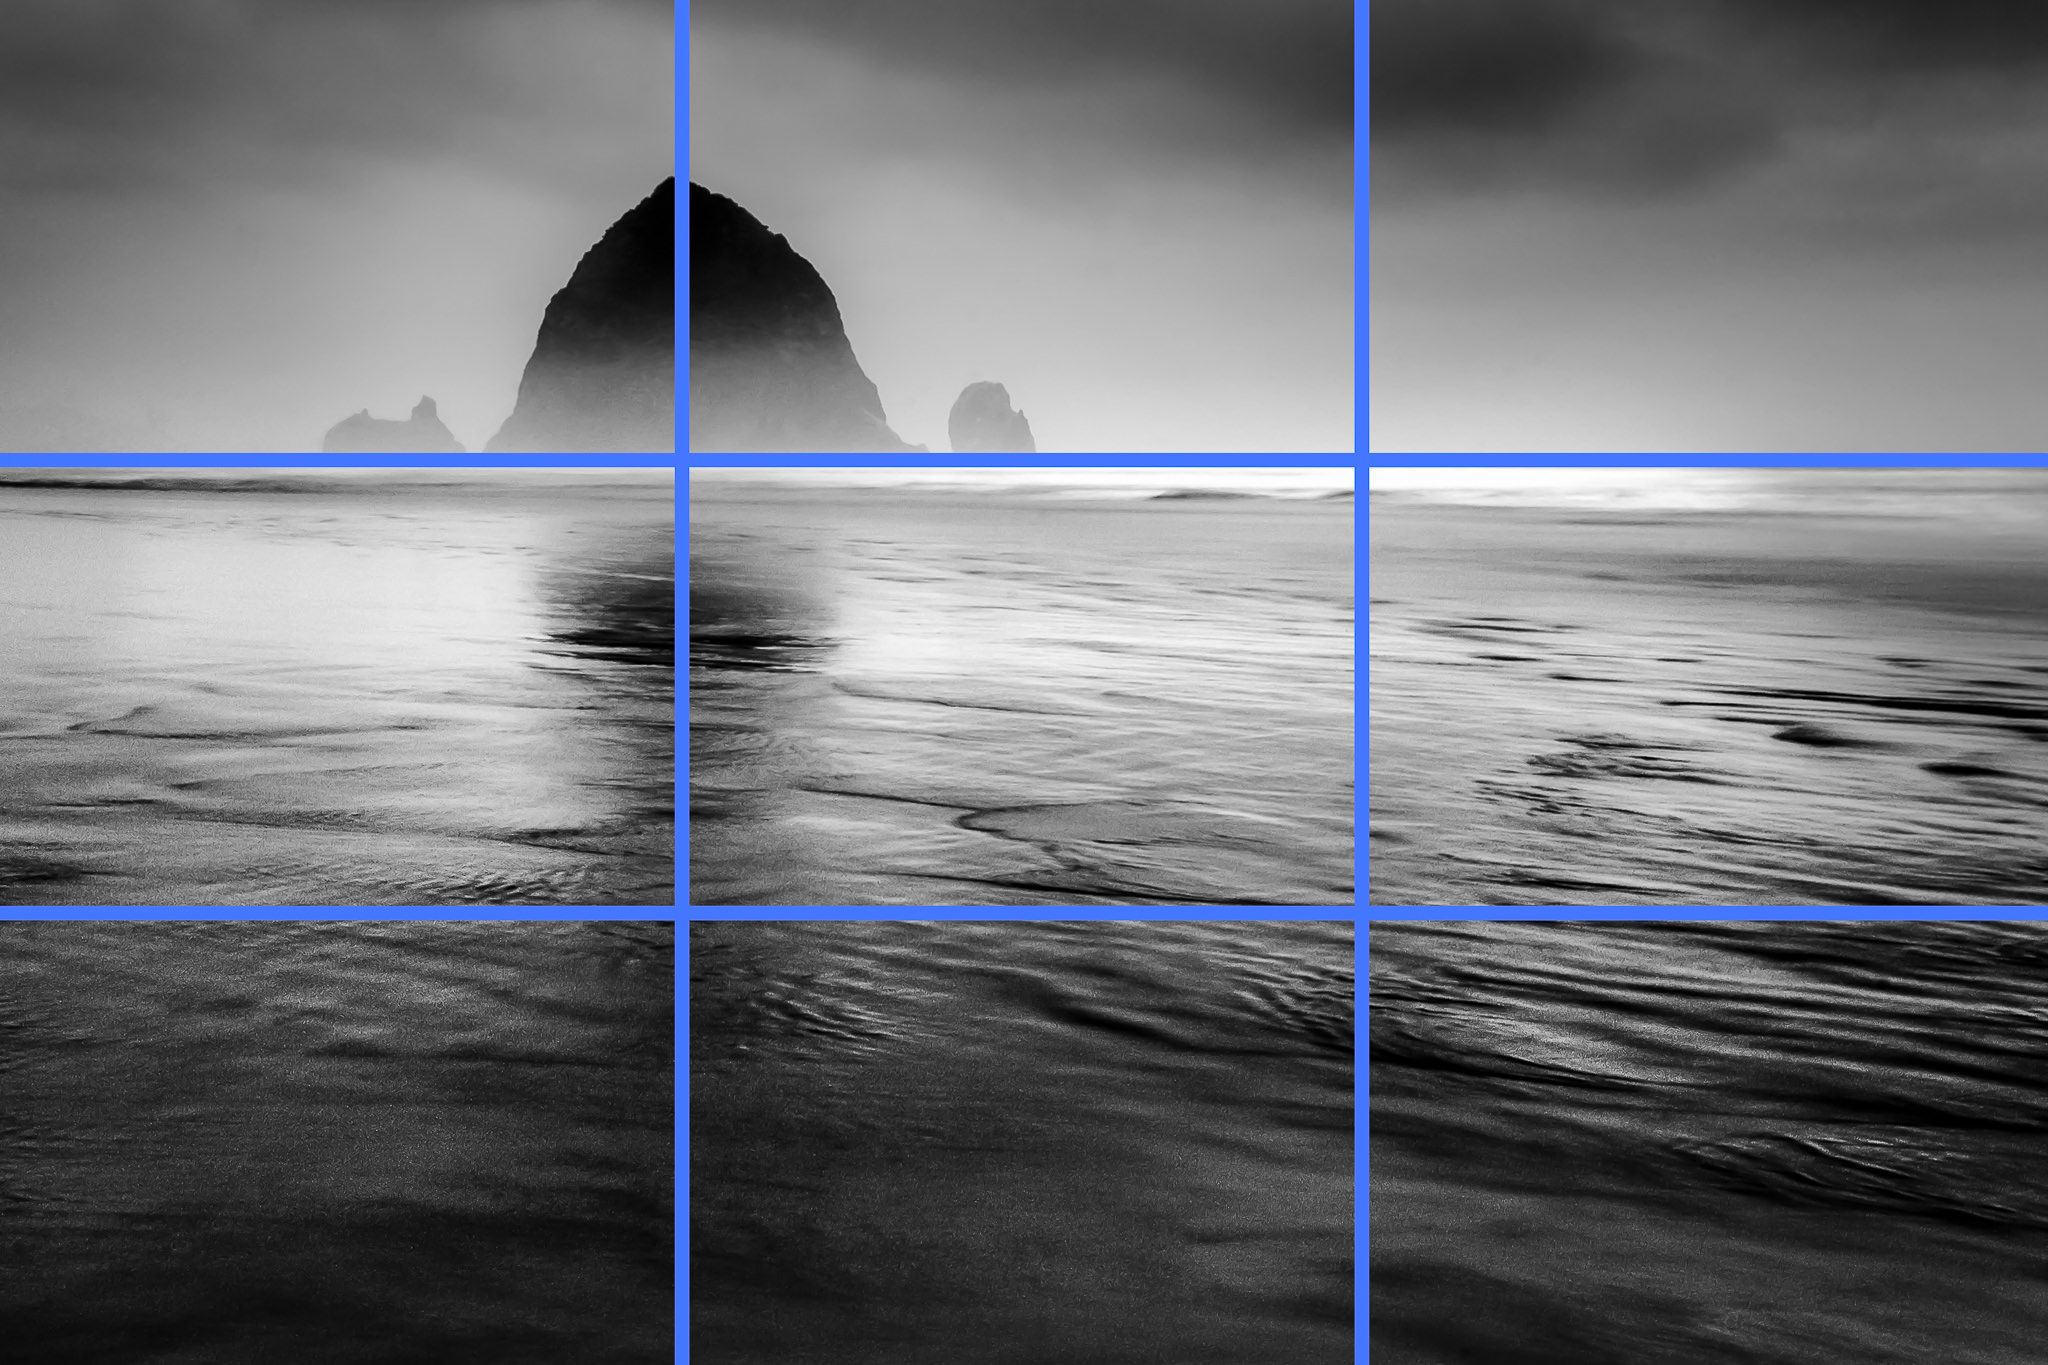
- Composition | low horizon line | Square format
- Perspective and detail / cluttering
- Wide depth of field | Large Format Camera
- Colour | impact and relevance
- Nationalism vs mobility vs isolation
- Social commentary | The American Dream ?
- An appreciation of the formal elements : line, shape, form, texture, pattern, tone etc

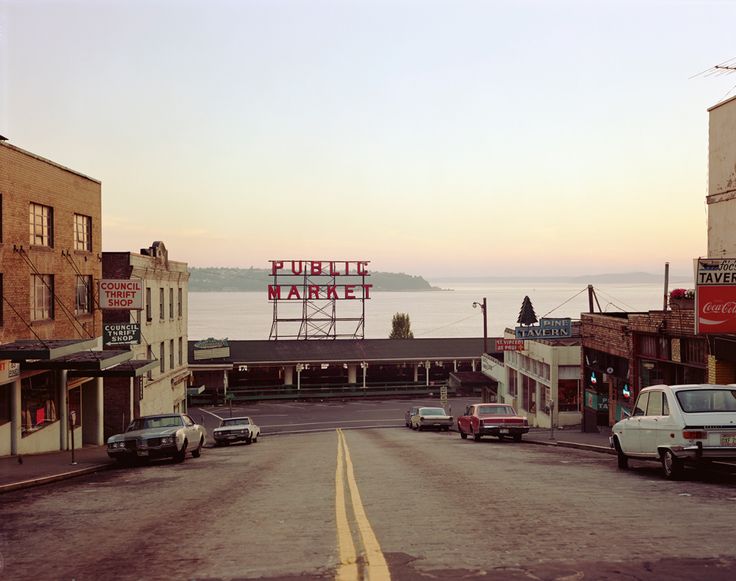
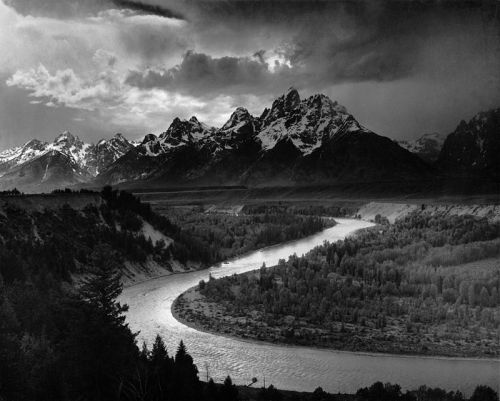
Explore Robert Adams seminal photobook: The New West here
Critic Sean O’Hagan, writing in The Guardian, said “his subject has been the American west: its vastness, its sparse beauty and its ecological fragility…What he has photographed constantly – in varying shades of grey – is what has been lost and what remains” and that “his work’s other great subtext” is silence…

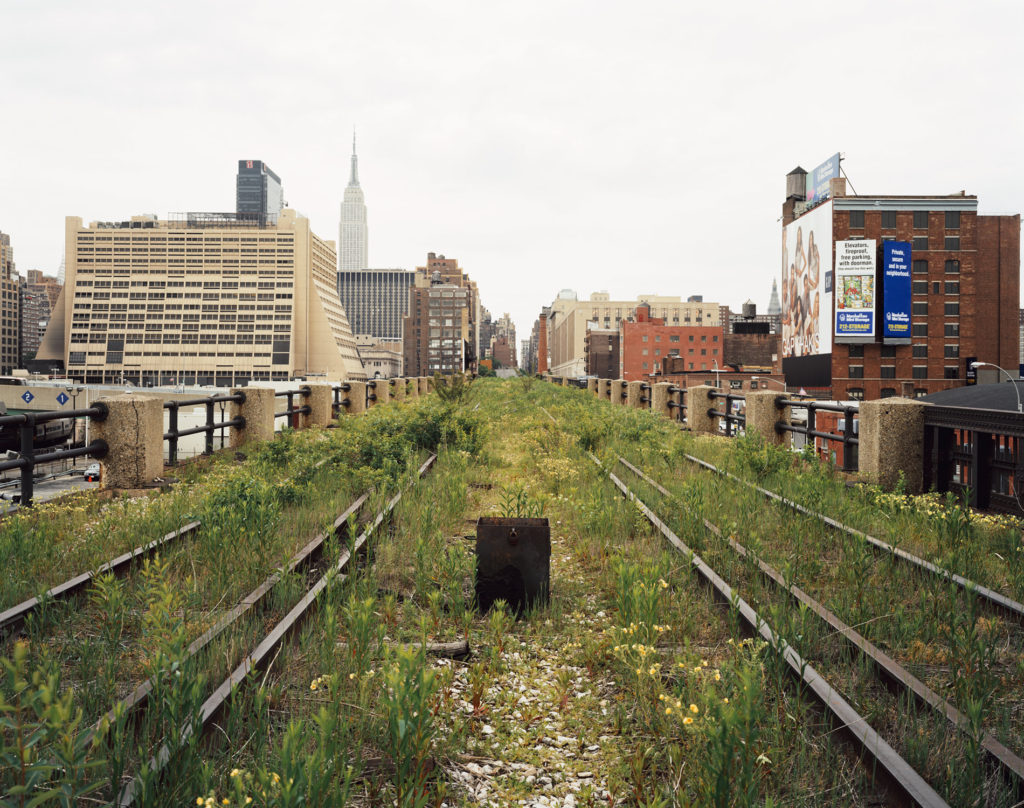
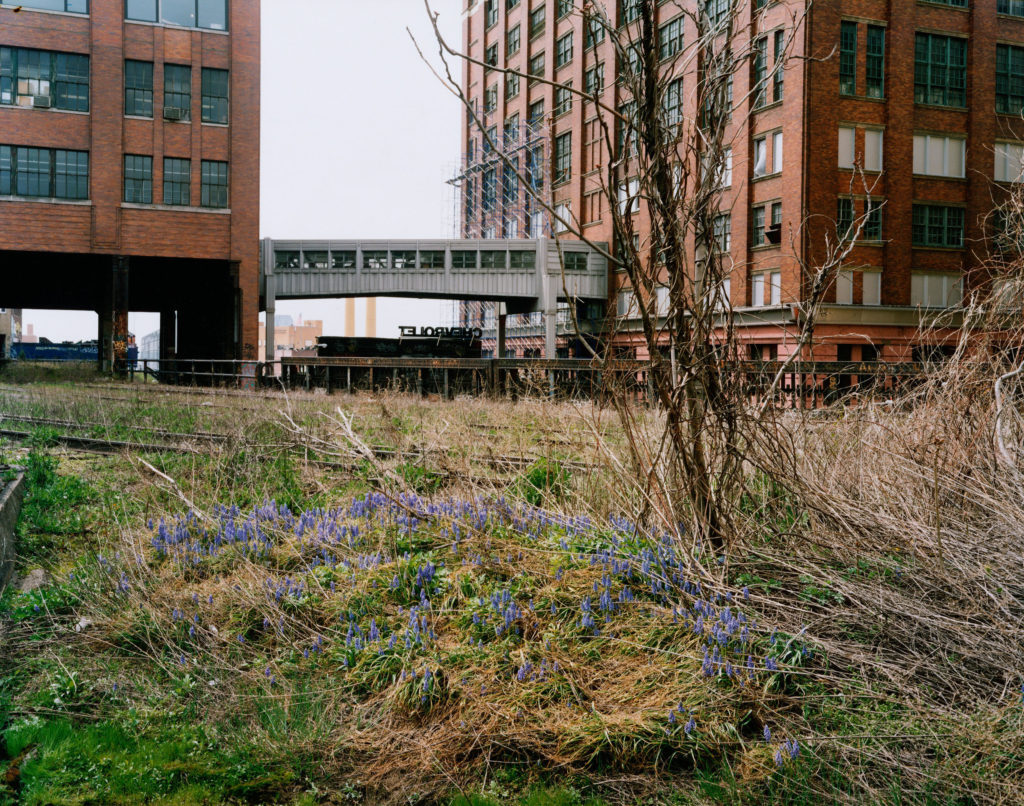
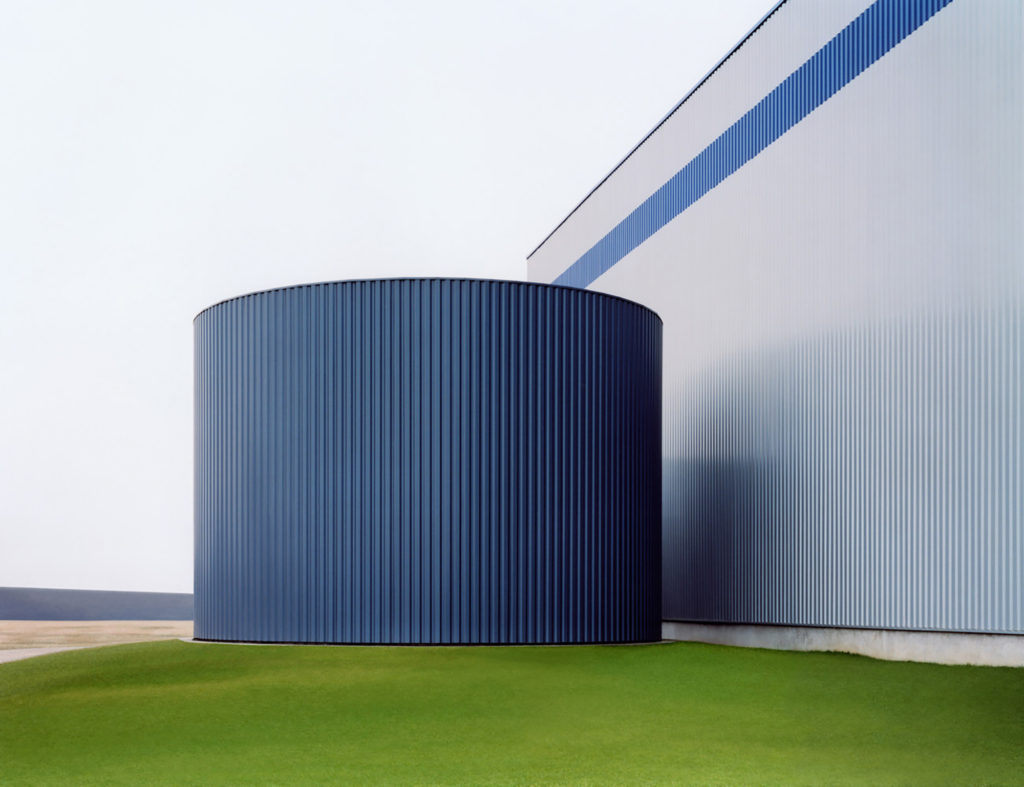
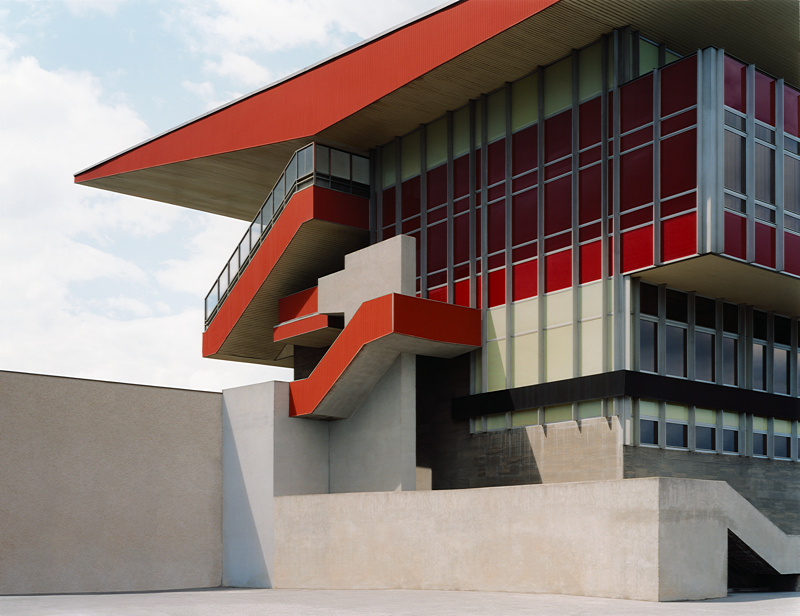
You could also look at these photographers who has been influenced by New Topographics…see below for images/ examples under RESOURCES…
Remember to use this

Follow this 10 Step Process and create multiple blog posts for each unit to ensure you tackle all Assessment Objectives thoroughly :
- Mood-board, definition and introduction (AO1)
- Mind-map of ideas (AO1)
- Artist References / Case Studies (must include image analysis) (AO1)
- Photo-shoot Action Plan (AO3)
- Multiple Photoshoots + contact sheets (AO3)
- Image Selection, sub selection (AO2)
- Image Editing/ manipulation / experimentation (AO2)
- Presentation of final outcomes (AO4)
- Compare and contrast your work to your artist reference(AO1)
- Evaluation and Critique (AO1+AO4)

- Research and explore The New Topographics and how photographers have responded to man’s impact on the land, and how they found a sense of beauty in the banal ugliness of functional land use…
- Create a blog post that defines and explains The New Topographics and the key features and artists of the movement.
- ANSWER : What was the new topographics a reaction to?
- A case study on your chosen NEW TOPOGRAPHIC landscape photographer. Choose from…ROBERT ADAMS, STEPHEN SHORE, JOE DEAL, FRANK GOLKHE, NICHOLAS NIXON, LEWIS BALTZ, THE BECHERS, HENRY WESSEL JR, JOHN SCHOTT ETC to write up a case study that will inspire your own photography.
- Analyse one image of this photographers work. Use the vocabulary support sheet to help. https://hautlieucreative.co.uk/photo22al/2020/08/20/photo-vocab-support/
Photo Walk – urban
Once you have completed your photo walk from Havre Des Pas to La Collette you should aim to make comparisons with photographers and their work…as well as the notion of psychogeography to help understand your surroundings
Your image selection and editing may be guided by this work…and you must show that you can make creative connections.
For Example Albert Renger Patszch and The New Objectivity
https://www.atlasofplaces.com/photography/new-objectivity/
or Keld Helmer Petersen
https://www.keldhelmerpetersen.com/1950-1959
- Produce a list of places in Jersey you could go and shoot urban landscapes. Create a blog post of a visual mood board and photo shoot plan.
Scrapyards, building sites, cranes, restoration yards, derelict ruins, car parks, underpass, harbours and dockyards, industrial centres, retail park, stadiums, floodlight arenas, staircases, road systems, circuit boards, pipework, telephone poles, towers, pylons, shop displays, escalators, bars, libraries, theatres and cinemas, gardens, parks, playgrounds, swimming pools, etc. - Possible titles to inspire you and choose from… Dereliction / Isolation / Lonely Places / Open Spaces / Close ups / Freedom / Juxtaposition / Old and new / Erosion / Altered Landscapes / Utopia / Dystopia / Wastelands / Barren / Skyscapes / Urban Decay / Former Glories / Habitats / Social Hierarchies / Entrances and Exits / Storage / Car Parks / Looking out and Looking in / Territory / Domain / Concealed and Revealed

Explore these options…
- St Helier
- Residential areas
- Housing estates
- High
- Retail Parks and shopping areas
- Industrial Areas
- Car Parks (underground and multi-storey too)
- Leisure Centres
- Building sites
- Demolition sites
- Built up areas
- Underpass / overpass
- The Waterfont
- Harbours
- Airport
- Finance District (IFC buildings)
What do I photograph?
ROADS / BUILDINGS / STREETS / ST HELIER / FLATS / CAR PARKS / OFFICE BLOCKS / PLAYING FIELDS / SCHOOL / SHOPS / SUPERMARKETS / BUILDING SITES / TRAFFIC / HOTELS
Where to shoot ?
ORDANCE YARD / ST AUBINS HIGH STREET / COBBLED BACK STREETS / OLD ST HELIER / NEW ST HELIER / FLATS / ESPLANADE / TOWN / CAR PARKS / FORT REGENT / FINANCE DISTRICT / UNDERPASS / TUNNEL / NIGHT TIME / PIER ROAD CAR PARK / HUE COURT / LE MARAIS FLATS / PLAYING FIELDS / SCHOOLS / ANN STREET BREWERY BUILDING SITE / SPRINGFIELD STADIUM / WATERFRONT / SH HARBOUR / LA COLLETTE
WHERE IN JERSEY ??


- First photoshoot inspired and influenced by New Topographics. (+100 photographs). Remember to include examples of work by photographers associated with that exhibition/ movement that have influenced your work.
- Select, consider and decide on best images (show contact sheets)
- Develop ideas through digital manipulation (ie: cropping, contrast, colour balance etc.)
- Realise a final outcome.
- Second photoshoot inspired and influenced by your case study of your chosen urban landscape photographer. see list below URBAN PHOTOGRAPHERS (+100 photographs). Can be any urban landscape photographer, but remember to include a brief case study and examples of their work that have influenced your work.
You could experiment with different vantage points eg: worms eye view, or birds eye view OR create a study on TYPOLOGY. - Select, consider and decide on best images (show contact sheets)
- Develop ideas through digital manipulation (ie: cropping, contrast, colour balance etc.)
- Realise a final outcome.
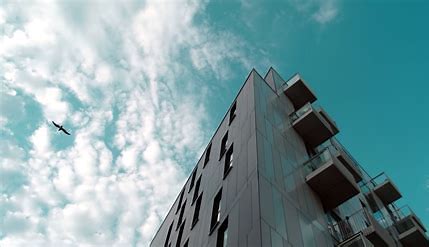
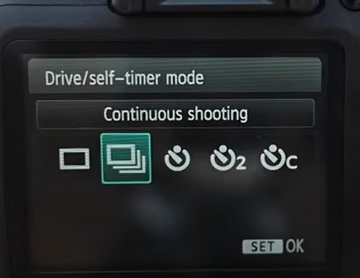
Technical: Shoot using different vantage points.
Why Is Vantage Point Important?
Your vantage point affects the angles, composition, and narrative of a photograph. It is an integral part of the decision-making process when taking a photograph.
We often spend more time considering camera settings and lighting, than exploring viewpoints. A picture taken from a unique vantage point makes us think about the subject in a different way. Perspectives from high or low angles add emotion to the photograph.
Eye-level vantage points provide a feeling of directness and honesty. Changing your vantage point can include or exclude part of the photo’s story.
As you look through your viewfinder, ask yourself some questions:
- How could I add interest to the subject?
- How can I show the viewer a new perspective on this subject?
- Do I always stand in this position when taking photos?
- What else can I include in the frame to tell the story? How can I make this happen?
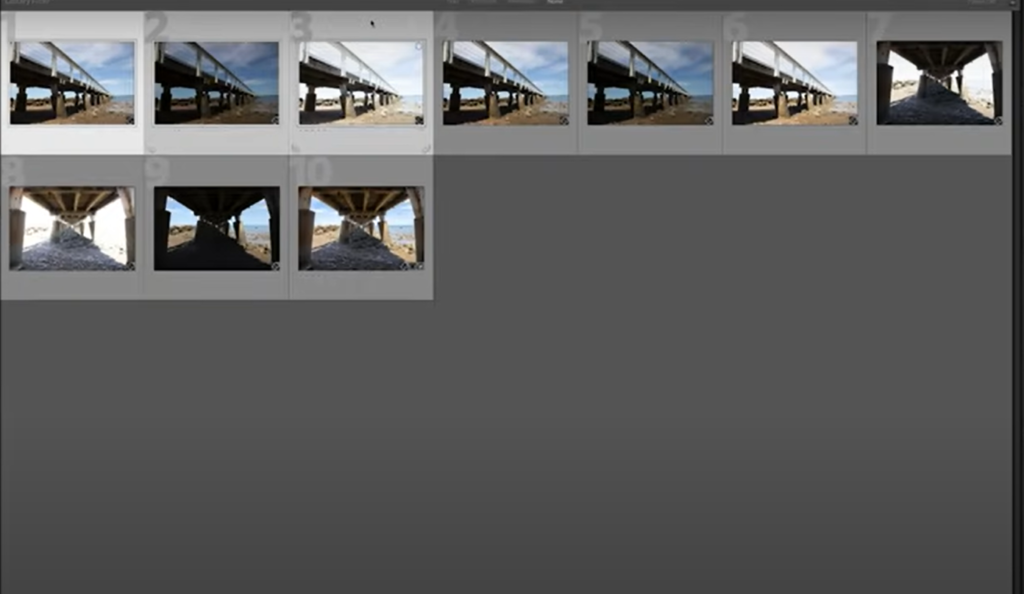
TRY LOOKING UP, LOOKING DOWN, AT AN ANGLE, FROM A DISTANCE, A WORMS EYE VIEW and BIRDS EYE VIEW ETC.
WORMS EYE VIEW


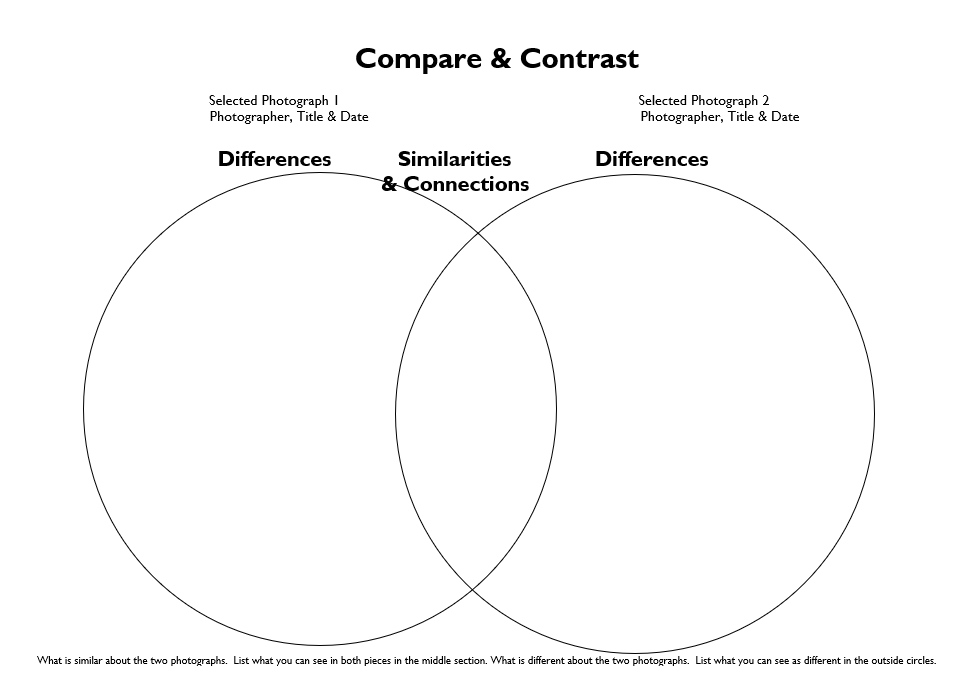
- Select one of your photographs to compare and contrast against one photograph of your chosen photographer.
- Create a venn diagram to illustrate the similarities and differences between the images.
- Using this information and prompts from the Photo Vocab Sheet write an in depth and thorough analysis. https://hautlieucreative.co.uk/photo22al/2020/08/20/photo-vocab-support/
Always ensure you have enough evidence of…
- moodboards (use influential images)
- mindmap of ideas and links
- case studies (artist references-show your knowledge and understanding)
- photo-shoot action plans / specifications (what, why, how, who, when , where)
- photo-shoots + contact sheets (annotated)
- appropriate image selection and editing techniques
- presentation of final ideas and personal responses
- analysis and evaluation of process
- compare and contrast to a key photographer
- critique / review / reflection of your outcomes
MORE RESOURCES / IDEAS / INSPIRATIONS
TYPOLOGIES and the landscape
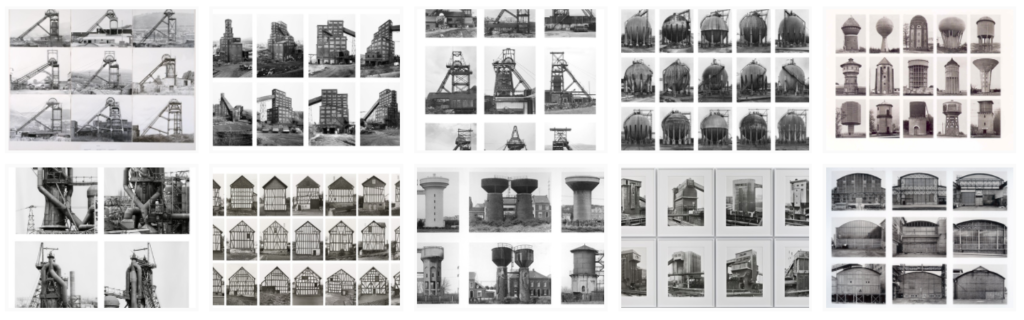
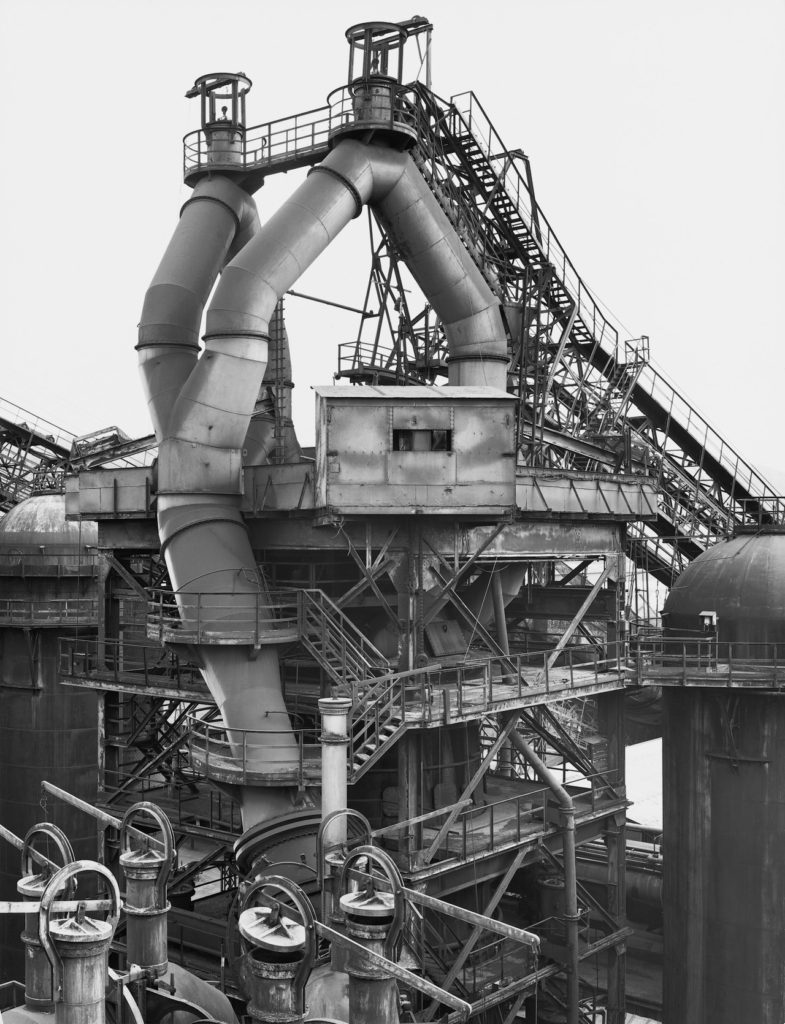
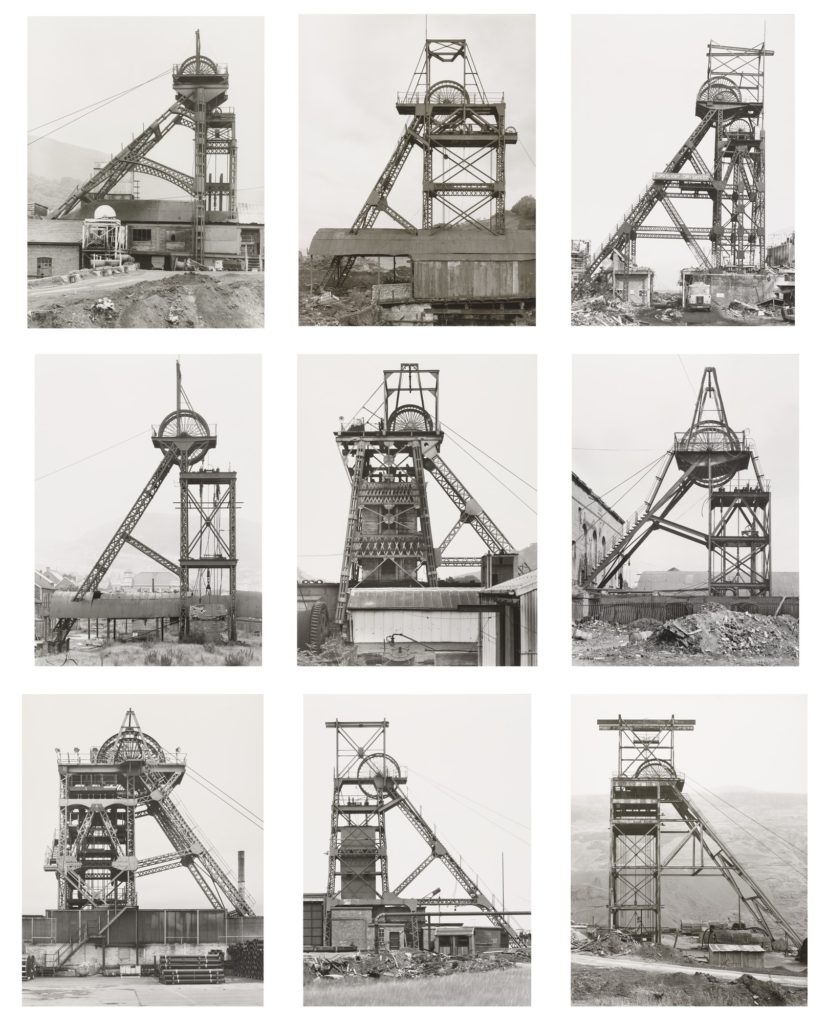
Bernd and Hilla Becher – Typologies of industrial architecture
Read this overview here of the Becher’s work at Tate Gallery which describes their interest in the ‘Grid’ and their influence on future generations of photographers, members of the Düsseldorf School.
The term ‘Typology’ was first used to describe a style of photography when Bernd and Hilla Becher began documenting dilapidated German industrial architecture in 1959. The couple described their subjects as ‘buildings where anonymity is accepted to be the style’.
Partly inspired by the likes of Karl Blossfeldt, August Sander and The New Objectivity (that we looked at in the previous project)
Stoic and detached, each photograph was taken from the same angle, at approximately the same distance from the buildings. Their aim was to capture a record of a landscape they saw changing and disappearing before their eyes so once again, Typologies not only recorded a moment in time, they prompted the viewer to consider the subject’s place in the world.
The Bercher’s influence as lecturers at the The Dusseldorf School of Photography passed Typologies onto the next generation of photographers. Key photographic typologists such as Thomas Struth, Thomas Ruff, Thomas Demand and Gillian Wearing lead to a resurgence of these documentary-style reflections on a variety of subject matter from Ruff’s giant ‘passport’ photos to Demand’s desolate, empty cities.
Questions to consider in relation to the Bechers and their concept of Typology:
1. How did they first meet?
2. What inspired them to begin to record images of Germany’s industrial landscape?
3. How did the Bechers explain the concept of Typology?
4. Which artists/ photographers inspired them to produce typology images?
5. What is the legacy of the Bechers and their work?
Here is another short film which discusses their work in more context.
You could:
Create your own typological series documenting repeated forms within your surroundings. For example, you might like to choose one of the following subjects:
- front doors on the street where you live
- cracks in the pavement
- fences and walls
- the colours of all the cars in the supermarket car park
- telegraph poles viewed from below
- TV aerials silhouetted against the sky
KEVIN BAUMAN

Images from 100 Abandoned Houses – A record of abandonment in Detroit in the mid 90’s by Kevin Bauman
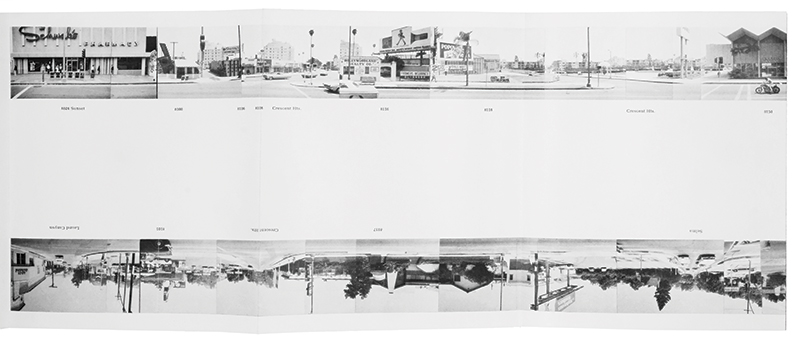
Ed Ruscha, “Every Building On The Sunset Strip”
The artist Ed Ruscha is famous for his paintings and prints but is also known for his series of photographic books based on typologies, among them Every Building on the Sunset Strip, Twentysix Gasoline Stations, Some Los Angeles Apartments, and Thirtyfour Parking Lots. Ruscha employs the deadpan style found in many photographic topologies. The book shown above is a 24 foot long accordion fold booklet that documents 1 1/2 miles of the Sunset Strip in Hollywood.


Here’s another topology for you to look at by Ólafur Elíasson :
Thom and Beth Atkinson “Missing Buildings”2016
https://www.thomatkinson.com/missing-buildings
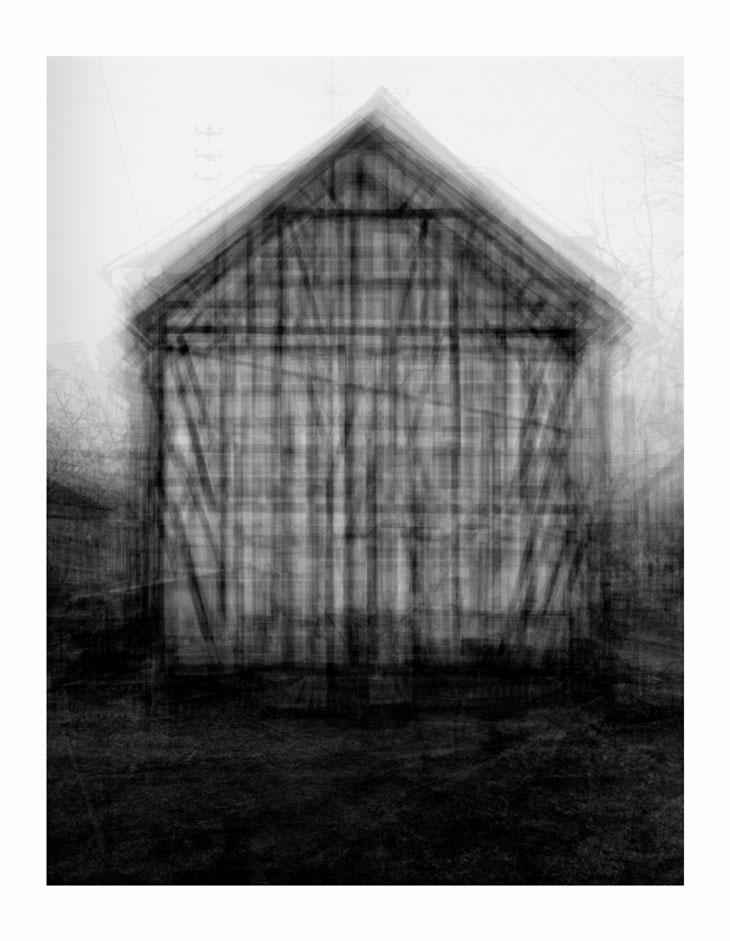
The structures in the Bechers’ original photographs are almost identical, though in Khan’s hands the images’ contrast and opacity is adjusted to ensure each layer can be seen and has presence. Though Khan works in mechanised media and his images are of industrial subjects, their effect is of a soft ethereal energy. They exude a transfixing spiritual quality in their densely compacted details and ghostly outlines. …Prison Type Gasholders conveys a sense of time depicted in motion, as if transporting the old building, in its obsolete black and white format, into the extreme future.
Creative Outcomes Can include : grids, animations, GIFs, Timelapse etc
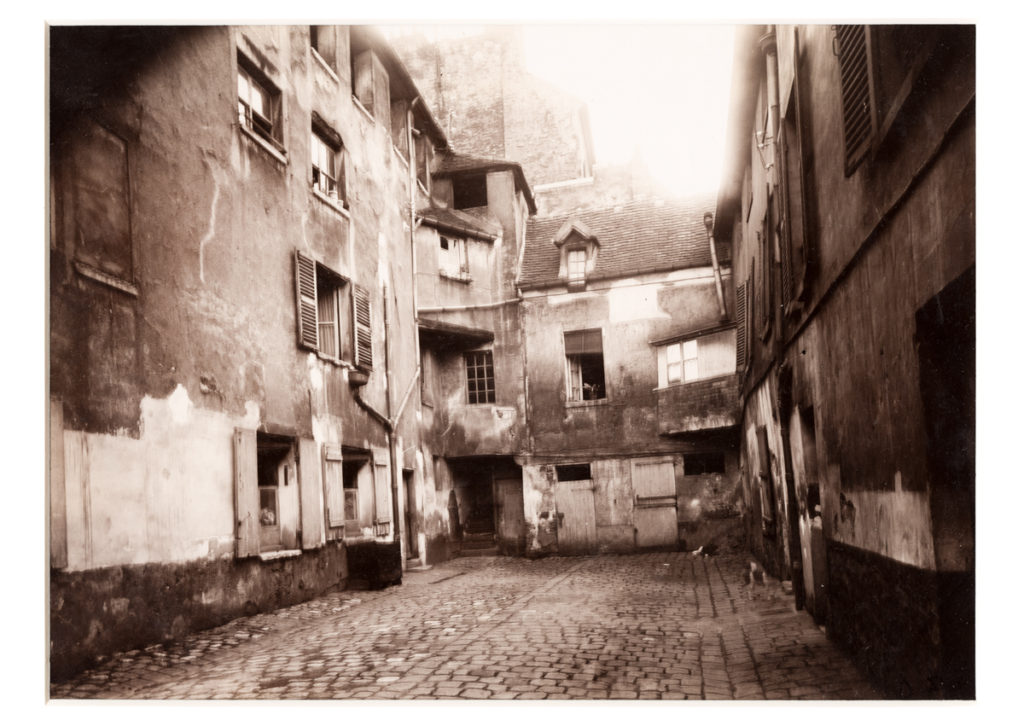
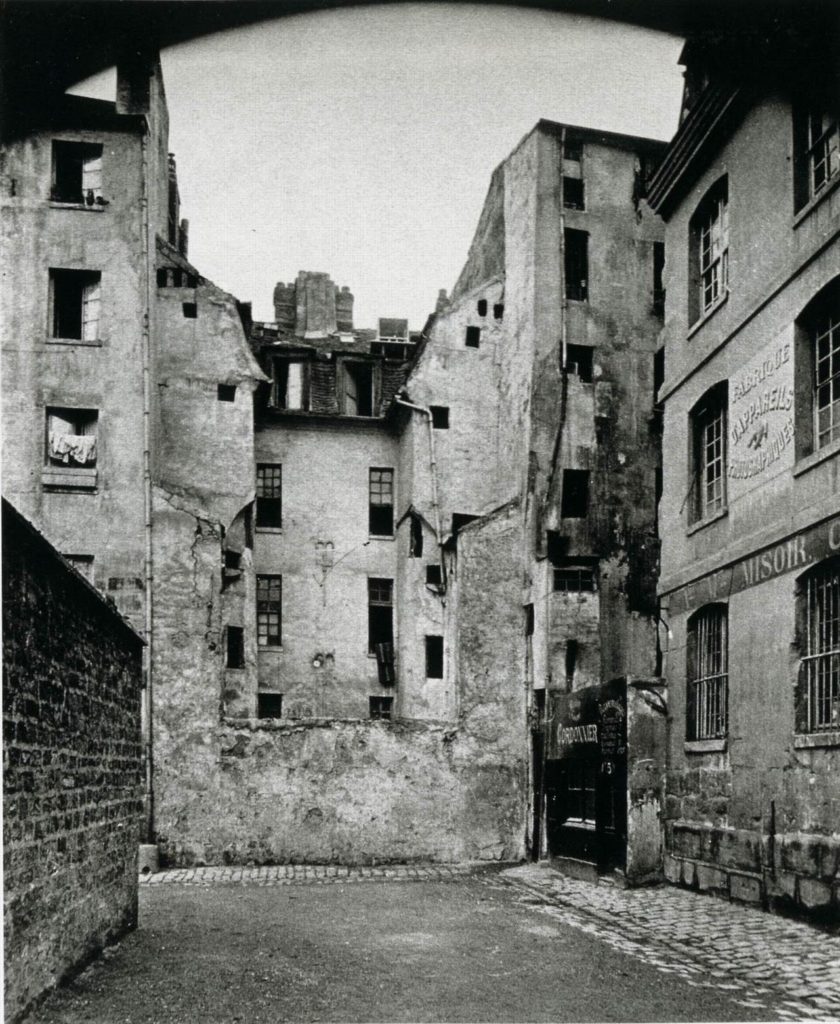
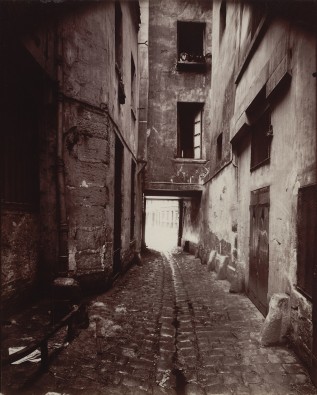
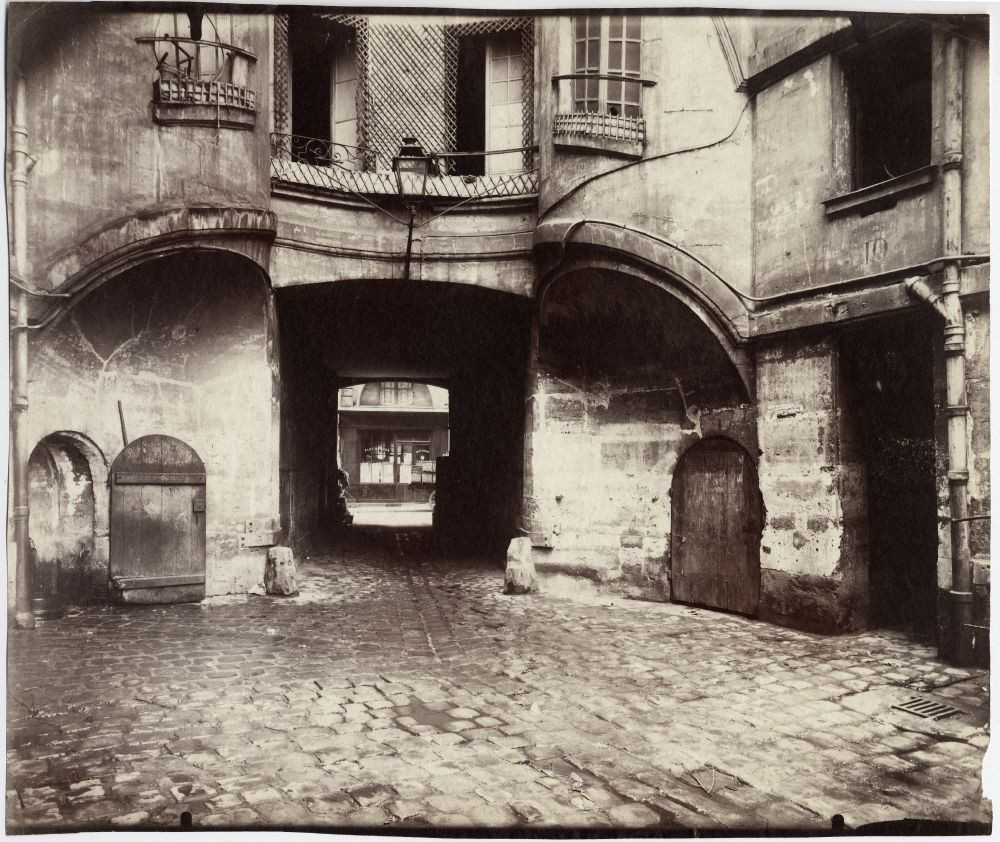
- Eugene Agtet
- Ed Ruscha
- Thomas Struth
- Gabrielle Basilico
- Gerry Johansson
- W. Eugine Smith
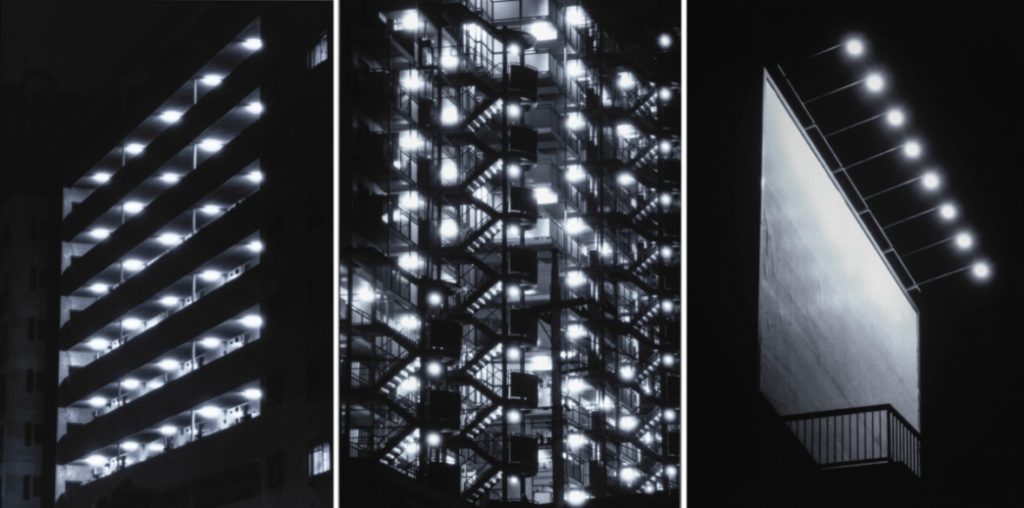
- Rut Blees Luxemburg
- Panos Kokkinios
- Naoya Hatakeyama
Eugene Agtet
Ed Ruscha


Thomas Struth


Gabrielle Basilico


Gerry Johansson


W. Eugene Smith


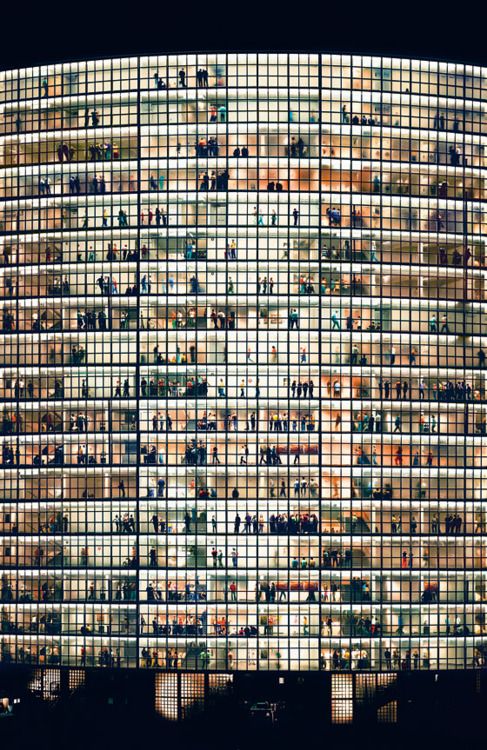
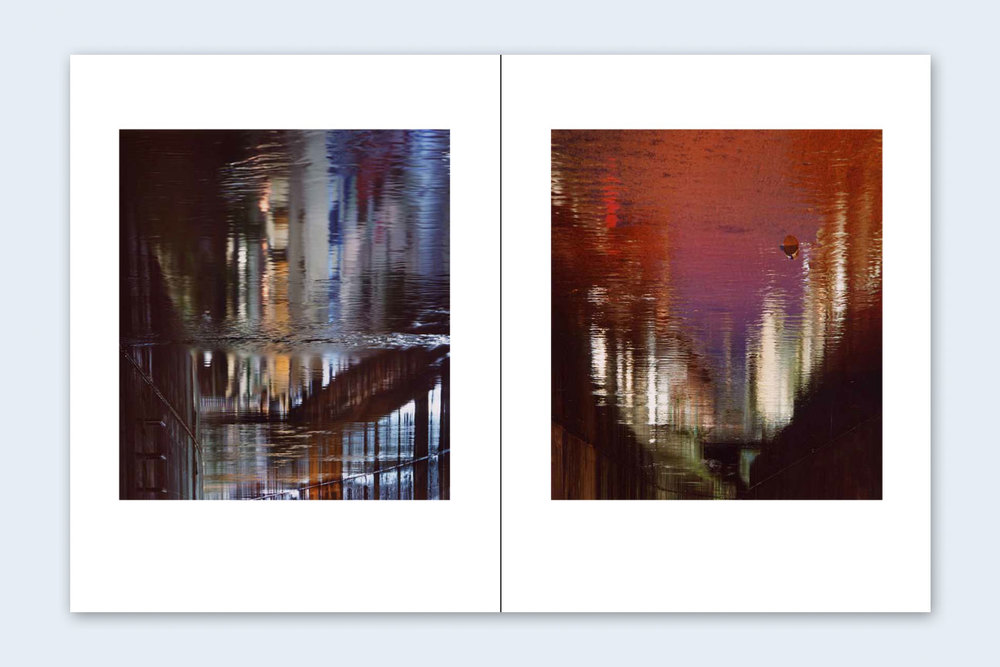
Rut Blees Luxemburg


Panos Kokkinios


Naoya Hatakeyama


- Alexander Apostol
- Bernd & Hilla Becher
- Donovan Wylie
- Edward Burntsky
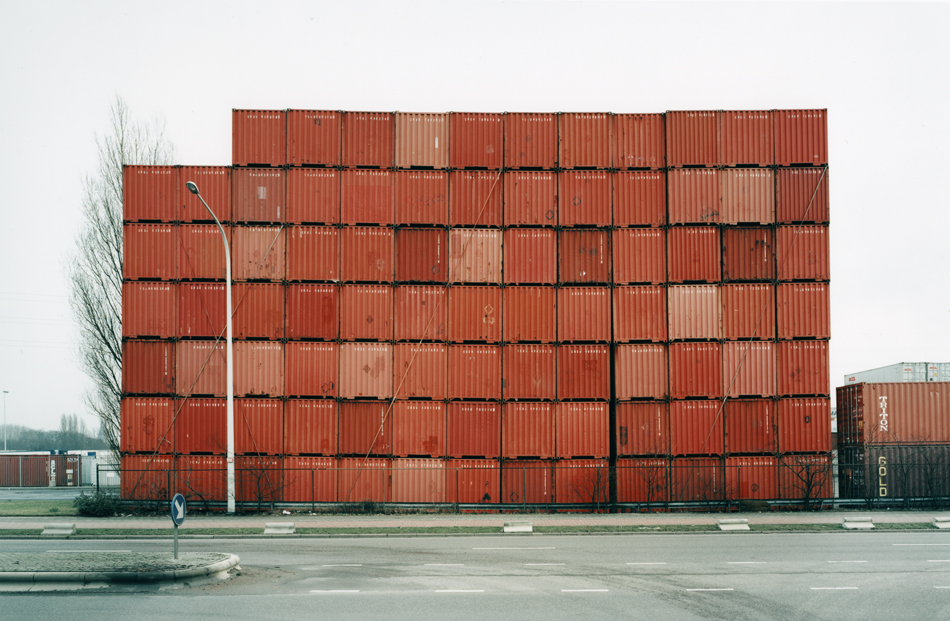
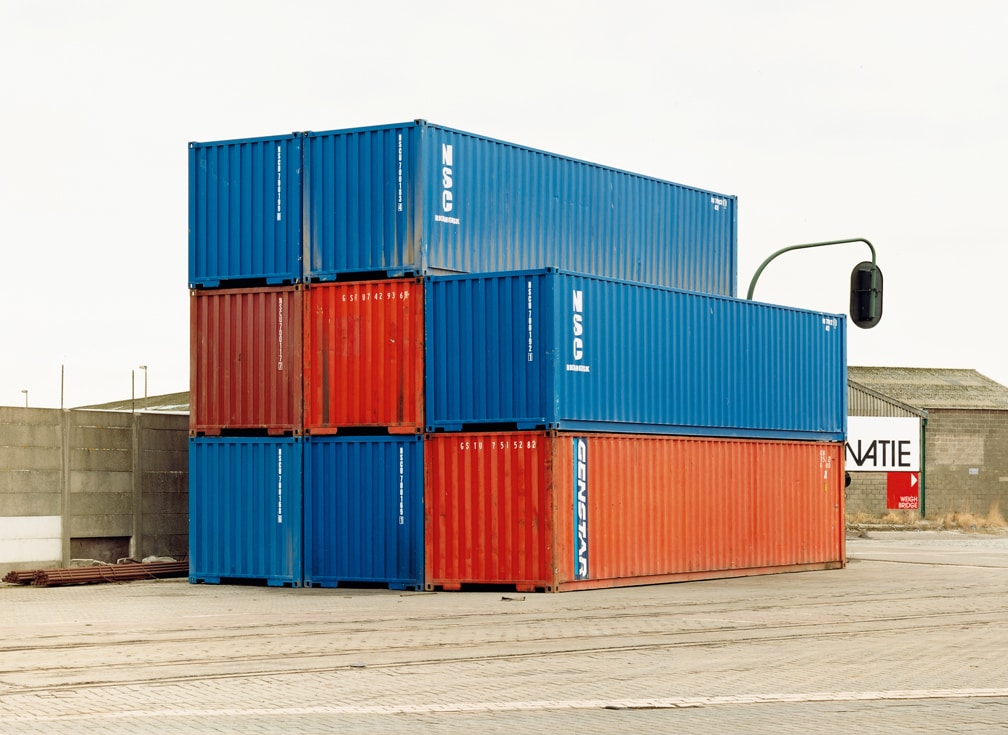
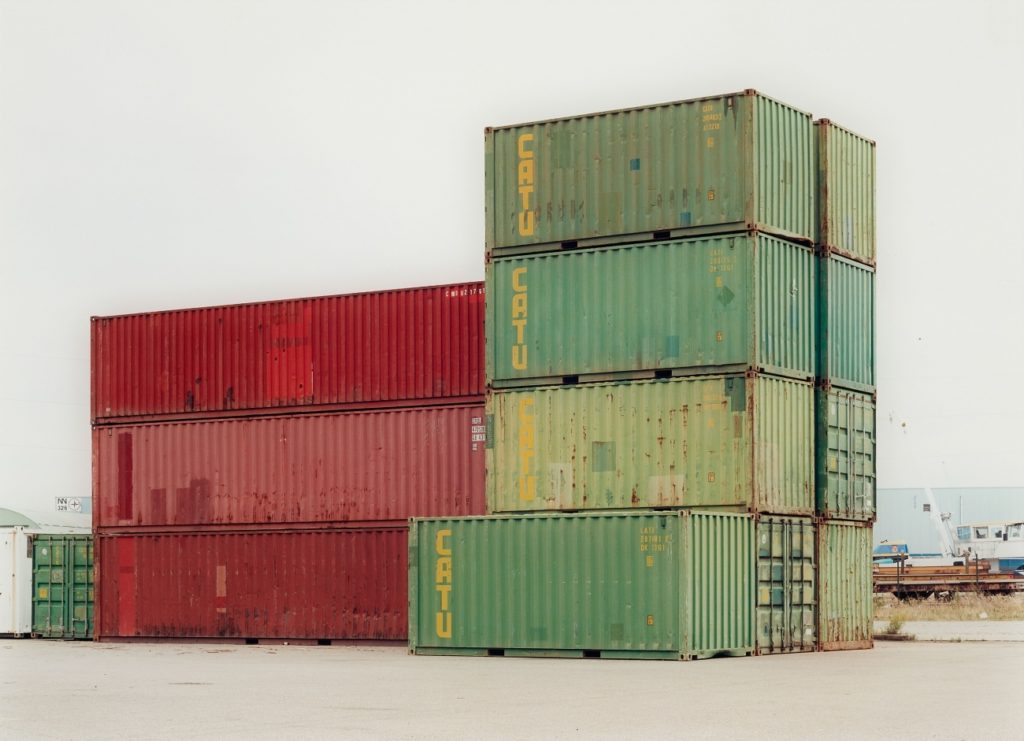
- Frank Breuer
- Gerry Johansson
- Joel Sternfeld
- Josef Schultz
- Lewis Baltz
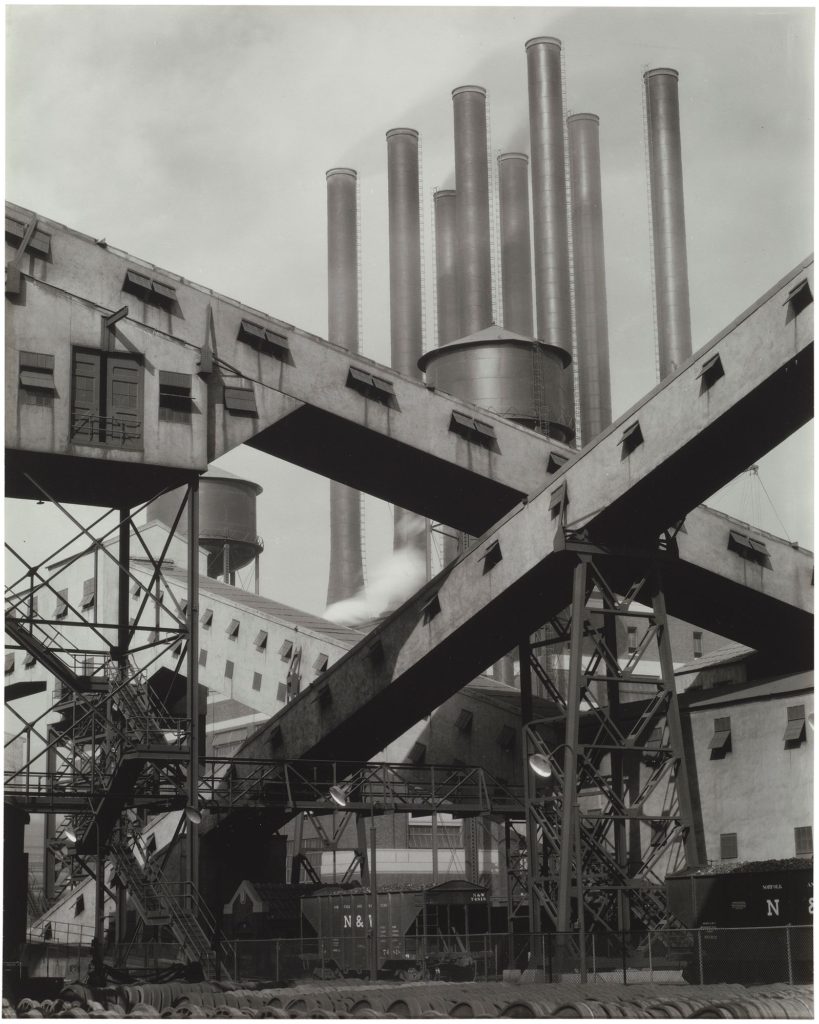
- Charles Sheeler
Alexander Apostol


Bernd & Hilla Becher


Donovan Wylie


Edward Burntsky


Frank Breuer

Gerry Johansson


Joel Sternfeld

Josef Schultz

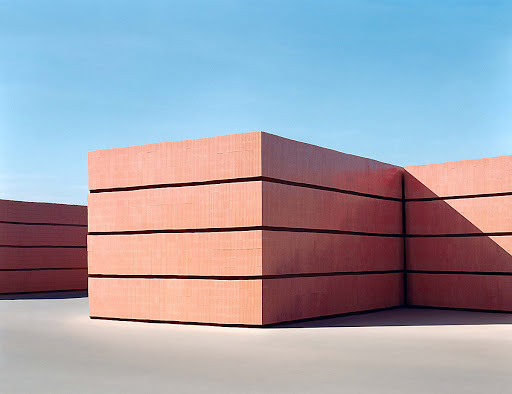
Lewis Baltz


Charles Sheeler


Surface and Texture
Aaron Siskind


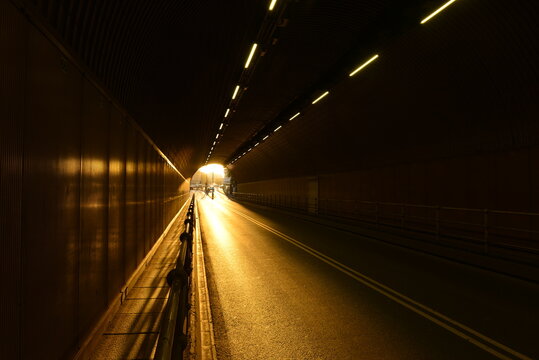
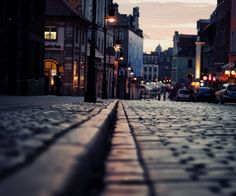
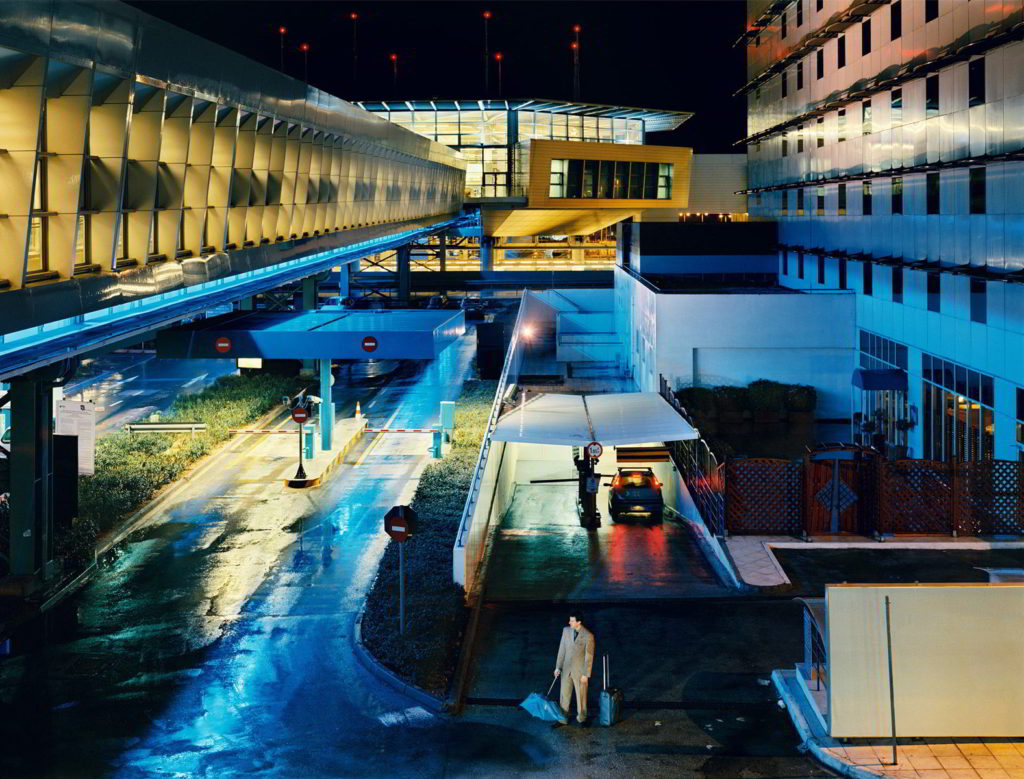
NIGHT PHOTOGRAPHY
Many urbanised areas are great to photograph at night or in low light conditions…


- use a tripod
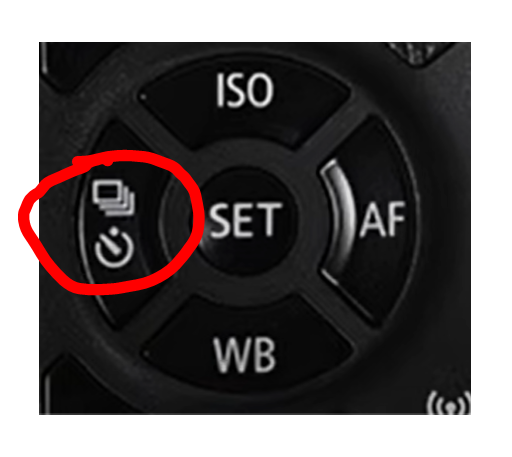
- use slow shutter speeds (experiment with your TV Mode / Shutter speeds !
- be safe…take a friend and let your parents know where you are going
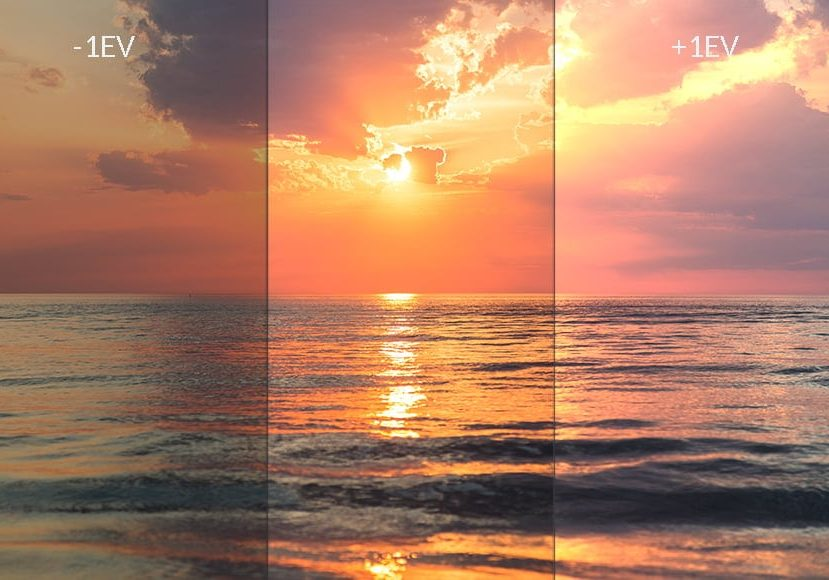
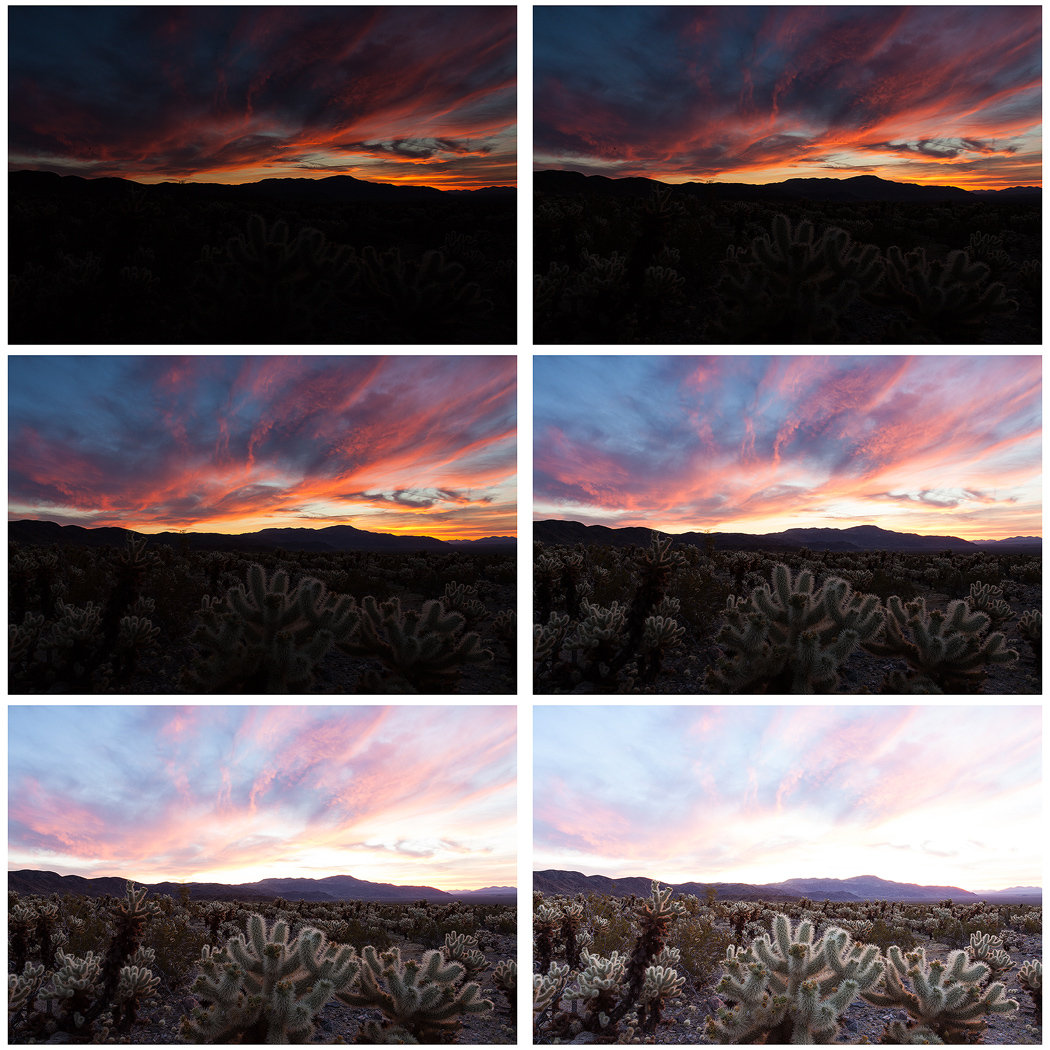
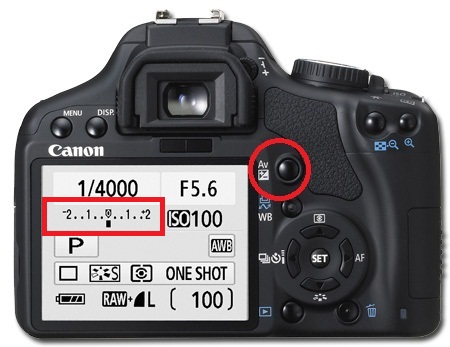
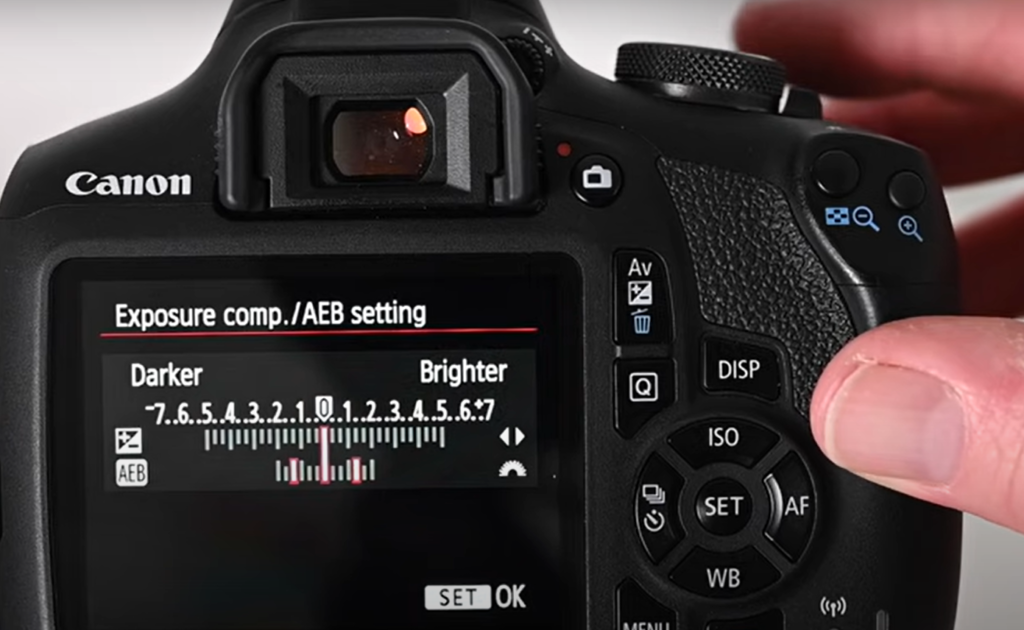
- Check your EXPOSURE SETTINGS according to the light and what you are photographing…
Follow this 10 Step Process and create multiple blog posts for each unit to ensure you tackle all Assessment Objectives thoroughly :
- Mood-board, definition and introduction (AO1)
- Mind-map of ideas (AO1)
- Artist References / Case Studies (must include image analysis) (AO1)
- Photo-shoot Action Plan (AO3)
- Multiple Photoshoots + contact sheets (AO3)
- Image Selection, sub selection (AO2)
- Image Editing/ manipulation / experimentation (AO2)
- Presentation of final outcomes (AO4)
- Compare and contrast your work to your artist reference(AO1)
- Evaluation and Critique (AO1+AO4)


