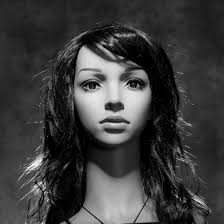
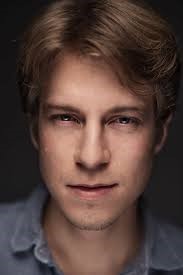
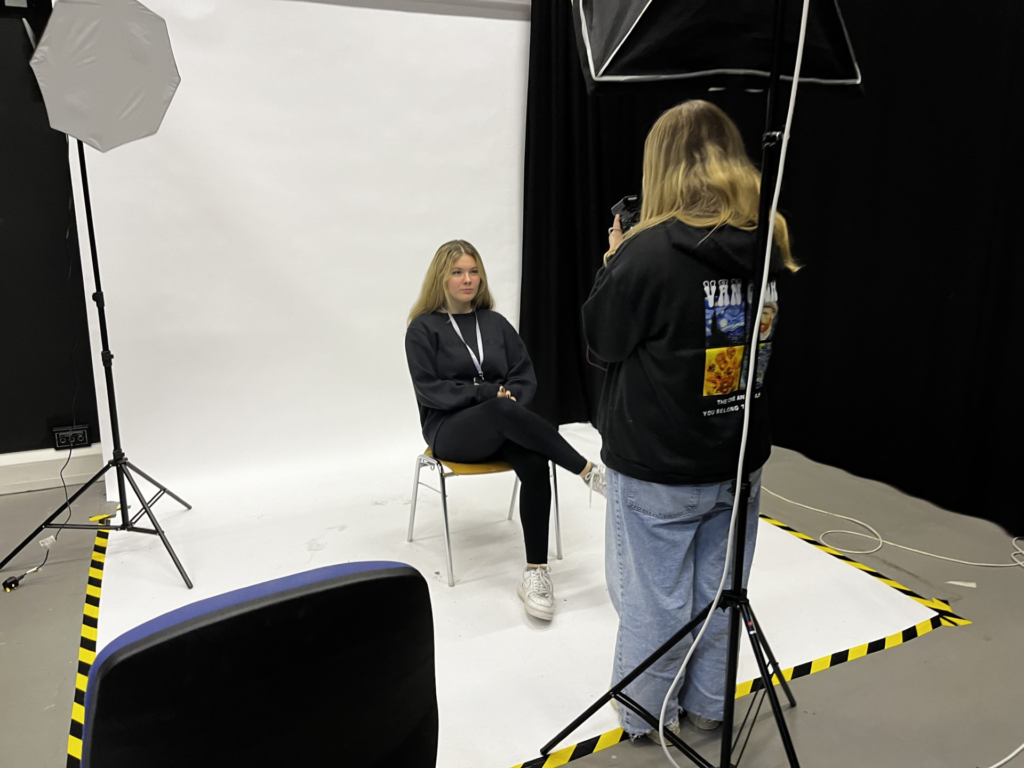
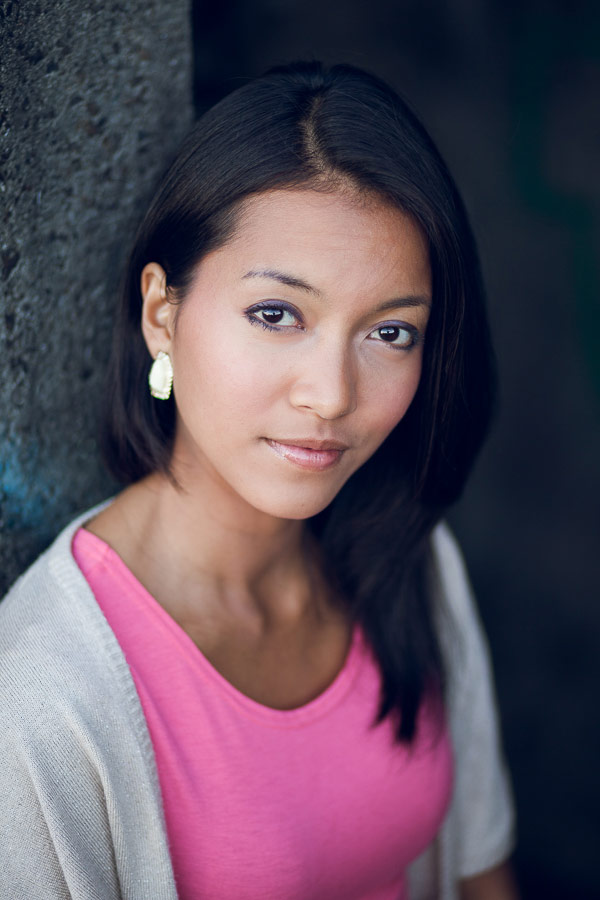
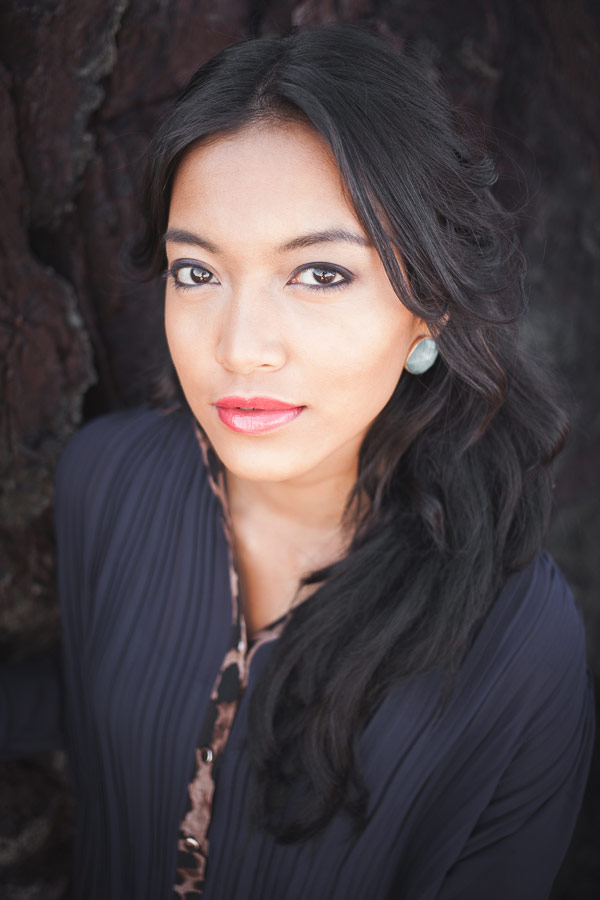
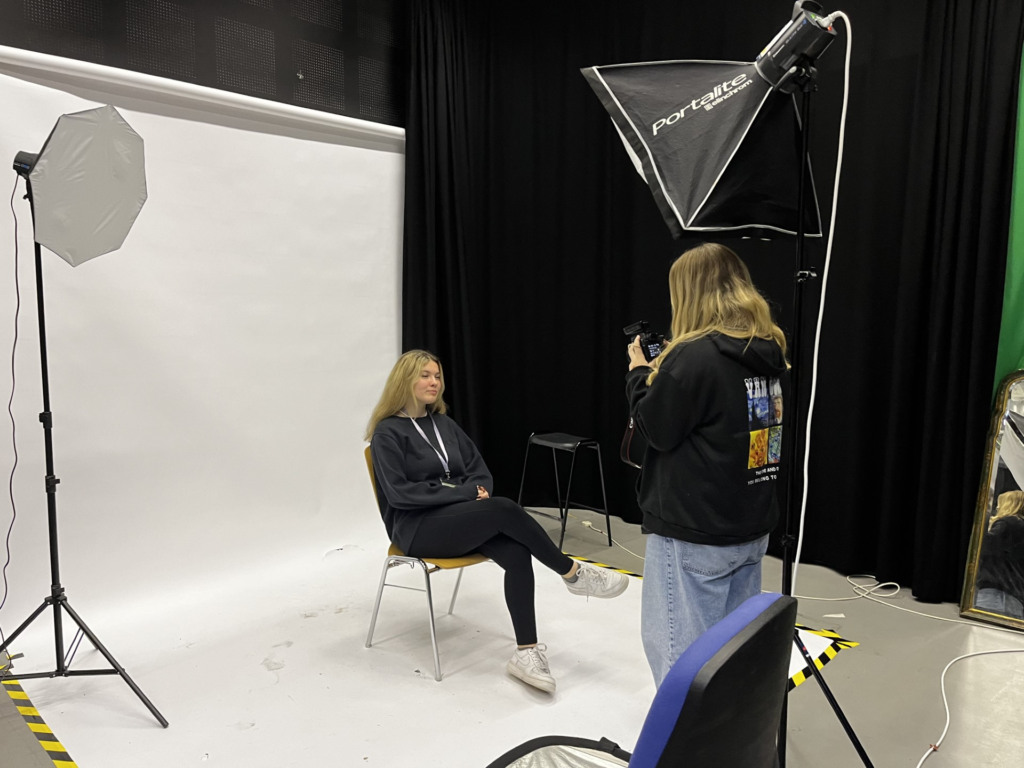
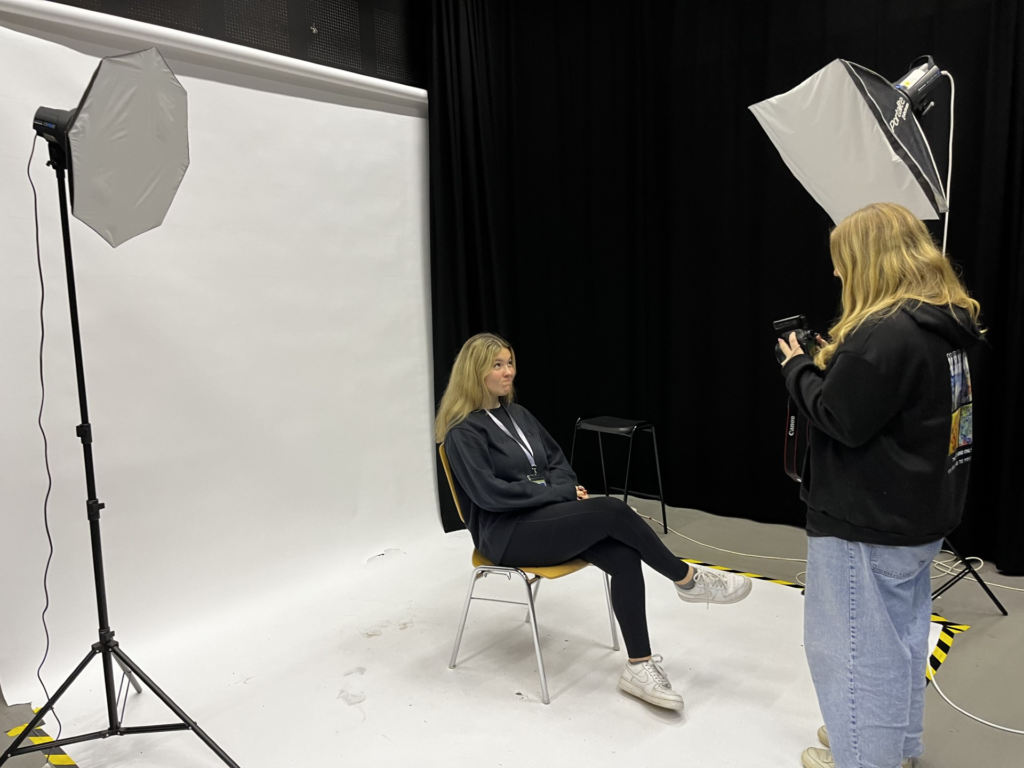
Studio, Point & Fill Lighting

Studio Lighting

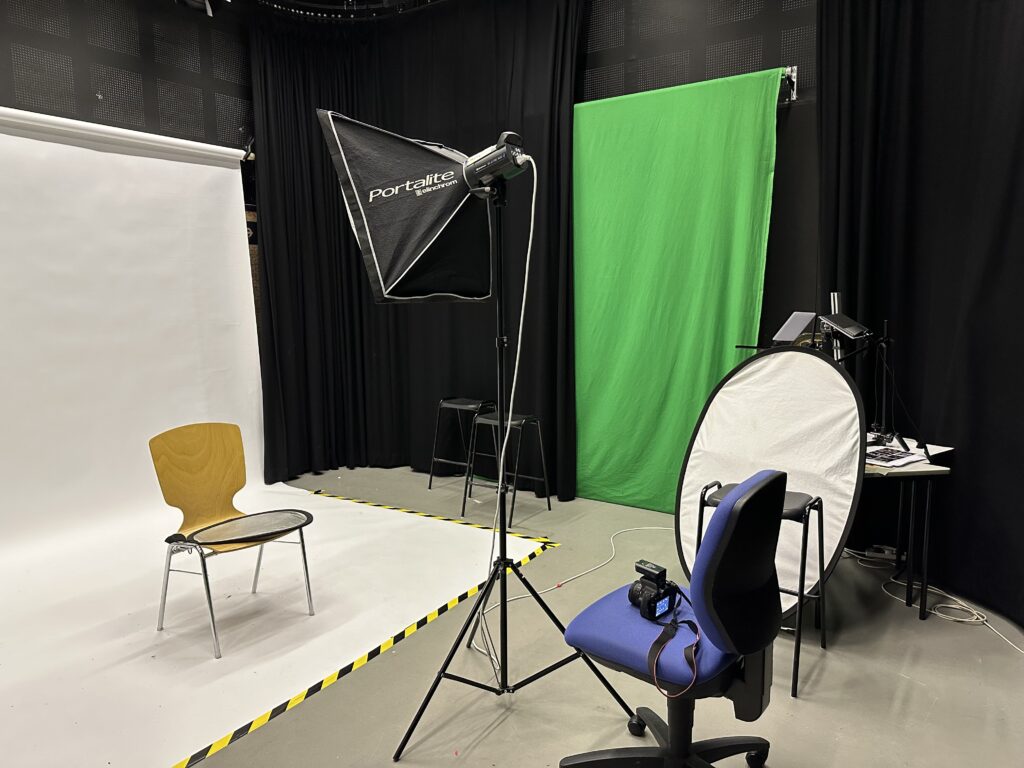
Studio lighting is used for consistency as you can take lots of photos with the same colour and lighting.

It is also used as you can easily recreate lighting techniques in an environment which won’t change based on the outside environment.

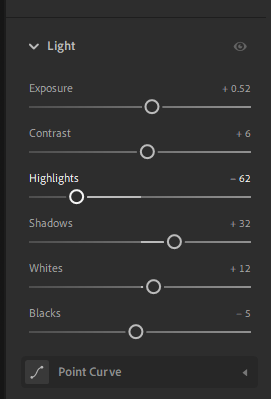
Furthermore you can also experiment and create lighting setups in a studio by changing the position, intensity and temperature of the lights.

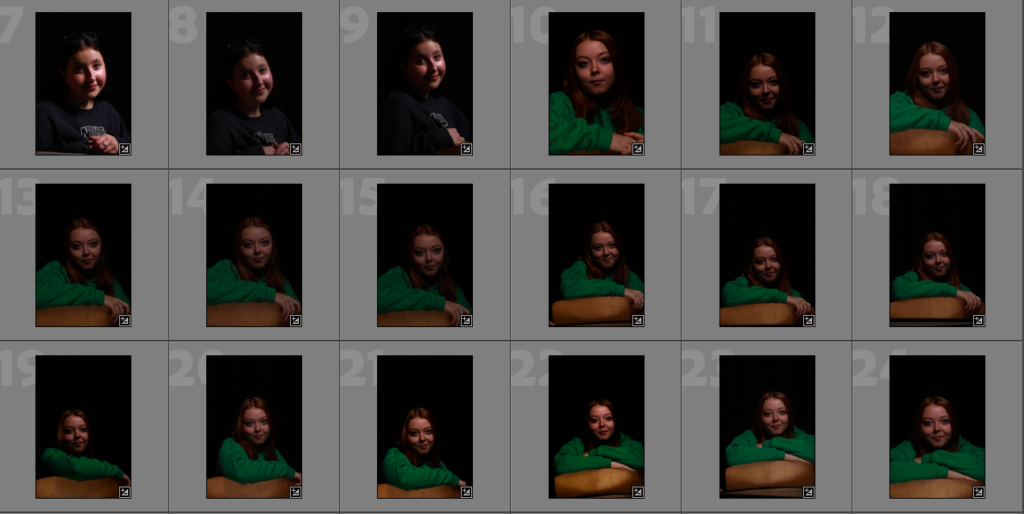
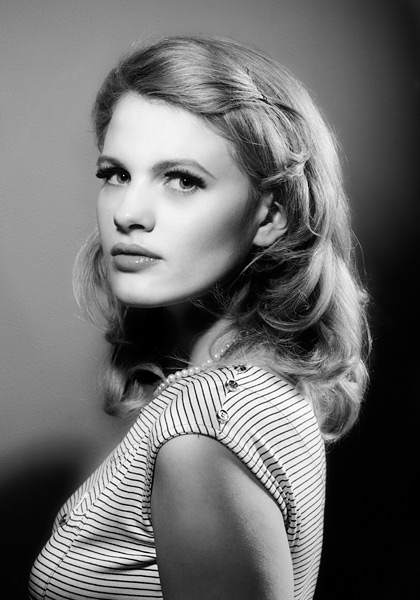
1 vs 2 vs 3 point lighting

A point is a light source and could be a key light, backlight, fill light and could even be a reflector.

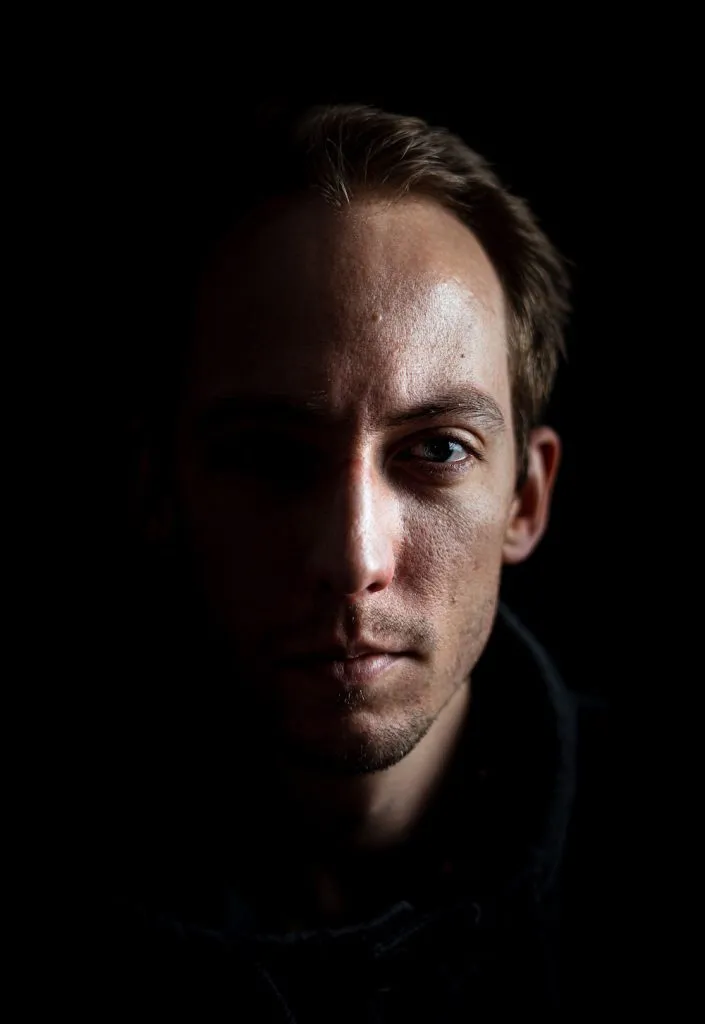
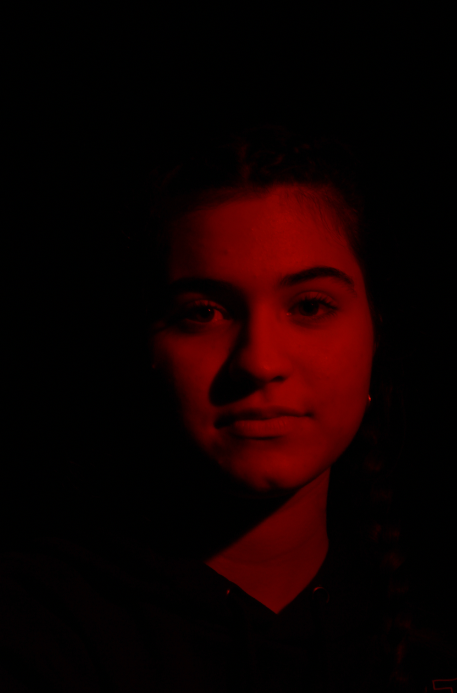
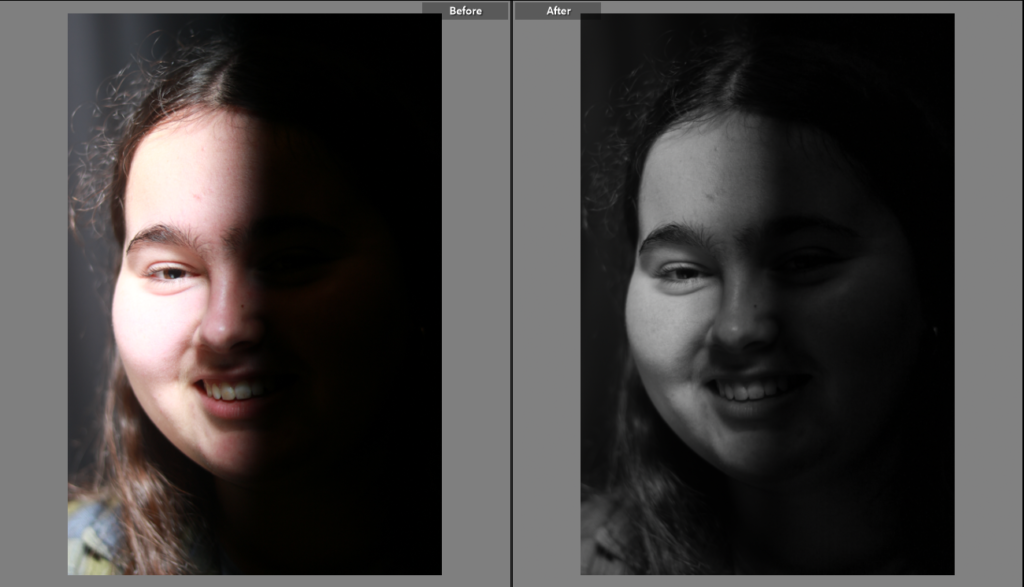
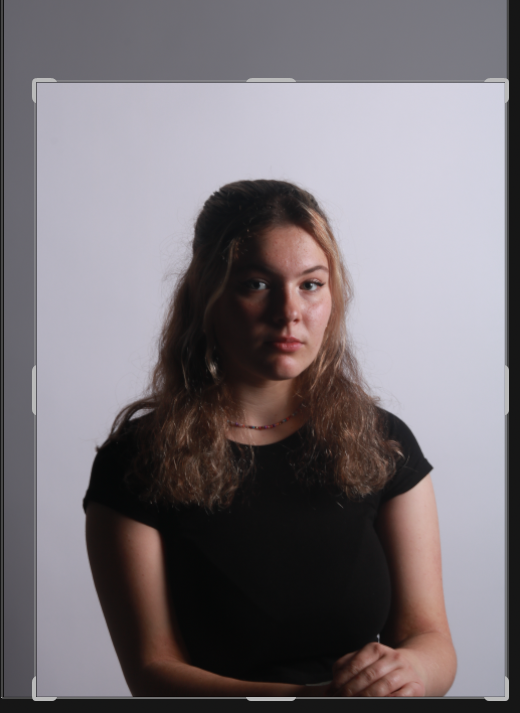
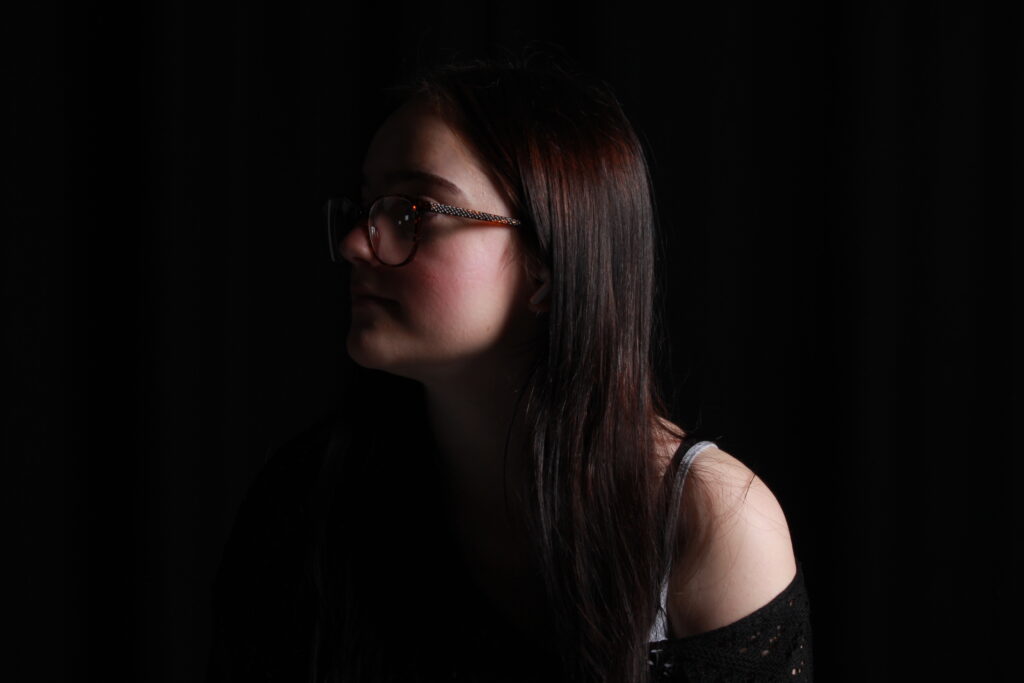
1 point lighting only uses 1 light source (usually a key light), this could be a light facing someone in a studio, or if someone is outside, the light source would be the sun.

  • 1 point lighting is important as without any lighting you won’t be able to see anything and the photo would just be darkness.

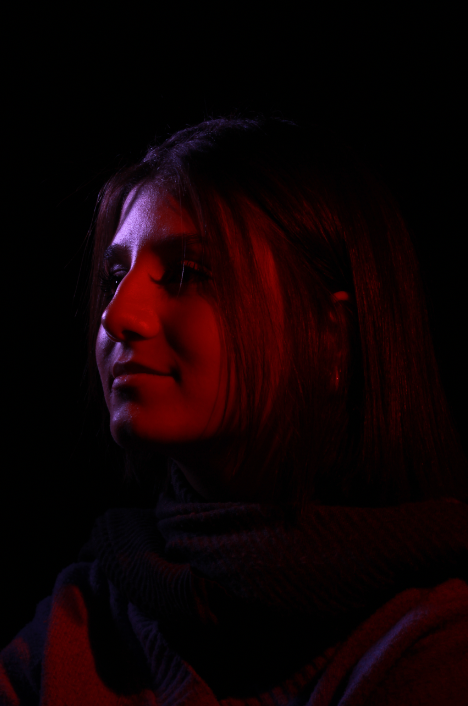
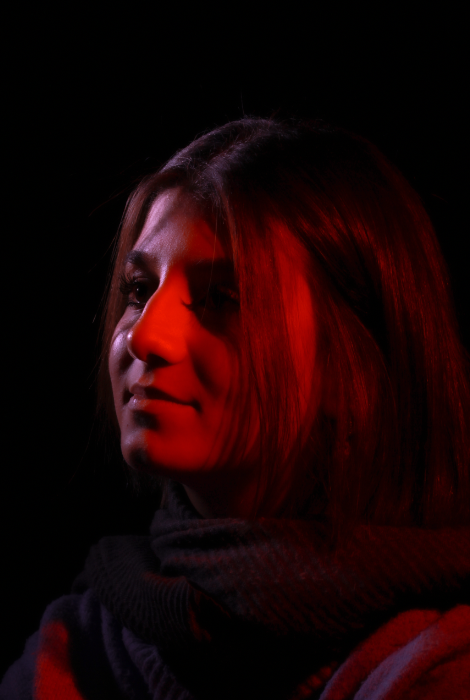
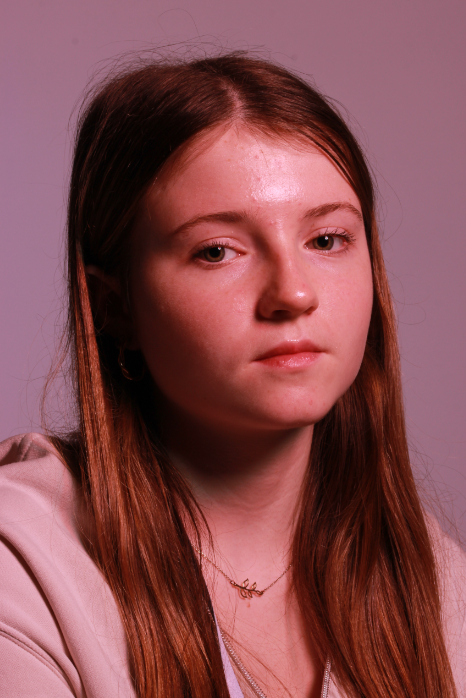
2 point lighting commonly uses 2 light sources or a light and a reflector

  • 2 point lighting is usually placed at a 45degree angle from the subject and usually uses a main light and a fill light.

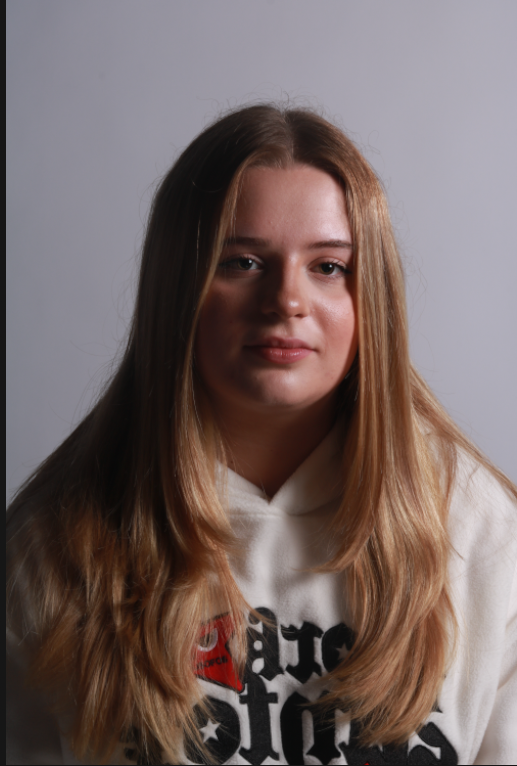
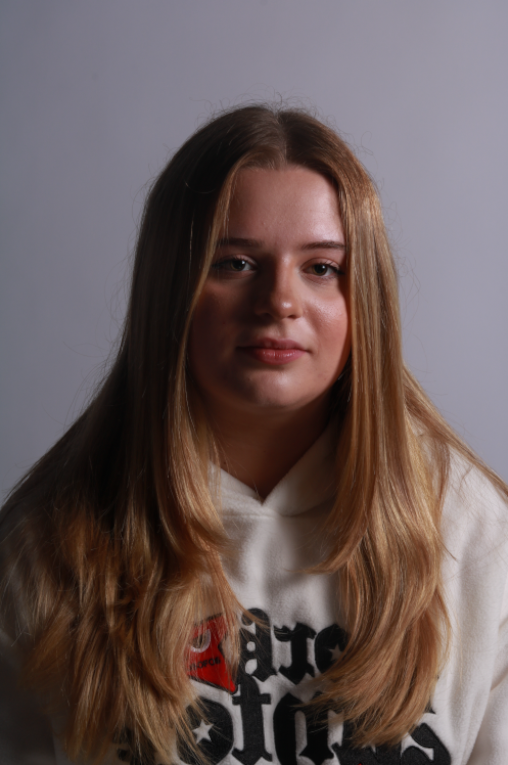
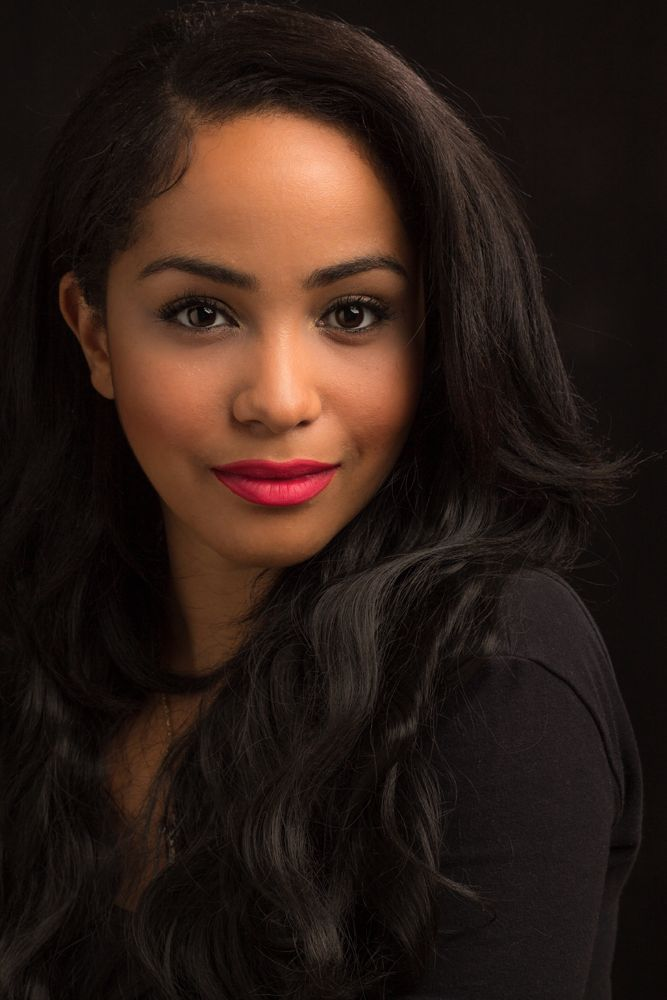
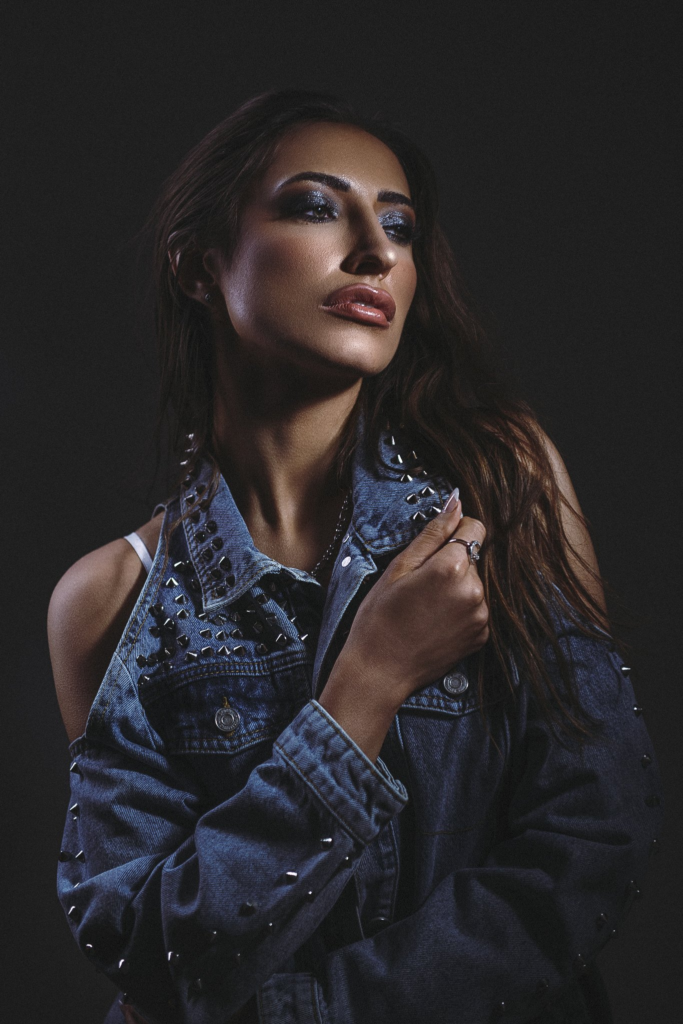
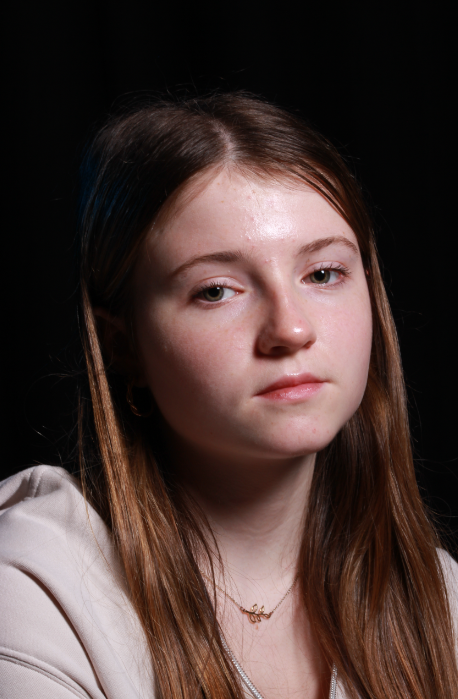
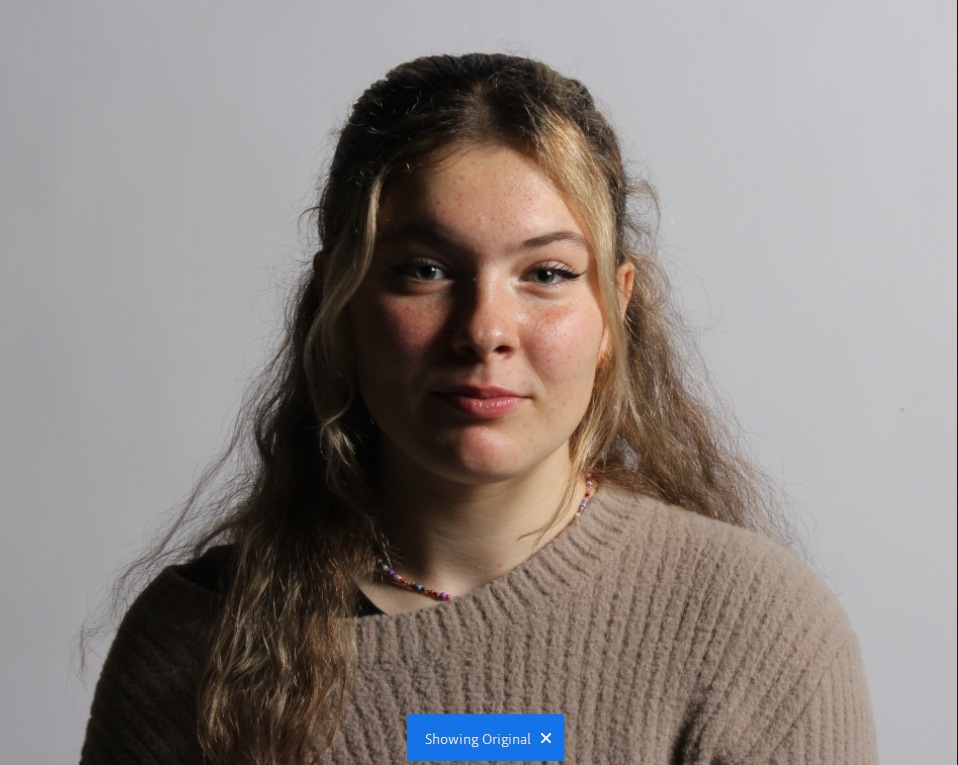
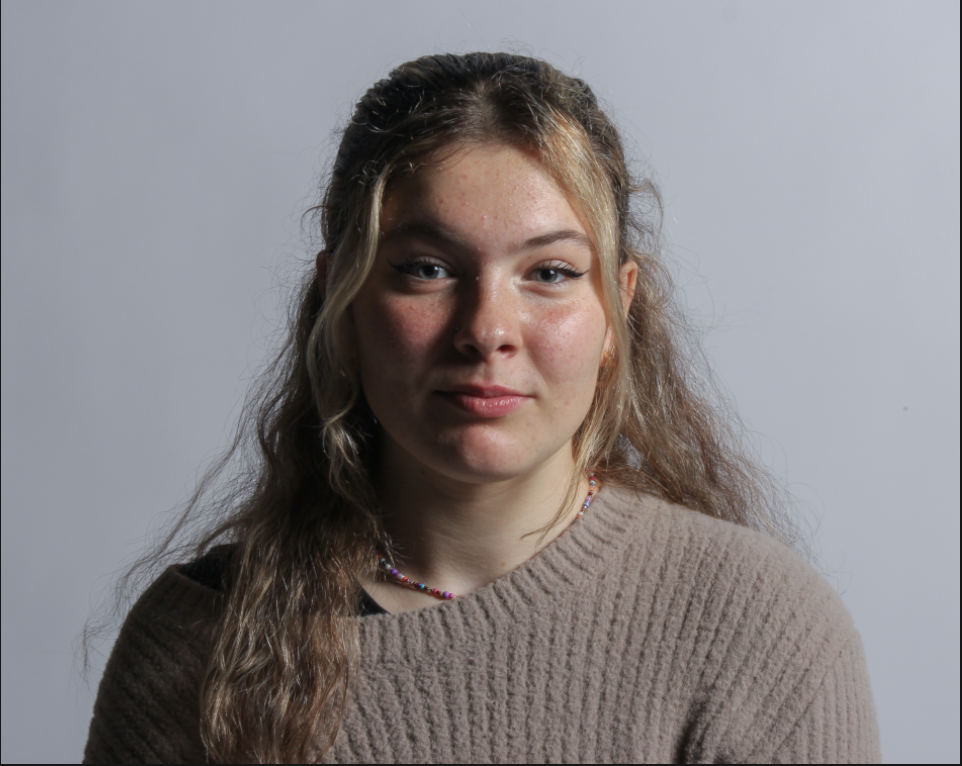
3 point lighting is common for portraits as it uses three light sources to control the shadows and make the subject well lit.

  • 3 point lighting normally features a Key light which acts as the main light in the photo and creates the overall exposure.
  • The second light normally used is the fill light which is used to control the shadows in the photo.
  • The last light normally used in 3 point lighting is the backlight which is placed out of frame and provides a highlight for the upper part of the body or the hair.
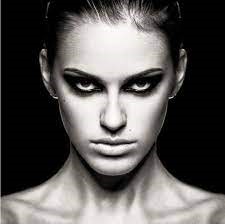
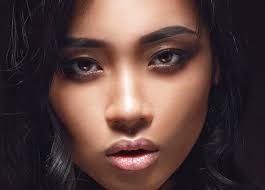
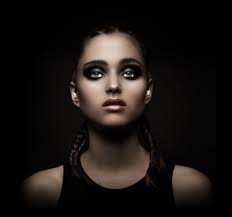
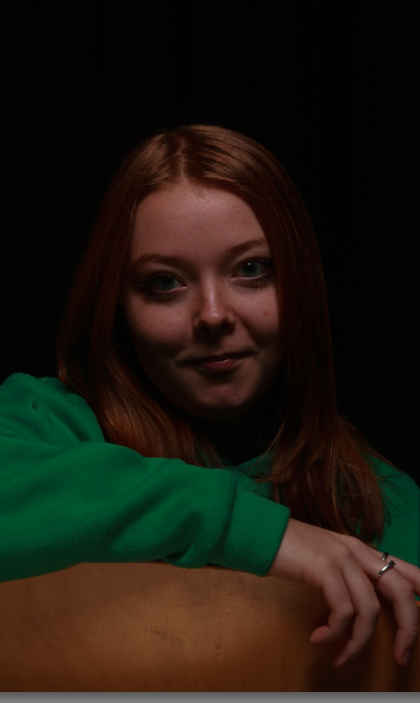
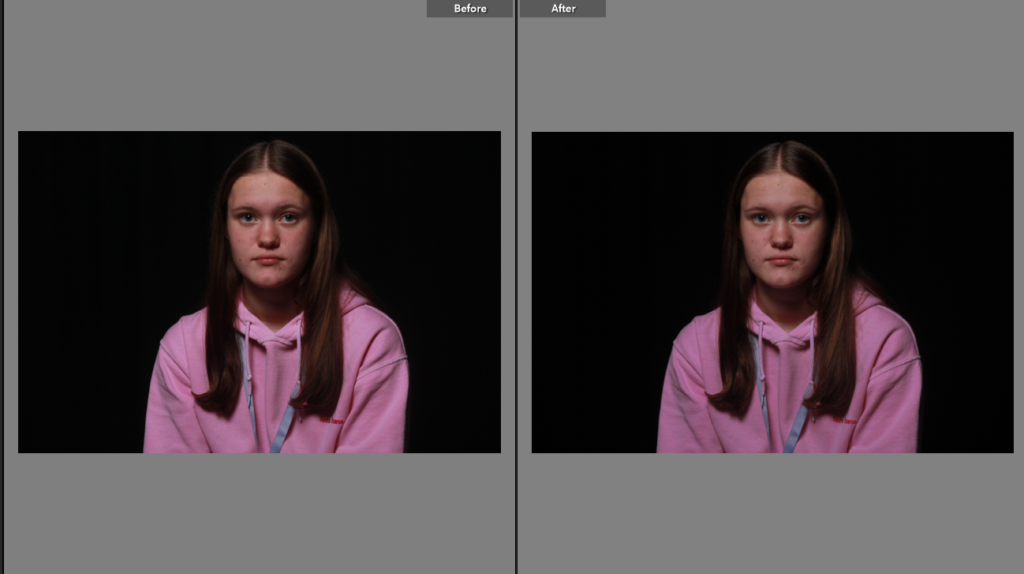
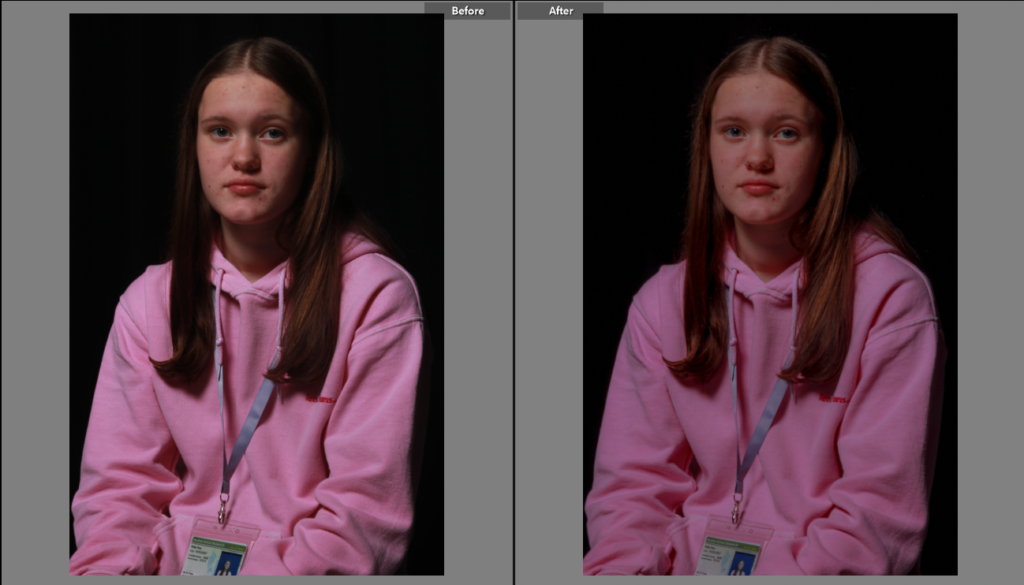
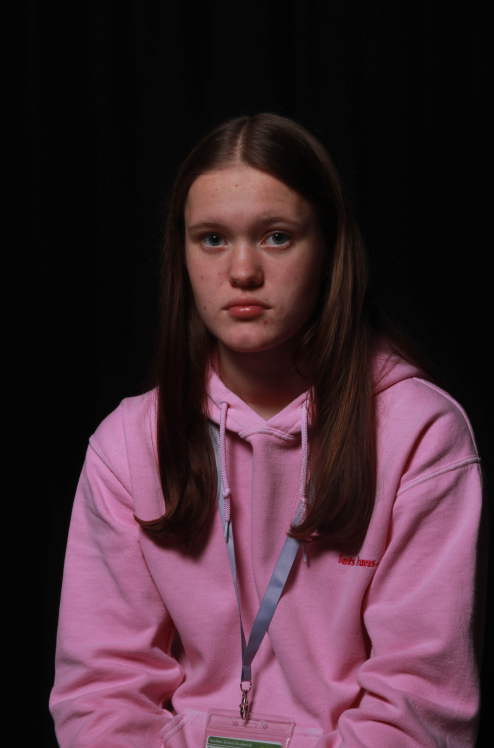
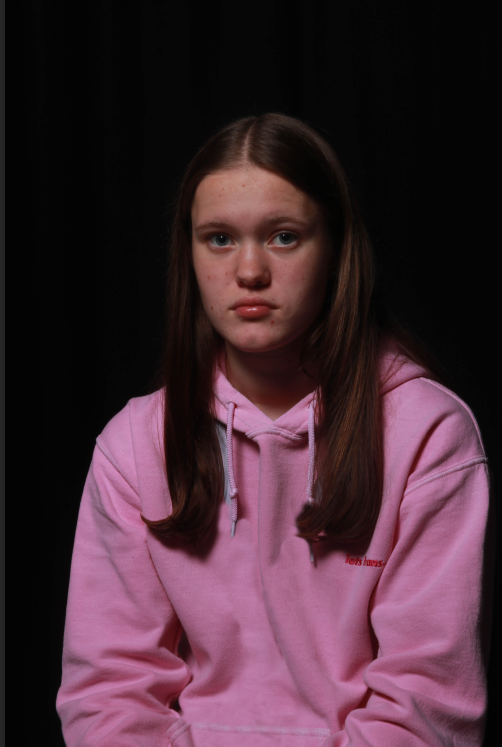
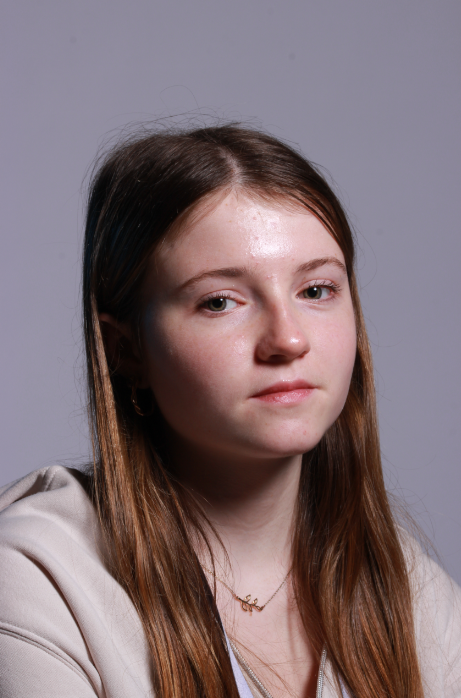
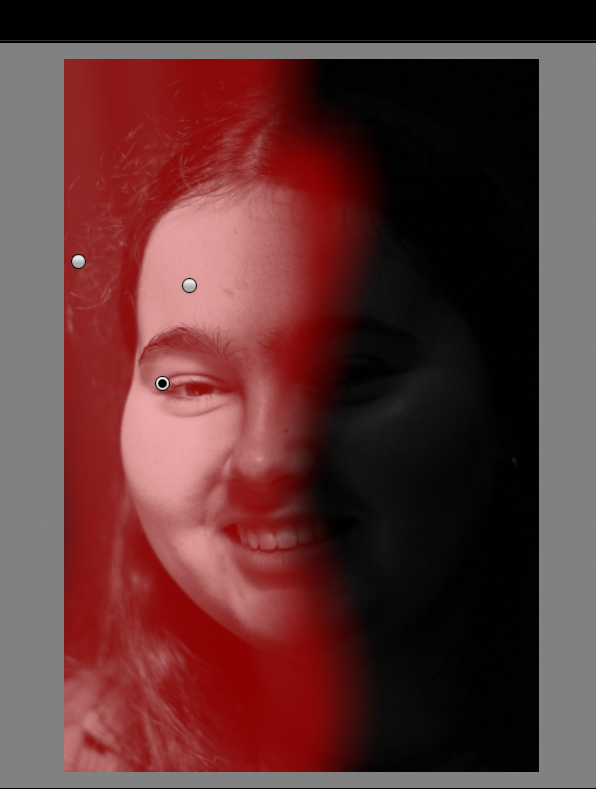
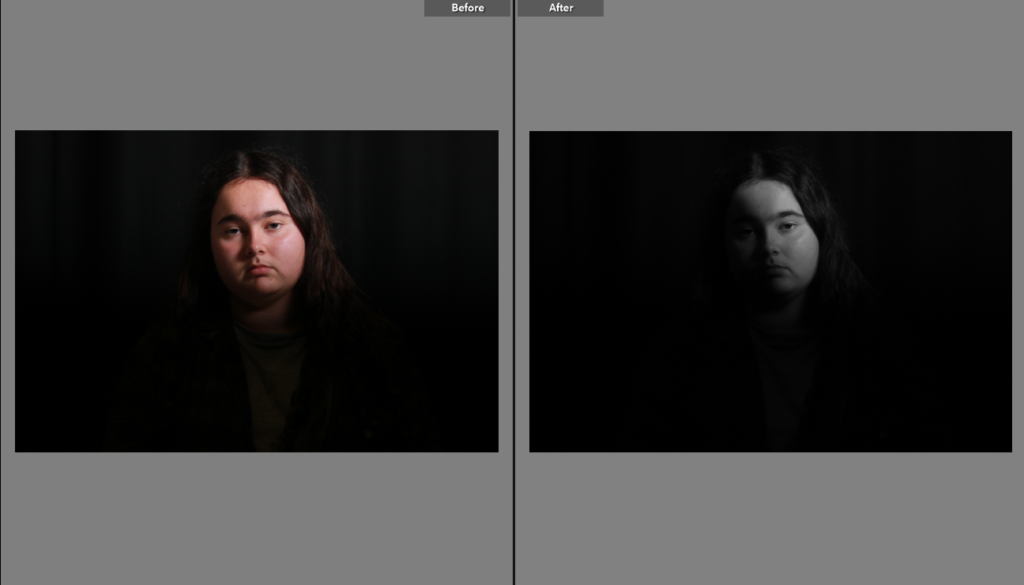
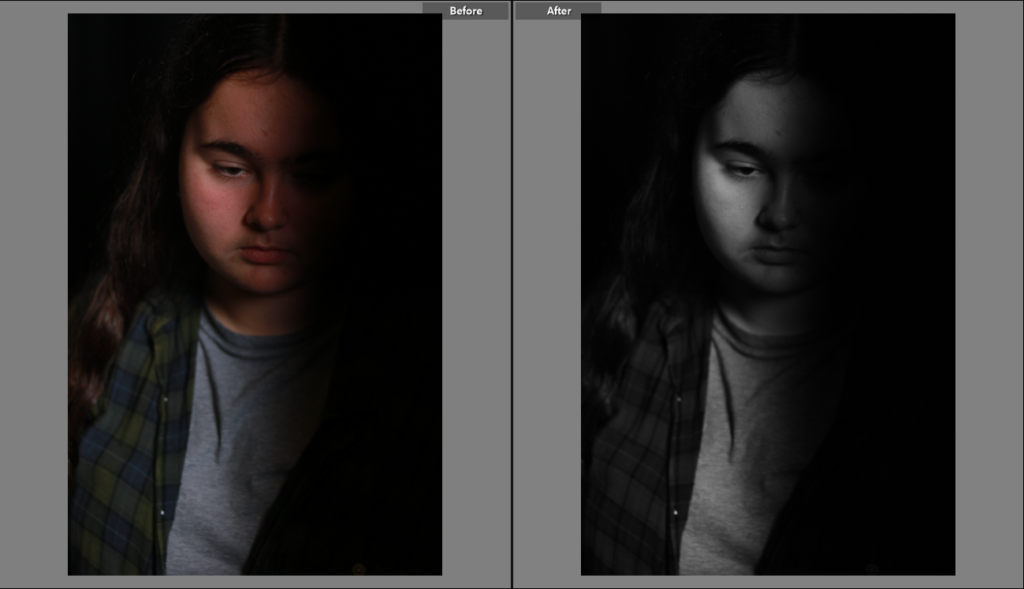
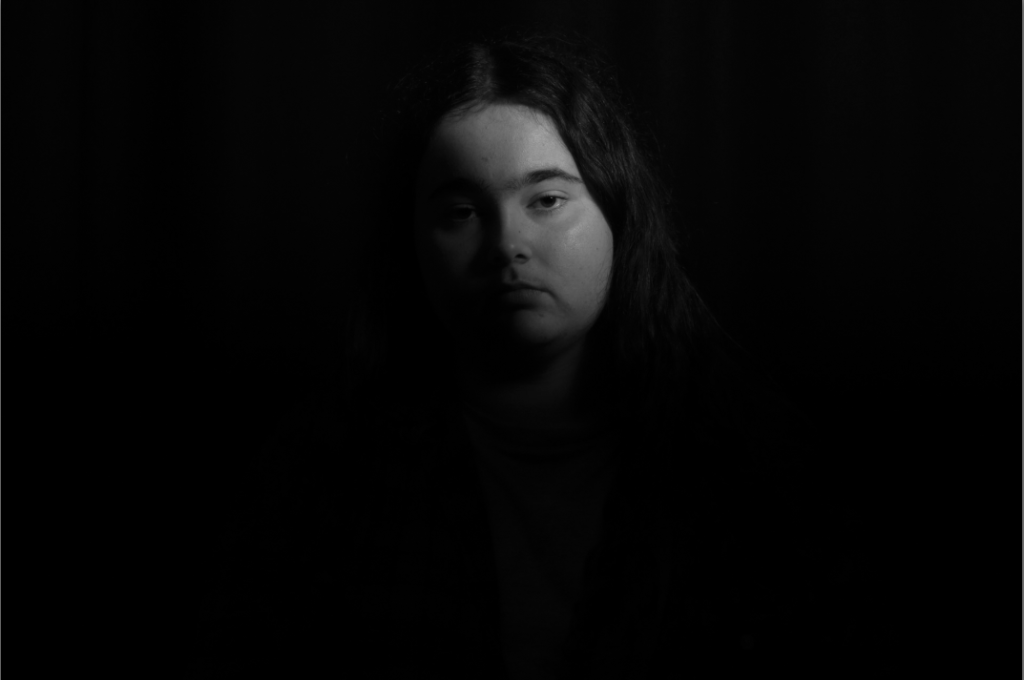
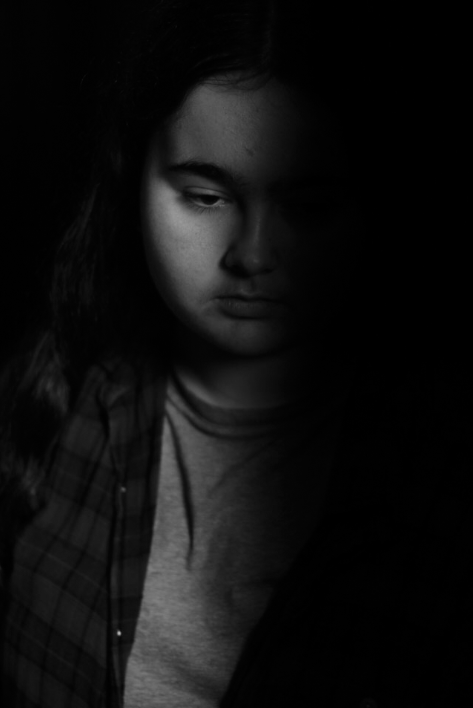
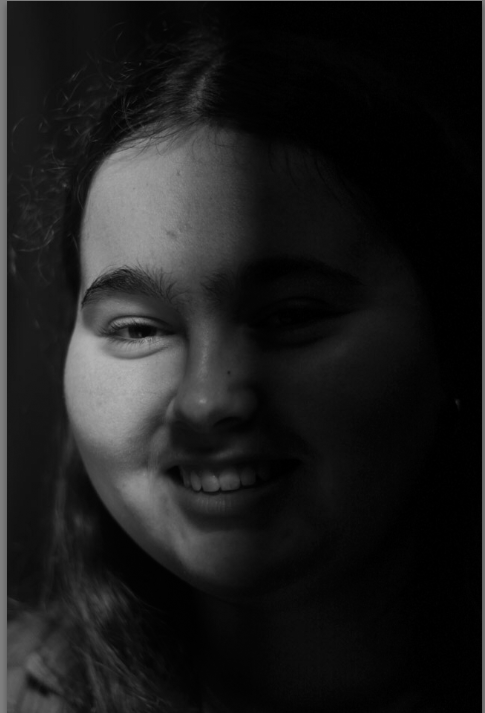
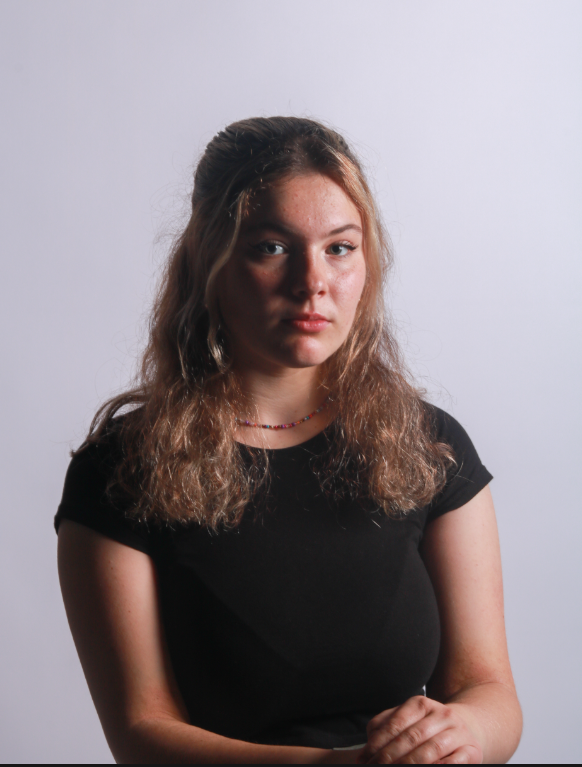
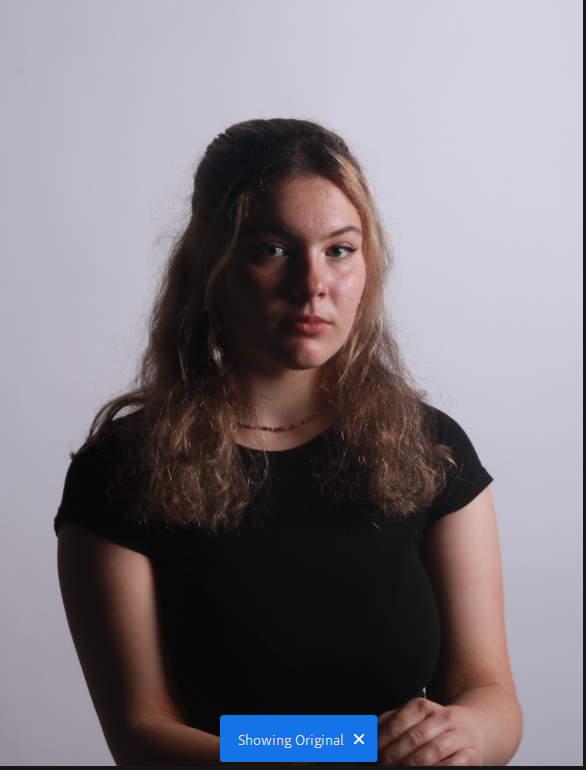
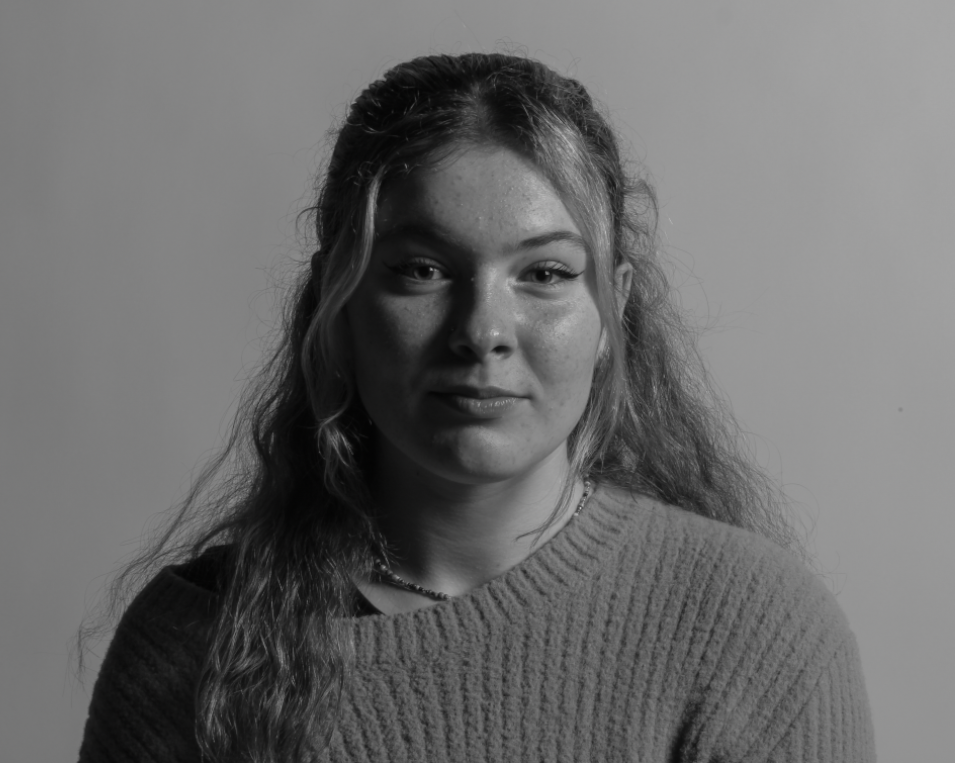
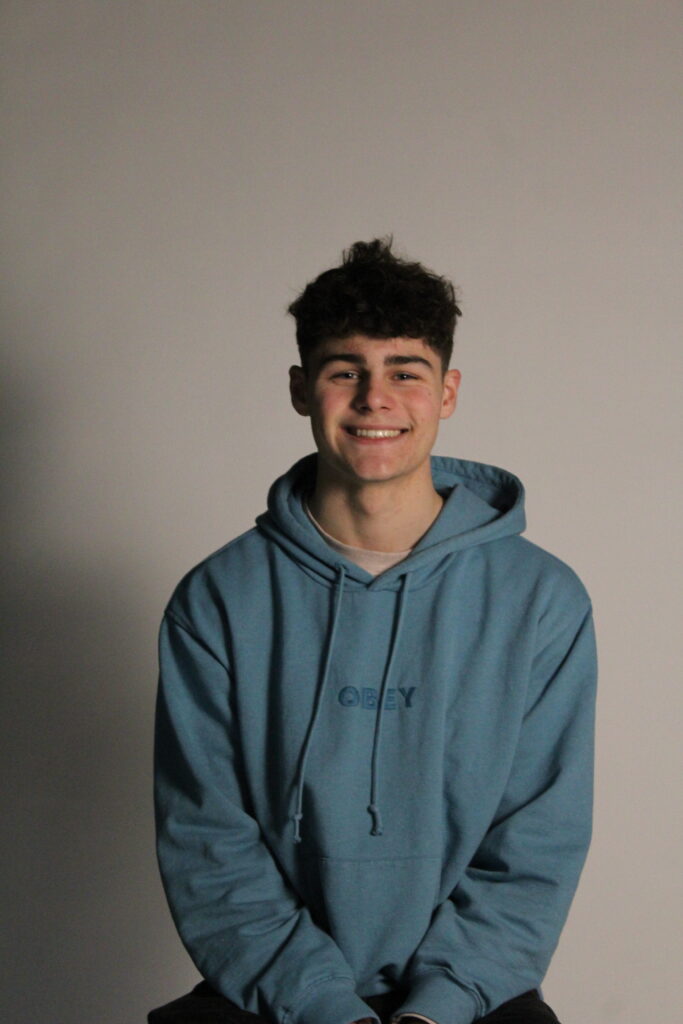
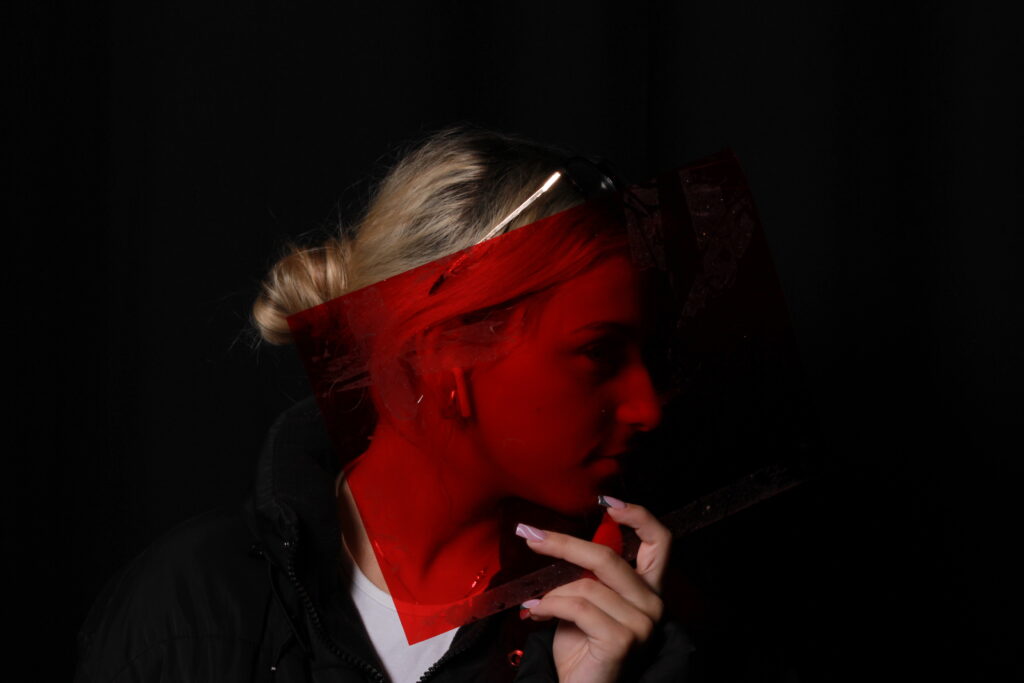
Fill Lighting

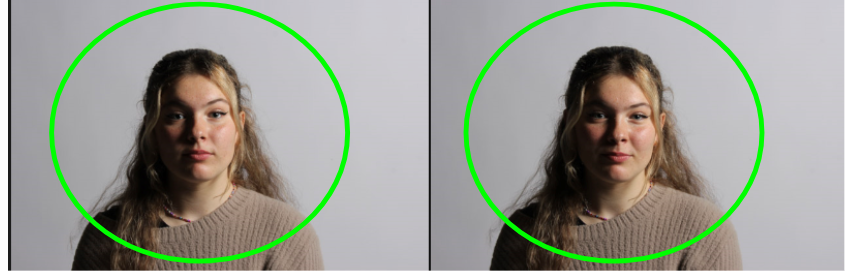
Fill lighting is a popular style of lighting used in theatre, film and photography. Fill lighting is commonly used with a 3 point lighting setup to light up darker shadows in order to reduce the contrast to make the subject look more natural. Furthermore it can increase detail by giving more light to darker areas revealing areas of detail.

Henry Mullins

Henry Mullins is one of the most prolific photographers represented in the Societe Jersiase Photo-Archive, producing in the 19th century. He captured 9,000 portraits of islanders from 1852 to 1873 at a time when the population was around 55,000, proceeding to place them in an order of levels of social class in albums. He began his career by working at 230 Regent Street in London in the 1840s, then moving to Jersey in July 1848, setting up a studio known as the Royal Saloon, at 7 Royal Square. Initially he engaged in a partnership with a Mr Millward yet very little is known about him. By the following year he was working alone and he continued to work out of the same studio for another 26 years.

Henry Mullins’ work of 19th century Jersey is highly politicised, taking images of Jersey political elite (E.g. The Bailiff, Lt Governor, Jurats, Deputies etc), mercantile families– involved in trade (Robin, Janvrin, Hemery, Nicolle etc.), military officers and professional classes such as doctors, bankers and advocates. He organised these images from the most powerful roles, to the lesser powerful.

Mood board of his work:

These images are only a small portion of the large amount of images he took, these images would then be placed into an album, presented as Cartes de visite:

Cartes de visite:

Defined as : ‘visiting card’ or a close-trimmed portrait photograph approximately 2¹/₄×3³/₄ in. intended as a substitute for a visiting card.

Mullins specialised in Cartes de visite, in which the photographic archive of La Société contains a large amount of these (online archive being 9600 images). The Cartes de visite small albumen print. This is described as the first commercial photographic print produced using egg whites to bind the photographic chemicals to the paper which is quite interesting as this is would be very rare to see now. Because the image emerges as a direct result of exposure to light, without the aid of a developing solution, an albumen print may be said to be a printed rather than a developed photograph. Usually, this consisted of a small thin photograph mounted onto a thicker piece of card, however Mullins placed is work into an album.

Many of these images contained the island’s most affluent and influential people, alongside officers of the Royal Militia Island of Jersey, for whom it was very popular to have portraits taken, as well as of their wives and children. The images of the officers document the change in generations as they do not look like the general person today, showing the fashion for long hair, whiskers and beards in the mid-1800s. Their appearance makes it difficult for the viewer to differentiate who is who as they were styled almost identically during this time.

Diamond Cameo:

This layout of final images is called a Diamond cameo due to the diamond-like shape produced by the placement of oval images. I do like this form of layout as it makes it more interesting rather than a regular image alone, or a regular layout of images side by side. It lets the viewer investigate the images more which is more engaging, also making it more aesthetically pleasing to the eye.

Butterfly Lighting

Mood board

What is butterfly lighting?

Butterfly lighting is a technique where the studio light is placed directly in front of the model so it creates a butterfly shape underneath the nose and gives defined cheekbones. Its also known as paramount lighting named for Hollywood glamour photography.

The importance of Butterfly lighting?

The butterfly lighting technique was used to take portraits of some of the most famous Hollywood actors. The photography technique creates a dark shadow underneath the neck and on the cheeks to make the model look thinner and leaner.

Image Analysis

The colour in this image is black and white and the contrast between the bright light in front of the model and the black background gives contrast which gives the photo a much more dramatic look. The texture of these photos is quite blurred, by having the light directly in front of the model it covers up the blemishes on the models face and covers up the imperfections.

My response

My best photo

This photo is my favourite because the shadow under the nose and on the cheekbones best showcases the butterfly lighting technique and the contrast between the green jumper and the dark shadow on the face gives a really nice contrast.

Butterfly Lighting

For this lighting set up I used the set up below. I found this one the trickiest to get right, but it has produced some great shots. Below I have put my best shots and shown the editing process.

By being under the light to create the butterfly lighting gave me the best results when taking the photos. I mostly had the model facing front on to emphasis the butterfly lighting under the nose.

For this contact sheet there is a mix of Chiaroscuro and butterfly lighting shots as while I was trying to get the butterfly lighting to work I took some great Chiaroscuro shots.

This was some basic lighting adjustments to level the shot out with the pink jumper reflecting making the models face have a pink tint. I would like to remove the lanyard in the future as I think it looks messy but it is accurate to the model being a student.

For this shot I used the lighting settings to manipulate the image. While this isn’t the best shot I took for butterfly lighting the shadow was improved when enhanced by editing. By also adjusting the presence settings the texture was increased while taking the clarity down and dehazing the image added to the smooth effect the lighting created. It also brought out the golden colour in the models hair.

These are some shots I have picked from other shoots that actually have butterfly lighting features. By changing the lighting to get different shots often means that sometimes when while you are trying to take photos for a particular style you end up with different techniques.

This is one of the shots that is bordering butterfly lighting while this isn’t textbook butterfly lighting it certainly has elements and in general is a nice shot. I like how the model is looking at camera, her hair frames her face nicely creating a frame around her face, pulling the viewer to models face.

I had a quick go at removing the lanyard off the model on this shot I have already edited. By using the clone stamp tool on varying brush hardness’s and it allowed me to play around with removing the lanyard, while it’s not perfect it is a good insight into potentially future editing.

Final Favourite Shot

Technical Headshots

Lighting: soft, hard

Soft-A portrait lit with soft light is generally lit with a large light source, like a big soft box or even a large window light. This large light source wraps the subject in light and provides a very flattering and beautiful light as a result of it filling in any unsightly lines and creases on the subjects face.

Hard-This characteristic is perfect for showcasing edgy features like a sharp jawline or muscular definition. More often than not, hard light is more commonly associated with male talent, but hard light can also be used with female talent to express feelings of mystery or intense facial features.

Some my own examples of soft and dark lighting.

Dark tones-

Here we added gel colours on the lens to create that darker tone onto the image, we had a back light with another colour to reflect as highlight on the face this helped us to see the models features but still keep the darker tones. The background is black to help maintain the dark shade onto the face otherwise the model would stand out a lot more again a lighter and soft background.

Light Tones-

Here we didn’t use any gels but simply added some different coloured backgrounds behind the model which added a bright colour onto the models face. As you can tell the middle photo with the black background looks quite dark whereas the brighter backgrounds add that soft features. The models face is quite lit up and all facial features are shown clearly.

Chiaroscuro Lighting

This lighting technique is definitely my favourite, I think the high contrast is really interesting to highlight certain features of the models.

Below is how I set up my lighting, a lot of the time this style peaked through in other shoots making it quite easy to have a wide range of shots to choose from. I think while I’m editing I will change a lot of them to black and white as it’s a great way to show off contrasting and tonal lighting. I also used a reflector in some shots to try different ideas and executions of photos.

For this technique, Chiaroscuro, in particular I moved the lighting sources quite a bit trying to get different shadows, I also used a black backdrop which isn’t featured in the above photo.

For this shot I wanted to change it into black and white to use the shadow well. I started by using the adjustments brush to fix the over exposed part, by fixing this it corrects the rest of the shot. I had the settings on the brush as a small brush size with heavy feathering to blend the two parts of the shot together. I then moved the saturation adjuster all the way down to change the shot to black and white. This editing works well for Chiaroscuro lighting as it empathises the dramatic two tone shot.

For this one again I changed the shot to black and white as it enhances the lighting set up which looks at tone within a shot. Black and white is a great way to create a tonal photo as it is only two main colours and the rest is different versions of the colour highlighting the darker patches, less exposed and the highlights which contrast well in Chiaroscuro lighting.

Final Favourite Shots

Rembrandt lighting photos

For this technique to work I made sure the light source was in the right place. The photo below is the set up I used.

I sorted through my photos by adding lines through the worst shots and green circles around the best. I will now go onto to do some minimal editing to improve the images that have green circles on. I looked for certain aspects within the shots like the triangle under the eye for the technique of Rembrandt lighting and then looked at the models facial expression and pose. By sorting photos this way it gives me a clear idea of how many good shots I have to work with.

Small adjustments to the lighting has helped bring out the golden colour in the models hair, it also helped bring out the models face as before it was rather shadowed by a fairly dull, grey shadow making the model appear washed out.

Again I used small lighting adjustments to pull out the brighter more golden colours in the photo. This is enhanced by the Rembrandt lighting technique under her left eye.

Henry Mullins

Henry Mullins, a photographer in the circle of the first photography studio in Europe.

Henry Mullins started working at 230 Regent Street in London in the 1840s and moved to Jersey in July 1848, setting up a studio known as the Royal Saloon, at 7 Royal Square. Initially he was in partnership with a Mr Millward, about whom very little is known. By the following year he was working alone and he continued to work out of the same studio for another 26 years.

For a brief period in the 1860s he also worked in London, but judging by the collection of his photographs, he found plenty of willing sitters in the island prepared to pay half a guinea (promoted as “one half of that in London”) to have their portrait taken by him.

Cartes de visite

His speciality was cartes de visite and the photographic archive of La Société contains a massive collection of these. Their online archive contains 9600 images, but the majority of these are sets of up to 16 photographs taken at a single sitting. In those times even 10s 6d was a substantial sum to pay to have one’s photograph taken, and included among his subjects are many of the island’s affluent and influential people.

He was also popular with officers of the Royal Militia Island of Jersey, for whom it was very popular to have portraits taken, as well as of their wives and children, for the more senior and more affluent officers. The pictures of these officers show clearly the fashion for long hair, whiskers and beards in the mid-1800s. Indeed, so similar is their appearance and so stylised the portraits, it is very hard to detect much difference between a large number of officers of the same rank and social standing.

Diamond Cameo , a technique used under licence by Henry Mullins.

Philip Baudains

Diamond Cameo photography is four small oval portraits which were placed on a carte de visite in the shape of a diamond, each portrait being of the same person photographed in a different position.

 albumen print

 Albumen prints were the most common type of photographic print made during the nineteenth century. They are characterized by a smooth, shiny surface, which is the result of a coating of egg whites.

Henry Mullins

Who is Henry Mullins?

Henry Mullins started working in London in the 1840s and moved to Jersey in July 1848. He set up a studio known as “the Royal Saloon”, at 7 Royal Square. He was initially in a partnership with Mr Millward, but a year later he was working alone, he continued to do so for 26 years in the same studio. His photographs are now held by La Societe Jersiaise, and he found many people willing to have their photos taken.

Cartes de visite

His speciality was Cartes de visite, La Societe Jersiaise holds 9600 of these images, but the majority are 16 photographs taken in a single sitting. “The carte de visite was a format of small photograph which was patented in Paris by photographer André Adolphe Eugène Disdéri in 1854, although first used by Louis Dodero” The size of a carte de visite is 54.0 × 89 mm normally mounted on a card sized 64 × 100 mm. In Mullins case he mounted his carted de visite into an album.

Albumen Print

Cartes de visite photographs were taken as a albumen print, this was published in January 1847 by, Louis Désiré Blanquart-Evrard. It used the albumen found in egg whites to bind the photographic chemicals to the paper and became the dominant form of photographic positives from 1855 to the start of the 20th century. During the mid 19th century, the carte de visite became one of the more popular uses for the albumen print.

Henry Mullins Work

Image Analysis

Henry Mullins photographs portray something like a passport photo, no shadows, uniform lighting, light grey/cream background, eyes are open and clearly visible, with no flash reflections, facial expression are neutral (neither frowning nor smiling), with the mouth closed, photos show both edges of the face clearly, photos show a full front view of face and shoulders, squared to the camera, the face and shoulder image must be centred in the photo; the subject must not be looking over one shoulder (portrait style), or tilting their head to one side or backwards or forwards, there is no hair across the eyes, photos with shadows on the face are unacceptable.

Henry Mullins uses different poses within his photos, such as looking directly ahead, to the right, to the left, up and down. This creates framing which almost changes the look of the models face, allowing for different interpretation and eye contact with the camera, or a side angle pose.

My responses

I took inspiration from Henry Mullins’ photos by using his poses, by taking photos from left, right or central angles, to portray all different sides of the face to show how a person can come across different depending on the angle you view them from, which also touches on the perception of the human eye, how everyone views everyone differently depending on their perception.

Henry Mullins

Henry Mullins started working at 230 Regent Street in London in the 1840s and moved to Jersey in July 1848, setting up a studio known as the Royal Saloon, at 7 Royal Square.

Between 1850-73 Henry Mullins made over 9000 carte de visite portraits of Jersey’s ruling elite and wealthy upper classes.

It’s not known when he was deceased, however he spent over 20 years in Jersey and produced 4 albums with 2 and half thousand in each album, he also put the most important people at the at pof the albums eg, people in chareg of state cham,bers and piut togther a social higharchoty with it going own to fame nd i mportamnce in his albums.

Cartes de visite

His speciality was cartes de visite and the photographic archive of La Société contains a massive collection of these. Their on line archive contains 9600 images, but the majority of these are sets of up to 16 photographs taken at a single sitting. In those times even 10s 6d was a substantial sum to pay to have one’s photograph taken, and included among his subjects are many of the island’s affluent and influential people.

He was also popular with officers of the Royal Militia Island of Jersey, for whom it was very popular to have portraits taken, as well as of their wives and children, for the more senior and more affluent officers. The pictures of these officers show clearly the fashion for long hair, whiskers and beards in the mid-1800s. Indeed, so similar is their appearance and so stylised the portraits, it is very hard to detect much difference between a large number of officers of the same rank and social standing.

An advertisement in the Jersey Times of 5 June 1849 states that “Portraits are taken in groups of two or three, or the single figure, or bust, and of various sizes, even small enough for a ring, the charge for which is reduced to one half of that in London.

Here is some of his grids that he took.

ALBUMEN PRINT

Invented in 1850, and commonly used in the late nineteenth century, the albumen print is a type of photographic print made from paper coated with albumen (egg white).

The albumen print became popular because it produced a rich sharp image. The process involves coating a sheet of paper with albumen (egg white), making the paper’s surface glossy and smooth. It is then coated in a solution of silver nitrate. The albumen and the silver nitrate form light-sensitive silver salts on the paper. When a glass negative is placed directly on the paper and exposed to light, it forms an image on the paper.

Here are some more recent images of his.

This technique is called diamond cameo, licenced by Henry Mullins. Some cameo carvers are well known and signed cameos are valuable. Hardstone cameos are more highly valued than the softer Shell cameos.

Diamond Cameo photograph was registered by F.R. Window of London in 1864. Four small oval portraits were placed on a carte de visite in the shape of a diamond, each portrait being of the same person photographed in a different position.

Their on line archive contains 9600 images, but the majority of these are sets of up to 16 photographs taken at a single sitting.

JUXTAPOSITION

Juxtaposition is placing two images together to show contrast or similarities.

Here is some of my examples’ of headshots, as well as an examples of diamond cameo.

Just another Hautlieu Creative site