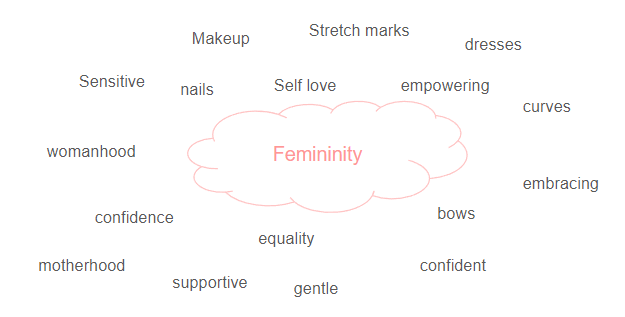
Femininity:
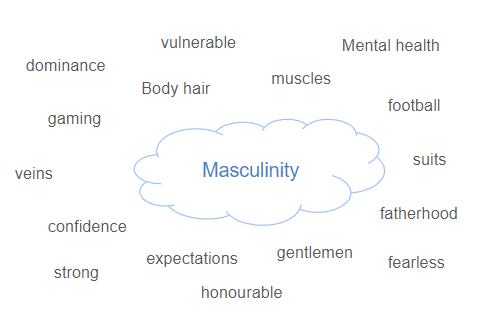
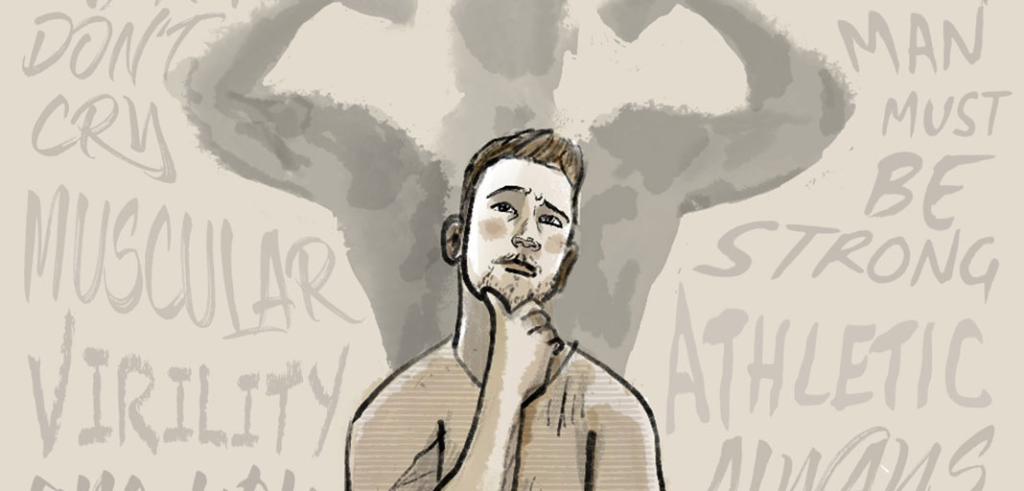
Masculinity:

Femininity:
Masculinity:
Femininity is described as: qualities or attributes regarded as characteristic of women or girls. Traits traditionally cited as feminine include gracefulness, gentleness, empathy, humility and sensitivity, though traits associated with femininity vary across societies and individuals, and are influenced by a variety of social and cultural factors.
Masculinity is described as: a set of attributes, behaviours, and roles associated with men and boys. Masculinity is constructed and defined socially, historically and politically, rather than being biologically driven. The understanding of masculinity varies across time and socio-cultural contexts, and within groups and networks; and men also ‘perform’ their masculinity differently and inconsistently.
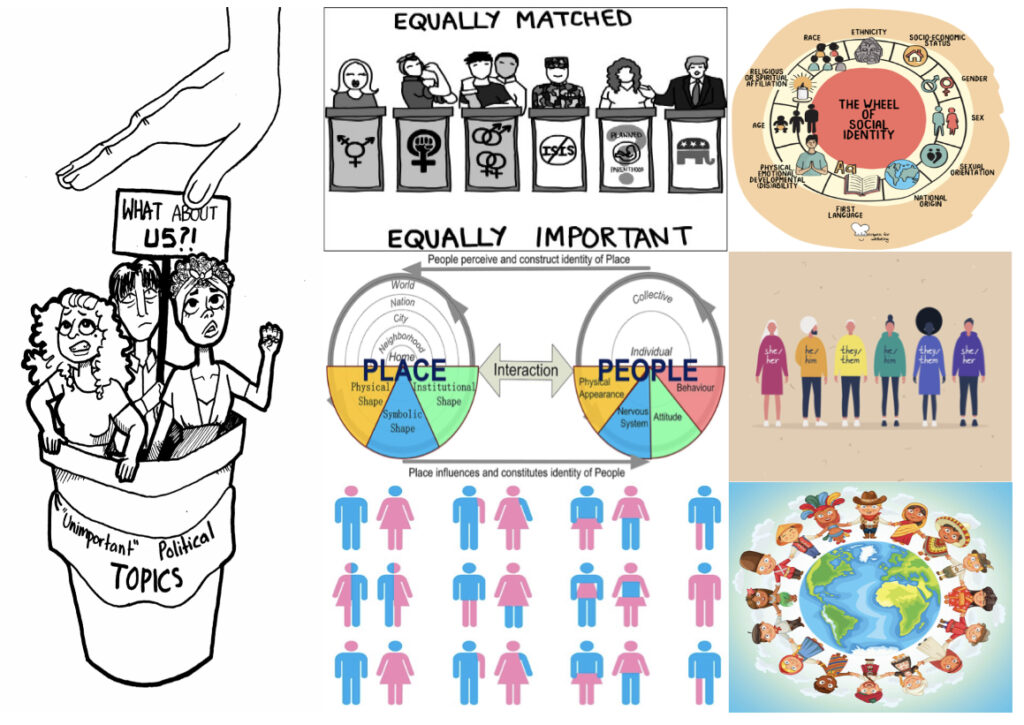
Gender identity is a person’s innate sense of their gender. It is a person’s sense of being a woman, a man, both, neither, or anywhere along the gender spectrum. A person’s gender identity may be the same as or different from their birth-assigned sex.
Cultural identities are the distinct identities of people or groups in culture or subcultural categories and social groups. Categories that make up cultural identities include sexuality, gender, religion, ethnicity, social class, or geographical region.
Social identity refers to the ways that people’s self-concepts are based on their membership in social groups. Examples include sports teams, religions, nationalities, occupations, sexual orientation, ethnic groups, and gender.
Geographical identity is an individual or group’s sense of attachment to the country, region, city, or village in which they live.
Political identity is a form of social identity marking membership of certain groups that share a common struggle for a certain form of power. This can include identification with a political party, but also positions on specific political issues, nationalism, inter-ethnic relations or more abstract ideological themes.
Identity can be influenced by many things such as: place, environment and upbringing.
Firstly, a person’s upbringing can influence their identity and how they view it as a whole for the better or the worse. For example, those who are bought up in a homophobic household or transphobic household may struggle with gender identity and consequently find it hard to express themselves later on in life as they have been surrounded by people who deem same sex relationships and trans people as ‘wrong’. This may lead to a person going through an internal battle in their head and trying to hide who they really are to the world in fear of being hated or judged. People may feel like they have to cover up who they really are in order to be accepted by society and therefore lose their sense of identity. Additionally, having a negative upbringing may also cause a person to act like those people and consequently be homophobic/ transphobic to other people as that is what they know as ‘right’. On the other hand, those who are bought up by parents who support lgbtq+ and trans people or are even same sex parents, their children are likely to be more acceptive of who they are and less likely to hide themselves from the world as they have been bought up in a setting in which they are encouraged to support and love everyone around them no matter what differences they may have. This can lead to an increased sense of identity. Lastly, upbringing can influence identity as those who are bought up with parents who have stereotypical ideas about the world eg same sex marriage is wrong, will then push those ideas onto their children causing them to believe this its wrong too. This may cause an internal war in the child’s head if they discover themselves to be attracted to the opposite sex etc as they would have been told their whole life how ‘bad’ it is and then feel ashamed to express how they feel to their family, resulting in them losing their sense of identity in order to fit in.

Furthermore, environment can also influence a person’s identity and ability to express themself. For example, those who are in an environment which consists of predominantly white supremacist groups may believe that they are not worthy of having their own identity and that they should conform to the opinion of those around them as that is what is considered the norm. These opinions form a divide between the different races and could cause those who live in those areas who are a different race to feel unworthy and unable to express themselves as they will be rejected and outcast from society. Whereas those who live in a supportive, multi race society are more likely to appreciate all races and will feel more comfortable in themselves to be able to express themselves however they want as they know they won’t be judged.
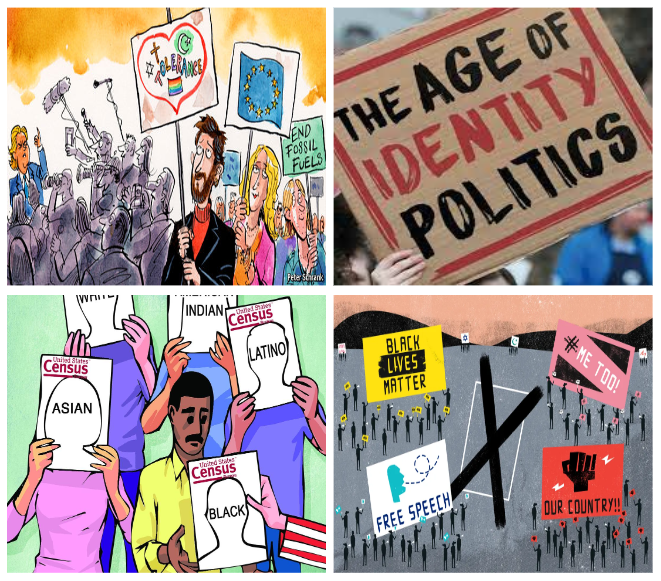
Identity politics is politics based on a particular identity, such as race, nationality, religion, gender, sexual orientation, social background, caste, and social class.
Identity politics aims to reclaim greater self-determination and political freedom for marginalized people through understanding particular paradigms (a typical example or pattern of something) and lifestyle factors, and challenging externally-imposed characterisations and limitations.
Identity politics and the privilege lens has many good effects on society. For example, it has made students more sensitive and attuned to each other, and attuned to structural discrimination and bias issues. Students, teachers, and politicians who use the privilege lens are less likely to trade in generalisations and stereotypes of marginalised groups. Because of these lenses, many do a better job creating atmospheres that are inclusive to individuals of a wide range of identity groups that have been marginalised or excluded from important conversations.
However, Identity politics and the privilege lens are often used as weapons to de-legitimise views based on identity and privilege instead of ideas. Some of this is necessary to remind us that views develop in context but some of it is intended to rob people of a voice if you disagree with their perspective. For example, some people who are “straight, white, males” have voiced that their views are seen as less legitimate/ bigoted due to identity politics and the privilege lens, leaving to the majority of them remaining silent as to not be met with backlash.
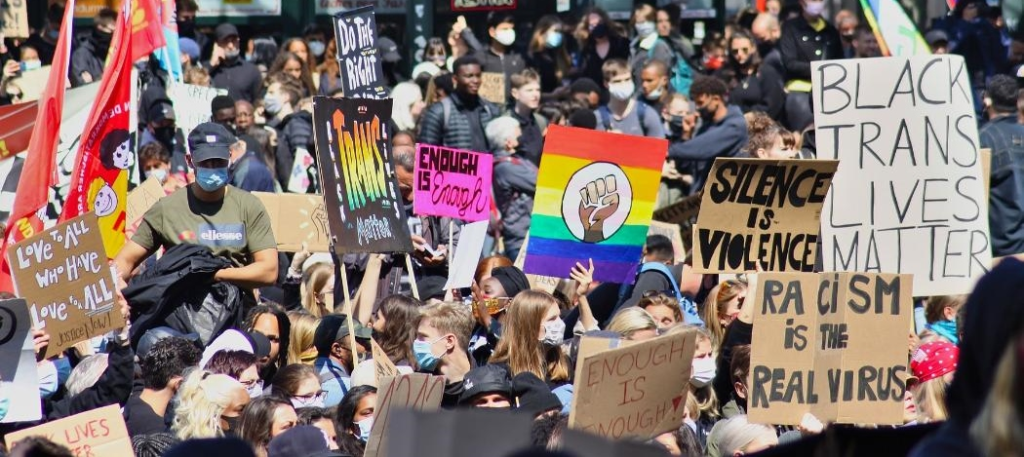
Culture war is a conflict between groups, especially liberal and conservative groups, that have different cultural ideals, beliefs, or philosophies. There have been a number of conflicts about diversity in popular cultures occurring in the 2010s, such as the Gamergate controversy, Comicsgate and the Sad Puppies science fiction voting campaign.
Social media’s advancement in recent years has been a big factor in fomenting culture wars. Its highly advanced algorithm has demonstrated its ability to intensify people’s opinions. Researchers have been seeing a trend of increasing arguments over history, race, and gender because of this.
Researchers have differed about the scientific validity of the notion of culture war. Some claim it does not describe real behaviour, or that it describes only the behaviour of a small political elite. Others claim culture war is real and widespread, and even that it is fundamental to explaining Americans’ political behaviour and beliefs.
Immigration, race, alcohol, evolution, gender politics, and sexual morality all became major cultural battlefields during the 1920s. Wets battled drys, religious modernists battled religious fundamentalists, and urban ethnics battled the Ku Klux Klan.
Studies have shown that the rise of cultural groups is what leads to in-group bias, which is strongly correlated with polarisation. These cultural groups can form based on minor characteristics, but with time, populations develop associations between particular characteristics and particular behaviours, increasing covariation. Meaning that polarisation can bring people together but can also create prejudice between groups. Over the past couple of years, the public has seemed more inclined to feel prejudice towards those outside their social group and feel sympathy towards those who are in.
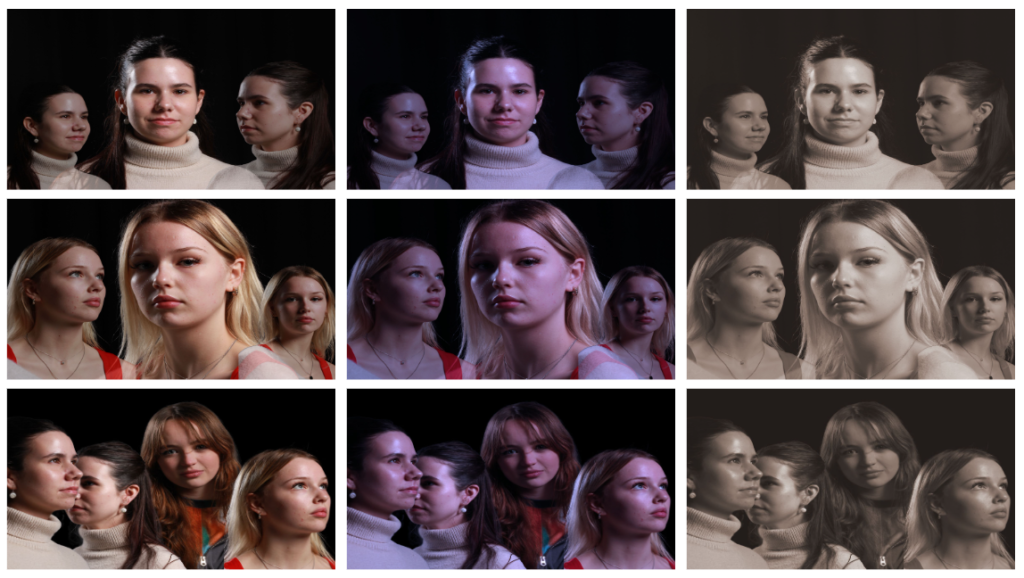
Here I decided to experiment with my headshots I had taken previously. To do this, I first opened up a landscape, blank page on photoshop then used the bucket tool to make the page black. I then opened up the image I wanted to use and selected the quick select tool and went around the outline of the person. I then pressed layer via copy and dragged my cut out onto the black page. I repeated this step until I had the desired amount of people on my page. Next, I changed the opacity of some of the images to create the sense of depth. Finally, I went onto adjustments, cinematic and then experimented with giving my photographs a blue or sepia tone.
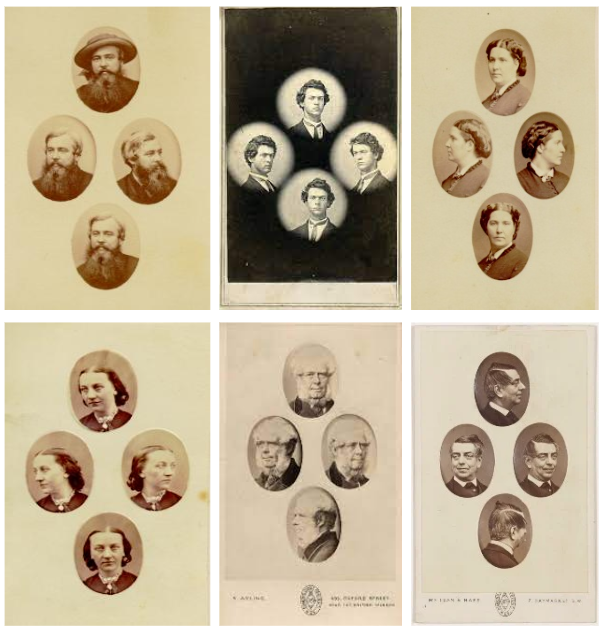
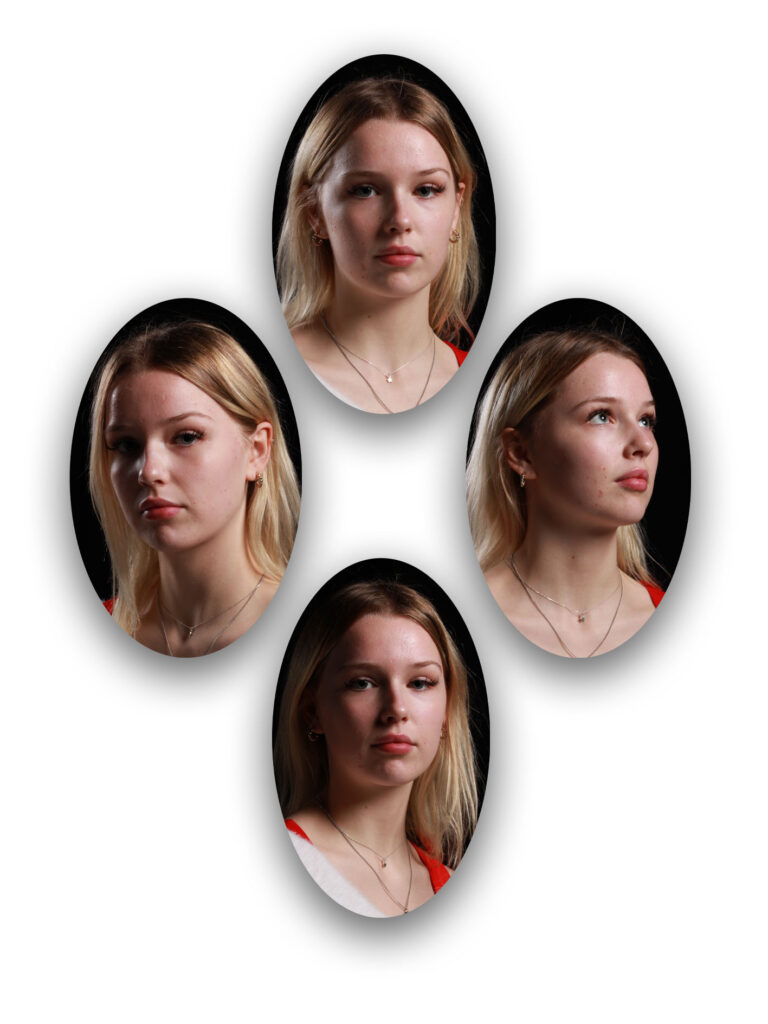
Diamond Cameo is where four small oval portraits (1″ x 3/4“) were placed on a carte de visite in the shape of a diamond, each portrait being of the same person photographed in a different position.
The carte de visite was a format of small photograph which was patented in Paris by photographer André Adolphe Eugène Disdéri in 1854, although first used by Louis Dodero. It was usually an albumen print from a collodion negative on thin paper glued onto a thicker paper card. The size of a carte de visite is 54.0 mm × 89 mm mounted on a card sized 64 mm × 100 mm.
Henry Mullins:
Henry Mullins was the first professional photographer to come to Jersey and establish a portraiture business in the very early days of photography
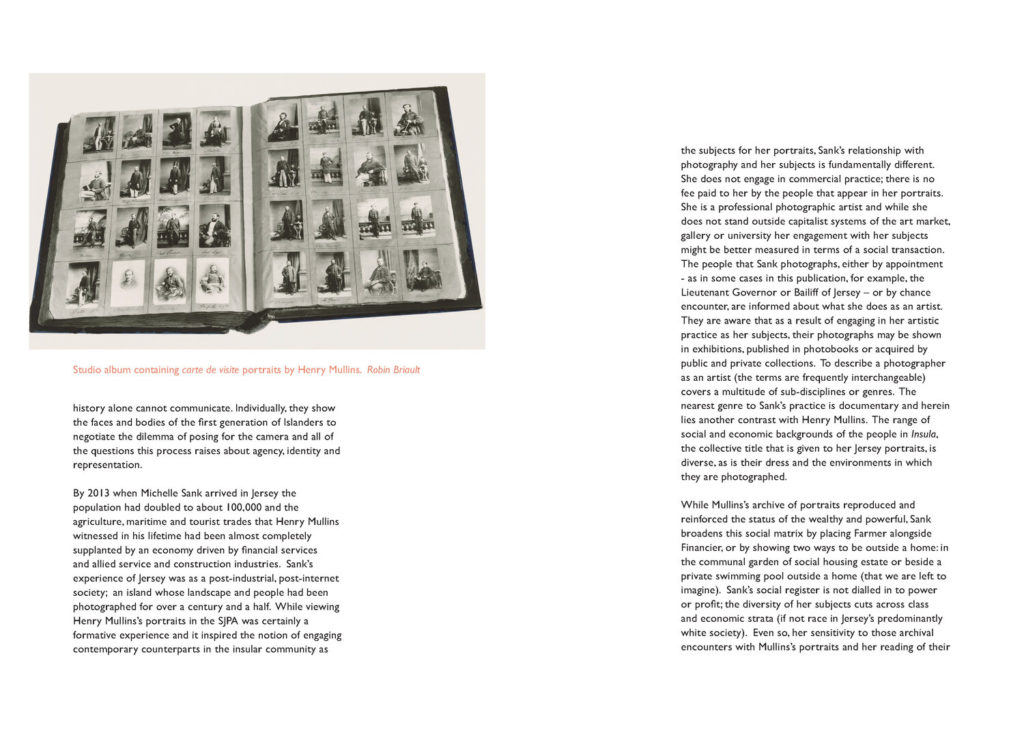
Henry Mullins is one of the most prolific photographers represented in the Societe Jersiase Photo-Archive, producing over 9,000 portraits of islanders from 1852 to 1873 at a time when the population was around 55,000. The record we have of his work comes through his albums, in which he placed his clients in a social hierarchy. The arrangement of Mullins’ portraits of ‘who’s who’ in 19th century Jersey are highly politicised.
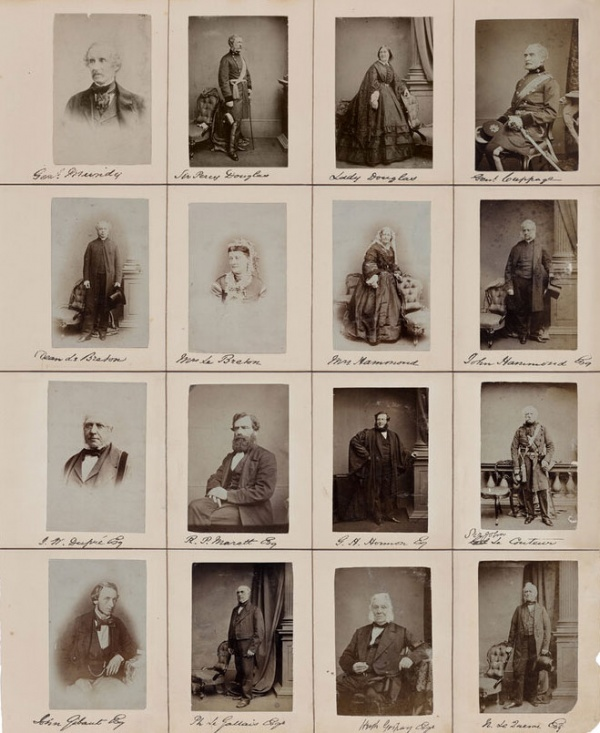
Henry Mullins started working at 230 Regent Street in London in the 1840s and moved to Jersey in July 1848, setting up a studio known as the Royal Saloon, at 7 Royal Square. Here he would photograph Jersey political elite (The Bailiff, Lt Governor, Jurats, Deputies etc), mercantile families (Robin, Janvrin, Hemery, Nicolle ect.) military officers and professional classes (advocates, bankers, clergy, doctors etc). Initially he was in partnership with a Mr Millward, about whom very little is known. By the following year he was working alone and he continued to work out of the same studio for another 26 years.
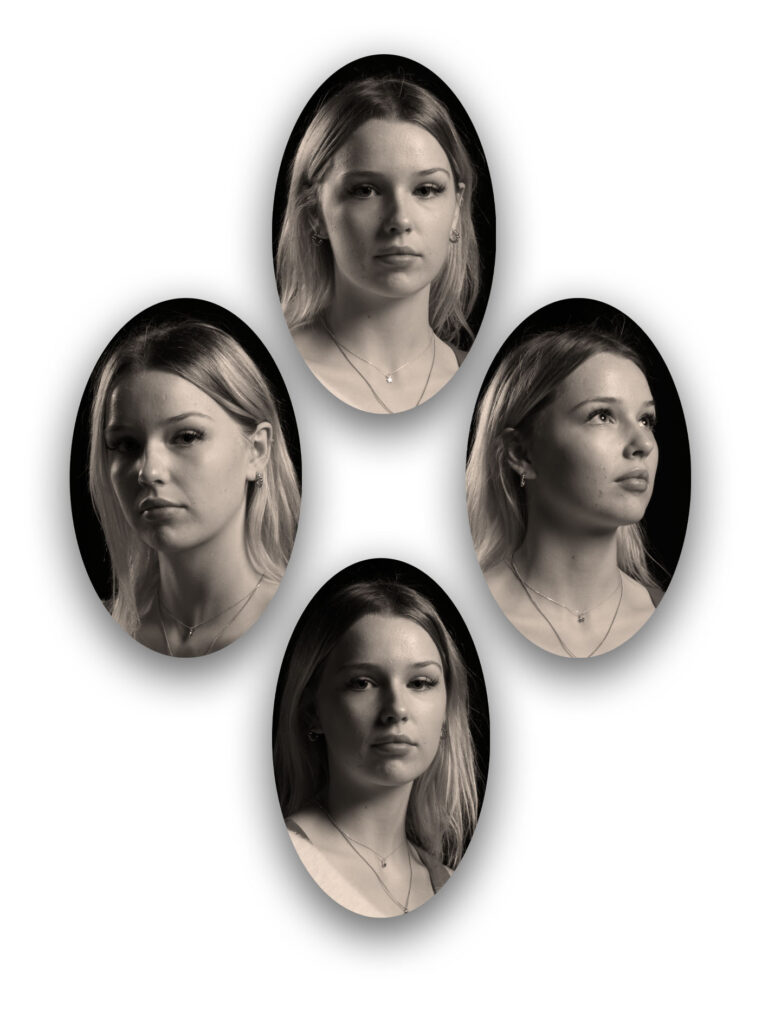
Diamond Cameo Photoshoot:
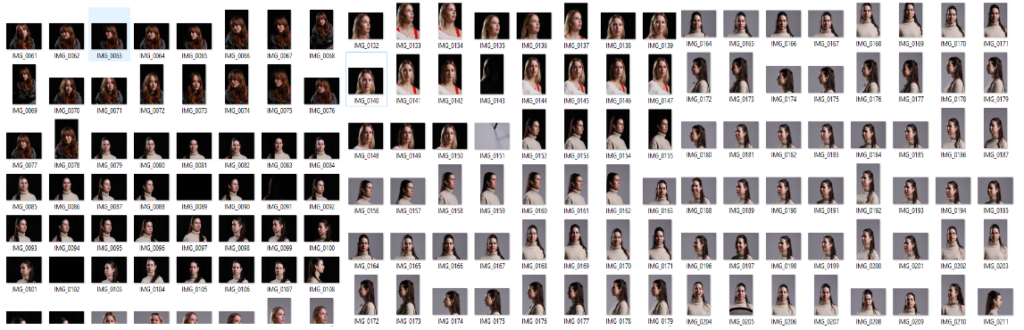
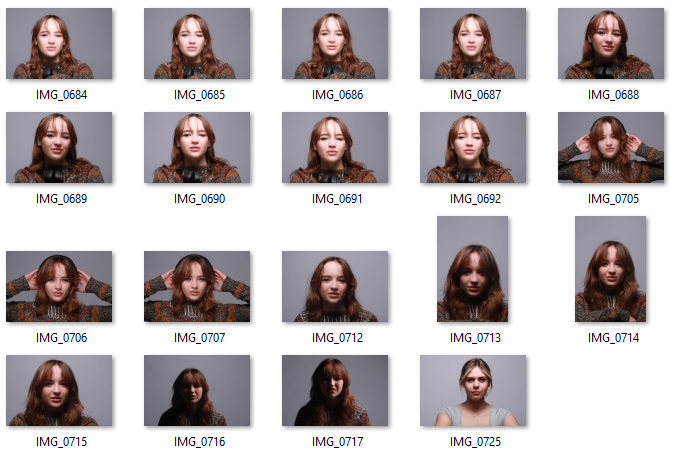
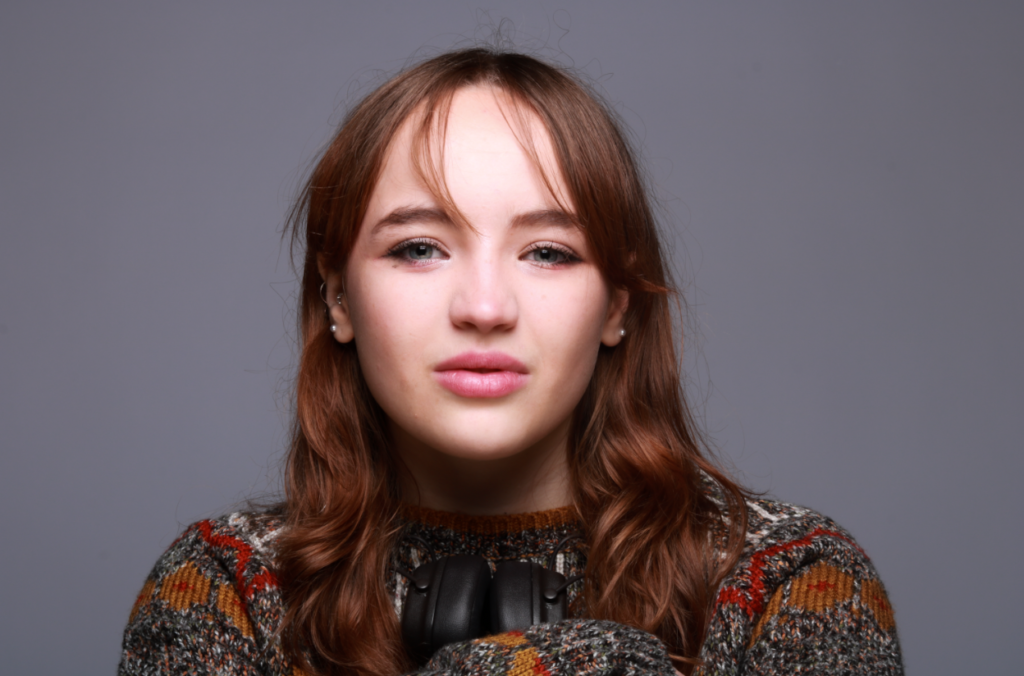
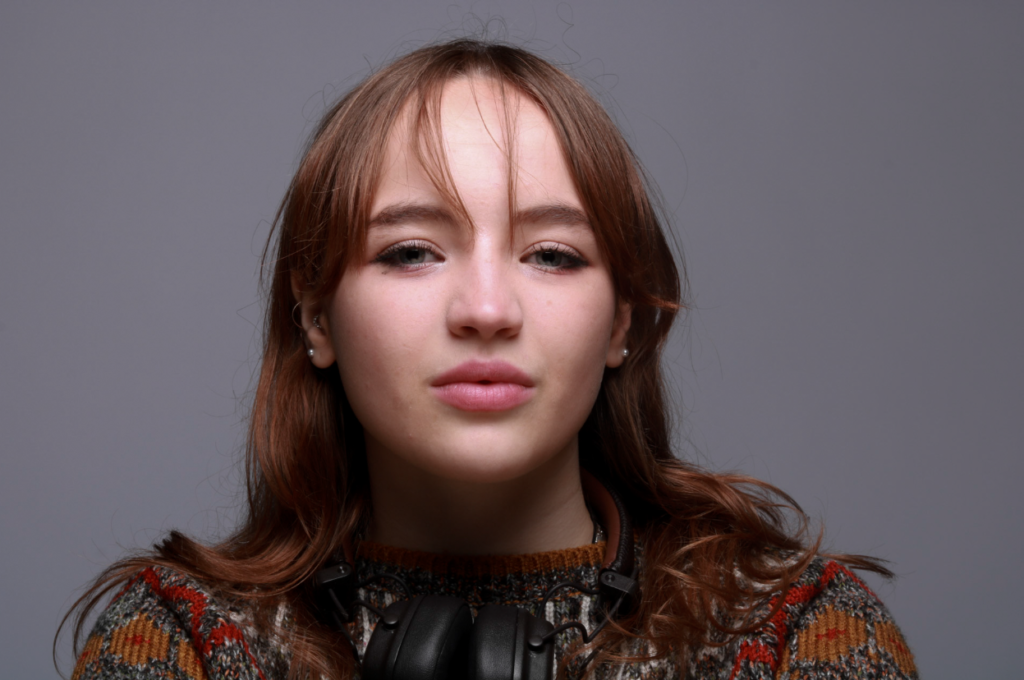
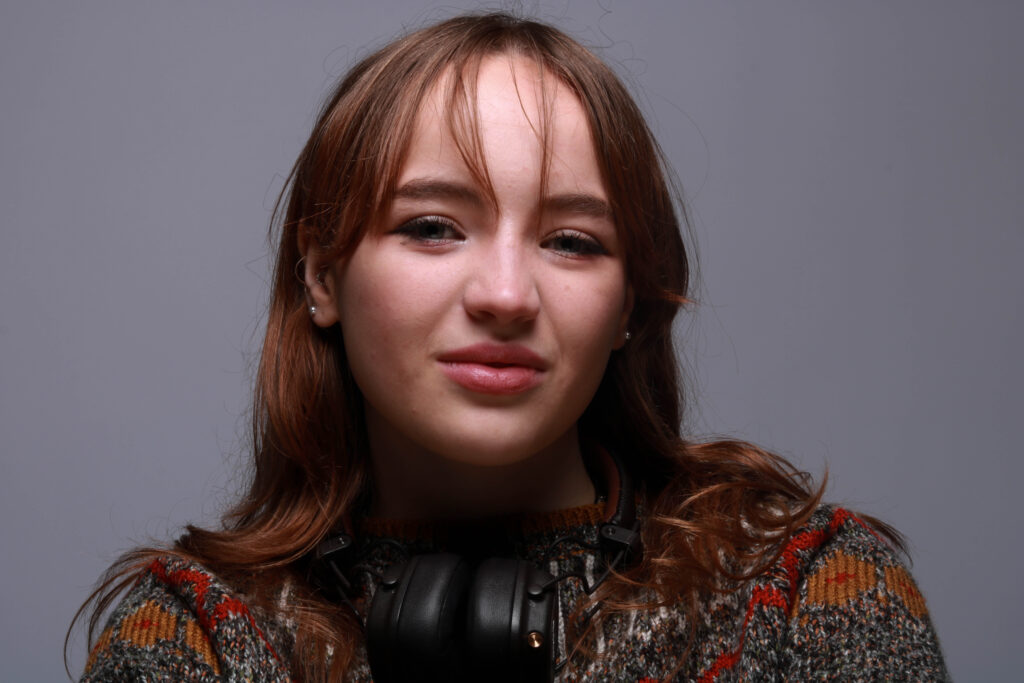
For this photoshoot, I went into the studio and took headshots of students. I ensured that I captured them from direct angles eg front on and side on so I can then use these to create a diamond cameo. I experimented with using a dark background and light background I took a variety of portrait and landscape photos.

Once I had my images, I then picked 4 that I wanted to use on my diamond cameo. I edited these on Lightroom, adjusting the exposure, composure, whites etc. I then opened a new blank page on photoshop then pressed file the open in order to pick on of the 4 images from my file. Once I had opened the image I wanted to use, I clicked on the elliptical Marquee Tool and created an oval shape around the face of the subject. I then dragged down the tab and using the select tool, dragged the cut out onto the blank page. I then used ctrl t in order to move and adjust the size of the images. I repeated these steps until I had 4 images in a diamond shape.

Finally, to finish off this first attempt, I added a drop shadow to each of the images to make them stand out compared to the white background. Here is my first attempt at creating a diamond cameo.
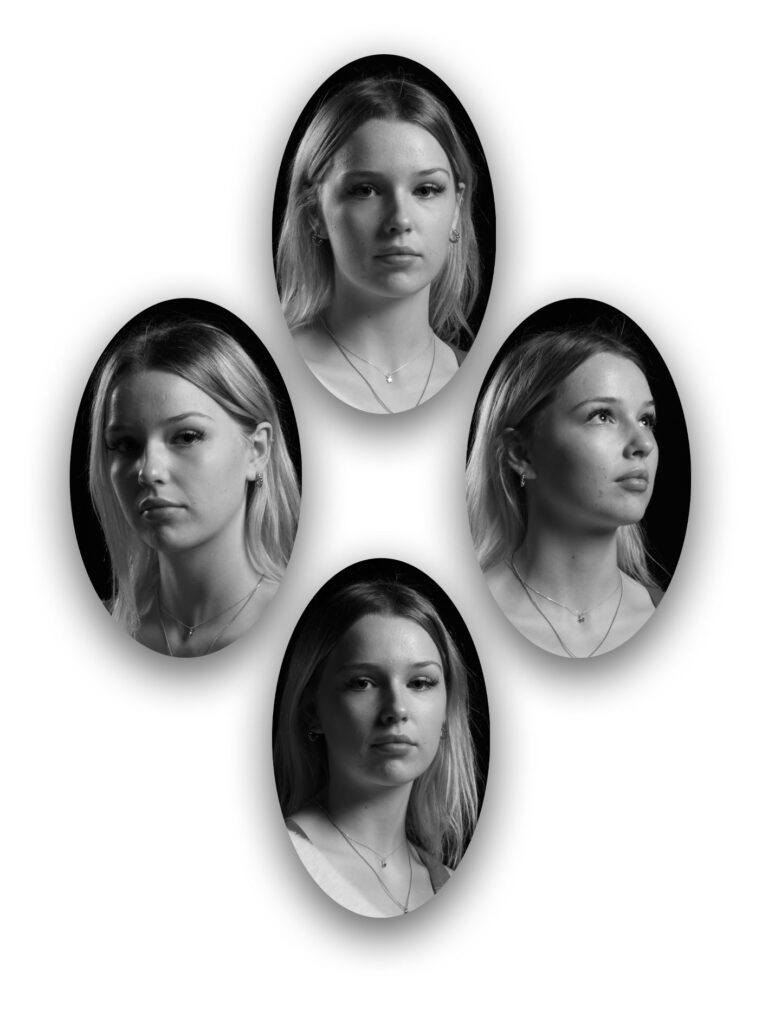
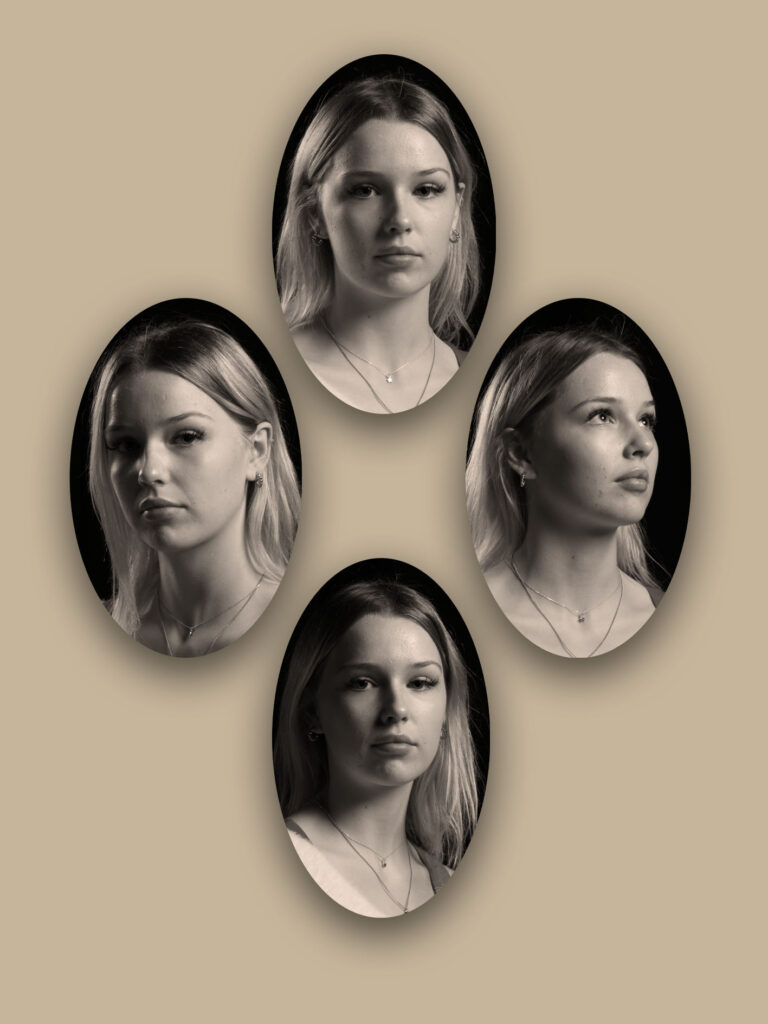
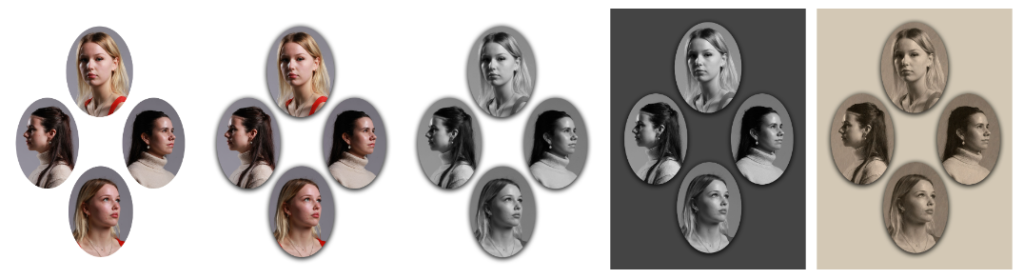
I then decided I wanted to experiment more with this first attempt and chose to make the images black and white. In order to do this, I went onto image, adjustments then pressed black and white.
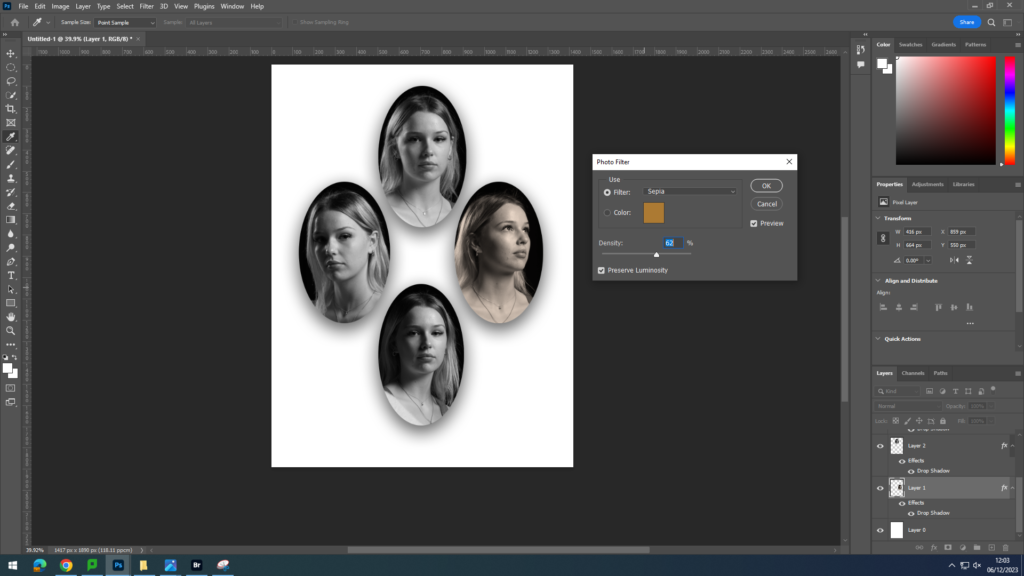
Next, I made the images have a sepia colour in order to give the impression of it being old as seen in Henry Mullins’ images. I did this by going onto image, adjustments, photo filter then chose the sepia colour and raised this to 62%.
I then decided to colour the blank background in order to make it more interesting to look at. I decided to use a beige like colour in order to match with the old theme I was going with. In order to colour the background, I used the paint bucket tool and then experimented with different colours until I was left with an image I was satisfied with.
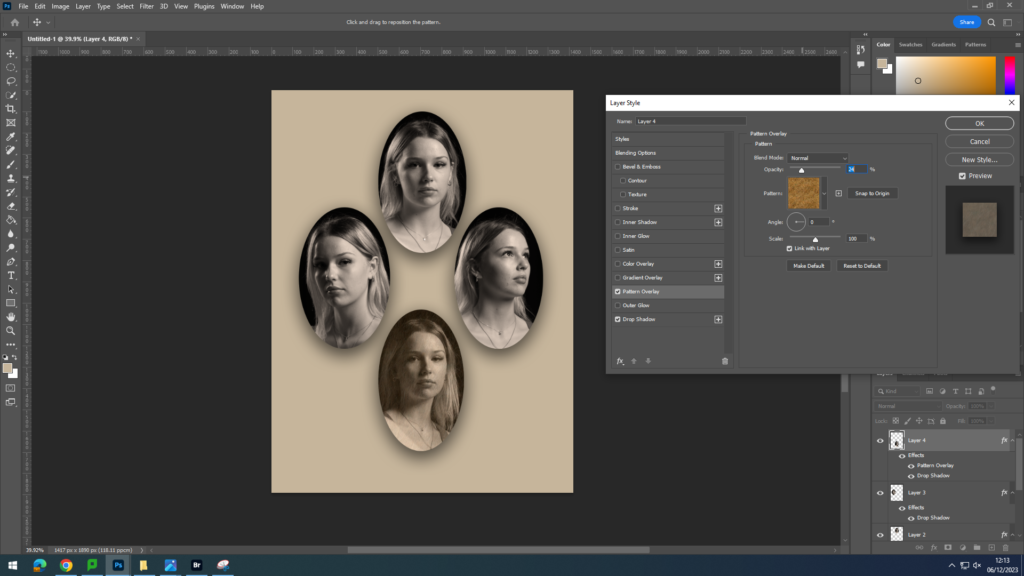
Lastly, I experimented with adding a pattern over my images. I did this by going onto each of my layers then right clicking and pressing blending options. I then went down to pattern overlay and chose a brown grassy pattern as I felt this matched the sepia tone I had previously. I then changed the opacity of it to be 24% so you can still see the person behind it. I also decided to make the background a bit less colourful as otherwise it felt too similar to the images and looked cluttered.

Overall, I like how this first attempt and my different experimentations of it came out. I feel I successfully managed to create a diamond cameo and a vintage tone as seen in Henry Mullin’s work, which is what I was trying to achieve. Next, I want to experiment with different images and a different model.
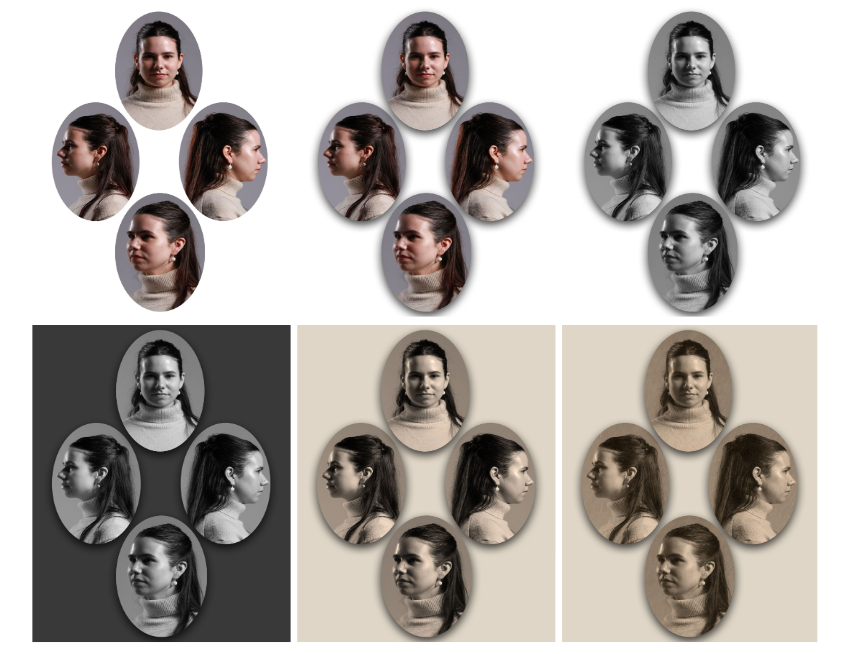
I think these diamond cameos turned out well too. However, to further my work next time I would try to add a frame to my images as I noticed that I whilst researching about diamond cameos, they sometimes had a frame around the headshots, making them look richer and helped to make the overall image look more vintage.
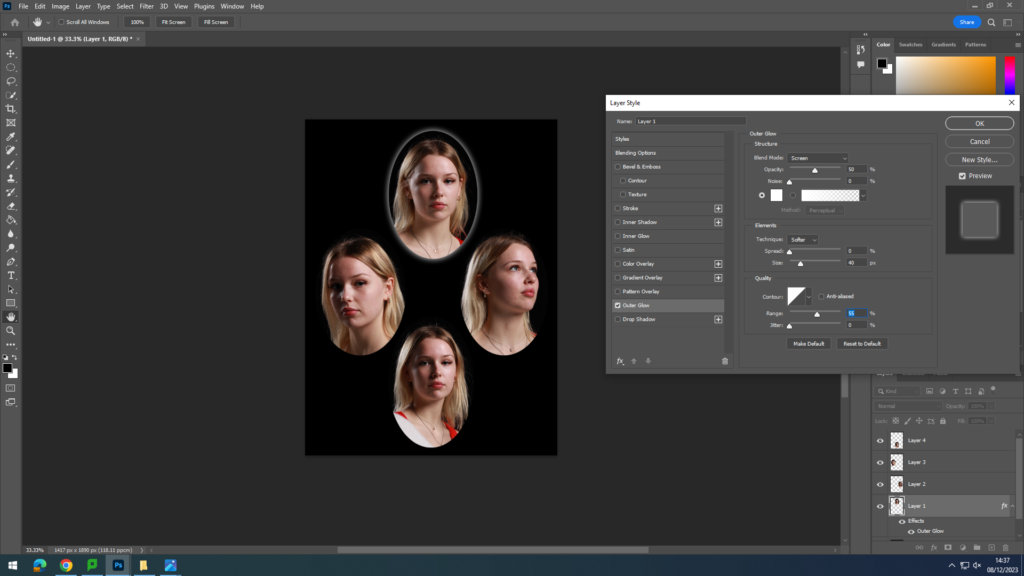
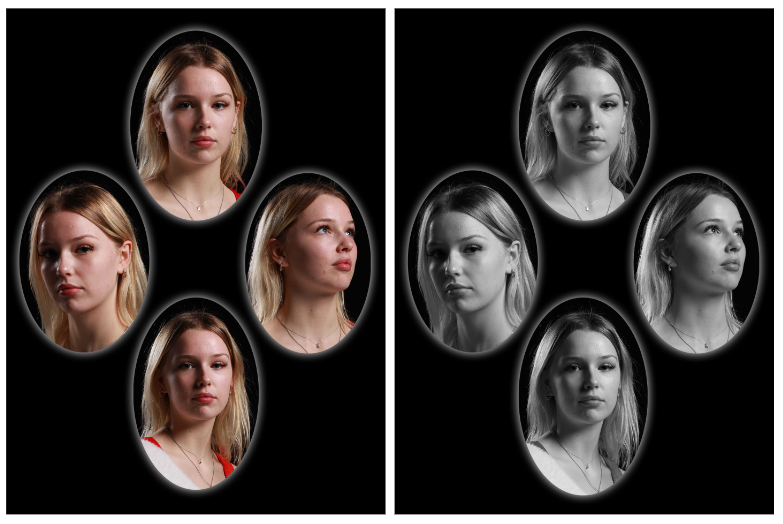
For my final diamond cameo, I decided to try something different and create a bright boarder around my images which are placed on a black piece of paper. I did this by repeating the usual steps when creating my other diamond cameos. However, once I had done these steps, I went onto each of my layers and right clicked on them. I then went onto blending options and selected outer glow. I experimented with different opacities, sizes and ranges until I found the perfect glow boarder. I made one in colour and then one in black and white.
Here I experimented with adding two different people to one diamond cameo:
During this project, I managed to experiment with a variety of different diamond cameos. For example, I tried a range of different colours, textures, people and backgrounds. These different attempts at creating different, unique diamond cameos helped me to be able to use photoshop more comfortably and make my work more interesting to look at as it isn’t just the same concept each time.

Throughout this project, I learnt about a variety of different lighting types eg Rembrandt, Butterfly and Chiaroscuro lighting and where they originated from. I also learnt how to set up each lighting type in the studio. During this process, I also became familiar with setting up the camera according to the type of picture I wanted to take eg changing the mode of the camera, the ISO, aperture etc. I think most of my photoshoots were successful and I managed to grasp the concept of each lighting technique and portray them in my work. I also like the clarity of my images and the quality which gives my images a professional look.
However, I felt that butterfly lighting was my weakest area of the 3 lighting types. This is because in my images the butterfly shadow that should be seen below the nose wasn’t as clear and defined as it could’ve been. So, if I were to do this photoshoot again, I would try placing my light source slightly higher in order to cast a bigger shadow.
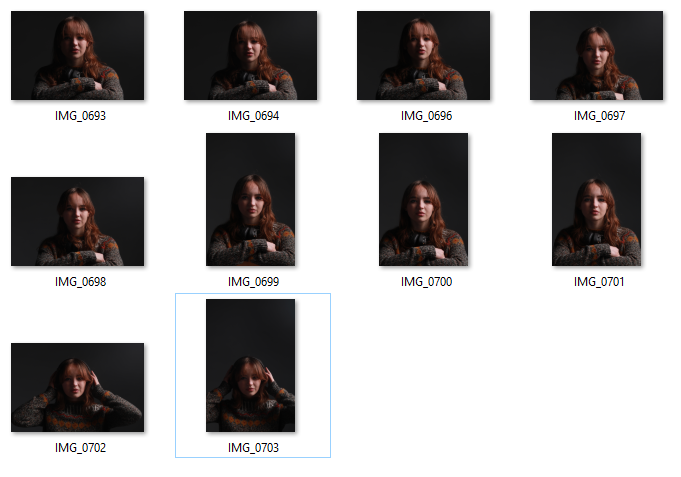
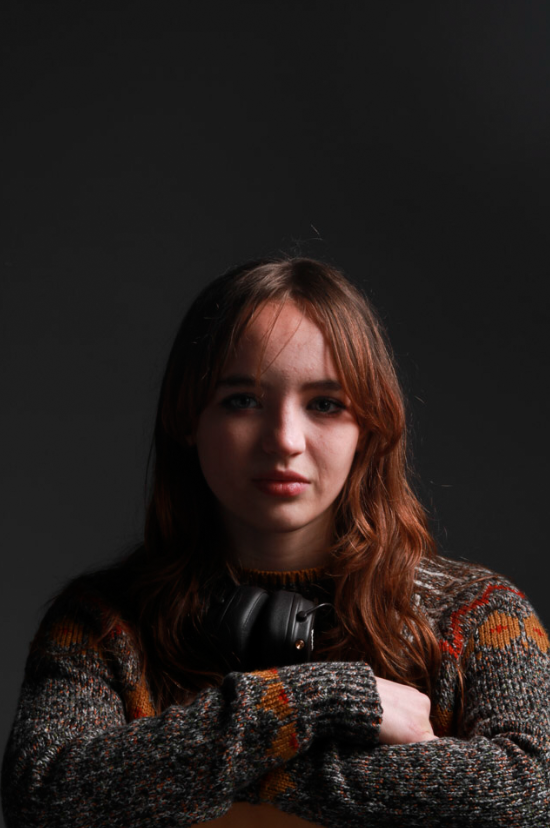
Three-point lighting is a traditional method for illuminating a subject in a scene with light sources from three distinct positions. The three types of lights are key light, fill light, and backlight. Key light is the primary and brightest light source in the three-point lighting setup.
This technique can be used to eliminate shadows cast by foreground elements onto the background, or to draw more attention to the background. It also helps to off-set the single eye nature of the camera, this means that it helps the camera give depth to the subject.
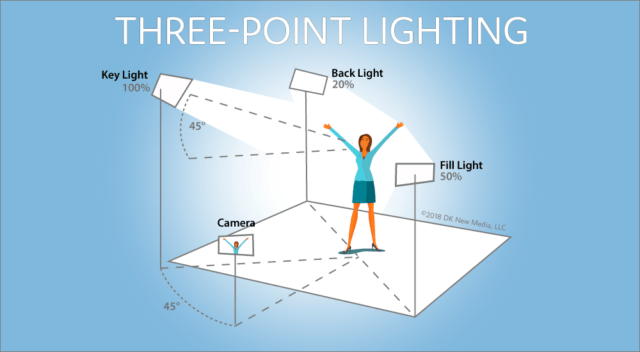
When taking 3 point lighting images, The key light should be pointed towards the subject’s face. Then position your fill light to the side of the subject at a 45-degree angle. The fill light should be 3-feet away from the subject. Finally, place your backlight behind the subject and 3-feet away.
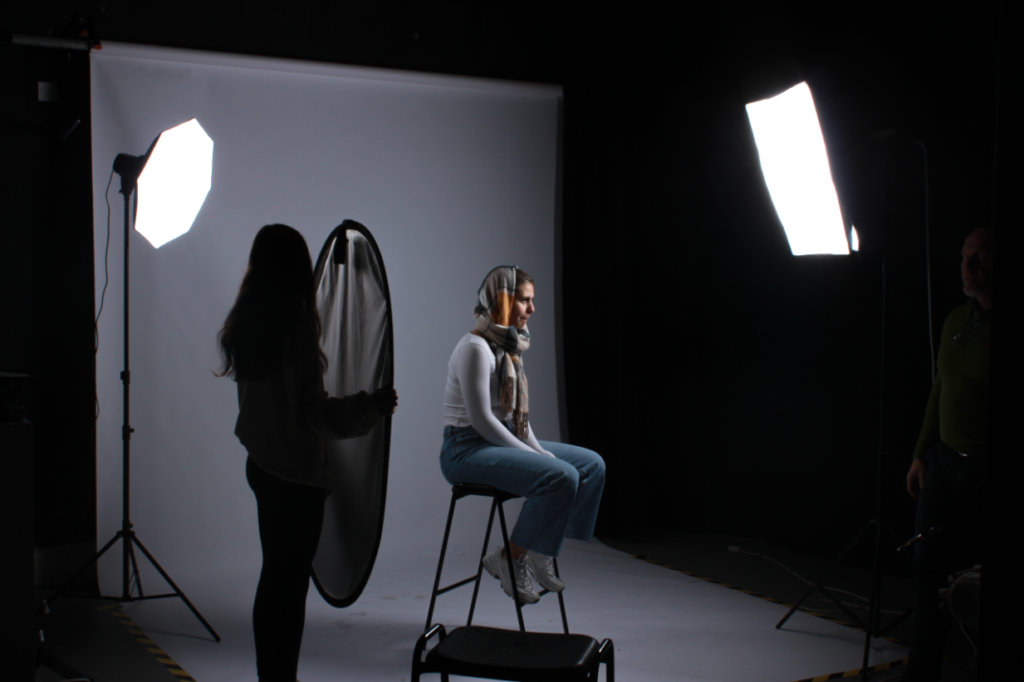
3 Point Lighting Photoshoot:
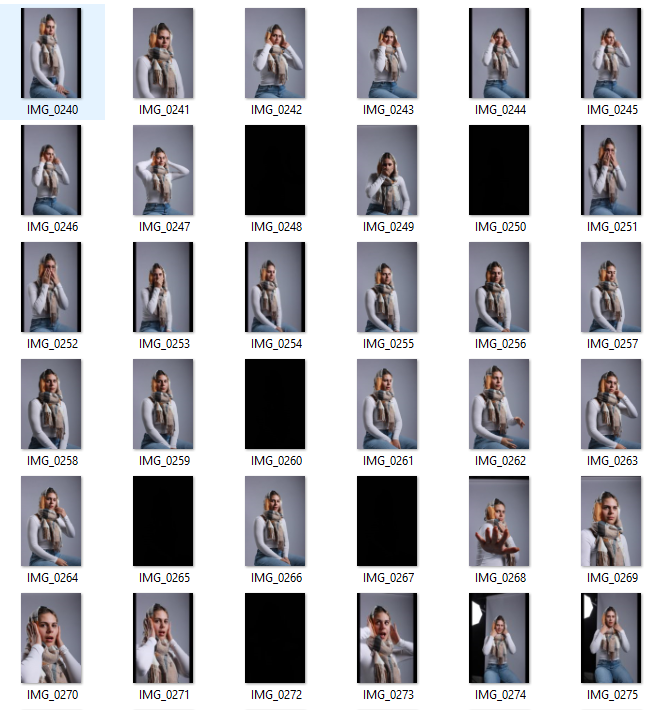
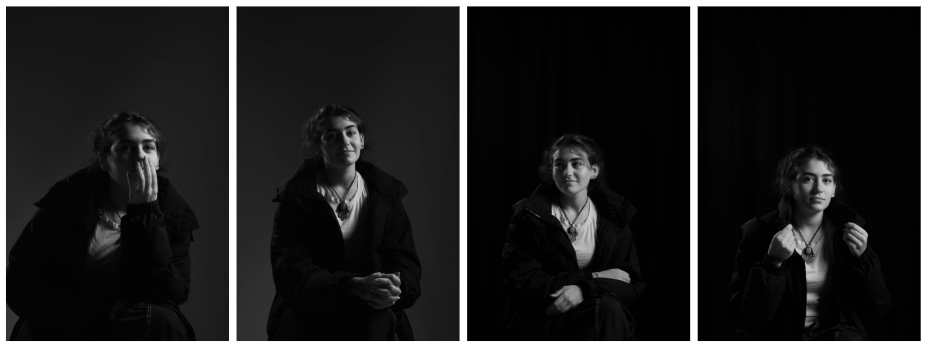
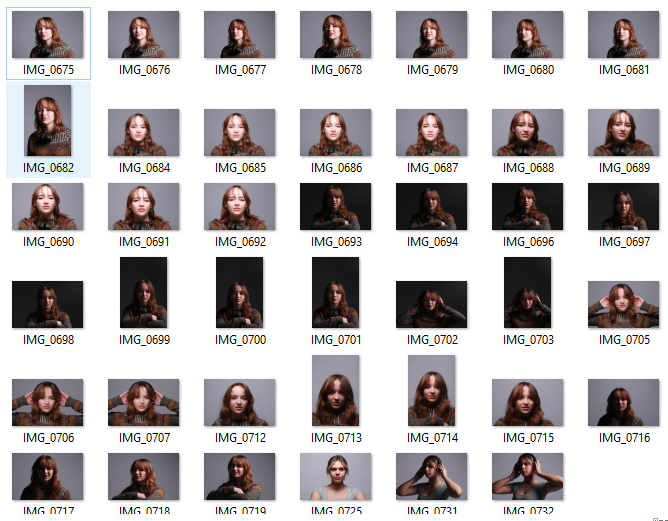
Before taking images, we had to setup the studio. We placed one light source in front of the model at an angle, another light source behind the model and then a reflector to the side of the model in which the light from the first light source could bounce off of and then hit the subject’s face from the other side. I then got the model to experiment with different hand gestures, positions and angles.
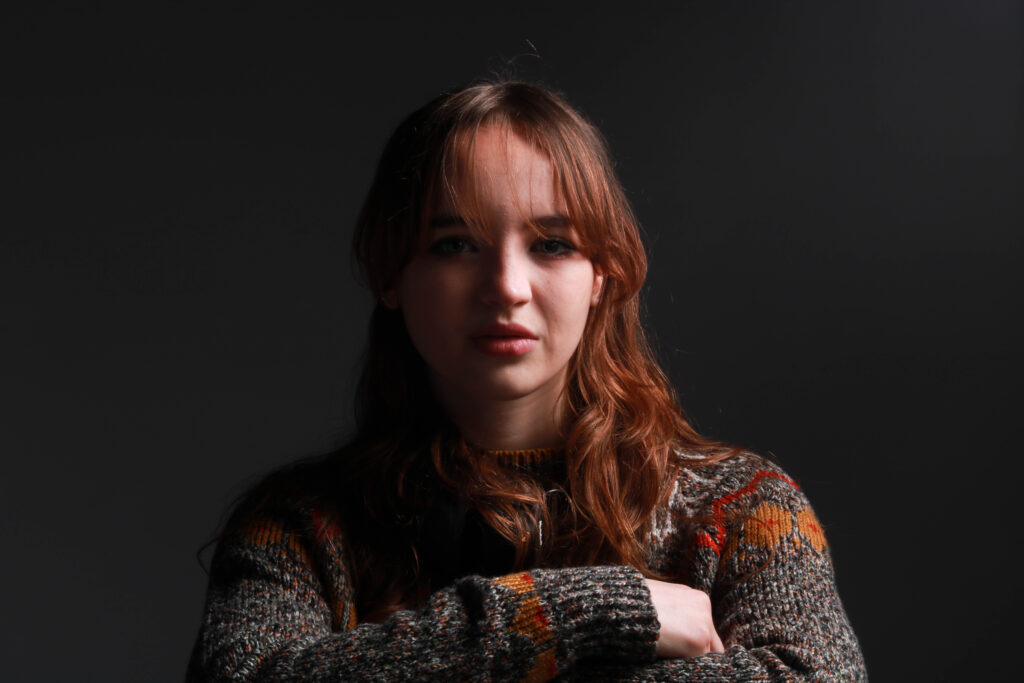
Once I had taken my images, I imported them into Lightroom. I first gave each picture either a black flag if I didn’t like it then a white flag if I did. Next, I gave all the images which I had just given a white flag to a rating out of 5 (5 being the best and 1 being the worst). Finally, I assigned a colour to each of my images: green=good, yellow=okay and red=bad. This process helped me to narrow down my images so I could display only the best ones. Once I was left with my best images, I adjusted the contrast, exposure, highlights, shadows, black and whites of them until I was left with an photo I was satisfied with.
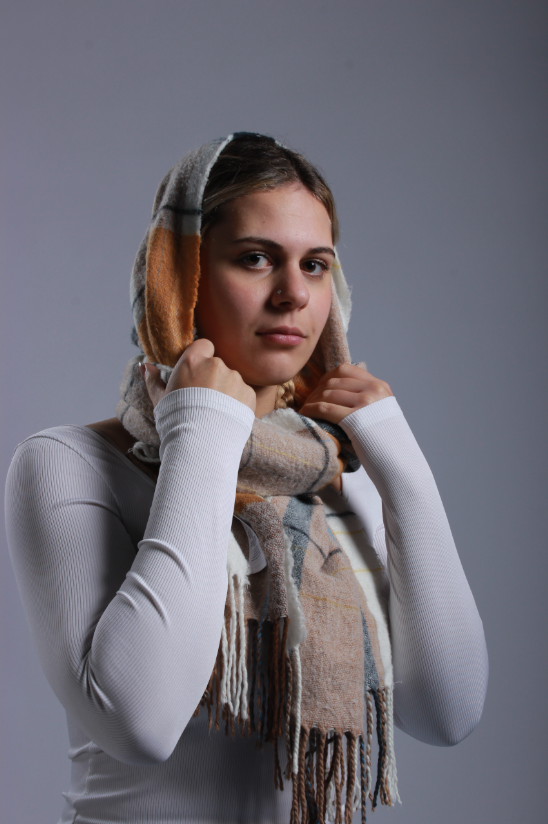

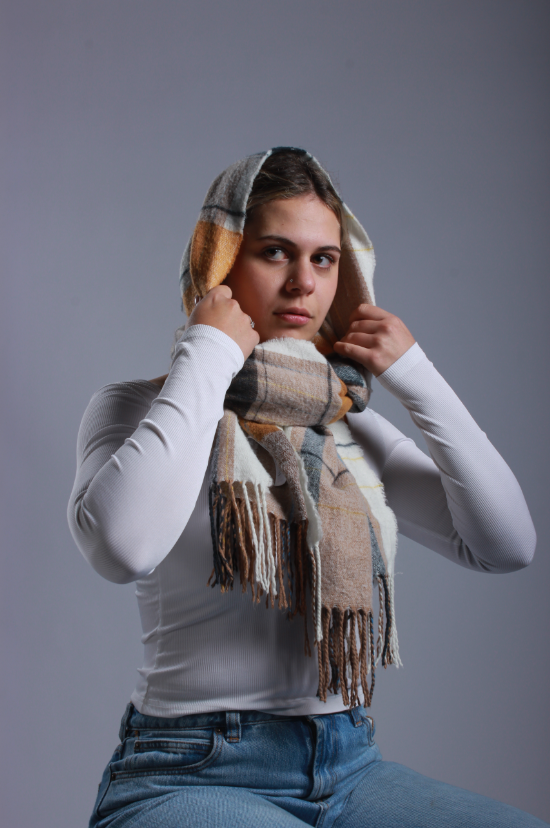

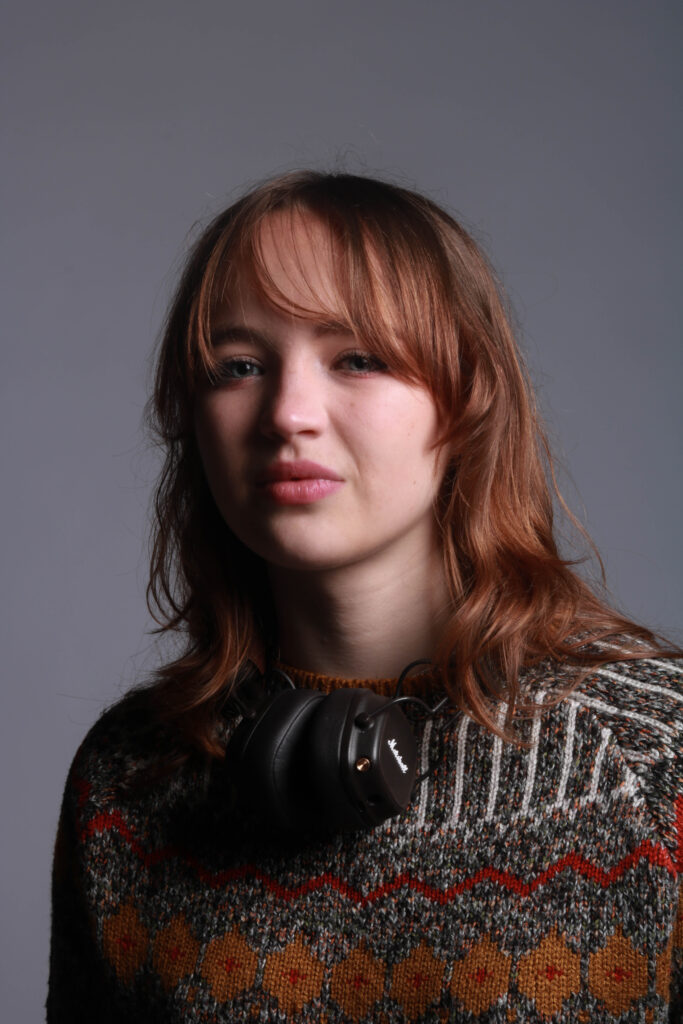
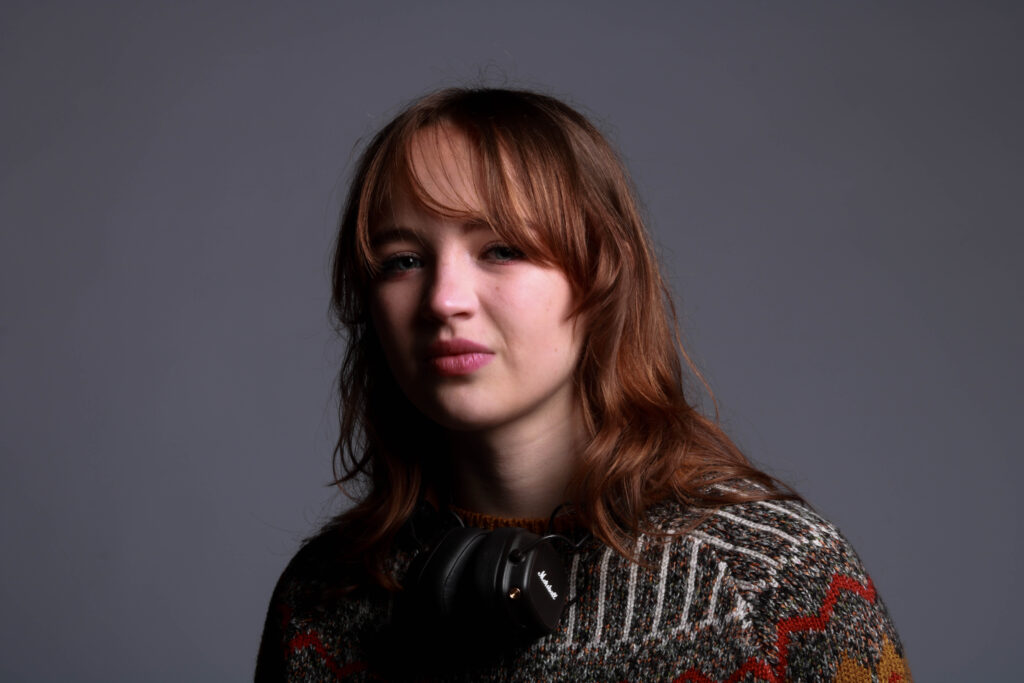
I like how this photoshoot came out due to the subject’s variety of facial expressions and use of hands which helped to make each image unique to itself. I tried to capture the model in a variety of ways. For example, some of the images are more closer up and focussed on the face whereas some of the images include her whole body. I think I successfully managed to create 3 point lighting as one of the main focusses of this lighting type is the lack of shadows seen in the images which is also seen in my work too.
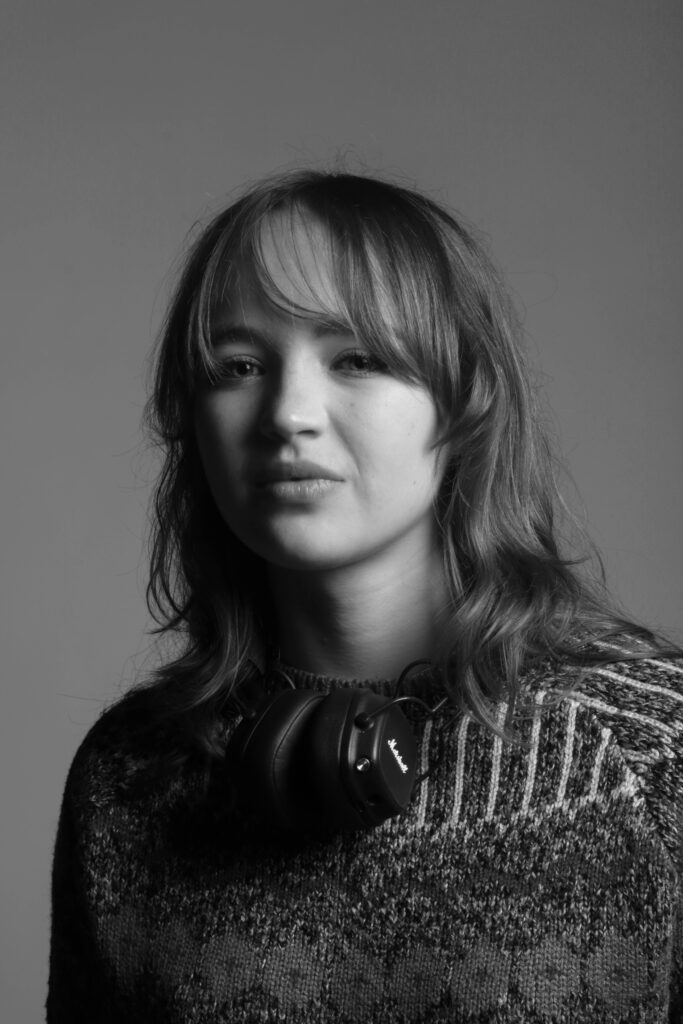
I then decided to experiment with my photos more and turned them black and white.
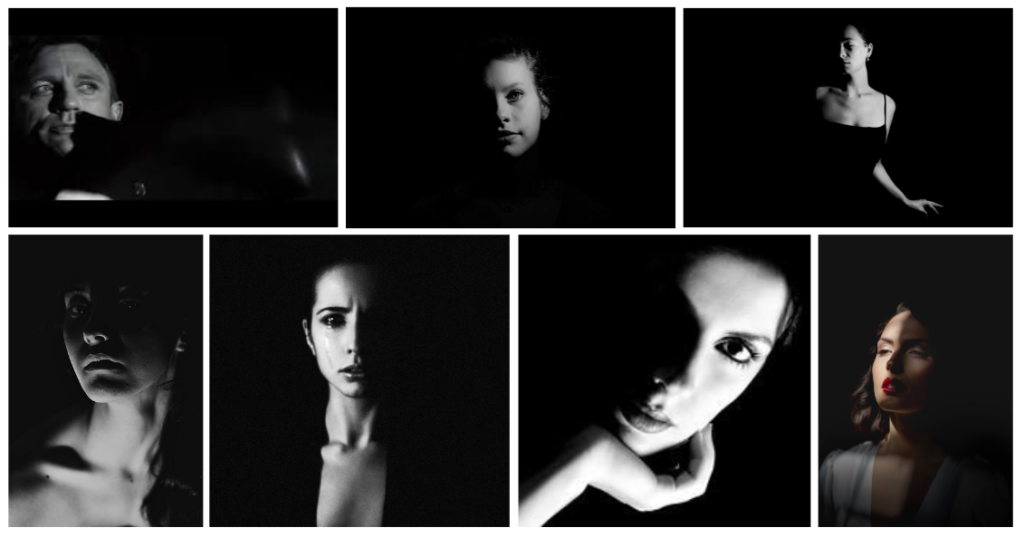
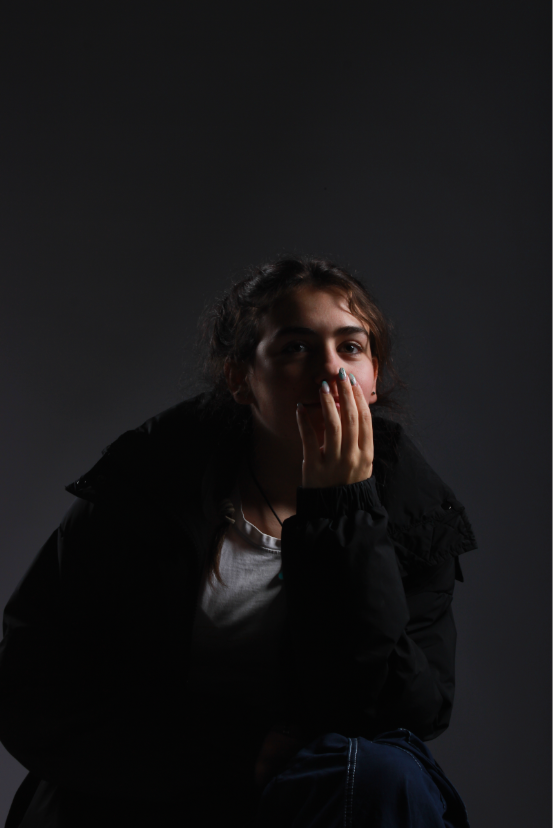
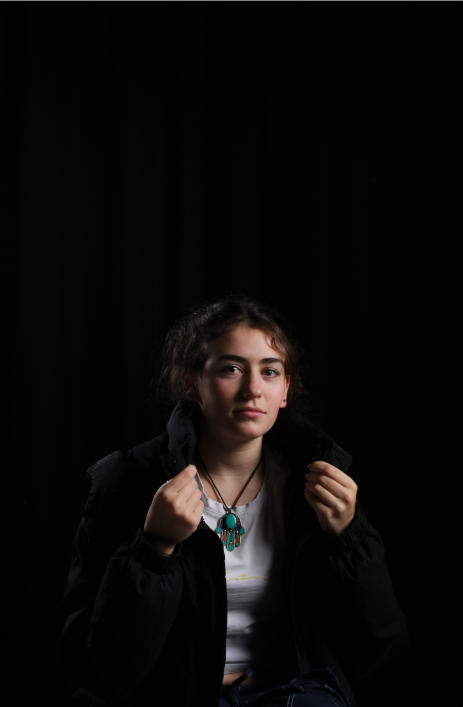
Chiaroscuro is a high-contrast lighting technique that utilises a low-key lighting setup to achieve contrast between the subject and a dark background. Chiaroscuro creates three-dimensionality on a two-dimensional plane, darkening the background and highlighting the subject in the foreground, drawing the viewer’s focus and attention.
The word chiaroscuro is Italian for light and shadow. It’s one of the classic techniques used in the works of artists like Rembrandt, da Vinci, and Caravaggio. It refers to the use of light and shadow to create the illusion of light from a specific source shining on the figures and objects in the painting.
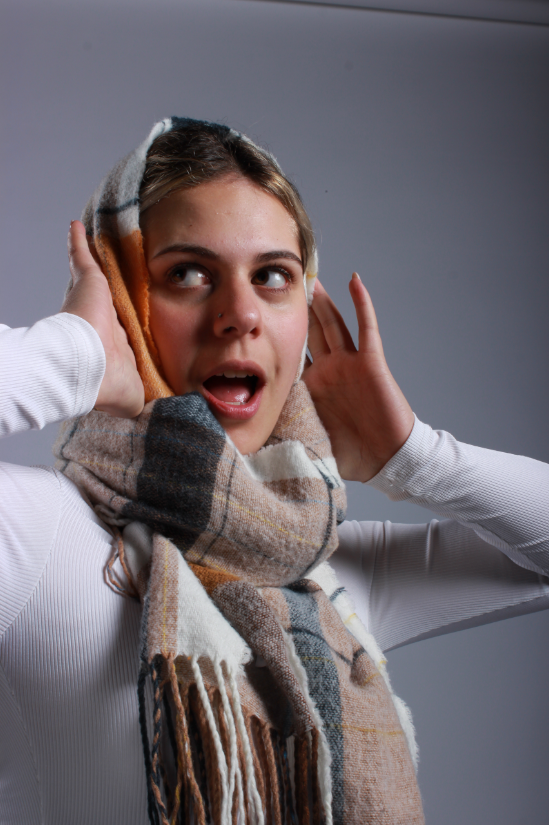
Chiaroscuro Lighting Photoshoot:
For this photoshoot, I took studio portraits using a chiaroscuro lighting setup. In order to make my background darker as seen in the majority of the images I saw, I placed the light source slightly behind the subject and then used a reflective board in order to make the light bounce back onto her face creating that triangular shape once again. I got the subject to try different poses like with her hands on her head, her hands on the back of a chair and with her side on to the camera.
I edited these images on Lightroom and adjusted the contrast, exposure etc. I then decided to make my images black and white on photoshop as when researching about chiaroscuro lighting, I noticed that the majority of the images that I looked at were black and white.
Overall, I feel this photoshoot was successful as I managed to create a dark background which contrasts with the face that is lit up. However, if I were to do this photoshoot again, I would place the light source more towards the camera in order to really enhance the contrast between light and dark.
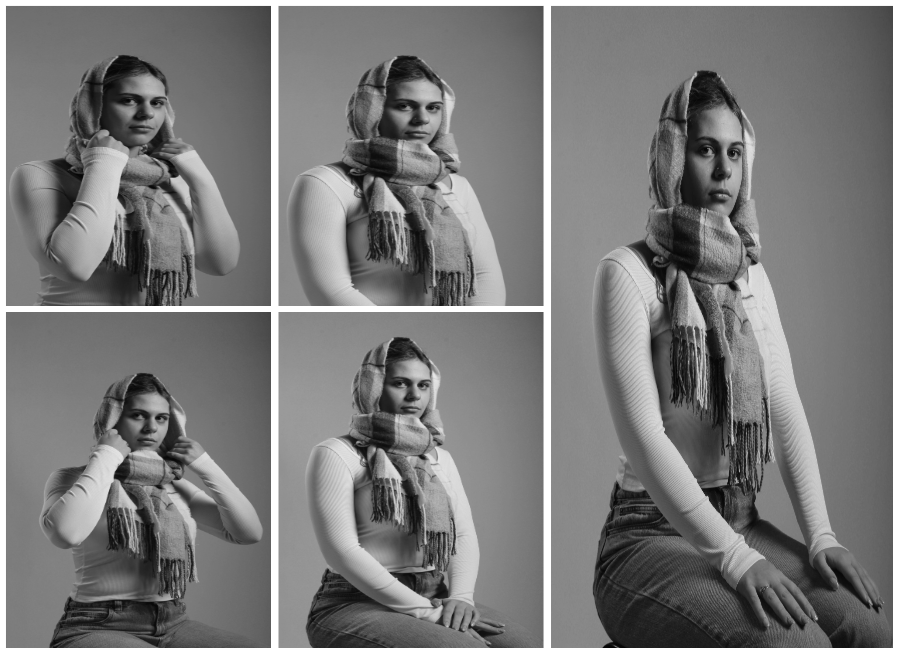
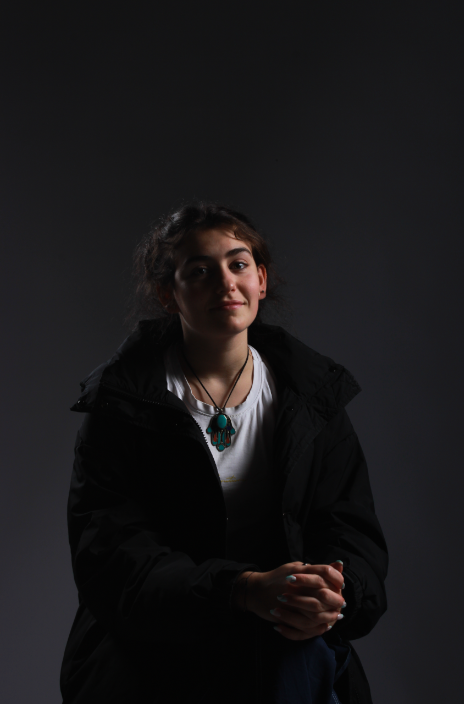
Chiaroscuro Lighting Photoshoot 2:
For my second photoshoot on Chiaroscuro lighting, I focussed on capturing more of the subject’s body in my images as in the first photoshoot I mainly focussed on the face. I think I managed to do this successfully and created a darker background as I hoped for.
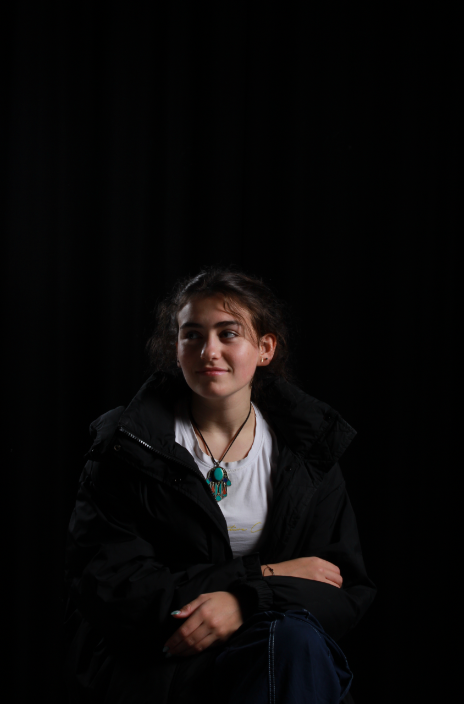
To finalise this photoshoot, I exported my edited images from Lightroom and edited them to be black and white in photoshop as this was a common theme amongst other chiaroscuro lighting portraits I had seen.
Overall, I like how this photoshoot came out as I managed to improve what I wanted to on my previous photoshoot. However, I could’ve shot my images in a portrait and landscape mode instead of just portrait in order to get more variety in my images.
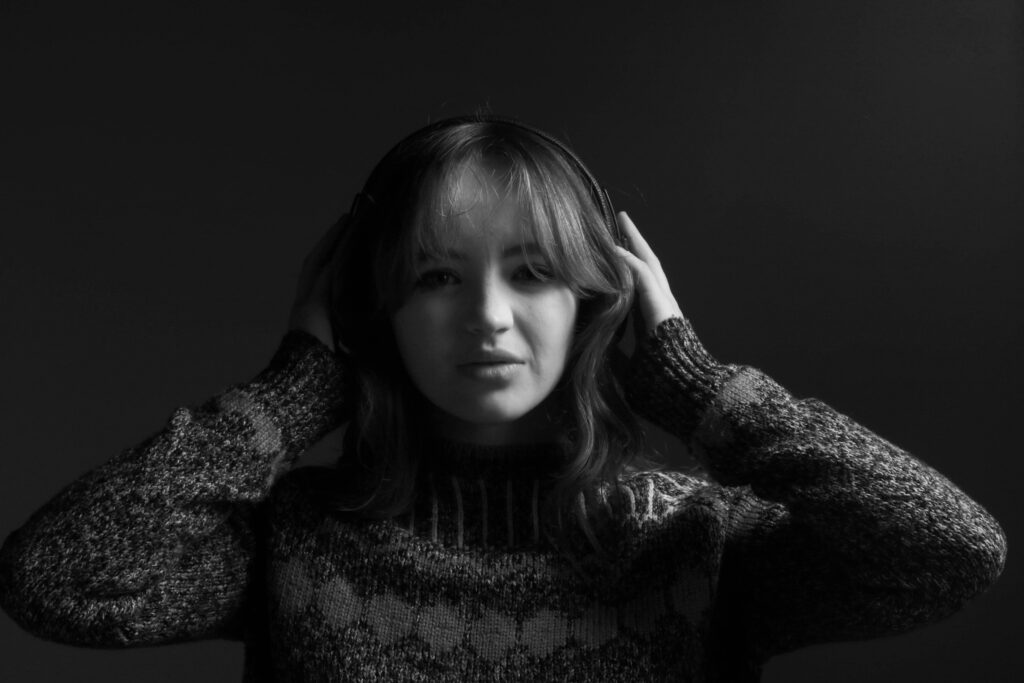
Butterfly lighting is a portrait lighting pattern where the key light is placed above and directly centred with a subject’s face. This creates a shadow under the nose that resembles a butterfly. Butterfly lighting is often used in portrait photography, especially in headshots. Butterfly lighting is commonly used to photograph famous stars from classic Hollywood.
Its main features are cheapness, versatility for almost all types of faces, and the fact that it is easy to set. The butterfly lighting creates a soft and flattering effect on the subject’s face. Another feature of butterfly lighting is it creates a slimmer look on the subject’s face due to the shadows that are created on both sides of it.
When making a Butterfly lighting setup, the light source should be placed directly above and slightly in front of the subject’s face, creating a small butterfly-shaped shadow under the nose. The technique is achieved by placing a light source at a 45-degree angle to the subject, slightly above eye level. The result is a soft and flattering effect that adds depth and dimension to the subject’s face. Butterfly lighting can also be achieved using natural lighting. In order to achieve butterfly lighting using natural light, you can position the subject facing a window or door where the light source is coming from directly above.
How to create a butterfly lighting portrait:
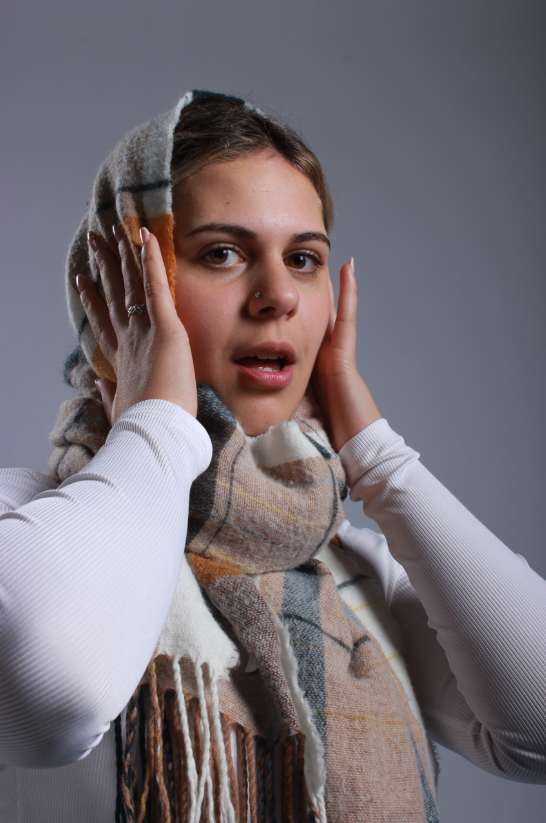
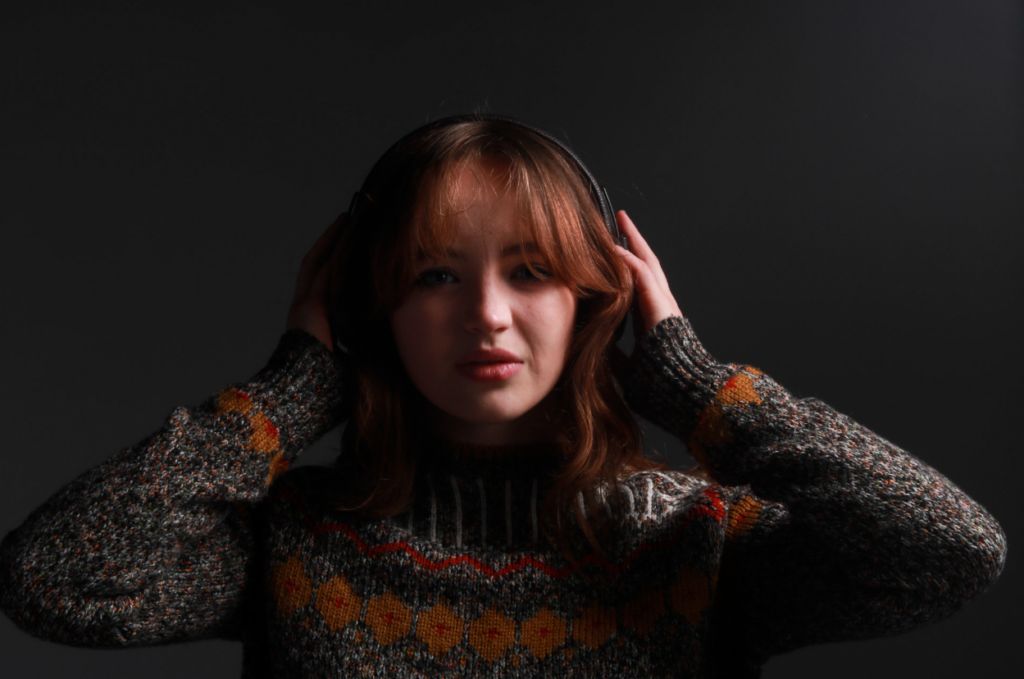
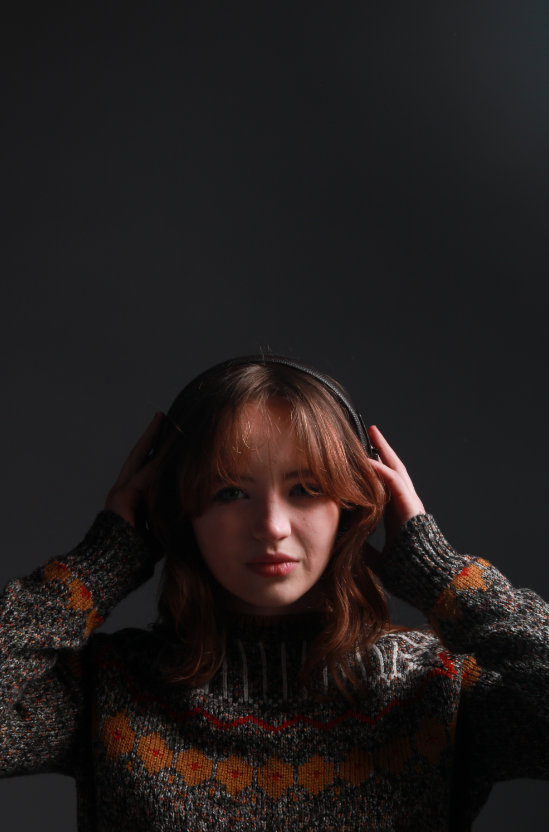
Butterfly Lighting Photoshoot:
For this photoshoot, I took studio portraits using a butterfly lighting technique. In order to achieve this type of lighting, I first placed my light source directly in front of my subject. Next, I raised up the Lightsource so that it was above the person I was photographing’s head. Finally, I got another person to hold a reflector slightly below the subject’s chin in order to reflect the light from the Lightsource back onto the face at the chin. I had to adjust the angle at which I took my photographs in order to get the most defined butterfly shape below the nose. I also got my subject to experiment with her poses as I found the straight on, hands down pictures to become quite repetitive and boring. She then put her hands up to her head in order to create a more interesting photograph.
I used Lightroom in order to edit my images. I altered and experimented with the contrast, exposure, highlights, shadows, whites and blacks of the photographs until I was left with an image I was satisfied with. Finally, to complete my photoshoot on butterfly lighting, I decided to turn my images black and white as this is what the majority of the images I saw online had.
Overall, I like how this photoshoot came out as a first attempt at trying to create butterfly lighting. I feel it helped me to become more confident using a camera and its different settings. However, if I were to do this photoshoot again, I would try and make the butterfly shadow under the subject’s nose more pronounced as I feel in some of the images it wasn’t as clear as I wanted it to be. Next time, I may try and put the Lightsource up higher in order to cast a bigger, more defined shadow under the nose.
Rembrandt lighting is a technique utilising one light and one reflector or two separate lights. It’s a popular technique because it creates images that look both dramatic yet natural. It’s predominantly characterised by a lit-up triangle underneath the subject’s eye on the less illuminated area of the face (fill side). One side of the face is lit well from the main light source while the other side of the face uses the interaction of shadows and light, also known as chiaroscuro, to create this geometric form on the face. The triangle should be no longer than the nose and no wider than the eye. This technique may be achieved subtly or very dramatically by altering the distance between subject and lights and relative strengths of main and fill lights.
Rembrandt lighting takes its name after Rembrandt Harmenszoon van Rijn, a 17th-century Dutch painter who was known for using earthy tones and golden highlights to frame the faces of his portraiture subjects. What made his painting style distinct was focusing lighting on the subject’s face and adding detail around it, tapping into an innate human attraction to the face. The Rembrandt lighting technique results in a moody and dramatic effect. This type of lighting technique often features a dark or black background behind the subject, putting the subject front and centre.
Rembrandt lighting technique is considered one of the go-to photography lighting setups because it produces a dramatic visual effect without requiring a lot of setup. A more sophisticated version of this setup includes a reflector, which brings detail back into the shadows on the subject’s face, but even this setup requires minimal tools and associated costs.
For the single light method you will need:
At its most basic, Rembrandt lighting consists of a single light source placed on a 45 degree offset from the subject, about 5 feet away. Positioned roughly two feet higher than eye level, the light source is angled slightly downward and hits the side of the face that is farthest away from the camera.
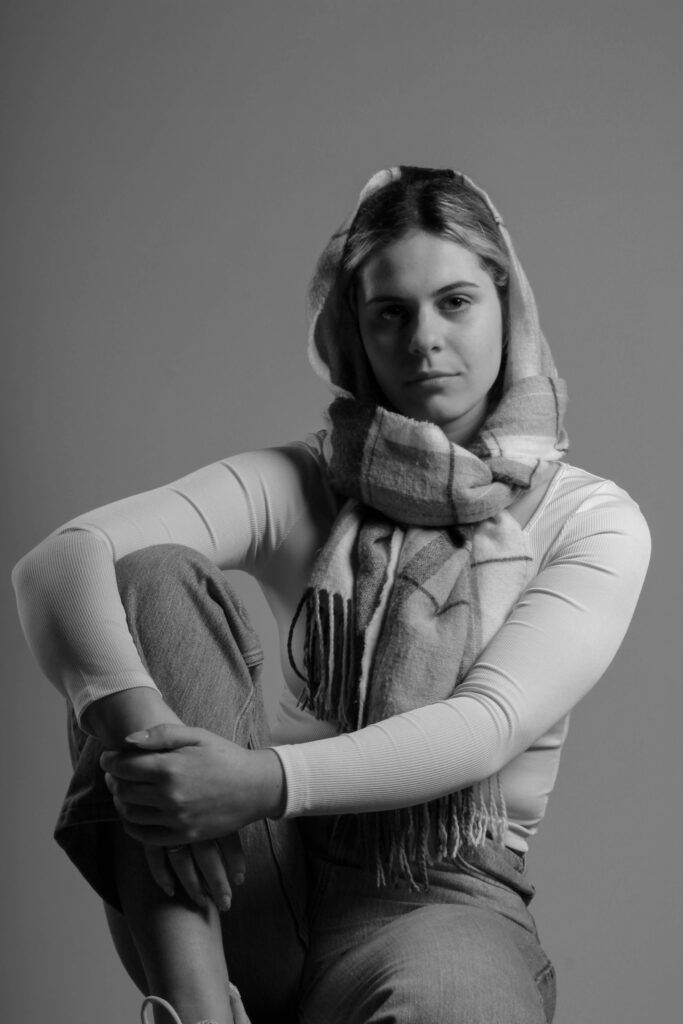
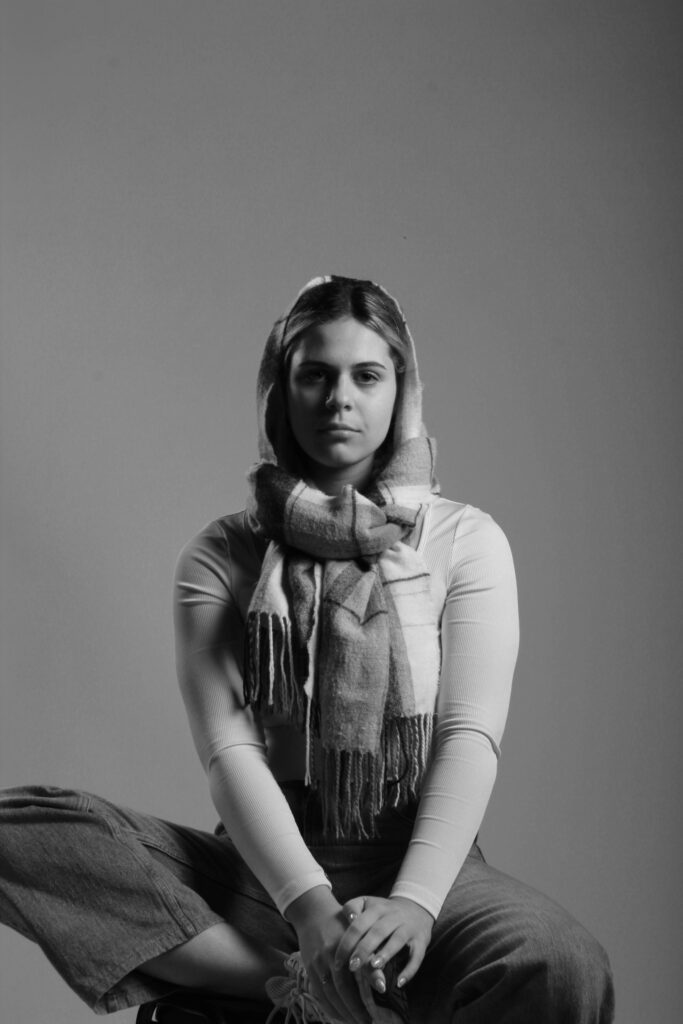
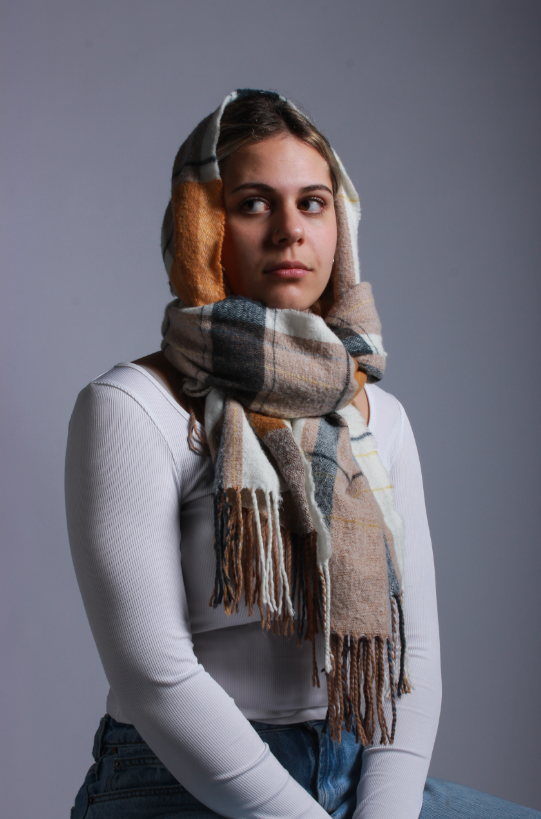
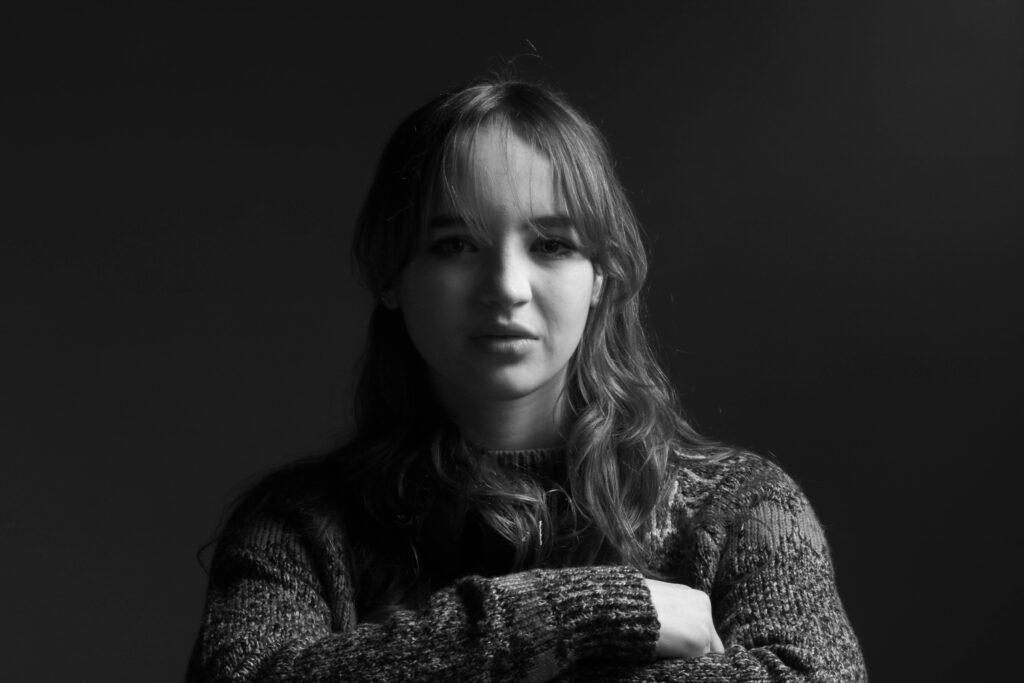
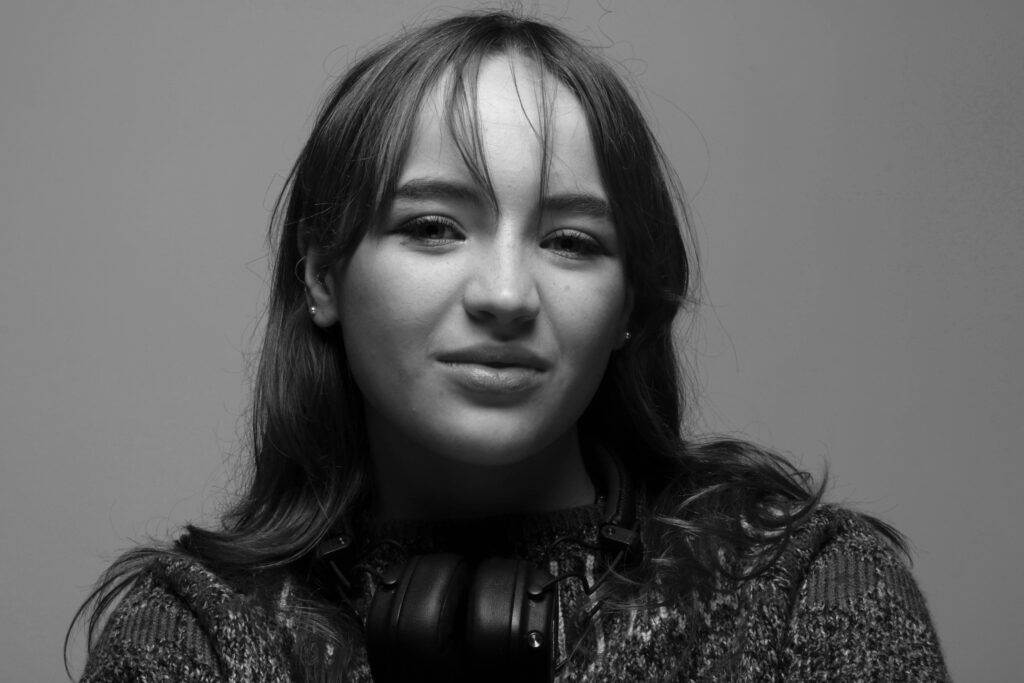
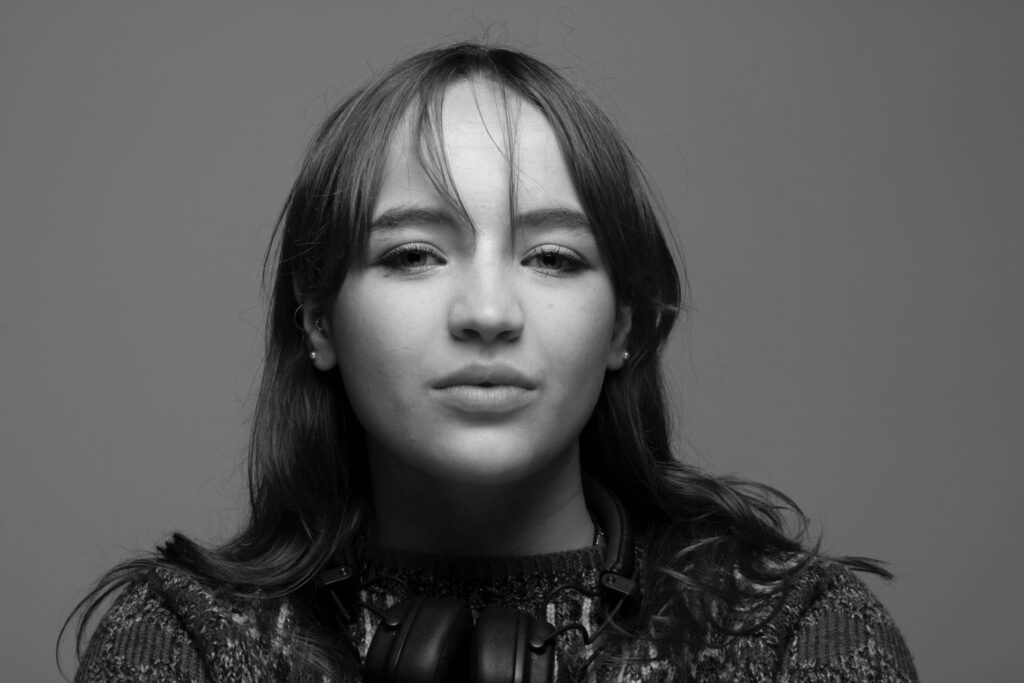
Rembrandt Lighting Photoshoot:
For this photoshoot, I took studio portraits using a Rembrandt lighting technique. In order to achieve this look, I placed my light source on a 45 degree offset from my subject (approximately). I then experimented with different distances and angles in order to get the most defined triangular shape I could possibly get. I had multiple attempts at this until I was satisfied with the final outcome.
Overall, I like how these images came out as I think I successfully managed to create a triangular shape on the majority of my images which is what I was trying to achieve. Additionally, I like the negative space in the background of my images which helps to draw the attention to the subject only. However, if I were to do this photoshoot again, I would try to get a more defined triangle shape and use Lightroom to enhance it even more. Additionally, to improve my final outcomes, I would make some of my images black and white as seen in traditional studio portrait photography.
Response to evaluation:

I decided to edit my images on photoshop in order to make them black and white as this was a common theme amongst the other images I saw online. I think I did this successfully and my final images came out similar to those seen on the internet. The black and white also helped to define my triangular shape created from the lighting setup as you can see the comparison more clearly and your attention is immediately drawn to the brighter side of the face rather than the different colours seen on her sweater etc.
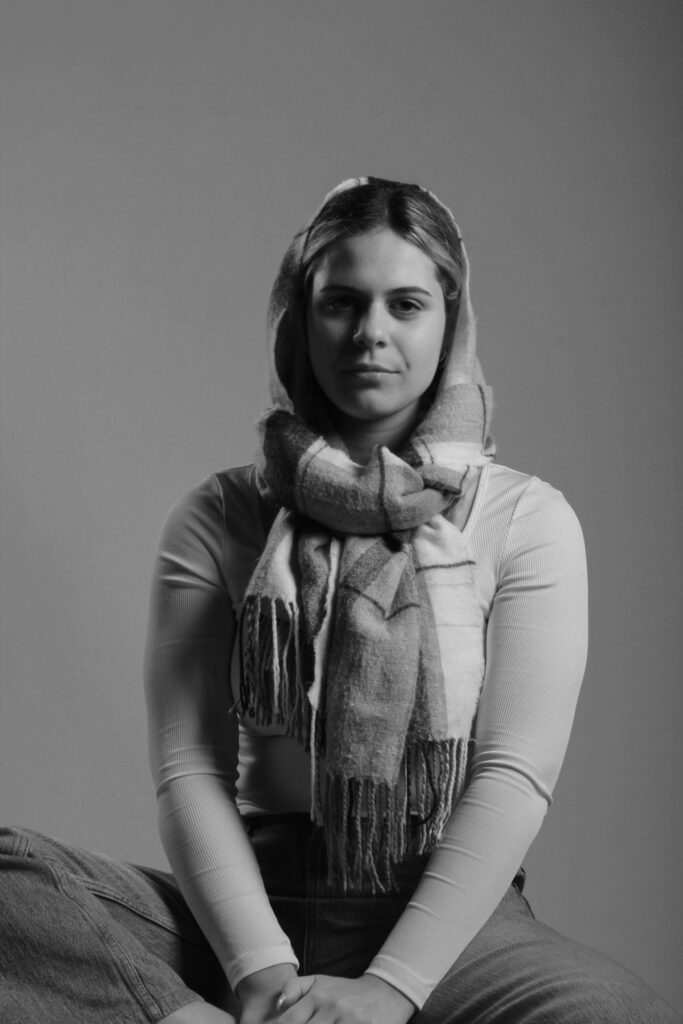
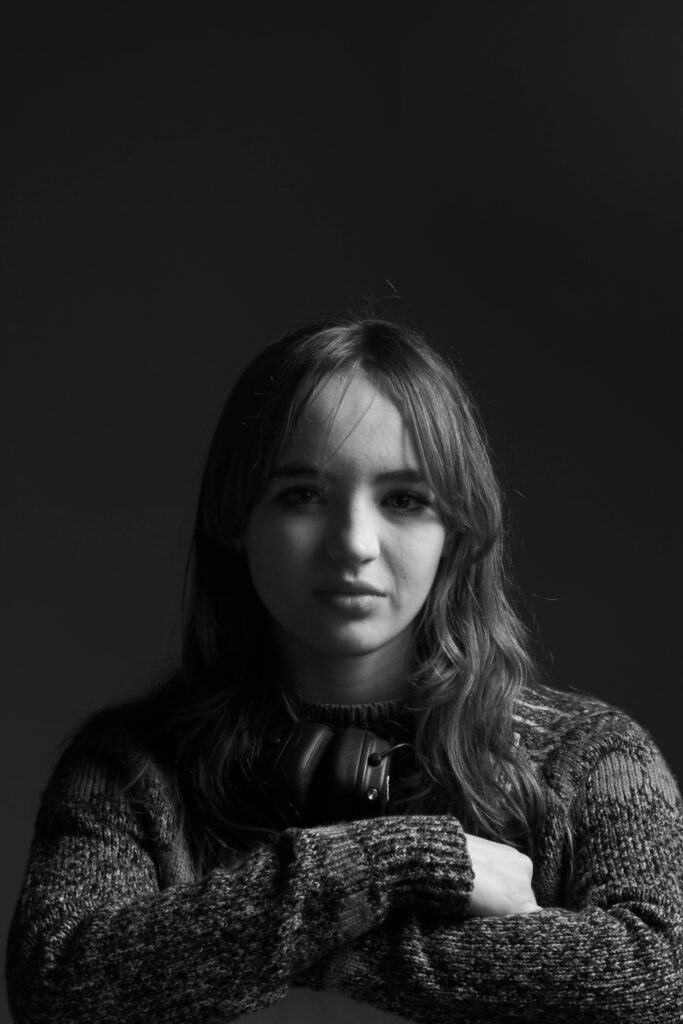
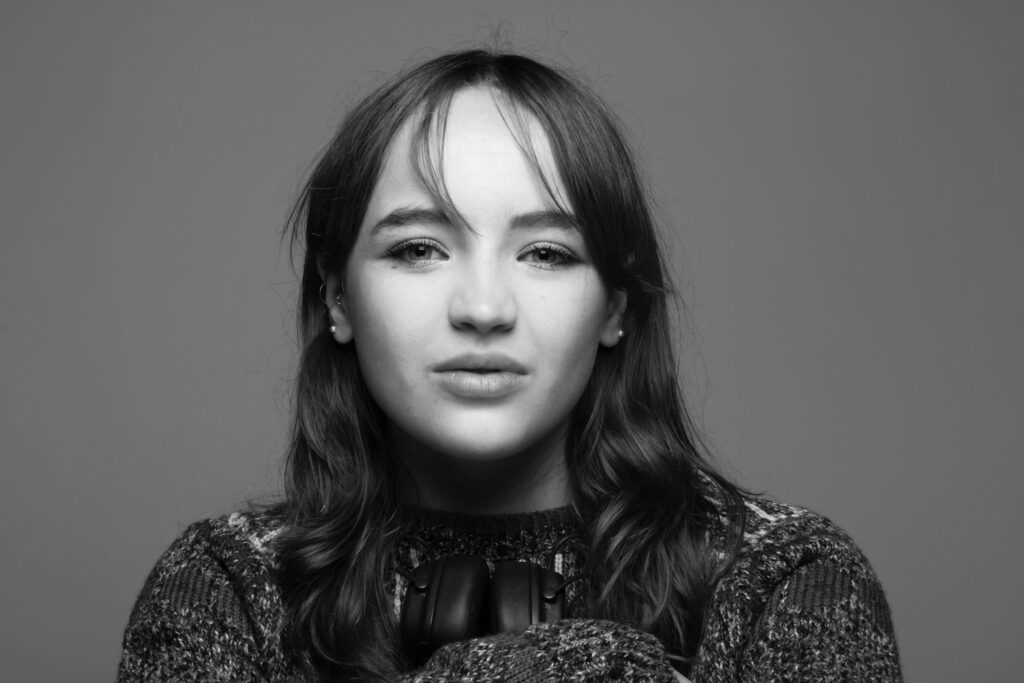
Rembrandt Lighting Photoshoot 2:

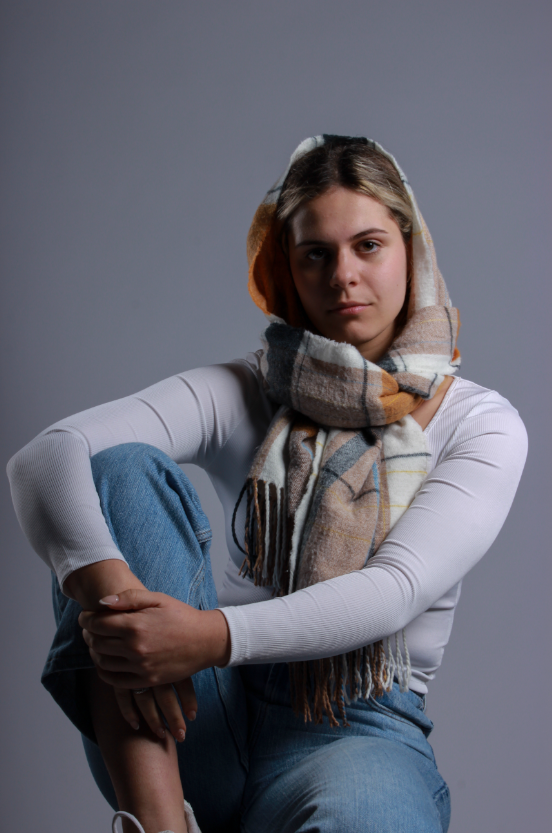
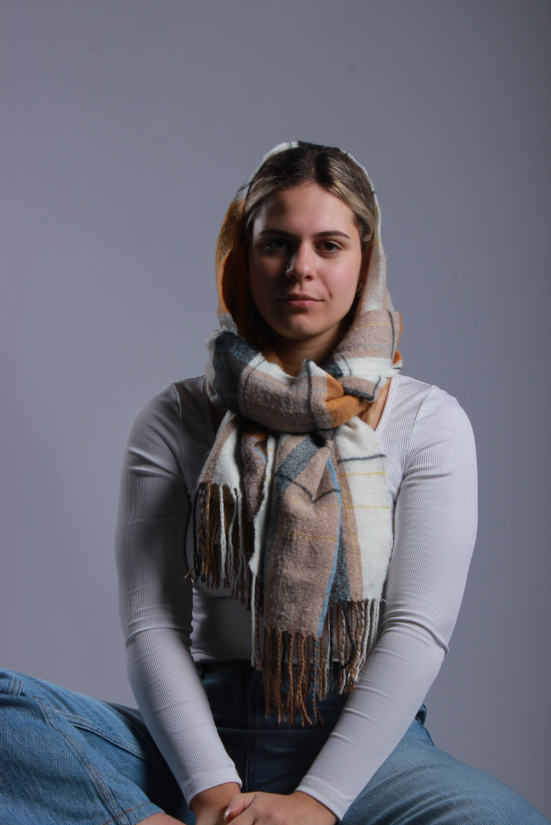
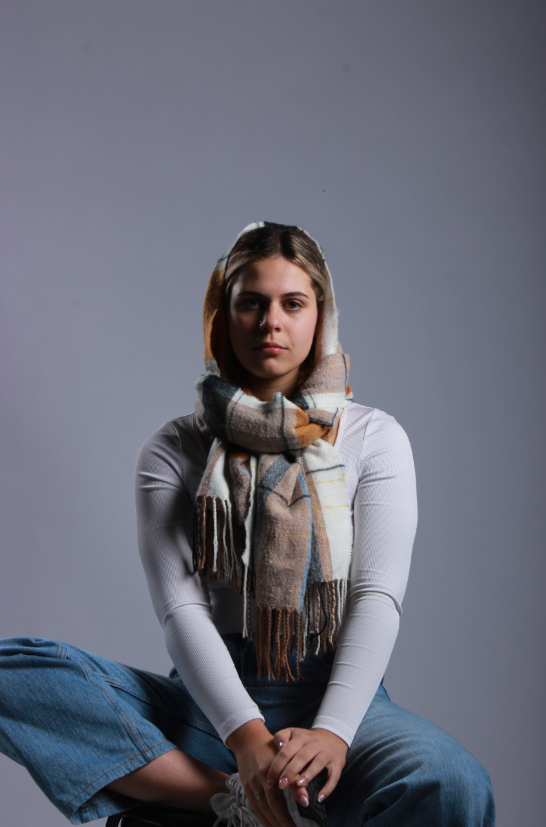
For my second attempt at creating Rembrandt lighting, I decided to include more of my subjects body in it as the first set of photos only had their face/ upper body. I think these photos came out well as they are of good quality and you can see the triangular shape on the subject’s face, which is the main focal point in a Rembrandt lighting photograph. However, an improvement that I would make to this photoshoot is I would turn the subject on her side slightly in order to enhance the triangle shape seen on her face. Additionally, I would get her to experiment with her hands more and maybe place them on her face etc. Finally, to finish this photoshoot, I decided to edit my photos and make them black and white on photoshop.