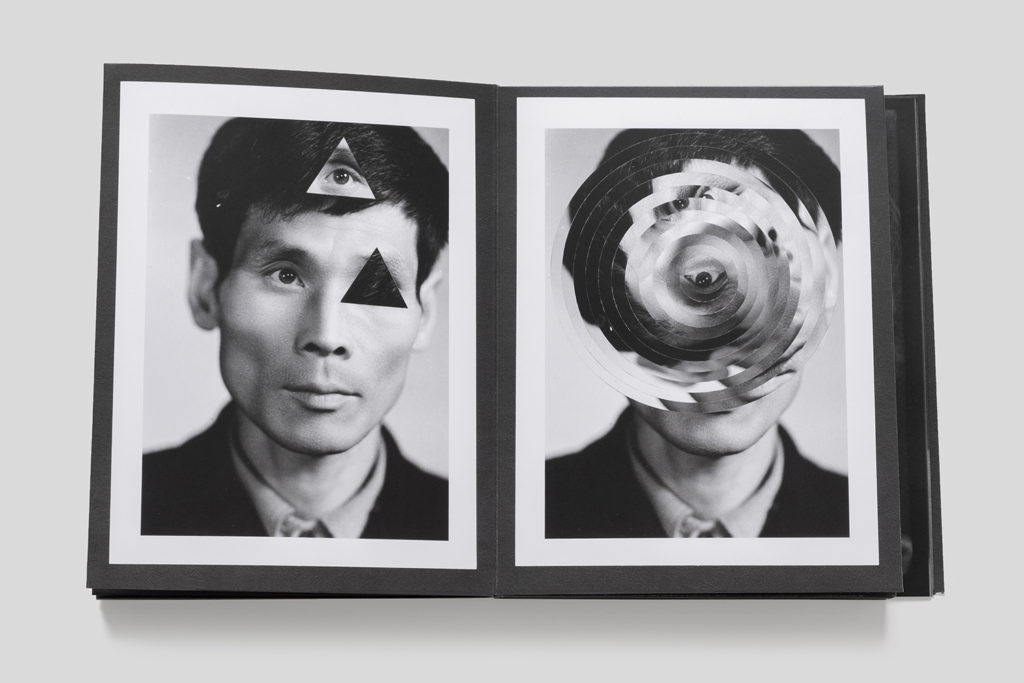
Photomontage is an artistic practice that has endured almost since the birth of photography itself. At its most basic level, the photomontage is a single image combined of two or more images. Photomontage is the process and the result of making a composite photograph by cutting, gluing, rearranging and overlapping two or more photographs into a new image. Sometimes the resulting composite image is photographed so that the final image may appear as a seamless physical print. Its a montage constructed from photographic images and uses the technique of constructing a photomontage.
My response:
Why is photomontage important?
It was first used as a technique by the Dadaists in 1915 in their protests against the First World War. It was later adopted by the surrealists who exploited the possibilities photomontage offered by using free association to bring together widely disparate images, to reflect the workings of the unconscious mind.
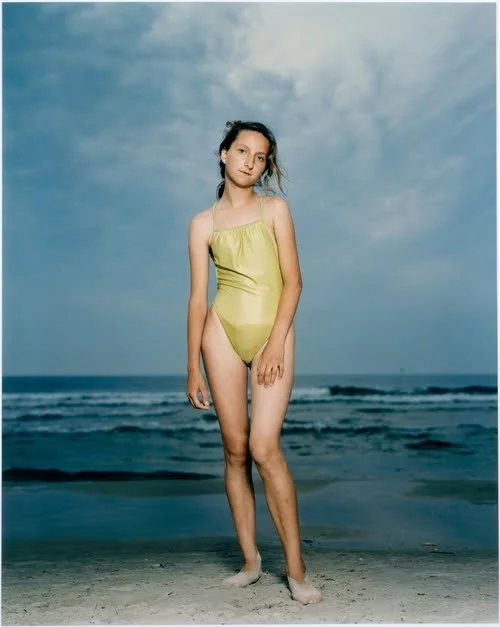
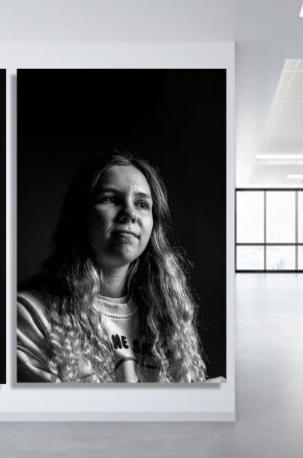
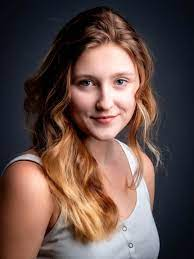
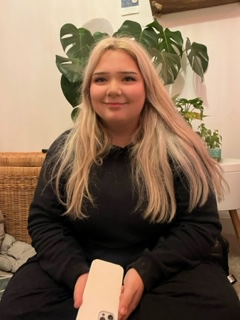
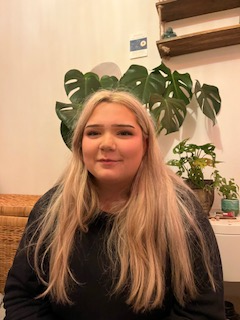
A head shot or headshot is a modern portrait in which the focus is on the person. The term is applied usually for professional profile images on social media, images used on online dating profiles etc.
A great headshot should include the following:
Simple background.
A clear photo of one person.
Good expression.
Proper attire.
Minimal distractions.
Should reflect how you look currently.
Proper cropping of the photo.
Flattering poses.
Flash lighting
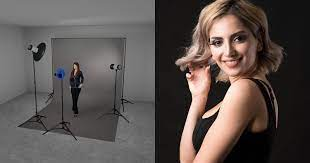
Flash photography is using an artificial light source to light a person or a scene whether you want to give that scene a different look or you have to out of necessity.
With your camera set to manual, set the shutter speed around 1/125sec to 1/250sec depending on your camera’s flash sync speed. ISO 320, aperture f/5.6, daylight white balance. For flattering results without much distortion use a short telephone lens or a zoom setting from 70-85mm.
A flash photograph can vary the appearance of a subject by controlling the intensity, position and distribution of light coming from a flash.
Continuous lighting
Camera settings (continuous lighting) Tripod: recommended to avoid camera shake Manual exposure mode White balance: tungsten light (3200K) ISO: 400-1600 – depending on how many light sources Exposure: Manual 1/60-1/125 shutter-speed > f/4-f/8 aperture – check settings before shooting Focal length: 50mm portrait lens
The deadpan aesthetic
The origins of the word “Deadpan” can be traced to 1927 when Vanity Fair Magazine compounded the words dead and pan, a slang word for a face, and used it as a noun. In 1928 the New York Times used it as adjective to describe the work of Buster Keaton.
In summary Deadpan photography is a cool, detached, and unemotional presentation and, when used in a series, usually follows a pre-defined set of compositional and lighting rules.
The deadpan aesthetics is considered a technically perfect photograph which depicts a landscape, still life or a person by a direct centred composition. The photographs usually have a single central theme (a mining tower, face, mound of clay, etc.), the background is usually unimportant (which does not apply for more sociologically oriented concepts), ignored or is neutral and sterile.
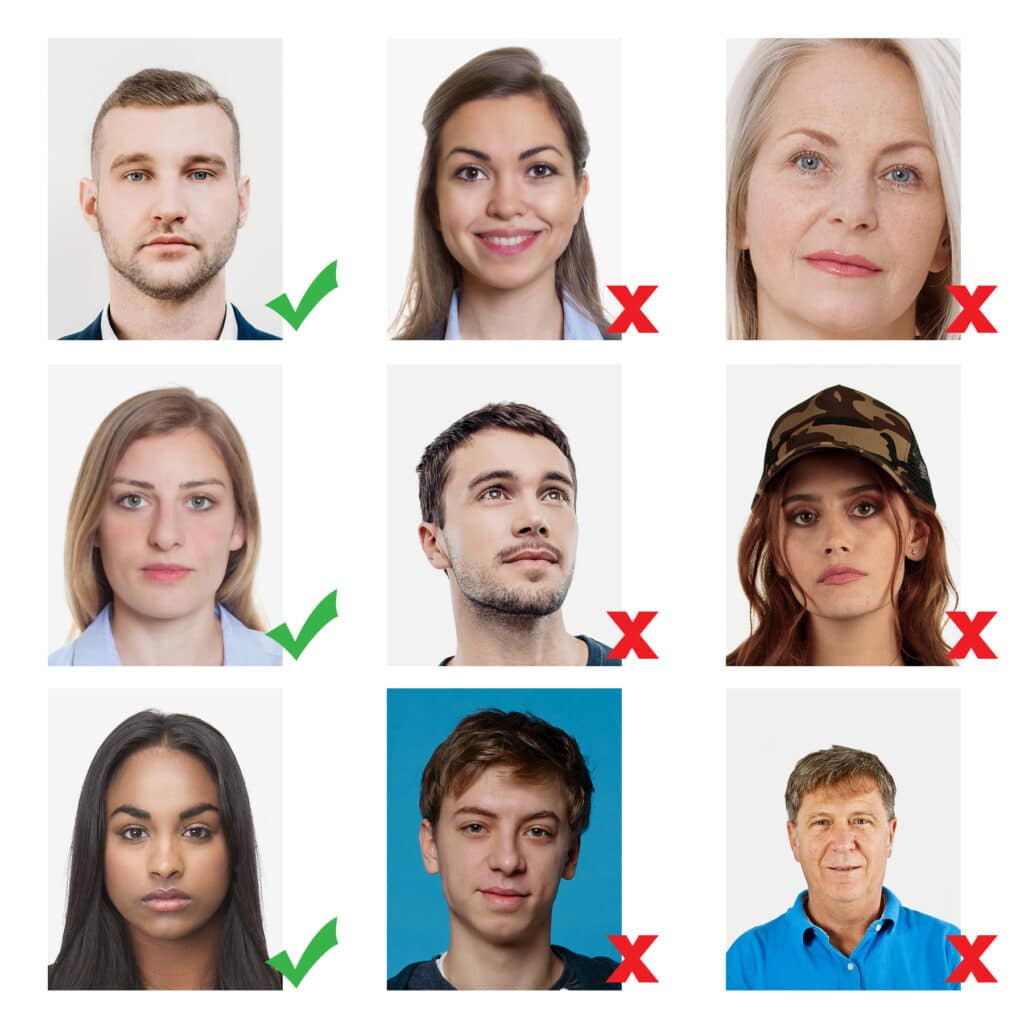
Passport Photos
The UK government has a specific list on what passports must include, this can be found on the UK government website.
FACE:
eyes must be open and clearly visible, with no flash reflections and no ‘red eye’
facial expression must be neutral (neither frowning nor smiling), with the mouth closed
photos must show both edges of the face clearly
photos must show a full front view of face and shoulders, squared to the camera
the face and shoulder image must be centred in the photo; the subject must not be looking over one shoulder (portrait style), or tilting their head to one side or backwards or forwards
there must be no hair across the eyes
hats or head coverings are not permitted except when worn for religious reasons and only if the full facial features are clearly visible
photos with shadows on the face are unacceptable
photos must reflect/represent natural skin tone
BACKGROUND:
Photos must have a background which:
has no shadows
has uniform lighting, with no shadows or flash reflection on the face and head
shows a plain, uniform, light grey or cream background (5% to 10% grey is recommended)
Typologies
the study and interpretation of types and became associated with photography through the work of Bernd and Hilla Becher, whose photographs taken over the course of 50 years of industrial structures; water towers, grain elevators, blast furnaces etc can be considered conceptual art. The Becher’s were influenced by the work of earlier German photographers linked to the New Objectivity movement of the 1920s such as August Sander, Karl Blossfeldt and Albert-Renger-Patzsch.
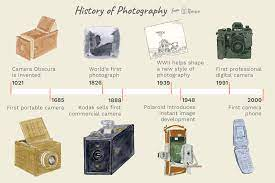
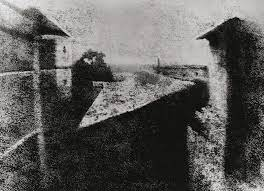
in 1826/7, Nièpce succeeded in making the earliest surviving camera photograph. It represented a view from a window at Le Gras (his hometown in Burgundy, France), captured on a pewter plate coated in bitumen diluted in lavender oil. The exposure time was probably several days.
Photography was invented by Frenchman Nicéphore Niépce in 1822. Niépce developed a technique called heliography, which he used to create the world’s oldest surviving photograph, View from the Window at Le Gras (1827). Heliography was conceived in response to camera obscura theories dating back to ancient history.
What is photography and its origin?
The word “photography” literally means “drawing with light”.
When did photography first begin?
Photography was invented in 1822 when the first photograph was taken by Joseph Nicéphore Niépce (pronounced “nyeps”). Unfortunately, the first examples of Niépce’s work have been lost to history, but he still holds the title for the oldest surviving photograph, taken in 1826.
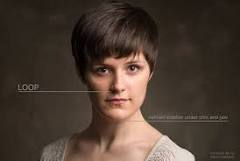
Loop lighting is an essential lighting technique for portrait photographers. It is easy to create with just a single light source and is flattering on most subjects. This lighting pattern will create a shadow that loops down and around the side of the nose, and on the neck and under the chin.
How does a loop light work?
Loop lighting is a lighting pattern that creates a circular shadow on the subject’s face just under the nose. You can achieve this by placing the key light 45 degrees to the side of the subject and raising it just above their eye line.
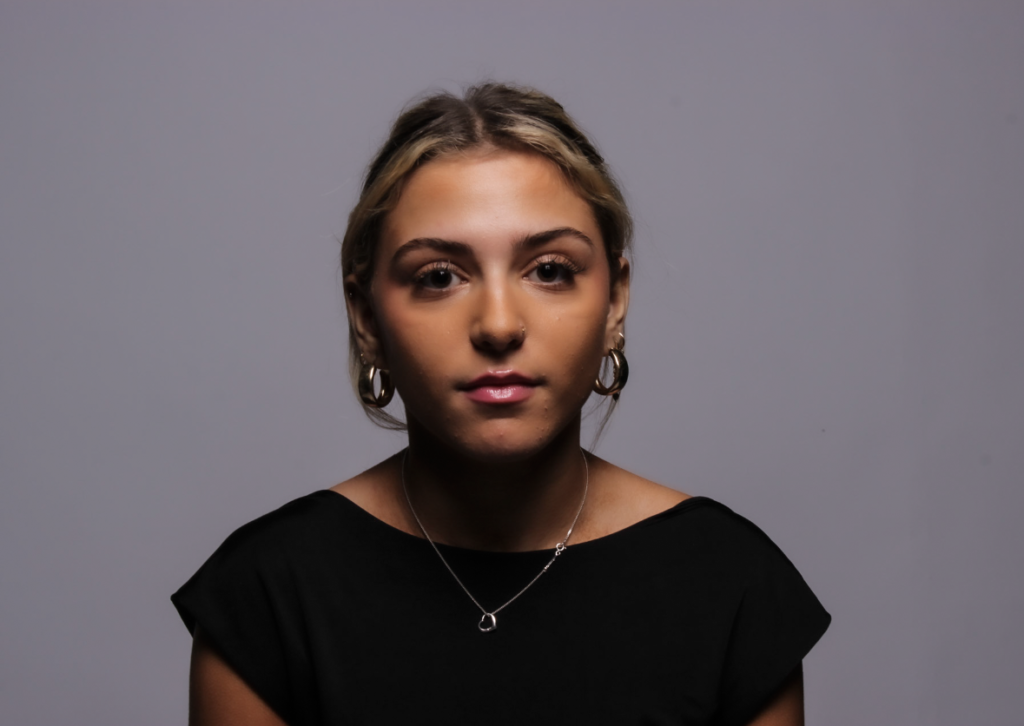
Here’s my example of loop lighting, which is edited.
This one is not..
To achieve loop lighting, chose a useful portrait lens, usually between 50mm and 100mm focal length. Position the camera in front of your subject to frame the head and shoulders. Place the light to the side of your camera (at 30-45 degrees) and slightly above the subject’s head.
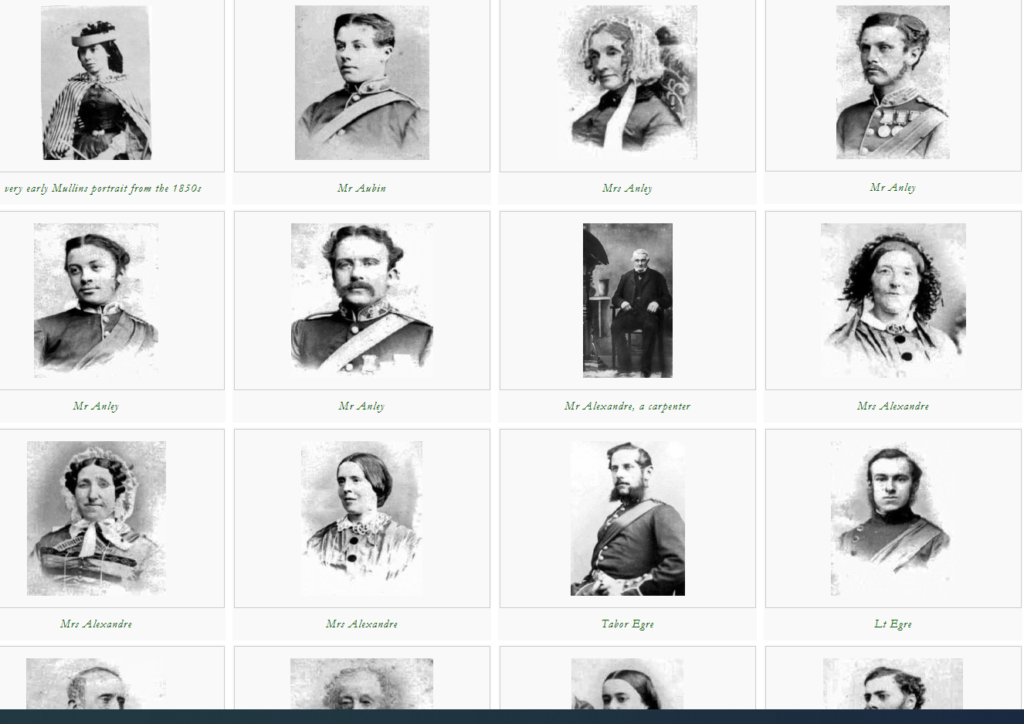
Henry Mullins started working at 230 Regent Street in London in the 1840s and moved to Jersey in July 1848, setting up a studio known as the Royal Saloon, at 7 Royal Square.
Between 1850-73 Henry Mullins made over 9000 carte de visite portraits of Jersey’s ruling elite and wealthy upper classes.
It’s not known when he was deceased, however he spent over 20 years in Jersey and produced 4 albums with 2 and half thousand in each album, he also put the most important people at the at pof the albums eg, people in chareg of state cham,bers and piut togther a social higharchoty with it going own to fame nd i mportamnce in his albums.
Cartes de visite
His speciality was cartes de visite and the photographic archive of La Société contains a massive collection of these. Their on line archive contains 9600 images, but the majority of these are sets of up to 16 photographs taken at a single sitting. In those times even 10s 6d was a substantial sum to pay to have one’s photograph taken, and included among his subjects are many of the island’s affluent and influential people.
He was also popular with officers of the Royal Militia Island of Jersey, for whom it was very popular to have portraits taken, as well as of their wives and children, for the more senior and more affluent officers. The pictures of these officers show clearly the fashion for long hair, whiskers and beards in the mid-1800s. Indeed, so similar is their appearance and so stylised the portraits, it is very hard to detect much difference between a large number of officers of the same rank and social standing.
An advertisement in the Jersey Times of 5 June 1849 states that “Portraits are taken in groups of two or three, or the single figure, or bust, and of various sizes, even small enough for a ring, the charge for which is reduced to one half of that in London.
Here is some of his grids that he took.
ALBUMEN PRINT
Invented in 1850, and commonly used in the late nineteenth century, the albumen print is a type of photographic print made from paper coated with albumen (egg white).
The albumen print became popular because it produced a rich sharp image. The process involves coating a sheet of paper with albumen (egg white), making the paper’s surface glossy and smooth. It is then coated in a solution of silver nitrate. The albumen and the silver nitrate form light-sensitive silver salts on the paper. When a glass negative is placed directly on the paper and exposed to light, it forms an image on the paper.
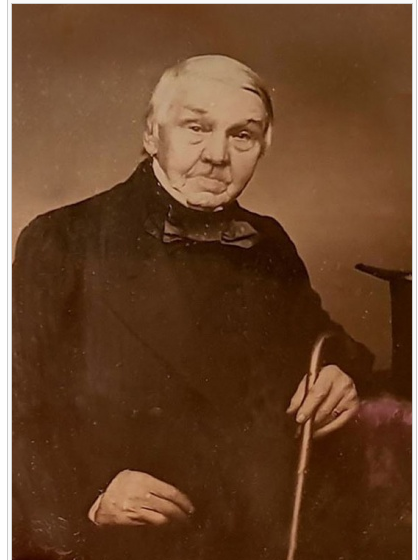
Here are some more recent images of his.
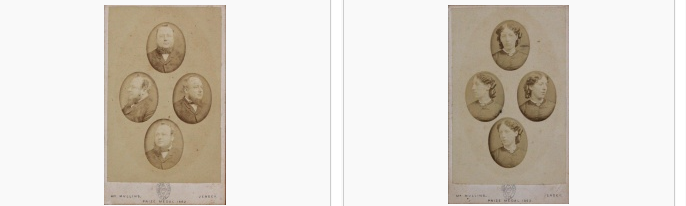
This technique is called diamond cameo, licenced by Henry Mullins. Some cameo carvers are well known and signed cameos are valuable. Hardstone cameos are more highly valued than the softer Shell cameos.
Diamond Cameo photograph was registered by F.R. Window of London in 1864. Four small oval portraits were placed on a carte de visite in the shape of a diamond, each portrait being of the same person photographed in a different position.
Their on line archive contains 9600 images, but the majority of these are sets of up to 16 photographs taken at a single sitting.
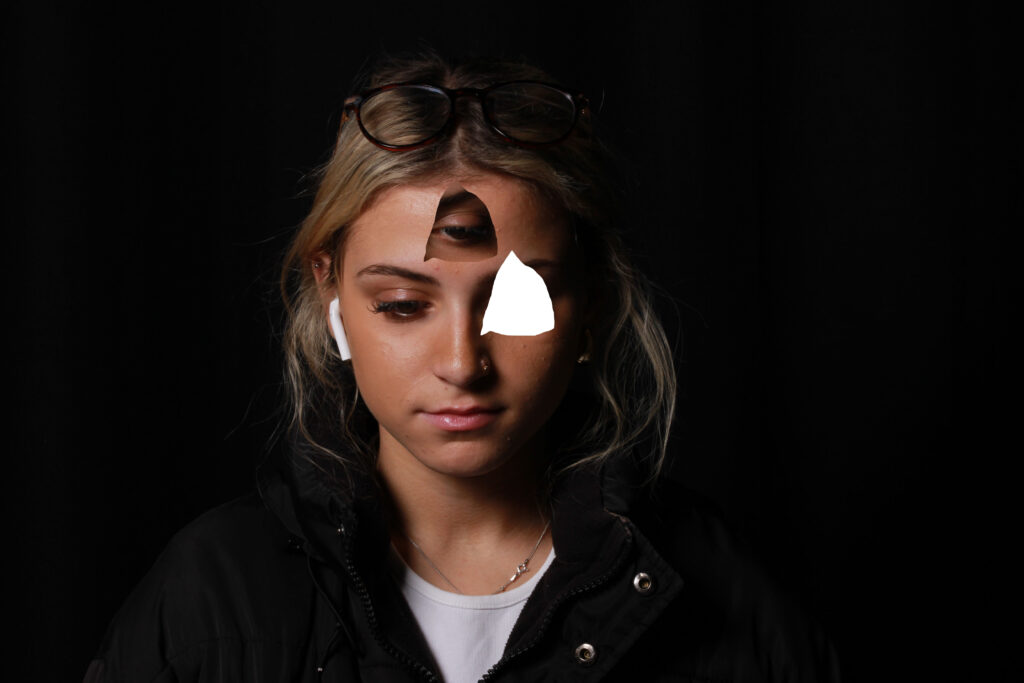
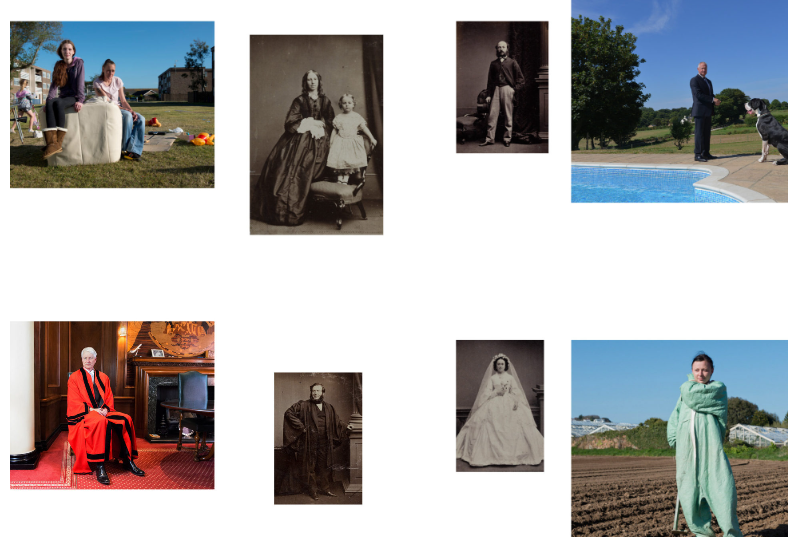
JUXTAPOSITION
Juxtaposition is placing two images together to show contrast or similarities.
Here is some of my examples’ of headshots, as well as an examples of diamond cameo.
there is only one light source in the scene with no complementary sources to fill in shadows.
This is the simplest type of light placement and in fact mimics something we see every day — the sun! It has the most natural look and can have a dramatic lighting effect. It also draws attention, but can give a person onstage a very flat, two-dimensional look.
My photo of one ,two and three point lighting:
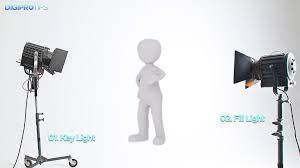
Two point lighting–
In a two-point lighting setup, two light sources are usually placed at 45 degree angle from the subject. One of them is your key light, which is the main light used to illuminate the subject, and the second is your fill light which helps to remove harsh shadows on the subject that are created by the key light.
Three point lighting-
Three-point lighting is a traditional method for illuminating a subject in a scene with light sources from three distinct positions. The three types of lights are key light, fill light, and backlight
Butterfly example..
This is butter fly because thee a butterfly shadow under the eye. It’s a single source directly in line with the subject’s face and the camera. If the shadows are a little too deep, a reflector can be placed below the subject to bounce light back up into the face.
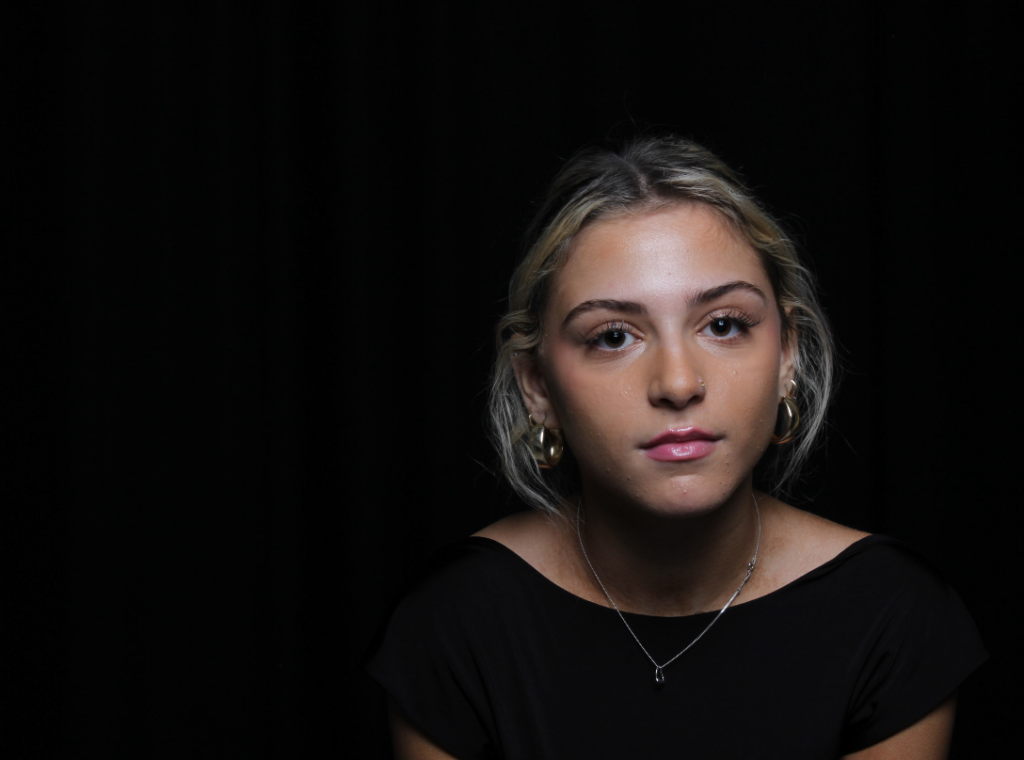
Chiaroscuro example..
Chiaroscuro is a high-contrast lighting technique that utilises a low-key lighting setup to achieve contrast between the subject and a dark background. You light across your subject in one direction, and here we lit the background in the reverse direction. Ideally, the subject should go to black on the unlit side and the same for the background, it shows off the looks and eliminates the face.
Rembert example…
You can tell this photograph is Rembert because there’s a triangle underneath her eye. This is a technique utilizing one light and one reflector or two separate lights. It’s a popular technique because it creates images that look both dramatic yet natural. Rembrandt lighting consists of a single light source placed on a 45 degree offset from the subject, about 5 feet away. Positioned roughly two feet higher than eye level, the light source is angled slightly downward and hits the side of the face that is farthest away from the camera
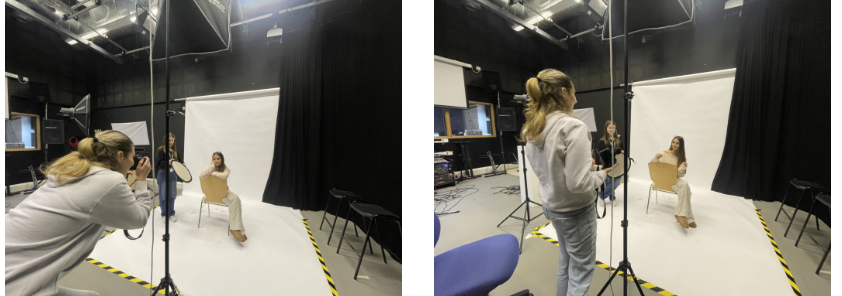
Here is some photos of the studio in action of 1,2,3, Rembert, butterfly and Chiaroscuro lighting..
One point lighting–
there is only one light source in the scene with no complementary sources to fill in shadows.
This is the simplest type of light placement and in fact mimics something we see every day — the sun! It has the most natural look and can have a dramatic lighting effect. It also draws attention, but can give a person onstage a very flat, two-dimensional look.
My photo of one ,two and three point lighting:
Two point lighting–
In a two-point lighting setup, two light sources are usually placed at 45 degree angle from the subject. One of them is your key light, which is the main light used to illuminate the subject, and the second is your fill light which helps to remove harsh shadows on the subject that are created by the key light.
Three point lighting-
Three-point lighting is a traditional method for illuminating a subject in a scene with light sources from three distinct positions. The three types of lights are key light, fill light, and backlight
Butterfly example..
This is butter fly because thee a butterfly shadow under the eye. It’s a single source directly in line with the subject’s face and the camera. If the shadows are a little too deep, a reflector can be placed below the subject to bounce light back up into the face.
Chiaroscuro example..
Chiaroscuro is a high-contrast lighting technique that utilises a low-key lighting setup to achieve contrast between the subject and a dark background. You light across your subject in one direction, and here we lit the background in the reverse direction. Ideally, the subject should go to black on the unlit side and the same for the background, it shows off the looks and eliminates the face.
Rembert example…
You can tell this photograph is Rembert because there’s a triangle underneath her eye. This is a technique utilizing one light and one reflector or two separate lights. It’s a popular technique because it creates images that look both dramatic yet natural. Rembrandt lighting consists of a single light source placed on a 45 degree offset from the subject, about 5 feet away. Positioned roughly two feet higher than eye level, the light source is angled slightly downward and hits the side of the face that is farthest away from the camera
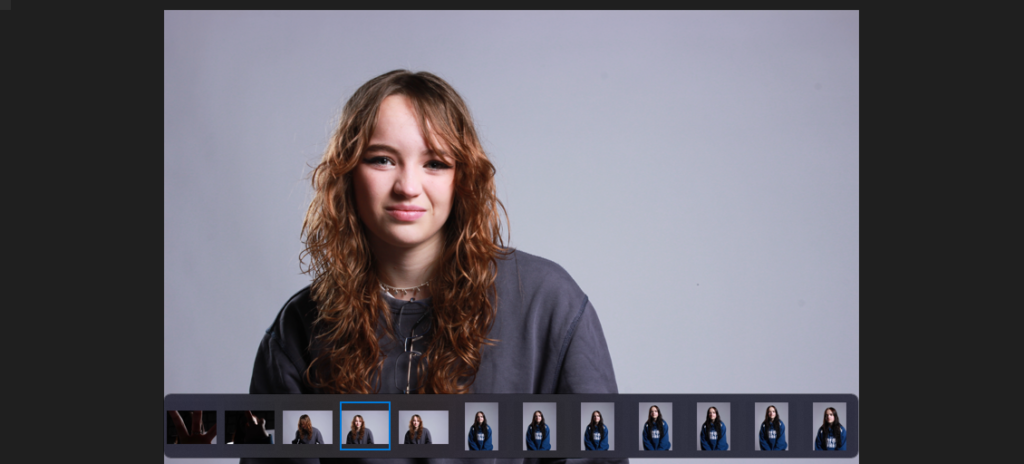
The last two pictures are edited to brighten up the contrast and flaws and imperfection’s.
Here is some photos of the studio in action.
To conclude
I think that this has been my best so far. It brings out so much about you as a person and having trail and error with different sets of lighting and 1,2 and 3 point lighting wasn’t easy, however we got there in the head. I really enjoyed taking these portraits but to do better I think I could’ve angled some of the light’s a bit better, which I will do for my next photoshoot. To wrap up I think I did quiet well in this project and these photographs’.
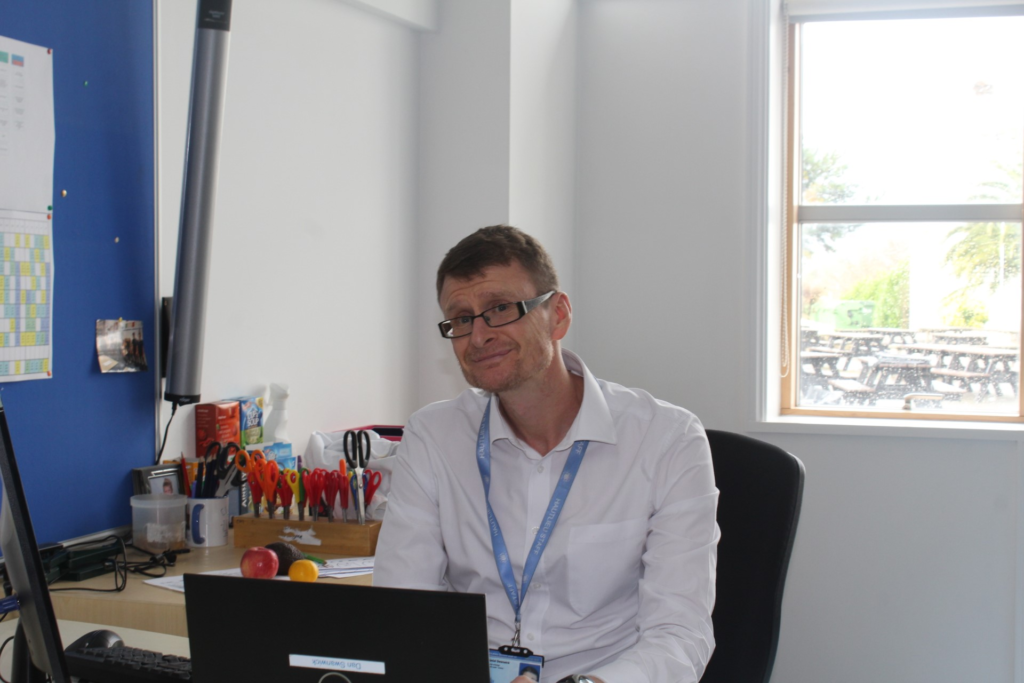
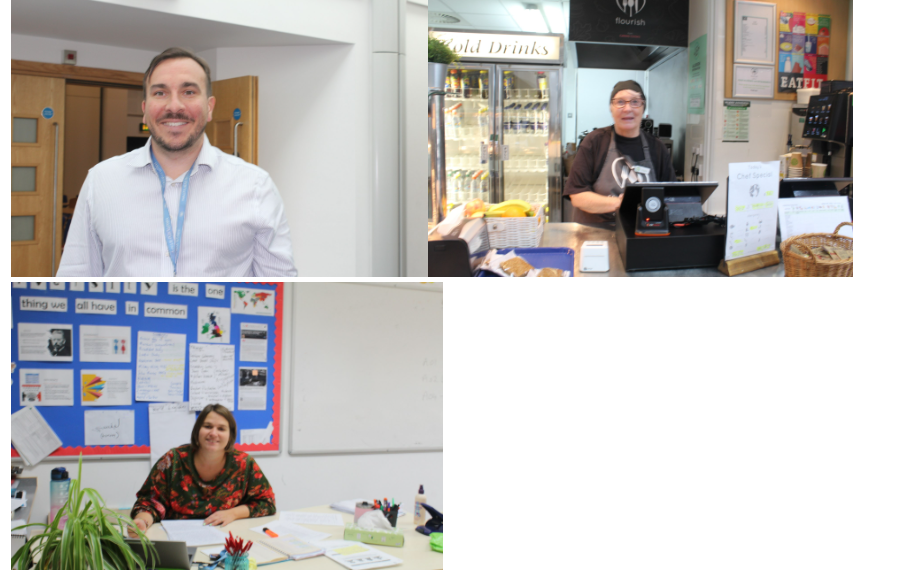
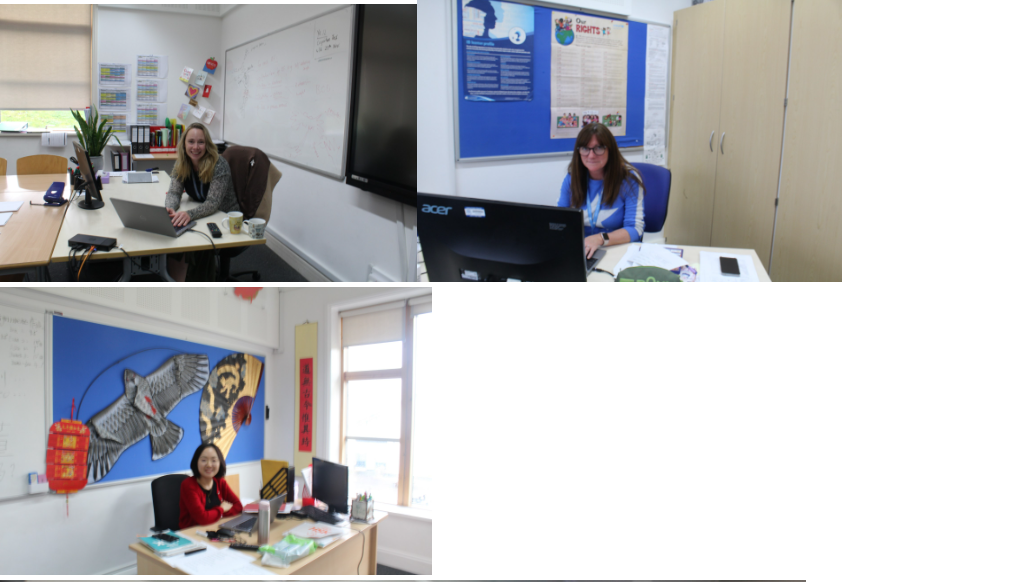
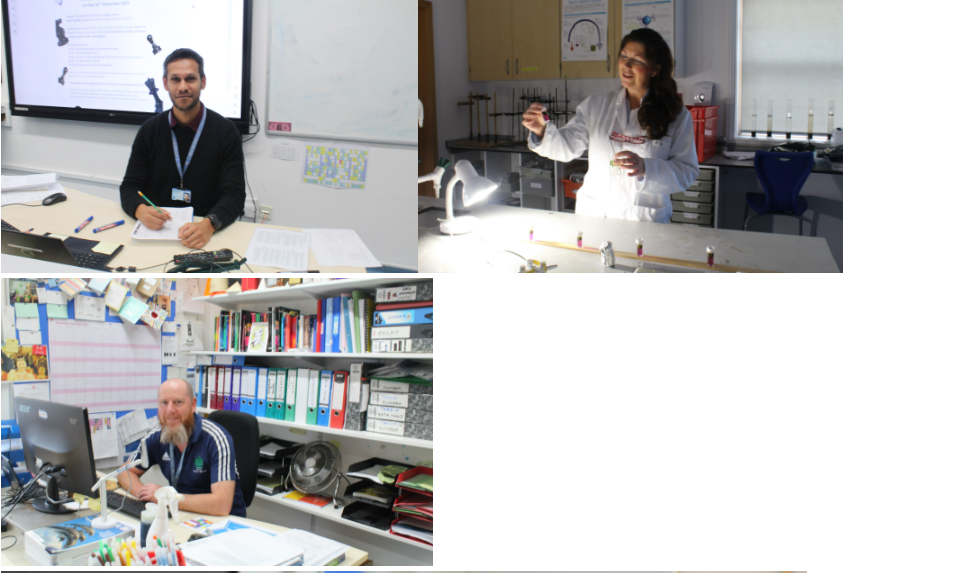
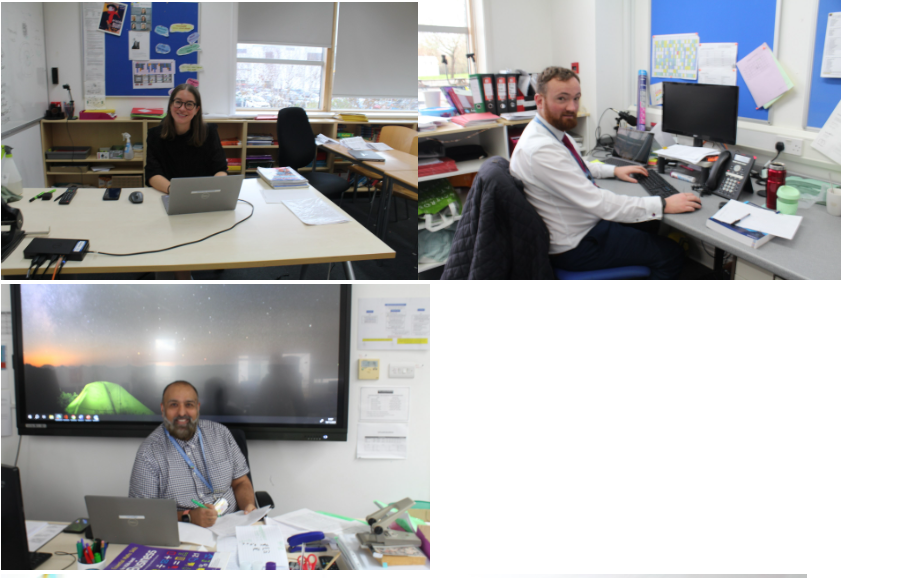
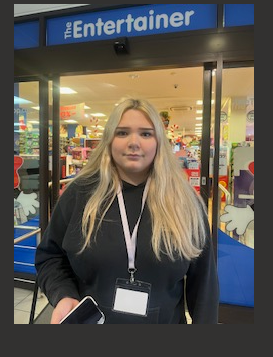
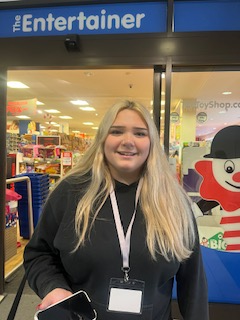
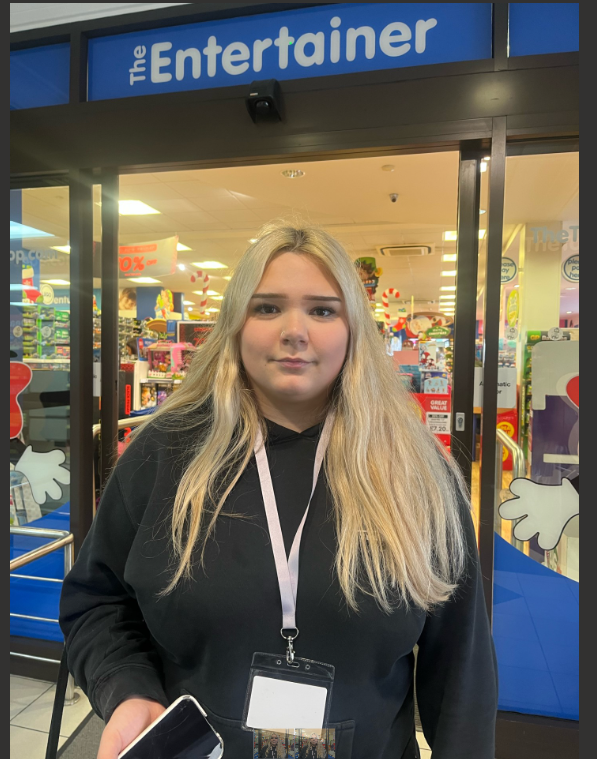
I took these photos of my teachers working. This shows them in their natural place of work, doing what they enjoy. I photographed these teachers because I feel as if I can trust them and know a bit about them therefore it would make sense to photograph them.
However I also took some of my own photos of my friend, at her work and happy a home enjoying herself.
These photos show a sense of charter and how hard they have worked to be where hey want to be.
The photo will provide more of a story about the person than a formal portrait would. A portrait of a person in their natural environment adds depth to both them and the location.
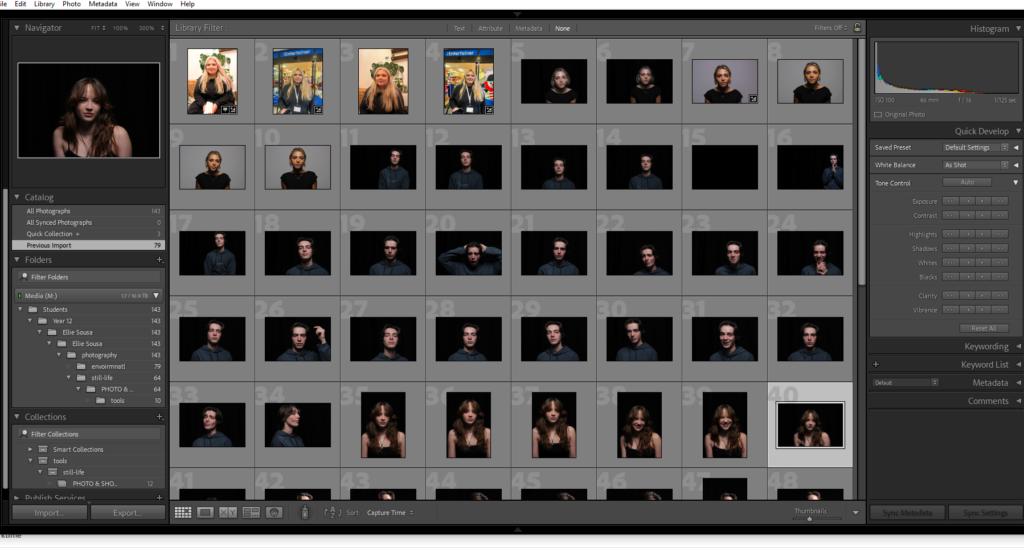
Here are some of the photos after Lightroom…
To conclude..
For photographers, the responsibility is profound. Photographers not only capture the beauty and tragedy of our world, but also contribute significantly to shaping its future .