Overall, I think my photobook turned out well. I was able to present my photographs as I had hoped to, with the images in such an order that the narrative is portrayed effectively. I believe the final images that I chose to use in the photobook work really well together and I think that they are good photographs. I also really like how the black and white theme turned out, I think that all of the photographs being black and white makes the aesthetics better than if I had a mix. If I were to do this project again, I would take photographs of other friends and family close to me, allowing myself to illustrate different lives and aspects of life to what is already shown.
Overall, I think this project turned out successful. The images I produced were high quality images of intriguing scenes. When placed in a photo book, the images come together well, supporting the narrative I had aimed – to portray different ages and lifestyles, and capture moments of bliss from different peoples lives. Throughout my photo book and images, there are similarities to both artists I has researched and taken inspiration from, Tom Wood, Andrew Kung and Andriana Nativio. My original inspiration for my project was Tom Wood’s projects and his style of street photography. This is similar to the work of Andrew Kung, I wanted my project to share alikeness in how the photographs are perceived. Additionally, Andriana Nativio inspired me with her style of documentary photography, as well as the images being presented in black and white which is what I found worked best with my images leading me to make the whole project black and white. When taking my photographs, I used a range of lighting techniques depending on how the environment was lit at the time to keep the authentic feel. When editing the images, I used the same black and white filter across all images so that, although some images are brighter whereas some are darker, they all have consistency in some form. I think that within this project, some photographs are better than others in terms of the scene being shot or the technical camera skills not being up to the same standards. However, overall I believe the images are still successful and flow well in the photo book.
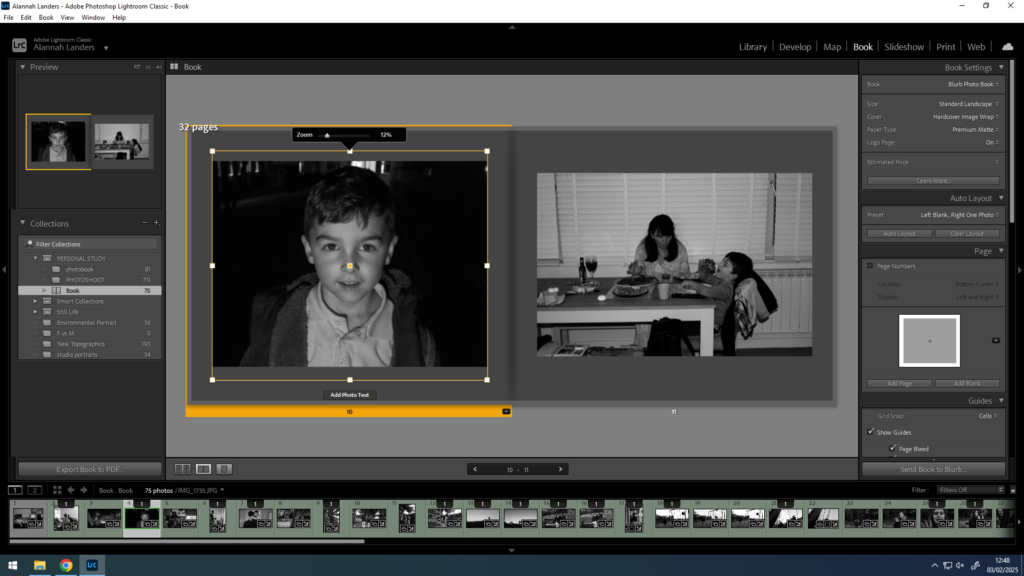
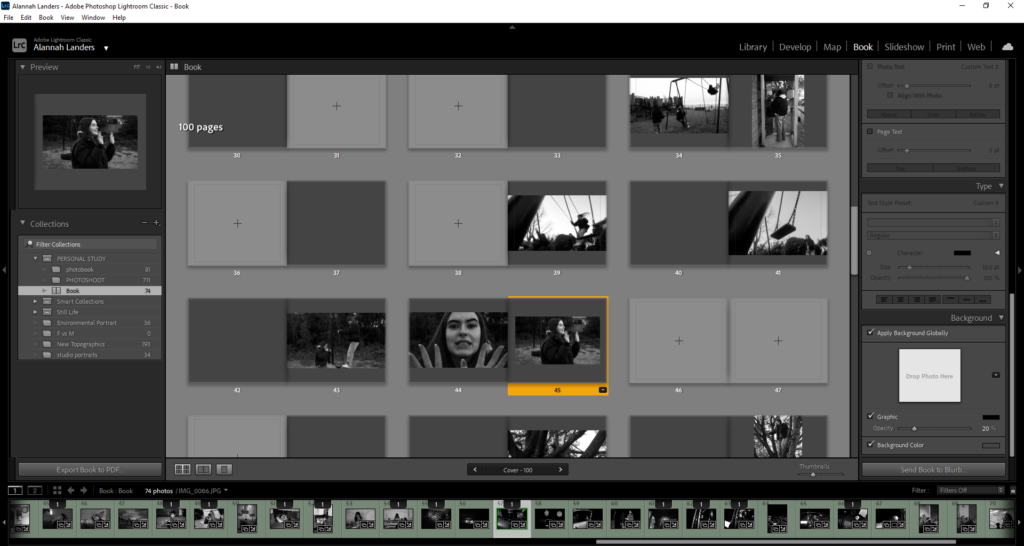
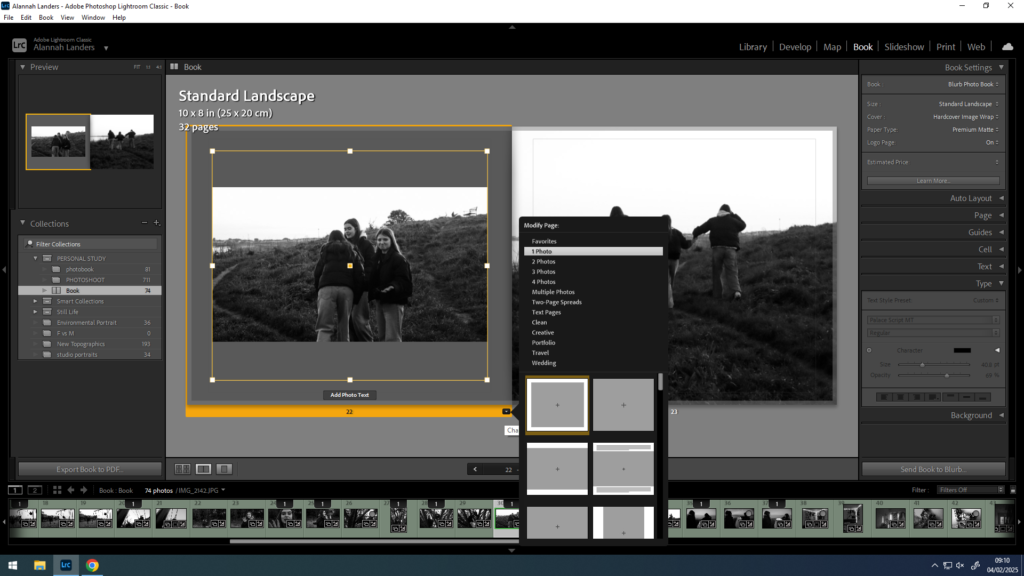
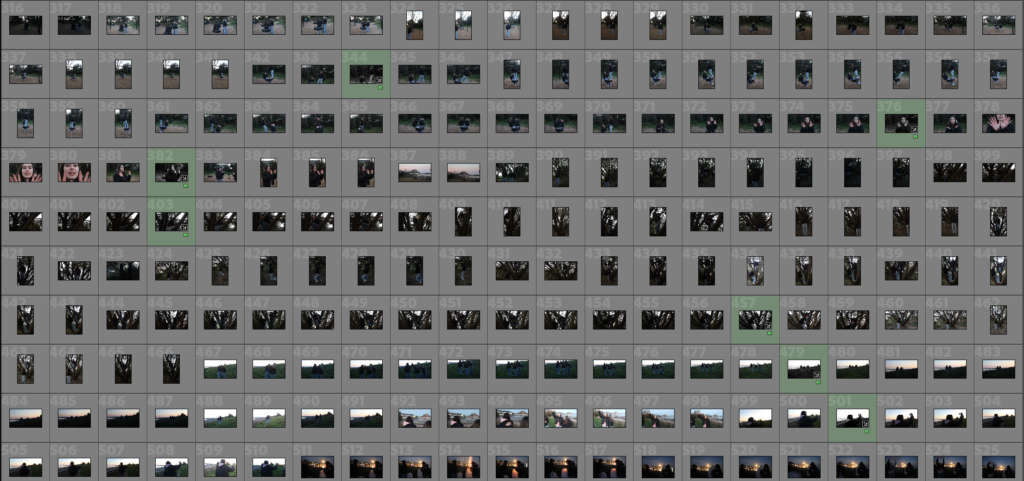
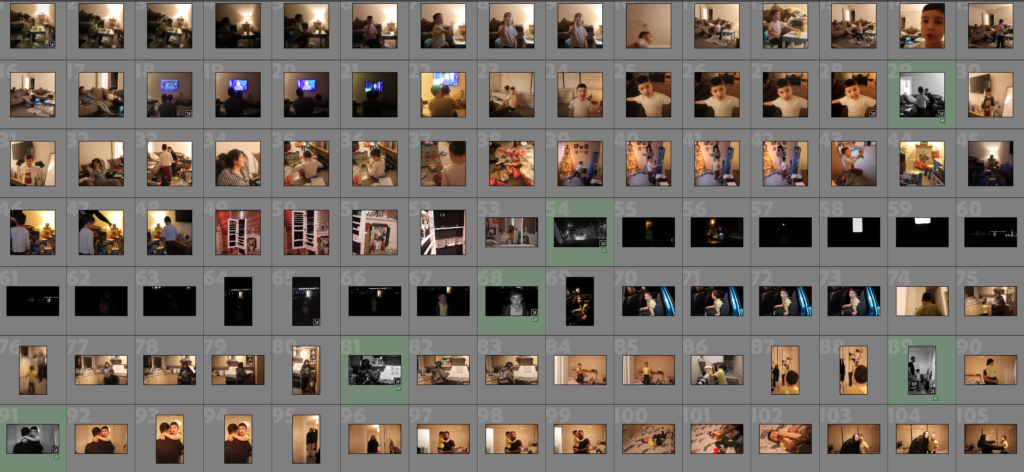
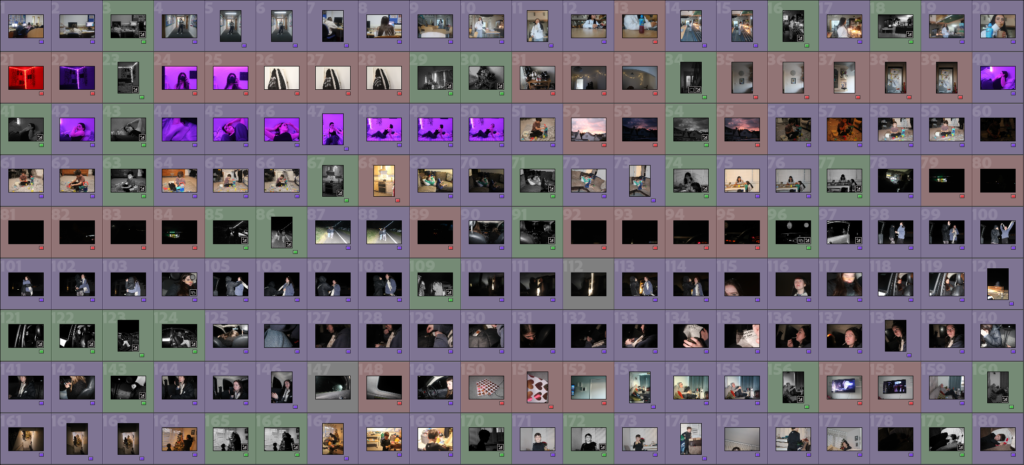
To start with my photobook, I moved around the images, placing them next to others or alone to figure out where they would best be presented. While doing this, I also evaluated each image, deciding whether or not it would make the final cut, removing some images or replacing them with better versions, as well as adding in completely new photographs that I hadn’t been sure on.
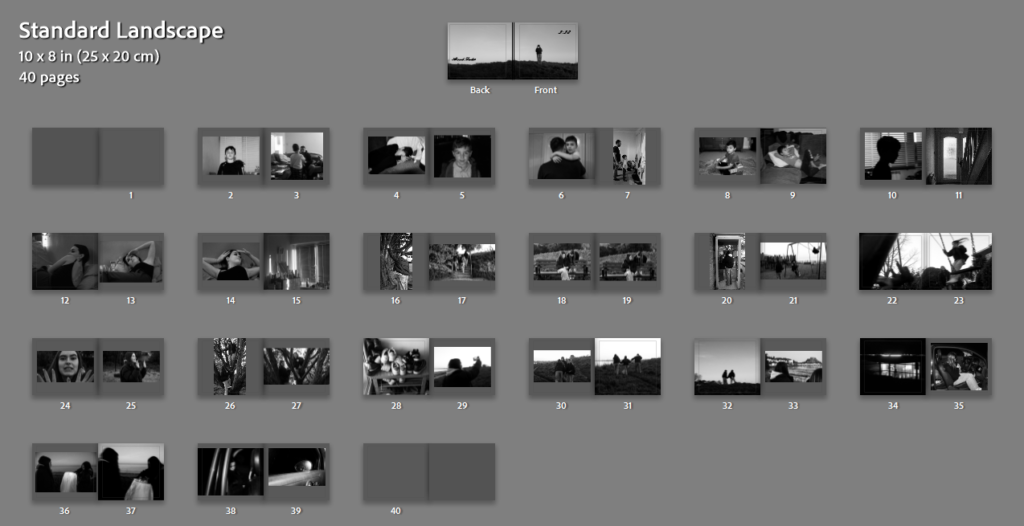
I also moved them around and experimented with different orders to present the photographs. This was the harder part as the images are from photoshoots with different scenarios. However, once I figured how to arrange them synonymously, I was able to position the images well within the book. I believe that the final way the photographs are ordered works well with the narrative and aesthetics of the entire book.
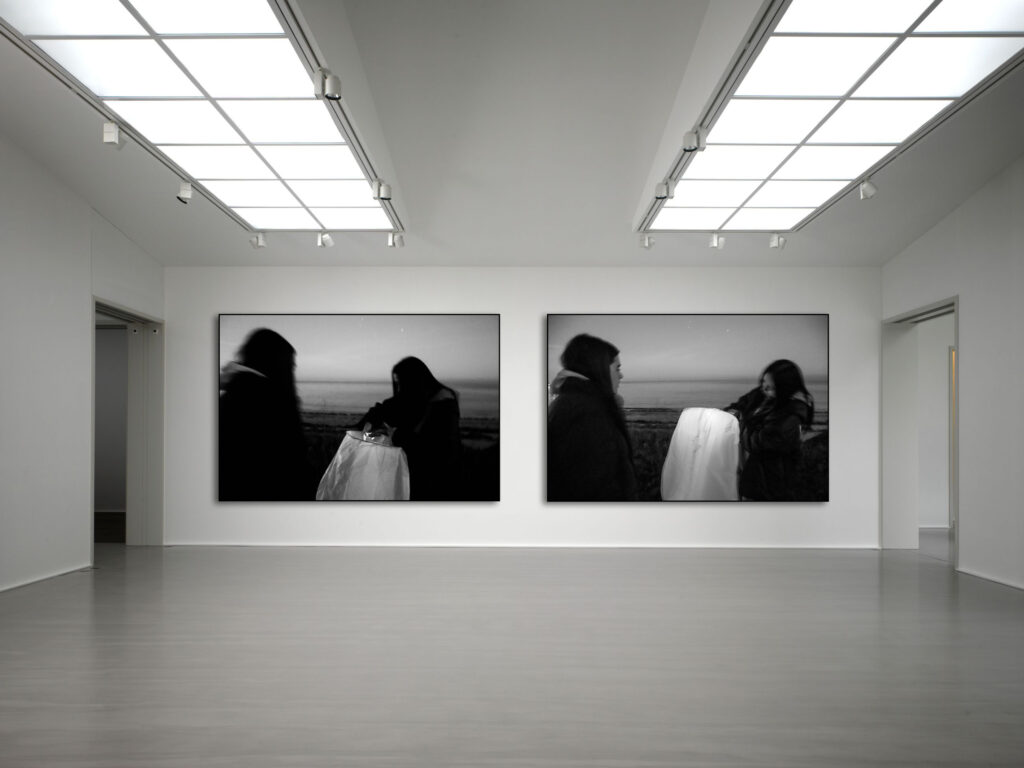
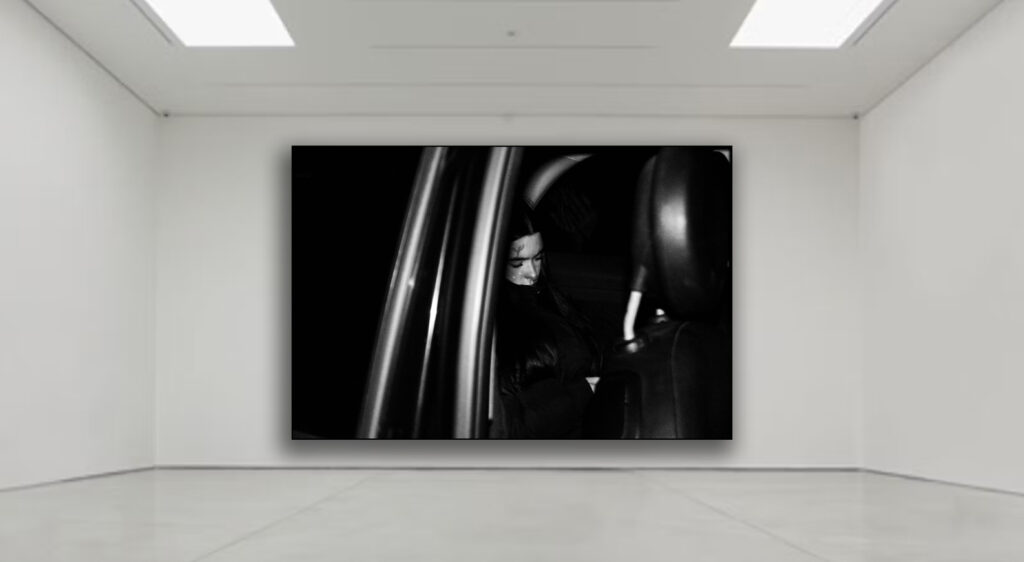
Finally, I went back through the images, changing the placement of how they were displayed on the page. I used a variety of positionings such as in the middle with a border, across the whole page, or a double page spread. This allows for a change in the book, avoiding too much repetition too often.
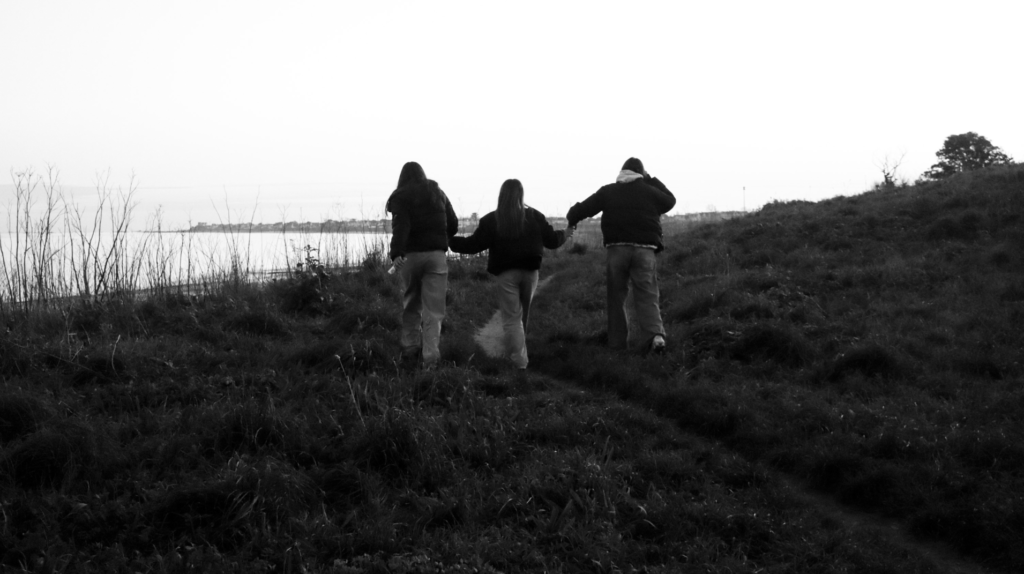
This photobook is a glimpse inside the life of another.
In a paragraph:
The narrative of this photobook, is to show a small segment of the lives of the people close to me. My aim is to portray the differences in the way every person lives their life uniquely from one another. Although this photobook only reflects particular moments, when observing the images, you are looking into a part of my life, and more specifically my friends and family’s who are in the images. This could be considered as ‘mirror’ images as they are reflecting myself and that is the main idea.
Design:
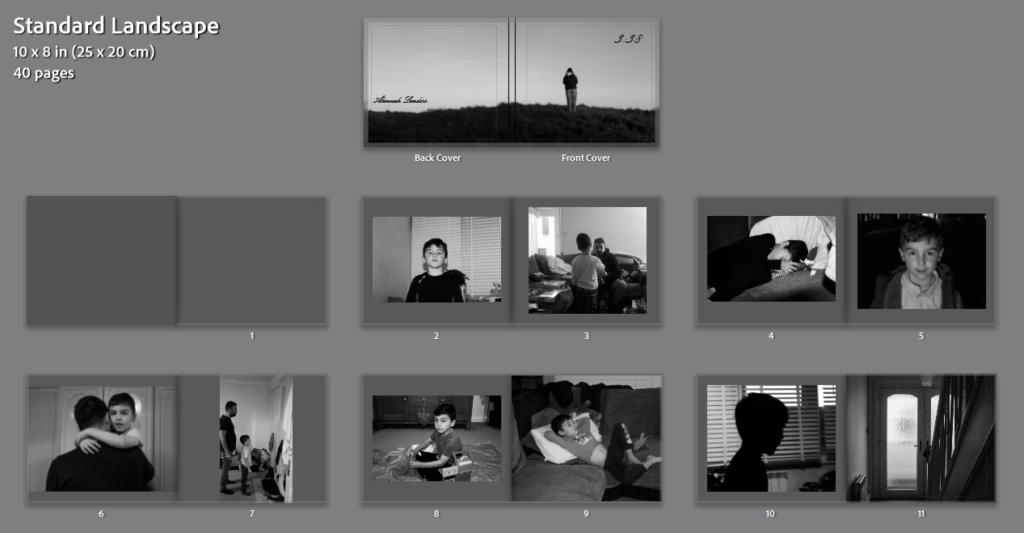
My photobook will use matte photopaper to make my images look classy and for a more subdued feel. I will be making a standard landscape photobook (25 x 20cm). I am going to use a hardcover image wrap for my book.
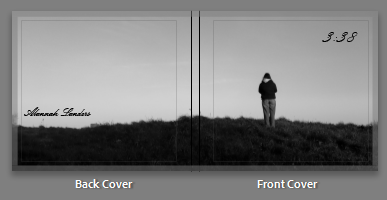
The title of my book is ‘3:38’, I have decided on this title as there are no words to describe what is inside of the book and I think it makes it more intriguing.
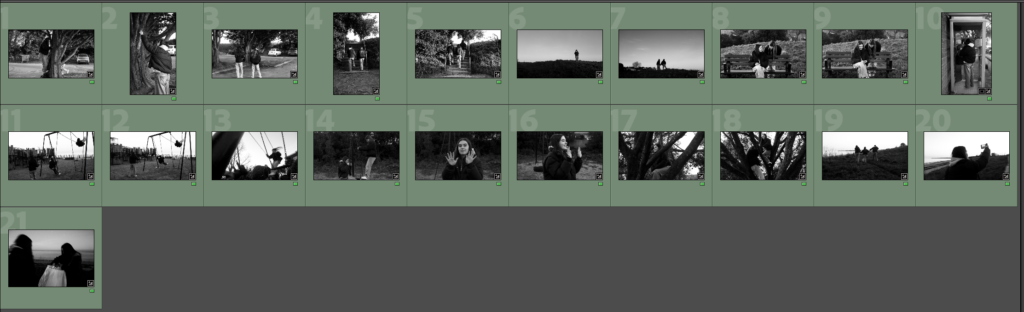
When designing this book, I carefully picked which images would sit well next to one another. I decided on whether the photographs fit well into the story together, whether they shared some similarities, if the people in the photographs differentiated etc. to come to the final sequence of images.
Once I had the order of my photographs in place, I then altered the presentation of each image. I have displayed some images across the whole singular page, some in the middle with the page bordering them, and some across a whole double page spread. I used a variety of ways to show my images to avoid repetition, and to reflect on how each page was a different part of the story.
To what extent is Henri Cartier Bresson’s theory of the ‘decisive moment’ a true representation of reality?
To me, photography is the simultaneous recognition, in a fraction of a second, of the significance of an event as well as of a precise organization of forms which give that event its proper expression – Henri Cartier-Bresson, “Foreword”, The Decisive Moment (1952)
What does photography really capture? Is it the essence of a moment? Is it the emotions of a scene? Or is it simply just an image? Photography as an art is such a subjective genre. Within photography, there is a multitude of different styles of how images are presented, for example, portraits, landscapes, documentary etc. Even these categories have different approaches that can be taken. My project focuses on the documentary style photography. But what actually is it? Documentary photography is a way to tell stories through only an image, it portrays the contrasting lives of the ordinary people around us. Documentary photography can be seen in many different forms such as street photography, photojournalism, reporting and others. A subgenre of photography known as the ‘snapshot aesthetic’ focuses on the everyday traits of life and capturing that moment in time, the images can often be said to appear like both staged and candid, which is similar to the aesthetics of my images. My investigation will consist of exploring and documenting the same people/ groups of people, my friends and family – socially and isolated, but in different environments and situations. Although my images will use the same subjects, the photographs will be portraying the different parts of their lives, and in some way reflecting who they are, which is the narrative of my project. I have decided to take my images in the documentary style because I find that these images are the most authentic, however the reason I will be photographing only those close to me, rather than outsiders like street photography does, is to add a personal touch to my project. This way, my images will have consistency as well as being captivating, with each photo you will discover and learn more. This project discusses street photography, photographers whose work is based on street photography, as well as my own interpretations and my own photographs produced. To take good documentary style photographs, you need to be able to observe the environment you are in and decide what would be the shot that will capture people’s attention. This means ensuring the composition, the light, the atmosphere of the scene are all what would make the most aesthetic, perfect image. This process of image making is known as the ‘decisive moment’ by Henri Cartier-Bresson.
Henri Cartier Bresson was a well-known, French artist and photographer, best known for his candid photographs and street photos. It was in 1937 that his first photojournalist photos were published, and this time period where his career peaked. Cartier-Bresson was born in and grew up in France in 1908 with a wealthy family and from an early age, was introduced to the arts. This led to his first interest in painting until he discovered photography. Then his passion was solely photography, he saw it as an extension of drawing and an extension of the eye as he could capture exactly what he was seeing. He also used the description, “like hunting but without the killing”, to describe the art of photo taking. He then went on to travel around Europe and Africa to dive into other culture. Which then inspired his view of life which became ‘photography isn’t just about images; it’s about capturing the essence of existence’. This helped him to form his philosophy of the ‘decisive moment’. The decisive moment is the point in time where an image builds itself, where all elements and components come together, the scene is the exact right shot, so you shoot. Cartier-Bresson is considered a humanist photographer, meaning he incorporates human experiences within the images he makes. Due to his photographs being candid, he is portraying the lives of the people his images capture, truthfully. His documentary street photography falls under the category of ‘windows’, when discussing mirrors vs windows in photography. A ‘window’ image is one that is more objective, real and truthful, they show the external world which is what Cartier-Bresson’s images are.
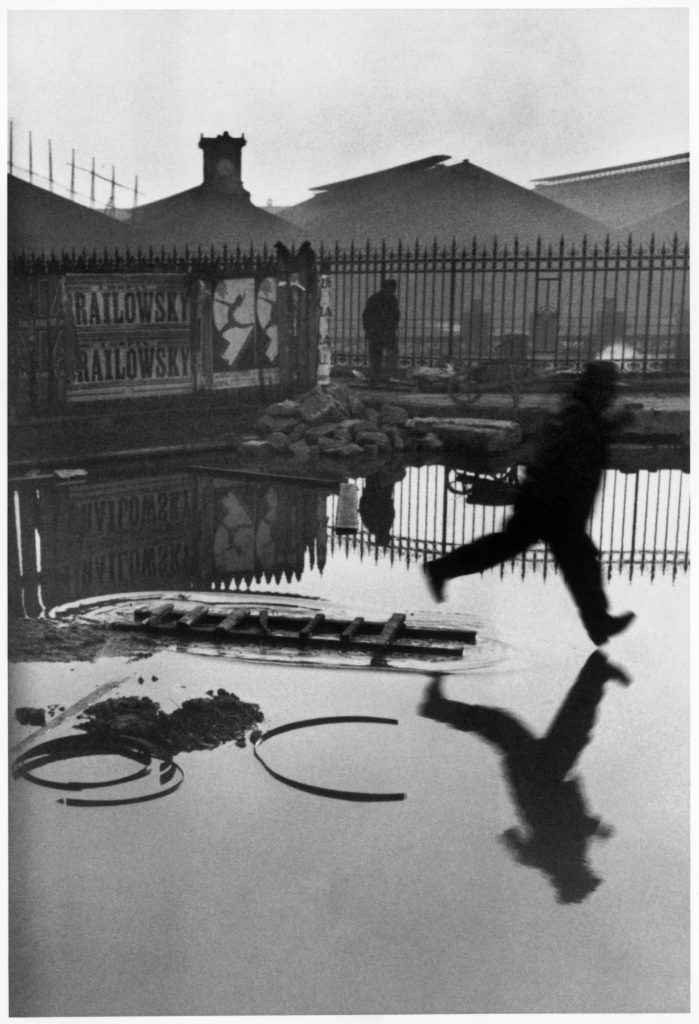
Henri Cartier-Bresson Behind the Gare St. Lazare1932
This photo, by Henri Cartier-Bresson, was taken behind the Gare St. Lazare, train station. The image miraculously captures the moment that this man jumped over a puddle of water. Because the man is mid leap, in the air, it is as if the photograph was planned, it almost seems too perfect. However, as we know from Bresson’s line of work, it was not planned which makes the image all the more intriguing. The background and foreground of this shot are also part of the reason that the image is as good as it is. Things such as leading lines, balance, framing and rule of thirds also make this image what it is. The leading lines in this photo can be seen going horizontally, along the gate and the reflection of the gate in the water. The positions of the leading lines guide you your attention, subconsciously to the leaping man as he is in between. Another aspect of the image which leads you to look at the focal point of the image, is the amount of negative space at the top and bottom of the image, this shows that there isn’t too much going on in the image, overbearing the viewers. Also, due to the puddle anything in the background of the image, is reflected causing a symmetrical middle ground to the image. The rule of thirds also adds to this image, this is because the man is in the right side of the frame separating him from other things going on in the shot but also, he is travelling in the same direction adding to the total composition.
I think that the theory of the decisive moment is a clever way of image making, this is because the images that are being produced from it, capture people in moments of ignorance, they are unaware they are being documented, or they are but they are caught off guard keeping their behaviours unchanged. Because of their unsuspecting state, this means the snapshots of them are all natural with no manipulation, making the images seem so genuine causing them to be intriguing. Since you don’t learn anything about what is really happening, you are left with questions that you ponder on or even make up the answers to in your head, making your own storyline to the image. Because of these reasons, I believe that the decisive moment is a true representation of reality as the photographs produced are candid shots, no staging, no manipulation, just the scene and the camera, adding a sense of vulnerability.
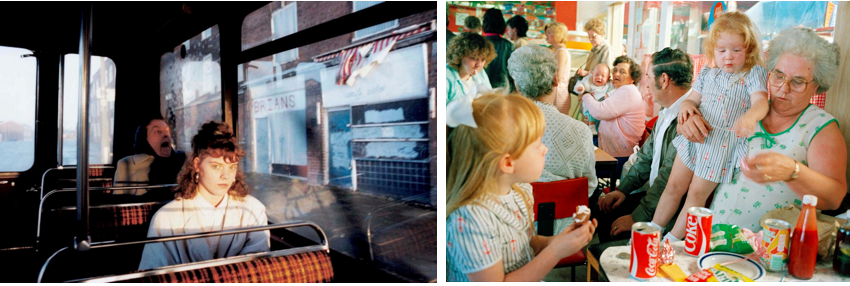
Tom Wood has a variety of projects around street photography, photographing people on the street, in pubs, clubs, markets, buses, essentially, anywhere, and everywhere. Wood has photographed since 1978 up until 2013, his photographs portray moments which have not been interfered with or staged, they are all naturally occurring images, meaning they are an authentic representation of the people in the images. Tom Wood spent a lot of his times taking the bus, which is what prompted him to take some of his best-known images. He would sit on the bus and shoot images of the strangers sharing the bus with him or of strangers out of the windows shooting pedestrians, buildings, traffic etc. When describing how he would take his images, Wood said, “I don’t think about it. The whole point is not to think – but more to feel, to be open”. This was his way of having the confidence to photograph these people he never knew, and to get his images pristine.
Tom Wood differs from Henri Cartier-Bresson’s style, the decisive moment, as he described his image making style by saying “I would just put up the tripod, open the lens and then wander around with a flash gun, not knowing how the photographs would turn out”. Whereas the decisive moment is about choosing when to shoot, paying attention to the details and shooting when the scene in front of you is the perfect image. Rather than looking through the lens, observing the details, Tom Wood would shoot quickly and whether or not the shot was good, would depend on chance. Similarly to Cartier-Bresson however, Tom Wood’s images are also ‘windows’, documenting the lives of the locals, in a genuine manner.
For this project, my photographs are being captured using a mix of both Tom Wood and Henri Cartier-Bresson’s strategies of photography. In most cases, I follow the theory of the decisive moment, I observe my scenery and shoot the image when I think all components have come together. Although, in some environments, I will take a photograph of what is in front of me without looking through the lens for long, I will watch what is happening and take images and decide after the shoot if the photographs turned out how I had hoped.
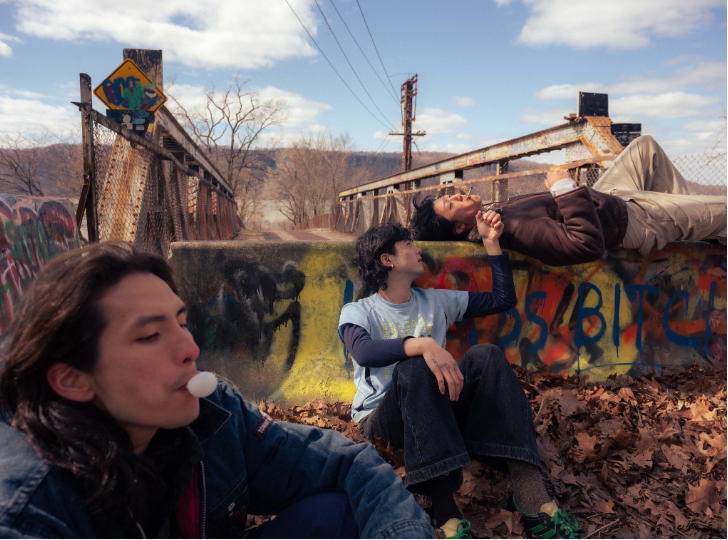
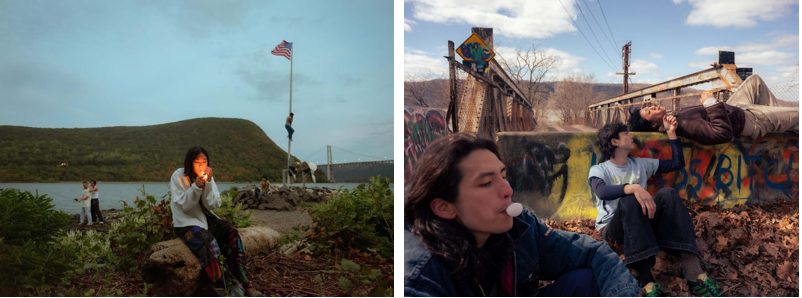
The second artist I have taken inspiration from is Andrew Kung, a modern photographer whose work is centred around portraying the lives of Asian American people. His specific project that has inspired me is ‘Dreaming on the Hudson’. The photographs from this project are documentary style, capturing the activities of young Asian men. The photographs produced in this project are staged situations of the men, plastered around in different settings of the Hudson River. Although the images were taken in the same location, Kung explored all of the different areas around the Hudson, allowing each individual photograph to be unique in its own way. For example, there are images in a field, the water’s edge, grassland etc. Even though the images are staged, they are taken in a documentary approach as the subjects don’t engage with the camera directly, they let themselves be documented.
Kung’s work and manner of shooting images differs from Henri Cartier-Bresson’s theory of the decisive moment, while sharing little similarities. Unlike the decisive moment, where the images produced are about the unpredictability of the moment, Kung’s image making is the opposite. The photographs are of arranged scenes, creating a cinematic feel to them. Although Cartier-Bresson’s images can have the same feel, his images can also be described as more chaotic, as they are captured in a moment of time that may not be captured again. Also, whereas Cartier-Bresson’s, as well as Tom Wood’s, images are ‘windows’, Kung’s images are ‘mirrors’. A ‘mirror’ photograph is one which reflects the photographer, they tend to be more subjective, staged etc., since Kung’s images are staged photographs portraying Asian American’s, they are ‘mirror’ images. Another difference between their photography style, is that Andrew Kung’s work is reflecting a message and meaning – “Through my images, my aim is to normalize Asian American beauty, belonging, and individuality. I often investigate themes of masculinity, family, intimacy, and what it means to be American“.
In my own project, I have taken inspiration from the aesthetics of Kung’s images, rather than his message, and have my own meaning behind the images. My aim is to highlight the idea that every individual has their own unique life, and to show a snippet of the lives of those close to me. The photographs taken of my friends are the ones that most reflect Andrew Kung’s images. This is because of the locations used and also due to how I have presented them in the images. In contrast to Andrew Kung, the majority of my images are not staged, I observed my friends socialising as normal, and shot images of them, apart from a few times where I directed them to perform a certain action to capture a better shot.
To conclude, I think that Henri Cartier-Bresson’s theory of ‘the decisive moment’, can be considered as a true representation of reality to a large extent. This is because, what the camera captures in the moment, is the exact scene in front of you. In terms of Cartier-Bresson’s photographs, it is a true representation of reality as he is not manipulating the images, they are authentic. Similarly, Tom Wood’s photographs, even though he didn’t shoot his images with the decisive moment in mind, both techniques share similarities, causing Wood’s work to also be a true representation of reality. However, Andrew Kung’s project consists of staged images, creating a false reality on the surface, but the true reality of the image is the meaning behind it. When taking my own images, during the photoshoots I would take multiple images while a scene unfolded in front of me, the final images produced are the ones where all of the components came together in place. As discussed previously, my images and procedure of image making have similarities and differences with Henri Cartier-Bresson’s as well as Tom Wood and Andrew Kung. In summary, I followed Cartier-Bresson’s theory of ‘the decisive moment’ to a certain extent, as I ensured all elements of the image were at their prime when taking the image. With Tom Wood’s photographs, my images share similarities in the sense that they were all documentary images, even though Wood didn’t prioritise that the style of his images were documentary, “I’m only interested in good pictures, if it’s a document then it’s a bonus”. I recorded the lives of those close to me and he reordered the lives of strangers in his town. Finally, my work is similar to Andrew Kung’s as a big part of my work is focussed on my friends who are youthful, like the people he photographed in ‘Dreaming on the Hudson’, also I find that the appearance of my images are similar to his. Oppositely to both Tom Wood and Andrew Kung, my final images are presented in black and white, whereas their photographs are bold and bright in colour. Each of these artists have a different approach to photography, and a different reason behind their work. In spite of this, in some sense, they all portray reality through their image, which is what my own photographs are intended to do.
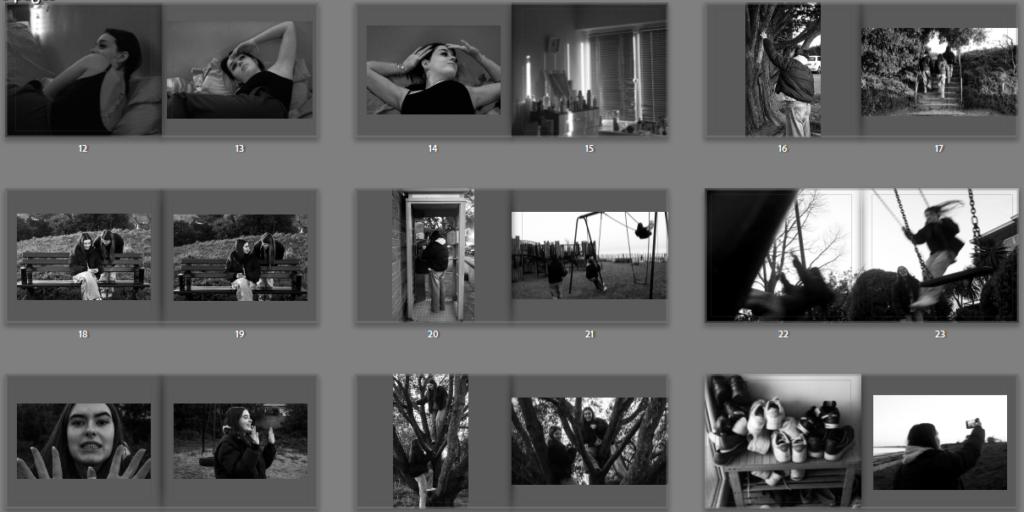
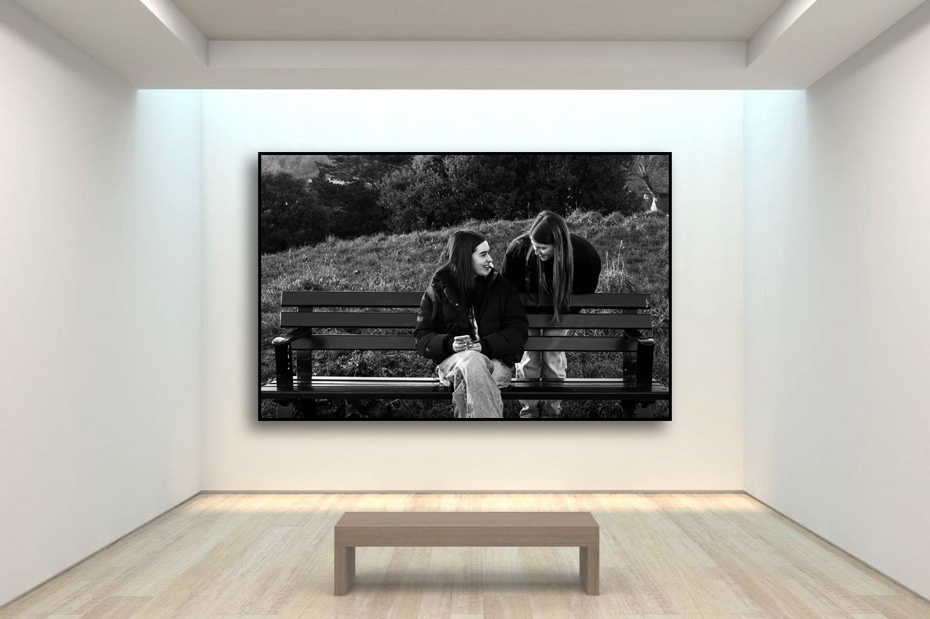
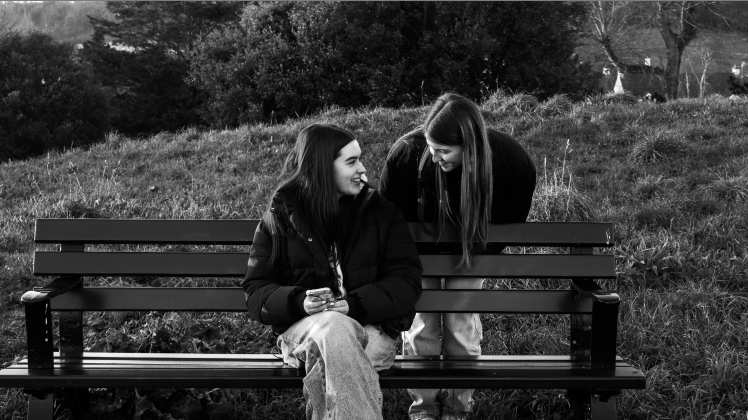
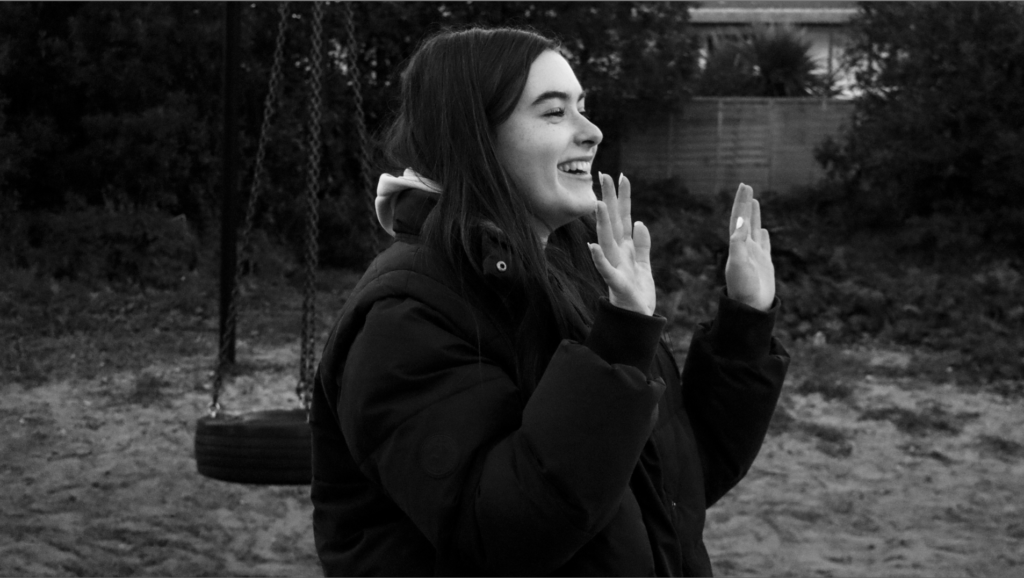
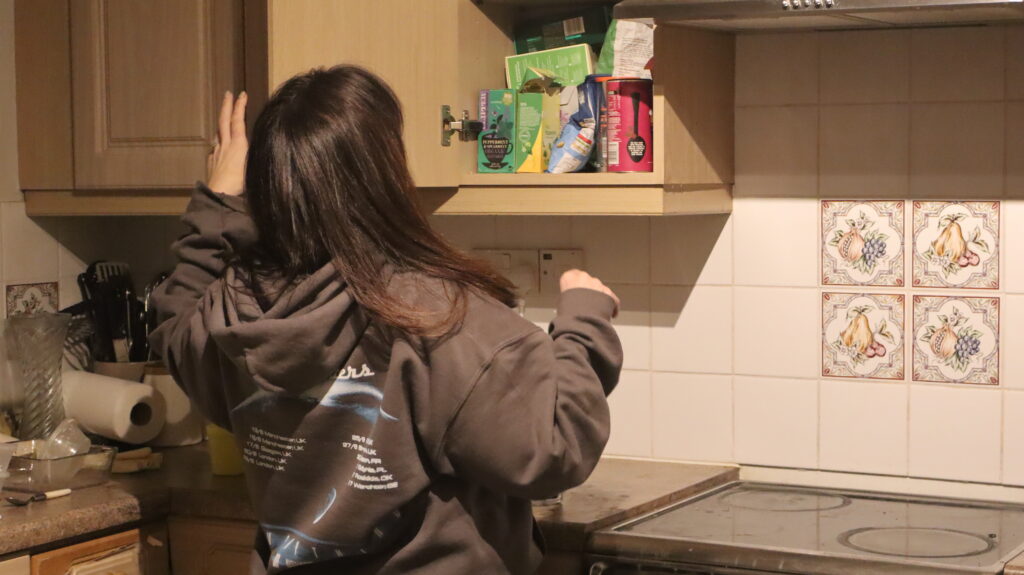
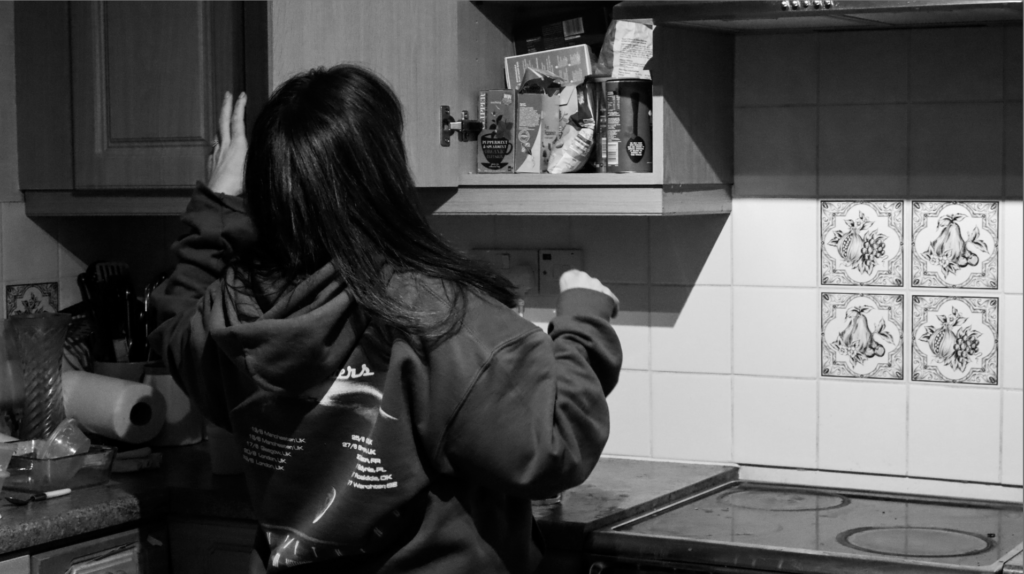
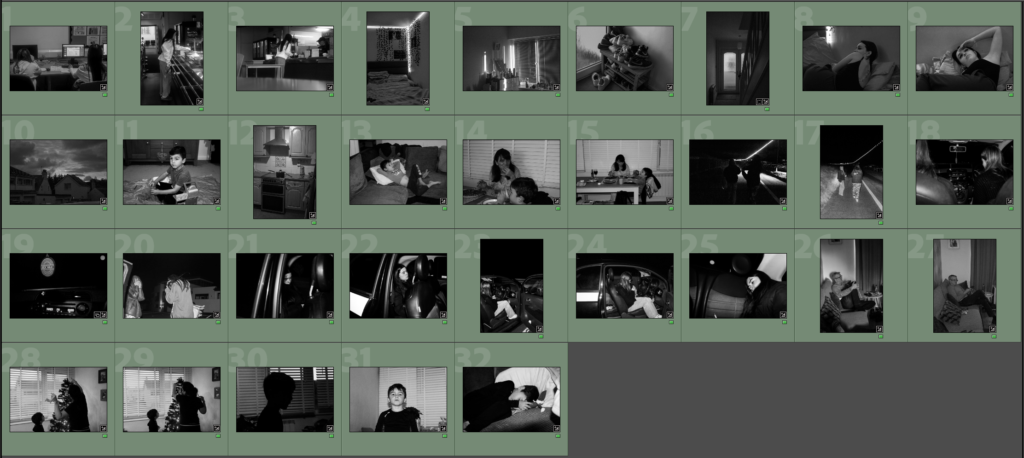
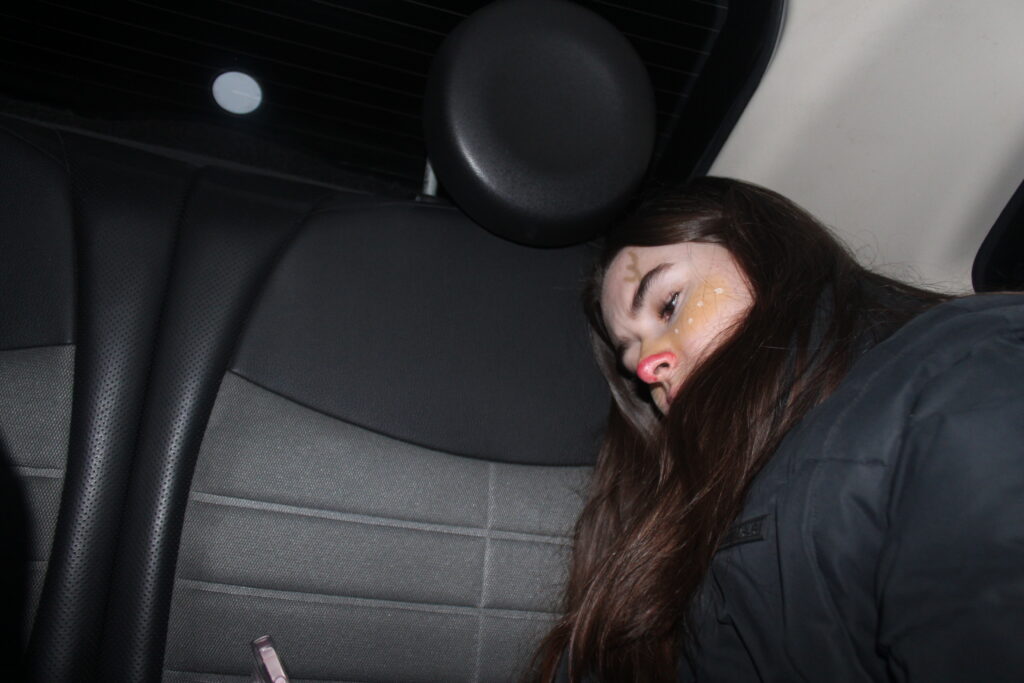
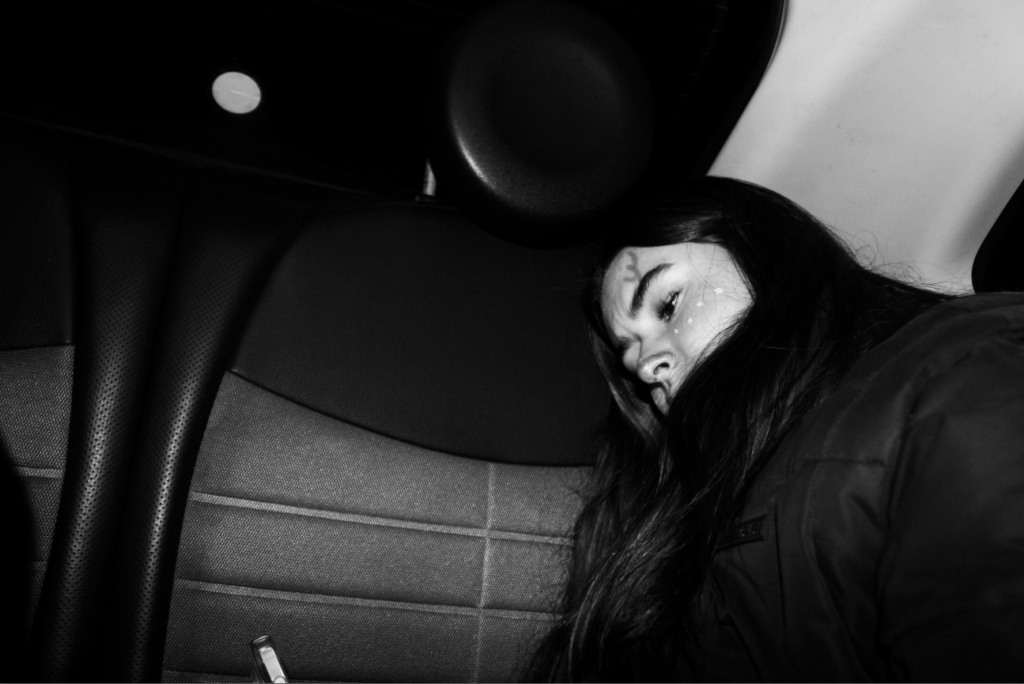
This is my third photoshoot for this project. In this shoot, I have focussed on capturing images of my friends, a group of teenage girls socialising. To take these images, I observed as we did the usual things we would do but I would exclude myself and take photographs. My goal was to take images of what was happening in front of me, making sure my friends could ignore the camera to ensure authentically aesthetic shots.
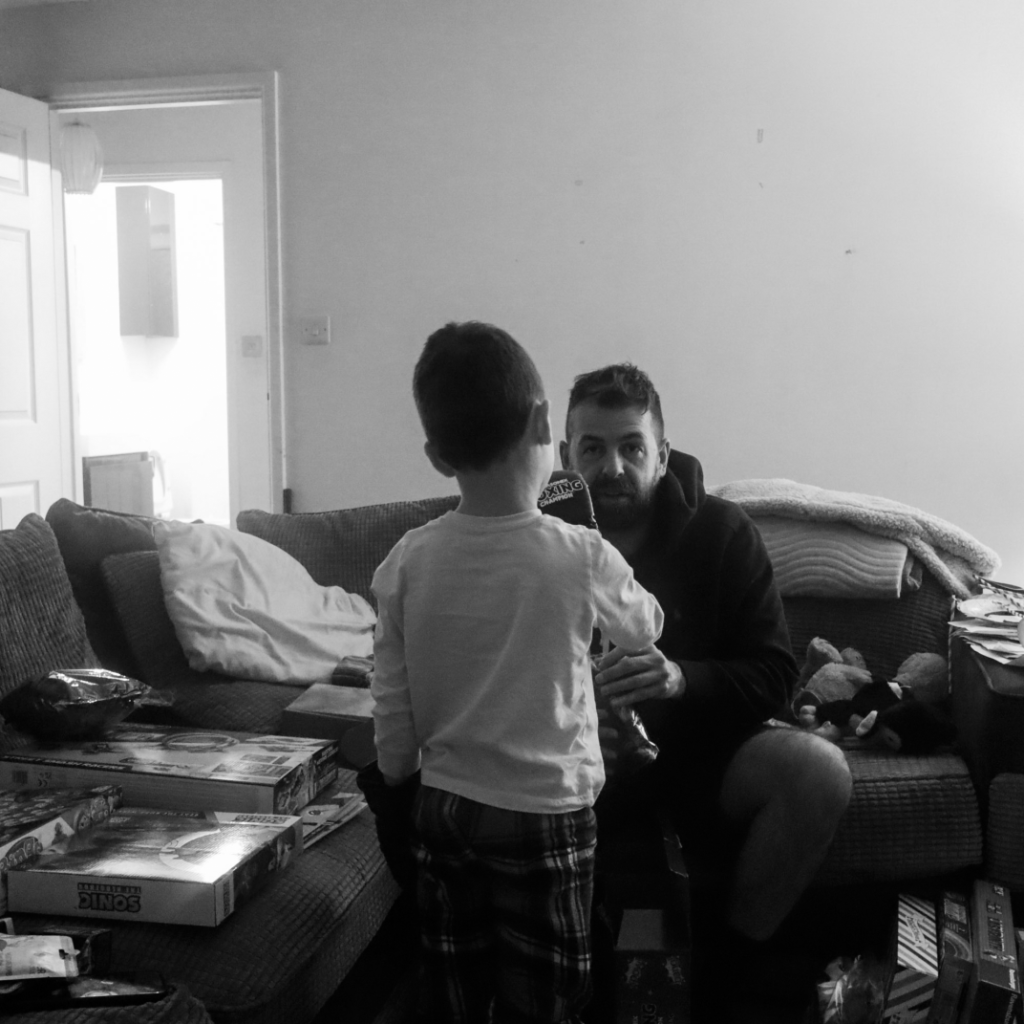
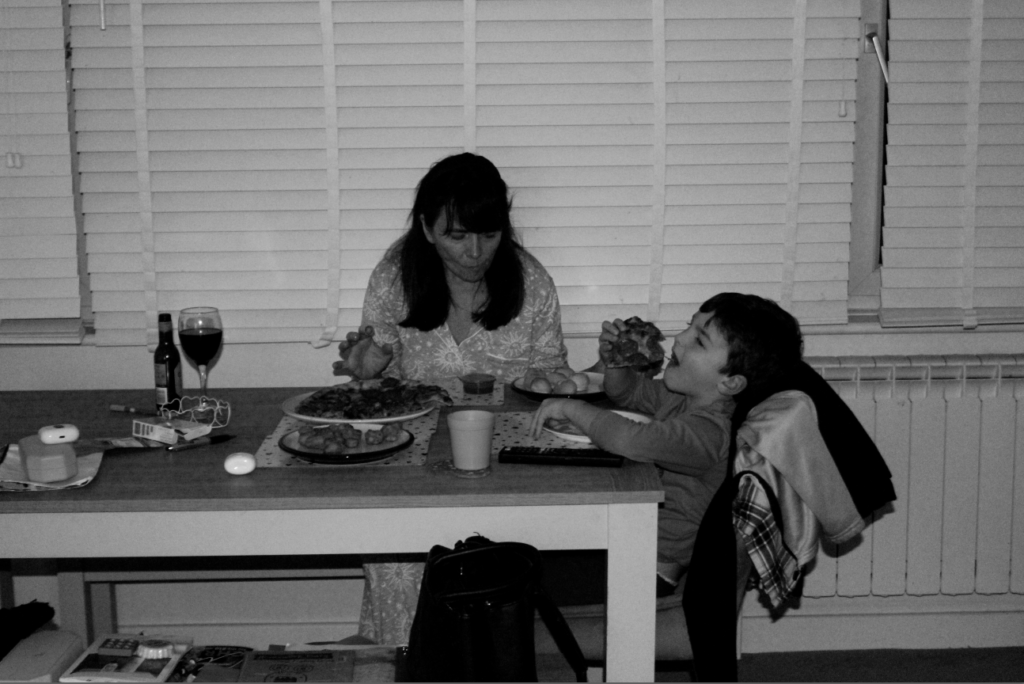
After looking over the final photographs, I decided to make the images black and white. I have now decided, after experimenting with the first few photoshoots, that my project will be presented with all of the images in black and white.
Some final images:
This third photoshoot is my best photoshoot for this project. The images I shot during this are good quality images, which portray the goal of these shoots perfectly well.
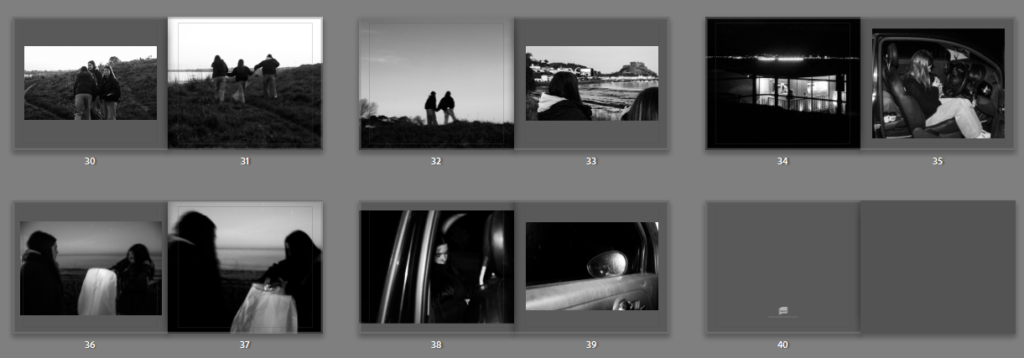
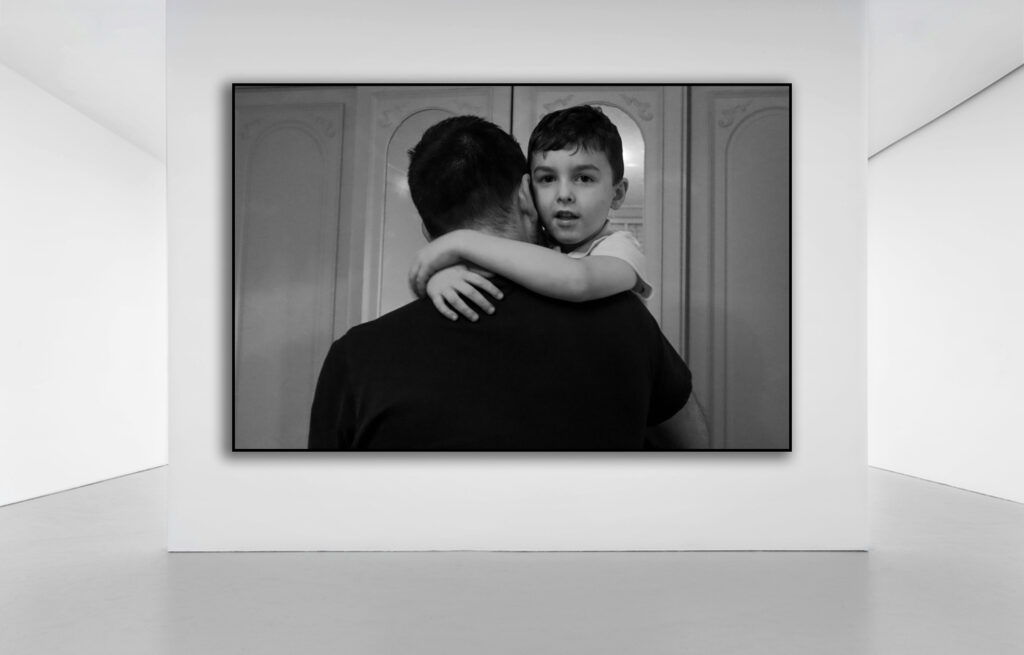
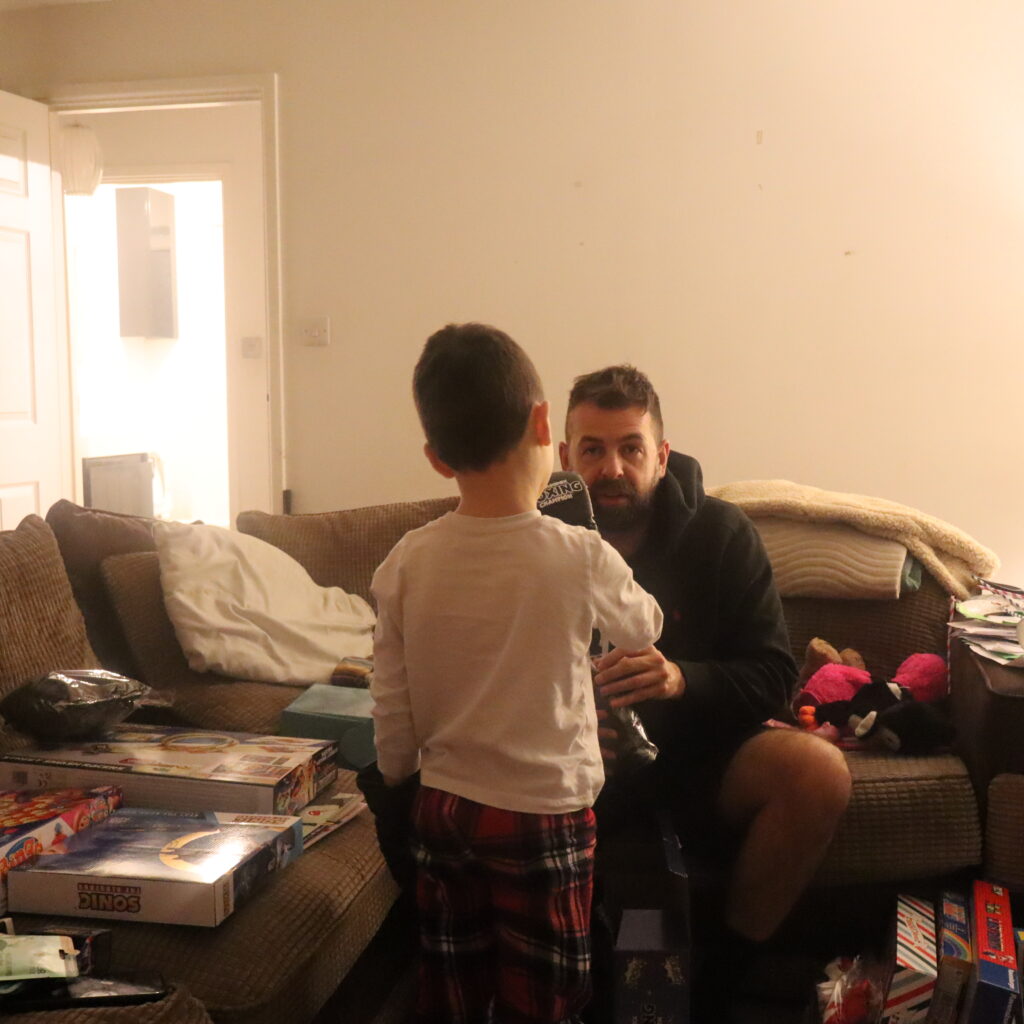
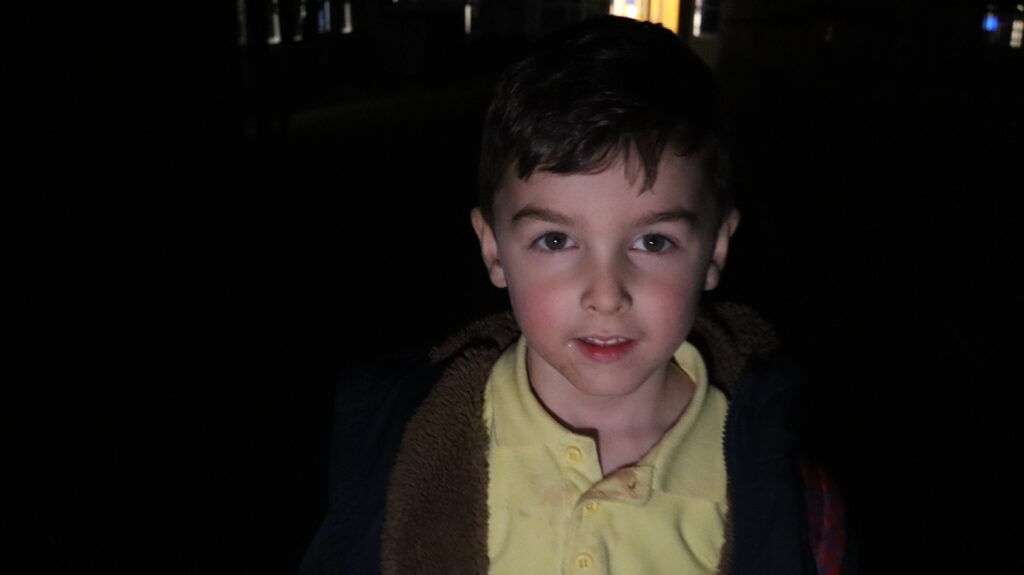
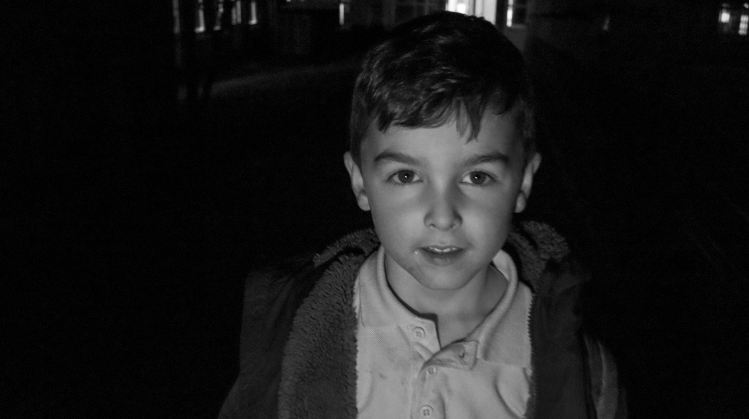
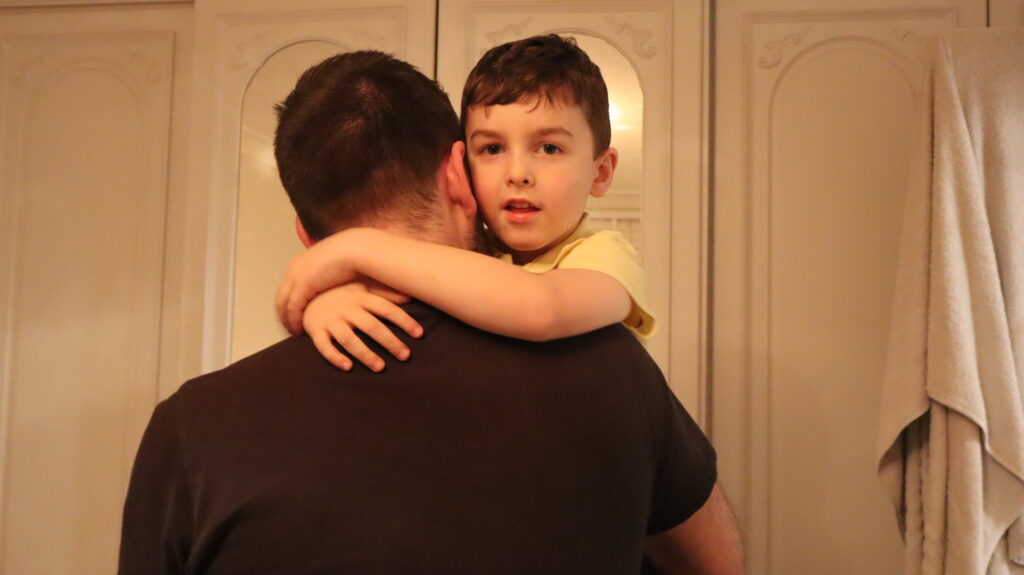
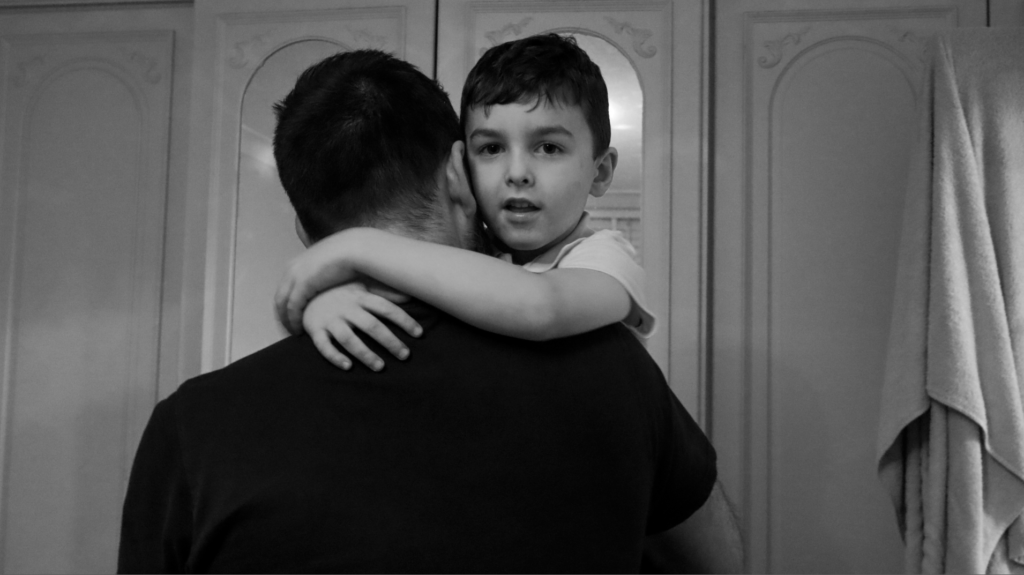
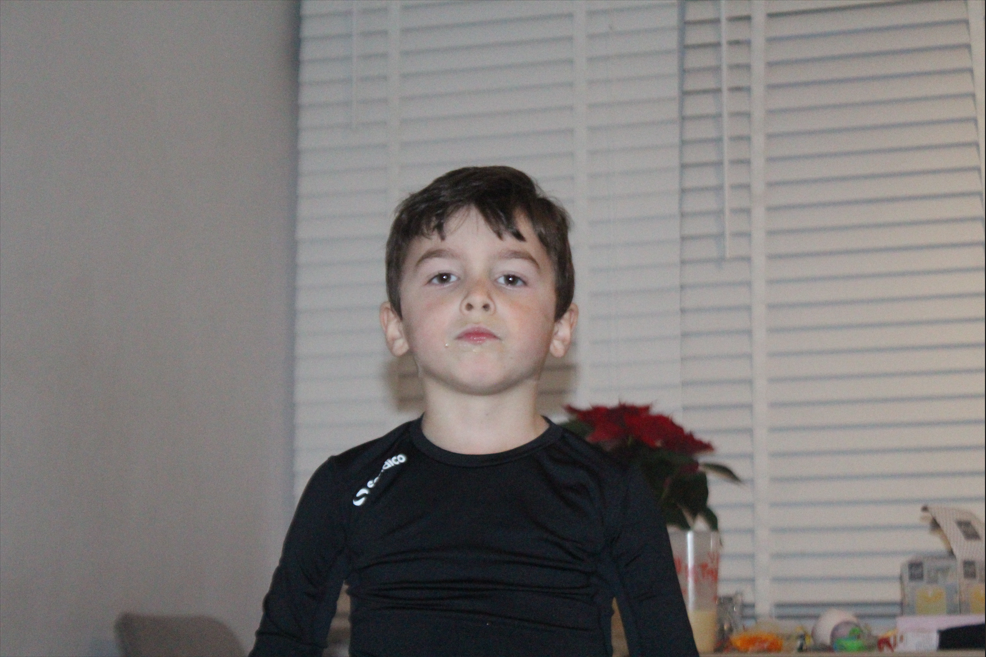
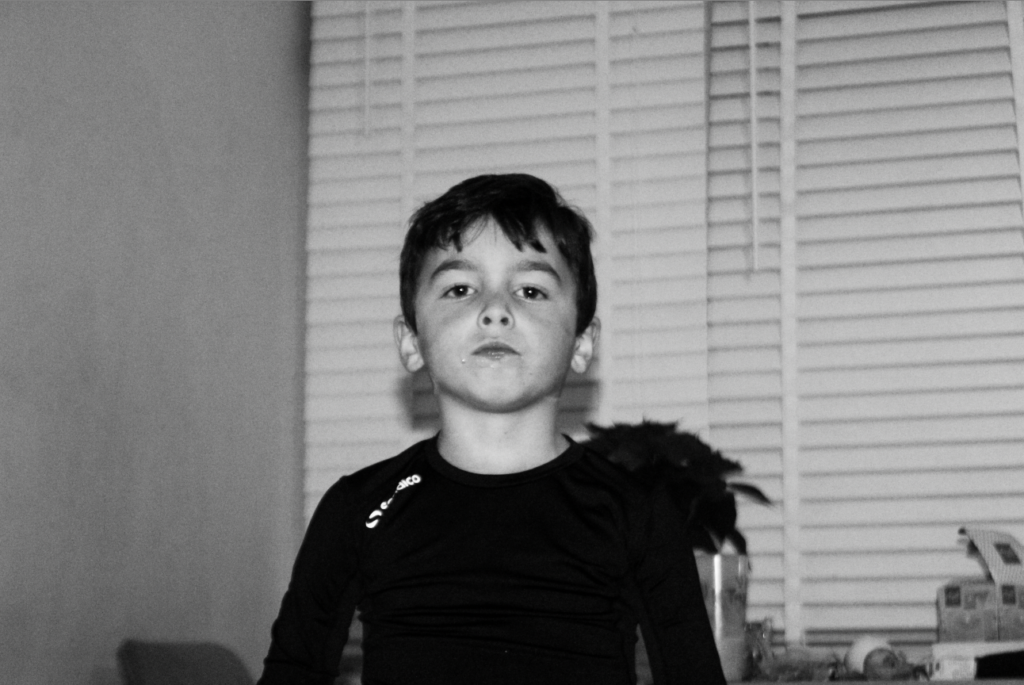
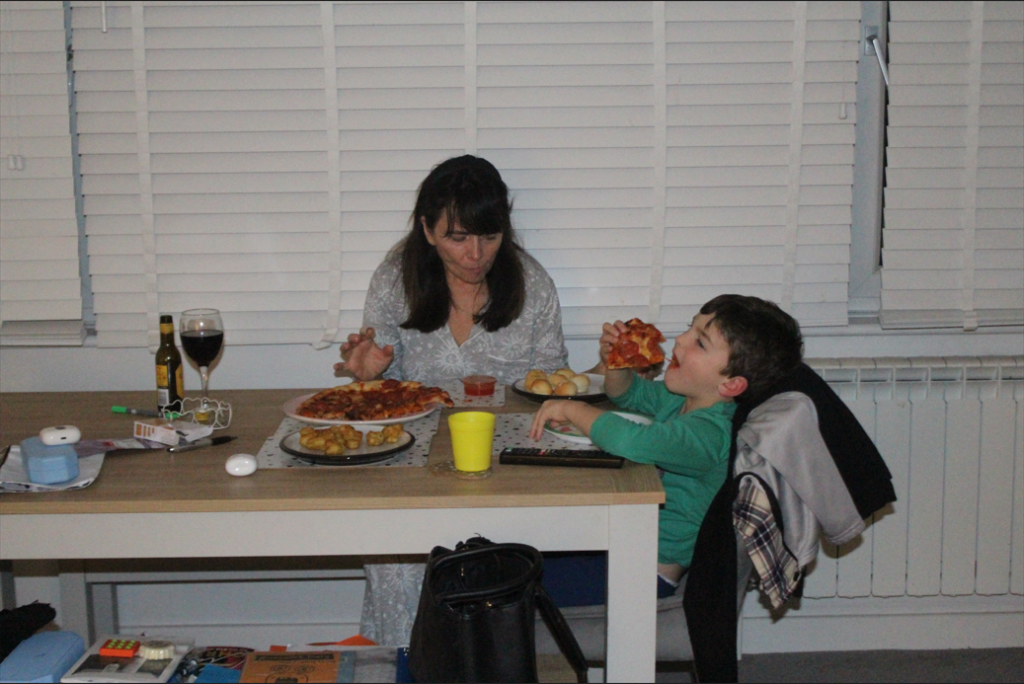
This photoshoot consists of images of my brother and family. I have images of my brother alone, with his dad and images of my mum. These photographs were taken both inside, the house, and outside, on the street and outside of his school.
My images before and after editing:
Before:
After:
Before:
After:
Before:
After:
Before:
After:
I think that this photoshoot didn’t capture as many good images as my first one, however there are still some images in this shoot that I think turned out well. Even though I find it wasn’t as successful, the images from this photoshoot followed my narrative as I had aimed so I will be able to incorporate the photographs that I do like, into my project.
These are the first lot of photographs that I have taken for m personal study. I have taken images of my younger brother at home, him and our mum, and photographs of my friends socialising. This is my first photoshoot to get an idea of the kinds of photos I want, and how to achieve this.
For each image, I tried to use the same black and white filter while also adjusting the exposure and contrast if needed. As well as altering things such as the highlights, shadows, whites and blacks.
Some of my images:
original:
edited:
original:
edited:
original:
edited:
I think this first photoshoot turned out well as I was able to capture good quality images successfully in the style that I had aimed for. This shoot has allowed me to explore different ways the photograph what I want as well as help me to expand on my ideas and approaches for the next photoshoot.
Tom Wood is an Irish photographer, who lived and worked in different places in the UK, mainly in Liverpool. The book consists of images of the town’s people in clubs, streets, beaches, everywhere of mothers, fathers, sons and daughters, friends, lovers etc. His book is a way of showing others, a small story of strangers lives.
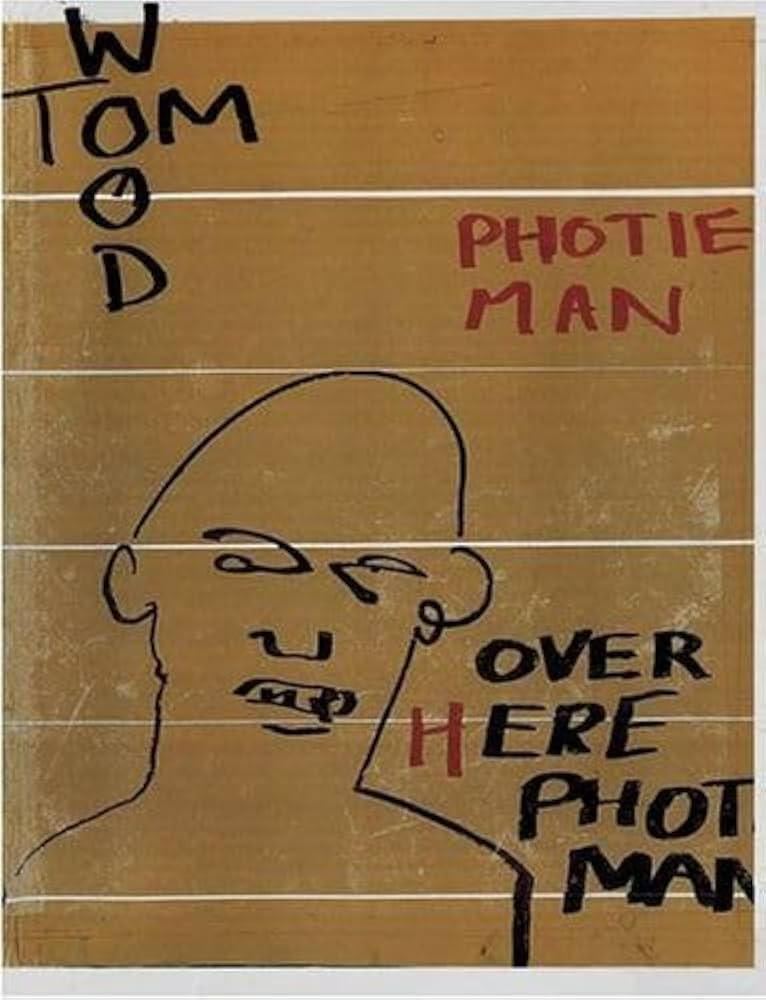
The title of this photobook is ‘Photie Man’, inspired by the nickname he was known as by the locals who he would take photographs of, and who would see him out always with his camera.
The cover of the book is a light brown/ beige colour with thick black writing, making his name more prominent. However, the title ‘Photie Man’ is in red bringing the attention to it. There is also a doodle-like illustration depicting a man, adding more to the cover. The cover is printed onto the paper, the designing wrapping around to the back cover.
This photobook is made up of a type of paper which isn’t quite glossy but has the same feel and is more satin. It’s slightly bigger than an A4 piece of paper and has over 200 pages with around 500 photographs. The images inside are presented in both portrait and landscape, images are displayed across a whole page, some have the paper boarder the image, presented across the double page spread or some pages even have a couple images on one.
Tom Wood’s photobook seems to intend to portray a narrative of life in Liverpool. The images in the book aren’t presented in a particular order, there may be a few images that group together so are presented with each other, for example photos from in a nightclub can be found following one another. However, the photographs are shown in such a way that reflects life itself, unpredictable.
In this essay, I will explore the work of Henri Cartier-Bresson, with a particular focus on his role in the development of documentary photography and his concept of the decisive moment. His approach to capturing spontaneous, meaningful moments has strongly influenced the direction of my own photography project.
The introduction will outline my chosen area of investigation within documentary photography. I will explain the key artist influences I have drawn upon throughout the project, including Cartier-Bresson and other photographers. This section will also set out the intentions behind my study — what I aim to explore and how I plan to investigate it.
Following this, I will examine the historical and cultural context of Henri Cartier-Bresson’s work. I will analyse the significance of the decisive moment, discussing how it shaped photography and how it continues to inform my own approach to timing, composition, and visual storytelling.
The main body of the essay will then provide a more detailed exploration of selected photographers whose work has inspired mine. I will interpret key images from these artists, analysing their use of technique, subject matter, and context. I will also reflect on how their approaches have influenced the development of my ideas and outcomes.
In conclusion, I will summarise the aims and outcomes of my project, evaluating how successfully I have communicated my intentions through photography. I will also compare and contrast my work with that of the artists I studied, highlighting both the similarities and the distinctions in our approaches.
For this project, the photographs I will be taking are documentary style, capturing moments in time. My aim is to take images unplanned, and unbeknownst to the subjects, ensuring that they are completely natural. However, I will also organise times where I photograph people but I will still only capture unplanned, spontaneous images.
These shoots will consist of images inside and outside, following where they go, incorporating a variety of locations in this project, e.g. town, seaside, schools, houses etc.
My first photoshoot that I will take for this project will be focused on my friends. The photoshoot will include teenager girls together doing what they do for fun, I will document what activities they do and capture moments of them naturally.
Next, I am going to take images of my younger cousin and his friends and family. I will use the same approach, shooting them acting and doing what they usually would. These photographs will have images of the family as a whole, portraying their life but then I will also zoom in on the individual members and shoot images based on their own independent life.
My third shoot will be based on the life of my own younger brother. I will follow a similar procedure, to shoot photos of what he gets up to in the day and his routines.
I am taking inspirations from the works of photographers Tom Wood, Andriana Nativio, and Andrew Kung. I’m using different aspects of all of their images to inspire my own project. My images will reflect some parts of these artists work, whether it is the type of image, the aesthetics or the intentions.