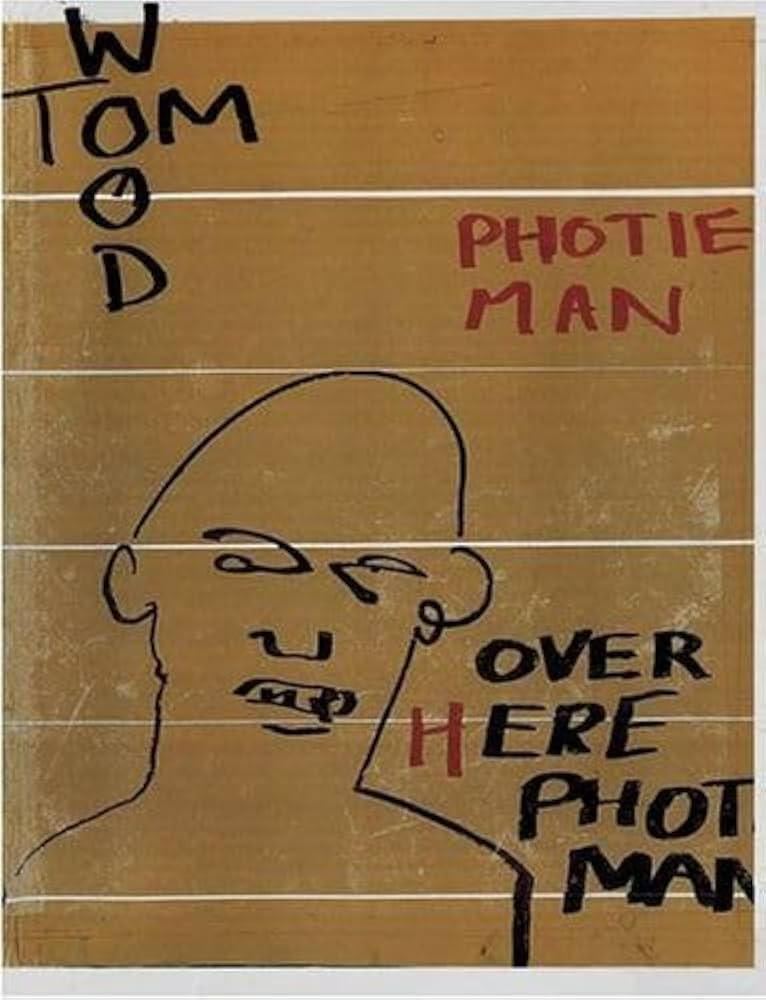
Tom Wood is an Irish photographer, who lived and worked in different places in the UK, mainly in Liverpool. The book consists of images of the town’s people in clubs, streets, beaches, everywhere of mothers, fathers, sons and daughters, friends, lovers etc. His book is a way of showing others, a small story of strangers lives.
The title of this photobook is ‘Photie Man’, inspired by the nickname he was known as by the locals who he would take photographs of, and who would see him out always with his camera.
The cover of the book is a light brown/ beige colour with thick black writing, making his name more prominent. However, the title ‘Photie Man’ is in red bringing the attention to it. There is also a doodle-like illustration depicting a man, adding more to the cover. The cover is printed onto the paper, the designing wrapping around to the back cover.
This photobook is made up of a type of paper which isn’t quite glossy but has the same feel and is more satin. It’s slightly bigger than an A4 piece of paper and has over 200 pages with around 500 photographs. The images inside are presented in both portrait and landscape, images are displayed across a whole page, some have the paper boarder the image, presented across the double page spread or some pages even have a couple images on one.
Tom Wood’s photobook seems to intend to portray a narrative of life in Liverpool. The images in the book aren’t presented in a particular order, there may be a few images that group together so are presented with each other, for example photos from in a nightclub can be found following one another. However, the photographs are shown in such a way that reflects life itself, unpredictable.
In this essay, I will explore the work of Henri Cartier-Bresson, with a particular focus on his role in the development of documentary photography and his concept of the decisive moment. His approach to capturing spontaneous, meaningful moments has strongly influenced the direction of my own photography project.
The introduction will outline my chosen area of investigation within documentary photography. I will explain the key artist influences I have drawn upon throughout the project, including Cartier-Bresson and other photographers. This section will also set out the intentions behind my study — what I aim to explore and how I plan to investigate it.
Following this, I will examine the historical and cultural context of Henri Cartier-Bresson’s work. I will analyse the significance of the decisive moment, discussing how it shaped photography and how it continues to inform my own approach to timing, composition, and visual storytelling.
The main body of the essay will then provide a more detailed exploration of selected photographers whose work has inspired mine. I will interpret key images from these artists, analysing their use of technique, subject matter, and context. I will also reflect on how their approaches have influenced the development of my ideas and outcomes.
In conclusion, I will summarise the aims and outcomes of my project, evaluating how successfully I have communicated my intentions through photography. I will also compare and contrast my work with that of the artists I studied, highlighting both the similarities and the distinctions in our approaches.
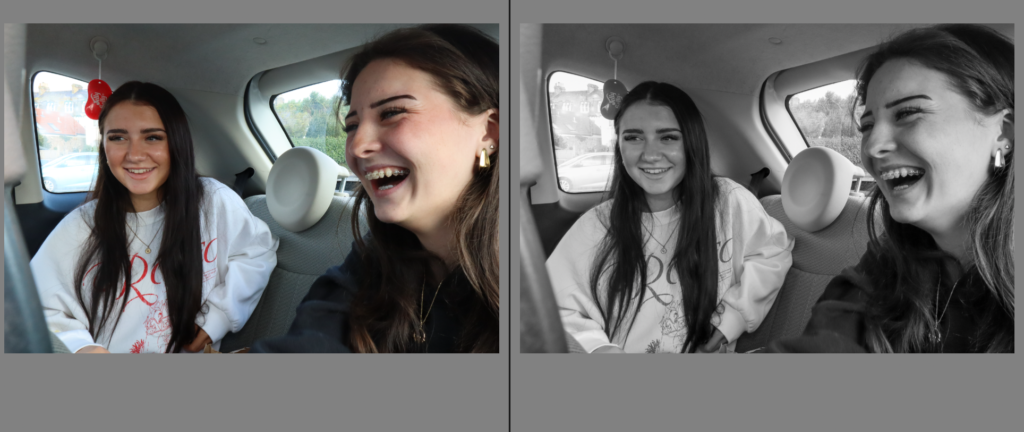
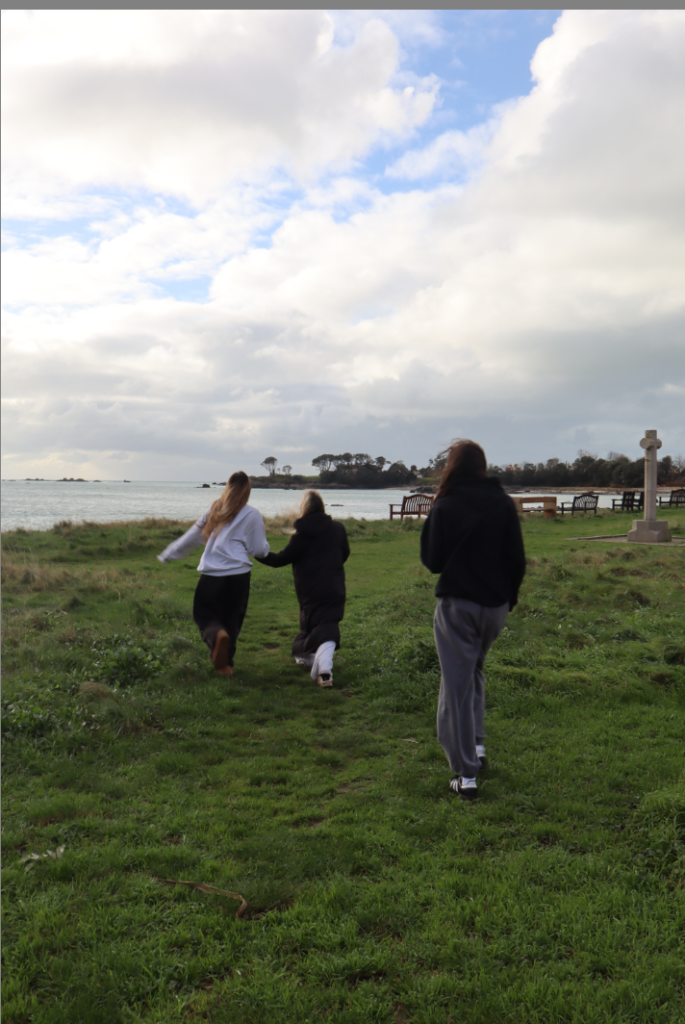
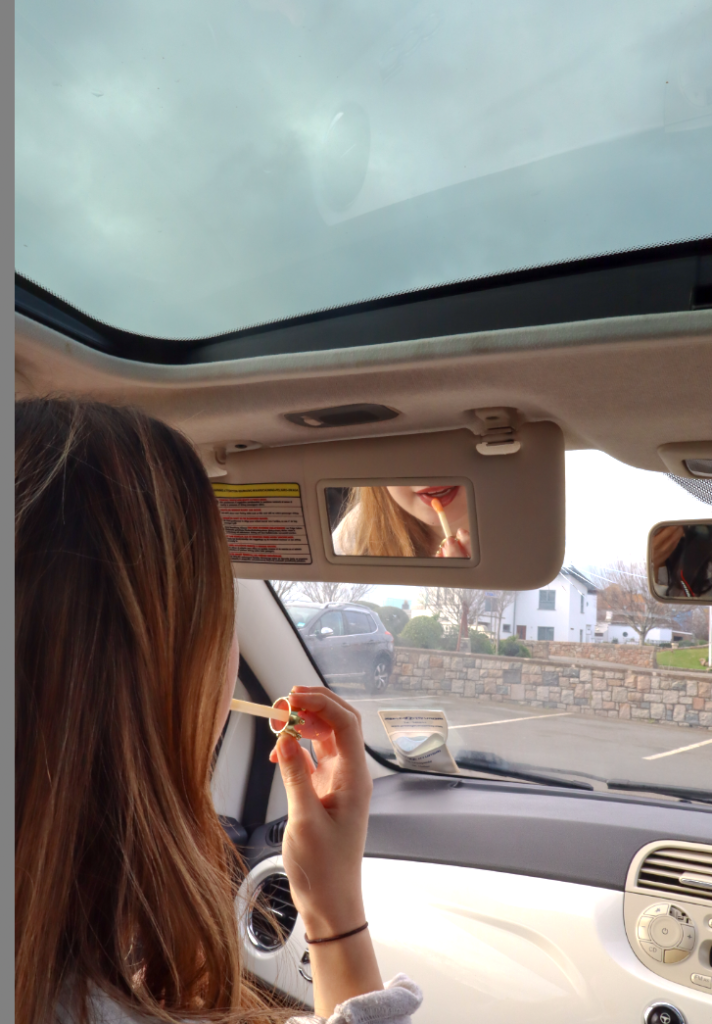
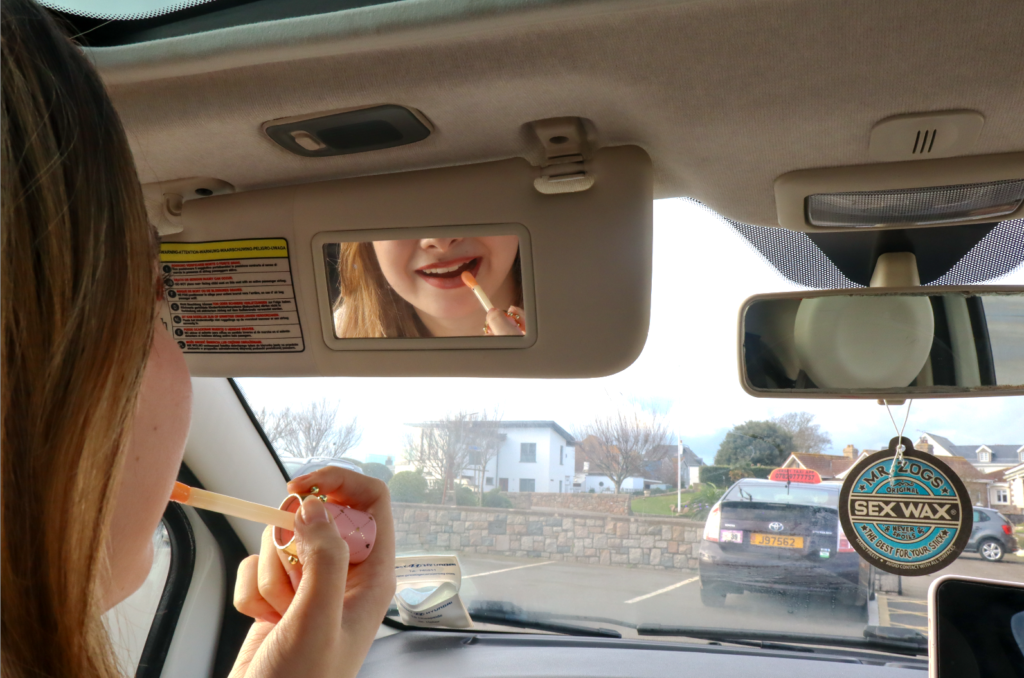
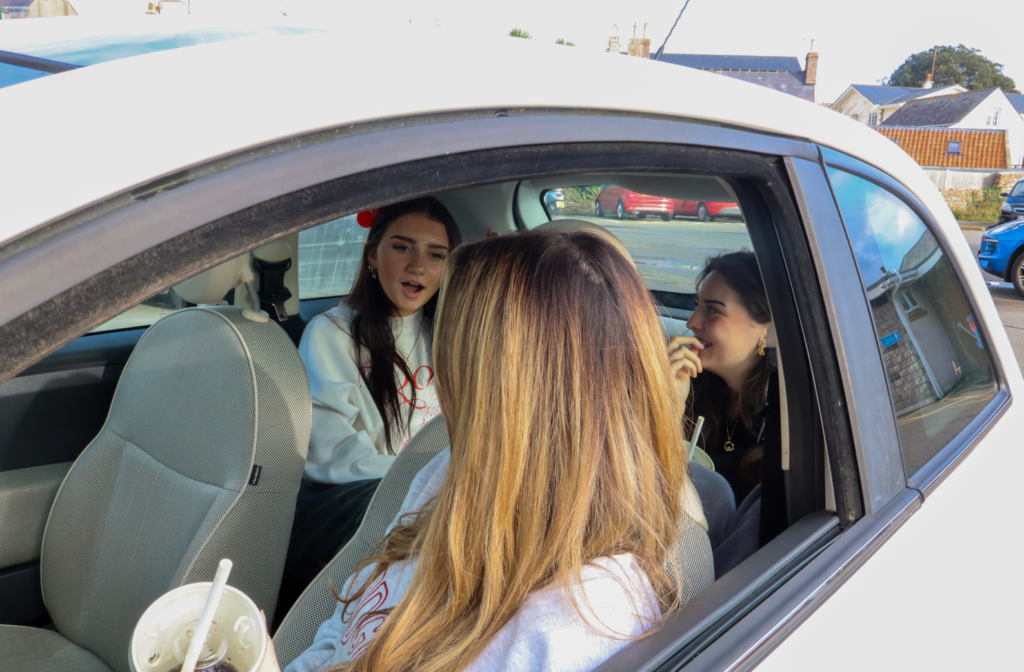
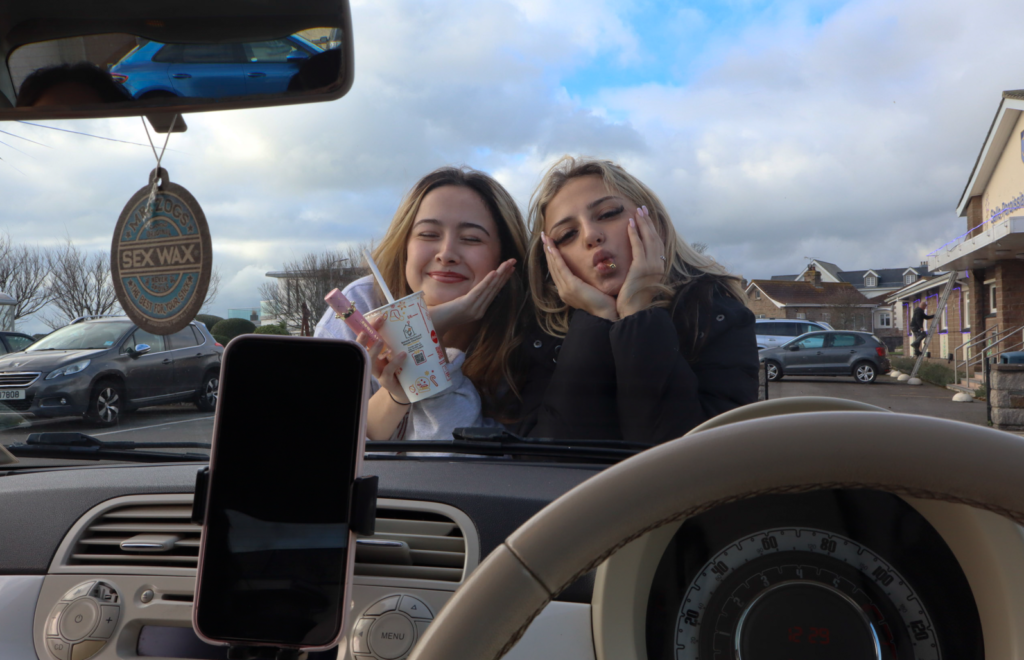
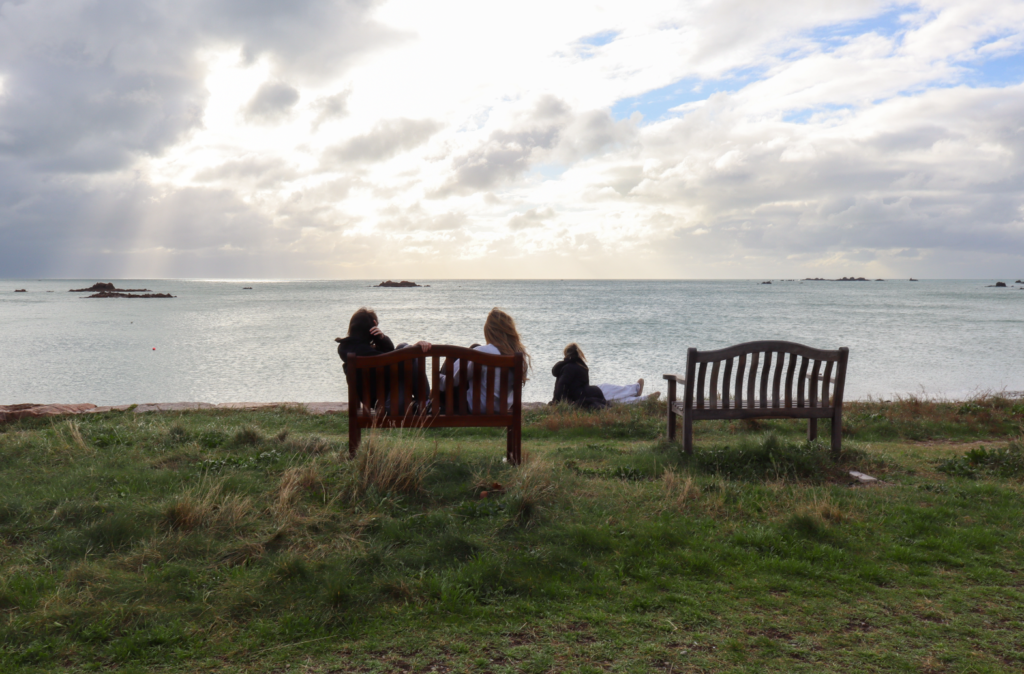
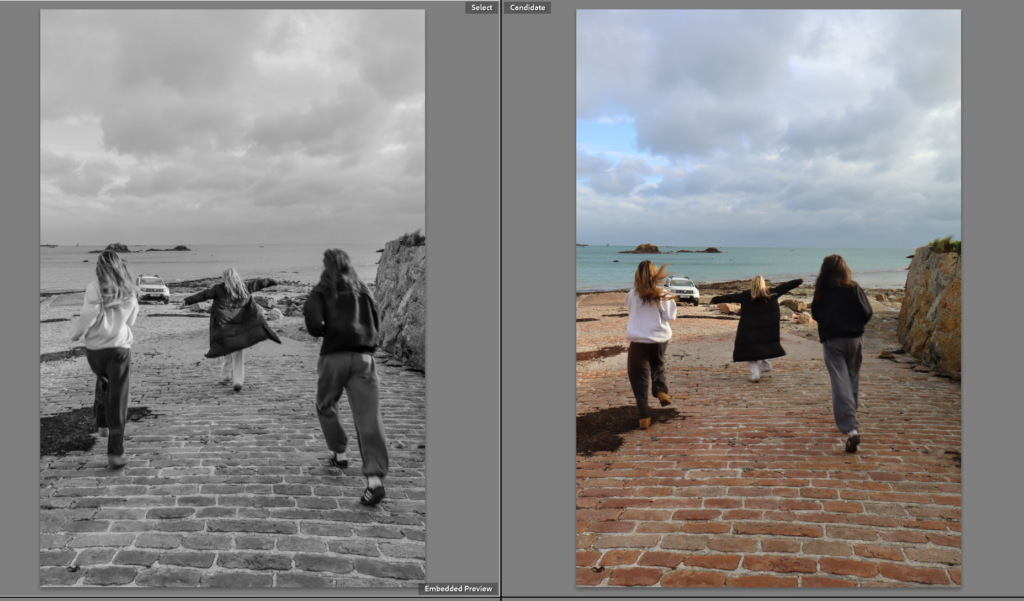
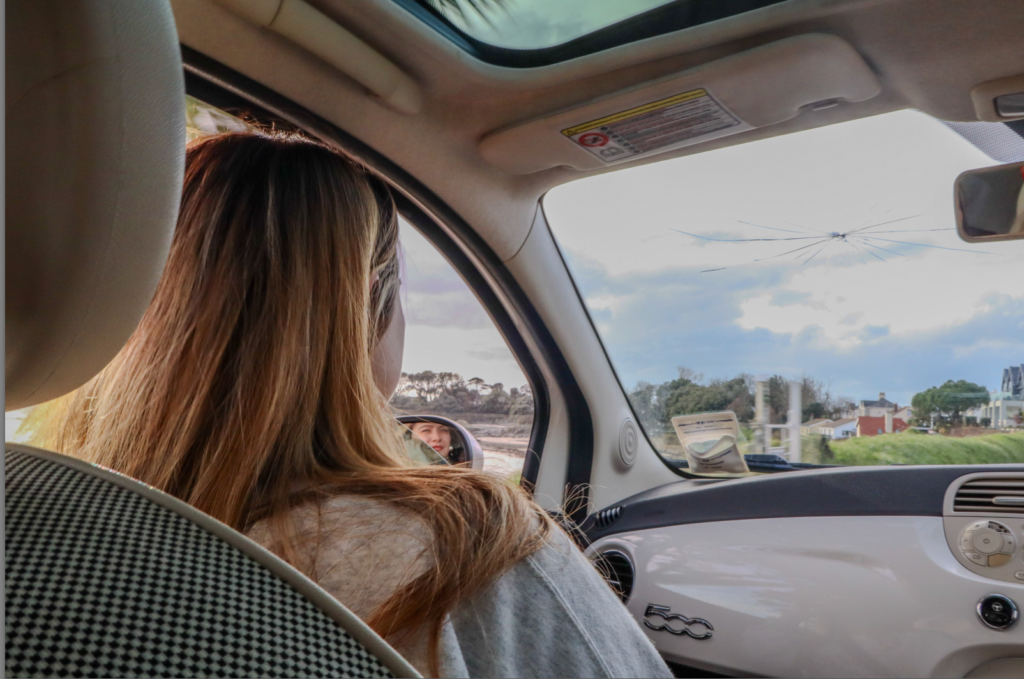
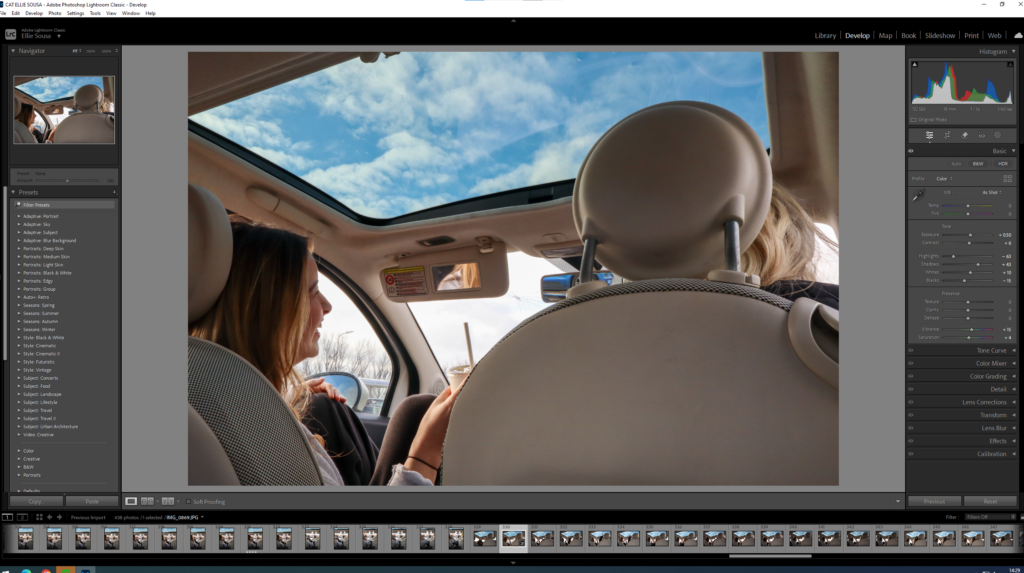
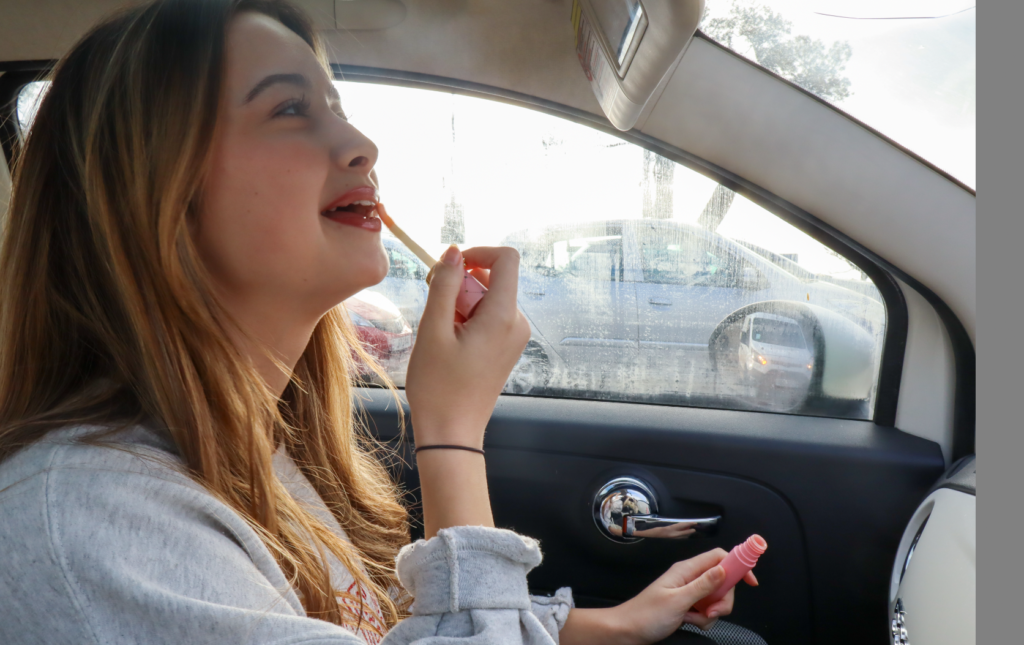
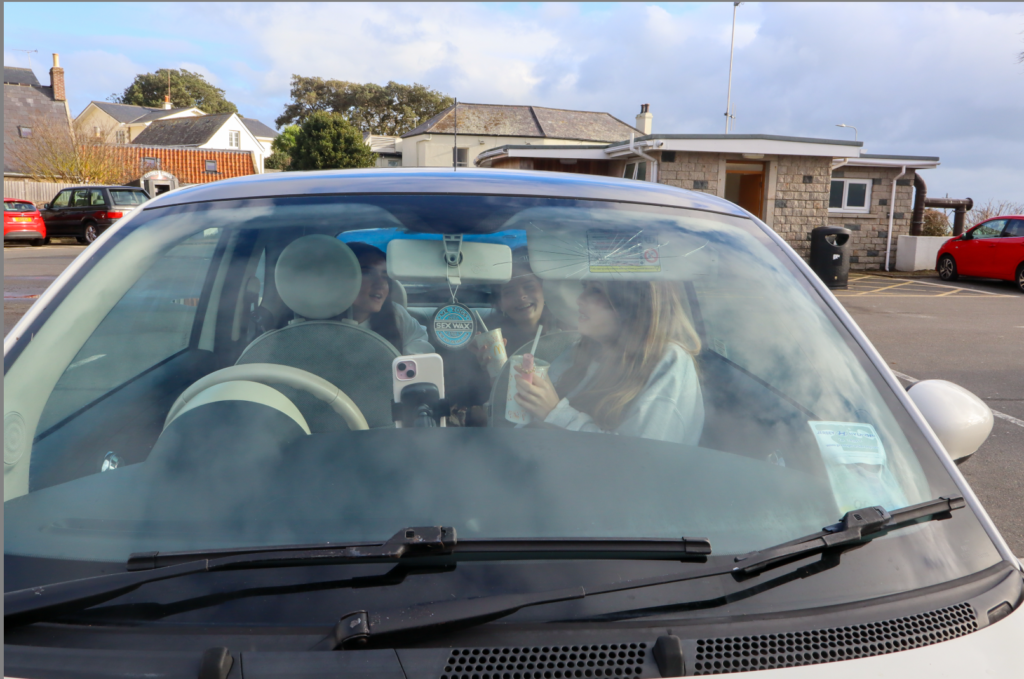
I started my girlhood shoot at Le Hocq in jersey around the beach and in my fiat 500. I took images of many different things such as girls putting on lip gloss, laughing (caudinid) and walks a long the beach.
Here are my favourite images from this shoot. I like that the lighting for the shoot was natural daylight, which illuminated the scene and the atmosphere of the beach. The soft sunlight created a warm, golden glow. I used a focused aperture to highlight the moments of joy and expressions of the girls. With a low ISO sensitivity, the images maintained a clean quality, preserving the sharpness of the scenes even in the bright daylight. For the warm tones, I set the white balance to a slight “cast” setting, allowing for a soft, sun-kissed glow that added to the overall nostalgic and dreamy feel of the shoot and the sense of girlhood.
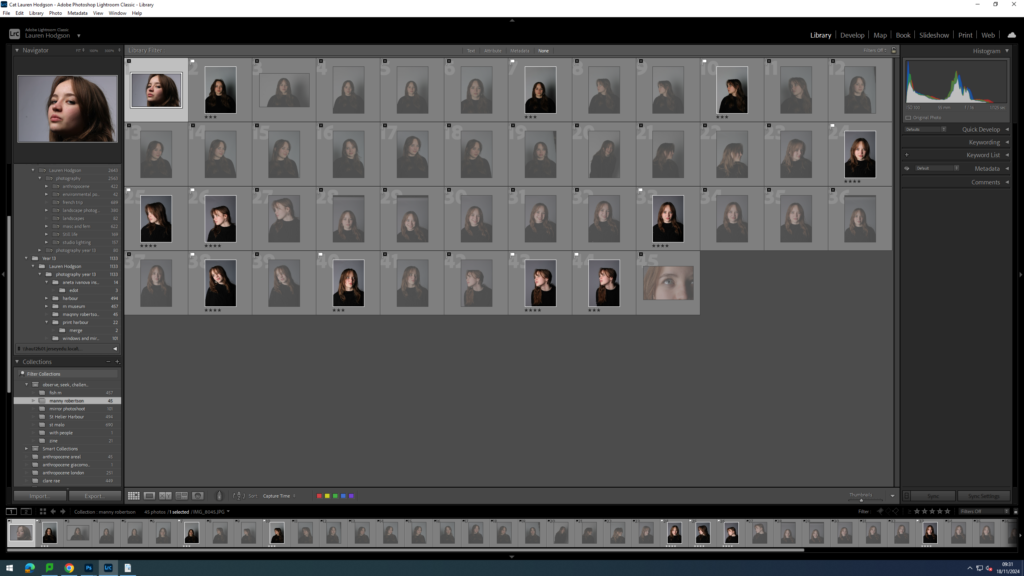
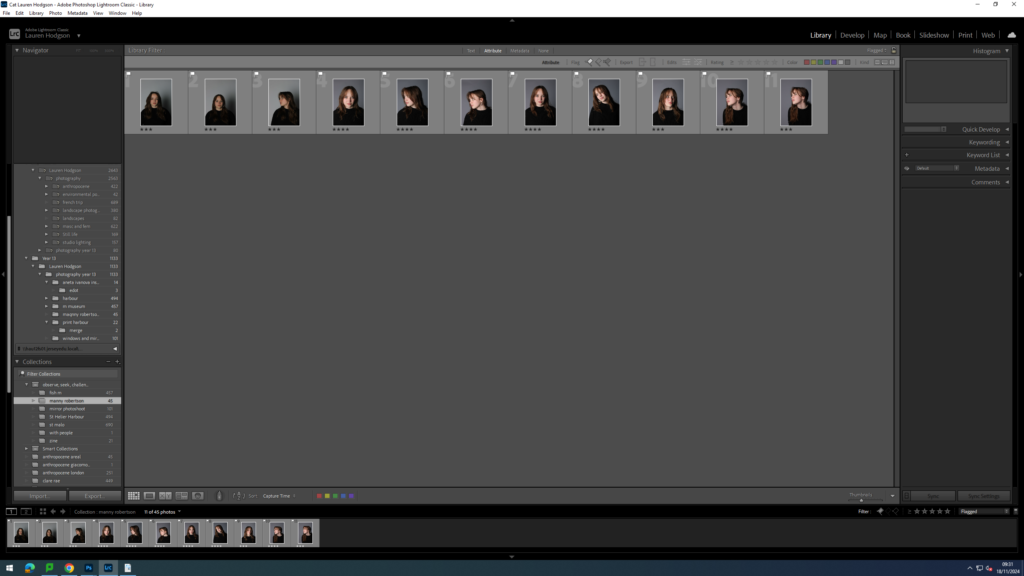
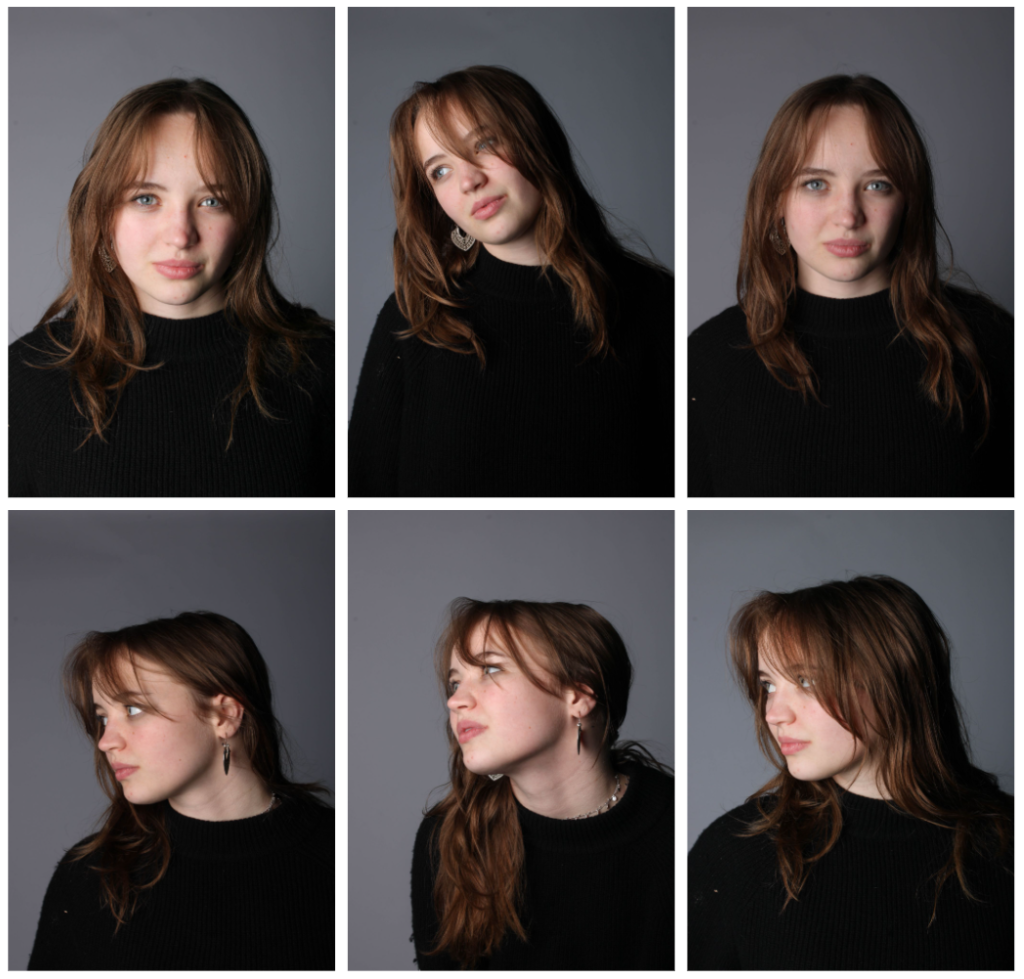
For this photoshoot, I was inspired by Manny Robertson. I began recreating his work by taking photographs of a model in the studio. I placed one of the studio lights directly in front of her face to ensure my images would be clear and without shadows. I photographed her in front of a white background as this is the background colour typically seen in his images. I then got the model to experiment with different poses for example, looking to the side or tilting her head. I then imported my images into Lightroom and began narrowing down what images I wanted to use. I did this by first giving either a white flag if I liked the image or a black flag if I didn’t like it. I then gave all my images with a white flag a ranking out of 5. 5 being the best and 1 being the worst. I then used the filter tool to make it so I could only see my images with a 4 star rating. Then I edited the contrast and exposure of each image. These are the images which I will edit in photoshop.
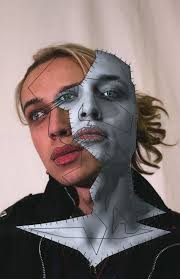
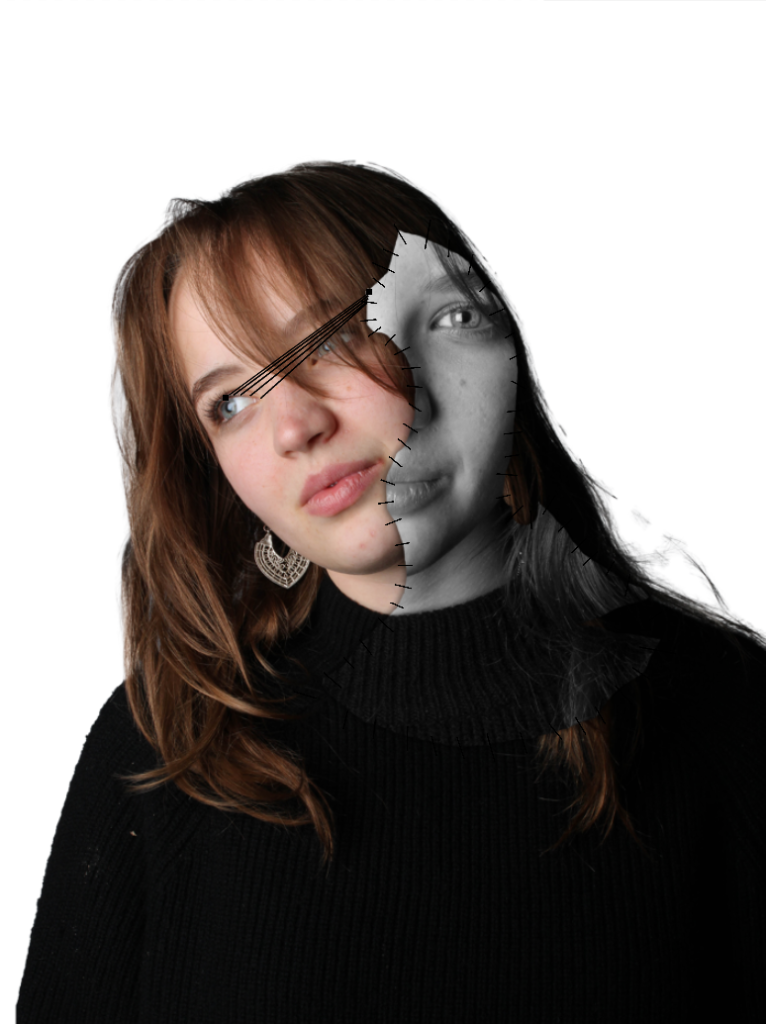
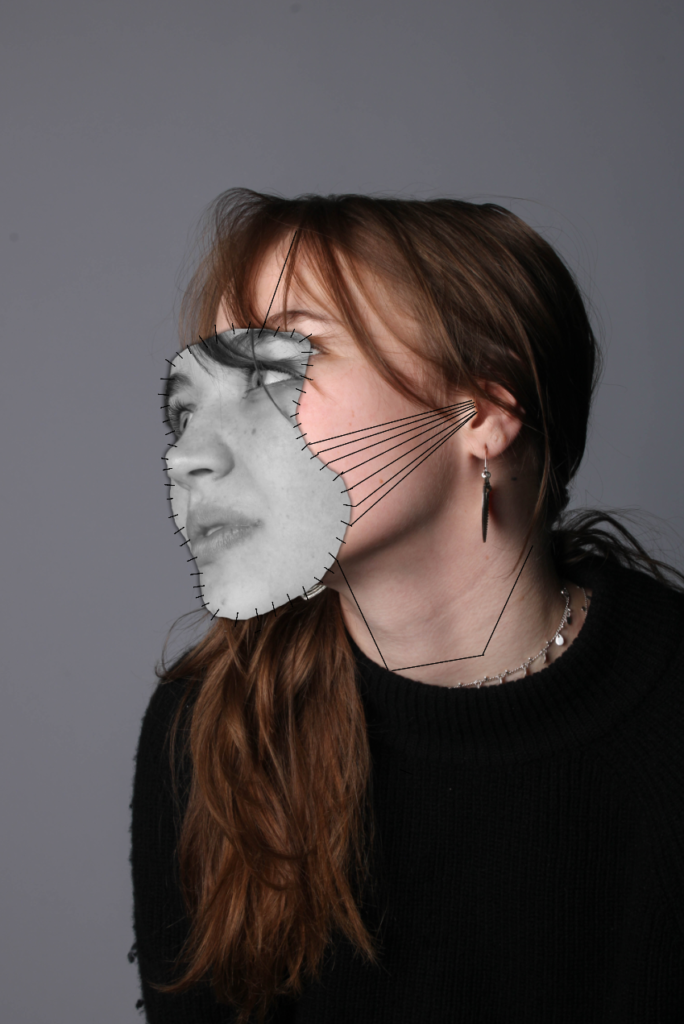
I then exported my photos into a folder which I could then open in photoshop. I began by opening up an image where the model’s head was tilted to the side then used the object selection tool the make a cut out of her outline and dragged the cut out onto a white piece of paper. I then opened up a different image where her head was facing upwards and used the lasso tool to go around a section of her face. Next, I pressed layer via copy and dragged that cut out onto the face on the white piece of paper. After that, I pressed on the top layer and made it black and white as seen in Manny Robertson’s work. Next, I worked on the stitching effect seen between the two faces. I recreated this effect by using the pen tool on photoshop to make marks going from one face to another then made the thickness of it lower so it looked like stitching. Finally, I wanted to emphasise the idea a mask being pulled off her face so I decided to add a drop shadow to the mask layer which created depth and the idea of her being two different people.
These are the images by Manny Robertson that inspired my idea.
Final outcomes:
Overall, I like how this idea came out as I think I managed to successfully recreate the work of Manny Robertson and I feel like these images clearly relate to the theme of identity as it portrays the idea of people putting on masks in front of people and hiding their true identity due to fear of being cast out of society etc. However, one improvement I would make to this idea is actually stitching on the black lines instead of using the pen tool in photoshop as it would make my idea more creative in the sense of how its presented.
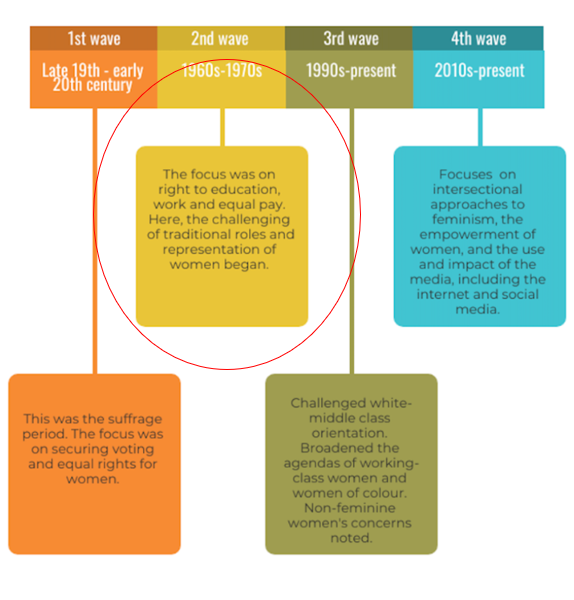
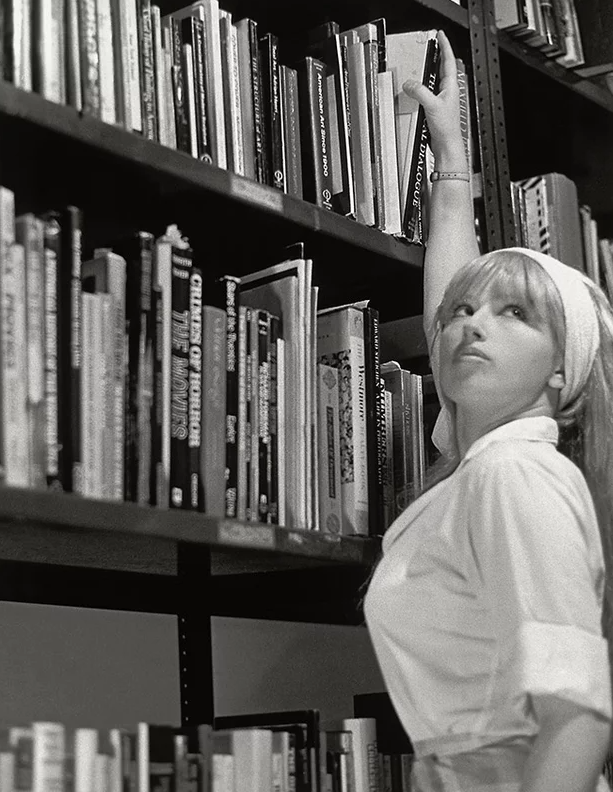
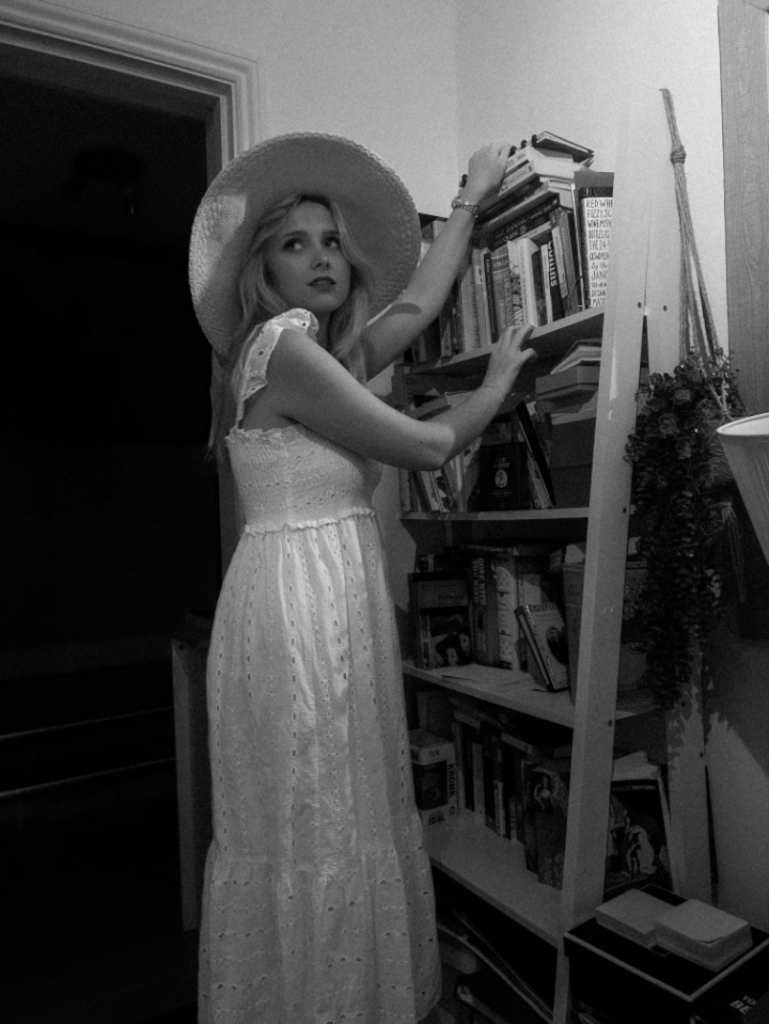
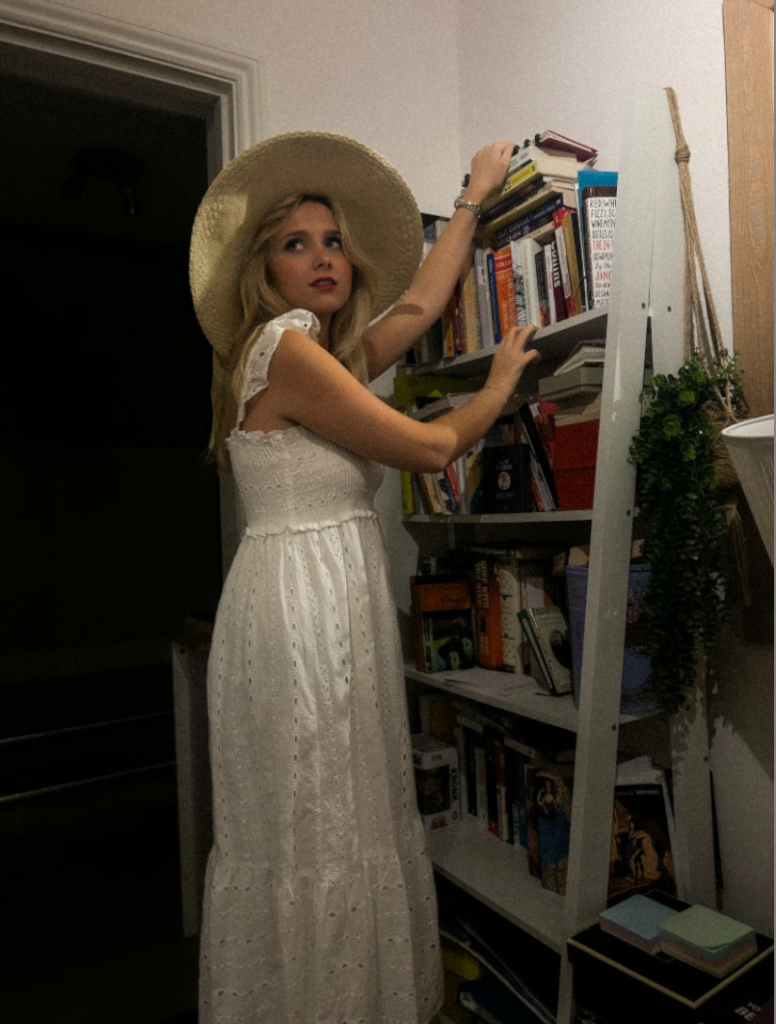
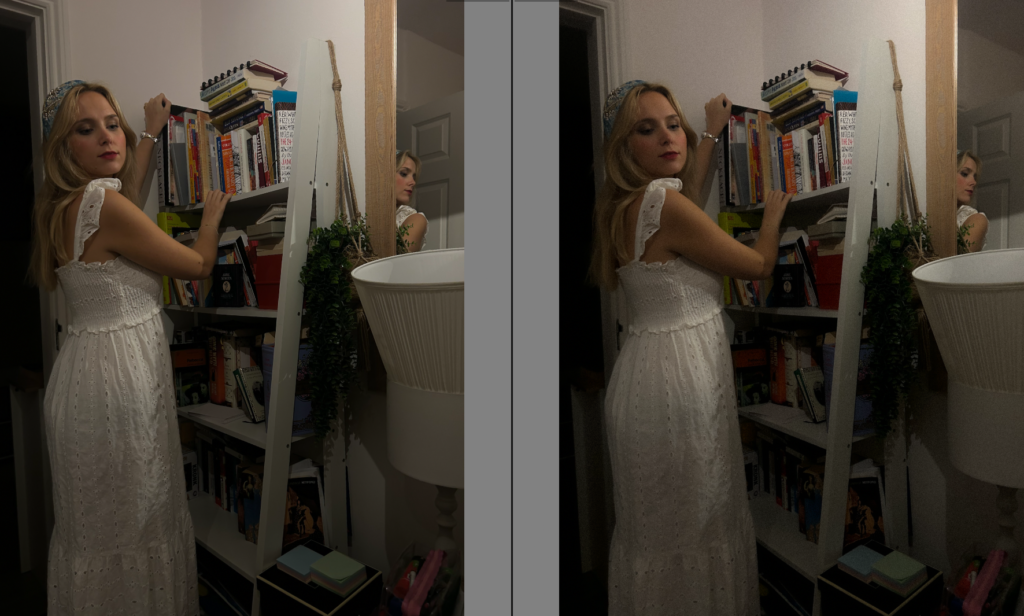
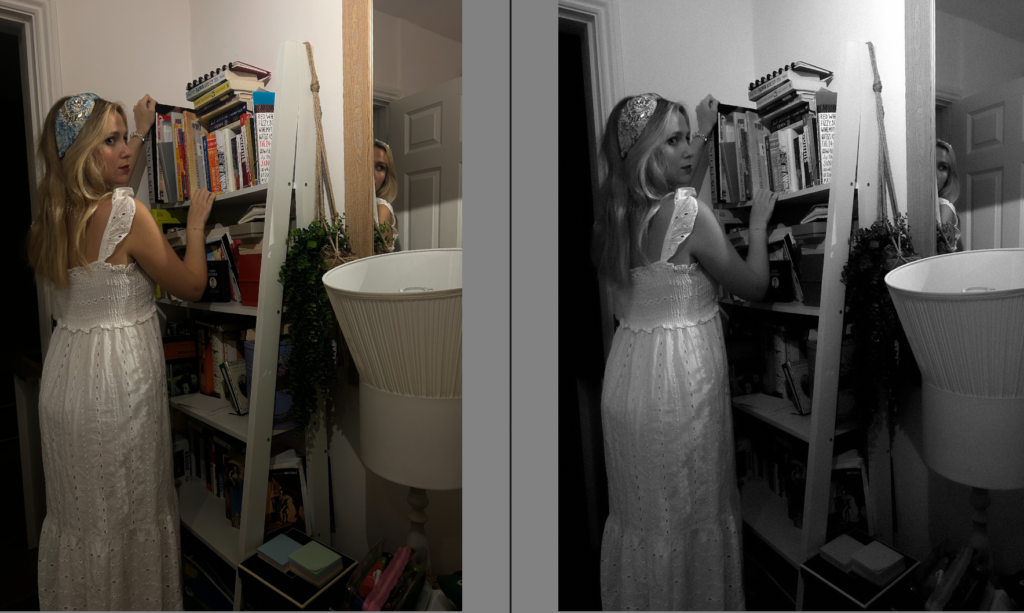
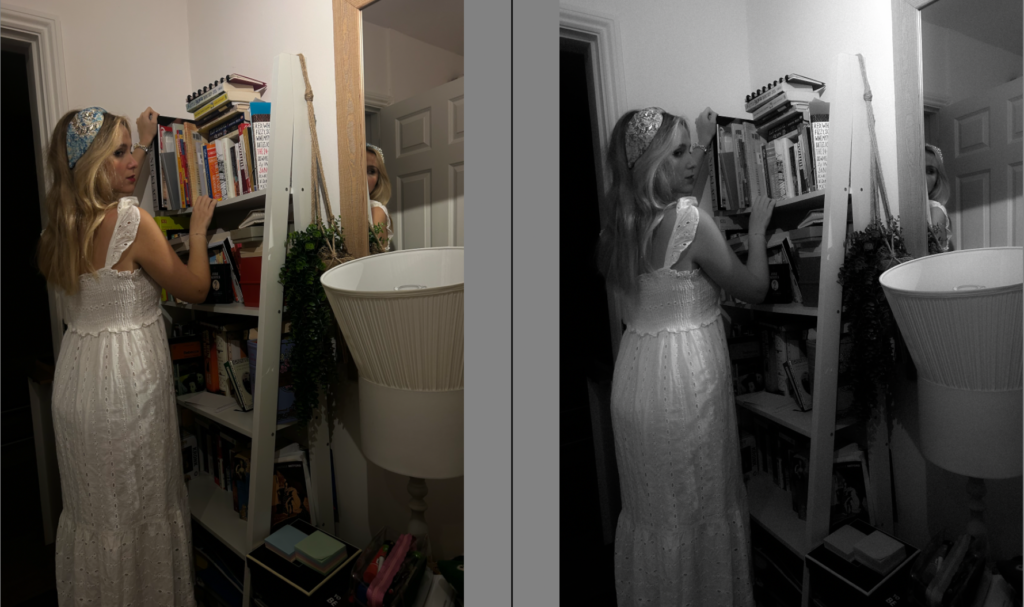
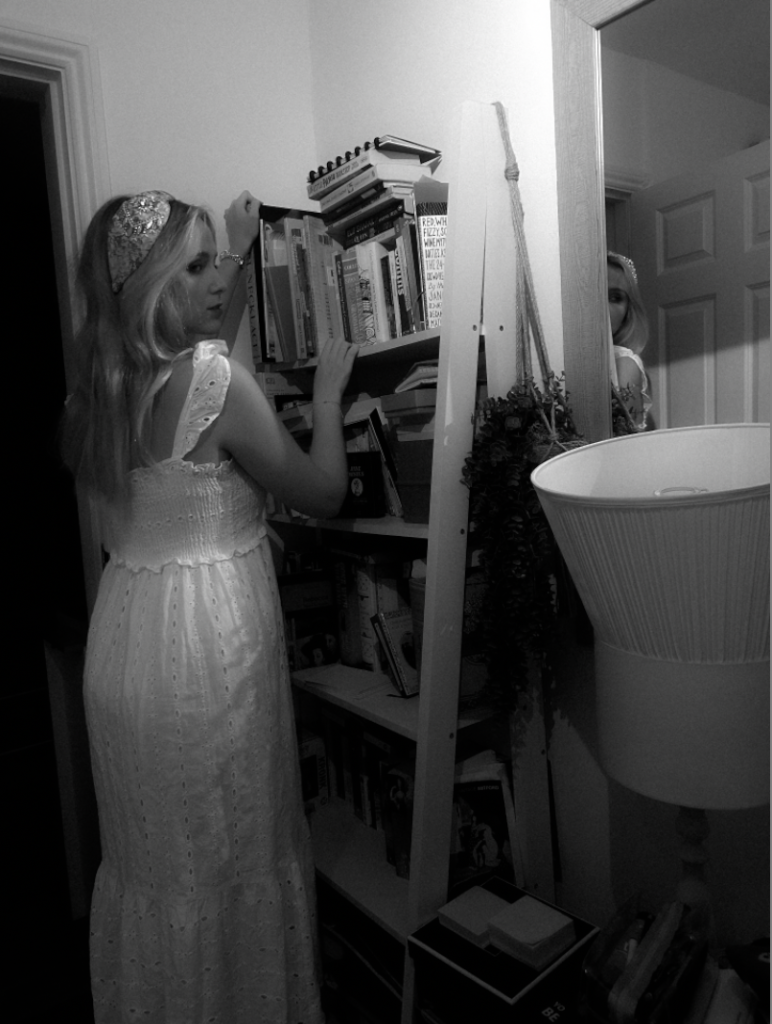
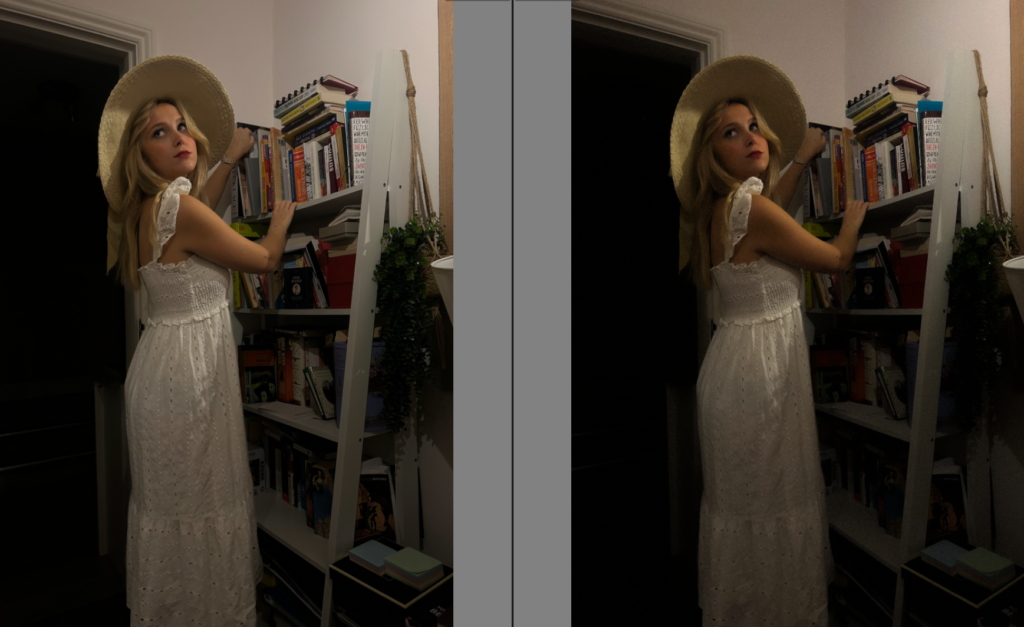
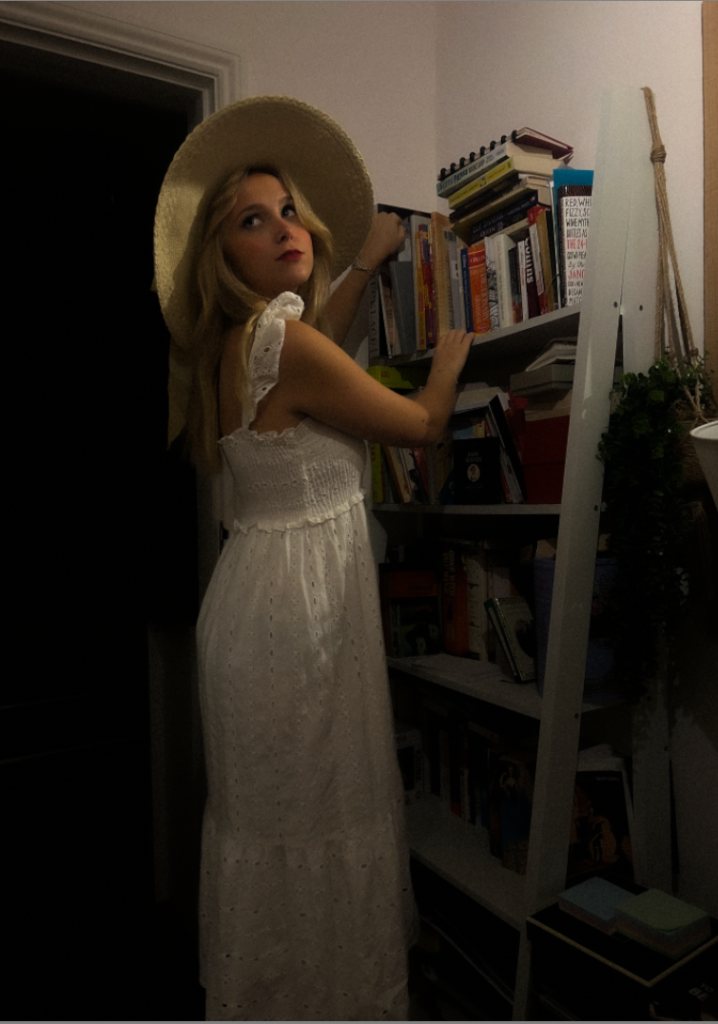
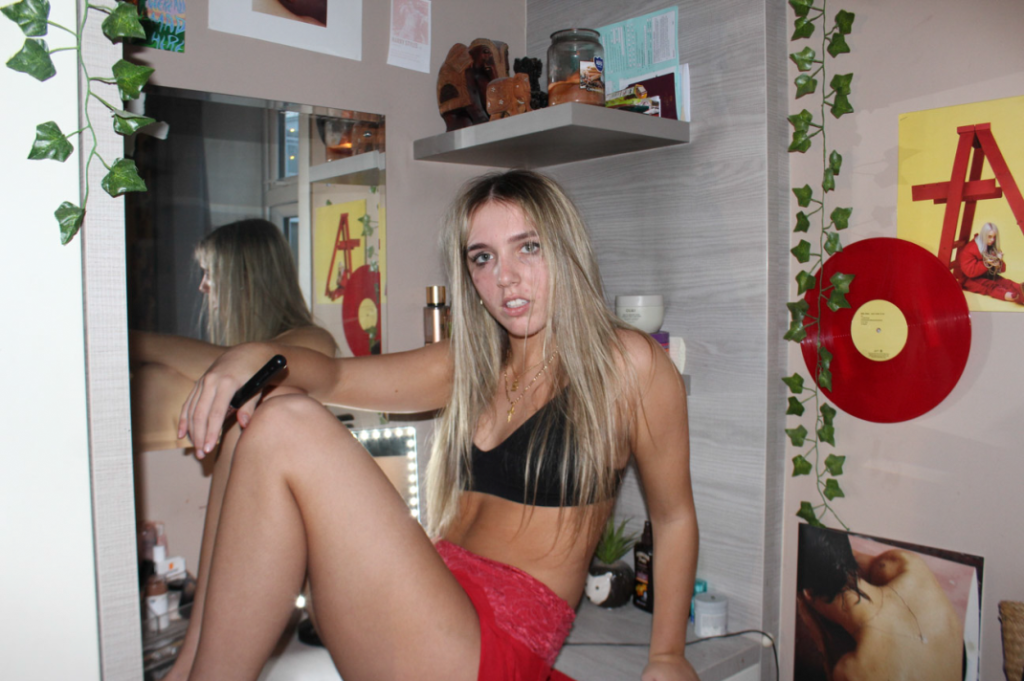
My intent and reasoning of these images was to represent the educational rights women gained during the 1960’s and 70’s which was focused on equality. The second wave fought for the right for women to have access to an equal opportunity in the workforce, as well as the end of legal sex discrimination. Feminists worked for the Equal Rights Amendment, the Equal Pay Act, the addition of sex discrimination to the Civil Rights Act, and other laws that would guarantee equality. Therefore, my way of presenting this stereotype is through a female getting books from a shelf to suggest women’s educational rights. I was inspired by Cindy Sherman’s famous image whilst she was presenting the deconstruction of stereotypes during this time period.
An essential factor that stood out to me effectively was her clothing. Sherman’s clothing is still slightly dressed up however it is a half body shot stopping the sexualized stereotype, as this was reduced after the traditional house wife stereotype. Therefore, for my images I dressed my subject up in a fairly vintage aesthetic outfit but with less of a sexual element to it.
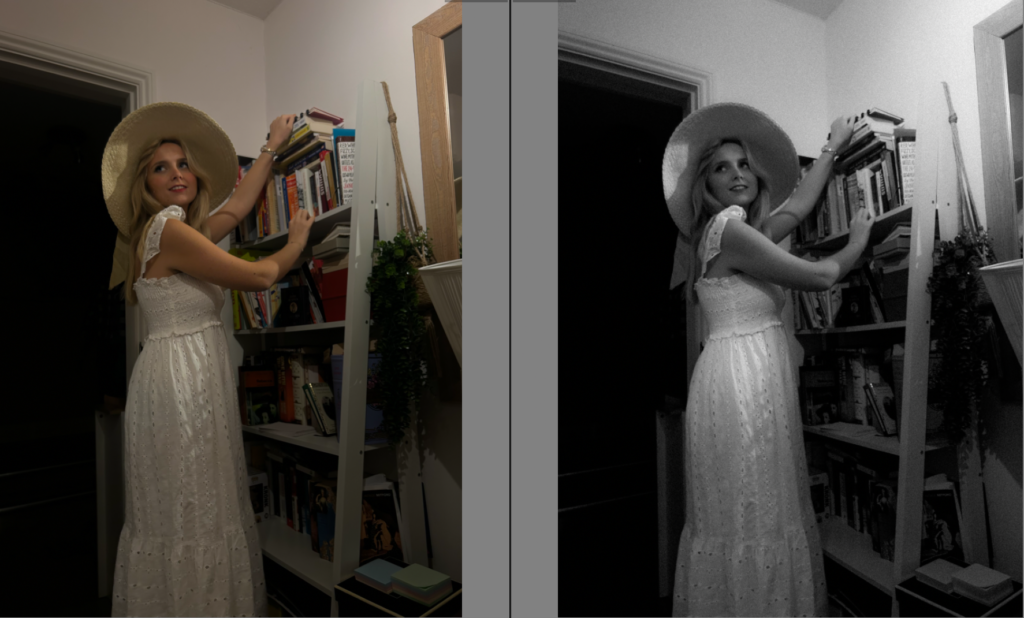
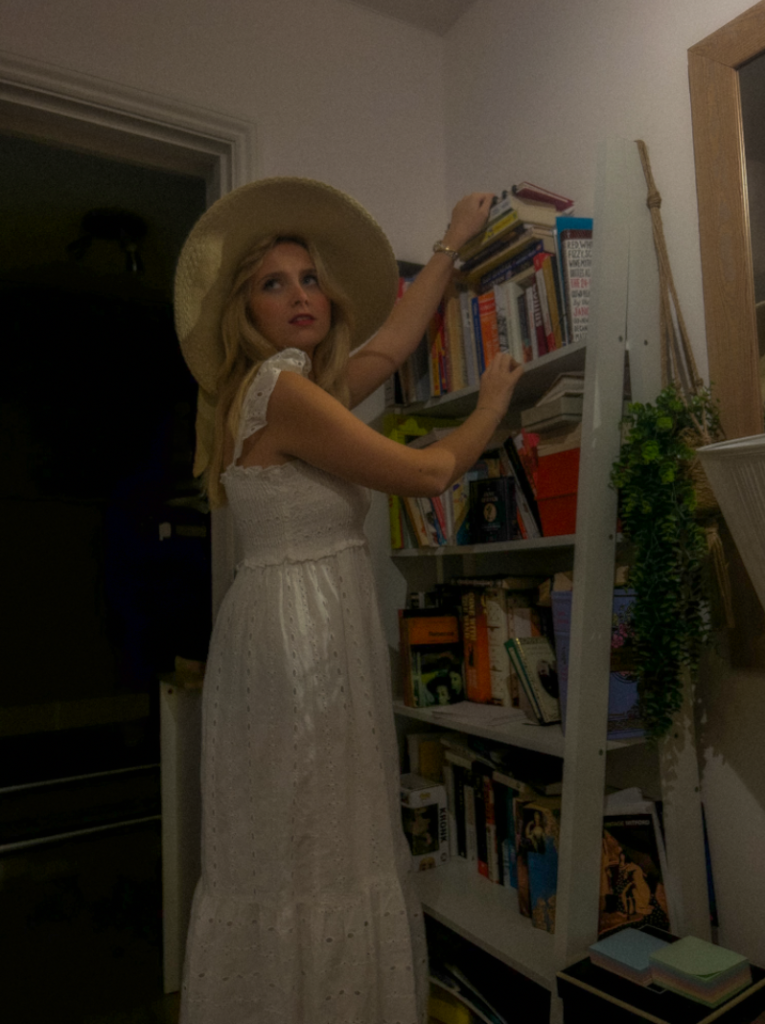
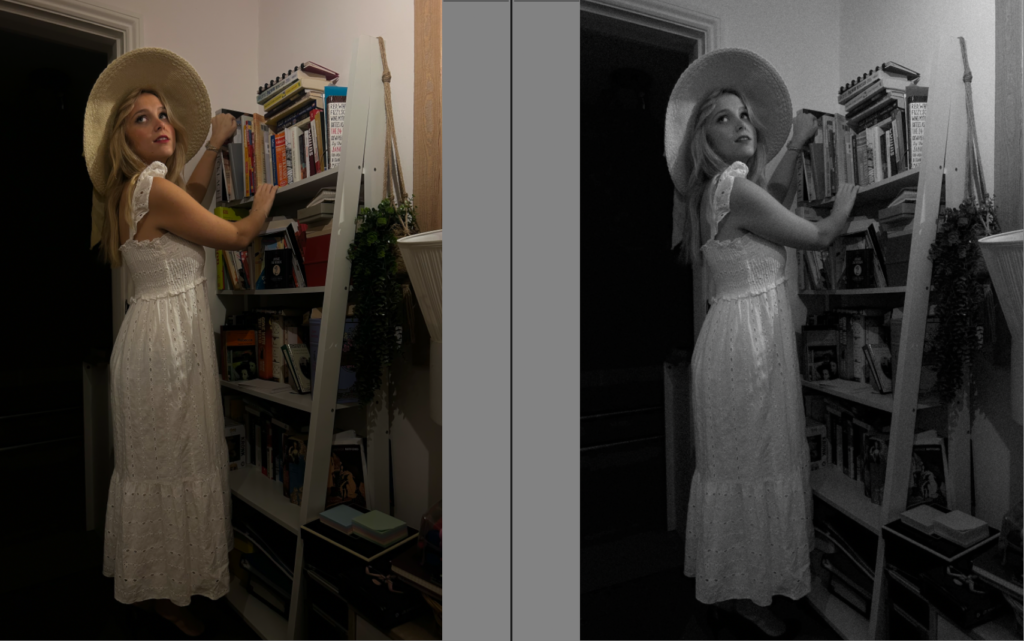
Editing
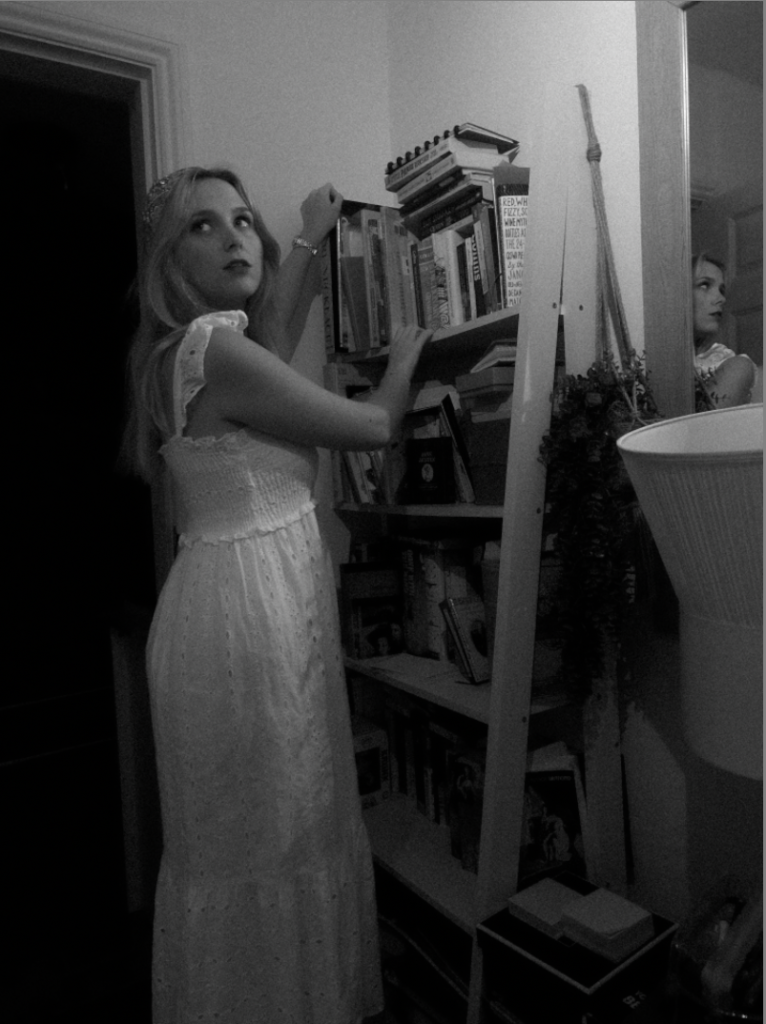
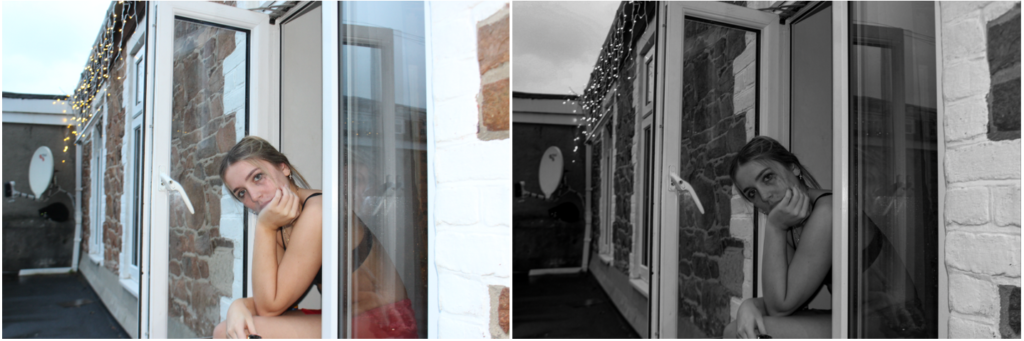
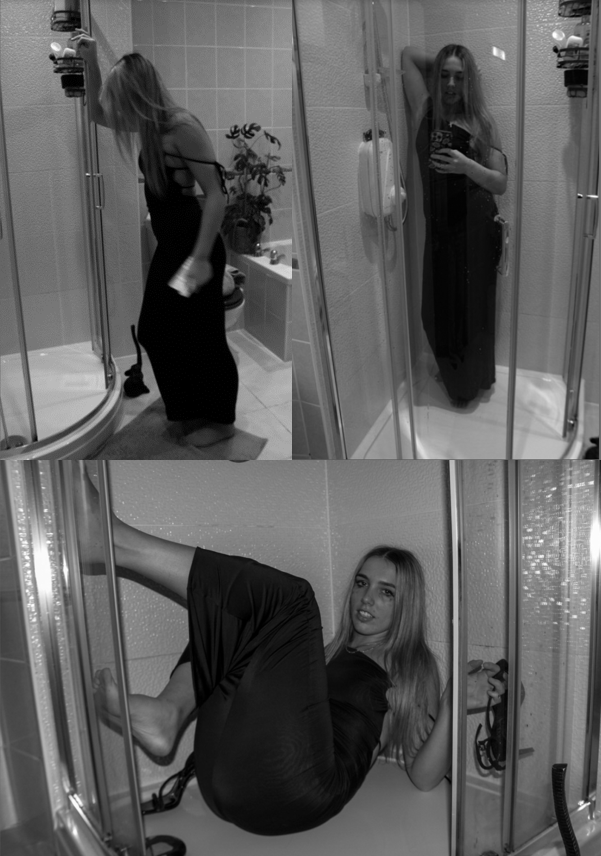
After these images, I decided to experiment with a change of props and using the mirror to show the reflection as I thought it made the image more significant and eye catching.
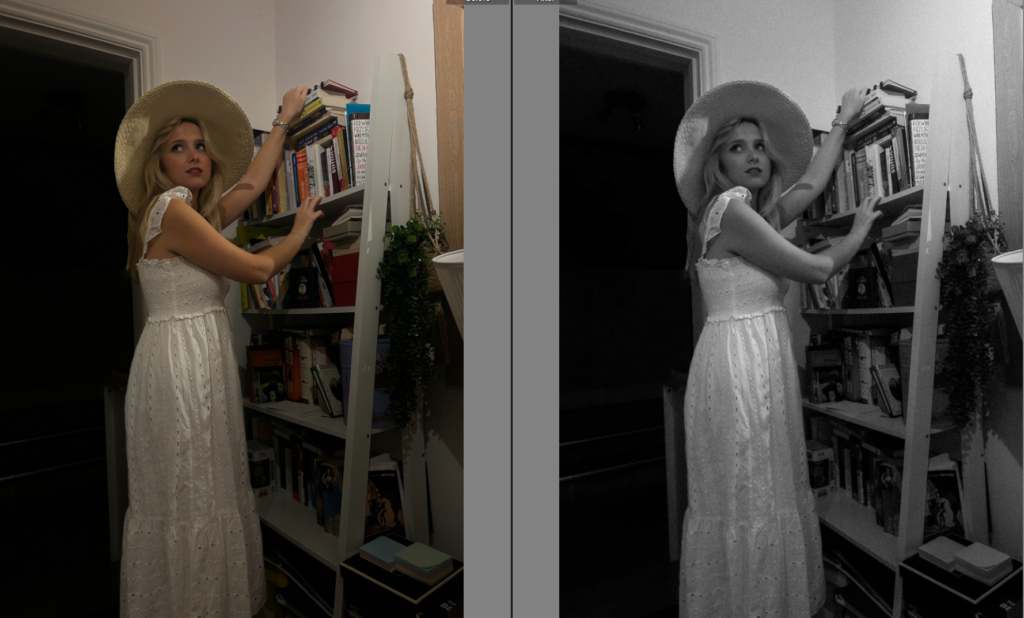
Overall–
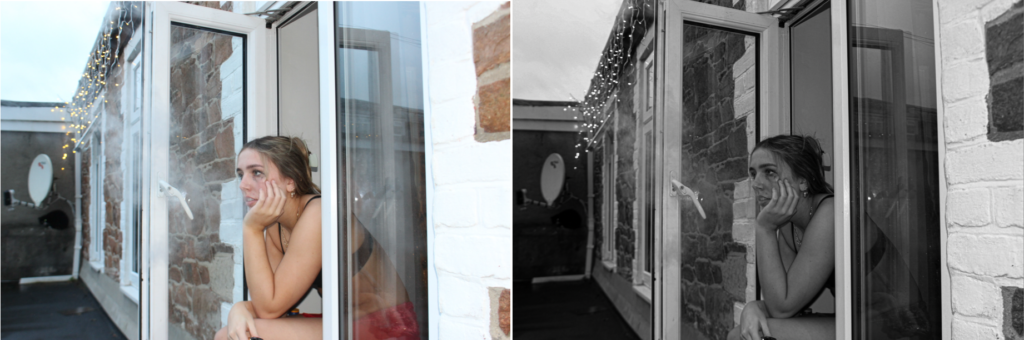
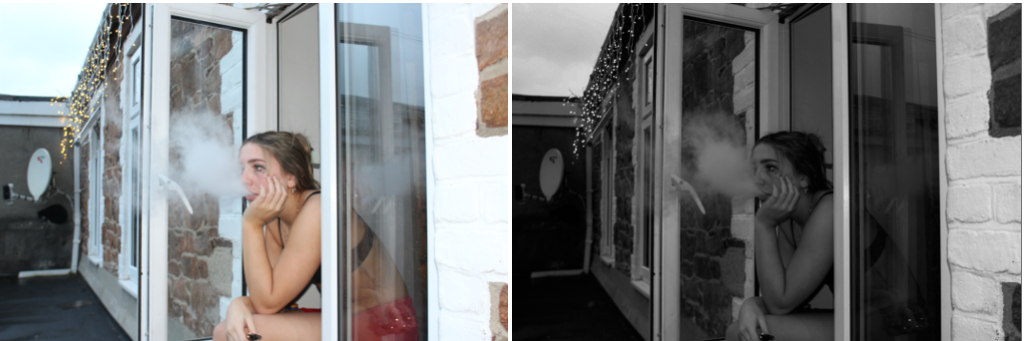
Overall, I changed my angles to experiment and realised I preferred the image with the mirror within the frame. I made sure to keep my subject obtaining the female gaze as I personally believe it is a significant factor to add to my images. The type of clothing my subject is wearing is suppose to signify a slight sense of independence. This is because of the hat and white flowy dress as it portrays her personality rather than restrictions or impressing males. I experimented in black and white and colour, to learn to see what I preferred most which was black and white as I plan all my images to be in black and white apart from my 4th photoshoot including the 4th wave feminism. The reasoning of this being my plan, is that all three photoshoots are signifying the past which I believe black and white will emphasize this. The last photoshoot (4th wave) is to signify more of a present element to it as a young women, which I think is still relevant now. Fourth-wave feminism, is a feminist movement hat began around the early 2010s and is characterized by a focus on the empowerment of women, the use of internet tools, and intersectionality. The fourth wave seeks greater gender equality by focusing on gendered norms and the marginalization of women in society. Fourth-wave feminism focuses on sexual abuse, sexual harassment, sexual violence, the objectification of women, and sexism in the workplace. Therefore, within these images I lowered the exposure to create the right amount of exposure to make the door way darker to add a mysterious element. To emphasize this, I increased the blacks and shadows but to keep the subject the main focus I would increase the whites. The bookshelf is to represent the educational rights women fought for in the second wave feminist movement. The mirror is to portray an element of identity which women struggle to find in an oppressive society. However, this slightly contrasts to the clothing involved as the clothing is to signify a little more of independence as it has a growth than the ‘ traditional housewife’. The heavy makeup and and red lip is to represent a factor of women still feeling the pressure too do certain things for men in this patriarchal society. The red lip is to signify a bold and confident factor as from its early use by prostitutes in ancient Greece to a symbol of glamor in Hollywood, rouge lips has long been associated with beauty, power, and rebellion. Rouge lips have served as a symbol of power, rebellion, and femininity throughout history, from ancient civilizations to modern-day movements. This ensures the sexualised element to my first photoshoot is still obtained, which is definitely impactful and significant as women still faced this stereotype during the 60’s and 70’s. Lastly , I decided to decrease the texture as women were stereotypically to be seen as ‘ perfect’ which significantly links to my 4th photoshoot because of the rise of social media and pressures on women.
Places around jersey that I think have a relation to anxiety
In school
Photos that will demonstrate working hard
Who?
My family
My friends
Me
My teachers
Landscapes
When?
Weekends
After school
During school
Whenever possible
What will I use?
Celetape
Mask
Lights
Projector
Pen
clock
mirror
paper
desk
hourglass
Why?
I will be honest, I struggles trying to find an idea for this topic, at first I was so excited because it would be fully my idea and I could be so creative and do what I wanted. Then I couldn’t think of idea, I got into a slump. I finally figured an idea on personality, as I realised I was always perceived differently by everyone, and no one really knew the true me, and thought that’s the same for everyone, case you can be whoever you want to be to anyone, and as long as your making them happy they probably wont questions it. I started to take photos of myself I wanted o use, spoke t some friends about my idea and they said it was great. then I spoke to my teachers, and I never felt like I was getting a great sense of love for my idea, always thought that’s a bit unfair, seeming’s as art is subjective, but I know they want to help, so I kept thinking, used them to help me but was still in a slump. Then I realised you know it can still be about identity but maybe only my anxiety, as I seem that’s pretty bad and its something that can go unseen from people but also something a lot of people can relate to. its also something that is darker and for some reason people love a darker deeper book. Took more photos. a lot of photos but just of things I found photogenic, maybe I could relate to my topic but not sure. then as I was upset because I wasn’t doing the best I could do in this topic I started thinking oh damn I know something personal about me relating to anxiety and all of this, and that’s me working so hard and sometimes it not being noticed or it getting hard and sometimes I need a hand or someone to notice its not because I’m lazy its because I’m struggling. so now after a million different thoughts on this topic I still have a million but I know to just take photos and try stuff and something will workout. so that Is how and why my photoshoot plans became a thing. I’m still trying buttt we will make it work because I believe I can.
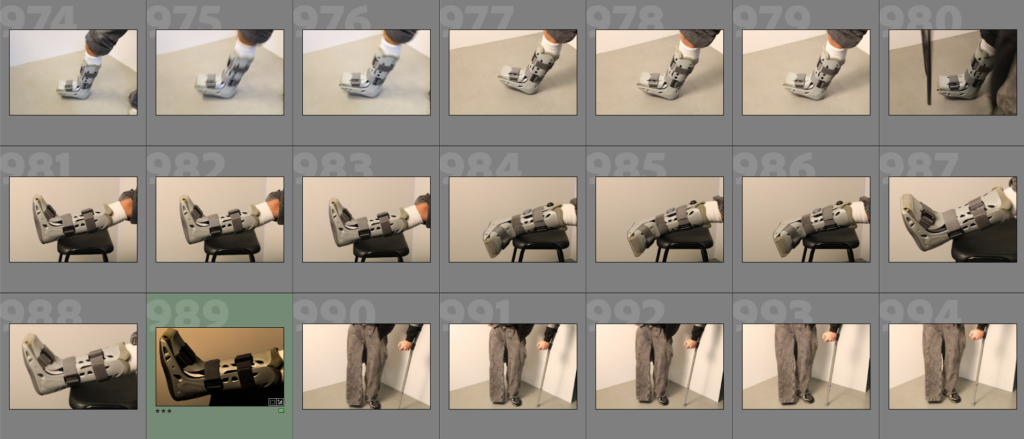
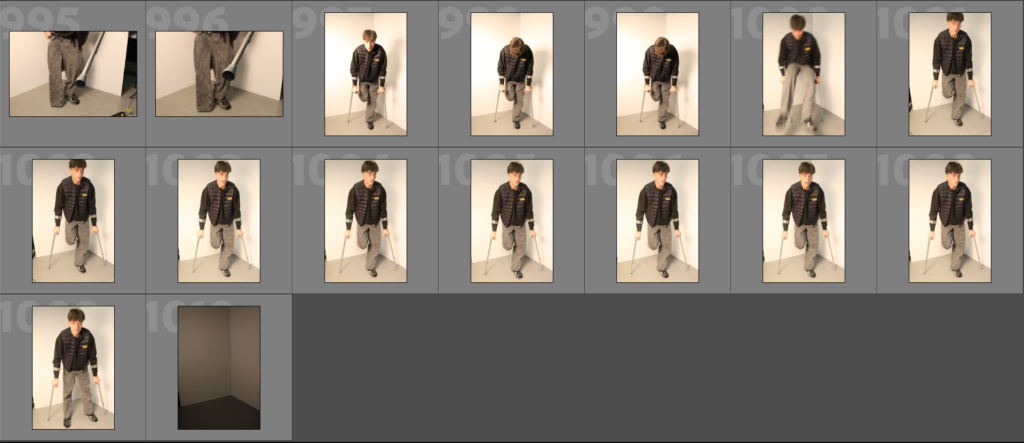
For my first photoshoot, I went into the studio and took multiple photos of my friend who has tore her posterior talofibular and anterior talofibular ligaments so she is in a boot. But that helps out my theme as my theme is all about injured players who used to play everyday but now have to go back to normal day to day life in their cast/crutches.
I also used my other friend who deeply loves basketball, and let him use a pair of crutches and he had his leg behind him like he almost, ‘doesn’t have a leg, or its broken and he’s just holding it behind’. I also took a lot of photos of my friend just talking to someone else whilst on the crutches because I wanted him in the moment just looking like he doesn’t know.
Photoshoot 2
Hoops ‘n’ Dreams
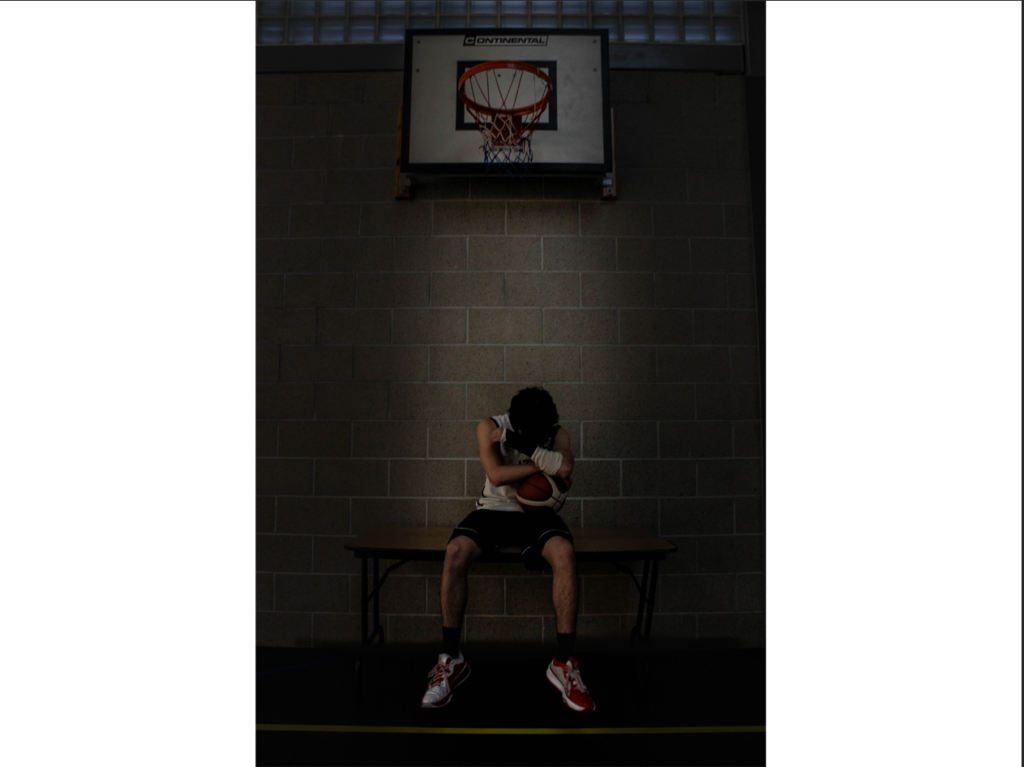
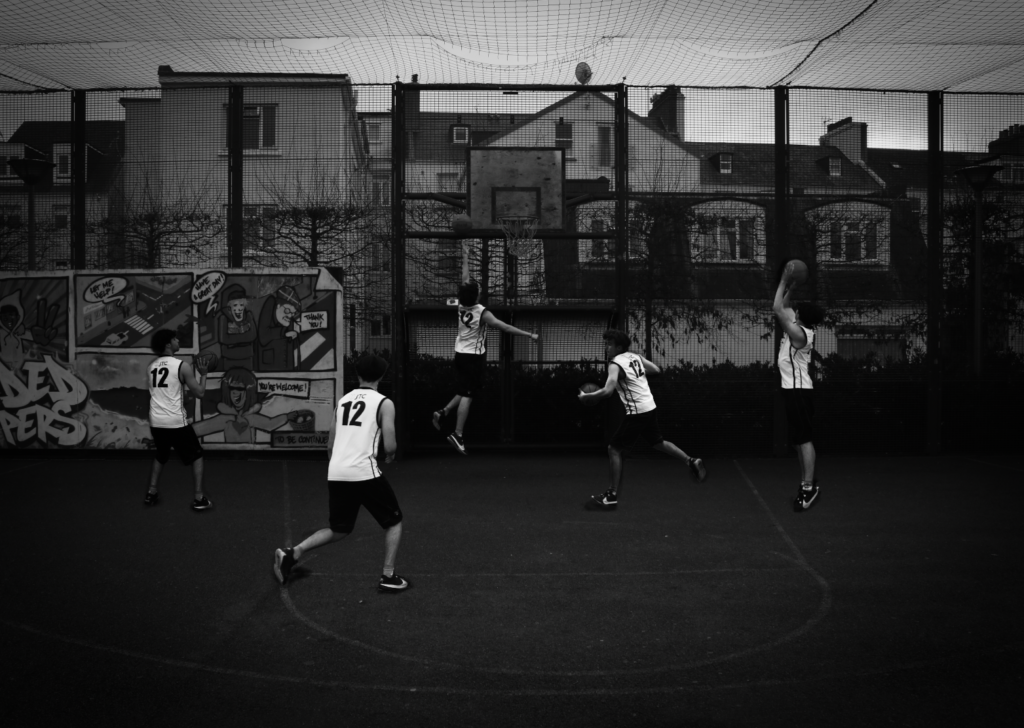
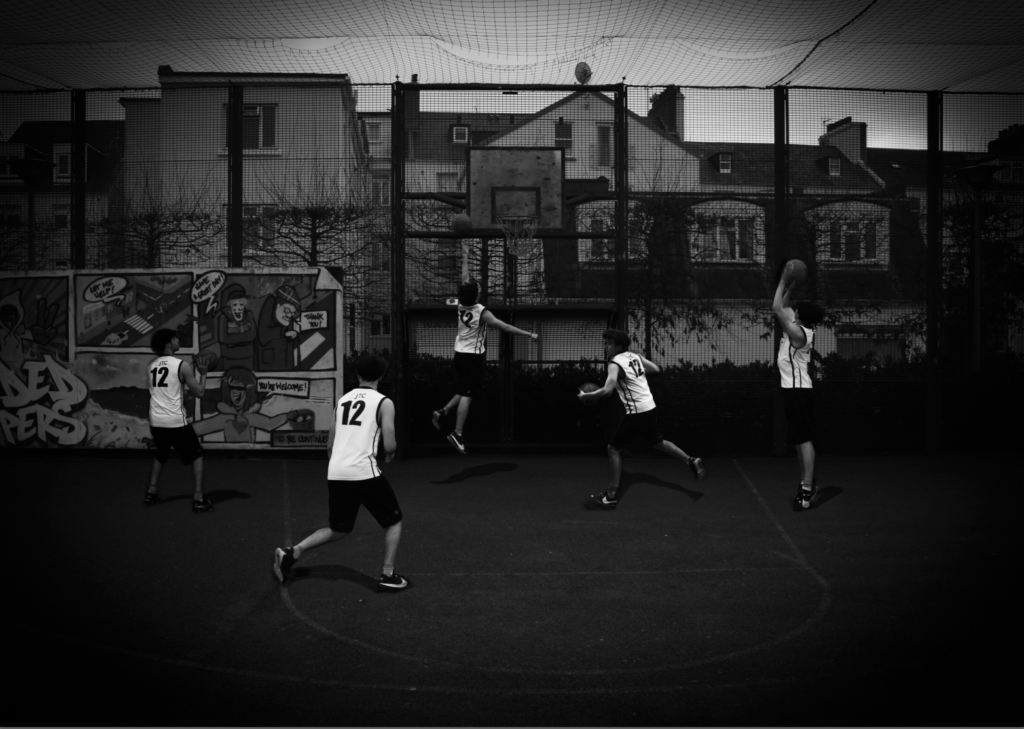
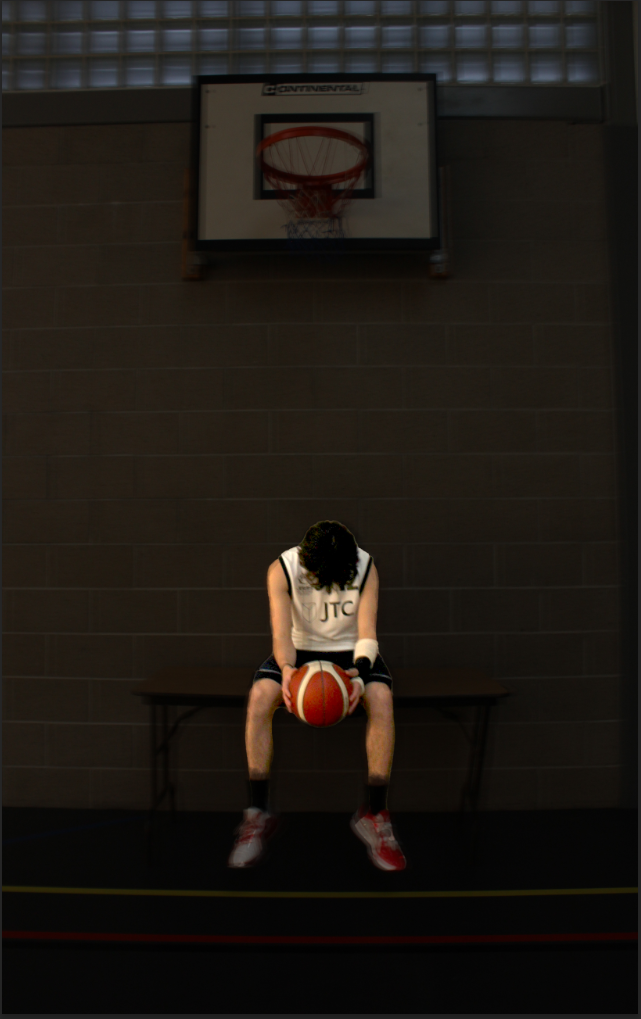
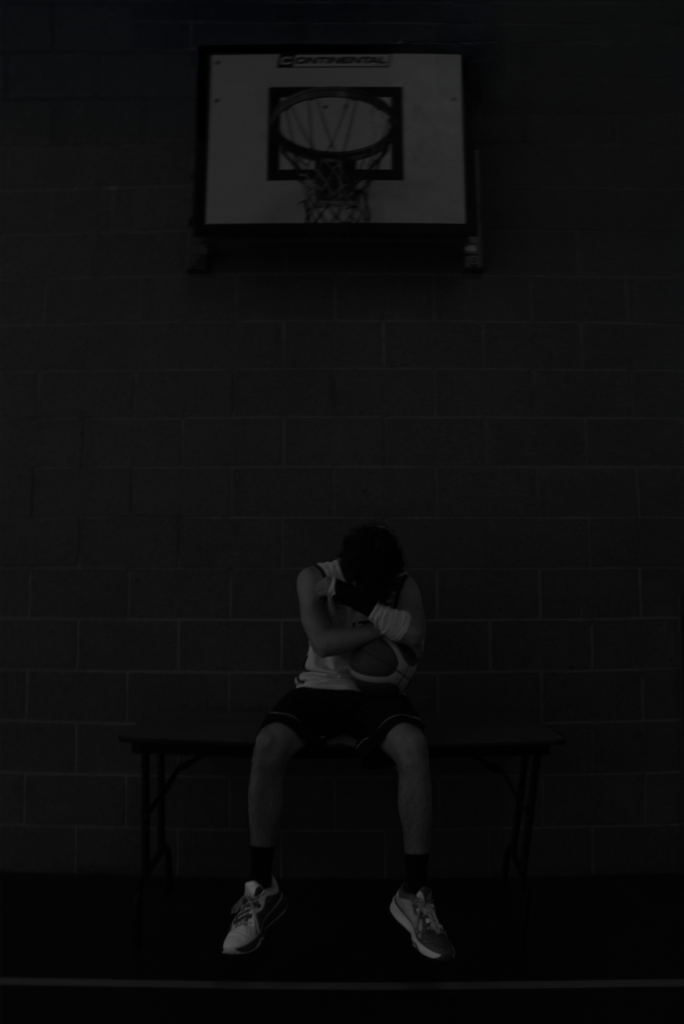
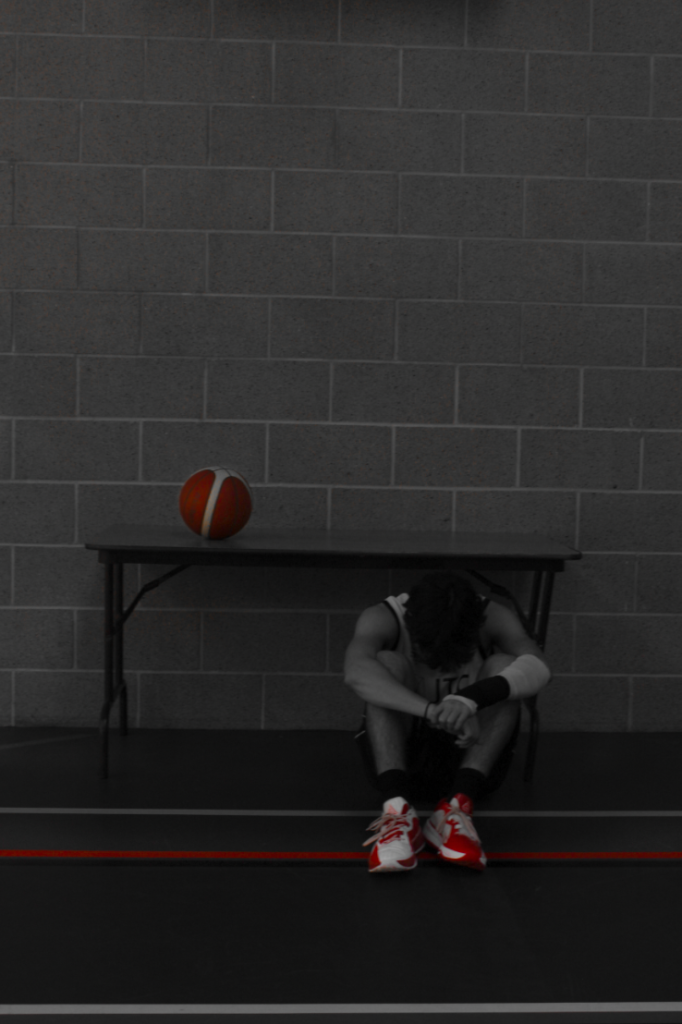
For my second photoshoot which is my main photo ideas, I chose the idea with one of my teammates who struggles a lot with injuries. I have an idea of him and how is daily struggles that lead to loneliness and sadness having worked and trained all his life to play basketball, but due to having constant injuries involving breaking his ankle 3 times, and currently he has a broken wrist from basketball. He can only watch our games, support the team and can’t train anything like he used to at his full potential and intensity.
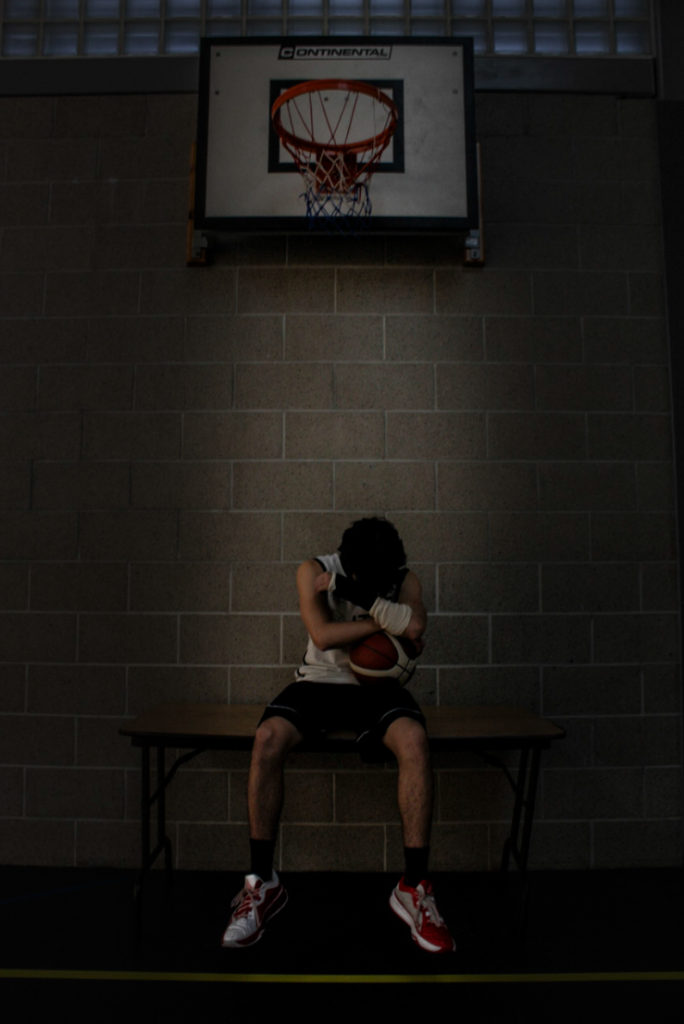
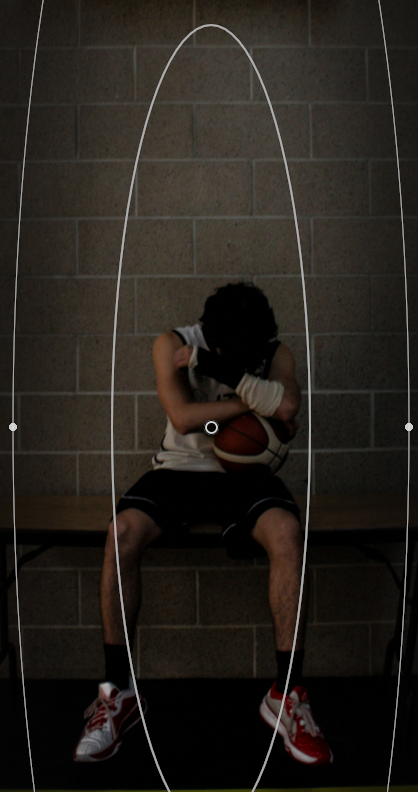
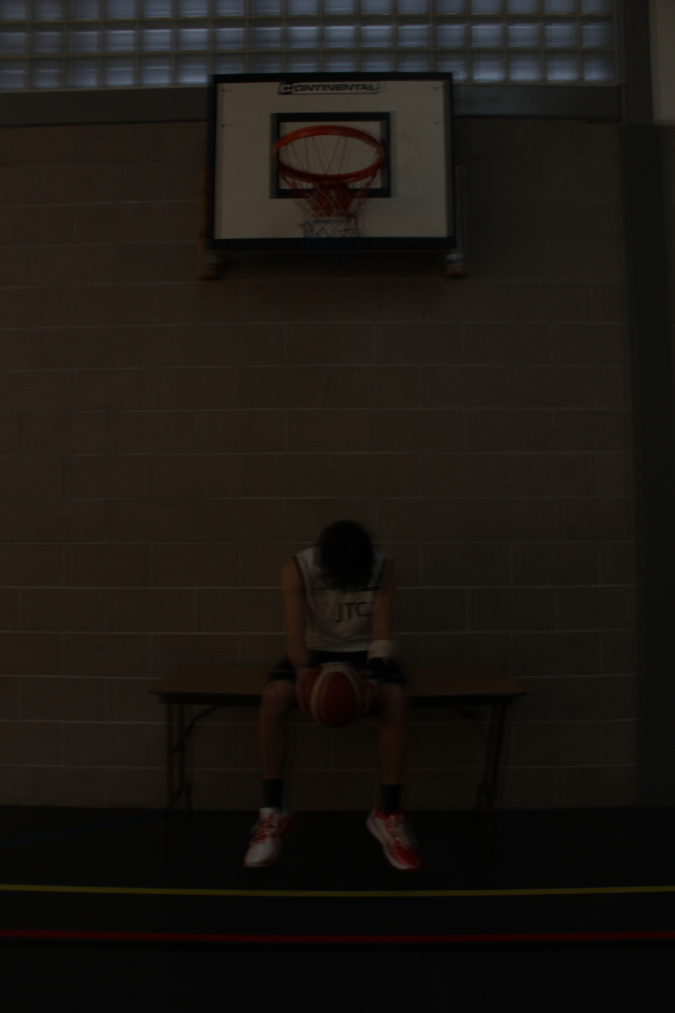
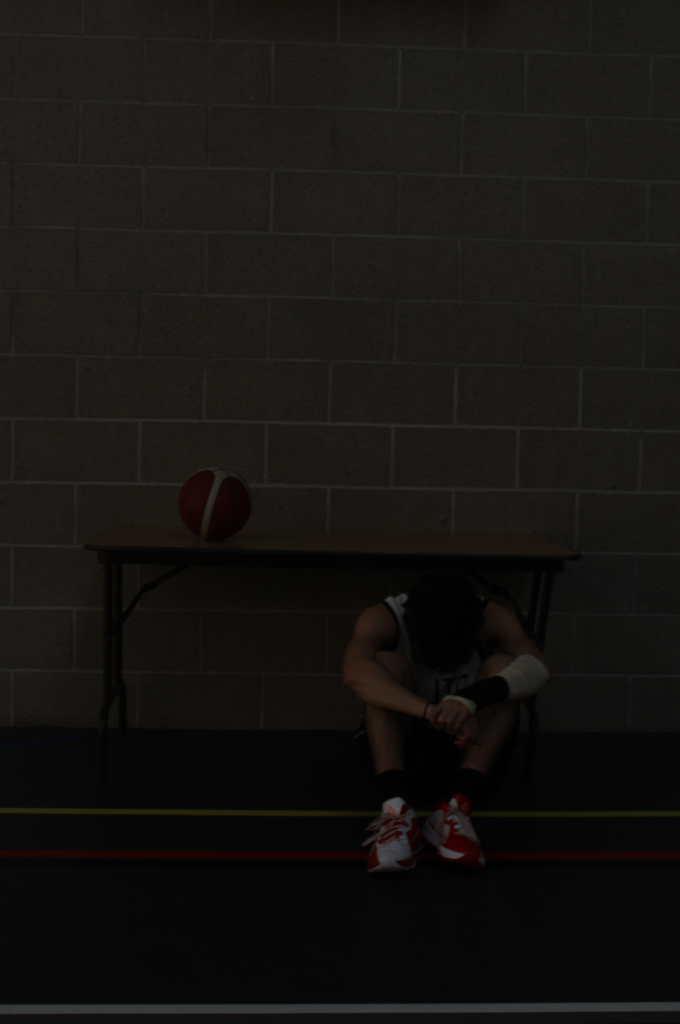
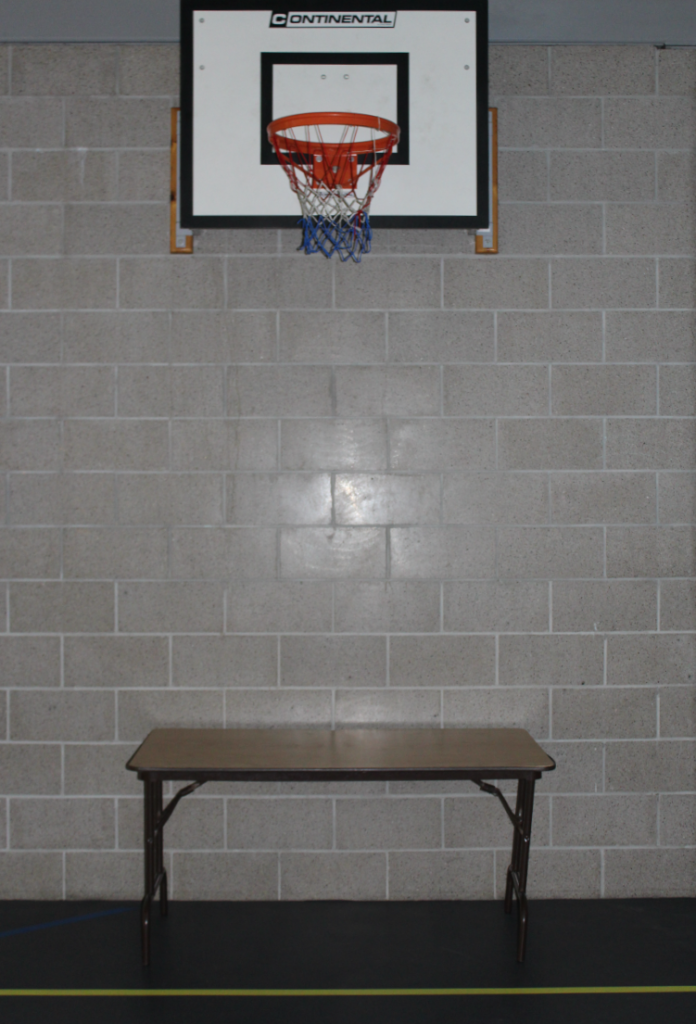
Many of these photos, I had an idea of how a few people are playing basketball, whilst he is just watching from the side of the court, looking sad and an idea of ‘what if’ (I didn’t get injured), or (where would I be at today without injuries). I really love this photo of him just holding a basketball with a cast on his wrist sat on a table below a basketball hoop with no emotion in his face/looking down at himself.
Additionally, a large factor involved in his backstory is that despite him owning many basketball shoes, Jerseys, shorts and skills, he is unable to use them anymore at this current moment because of his injury. As a result of this, he continues to wonder, ‘why did I train so hard to just constantly get injured.’
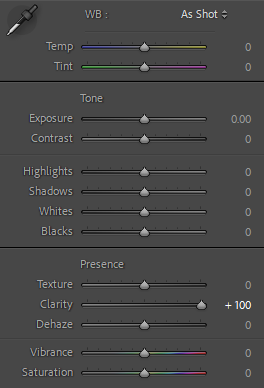
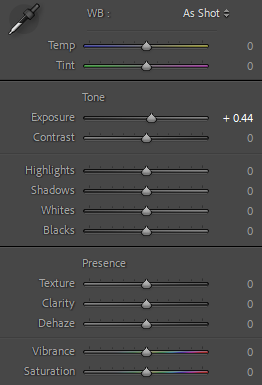
For my edits, I only changed the Clarity which makes the photo look more textured instead of smooth, because I felt like, the use of the concrete walls, old-styled table and basketball hoop matches his leg hair/muscle outlines and bone outlines to also not just show loneliness but to show the masculinity as well. I also added a radial gradient to help make a fake ‘spotlight’ over my subject to show light shining down on him making him the main focus point in the photo, to allow the viewer to see his emotion and expression.
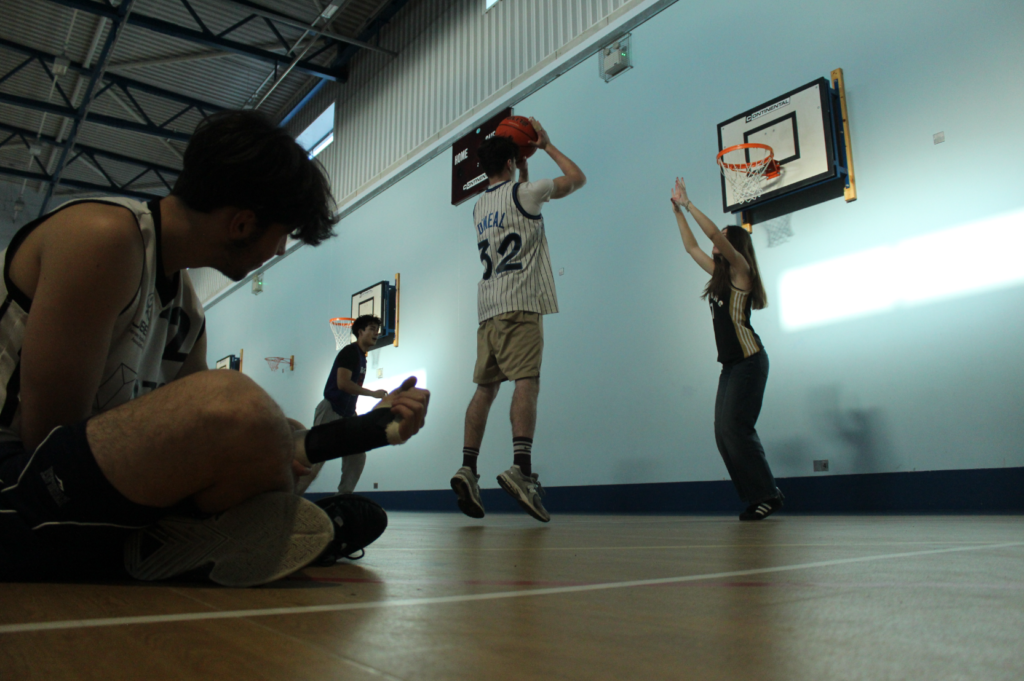
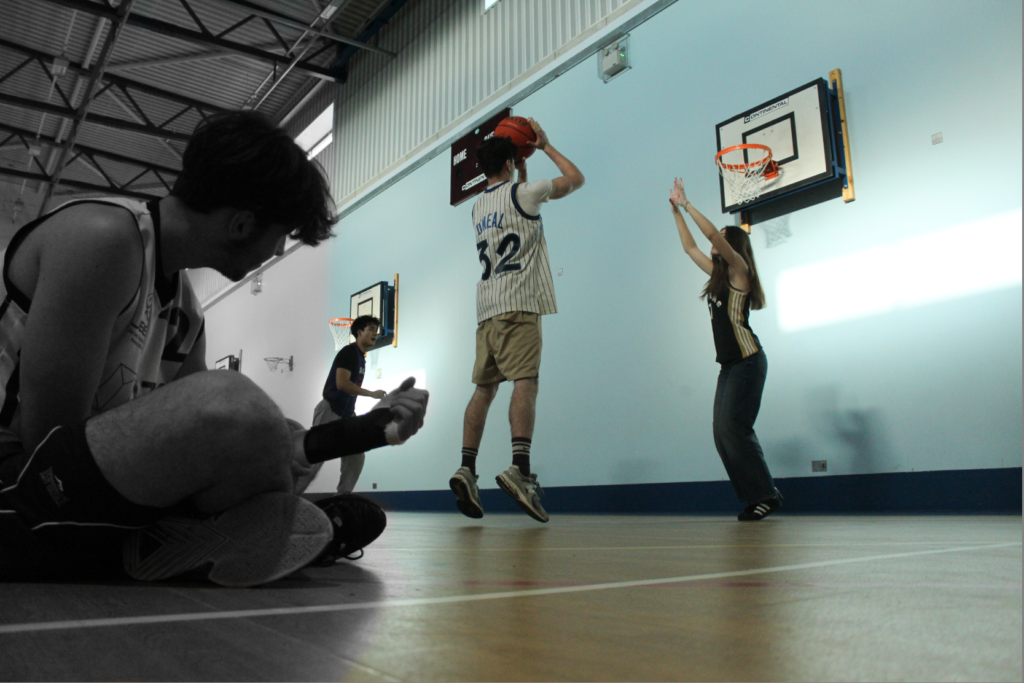
I also have the idea of a team all doing a group huddle with their hands all together celebrating as a team, or getting ready to go into the game/half time. With Bruce (my subject) on the bench not with the team feeling sad and lonely again wishing he was part of the team and could play. I can achieve this by going to Langford or Beulieu courts which have basketball games every week and set it up with the players and my subject.
Another photo I took was this photo with the placement I got my subject to be sat in looking sad, holding his wrist, whilst the other people are playing together shooting around.
I then decided to make the left side of the photo in black and white with his arm in black and white as well to show difference as well.
I did minimal edits to the exposure and then added a radial gradient over my subject and used the brush tool to make the background black and white as well.
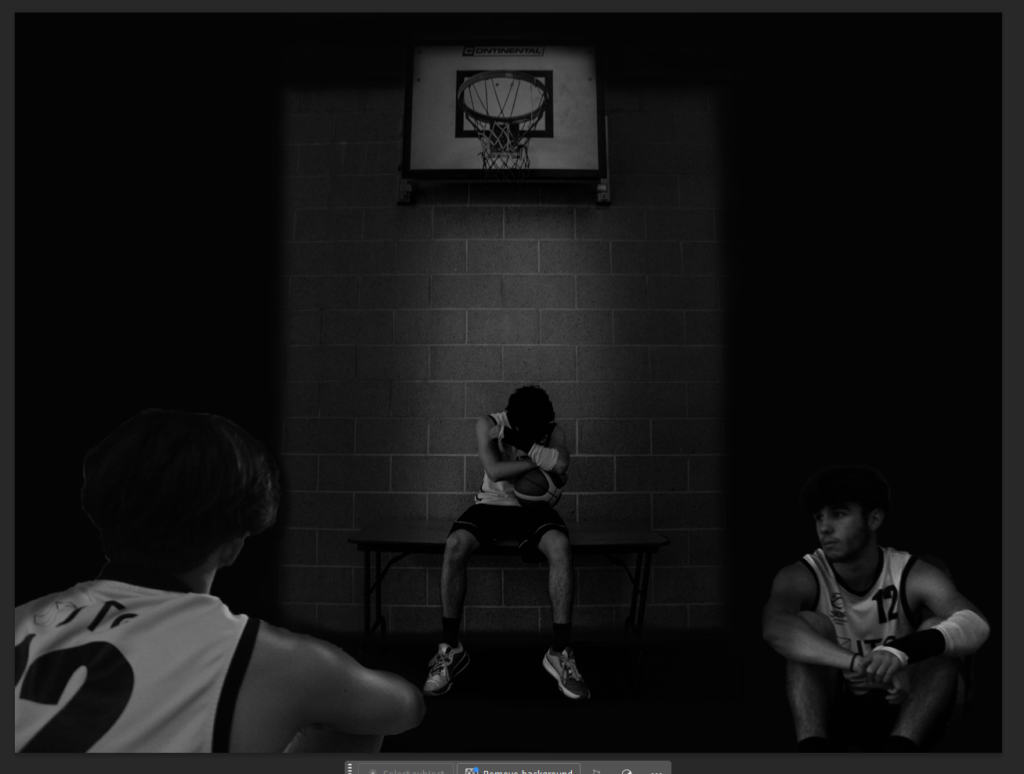
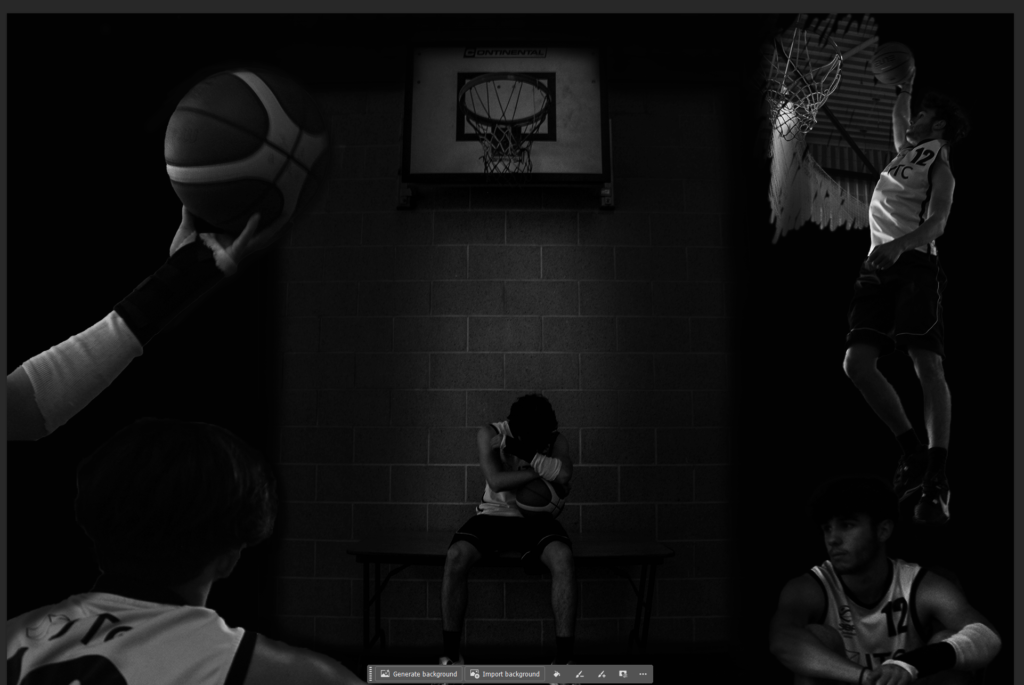
I have started a multi-exposure photo edit using photoshop, with a lot of different photos of Bruce all in different angles or places with the main photo of him sitting on the table looking down under the hoop.
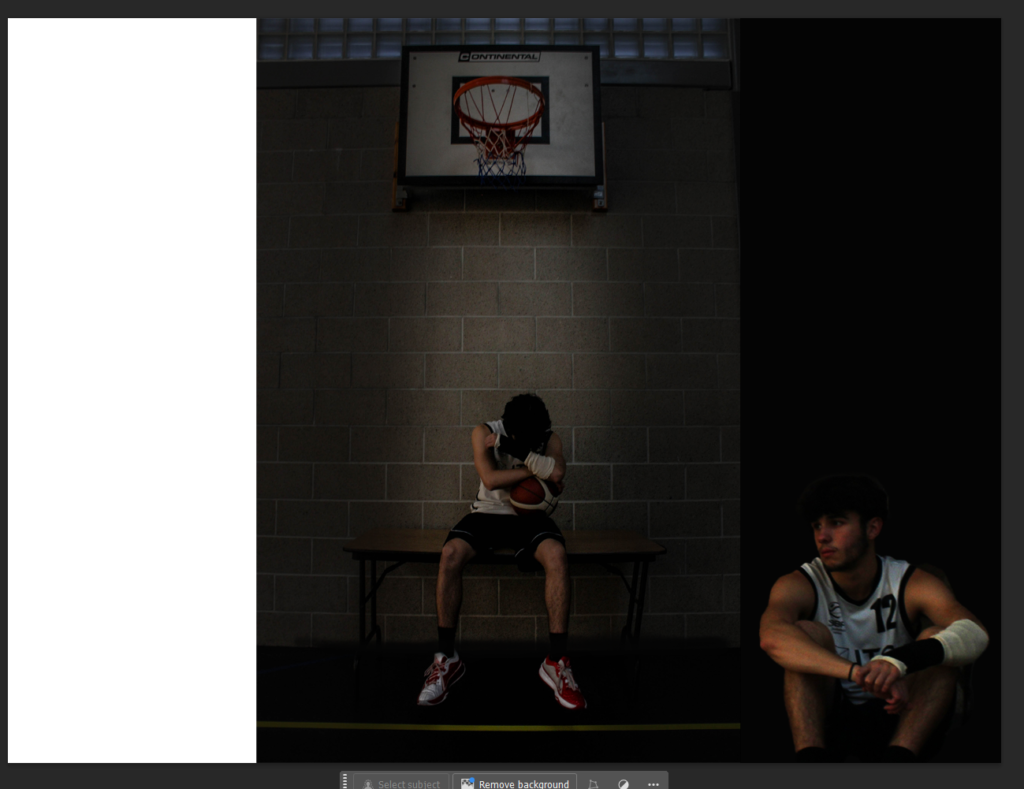
I Started with this photo of my subject in the middle of the page. I chose this one because there is a hoop above him and with the light shining on him it helps show he is the main subject and could be used as the front cover for my story book. I then decided to crop off the two sides of the walls and replace it with a black background.
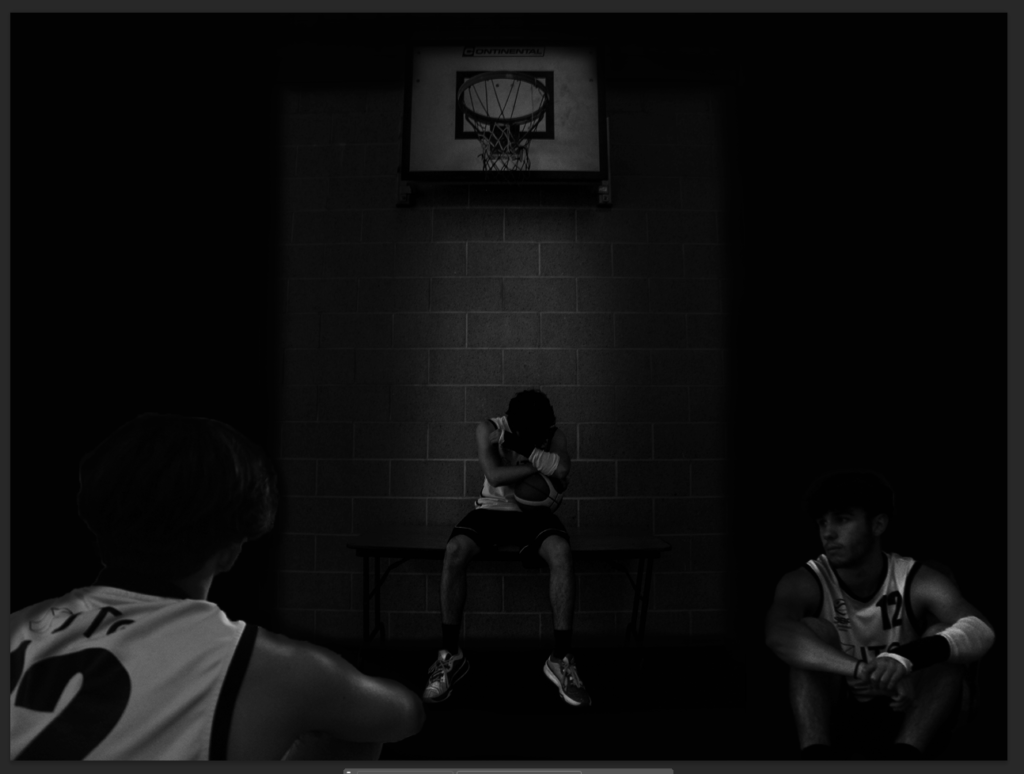
Then did it on both sides and imported another photo of Bruce sat down and removed the background off of him. Then created a light shadow/black outline around him to make him suit and blend in with the black background.
I then used the brush tool on photoshop and drew on the sharp edges from the black backgrounds to the main photo, the line in-between I didn’t want it to look sharp and also drew over the yellow line at the bottom and the top blue squares which I didn’t want in my photo.
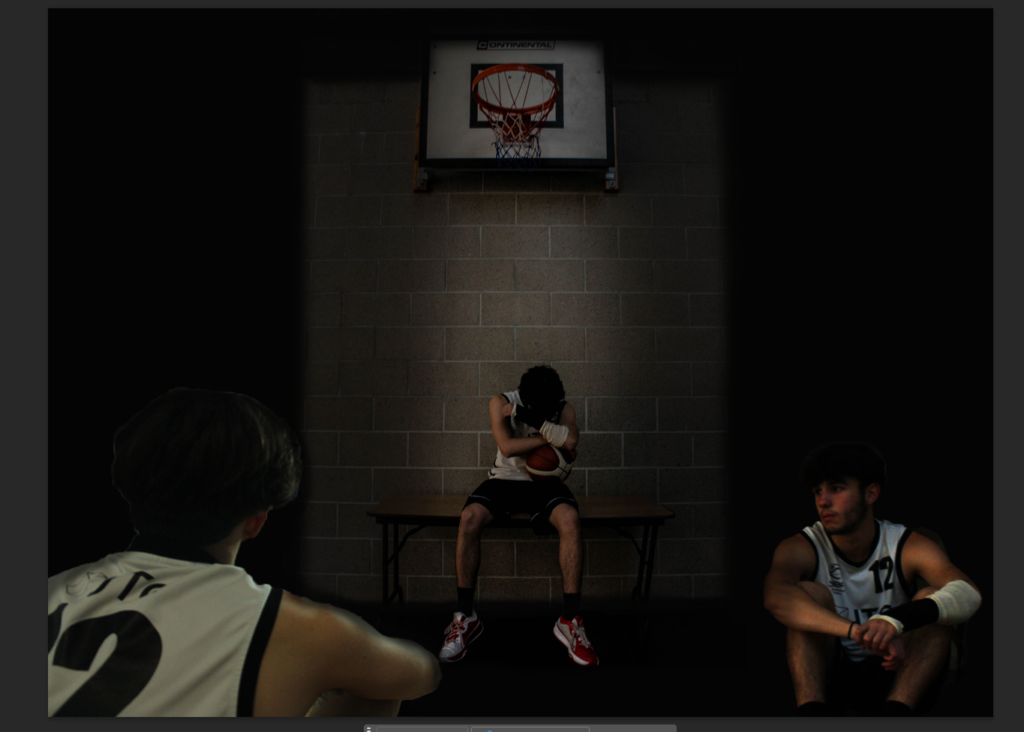
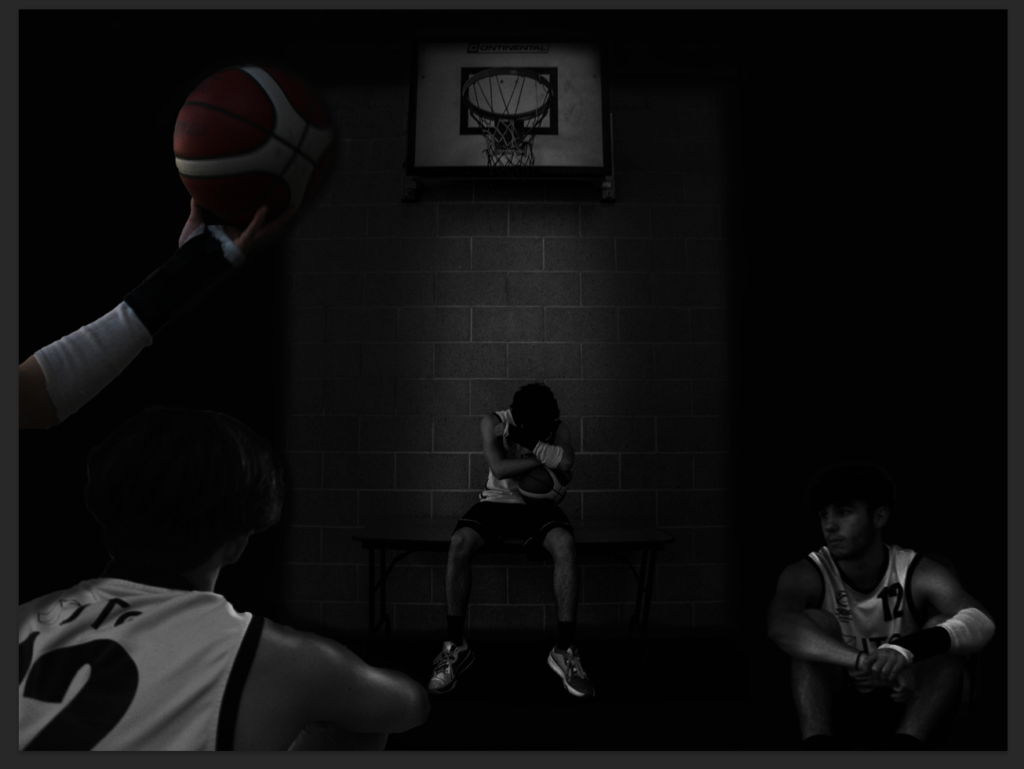
Then I imported another photo of my subject but this photo was him with his body and face turned away from the camera so you can see his Jersey and number, and his arm resting on his knee. I also put him bigger than the other photos because I feel like for the best multi-exposure photo edit, all of the individual photos need to be different sizes and in different directions/places.
I then made the photo black and white because I want to show the theme of sadness/loneliness and the black and white overlay, really persuades the end photos and the sadness behind injuries in sport.
I then changed the lighting, brightness, exposure and contrast on each photo of Bruce. I chose to increase the brightness but also increase the contrast. So, his jersey stands out more, his wrist cast also stands out more, and overall it makes the whole photo darker but the subject stand out more and is better for a main cover as I want the viewers to focus on him.
Next, I imported this photo of his arm when he took a layup shot. I like this photo because it’s not his body or face and so there is no emotion through it, but, with his arm and wrist all covered up and in a cast, it shows the pain and struggles he has to deal with just to play again.
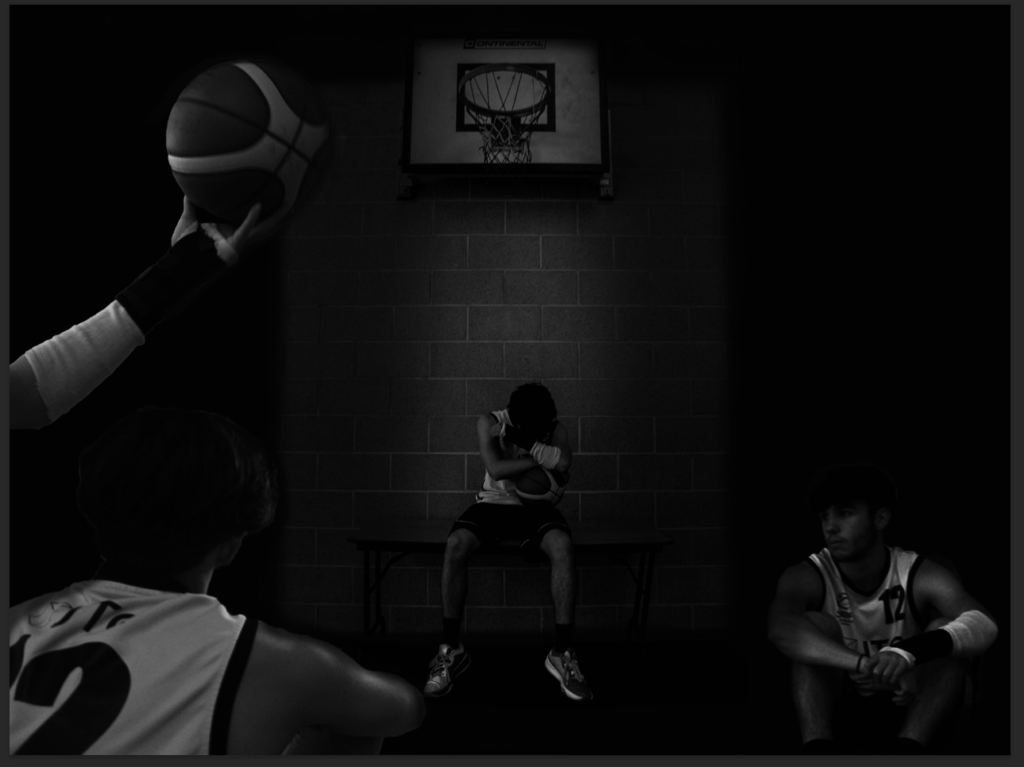
I then made it black and white to match the other photos and again increased the brightness which increased his arm sleeve brightness and the lighter parts on the ball. But, also increased the contrast so the whole arm/fingers/ball stands out compared to the dark/black background.
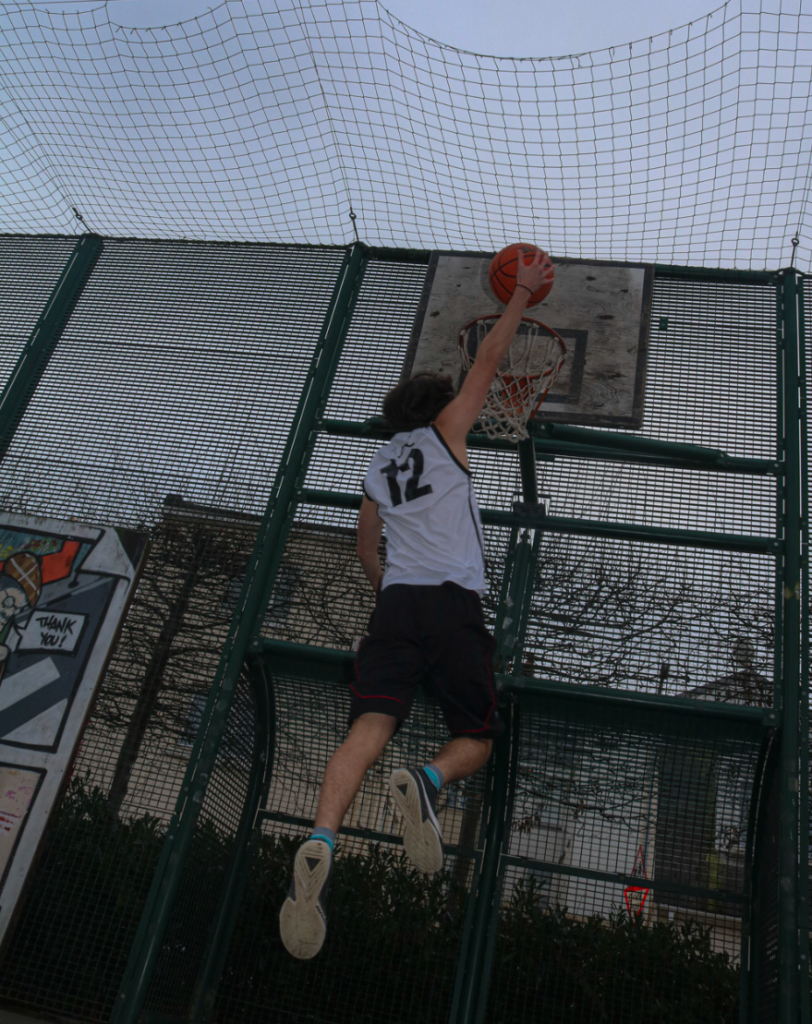
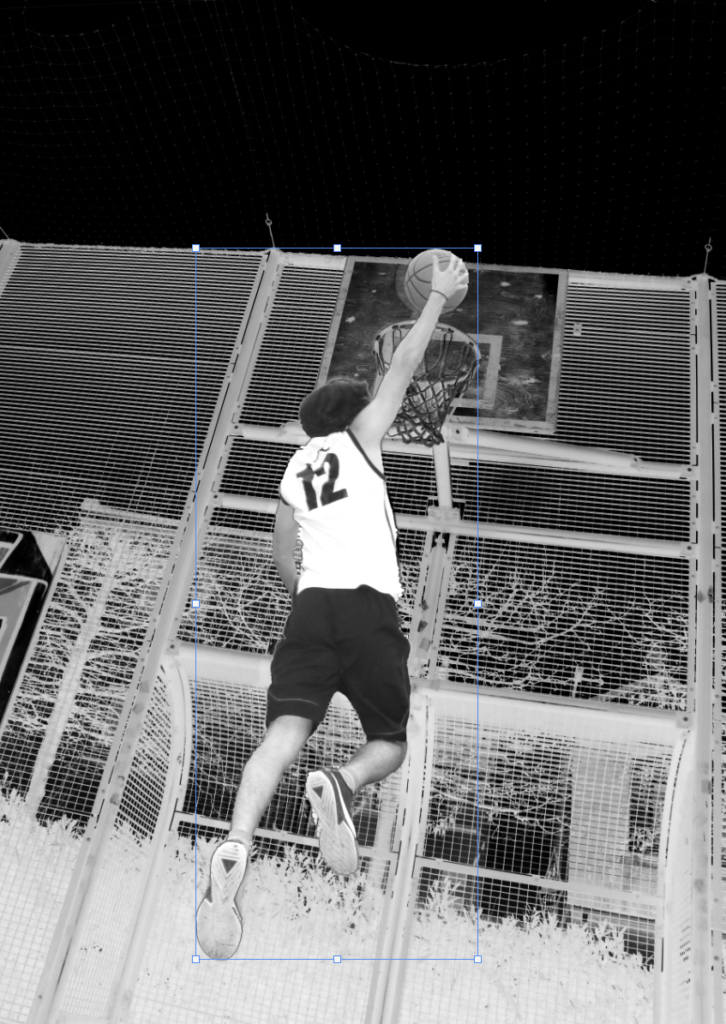
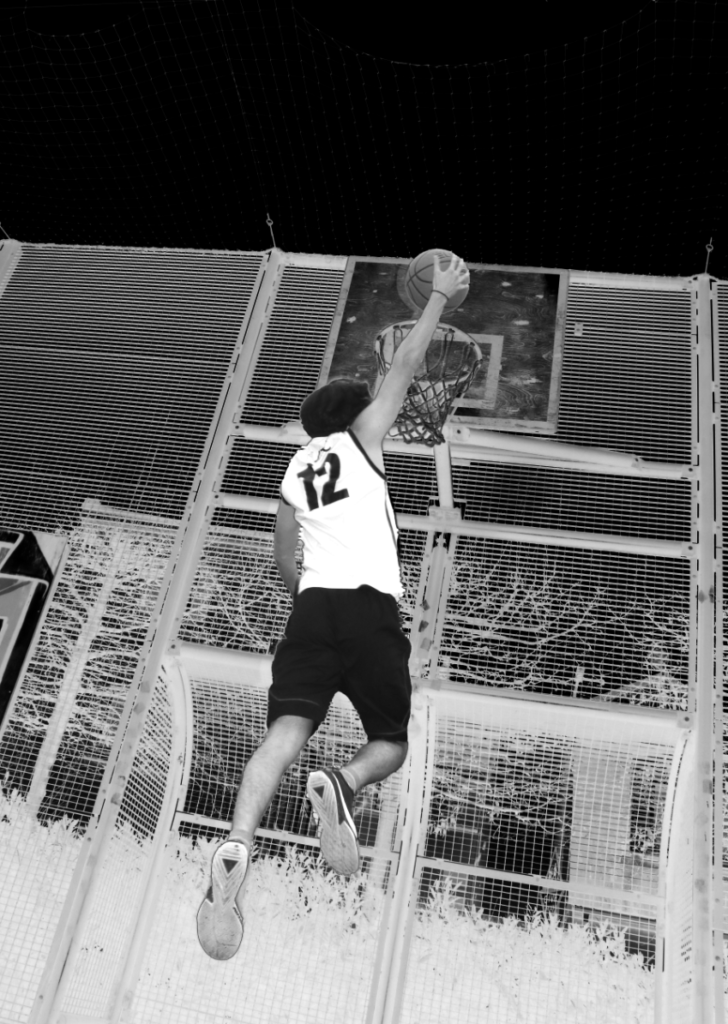
I next needed one last photo to take up the top middle/right space of my multi-exposure photo cover. But, I chose this photo of Bruce my subject going for a dunk before he had the injury with no cast on. But, I am not too sure how I want to implement the photo background involving the actual hoop he was dunking on and so I tried using the rubber tool and rubbed out an area of the black for the background to be seen but I will redo it and either involve a shape as the background or use the rubber tool again but make it look less random.
I also increased the brightness and contrast for this photo as you can see his jersey has very bright parts on and his knees/legs are very reflective and have bright areas too.
What I will do next, is fix the background of the top right photo of my subject, either using shapes or I will use the rubber and properly draw out a background. I could also try merge the brick background from the middle into the black sides as they look good together but they are still very opposite and don’t quite blend well yet.
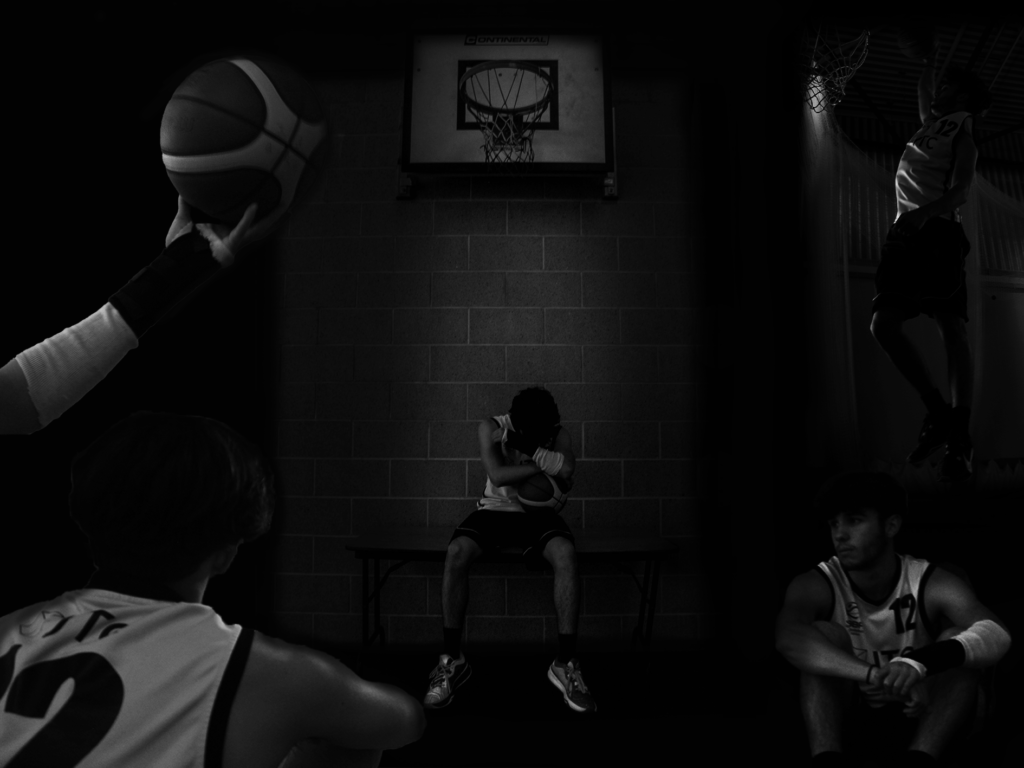
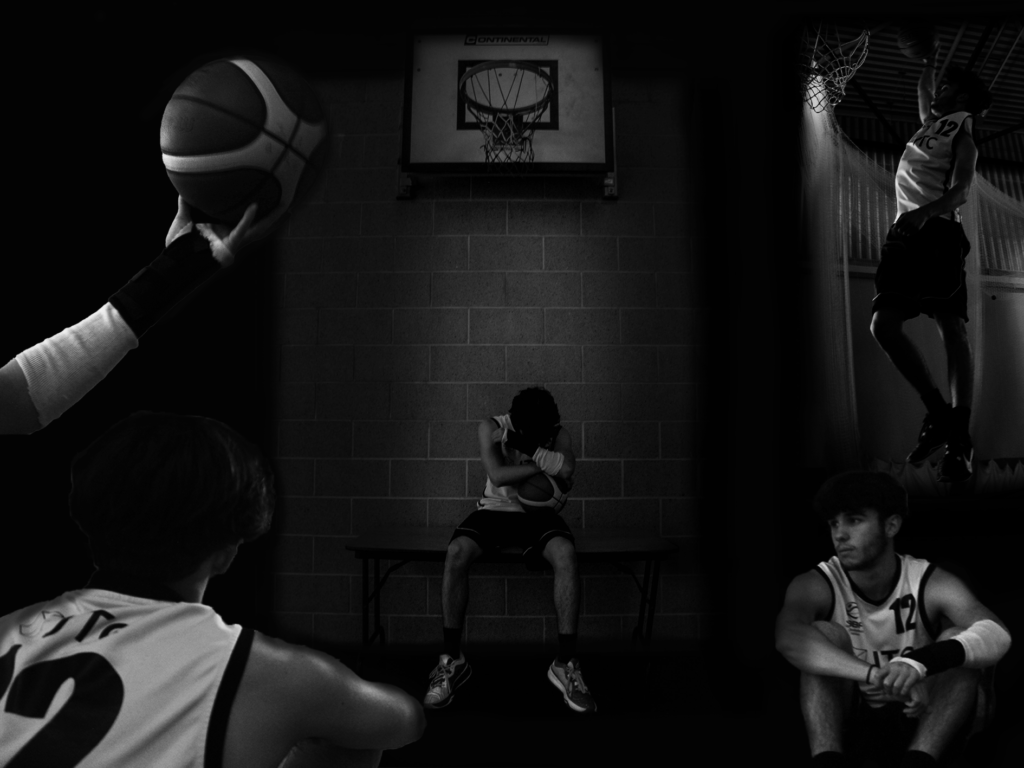
I fixed the top right photo keeping the background around him dunking in the full photo because I like how it looks, cutting out the outsides of it though and the bottom of it just above my bottom picture of Bruce.
I also increased the brightness of each image as I felt like they were all too dark and now you can see them all clearer, especially the top right photograph, and you can see more emotion in Bruce’s face in the bottom right photograph.
‘In the Shadow of the Hoop’
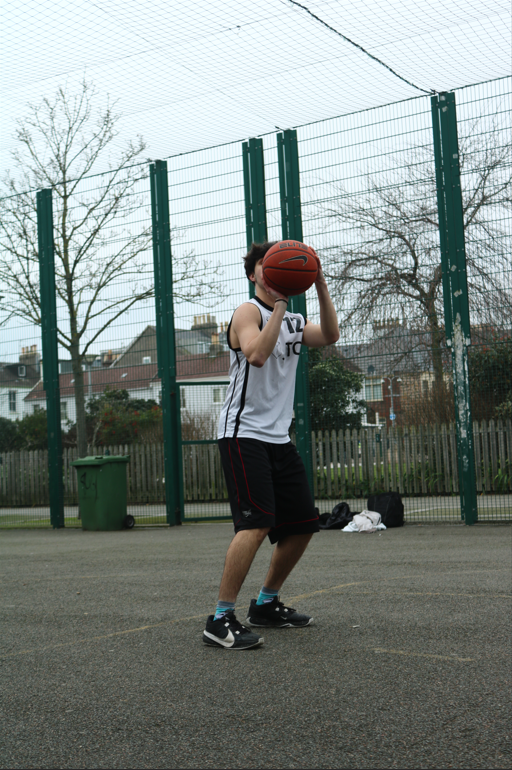
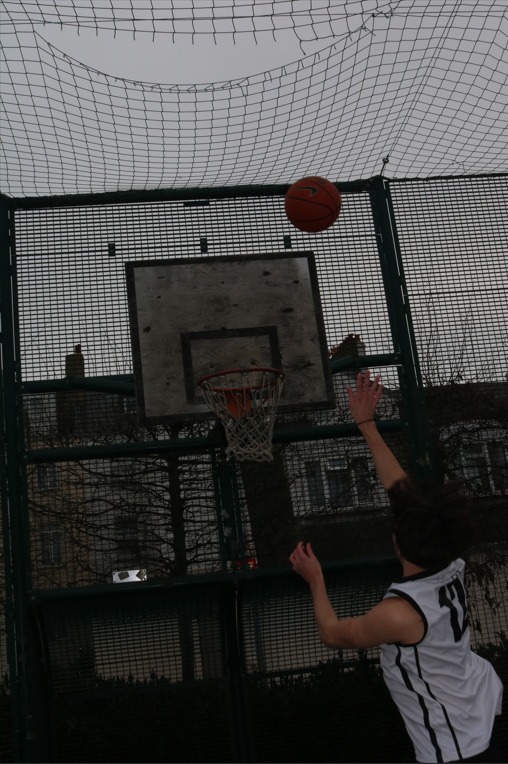
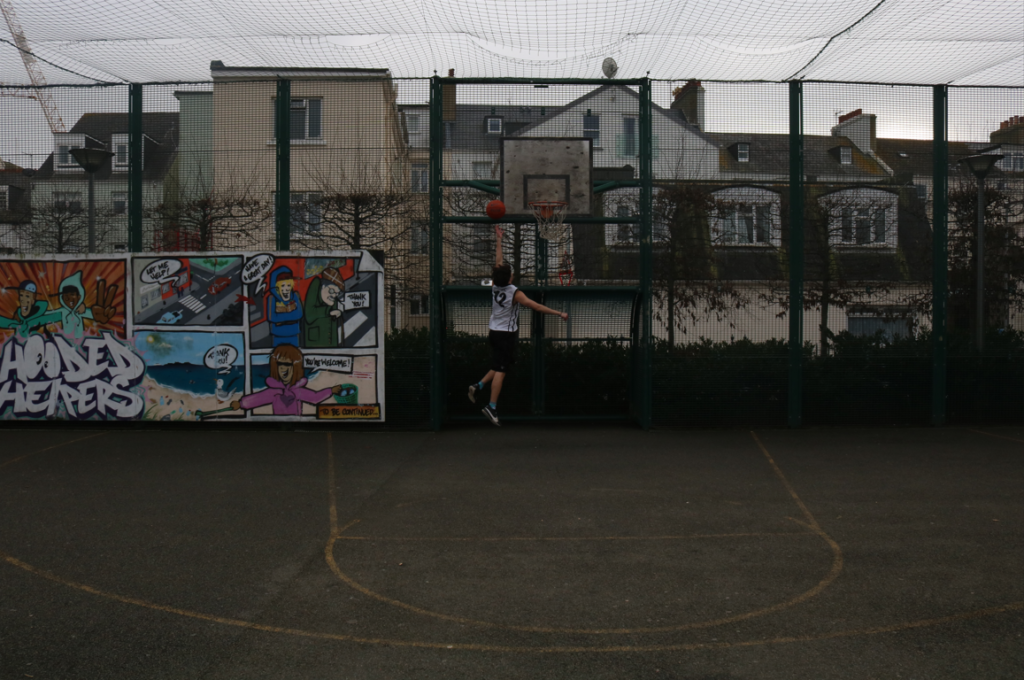
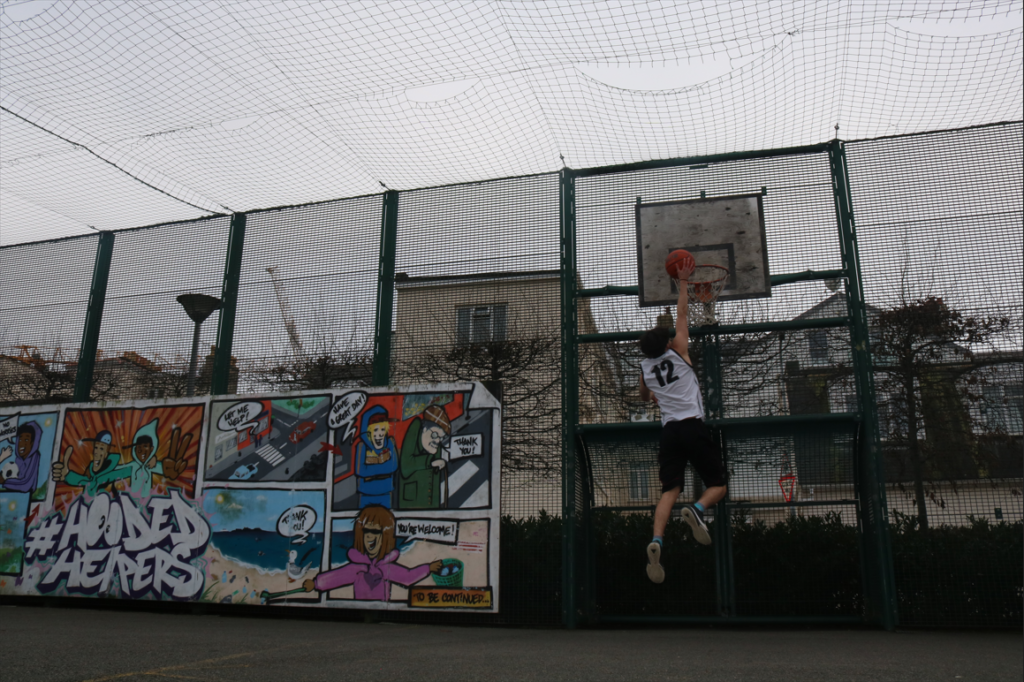
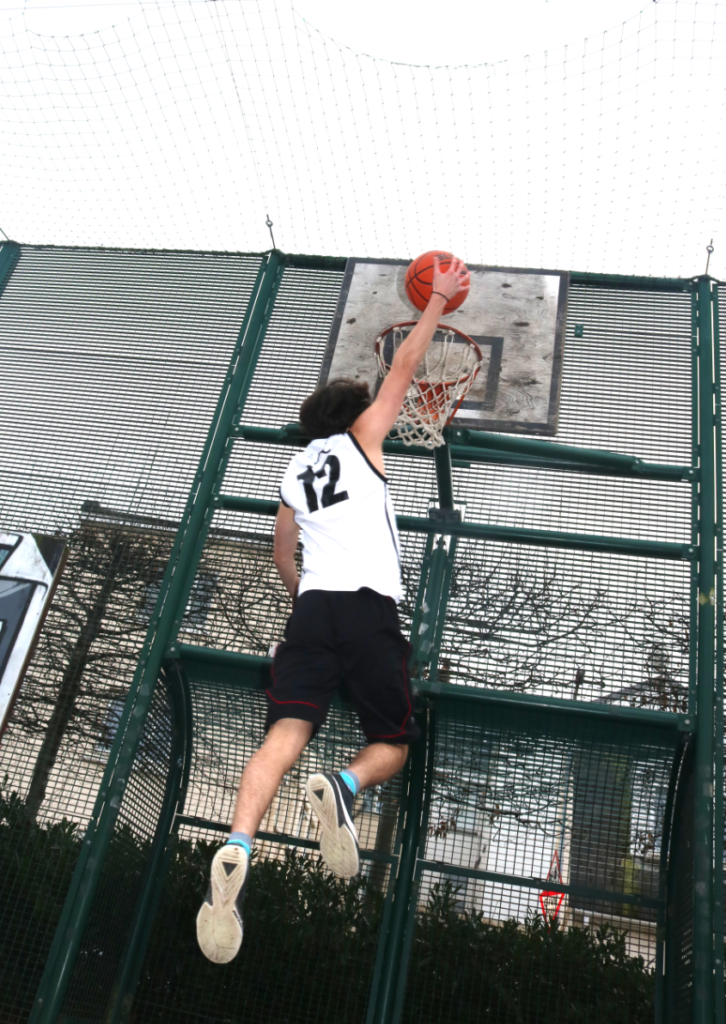
I have done another small photoshoot at Millennium Park with my Subject Bruce. I chose Millennium Park because this is where he started playing basketball on an outside court with restrictions such as a net above the court which doesn’t allow high shots. Bad grip on the floor which is tarmac which has also caused past injuries to him.
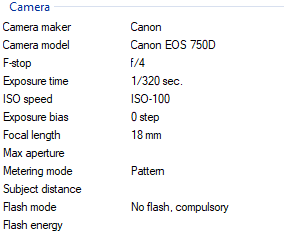
For the beginning of my photoshoot I used Sports Mode on the camera with these settings.
It made my photos have Low ISO and low F-stop with a very fast Exposure time. The reason for these settings are set to that are because my subject is moving whilst shooting the basketball and so I have to capture him in frame and the ball moving in the air.
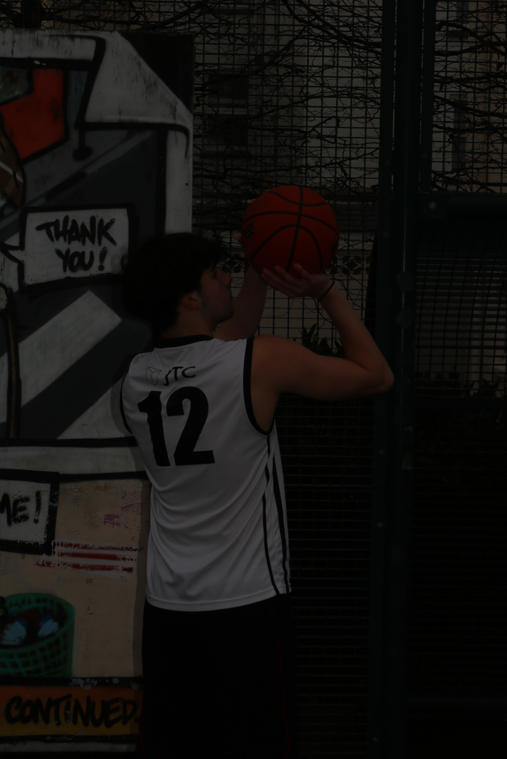
For these photos I used portrait mode with these settings.
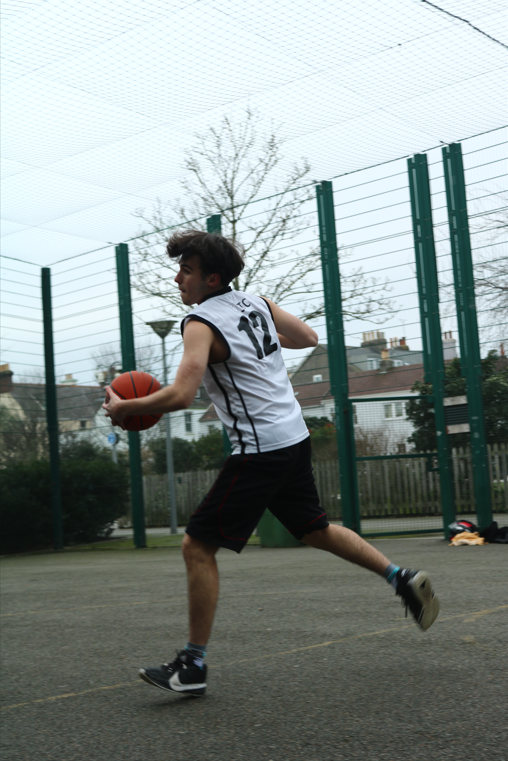
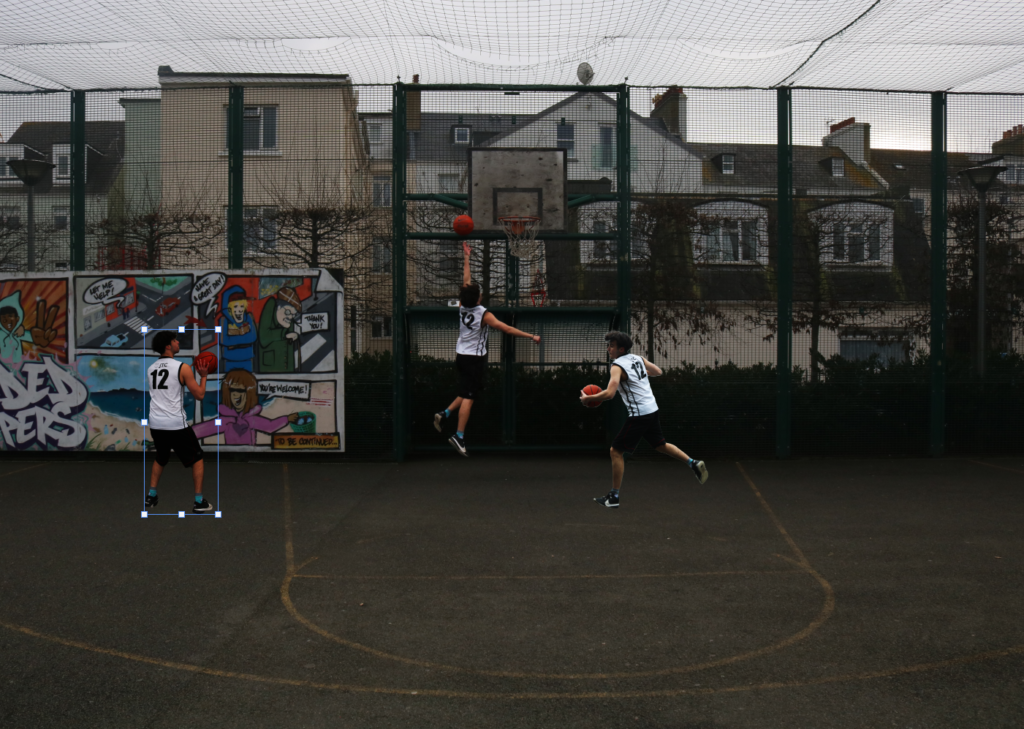
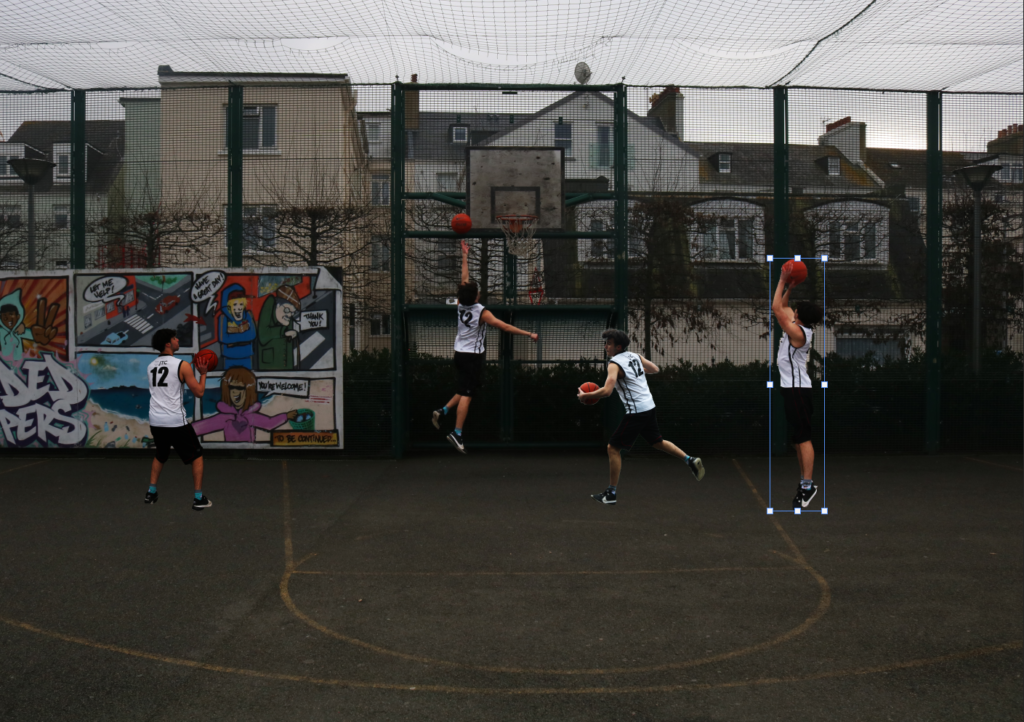
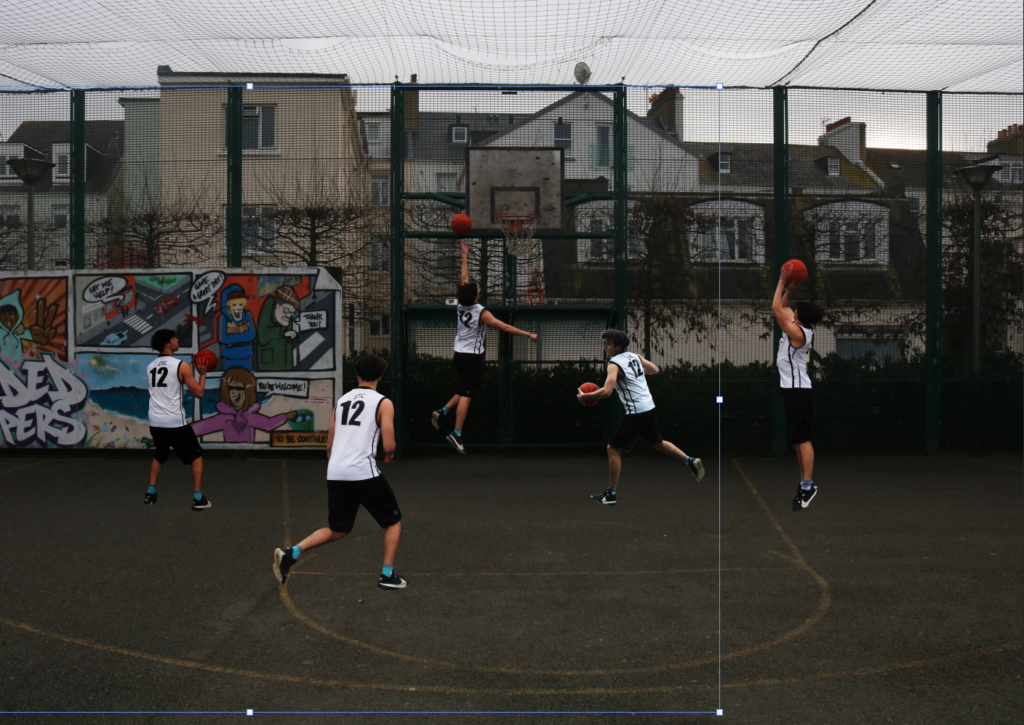
Twelve Back
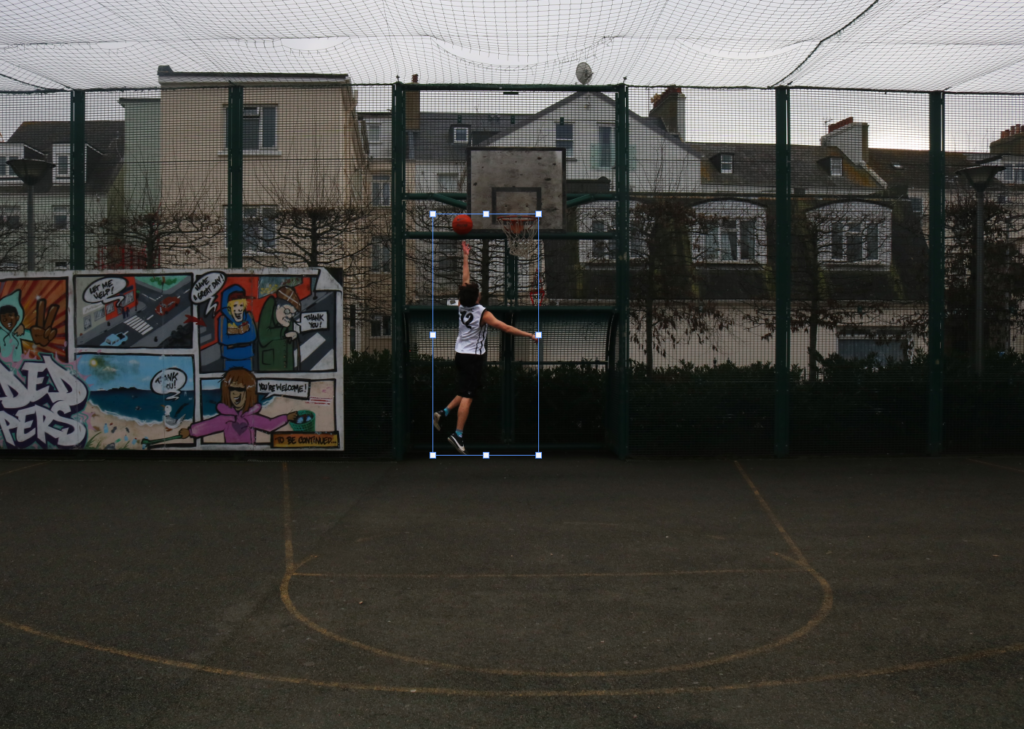
I am starting a multi image photograph with a lot of different photos of Bruce (my subject), playing around the court taking different shots or doing different moves.
I started by cropping the left side of the image to make it more central and added brightness and contrast onto Bruce making his jersey and the ball and even his arms and legs stand out more.
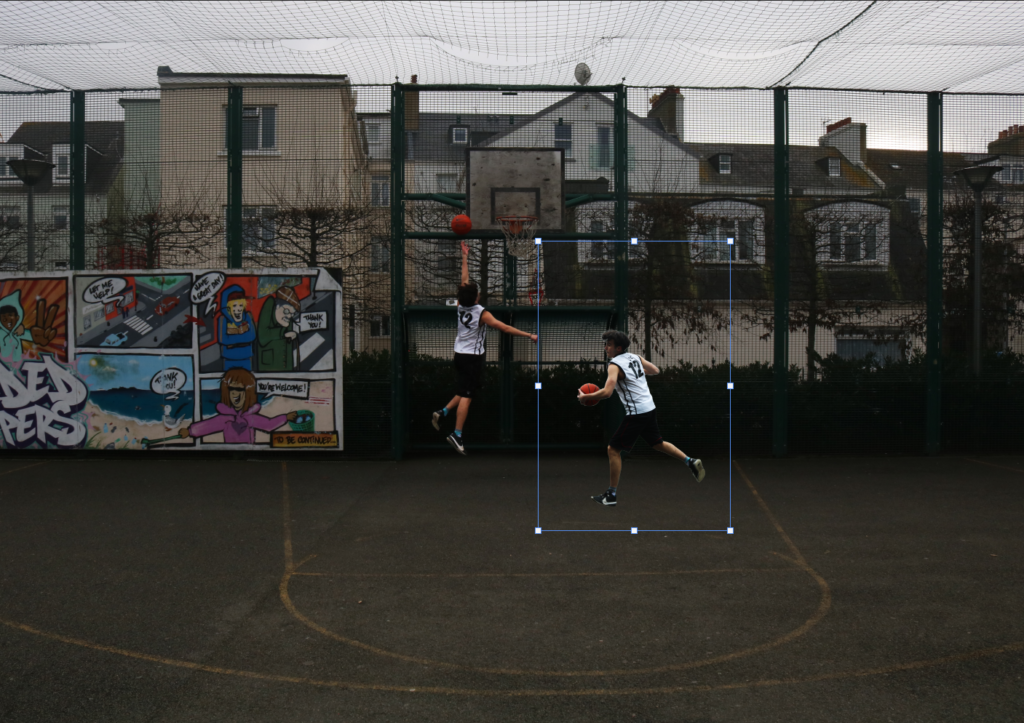
I then added another photo of Bruce doing a spin move with the ball, I removed the background around him so its just his figure and I also increased the brightness and contrast on him too, to stand out more for the overall image.
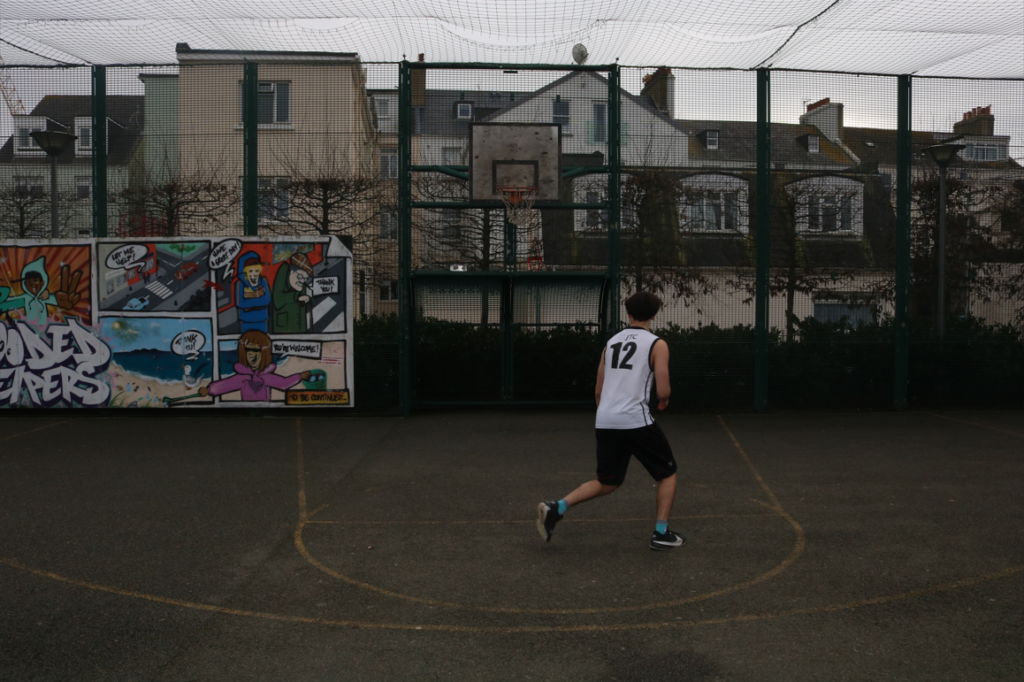
I then added another photo of my subject, but what I really like is how his jersey is white so it stand out a lot when I increase the brightness and contrast of him and also how the number 12 from his jersey is showcased all around in the photo and that is what the overall photograph will be called.
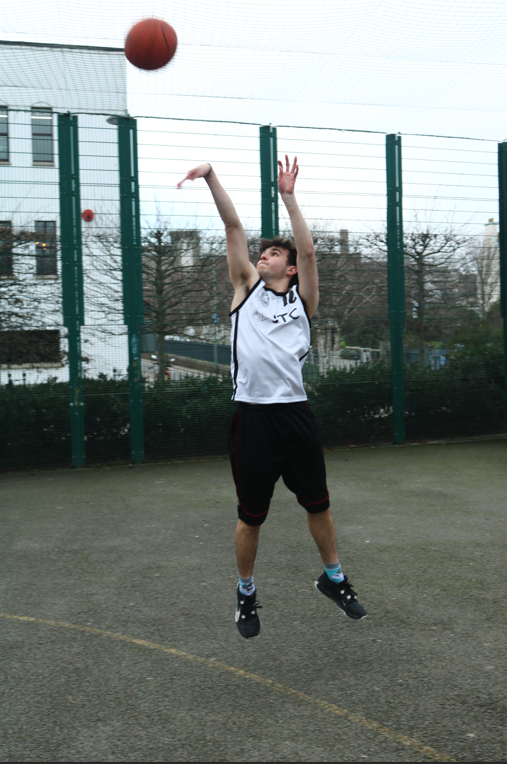
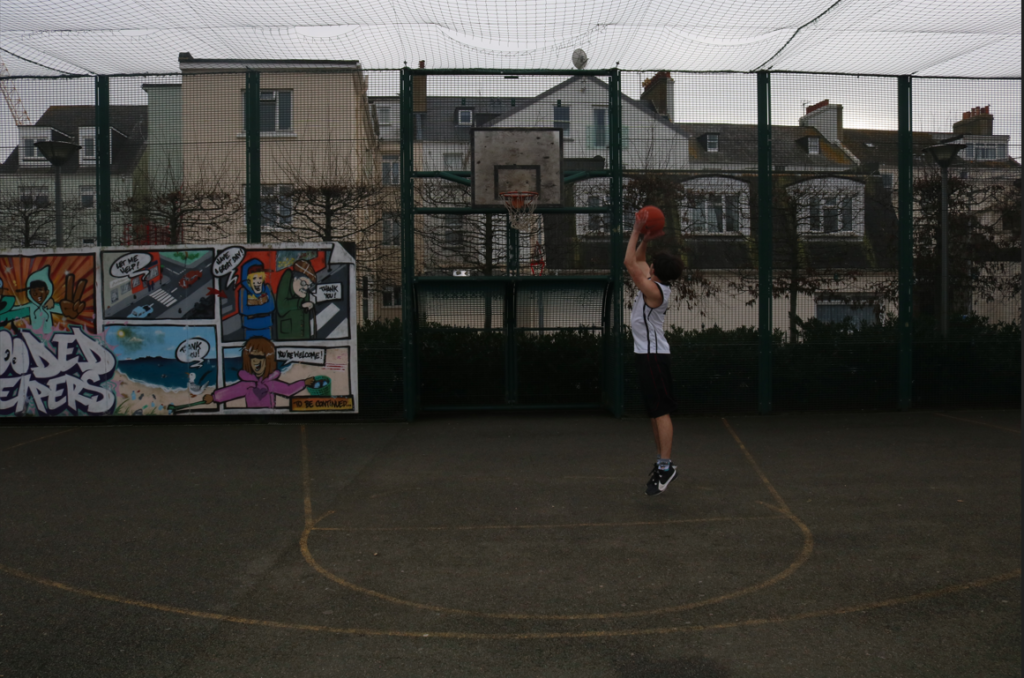
Next I added this photo of Bruce taking a jump-shot with him in the air, I raised him up because he was in the air whilst shooting and I will need to add a shadow below him to make him seem more ‘in the air’. I also added more brightness and contrast onto him to match the other images.
I finally added this last photo of Bruce next to the free throw line with his number 12 fully showing to the camera, with increasing the contrast and brightness as well so he stands out the most.
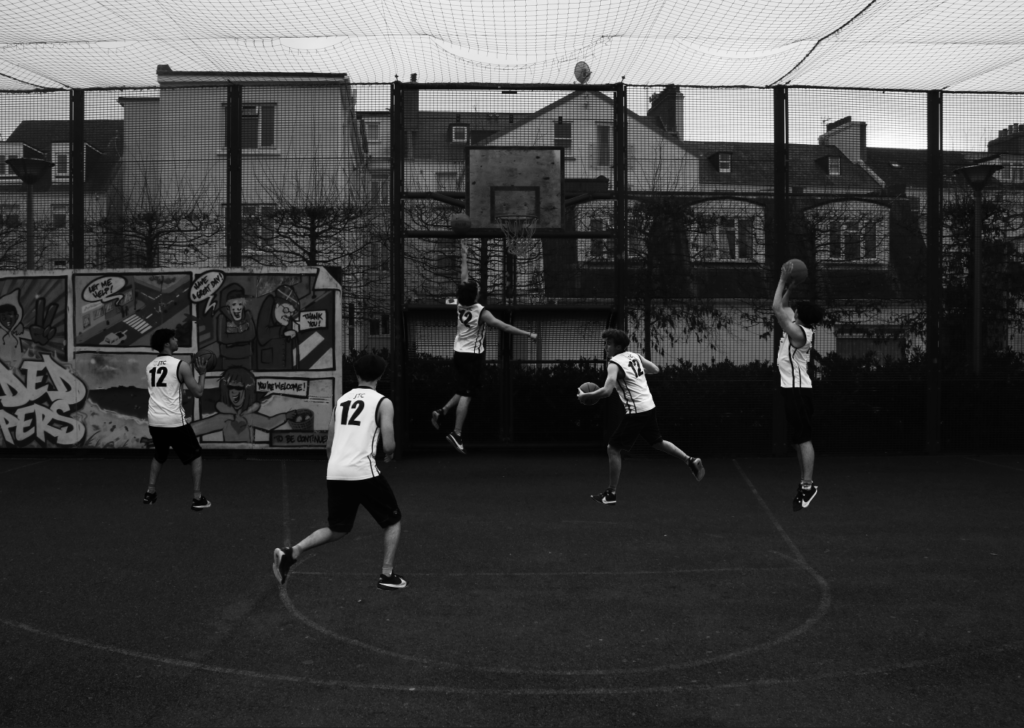
I then decided to make the whole image in black and white which helped with the different brightness from each photograph of Bruce and I when I add shadows to each photo of Bruce it will look better.
This is the end photo I created on Photoshop with the shadows involved as well but I wanted to add a Vignette around the whole photo which I did in Lightroom creating this.
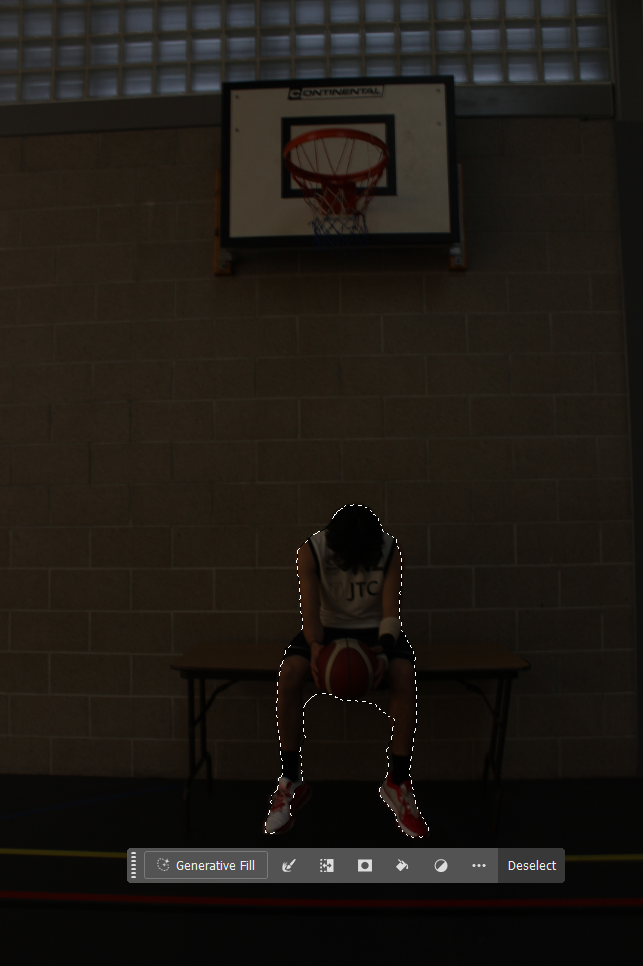
In this photograph you can see my idea with the shadows under Bruce/my subject. But, the drawing shadows I made, I don’t like so I will try Photoshop Generative Fill to create shadows.
This is my overall final photo of Bruce my subject playing basketball around Millennium Park Court and I am calling it Twelve, Back.
Another Photo edit I have created was an inverted photo of my subject, starting with this photo.
I liked this photo because it is a little blurry with the hoop, my subject and the ball all fuzzy and out of focus. But, what I did is I used another photo where my subject is sat in the same position doing the same pose, but in focus, then selected his outline, copied it, pasted it over the fuzzy out of focus photo over the top.
It looked better because my subject was in focus but the background and environment was all blurry and fuzzy, creating a main focus.
I then cropped the image to be more central and in the rule of thirds with the hoop and my subject on the lines. But, I also increased the brightness, contrast and exposure so he is more lighter and brighter than the background so he is the main focal point for the viewers.
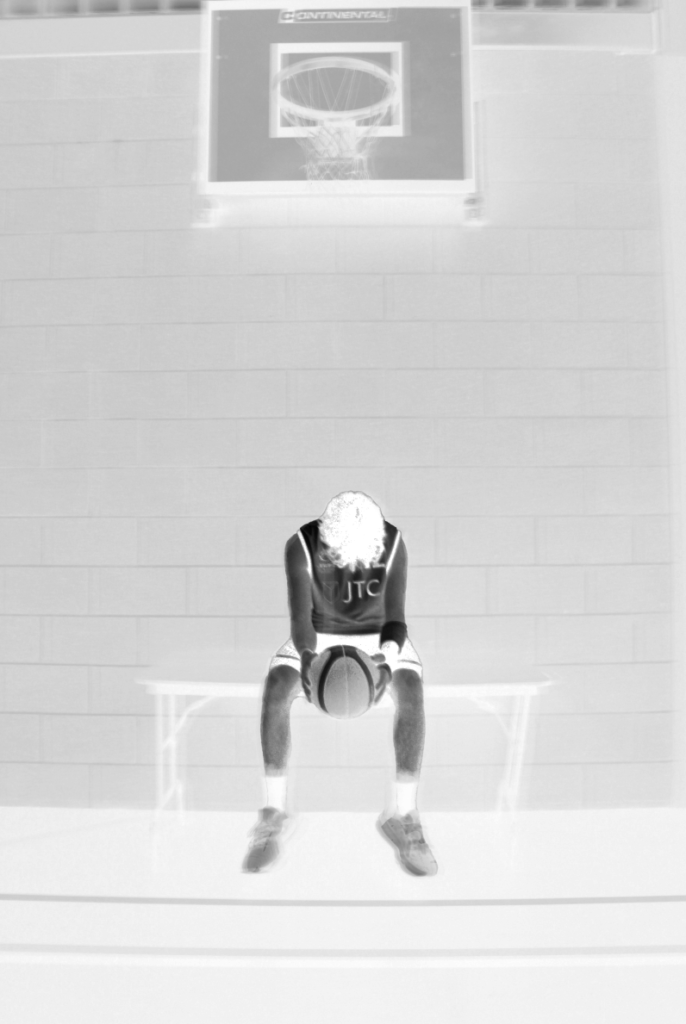
I then added an inverted filter over the top of the whole image creating this black and white overall photograph with my subject darker in the middle showing the sadness looking down at himself, holding the basketball, not showing his face, sat under the hoop.
I decided to keep his shoes up to his socks still blurry and rubbed out with 50% opacity rubber tool, the top focused layer because I don’t want the viewer focusing on the bottom half of the photo, only my subject in the middle sat on the table under the hoop, with the backboard also a bit darker then the rest which also stands out but not as much as my subject as that is the main view for this photo.
I then didn’t like the top of the photo with those glass squares, so I cropped the photo down to the top of the backboard which created this photograph.
I then used generative fill on Photoshop 2025, to replace the top with fake brick layers/get rid of the darker areas and be grey instead, resulting in the final image.
This is my overall photograph for it, but what I might do next, is actually keep it un-cropped like the photograph with the glass panels, but then use generative fill to just replace them with grey bricks so the photo still looks far away and long with the hoop on the wall above him.
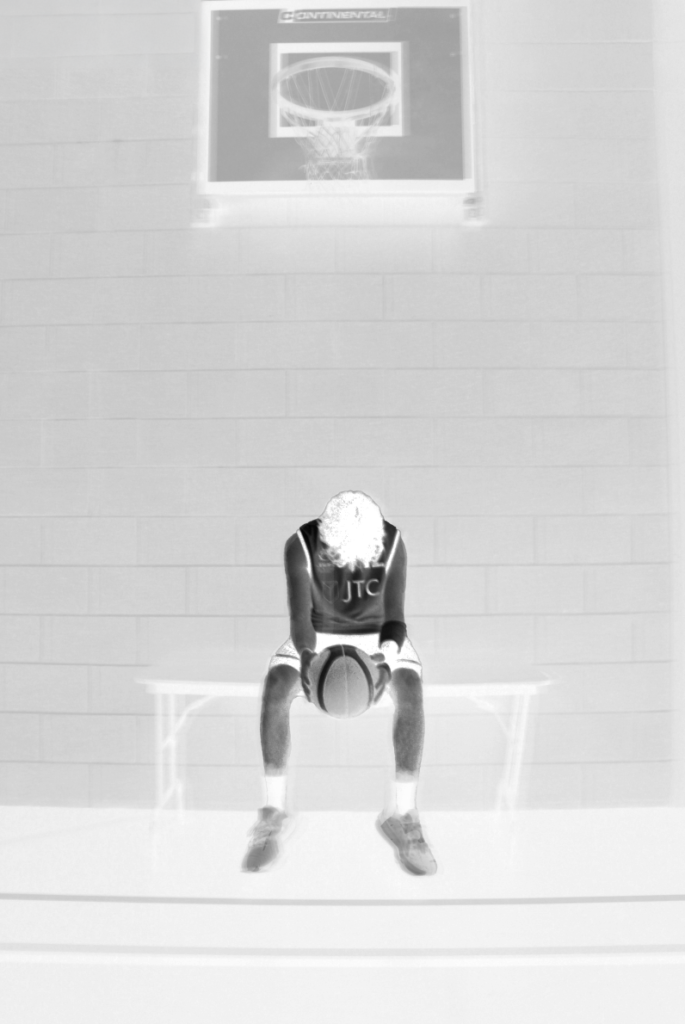
I also did a plain black and white photo of my subject sat under the hoop, showing sadness emotion but without his face being seen, instead being covered by his cast on his wrist. I will next photoshop the top part again getting rid of the glass panels to make the photo more focused on him and the hoop.
Then I will create a photo of my subject under the hoop like the one above, but instead it will all still be in black and white, apart from his wrist/cast. This will be in Red, to show the focus point, and show more emotion through the photo such as anger and the frustration he has to deal with, from getting injured constantly and not being able to play but only to watch from afar.
I chose this environment because it is closed off with no natural lighting, I also positioned my subject Bruce to be against the dark brick wall which is cold and can help pursue the sadness and loneliness of my subject. Finally, with him covering his face with his injured wrist with the cast on, makes the viewer concentrate and think more about what emotions and feelings he is going through. It also resembles how he couldn’t be involved in the action on the real court, instead he was sat down on a table under a redundant hoop away from the other people playing.
Another aspect of this image is how my subject in his training gear, whilst not being able to train, shows his dedication, passion and optimism for the sport, that he will hope to play once again. But it is too painful to watch other people running and jump around, whilst he can’t participate.
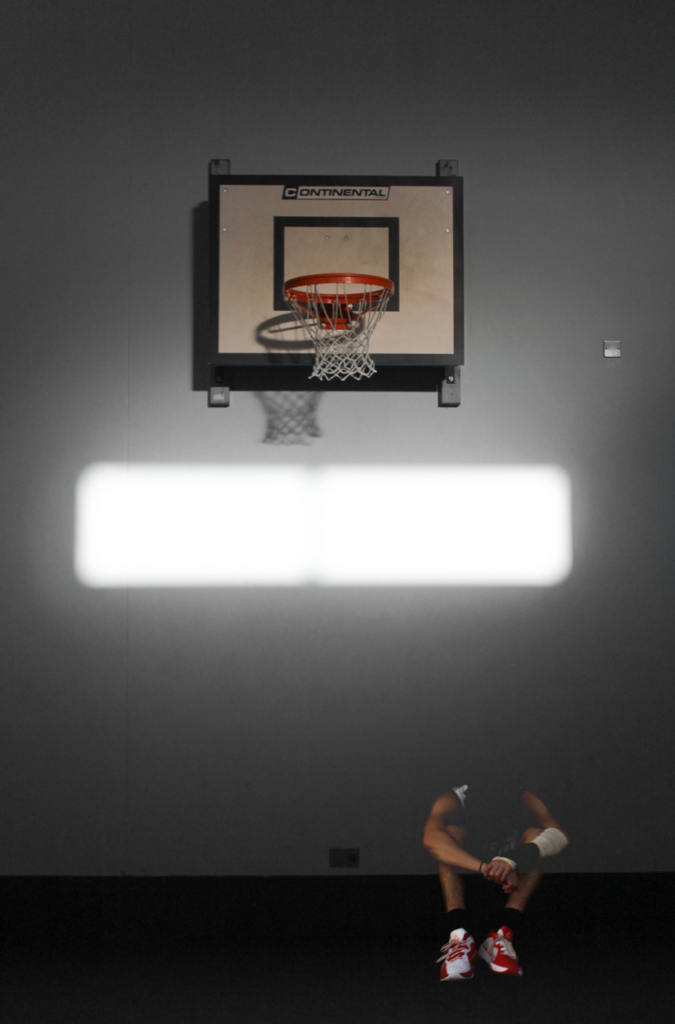
I started editing this photograph of my subject attempting to dunk a basketball. I managed to capture this action shot mid-jump because of my knowledge of basketball, I can anticipate when the perfect snapshot would be.
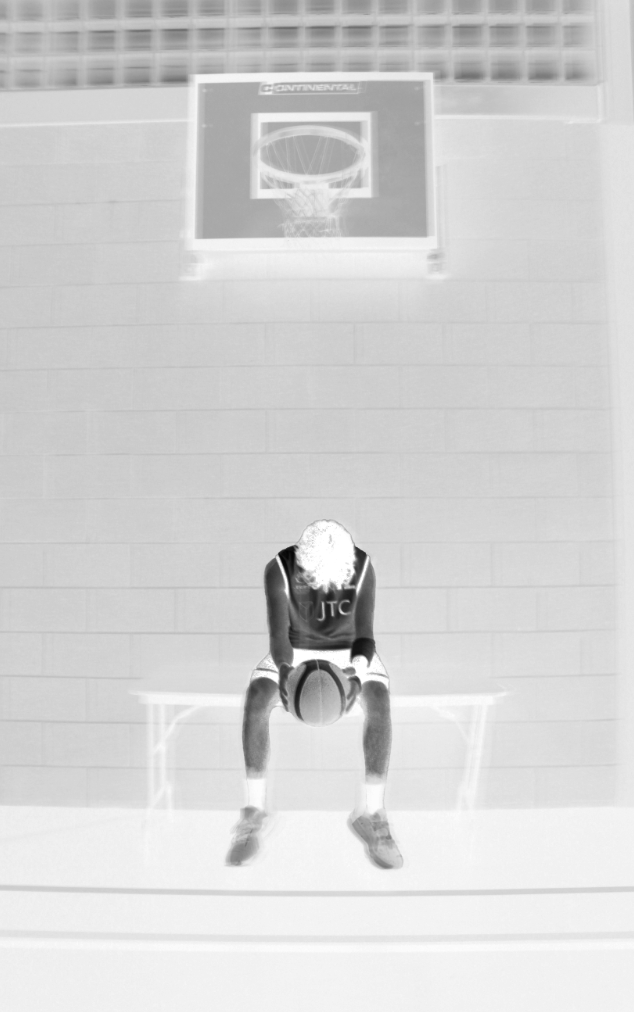
I started by increasing the brightness on my subject and the overall image whilst lowering the contrast overall as well. I did this because I wanted to use the inverted filter again, so he would have to stand out brighter, to match my cover photo of my subject sat on the bench in a white invert.
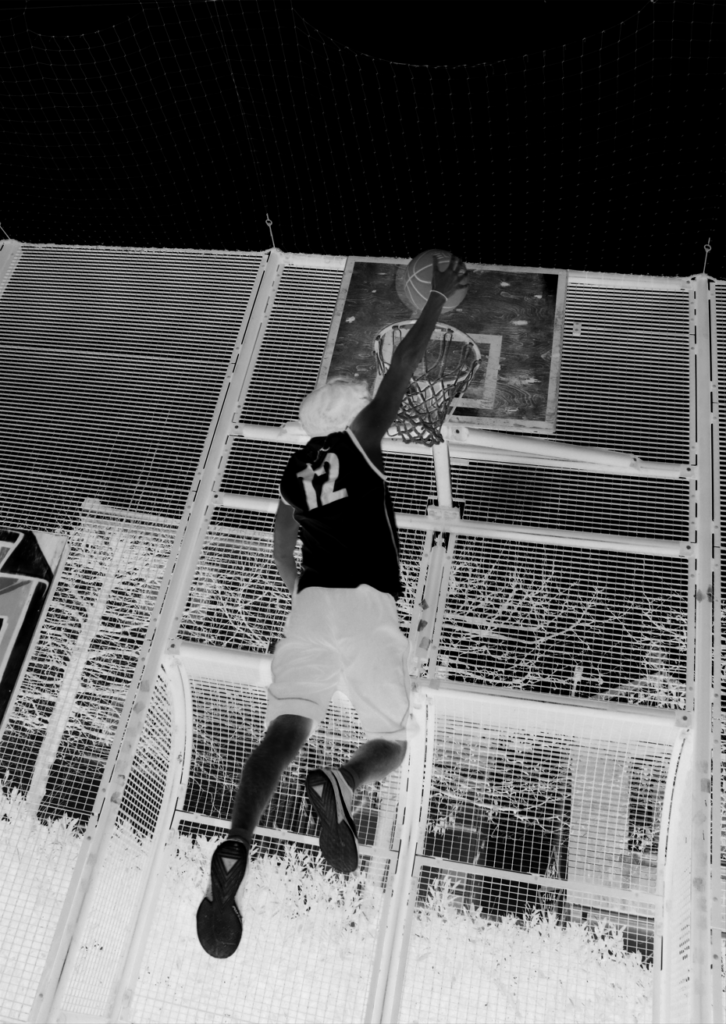
I tried both inverts with my subject in black with the black objects in white, and the black in white. I preferred the black overall inverted photo because it is opposite to the front cover, which tells the viewer how he started in injury and has to recover, and at the end of the photobook, it will be this darker inverted photo of my subject jumping and playing fully again because he is fully recovered.
I then wanted to try the other side of the invert, with my subject in white with his shorts and the number still staying in black. I did this by adding another layer of him over the top and just inverting him. But, I felt he was too bright, so I decreased the brightness and contrast on the copied layer to separate him from the background better resulting with this final photo.
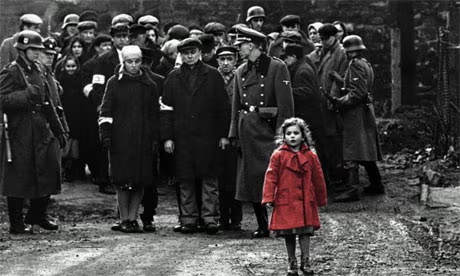
I created this image of my subject who I positioned centre, underneath the basketball hoop, sat on a bench hiding behind his cast, hiding his face. I made the photo in black and white to show the emotion through this photograph, with it all in black and white to show isolation and sadness, but with the cast in red to show frustration because he has all this anger from these injuries and that he can’t play because of them. Also, I related it and got inspiration from Schindler’s List, which in this movie, it is all made in black and white, apart from one singular thing, which is this young girl’s red coat. This created another sense for the movie to stand out and point out the struggles they all have to go through and later you see the girl in her coat dead. I matched the red cast to her dress to show the main focus point about his injury and the reasons behind it, like how it tells the viewer the struggles and sadness, he has to go through with the injuries.
I created this photo from using the plain background of the hoop, then cutting out separate photo of my subject sat down, crossed arms and lowering his head. I layered him twice, one on top of the other and then used the ‘Hue’ mode to make him transparent, and the other layer using lighten mode to make the whole two photographs of him brighter.
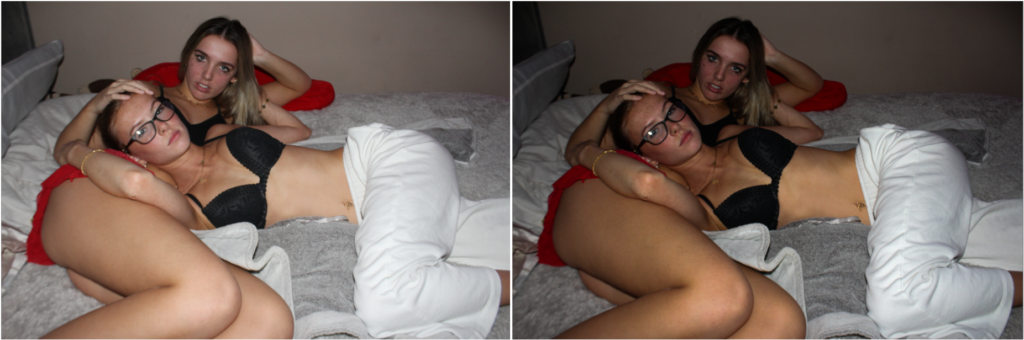
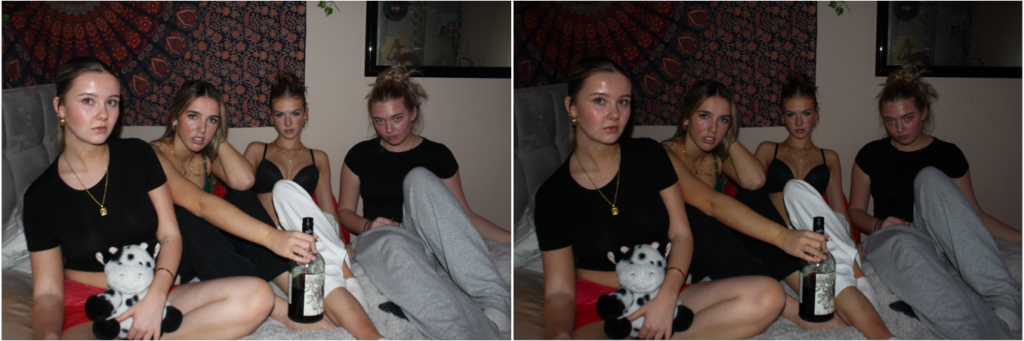
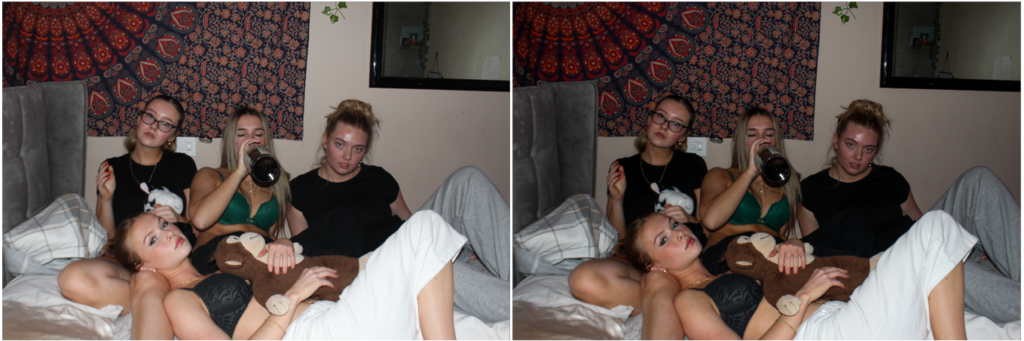
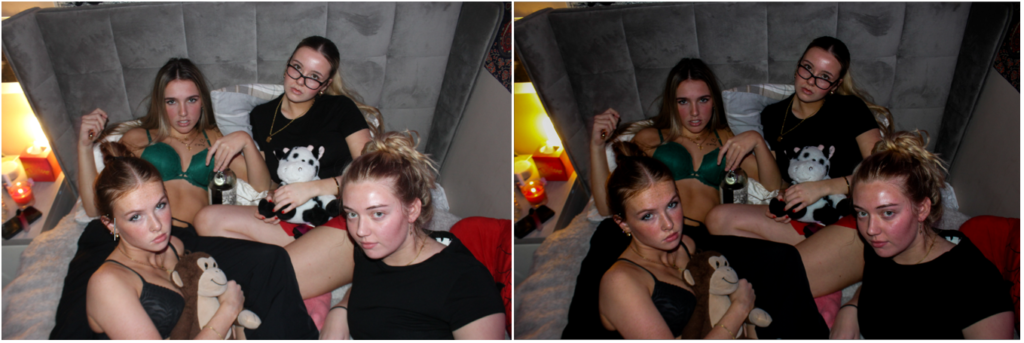
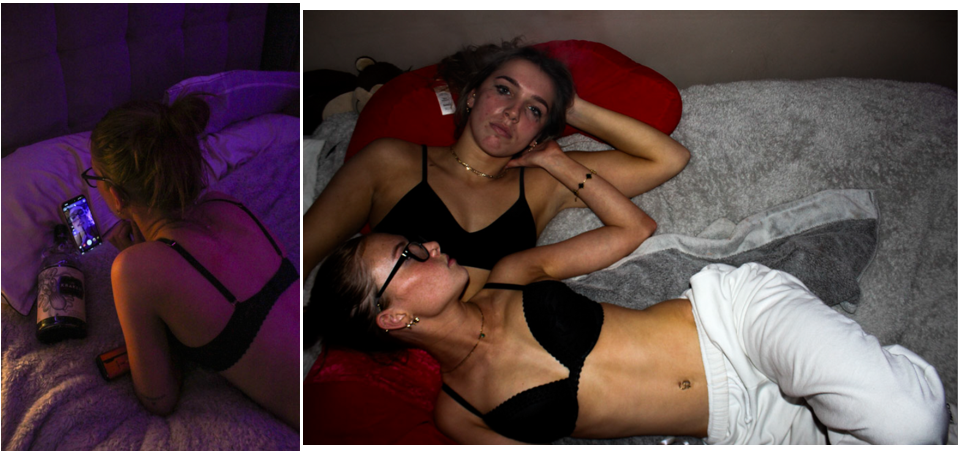
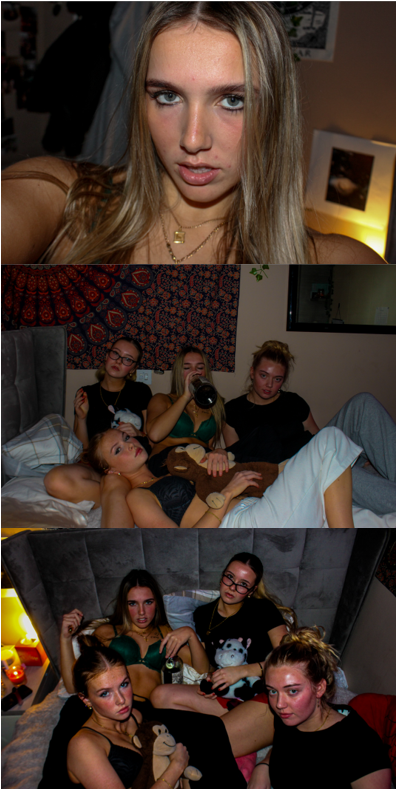
So far, I think this has been my favourite photoshoot overall because it was fun and creative, and it shows a clear connection between the female subjects. In this photoshoot, I focused on the reality of party life, creating a mood of intimacy between the girls. I also tried to include a theme of depression through the impact of social media and how it affects girls when they’re with friends/ going out.
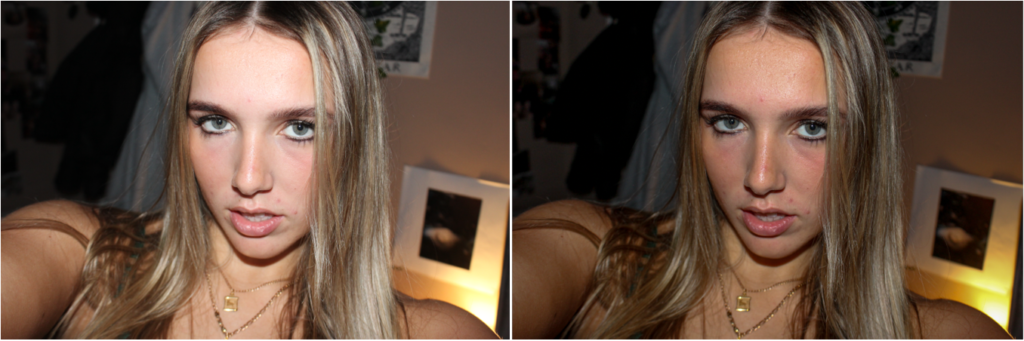
Edited photos: Coloured images
I have chosen my few favourite images out of the whole photoshoot, and edited them to portray the narrative I was aiming for. I wish for these images to convey sensuality and intimacy between the girls as we see they are closely positioned together.
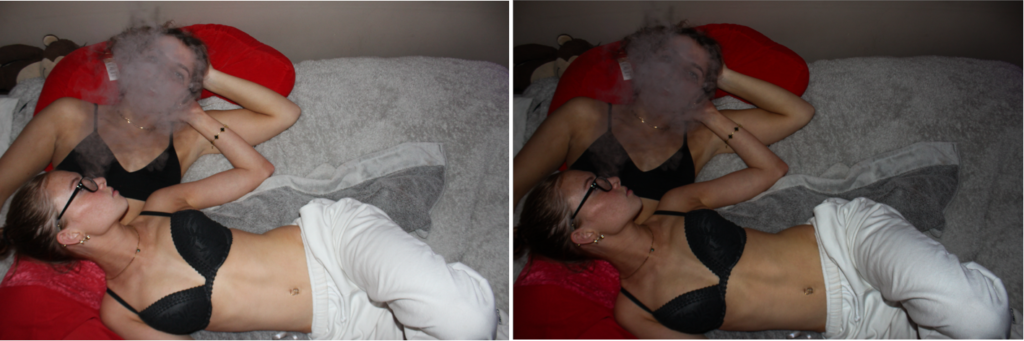
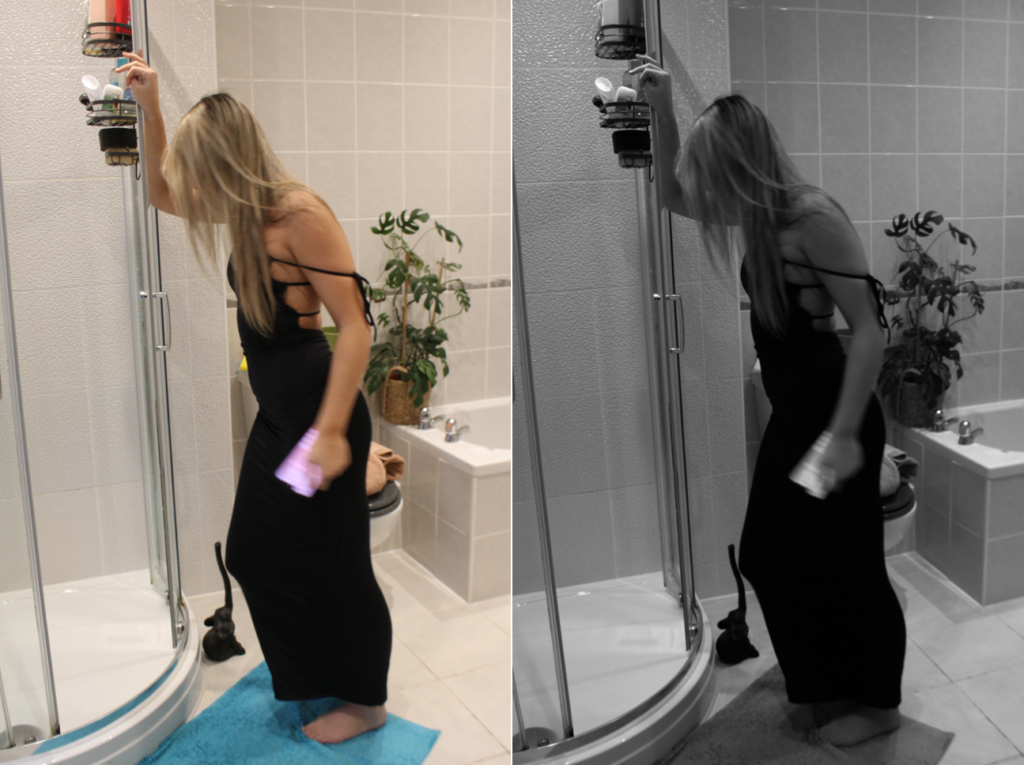
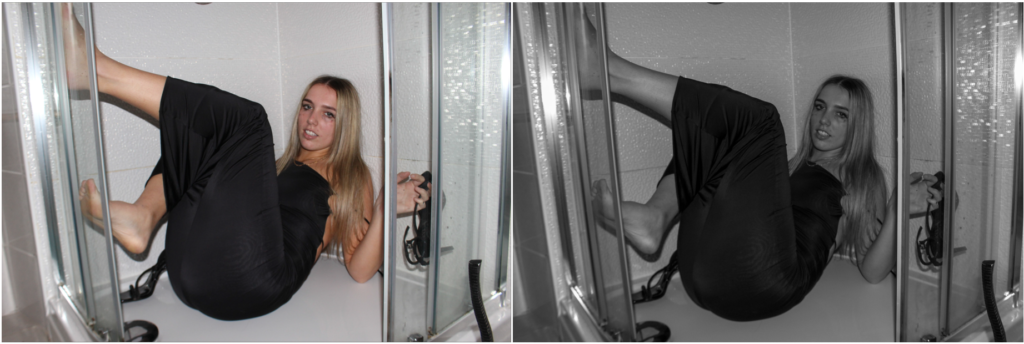
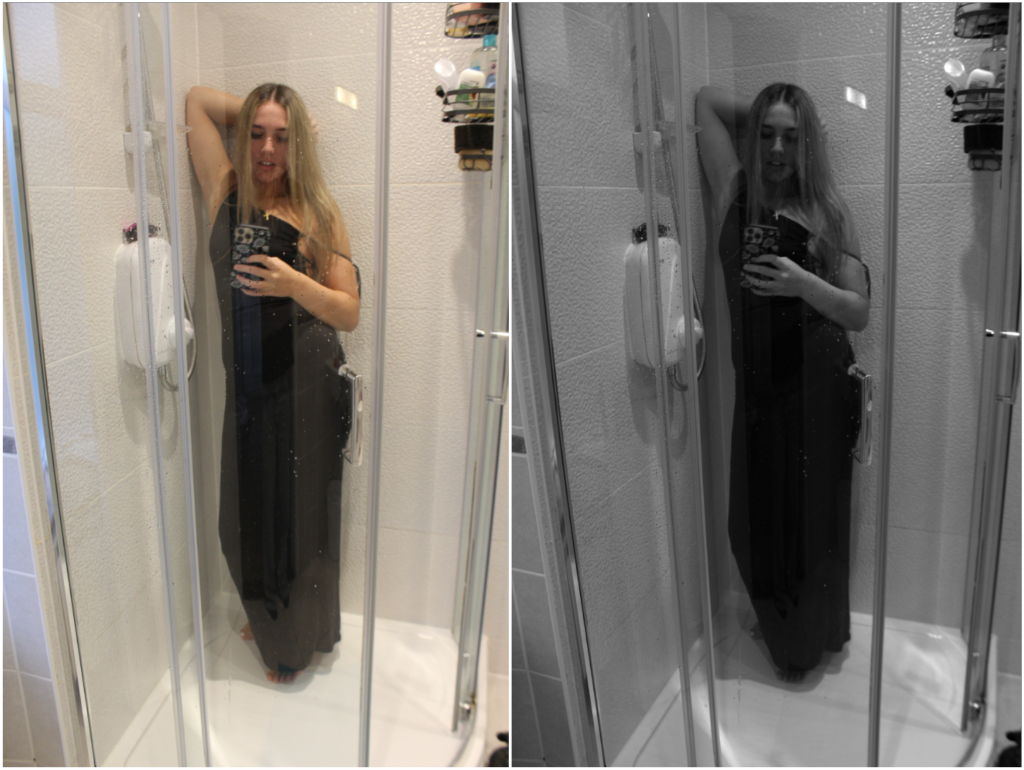
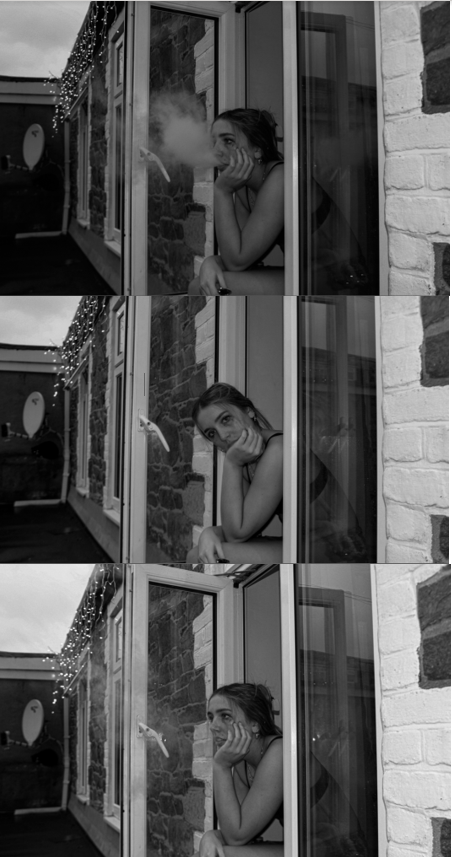
Black and white images:
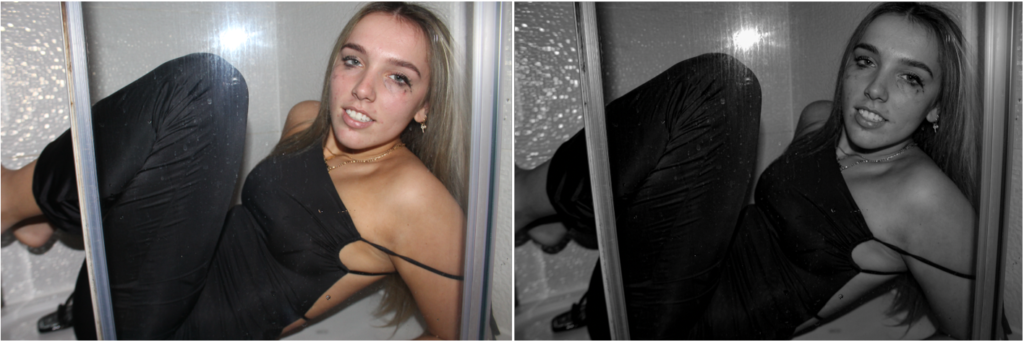
For these images, I wanted to present a depressing, lonely feeling as the subject appears to be drunk and dejected. I wanted to present the subject as drunk so it reflects the rebellious side of teenagers, yet the impact it has on emotions. I really like the contrast between the light and dark shadows because it creates an exaggerated texture, which evokes the emotions within it.
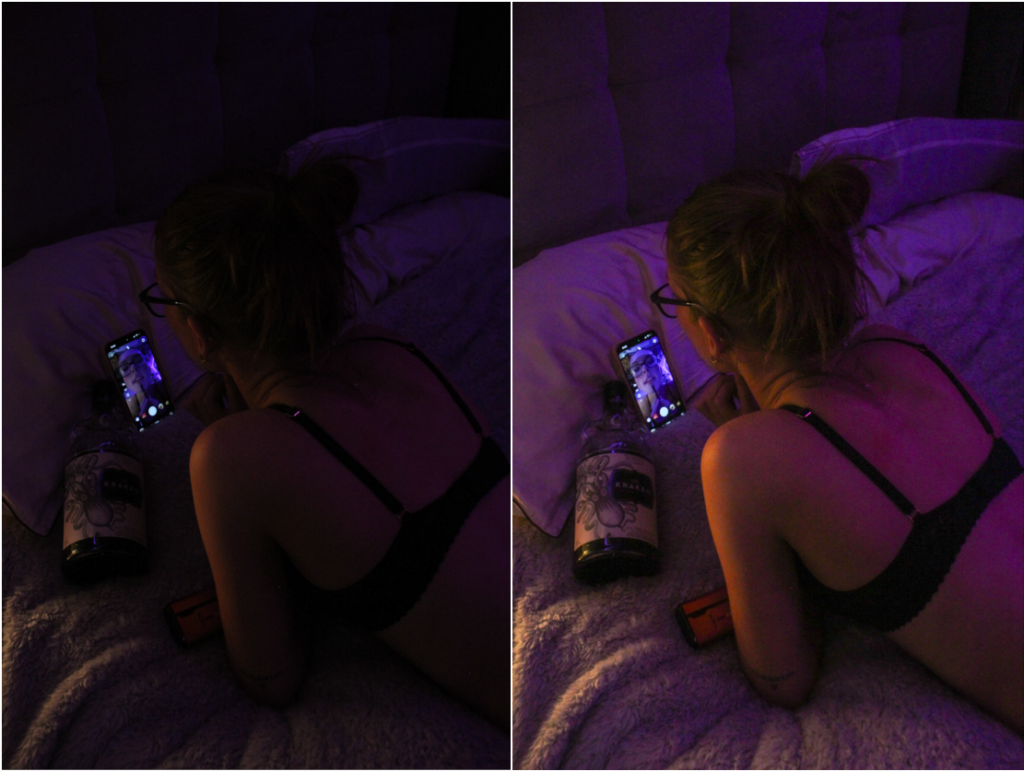
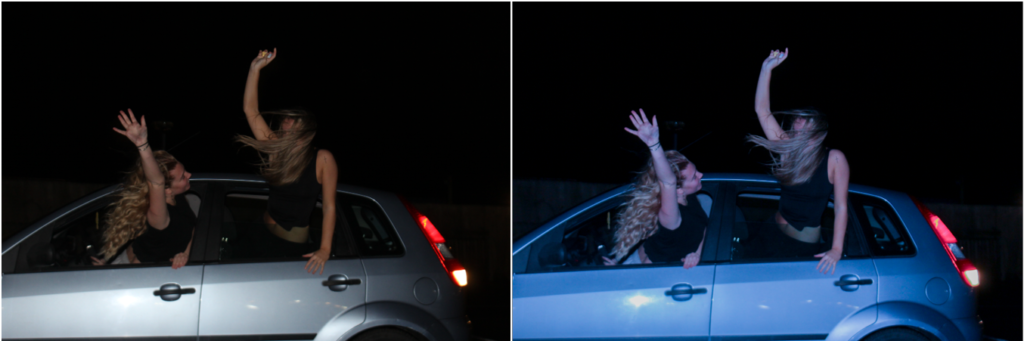
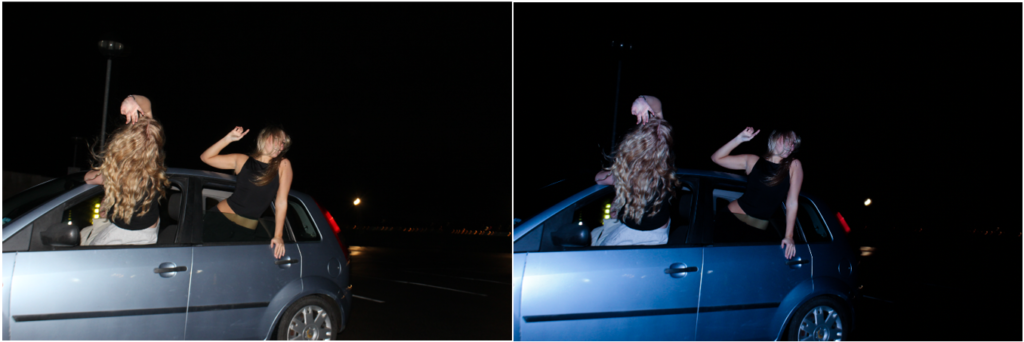
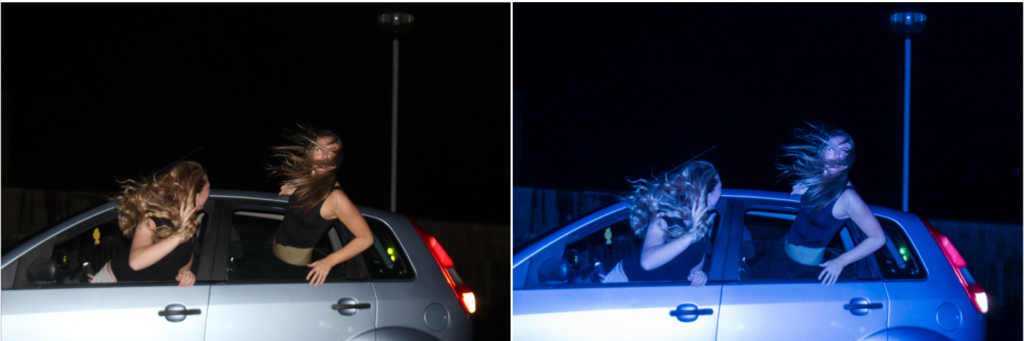
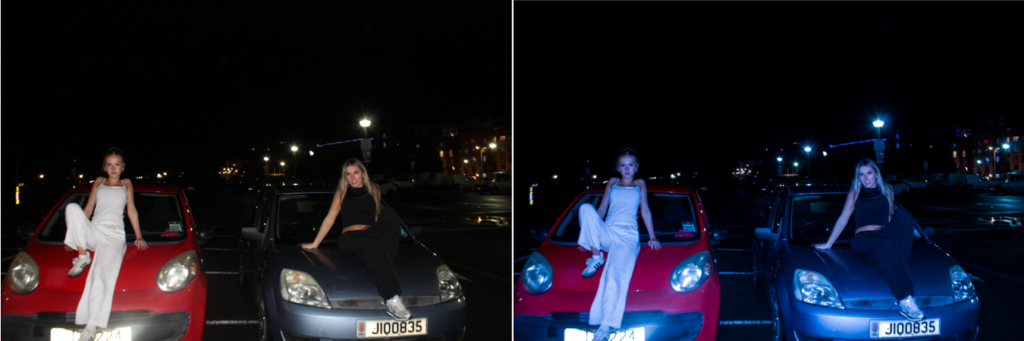
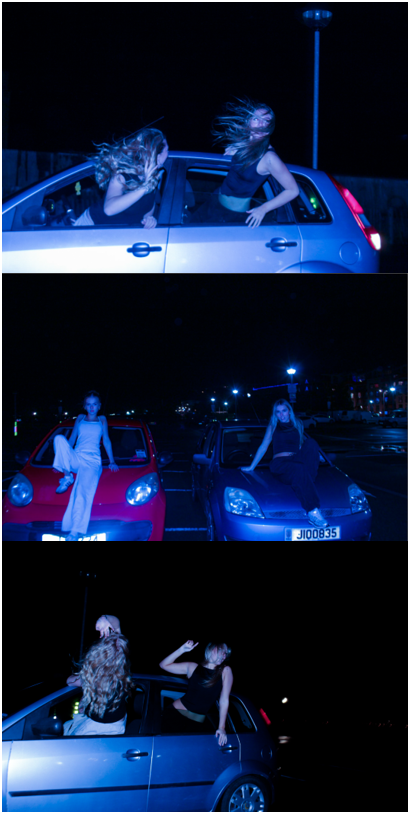
Blue toned images:
As you can see, I have edited various photos which represent different stories and feelings. I decided to edit these photos in three different ways: Black and white, coloured and blue toned. This is because the tone of the photograph depicts the mood of the scenario. For example, the coloured photos show the subjects drinking as a group, representing a close feminine relationship. Whereas, the black and white images represent a depressing mood and could suggest that the subject is drunk and feels like this. Finally, the blue toned images represents the subjects having fun and shows the freedom they have.