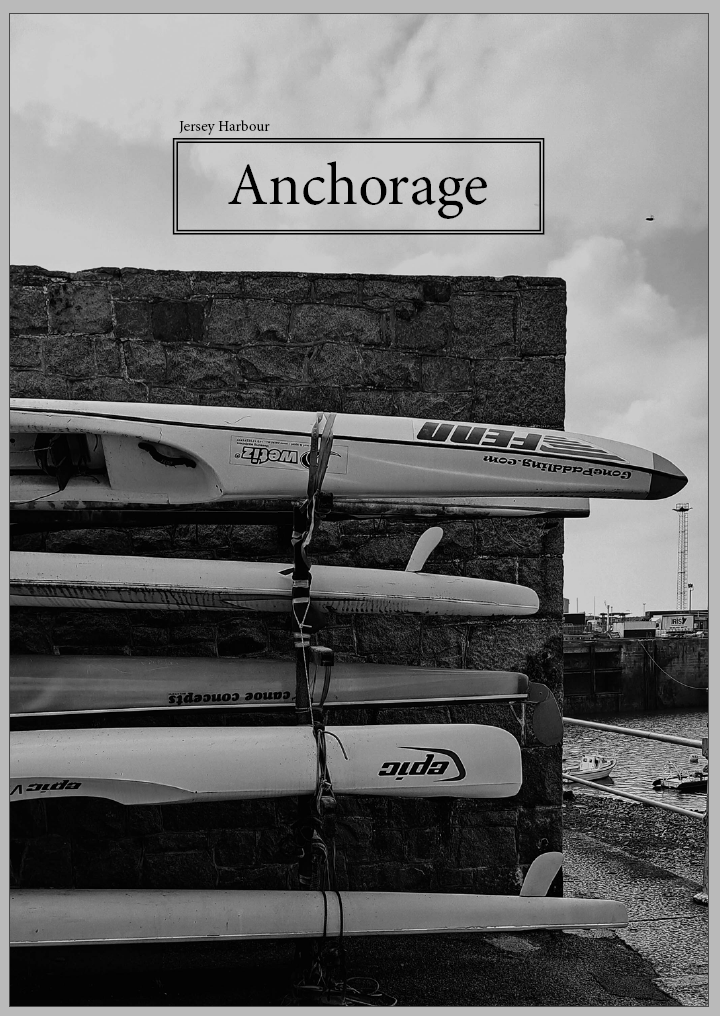
For the front page I decided to use this image as I liked how the negative space framed the title of my zine, which I chose to be ‘Life of Jersey Harbour’ as my zine is going to explore not only the outside view of the harbour but also the inside perspective and the history behind it.
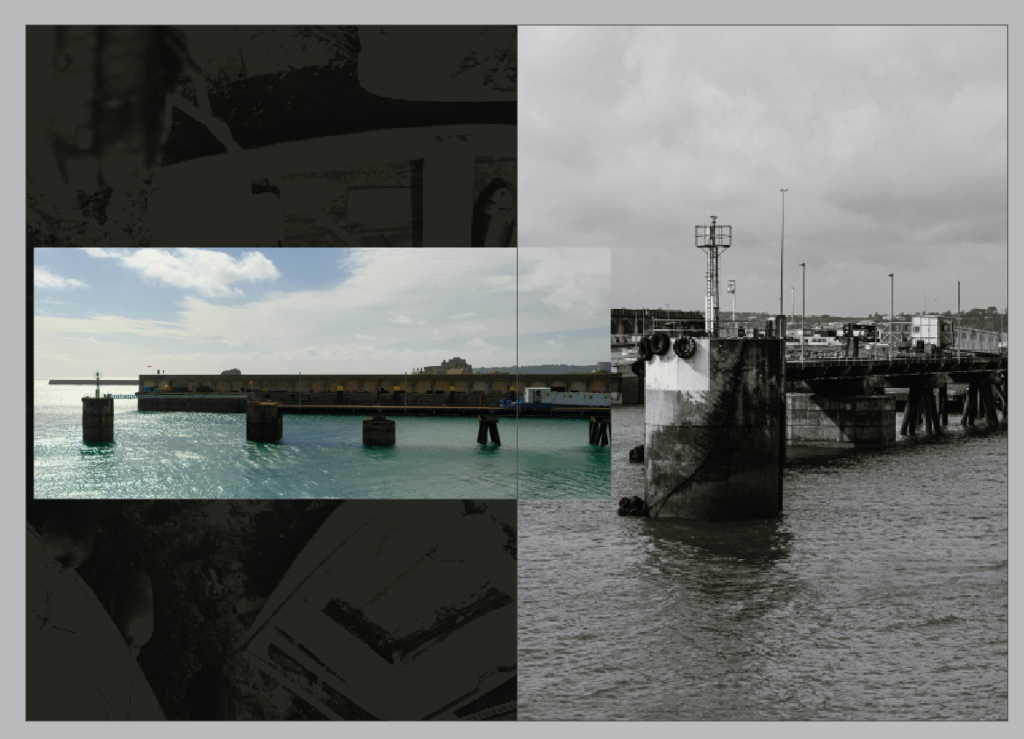
Page 1-2
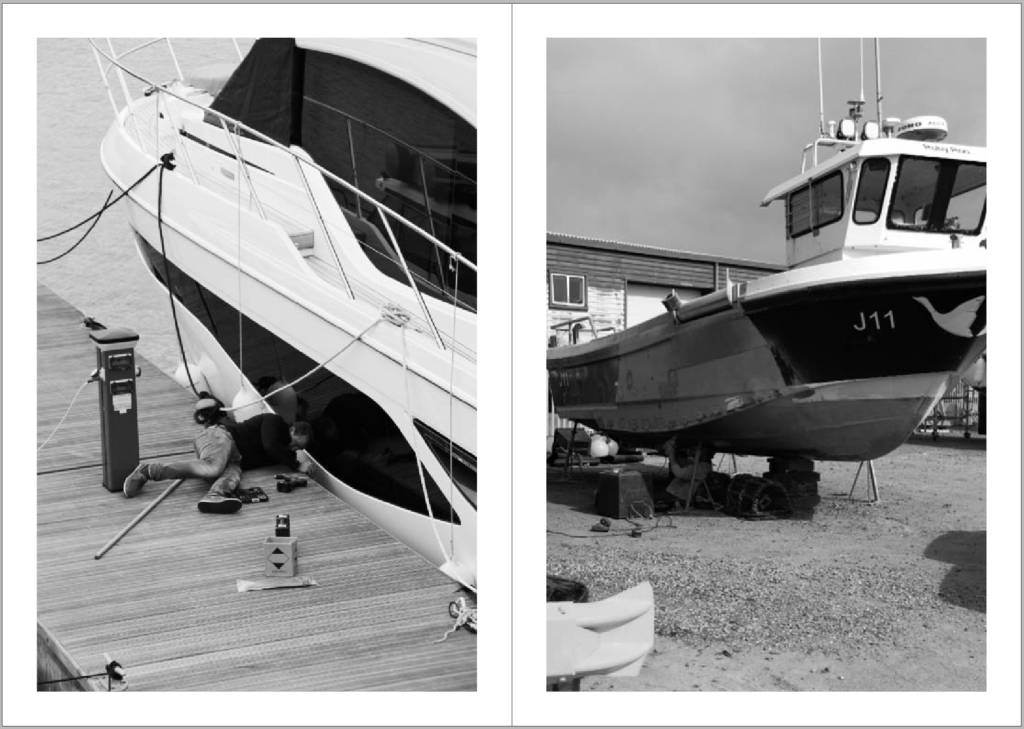
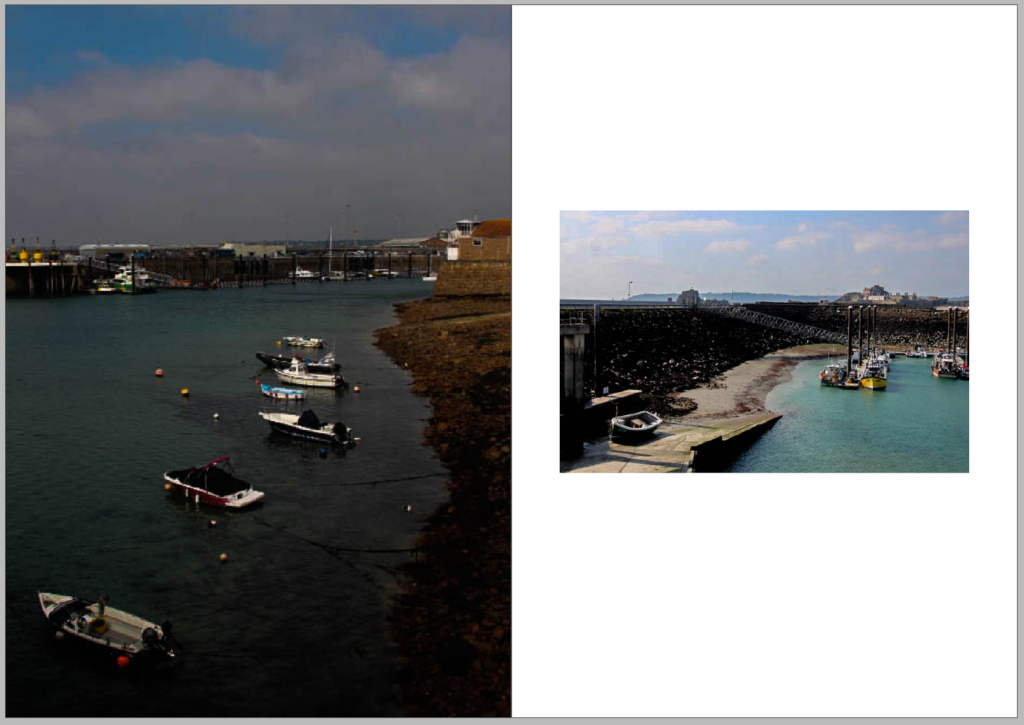
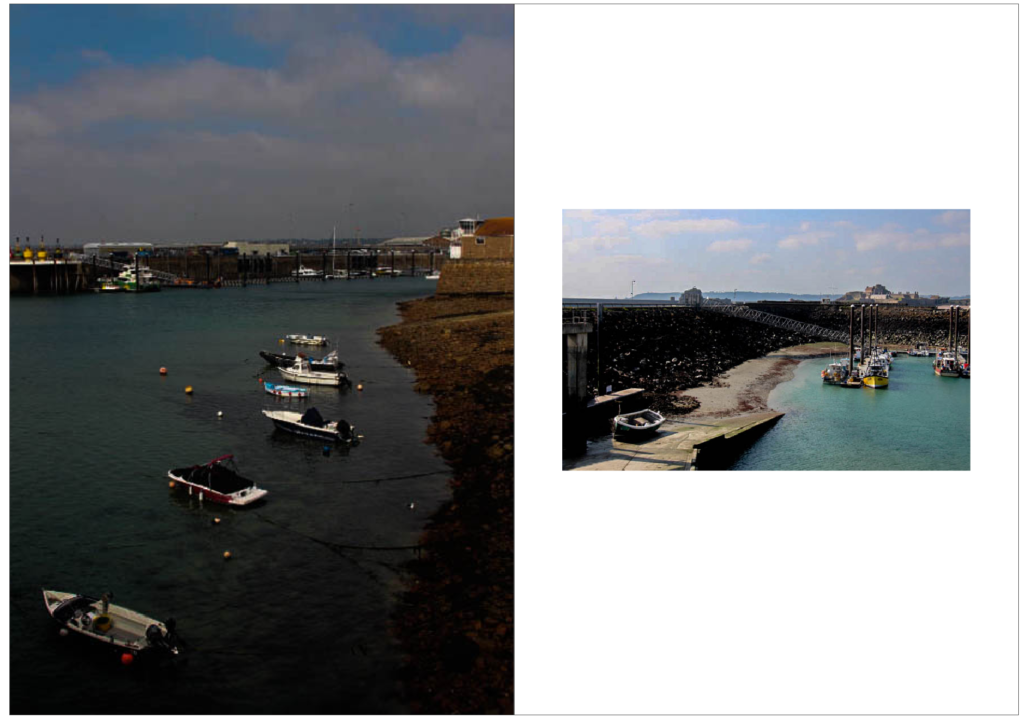
For my first two pages I chose to focus more on the outside view of the harbour and how many people see it. I included two black and white photos as well as two coloured images. I included views from the harbour above as well as at a close up view. I also added the commercial buildings into the second page as they are an iconic area of the harbour and they are well recognised. In order to make it stand out I made the Normans buildings yellow and the rest of the buildings black and white.
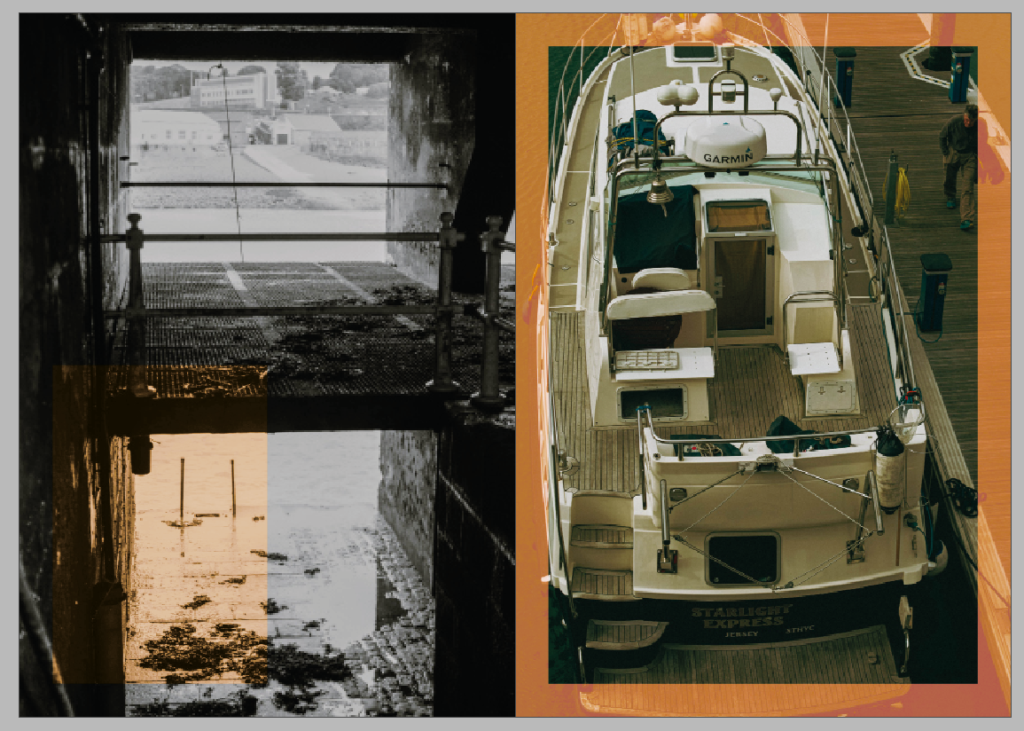
Page 3-4
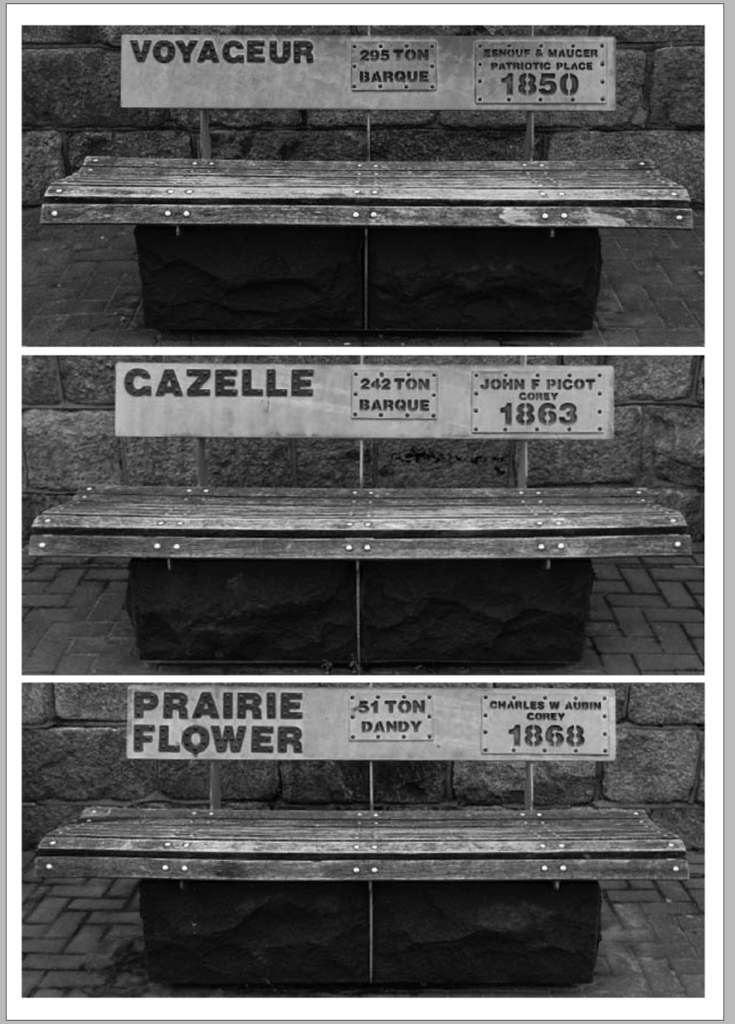
I then added two pages which focus the Maritime Museum, both outside and inside of it. I wanted to include the museum as it is another iconic part of the jersey harbour and it holds a lot of history from the Jersey Harbour.
Page 5-6
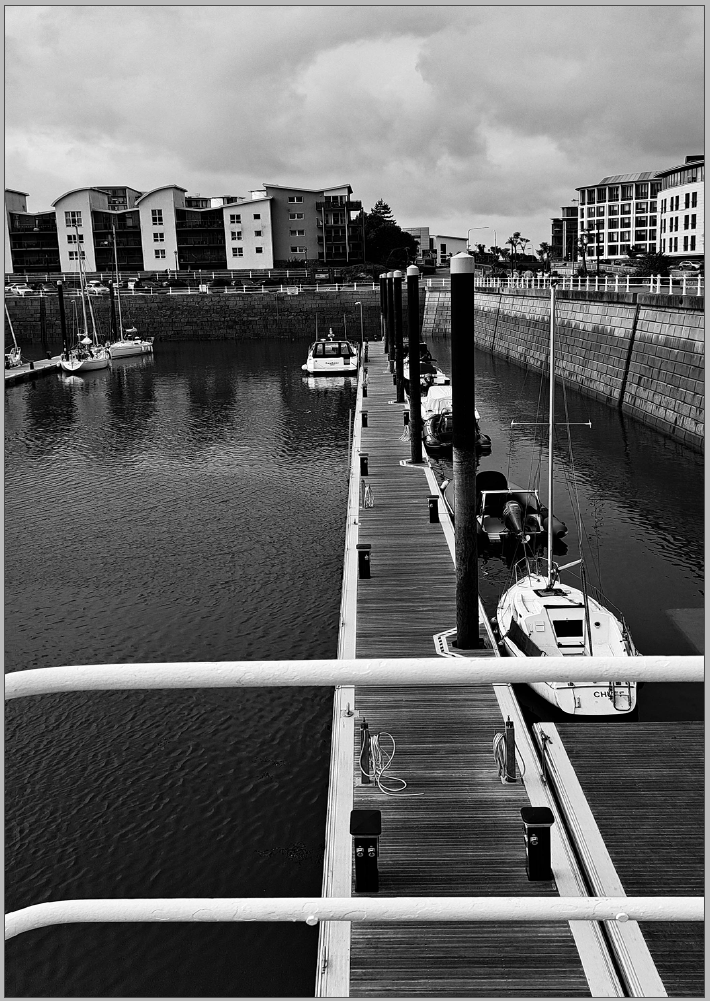
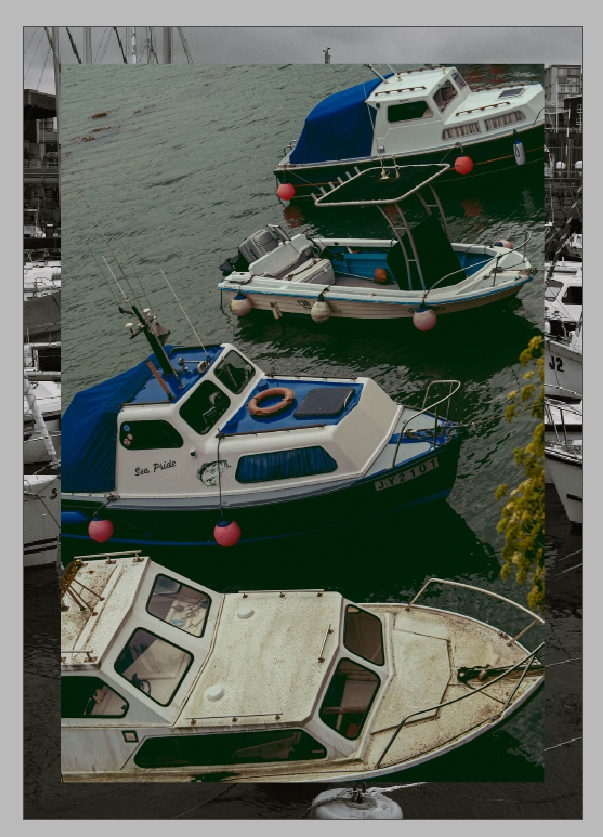
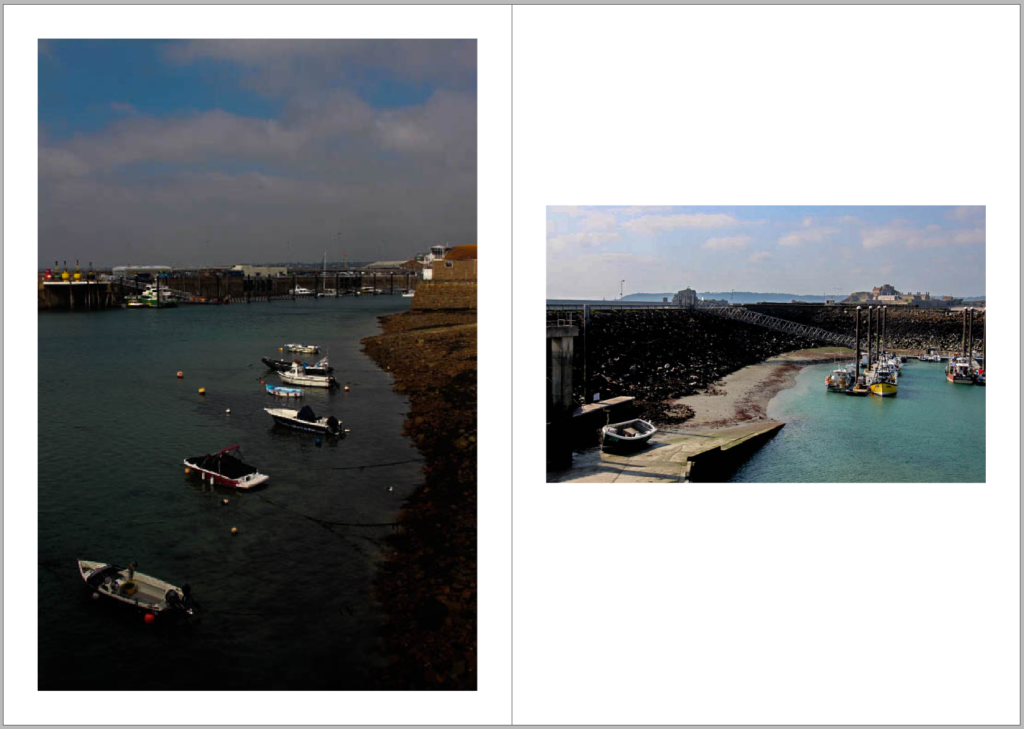
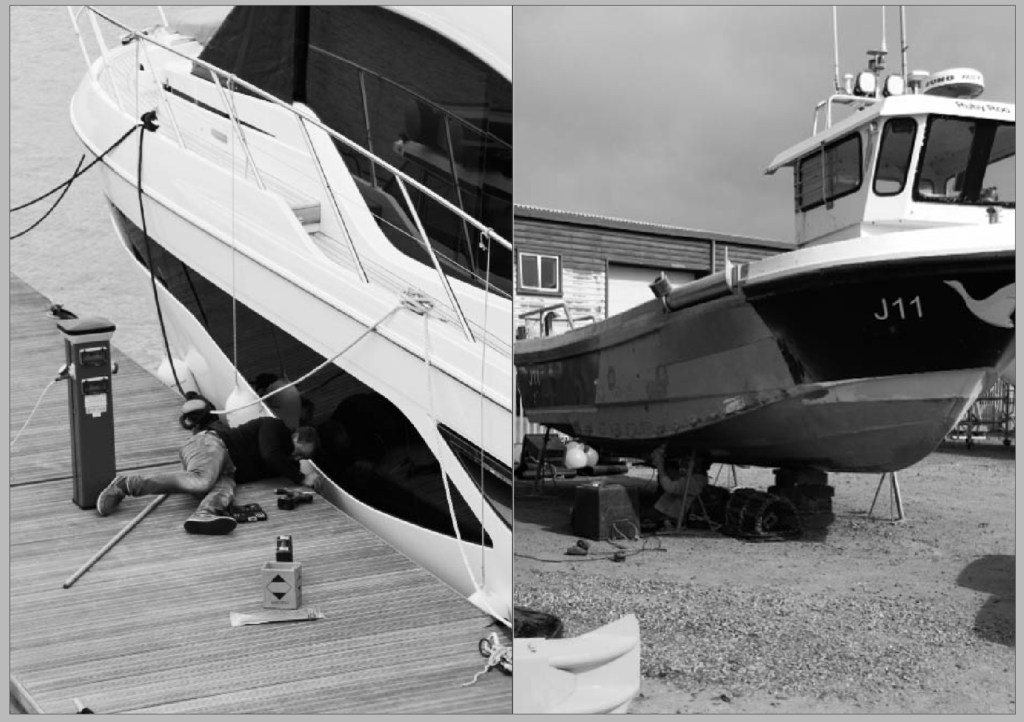
For these pages I wanted to include some detailed shots of the coloured boats as they are an important part of the harbour as people need them to get to and from their boats. I placed coloured images in opposite corners of each other and in the other corners I added the photos which only consisted of one coloured boat.
Page 7-8
In these pages I chose to focus on Brian Nibb’s, a former Harbour master, who gave us a tour and talk around the harbour.
Page 9-10
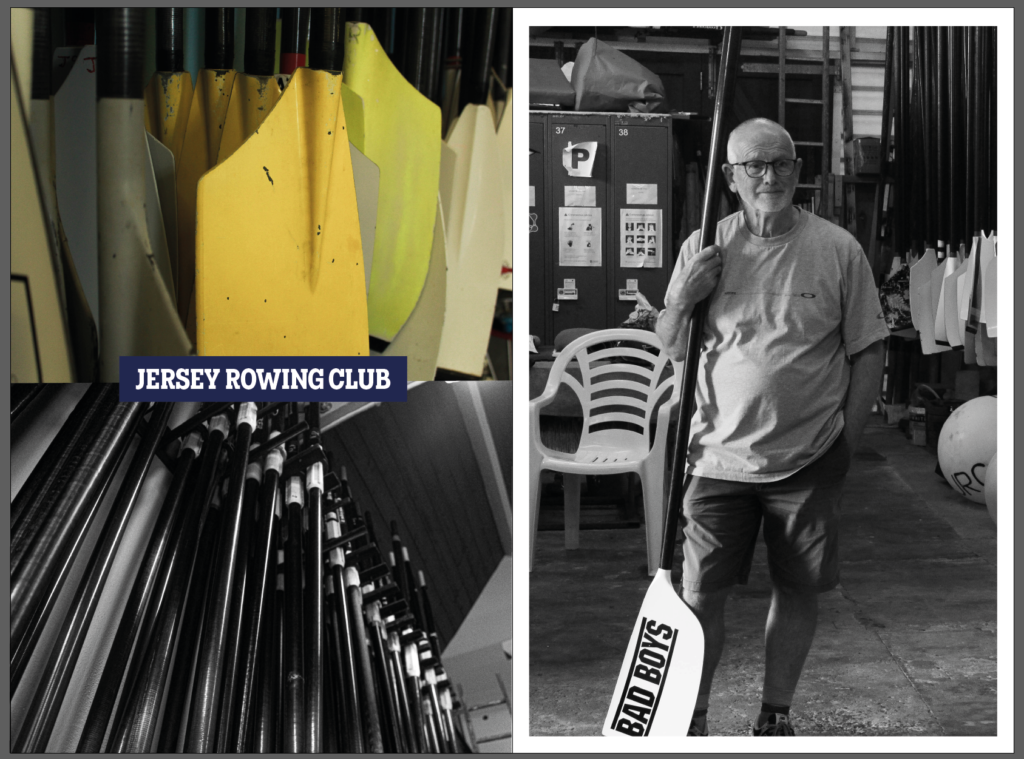
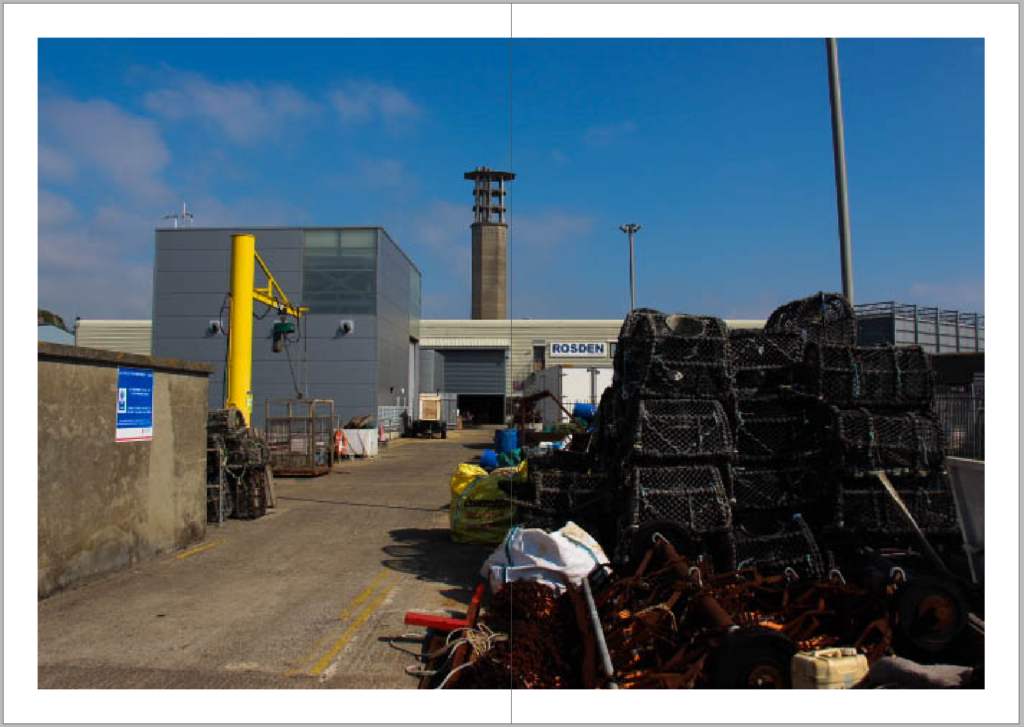
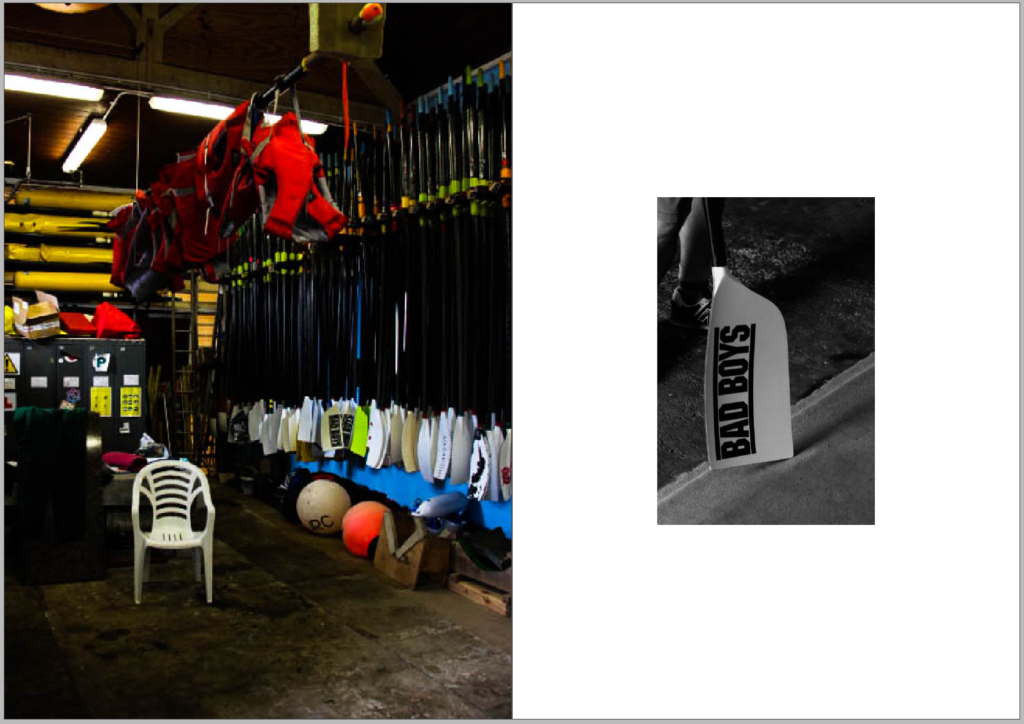
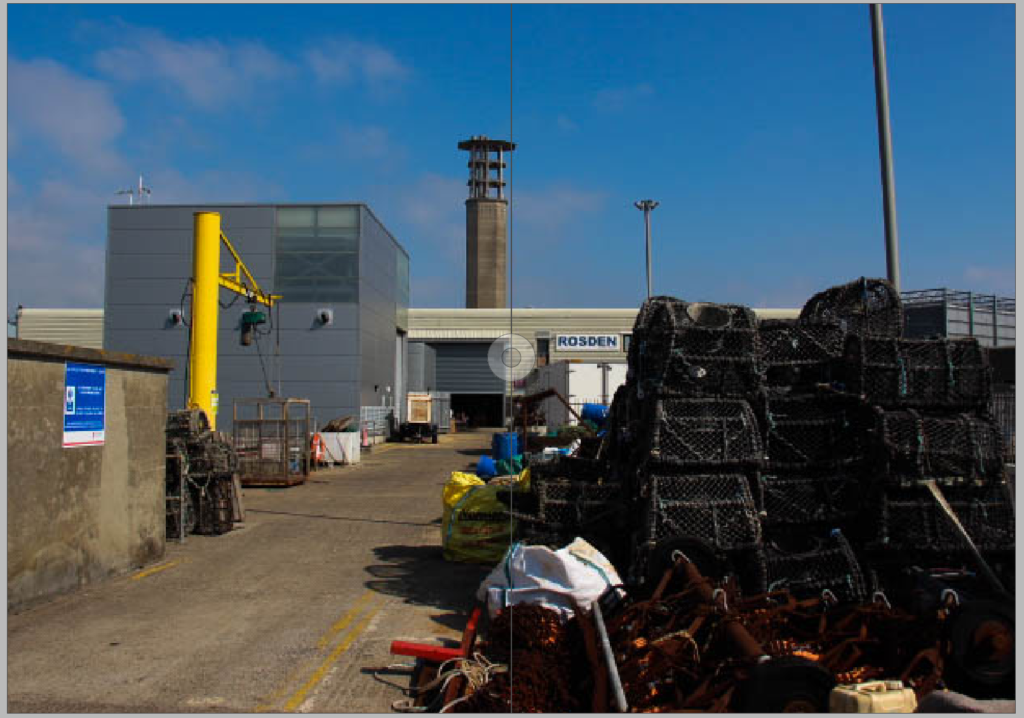
I then started to focus on the different businesses of Jersey Harbour as they symbolise the Life of the harbour more than anything as it is their way of making a living. This is why I included the Jersey Rowing Club as it is an important business down the harbour as it is not only a way for the workers to make a living but also a way for people to come together to do sports.
Page 11-12
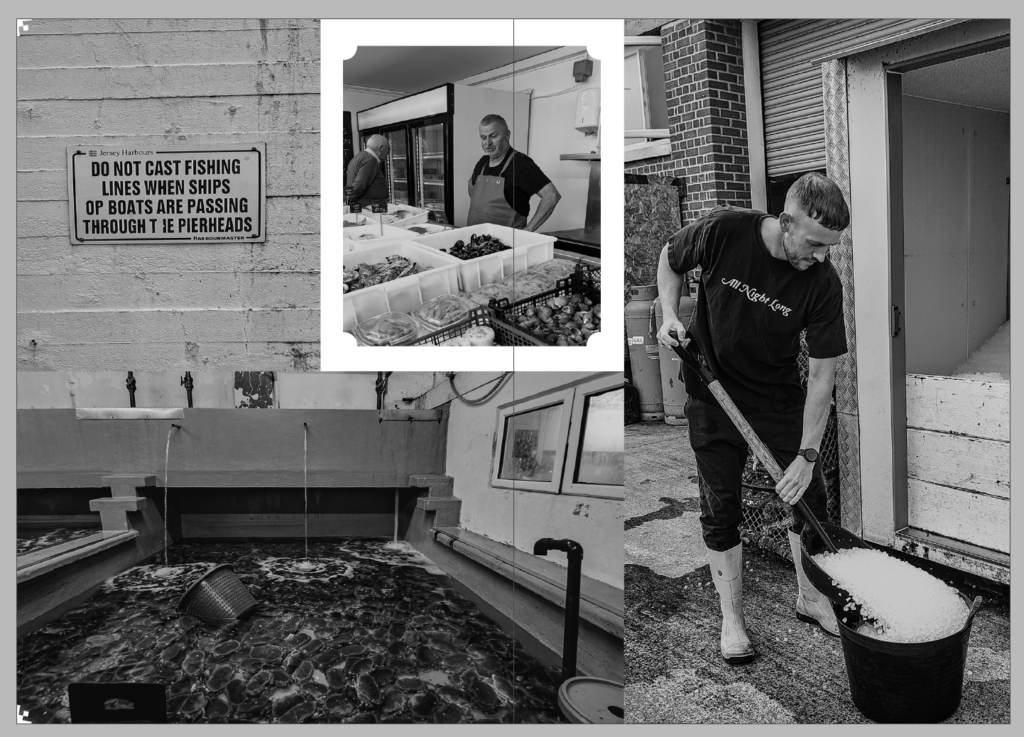
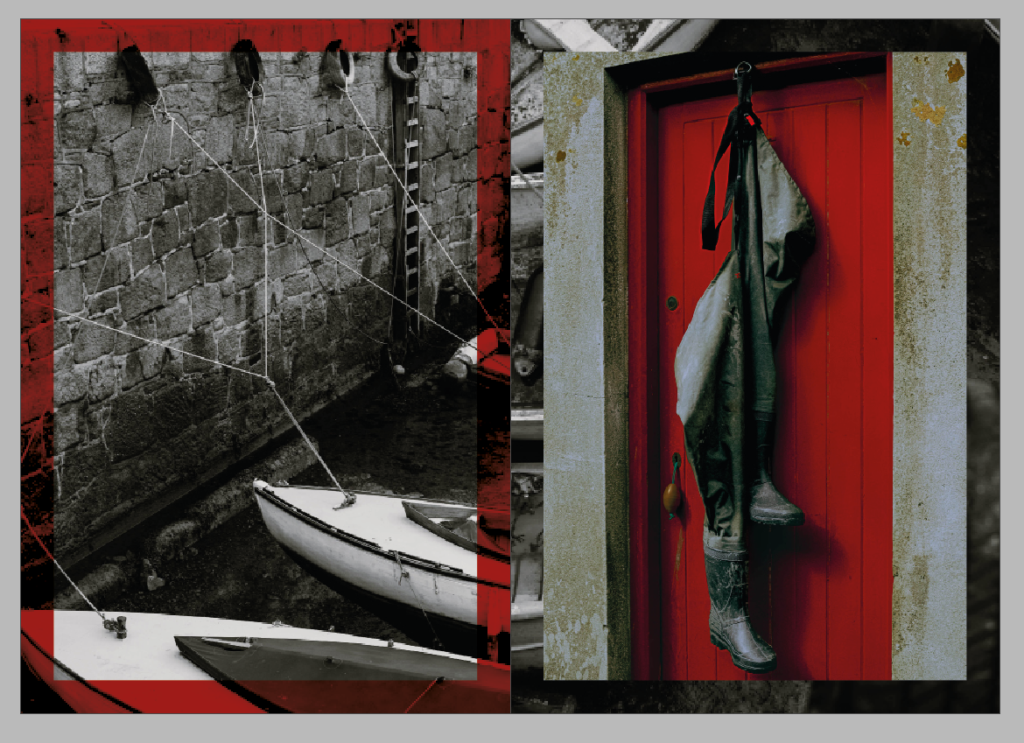
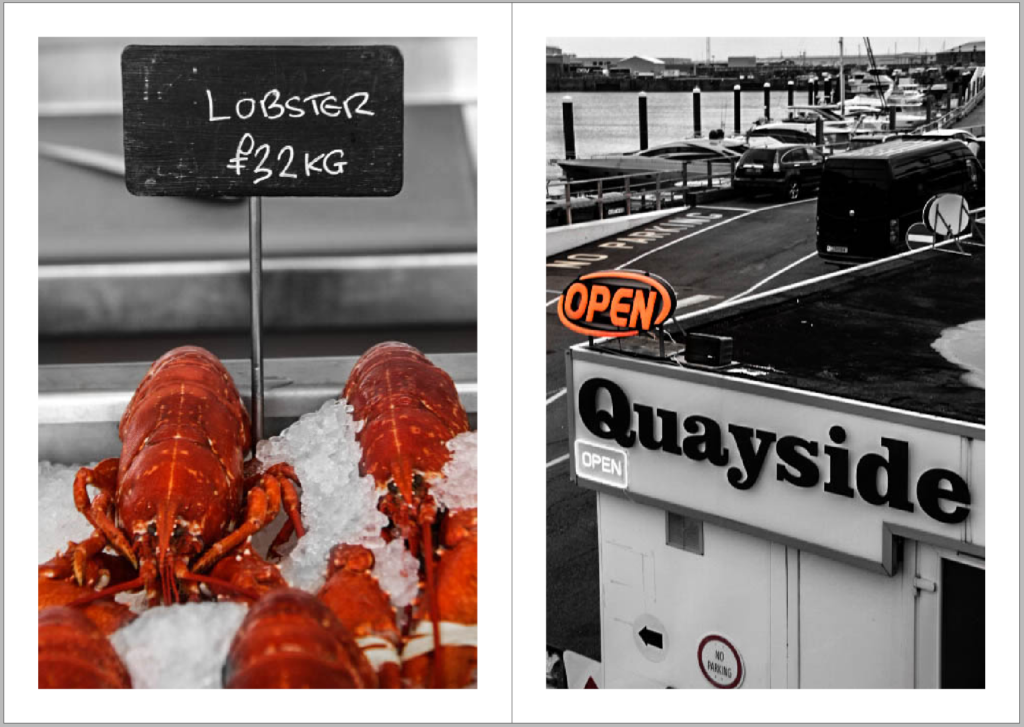
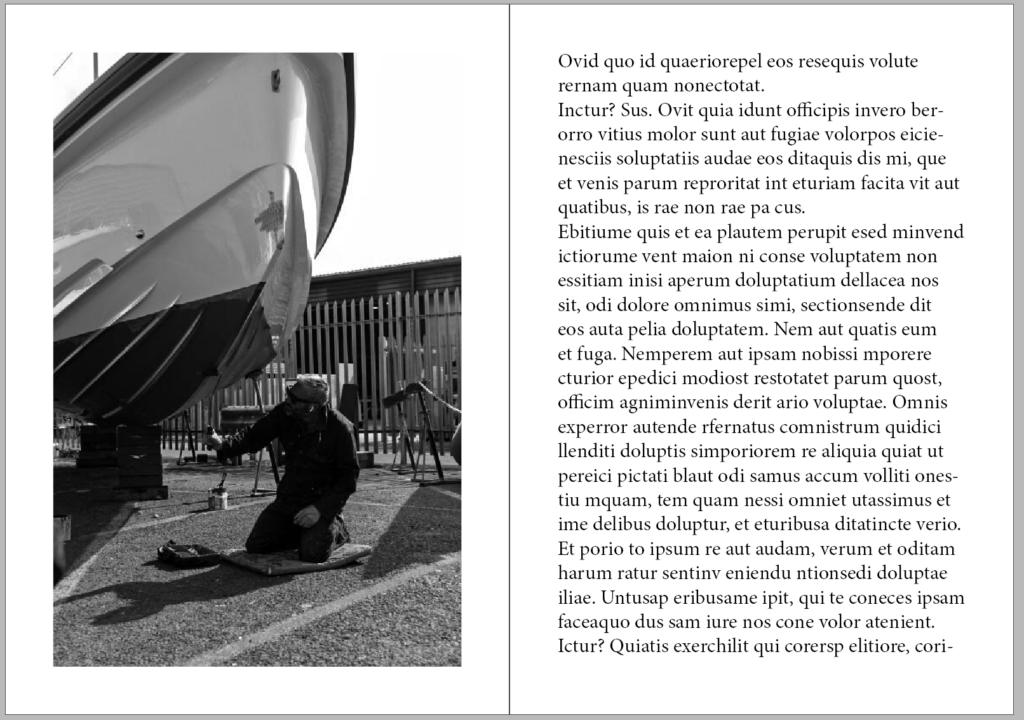
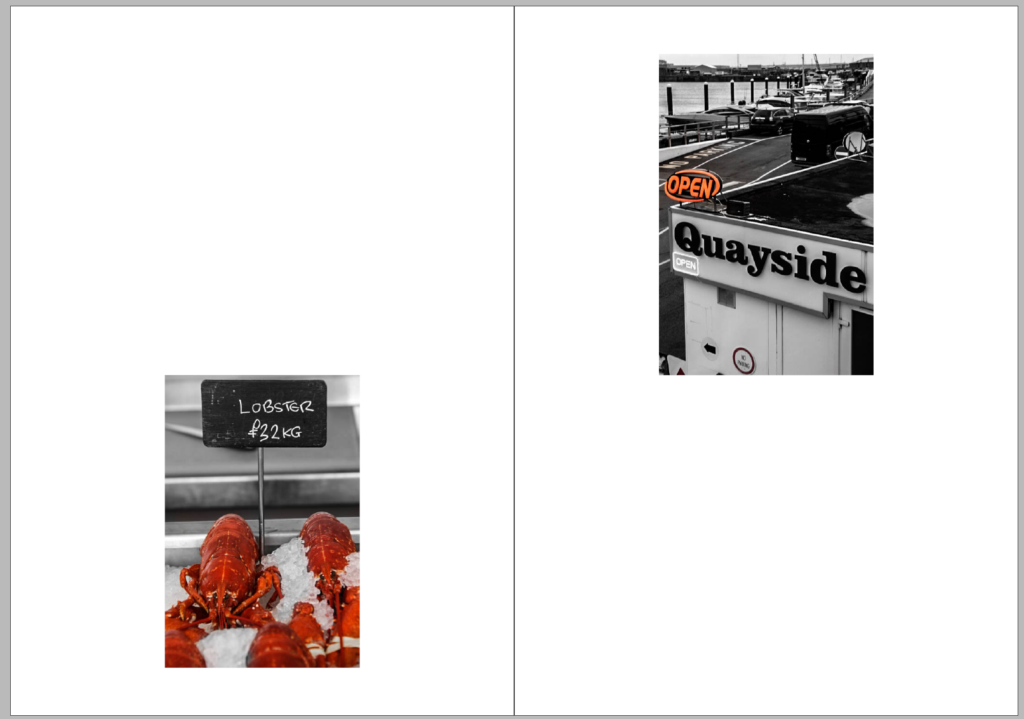
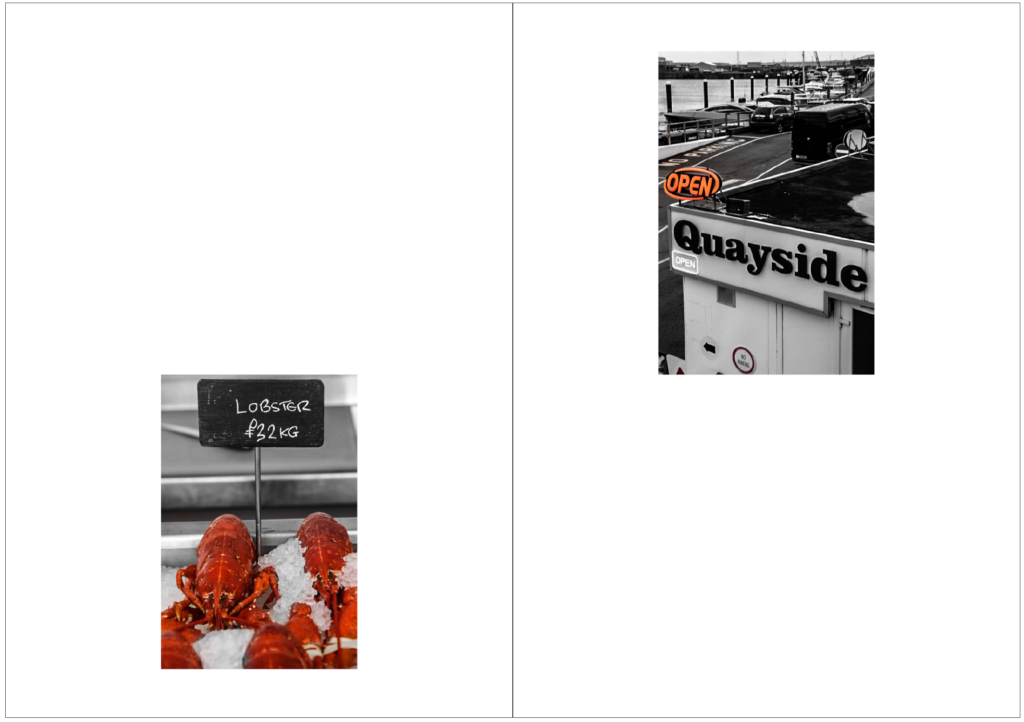
The second business I included was the Jersey Fishery. I included an observational portrait of the man working as well as two detailed shots of the fish and crabs that they sell.
Page 13-14
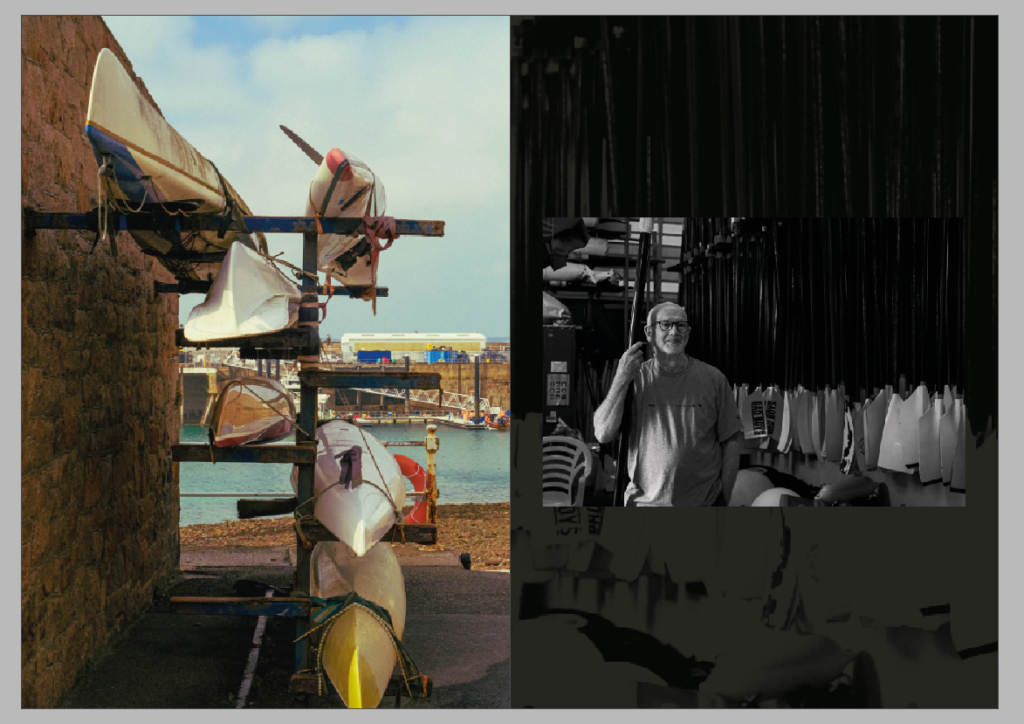
Then I added a page which shows one of the fisherman who provide the products to the Fishery on the previous pages. I included an environmental portrait and two detailed shots.
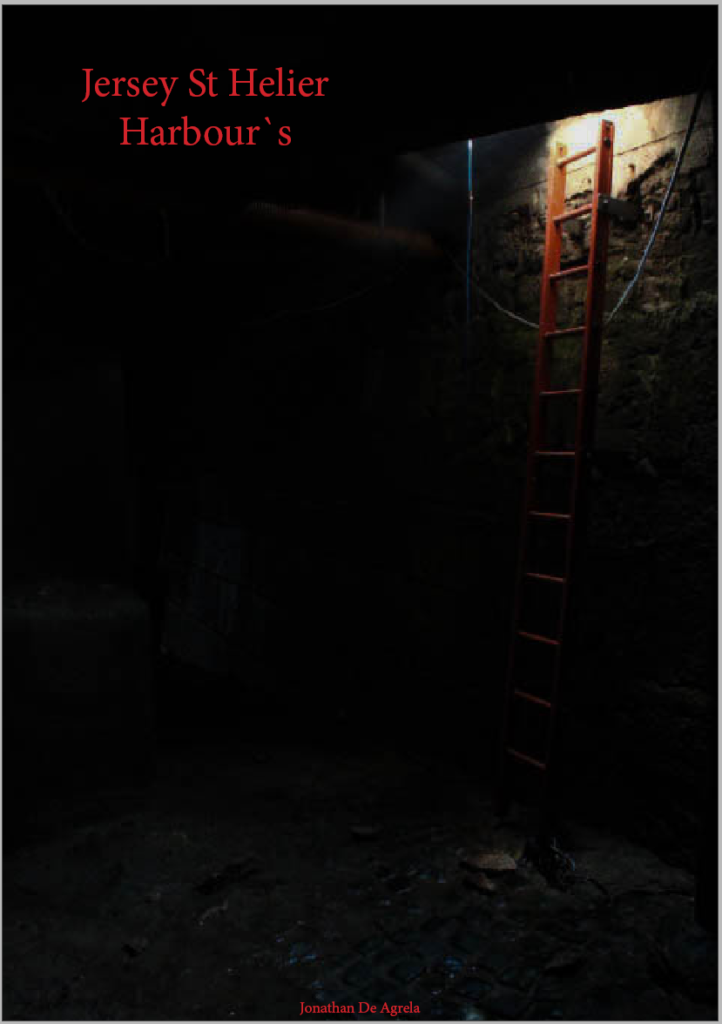
Back Page
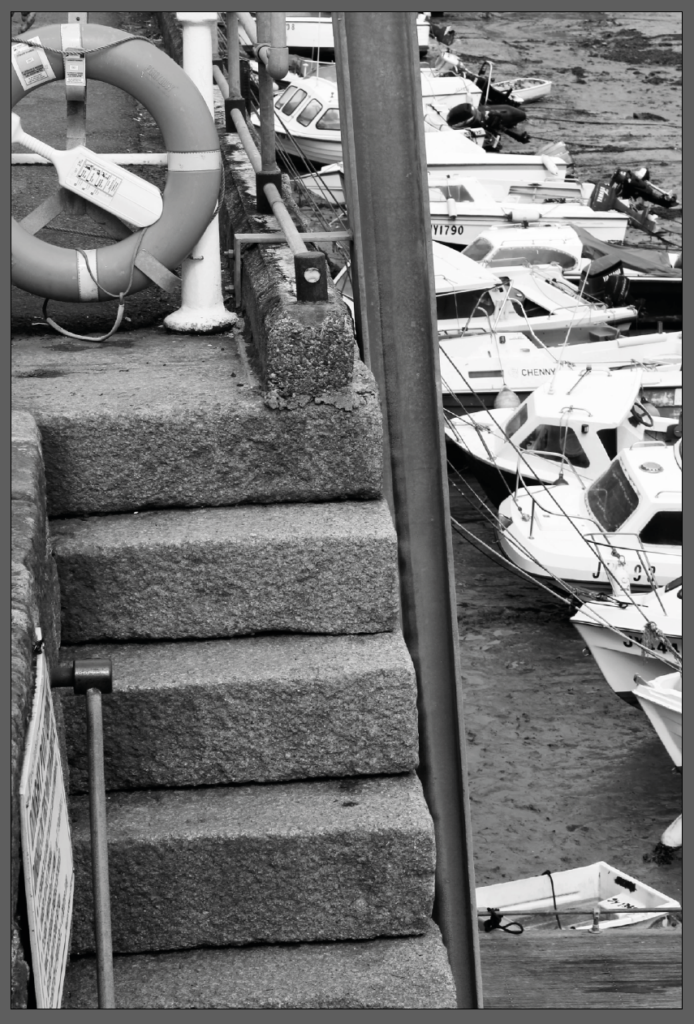
I wanted to use a simple yet effective image for the last page which is why I chose to use this close up of the stairs with the boats in the background.
Photography turns the ordinary into the extraordinary…
Meudon is a photo of a street with a bridge in the background taken by André Kertész. After he took the photo he went back and took another photo of it but this time there was a steam train going over the bridge and people on the street and the photo was more interesting than the first one.
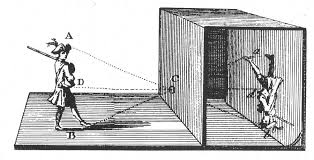
Camera obscura
The camera obscura is a natural phenomenon where rays of light entering a completely dark room form an upside down image of the outside of the room on the opposite side of the room the light is coming from. This technique has been used for thousands of years to trace images way before photography was invented in 1839 making it the starting point on the concept of photography.
Joseph Nicéphore
Joseph Nicéphore was originally interested in lithography which is a form of printmaking but eventually went on to try and to capture photos. It is unknown when but after years of experimenting with different chemicals he wrote a letter to his sister in law in around 1816 which suggested that he managed to capture small images on paper coated in silver chloride however the images he created were negatives. He describe the process as “The discovery I have made and which I call Heliography, consists in reproducing spontaneously, by the action of light, with gradations of tints from black to white, the images received in the camera obscura.”
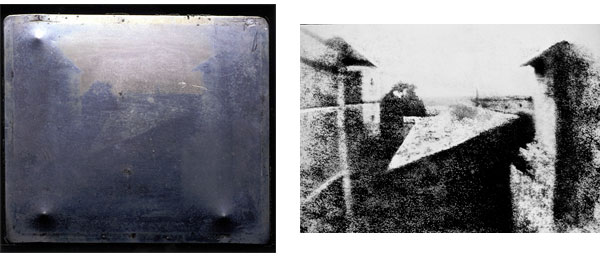
The oldest surviving photograph by him, and the first ever photograph that exists, is called View from the Window at Le Gras, and was taken around 1822-1827. This breakthrough lead him to partner up with Louis Daguerre in helping to create Daguerreotype.
The Daguerreotype
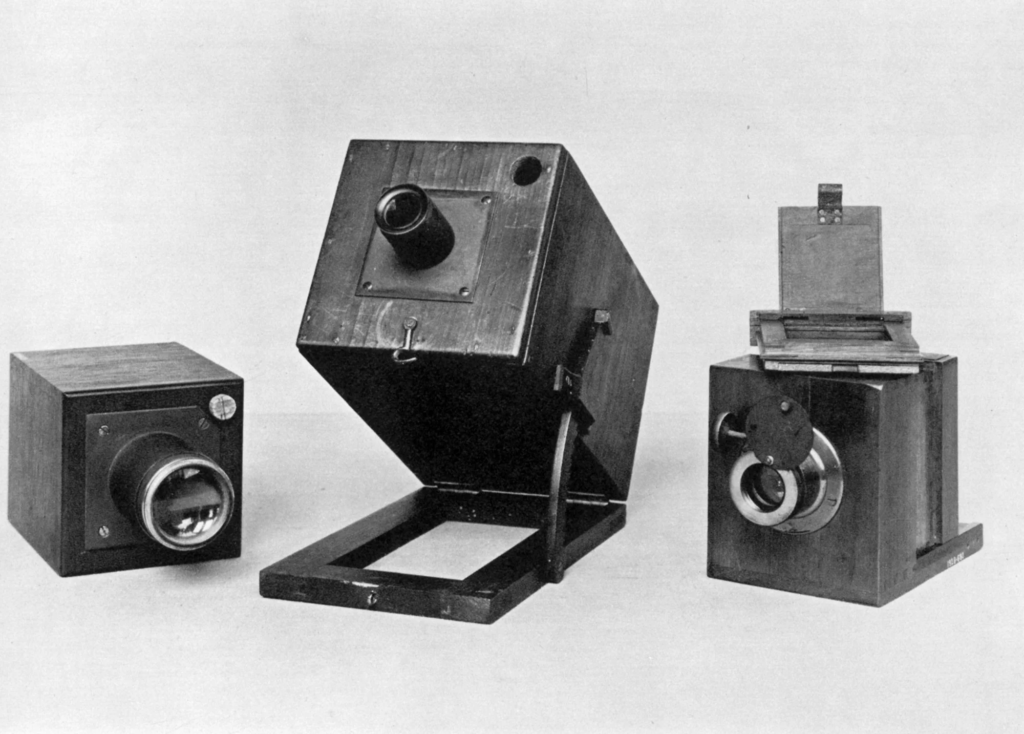
The Daguerreotype was the first commercially available photographic processes invented by Louis Daguerre in august 1839, which allowed images to be physically saved. The process was long and tedious which involved polishing silver plated copper until its surface was like a mirror while treating it with chemicals so the metal became light sensitive. Afterwards you would put in in a camera obscura box and then treat it with more chemicals, the proses was expensive and very time consuming, however with it being the first way to commercially take physical photos and was a massive milestone in the history of photography.
Robert Cornelius
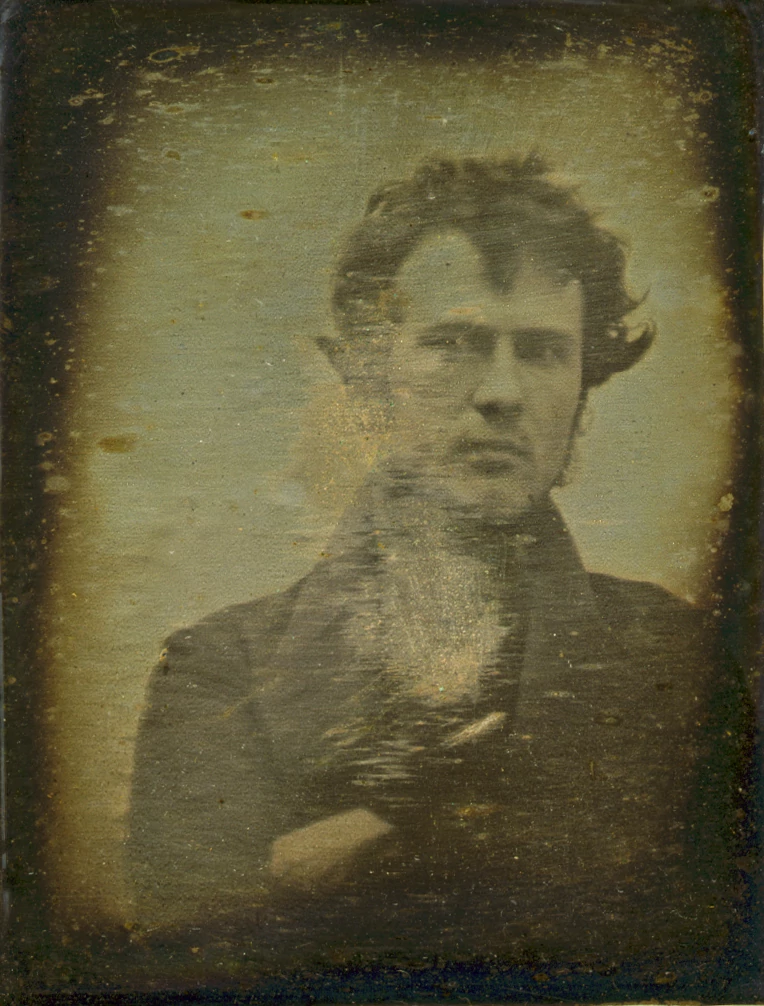
Robert Cornelius was the first person ever to take a ‘selfie’ (self portrait) in 1839 using the Daguerreotype, just months after it was invented. It was not an easy task as Robert Cornelius had to determine that the lighting, in his families garden, where he took the self portrait, was good enough and then stand motionless in front of the camera for around 10-15 minutes for the cameras exposure to take him in.
The Calotype
Henry Fox Talbot was also a major founder of photography and invented the Calotype in 1840, an improvement of the Daguerreotype, which was a technique of putting photographic paper in a camera obscura box, which would produce an invisible negative image which when put in a chemical solution in a dark room would produce a negative image which could be used to produce clones of an image. This process was an extreme improvement to the Daguerreotype as it allowed images to have a shorter exposure time as it would usually take ages to take a photograph due to the exposure needed, It also meant photographs could be printed on paper instead of metal and you could make multiple copies of the image.
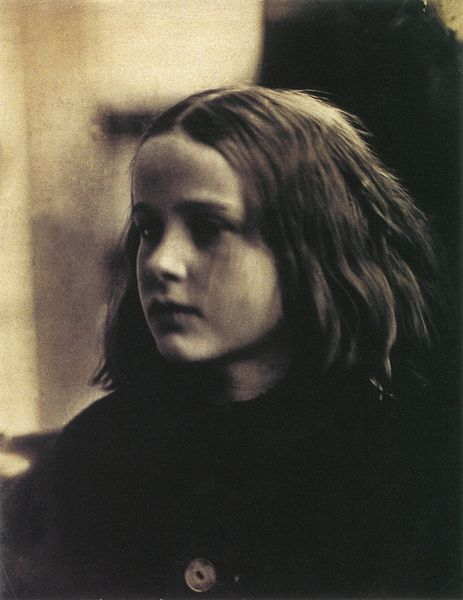
Julia M. Cameron
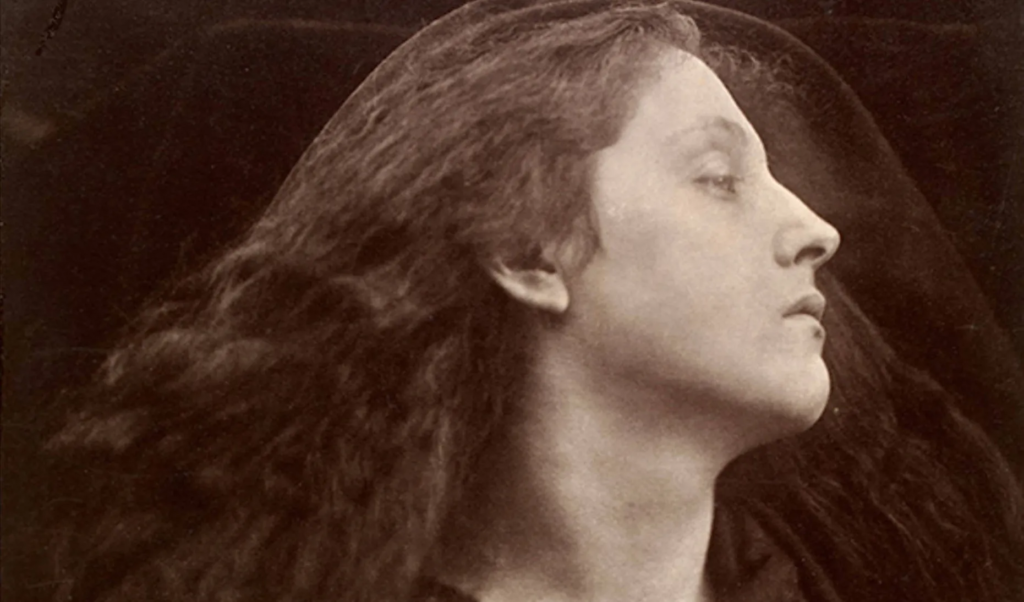
her first successful portrait
When Julia was 48 she got gifted a camera by her daughter which was the beginning of her photographic legacy. She began taking photographic portraits of people, in 1864 she took a photograph of a 9 year old girl which became her first successful image and that year she ended up being elected to the photographic society of London, making her a member. Her photographic technique of taking soft focus portraits was criticized at the time however those photos have paved the way for modern portrait photography and are now highly valued. She described photography as: “The camera has become to me, a living thing, with voice, memory and a creative vigour.”
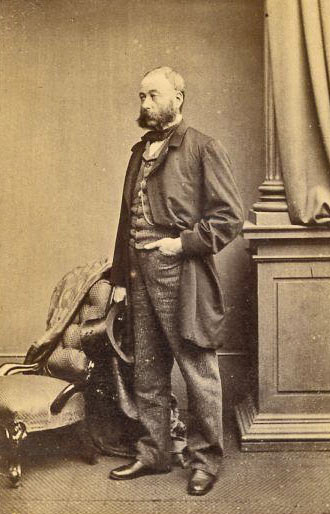
Henry Mullins
Photo taken by Henry Mullins
Henry Mullins was a professional portrait photographer who started his career in London in the 1840s and moved to Jersey in 1848 because it was cheaper to produce photos here. While he lived in jersey he took over 9,800 of portrait photos of Islanders in his photography studio in the Royal square, St. Helier.
My zine is going to tell a story about the fishing industry in Jersey at St Helier Harbour.
A paragraph
My zine will tell the story of the lives of the fisherman at St Helier Harbour. The story will be displayed through photos of fisherman and the activities they get up to from day to day. Finally, it will present their surrounding environment as an overview of their lives.
Narrative
I am going to tell my story by presenting various images that relate to the fishing industry in Jersey. These will include things such as fisherman boats, fishermen and men working on their boats. I will also display images of the harbour and potentially even an archive image to show its development over the years.
Selection of Images
Final Edits
Selection After Elimination
Mock-up on Paper
I have made a mock-up zine using 4 folded sheets of A4 paper and my selected images which I printed out.
Editing name into image
I started off editing this photo in Photoshop by using generative fill to remove the text.
I then selected and copied and pasted number plate letters across. I got these letters from an image on google which I then opened in Photoshop.
I then put the letters in to place by using the original image and putting my letters on top so that they were the same size and position.
Camera obscura was an optical phenomenon which was created to project images from the outside into a dark room. By completely darkening a room apart from a small hole in the wall allows rays of light to enter, letting the outside world pour in. This process takes around an hour and projects an upside down image into the dark room. This process is admitted for being all natural, deep and primitive as it uses old historical technology instead of new and upcoming tech. After being used for many centuries, camera obscura was developed by using different camera filter and adjustments to make images stronger and clearer. Pinhole photography is a similar process which uses a tiny hole in a camera to allow light to come in. This creates an image onto photosensitive material. As light hits material such as photographic film or paper the inverted image is created, with a long exposure time of around several seconds to minutes, the small hole incision only lets a small amount of light through which makes it very unsuitable for fast- moving objects. However, due to the fact it it’s simple, accessible and inexpensive with a unique looking vignette, the style of photography became increasingly popular.
The French inventor named Joseph Nicéphore Niépce was born in 1765. Within the time period of 1826 and 1827, he created the first ever permanent photograph which was named ‘View from the Window at Le Gras’. This introduced the process of Heliography. This process he created consists of the sun reflecting its light to create images. To achieve this he used a pewter plate which was covered with Bitumen of Judea which is a light sensitive substance. This substance hardens when it is exposed to light. The process takes up to eight hours and this time period is essential as the sensitivity of materials was much lower than modern materials. The plate is then needed to be washed with a solvent, this removes the Bitumen of Judea and leaves a permanent image. This process was particularly essential to the development of photography.
Louis Daguerre was a French artist and photographer, recognized for hisinvention of the daguerreotype process of photography. He became known as one of the fathers of photography. This method preserving images and capturing them was a huge historical moment and made a large breakthrough. The daguerreotype is made by after capturing the image exposing it to mercury vapour which brings the visible image to life. The image also then needs to be rid of any unexposed silver iodide. This is achieved by completely covering the image in a salt or sodium thiosulfate solution. These images are very reflective and change when exposed to different angles of view. Daguerreotypes are also very detailed and clear which makes them stand out amongst other images from around the 1840s and 1850s. Louis decided to create the daguerreotype as he knew the world was seeking a photographic process which was easier to put into practice, since exposure times were only of a few minutes. So by creating his own process of photography, he became very successful and made Louis Daguerre world famous.
Henry Fox Talbert is very well known for being a successful pioneer of photography, scientist and inventor. Amongst his other successes he created a method of photography by using a ‘calotype’ which is a negative-positive process which is also known as the ‘paper negative’. He created images when exposed to light, these images were easy to produce and easy to distribute. However, they faced many drawbacks such as the people in the photos looking ‘on the edge of being present’ and seen as looking not quite alive due to a low sharpness and graininess, this caused a loss of fine detail. However, these images were popular as they captured a moment in time, fixed into place which was profitable and popular at this time. He used different light sensitive chemicals and salts such as silver nitrate and silver chloride.
The American photographer Robert Cornelius was known best for self-portraits around 1839. He is also known as creating the ‘first ever selfie’. This selfie was created outside his family lamp shop in 1839 in Philadelphia. and was made by setting up the camera and standing still for around 10-15 minutes due to the long exposure times of the camera. The photograph consists of Cornelius standing with a very serious expression, looking directly at the camera. This image is seen as very impressive as it is very clear due to the fact there was a very long exposure time and Cornelius was created for ‘himself’ and not for science or historical purposes. Due to the fact Robert created one of the first successful self portraits he displayed a legacy for self-expression, artistic exploration and identity through the art of self-portraiture.
Julia Margaret Cameron is highly commended for being a female pioneer or photography in the late 19th century. Her photographic style stuck out as she attempted to elevate photography as ‘fine art’. Her portraits focus mainly on sentimental pieces such as friends and family, this makes her style particularly personal and intimate, this links to her passion to pictorialism. This style of art and photography portrays emotion and mood through images, occasionally through metaphors in their work. Camera settings such as soft focus and blurred images were a significant contribution to a ‘dreamlike’ feel, this feeling was also through dramatic lighting and very rich tonal contrasts. However, the popularity and excitement over pictorialism declined around the 1920s when photographers and artists began to use a more modernist approach to their work and use more high- quality and direct styles with greater precision and detail. However, the beauty of pictorialism through natural scenes is still favoured by using the beauty of nature to emphasize the beauty of pictorialism.
Henry Mullins was a photographer who explored the Carte-de-Visite format which was a popular style around the 1800s. These portraits were very popular around the time the general public were having more access to cameras. These portraits were used for personal and social representation, and used details captured the likeness of individuals. The arrangement of a Carte-de-Visite consists of a small photograph on a piece of card with a CDV format which allows a single negative to have multiple images on. This also makes it affordable and accessible as more than one image can be displayed to document social status around the 1860s. People of multiple classes such as celebrities and political leaders would display their power through 4 strong images in the Carte-de-Visite formation. However the popularity declined in the late 1860s as larger formats and advancements became more popular and reliable. However, the legacy of Carte-de-Visite still carries on as a revolutionary discovery and creation as his work reflects the aesthetic sensibilities of the time and emphasised the clarity and compositions of cameras during this time period.
In my first design layout for the zine, I appreciate the chronological order of the photographs as they display the order in which the images were taken, creating a smooth flow throughout the pages. However, I think that the placement and fitting of the images could be more interesting and bold because currently, the arrangement of the images are quite bland and does not catch the visual interest I am trying to create. Also, I am not happy with the title of my zine: “Jersey St Helier Harbours” as I feel that the title is too straightforward and does not actually express the feeling of the stories behind the photographs. Another thing I like in this layout of my zine is that there is a page simply with just writing, I think this was a good idea because it gives the viewer/reader a break from the visuals or images and gives them time to reflect on the images in the zine. I think that the balance between images and writing is important in a zine, as it allows the readers to engage properly and thoughtfully with the content. Additionally, it also lets me express my thoughts and give context behind the photographs that the images themselves cannot show. Overall, even though the layout has a good base, the design and arrangement of the photos can definitely be improved.
Design Layout 2
In my second design layout, I decided to keep the chronological order of the photos as I think that it clearly tells the story I wanted to share. In addition, I kept the one page dedicated to writing, which improves the readers connection to the images and allows the reader to understand some context behind the photographs. To differentiate this layout, I changed the arrangement and fitting of most images, for example, making some images full bleed, and including some smaller ones. The contrast with this arrangement adds an element of surprise and gives more visual interest towards my zine. I also think that my landscape photograph taking up a double page has a strong impact on my zine, giving the reader time to fully indulge in the setting/scene. Additionally, I have not changed the title yet, because I could not think of one that fits the zine perfectly. However, I plan to include a new title in Design Layout 3. Overall, I think that these changes and slight tweaks grant a more engaging and interesting layout to my zine.
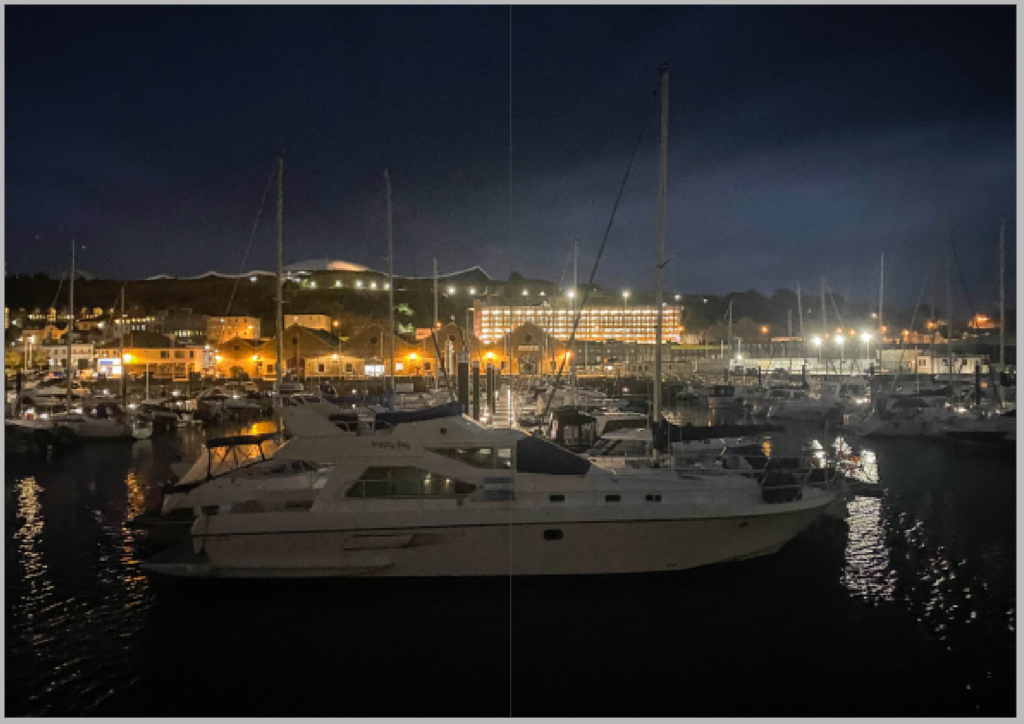
Design Layout 3
This is my Final Design layout; I have included several needed improvements that strengthens the overall design and impact of my Zine. First, I updated the title from Jersey’s Harbour’s to Harbour Life, Jersey’s Maritime Moments, I think that this title is more expressive and fits with the theme of the content within my Zine. Also, I replaced the placeholder text on one of my pages with my own writing, giving context and my personal opinions engaging the reader more. So that the zine kept a professional appearance, I added a double page spread containing a landscape image of Albert pier during the night, keeping to the needed multiple of four pages. Another thing in this design layout different to others is that I changed the regular font to Britannic Bold for both my name and the title of my zine, making the bold red title a focal point. These changes have improved the aesthetic of my zine and also have evolved the storytelling aspect of my zine. Making the zine more engaging Overall.
I am using Adobe InDesign to create my zine layout.
Page 1
I chose this to be my front cover as i like how the picture is bland, but then the sailor is a burst of colour. I think it represents the harbour well.
Pages 2 and 3
To start my zine off, i used a picture of the sea and the entry to the harbour. I used these as its the beginning process of the harbour, where the fish get caught, and where boats bring in our foods/packages.
pages 4 and 5
I then used these two pictures of boats to show what comes in to the harbour, whether its for work or leisure.
Pages 6 and 7
I then used this picture of where the boats dock up. I spread this picture across two pages as i am moving in to the labour side of the harbour on the next pages. I like how it evenly divides the book and switches it up.
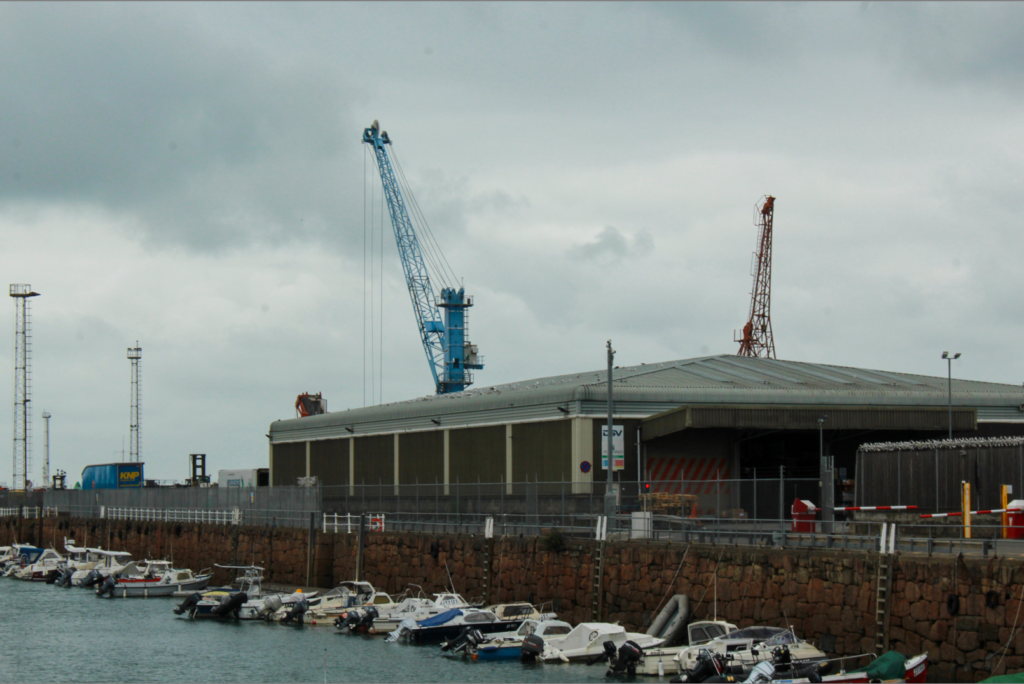
Pages 8 and 9
I used a picture with two cranes to show how things are moved off of boats on to land sometimes. I then used a picture of the lorry to show how things are manoeuvred around the harbour.
Pages 10 and 11
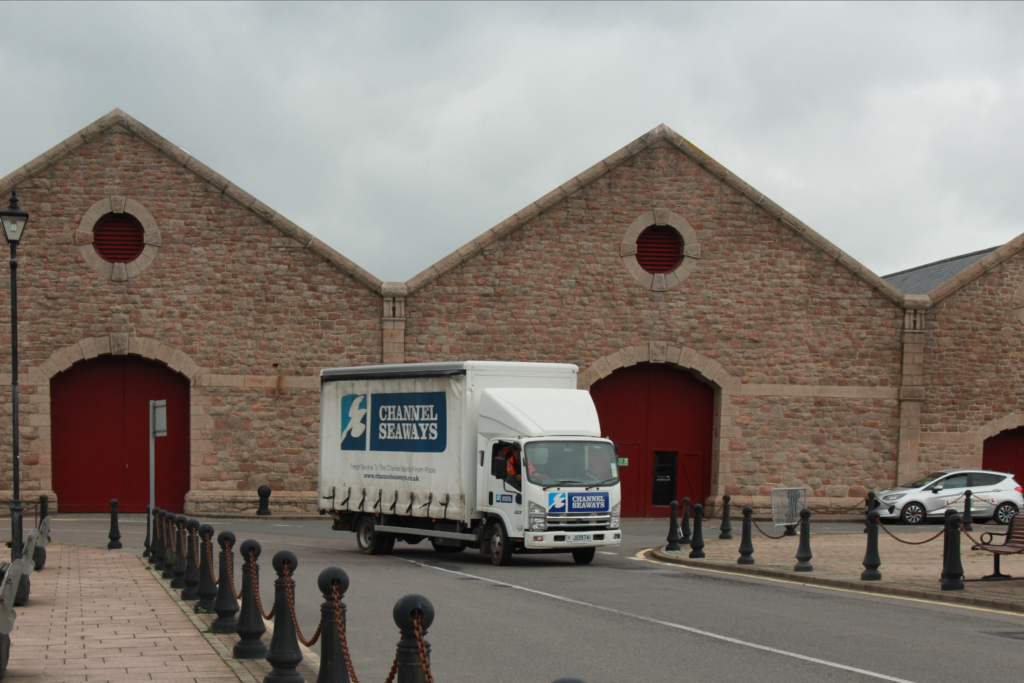
These pictures were chosen because I like how they tell a story with the lorry coming in on the previous picture, then them parked up, and finally the worker getting ready to work.
Pages 12 and 13
I like the picture on the left because of how central the lorry is. I also like how the picture links back to the previous photos of the lorry’s as its leaving the harbour with the goods inside. I then picked the picture of the left as it is nearly opposite the picture its next to. I also put it in black and white as it is a very old wall with lots of history.
Pages 14 and 15
With these two pictures, I followed the story of history at the harbour. The left picture is a bell pointing to the maritime museum. So, with the next picture I used a cannon which is outside the museum, also representing a lot of history.
Page 16
I then finally used this image as my final one because I like how the figurehead stands out, which also links back to the beginning with the same theme of the sea/linking to the sea.
Evaluation
I chose to layout my zine this way as I like how it kind of tells a story. I like how its a walk through of jerseys harbour and what goes on, from the sea, to boats, to labour and then the history. My aim was to go from the harbour now, to more historical pictures. I like how the picture change from colour to black and white as well to have that mix.
Zine mock up
To physically look at my images and see how the layout looks in person, I printed them out and made a quick ‘zine’. This helped me decide my final layout and how I wanted it to come together.
Add a selection of your final 10-16 images as a moodboard/ gallery to the blog post too, including any archive material too.
What is a narrative?
A narrative is essentially the way a story is told. For example you can tell different narratives of the same story. It is a very subjective process and there is no right or wrong. Whether or not your photographic story is any good is another matter. Narrative writing can be broadly defined as story writing (a piece of writing characterized by a main character in a setting who encounters a problem or engages in an interesting) significant or entertaining activity or experience. There’s the plot. The plot follows a beginning, middle, and end sequence. The middle of the story is the largest, most significant part, which we call the main event. The main event is really what the story is all about and involves either a problem to be solved or a significant life experience for the main character.
Stories
Stories let us share information in a way that creates an emotional connection. They help us to understand that information and each other, and it makes the information memorable. Because stories create an emotional connection, we can gain a deeper understanding of other people’s experiences. That not only helps us to understand their lives but allows us to take the lessons they have learned and apply it to our own.
Zine
A photo zine is a self-made, printed issue built of photos and captions. The term comes from the word “magazine”, as zines follow the style of magazines with headings, text, and illustrations put on a grid. An important feature of a photo zine is visual storytelling.
What is my story?
The story for my zine is showing around jersey harbour, and the process and history of it. I used 14 images, both in black and white and colour, to disconnect one theme and make it different.
NARRATIVE:How will you tell your story?
3 Words : romanticize, imagination & reality.
A sentence : A reminder that a lot of hard work goes in to the harbour.
A paragraph : To tell my story, i am going to be using my own images i took at the harbour. I did half in colour to half in black and white. I wanted to go from romanticising the harbour and its ‘beauty'(being shown by the colour) and how Jerseys harbour is advertised now, to getting back to the reality of everyday life and how it was back years ago(being shown by the black and white). For the black and white images, i focused on the presence section of developing my images on adobe Lightroom, this made an older looking effect for these images. For the coloured images, i looked at all the effects and adjusted them, making the colours stand out to attract the eye. I will be going from black and white pictures, to the more colourful and meaningful pictures.