
Plan: In my 5 hour exam I plan to create a selection of edits based on my response to the photographer Zed Nelson.
Selecting images:
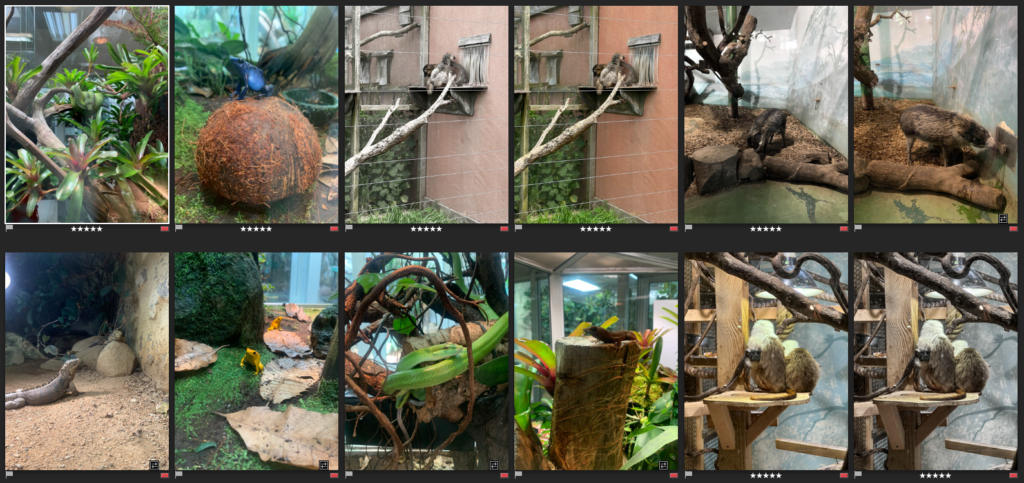
I selected the images which I would like to edit by giving them a red colour label. I will experiment with adding blurry backgrounds and removing certain colours from the photos via photoshop.
Editing:
First edit:
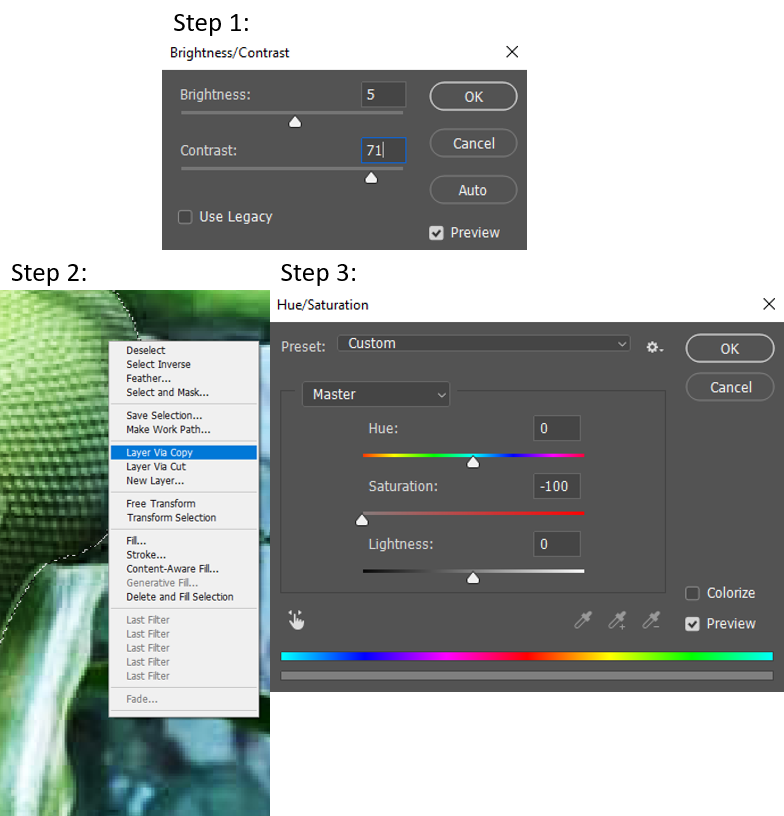
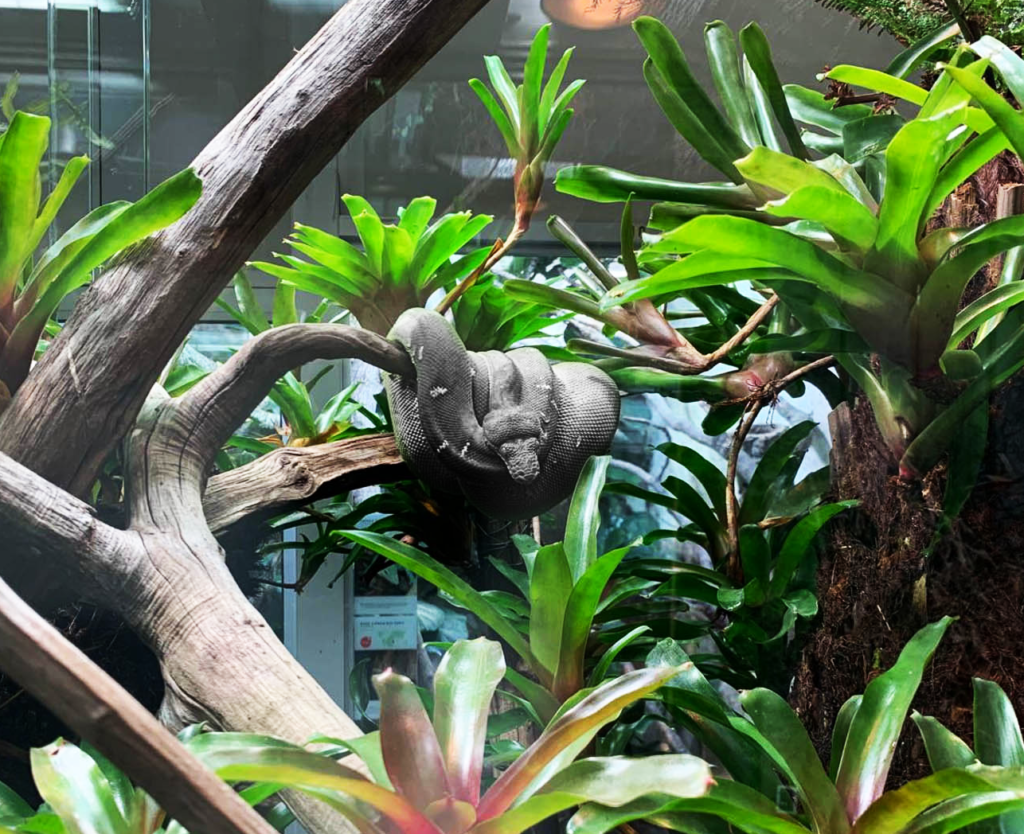
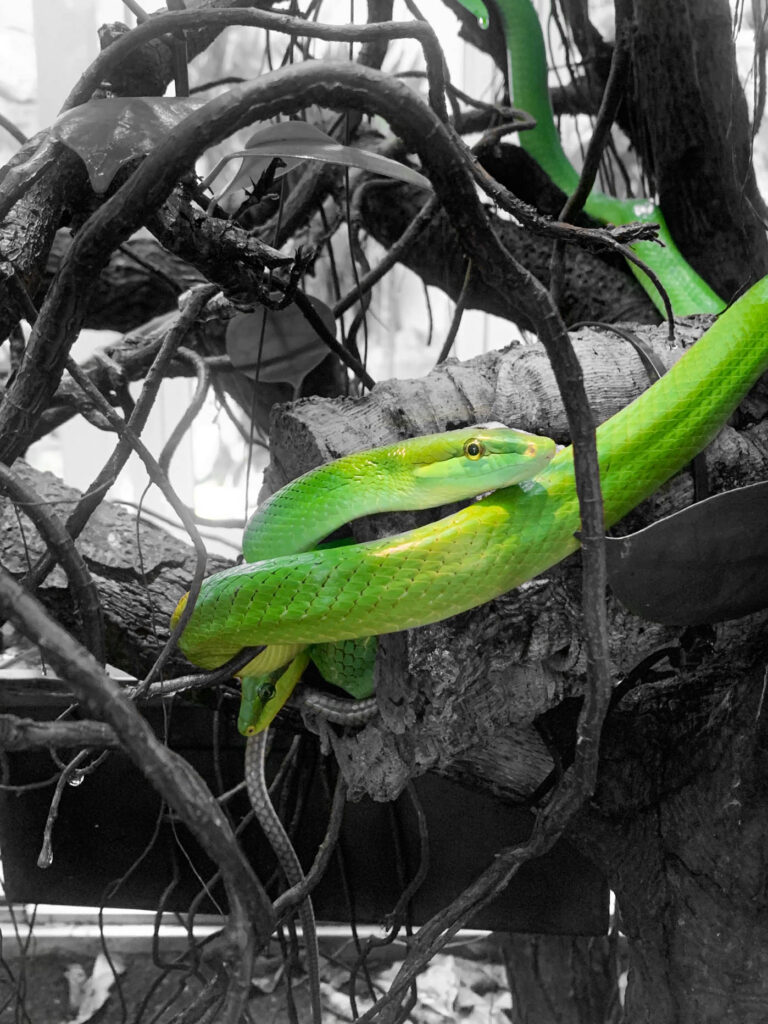
For this edit I wanted to make the snake black and white and the environment around it colourful. To do this I first made some adjustments to the original image by increasing the contrast to make everything stand out more as well as slightly increasing the brightness. Then I selected the snake using the quick selection tool and the I inverted the selection so that I had the background selected, I then pressed ‘Layer Via Copy’. Once I had copied the layer I moved onto adjusting the saturation of the first layer so that the snake would be black and white.
Finished product:
Next I wanted to experiment by making the subject vibrant and the background black and white.
Edit 1:
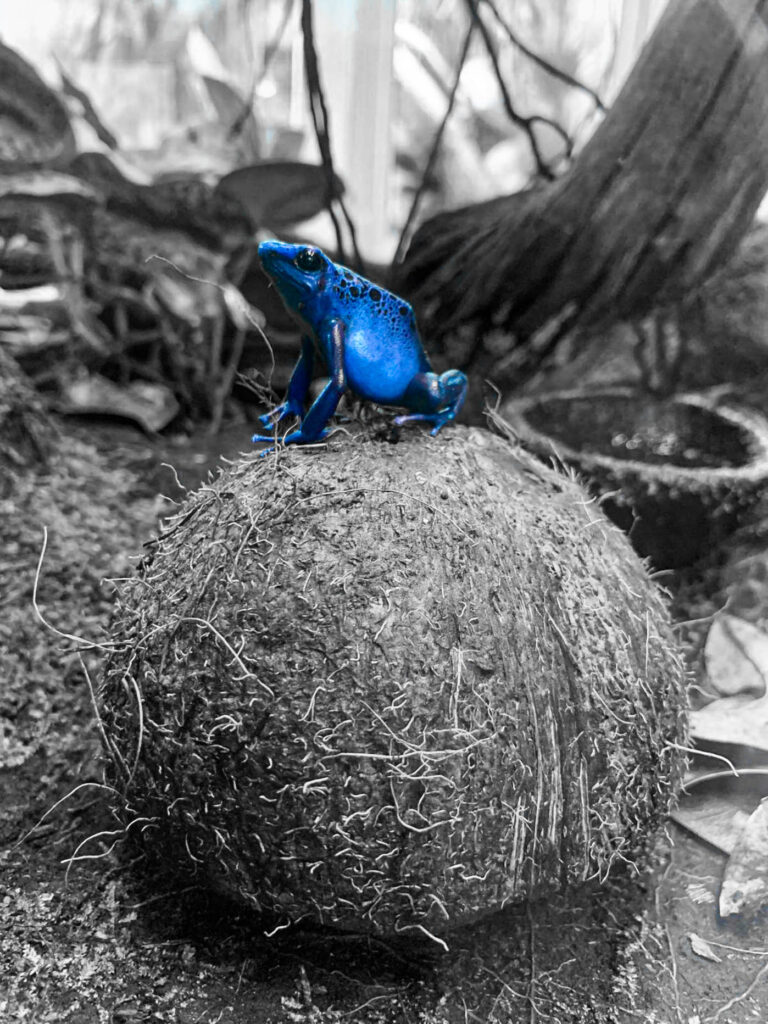
I like the way this image has turned out as the bright blue colour of the frog makes the image stand out. I did this by reducing the saturation of all the colours on the HSL/Colour option, except blue, and next I used the Adjustment brush to remove any remaining colour which may have been in the photo.
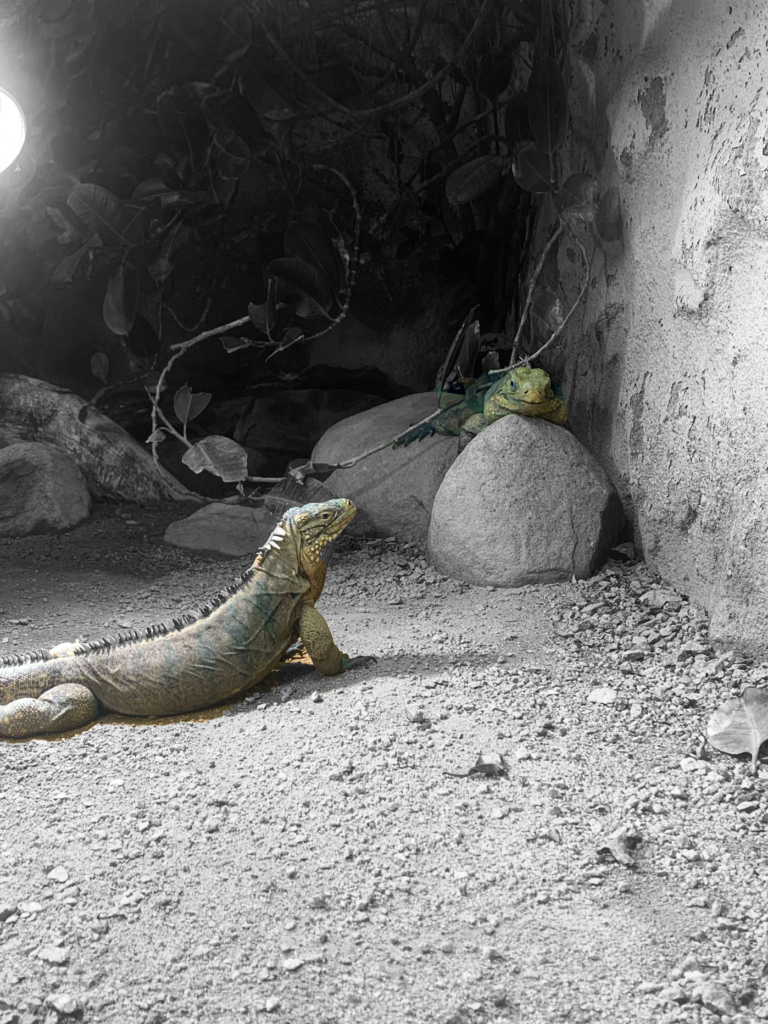
Edit 2:
Next I edited this one using the same method on Lightroom, except this time I didn’t remove the green tones.
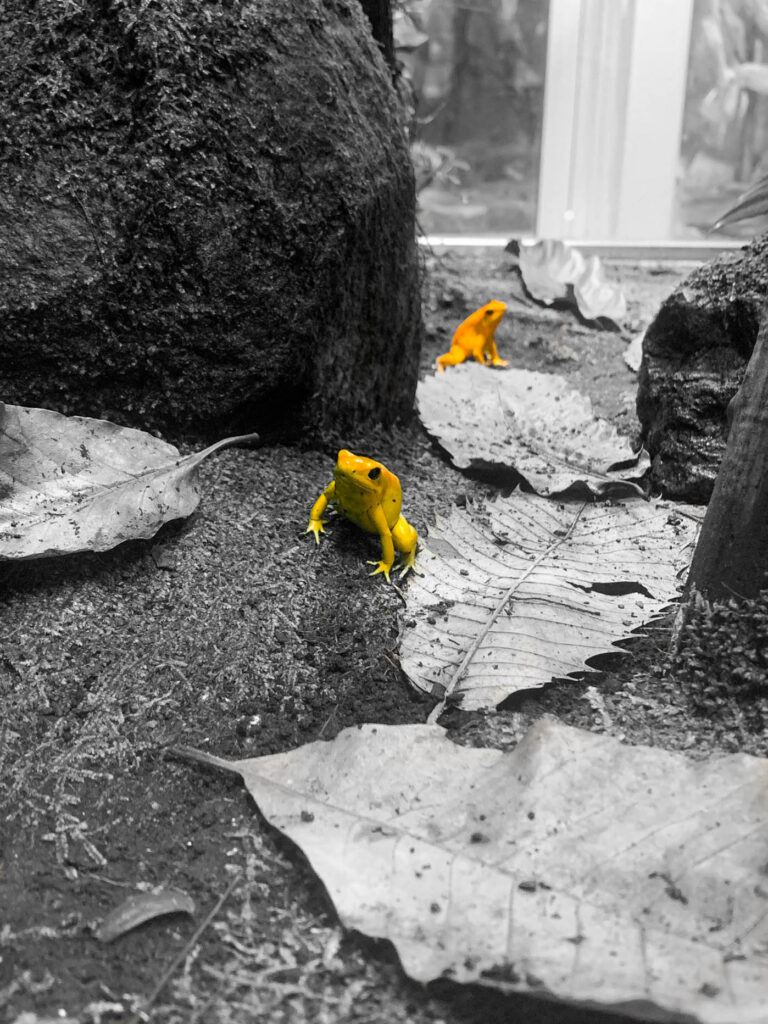
I believe these images stand out more compared to the ones where the animal/subject is grey as these reptiles are often brightly coloured and it makes the photo stand out when there is one bright colour present contrasting with black and white.
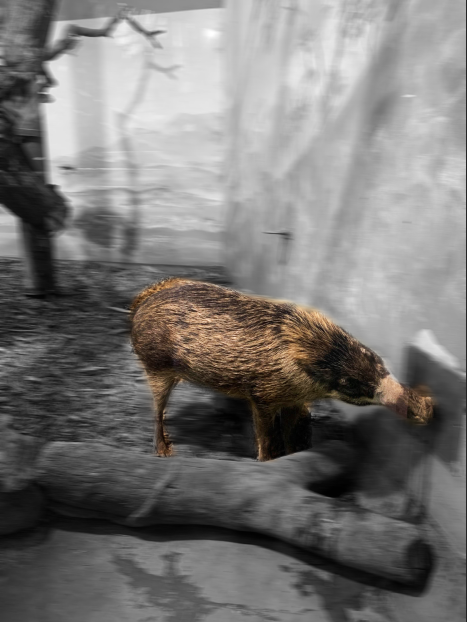
Photoshop:

I also used this technique however I used photoshop, I found it much easier using Lightroom as selecting the animal in photoshop was quite challenging. I also feel like the edges of the animal in this one are not smooth unlike in Lightroom where the animals all have sharp defined edges.
Blurry backgrounds:
To create a blurred background I did the same steps to select the background however after copying the layer I instead selected motion blur so that the background was blurred. I like how it has turned out as the blurred black and white background makes the animal stand out and it creates an interesting image. It almost looks as if the animal is stuck there with everything else around it constantly moving which is how animals in zoos may feel with constantly having things change around them however they are always there.
Presenting final edits:
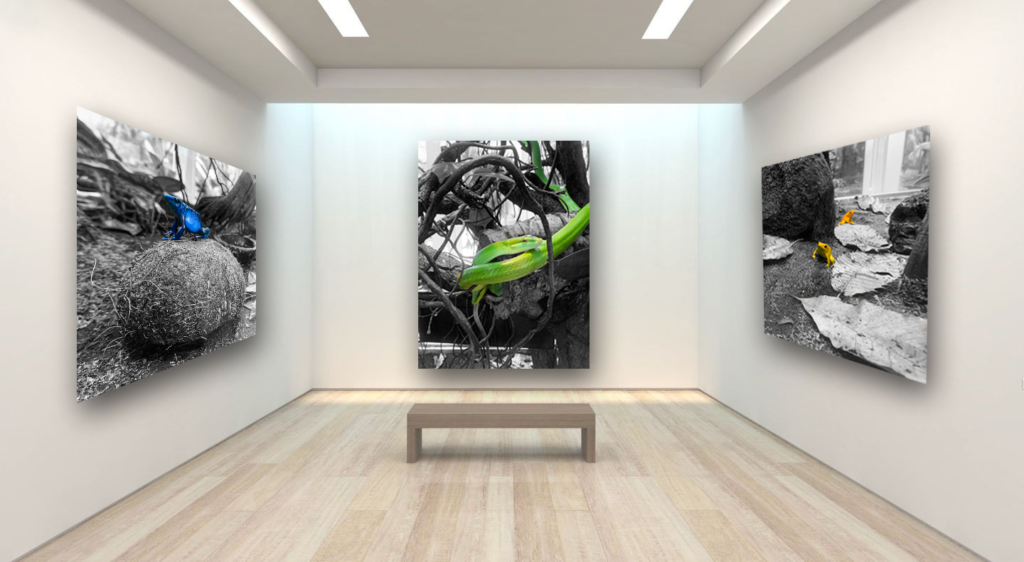
I chose these as my final images as I think they worked out the best and each photo stands out. I chose to put one of the frog photos on each side and to place the snake photo in the middle. I did this because the snake photo is a vertical image whereas the others are both horizontal. I added a drop shadow to each photo to make it look realistic I also used the perspective tool.