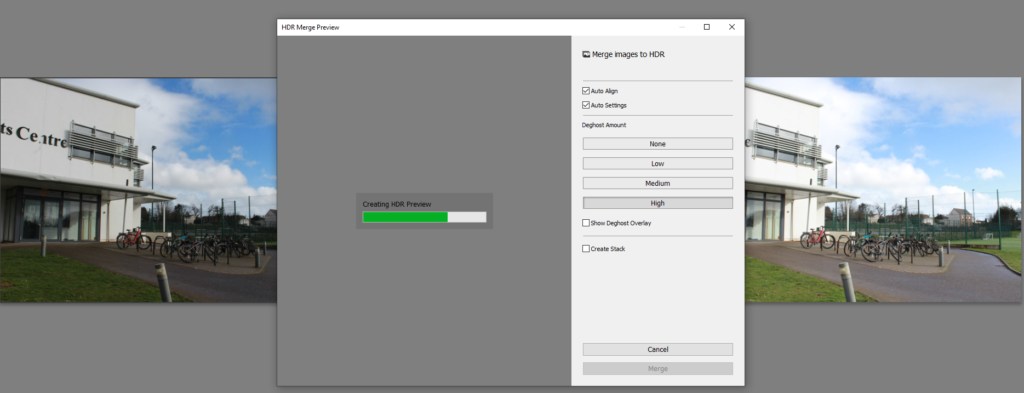
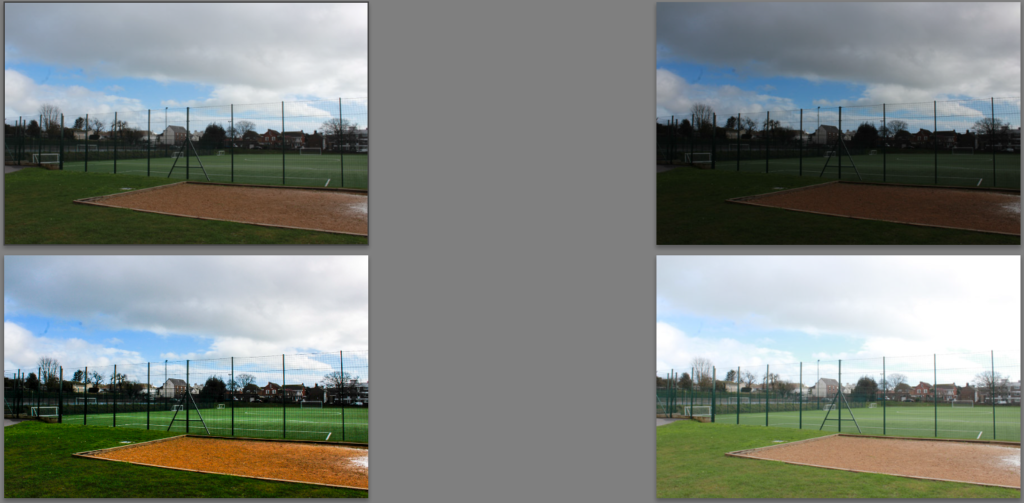
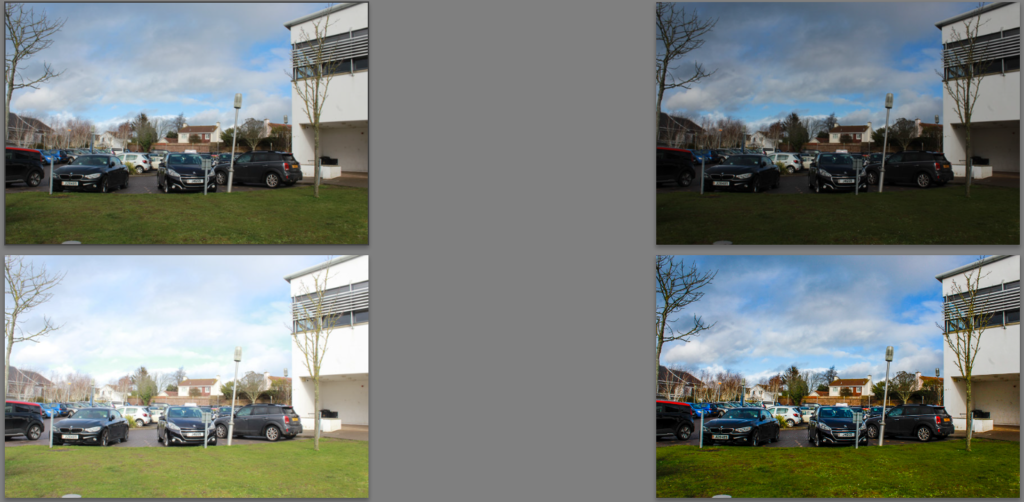
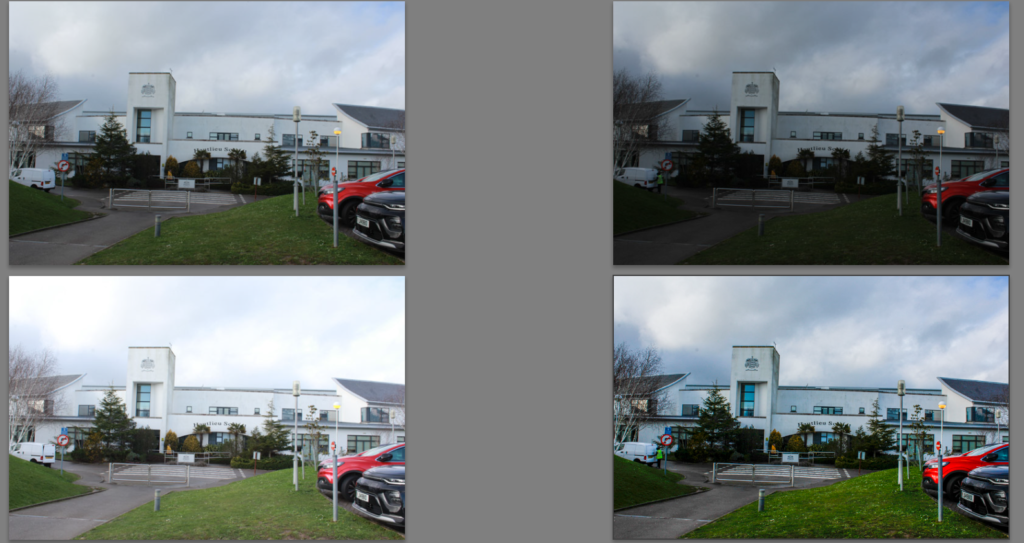
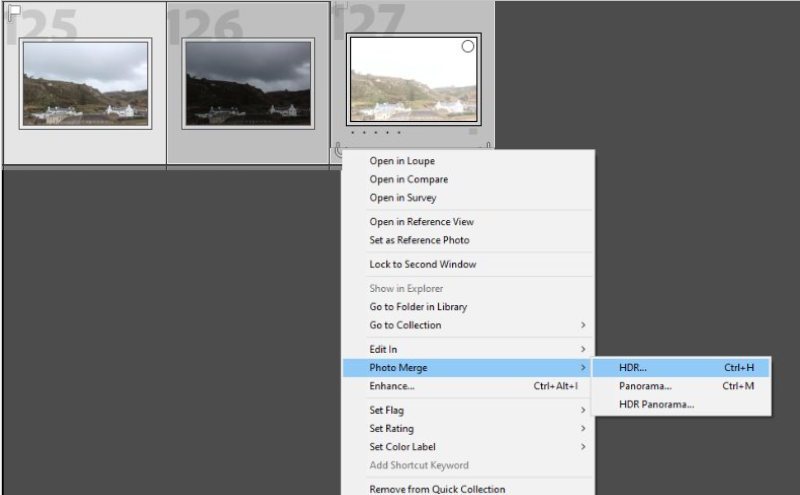
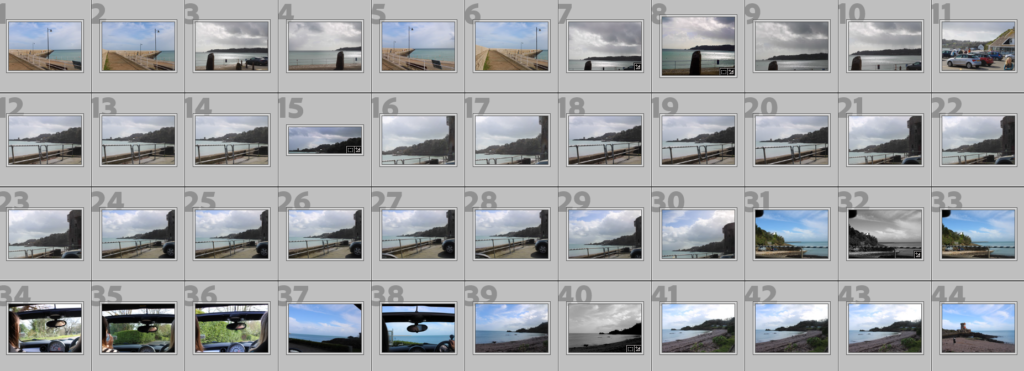
Once you have your 3 images selected, right click on one of the images and click “photo merge” and then click “HDR“. Next select the deghost amount and change it to “high” to allow your photos to have the best quality and see the difference between each image successfully. This will give you a final result of all three exposure levels merged together to create the perfect exposure for your images.
During studying landscapes, we have looked at how to produce HDR images so my outcomes can obtain details from different images, merged into one. In photography, HDR stands for high dynamic range. Dynamic range is simply the range of the lightest tones to the darkest tones within a photo. In other words, it’s a measure of the light intensities from the highlights to the shadows. In photography and videography, multi-exposure HDR capture is a technique that creates high dynamic range images by taking and combining multiple exposures of the same subject matter at different exposures.
How does HDR affect my images?
The higher dynamic range your camera has, the closer the photo will compare to what an eye can see. This means that you’ll be able to capture more details in the shadows that might otherwise appear pure black, and you’ll be able to see details in the highlights that might otherwise be washed out with white. HDR captures multiple exposures of the same scene at different brightness levels. Typically, the camera takes one average exposure, an underexposed image to capture details in the highlights, and an overexposed image to capture details in the shadows.
The HDR camera setting is useful when you have trouble balancing a photo’s light. When shooting landscape photography, it can help show the details of where the sun is hitting as well as where the shadows fall.
My plan:
Before I take my photos, I will make sure to adjust the correct exposure levels for my specific images. Most photographers take three shots at exposure values of -3, 0, and +3. A negative value results in a darker exposure, and a positive exposure is brighter.
After I have adjusted my camera correctly and experimented by taking photos. I can merge all 3 images with 3 different exposure levels to create an HDR image in Adobe Lightroom. If I am not happy with my final result I can continue to edit them in Lightroom.
When taking a single-exposure photo, you might notice that the scene’s dynamic range is too wide for your camera. In other words, your camera doesn’t capture all the detail in one frame.
For example, suppose you are photographing an object in sunlight. In this case, the brightest elements will appear glaring white, and you will lose the details of these elements.
Similarly, when taking a photo of a person in front of a bright background, your camera might capture your subject as a flat shadow with no detail.
HDR stands for high dynamic range. This function increases your camera’s dynamic range to pick up detail in the shadow and the light elements of a frame.
HDR processing involves taking multiple images and capturing the same scene at different exposure values. Then, you need to merge these images using high-end photo editing software such as Adobe Lightroom
The result is an image with visible detail in its lightest and darkest elements, making it appear more natural to the human eye.
I would successfully execute by adjusting my camera settings- I would control my camera’s aperture while my camera automatically adjusts the shutter speed.
I would adjust my ISO setting as it determines your camera’s light sensitivity. Choose the lowest possible setting to ensure that your images are not grainy.
Select the correct aperture- In landscape photography, a narrow aperture of f/11 or higher is ideal. All your subjects will be in focus at these aperture settings, even at varying distances.
Adjust the correct exposure levels for my specific images- Most photographers take three shots at exposure values of -3, 0, and +3. A negative value results in a darker exposure, and a positive exposure is brighter.
A camera with an auto exposure bracketing (AEB) function can automatically take multiple photos at varying exposure levels.
We made sure to use a tripod so there isn’t any noticeable movements or camera shakes.
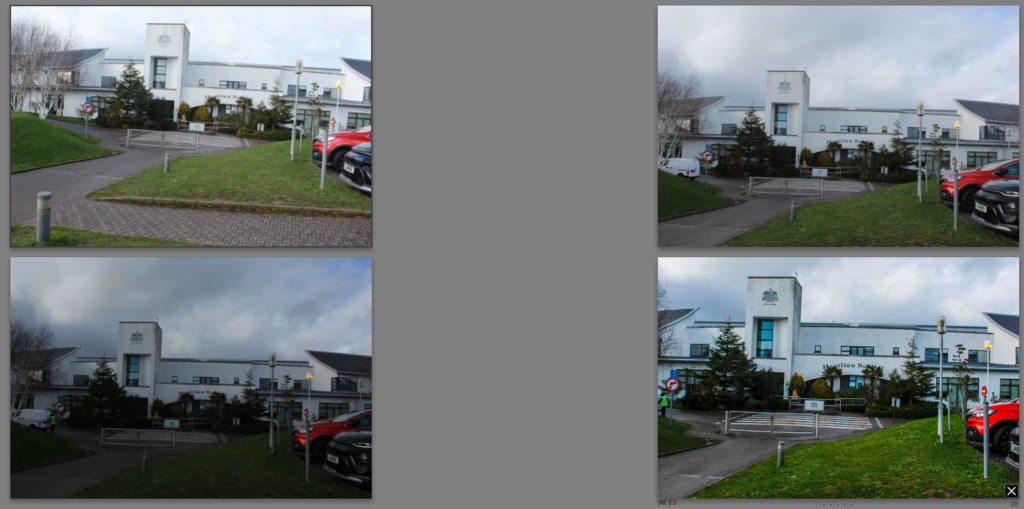
We put the camera settings on continuous shooting so we can quickly take 3 images without the camera moving or shaking as well as using a tripod. Also preventing a subject moving in the image e.g. a car or person which unfortunately happened within these images. However when I merged the image the person came out clear and detailed therefore didn’t cause much of a problem.
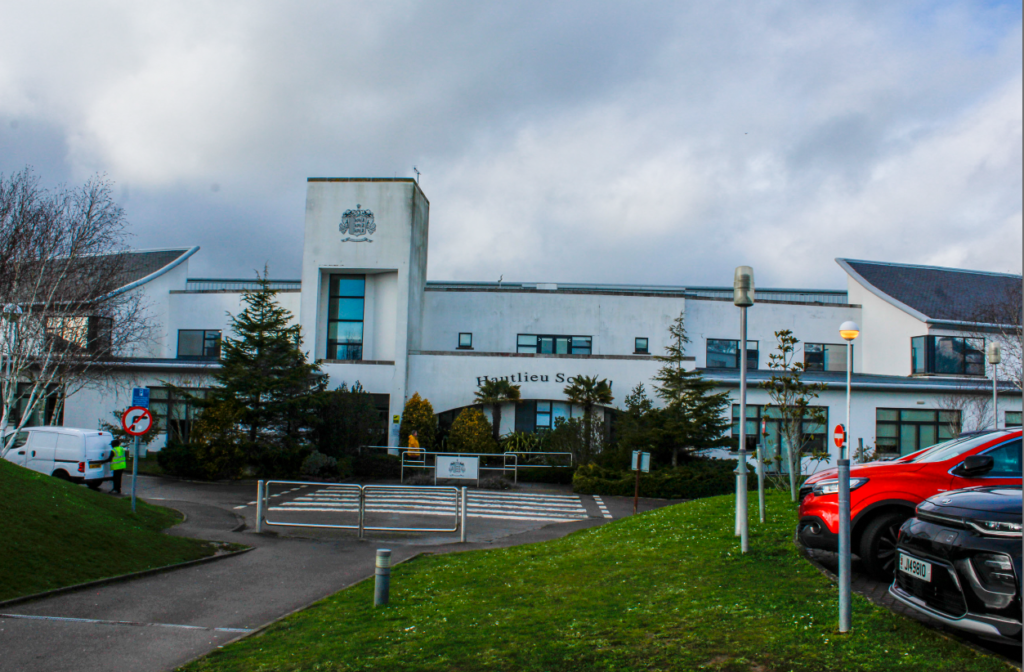
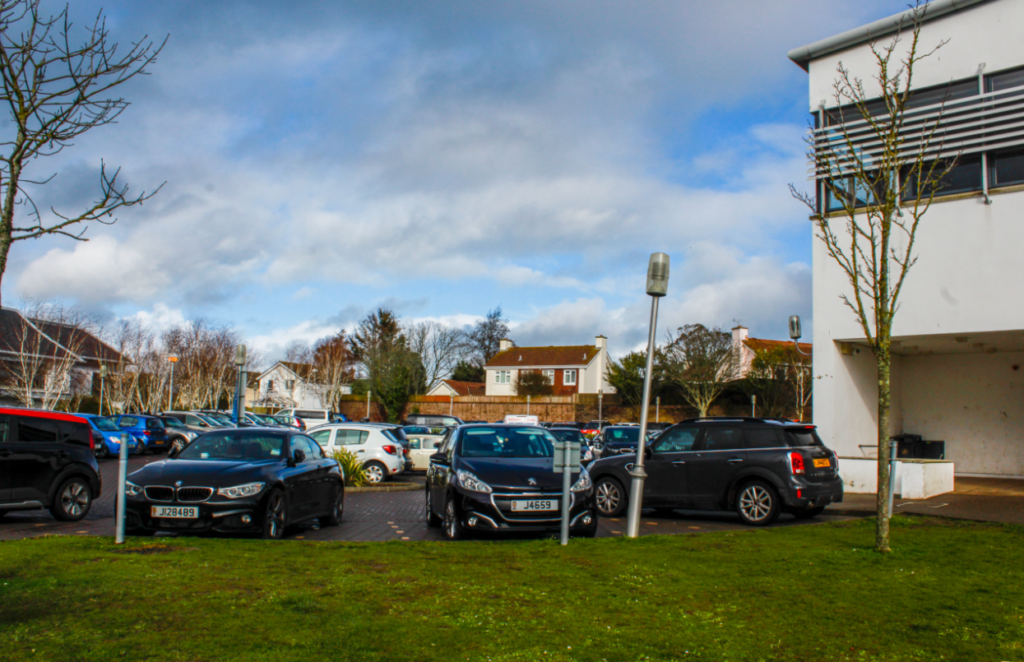
Here is a preview of what merged together within the image. I selected high DE ghost amount which clearly shows what created the final outcome.
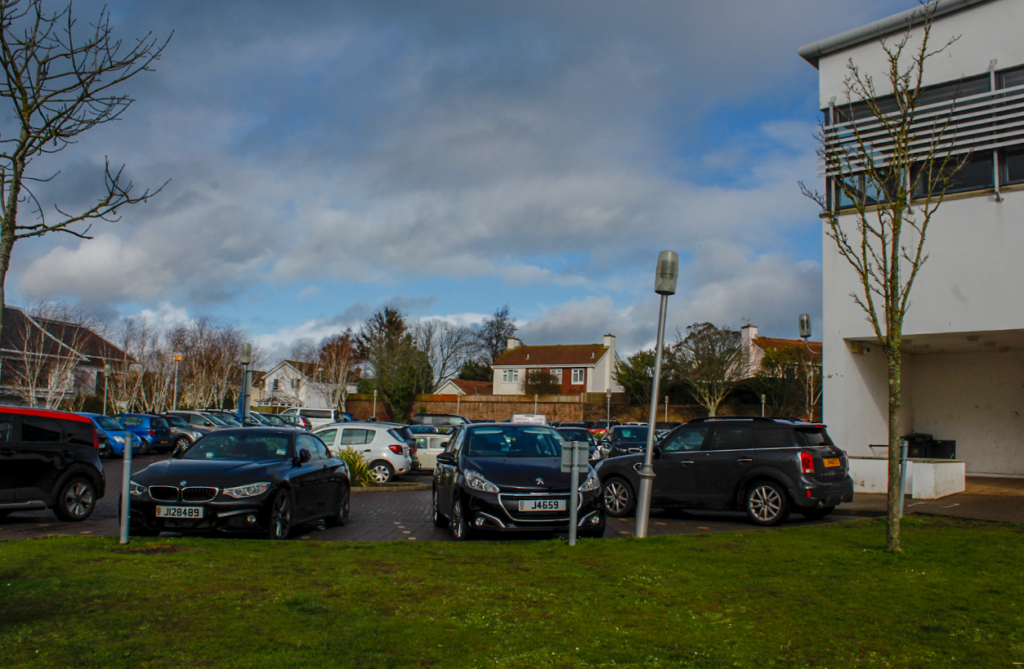
Personally, I think this image is slightly grainy and looks unrealistic within the tones and shades so I could select a lower De ghost amount to make it look more realistic.
There isn’t a significant amount of change however I personally prefer this photograph as it slightly looks more realistic as you ca see a slight difference within the shade of the grass and the sky.
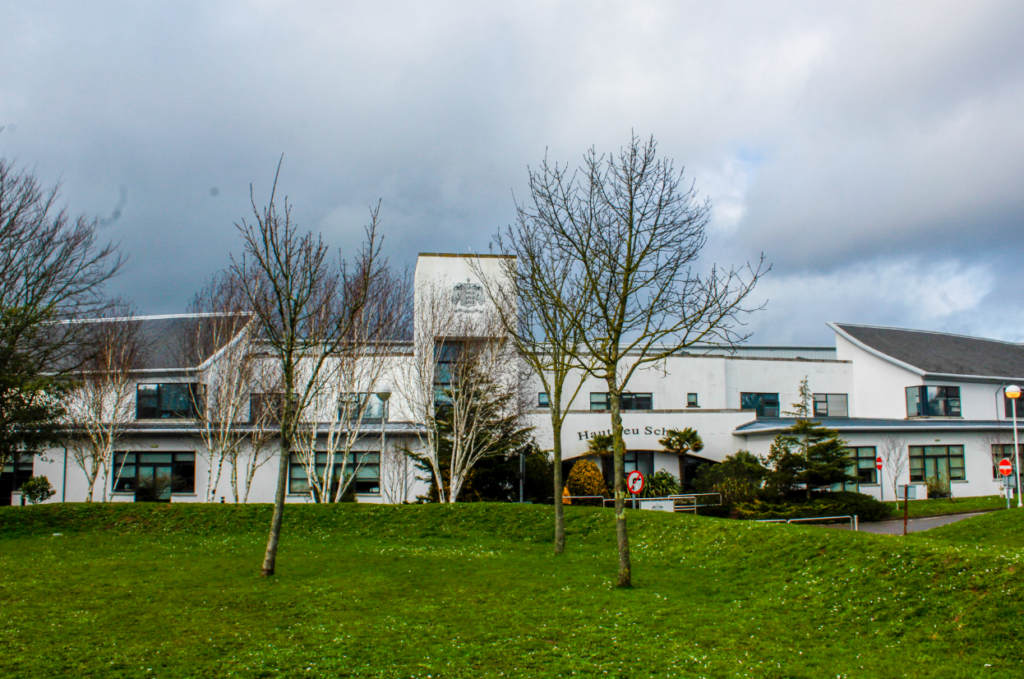
Within this image I selected the high exposure level and selected show the De ghost which ultimately shows what has been merged with red highlights to show you the difference.
To create photos similar to Ansel Adams I am merging three different exposures (over exposed, under exposed, normal exposure) using the HDR tool in Adobe light-room classic.
1: To start I selected the three of the same photos with different exposures to use.
2: Next I selected the photo merge tool and the HDR option.
3: I then needed to select which amount of Deghost (none, low, medium, high) looked best for this photo.
4: I selected the high amount as it made it the most detailed in comparison to the low and medium
Adjusting the photo:
To turn the photo into a black and white image I turned the saturation level to 0. I also adjusted the other settings such as dehaze and texture as I found it made the photo darker in areas.
Final result:
I turned this photo black and white in order to make it similar to Ansel Adam’s photographs. I like how it has turned out as it has a dramatic look to it which is created by the intense dark clouds that are in the upper portion of the image and the contrast of the light and dark details in the lower portion of the image.
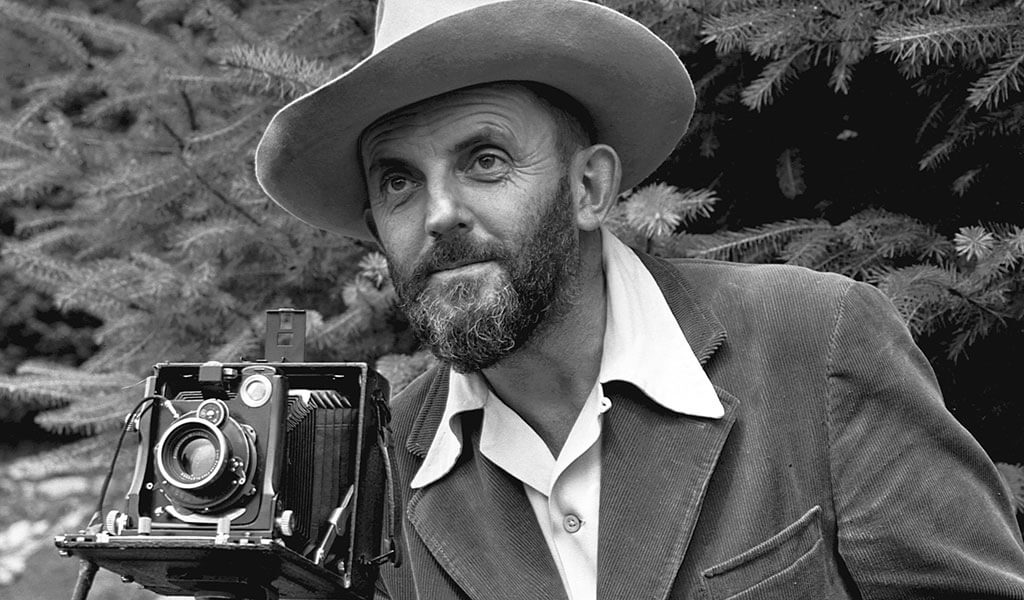
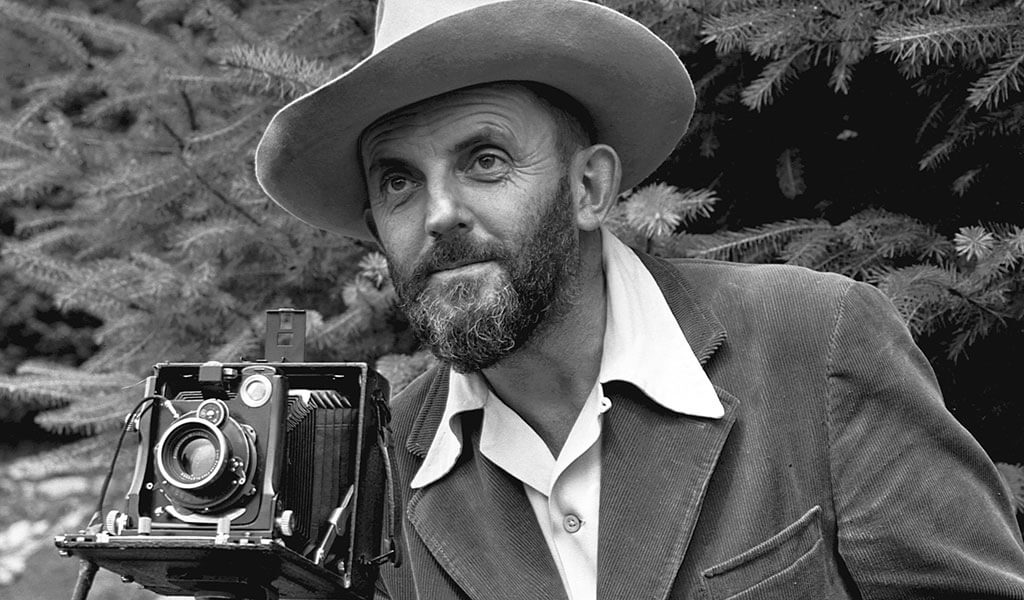
Ansel Adams was born in 1902 in San Francisco, he grew up in a house set amid the sand dunes of the Golden Gate. Adams was a famous photographer, most known for his landscape photography capturing Americas natural beauty. When he was very young, the great earthquake of 1906 happened and affected him and his family. He badly broke his nose, distinctly marking him for life and making him feel very self conscious. Natural shyness, along with his disfigured face, caused Adams to have problems fitting in at school. He was not successful in the various schools to which his parents sent him, this led to his father taking up the role and tutoring him at home. The most important result of Adams’s somewhat solitary and unmistakably different childhood was the joy that he found in nature. Adams took long walks in the still-wild reaches of the Golden Gate, nearly every day he found himself hiking the dunes or meandering along the beaches or forests. When Adams was twelve he taught himself to play the piano and read music. He soon realised that he was not going to become professional in music, so he ultimately gave up music to focus on photography.
While sick in bed with a cold one day at age 14, Ansel read a book that would eventually change his life. James Mason Hutchings’ In the Heart of the Sierras caught Adams’ imagination, and he soon managed to convince his parents to vacation in Yosemite National Park. From his first visit, Adams was transfixed and transformed. Equipped with a simple Kodak Box Brownie camera his parents gave him, he hiked, climbed, and explored, gaining self-esteem and self-confidence whilst snapping the first images of what would become a lifetime of incredible artistic productivity. He spent substantial time there, due to the love he had for the place, every year from 1916 to his death.
In 1919 he joined the Sierra Club and then spent six summers accompanying High Sierra tour groups as trip photographer. He became friends with many of the club’s leaders there and he also met his wife, Virginia Best, and they married in 1928. The Sierra Club was vital to Adams’s early success as a photographer and his first published photographs appeared in the Club’s 1922 Bulletin.
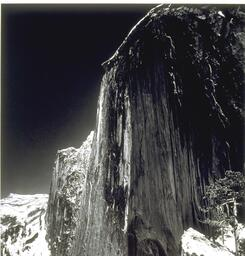
1927 was the pivotal year of Adams’s life. He made his first fully visualized photograph, Monolith, the Face of Half Dome, and took his first HighTrip. Adams came under the influence of Albert M. Bender, a San Francisco patron of arts and artists. The day after the pair met, Bender set in motion the preparation and publication of Adams’ first portfolio.
In 1928, Adams and Virginia Best became married, who also happened to be the daughter of landscape painter Harry Cassie Best. Best’s Studio in Yosemite Valley was a convenient place for Adams to display his photography, and after Virginia’s father’s death in 1936, Ansel and Virginia took over the studio. The couple had two children, Michael and Anne, who grew up in the Valley. The children eventually also became involved in the family business, renamed it The Ansel Adams Gallery.
In 1933, he made his first visit to New York on a pilgrimage to meet photographer Alfred Stieglitz, who gave him a solo exhibition at his gallery An American Place in 1936. After this meeting, Adams opened his own gallery in San Francisco. Most importantly, in 1936 Stieglitz gave Adams a one-man show at An American Place. He gained much attention over the years and influenced many people through his photography. His black-and-white images were not “realistic” documents of nature. Instead, they sought an intensification and purification of the psychological experience of natural beauty. He created a sense of the sublime magnificence of nature that infused the viewer with the emotional equivalent of wilderness, often more powerful than the actual thing.
Ansel did not only influence people through his photography, he also influenced people through his respect for nature. Adams routinely lobbied personally for conservation efforts. And perhaps nowhere was he more successful than in the creation of Kings Canyon National Park. Kings Canyon sits immediately to the north of world-famous Sequoia National Park. in spite of its stunning natural beauty and its proximity to Sequoia National Park, Kings Canyon itself remained unprotected into the 1930s. And by 1936, its future as a natural wonder was in jeopardy. The powerful river in the park plunges nearly 11,000 feet in just 80 miles. It carried enormous potential as a power source, which led water interests into the idea of creating a series of large dams in the canyon to conserve the power. The Sierra Club entrusted the job to Ansel Adams, one of their most prominent members, to convince Congress to protect the High Sierra.
Over the course of the fight to preserve Kings Canyon, Ansel presented his portfolios proudly when eventually meeting with over 40 members of Congress. Of course, the photographs themselves were stunning, but equally compelling were Ansel’s personal stories of hiking the John Muir trail and how his experiences in the High Sierra led him to devote his life to photographing and preserving America’s natural heritage. Though the idea to preserve the canyon failed in 1936, Ansel’s fight was not over. In 1938, he published his Kings Canyon images as a book, Sierra Nevada: The John Muir Trail.
The United States secretary of the Interior, Harold Ickes, received a copy from the Director of the National Park Service, and realised it was not only just a book, it was an argument: protect Kings Canyon. Ickes was so convinced to help Adams that he took a copy to the White House, and set it in front of President Franklin D. Roosevelt. Finally, as the President of the United States took a look at this stunning book, capturing the full grand view of Kings Canyon, Ansel’s argument found purchase. Just two years later, in 1940, Kings Canyon National Park was founded, and today it sees over 600,000 visitors a year.
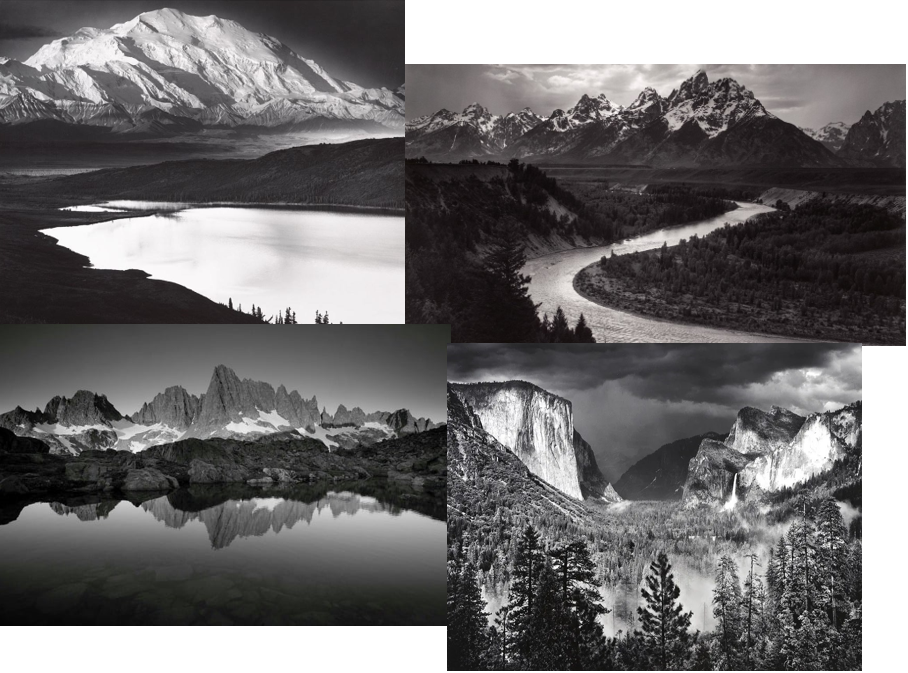
Examples of his work
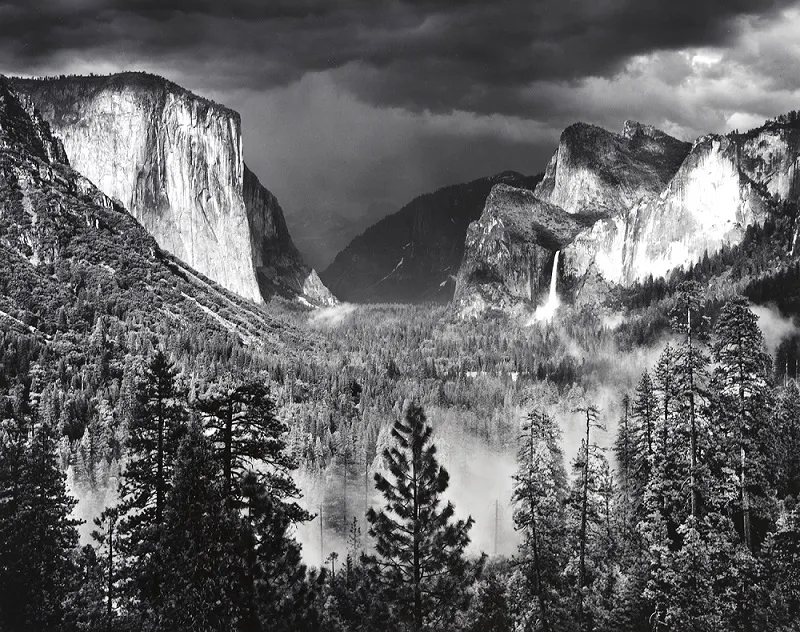
This particular image caught my eye as I love the contrast between the dark thundery clouds and the highlighted points, like the unique granite esplanade. Through this image, Yosemite Valley is presented in a beautiful way. This image documents not just the fierce beauty of a looming thunderstorm, but one of Yosemite National Park’s most beloved aspect, the classic Tunnel View. Ansel made this stunning image in 1949, and published it . To increase the contrast and show off the ethereal beauty of the rain-soaked forest in the valley below, he used a yellow filter, which darkened the sky and intensified the stormy, To increase the contrast and show off the ethereal beauty of the rain-soaked forest in the valley below, he used a yellow filter, which darkened the sky and intensified the sinister, ominous clouds.
What is the Zone system?
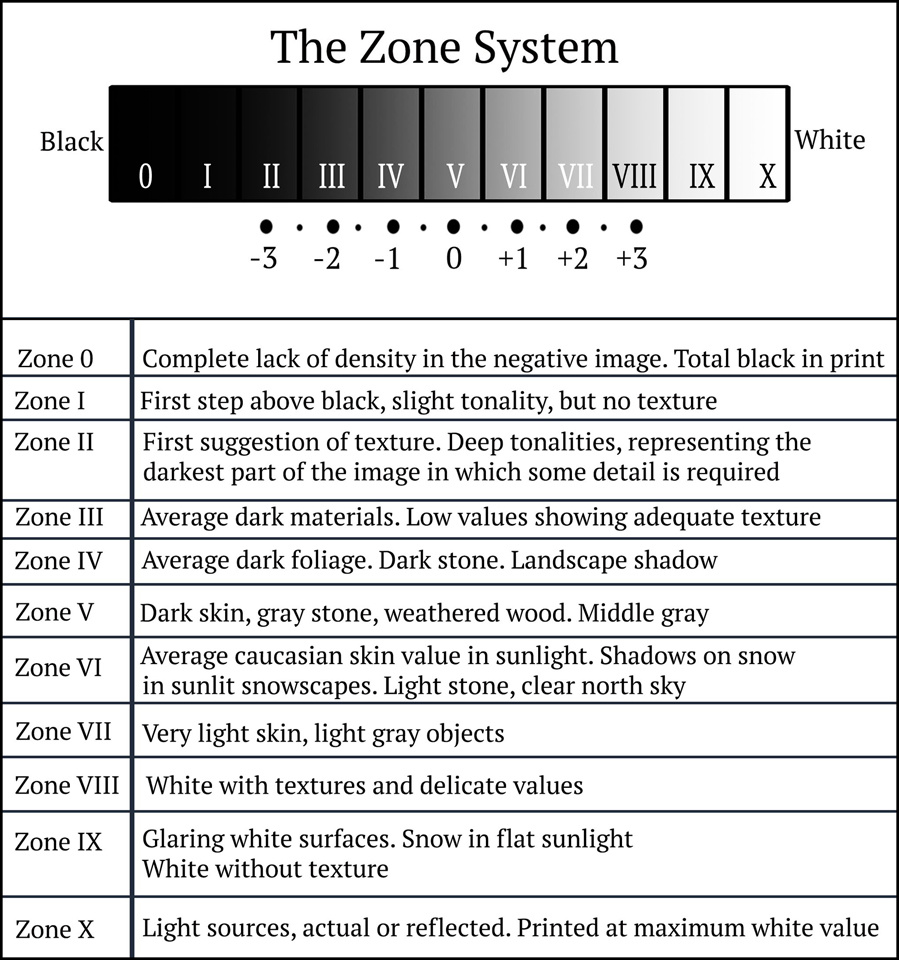
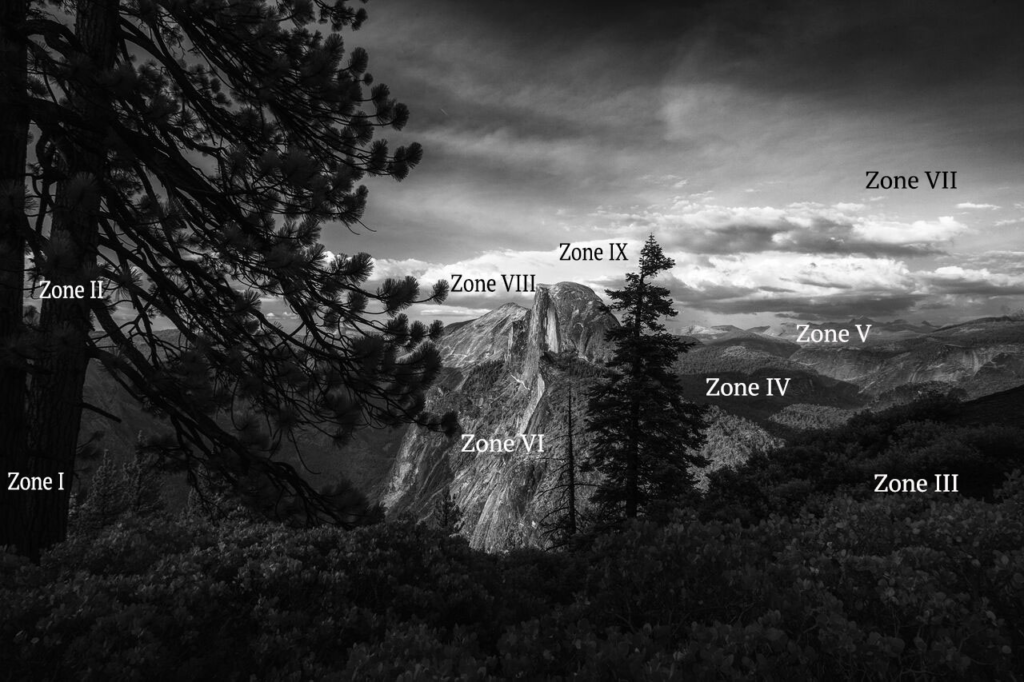
The 11 zones in Ansel Adam’s ‘Zone System’ are used to represent the graduation of all the different tones you would see in a black and white print and divide the photo into eleven zones, nine shades of grey, with pure black at 0 and pure white at 10. With this system, Adams was able to perfectly control the contrast in his black and white photos. Adams base rule was: “Expose for the shadows; develop for the highlights.” The biggest advantage of understanding a Zone System is that it allows you to be in control over the photos. Nowadays, the Zone System focuses more on understanding how digital cameras respond to different levels of light and dark. The Zone System allows you to get the right exposure every time without guessing. It does not require you do any special film development and you never have to waste time with bracketing.
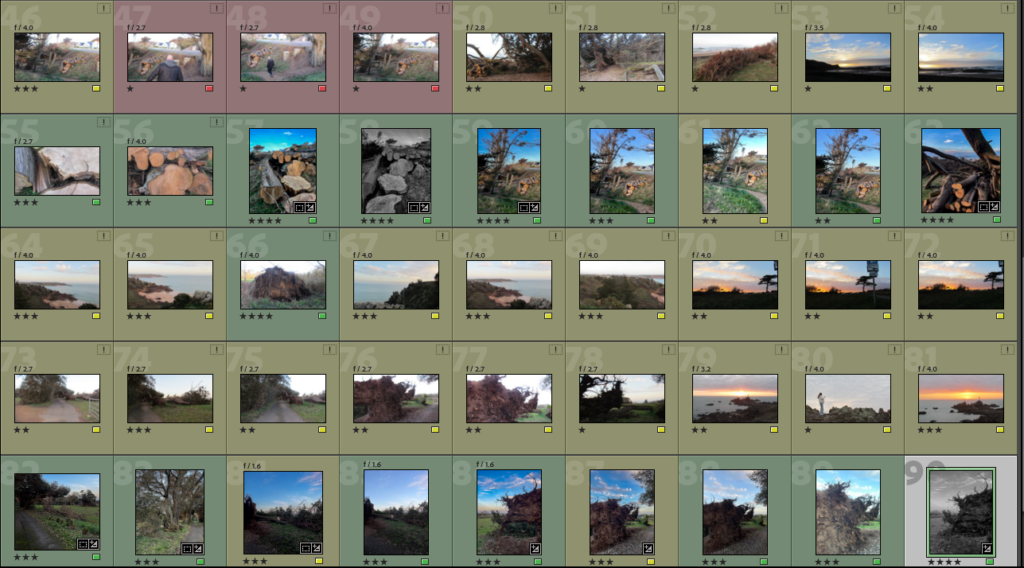
For this half term task, I decided to visit places in Jersey that have been affected by storm Ciaran. The storm hit the Island around midnight on Wednesday 1 November, was in fact the most powerful ever recorded on the Channel Islands. Whilst taking photos of the aftermath, I mainly focused on fallen down trees in more rural locations, as I think this is a vital part of the destruction and reconstruction of the island. I travelled around different parts of the Island such as…
St Ouen
La Pulente
Beauport Bay
Whilst visiting these places, I came across lots of destruction of huge trees which had fallen down. I then photographed these with my camera in order to capture the best angles possible and altering my camera settings when necessary.
My Camera Settings.
The first area that I visited, I could see from my car that there was a large field that had been affected, this resulted in lots of branches being broken and lying on the floor. There was also many large trees that had fallen down, with multiple large branches being piled on top of each other.
The next location I came across, I was driving along St Ouens bay, when I saw a large tree which had completely fallen down. With all the roots being completely ripped out of the ground, this tree really demonstrates the ferocity of the conditions. This tree took up a lot of space, this photo was taken at 4:46 pm, this was when the sun was setting, which I think created a really beautiful effect on the tree, because the sun creates a sort of yellow colour on the tree. This huge tree had lots of sticks and branches poking out of it, which shows how dangerous the effects of the storm were. I also really like the blue sky with the clouds in the background. I think the contrast between the broken trees, with a beautiful blue sky highlights the aftermath and how the stormy weather may be gone, but the destruction remains.
I then went to La Pulente where I saw lots of logs that had been piled up, next to some swings that are made out of branches from the trees. These logs that had been cut and made out of the fallen trees, demonstrates the reconstruction of the trees mostly, out of all the locations I photographed. This also signifies work put in to restoring the damage that had been made.
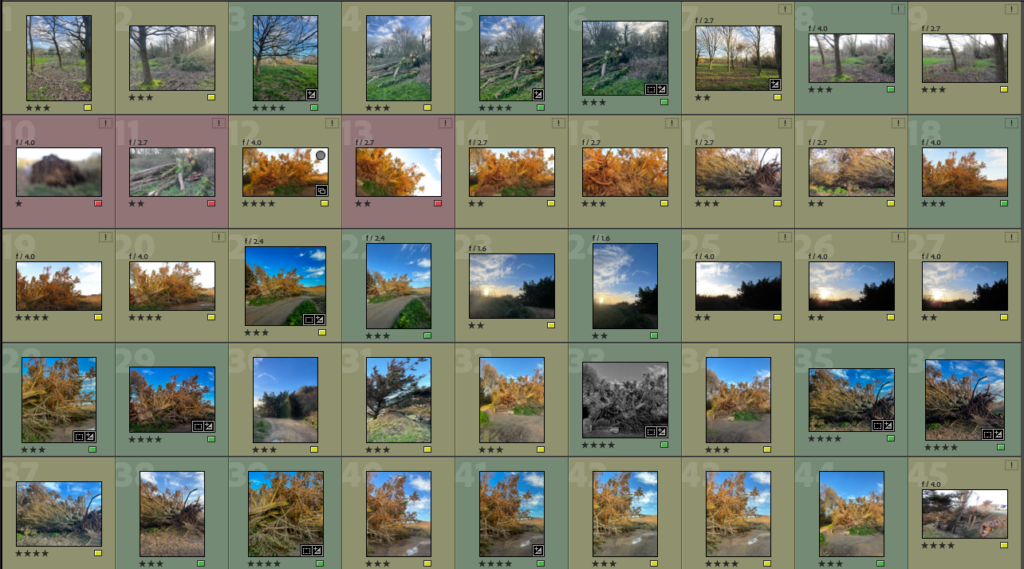
My Best Photos.
My Favourite 4 Photos.
I like this photo because of the bright blue sky with the clouds and how the blue fades into a faint yellow creates a dramatic effect. I also like the sea, trees and green grass in the background, this dramatization from behind I think really pulls the tree roots and insides out, making them eye-catching and more interesting due to the bright colours. It also shows the true strength and power of the storm and how its dangerous conditions created extensive damage.
This photo is taken at La Pulente, this photo also has a beautiful blue sky background, with the sea, sand and rocks in the background which makes a strong backdrop of the image of logs of trees that have been cut and chopped by people. This signifies the restoration from the storm, and the human effort to replenish any damage that was caused.
I also like this photo very much, this is similar to my first favourite photo, however I also like this because it captures a fallen down tree in the background. The large tree as the main part of the photo, and then the tree in the background shows the mass destruction.
This photo was taken along St Ouen, whilst driving down a road, there was many puddles and destroyed trees and branches around. I decided to photograph this large tree that fell down, which I particularly like because of the oranges, reds, yellows and greens in the sunlight.
Ansel Adams was born 20th February 1902, in San Francisco California and died 22nd April 1984, in Carmel California. He was an American photographer and environmentalist, who was the most important landscape photographer of the 20th century, creating black and white landscapes, and even creating the zonal system. His work has continued to increase in popularity since his death and now inspires many other artists, such as Robert Adams, Judy Dater, Robert Dawson, Minor White, Ted Orland and many more.
Ansel Adams was a hopeless and rebellious student, until his dad removed him from school at the age of 12. He then became a serious musician as a highly gifted pianist, until he fell and broke his nose and lost his confidence. After he received his first camera in 1916, Adams also proved to be a talented photographer. Throughout the 1920s, when he worked as the custodian of the Sierra Club’s lodge in Yosemite National Park, he created impressive landscape photographs.
Group f64?
In 1930 he met the American photographer Paul Strand and was shown the negatives that Strand was then making in New Mexico. Adams was deeply impressed with the simplicity of the images’ conception and by their rich and luminous tonality, a style in contrast to the soft-focus Pictorialism still in vogue among many contemporary photographers. The experience confirmed in him his evolution toward a purer and more realistic style. In 1932 Adams helped form Group f.64, a loose and short-lived association of West Coast photographers (including Edward Weston and Imogen Cunningham), who favoured sharp focus and the use of the entire photographic grey scale, from black to white, and who shunned any effects borrowed from traditional fine arts such as painting.
What is the Zonal System?
Ansel Adams created the zonal system, so he could predict what the exposure would need to be for his visualisation of his landscape, so he could get his visualisation quicker and correct.
Ansel Adams base rule was:
‘Exposure for the shadows, develop for the highlights.’
The zone-system of Ansel Adams divides the photo into eleven zones; nine shades of grey, together with pure black and pure white.
This zonal system was used, so he could create the photograph he was visualising. This zonal system helped him get his visualisation correct quicker, because he could not just take multiple tries for free, like we can today. This zonal system was also what he used to create his black and white pictures, as 0 was pure black, 5 was middle grey and 10 was pure white. However, you could assume that a normal photo does not contain pure black and pure white.
How did he use Romanticism and the sublime?
Ansel Adams produced photographs using the sublime, because he took photos of different parts of nature, such as mountains, waterfalls, rivers, cliffs etc, which are places that support the sublime, because they can be admired and create a sense of awe, while also creating a sense of panic and danger, because these parts of nature can be very strong and violent, because of their power and strength, or there mass/ height.
Adams created romanticism images as he took pictures of different parts of nature again, such as forests, trees, mountains, flowers etc, which supports romanticism, because romanticists believed that nature should be admired and create a sense of awe, because of its beauty. Adams presented the beauty of the nature through all his different photographs.
Who did he influence?
Ansel’s photography has had great impact, not only in awakening people to the beauty of nature but in inspiring many other photographers to turn their efforts to the natural scene and to use photography in the interests of environmental preservation.
Ansel Adams was influenced by Paul Strand, because his images had a powerful impact on Adams and helped him to move away from the pictorial style, which Adams and favoured in the 20s and focussed him more on the sublime and on the beauty and awe of nature, while also capturing the strength and power of it.
Ansel Adams has left a legacy to everyone by creating visually unforgettable images of unspoiled nature in spectacular places. He has paved the way for photography to be exhibited beside traditional painting and portraiture in national galleries. He is remembered for his most important work, which was devoted to what was or appeared to be the country’s remaining fragments of untouched wilderness, especially in national parks and other protected areas of the American West. He was also a vigorous and outspoken leader of the conservation movement.
Ansel Adams inspired people by making photography more creative by saying:
‘You don’t take a photograph, you make it.’
This influenced many other photographers to become more creative with their work, like Ansel Adams did instead of just taking pictures that looked ‘pretty’ and were the ‘norm.’
Most Popular Work
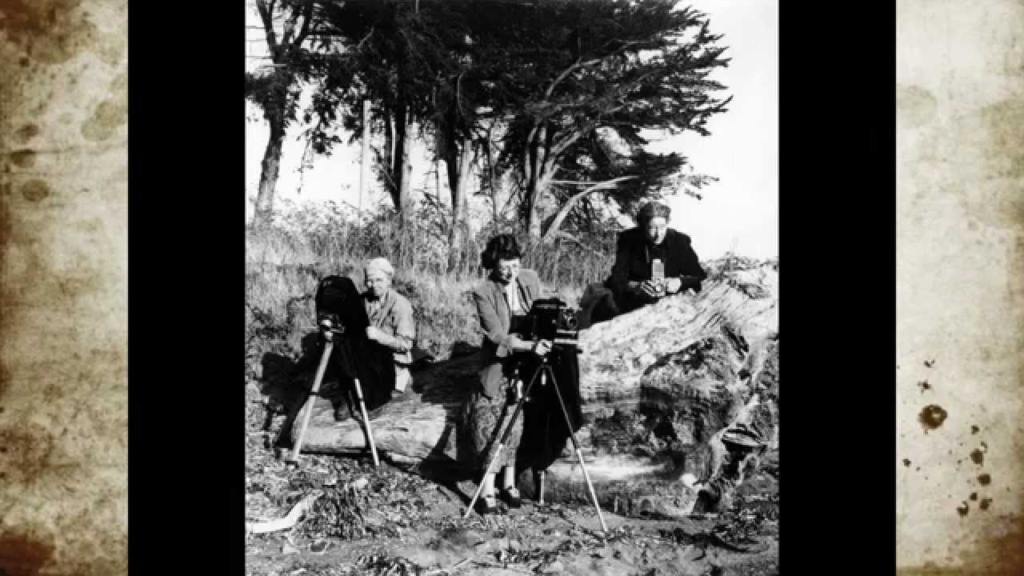
Ansel Adams favourite and most popular photograph was the Half Dome in full shadow in the Happy Isles. He travelled from his home there with his fiancée, Virginia, and two friends to begin a photoshoot.
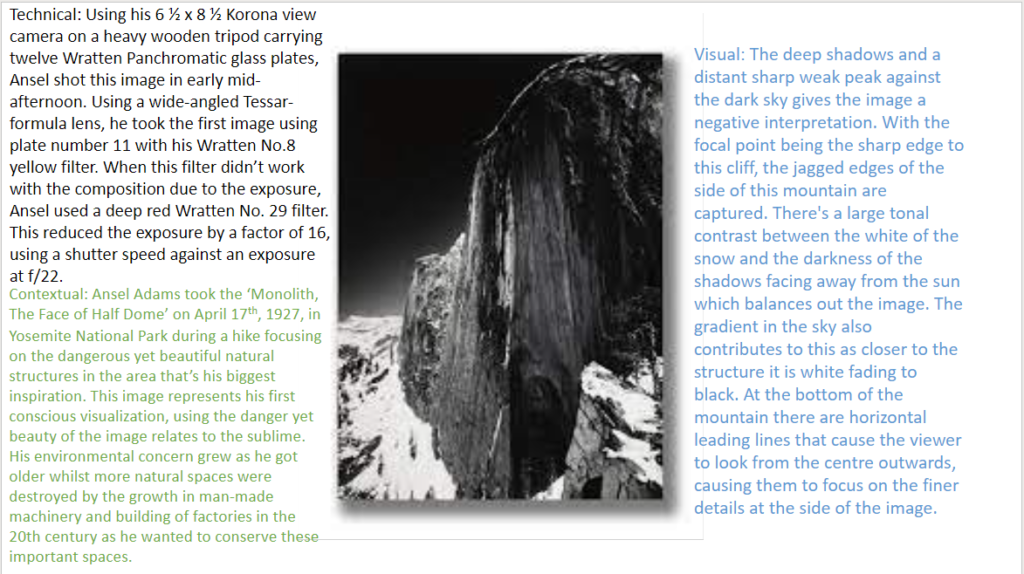
He used a Korona View Camera with two lenses, two filters, a wooden tripod and twelve wratten panchromatic glass plates.
Firstly, he attempted to take the photo using an 8 1/2 inch focal length and made his first exposure of 11, using a wratten no. 8 k2 yellow filter. This image did not fit his visualisation. Next, he used his deep red wratten no. 29 with the shutter release for 5 second exposure at f/22. He then achieved his visualisation.
Image Analysis
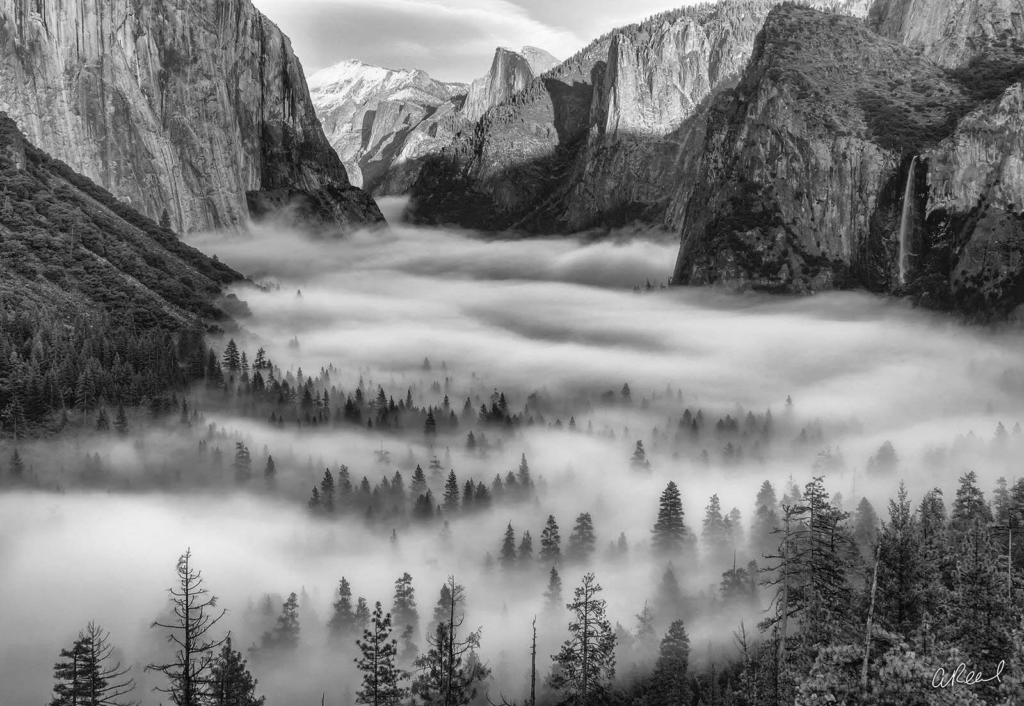
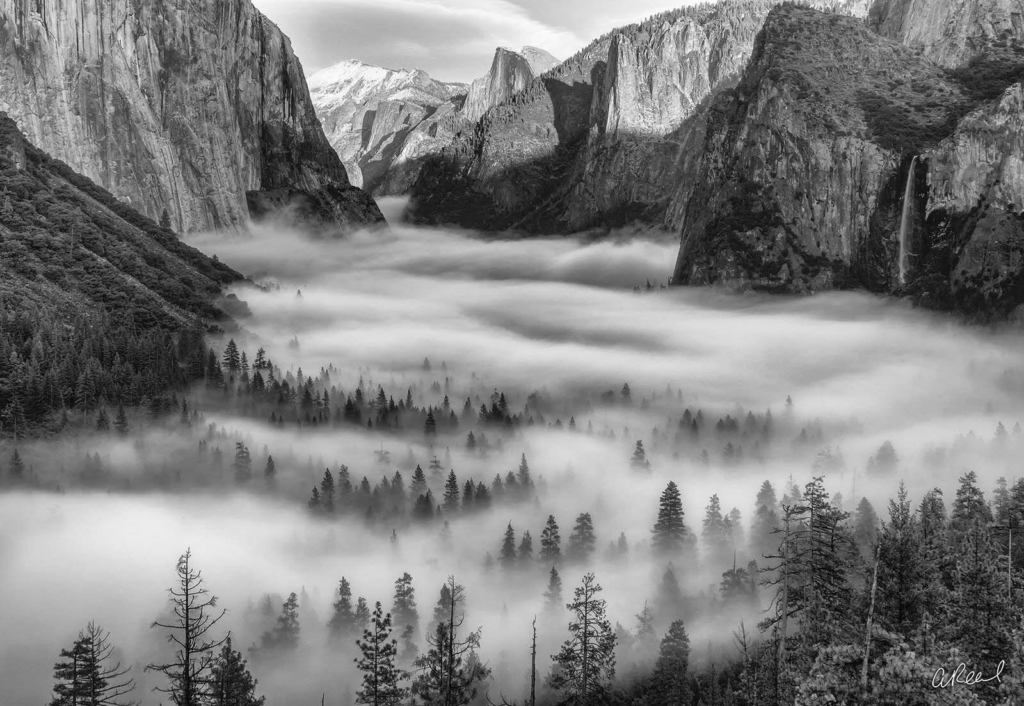
I have chosen this image to analyse, because I think it portrays the sublime in Romanticism very well, as Adams has used the clouds/fog to his advantage, to show how strong and powerful they really are, as they cover the entire ground and most of the trees. However, he also uses them to show the beauty of the nature in this photograph.
Ansel Adams used natural lighting, while he was positioned on top of a mountain, while taking an image of the surroundings and down below. He used a high contrast of white and blacks throughout this whole image. He also used high exposure for the lighter areas and lower exposure for the darker areas, so he could create that contrast.
Adams created a black and white image with dark and light tones throughout, with lots of texture throughout (the trees, mountains, clouds). He also used leading lines in his image, so that the viewers eyes follow the line down the picture, until they reach the viewpoint. The viewpoint in the image was the low ground, where the mountains were surrounding. He also used depth of surface illusion in this image, to attract the viewers attention more.
This image was taken on the West side of America, because Adams believed the weather was better for photographs on this side of America, because it was darker and colder and changed more, compared to California where it was always sunny. This helped him create the sublime in Romanticism better, because the weather was more powerful here.
I think Ansel Adams took this image, so he could portray the sublime and move away from just ‘pretty sunsets.’ He showed ‘bad weather’ and made it beautiful, but also scary, because of its strength and power.
‘Life is your art. An open, aware heart is your camera. A oneness with your world is your film.‘
Ansel Adams was an American photographer and environmentalist known for his black-and-white images, documenting his experiences in the West. He had a visionary belief in the conservation of nature and wanted to inspire that through his images. At the age of twelve, Adams found a passion for the piano, acting as a distraction from the bullying he received from classmates due to his disfigured nose from an accident that occurred when he was four. Throughout the 1920s, Ansel was pursuing both music and photography however once realising that he wasn’t able to become a professional musician, he transferred to photography for his future. Adams always enjoyed spending time outside taking images of nature and growing a strong love for it, desperate to capture such an overwhelming experience on film. The process began when he was just age 14, gifted a Kodak No. 1 Box Brownie Camera. This passion grew as he got older whilst more natural spaces were destroyed by the growth in man-made machinery and building of factories in the 20th century as he wanted to conserve these important spaces.
In 1932, Adams founded Group f/64 with Edward Weston, referring to the smallest aperture setting on a camera to achieve the sharpest detail and depth of field. He would travel on hikes through areas such as Yosemite National Park, being his greatest inspiration as these were areas with great natural structures.
The Zone System
Ansel Adams used a technique called the zone system – a scale from 0-10 showing the different shades beginning at pure black to pure white. He used this as a way of visualising how the image would look before he even took the image, he called this seeing into the minds eye. By doing so, he could use his exposure to show the illuminance of each subject in the image to achieve his intention. For example, due to exposure metering the camera may not be able to fully show the detail of a darker object in the image however by using the Zone system it allows tonal balance and contrast. This means that Ansel Adams was able to achieve the shot he previsualised as he will know what it will produce before he even takes it.
The rural landscape includes a variety of geological and geographic features such as cropland, forests, deserts, swamps, grasslands, pastures, rivers and lakes. The rural landscape provides natural resources, food and fibre, wildlife habitat and inspiration.
Rural landscape photography is in many ways similar to photographing urban landscapes. The difference is rural photography is about capturing the “life” in the countryside. Of some reasons I like to think of rural as something “old” while urban is mostly modern.
Rural is defined as “of or relating to the country, country people or life, or agriculture.” A critical element in successful photography is capturing the interaction that occurs between subject and environment.
MOODBOARD
As you can see, most of these images include an old barn or hut of some sort with autumn leaves and colours in the countryside. This is the opposite to urban landscapes as it gives off a nostalgic and vintage feeling to the image using mostly natural environment factors to create more significance and meaning. In my opinion, keeping this image in colour creates the whole “vintage” look
Ansel Adams
Ansel Easton Adams was an American landscape photographer and environmentalist known for his black-and-white images of the American West. Ansel Adams is one of America’s most famous photographers and is known for his stunning photos of the American wilderness and his passion for conservation. Ansel Adams’ photography puts the American wilderness on display, highlighting its enormity and beauty through dramatic black and white photos.
Why did Ansel Adams photograph in black and white preferably?
There are two main reasons, according to an expert source, why Adams preferred black and white. The first was that he felt colour could be distracting, and could therefore divert an artist’s attention from the achievement of his full potential when taking a photograph.
However, Renowned as America’s pre-eminent black-and-white landscape photographer, Ansel Adams began to photograph in colour soon after Kodachrome film was invented in the mid 1930s. He made nearly 3,500 colour photographs, a small fraction of which were published for the first time in the 1993 edition of ANSEL ADAMS IN COLOR.
Few artists have had a greater impact on environmentalism than Ansel Adams. His belief in the possibility of humankind living in harmony with the environment was illuminated through his artwork and worked to strengthen other environmental efforts.
Who was Ansel influenced by?
Adams was strongly influenced by Alfred Stieglitz, whom he met in 1933 and who mounted a one-man exhibition for him in 1936 at Stieglitz’s An American Place gallery in New York City.
Ansel Adams uses the zone system. The Zone System assigns numbers from 0 through 10 to different brightness values, with 0 representing black, 5 middle grey, and 10 pure white; these values are known as zones.
Group f/64 was created when Ansel Adams and Willard Van Dyke, an apprentice of Edward Weston, decided to organize some of their fellow photographers for the purposes of promoting a common aesthetic principle. In the early 1930s Van Dyke established a small photography gallery in his home at 683 Brock Hurst in Oakland.
64, loose association of California photographers who promoted a style of sharply detailed, purist photography. The group, formed in 1932, constituted a revolt against Pictorialism, the soft-focused, academic photography that was then prevalent among West Coast artists.
What style is Ansel Adams associated with?
Where landscape artists used colour and brushstrokes to show the beauty of the places that became part of the National Park System, many of Ansel’s photographs were minimalist, shot in black and white using sharp contrast and deep focus. Ansel’s photography is known for its realist style.
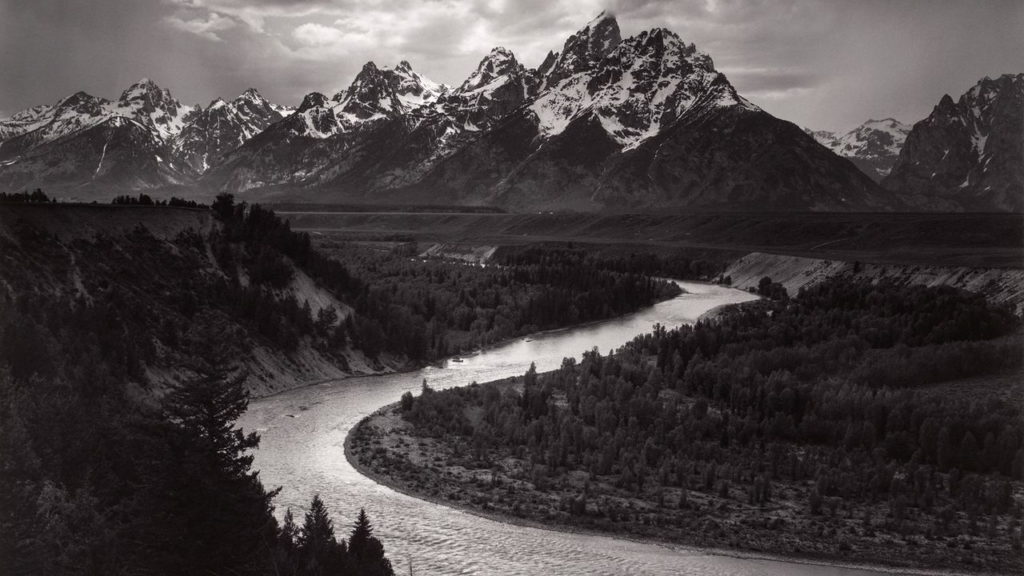
The zone system is a range from the amount of shades which ultimately create a contrast and a significant eye catching feature to the image. It is important to recognize that Adams made this effect in the 20th century without the use of adapted technology. An example is this image.
In this image you can see the river is highlighted with light shades ( end of the zone system ) contrasting with more blacks with the trees with detailed greys which easily catch your eye. With the highlighted sky contrasting with the mountains creates significant importance with this photograph.
ANSEL ADAMS AND ROMANTICISM
Similarities& Differences
A similarity within these images is that they both have significant contrasting and highlights to create a beautiful look within the environment and atmosphere. They both are typical landscapes obtaining natural/non- man made objects. An important difference is romanticism typically involves historic values and sometimes humans however they still normally do not make it the main subject of the image as the background is the main eye catcher. A major difference is that Adams prefers to use black and white but still manages to contrast the highlights and shadows so it isn’t all one tone and shade. Ansel’s work looks a bit more detailed and focused however these romanticism images are more hazy/misty and less focused compared to Adams.
COMPARISON WITH EDWARD WESTON
Edward Westonmood board–
My first initial thought from my perspective is that Weston focuses on texture rather than tone and shade like Adams. Each landscape has a different type of texture and is the main subject of each image. Whereas Adams focuses on the environment and landscapes but most importantly he focuses on the zone system which Weston does not which is obvious as he does not use a large range of shades. A similarity is they are both of environmental and natural scenery and are both typically in black and white. Although Weston images are significantly contrasting between light and dark his images mainly create this by the use of very dark tones of black almost pure black and then grey tones. This shows us that Weston does not follow the zone system created by Adams. Edward Weston in my opinion shows romanticism however still changes it from what we would see by the naked eye yet still beautiful and captivating way, he uses the use of patterns and lines. It is almost as he uses each curved line in this image as a different section and tone of grey or black. The ripples show consistency through the image which makes it appealing to look at and gives the image the calmness and natural beauty of romanticism images. Weston’s vision and photographic theories were heightened and perfected. He believed in the previsualization of the final photographic image. If cropping was necessary, the image was a failure.
“The camera should be used for a recording of life, for rendering the very substance and quintessence of the thing itself, whether it be polished steel or palpitating flesh.” “My own eyes are no more than scouts on a preliminary search, for the camera’s eye may entirely change my idea.”
How did Adams influence others?
Ansel’s photography has had great impact indeed, not only in awakening people to the beauty of nature but in inspiring many other photographers to turn their efforts to the natural scene and to use photography in the interests of environmental preservation.
Ansel Adams’ love of nature and his work in capturing vistas within the Sierras and other protected lands for all to see changed the American art world to include nature photography.
IMAGE ANAYLYSIS
The first noticeable feature of this image is the mist between the trees. Adam’s successfully contrasts the trees against the mist using the zone system as the trees are low within the zone system. He also significantly uses dark mountains but in the background you notice the sun slightly shining in with a higher zone system and lighter shades. The start of the image the mountains are dark and they slowly go lighter because of the sun. This creates an interesting factor by preventing it from making the image dull and boring with one shade and tone. The trees stop poking out of the mist half way through the background which creates mystery as we do not know what is underneath however we assume there is trees. To prevent this image from being dull he uses a range of grey shades from the zone system. This image also contains different textures from the mist to the trees and mountains which shows HDR high dynamic range.
MY PHOTOSHOOT PLAN
Within my images I want to create a HDR image so it obtains all detail and shades to create an interesting factor.
What are HDR photos?
When taking a single-exposure photo, you might notice that the scene’s dynamic range is too wide for your camera. In other words, your camera doesn’t capture all the detail in one frame.
For example, suppose you are photographing an object in sunlight. In this case, the brightest elements will appear glaring white, and you will lose the details of these elements.
Similarly, when taking a photo of a person in front of a bright background, your camera might capture your subject as a flat shadow with no detail.
HDR stands for high dynamic range. This function increases your camera’s dynamic range to pick up detail in the shadow and the light elements of a frame.
HDR processing involves taking multiple images and capturing the same scene at different exposure values. Then, you need to merge these images using high-end photo editing software such as Adobe Lightroom
The result is an image with visible detail in its lightest and darkest elements, making it appear more natural to the human eye.
I would successfully execute by adjusting my camera settings- I would control my camera’s aperture while my camera automatically adjusts the shutter speed.
I would adjust my ISO setting as it determines your camera’s light sensitivity. Choose the lowest possible setting to ensure that your images are not grainy.
Select the correct aperature- In landscape photography, a narrow aperture of f/11 or higher is ideal. All your subjects will be in focus at these aperture settings, even at varying distances.
Adjust the correct exposure levels for my specific images- Most photographers take three shots at exposure values of -3, 0, and +3. A negative value results in a darker exposure, and a positive exposure is brighter.
A camera with an auto exposure bracketing (AEB) function can automatically take multiple photos at varying exposure levels.
After I have adjusted my camera correctly and experimented by taking photos. I can merge all 3 images with 3 different exposure levels to create an HDR image in Adobe Lightroom. If I am not happy with my final result I can continue to edit them in Lightroom.
My Example/ Not final Products
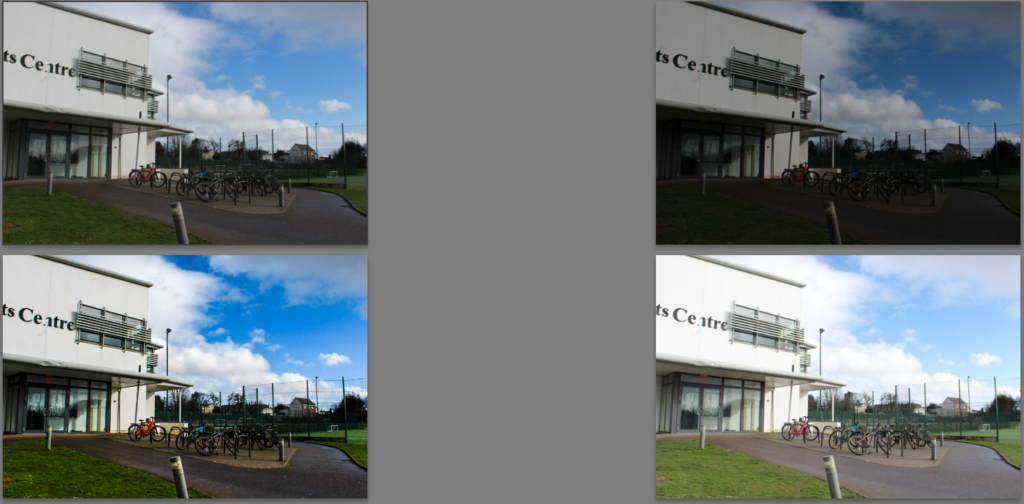
As shown, there are 3 different images with different exposure and saturated levels and with one extra image which all 3 have merged to create.
Within this image it shows what has been merged together using red highlights. I selected the ‘high’ DE ghost amount as it was personally my preferred out of all the options and it obtains the most noticeable exposure levels without it making it to grainy which I personally like as it creates an interesting factor to the human eye.
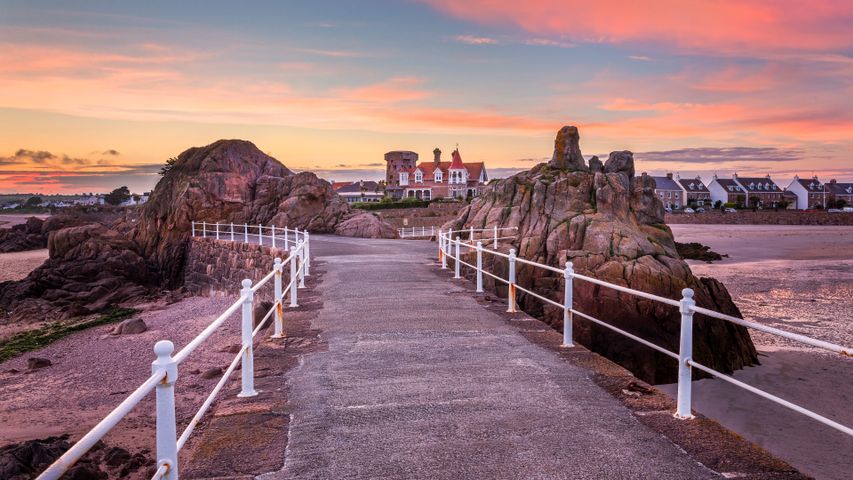
Now, I will do the same method and take landscapes related to Romanticism and try to use the zone system like Ansel Adams.