Naoya Hatakeyama’s work portrays human intervention with landscapes of the world with and natural materials e.g. the life of cities and the built environment. His work mostly encircles the topics of nature, the city and photography.
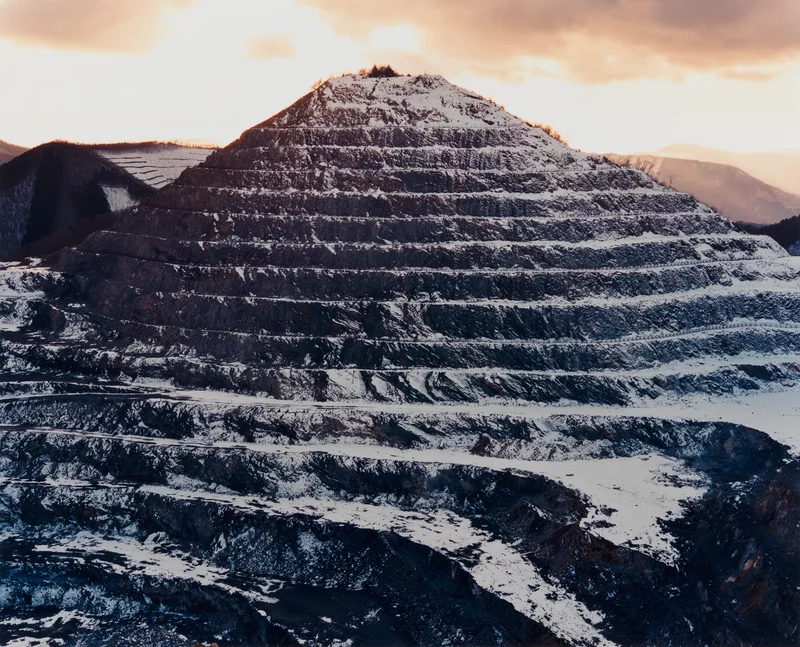
His first proper piece of work was Lime Hills- which was a collection of images of limestone quarries throughout Japan. He described the experience as “my appreciation of its cityscapes underwent a subtle change.” due to the fact he came to realisation that Japan was a land of limestones. These are some photos of his limestone photographs from 1986-1990
My Favourites and Why.
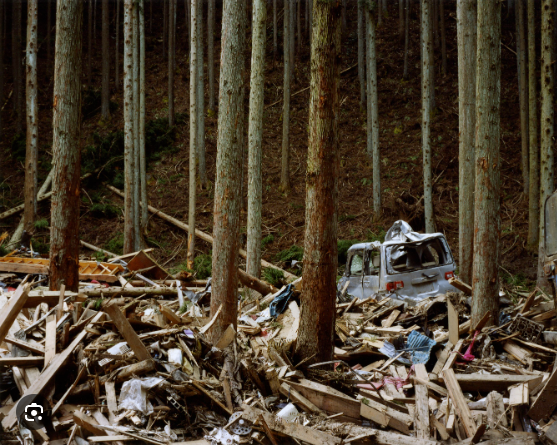
I particularly like this photo of Yonesakisho-Donomae which was taken in 2011, this captures the havoc that was caused by The Great East Japan earthquake, and was recorded as the largest ever earthquake in the country. This earthquake killed 20,000 people and causes 10,000 people to be homeless, I feel this is particularly inspiring as Hatakeyama’s photograph captures a completely submerged home, surrounded by waste and wood, this shows the severity of the situation and shows a direct approach on how it affected the residents lives. There is also a boat of people (4), who are seen to be travelling across the wreckage, they could possibly be looking for people, transporting or seeing the damage that has been caused.
URBAN LANDSCAPES PHOTOSHOOT.
Potential Locations to Photograph.
Front doors on the street
Cracks in the pavement
Puddles with bright reflections
Fences and walls
Stairs
Colours of all the cars in the supermarket car park
“The question ‘is this a work of art or not?’ is not very interesting for us.” – BERND AND HILLA BECHER
Bernd And Hilla Becher are a husband and wife duo from Germany who decided to photograph architectural forms which they named “anonymous sculptures”. They photographs many structures such as:
Water towers
Coal silos
Blast furnaces
Lime kilns
Grain elevators
Preparation plants
Oil refineries
Coal bunkers
Winding towers
Breakers (ore, coal, stone)
Steel mills
Factory facades
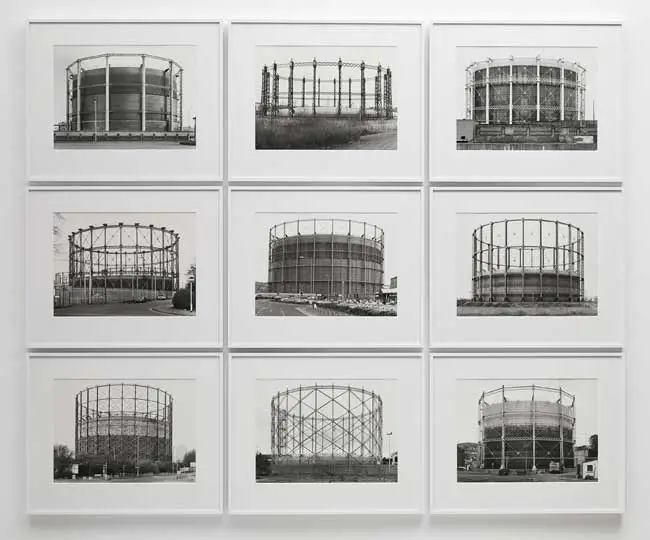
They named their works ‘typologies’ which represented their collections of grouped images in small symmetrical squares. They categorized these photos by the buildings functions. An example of their signature image of smaller photographs which have been grouped together:
Their work can be seen as conceptual art, and took place over course of 40 years. Their chapters all contributed to different structures and were all organised due to typologies and are laid out into 12 images into a uniform arrangement. There is over 1500 different images,, and they have received many famous awards such as:
The Golden Lion
-The 1990 Venice Biennal
The 2002 Erasmus Award
I find Bernd and Hilla Becher’s particularly interesting because their work is most definitely minimal and conceptual, which sets their work aside from other artists, as they focus on one main object taking up the majority of the picture, rather than multiple objects being the subject of a photo.
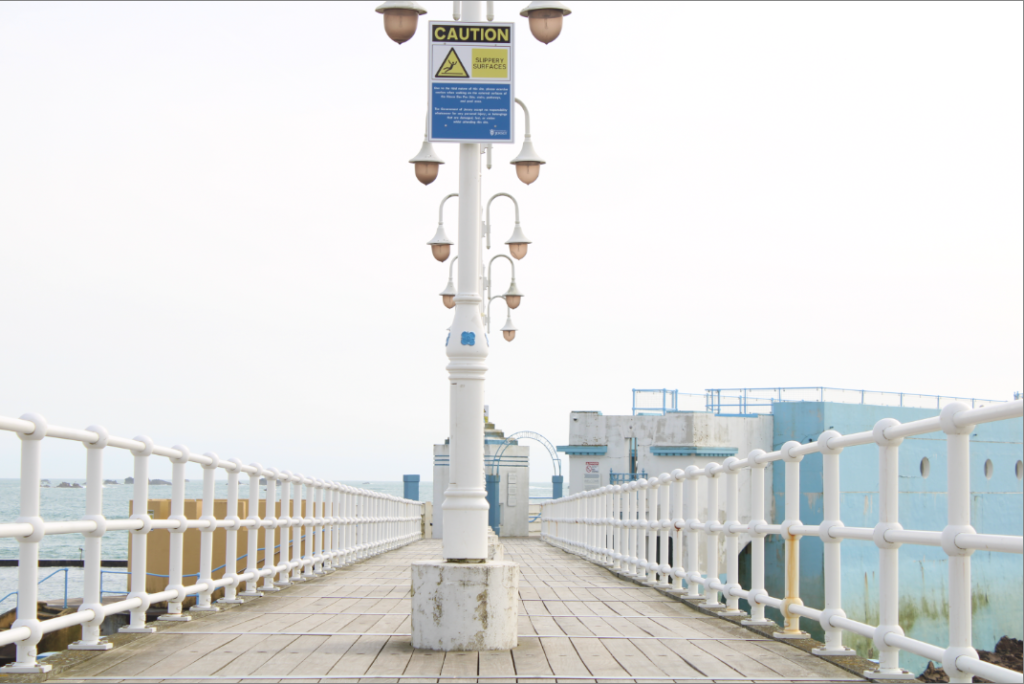
For the first photoshoot, the class took a trip to Harve des Pas, as the environment was fitting for the topographical theme.
We spent an hour walking around the coast line finding things to take photos off which included the bay and the swimming pool and even managed to get photos of some a textured, almost broken wall to just give a variety.
These are the photos I got on the trip ( after I deleted the photos that were blurry etc. ) They consist of photos of the wider landscape and some buildings and different structures that vary from timelines, I also got some photos of the industrial side of Harve Des Pas, around La Collette.
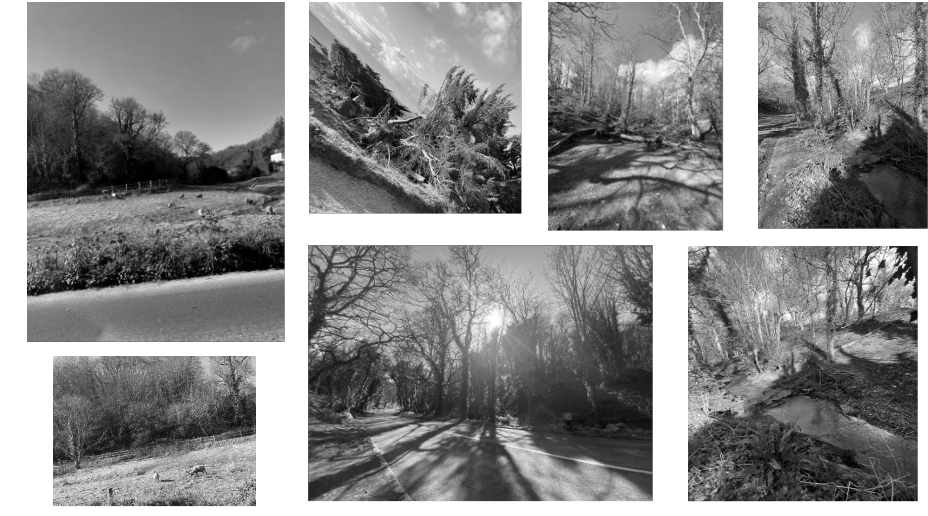
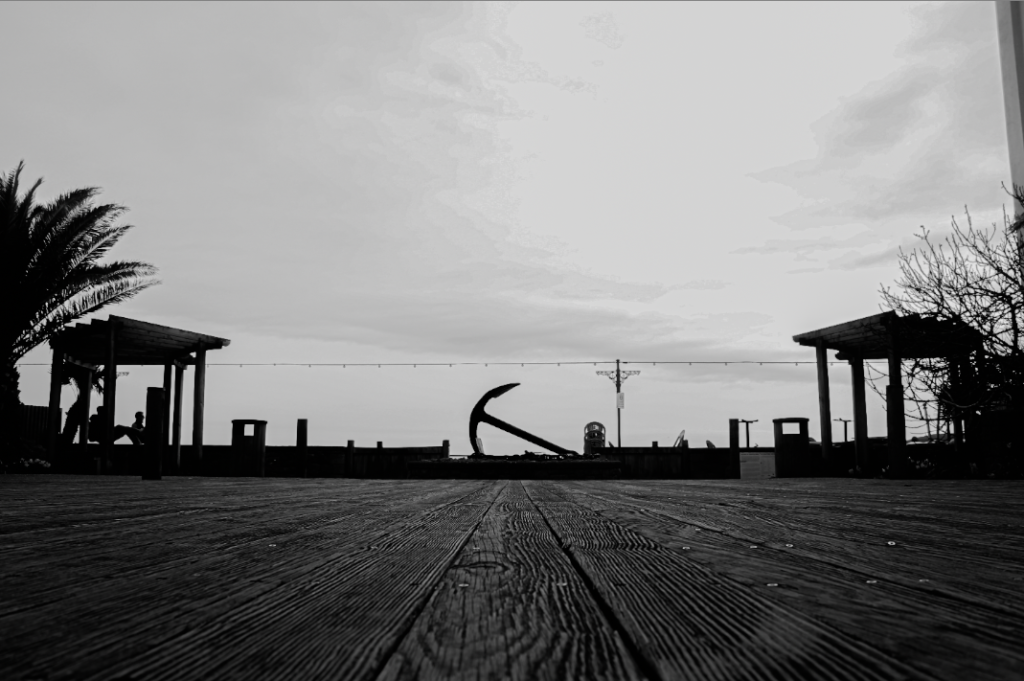
Black and white edits –
I wanted to add a black and white approach to some of my photos to almost give a worn and vintage look to them.
I thought that in the first photo in particular, the inclusion of different buildings from different eras of time the vintage look would be very impactful for the theme of the photo.
In the beginning I decided to just put a black and white film over the top to give me a base to work with, then I played around with the contrast and highlights to deepen the shadows and contrast between the highlights.
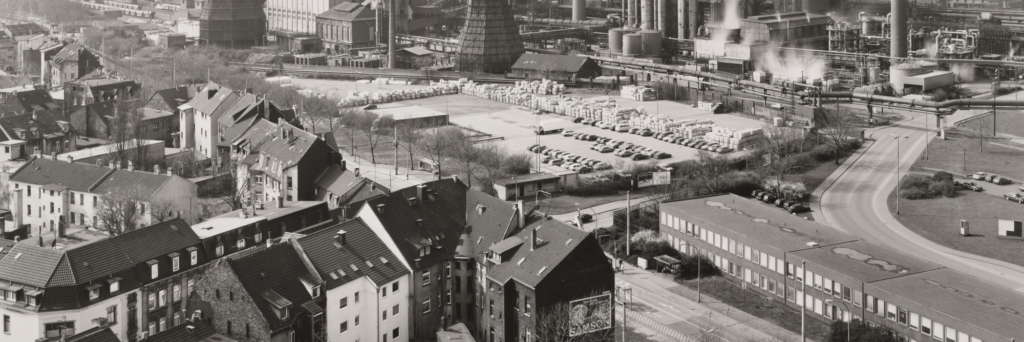
I thought that this photo would be complimented well in black and white because of the industrial architecture, I thought that the use of black and white could enhance the dark colours and the highlights.
I put a simple black and white film over the photo to start, then I enhanced the highlights so that the photo didn’t look so dark and was clearer. I wanted to keep some of the shadows throughout the original photo so after enhancing the highlights I played around with the shadows to see what fit best and landed on keeping them pretty subtle.
With this photo, the structure ( the pool ) was built in the late 1800’s before WW1 which was just after the first colour photo was made so I wanted to make it black and white for almost nostalgic purposes.
I turned the contrast up and highlights too to make the photo as bright as I could without it looking light a white photo. To almost give a vintage look I focused on the texture of the photo too and enhancing that to make it look genuinely older.
moonlight – substance abuse can ruin relationships close to you
joker – society doesn’t do enough to support less fortunate ‘poorer’ people so they can put themselves and others in danger and go to extreme lengths to get where they want to be
Born: February 20th, 1902, Western Addition, San Francisco, California, United States
Died: April 22nd, 1984 (age 82 ), Bariatric Surgery Center at Community Hospital of the Monterey Peninsula, Monterey, California, United States
How did he begin photography and what did he do after?
Ansel Adams was given a camera at 12 when he first visited the Yosemite national park where he admired the beautiful valley, at age 17 he joined the sierra club which is an American environmental organization with chapters in all 50 U.S. states, In 1927, Adams participated in the Club’s annual outing, known as the High Trip, and, the next year, he became the Club’s official trip photographer. In 1930 he became assistant manager of the outings which consisted of month-long excursions of up to 200 people.
In 1934, Adams was elected as a member of the Board of Directors of the Sierra Club, a role he maintained for 37 years. Then he made a big book of photos of the national park in the Kings River region of the Sierra Nevada. Adam then was lobbying congress for a Kings Canyon National Park. he had to keep persuading congress to not change the waterfall into a power dam and make it protected instead.
In 1968 Adams was awarded the Conservation Service Award, the Interior Department’s highest civilian honor, “in recognition of your many years of distinguished work as a photographer, artist, interpreter and conservationist, a role in which your efforts have been of profound importance in the conservation of our great natural resources.”
In 1980 Adams received the Presidential Medal of Freedom, for “his efforts to preserve this country’s wild and scenic areas, both on film and on earth. Drawn to the beauty of nature’s monuments, he is regarded by environmentalists as a national institution.”
His 5 photo techniques
1. “You don’t take a photograph, you make it“
Ansel Adams is famous for his “zone system” — a complicated method of making the “perfect” monochromatic print.
Ansel would say this a lot because he believed that it wasn’t just about clicking the shutter it was spending hours in a dark room developing and editing to make it how he visualised.
2. Know where to stand
“A good photograph is knowing where to stand.” – Ansel Adams
In landscape photography, position is everything. Where you are situated in respect to your landscape, will determine your perspective, the mood of the photograph, as well as the composition.
By moving your feet and getting a better position, you will create more unique and creative images. Not only that, but practice crouching, moving to the left, to the right, and sometimes even your tippy-toes. Try to hike to get very high perspectives, and sometimes lie on your stomach or back to get very low perspectives.
3. Photograph how it feels (not how it looks)
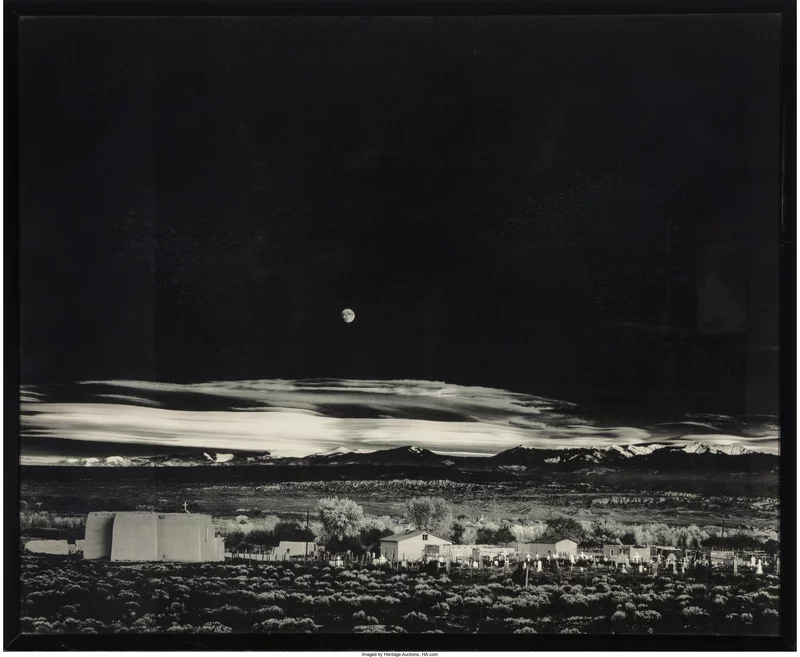
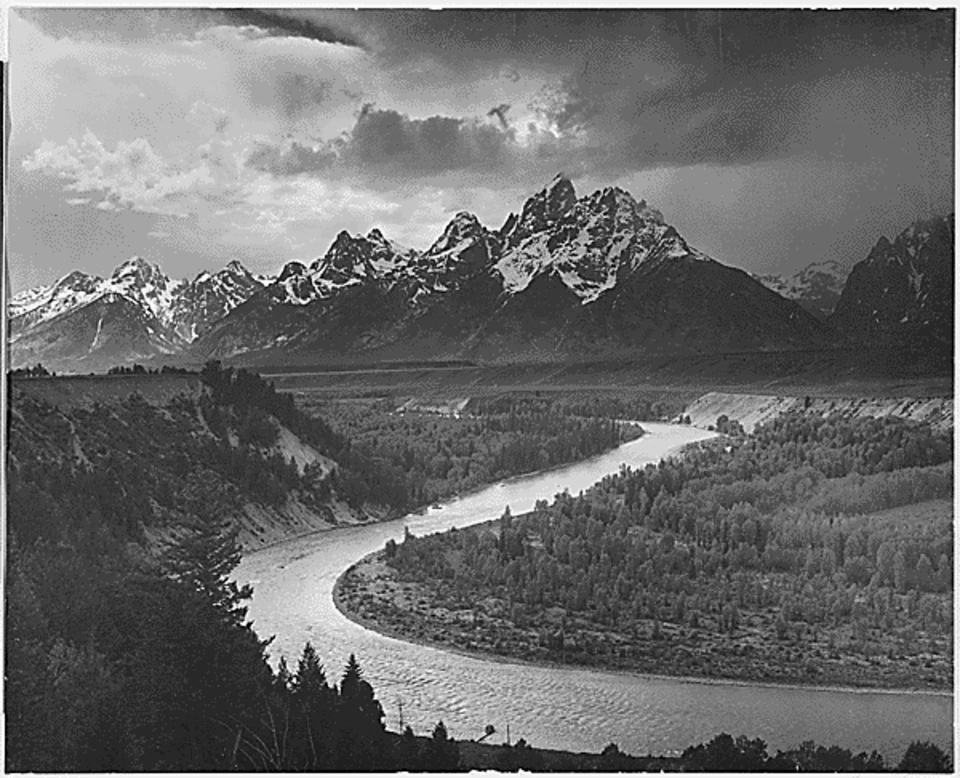
we want to make more effective images, we should focus on photographing how a scene feels— not how it looks. Ansel Adams tells why he decided to photograph his famous image, “Moonrise, Hernandez, New Mexico” shot with an extremely dark sky:
“My Moonrise, Hernandez, New Mexico has the emotion and the feeling that the experience of seeing the actual moonrise created in me, but it is not at all realistic. Merely clicking the camera and making a simple print from the negative would have created a wholly different–and ordinary–photograph. People have asked me why the sky is so dark, thinking exactly in terms of the literal. But the dark sky is how it felt.” – Ansel Adams
We can create a certain emotion or feeling in our photos by different methods and techniques. If we are photographing landscapes, we should look for the light, mist, smoke, fog, or other natural splendors. And the way we post-process our photos afterwards will change the emotion dramatically.
4. Pre-visualize your photos
“In my mind’s eye, I am visualizing how a particular revelation of sight and feeling will appear on a print. If I am looking at you, I can continue to see you as a person, but I am also in the habit of shifting from that consciously dimensional presence to a photograph, relating you in your surroundings to an image in my mind. If what I see in my mind excites me, there is a good chance it will make a good photograph. It is an intuitive sense and also an ability that comes from a lot of practice. Some people never can get it.” – Ansel Adams
To become a better photographer is to better-translate what you see in real life, and make it appear in a photograph.
This happens by improving your composition, understanding your technical settings, understanding your camera, and also knowing where to stand, when to click, and how to post-processing your photos.
5.Ignore critics
No matter what, you can never please 100% of your audience with your photography. In-fact, I think becoming a good photographer is to not compromise your vision. The more innovative you are in your photography, the more people you are going to confuse, frustrate, and alienate.
In this photoshoot, I mainly focused on the urban area around Havre des Pas beach as I thought this could link really well to New Topographics. I also tried to include photos of man-made structures vs nature to show the difference and development between the two. It was very interesting seeing the contrast between the older, traditional houses compared to the newly-built, modern ones. I was very much inspired by Robert Adams and his photography, and I tried to use his work to influence mine.
MY PHOTOSHOOT:
MY BEST IMAGES:
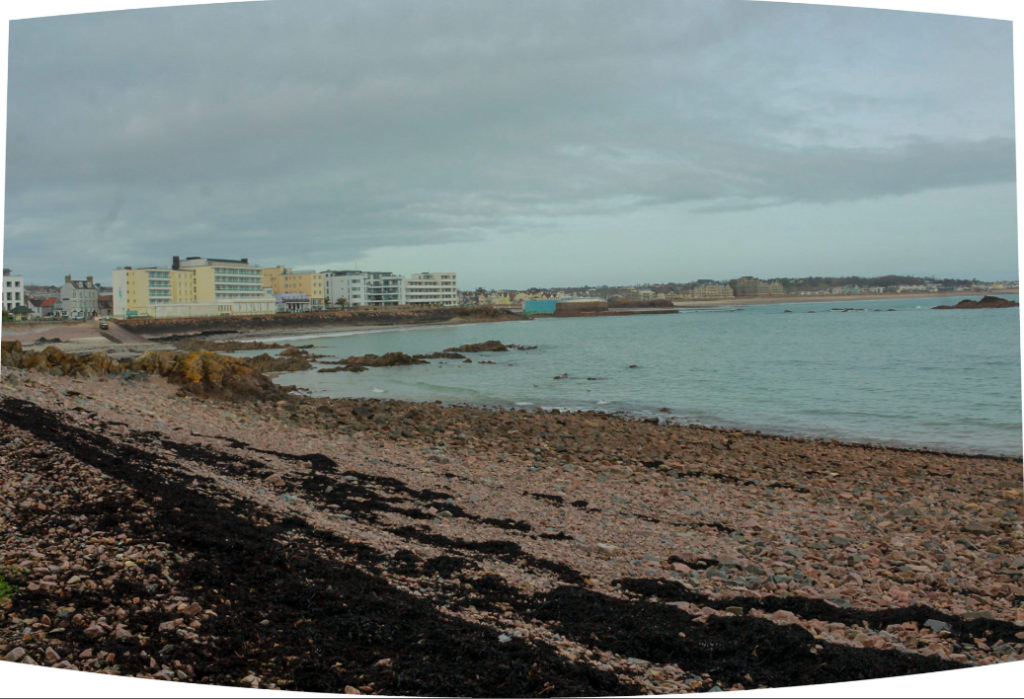
All of these following images are my final outcomes of the topic ‘New Topographics’. I edited them using Lightroom Classic, and I think they were all very successful. My favourite edited image is the last one, because I really like the dramatic detailing of the rocks and also, how the clouds have been exaggerated to look as if they’re looming over the beach. The clouds have been edited to make them look emphasised, as if they are storm clouds, which creates emotion within the image and towards the viewer. I have edited all of these images similarly to each other to make sure all of the photographs hold the same amount of feeling, and they present the natural world in a straightforward, realistic way.
ORIGINAL VS EDITED:
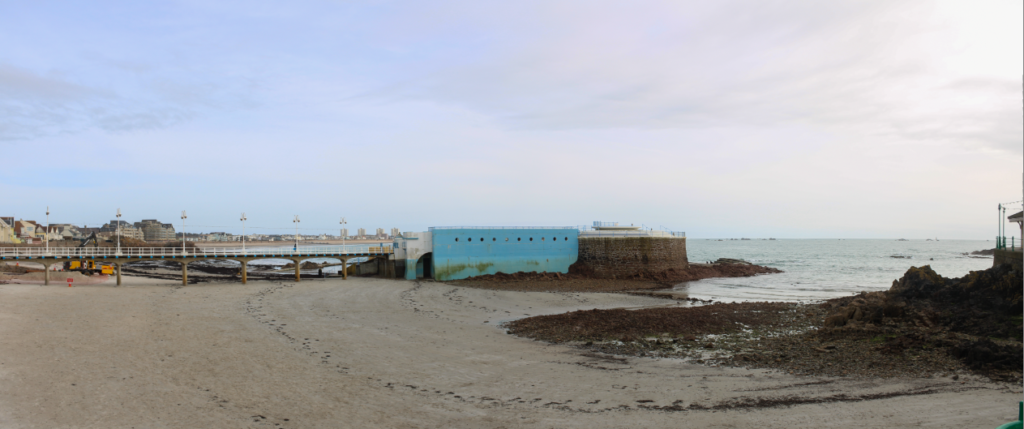
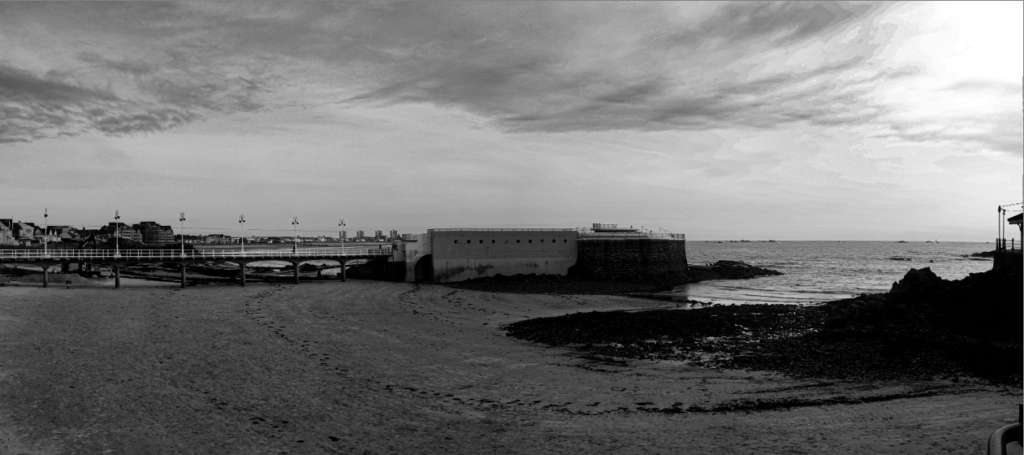
PANORAMIC PHOTO EDIT:
I tried to make a panoramic edit by merging 3 similar photos together, which then resulted in a panoramic-like image. I think this was very successful, and it’s a new way of exploring landscapes through different ways of presenting them. This is a good way of presenting landscapes because it includes all 3 images into 1, therefore it’s unique yet detailed. I carried on to edit this image to make it black and white, which links it back to New Topographics.
Ansel Adams was an important and iconic landscape photographer based in California.
He used his work to help increase the acceptance of photography by helping create the curatorial department of photography as an art, at the museum of modern art in New York. He also helped establish the San Francisco art institute which had the first ever department that taught photography.
He started off his career as a pictorialist but transitioned into pure/straight photography.
Most of Ansel Adams photos are based in the Yosemite National Park California, which is home to the Sierra Nevada Mountain range. His love for the National park and nature started in 1916 when Ansel Adams was a child and visited the Sierra Nevada on a family vacation. After this initial visit he started visiting the mountains annually and spent a great amount of his life there.
When Ansel was 17 he took on a Job as a custodian for the Sierra club’s headquarters in the national park. Eight years later in 1927, Ansel’s passion for photography grew as well as prescience in the Sierra Club. He started going on outings with the club and quickly became the club’s official photographer and in 1930 became the assistant manager for the club’s outings.
Ansel Adams even said his life was “colored and modulated by the great earth gesture of the Yosemite Sierra” which shows that is had a great influence on his life.
Group f/64
In 1932 Pictorialism was the dominant style of photography where photos were made to look more like paintings by focusing on tone and composition as well as using soft focus lenses.
Ansel Adams wanted photography to be more pure and less arty by creating photos with a high contrast and a sharp focus rather than a soft focus. This was known as pure/straight photography.
So Ansel Adams formed Group f/64 and consisted of eleven group photographers all wanting to create pure/straight photography and to make it the dominant form of photography.
The f/64 group members were:
Ansel Adams
Alma Lavenson
Brett Weston
Consuelo Kanaga
Edward Weston
Henry Swift
Imogen Cunningham
John Paul Edwards
Preston Holder
Sonya Noskowiak
Willard Van Dyke
Why was the group named group f/64?
Back when the group was formed in 1932, the only cameras they had were called ‘Large format cameras’ and the smallest apertures the cameras had was f/64.
The group was named after this, as the f/64 depth of field was the best at the time for those cameras, and gave the images a sharp focus, making the photos look more pure/real, which links back to the groups aims of creating pure/straight photography.
The zone system
The zone system was developed by Ansel Adams and Fred archer, who was a portrait photographer who collaborated with Ansel to create the zone system, while they were both teaching photography at the art centre collage of design in Los Angeles.
Ansel Adams described the zone system as “A codification of the principles of sensitometry, worked out by Fred Archer and myself at the Art Centre School in Los Angeles”
The zone system was used to visualise different tonal values so they would be in a photo, leading to a higher contrast. It divides tonal range into 10 zones with 0 being black 5 being grey and 10 being white.
Ansel Adams + Romanticism
Ansel Adams’s work can be linked to the genre of romanticism as it has similar properties to romanticism art and photography, such as the focus on nature and its beauty. Ansel’s photos can also be linked to the sublime which is a key topic in romanticism. This is because his photos create awe by the beauty of the natural wilderness but also unease by how vast it is and how small we are compared to it e.g. the valley/mountains.
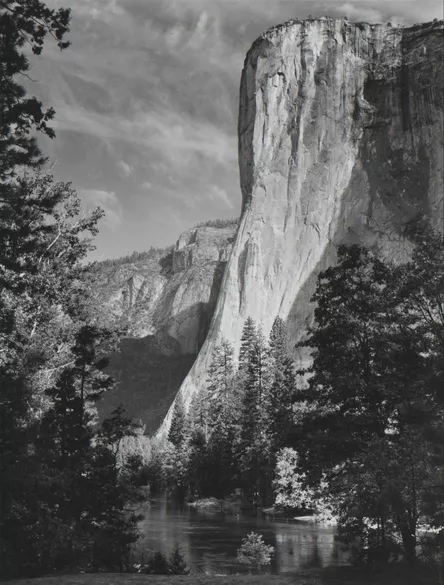
The Lighting used in the photo uses completely natural light and has a wide contrast as a result. The photo has a good exposure due to Ansel creating a high dynamic range. The photo also has a large Depth of Filed as the photo contains no blurring and has a sharp focus which Ansel wanted his photos to have.
The photo is taken in Black & White, hence having no colour, however it has a large tonal range, which creates depth, due to Ansel Adams using the zone system. The mountains in the photo are incredibly rocky and as a result it gives the photo a rough texture. However, because the photo is taken high up the trees in the bottom right look small and the leaves give that area a soft/softer texture, which contrasts with the rest of the photo.
The mountains in the background give the photo a triangular shape. This is due to the diagonal lines caused by the edges of the mountains, which form triangular shapes. In the foreground the rocks look three dimensional due to the shades of black and white created by the tone and the rough texture. This combination of tone and texture of the rocks in the foreground give them depth.
This photo was taken of the mountains in the Yosemite national park in California by Ansel Adams. The photo could be linked with romanticism and the sublime as the photo focuses on nature, giving it a sense of awe and beauty, but also a sense of unease due to the large scale of the mountains.
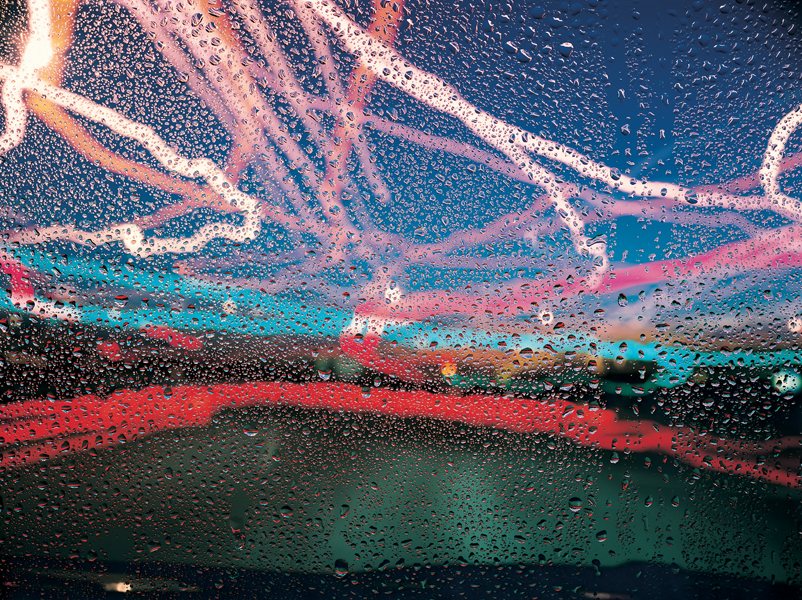
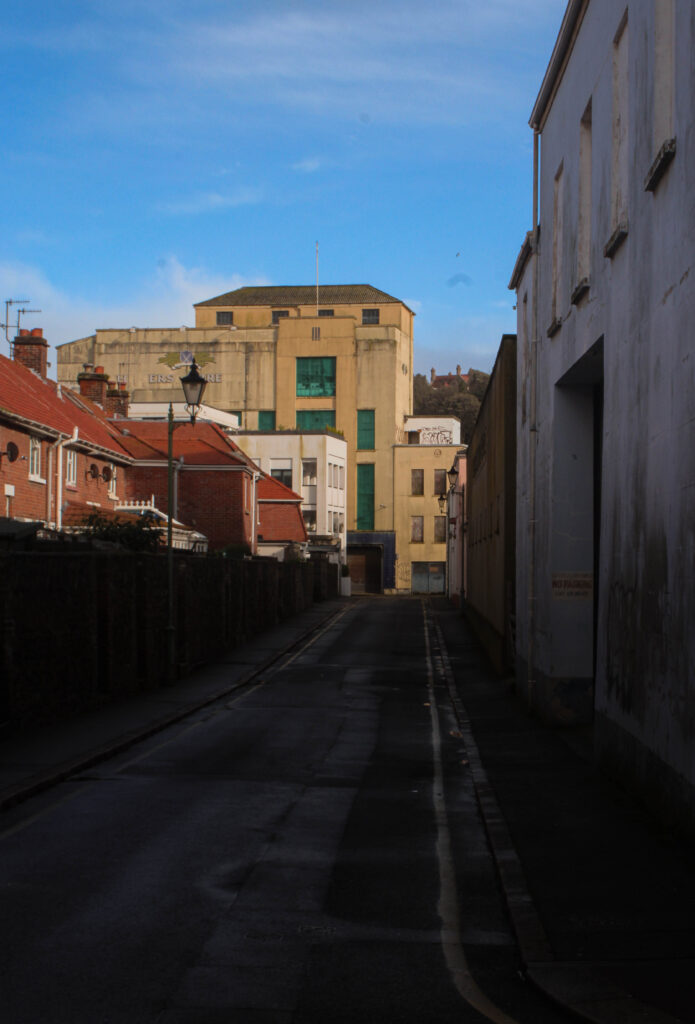
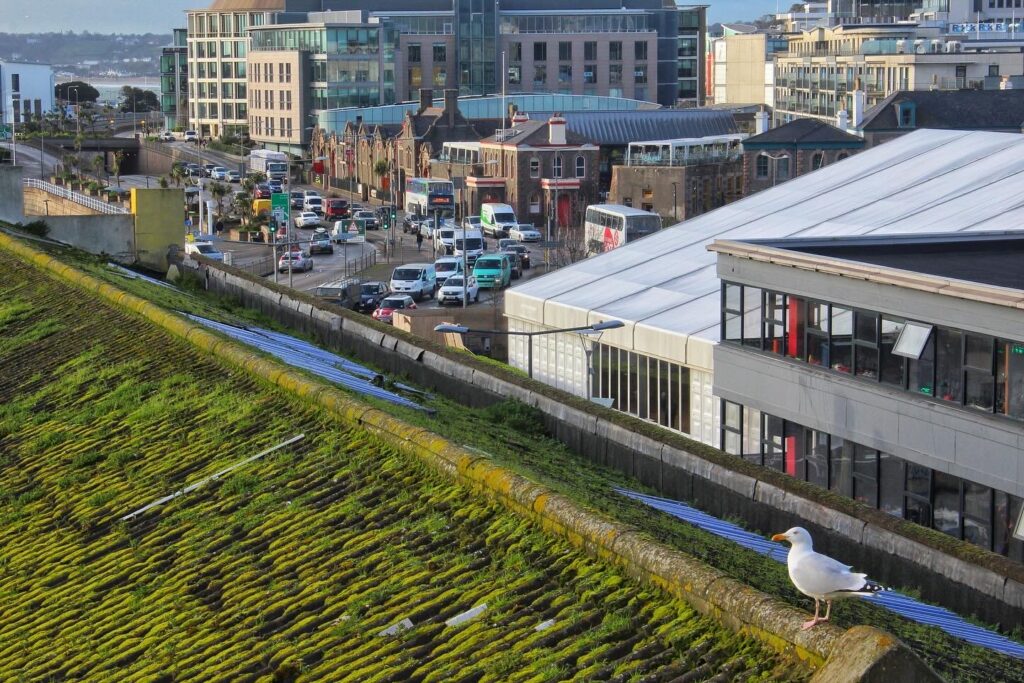
For this photograph, I used highlights, temp ands hue to make the colours pop out more, with a vibrant mixture of colour, Blue, Orange these help bring the viewers attention from the darkened alleyway.
Final Result:
Before:
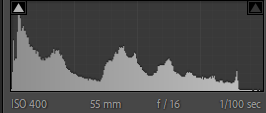
First Edits:
Due to the lack of colour in the buildings stretching across the landscape, I decided to make it into black and white to create a visual contrast between their tones.
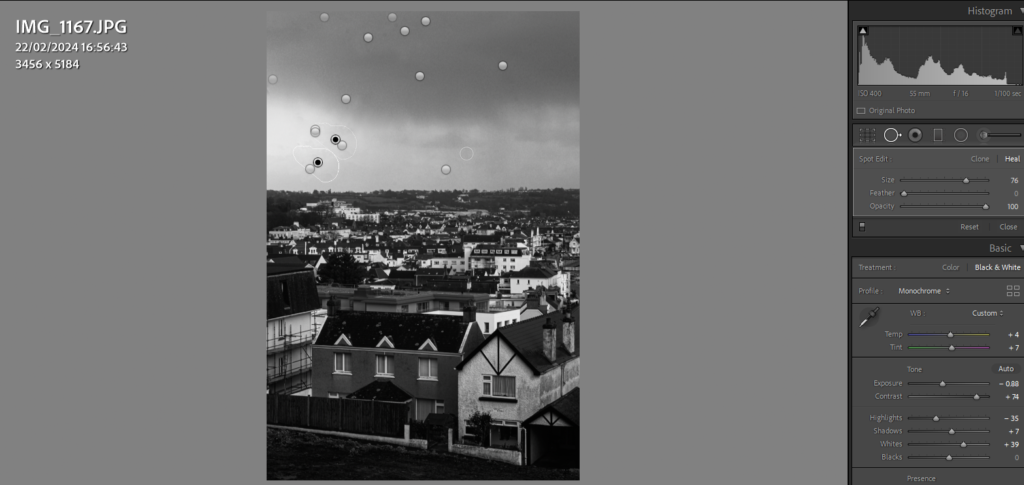
Final Result:
Mobile Edits:
These Edits have been made on the App, Snapseed, Using their features of filters, and adjustment settings, similar to Lightroom I altered with the exposure, White & Black balance and other settings to improve them further.
Photoshoot 2:
Before:
First Edits:
For this image, I was Inspired from the works of Lewis Baltz, With his dead-pan shots of purpose built environments I believe I have captured that in this image, by adjusting the exposure, contrast and the WB balance I was able to create, what I think is a similar image to his work.
Final Results:
Before:
First Edits:
Like the previous image, I took inspiration from Lewis Baltz as well as Robert Adams. With Lewis Baltz’s restricted shot angle and as a conceptual basis of housing being photographed due to an increasing population which I believe fits the topic of New Topographics. Using the WB balance, contrast and highlights this is what created that dramatic tonal difference from black windows to the flat white walls.
Final Results:
Before:
First Edits:
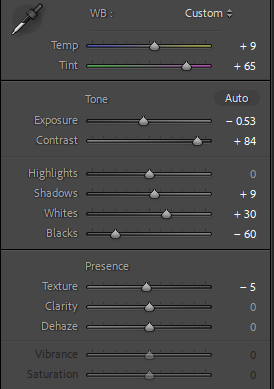
Having the same conceptual basis of Lewis Baltz, the empty, dystopian sense of his images of industrial areas on a grandeur scale. Using tone setting such as highlights, shadow and whites and blacks I was able to create a shiny effect on the sun surfaced part of the building and big tanker.
Final Results:
Before:
First Edits:
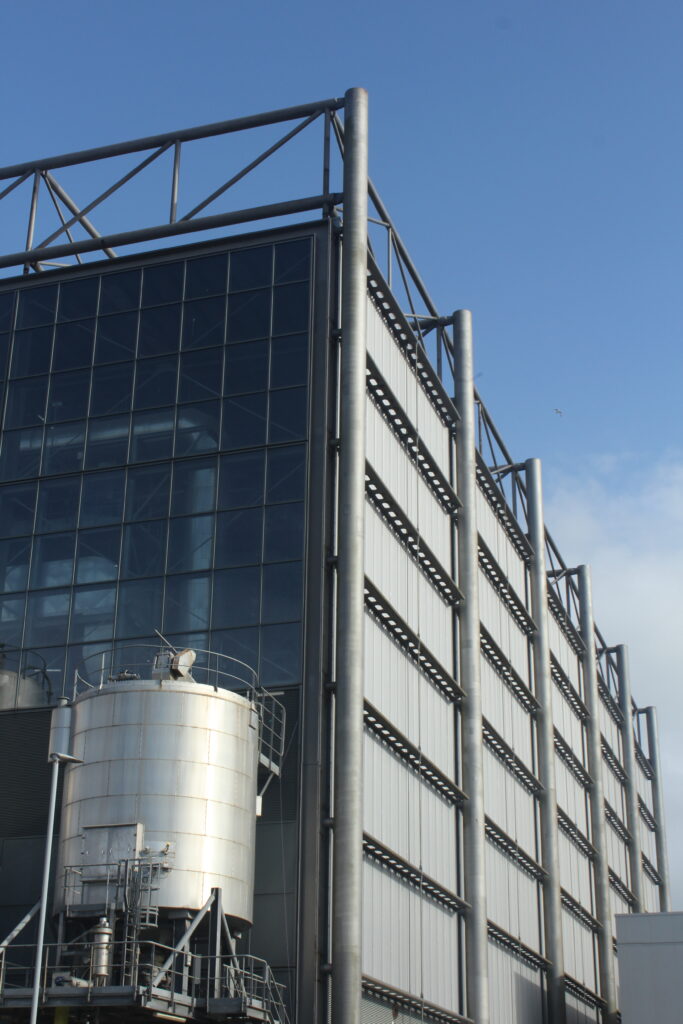
Inspired by the works of a New Topographics photographer, Kieran Gosney, who I didn’t mention in my art reference, he photographs large industrial structures similarly to this one.
By altering the dramatic tones of the whites and blacks in the image, this is how I created the dramatic sky behind the brutalist tower. Like the previous image, I used contrast to have that shiny effect on the metal structure of the towers support beams.
(Kieran Gosney’s work)
Final Results:
Before:
First Edits:
By turning down the saturation entirely and highlighting the tone of the black and white parts of the buildings this adds much more volume to their architectural features as prior to being edited their colours are quite faded and muted.
Final Results:
Before:
First Edits:
Specifically inspired by this image of the New Industrial parks by Lewis Baltz, the use of space within the photograph shows the dystopian emptiness of industrial areas. In my image I feel I replicated that conceptual idea through capturing a large empty are where no people are in sight (despite the car).
Using effects such as contrast and tonal features like shadows I was able to create a deeper feeling to the image of the sites vast size, to further express this I also increased the clarity.