I took a series of images focusing on the damages around the island from Storm Ciaran however I also took images that involved Romanticism and the Sublime.
My Inspiration from the Storm:
Photoshoot:
I focused on the area of St Clements for my photoshoot as it was one of the areas in Jersey that was affected the most severely therefore it would still have damage and debris around.
Photoshoot 1 best images:
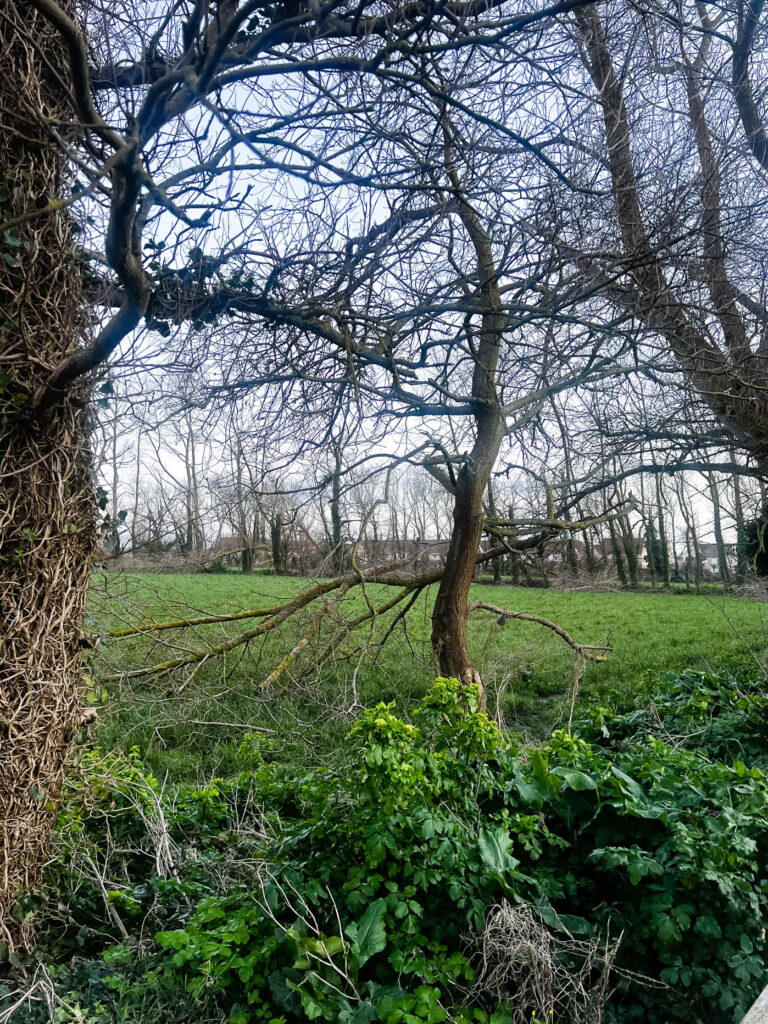
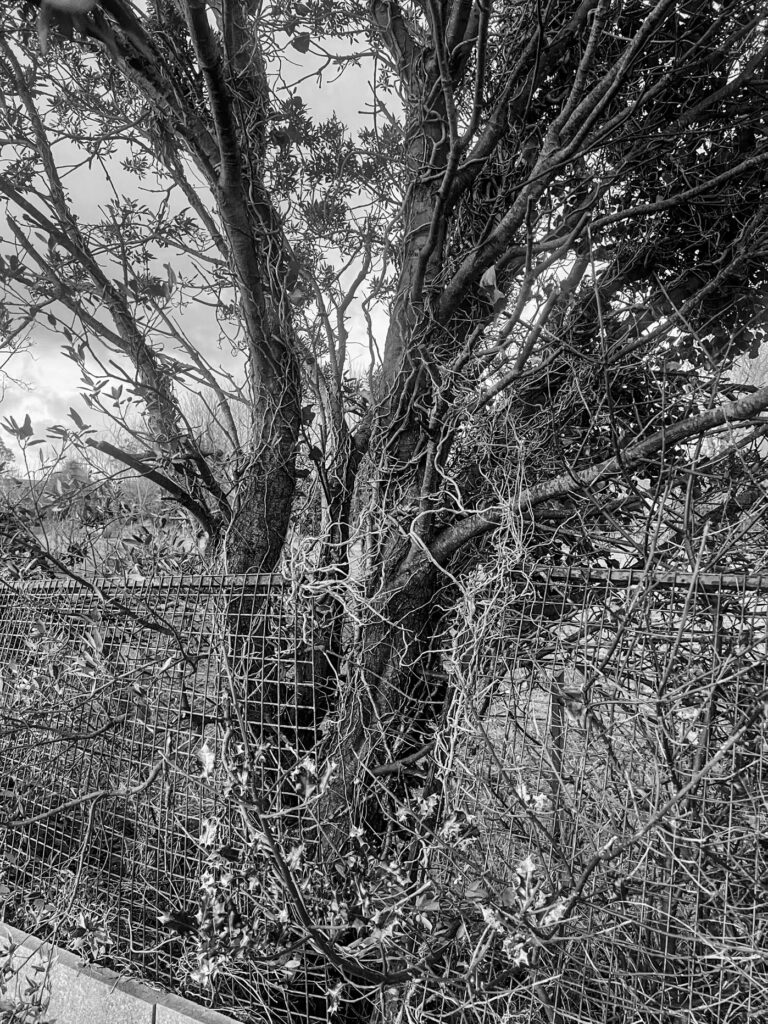
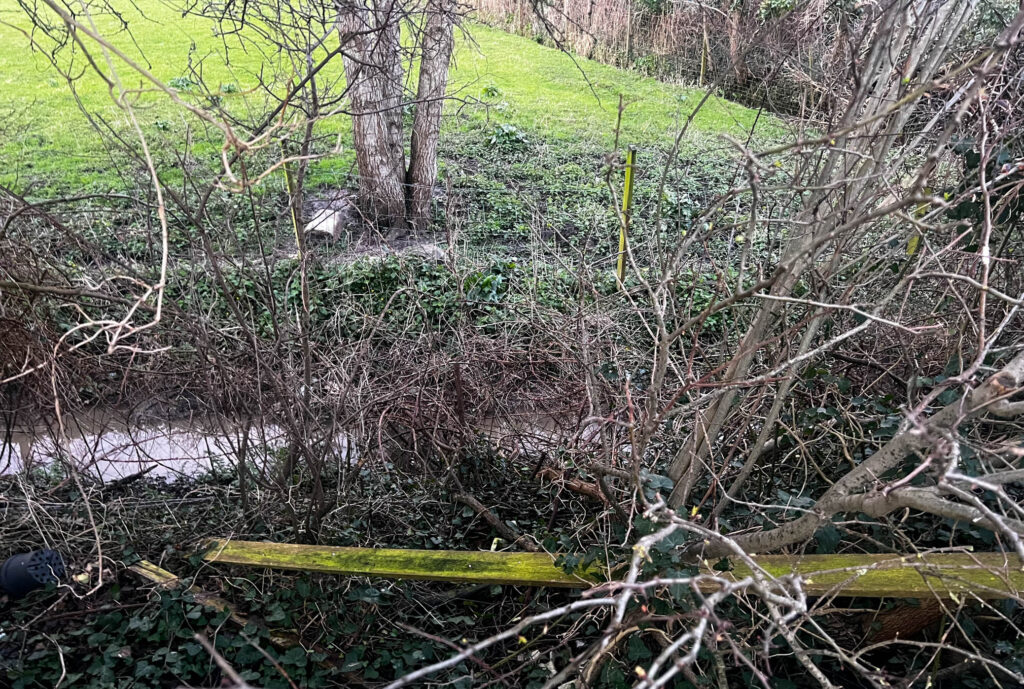
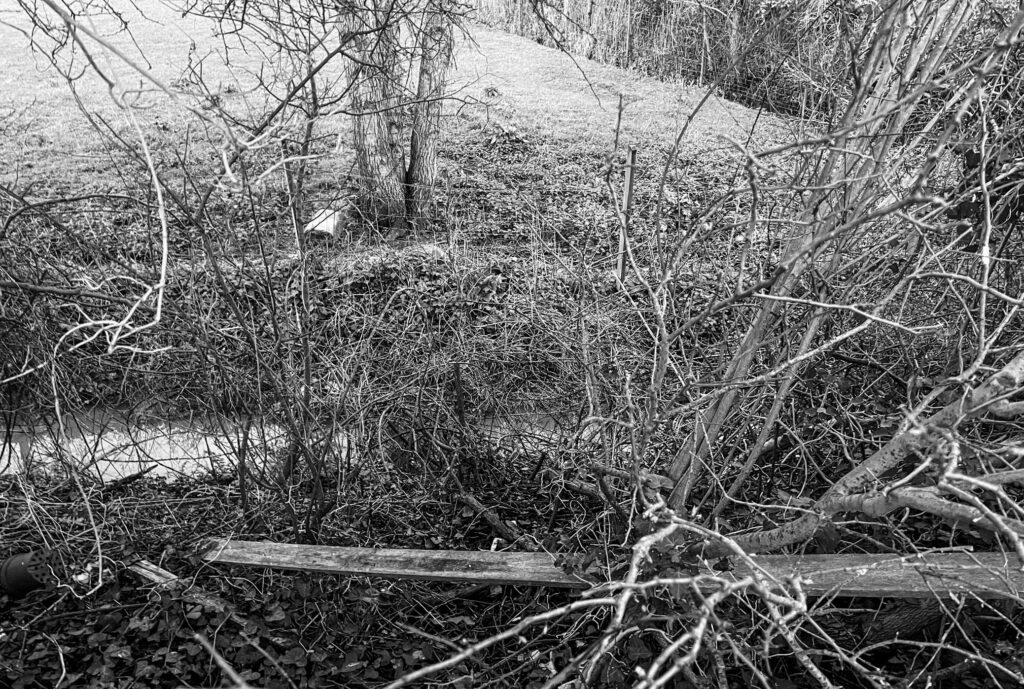
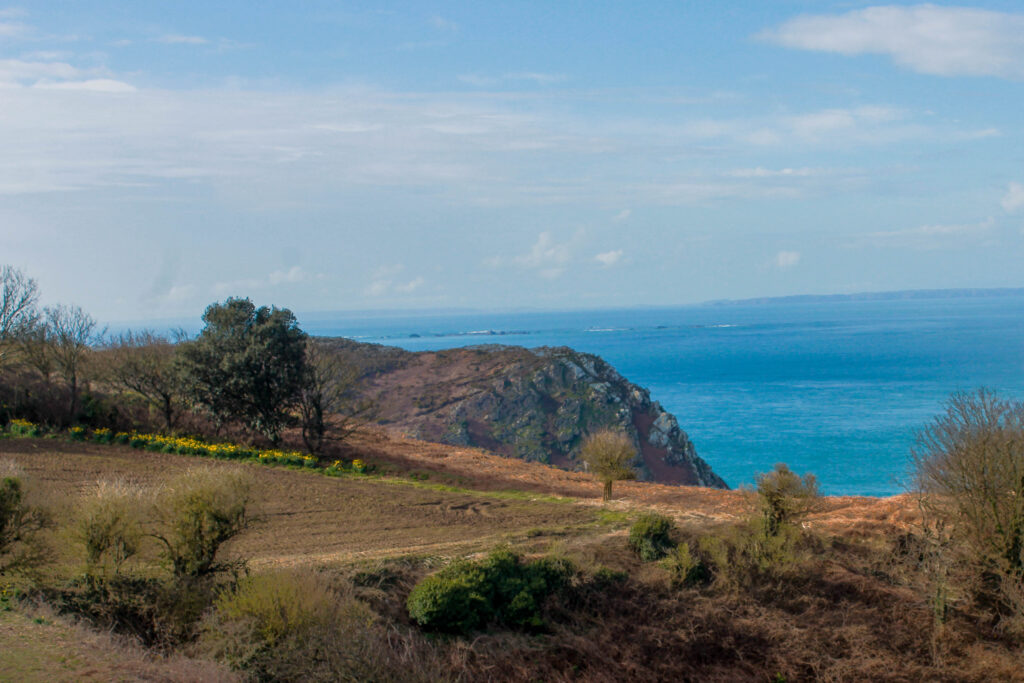
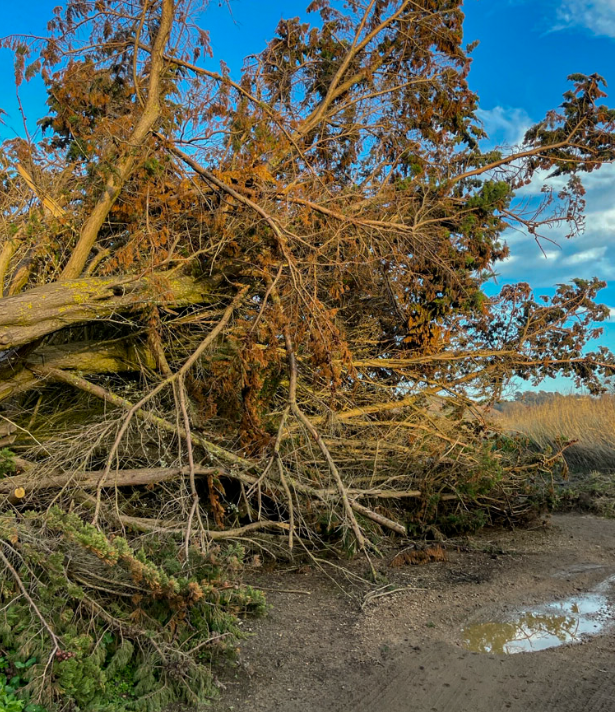
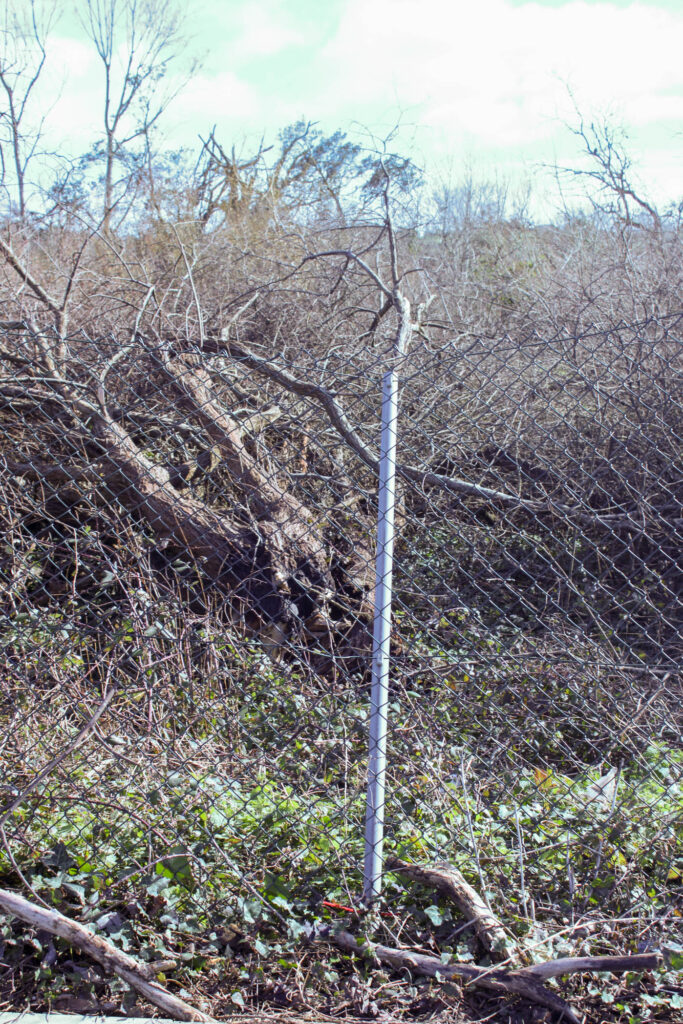
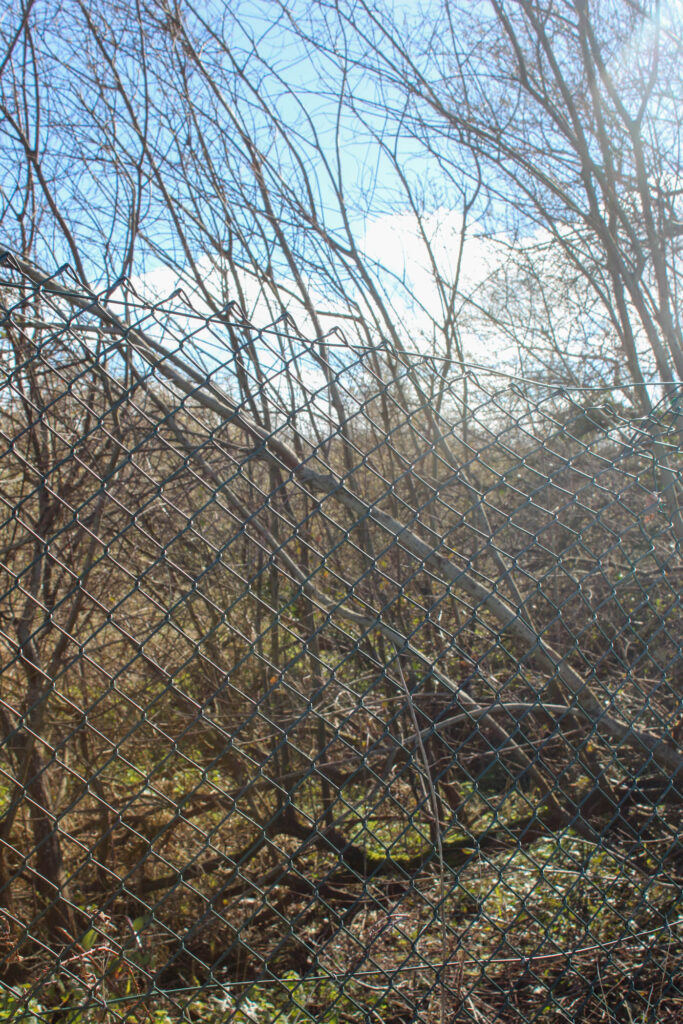
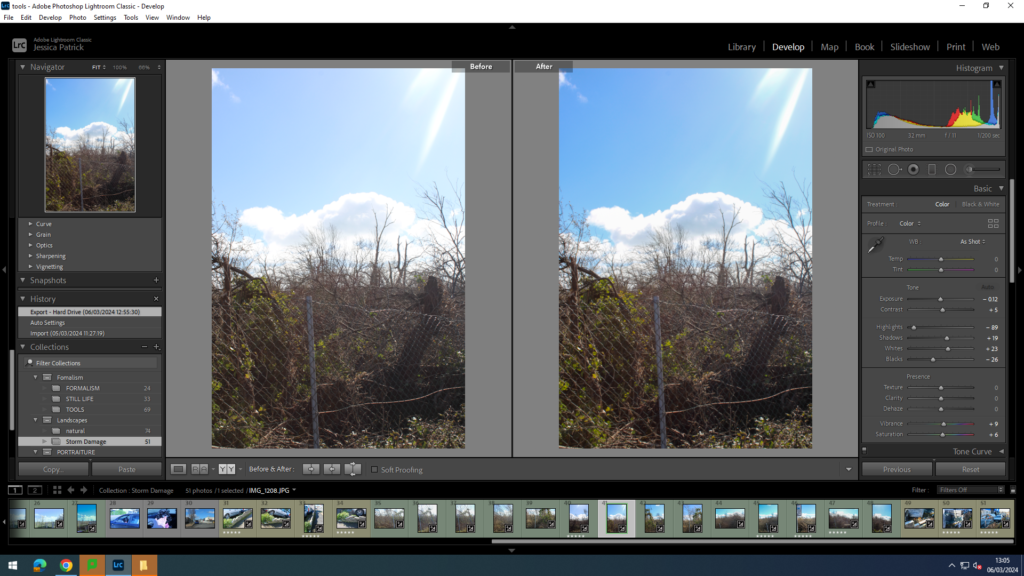
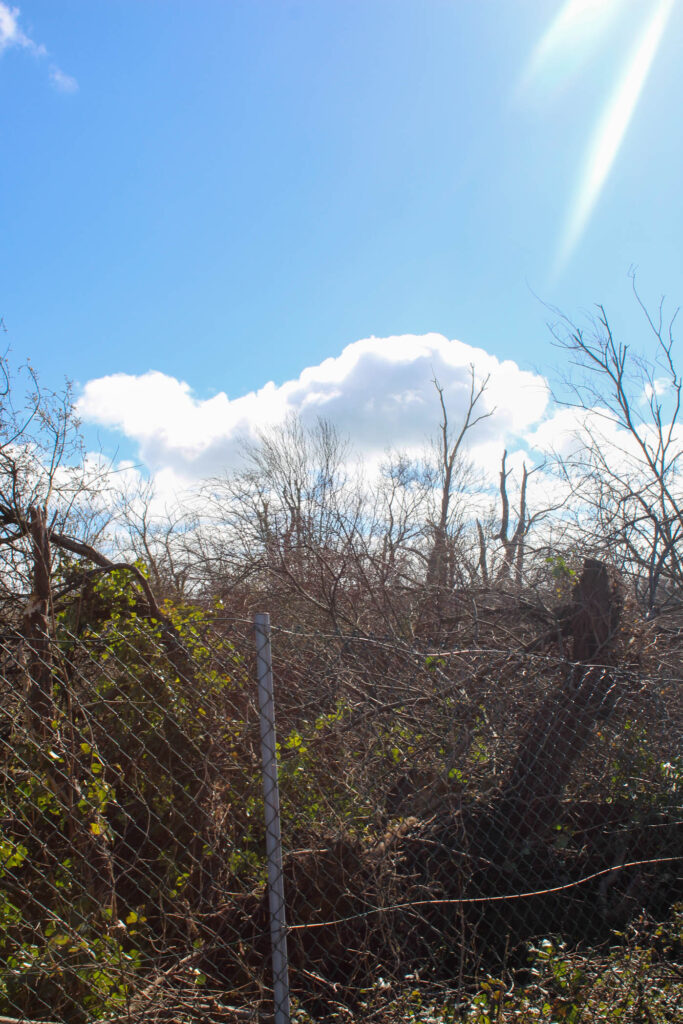
For these images I focused on the surrounding areas of a row of fields as I felt that this would be an area where there would be not only a lot of damage from the storm but also many different locations and perspectives to find.
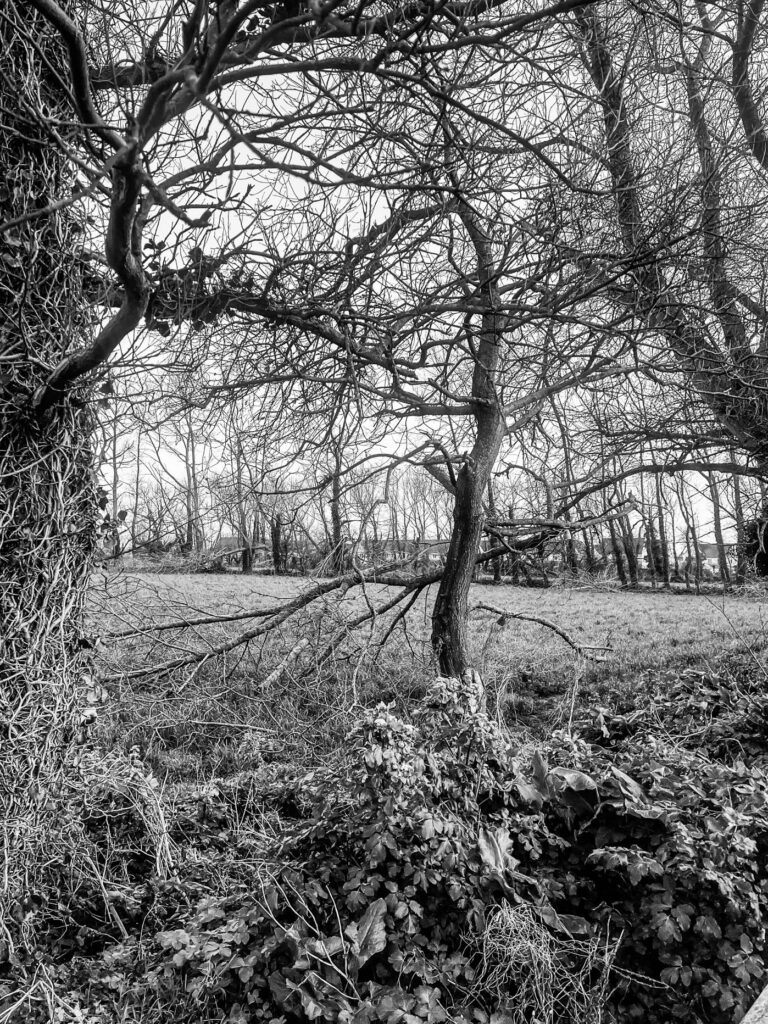
For most of my images I created virtual copies of them and made them black & white to represent Ansel Adams’ work as his were also monochrome. I also feel that this shows the distinct and unique forms that the branches take on due to the strength of the wind. I really liked this area as there was a combination of natural and man-made resources, as well as many twisting branches varying in size. Many of them twisted forwards so I positioned the camera in certain angles the create depth in the image. For some of my images I used HDR to combine 3 images so that the exposure was suitable, this also resulted in the images looking more vibrant by saturating the green tones more. However, this wasn’t necessary for all images as I wanted some to have a more pastel shade such as in the sky as I feel that this creates a calming and tranquil tone for the viewer, representing ‘the calm after the storm’. As well as this, in the majority of my images I used the graduated filter to create a smoother gradient from the top of the image through to the middle, then increasing or decreasing the contrast.
Photoshoot 2 best images:
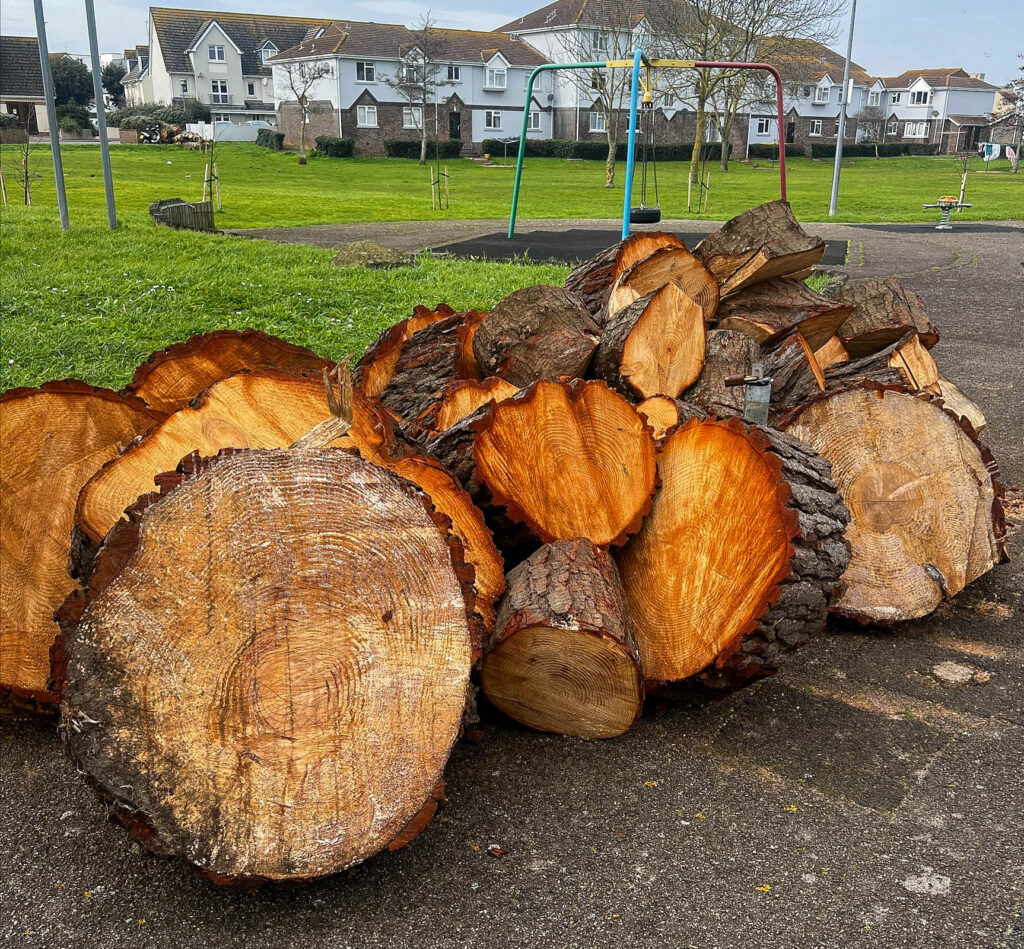
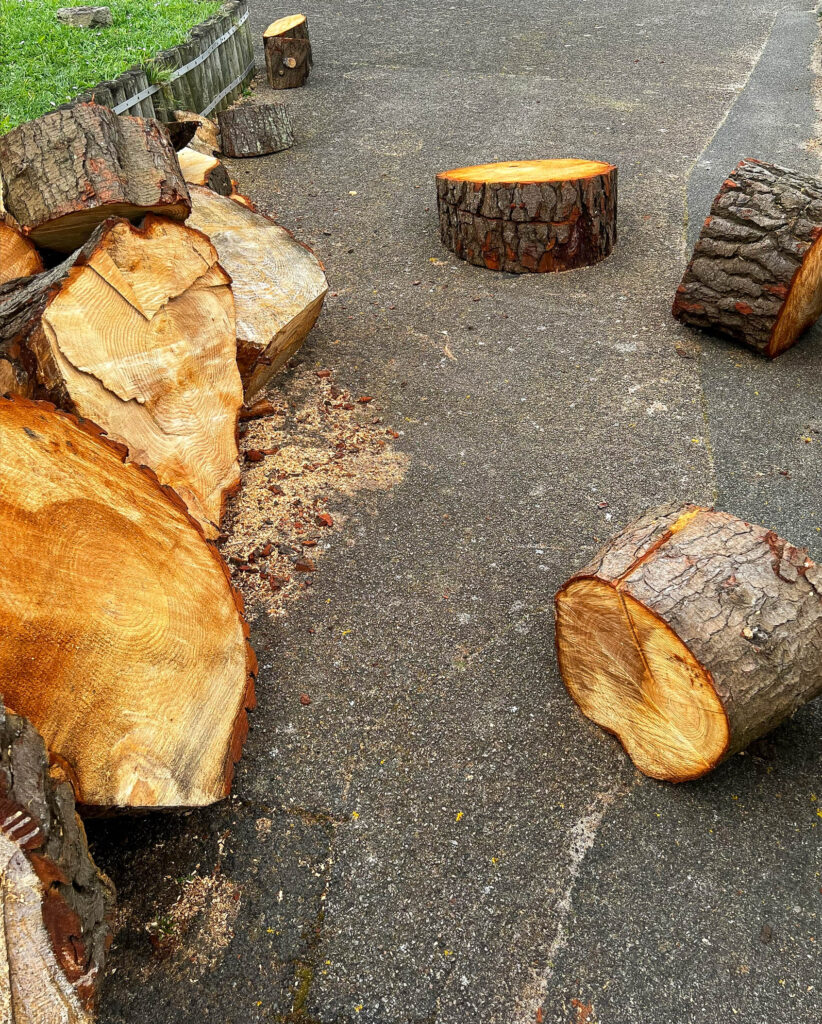
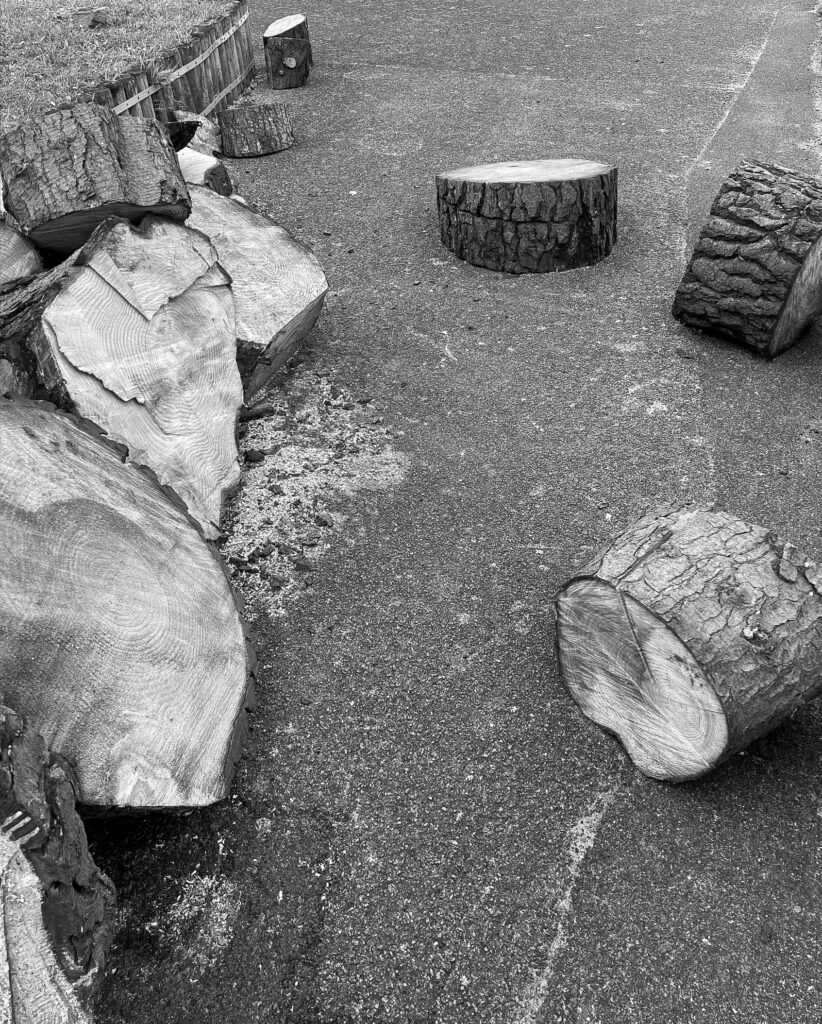
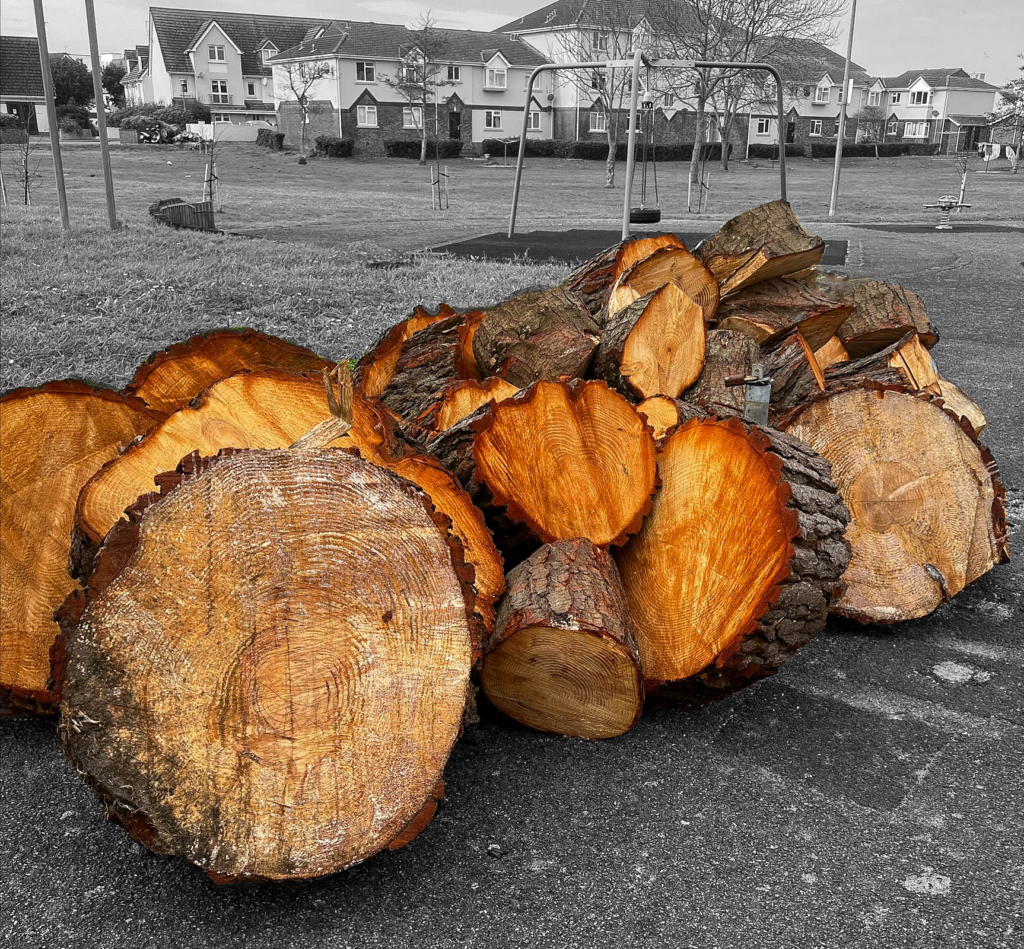
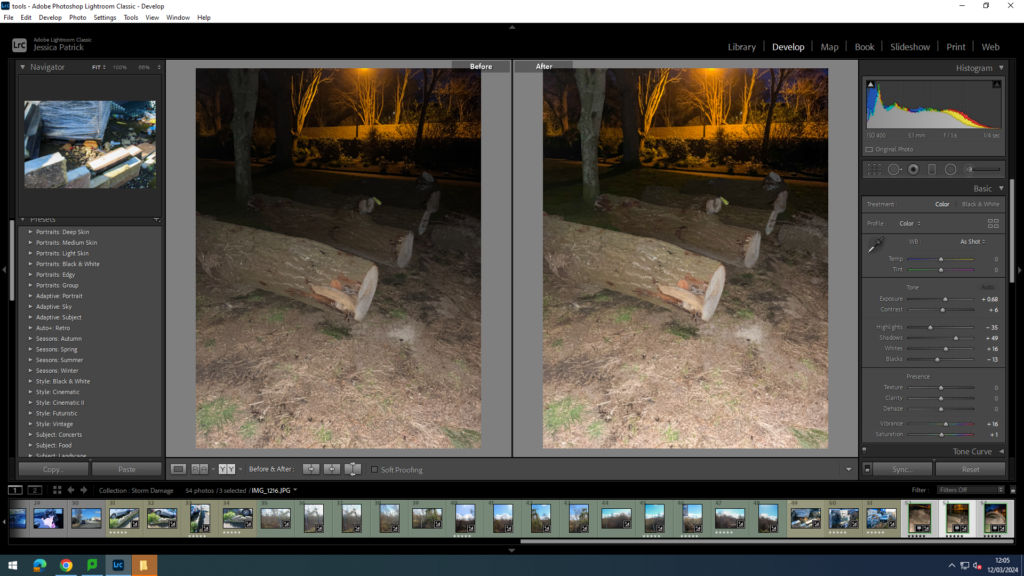
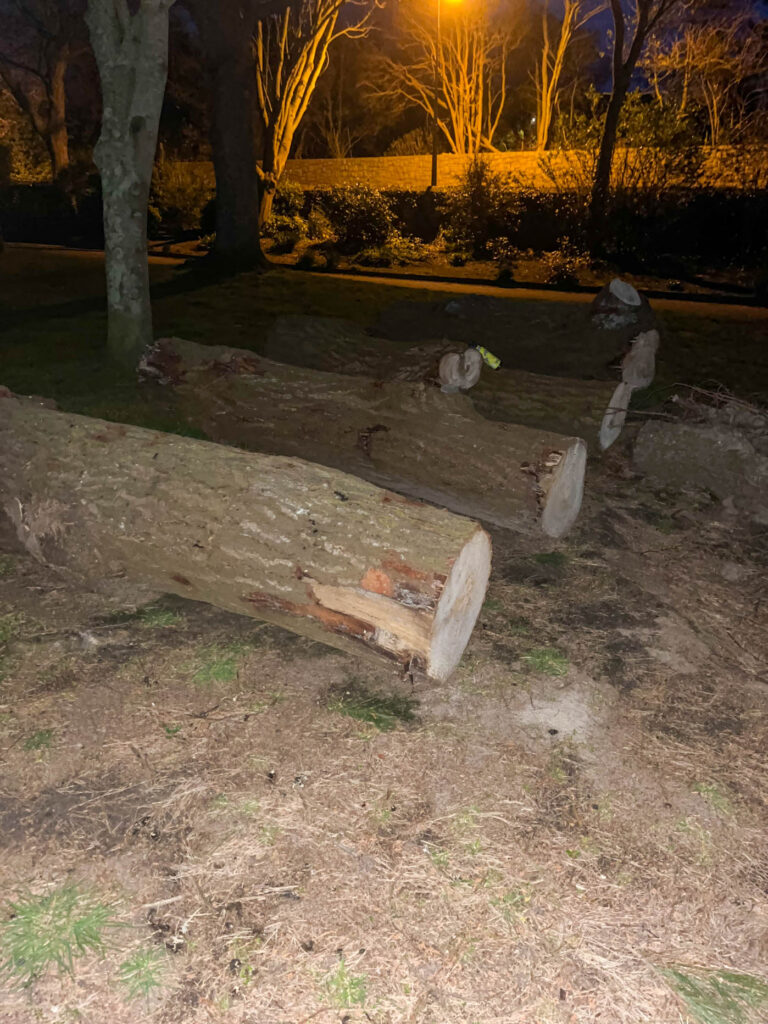
For these images I chose to go into a more public space. This was a pile of chopped wood from trees that had fallen down and been piled up on top of each other. I really liked the way they had been placed and all the details that would’ve been hidden within the tree have been exposed that wouldn’t normally be shown. I also liked the way some smaller pieces had rolled off as the position each of them have landed in makes it look intentional yet relaxed. I created some blank and white versions of these images too because I wanted to show aspects of Ansel Adams work in my own.
I created an idea using Photoshop, keeping the main part of the image in colour and the background in black and white. This adds more vibrancy to the orange/brown tones and makes each layer stand out more.
Romanticism art is a style of art which started in Europe towards the 19th century. Romanticism is said to be a way to express personal feelings, emotions and interest for the world. It gets its name due to the rise of popularity for medieval romance which heavily inspired this genre.
There are said to be 5 classifications of romanticism art individualism, nature, emotion, freedom and gothic/the unknown. Lots of romanticism art contains something like “idealization of women; awe of nature; return to the past; critique of progress; purity of childhood
Part of the romanticism art movement was about it being a revolt against the ideas of aristocratic social views and the political norms at the time. They wanted to draw attention to them and criticize their views which they did through their art.
The French revolution was a big contributing factor to the whole romanticism movement they would illustrate some of the of heroic acts which were taking place and should have gotten recognition. They also saw a spike in these aristocratic views and the the Enlightenment values so it was their response to that.
Sublime-
Sublime is said to be feeling when something is so amazing overwhelmingly so and its meant to be its the strongest emotion the mind is capable of feeling
The sublime is often described as a way to describe the feeling of greatness or awe and wonder to do with nature. When looking at the history behind it you can tell that it has taken inspiration from the baroque period is an elaborate style which gained popularity during the 1600’s and 1700’s in Europe. This philosopher Edmund Burke believed that the sublime can be beautiful but it also has this aspect of horror to it. He also spoke about the opposition of “beauty and sublimity” “He made the opposition of pleasure and pain the source of the two aesthetic categories, deriving beauty from pleasure and sublimity from pain”
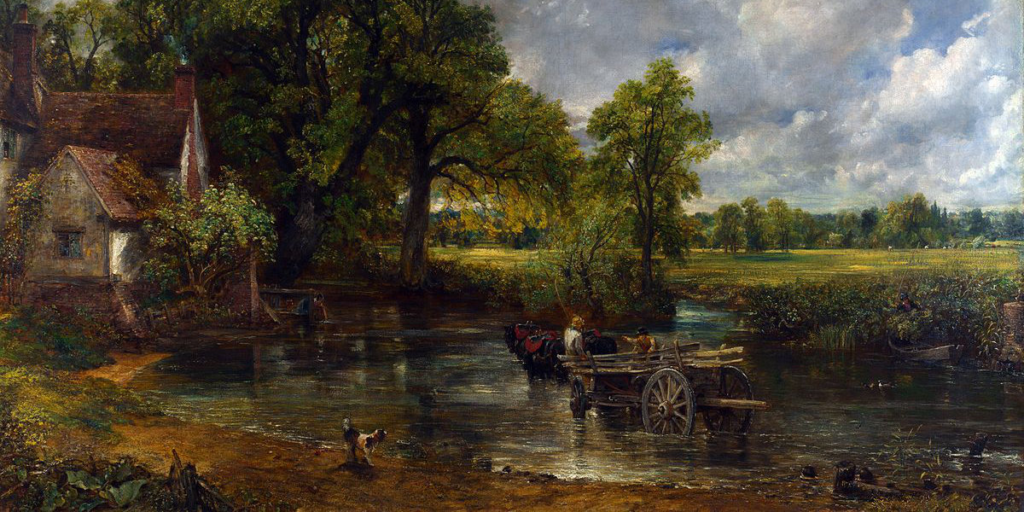
John Constable the Haywain-
This painting was originally called “Noon” by John Constable which was later renamed to what we now know as The Haywain. The painting shows us this country side/rural area around the river Stour in England during the early 1820’s.
John Constable had a strange approach to his art compared To other artist at the time. This is because most artists were striving to have these perfect pieces of art with each stroke being calculated and “perfect”. However John Constable tried to do the opposite he didn’t feel like it had to look “perfect” his pieces were often more emotionally driven as he wasn’t planning it out as much and he did what felt right to him.
It’s said the concept behind this painting to show “an emotional reaction to a crisis beyond his control, and probably understanding”. At the time this paining was created they were in the middle of the industrial revolution. And World War 1 had only ended around 10 years ago so people were still heavily effect by those actions.
The enlightenment–
Enlightenment is the idea of “individual liberty and religious tolerance” it kind of goes against the ideas of religion and the monarchy with the ideas of strict aspects of it and the values. The idea of enlightenment was created due to the rise of the intellectual movement during the 17th and 18th century where ideas such as God, reason, nature, and humanity were becoming more mainstream and enlightenment was a way of defying those views.
There are said to be 5 main values of enlightenment are said to be happiness, reason, nature, progress, and liberty. these concepts were created by French philosopher Voltaire who felt very strongly about the idea of social progress. Joseph Wright was a very talented artist who contributed greatly to the enlightenment movement.
Photoshoot one: For my first photoshoot, I am planning on going to the woods to take photos of the damage that has been caused due to the storm. I like this idea because it is a good way to view landscapes in a different way, instead of it being presented in a romanticised way.
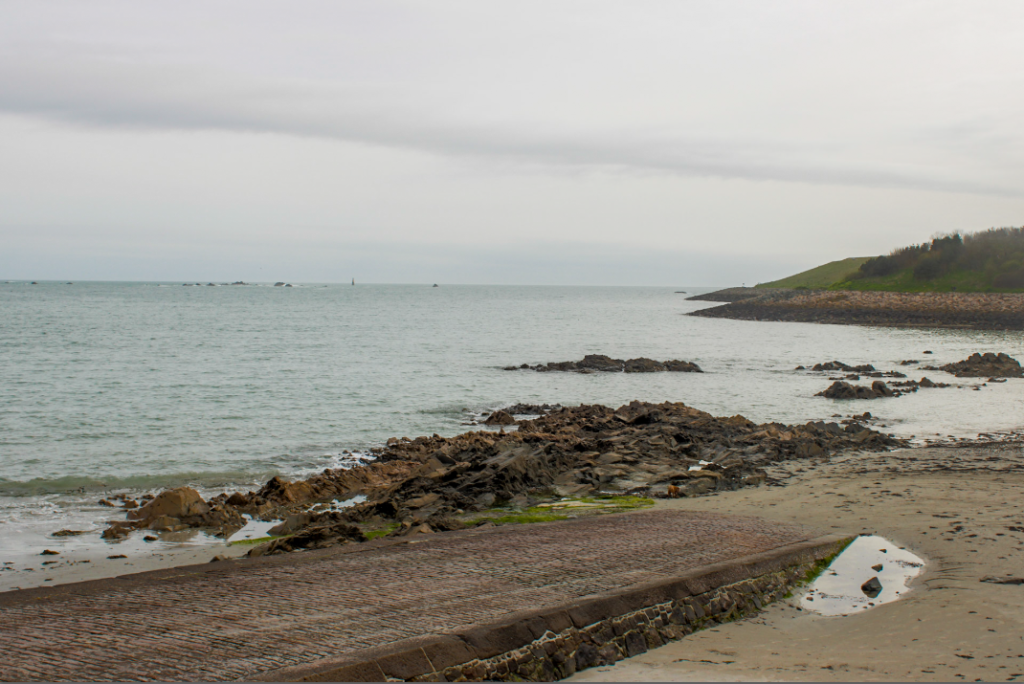
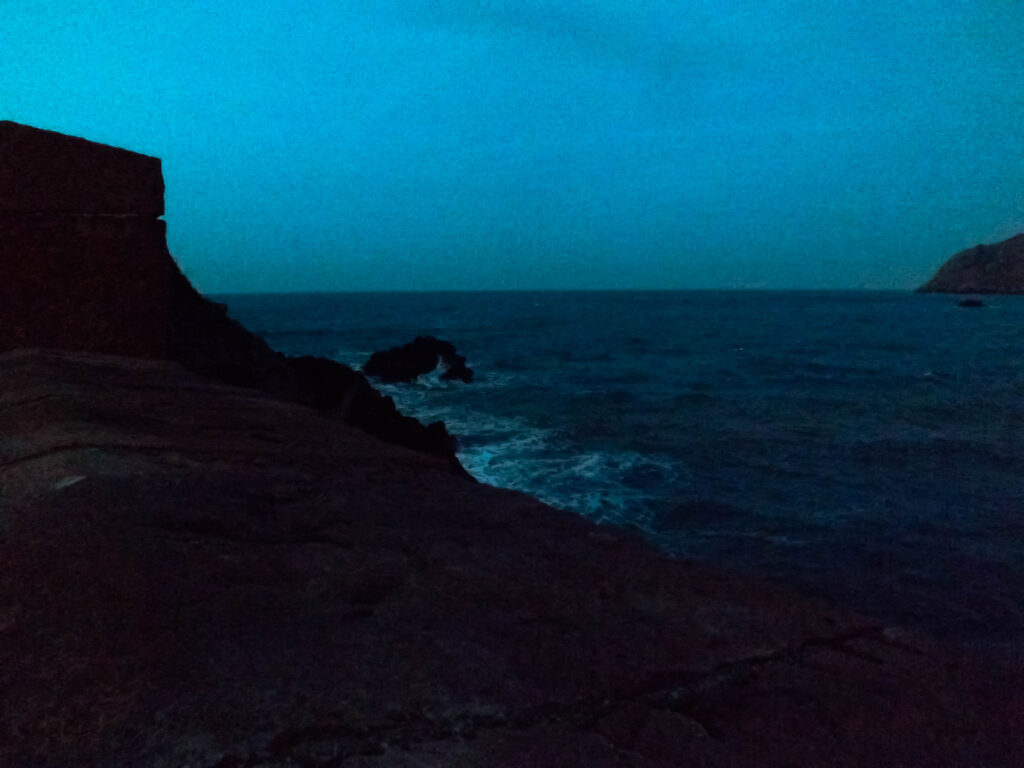
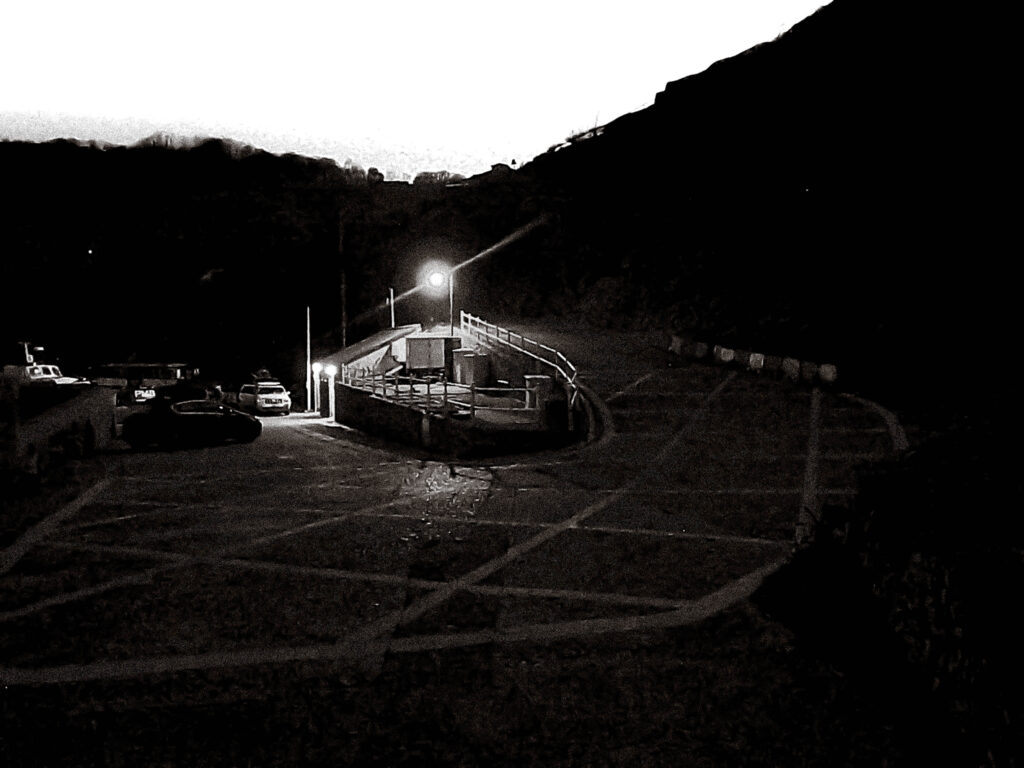
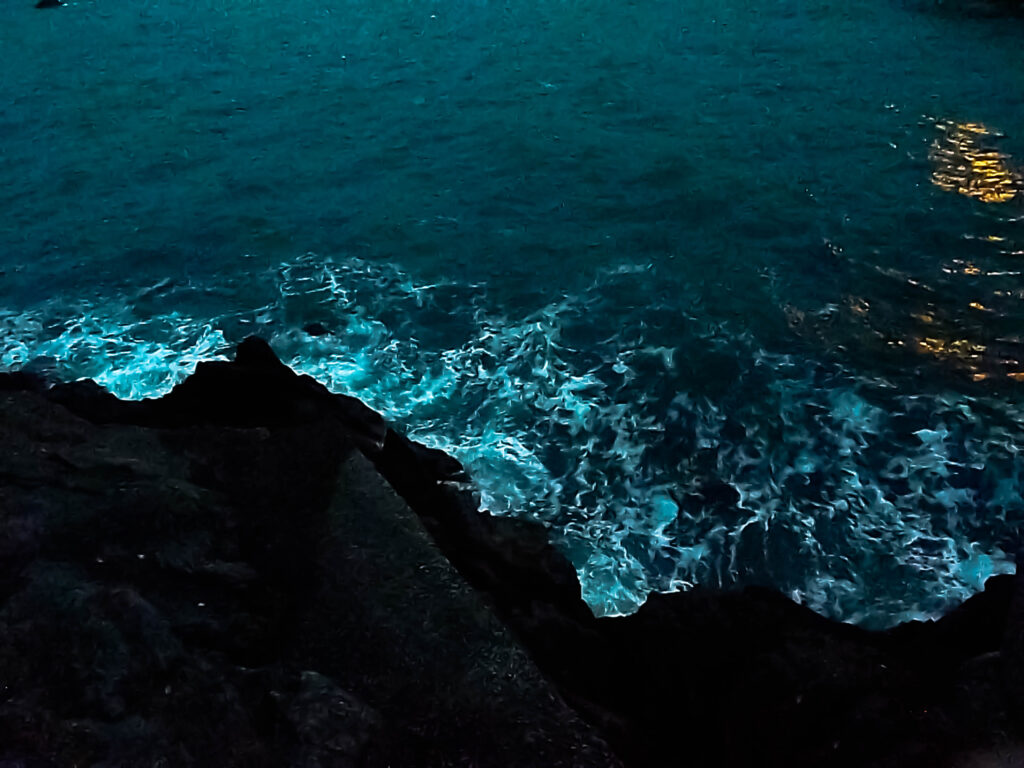
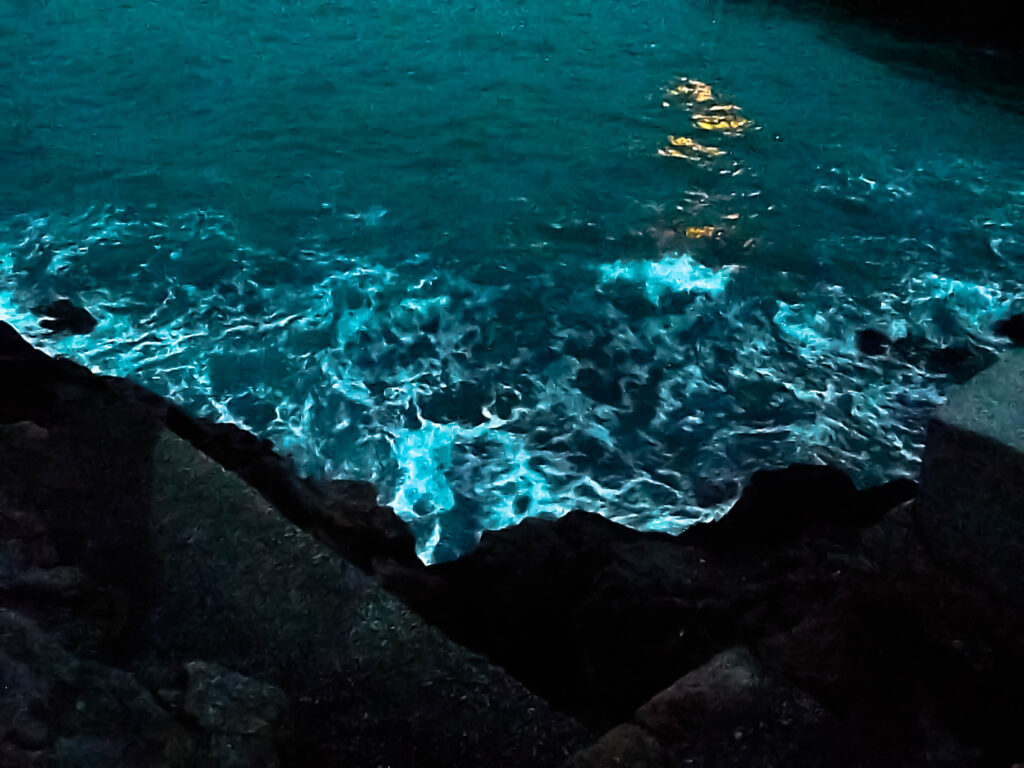
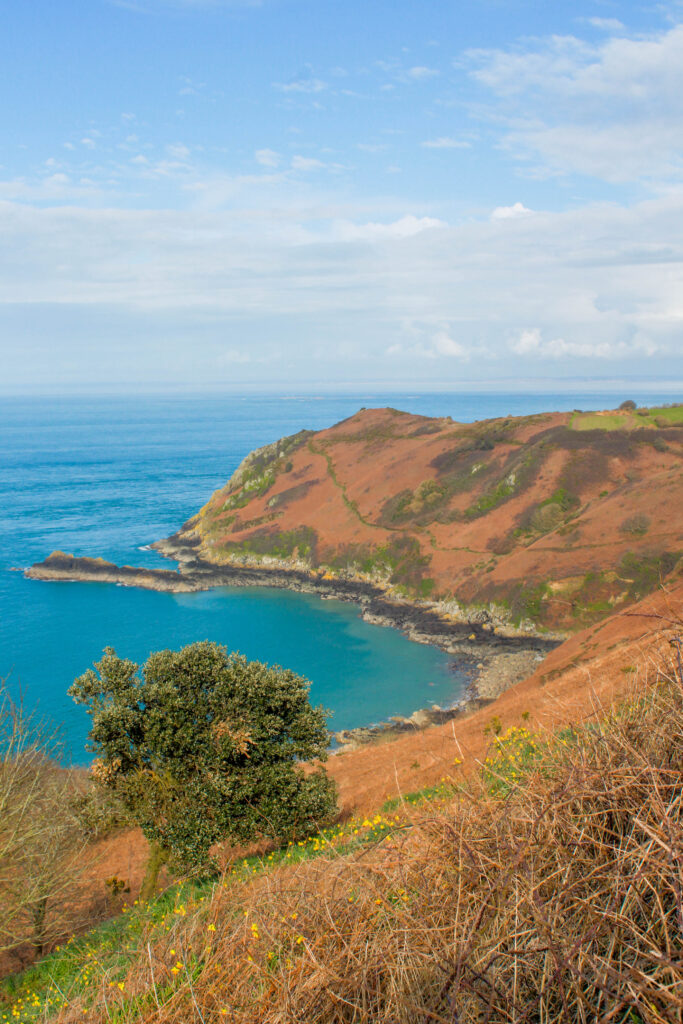
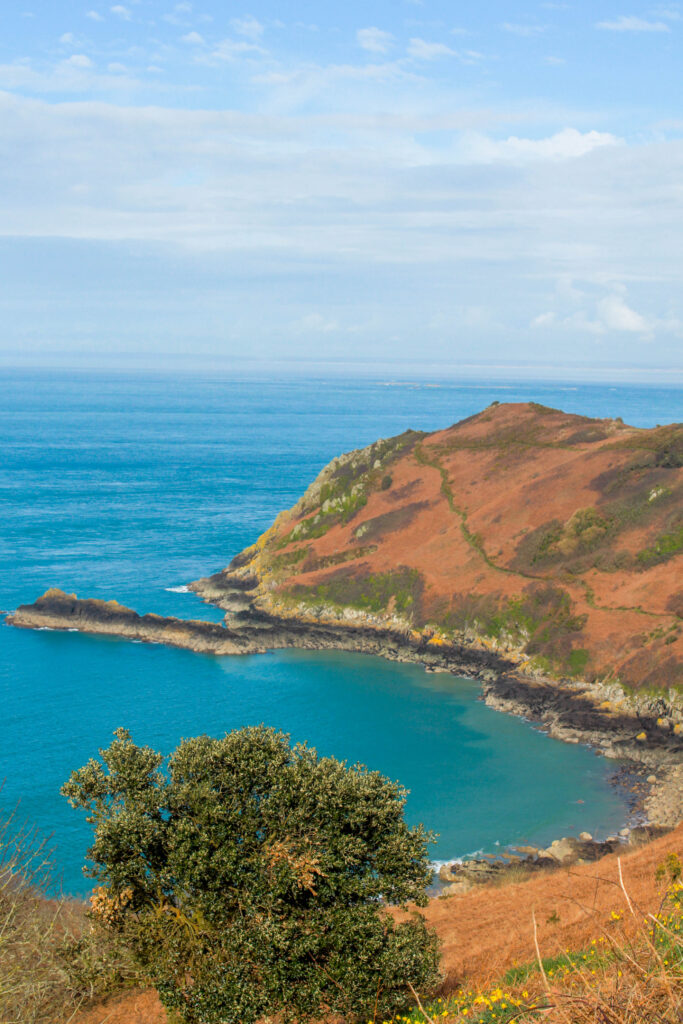
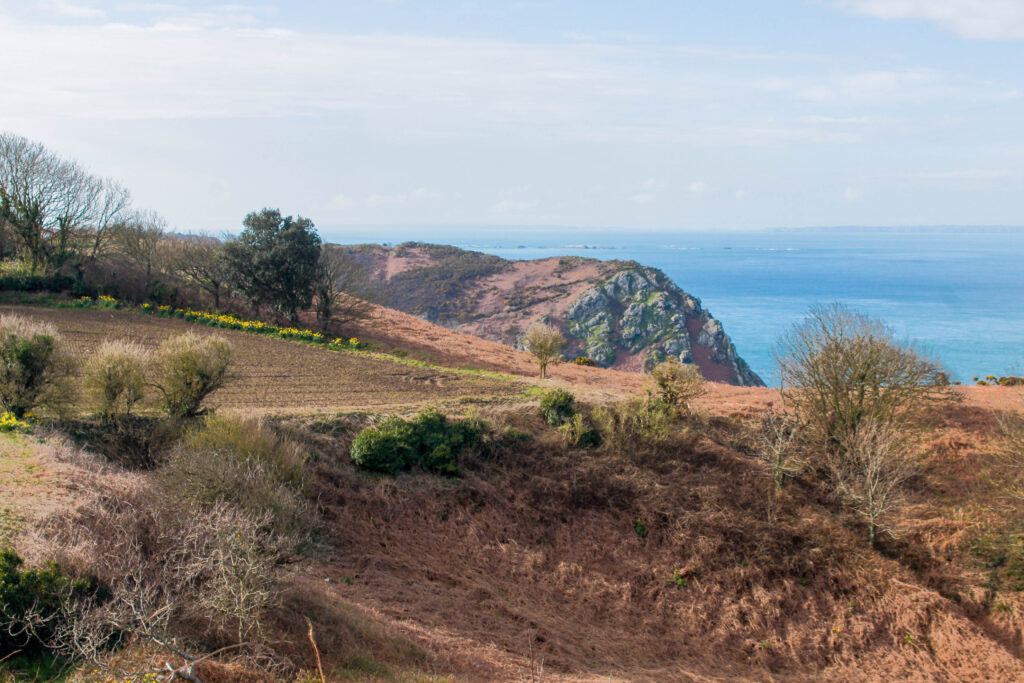
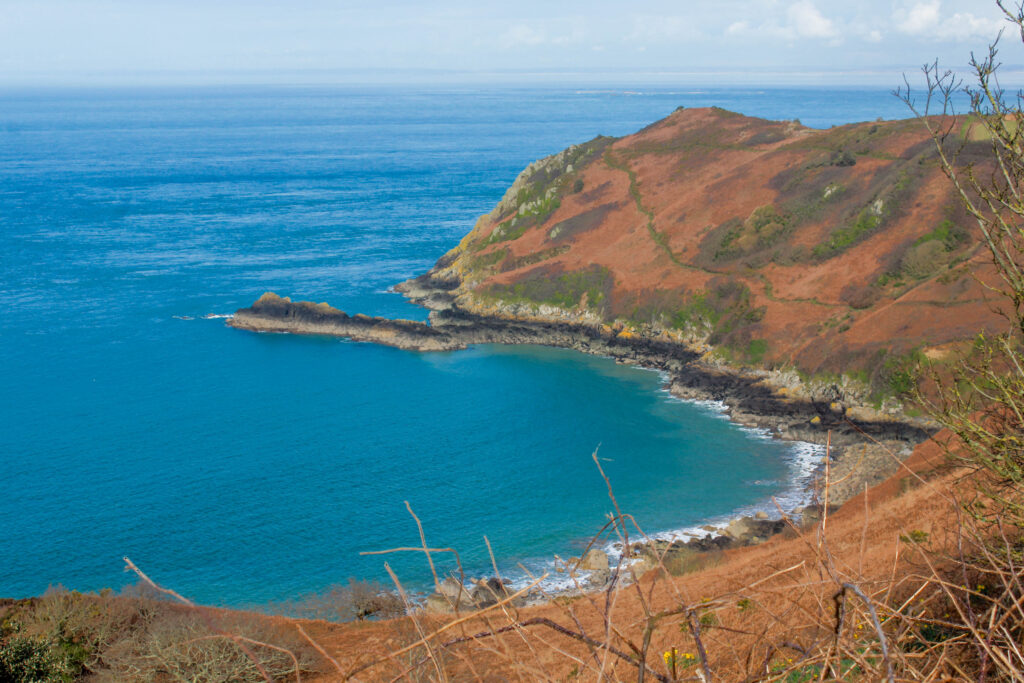
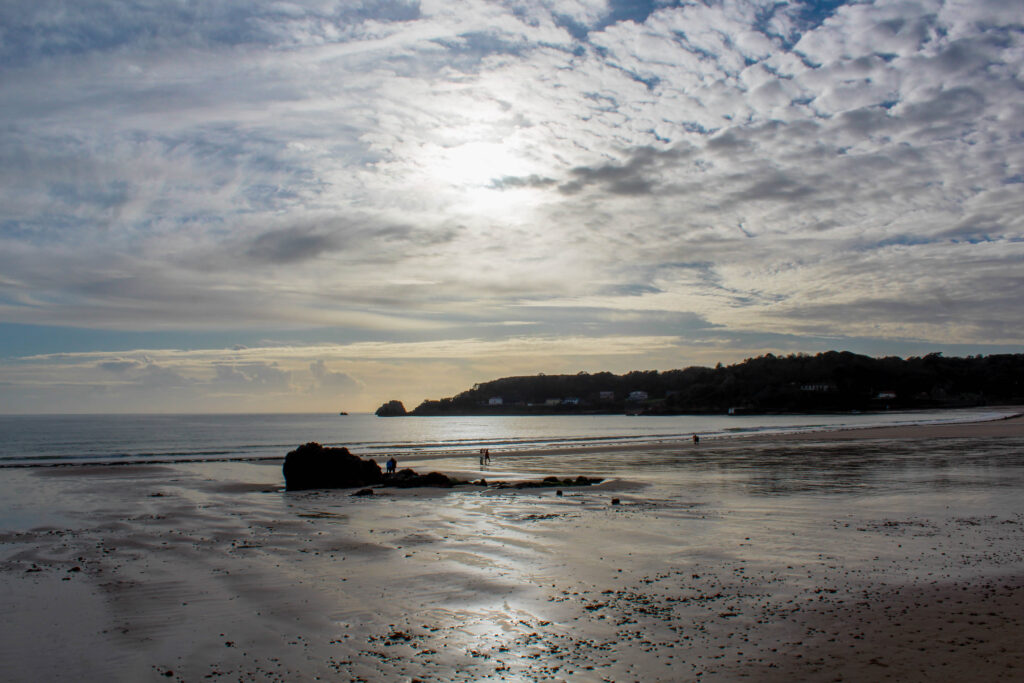
Photoshoot two: For my second photoshoot, I am going to visit different landscapes around the coast and photograph the cliff sides/beaches and include aspects of the sublime.
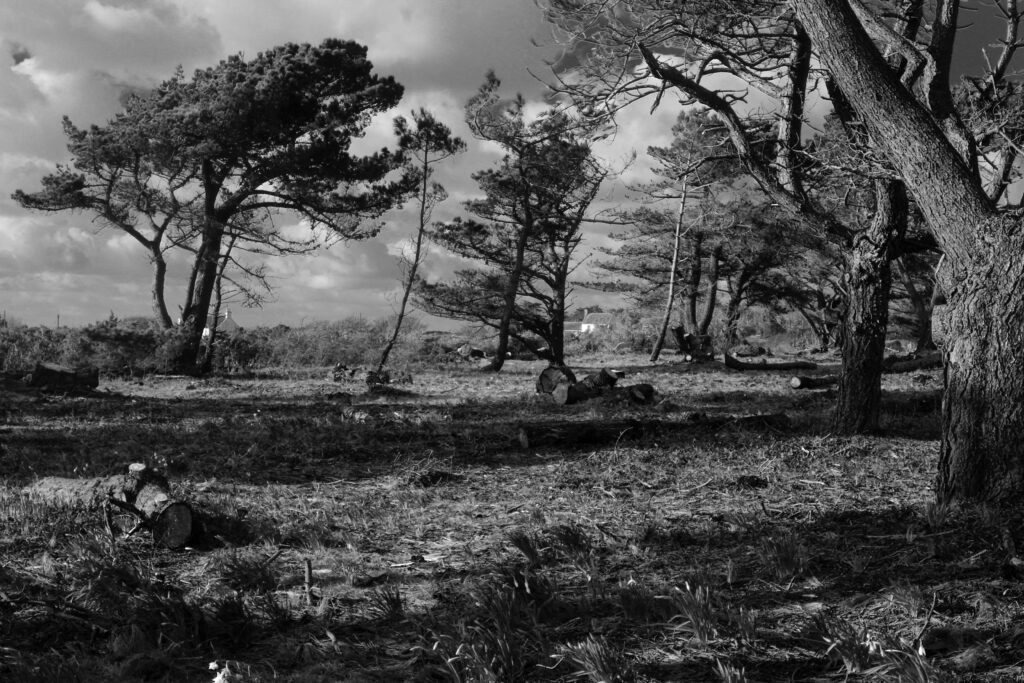
For this Photoshoot I took inspiration from Landscape Photographer Ansel Adams and based my images of his work. Mainly taking landscapes of storm damage, rather than expanses of areas with untouched natural beauty, I aim to show the natural effect of destruction caused nature.
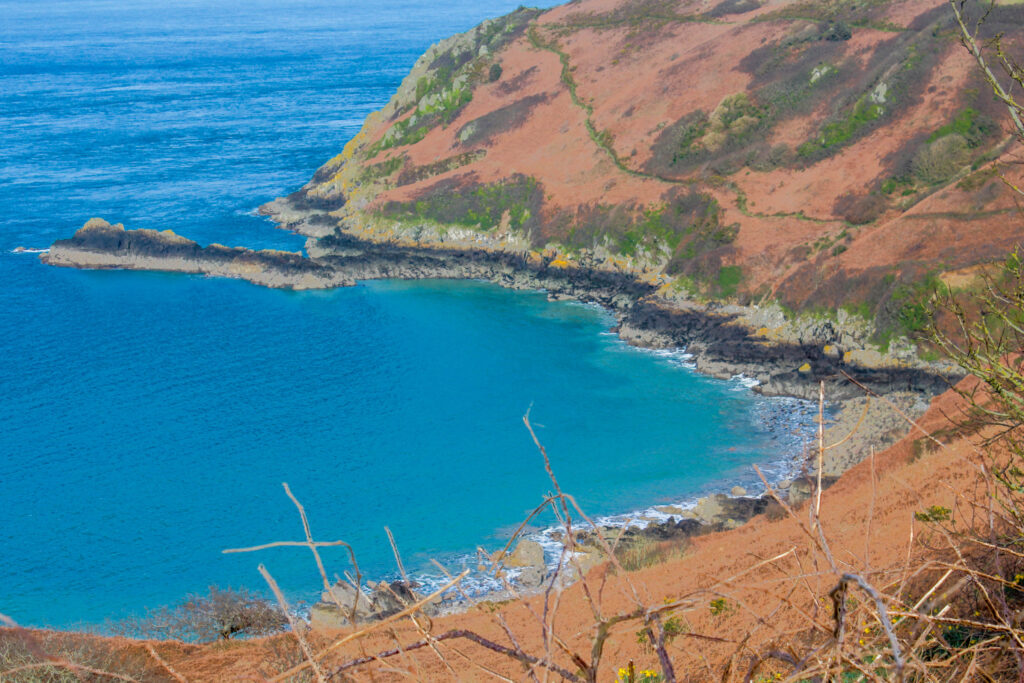
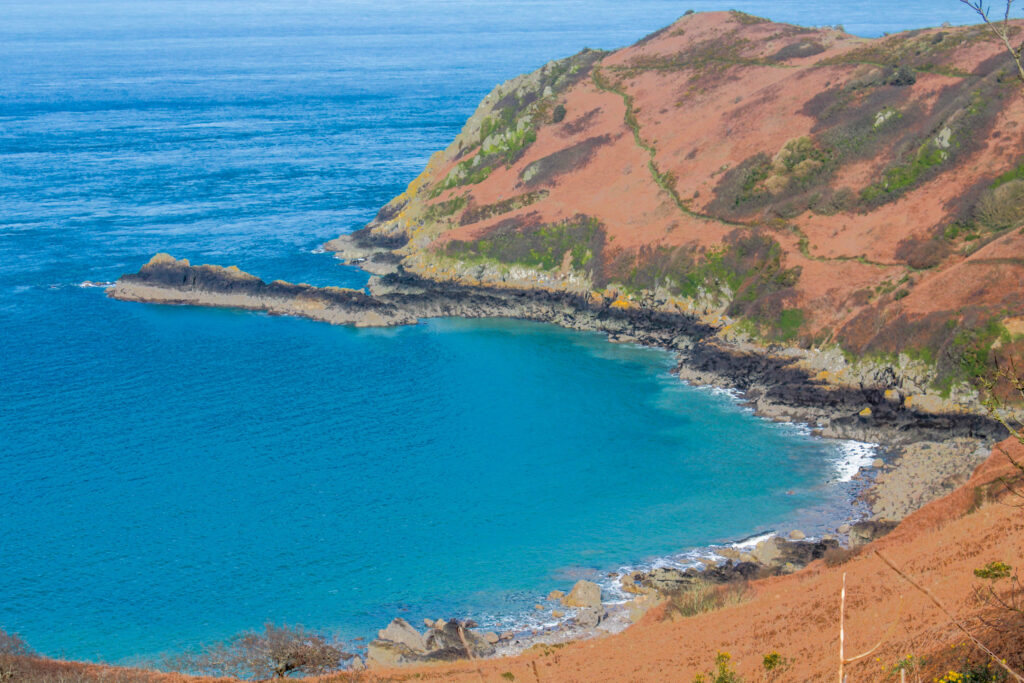
Noirmont – Storm Damage.
I like how this image turned out as the depth of field covers largely into the details of damage, with a path of destruction stretching from foreground all the way to the background, The suns casting of light across the fallen trees creates a stark contrast in tone. What can be improved is the focus as Some parts of the image had blurs or out focus patches.
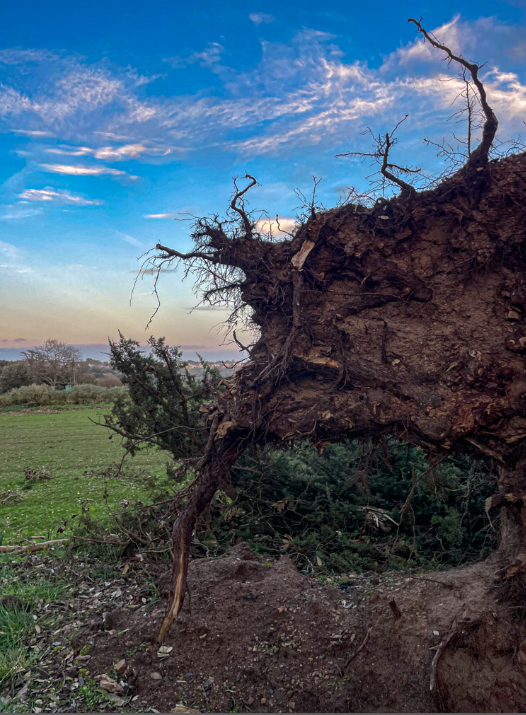
Although not technically a landscape, the detail of this image is what enticed me to adjust and edit this image. With a good use of golden natural light, the shadows hugging around the back facing part of the tree creates a engaging point of interest within the image when converted into black and white.
Having the same conceptual use of visualisation, like Adams I had an idea on how I wanted to create this image. With a good composition of trees, fallen debris on the ground, shrubbery and moody clouds in the background the mise-en-scene of this image was further improved with more definition being put on the lights contrast to shadow and reflection of sun on the blades of grass.
This image, to me, turned out well. With a good composition the bushes to the left and trees to the right frame the larger trees in a suitable position to catch the viewers eye. With the trunks silhouettes against the white wall of clouds the top canopy emerges above them on a shade of grey. Coincidentally, this creates a interesting effect to the image. Furthermore with the cleared out area in the foreground, Tire tracks act as leading lines into the area, with the trees reflected in the puddle, it acts almost as a metaphor of what used to be there in that cleared out area.
Needing more space, I would still count this as a landscape due to the depth the picture has into the woods. With the camera centred into the pathway, I waited for the clouds to clear to allow more natural lighting into the frame. Like previous images the natural contrast of tones in light is what I find captivating in these images.
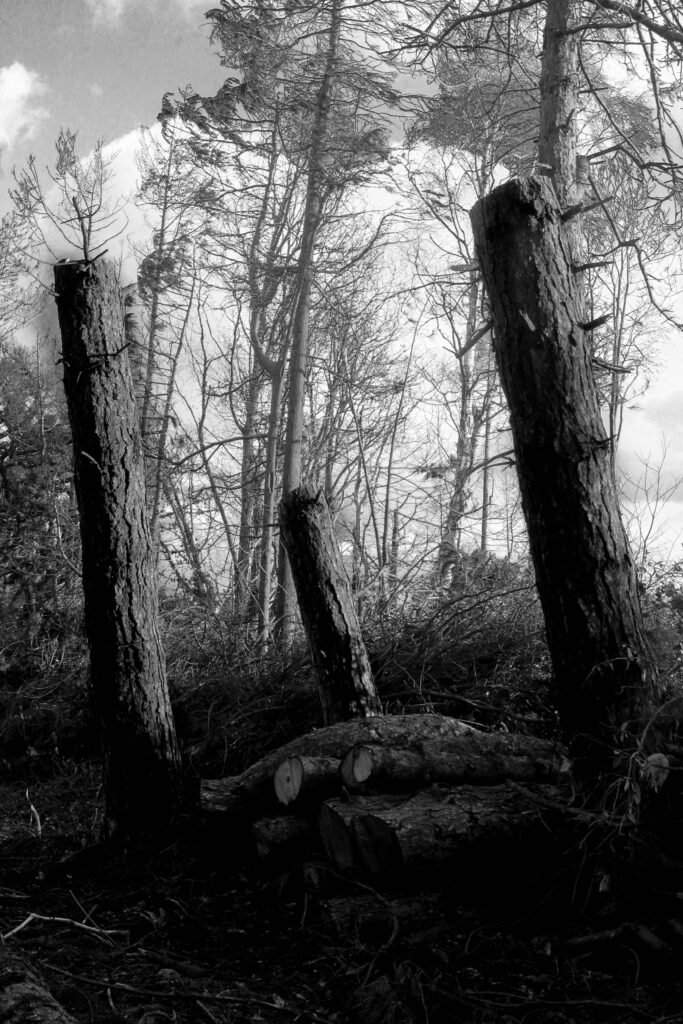
Although close the nature, I feel as if I have captured the concept of storm damage well in this image with the 3 tree trunks and pile of logs showing the extent of damage caused to Jerseys local environment. Shown to stick out like a fork the 3 tree trunks define themselves within the image against the greyer toned trees in the background. To me this exemplifies their importance as by dragging the attention with their altered shape, compared to the undamaged trees in the rear, their changed appearance conveys a deeper effect both visually and metaphorically.
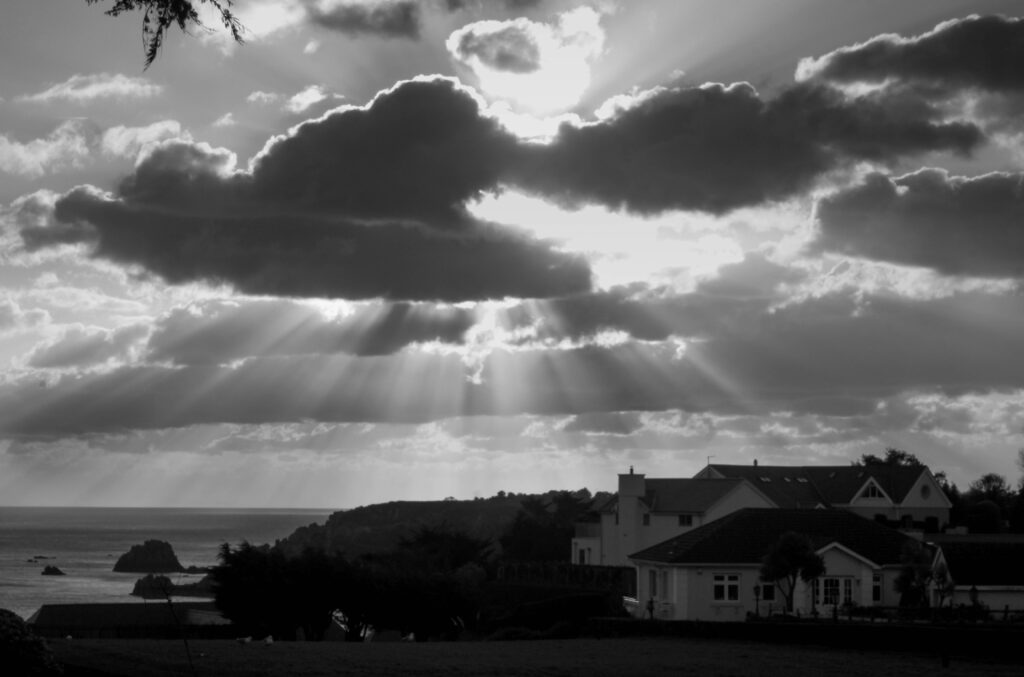
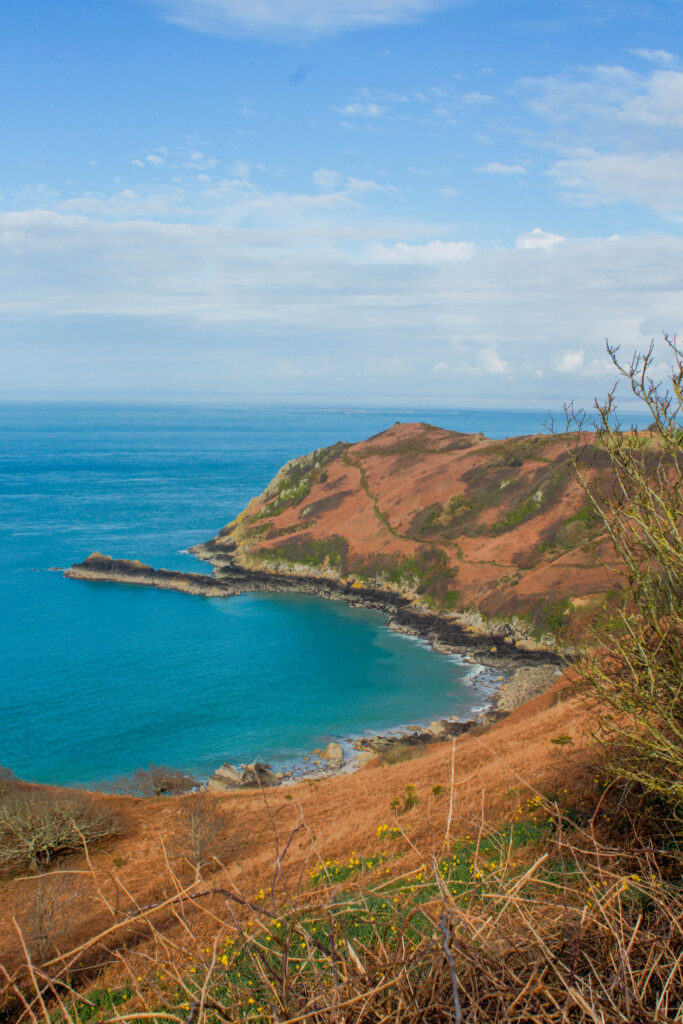
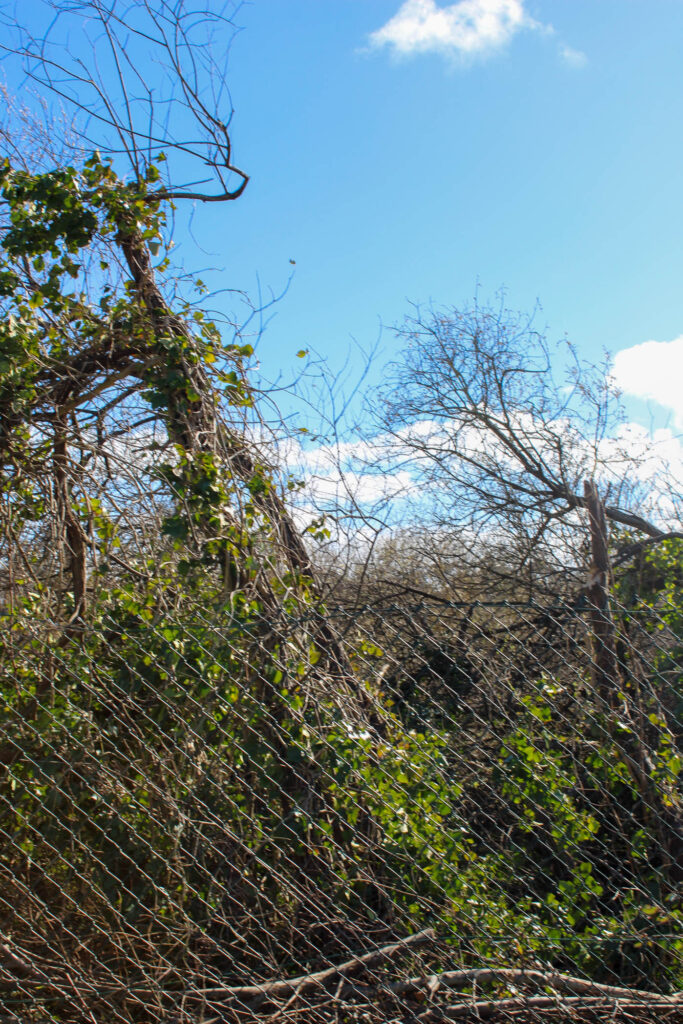
St Brelade – Damage and landscapes
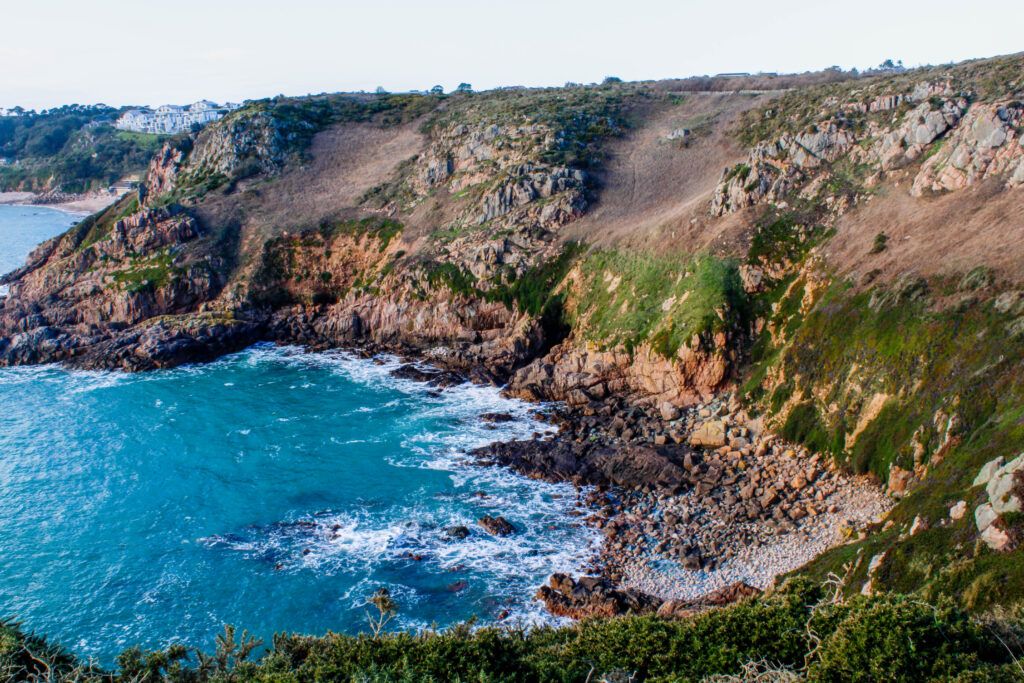
With the beams of pure light emerging in the crevices of the grey clouds, the landscape contrasts with darker tones and the seas lighter horizon line. With houses to the right and view of the rock face and sea to the left, this creates a balanced composition within the image. Lines in this image can be seen from the field below the houses, to their roofs, in the clouds and across the sea, acting like stairs, the viewers eyes can travel from these lines up the image.
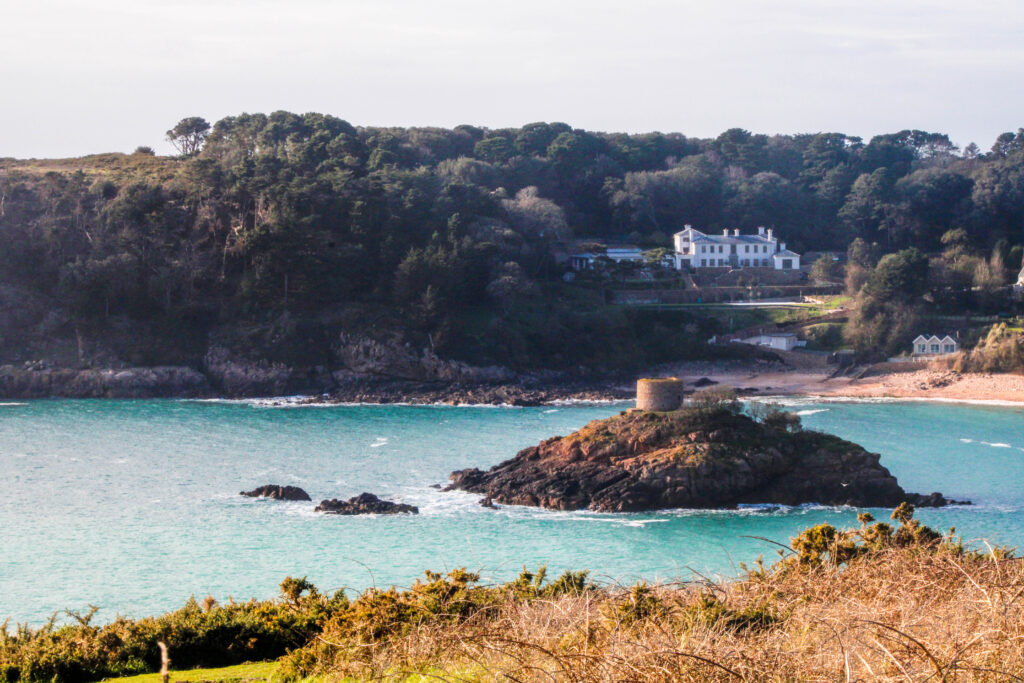
With the lighter toned building, its presence is well contrasted through edits to stand out from the darker tones nature that surrounds it. Although more fitting for the next subject (‘The New Topographics’), I saw it as a fitting image to the concept of Romanticism, which Adams was inspired by for his shoots.
Sandwiched in the middle, the lighter tones of fallen branches is surrounded by the much larger, fallen and still standing trees from the bottom to the top. In this image, I find that the darker toned trees acts as representation to the fallen trees in the past, acting as a shadow to their former stature. The fallen trees and branches however, much more brighter in appearance show their present manner.
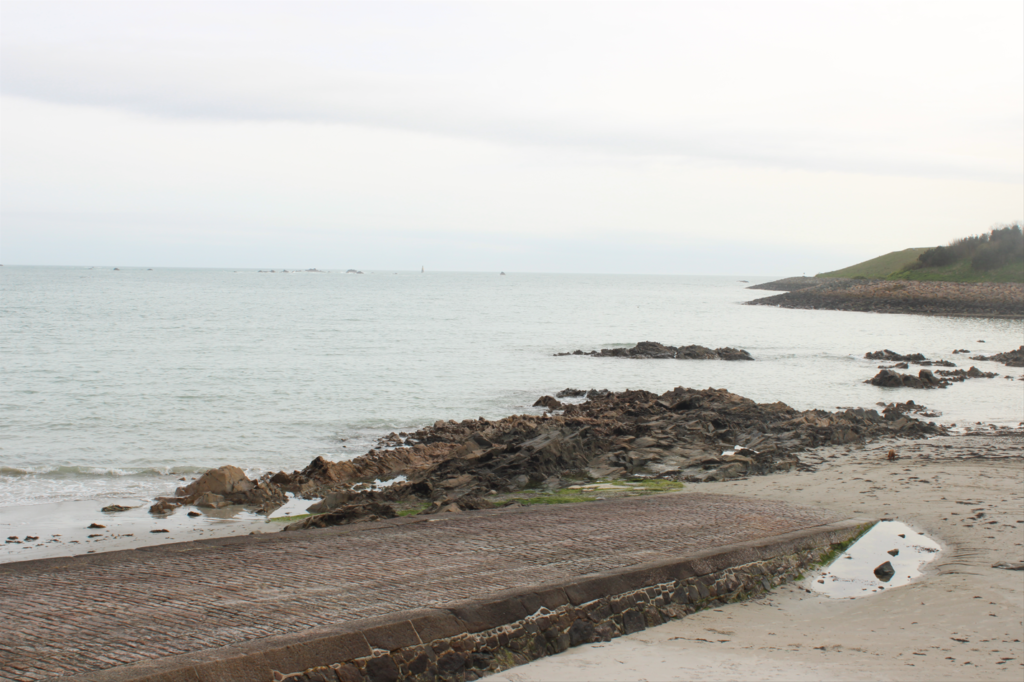
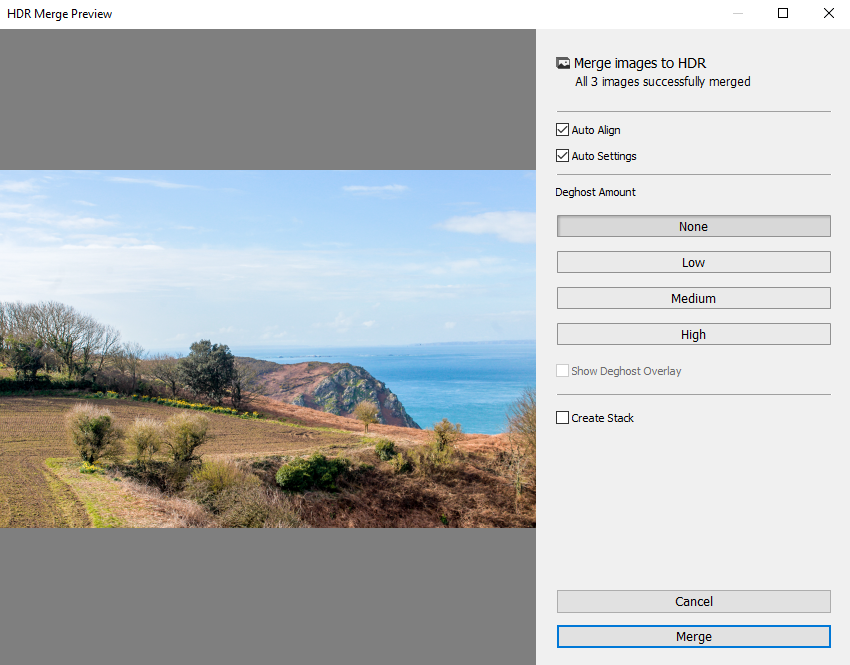
Exposure bracketing is when you take two or more images of the same thing, one over exposed and one underexposed, and then merge them together. When merged, the final image has the best details from each photographs creating a photograph with a higher dynamic range. Exposure bracketing can be done by using the specific mode on a camera which, when you use it, it takes multiple photos at once so that they can be merged.
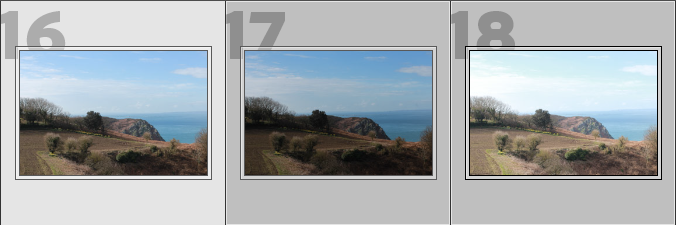
I took these three photos below, one overexposed, one underexposed, and one normal so that I can merge them together.
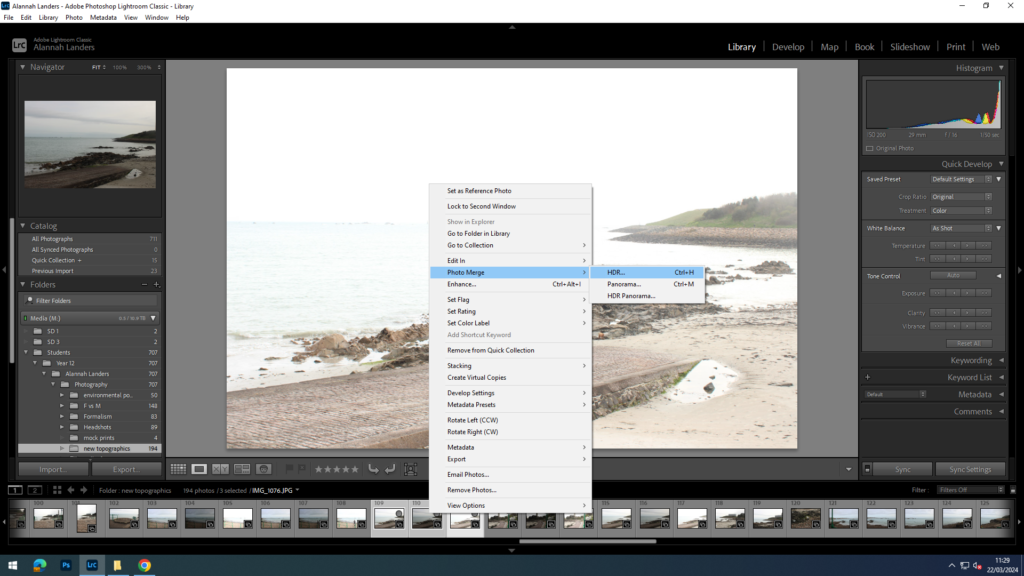
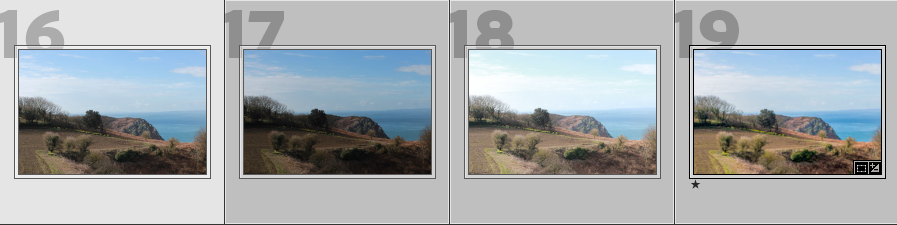
After selecting the three photos, I clicked photo merge and then HDR. This is the final outcome:
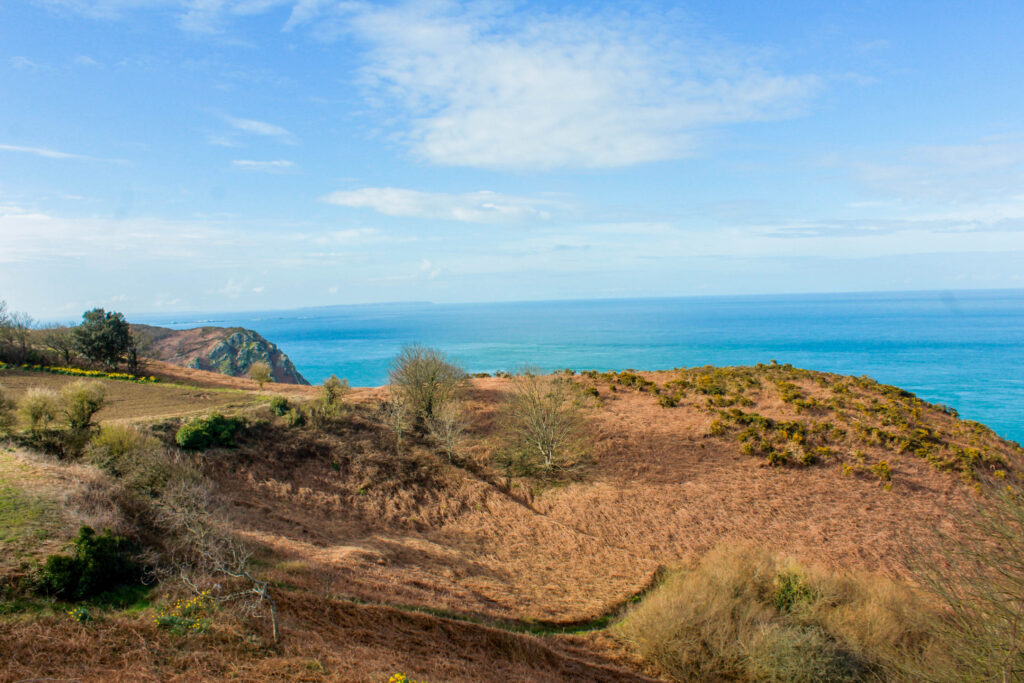
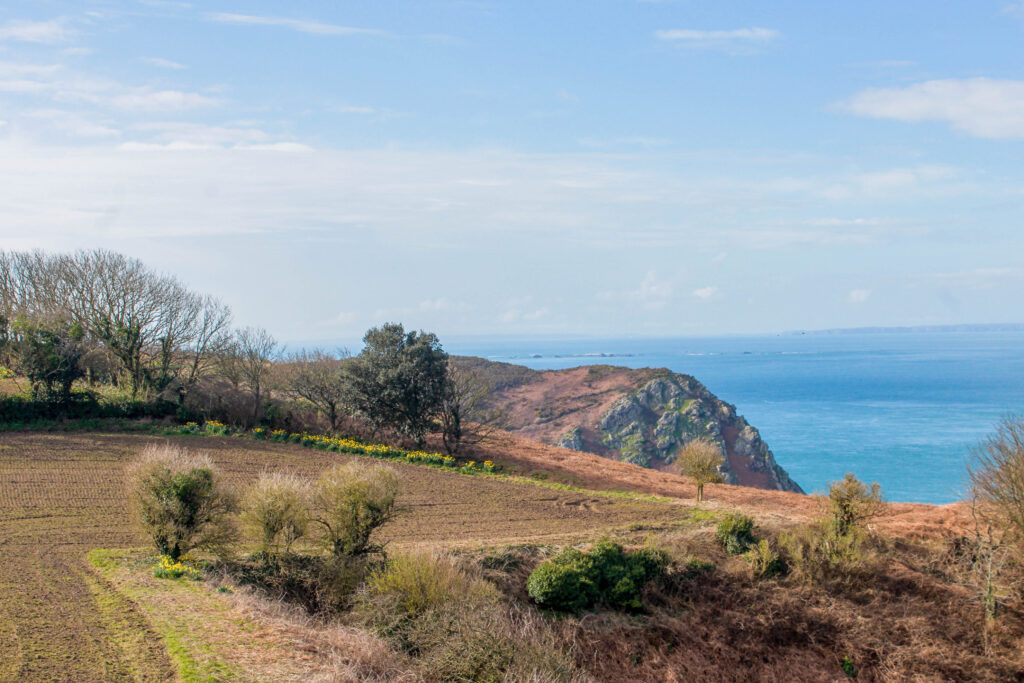
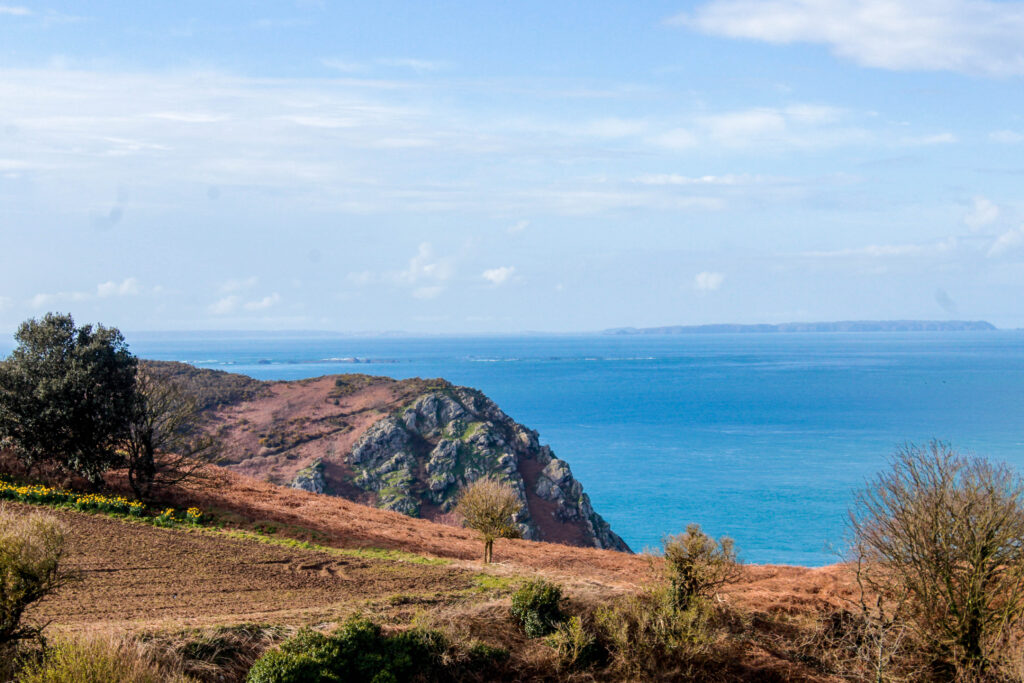
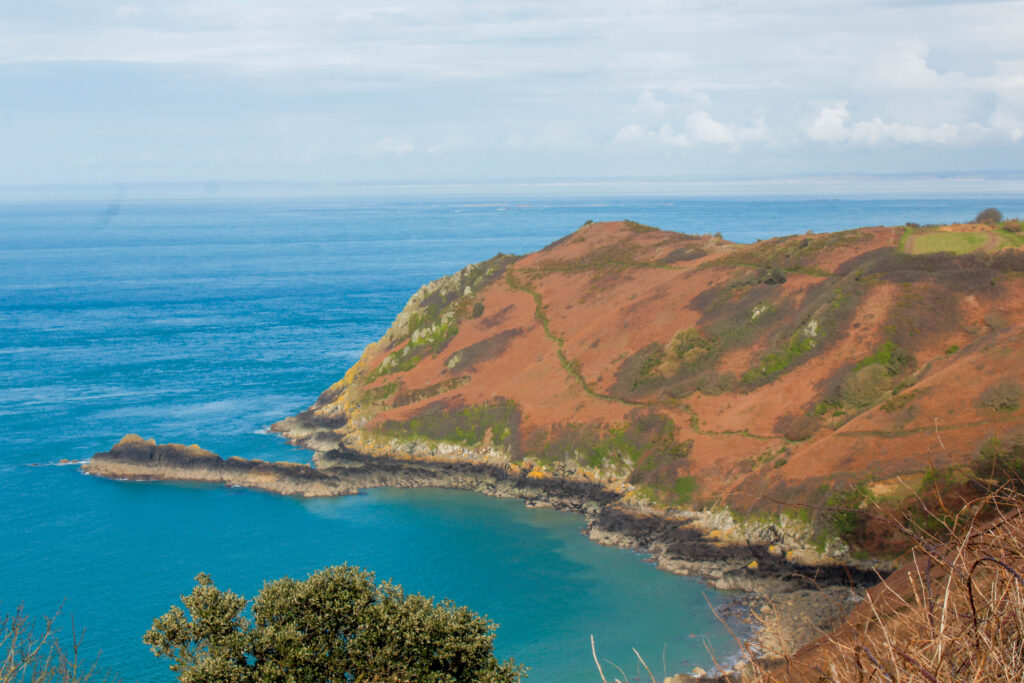
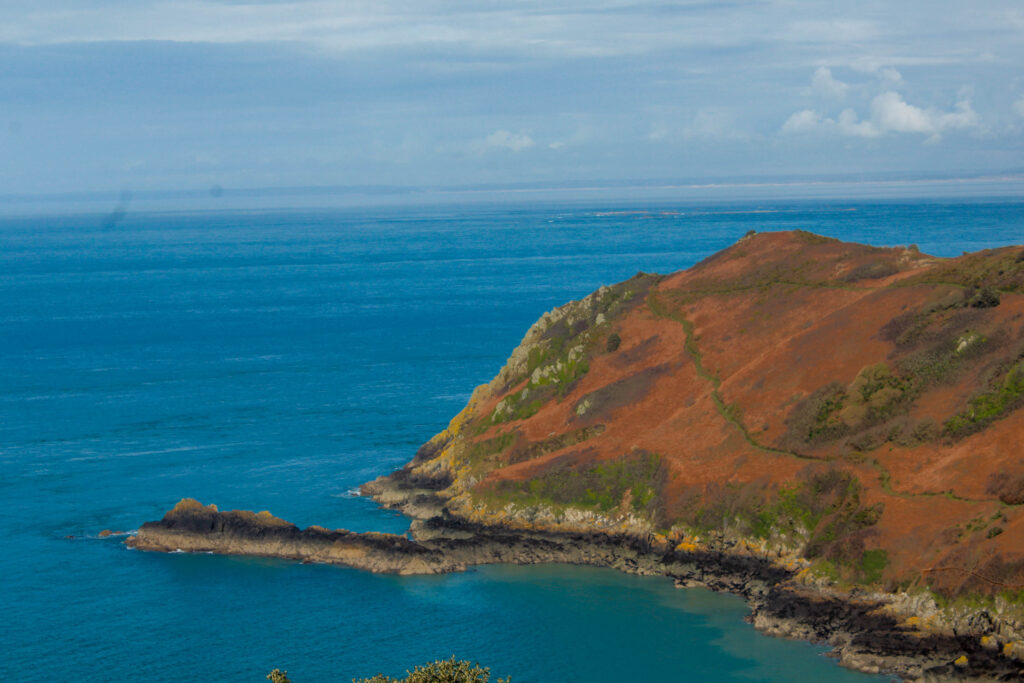
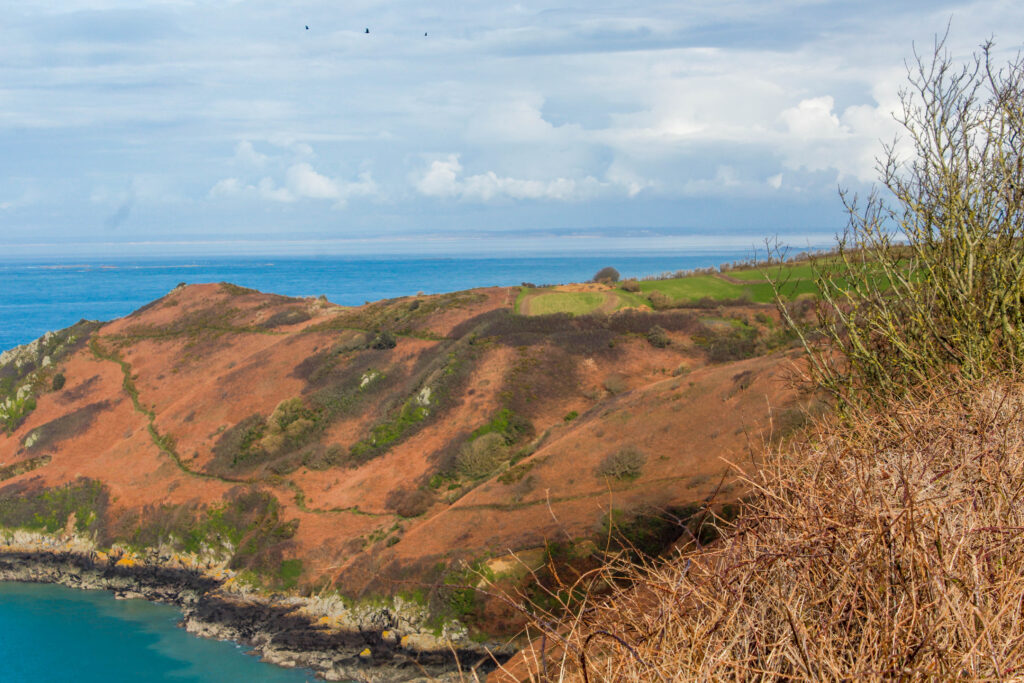
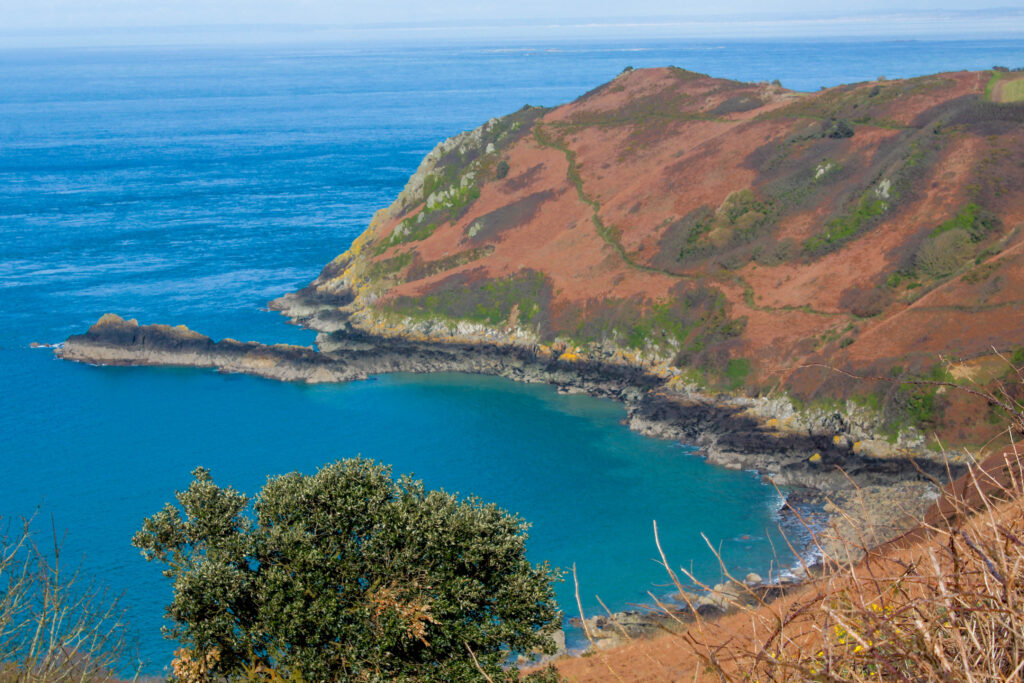
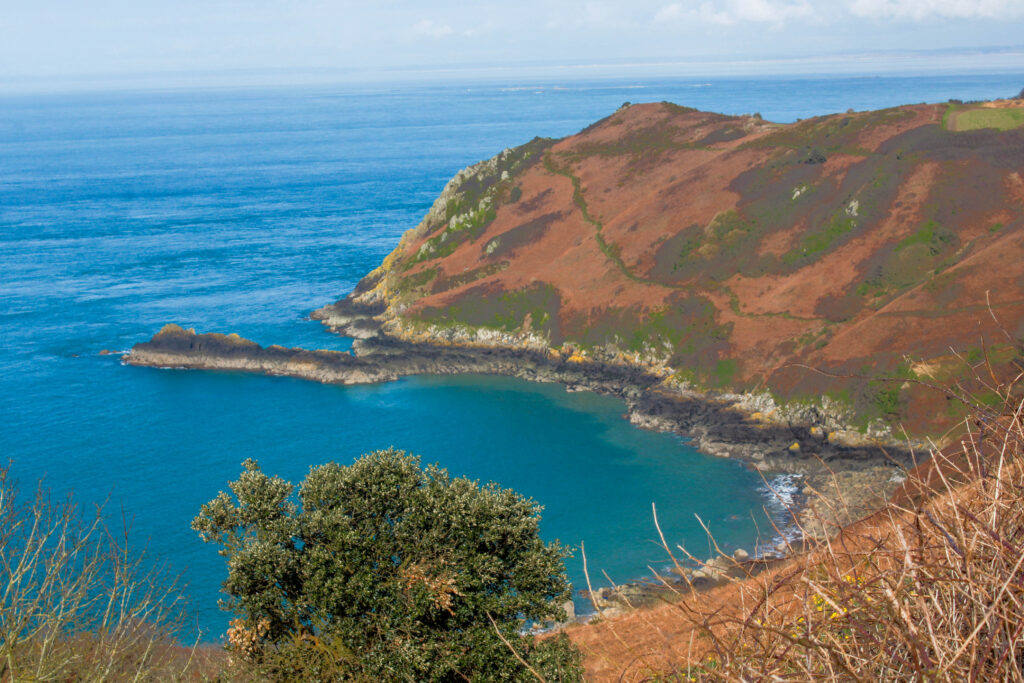
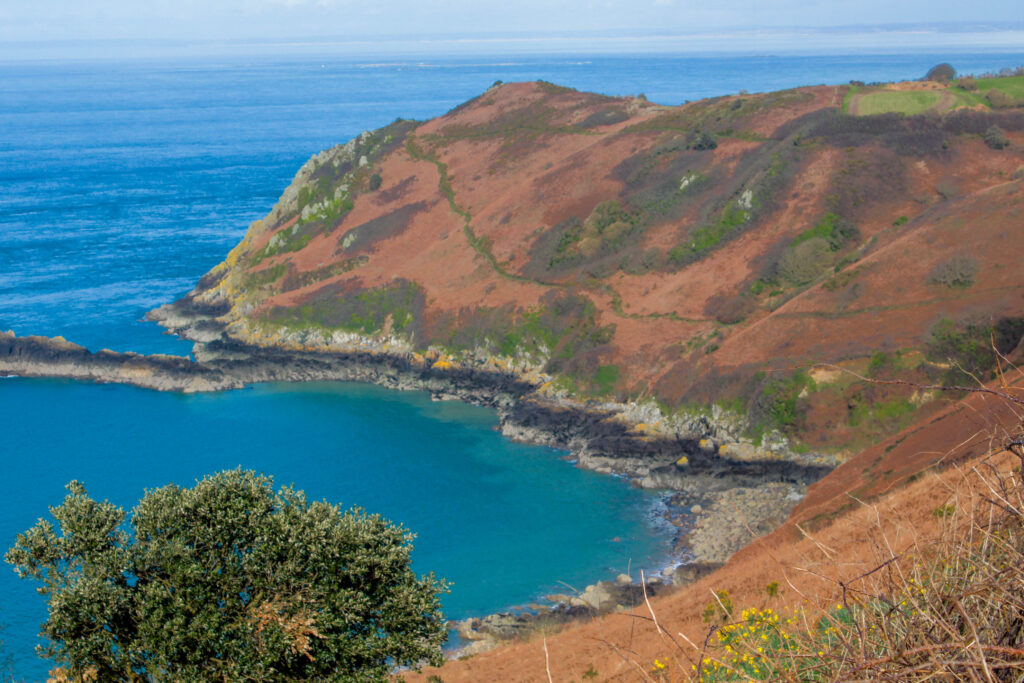
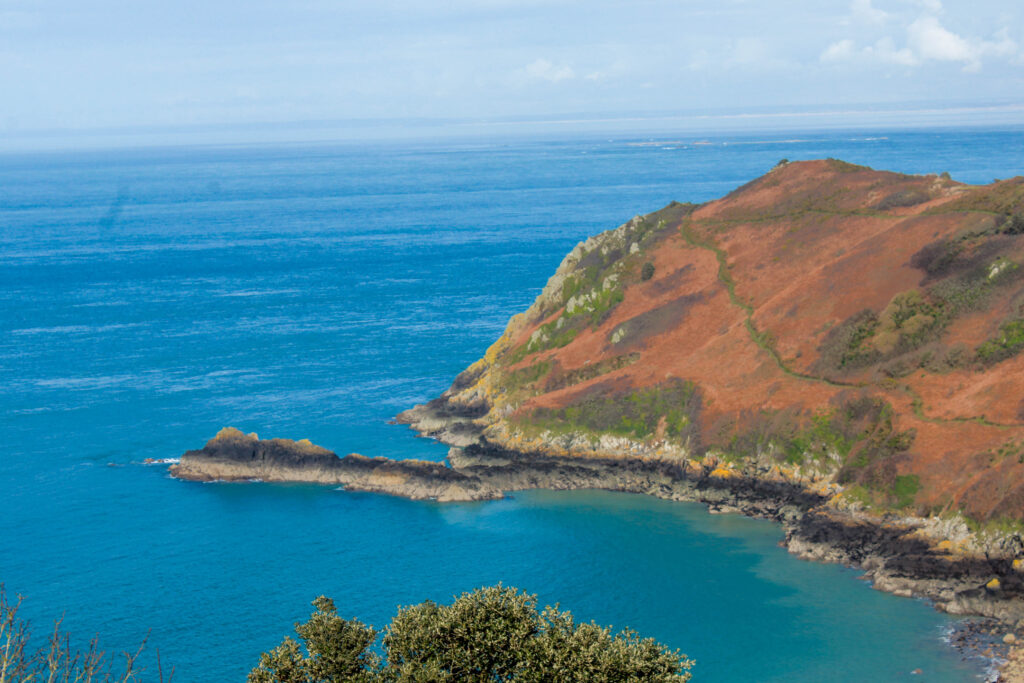
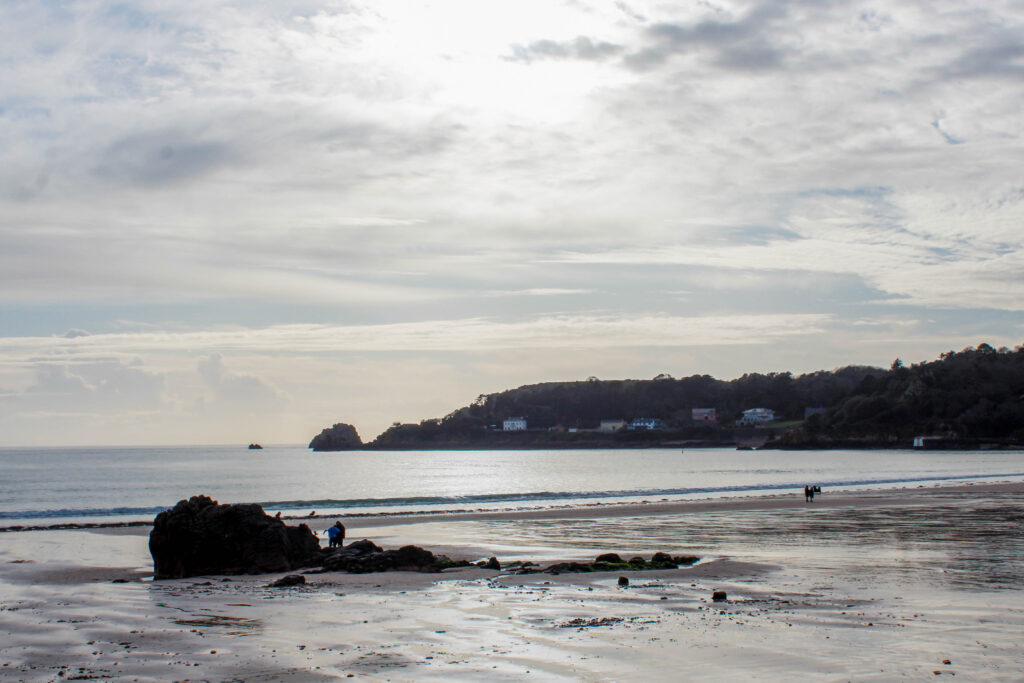
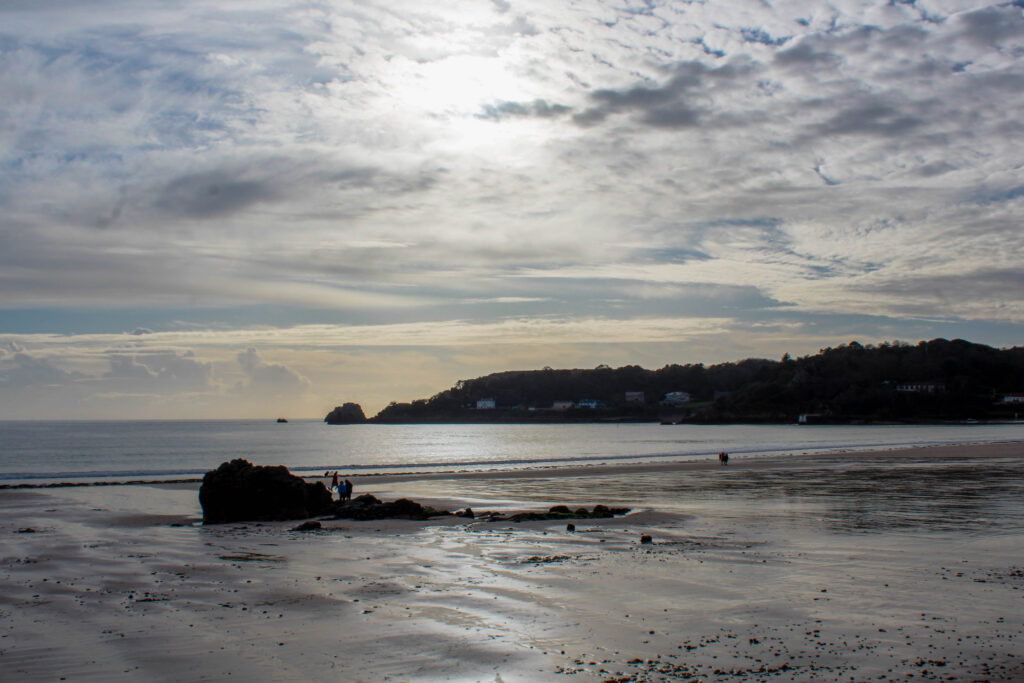
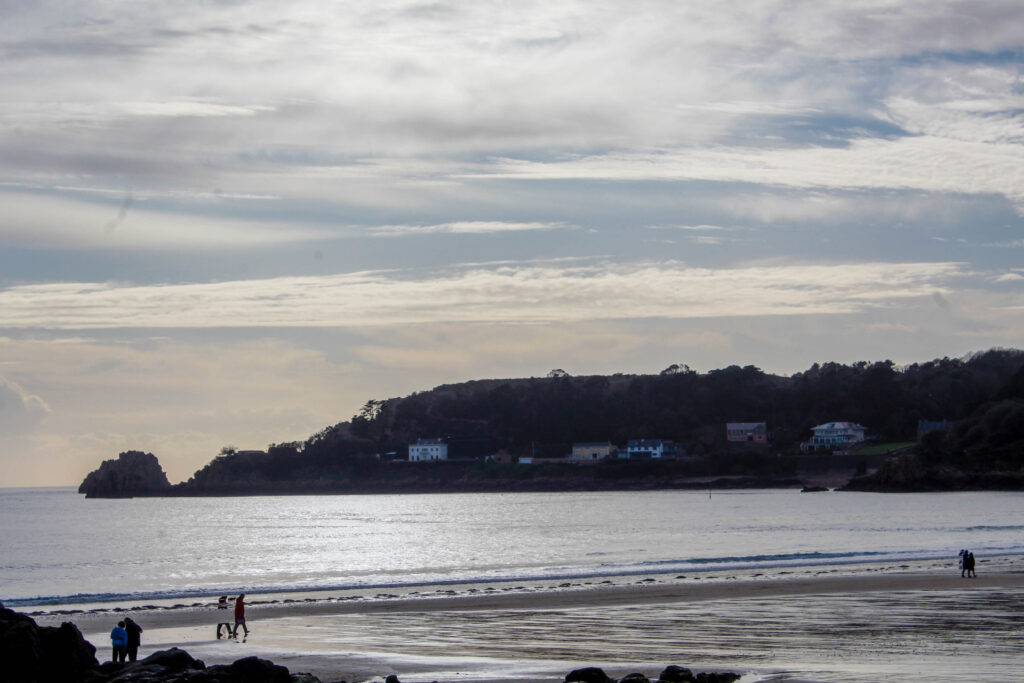
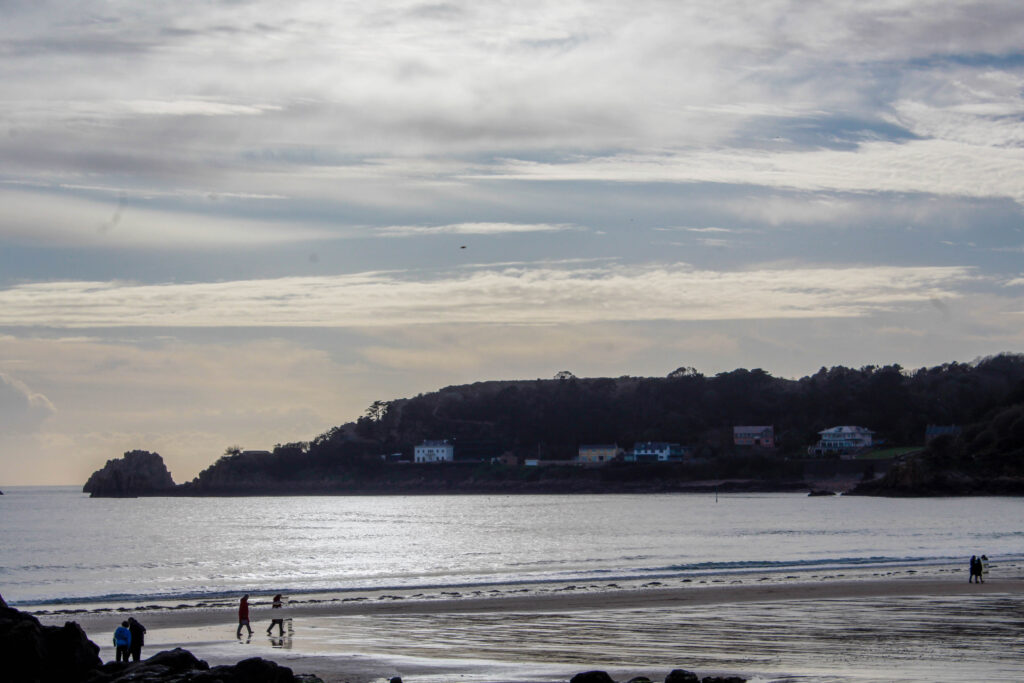
For this photoshoot I tried to focus more on the romanticism style of work where they often had the paintings including the sea and nature.
Editing Process
For this photoshoot I tried HDR image merging where you set your camera so the exposure will change each photo you take so the first image will be under exposed then normal/neutral and the last one will be over exposed. So then later in photoshop you select all three images and merge the three together so it creates this new image.
First version of images
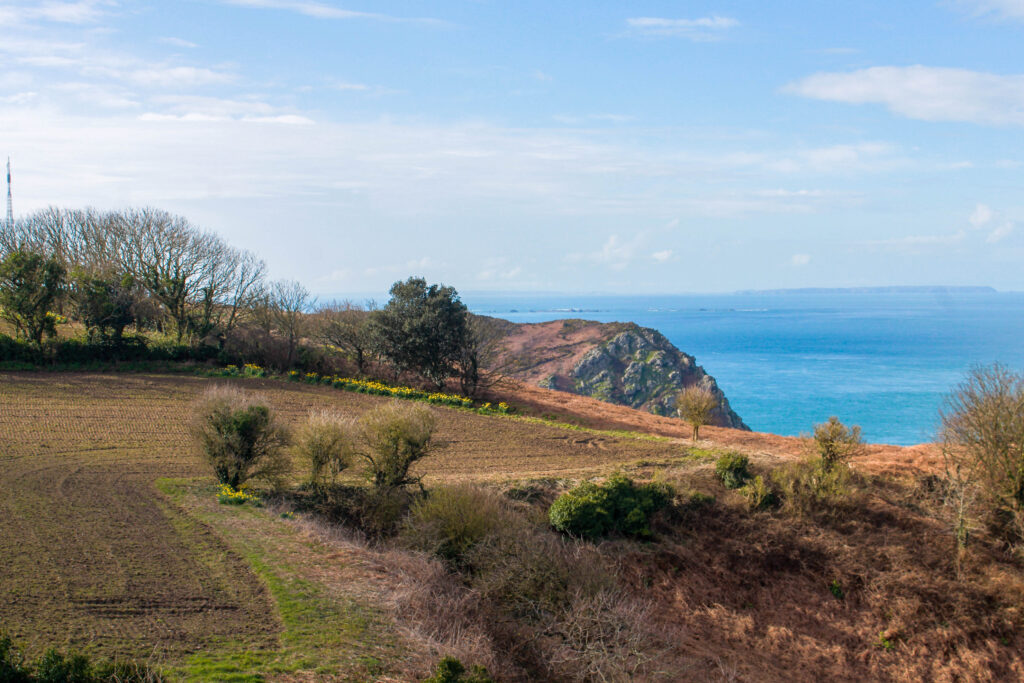
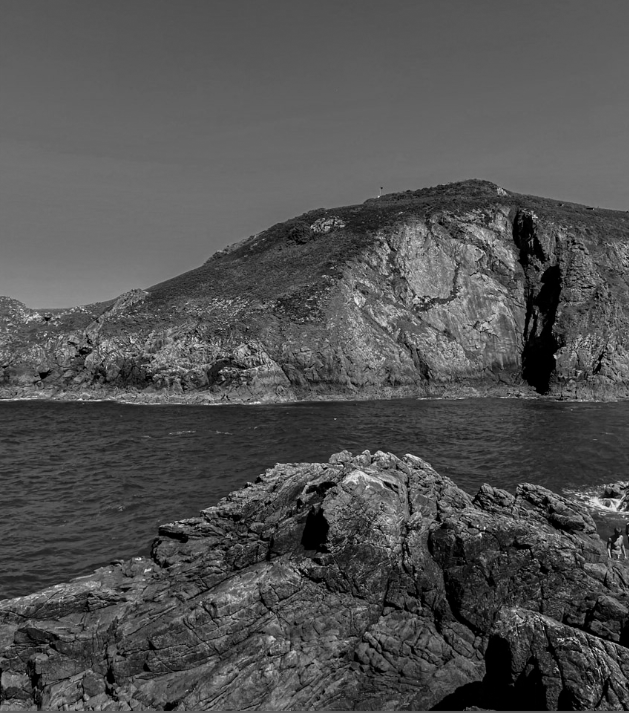
The image beneath I think was one of my most successful due to the interesting position of the focal point. On that image you find that the cliffs are curving around the image which I find adds more dimension to the image but also it makes the photo stand out compared to the rest of my photos as the others just tend to have the focal point in one half of third of the image.
overall I’m really happy with how this photoshoot came out I think all the images capture some of the essence of romanticism paintings with having these beautiful landscapes of the natural coast and also the sea which is commonly used in original romanticism paintings.
second version of images
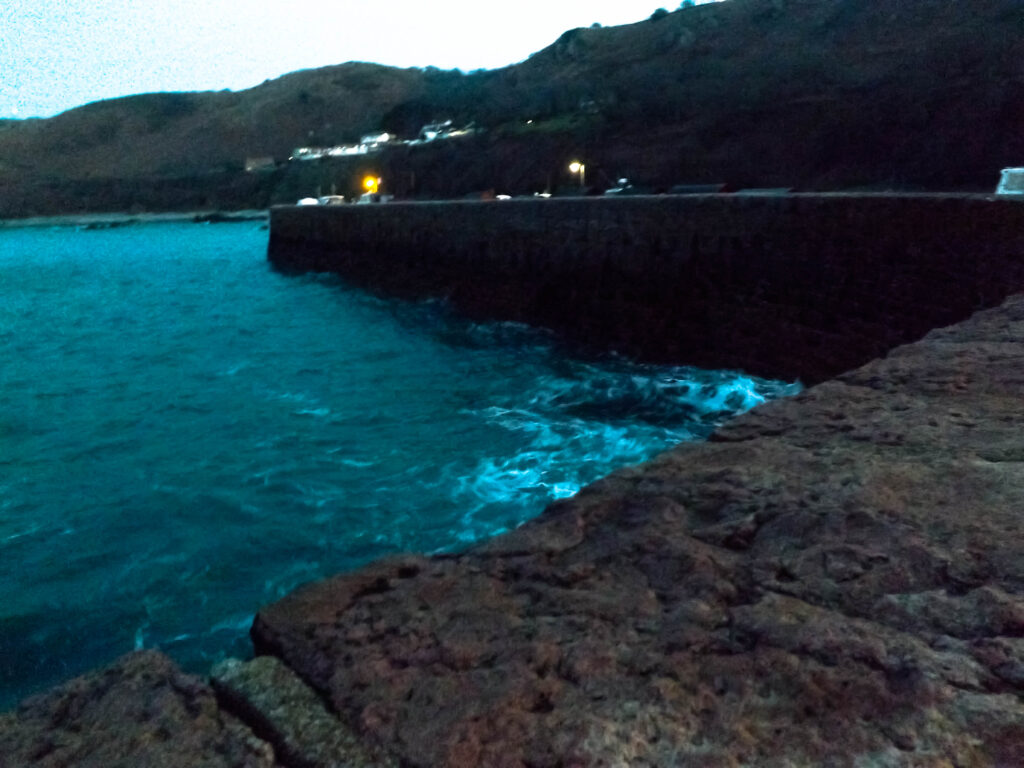
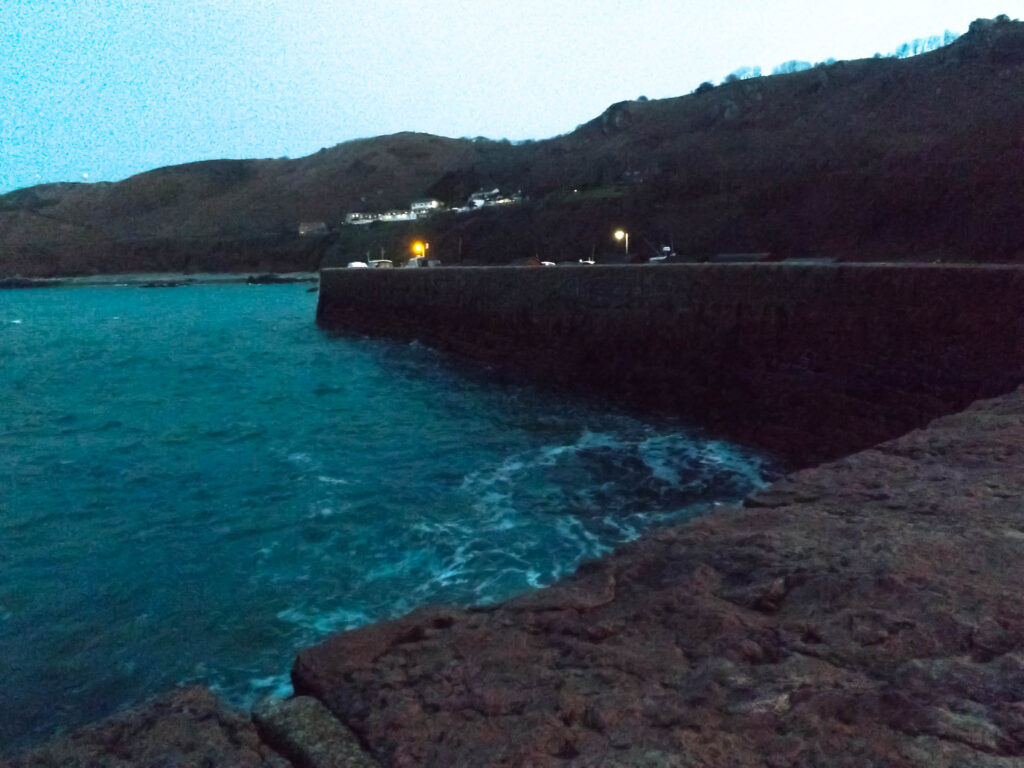
In the first edit I had the in colour which works well with romanticism however I I edited these more in the style of Ansel Adams by turning the images into black and white and then increasing the contrast and the level of the colours while they were in black and white so that certain colours turned out darker and others light like the system below.
I think that these edits are a lot more interesting than the first ones because they have that dramatic aspect and effect to them now. These images all have lots of the different zones from the zone system Ansel Adams used which creates this amazing detail which you may not have been able to see before due to maybe the colours being too similar but in black and white they really stand out.
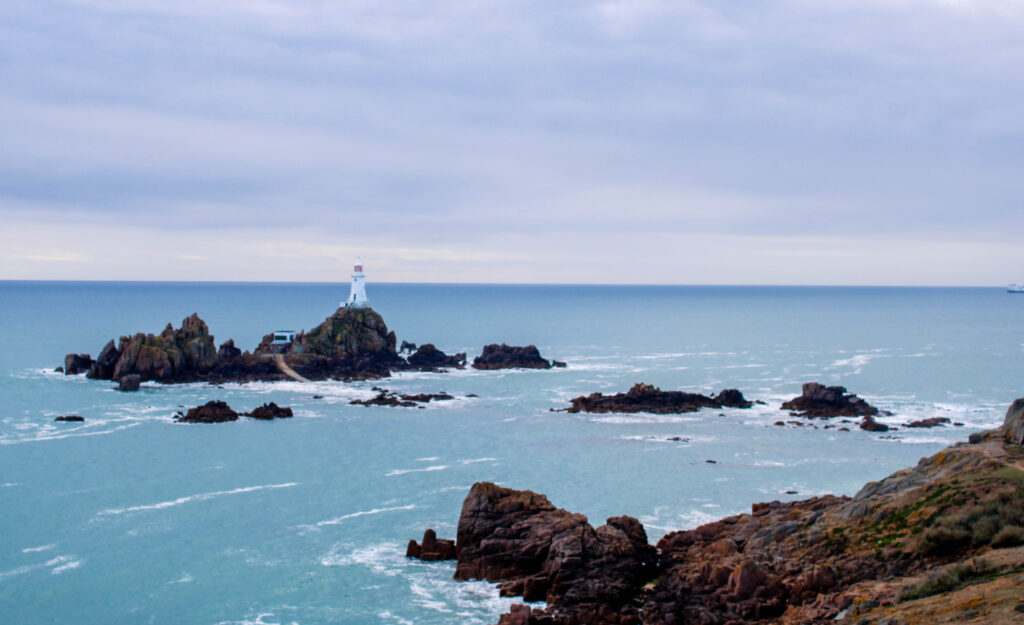
I think this image above might be my favourite with this style of editing as it really reminds me of Ansel Adams work with the darker sky still with the lighter areas which gives it more texture and detail. However it also works really well with romanticism with the sea which was a common thing to be painted but with the lighthouse and the rocks surrounding it makes it more unique. I also think the sharp darker line from where the sea and the sky meet creates this mazing and contrast between the two elements.
I have made a virtual gallery in Photoshop for 4 different photoshoots I have made in this landscape project. These consist of:
Ansel Adam inspired photoshoot
Storm Ciaran destruction photoshoot
The Sublime inspired photoshoot
I also chose 3 different empty gallery images off Google which I think are the best choices to display these photos. I have picked between 2-4 photos from each photoshoot which I think are my strongest images and display my work the best.
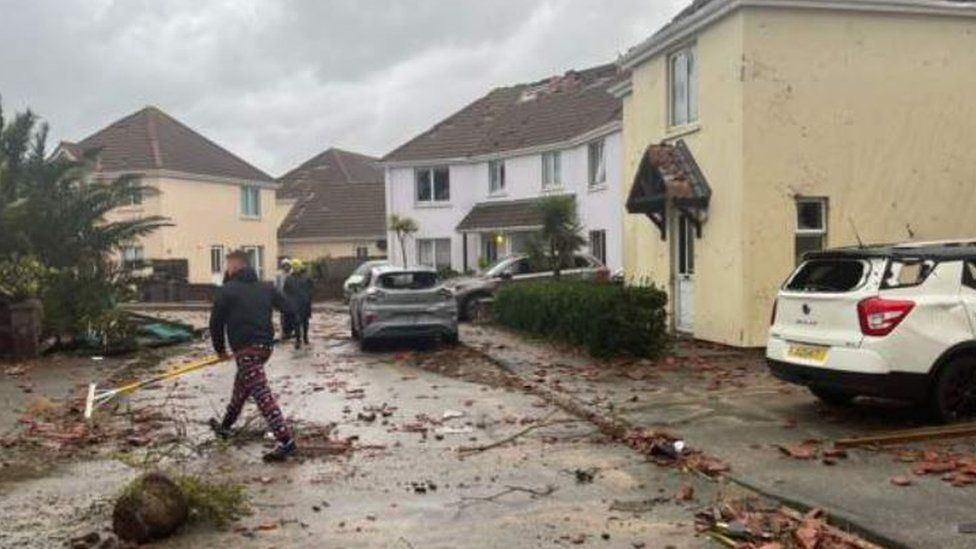
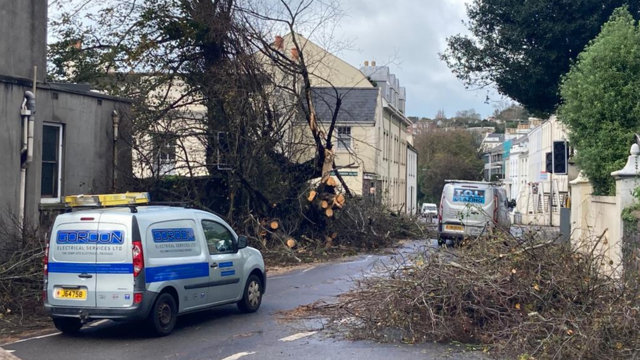
Storm Ciaran hit Jersey Channel Islands Wednesday 2nd November 2023. Jersey was hit by a tornado and extremely strong winds lashed the island. This caused dozens of people to be evacuated from their homes. Schools, work, shops were shut due to this storm and the whole island was advised to stay inside until the next day due to the really unsafe conditions and unsafe damage.
“It’s really clear certain areas of the island have really been hit hard this time and the damage is very significant.”
“We’ve all seen footage of some really serious damage that has been done but it will take some time to be able to assess all of that.”
The government asked any islanders planning to return to their properties and assess damage should only return “if it is absolutely safe to do so.”
“For properties that have sustained significant damage, we strongly advise seeking the opinion of a property surveyor or structural engineer before entering and or trying the collect belongings.”
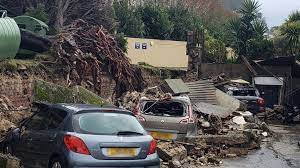
Lots of damage was caused, mainly in St Clements, as that is where the storm/ tornado hit the worst. Damage occurred to;
Schools (Hautlieu, Highlands)
Many homes
Airport
St Clements Golf club
Trees/ environment
etc.
This has taken a while to fix, even though some of the damage still has not been fixed yet. This also costed the Government and many people lots of money and time to fix this damage created by the storm.
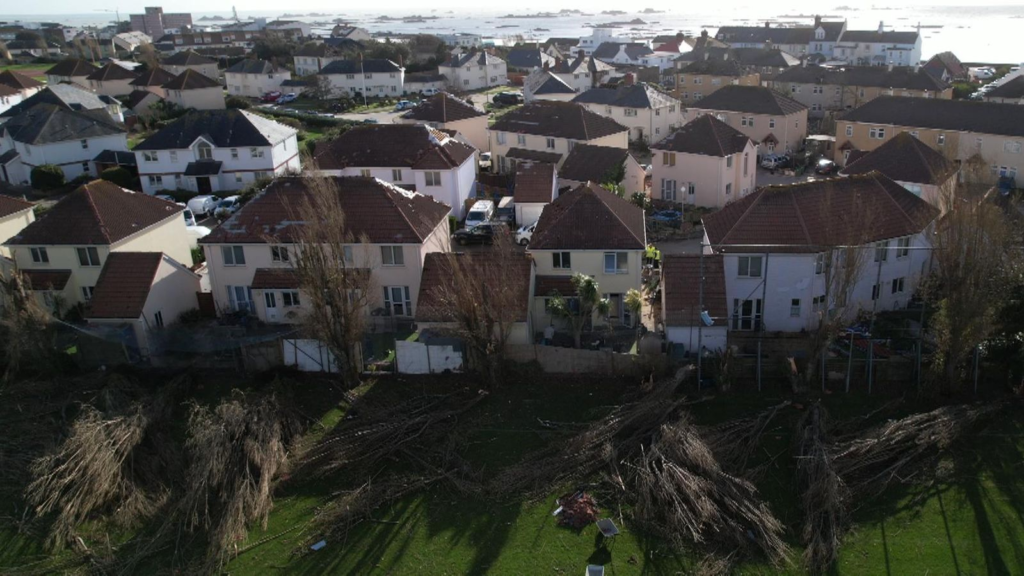
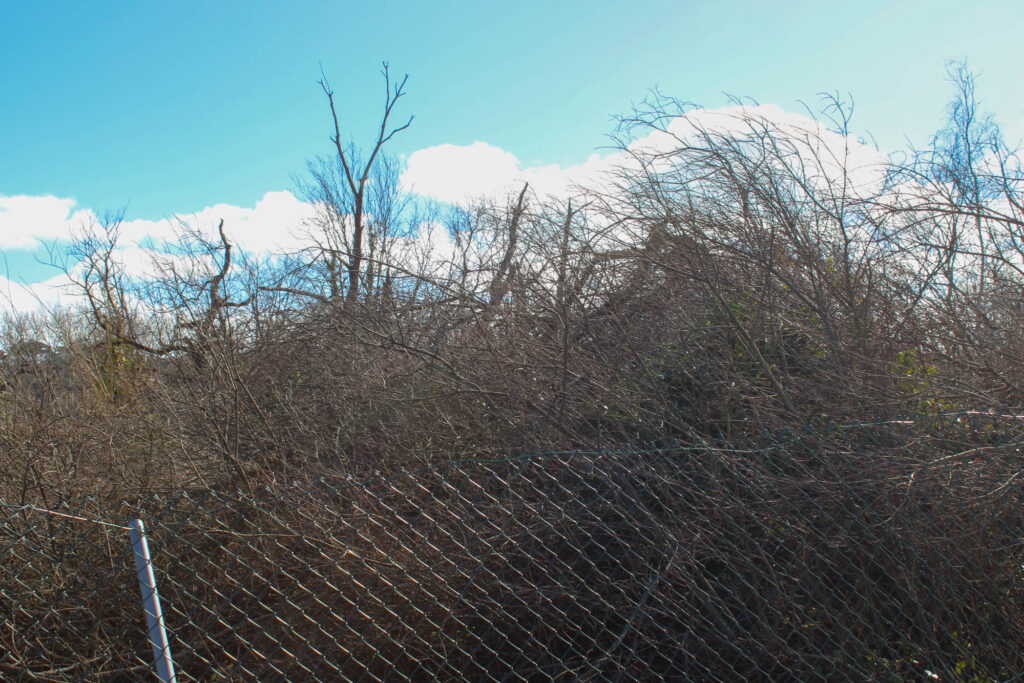
Examples of tree Damage
These images were taken by other people in jersey a few days after the storm, when there was much more damage and fallen trees still around, before the clean up. This is an example of how powerful Storm Ciaran was.
Examples of house Damage
These images were of peoples homes not long after Storm Ciaran, and these images present just how powerful the storm and the wind was, to be able to knock down walls, and take off roofs etc.
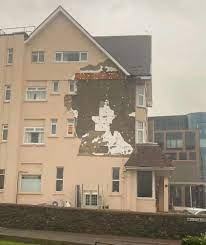
Examples of other buildings Damage
These images were also taken not long after the storm of other buildings, which were not people’s homes. These images also present how strong and powerful, while also dangerous the Storm and the winds were.
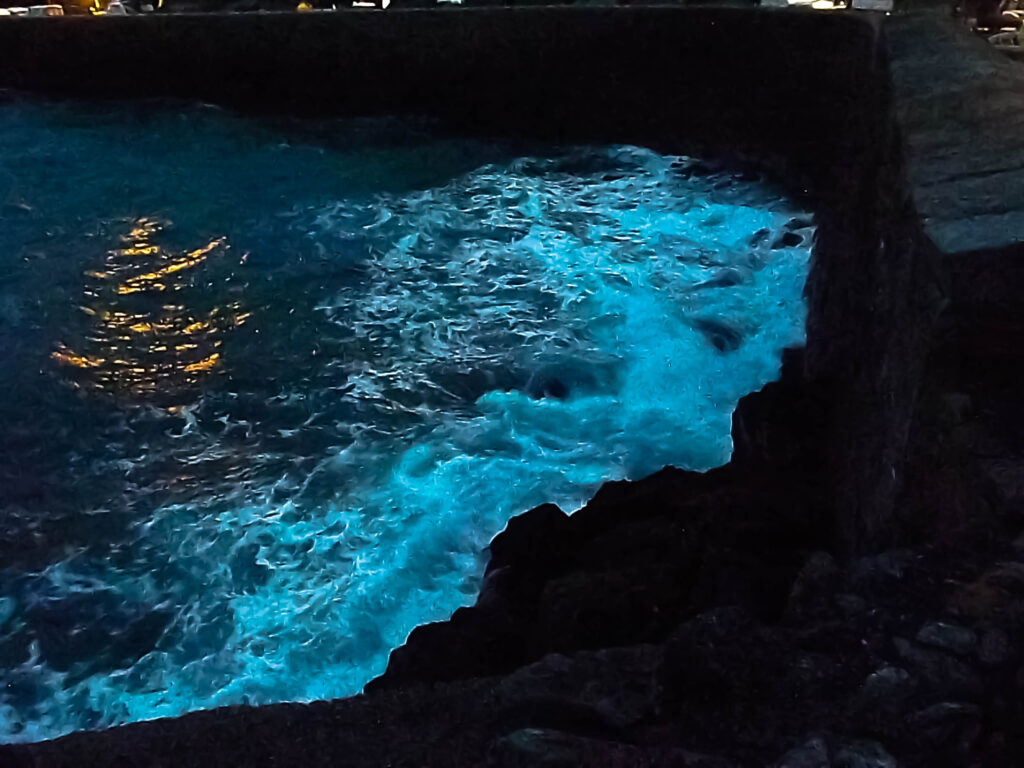
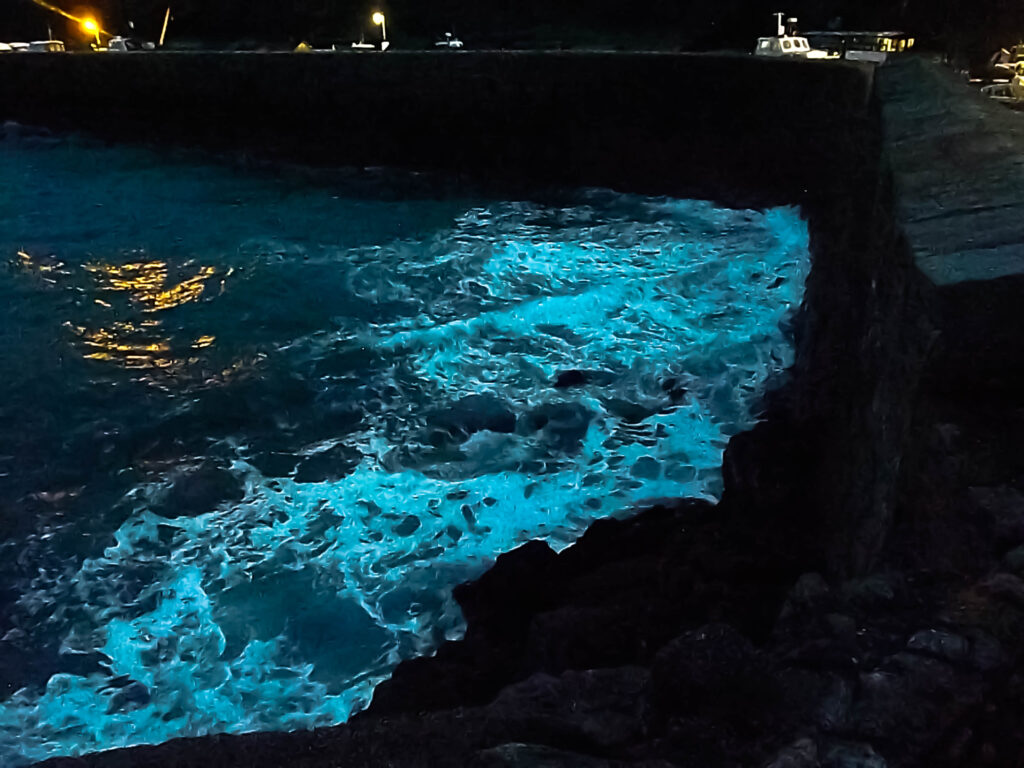
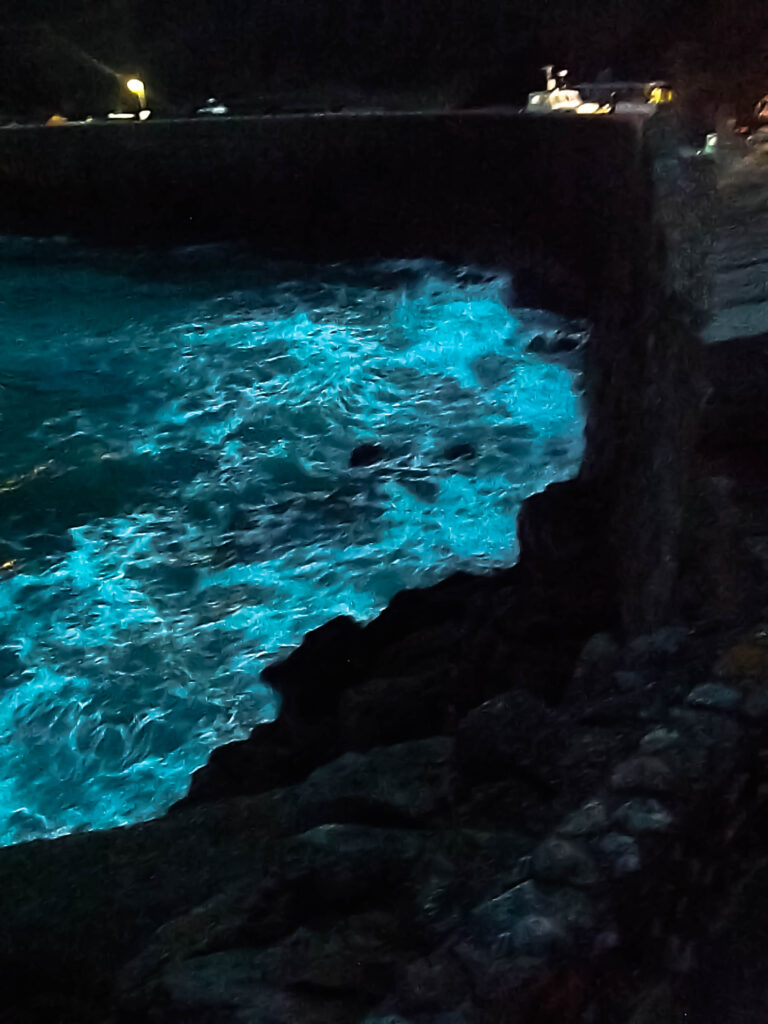
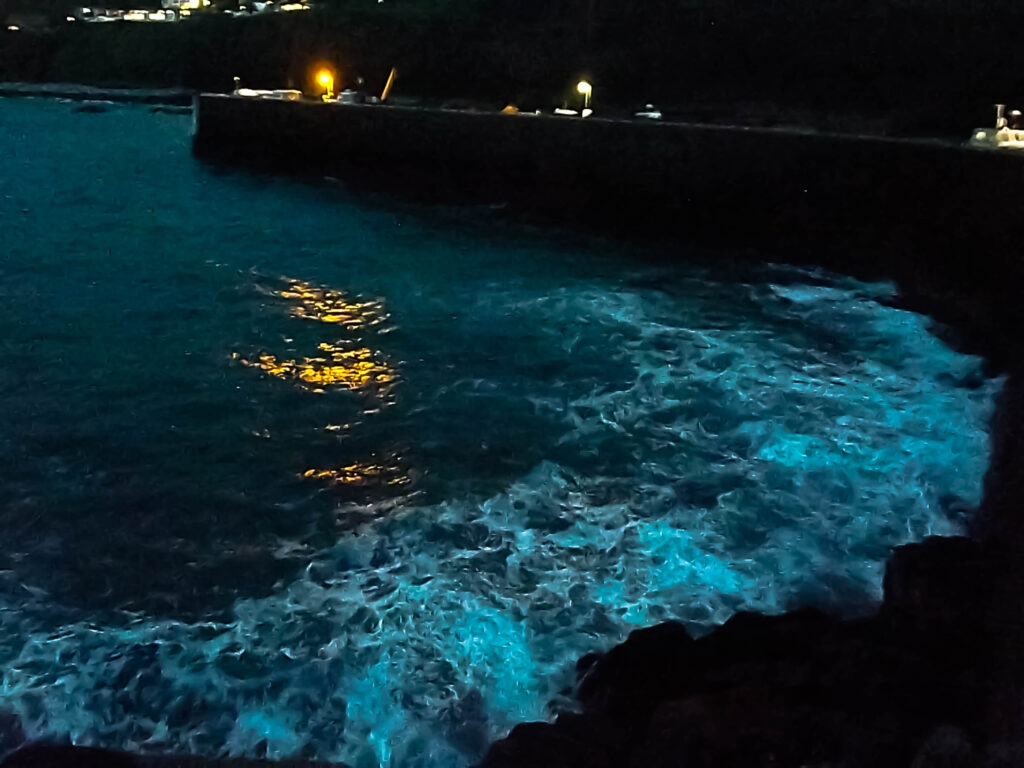
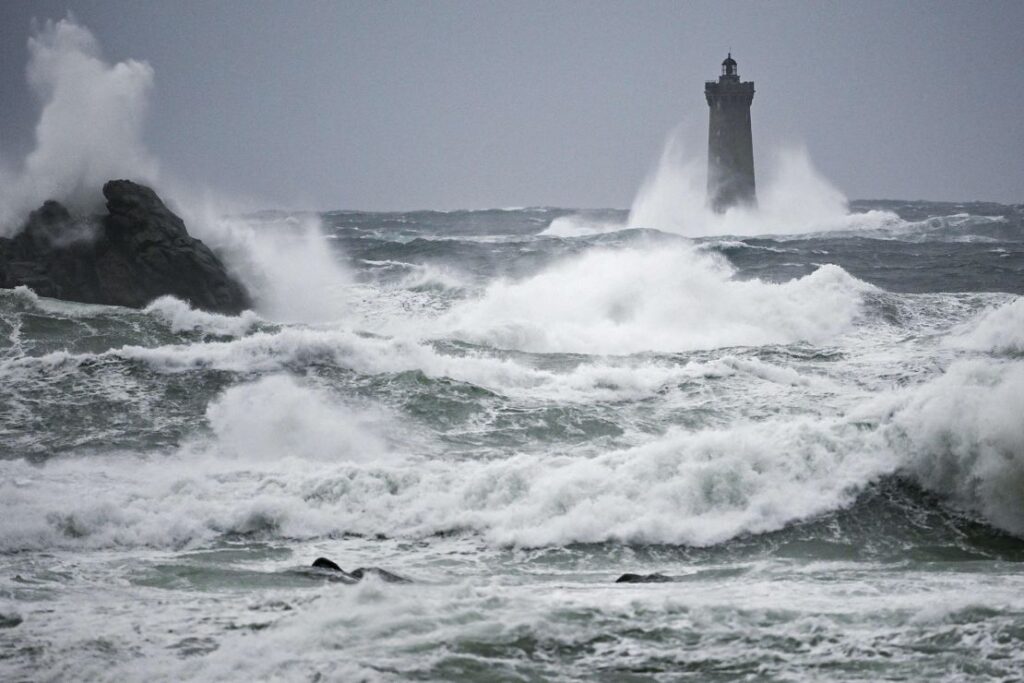
Examples of Rough Waves
These Images were taken of the waves during the strong winds of the storm. These waves help present how rough and strong the storm and winds were, to be able to produce these mighty waves.
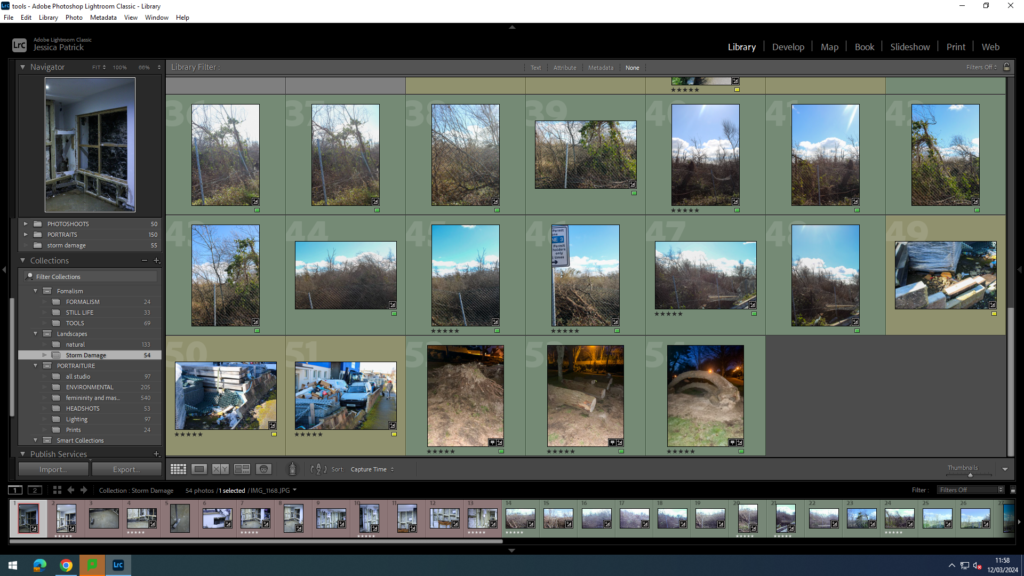
My Storm Damage Photos
The images that I have highlighted green are the images I have chosen to edit, because I think they show all the different damage the storm did the best, while also having the best focus and composure.
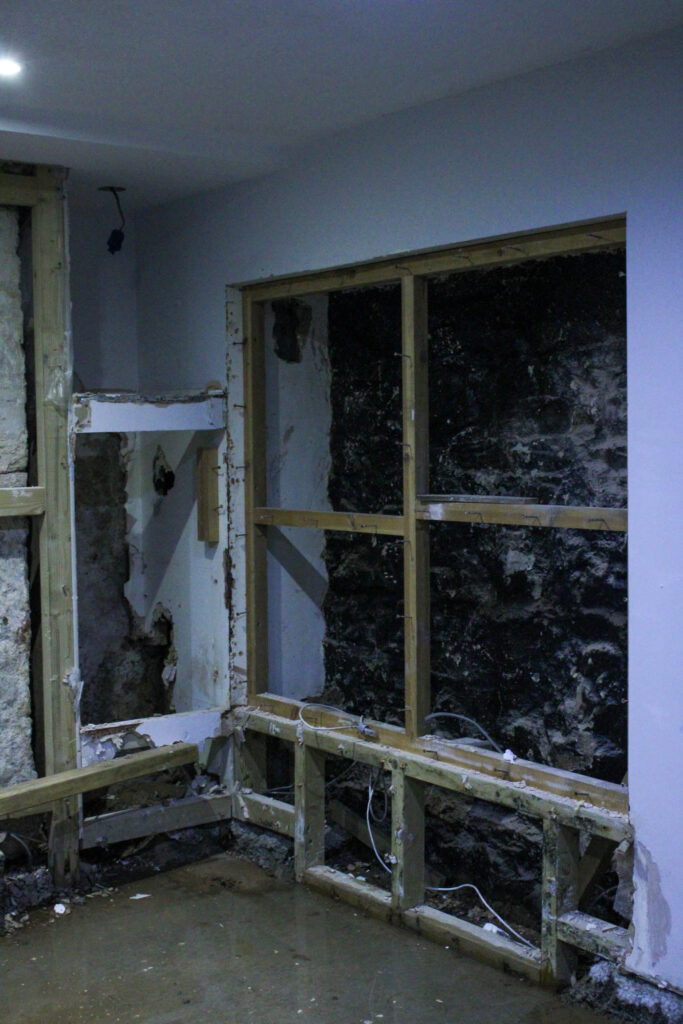
House Damage
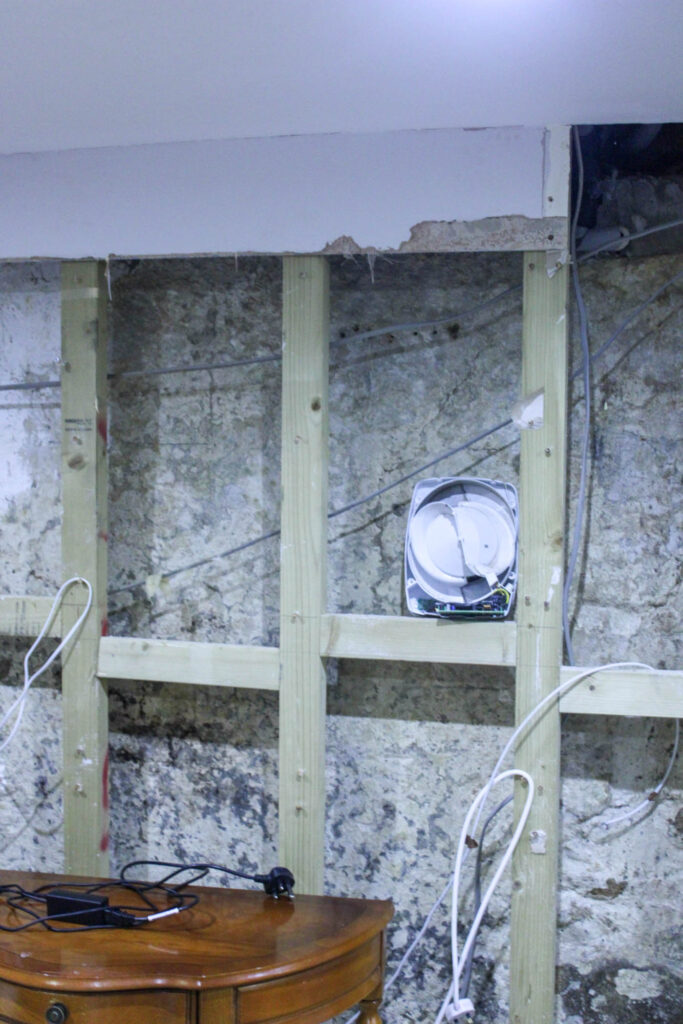
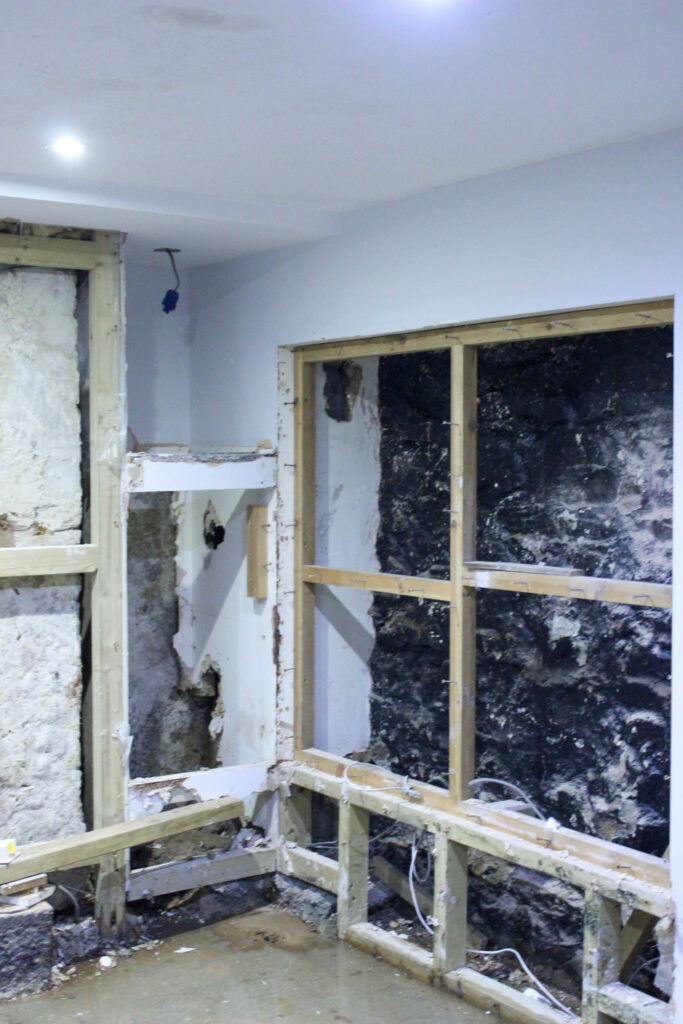
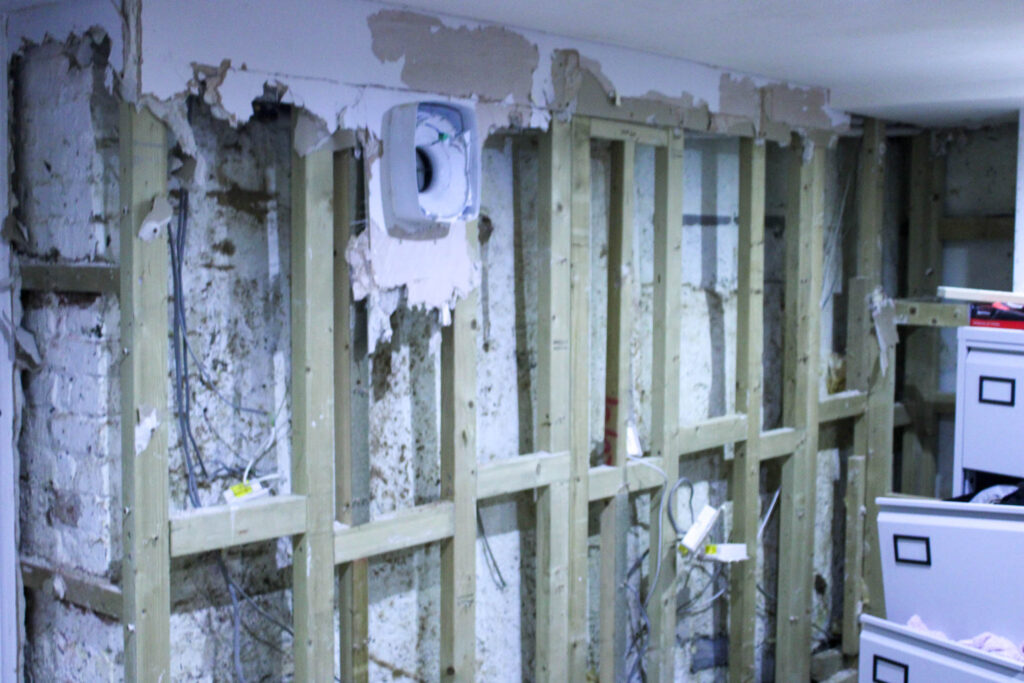
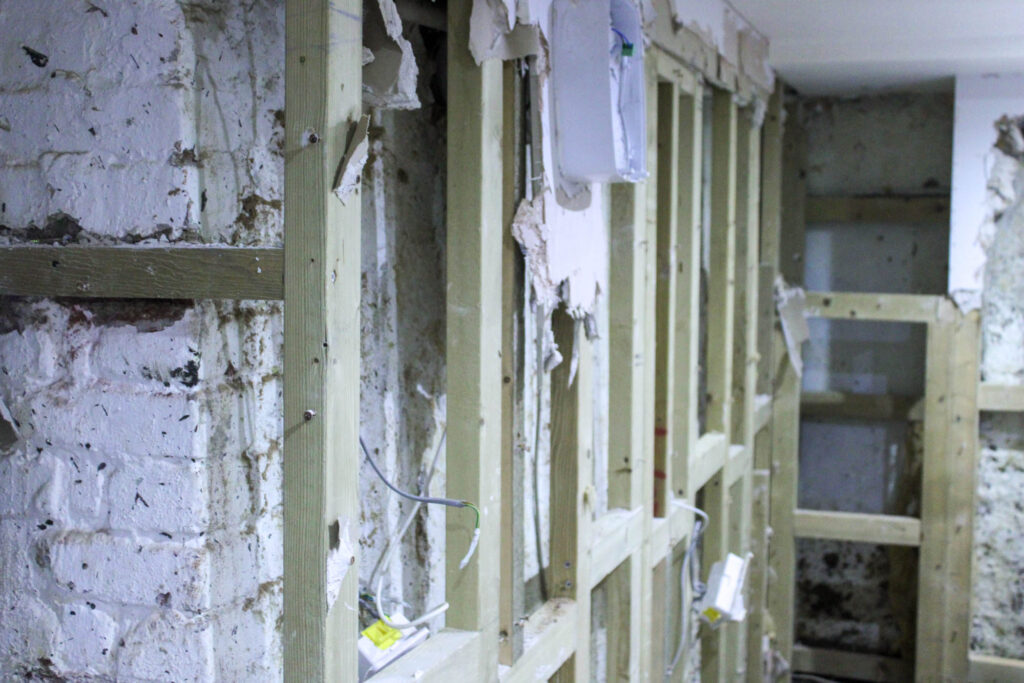
I took these photos in my bedroom in St Helier near Harve De Pas. The storm damaged my room, by causing flooding, which you can see with the water on the floor. This then caused the walls to wear away, and then have to be knocked down.
Edits
I edited these pictures by increasing the exposure, contrast, shadows, whites, vibrancy and saturation, while also decreasing the highlights and blacks, so that the photo would be brighter, and so the white walls would have less of a grey tint and look more of a clean white. I also did this, so the image would be brighter and have less blacks through it, so that all the damage was more visible.
The final edited images then came out like this. In this image you can see the hole in the wall in the corner, where the water is flooding in, as well as the damage it has done to the walls and floor. You can also see lose wires that have been hung up, so they do not fall in the water, so they will not cause any electrocutions.
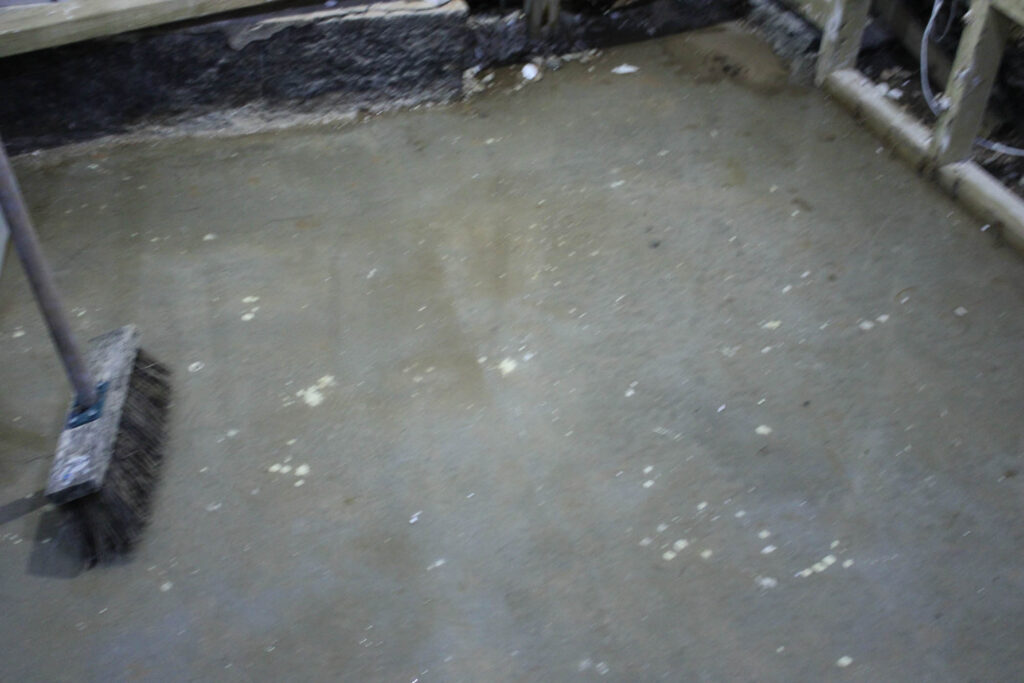
I edited this photo by increasing the exposure, contrast, shadows, whites, vibrancy and saturation, while decreasing the blacks and highlights, so that the room and walls looked much brighter, and so the water on the floor was more visible.
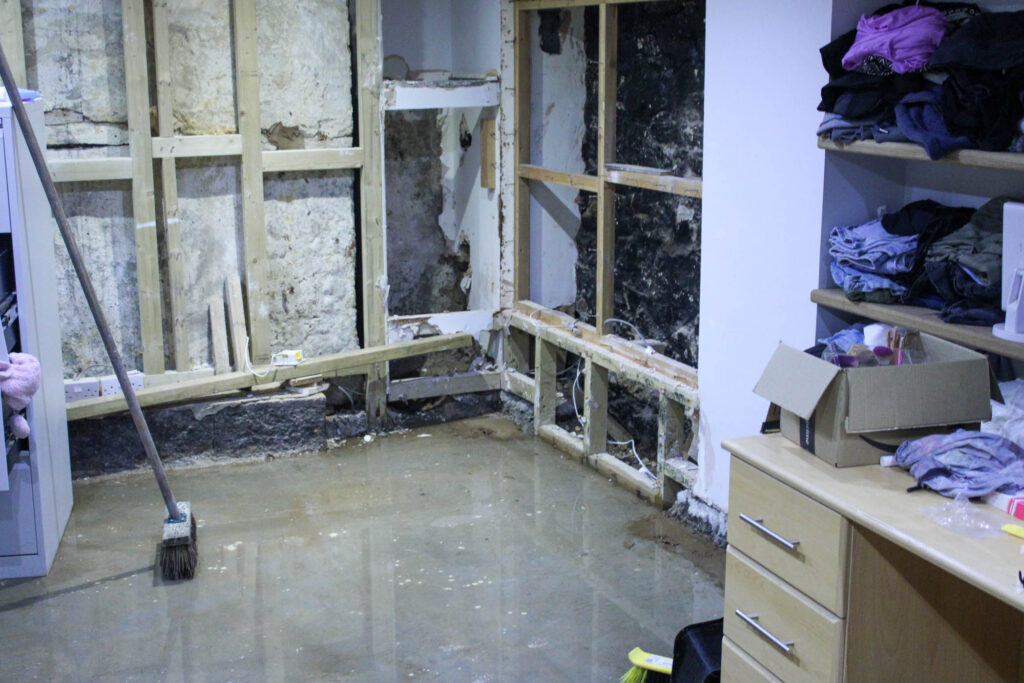
This is how the final edited image came out. You can still see the damage to the corner of the room, but you can also see the water on the floor now, and a broom which was used to tidy some of the damage.
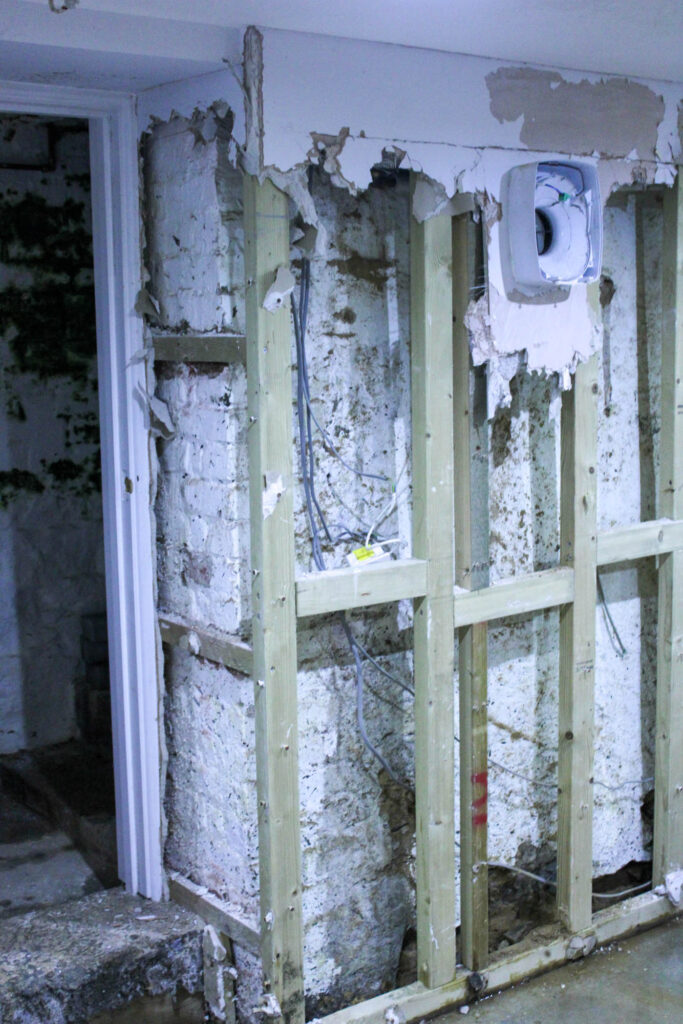
I edited these photos in the same way, by increasing the exposure contrast, whites, shadows, vibrancy and saturation, while decreasing the blacks and highlights, so that the images were more vibrant and visible. However, on the second image I also increased a yellow tint, because the original image had a slight blue tint.
This is how the final edited images came out. They show the huge damage done by the storm to the walls in my bedroom.
Tree Damage
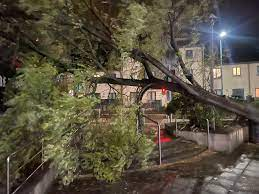
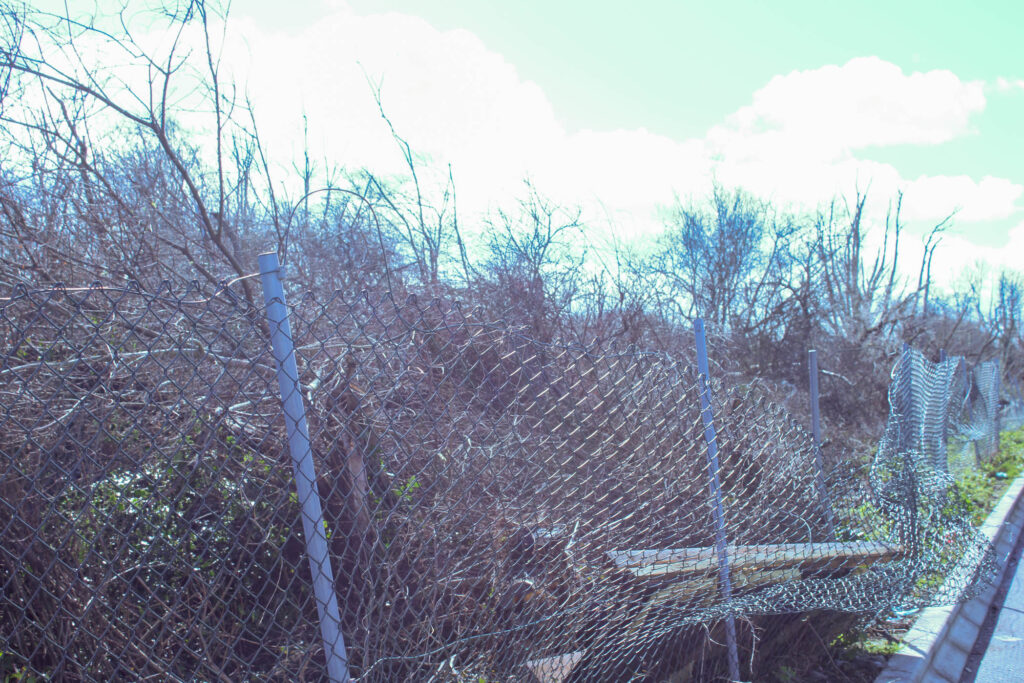
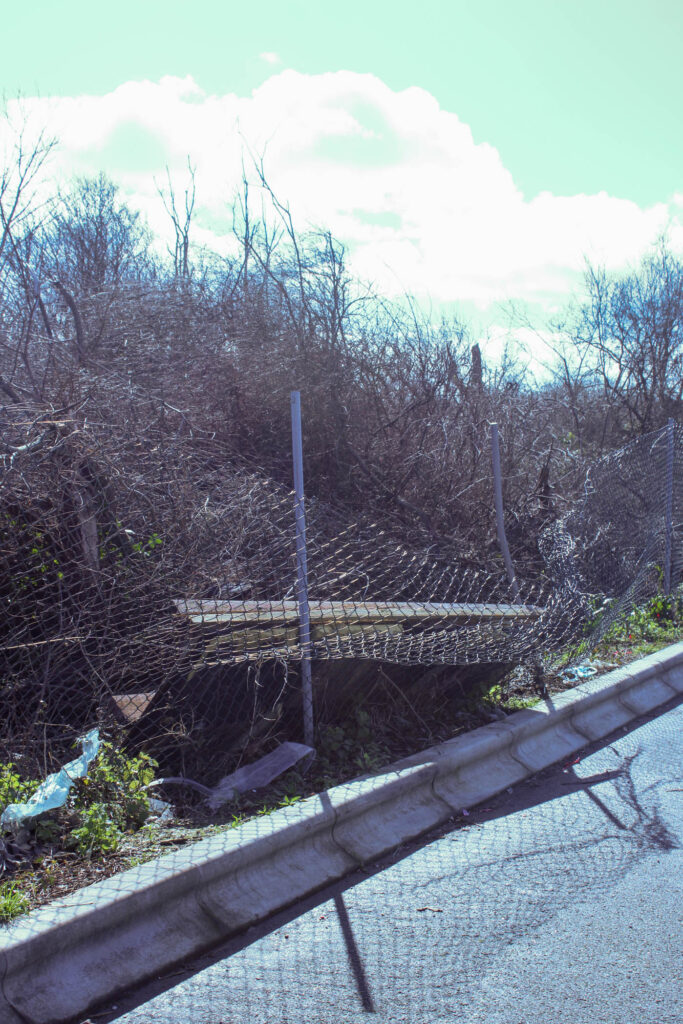
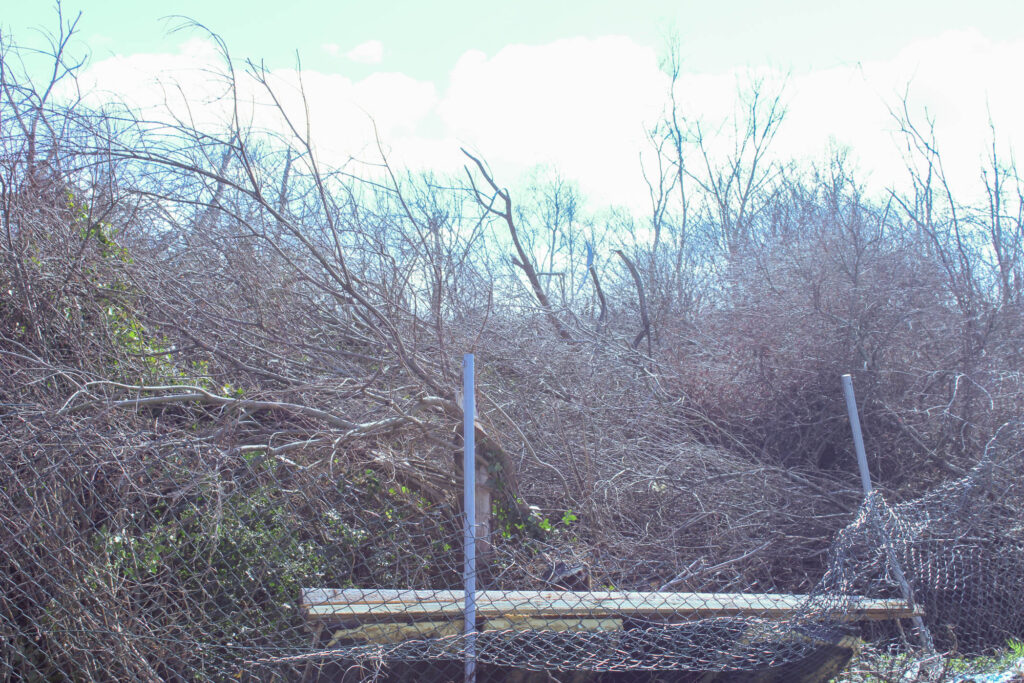
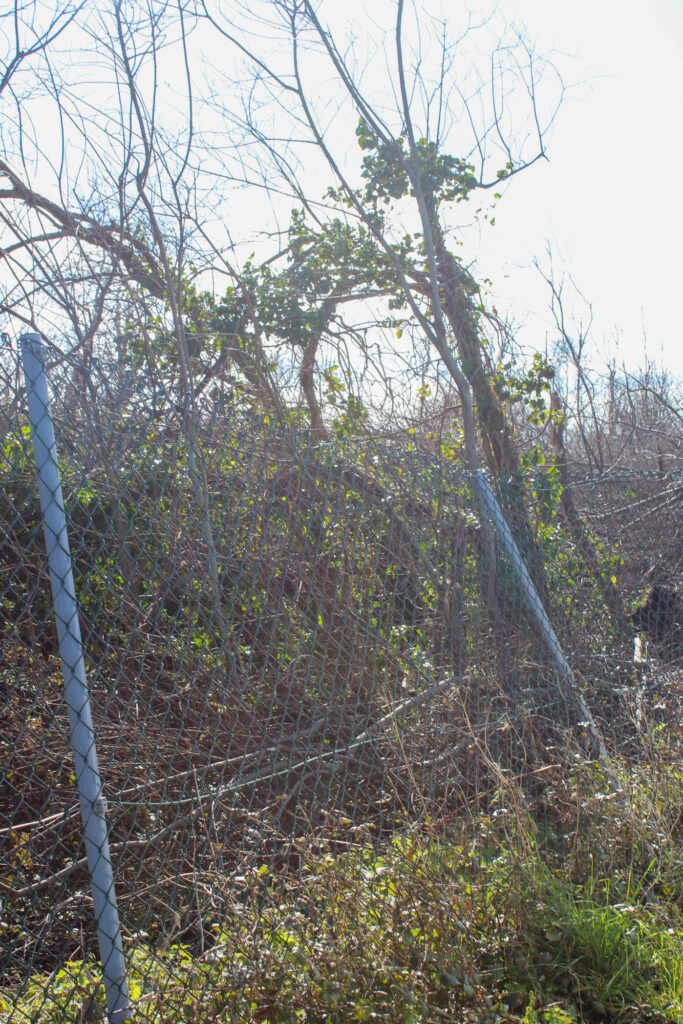
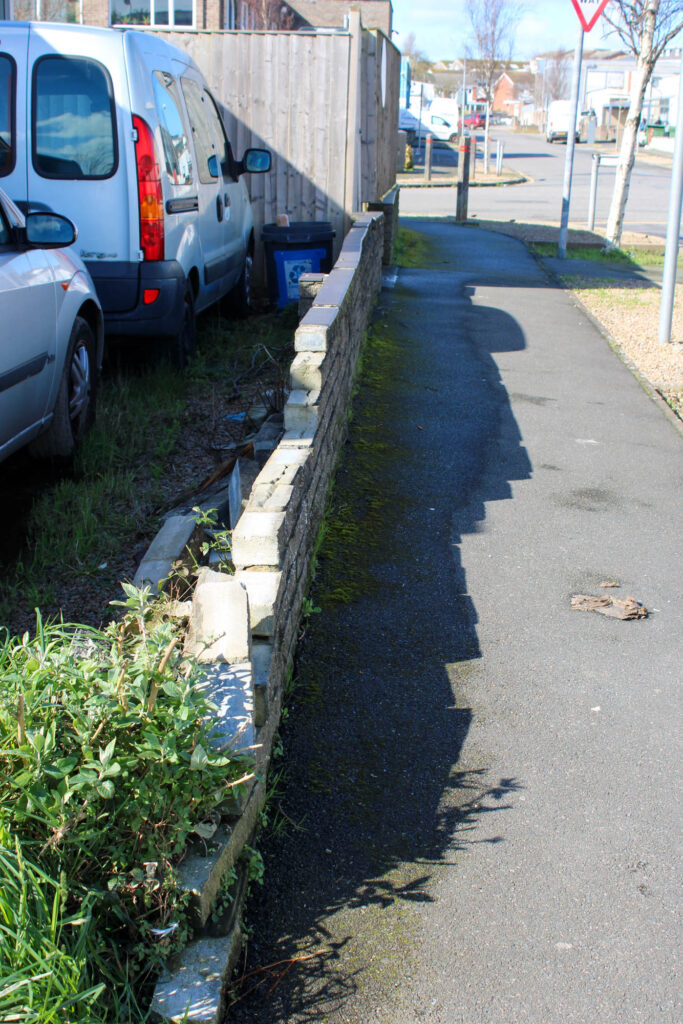
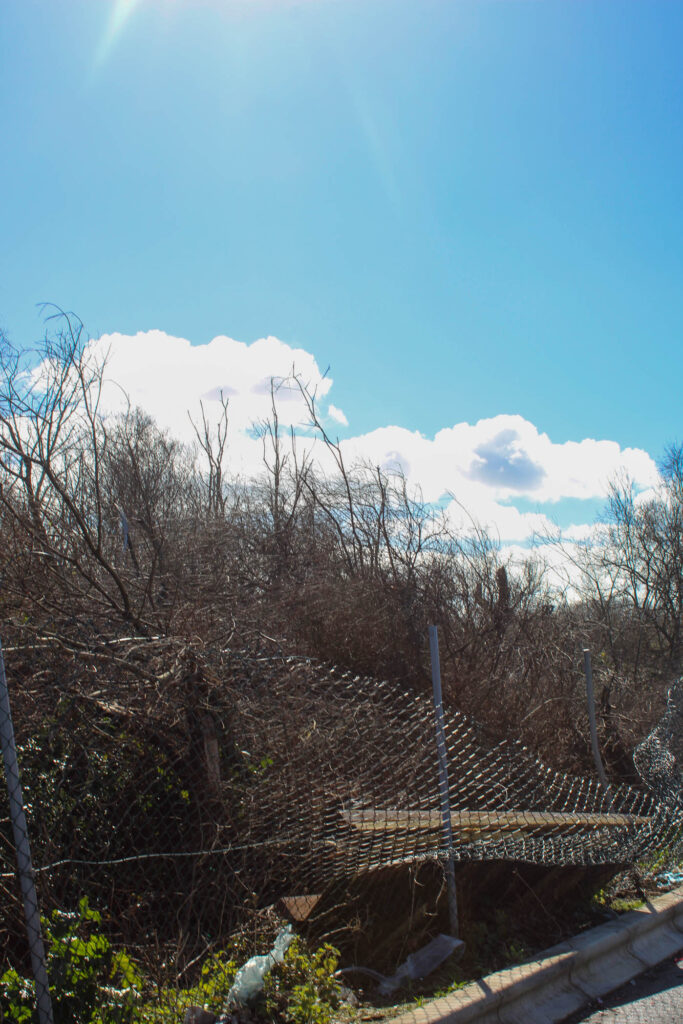
I took these images near the Post Office in St Clements. The storm has caused many of these trees to have fallen over and fallen all on top of each other. This presents how powerful and strong the wind was from the storm to be able to blow all these trees down. Many bigger trees were cleared up just days after the storm, but smaller trees in non-hazarded places are less of an urgent concern. In these images there was also damage to the fence surrounding the trees, which you can see.
Edits
These first images I took had quite a blue tint on them, so I had to adjust it and add more of a yellow tint to be able to cancel the blue out. Then, I edited these pictures in the same way, by increasing the contrast, shadows, whites and vibrancy, while also increasing the saturation on the first one. Then, I decreased the exposure highlights and blacks on both. I did this, so that the colouring was better and brighter on each image, so that the image was more accurate compared to what I saw.
The final images then came out like this, where you can see all the fallen trees piled on top of each other, while also being able to see the damage done to the fence surrounding the trees in the second image.
Once, I realised my photos were coming out with a blue tint I played around with my camera settings adjusting them, so that there was no longer a blue tint.
I edited these images, by increasing the contrast, shadows, whites, vibrancy and saturation, while also decreasing the exposure, highlights and blacks, so that the image looked less dull and the damage done by the storm could stand out more.
The final edited images then came out like this. You can clearly see the damage done to the trees, as they are all fallen and on top of each other, while also seeing the damage done to the fence surrounding it. This presents how strong the storm must of been to be able to cause all this damage.
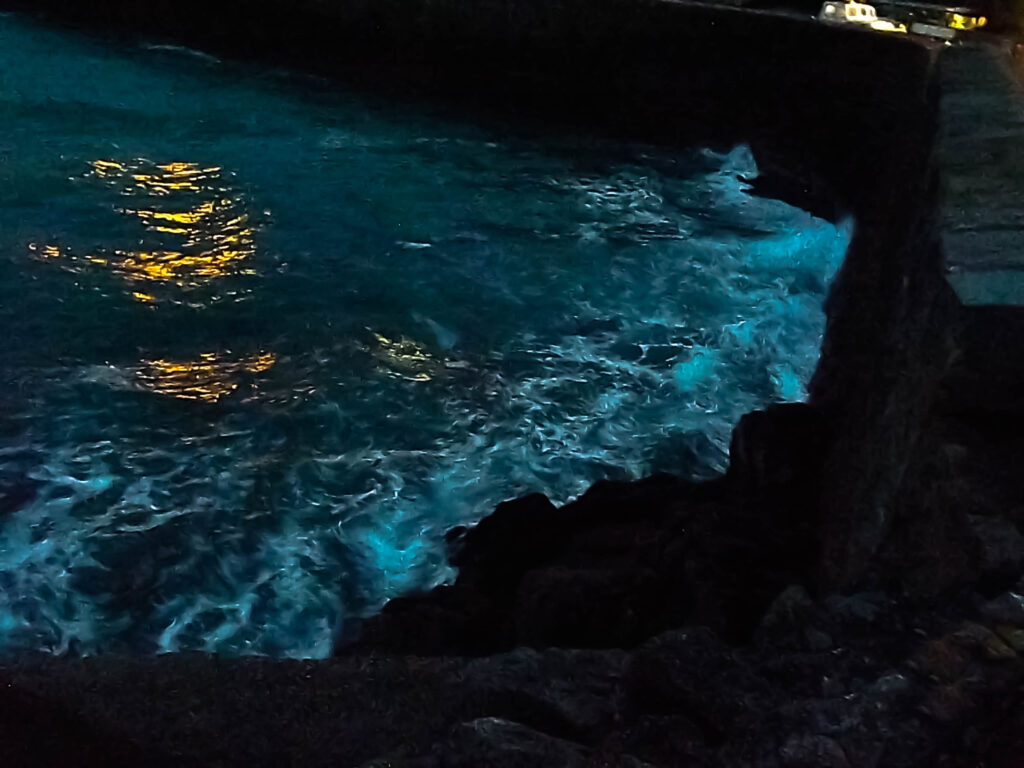
I edited these images by increasing the exposure, contrast, shadows, whites, vibrancy and saturation, while decreasing the highlights and blacks, so that the image would be brighter and more visible, as the images were taken when it was dark.
The final images came out like this. These images are not the best, as they were taken on my phone, because I only spotted this, while on a dog walk and did not have my camera, so they could have been better quality. However, I think the images show the damage from the storm very well and shows how powerful the storm was the be able to tear the tree out of the ground like that.
Other Buildings
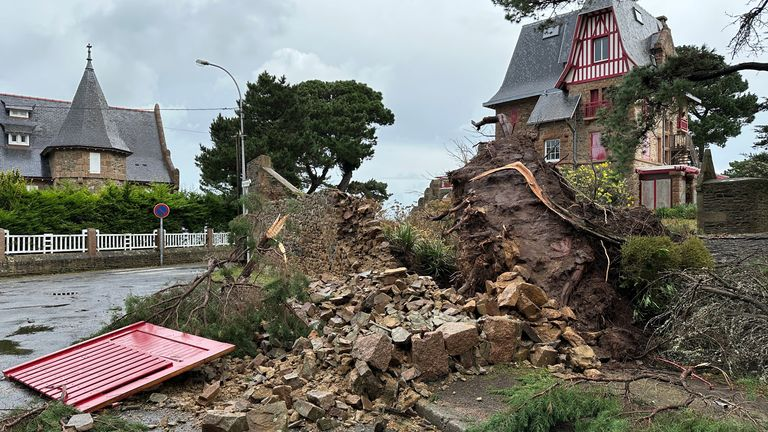
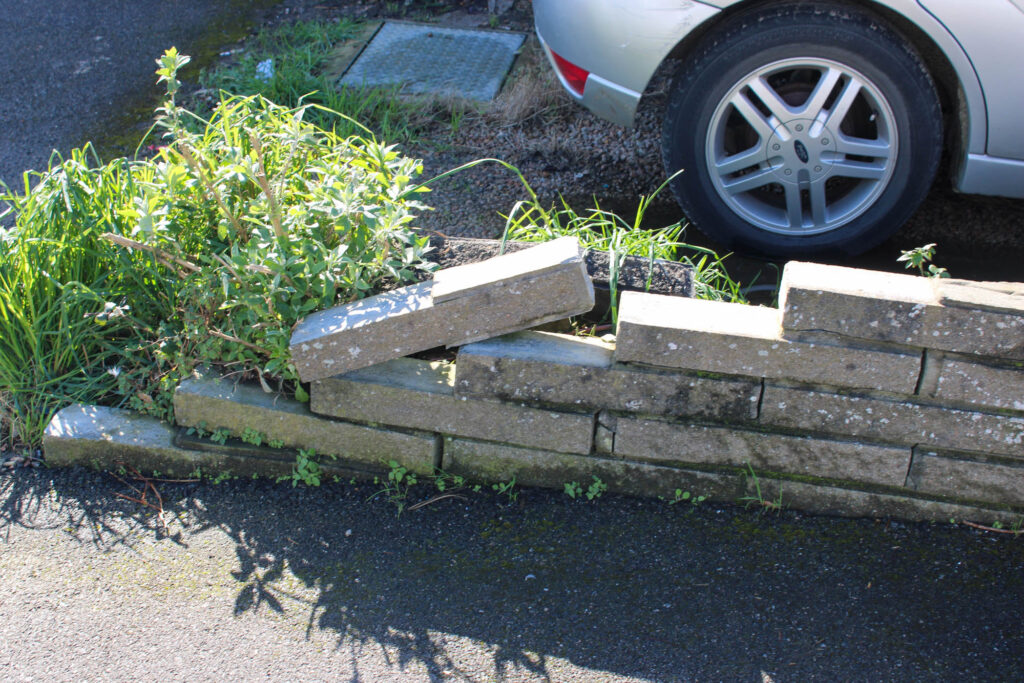
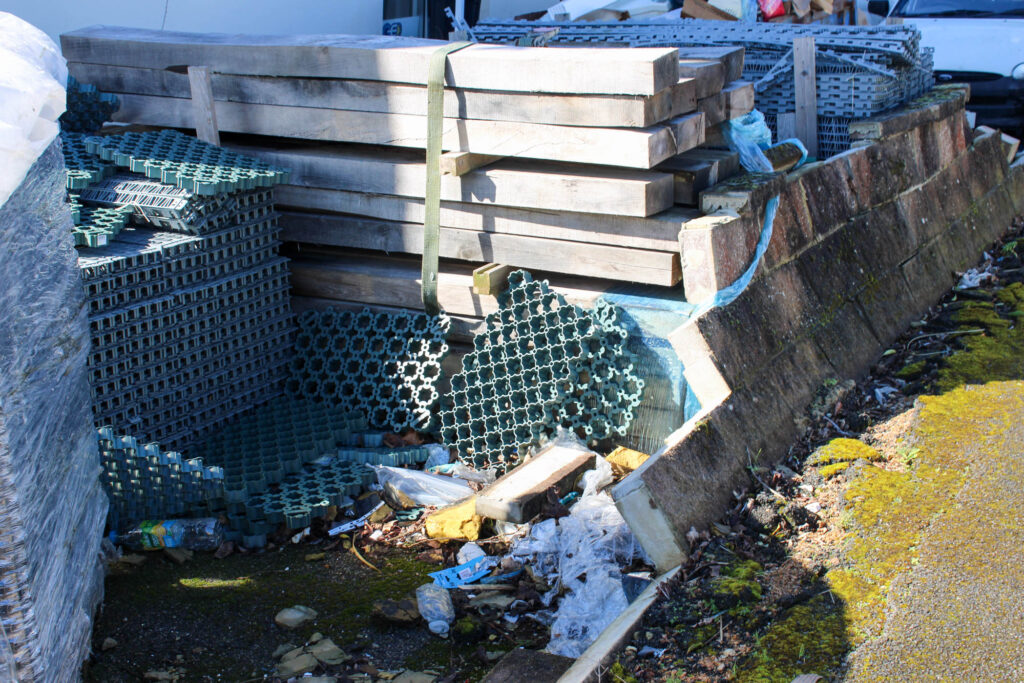
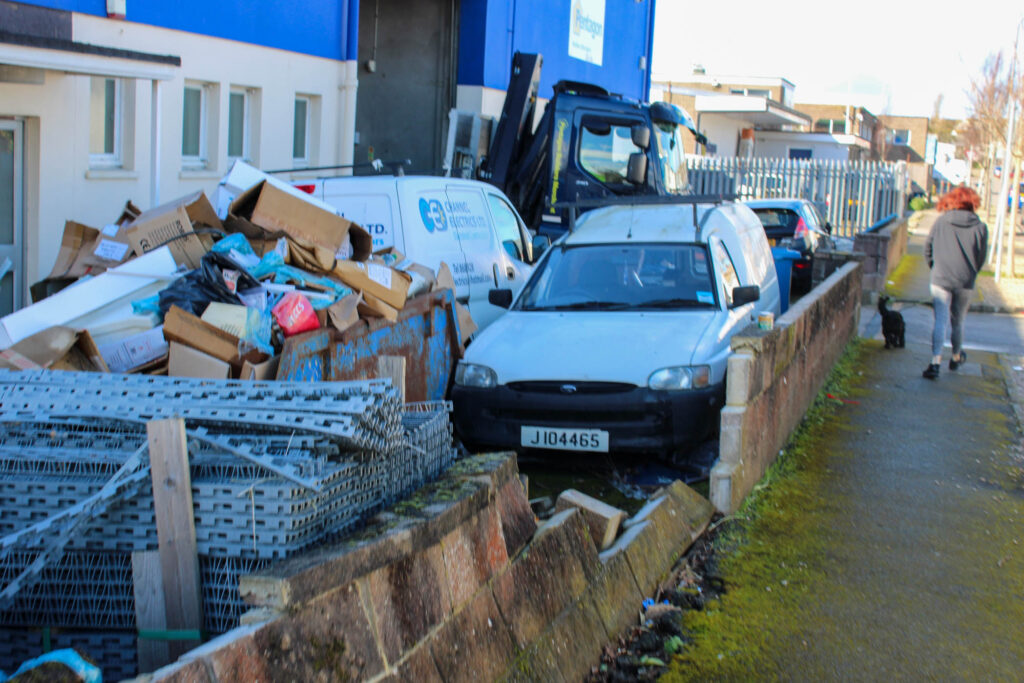
I took these images of the buildings near the Post Office in St Clement. I focussed on taking pictures in St Clement, because that is where the storm hit Jersey the hardest. In these images you can see the damage done by the storm on other buildings and walls. Most damage to many buildings has been fixed by now, but this damage was minor, so not a priority.
Edits
I edited all these images, by increasing the contrast, shadows, whites, vibrancy and saturation, while decreasing the highlights and blacks, so that the image would be more clear and vibrant.
This is how the final edited photos came out, and you can see where the storm sad damaged the walls and equipment near it. This also shows how strong the storm must of been, to be able to knock down a brick wall.
Final Best Images
I have chose these images as my final best images, because I think they have the best editing skills done to them , while also having the best composure. They also all present the storm damage well and present how strong and powerful the storm was.
Virtual Gallery
I made this virtual gallery of my storm damage images using ArtSteps. Firstly, I picked out a suitable gallery that I liked. Then, I imported my chosen images into ArtStepsand put them in the gallery. Next, I positioned them all where I thought they looked good and gave them all different frames. Finally, I previewed my gallery and took photos of all my images.
PhotoShop
I made this image using photoshop. Firstly, I imported my two chosen images onto and a4 print and resized them both so they filled up the print. Next, I adjusted the opacity of the image on top, so that all the trees from the image underneath would come through. I did this, so it looked light there was much more damage and trees fallen in this image. The only thing ruining this image is the sign post.