Butterfly lighting is a lighting pattern used in portrait photography where the key light is placed above and pointing down on the subject’s face. This creates a dramatic shadow under the nose and chin that looks like a butterfly. One of the most famous photographers to use butterfly lighting was George Hurrell, who was known for his dramatic portraits of Hollywood stars, and since, the technique has grown more popular.
This creates a shadow under the nose that resembles a butterfly. It’s also known as ‘Paramount lighting,’ named for classic Hollywood glamour photography.
Some benefits of butterfly lighting is-
- It’s Perfect for Portraits. Butterfly lighting is often used in portrait photography, especially in headshots. …
- Create Different Moods. …
- Easy to Set Up. …
- It’s a Natural Look. …
- It’s Versatile.
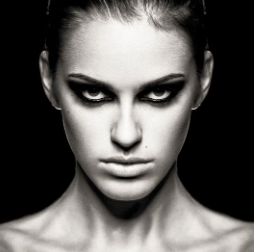
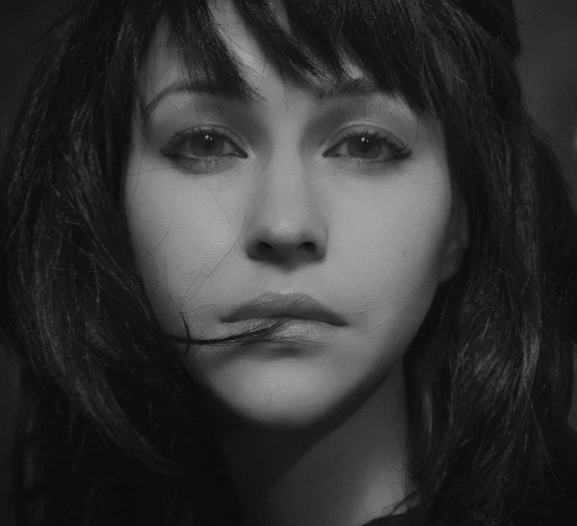
Butterfly lighting is primarily used in a studio setting. It is named “butterfly” because of the butterfly shaped shadow that it creates just under the models nose. This occurs because of the lighting in the shot, comes from above the models head. Butterfly lighting is mostly used for portraits, as it is flattering on everybody.
Lighting set up:
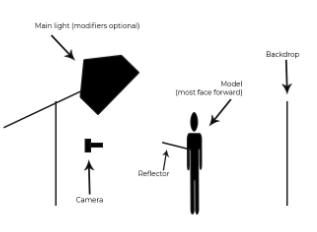
Light – Butterfly lighting requires a key light that can be a flash unit, or continuous. If continuous, it can be artificial or natural, meaning you have a lot more choice in which lighting you think would benefit your photos a lot more. Butterfly lighting can be varied, soft or hard depending on the objective of the image.
Lens – The most popular lens used for butterfly lighting is between a 50 – 85mm lens. This helps the photo because it allows a larger depth of field.
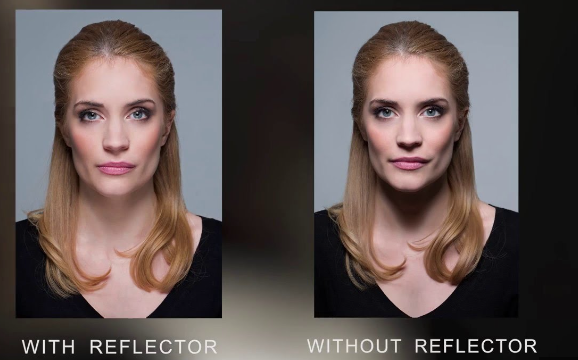
My own photoshoots-
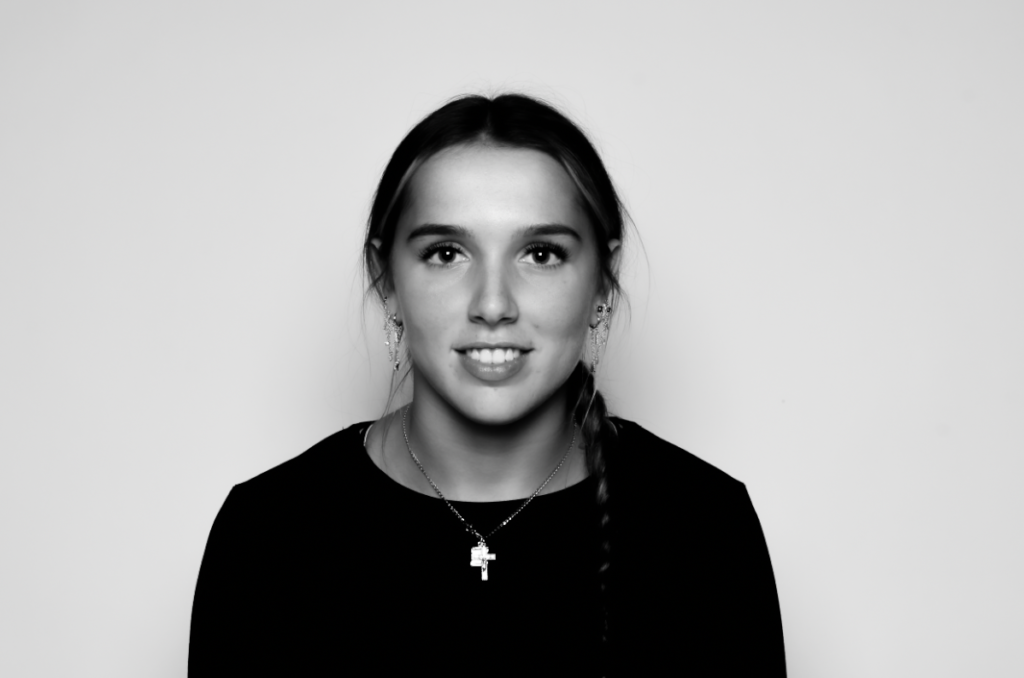
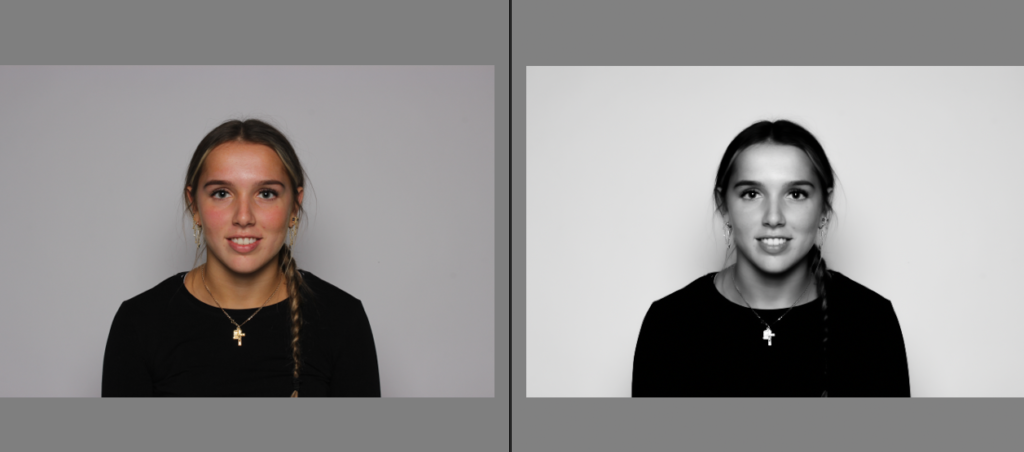
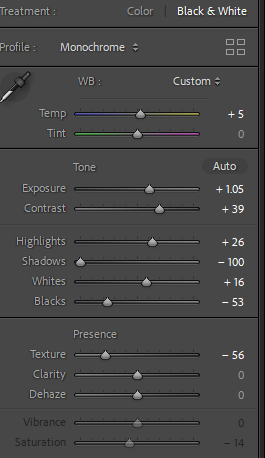
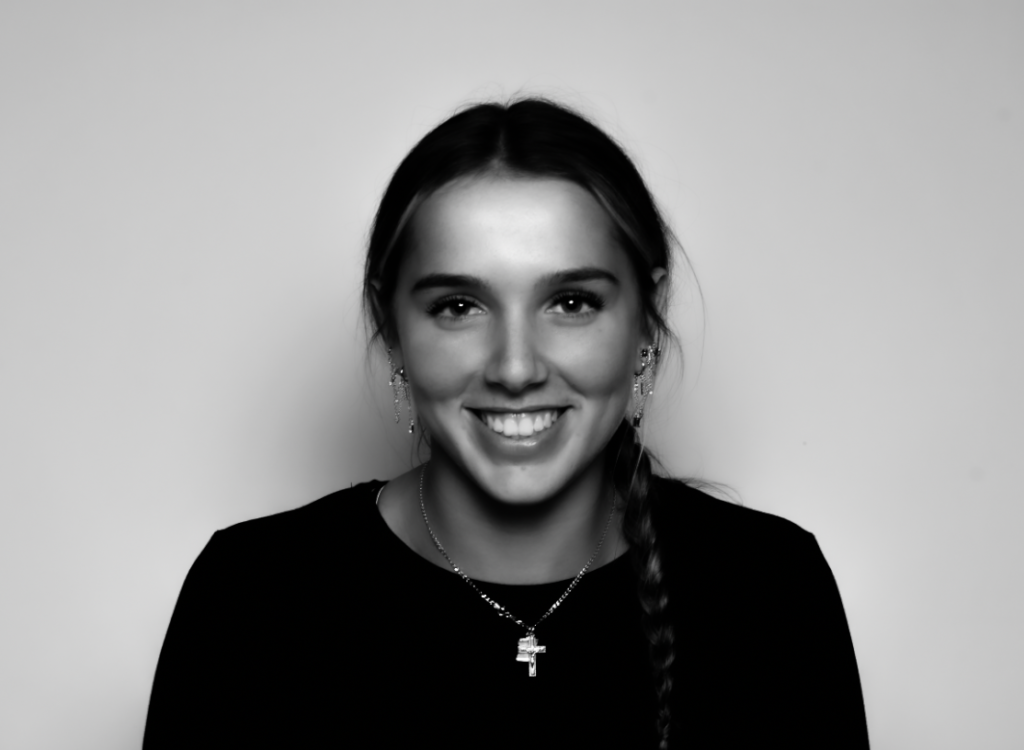
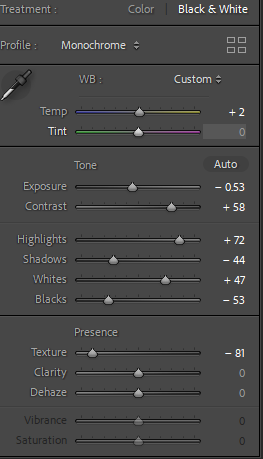
Within these photos, we placed the light in a 45 degree angle above the subject in order to attempt to get the shadow underneath the subjects nose. We attempted to get that strong eye catching deep shadow however we used a reflector in the set up which as shown above there is a significant better result without the reflector. I have therefore learnt for future photoshoots using this technique in order to improve and result in a better outcome without a reflector would be better. However within these images, I either increased or decreased the exposure depending on how exposed and bright the image was so it has the correct amount of brightness. I increased the contrast on both images so the image was more detailed and had high depth in the shadows which is needed for this lighting style. To emphasize this, I decreased the shadows just to add more eye catching and significance to the image but contrasted that with increasing the highlights so the image wasn’t too dark or dull as the contrast had been increased. Finally, I increased the whites and decreased the blacks so it had a perfect mix and balance of both. Overall I decreased the texture so the image looked a lot smoother therefore making the outcome look a lot more professional.
