What is the difference between 1-2-3 point lighting and what does each technique provide / solve
What is fill lighting?
What is Rembrandt lighting, Butterfly lighting, Chiarascuro ? Show examples + your own experiments
Independent Study
You must complete a range of studio lighting experiments and present your strongest ideas on a separate blog post
Remember to select only the most successful images
You should be aiming to produce portraits that show clarity, focus and a clear understanding of a range of lighting techniques
Editing should be minimal at this point…we are looking for your camera skills here
But…be creative and experimental with your approach “in camera”…extremes, uniqueness and possibly thought provoking imagery that will improve your ideas and outcomes.
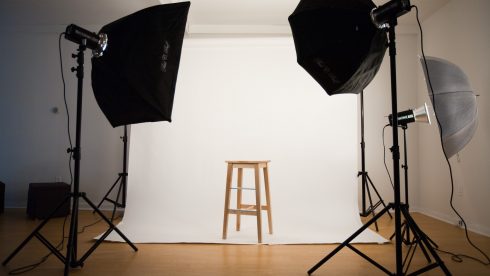
To get you started we are going to learn some more studio methods…using a variety of simple lighting techniques.
In most cases we can make use of natural or available / ambient light…but we must be aware of different kinds of natural light and learn how to exploit it thoughtfully and creatively…
intensity of the light
direction of the light
temperature of the light (and white balance on the camera)
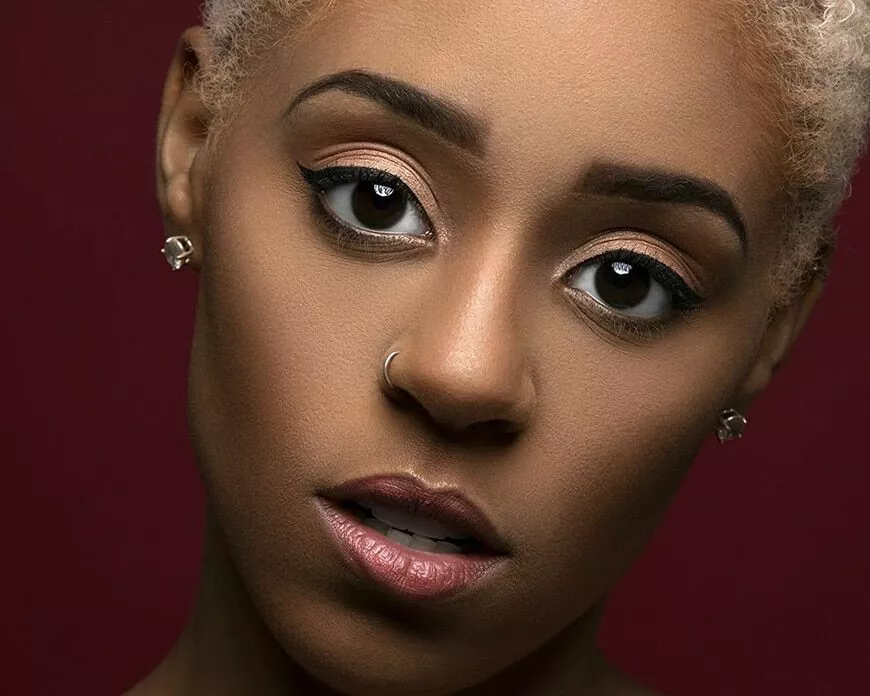
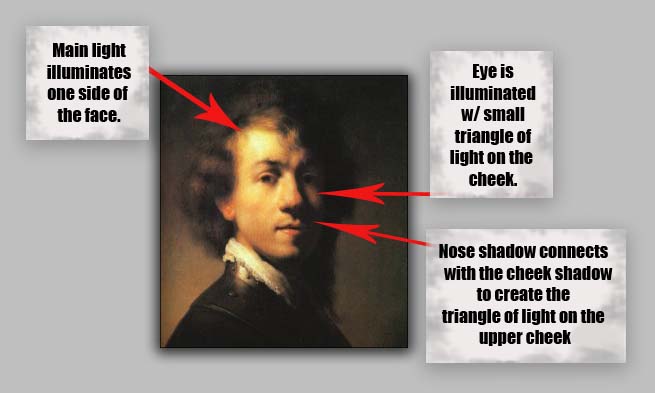
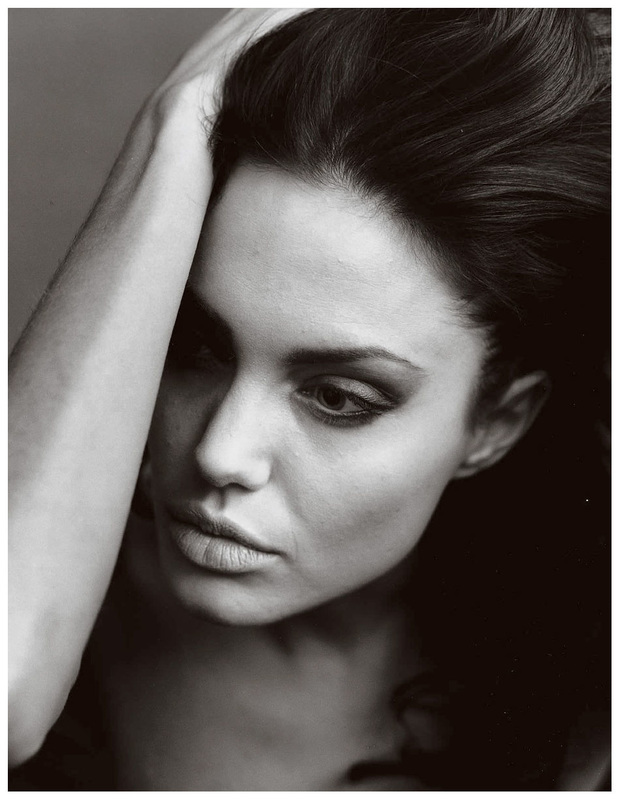
Rembrandt lighting is a technique for portrait photography named after Rembrandt Harmenszoon van Rijn, the great Dutch painter. It refers to a way of lighting a face so that an upside-down light triangle appears under the eyes of the subject.
In Hollywood in the early 20th century, the legendary film director Cecil B. DeMille introduced spotlights to create more realistic effects of light and shadows into the ‘plain’ studio lighting setup that was generally in use. Rembrandt lighting is one effect that was created by this, and it became widely used in promotional photographs of film stars showing them in a dramatic and eye-catching way.
Marilyn MonroeKeanu Revees
Why use Rembrandt Lighting?
By using Rembrandt lighting you instantly create shadows and contrast – and of course, the characteristic ‘triangle of light’ beneath the subject’s eye
Rembrandt lighting adds an element of drama and psychological depth to the character of your sitter.
It’s effective, not just because it gives an individual ‘look’ to your portrait photography, but also because it acts as a photographic device to draw the eye.
You can do this in so many ways in photography – leading lines, depth of field and negative space are all methods of drawing the viewer’s eye to the focal point/subject of the image.
In portraiture, the eyes of your subject are nearly always the main point of focus. The triangle of light, placed just below the eye on the shadow side of the face, will increase the emphasis and the viewer really will be ‘drawn in’ to your image.
So, use Rembrandt lighting to create not just dramatic portrait photography, but also portrait photography that grabs the viewer’s attention and draws their eye to your subject. After all, this is the aim of portraiture – it’s all about your subject – adding in creative lighting helps to enhance the impact of the photograph.
Light set-up using one key light to the right
How to Create a Rembrandt Lighting Setup
Light: Lighting styles are determined by the positioning of your light source. Rembrandt lighting is created by the single light source being at a 40 to 45-degree angle and higher than the subject. Use cans use both flashlights and continuous lights.
Lens: Use a 35mm or 50mm if space is at a premium – or if you’re looking at including more of the subject than just the head and shoulders. A 50mm works really nicely for portraits and will give a nice depth of field if you’re shooting at a shallow aperture. But a 35mm will give you a wider point of view and is great to fit more of the body in of your subject.
Camera settings (flash lighting) Tripod: optional Use transmitter on hotshoe White balance: daylight (5000K) ISO: 100 Exposure: Manual 1/125 shutter-speed > f/16 aperture – check settings before shooting Focal lenght: 105mm portrait lens
Camera settings (continuous lighting) Tripod: recommended to avoid camera shake Manual exposure mode White balance: tungsten light (3200K) ISO: 400-1600 – depending on how many light sources Exposure: Manual 1/60-1/125 shutter-speed > f/4-f/8 aperture – check settings before shooting Focal lenght: 50mm portrait lens
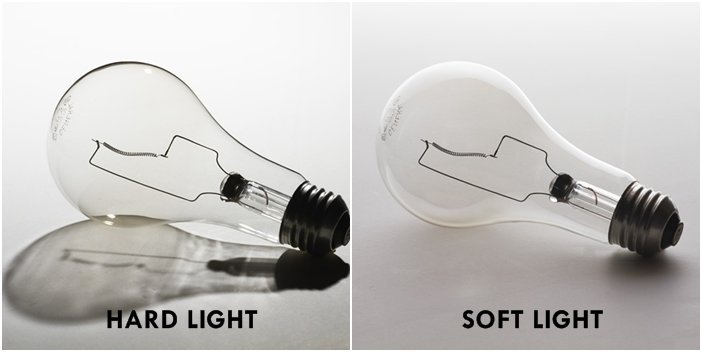
Rembrandt lighting using hard light
Rembrandt lighting using soft light
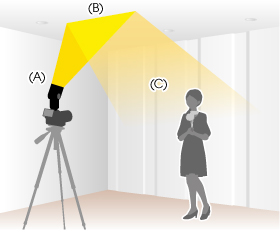
BUTTERFLY LIGHTING
Butterfly lighting is a type of portrait lighting technique used primarily in a studio setting. Its name comes from the butterfly-shaped shadow that forms under the nose because the light comes from above the camera. You may also hear it called ‘paramount lighting’ or ‘glamour lighting’.
What is butterfly lighting used for?
Butterfly lighting is used for portraits. It’s a light pattern that flatters almost everybody, making it one of the most common lighting setups.
Butterfly lighting was used to photograph some of the most famous stars from classic Hollywood, and that’s why it’s also called Paramount lighting.
With it, you can highlight cheekbones and create shadows under them as well as under the neck – which makes the model look thinner.
Lighting: Butterfly lighting requires a key light that can be a flash unit or continuous. If continuos, it can be artificial or natural. In other words, you can use strobes, speedlights, LEDs or even the sun.
A butterfly lighting effect refers to the setup and not to the quality of light – it can be soft or hard light depending on the effect you want.
If you want to create a soft light, you’ll need to use modifiers. A beauty dish is perfect for glamour photography as it distributes the light evenly and smooths the skin. You can also use a softbox or an umbrella.
Instead, if you want to have hard light, you can leave the light source as it is. Alternatively, you can use grid spots to direct it and create different effects – check out MagMod gels for some creative options and examples of what hard light is used for.
Experimentation: Once you have the key light set up, it’s time to fill the shadows. You can use a reflector to bounce the light back up and soften the shadow under the chin and the one from under the nose.
To do so, position the reflector under the subject’s face. Start at waist level and see how it looks. If the shadows are still strong, move it closer to the face and so on.
Experiment with different positions to achieve different effects. You can also change the colour of the reflector. A white one will give you a neutral tone, while a golden one gives a warming overcast.
Once you’re happy with your butterfly lighting, direct the model to have a striking fashion pose or whatever the desired pose or expression you’re looking for.
Just keep in mind that the subject’s face needs to be towards the light in order to have the butterfly shadow under the nose.
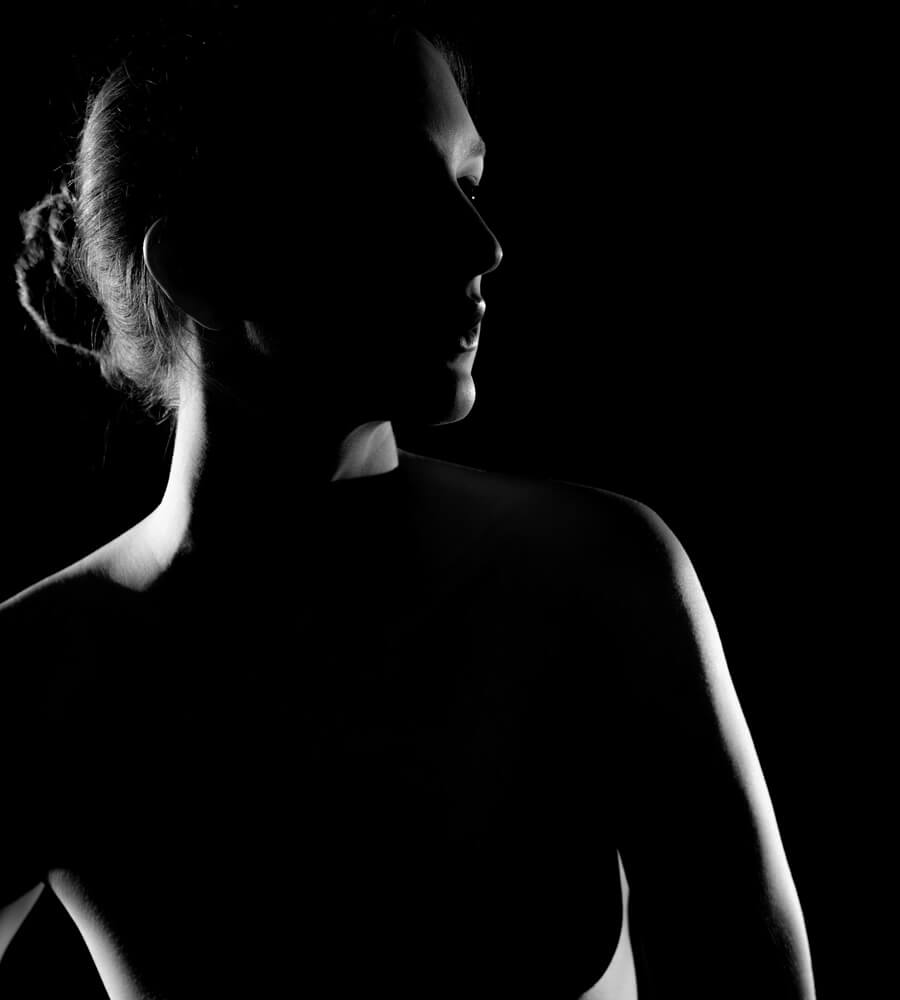
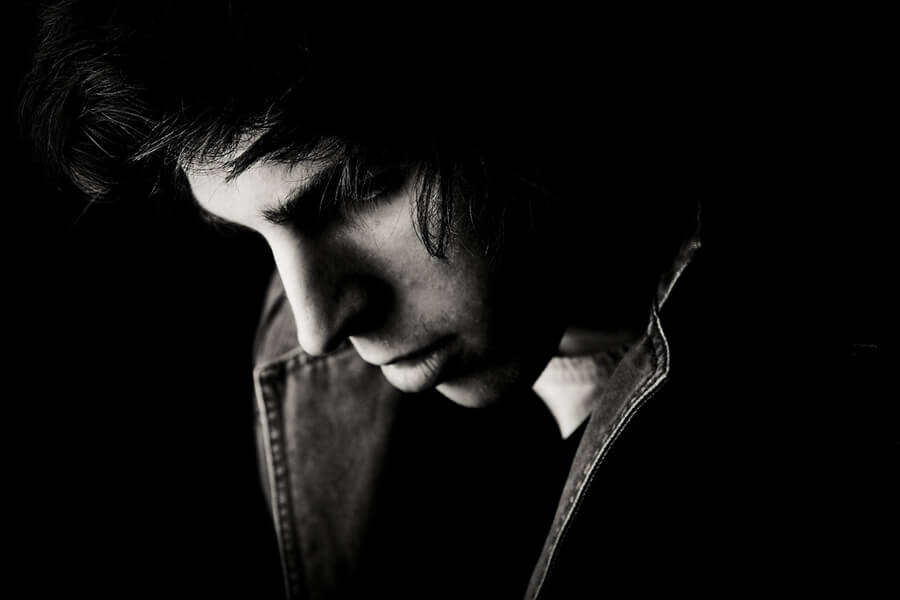
CHIARUSCURO
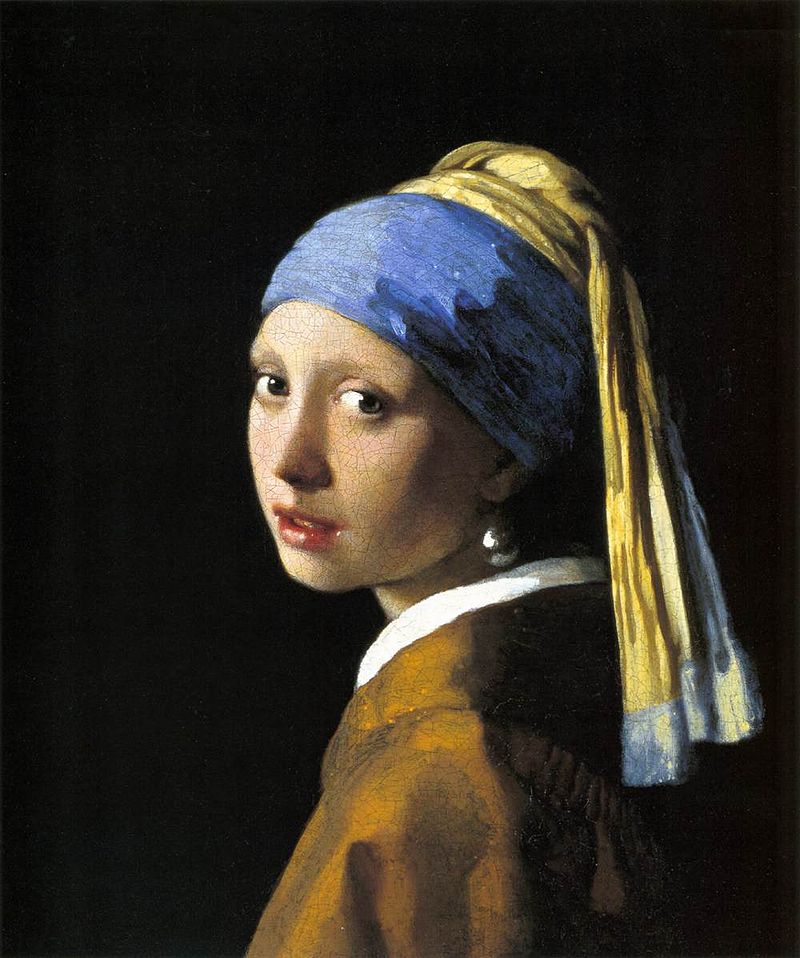
A visual element in art, chiaroscuro (Italian for lightdark) is defined as a bold contrast between light and dark). A certain amount of chiaroscuro is the effect of light modelling in painting where 3-dimensional volume is suggested by highlights and shadows. It first appeared in 15th century painting in Italy and Flanders (Holland), but true chiaroscuro developed during the 16th century, in Mannerism and in Baroque art.
Dark subjects were dramatically lighted by a shaft of light from a single constricted and often unseen source was a compositional device seen in the paintings of old masters such as Caravaggio and Rembrandt.
Johannes Vermeer, The Girl with the Pearl Earring, 1665—-chiaruscuro as employed by the Dutch Masters
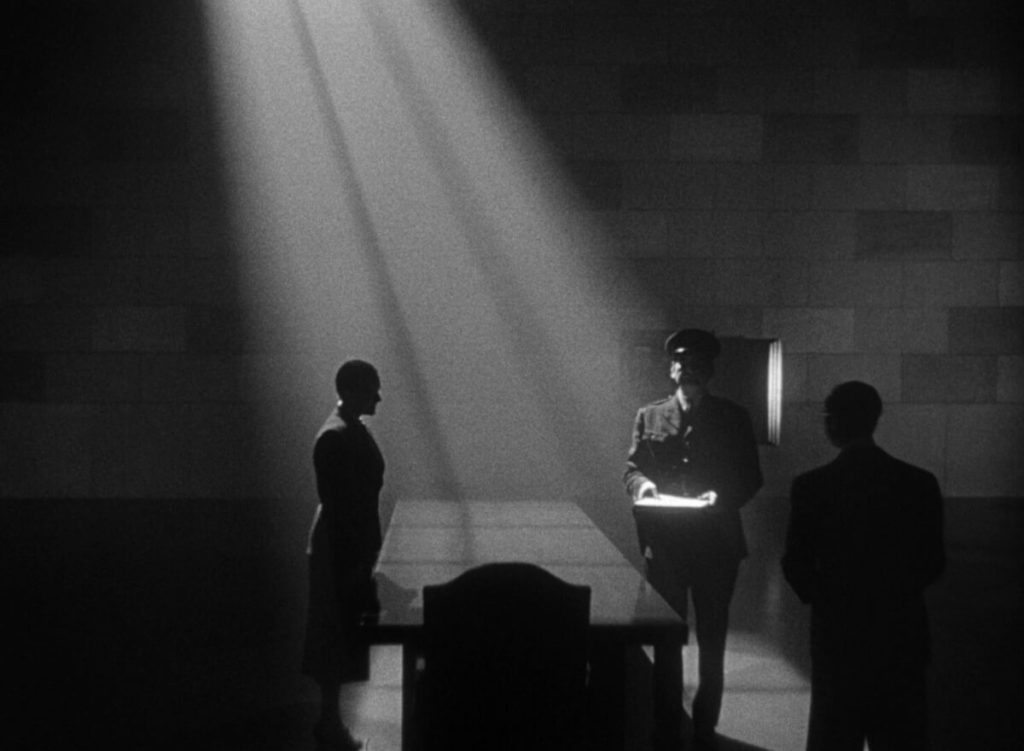
Chiaruscuro in film: Film noir (French for “black film”), is a cinematic term used primarily to describe stylish Hollywood crime dramas, particularly those that emphasize moral ambiguity and sexual motivation. Hollywood’s classic film noir period is generally regarded as stretching from the early 1940s to the late 1950s. Film noir of this era is associated with a low-key black-and-white visual style that has roots in German Expressionist cinematography, while many of the prototypical stories and much of the attitude of classic noir derive from the hardboiled school of crime fiction that emerged in the United States during the Depression.
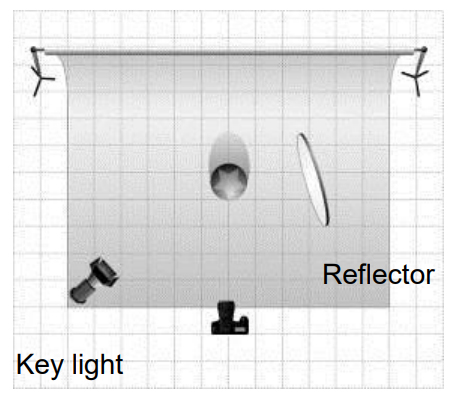
Chiaroscuro in photography: Chiaroscuro using one key light and a variation using a reflector that reflects light from the key light back onto the sitter.
Back light / rim light
Chiarascuro used to illuminate features
Have a look at the work of Oliver Doran a studio portrait photographer in St Helier, Jersey
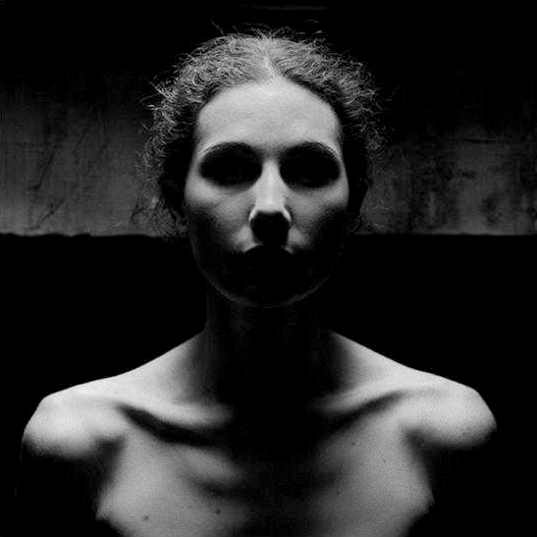
Francesca Woodman created blurred (self) portraits, due to movement and long exposure times), who are merging with their surroundings,
Using Flash
Bouncing the flash to soften its effects
Above : An example of “bouncing” the flash to soften the effects and create a larger “fill” area…try this wherever there are white walls/ ceilings
Flash units offer a range of possibilities in both low and high lighting scenarios that you could explore such as…
flash “bouncing”
fill-in flash
TTL / speedlight flash
remote / infra-red flash (studio lighting)
fast + slow synch flash
light painting c/w slow shutter speeds
Evidence of Your Learning
During this unit we would expect all students to complete 2-3 blog posts detailing how you are experimenting with various lighting techniques eg REMBRANDT LIGHTING/ BUTTERFLY LIGHTING / CHIARUSCURO
Rembrandt Lighting
Add information / links showing how Chiarascuro has been used since the Renaissance in painting…but also how it used now in photography and film
You must describe and explain your process with each technique…add your images to your blog as you progress, print off your successful images and evaluate your process using technical vocab and analysis skills. Think carefully about the presentation of your ideas and outcomes…compare your work to relevant portrait photographers as you develop your studio portraiture – see below
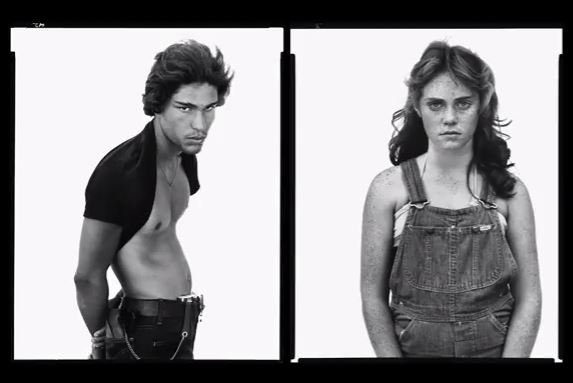
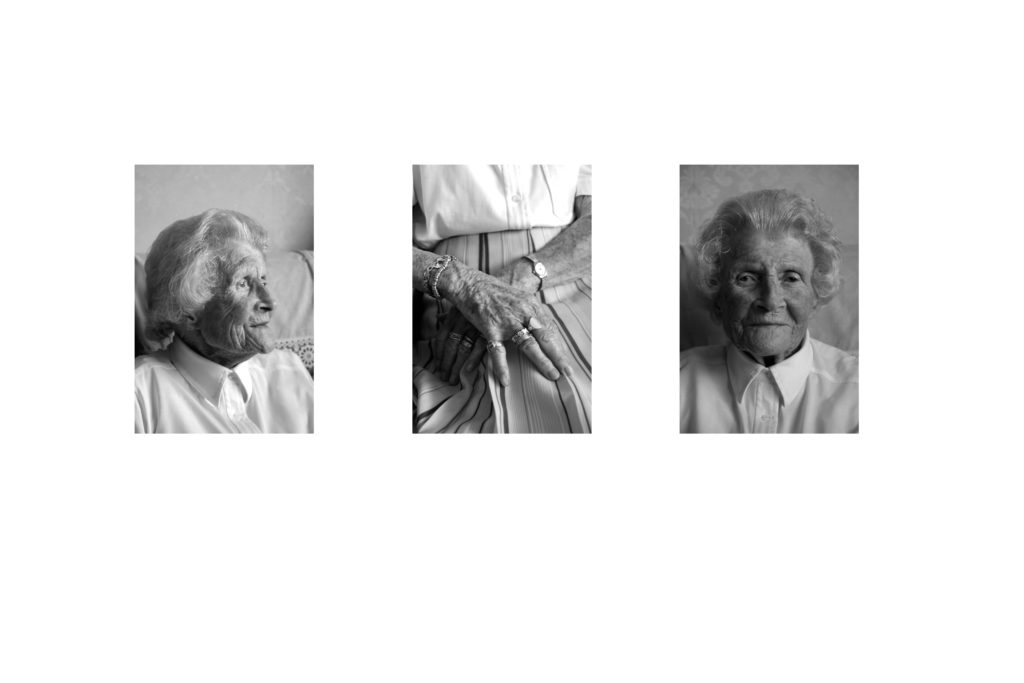
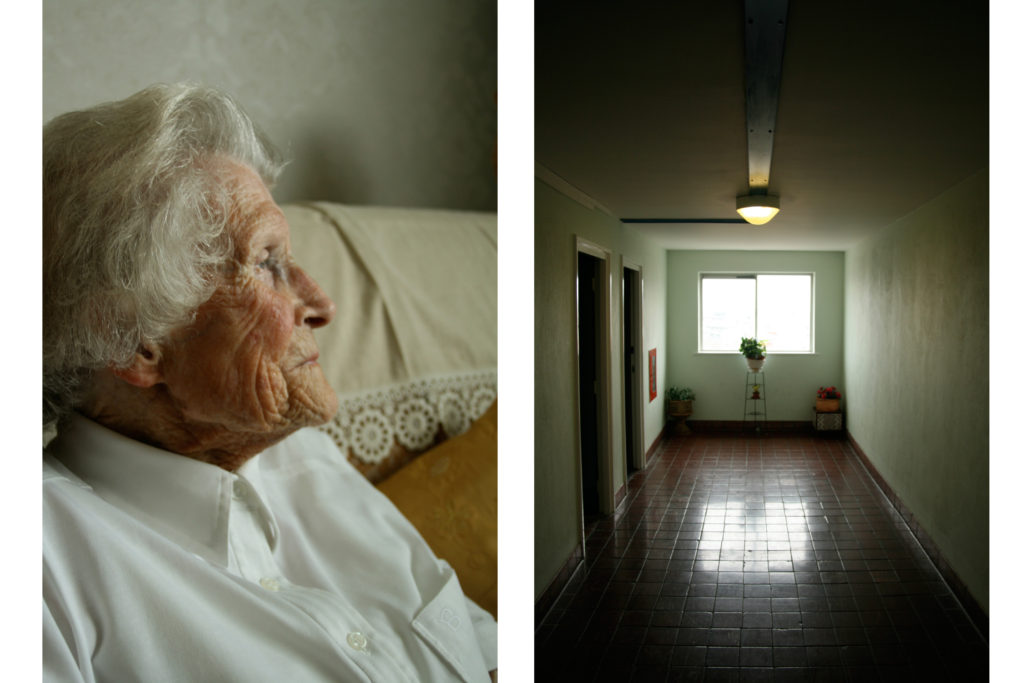
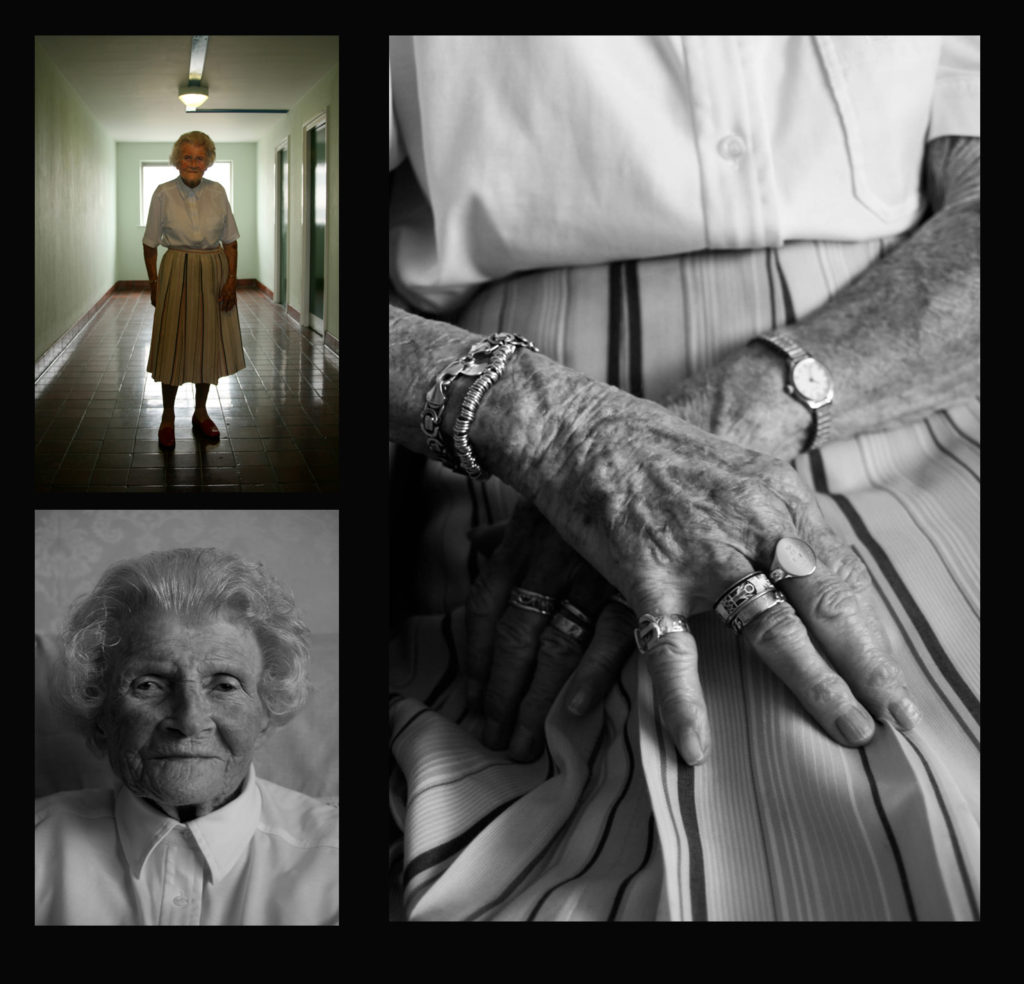
INSPIRATIONS: PORTRAITURE
Annie Leibovitz, Irving Penn, Rankin, Nadav Kandar, Richard Avedon, Yousef Karsh, David Bailey, Mario Testino, Steve McCurry, Jill Greenberg, Nick Knight, Tim Walker, Corrine Day, Jane Bown, Rineke Djikstra, Thomas Ruff et al…
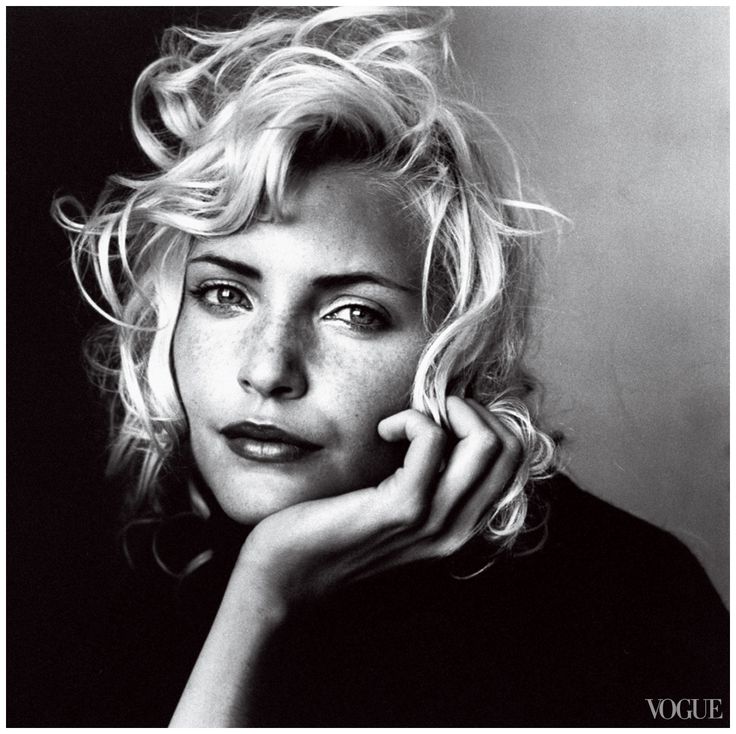
Annie Leibovitz is an American portrait photographer best known for her engaging portraits, particularly of celebrities, which often feature subjects in intimate settings and poses.
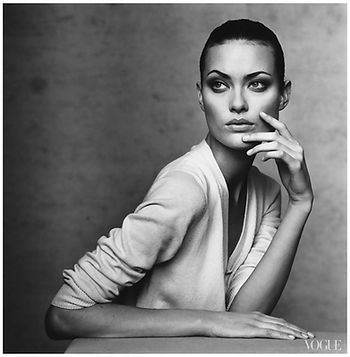
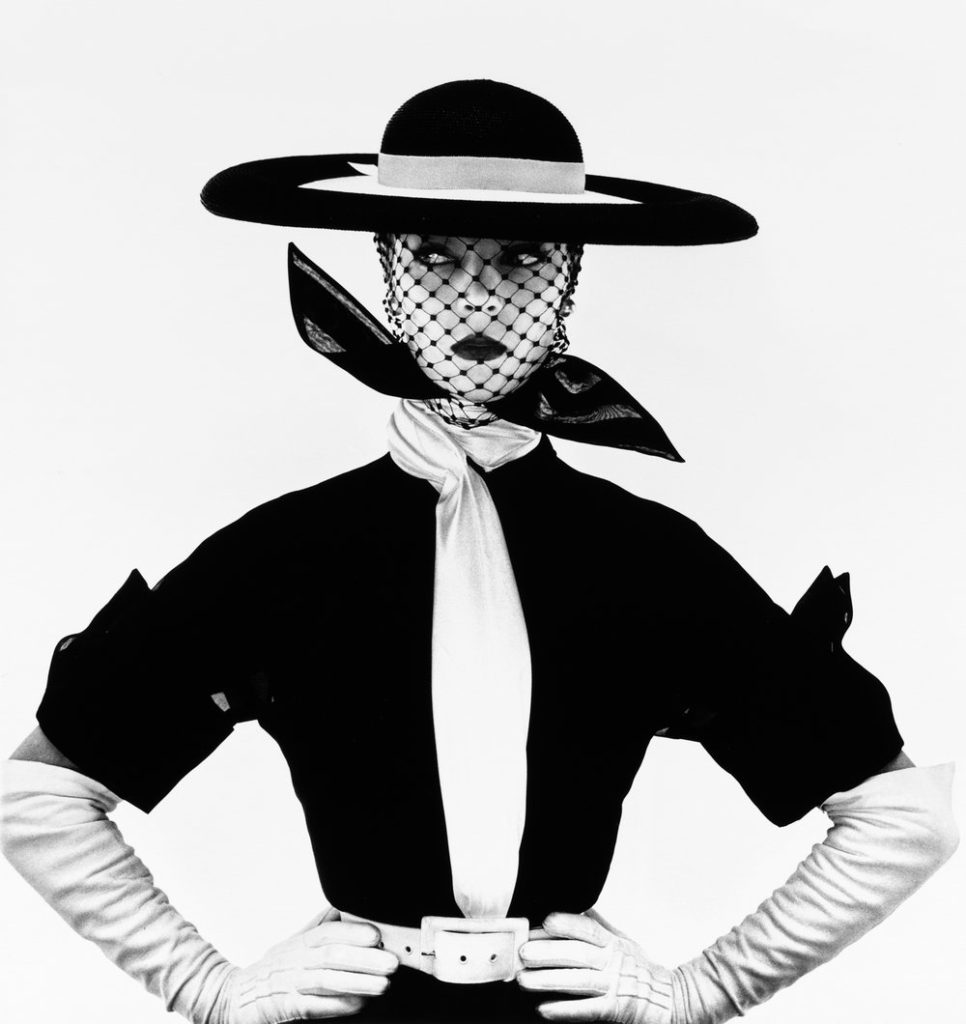
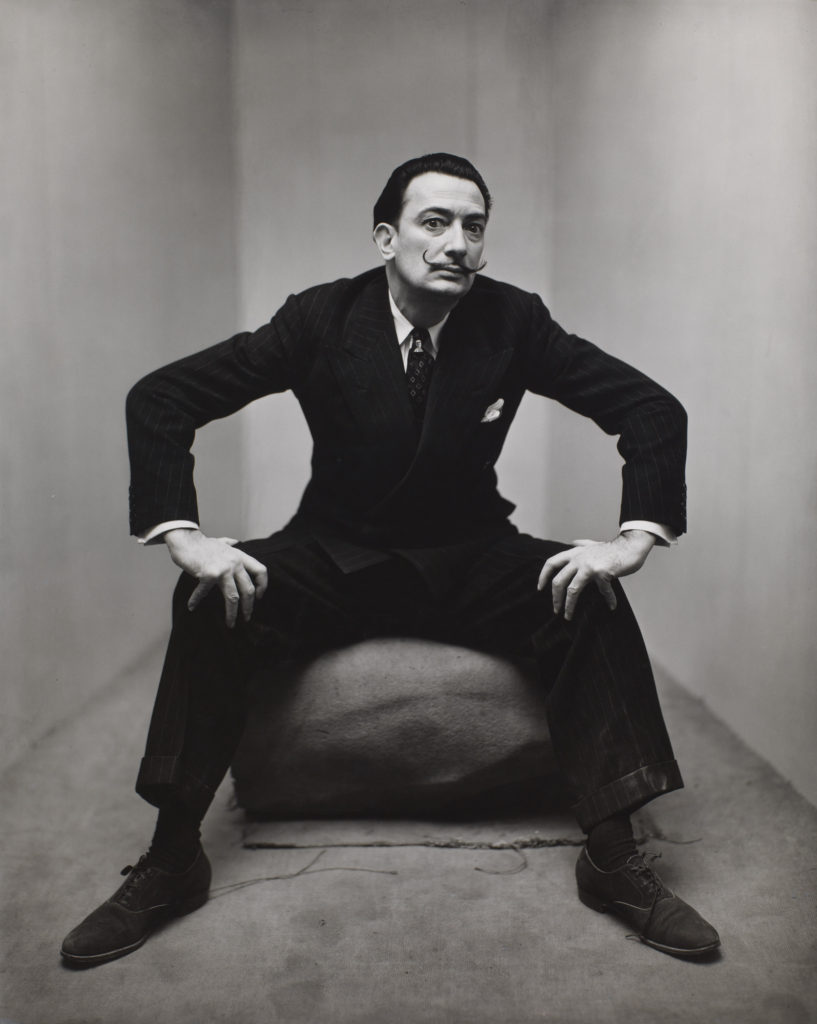
Irving Penn was an American photographer known for his fashion photography, portraits, and still lifes. Penn’s career included work at Vogue magazine, and independent advertising work for clients including Issey Miyake and Clinique.
Salvadore Dali
John Rankin Waddell, known as Rankin, is a British photographer and director who has photographed Kate Moss, Madonna, David Bowie and The Queen. The London Evening Standard described Rankin’s fashion and portrait photography style as high-gloss, highly sexed and hyper-perfect.
Watch film where Rankin photograph a group of GCSE students and talk to them about his career and beauty in photography
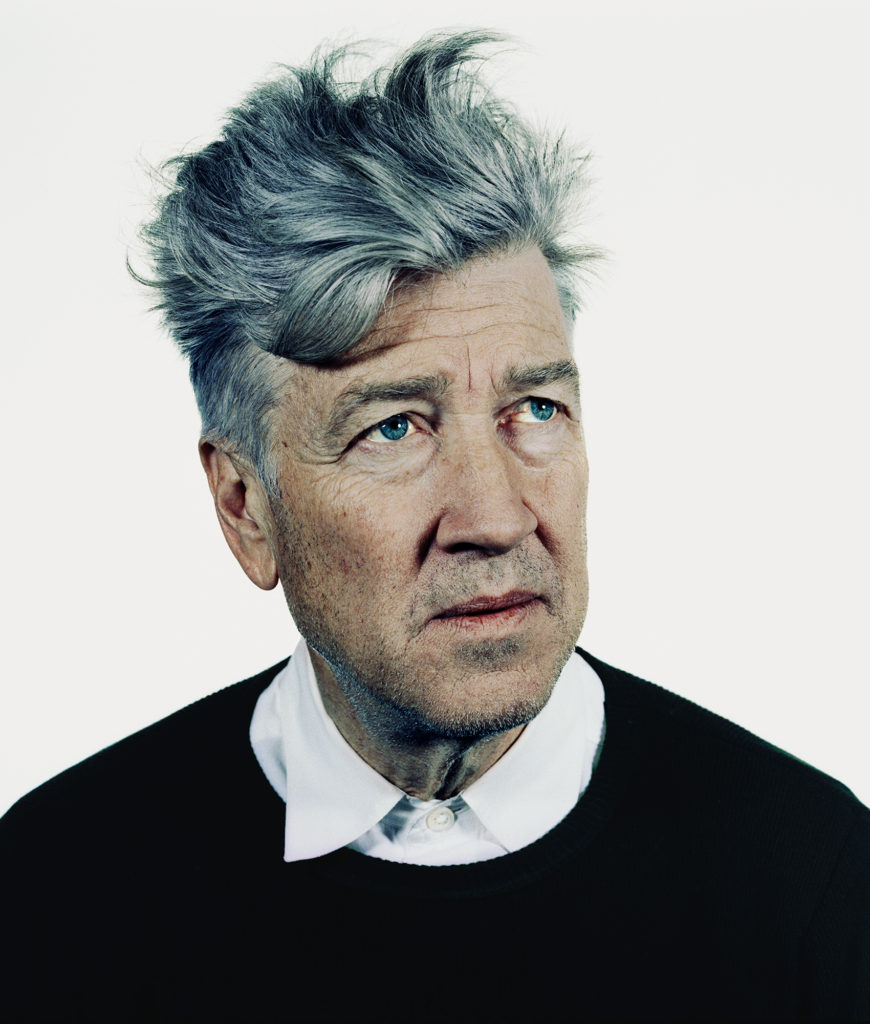
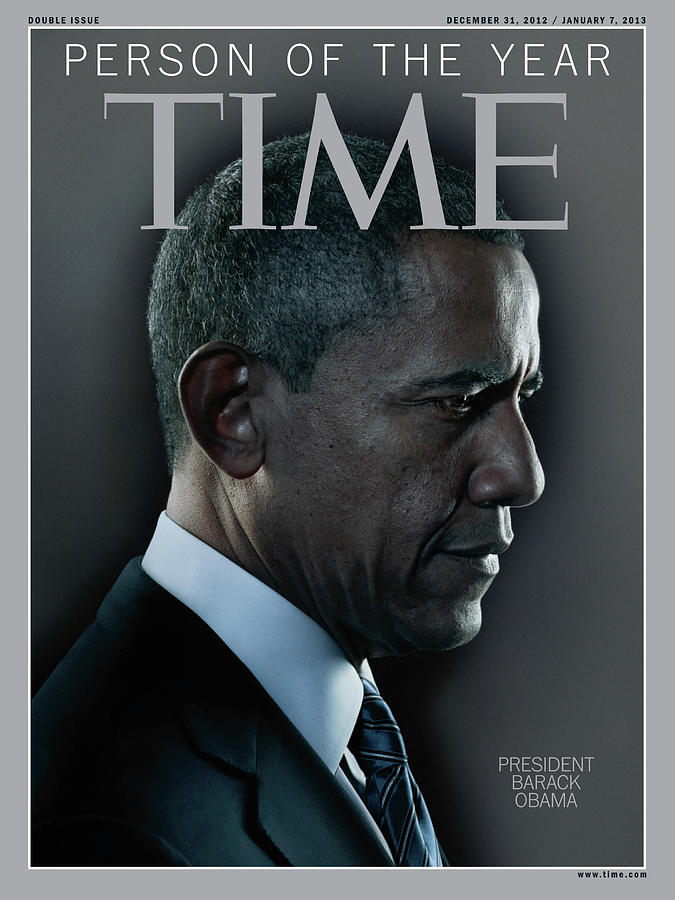
Nadav Kander is a London-based photographer, artist and director, known for his portraiture and landscapes. Kander has produced a number of books and had his work exhibited widely.
As Molesworth notes, “Each of these artists has engaged portraiture—a genre of image-making as old as modernity itself—as a means of connecting themselves to other artists. The results are three bodies of work that play with the historical conventions of the genre while nibbling away at its edges.”
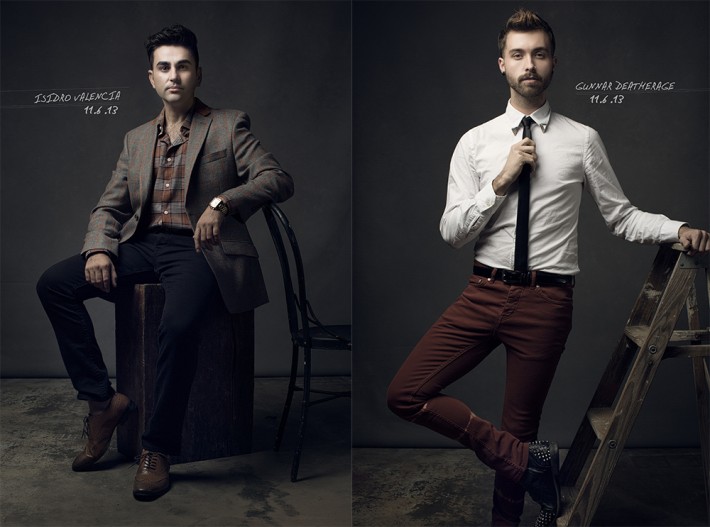
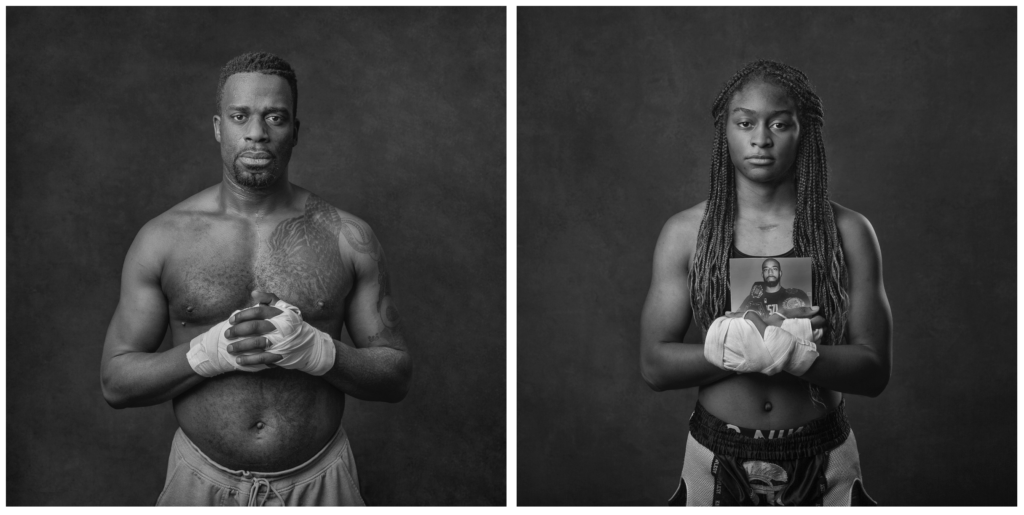
Aneesa Dawoojee – Gloves off: The Fighting Spirit of South London A diverse London based community bonded by strength, hardships and determination. With an underlying theme of life’s struggle and overcoming it. The journey of real Londoners bonded by a sport that sees no colour. Each person stripped away from their environment and placed against a fine art backdrop in order to take away judgements and let them speak as one voice. Compassionate visual stories that offer hope.
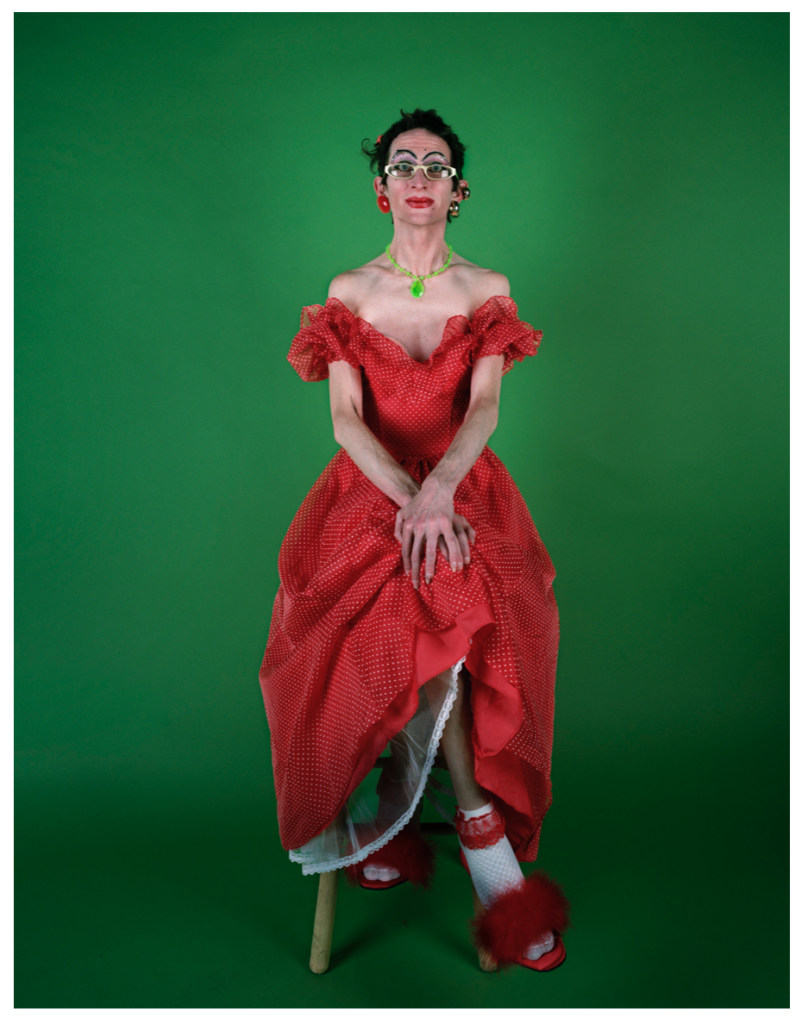
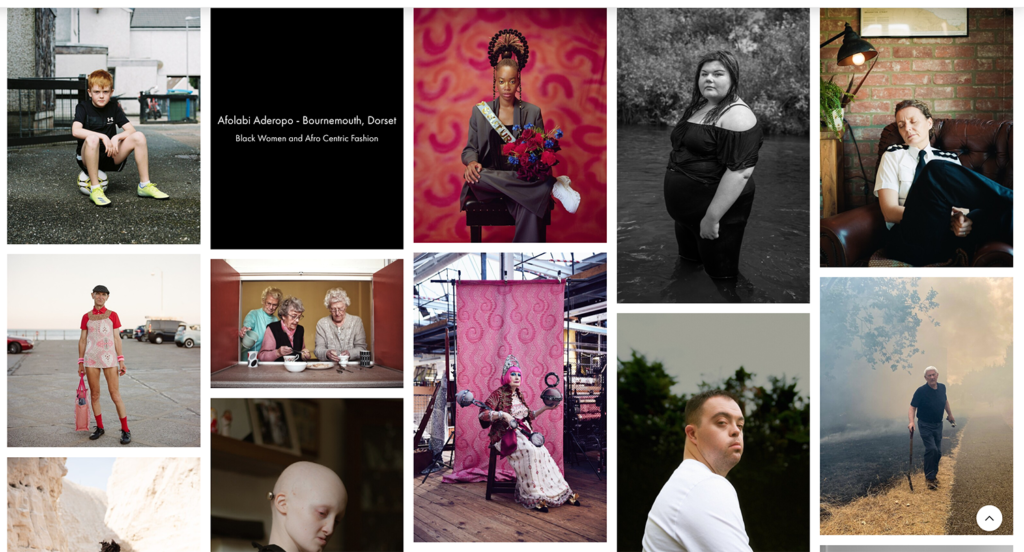
Portrait of Britain vol. 5 Portrait of Britain returns this year with images that define contemporary life in Britain. Alongside the many events that have shaped 2022 – the outbreak of war, record-high inflation, soaring temperatures, and the death of the Queen, to name a few. This year’s winners provide a snapshot of a frenzied year through 99 compelling portraits. Designed to illustrate the diversity of life in modern Britain, the award invites us to reflect on the multiplicity of voices and stories across the country, forming a precious historical record of British life.
Published by Hoxton Mini Press – Explore more here
Expected Final Outcomes
A Case Study and Practical Responses to a photographer who employs a range of lighting techniques
1 x Final Portrait using natural light + analysis and evaluation
1 x Final Portrait using 1 point lighting + analysis and evaluation
1 x Final Portrait using 2 point lighting + analysis and evaluation
Show you can provide evidence of head shots, cropped head shots, half body, three-quarter length and full length portraits.
Show that you can employ interesting angles and viewpoints…
Make sure you ANSWER THESE QUESTIONS IN YOUR BLOG
Why do we use studio lighting?
What is the difference between 1-2-3 point lighting and what does each technique provide / solve
What is fill lighting?
What is Rembrandt lighting, Butterfly lighting, Chiarascuro ? Show examples + your own experiments
Independent Study
You must complete a range of studio lighting experiments and present your strongest ideas on a separate blog post
Remember to select only the most successful images
You should be aiming to produce portraits that show clarity, focus and a clear understanding of a range of lighting techniques
Editing should be minimal at this point…we are looking for your camera skills here
But…be creative and experimental with your approach “in camera”…extremes, uniqueness and possibly thought provoking imagery that will improve your ideas and outcomes.
Use this simplified list to check that you are on task. Every item on the list represents one piece of work = one blog post. It is your responsibility as an A-level student to make sure that you complete and publish appropriate blog posts each week.
Homework and due dates will be listed / issued as necessary…
WEEK 1: 19th Feb
1. Intro and examples of landscape
2. Image Analysis + Artist Reference
3. Romanticism
4. HW Photoshoot due in
WEEK 2: 26th Feb 1. Romanticism –Ansel Adams 3. Photoshoot based on Ansel Adams
WEEK 3: 4th March 1. Select and Edit images 2. natural / romanticised 3. Complete blog posts
WEEK 4: 11th March 1. New Topographics -intro
2. Artist Focus / Case Study 3. Photoshoot
Havre Des Pas – Harbour : Photo-Walk
WEEK 5: 18th March 1. Typologies – intro
2. Artist Focus / Case Study 3. Photoshoot HW
4. The Land and Us Arthouse
WEEK 6: 25th March 1. Select and edit New Topographics images 2. Complete blog posts
3. The Land and Us Arthouse
EASTER BREAK
Week 7: 15th April 1. Introduce Anthropocene 2. Complete blog posts
Y12 AL mock exams run Thursday 18th April to Wednesday 24th April inclusive. Y12 will be on study leave for these days so you can sit the mocks in blocks and experience a ‘real life’ exam season.
Lessons as normal Mon 15 Tues 16 Wed 17 April but you will not return to the classroom until Tue 7 May !!!
Week 8: 22nd April 1. Photo-assignment 1 ANTHROPOCENE
Week 9: 29th April YEAR 13 EST week 1. Develop and expand Anthropocene 2. Photo-assignment 2
Week 10: 6th May 1. Develop and expand Anthropocene
2. Initial image edits
Week 11: 13th May 1. Anthropocene 2. Final image selections and edits 3. Blog Posts
Week 12 : 20th May
Complete Landscape / Anthropocene Project
Final Prints must be ready by Friday 24th May
HALF TERM
Week 13: 3rd June Frame, mount and print Landscape / Anthropocene Prints
Week 15: 10th June Frame, mount and print Landscape / Anthropocene Prints
Week 16: 17th June Start Y13 Program
Week 17: 24th June
Week 18: 1st July PHOTOG MOCK WEEK
Week 19: 8th July Week 20: Page Spreads
15th July End of Term !
Follow the 10 Step Process and create multiple blog posts for each unit to ensure you tackle all Assessment Objectives thoroughly :
Mood-board, definition and introduction (AO1)
Mind-map of ideas (AO1)
Artist References / Case Studies (must include image analysis) (AO1)
Photo-shoot Action Plan (AO3)
Multiple Photoshoots + contact sheets (AO3)
Image Selection, sub selection, review and refine ideas (AO2)