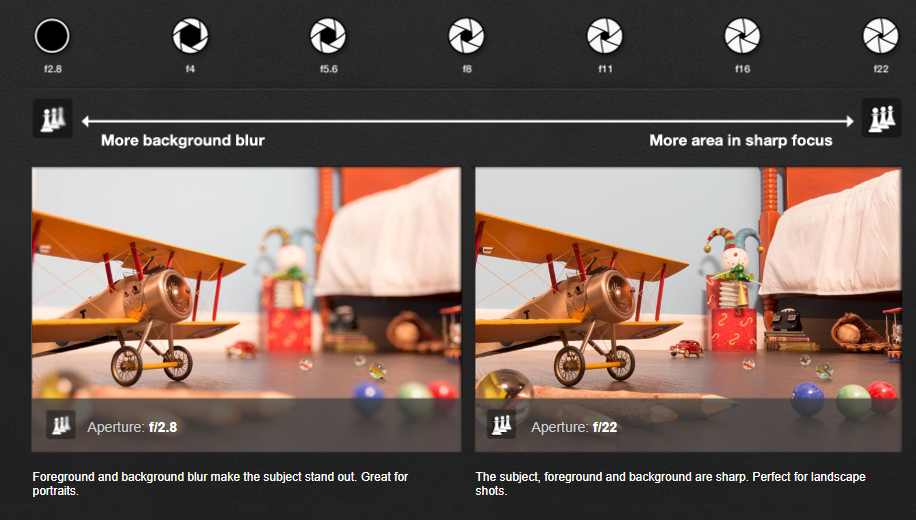
My understanding of the settings used manually is that the aperture (will affect the shutter speed and the depth of field). As the aperture increases the background comes more into focus.

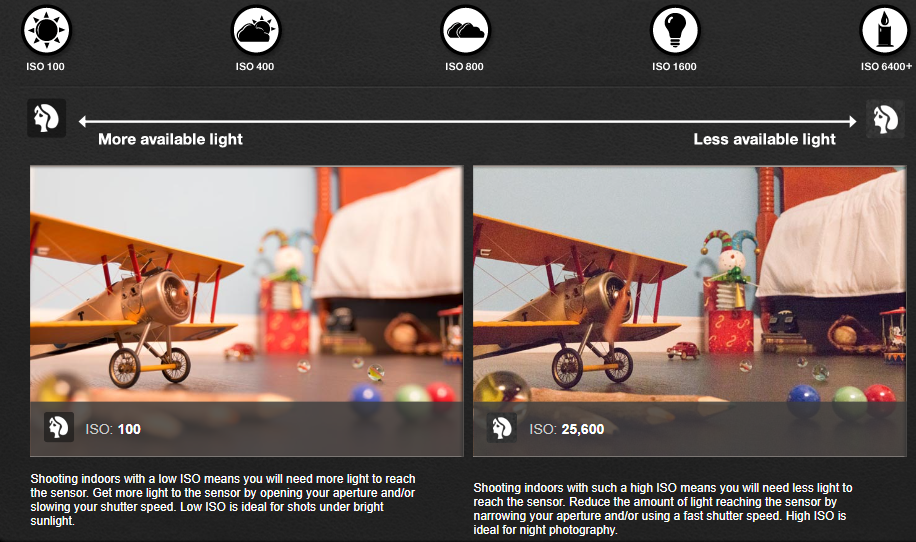
ISO (increasing it makes the camera sensor more sensitive to the light). Enables the photographer to use a faster shutter speed/ higher aperture. In low light you can increase the ISO too make the low light photograph more visible/ good exposure.
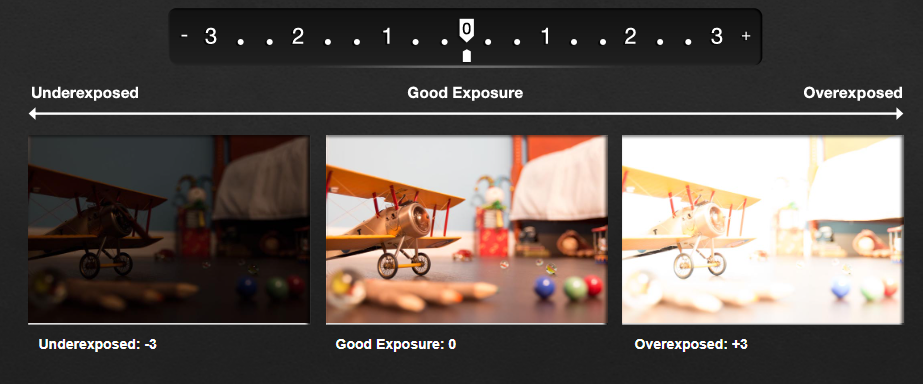
Exposure Settings:
The final check before you snap a picture. At a glance the exposure setting will tell you how our picture will turn out (based on the aperture, shutter speed settings and ISO settings. It works as a guide and exposure is a matter of personal preference.