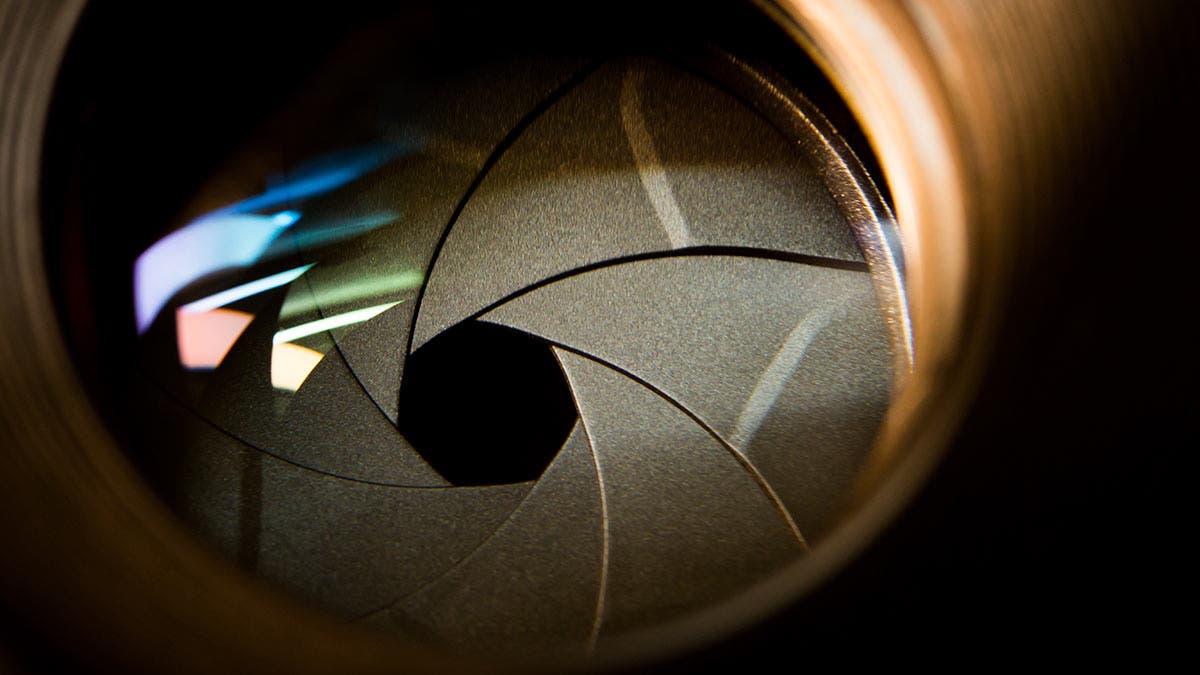
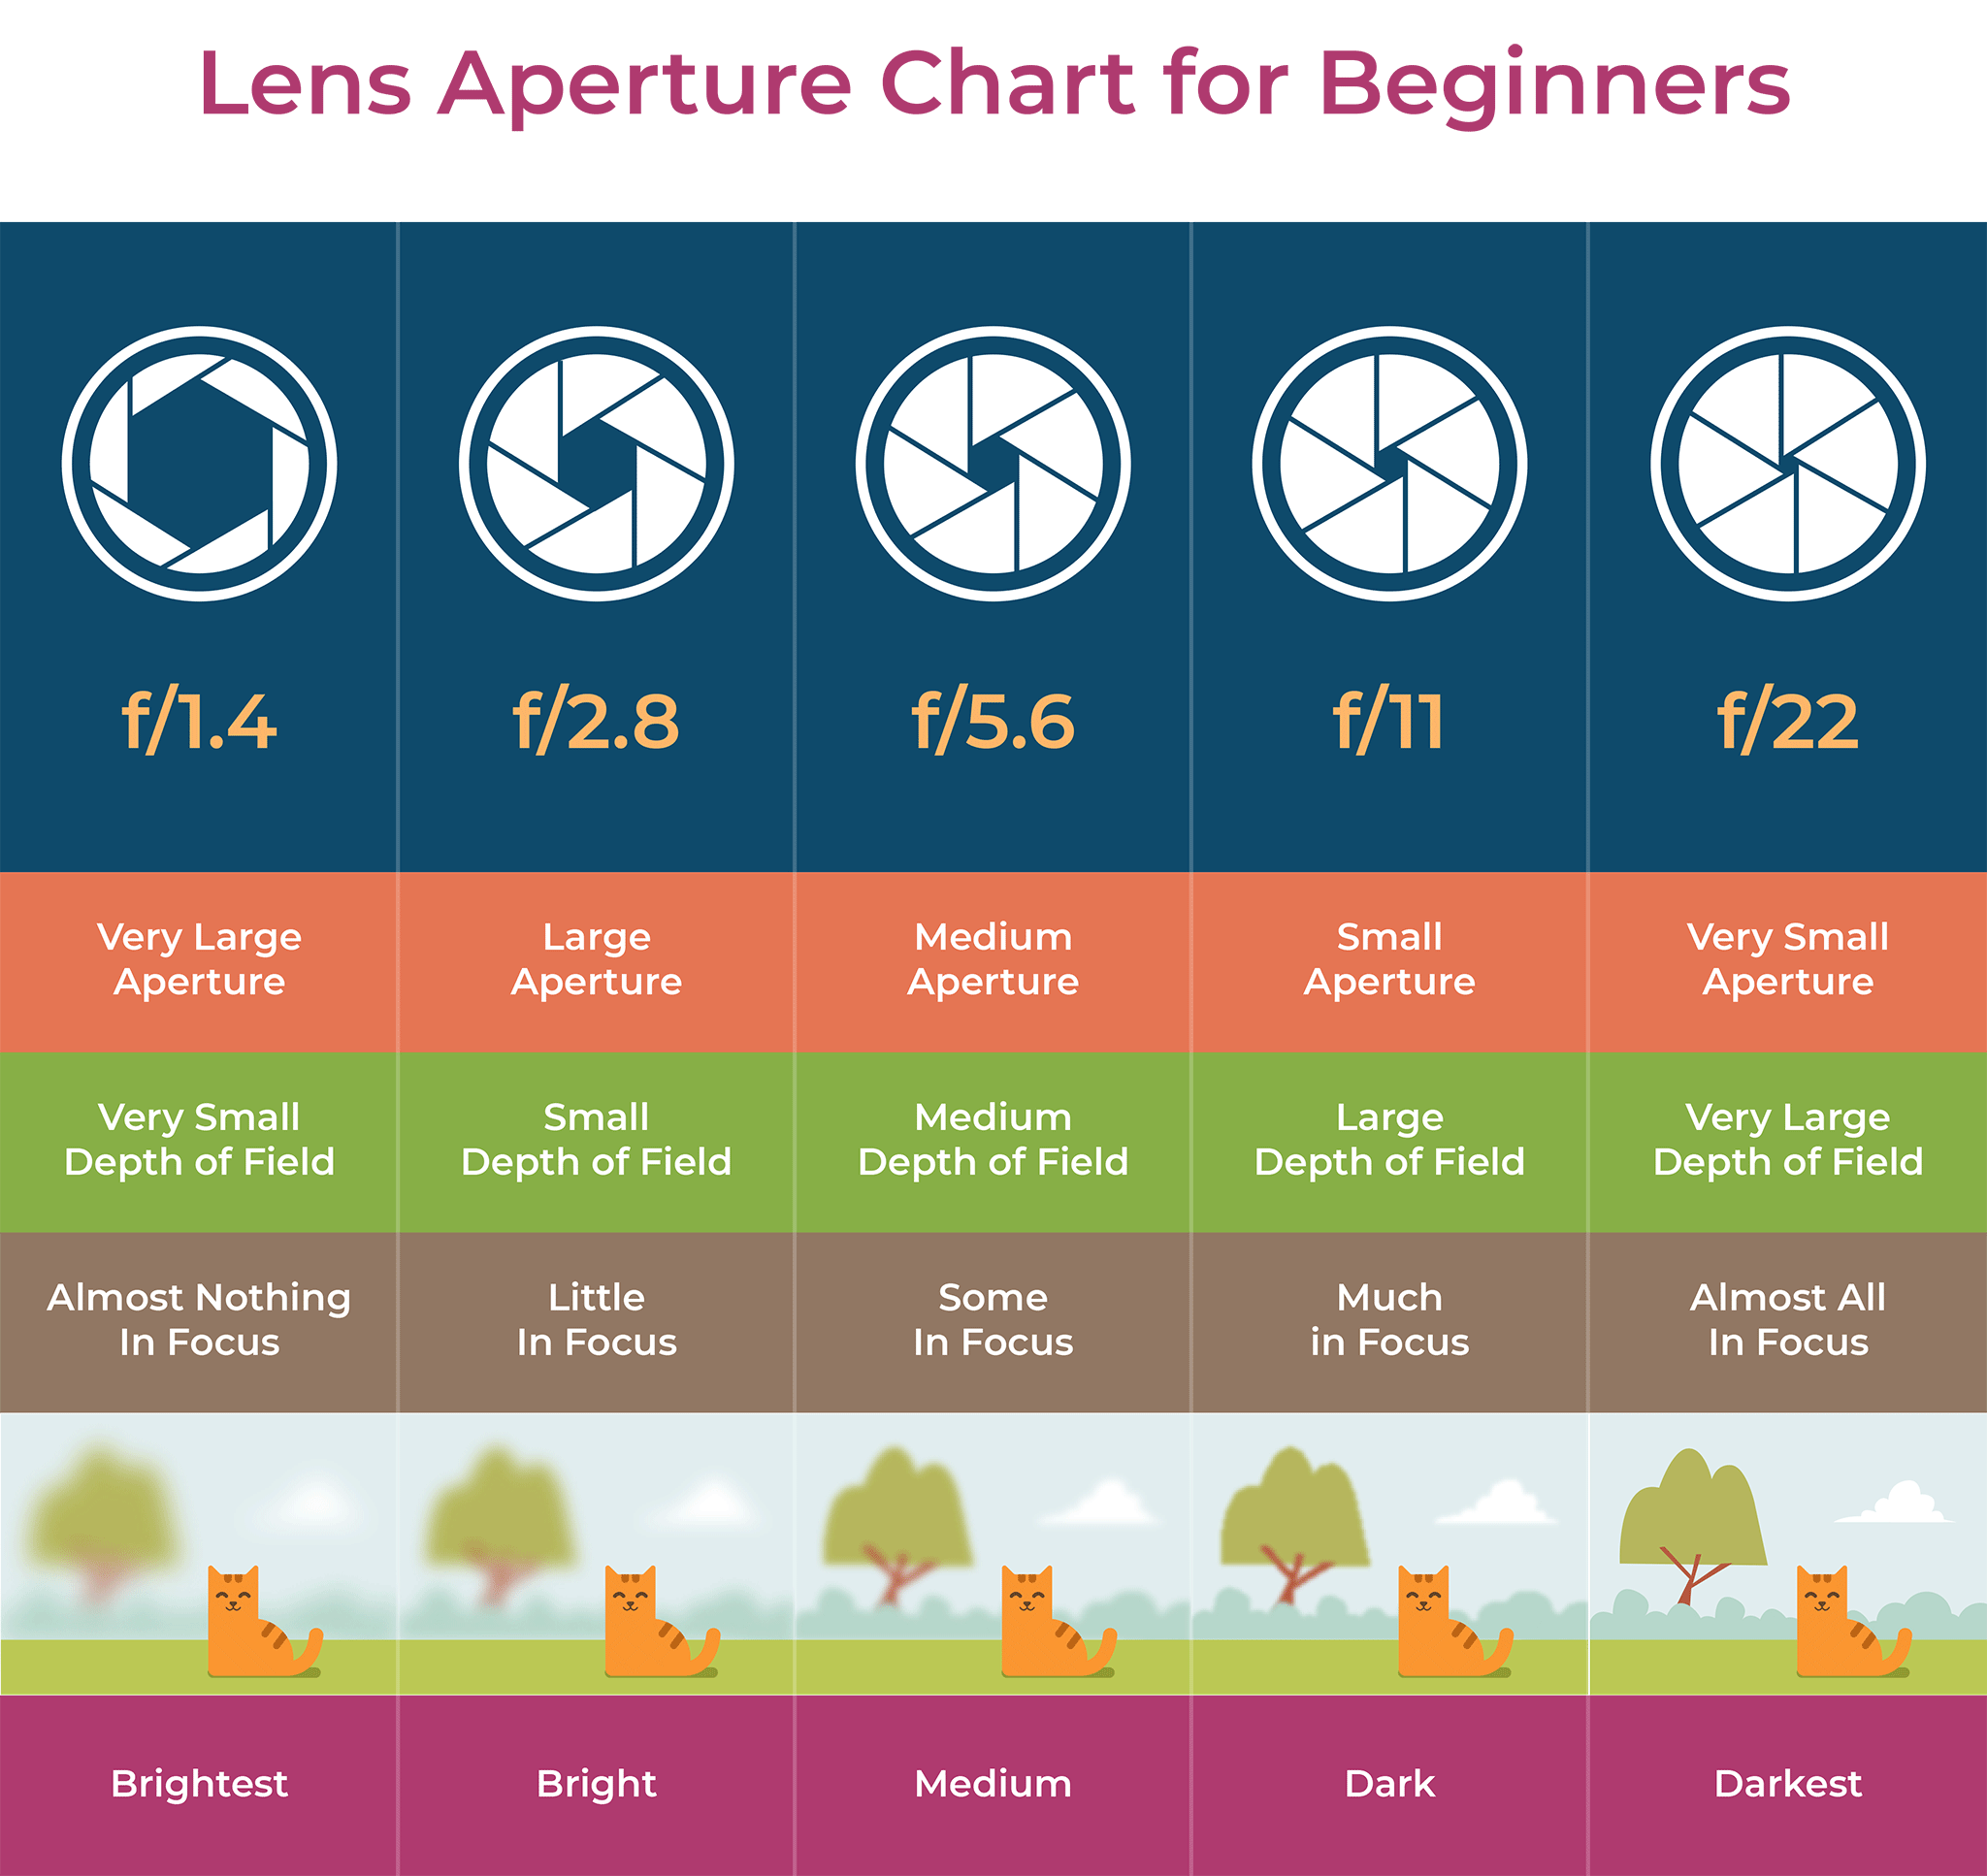
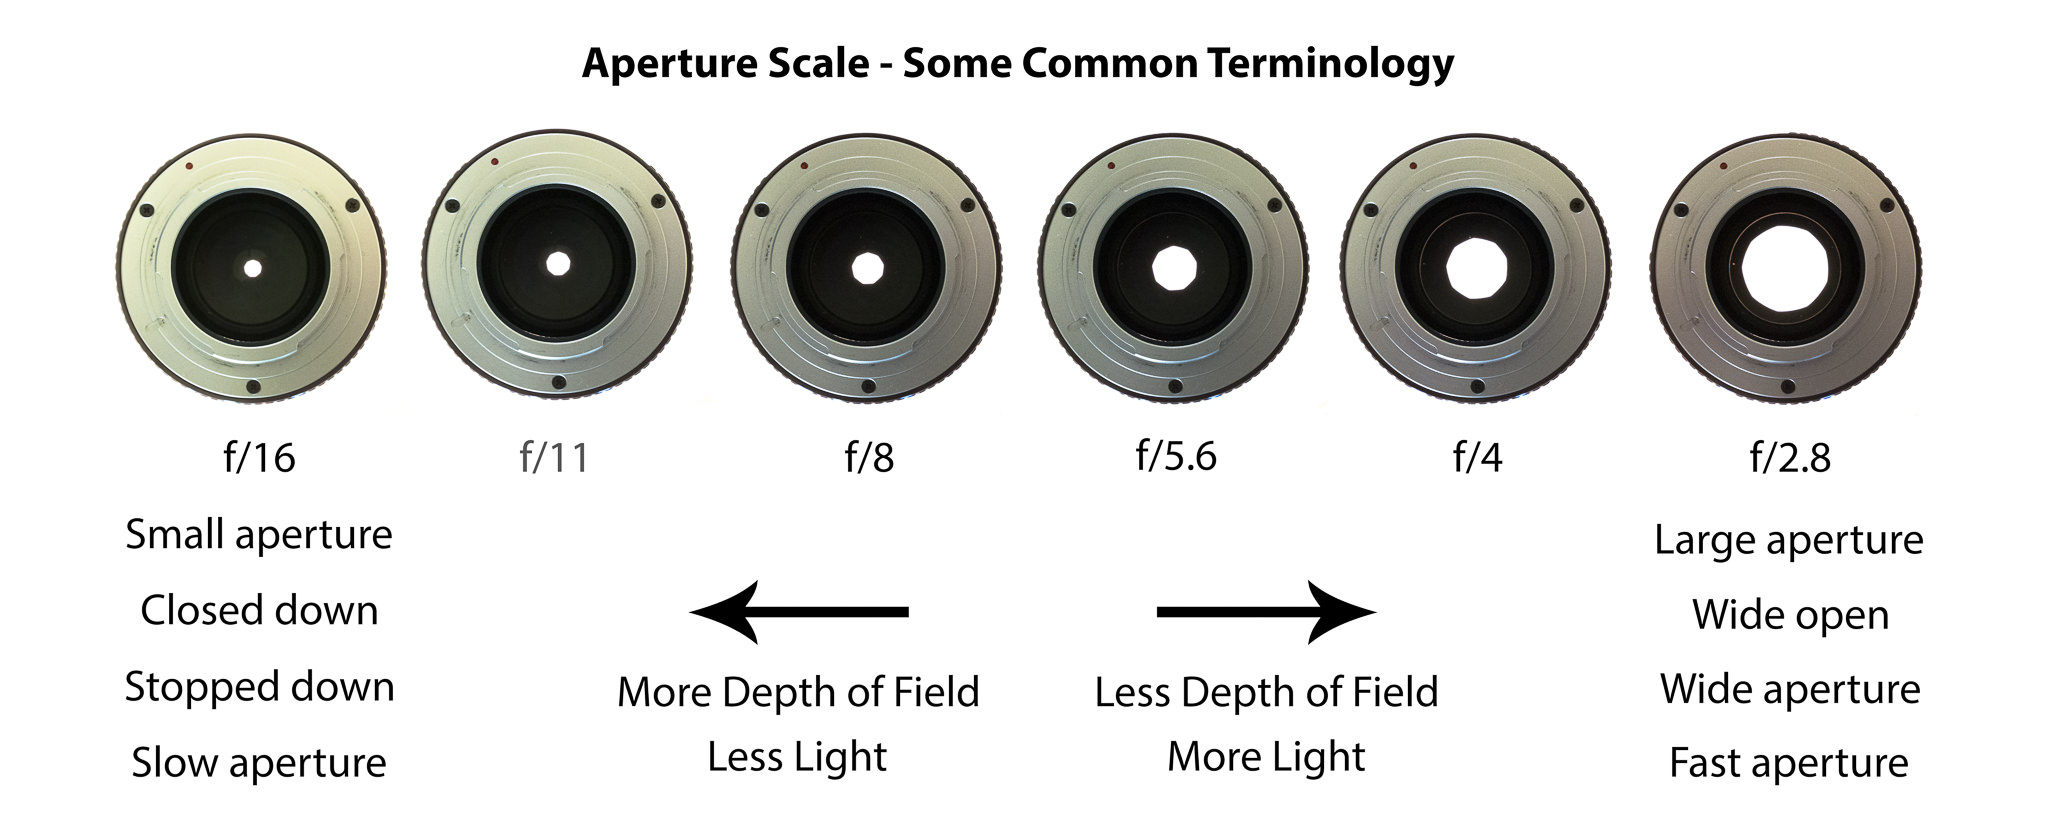
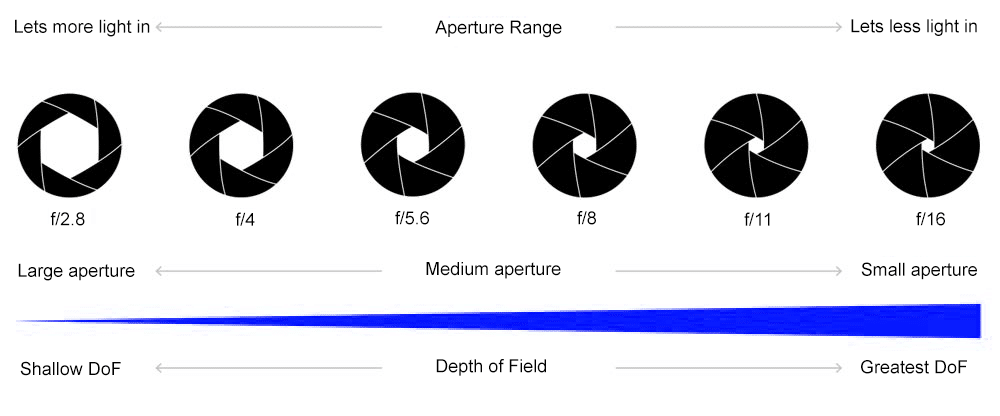
Aperture is the thing in the camera lens that you can shrink and enlarge to control the Depth of Field. The bigger the aperture opening, the less depth of field. The smaller the aperture opening, the more depth of field.
The Aperture is controlled by using the dial on the top of the camera when in Aperture Mode (Av)
What is Depth of Field?
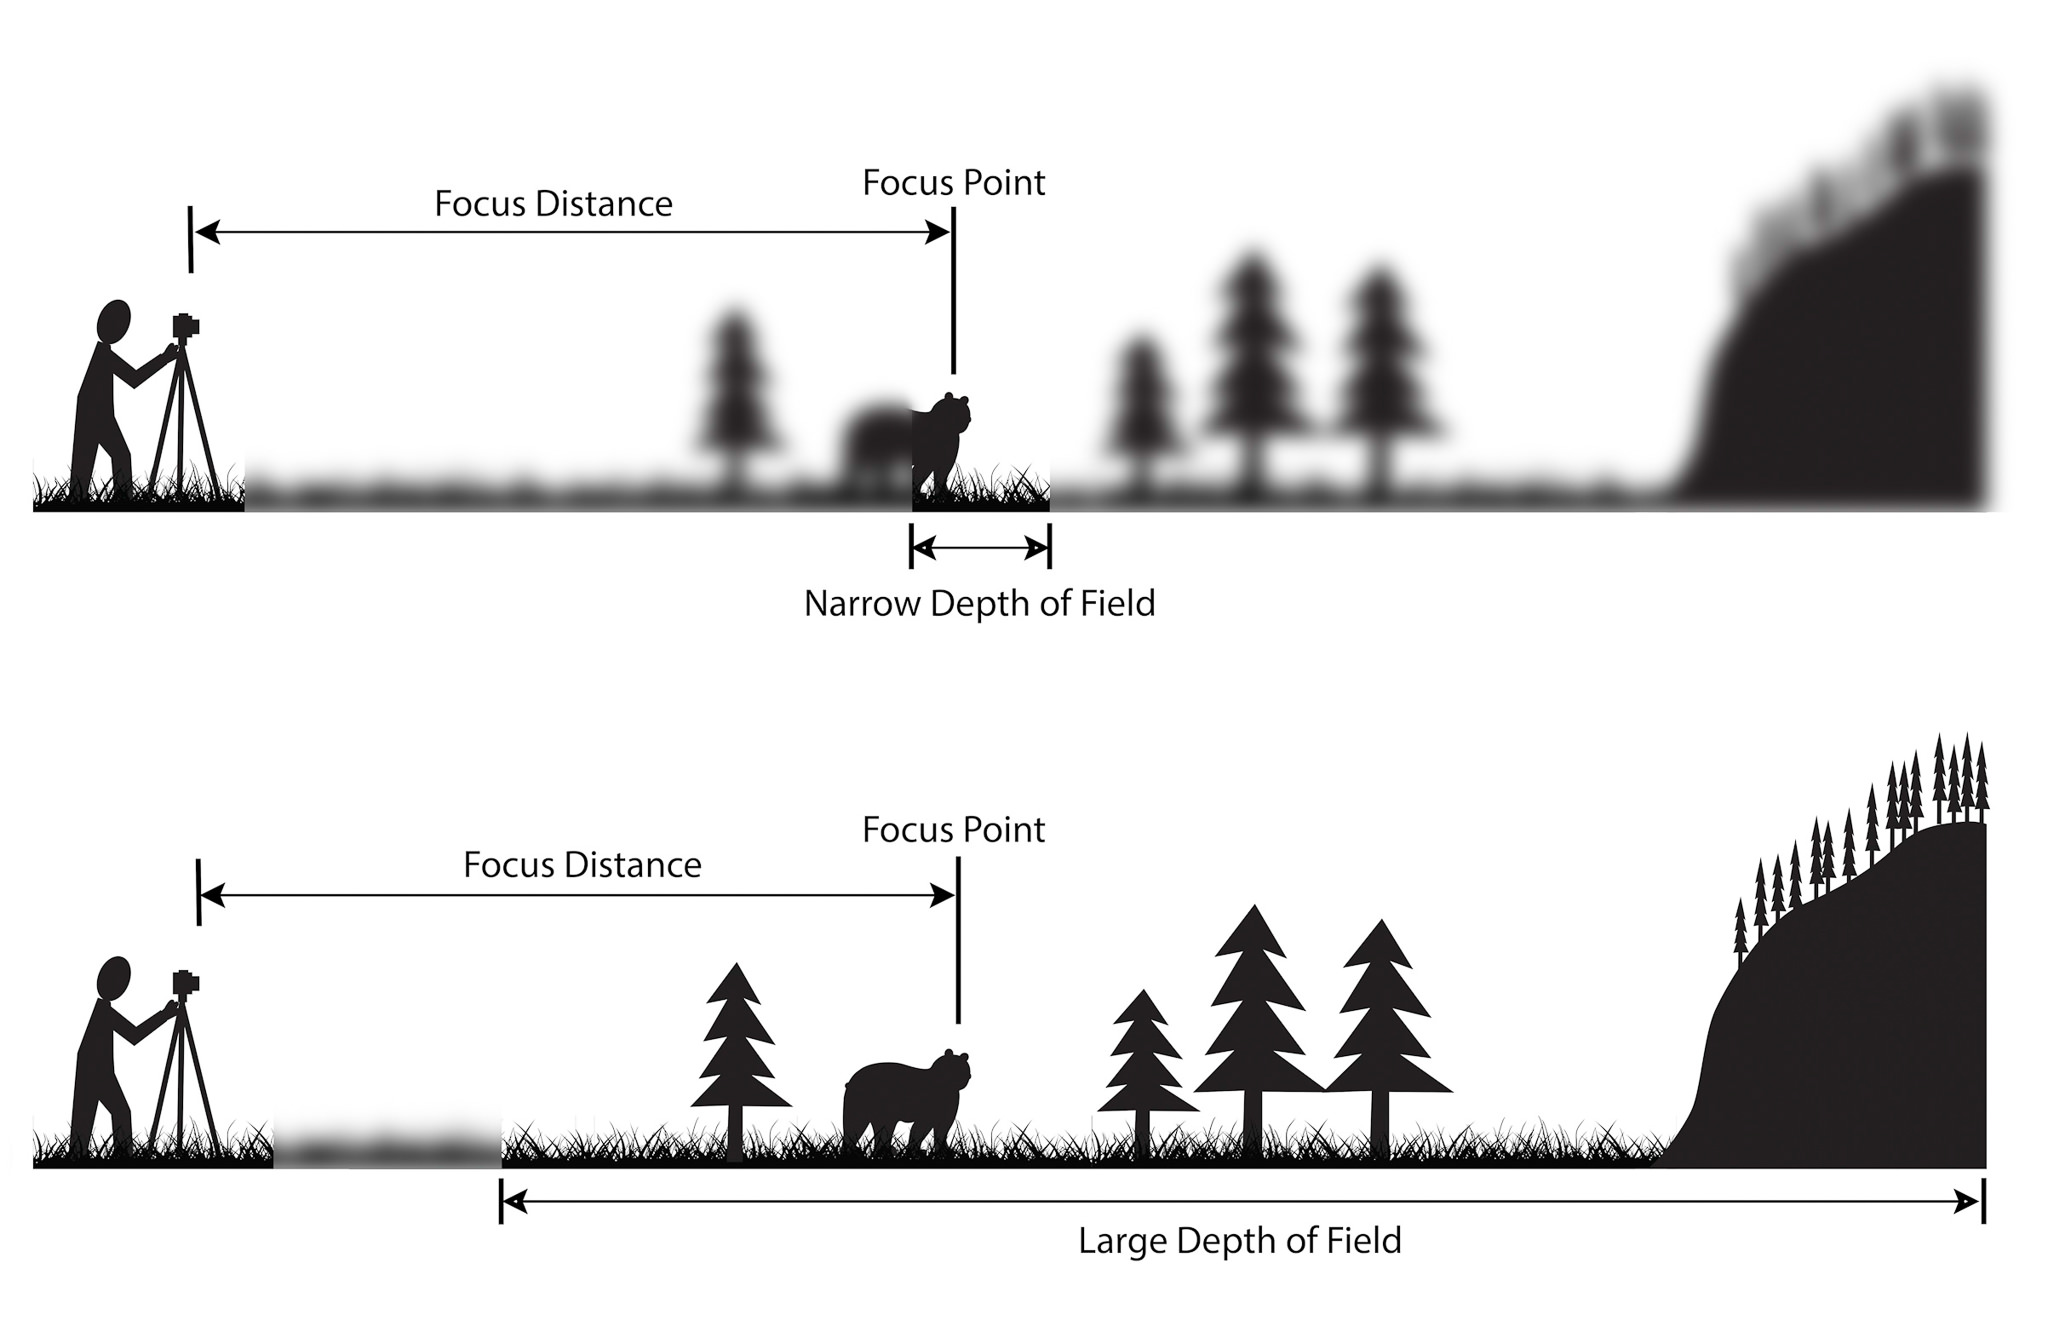
Depth of Field, put simply, is the range of the camera. It determines how clear or blurry the background or an object further away is.
The less depth of field, the blurrier the background. The more depth of field, the clearer the background.
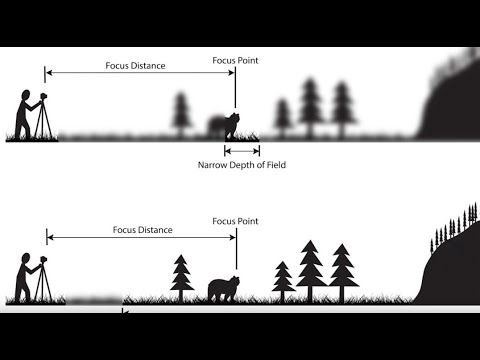
Low depth of field: High depth of field:
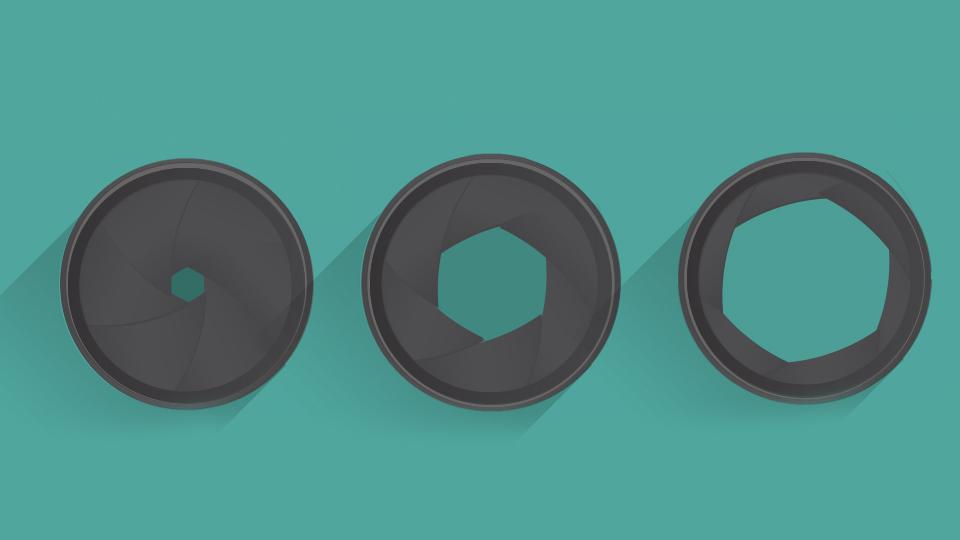
As you may have noticed by now, the unit to measure Depth of Field is f/number. The higher the number, the smaller the Aperture gap, the higher the Depth of Field.
With this knowledge, you can take advantage of the Depth of Field to make different kinds of shots.
Located at the front of your camera, it allows specific amounts of light into the camera to create a sharper, accurate image.
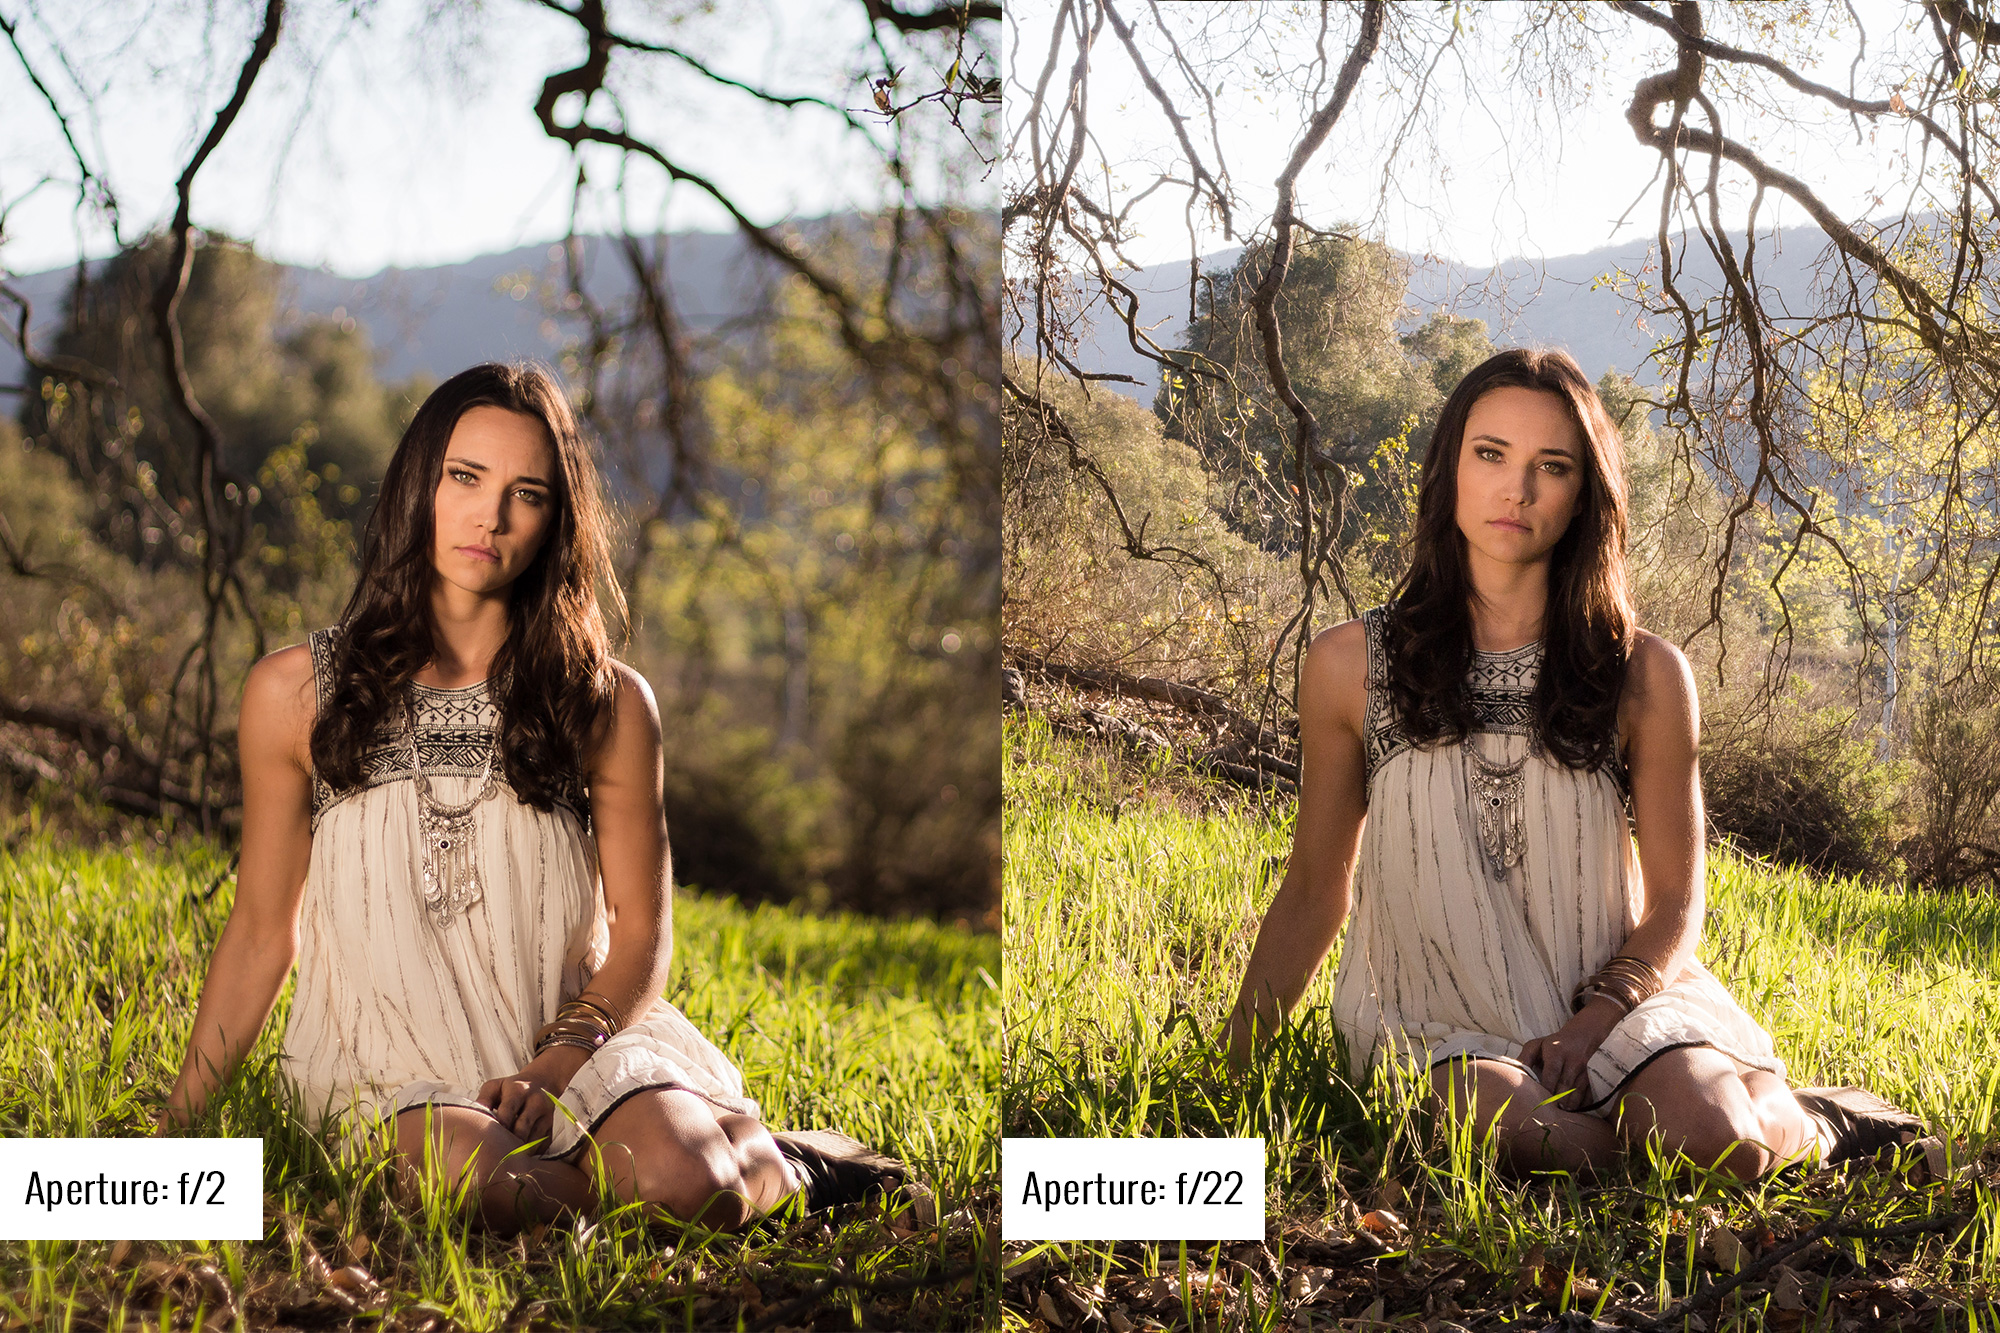
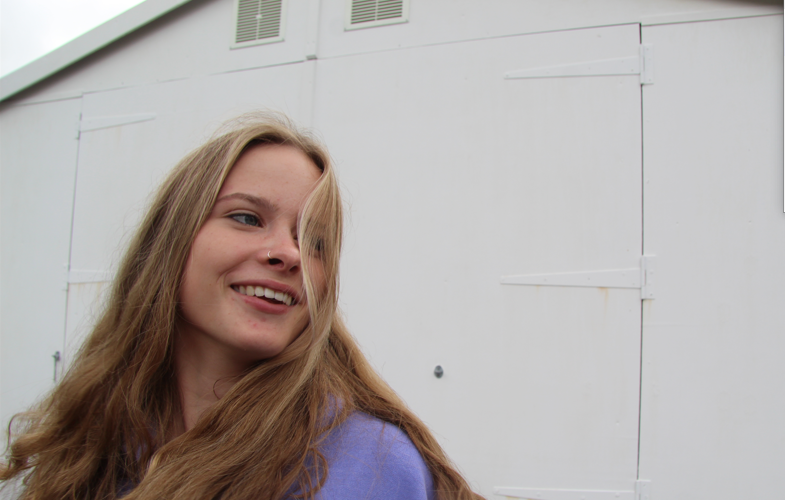
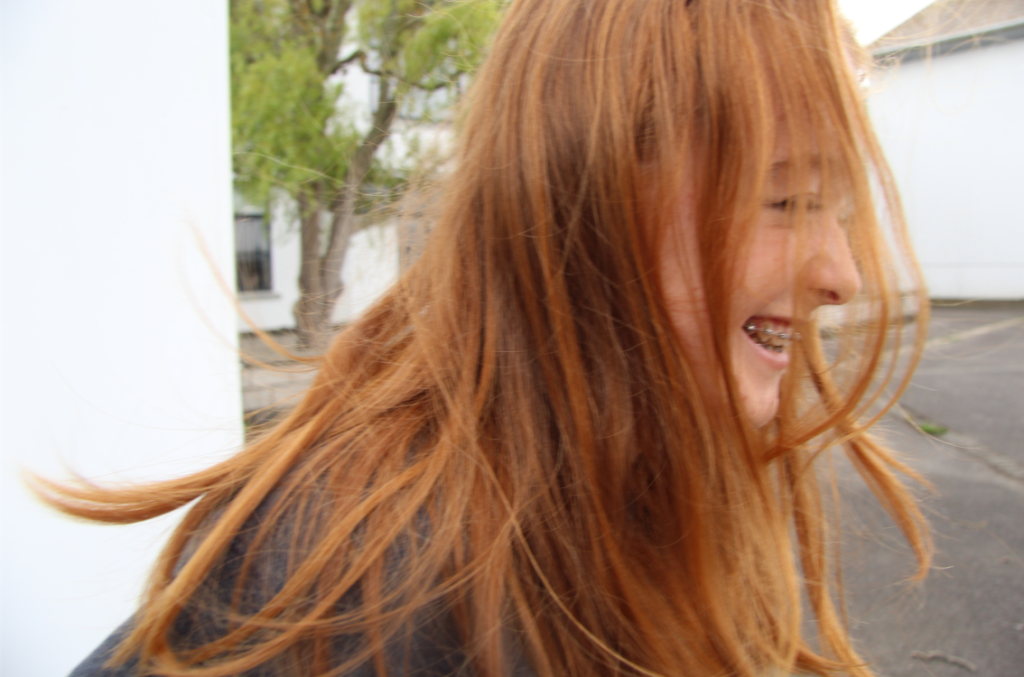
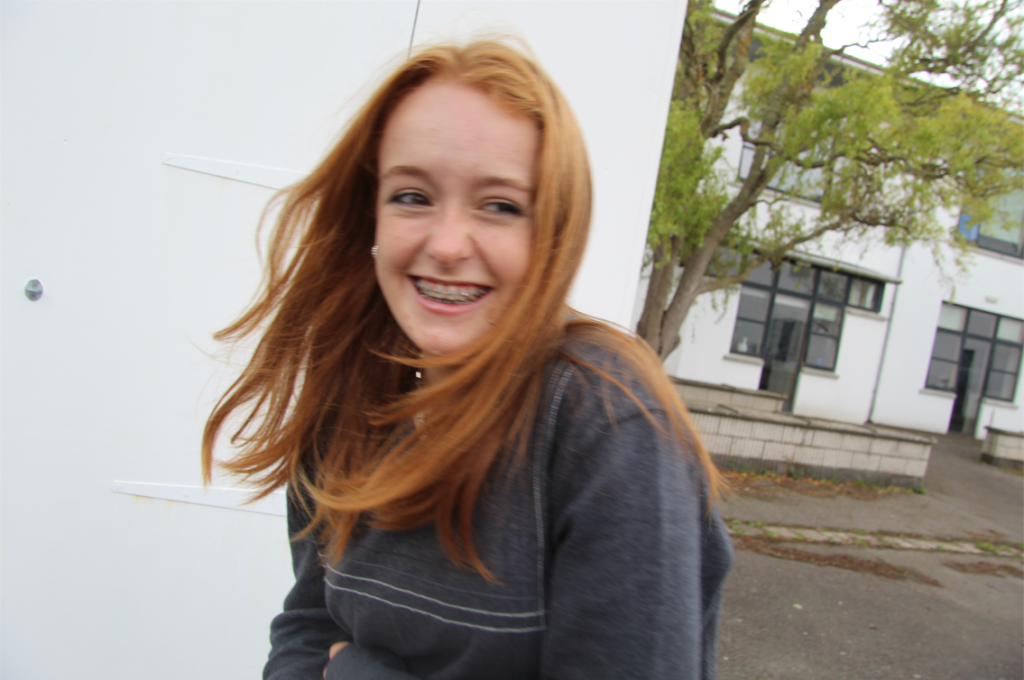
For example in the left photo, there was a larger aperture used, which gives more attention to the image that is closes to the camera. It gives it a sharper focused look. Whereas the photo on the left is used with a slightly smaller aperture where the camera focuses on the whole of the image rather than one picture.
This could also be known as depth of field, which is the distance between the nearest and furthest objects giving a focused image. This can create much more eye catching images as it can make a specific object look much sharper, and giving it more of the attention than the objects around it in the background, while bringing out details within the object it is more focused on, like the tonality.
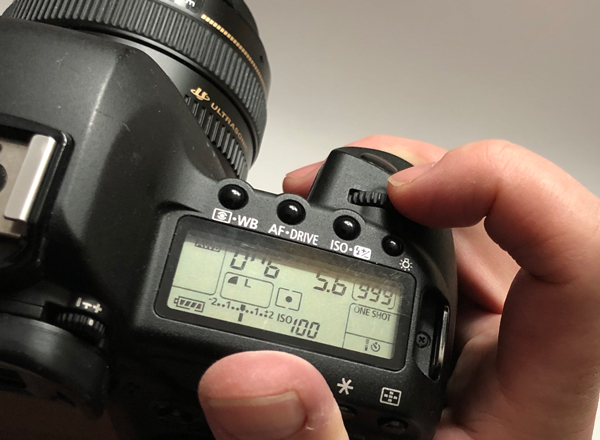
In order to change the option on your camera of the Aperture, it is visually seen as “F–“. With a scrolling option at the front of the camera as seen in the image, which allows you to have a higher or lower aperture option.
Aperture is the adjustable lens opening that controls the amount of light allowed into the camera. the smaller the aperture the greater the depth of field. Whereas, a wide aperture gives you a shallow depth of field which leads to only the foreground is sharp. A narrow aperture gives you a deep depth of field which means everything is sharp.
depth of field
depth of field is the distance between the nearest and further objects in a scene that appear to be sharp/ clear in the image.
The top image is taken with a smaller aperture meaning that the background of the image is blurred. Whereas the image on the bottom is taken with a larger aperture meaning that it is allowing more light in.
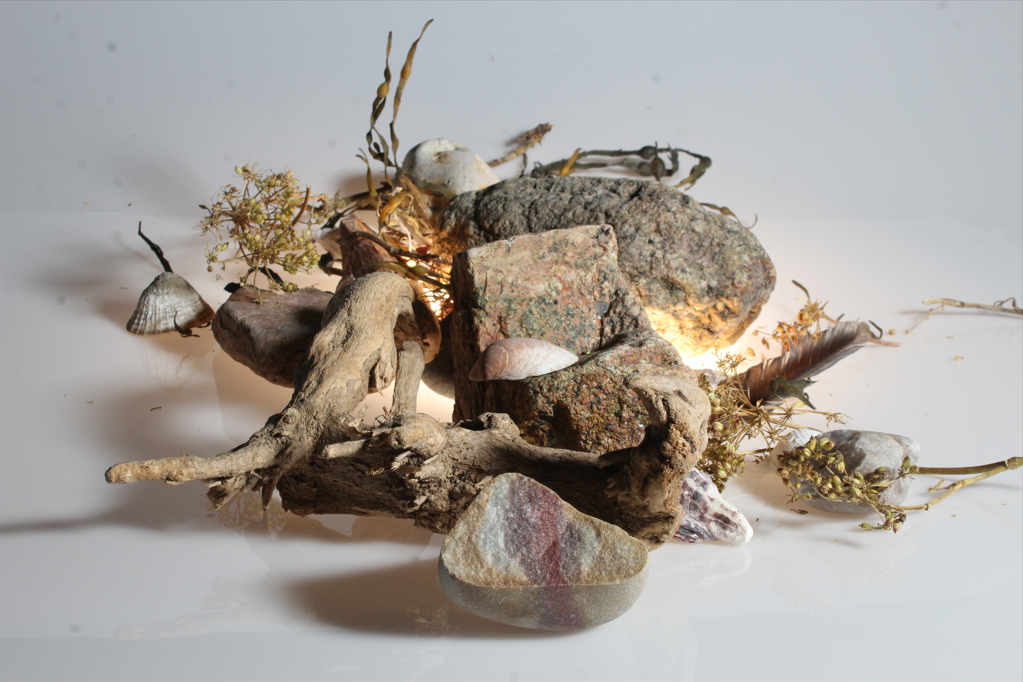
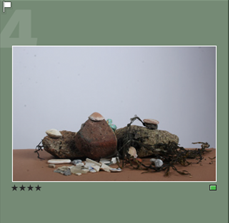
STUDIO SHOOT
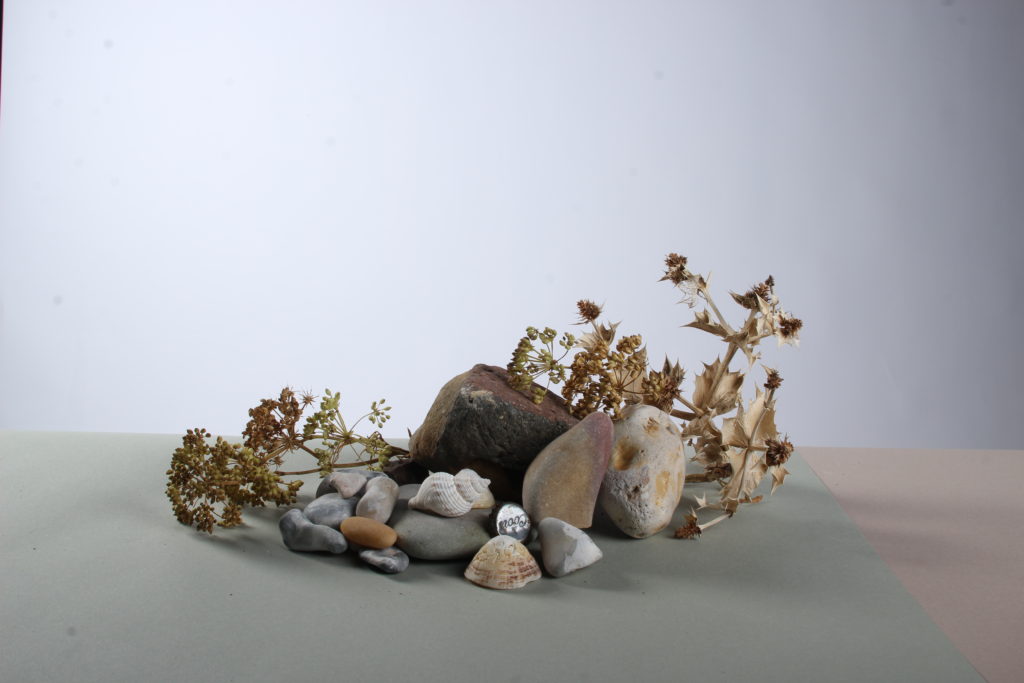
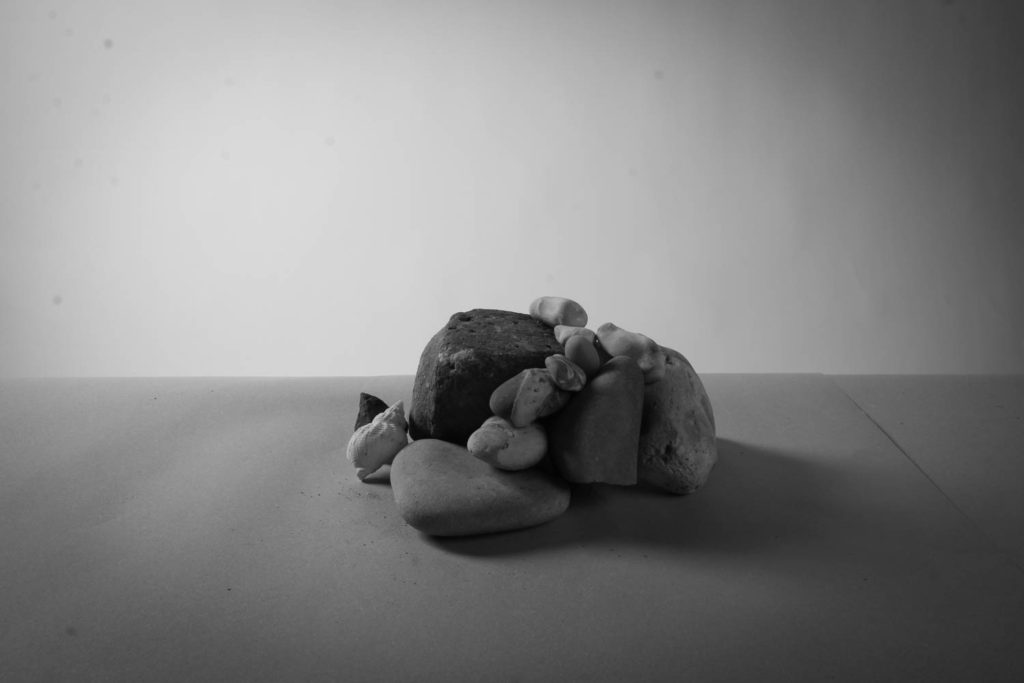
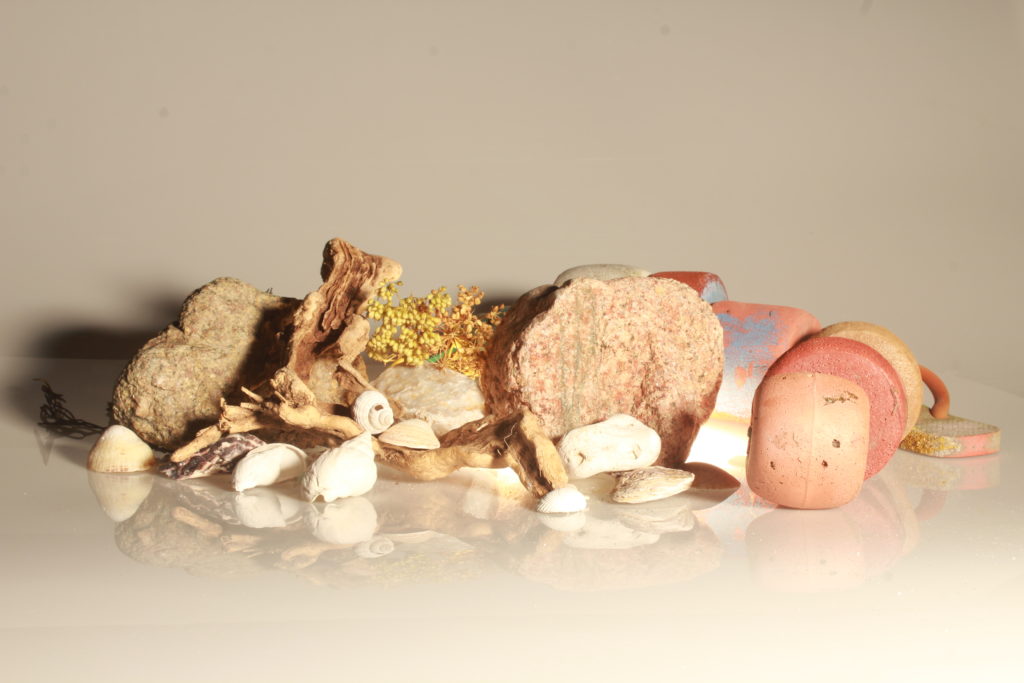
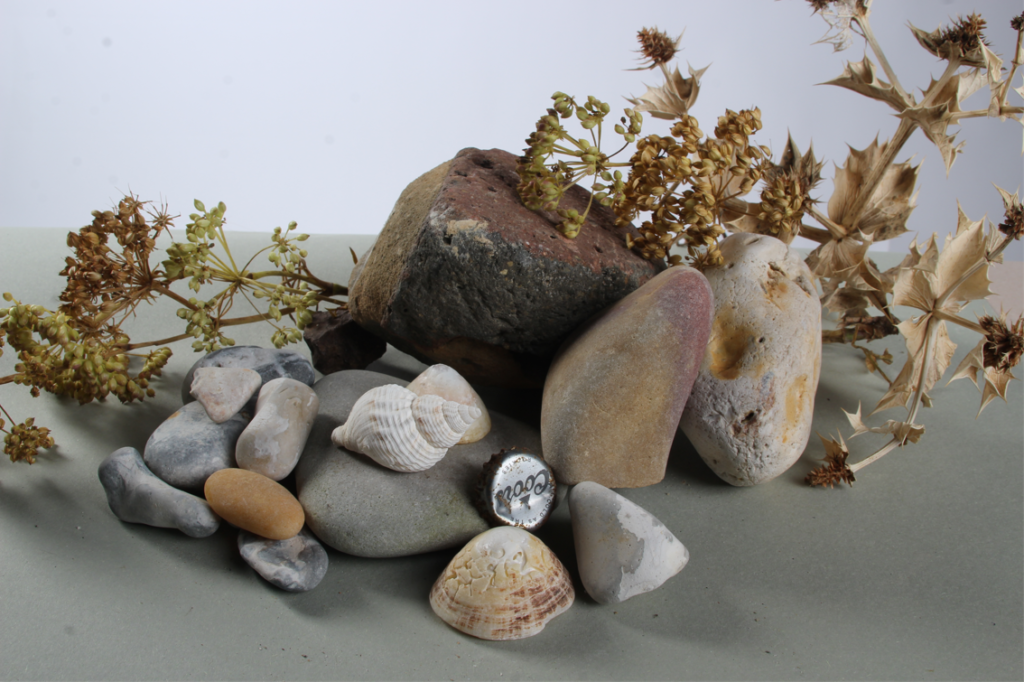
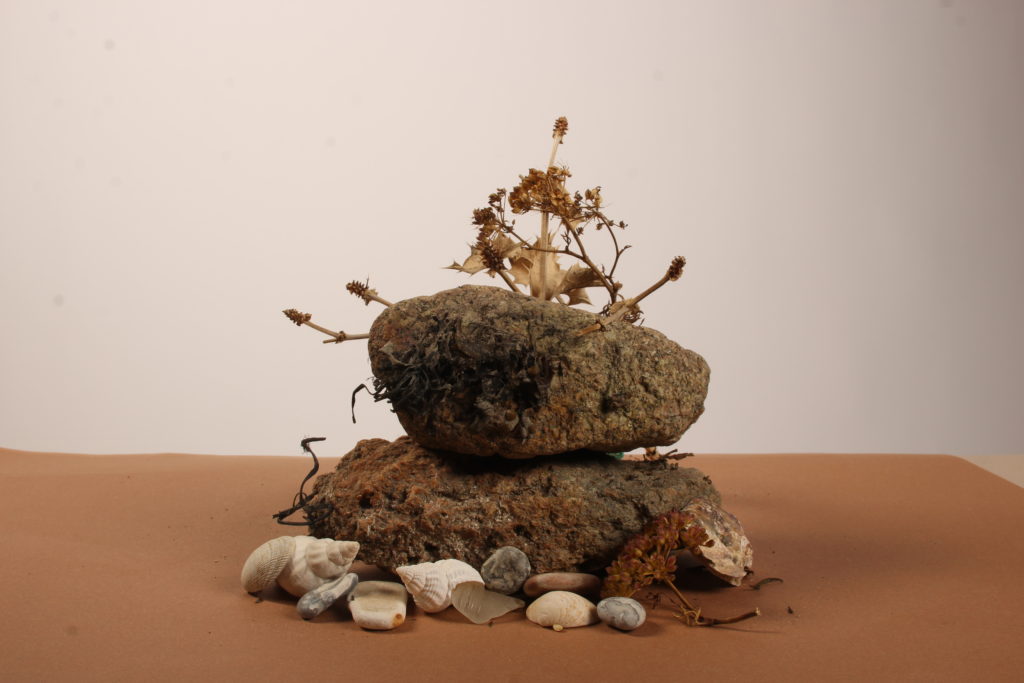
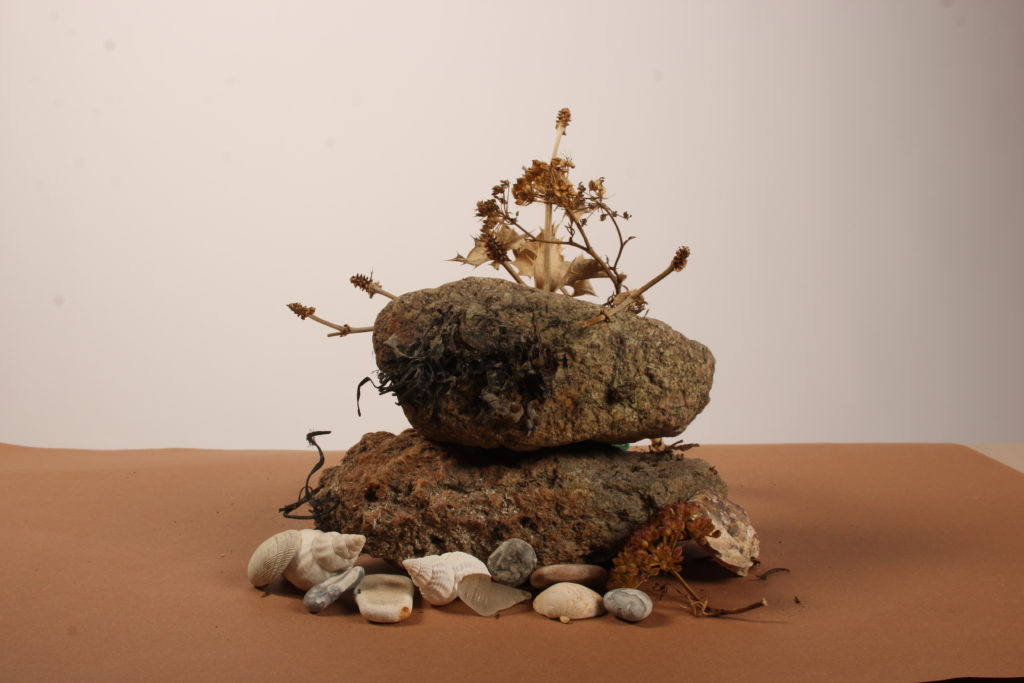
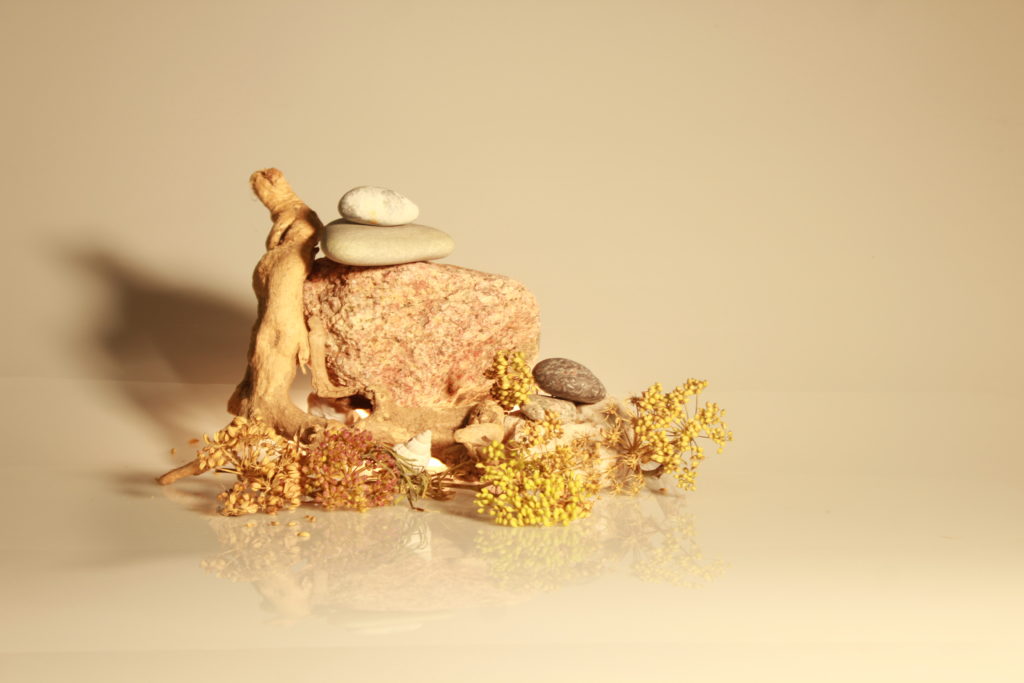
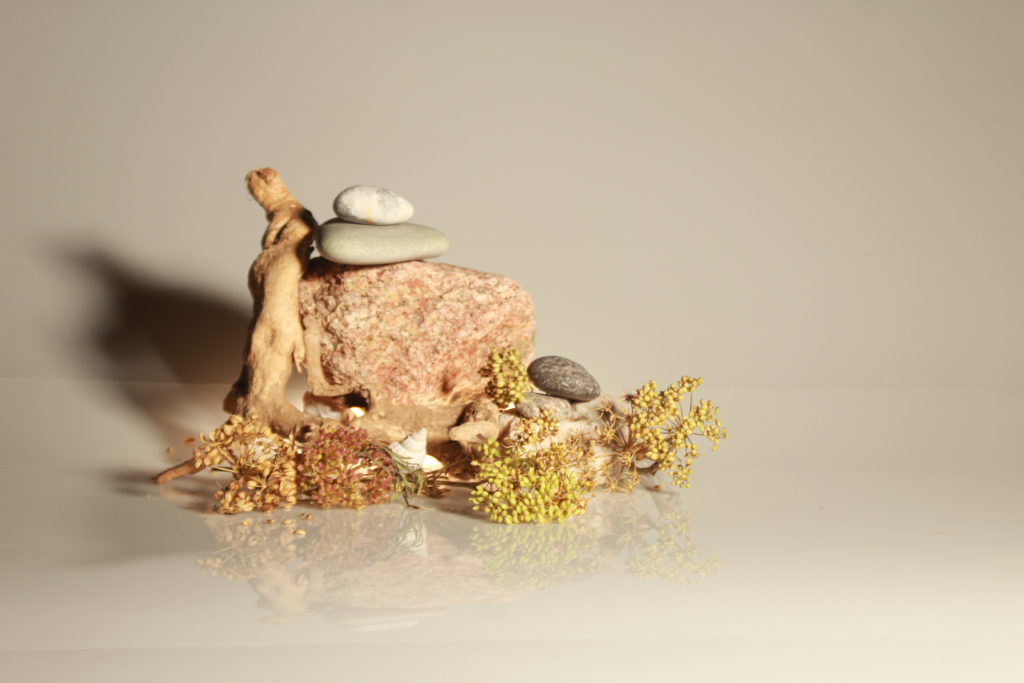
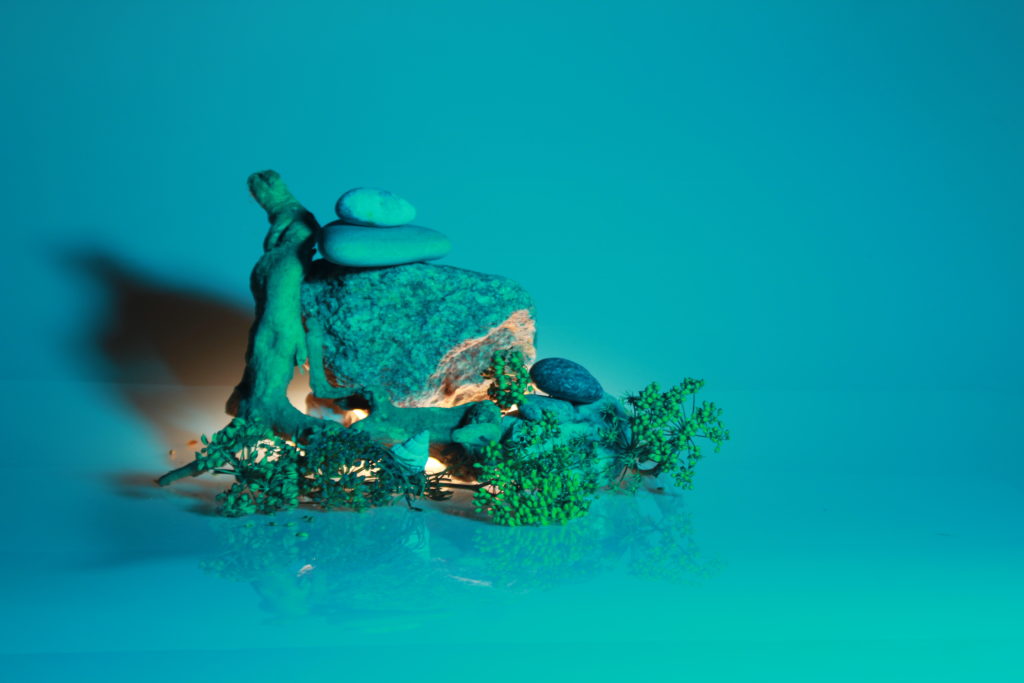
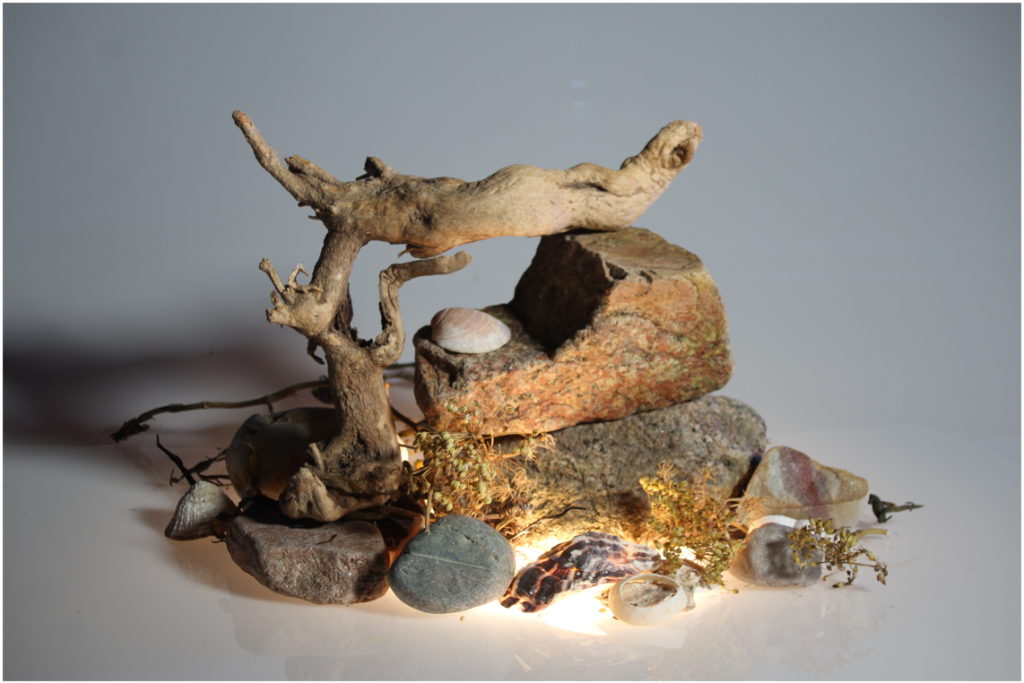
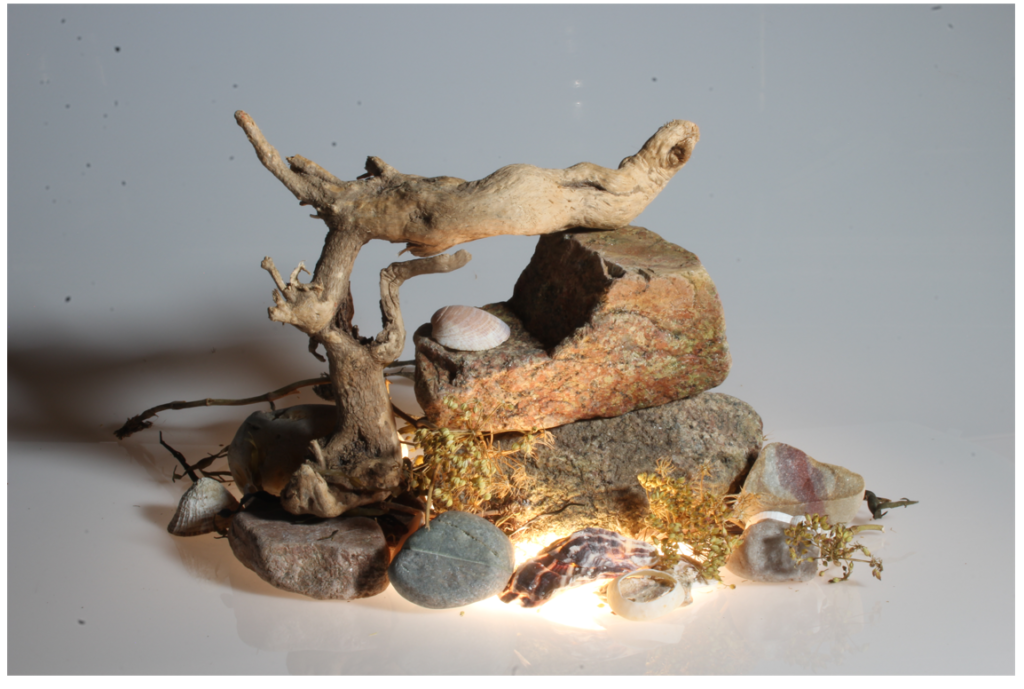
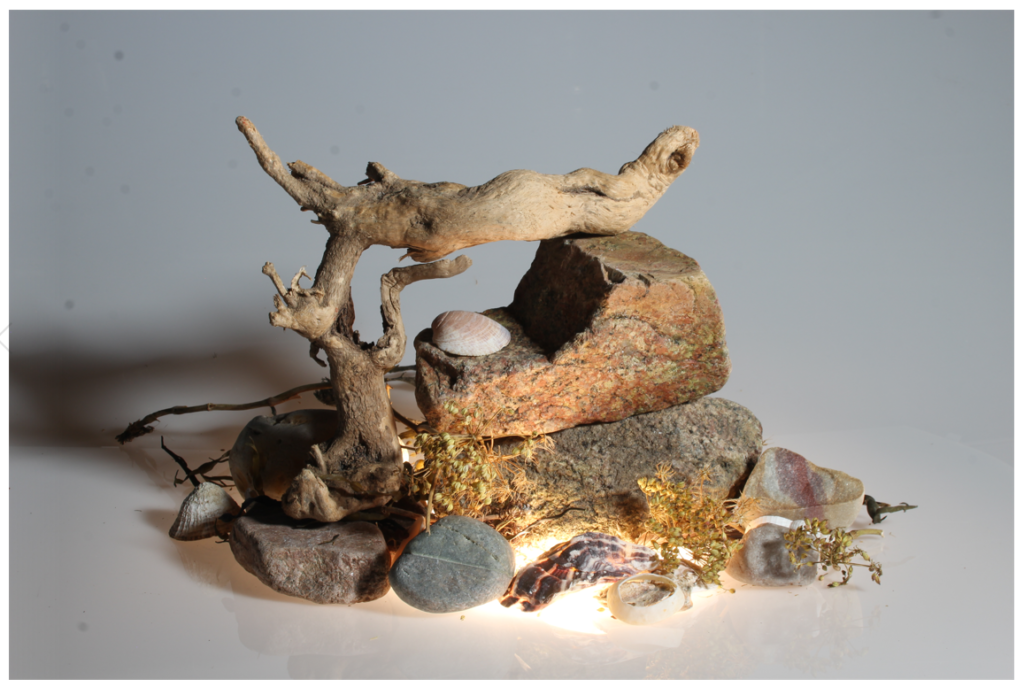
this image was taken with a white background which contrasts against the beige two toned lower background. this was taken with a wide aperture as everything in the image is in focus.
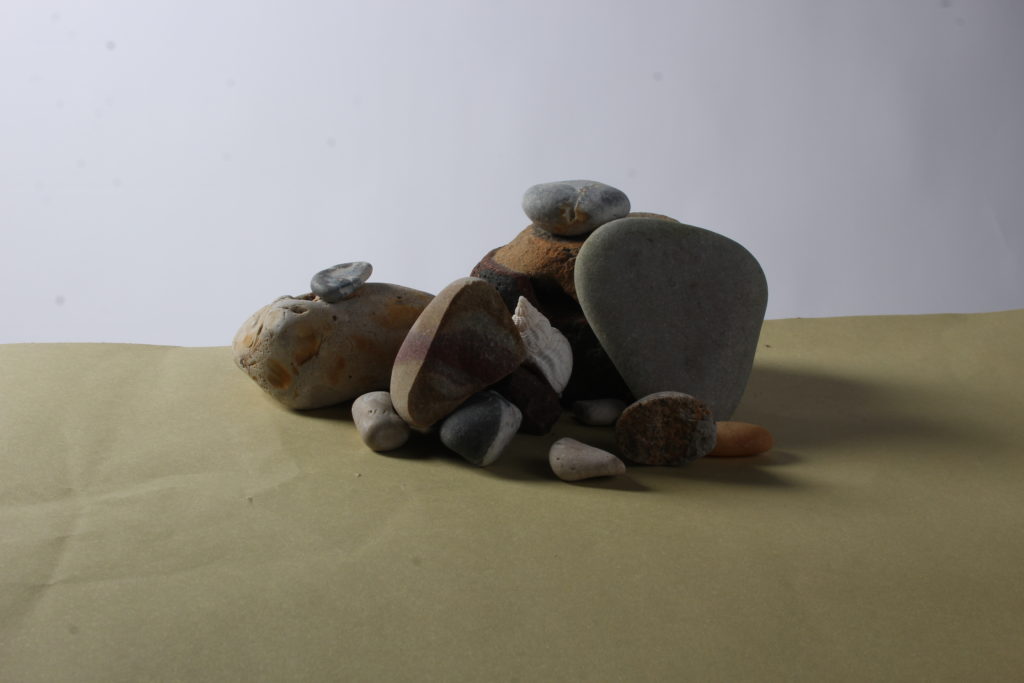
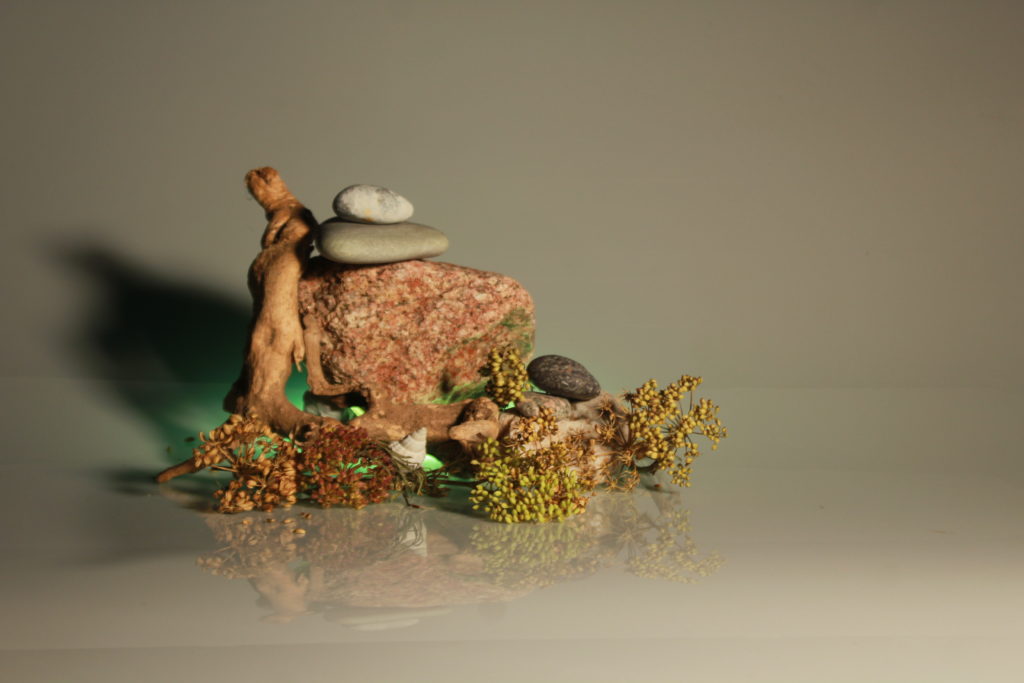
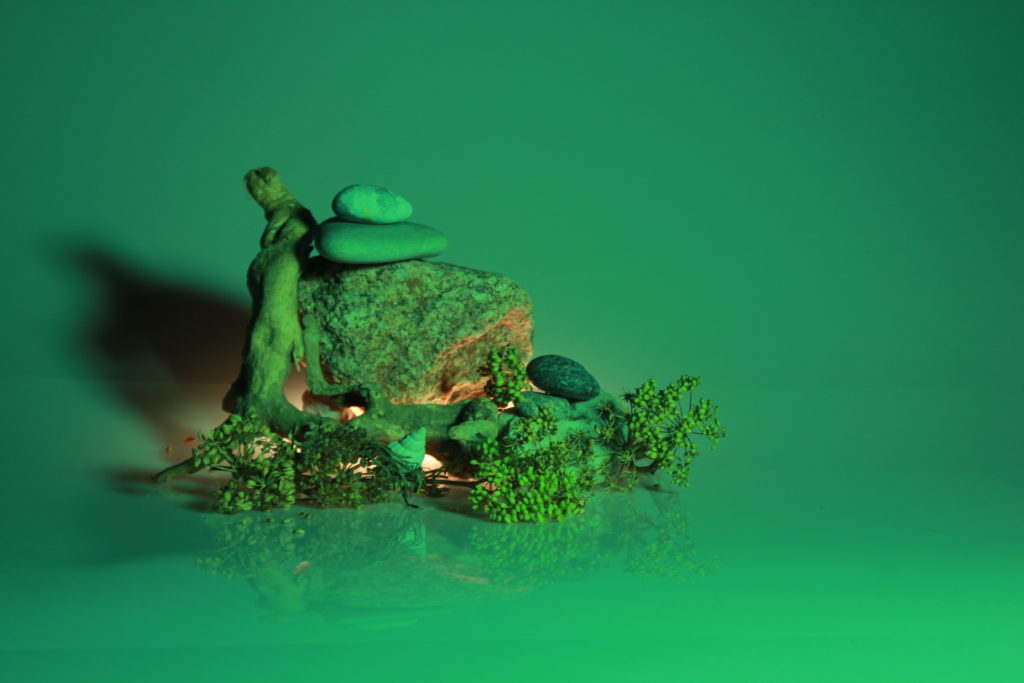
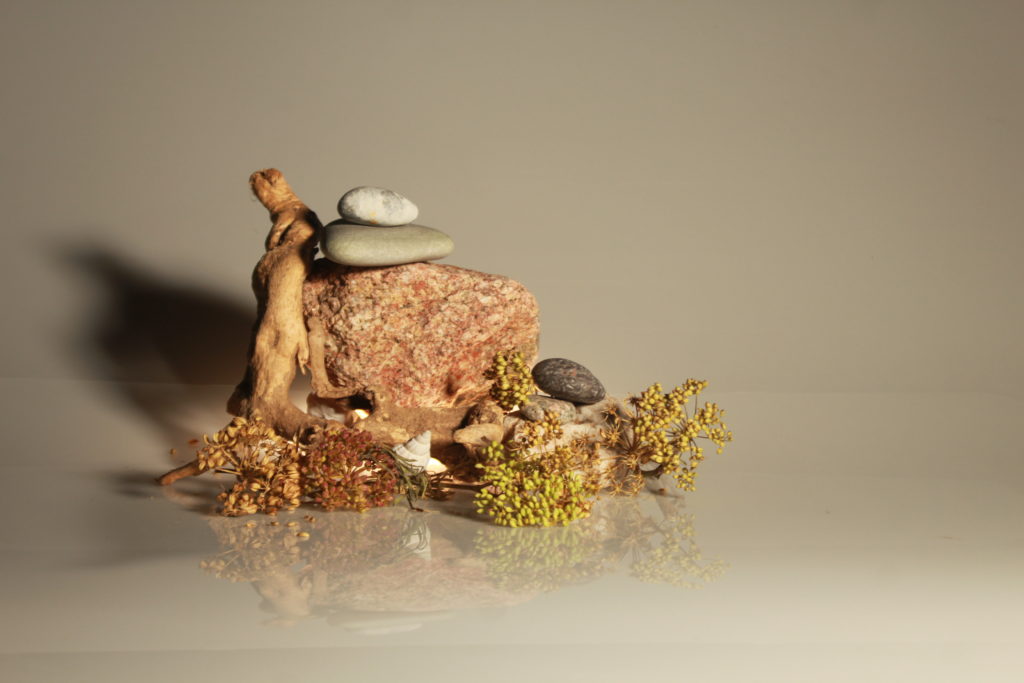
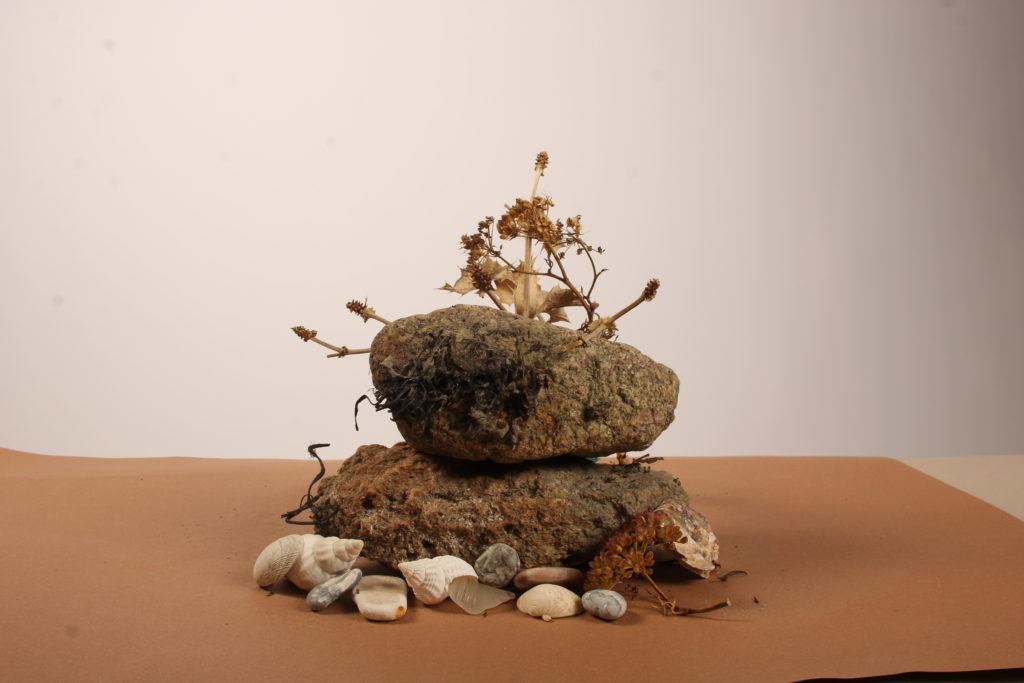
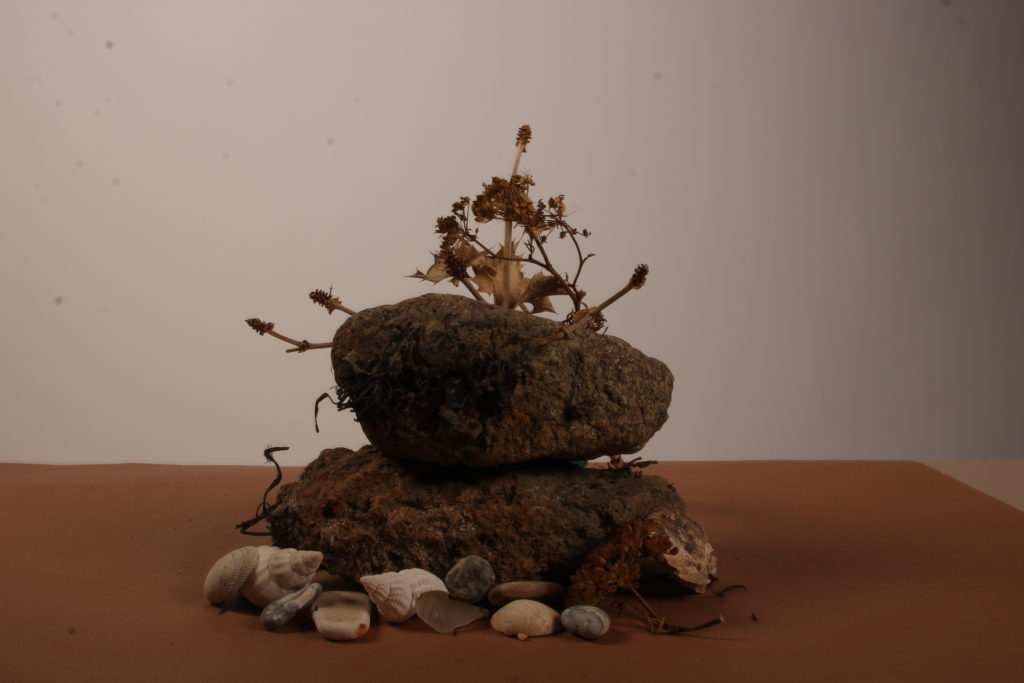
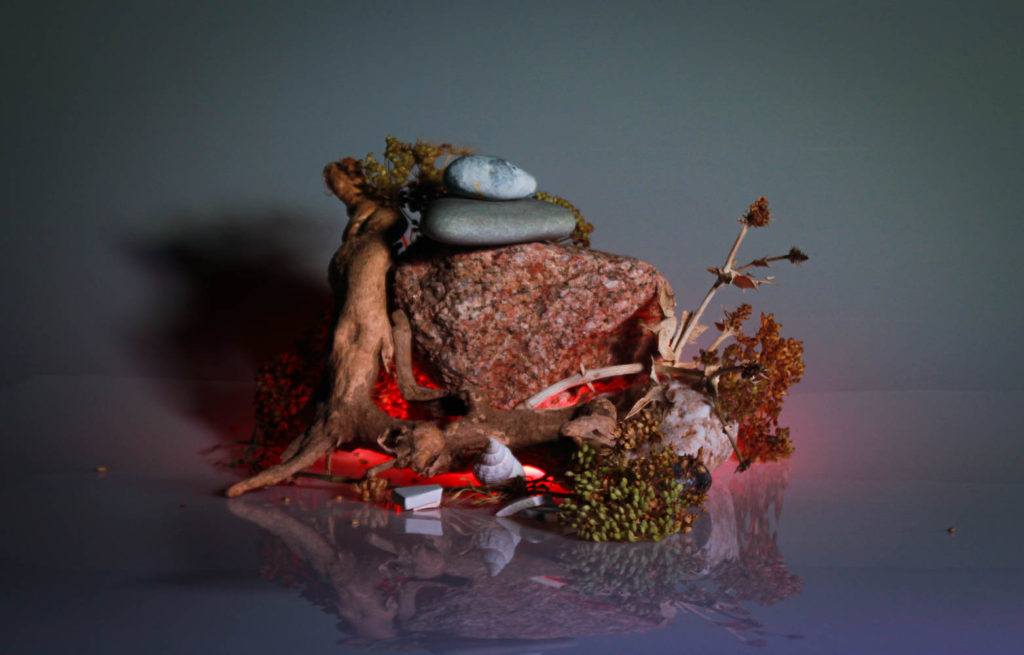
This photo was taken with a slightly bigger aperture than the photo below as has a smaller depth of field due to only the rocks and reflection being in focus and the background being blurred. Furthermore, this photo was taken on an infinity screen which gives the illusion that there is an infinite white background.
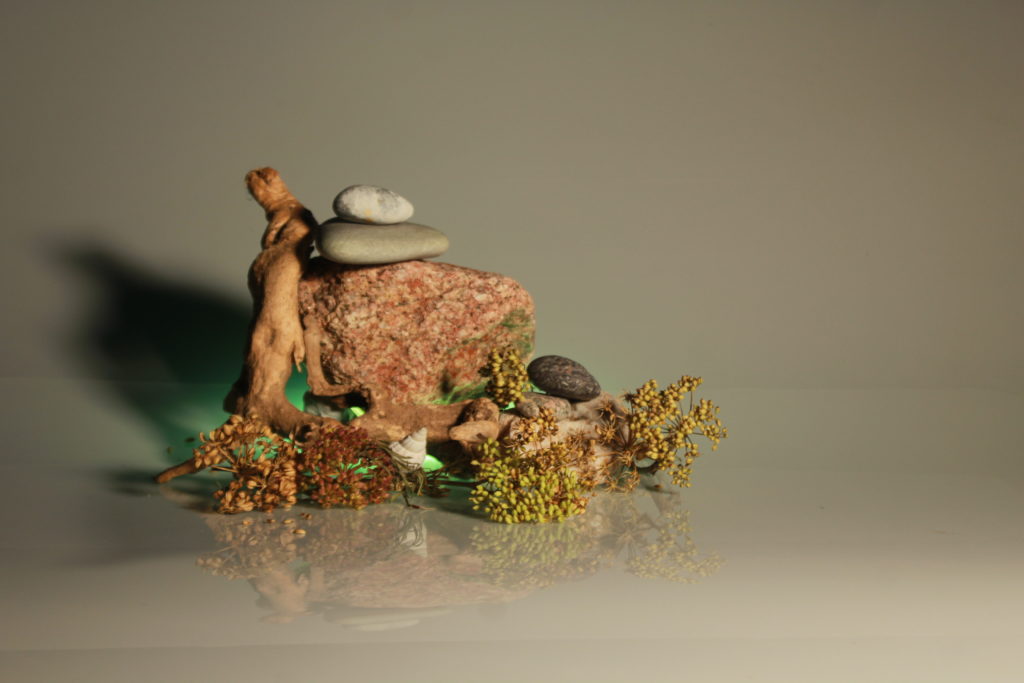
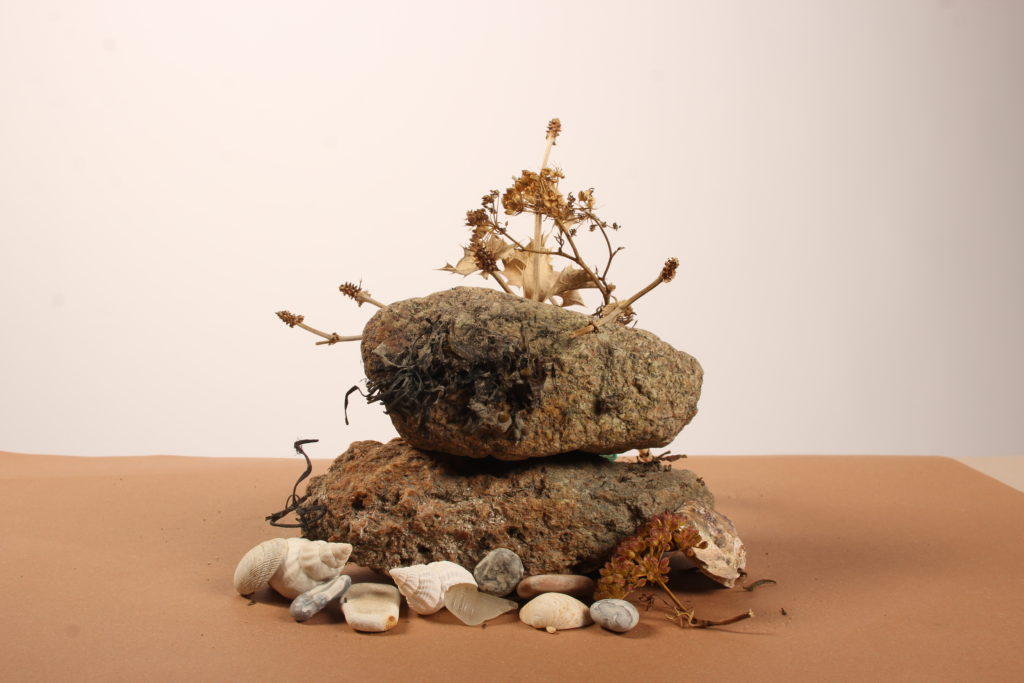
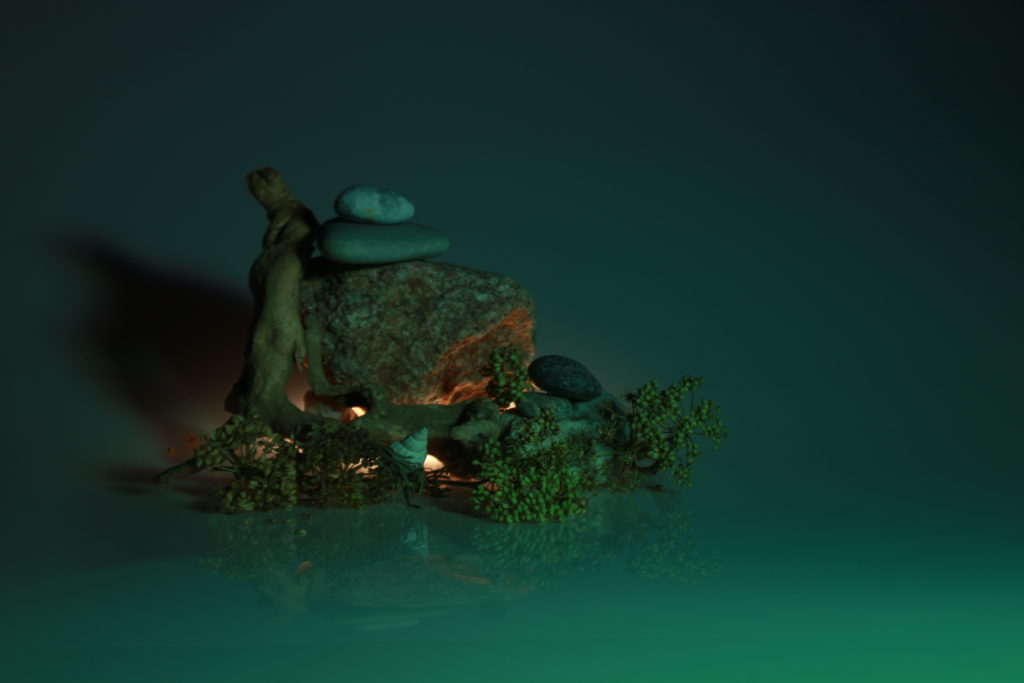
this was taken with a small aperture meaning that is has a large/ long depth of field. you can tell this as everything in the photo is in focus.
The aperture controls how much light enters the camera. It also controls the depth of field. Aperture is the adjustable lens opening that controls the amount of light allowed into the camera. Learning to properly adjust these three settings based on your location and subject is essential for capturing good exposures.
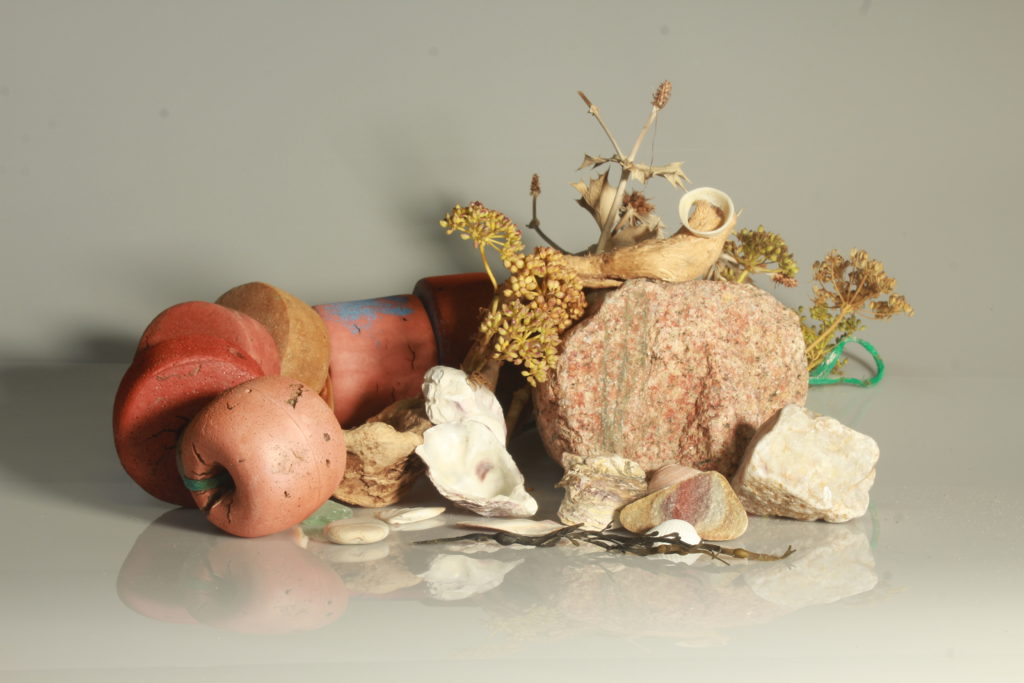
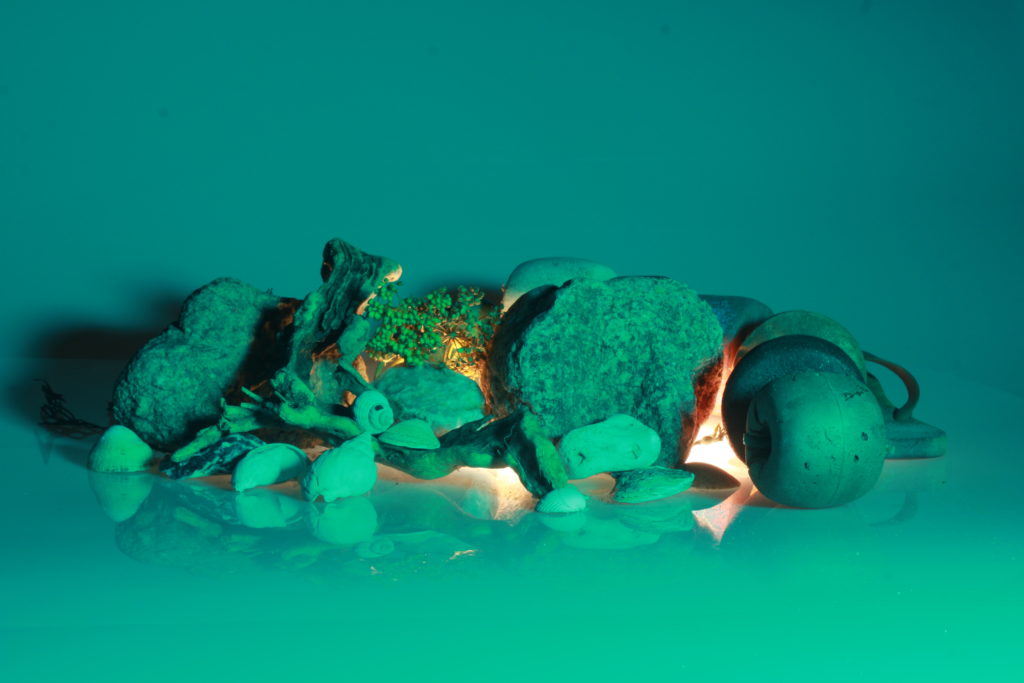
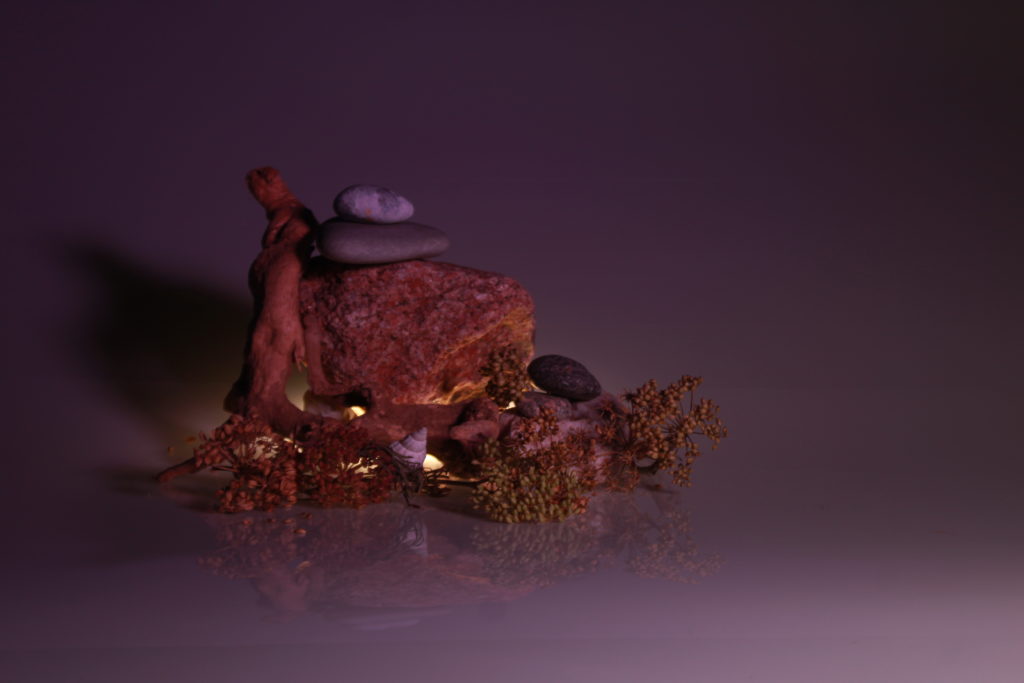
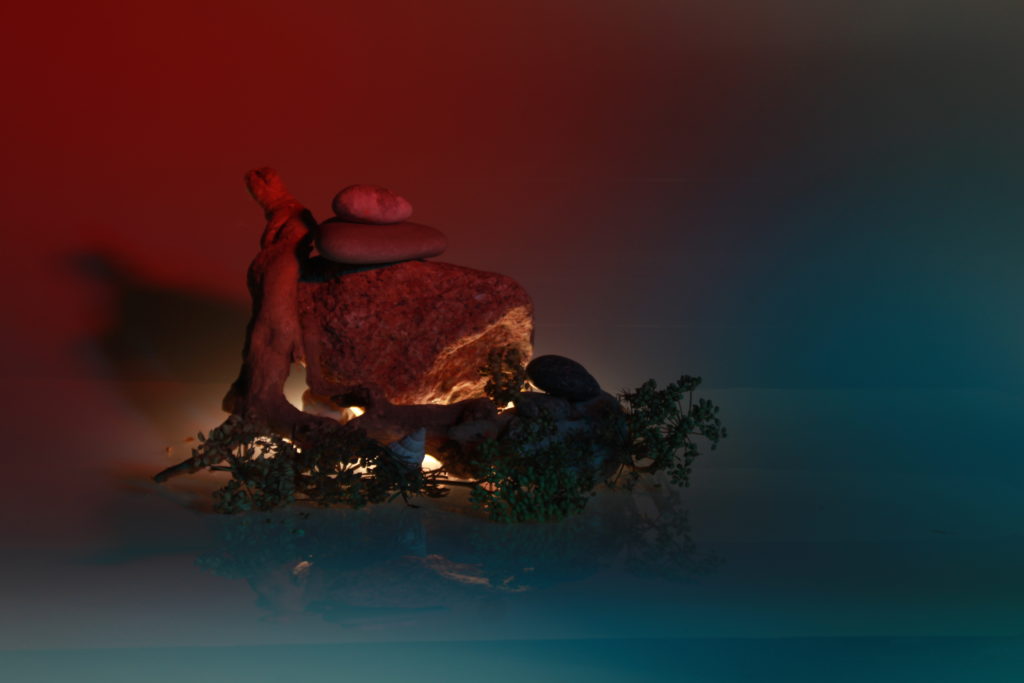
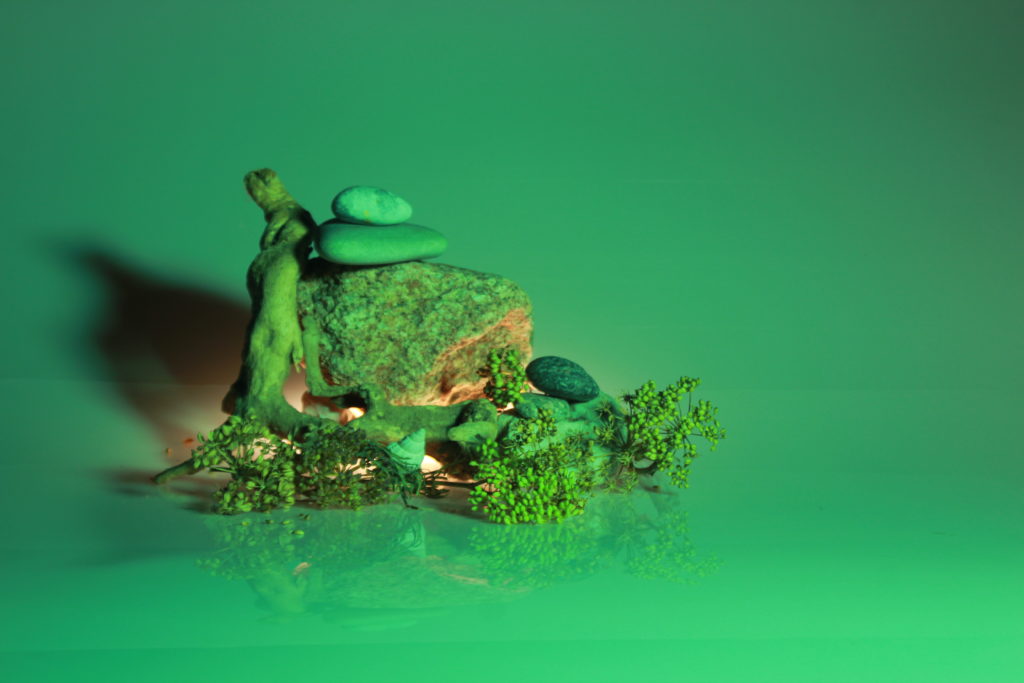
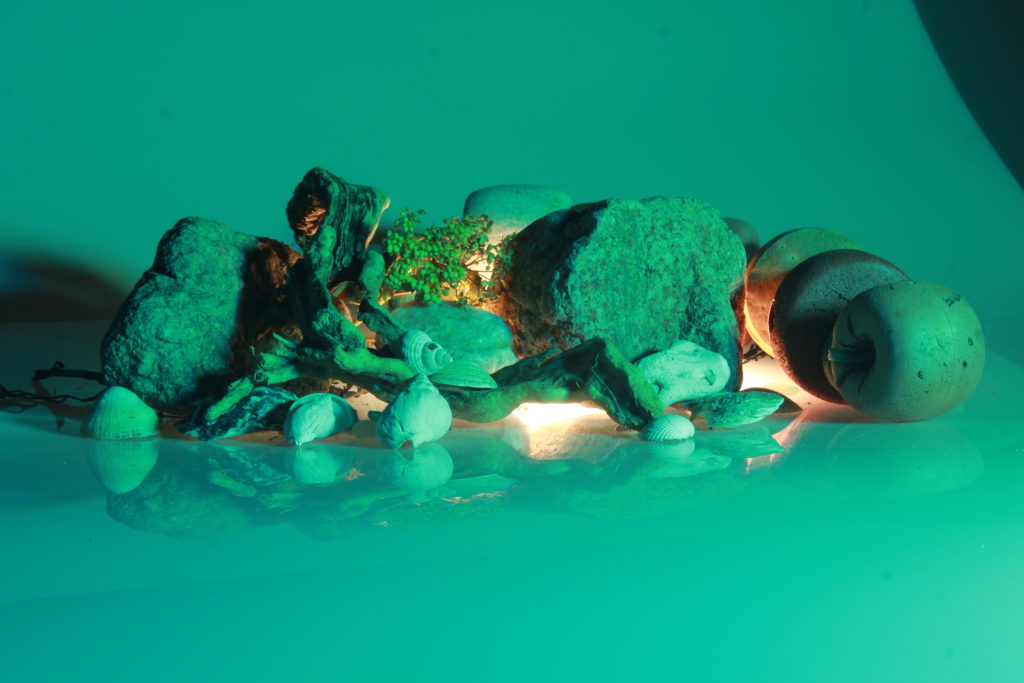
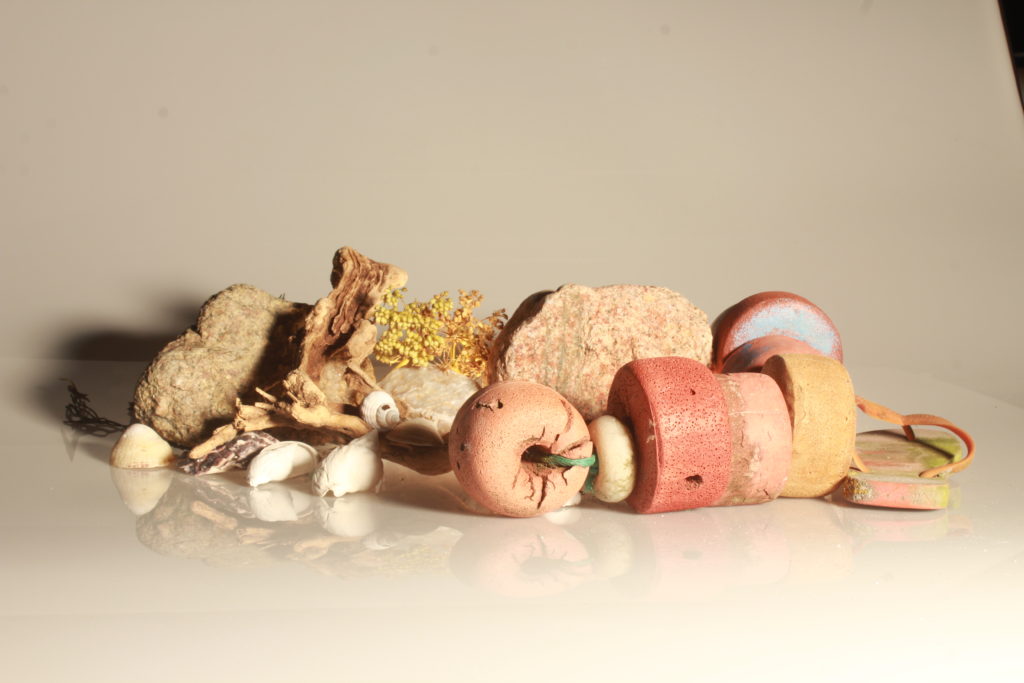
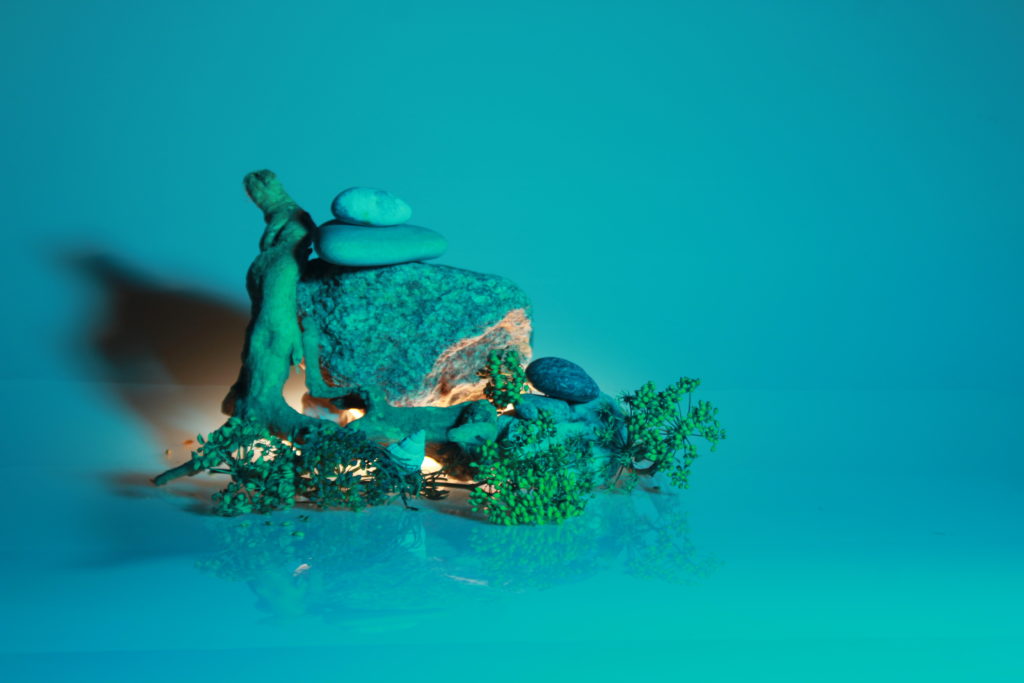
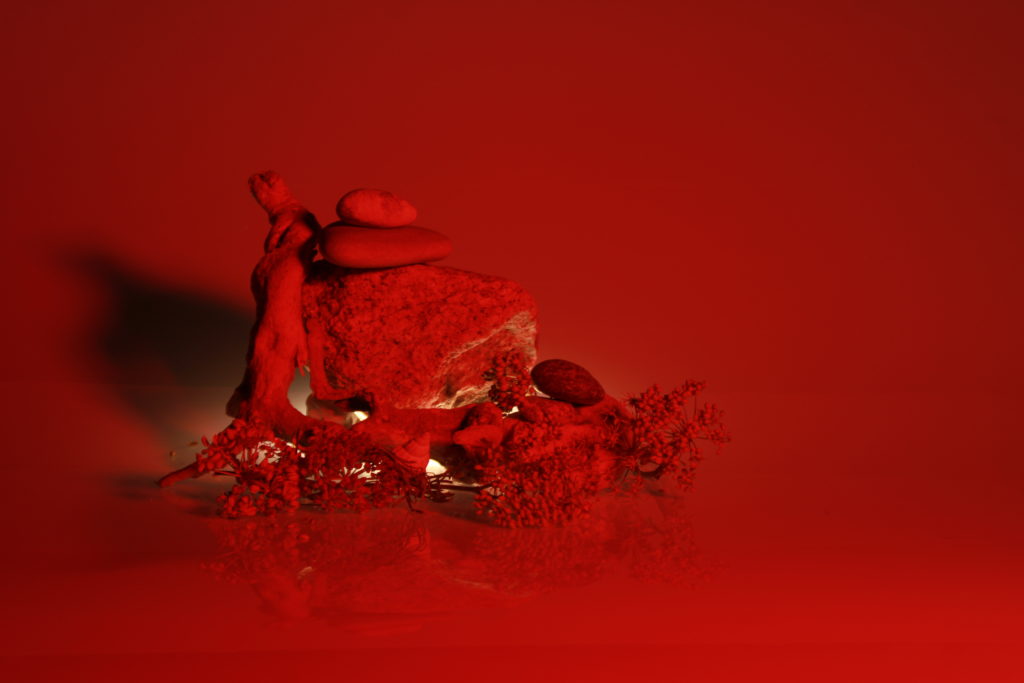
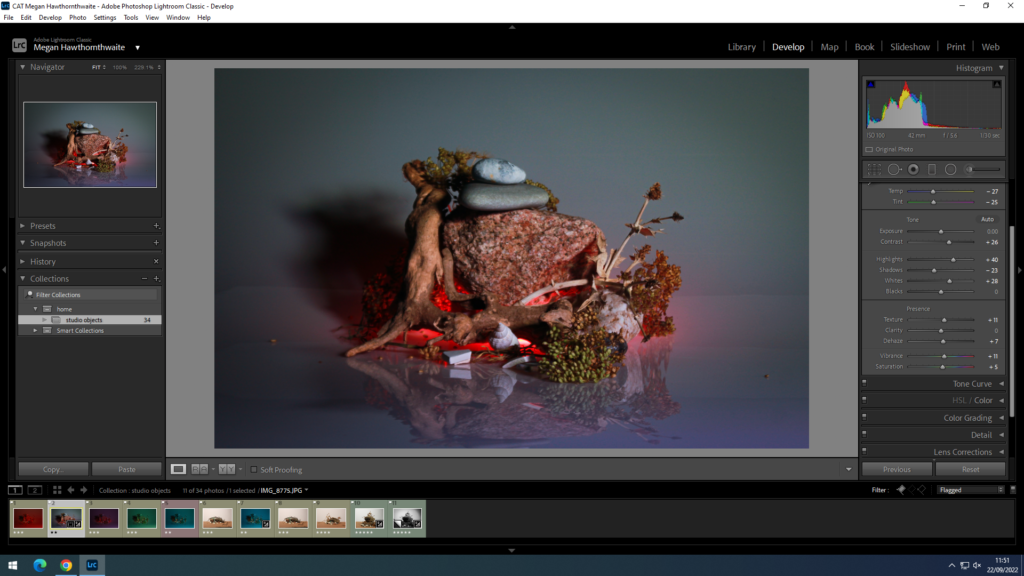
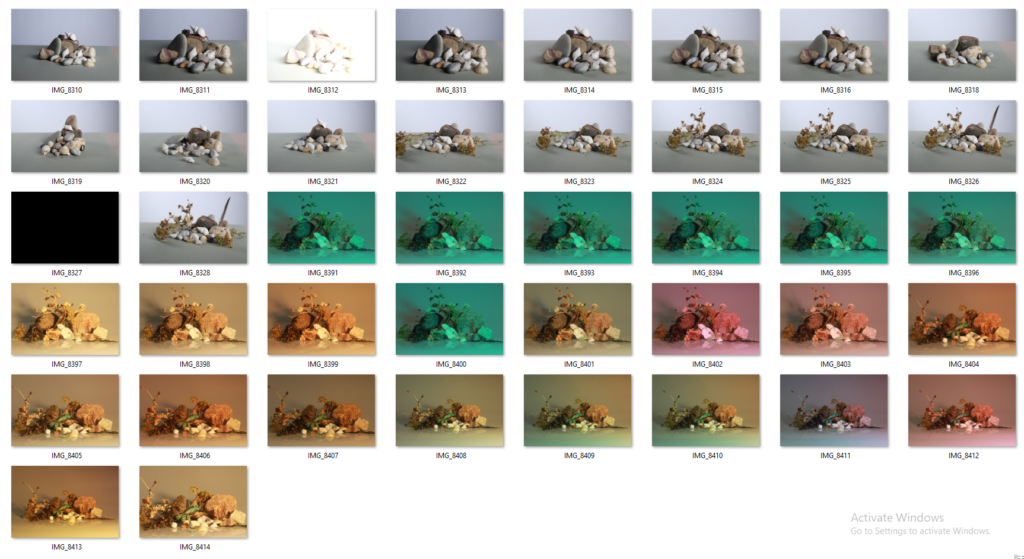
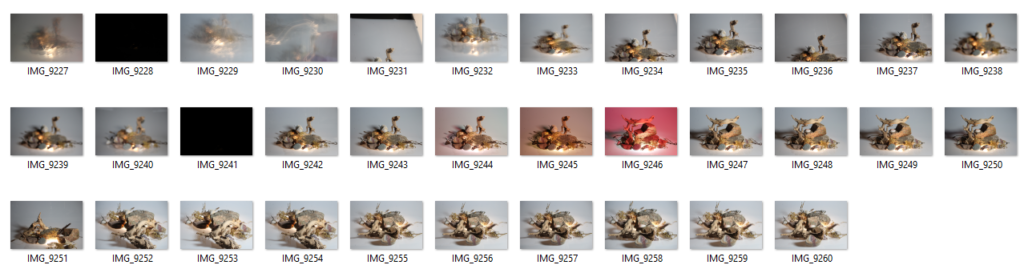
We tested using the aperture by taking pictures of things we collected from the beach, rocks, shells, flip flops, and other objects. Using two types of set up, first was an infinity table which gives the illusion of white space in the background of the image. We placed coloured jell sheets in front of the lights changing the colour of the images. Our second set up was using more natural light, with a white backdrop.
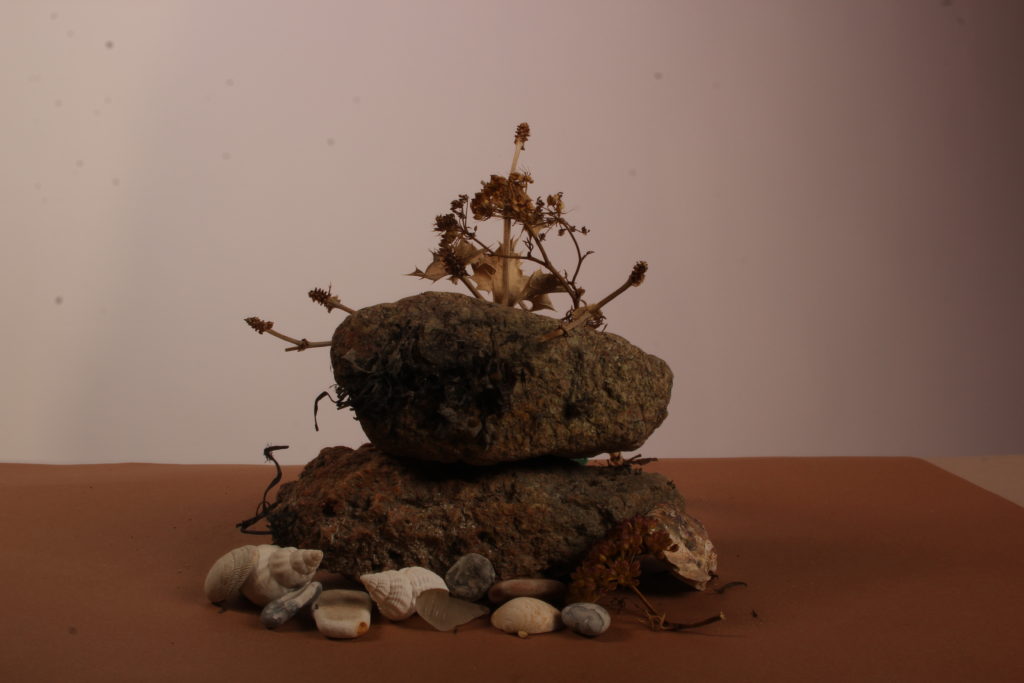
Images from the photoshoot.
What is depth of Field?
Depth of field is the distance between the nearest and furthest objects giving a focused object that are in acceptably sharp focus in an image captured with a camera. The lower the depth of field, the closer you are to your subject.
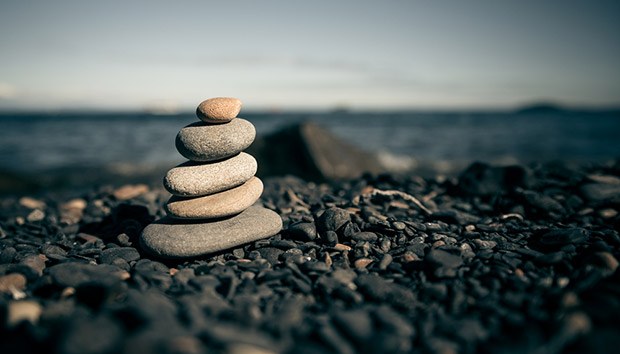
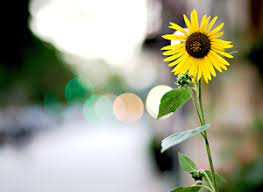
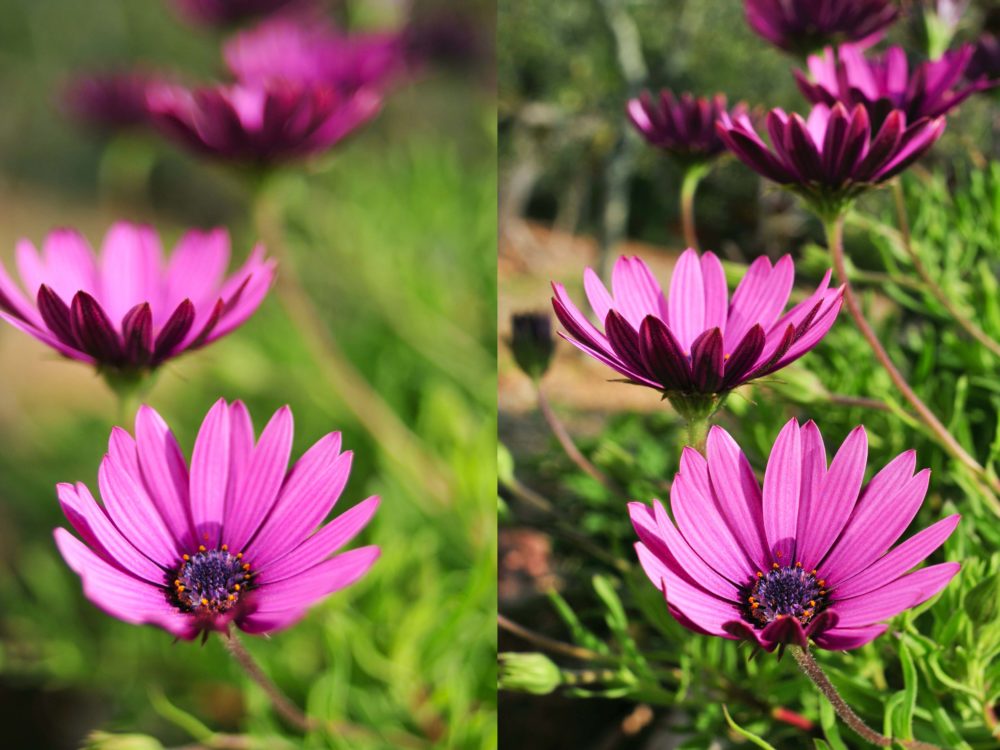
Here is an example of different depth of field where on the right the background of the image is out of focus and the flower is in focus.
Aperture is like the “pupil” for your camera system. It opens and closes to alter the amount of light that passes through.
How does it effect depth of field?
Depth of field determines which parts of your photo are in focus and aperture lets you control that. A wide aperture gives you a shallow depth of field (only the foreground is sharp) A narrow aperture gives you a deeper depth of field (everything is sharp).
Object images
For these images we used a narrow aperture giving it a deep depth of field to ensure the whole image was in focus. If we had widened the aperture the background would be out of focus and the objects would still be clear.
Aperture is the adjustable lens opening that controls the amount of light allowed into the camera. Learning to properly adjust these three settings based on your location and subject is essential for capturing good exposures.
large aperture= shallow depth of field
small aperture= great depth of field
In this photoshoot I experimented with aperture, with some images resulting in being darker then others. In some of these images I used coloured gel sheets to create a colour filter over the images, holding the sheets over the lights.
what is depth of field?
As a result, depth of field (DoF) is the distance between the nearest and furthest elements in a scene that appear to be “acceptably sharp” in an image. The distance between the camera and the first element that is considered to be acceptably sharp is called DoF near limit.
In the image, if a lot of the image is being focused on, this is called large depth of field. In the image, if a small amount of the image is being focused on, this is called narrow depth of field.
This visually demonstrates depth of field.The image on the left has a narrow depth of field as only the flower at the front is focused on whereas, the image on the right has a large depth of field as the whole image is focused on.
To import, click the ‘import’ button in the bottom left and you will be shows the files on your computer. Select the folder and images you want to edit and click ‘import’.
I used ‘shift’ and ‘X’ to reject the images that I didn’t want to edit as they were out of focus or over exposed.
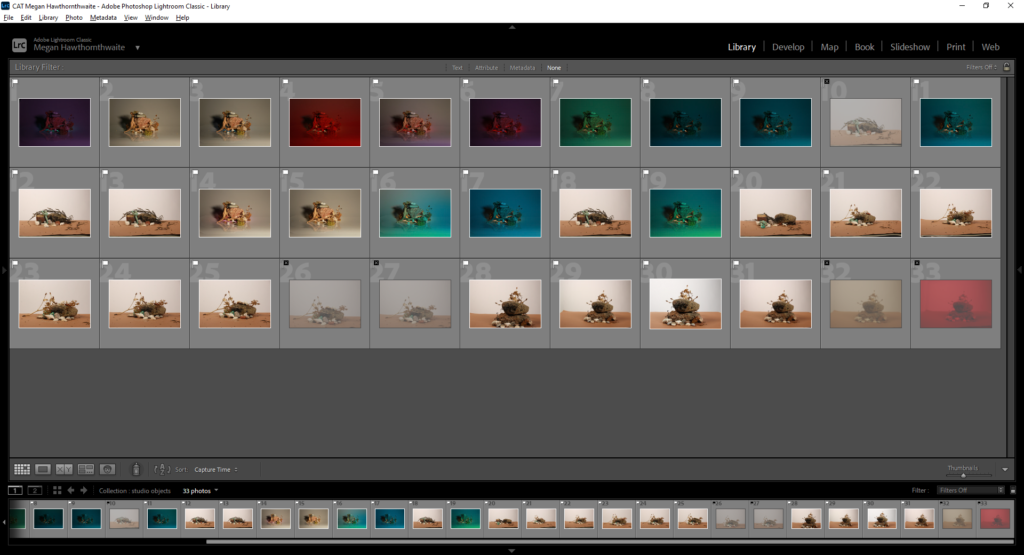
I have filtered out my rejects by filtering to only show the flagged photos.
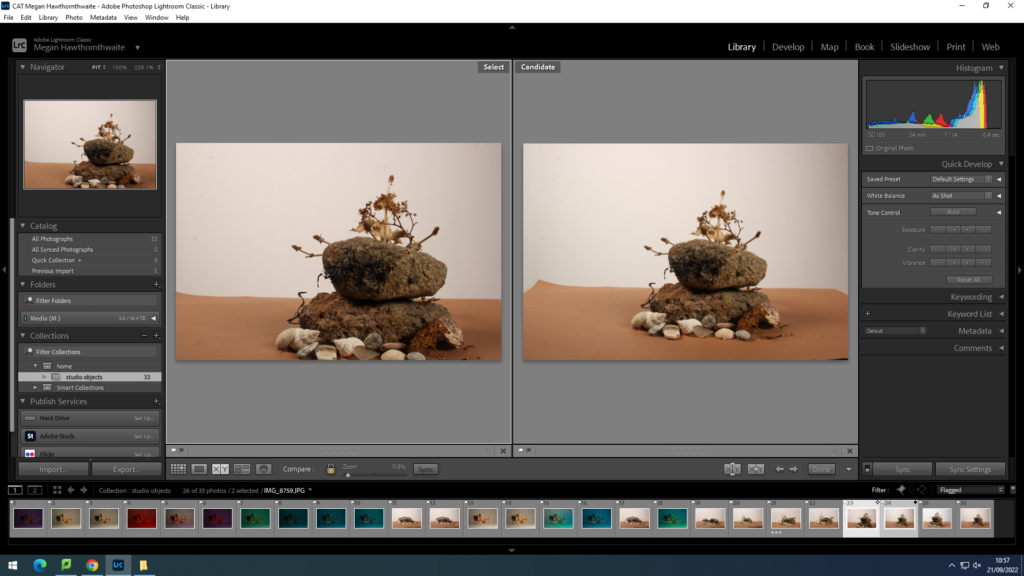
You can compare images next to each other by selecting two and then clicking ‘Compare View’. You can then zoom in on them by clicking on an image and moving about.
You can also compare more than two images in ‘Survey View’, however you can’t magnify the images in this mode.
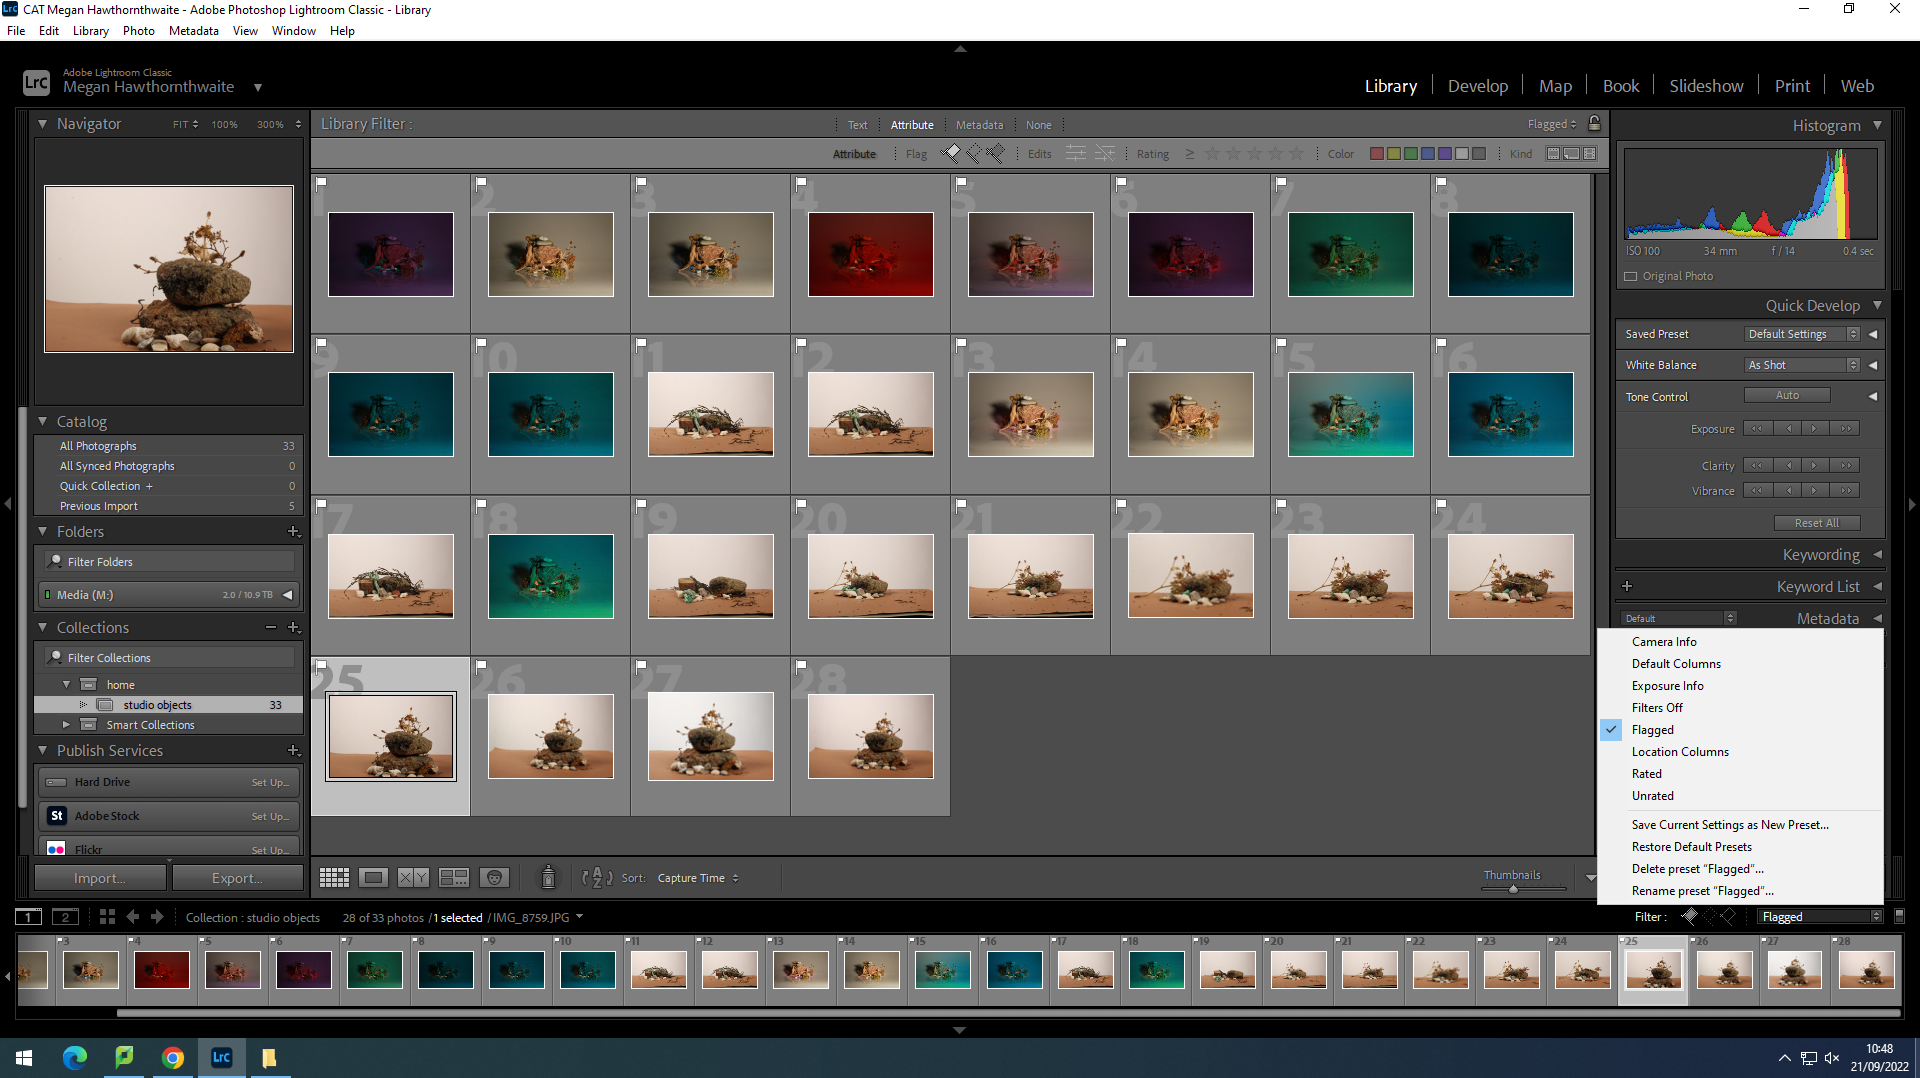
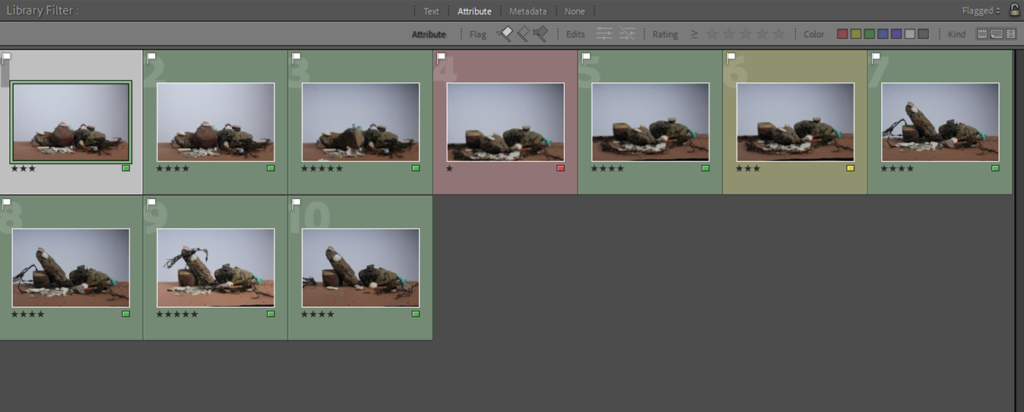
I RAG rated my images from green to red. Green is the images I will definitely edit, yellow is alright, and red is the least best images out of my final selection.
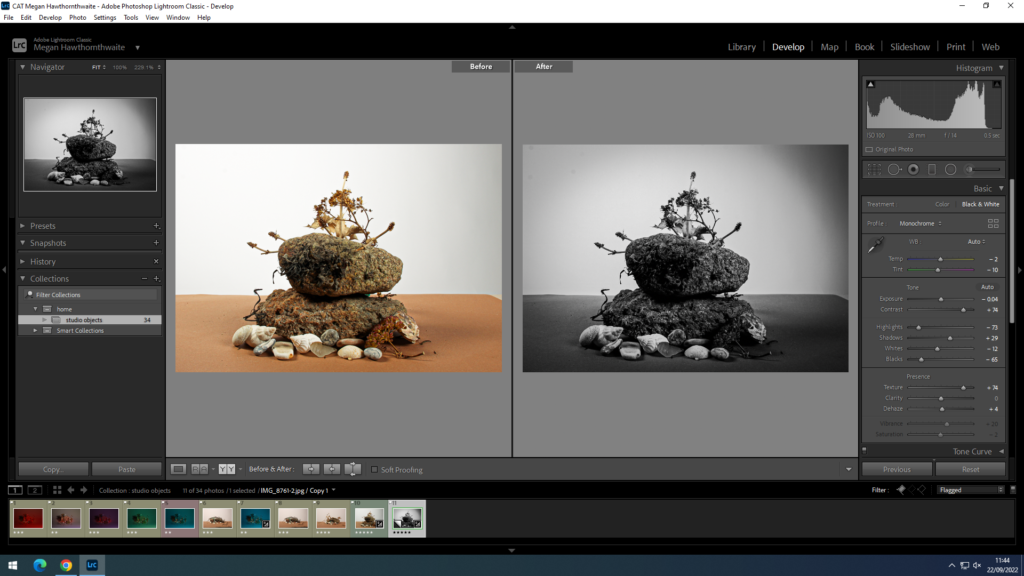
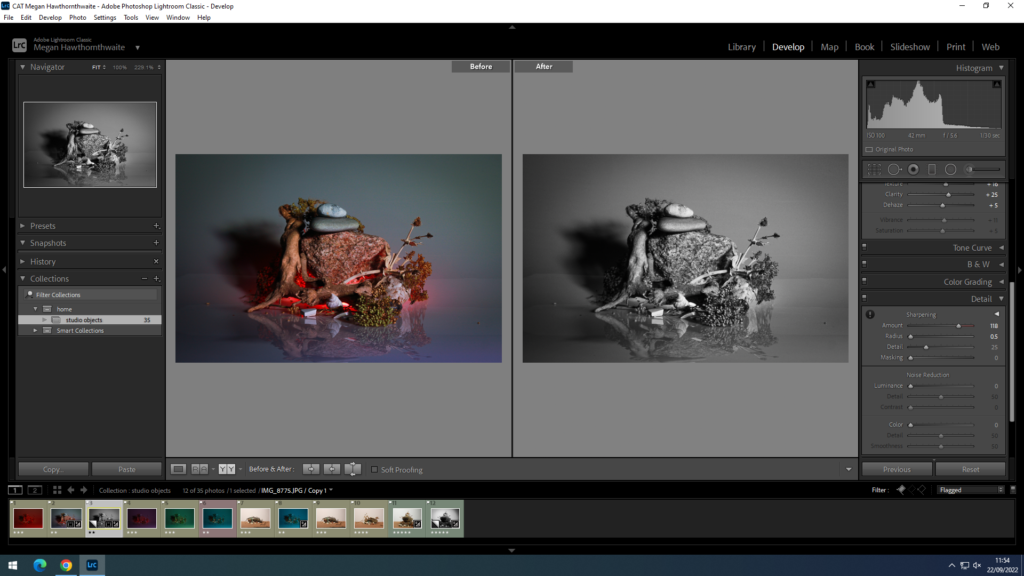
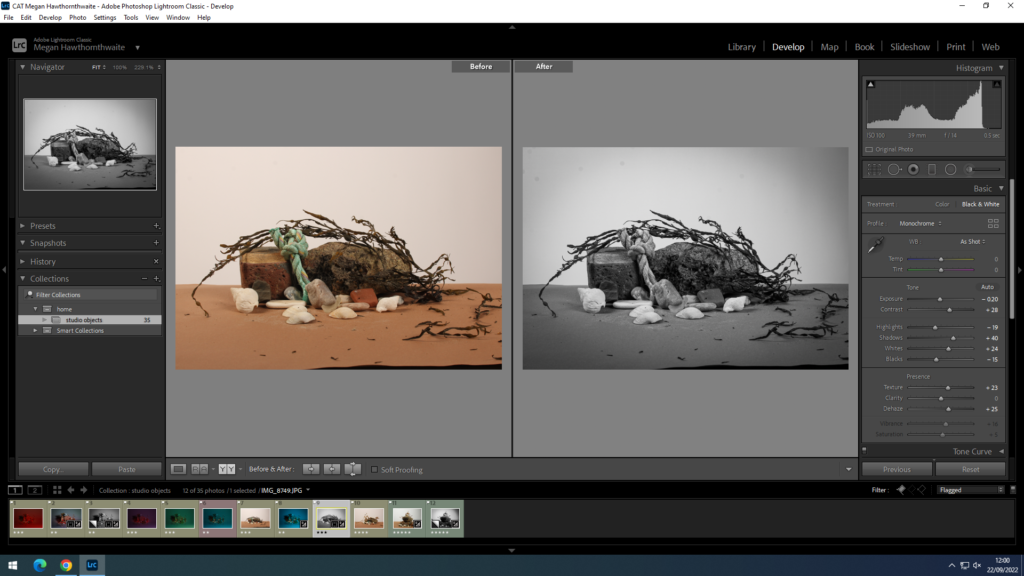
I edited my best image adding contrast, vignette, texture etc. to add depth and make the image more interesting. This is the original compared with the edit.
More Basic Edits
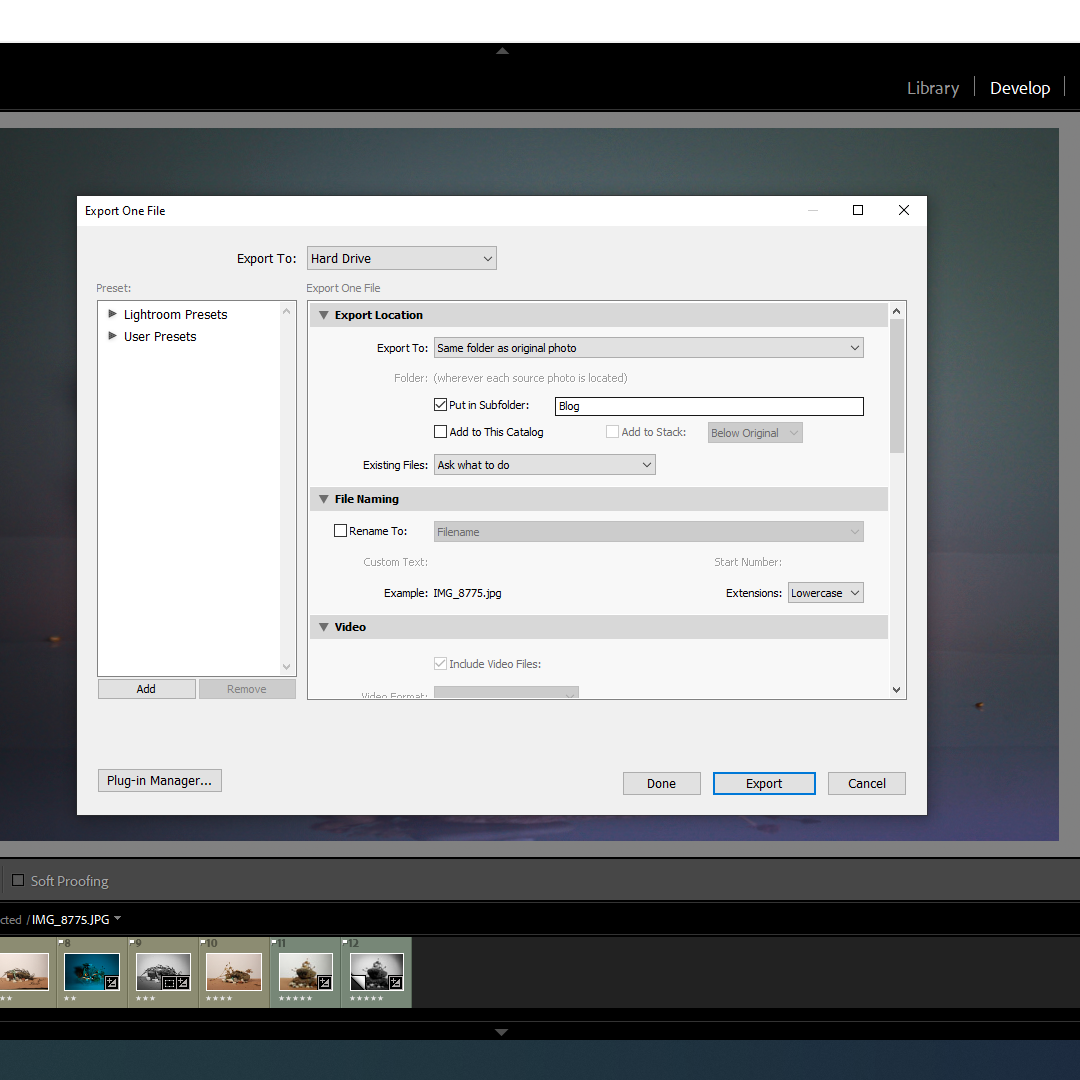
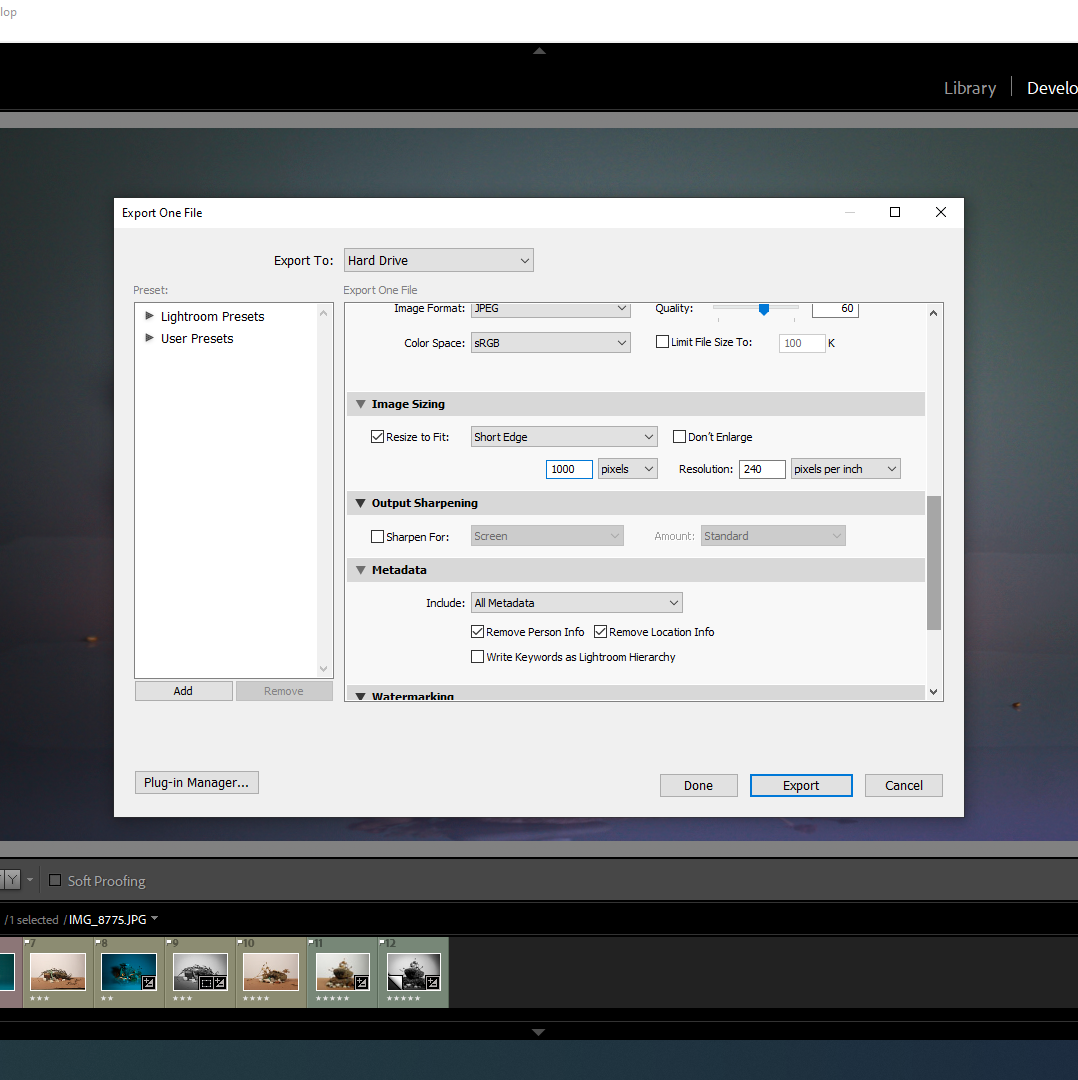
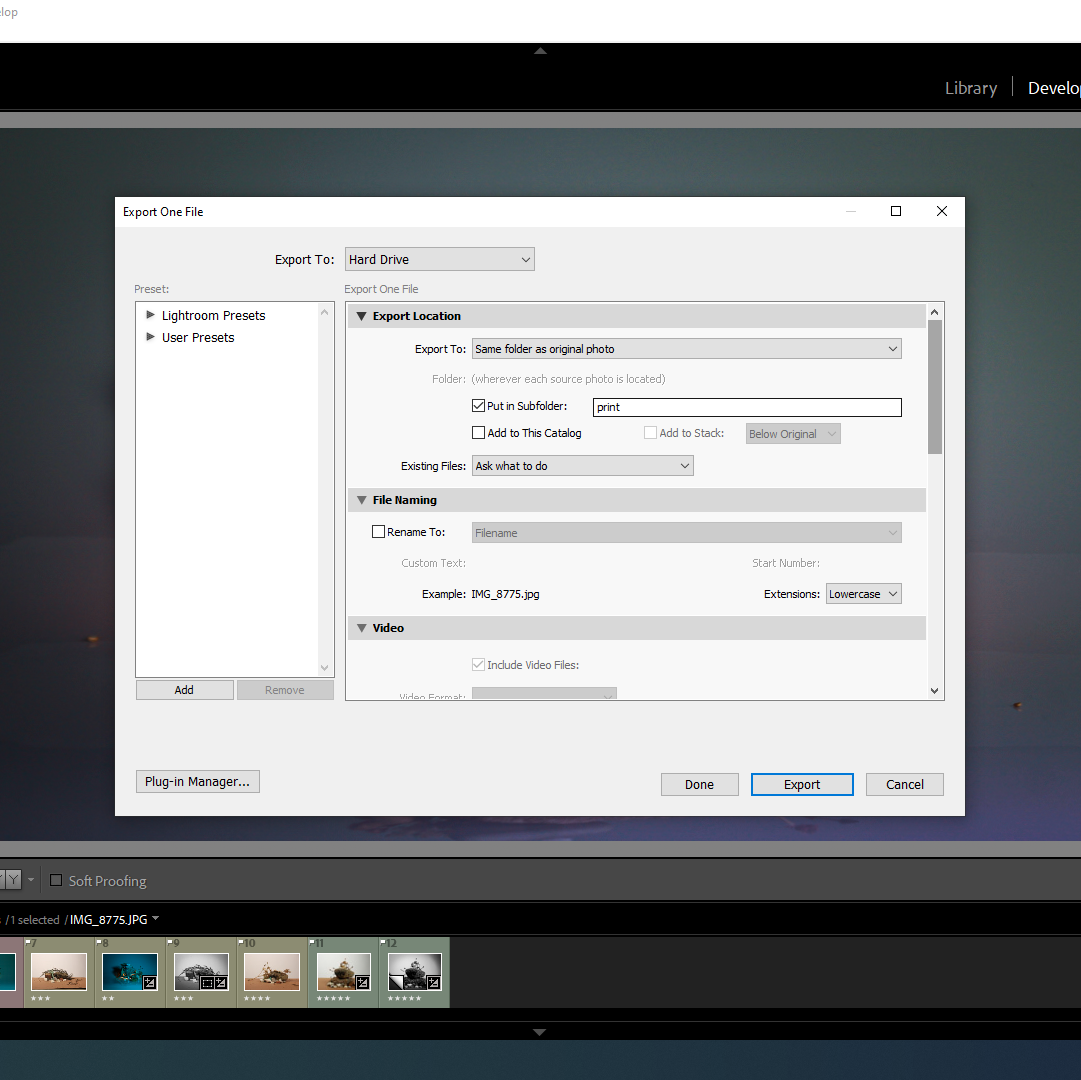
How to export images from Lightroom:
File – export – ‘export to: same folder as original photo’ – tick ‘put in subfolder’ – ‘Blog’ – image sizing – tick ‘resize to fit’ – ‘short edge’ – 1000 pixels.
Do the same for the ‘print’ folder but choose 4000 pixels.
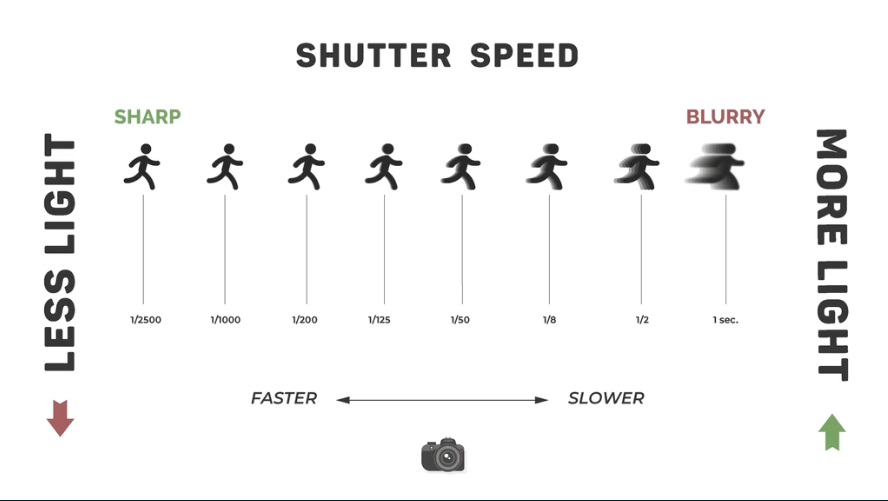
A shutter – is a device that allows light to pass for a determined period, exposing photographic film or a photosensitive digital sensor to light in order to capture a permanent image of a scene.
shutter speed – It’s the speed at which the shutter of the camera closes. A fast shutter speed creates a shorter exposure which is the amount of light the camera takes in and a slow shutter speed gives the photographer a longer exposure.
Using different levels of shutterspeed we then did a shoot of our own where one person was taking the photo and the other moved around trying to avoid the camera. This meant the photogropher had to set their shutter speed depending on the model, as they were moving fast, to capture the focussed image.
JOHN BALDESSARI
John Baldessari was an American photographer known for his work featuring found photography and appropriated images. Initially a painter, he began to incorporate texts and photography into his canvases in the mid-1960s. In 1970 he began working in printmaking, film, video, installation, sculpture and photography.
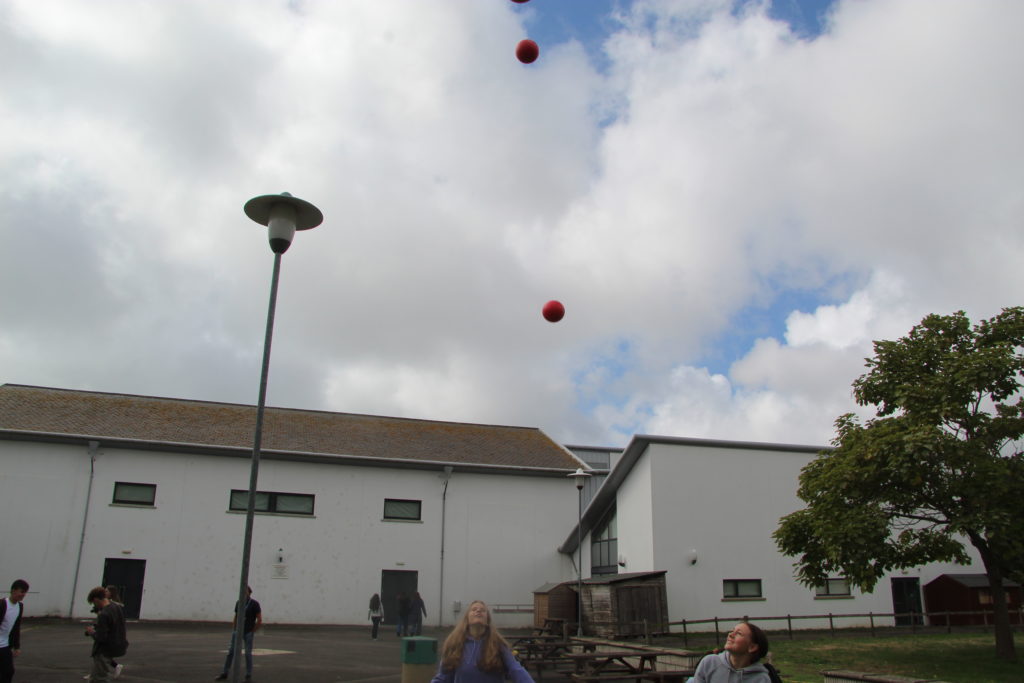
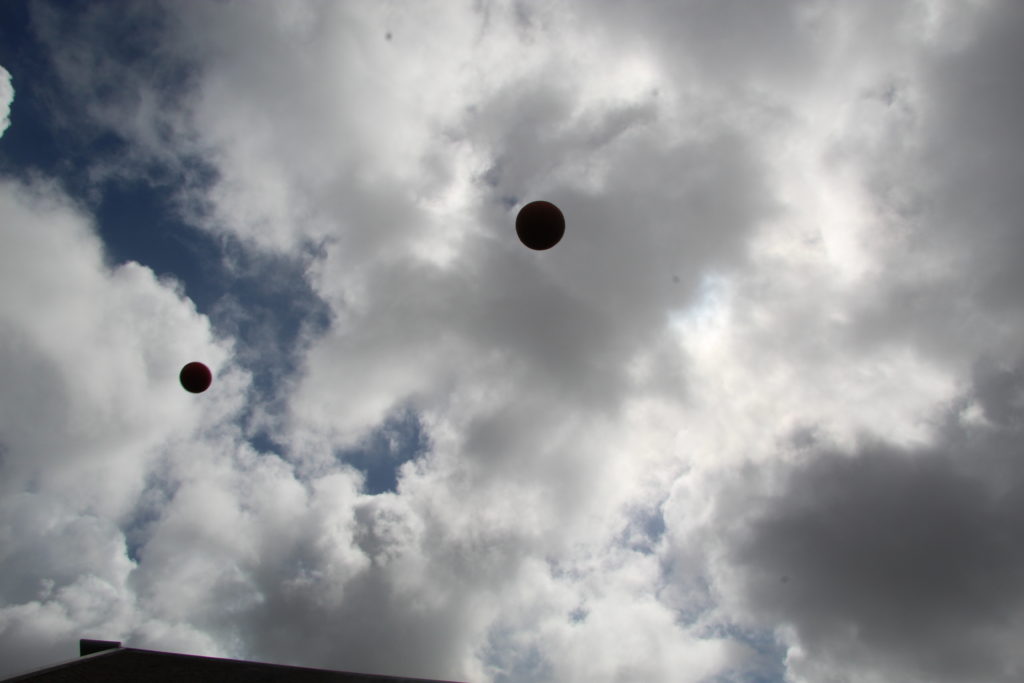
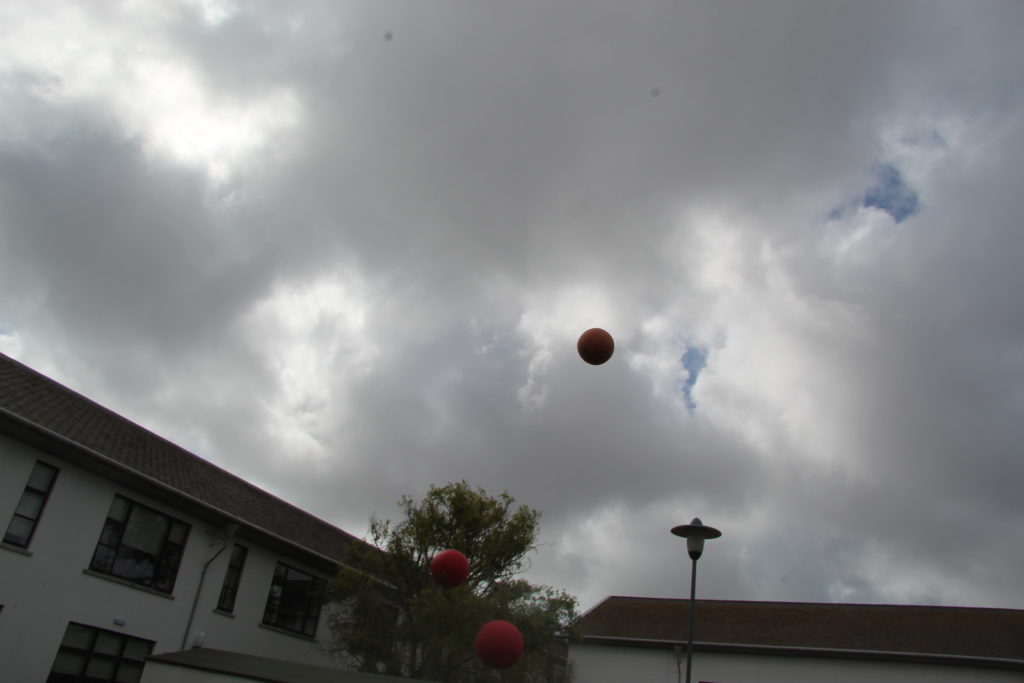
The three balls
One of his most recognised shoots involved photographing three balls being thrown into the air attempting to capture them in a straight line. In this shoot no two photographs are the same because of variables such as changes in wind speed and the natural lighting. Through this process, he captured a divide between the thought of an idea and its execution.
My attempt
Inspired by his collection called – Throwing Three Balls in the Air to Get a Straight Line – We tried to capture some similar images.
Camera dodge game
To experiment with the effects of changing the shutterspeed we played a game where one person has the camera and the other tries to dodge the camera whilst the photographer attempts to capture them.
The more focused images had a faster shutter speed allowing the image to be captured faster reducing the movement.
Here are the results from my recent studio shoot exploring the use of aperture to create different effects.
Here is a diagram to remind you of the effects that aperture creates:
In this shoot, we chose to show the results of using different apertures to take the same images:
Here is an image taken with an aperture of f5.6 and a shutter speed of 1/4″ – you can see this because of the nature of the radial focus – only the focal point of the image is clear whilst the rest is slightly blurry.Here is an image taken with an aperture of f16 and a shutter speed of 4″ – you can see this because although the image is not fully clear, there is more clarity than the previous image. Also, the image is slightly lighter which is due to the camera’s automatic shutter speed setting adjusting the shutter speed with the aperture to ensure that, as the hole is now smaller in size, the same amount of light will still be let in (requiring a longer shutter).Here is an image taken with an aperture of f36 and a shutter speed of 20″ – you can see this because although the image is now crisp and clear, with almost full focus.
The following images are in the same order of aperture (f5.6, f16, f36), but in these, the objects were arranged moving away from the camera, in order to show the clarity in aperture levels. This is drawing on the idea of lining up 22 eggs away from the camera, and by increasing aperture from lowest to highest, seeing an increase in the number of eggs that are in focus. Here we of course didn’t use eggs but instead the objects we were already photographing. You can see this effect was achieved as in the first image (with a low aperture) a low number of the objects are in focus, but in the final image (with a high aperture) all the objects are in focus.
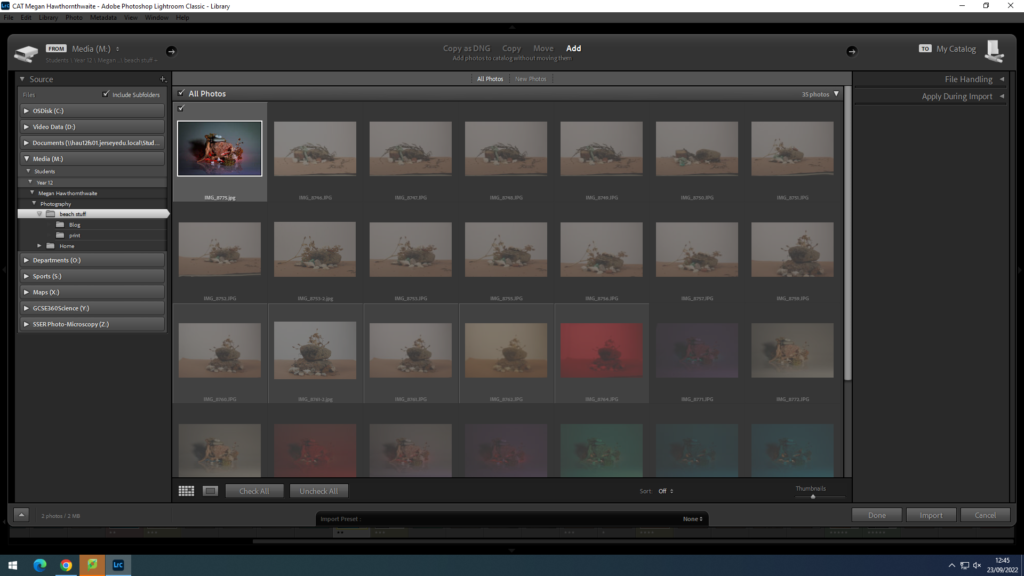
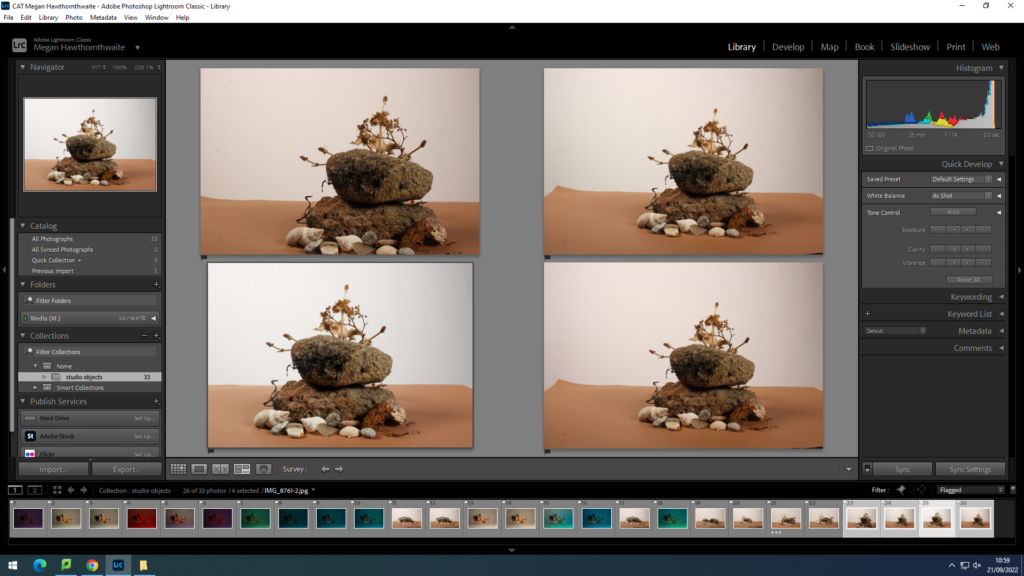
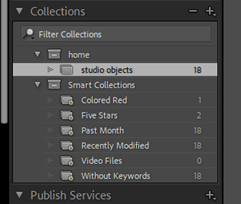
When I first opened Lightroom Classic, I created a collection to put my photos inside. I made a sub-folder for the photographs we had taken in the studio, and began the process of editing.
Using the picker tool, I selected my best images that would be eligible for editing, ones with the least blurring, highest resolution, and good framing. The rest would be discarded as the set was obstructed by either someone else or the shutter when the shutter speed was set too high.
this is annoying
The photographs with the white flag in the top left were the ones that were kept, whilst the ones with the black flag were discarded.
I gave each image a star rating (/5) and colour-coded them based on how usable they were (red = unusable, yellow = could use, green = usable)
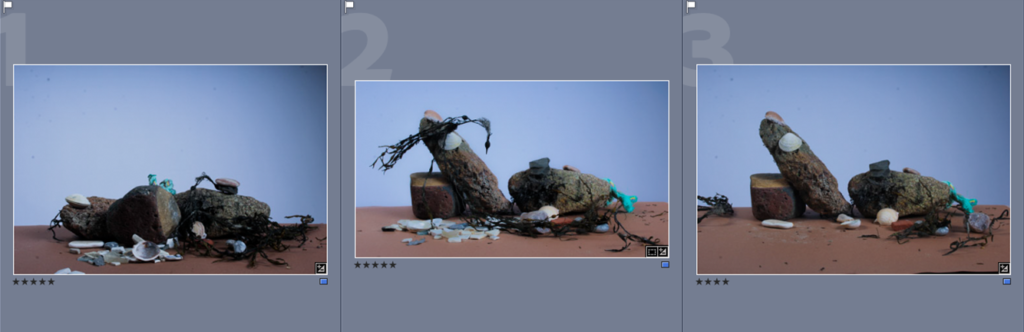
These were the photos I was left with. My plan was to then experiment with editing to give them more colour and detail.
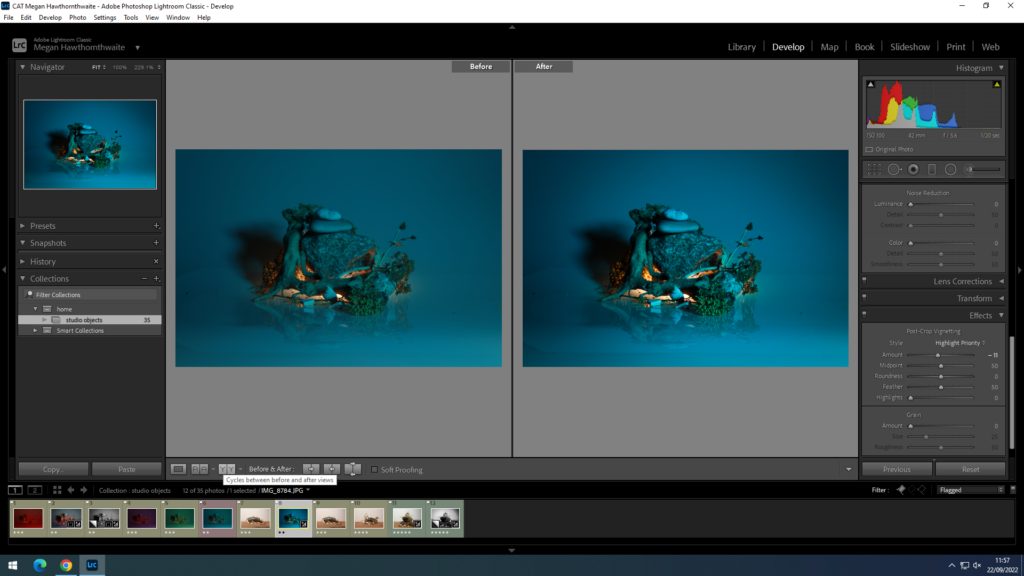
These were the three edited images I was left with. I increased the vibrance in each one to bring out the blue hue of the background, and messed mainly with the exposures and contrasts to create three similar pieces that could work as a tryptic.
During my GCSE’s I used Lightroom for my photography, so I’m familiar with the tools and layout of Lightroom Classic.