All posts by George Flavell

Filters

Author:
Category:

Photo Montage – Physical Experiments

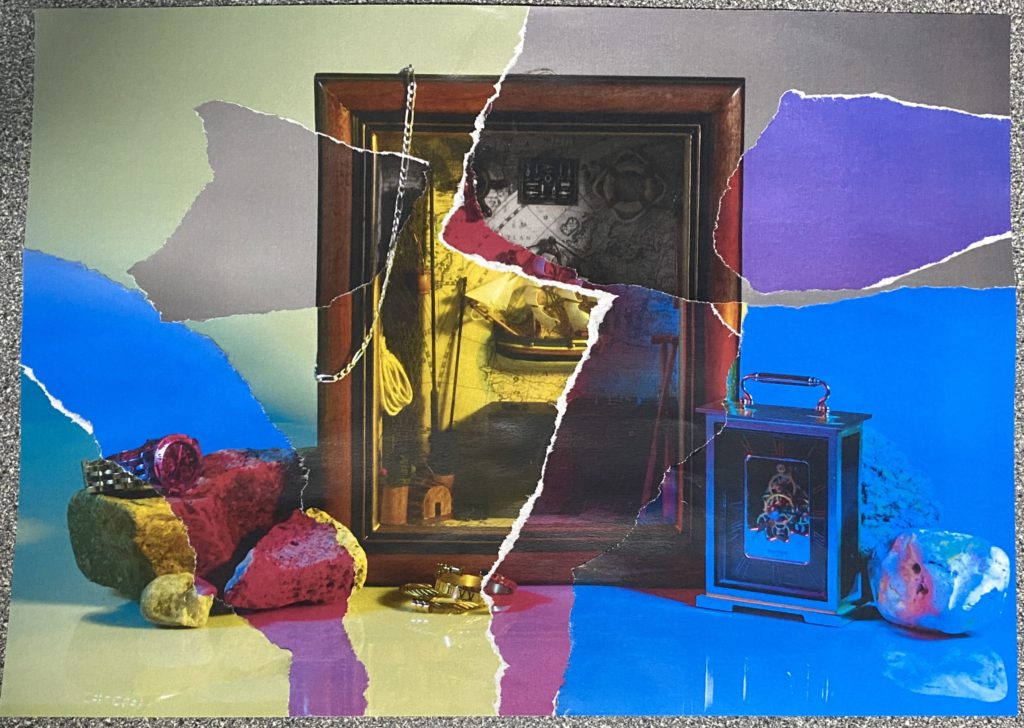
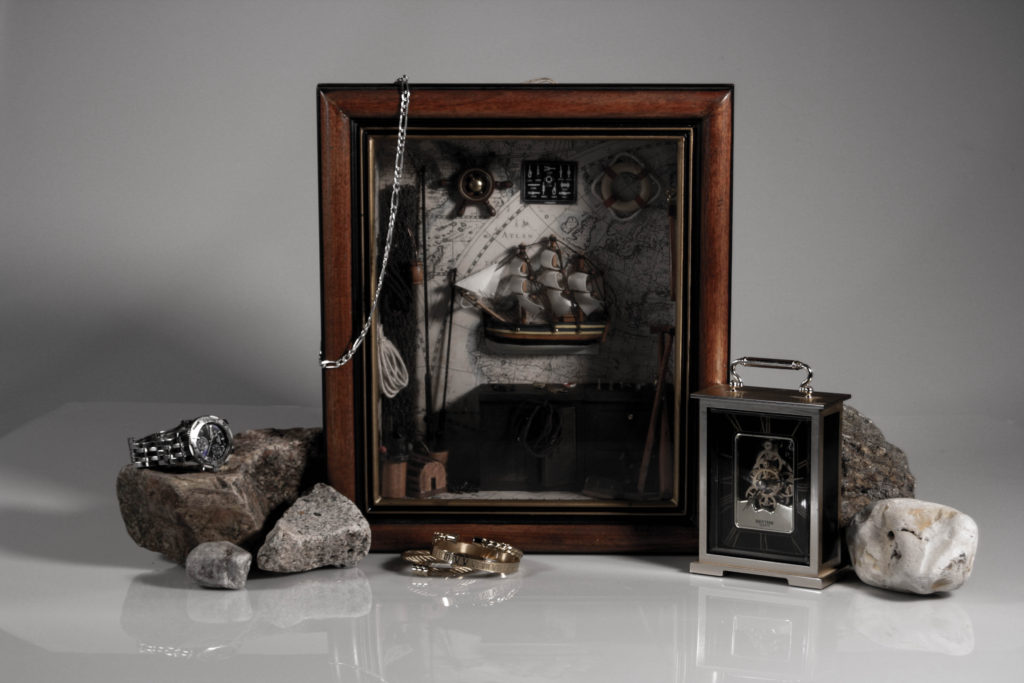
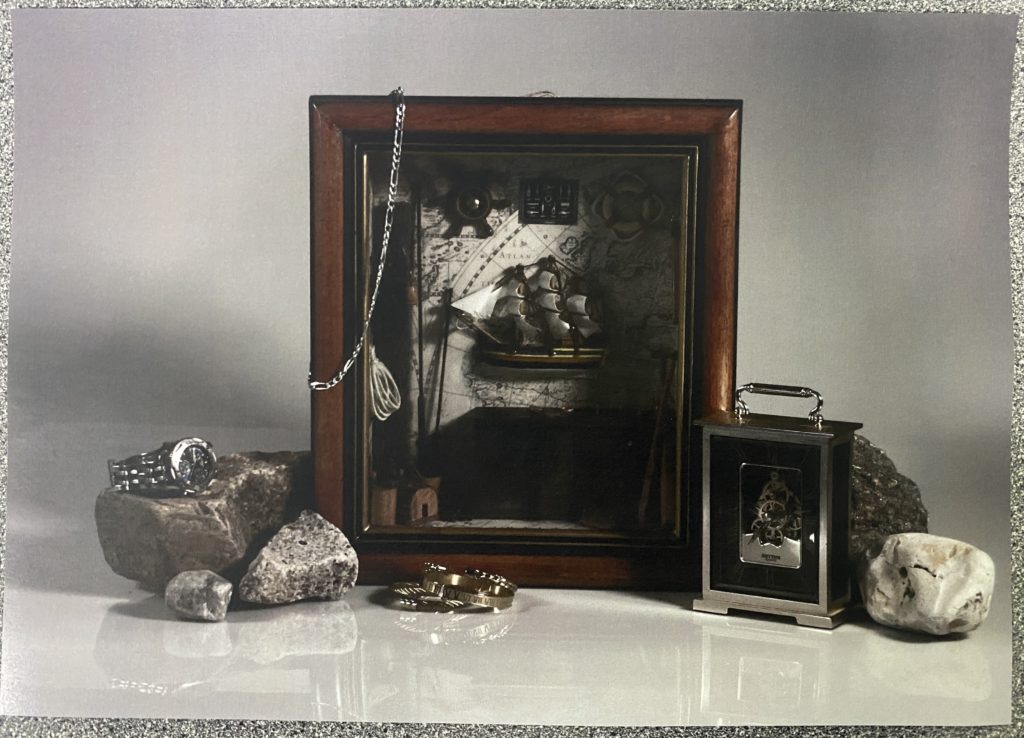
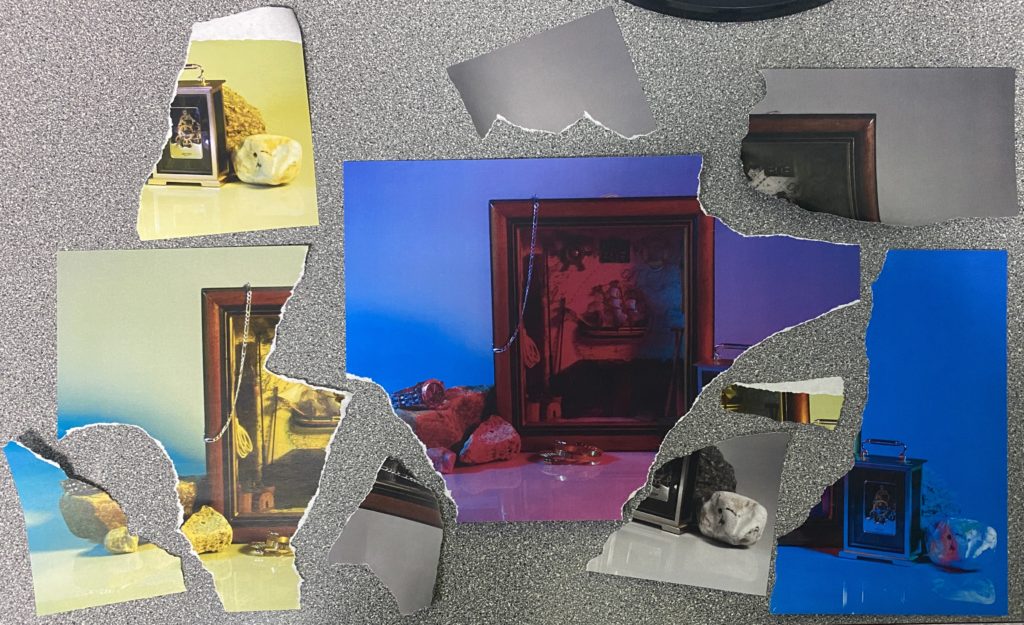
I started out with this image from my still life shoots. I planned to use it as a base for the rest of the image, as it was the most dull variation of the several similar images that I had edited, as it would cause a heavy contrast in the colour palette.
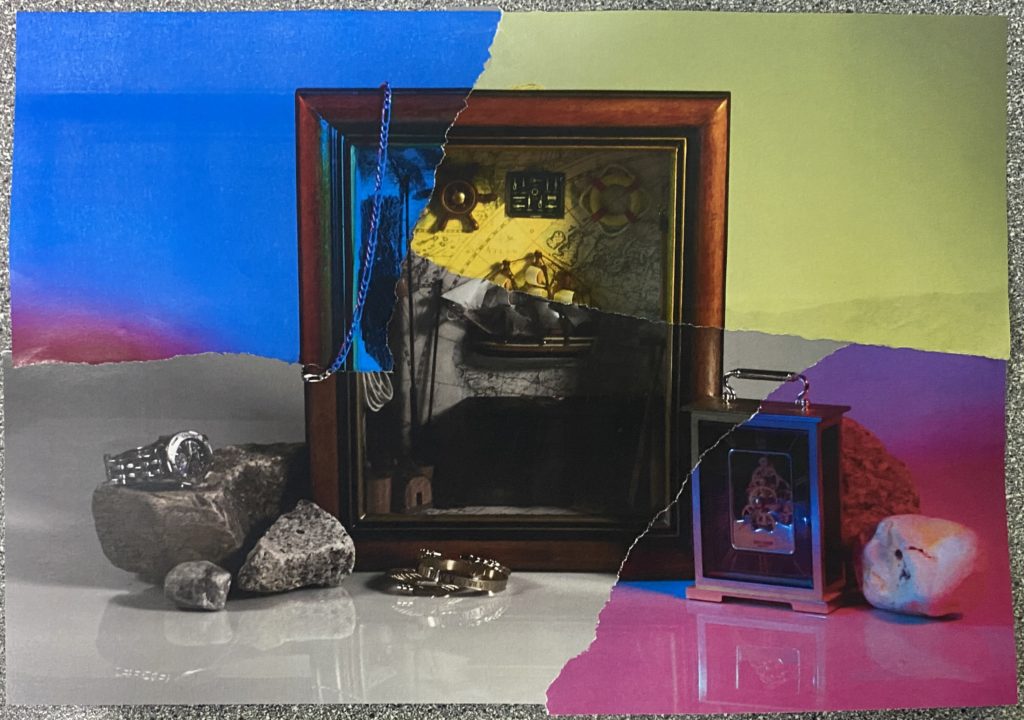
After ripping off some of the corners from the other similar photographs I’d printed in large pieces, I stuck them to the base image after also ripping off the same corners from it. I made sure to try and stick them to the image so that the continuity and mise-en-scene stayed the same; the only difference being the colour.
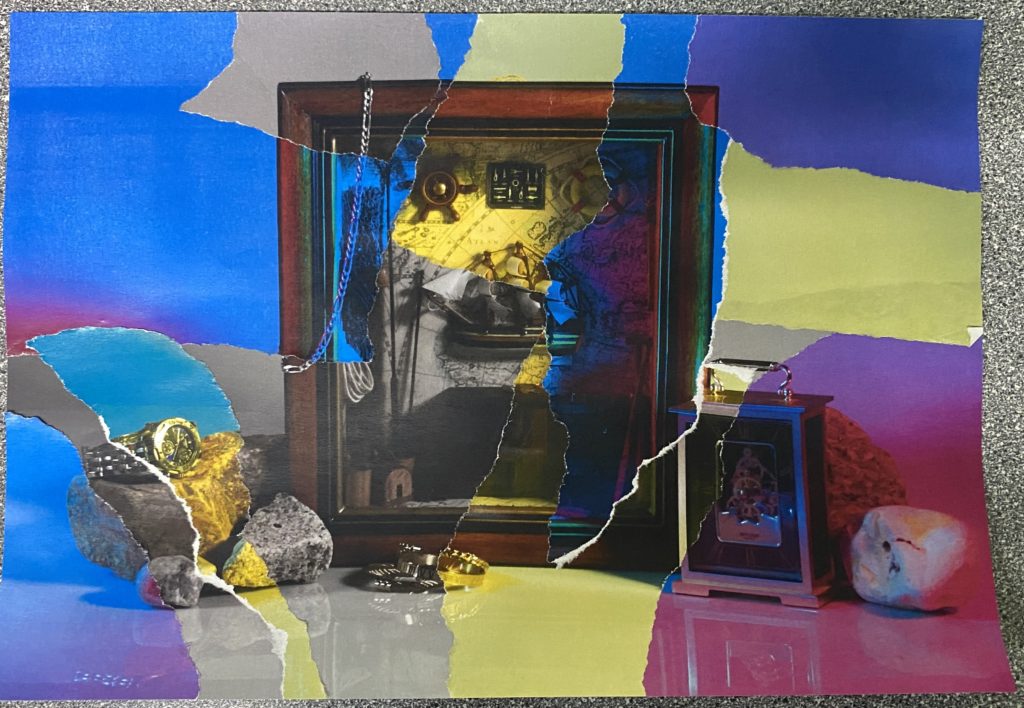
I then gradually implemented smaller pieces ripped from the other photos, until I was left with this composition. I trimmed the edges to make the piece look neater, and left it there.
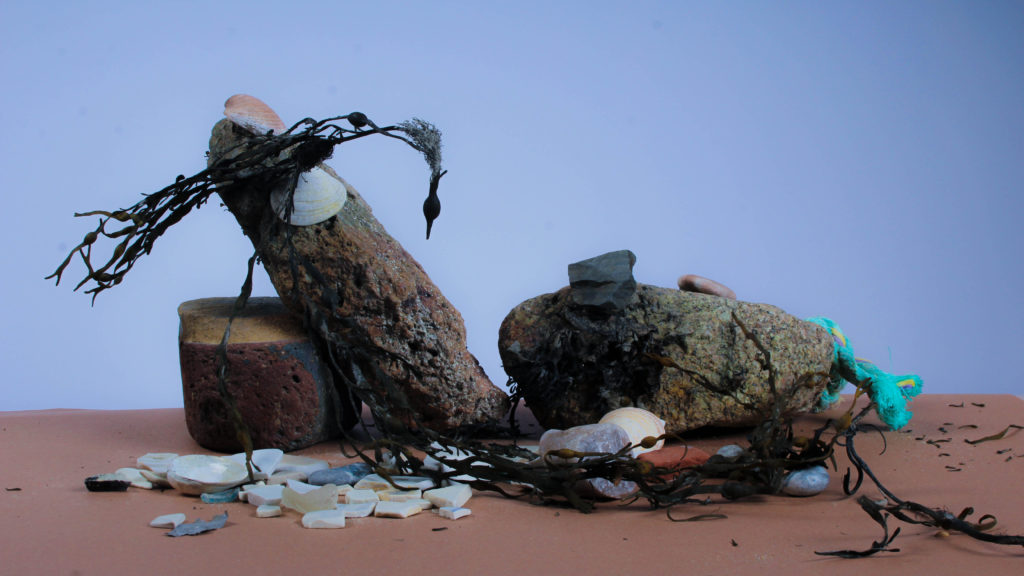
With the pieces that remained from each image so far, I decided to make a second iteration of the original, except I started with the largest piece that was available.
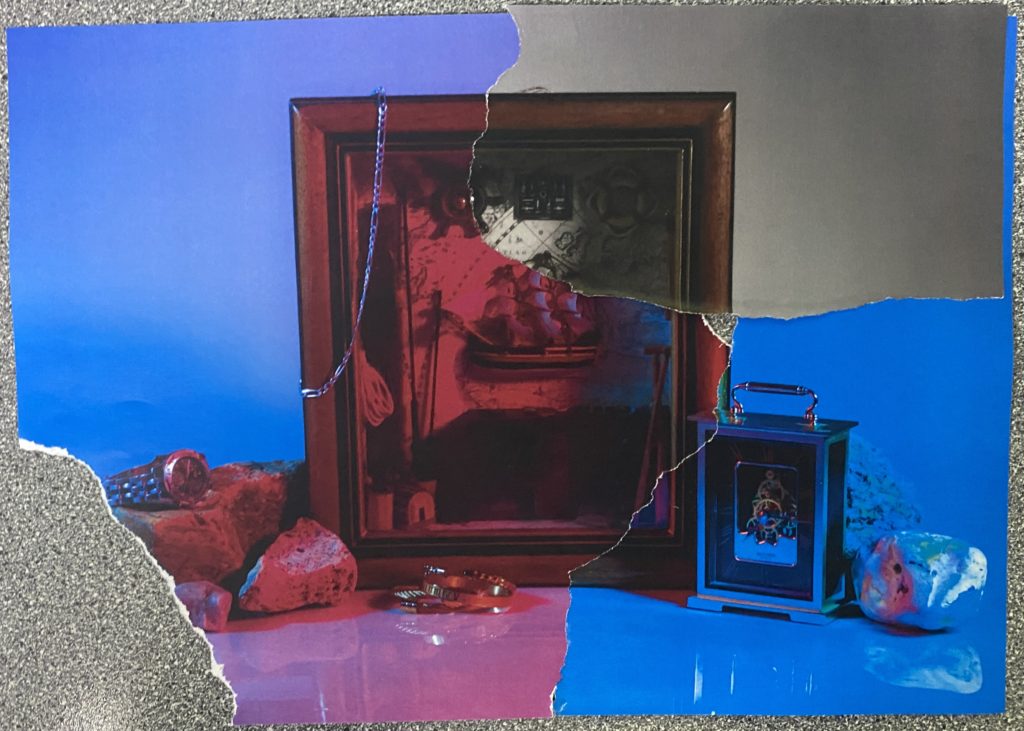
After sticking the first few pieces together, I noticed a small hole just a bit to the right of the centre, which I decided would be nicer to patch from behind to add some slight depth to the work.
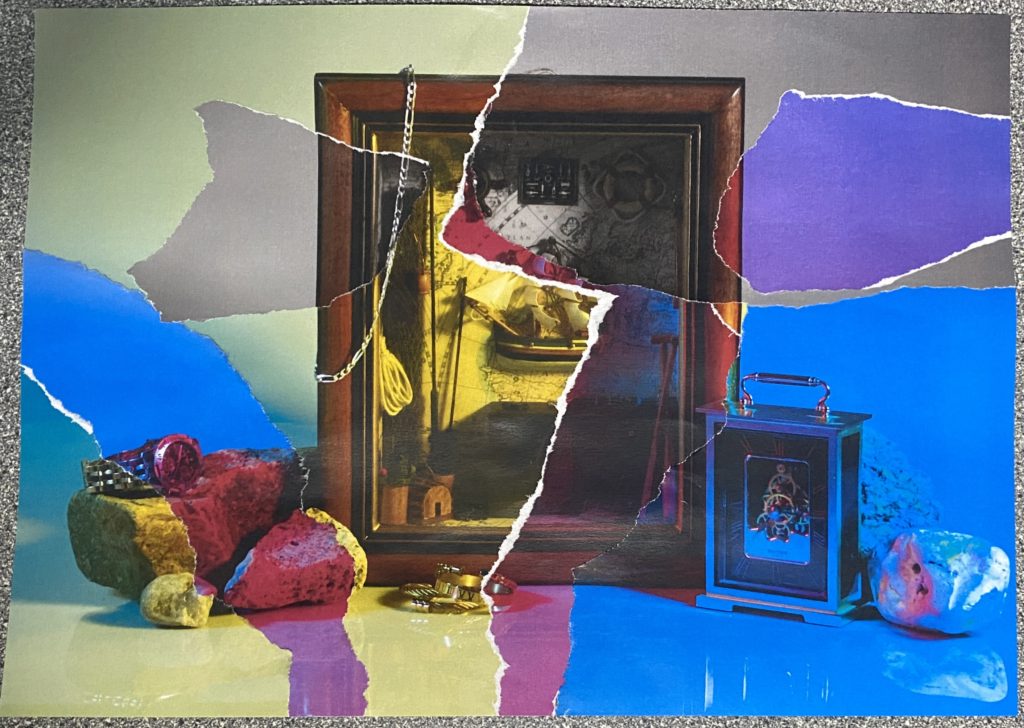
After I’d put all the pieces that I could together, I was left with this; a more vibrant composition that focused a lot less on the darker aspects of the image.

Evaluation

I’d created two similar pieces that varied only in colour, and contrasted vastly because of it. In my opinion, my preference is the first piece (left), as each piece is well placed and functions better as an overall composition, whereas the second piece (right) wasn’t planned and feels a bit too oversaturated with the loud yellow hues, also featuring less smaller pieces, so most of the colours congregate in one area.

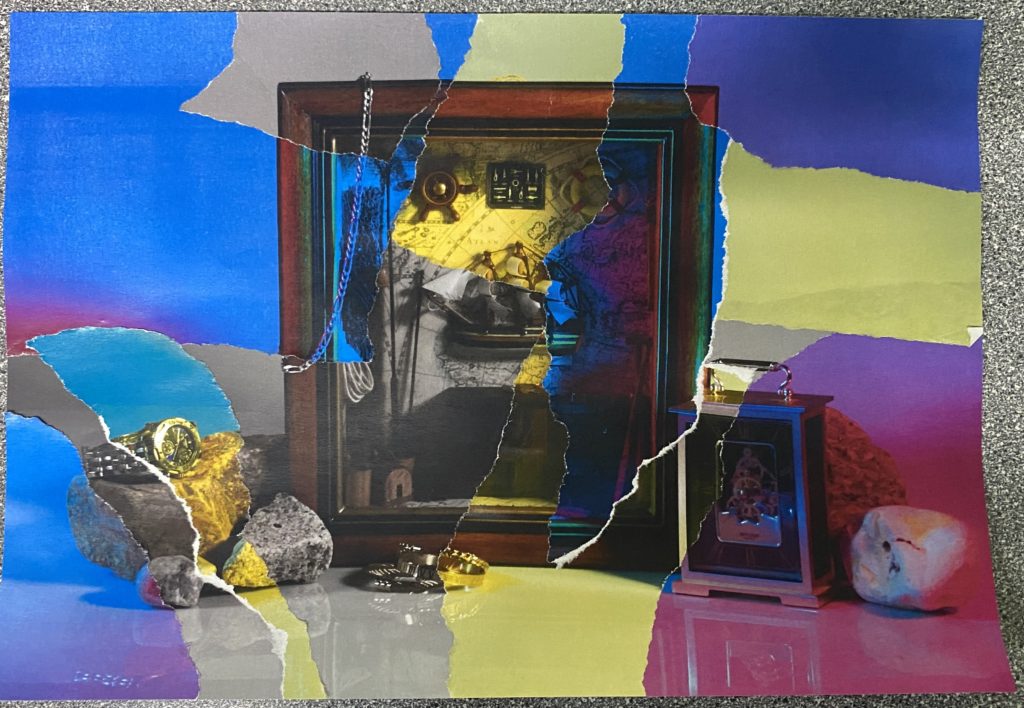
Still Life – Personal Objects Shoot

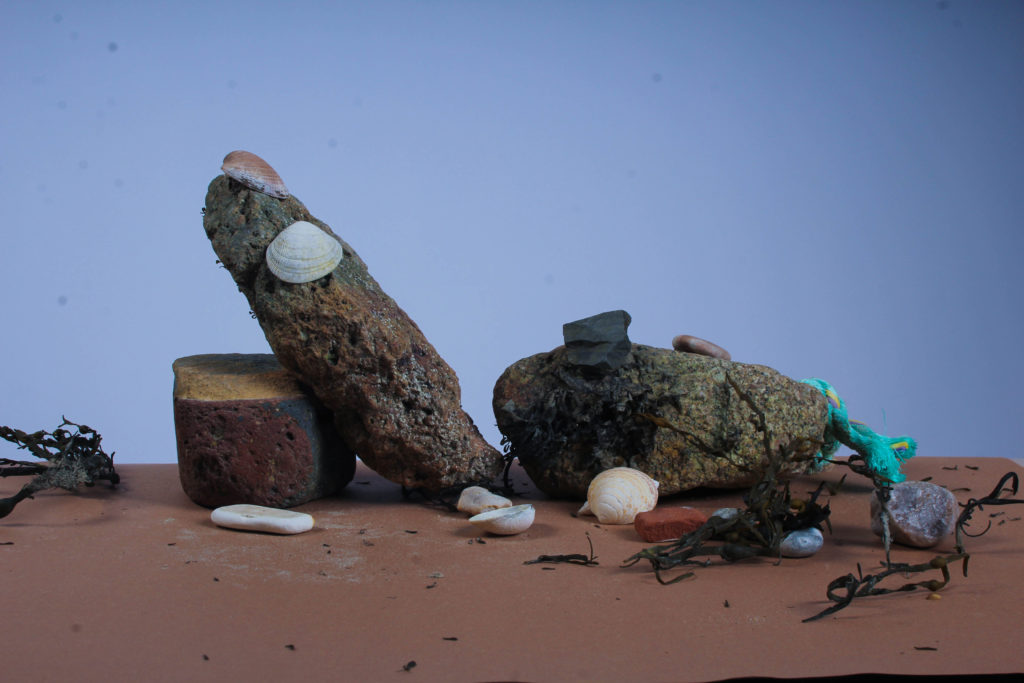
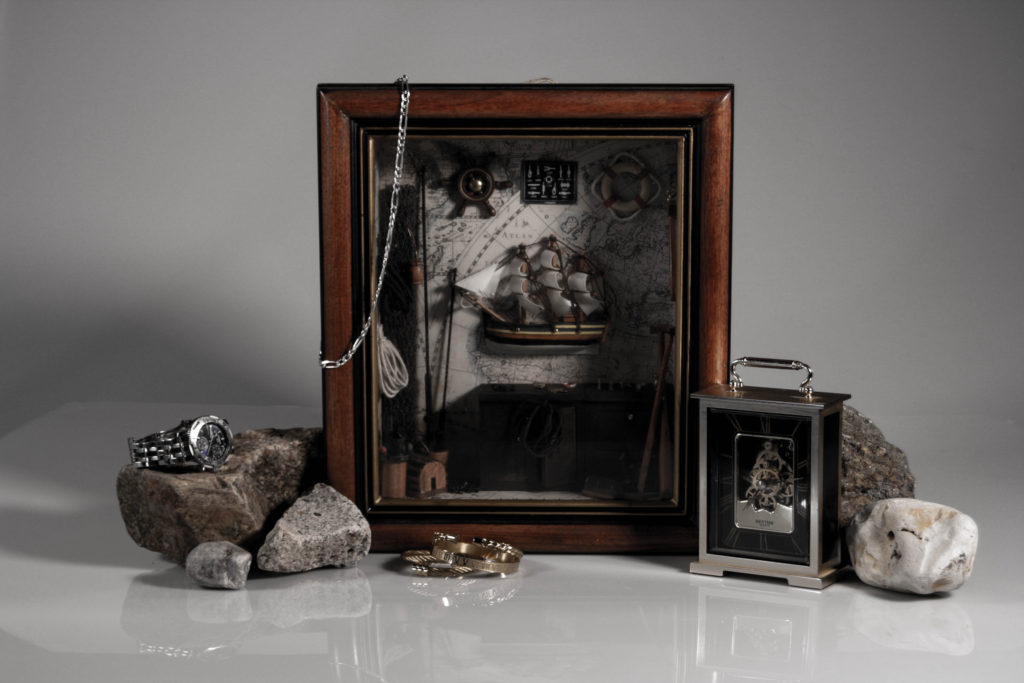
These images were taken before we introduced the colour panels to the shoot. We experimented with aperture and tried to weaken some of the shadows.
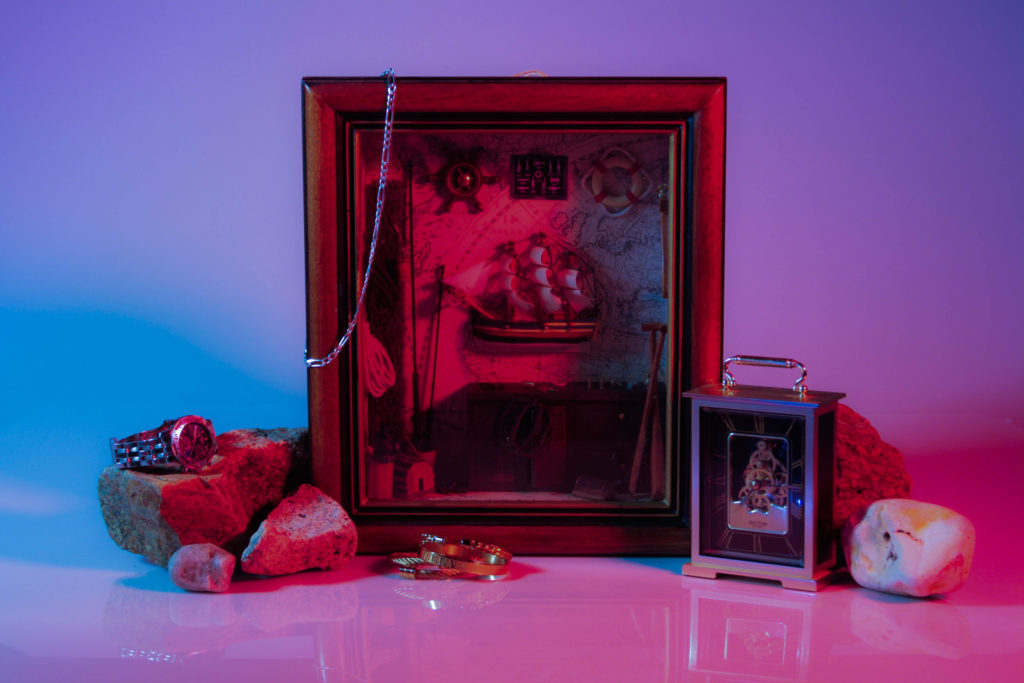
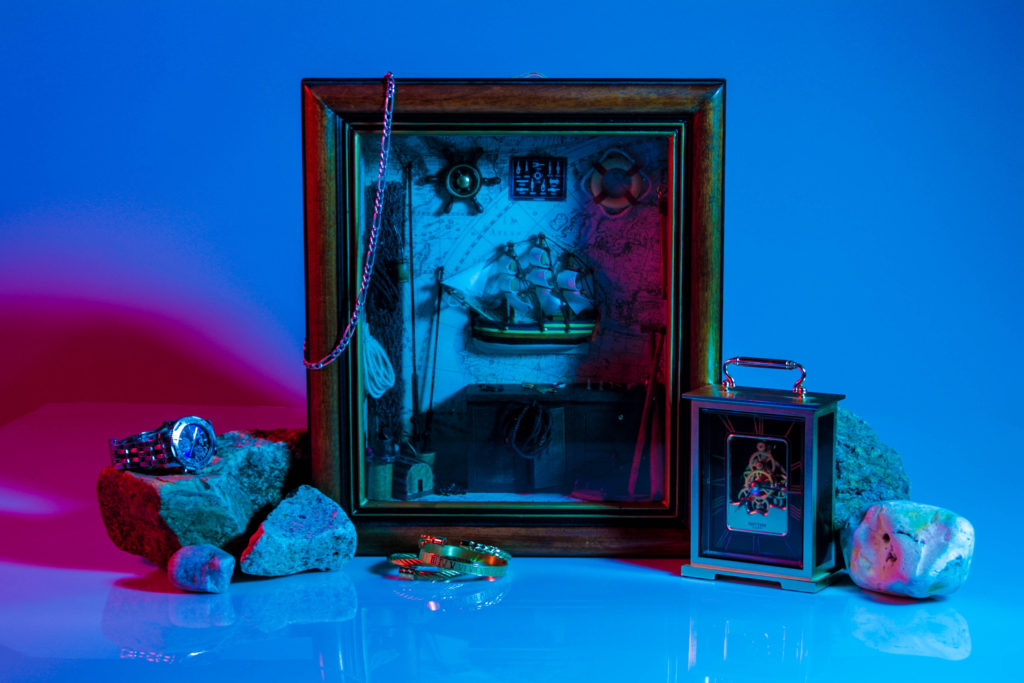
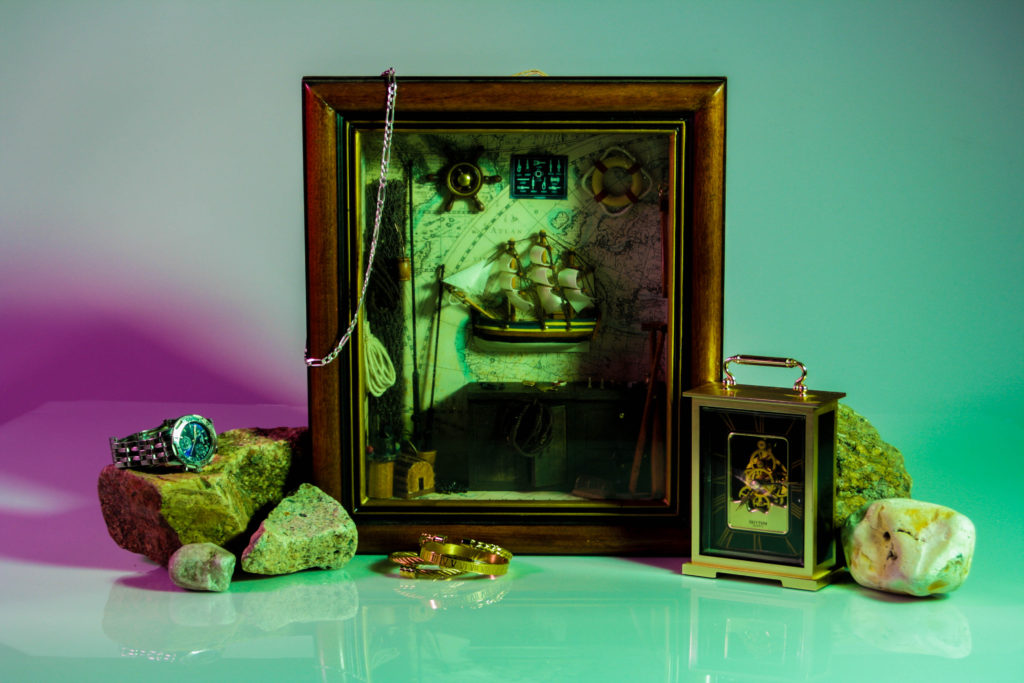
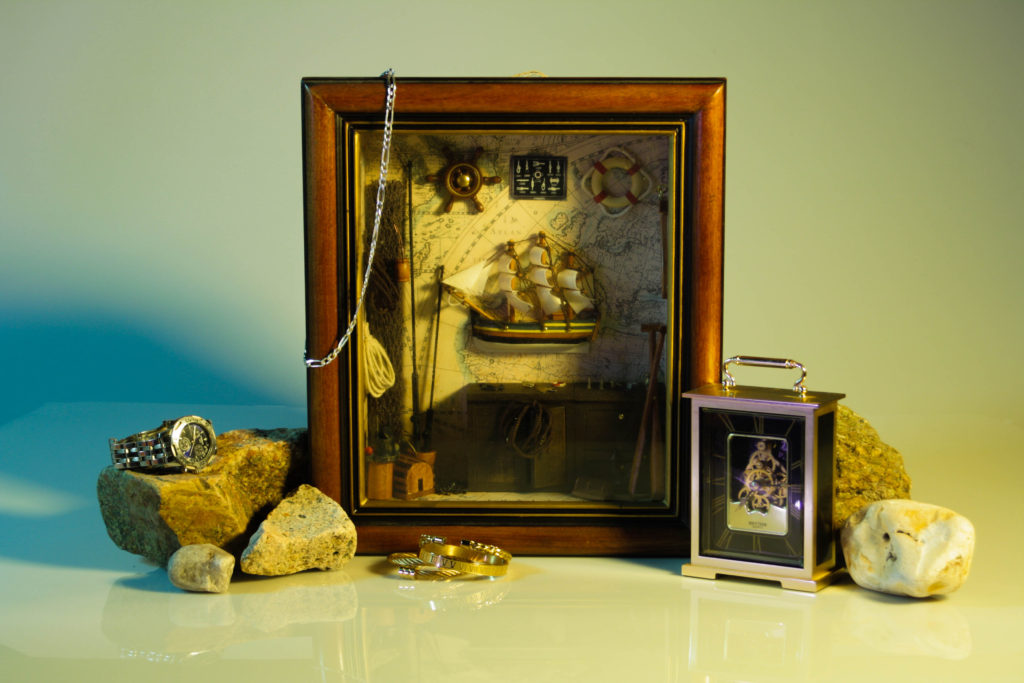
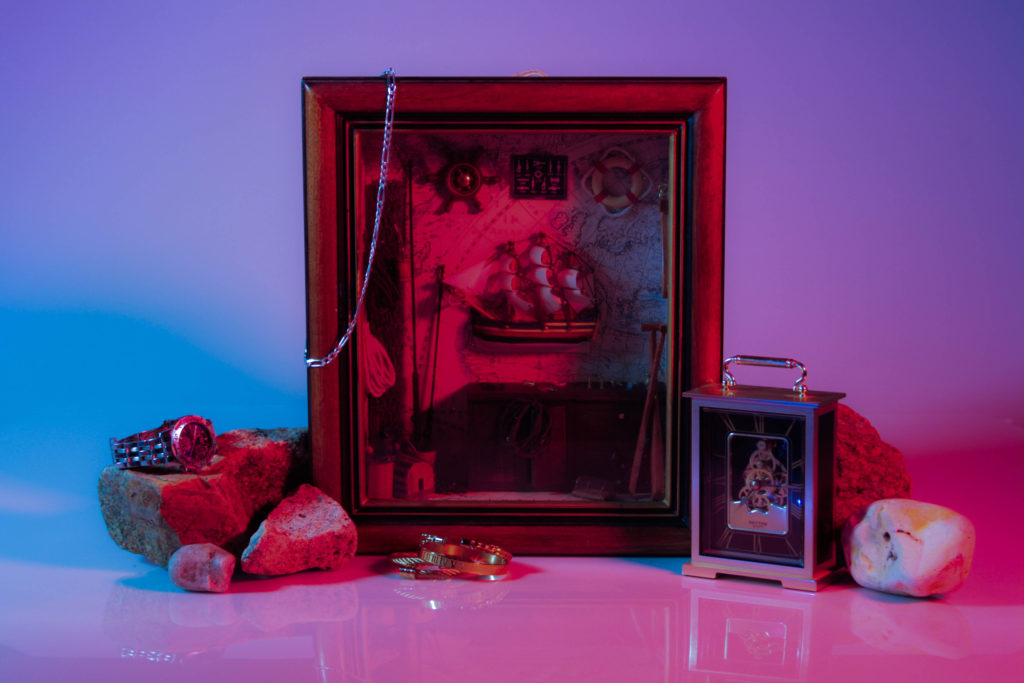
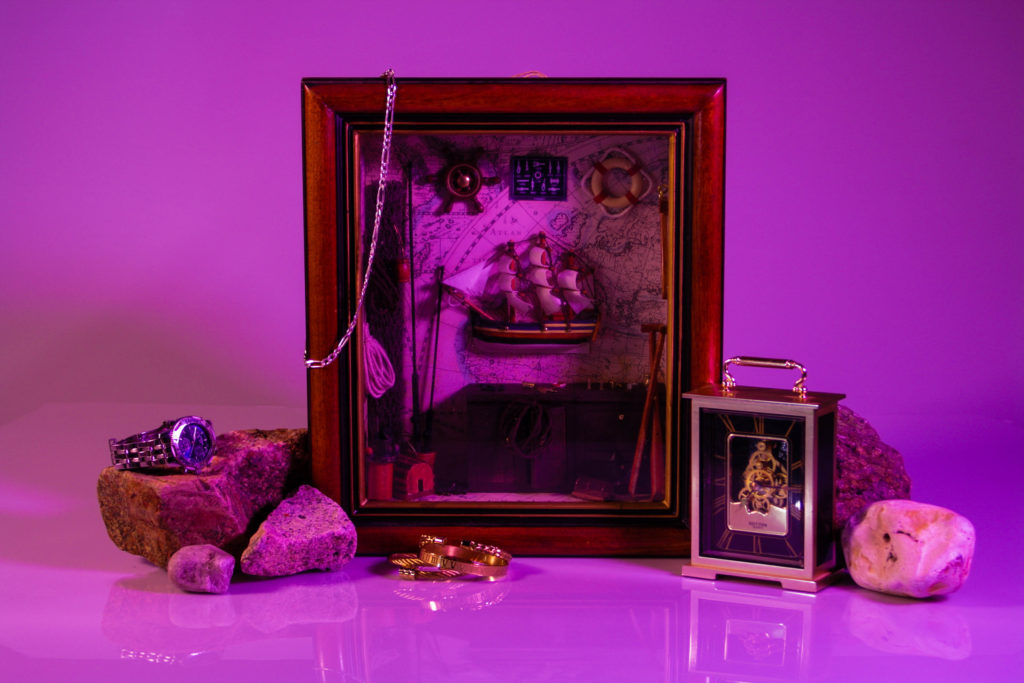
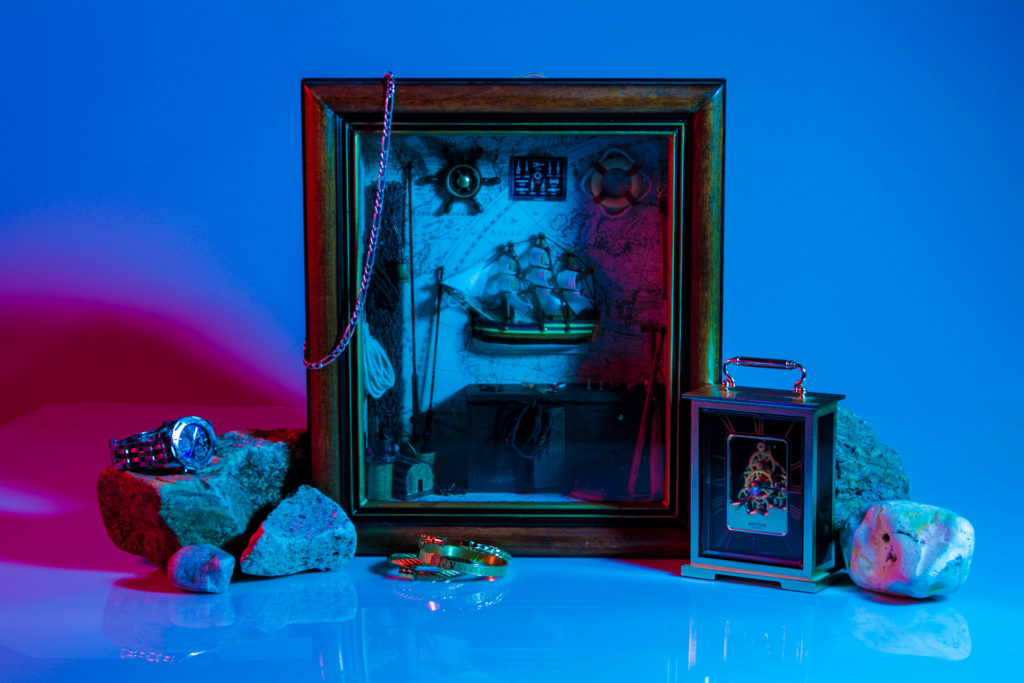
We used colour panels that we’d previously used in our still life shoot to create unique colour compositions, and create a more interesting piece.
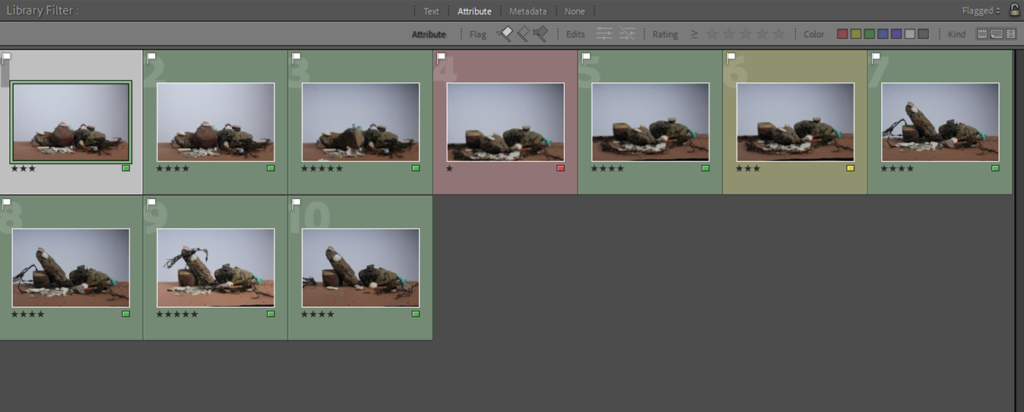
I then rated each image with three colours; green for images that I can easily use, yellow for the photos that I could use, and red for images which didn’t really have much potential or were too repetitive with the others.

After, I edited most of the photos I marked as green, and came up with these as the results:

Formalism

Photographers have to impose order, bring structure to what they photograph. It is inevitable. A photograph without structure is like a sentence without grammar—it is incomprehensible, even inconceivable.
– Stephen Shore

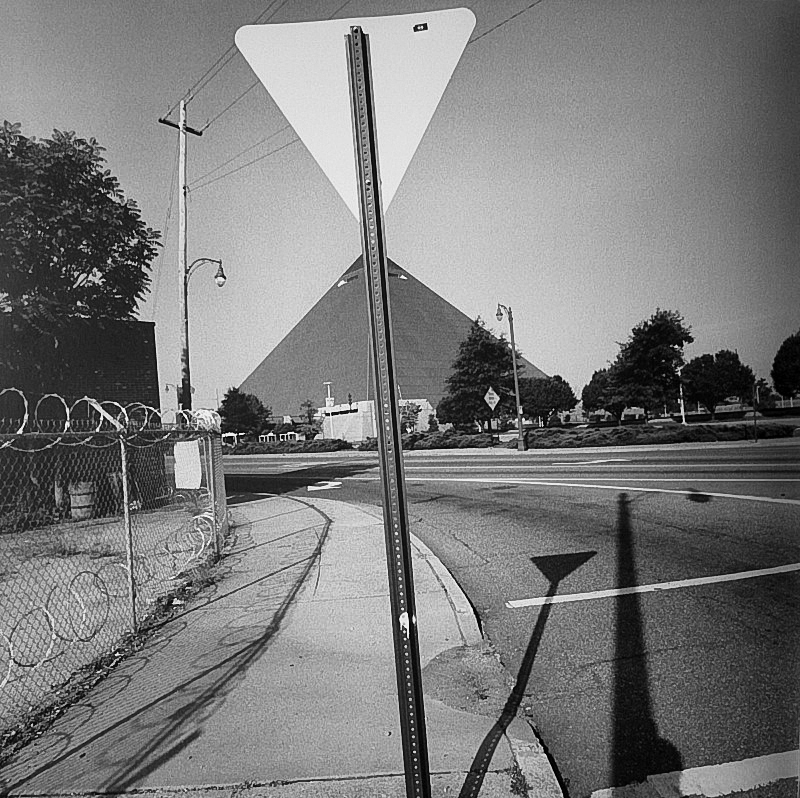
Memphis – Lee Friedlander, 2003

Photographs are composed of two main elements; visual and formal. This creates a sort of “grammar” within each image that can be used to convey and enhance meaning, often to do with beauty, but sometimes subverting from concepts of regular definitions of beauty. Whilst photography isn’t unique in most of its formal and visual elements, it strays from other art forms through elements of framing, time, focus, and flatness, something that cannot be achieved through methods such as painting.

Alexander Rodchenko | Fire Escape, 1925 (Printed later) | Artsy
Fire Escape – Alexander Rodchenko, 1927

As a group, we analysed this image by Alexander Rodchenko, referencing it to a guide on how to pick out different formal and visual elements. We picked out the rungs of the ladder as repetitive lines, and the side rails of it as leading lines. The boy, presumably a chimney sweep by his clothing, asserts a focal point in the centre of the image, and creates a sense of enigma by the low lighting on his face, although a facial expression can be made out. The use of monochrome, excluding the fact that the photograph was taken during an era where colour photography was rare and expensive, displays an dark and moody tone in combination with the low exposure. In addition to this, the image flips the idea of the rule of thirds on its head – quite literally – by featuring the wall of the building at the top of the photo, creating a sort of ‘reverse horizon’.

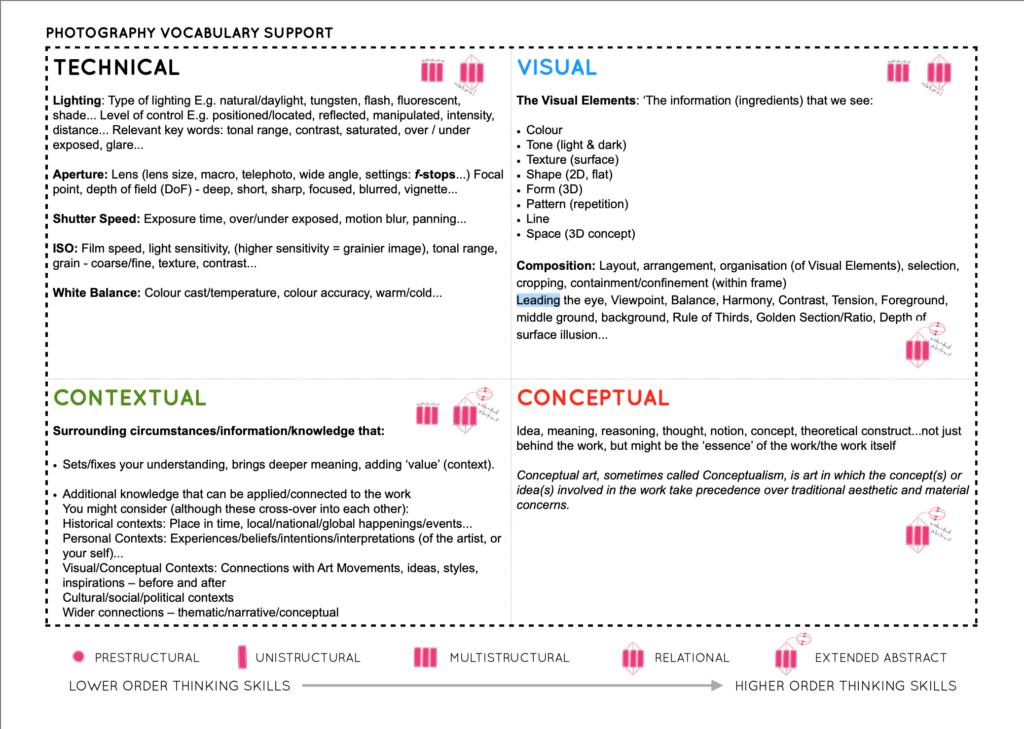
The reference guide we used to analyse the image.

The formal and visual elements include:

Light: Which direction is the light coming from? How strong is the light/How thick are the shadows? Is the lighting natural/from studio lights?

Lines: Are there any structures that create outlines/lines in the image? Are the lines straight/curved/thick/thin? Are they parallel/perpendicular? Do they create a shape

Repetition: Are there any patterns in the image? Are they created by lines or shapes within the photo? Are there any reflections?

Texture: What kind of surface does it look like the subjects within the photograph have? Rough/smooth? How much depth is there in the composition/shapes?

Shape: What kind of shapes are present in the photo? What are they composed of? Do they create repetition within the image?

Tone: What mood does the colours within the image create? Are there darker/lighter tones dominating the image? Which areas are the brightest and darkest? Is there an equal level of light and dark?

Composition: How is the photograph staged? Is it organised? Does the order/angle create any shapes? Is the rule of thirds present?

Colour: What colours are present throughout the composition? Is the image monochrome or in colour? Do the colours suggest mood/danger/nature/love, etc.? Are they heavily saturated or muted?

Essay – What is Photography?

Photography, by definition, is an art form that involves the capturing of light by chemical or digital means, through light-sensitive materials or image sensing technology respectively. First established during the earlier half of the 18th Century, the first commercialized ‘camera obscura’ invented by French artist Louis Daguerre and Inventor William Talbot, creating what they called ‘daguerreotypes’ and ‘calotypes’ – precursors to what modern photography is today.

Daguerreotype camera | Daguerreotype, Louis daguerre, Vintage cameras
Daguerreotype camera – 1839

However, photography also has its own individual definition to each viewer and artist, thanks to its fast-evolving history and ever-expanding versatility. In my opinion, I believe photography works as a physical time capsule, capturing a moment or memory in as clear a medium as possible – outlasting the deterioration of memories and the transience of life – and its power in the form of relating to each and every viewer uniquely, through a personal experience with a similar scene or colour palette, or a great feat of their own reminded by an intense, breath-taking piece. It functioned better than other forms of artwork in the sense that it captures the unforgiving reality of its subjects and their own unique imperfections, such as perhaps dull scenery or blemishes and marks that might be missed in painted portraits. Although, in today’s modern world, thanks to advances in technology, it’s a lot easier to manipulate photographs into something more idealistic, and to edit undesirable areas of images out.

Artistic action by Yves Klein | Leap into the Void | The Metropolitan  Museum of Art
Leap into the Void – Yves Klein, 1960

Editing within photography became more and more common as the years progressed, the first processes involving painting over undesired sections of the image, later including something known as the ‘wet collodion’ process, followed by gelatin-silver (dry) process. One of the most iconic instances of early editing took place during the 1960s, when Yves Klein created his “Leap into the Void” works, where he would jump off of a building onto a tarpaulin held by his artist friends, and create composite photographs using the same scenery without his friends below, creating the illusion that he was able to undertake “unaided lunar travel”. This meant that photography was able to evolve more as an art form to depict unbelievable settings and acts, or, as it is often used today, to make a more appealing final product.

“Photographs confuse as much as fascinate, conceal as much as reveal, distract as much as compel. They are unpredictable communicators”. – David Campany

This quote is direct from photographer David Campany himself, and his opinion on the art form of photography. His belief is that equipment and skill are irrelevant when taking photographs, all that is needed is a camera – something easily accessible in today’s world, even just from a phone – and a pair of eyes that can interpret images. Photography is a universal skill that allows anyone to administer their own message into a world that isn’t theirs, but a piece of work that is their own.

Still Life

Still life in photography derives from the traditional concept of photographing objects organised in such a way that orchestrates a narrative, forming complex compositions that communicate varied allegorical meanings. In its early days, still life photography took the initial meanings and ideas behind still life used in painting, and implemented it into photography, slowly becoming less and less definable over time, to where – in the modern day – still life pieces are able to take any form or definition; from concerns surrounding the environment

William Henry Fox Talbot (1800–1877) and the Invention of Photography |  Essay | The Metropolitan Museum of Art | Heilbrunn Timeline of Art History
William Talbot – Articles of Glass (>1844)

The use of still life was very prominent in photography inventors Jacques-Louis-Mandé Daguerre and William Talbot’s work dating back as early as the 1830s. Still life itself originated within painting in the Netherlands during the 17th Century, representing wealth of the upper classes, religion, morality, colonialism, and various other themes within literature – the phrase ‘still life’ forming from the Dutch word ‘stilleven’.

Still-Life with Partridge and Gauntlets - Wikipedia
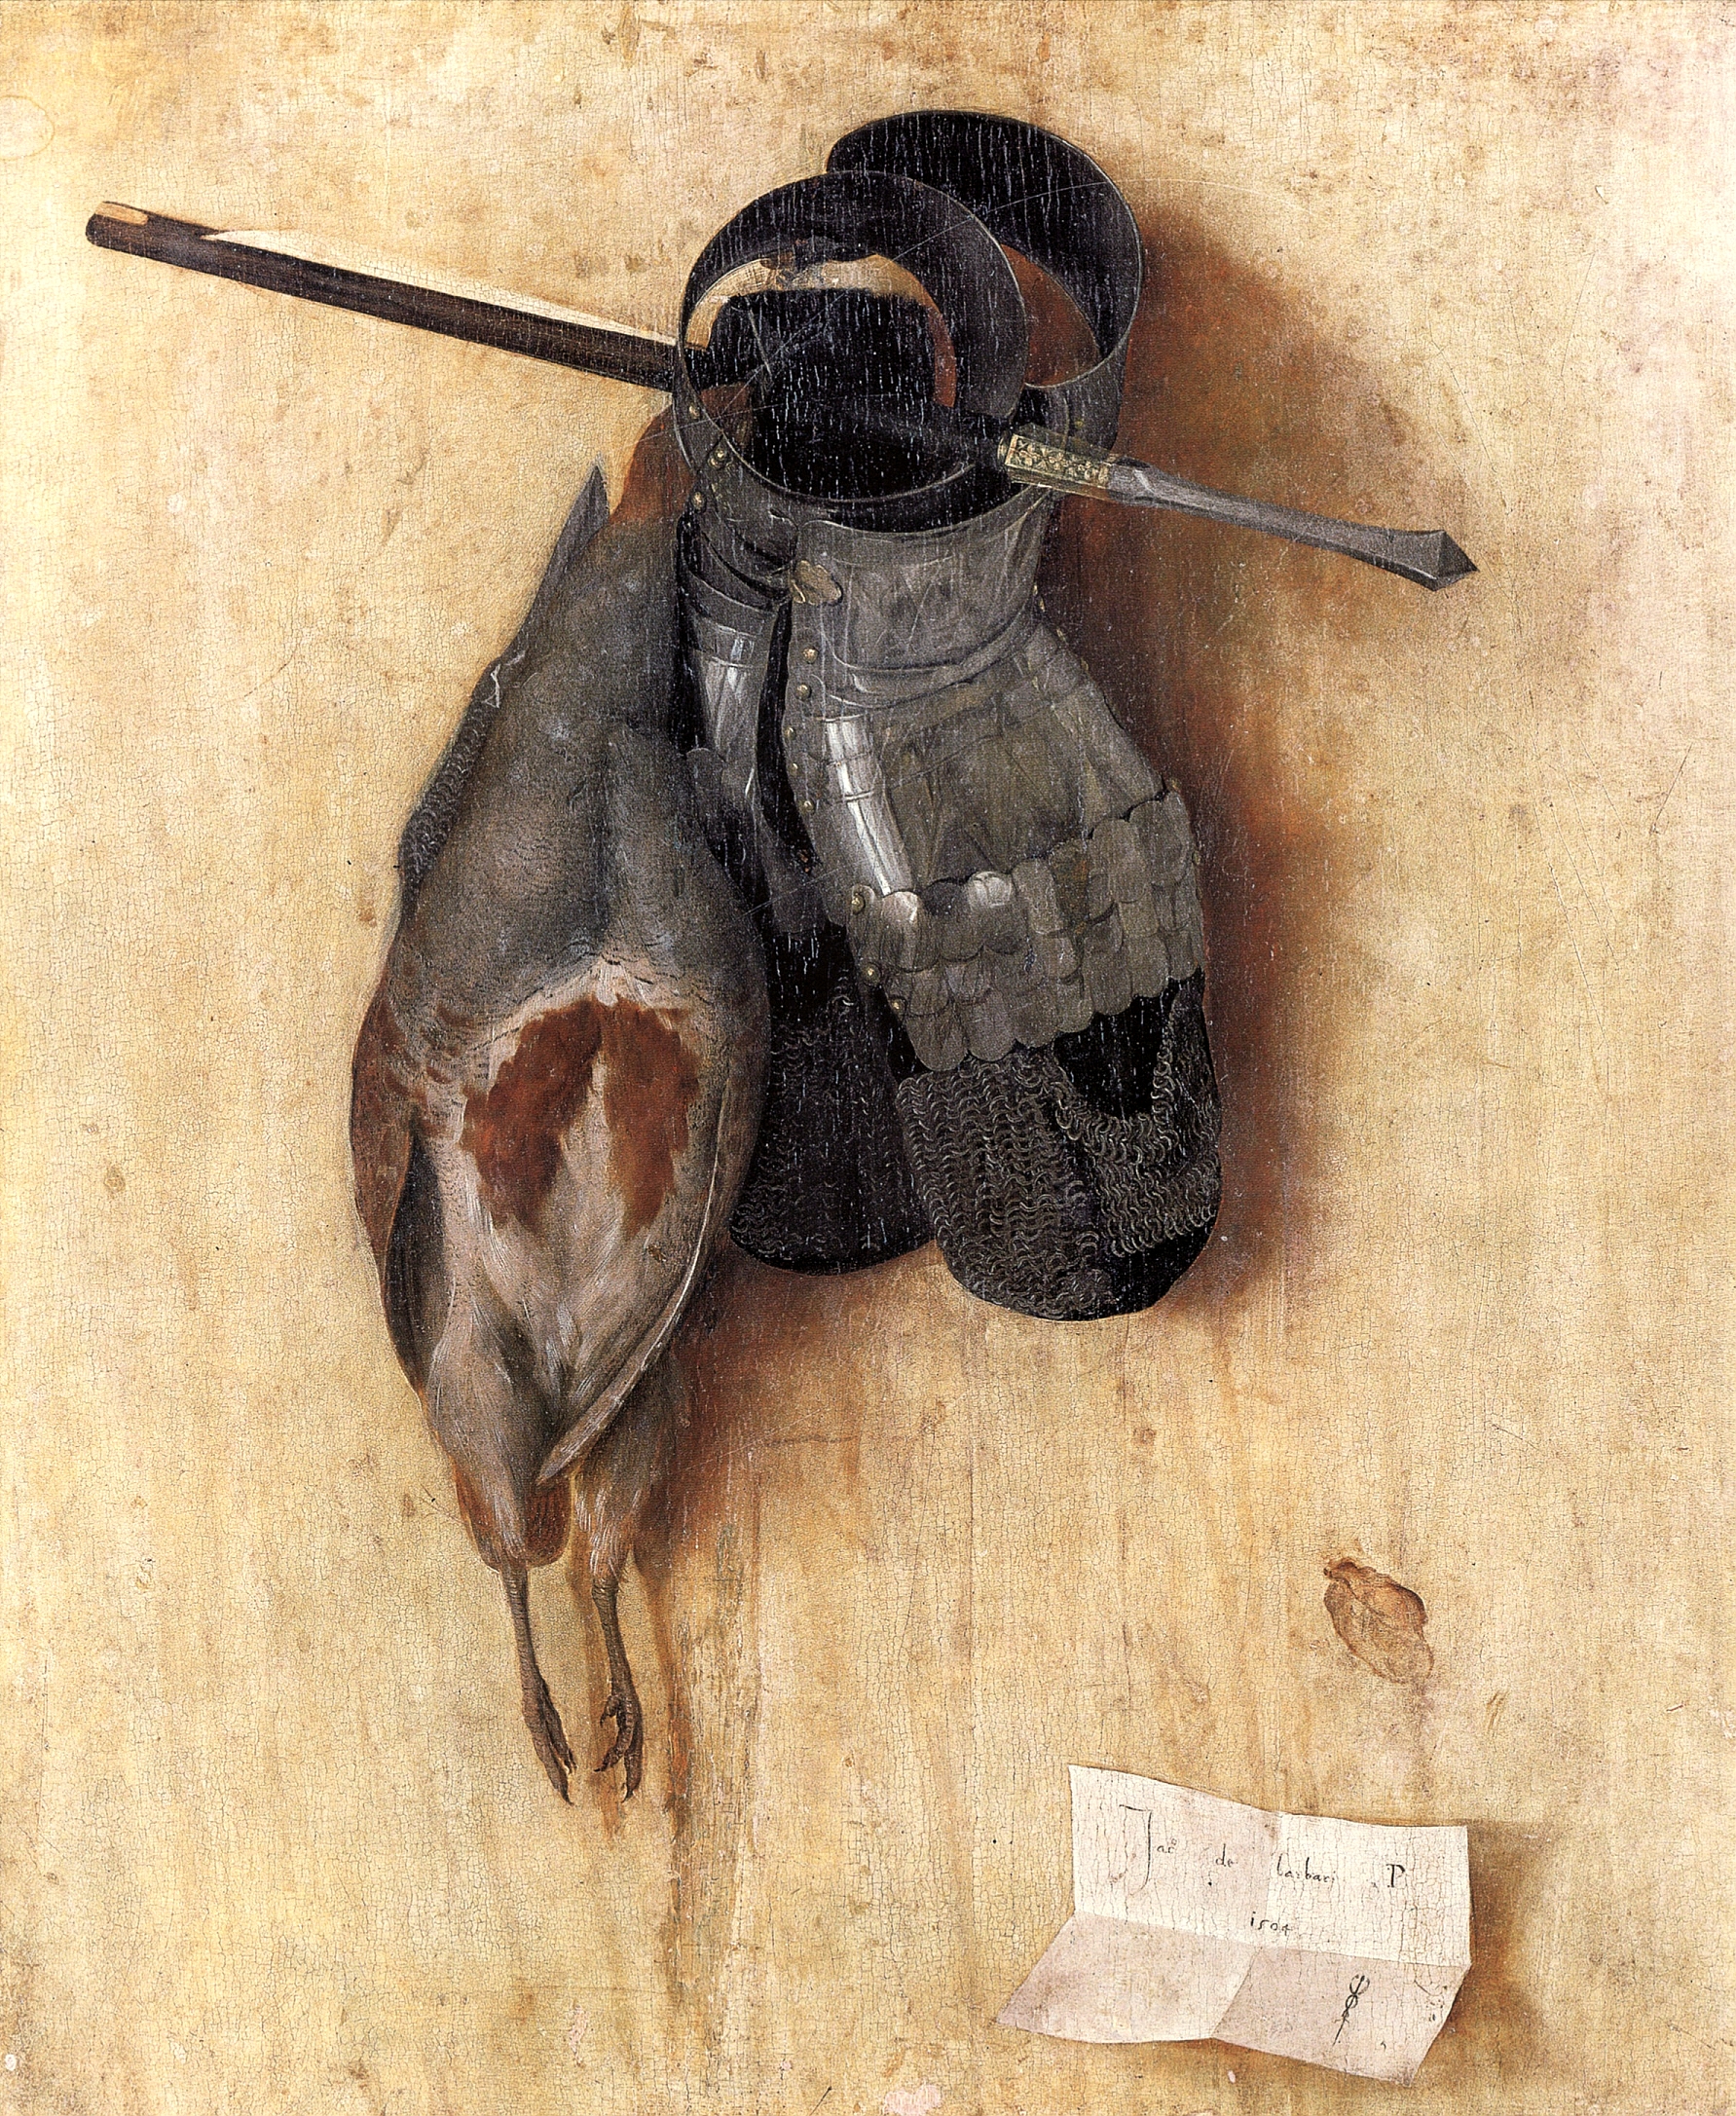
Still Life with Partridge and Gauntlets – Jacopo De’Barbari, 1504

The ‘first’ still life painting ever created was created by artist Jacopo De’Barbari, although still life didn’t rise to popularity until later on up north. It depicts a deceased grey partridge, with two iron gauntlets, and a bolt from a crossbow passed through each object against a wooden table or wall.`

Vanitas painting by Antonio de Pereda

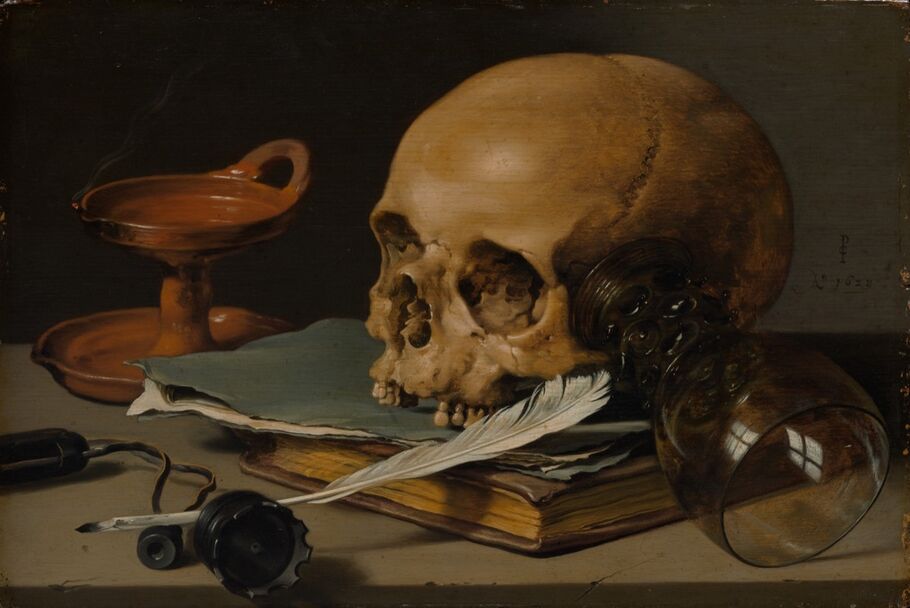
A vanitas is a piece of artwork that typically symbolises the transience of time and life, the idea of death being absolute, and the futility of pleasure. In its prime, vanitas paintings were produced primarily from the mid-16th-mid-17th Centuries, being another key genre during the Dutch Golden Age. The paintings contrast ideas of wealth and death, ‘vanitas’ deriving from Latin – meaning vanity – which links to Christian beliefs in the sense that material objects have no meaning, as they can’t be carried to the next life with us.

How Memento Mori and Vanitas Paintings Symbolized Death | Artsy
Still Life with a Skull and a Writing Quill – Pieter Claesz, 1628

“Memento Mori” – remember death – is also another key theme presented throughout still life, vanitas works in particular, the theme that all living things must die at some point or another, and that nothing is forever.

The common themes and symbols – death, wealth, vanity, time, beauty, nature, etc. – used in still life are used to enforce a clear and concise message, and almost provide a comfort about the terrifying uncertainties that are experienced throughout a lifetime.

ISO and White Balance

ISO and white balance are two crucial settings when it comes to managing exposure and tonal values in photography.

– Photograph of Golden Gate Bridge at four different ISO values – Upskillist Blog

ISO refers to the sensitivity of a camera’s image sensor – higher ISO values increase this sensitivity, which allows for images to be captured in low-light conditions without decreasing the shutter speed or using the flash. When the ISO value is too high, however, it can introduce noise into photographs, which can lower a final image’s quality, which means that to achieve a crystal clear image, the ISO needs to be properly adjusted to the environment.

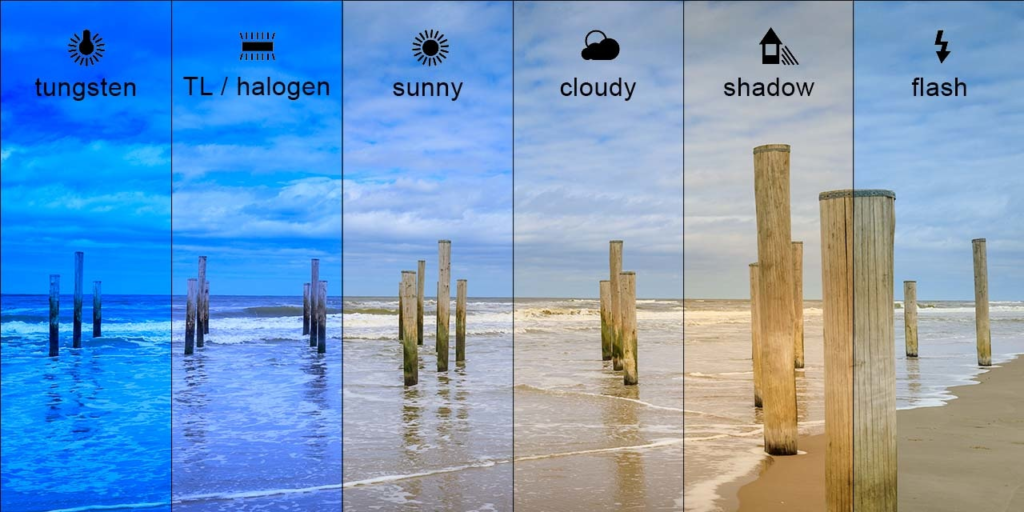
– Shot of a beach using different ISO value presets – Fstoppers

White balance is essential when it comes to accurately representing the tones in a photo. These settings are used to select an appropriate colour temperature for the light sources present in a composition, which can be done either manually using a white card or through the various presets that most cameras have available.

Depth of Field

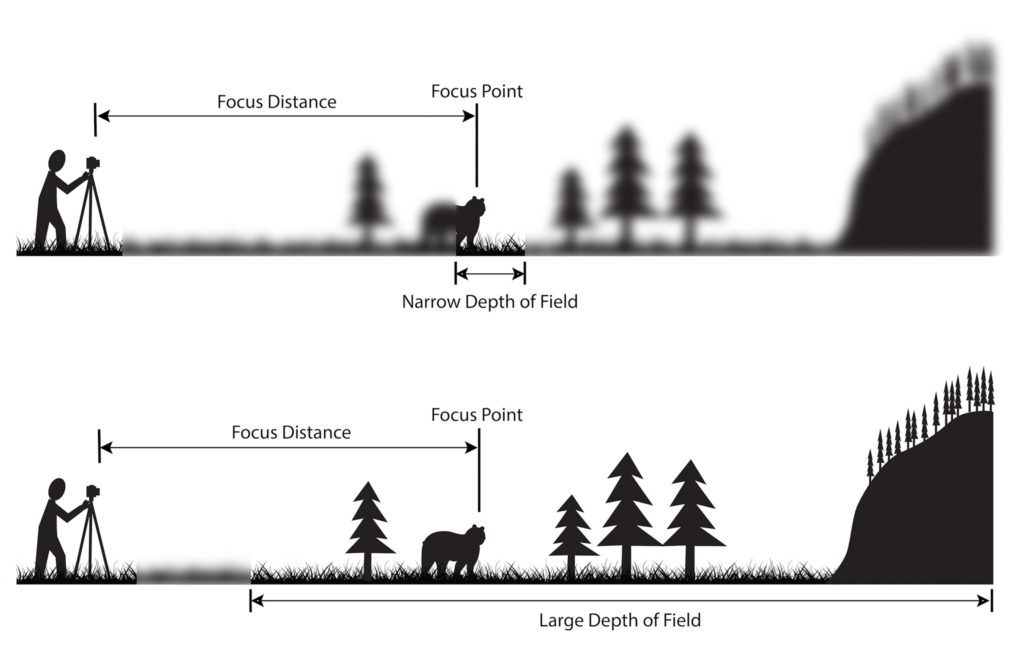
– Diagram explaining depth of field – Photography Life

In photography, depth of field refers to the range of distance within an image that appears to be in focus. This effect is created by adjusting the aperture of the camera’s lens, which controls the amount of light that hits the camera’s sensor. Wider apertures – such as f/1.8 – will result in shallower depths of field, whereas a narrow aperture – such as f/16 – will leave the final image with a deeper depth of field.

– Bruce Gilden

When the depth of field is shallow, the subject in the foreground will be in sharp focus, while the background should appear out of focus. This can often be used to draw attention to the subject and create a stronger sense of depth in the image – commonly used in portrait photography.

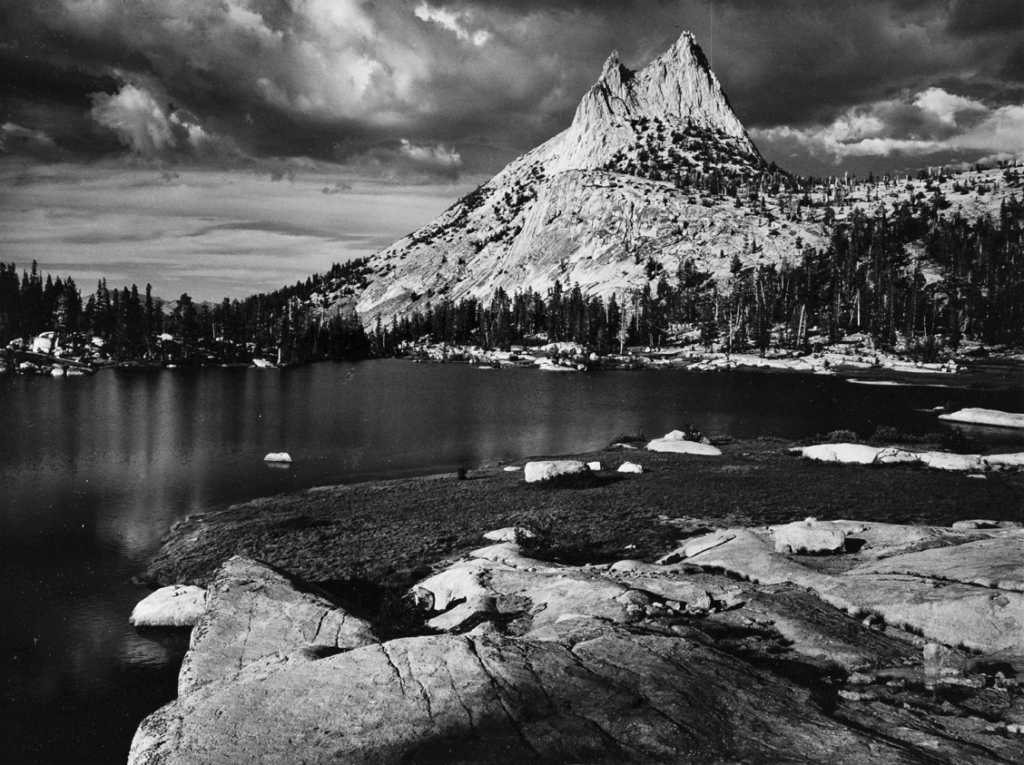
– Ansel Adams

On the other hand, when the depth of field is deeper, more of the scene will appear in focus – which is typically present in landscape photography to capture more detail within the scenery. Either way, depth of field is essential when it comes to developing a more visually appealing photograph.

Depth of field is also controlled by the distance between the camera, subject and foreground, the closer the subject is, the shallower the depth of field is, and vice versa.

Focal Length

– Diagram displaying focal length – Photography Life

Focal length within a camera is an essential aspect of photography that influences the angle of view and magnification of the image captured. The focal length of a camera lens is the distance between the optical centre of the lens and the image sensor when the lens is focused on infinity. Typically, it’s measured in millimetres and can vary widely depending on the lens used.

– Visual representation of different focal lengths – Nikon

A lens with a shorter focal length, such as a wide-angle lens, captures a broader field of view, making it ideal when used in landscape and architectural photography. On the other hand, a lens with a longer focal length, such as a telephoto lens, narrows the angle of view and magnifies the image, making it perfect for wildlife and portrait photography.

The choice of focal length often depends on the desired effect and the distance between the photographer and the subject. Lenses with different focal lengths can be switched to achieve various perspectives and styles in their image.

Using lightroom Classic

This image has an empty alt attribute; its file name is image-356.png

When I first opened Lightroom Classic, I created a collection to put my photos inside. I made a sub-folder for the photographs we had taken in the studio, and began the process of editing.

This image has an empty alt attribute; its file name is image-360.png

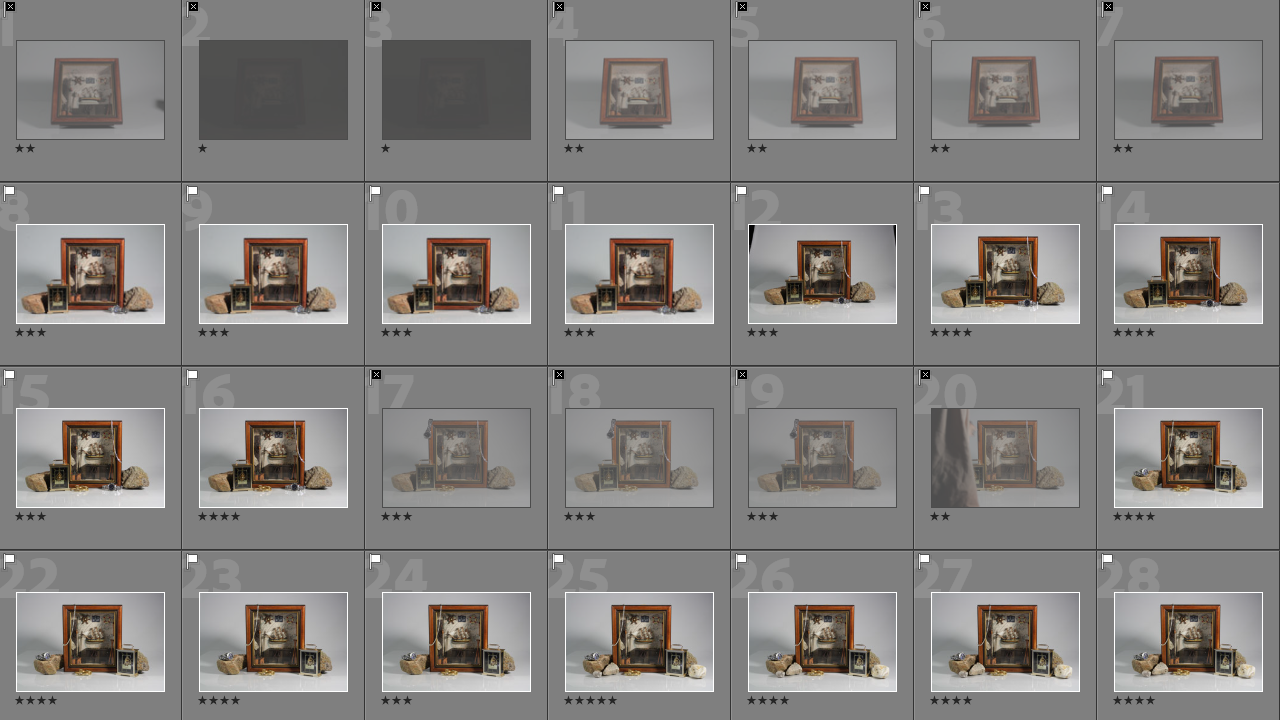
Using the picker tool, I selected my best images that would be eligible for editing, ones with the least blurring, highest resolution, and good framing. The rest would be discarded as the set was obstructed by either someone else or the shutter when the shutter speed was set too high.

This image has an empty alt attribute; its file name is image-362.png
This image has an empty alt attribute; its file name is image-361.png

this is annoying

The photographs with the white flag in the top left were the ones that were kept, whilst the ones with the black flag were discarded.

This image has an empty alt attribute; its file name is image-365-1024x412.png
I gave each image a star rating (/5) and colour-coded them based on how usable they were (red = unusable, yellow = could use, green = usable)

These were the photos I was left with. My plan was to then experiment with editing to give them more colour and detail.

These were the three edited images I was left with. I increased the vibrance in each one to bring out the blue hue of the background, and messed mainly with the exposures and contrasts to create three similar pieces that could work as a tryptic.

During my GCSE’s I used Lightroom for my photography, so I’m familiar with the tools and layout of Lightroom Classic.