PRACTICAL WORK: This term you have 5 weeks to complete all coursework, including essay and photobook or film. This include all relevant blog posts demonstrating your knowledge and understanding of: RESEARCH > ANALYSIS > PLANNING > RECORDING, EXPERIMENTATION > PRESENTATION > EVALUATION.
DEADLINE: MUST complete final photo-shoots/ moving image recordings by MON 5 February 2024
ESSAY: We will continue to spend at least 1 lesson a week on CONTEXTUAL STUDIES where you will be learning about critical theory, photo history and contemporary practice as well as developing academic study skills to help you writing your essay. However, it is essential that you are organising your time effectively and setting aside time outside of lessons to read, study and write.
DEADLINE: Essay MUST be handed in FRI 2 FEB 2024
PHOTOBOOK / FILM: Returning after Christmas we will be spending the whole month of January developing, designing and printing the photobook which will include your essay and somewhere between 40-60 images sequenced to tell a story. For those making a film you will spend January editing moving images and sound in Premiere.
MOCK EXAM: 5 – 9 Feb 2024. 3 days controlled test (15 hours) Groups: 13A: MON 5 – WED 7 FEB 13B: WED 7 – FRI 9 FEB
DEADLINE: Completion of photobook or film LAST DAY OF YOUR MOCK EXAM.
Week 15-16: 4 – 14 Jan PHOTOBOOK: Editing photoshoots FILM: Editing footage and sound ESSAY: Hypothesis, essay plan and Introduction
PHOTO-SHOOTS:Lessons Thurs 4 – Fri 5 Jan Upload new images from to M:drive and begin to edit in Lightroom. Follow these instructions:
EDITING:
Save shoots in folder and import into Lightroom
Organisation: Create a new Collection from each new shoot inside Collection Set: PHOTOBOOK
Editing: select 8-12 images from each shoot.
Experimenting: Adjust images in Develop, both as Colour and B&W images appropriate to your intentions
Export images as JPGS (1000 pixels) and save in a folder: BLOG
Create a Blogpost with edited images and an evaluation; explaining what you focused on in each shoot and how you intend to develop your next photoshoot.
Make references to artists references, previous work, experiments, inspiration etc.
Prep for photobook design: Make a rough selection of your 40-50 best pictures from all shoots. Make sure you have adjusted and standardised all the pictures in terms of exposure, colour balance.
EVALUATING: Upon completion of photoshoot and experimentation, make sure you evaluate and reflect on your next step of development. Comment on the following:
How successful was your photoshoot and experimentation?
What references did you make to artists references? – comment on technical, visual, contextual, conceptual?
How are you going to develop your project from here? – comment on research, planning, recording, experimenting.
What are you going to do next? – what, why, how, when, where?
ESSAY:Lessons Mon 8 – Fri 12 Jan Complete the following:
MON: Academic Sources
Research and identify 3-5 literary sources from a variety of media such as books, journal/magazines, internet, Youtube/video that relates to your personal study and artists references .
Begin to read essay, texts and interviews with your chosen artists as well as commentary from critics, historians and others.
It’s important that you show evidence of reading and draw upon different pints of view – not only your own.
Take notes when you’re reading…key words, concepts, passages
Write down page number, author, year, title, publisher, place of publication so you can list source in a bibliography
Bibliography
List all the sources that you have identified above as literary sources. Where there are two or more works by one author in the same year distinguish them as 1988a, 1988b etc. Arrange literature in alphabetical order by author, or where no author is named, by the name of the museum or other organisation which produced the text. Apart from listing literature you must also list all other sources in alphabetical order e.g. websites/online sources, Youtube/ DVD/TV.
Quotation and Referencing:
Why should you reference?
To add academic support for your work
To support or disprove your argument
To show evidence of reading
To help readers locate your sources
To show respect for other people’s work
To avoid plagiarism
To achieve higher marks
What should you reference?
Anything that is based on a piece of information or idea that is not entirely your own.
That includes, direct quotes, paraphrasing or summarising of an idea, theory or concept, definitions, images, tables, graphs, maps or anything else obtained from a source
How should you reference?
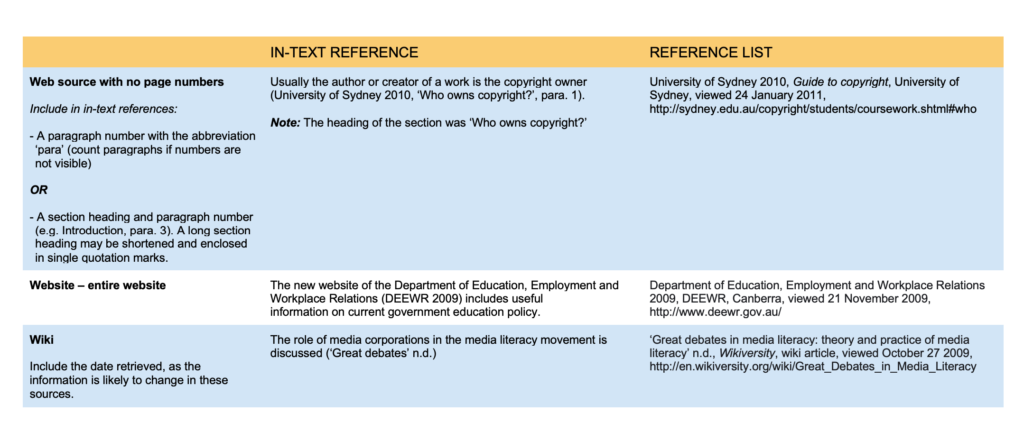
Use Harvard System of Referencing…see Powerpoint: harvard system of referencing for further details on how to use it.
https://vimeo.com/223710862
Here is an full guide on how to use Harvard System of Referencing including online sources, such as websites etc.
TUE: Essay Question
Think of a hypothesis and list possible essay questions
Below is a list of possible essay questions that may help you to formulate your own.
Tue: Essay Plan Make a plan that lists what you are going to write about in each paragraph – essay structure
Essay question:
Opening quote
Introduction (250-500 words): What is your area study? Which artists will you be analysing and why? How will you be responding to their work and essay question?
Pg 1 (500 words): Historical/ theoretical context within art, photography and visual culture relevant to your area of study. Make links to art movements/ isms and some of the methods employed by critics and historian.
Pg 2 (500 words): Analyse first artist/photographer in relation to your essay question. Present and evaluate your own images and responses.
Pg 3 (500 words): Analyse second artist/photographer in relation to your essay question. Present and evaluate your own images and responses.
Conclusion (250-500 words): Draw parallels, explore differences/ similarities between artists/photographers and that of your own work that you have produced
Bibliography: List all relevant sources used
Wed-Fri: EssayIntroduction In this lesson you will write a 45 mins draft essay introduction following these steps:
Open a new Word document > SAVE AS: Essay draft
Copy essay question into Essay title: Hypothesis > if you don’t have one yet, make one!
Copy your Statement of Intent from previous blogpost.
Identify 2 quotes from your literary sources using Harvard System of Referencing.
Use one quote as an opening quote:Choose a quote from either one of your photographers or critics. It has to be something that relates to your investigation.
Begin to write a paragraph (250-500 words) answering the following questions below.
You got 45 mins to write and upload to the blog!
Think about an opening that will draw your reader in e.g. you can use an opening quote that sets the scene. Or think more philosophically about the nature of photography and its feeble relationship with reality.
You should include in your introduction an outline of your intention of your study, e.g.
What are you going to investigate?
How does this area/ work interest you?
What are you trying to prove/challenge, argument/ counter-argument?
Whose work (artists/photographers) are you analysing and why?
What historical or theoretical context is the work situated within?
What links are there with your previous studies?
What have you explored or experimented with so far in your photography project?
How will your work develop.
What camera skills, techniques or digital processes have you used, or going to experiment with?
PHOTOBOOK: Lessons Mon-Wed Produce a number of blogposts that show evidence of the following:
1. Research a photo-book and describe the story it is communicating with reference to subject-matter, genre and approach to image-making.
2. Who is the photographer? Why did he/she make it? (intentions/ reasons) Who is it for? (audience) How was it received? (any press, reviews, awards, legacy etc.)
3. Deconstruct the narrative, concept and design of the book and apply theory above when considering:
Book in hand: how does it feel? Smell, sniff the paper.
Paper and ink: use of different paper/ textures/ colour or B&W or both.
Format, size and orientation: portraiture/ landscape/ square/ A5, A4, A3 / number of pages.
Title: literal or poetic / relevant or intriguing.
Narrative: what is the story/ subject-matter. How is it told?
Structure and architecture: how design/ repeating motifs/ or specific features develops a concept or construct a narrative.
Design and layout: image size on pages/ single page, double-spread/ images/ grid, fold- outs/ inserts.
Editing and sequencing: selection of images/ juxtaposition of photographs/ editing process.
Images and text: are they linked? Introduction/ essay/ statement by artists or others. Use of captions (if any.)
UNDERSTANDING PHOTOBOOKS: NARRATIVE, EDITING, SEQUENCING, DESIGN, FORM, FUNCTION
Earlier in the academic year we looked at narrative in photography. Let’s refresh our memory and revisit some of the theories around visual storytelling.
Narrative is essentially the way a story is told. For example you can tell different narratives of the same story. It is a very subjective process and there is no right or wrong. Whether or not your photographic story is any good is another matter.
Narrative is constructed when you begin to create relationships between images (and/or text) and present more than two images together. Your selection of images (editing) and the order of how these images appear on the pages (sequencing) contributes significantly to the construction of the narrative. So too, does the structure and design of the photo-zine or photobook.
However, it is essential that you identity what your story is first before considering how you wish to tell it. Planning and research are also essential to understanding your subject and there are steps you can take in order to make it successful. Once you have considered the points made between the differences in narrative and story complete the following:
CASE-STUDIES: Let’s explore some examples of images used in photo-essays and photobooks and see if we can identify the story as well as examine how narrative is constructed through careful editing, sequencing and design.
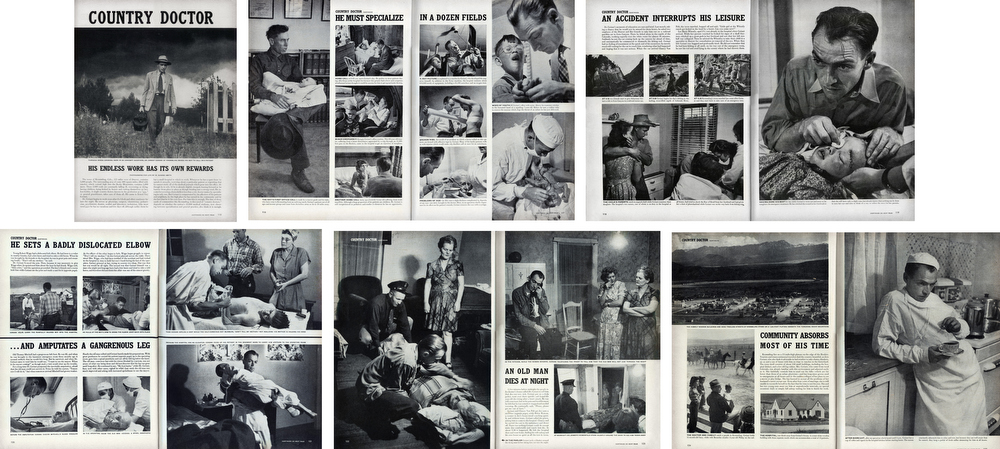
PHOTO-ESSAY: The life of a country doctor in Colorado’s Rocky Mountains
“A photo is a small voice, at best, but sometimes – just sometimes – one photograph or a group of them can lure our senses into awareness. Much depends upon the viewer; in some, photographs can summon enough emotion to be a catalyst to thought”W. Eugne Smith
W. Eugene Smith compared his mode of working to that of a playwright; the powerful narrative structures of his photo essays set a new benchmark for the genre. His series, The Country Doctor, shot on assignment for Life Magazine in 1948, documents the everyday life of Dr Ernest Guy Ceriani, a GP tasked with providing 24-hour medical care to over 2,000 people in the small town of Kremmling, in the Rocky Mountains. The story was important at the time for drawing attention to the national shortage of country doctors and the impact of this on remote communities. Today the photoessay is widely regarded as representing a definitive moment in the history of photojournalism.
Here is a Powerpoint with more information about how to construct a Traditional Picture Story that includes individual images such as:
Person at Work
Relationship Shot
Establishing Shot
Detail shot
Environmental Portrait
Formal Portrait
Observed Portrait
Here is a link to an entry for Percival Dunham considered Jersey first photojournalist for a very brief period in 1913 and 1914, when he worked for Jersey Illustrated Weekly and then the Morning News, the main competitor for many years for the Evening Post (now the Jersey Evening Post and the island’s only daily newspaper for over half a century). Try and identity individual images as above from a selection of prints from the Societe Jersiaise Photographic Archive that holds over 1000 images by Percival Dunham in their collection.
Select somewhere between 12-15 images from the set and edit and sequence them to construct a specific narrative.
Record an image of your sequence and produce a blogpost where you describe the above process.
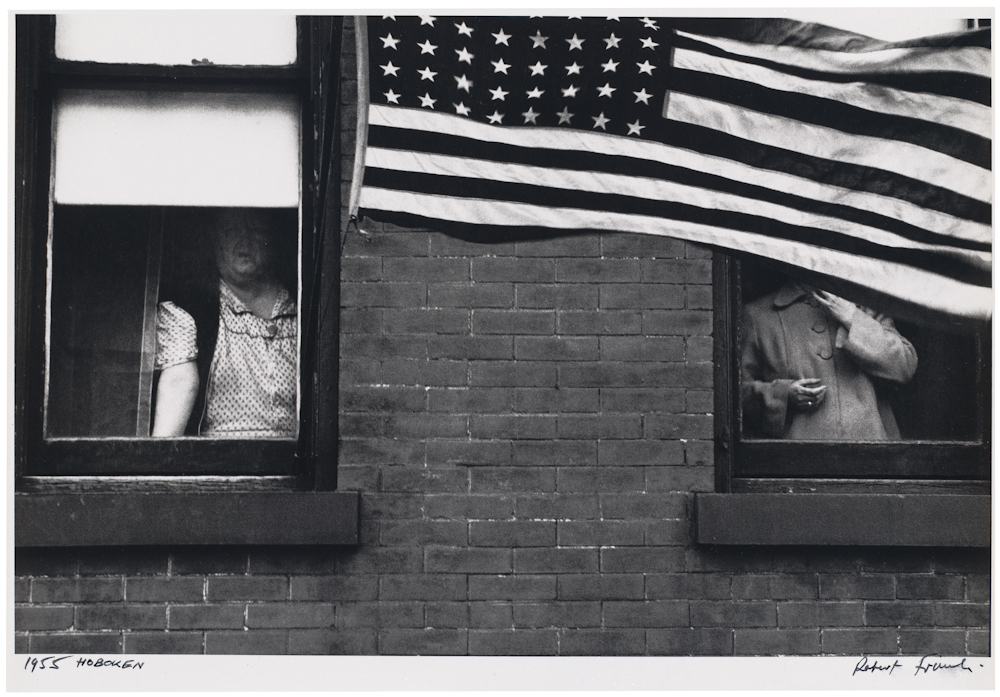
PHOTOBOOKS: In October of 1958, French publisher Robert Delpire released Les Américains in Paris. The following year Grove Press published The Americans in New York with an introduction by American writer, Jack Kerouac (the book was released in January 1960).
Like Frank’s earlier books, the sequence of 83 pictures in The Americans is non-narrative and nonlinear; instead it uses thematic, formal, conceptual and linguistic devices to link the photographs. The Americans displays a deliberate structure, an emphatic narrator, and what Frank called a ‘distinct and intense order’ that amplified and tempered the individual pictures.
Although not immediately evident, The Americans is constructed in four sections. Each begins with a picture of an American flag and proceeds with a rhythm based on the interplay between motion and stasis, the presence and absence of people, observers and those being observed. The book as a whole explores the American people—black and white, military and civilian, urban and rural, poor and middle class—as they gather in drugstores and diners, meet on city streets, mourn at funerals, and congregate in and around cars. With piercing vision, poetic insight, and distinct photographic style, Frank reveals the politics, alienation, power, and injustice at play just beneath the surface of his adopted country.
Since its original publication, The Americans has appeared in numerous editions and has been translated into several languages. The cropping of images has varied slightly over the years, but their order has remained intact, as have the titles and Kerouac’s introductory text. The book, fiercely debated in the first years following its release, has made an indelible mark on American culture and changed the course of 20th-century photography. Read article by Sean O’Hagan in The Guardian
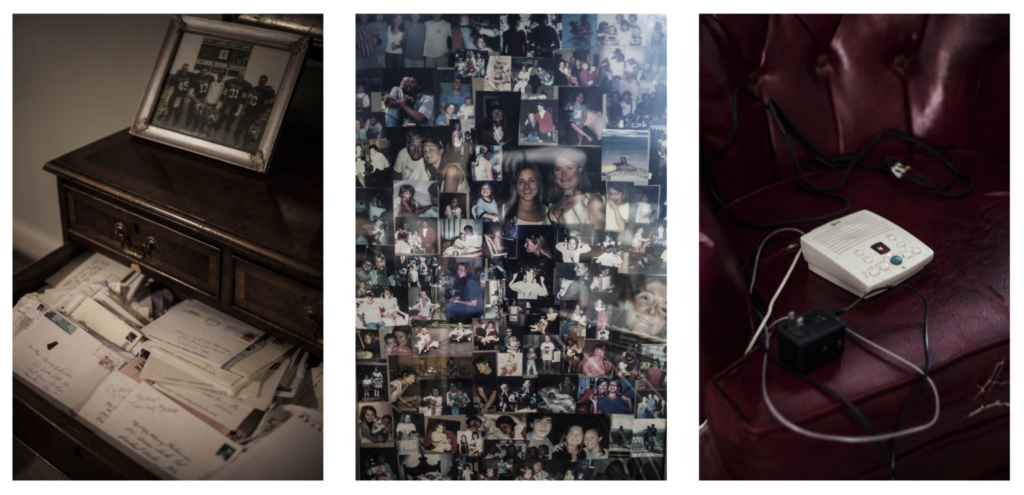
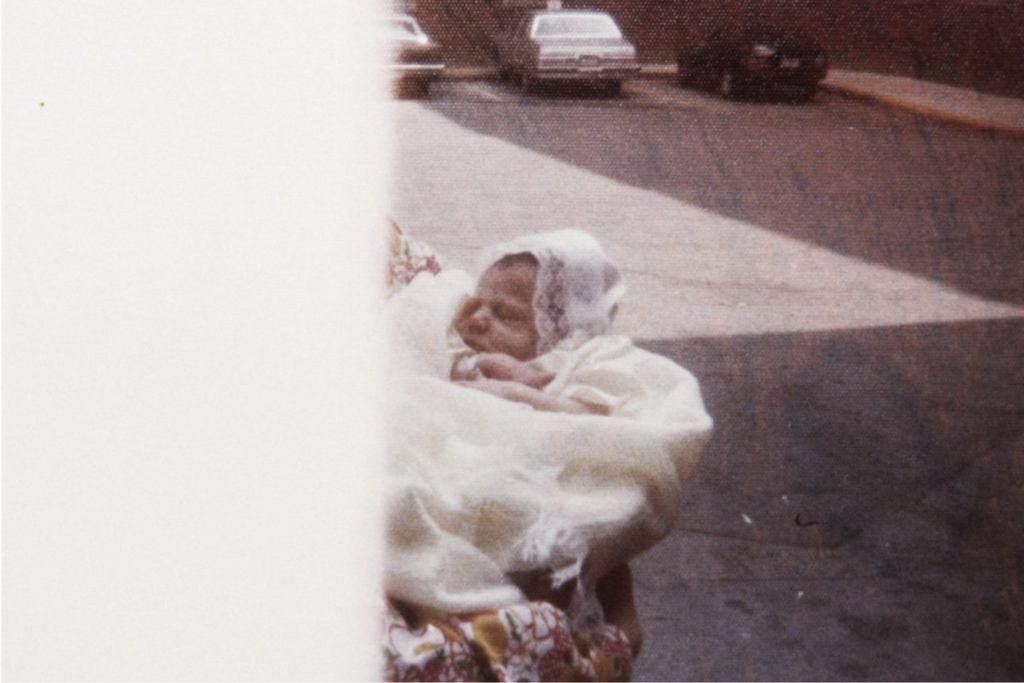
MORE PHOTOBOOKS: A few photobooks dealing with memory, loss and love
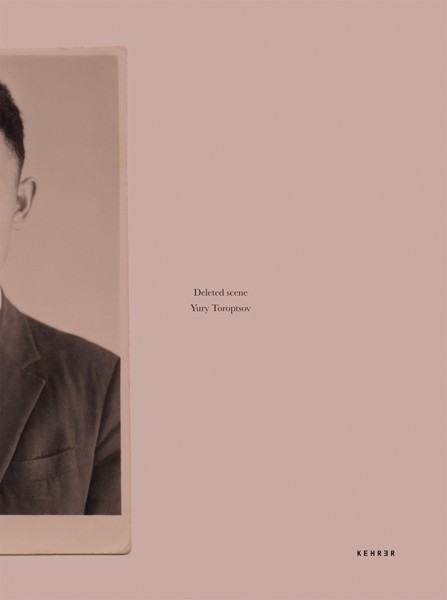
I went back to Russia to visit the places containing scattered vestiges of my father’s memory.
On a mission to photograph the invisible, with Deleted Scene photographer Yury Toroptsov takes us to Eastern Siberia in a unique story of pursuit along intermingling lines that form a complex labyrinth. His introspective journey in search of a father gone too soon crosses that of Akira Kurosawa who, in 1974, came to visit and film that same place where lived the hunter Dersu Uzala.
Yury Toroptsov is not indifferent to the parallels between hunting and photography, which the common vocabulary makes clear. Archival documents, old photographs, views of the timeless taiga or of contemporary Siberia, fragments or deleted scenes are arranged here as elements of a narrative. They come as clues or pebbles dropped on the edge of an invisible path where the viewer is invited to lose himself and the hunter is encouraged to continue his relentless pursuit.
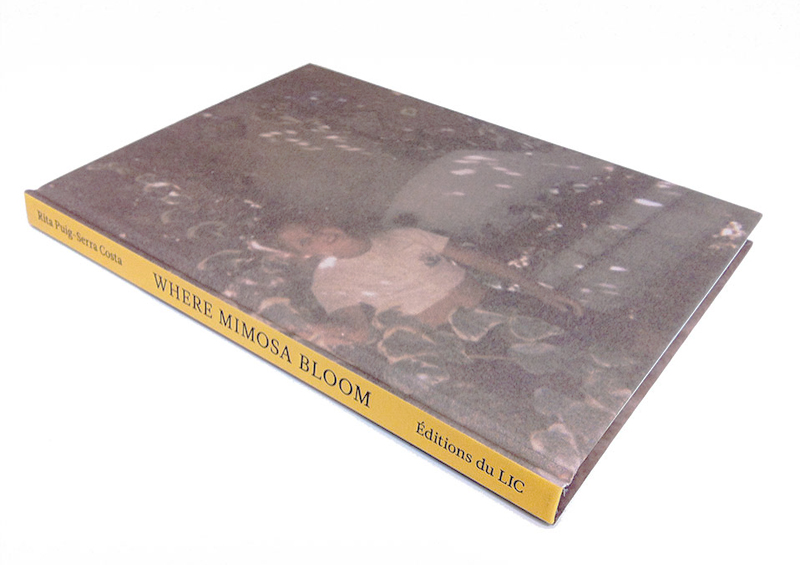
Dealing with the grief that the photographer suffered following the death of her mother, Where Mimosa Bloom by Rita Puig Serra Costatakes the form of an extended farewell letter; with photography skillfully used to present a visual eulogy or panegyric. This grief memoir about the loss of her mother is part meditative photo essay, part family biography and part personal message to her mother. These elements combine to form a fascinating and intriguing discourse on love, loss and sorrow.
“Where Mimosa Bloom” is the result of over two years work spent collecting and curating materials and taking photographs of places, objects and people that played a significant role in her relationship to her mother. Rita Puig Serra Costa skillfully avoids the dangerous lure of grief’s self-pity, isolationism, world-scorn and vanity. The resonance of “Where Mimosa Bloom” comes from all it doesn’t say, as well as all that it does; from the depth of love we infer from the desert of grief. Despite E.M.Forster’s words – “One death may explain itself, but it throws no light upon another” – Rita Puig Serra Costa proves that some aspects of grief are universal, or can be made so through the honesty and precision with which they are articulated.
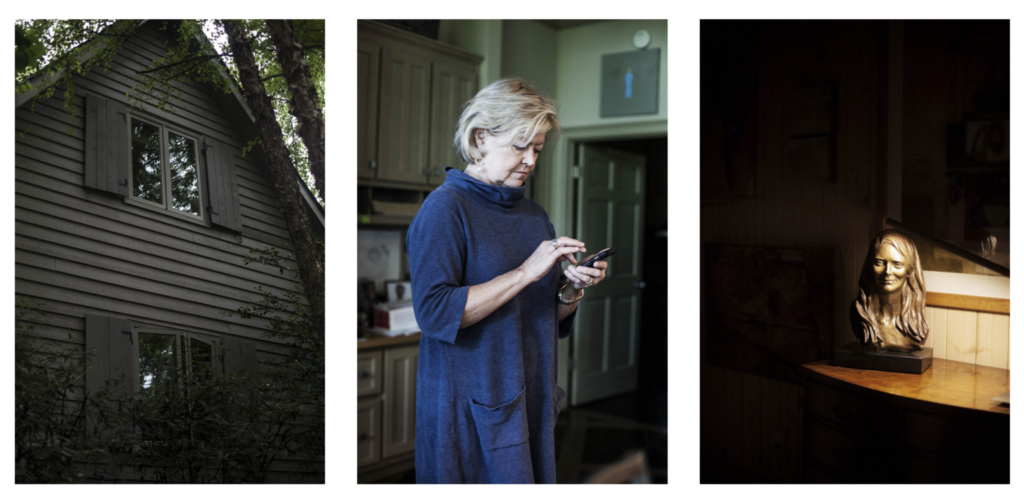
I received a text message. “Today, our divorce was finalized.” The message from my mother was written simply, even though she usually sends me messages with many pictures and symbols. I remember that I didn’t feel any particular emotion, except that the time had come. Because my parents continued to live apart in the same house for a long time, their relationship gently came to an end over the years. It was no wonder that a draft blowing between the two could completely break the family at any time.
In Japan, legend has it that a man and woman who are predestined to meet have been tied at the little finger by an invisible red string since the time they were born. Unfortunately, the red string tying my parents undone, broke, or perhaps was never even tied to begin with. But if the two had never met, I would never have been born into this world. If anything, you might say that there is an unbreakable red string of fate between parent and child.
Before long, I found myself thinking about the relationship between my parents and . How many days could I see my parents living far away? What if I couldn’t see them anymore? Since I couldn’t help feeling extremely anxious about it, I was driven to visit my parents’ house many times. Every day I engage in awkward conversation with my parents, as if in a scene in their daily lives. I adapt myself to them, and they shift their attitude toward me. We do not give way entirely to the other side, but rather meet halfway. Indeed family problems remain unresolved, although sometimes we tell allegorical stories and share feelings. It means a lot to us that our perspectives have changed with communication.
My family will probably never be all together again. But I feel without a doubt that there is proof inside of each of us that we once lived together. To ensure that the red string that ties my family together does not come undone, I want to reel it in and tie it tight.
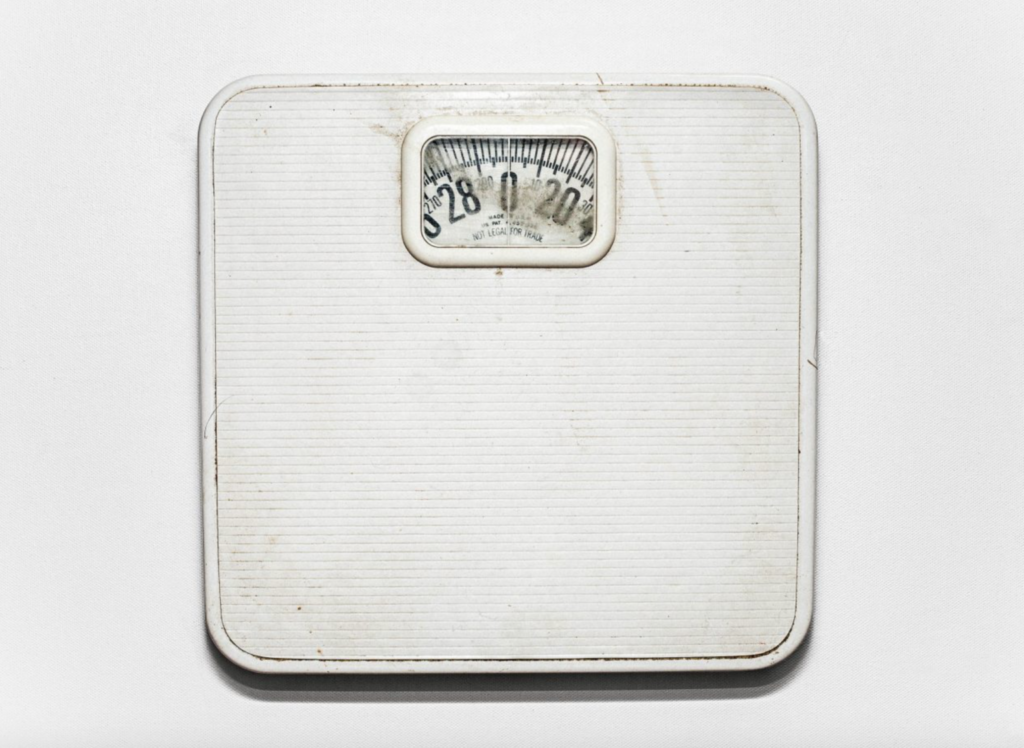
‘The Epilogue’ is the book about the story of the Robinson family – and the aftermath suffered in losing their 26 year old daughter to bulimia. Working closely with the family Laia Abril reconstructs Cammy’s life telling her story through flashbacks – memories, testimonies, objects, letters, places and images. The Epilogue gives voice to the suffering of the family, the indirect victims of ‘eating disorders’, the unwilling eyewitnesses of a very painful degeneration. Laia Abril shows us the dilemmas and struggles confronted by many young girls; the problems families face in dealing with guilt and the grieving process; the frustration of close friends and the dark ghosts of this deadliest of illnesses; all blended together in the bittersweet act of remembering a loved one. Read more here on Laia Abril’s website
Here are a few lists of Best Photobooks 2022 and 2023
Thurs-Fri: EssayParagraph 1 In this lesson you will write a 45 mins draft essay paragraph 1 following these steps:
Use information gathered in previous blog posts, or use hyperlinks below, in relation to Art Movement and Isms relevant to your artists references and their work.
Select at least two quotes from your literary sources that you can incorporate into your paragraph.
Your paragraph must include visual examples of artists work within that art movement that is relevant to your Personal Study.
Consider content and instructions below
Complete Paragraph 1 and upload to the blog at the end of lesson
Paragraph 1 Structure (500 words): Use subheading. This paragraph covers the first thing you said in your introduction that you would address.The first sentence introduces the main idea of the paragraph. Other sentences develop the subject of the paragraph.
Content: you could look at the following…exemplify your hypothesis within a historical and theoretical context. Write about how your area of study and own work is linked to a specific art movement/ ism. Research and read key text and articles from critics, historians and artists associated with the movement/ism. Use quotes from sources to make a point, back it up with evidence or an example (a photograph), explain how the image supports the point made or how your interpretation of the work may disapprove. How does the photograph compare or contrast with others made by the same photographer, or to other images made in the same period or of the same genre by other artists. How does the photograph relate to visual representation in general, and in particularly to the history and theory of photography, arts and culture.
Include relevant examples, illustrations, details, quotations, and references showing evidence of reading, knowledge and understanding of history, theory and context!
Week: 18 (Yr 12 Mock exam): 22 – 28 Jan PHOTOBOOK: Editing & designing Photobook FILM: Editing Film ESSAY: Complete paragraph 2 & 3 (artists case studies)
PHOTO-SHOOTS:Lessons Mon- Wed Upload new images from to M:drive and begin to edit in Lightroom. Follow these instructions:
EDITING:
Save shoots in folder and import into Lightroom
Organisation: Create a new Collection from each new shoot inside Collection Set: PHOTOBOOK
Editing: select 8-12 images from each shoot.
Experimenting: Adjust images in Develop, both as Colour and B&W images appropriate to your intentions
Export images as JPGS (1000 pixels) and save in a folder: BLOG
Create a Blogpost with edited images and an evaluation; explaining what you focused on in each shoot and how you intend to develop your next photoshoot.
Make references to artists references, previous work, experiments, inspiration etc.
Prep for photobook design: Make a rough selection of your 40-50 best pictures from all shoots. Make sure you have adjusted and standardised all the pictures in terms of exposure, colour balance.
EXPERIMENTING:
Export same set of images from Lightroom as TIFF (4000 pixels)
Experimentation: demonstrate further creativity using Photoshop to make composite/ montage/ typology/ grids/ diptych/triptych, text/ typology etc appropriate to your intentions
Design: Begin to explore different layout options using InDesign and make some page spreads for our newspaper (format: 280.5 (h) x 420 mm (w)
Alternatively design a photo-zine. Set up new document as A5 page sizes. This is trying out ideas before you begin designing photobook.
Make sure you annotate process and techniques used and evaluate each experiment
EVALUATING: Upon completion of photoshoot and experimentation, make sure you evaluate and reflect on your next step of development. Comment on the following:
How successful was your photoshoot and experimentation?
What references did you make to artists references? – comment on technical, visual, contextual, conceptual?
How are you going to develop your project from here? – comment on research, planning, recording, experimenting.
What are you going to do next? – what, why, how, when, where?
FILM:Lessons Mon- Wed Bring footage from video/ audio recordings to lessons: Follow these instructions:
EDITING: • Save media in folder on local V:Data Drive • Organisation: Create a new project in Premiere • Editing: begin editing video/ audio clips on the timeline • Adjusting: recordings in Colour / B&W appropriate to your intentions.
EXPERIMENTING: • Video: experimenting with sequencing using relevant transitions and effects • Sound: consider how audio can add depth to your film, such as ambient sound, sound fx, voice-over, interview, musical score etc. • Title and credits: Consider typography/ graphics/ styles etc. For more creative possibilities make title page in Photoshop (format: 1280 x 720 pixels) and import as a Psd file into your project folder on the V-Data drive.
EVALUATING: Write an evaluation on the blog that reflects on your artistic intentions, film-editing process and collaboration. Include screen-prints from Premiere and a few ‘behind the scenes’ images of the shooting/ production for further annotation. Comment on the following:
How successful was your photoshoot and experimentation?
What references did you make to artists references? – comment on technical, visual, contextual, conceptual?
How are you going to develop your project from here? – comment on research, planning, recording, experimenting.
What are you going to do next? – what, why, how, when, where?
Thurs-Fri: Essay Paragraph 2 & 3 In each lesson you will write a 45 mins draft essay paragraph 2. First, go to your blog posts that you produced about your artists references and copy your research and analysis into your new paragraph. You may need to re-structure or re-write some of the sentences using linking words so that they flow better in a coherent manner. You may also need to do some more research and interpret their work in relation to your essay question. Follow these steps:
Paragraph 2 Structure (500 words): Use subheading. In the first sentence or opening sentences, link the paragraph to the previous paragraph, then introduce the main idea of the new paragraph. Other sentences develop the paragraphs subject (use relevant examples, quotations, visuals to illustrate your analysis, thoughts etc)
Content: you could look at the following...Introduce your first photographer. Select key images, ideas or concepts and analyse in-depth using specific model of analysis (describe, interpret and evaluate) – refer to your hypothesis. Contextualise…what was going on in the world at the time; artistically, politically, socially, culturally. Other influences…artists, teachers, mentors etc. Personal situations or circumstances…describe key events in the artist’s life that may have influenced the work. Include examples of your own photographs, experiments or early responses and analyse, relate and link to the above. Set the scene for next paragraph.
Include relevant examples, illustrations, details, quotations, and references showing evidence of reading, knowledge and understanding of history, theory and context!
Paragraph 3 Structure (500 words): Use subheading. In the first sentence or opening sentences, link the paragraph to the previous paragraph, then introduce the main idea of the new paragraph. Other sentences develop the paragraphs subject (use relevant examples, quotations, visuals to illustrate your analysis, thoughts etc)
Content: you could look at the following…Introduce key works, ideas or concepts from your second photographer and analyse in-depth – refer to your hypothesis…Use questions in Pg 2 or add…What information has been selected by the photographer and what do you find interesting in the photograph? What do we know about the photograph’s subject? Does the photograph have an emotional or physical impact? What did the photographer intend? How has the image been used? What are the links or connections to the other photographer in Pg 2? Include examples of your own photographs and experiments as your work develop in response to the above and analyse, compare, contrast etc. Set the scene for next paragraph.
Include relevant examples, illustrations, details, quotations, and references showing evidence of reading, knowledge and understanding of history, theory and context!
Week: 19 – 20: 29 Jan – 9 Feb ESSAY: complete Essay hand in draft Fri 2 Feb PHOTOBOOK: complete layout, design and order book FILM: complete final edit and export film MOCK EXAM: 3 days (15 hrs) Mon 5 – Fri 9 Feb
In the next two weeks focus on beginning to edit and collect all your images, archival material and texts, including finishing writing your essay needed to complete your photobook.
ESSAY:Mon-Wed Complete conclusion, bibliography, proof read and hand in draft essay no later than Fri 2 Feb 2024. Follow these steps:
Conclusion (500 words): Write a conclusion of your essay that also includes an evaluation of your final photographic responses and experiments.
List the key points from your investigation and analysis of the photographer(s) work – refer to your hypothesis. Can you prove or Disprove your theory – include final quote(s). Has anything been left unanswered? Do not make it a tribute! Do not introduce new material! Summarise what you have learned. How have you been influenced? Show how you have selected your final outcomes including an evaluation and how your work changed and developed alongside your investigation.
Bibliography: List all the sources that you used and only those that you have cited in your text. Where there are two or more works by one author in the same year distinguish them as 1988a, 1988b etc. Arrange literature in alphabetical order by author, or where no author is named, by the name of the museum or other organisation which produced the text. Apart from listing literature you must also list all other sources in alphabetical order e.g. websites, exhibitions, Youtube/TV/ Videos / DVD/ Music etc.
PHOTOBOOK: Thurs-Fri DRAFT PHOTOBOOK LAYOUT: FRI 2 FEB
You want to aim for a draft layout and hand in draft version of your essay before your Mock Exam day, then use that day to fine tune design and complete essay.
1. Write a book specification and describe in detail what your book will be about in terms of narrative, concept and design with reference to the same elements of bookmaking as above.
Narrative:What is your story? Describe in:
3 words
A sentence
A paragraph
Design: Consider the following
How you want your book to look and feel
Paper and ink
Format, size and orientation
Binding and cover
Title
Structure and architecture
Design and layout
Editing and sequencing
Images and text
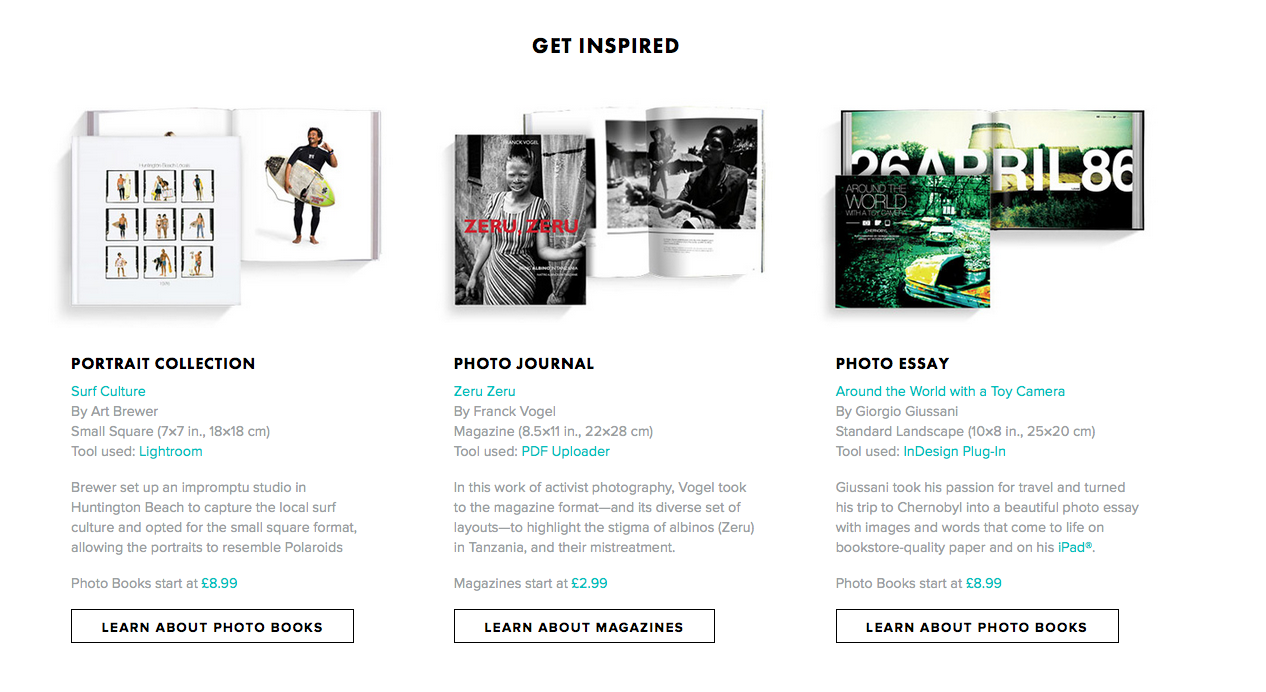
2. Produce a mood-board of design ideas for inspiration. Look atBLURB online book making website, photo books from photographers or see previous books produced by Hautlieu students on the table in class.
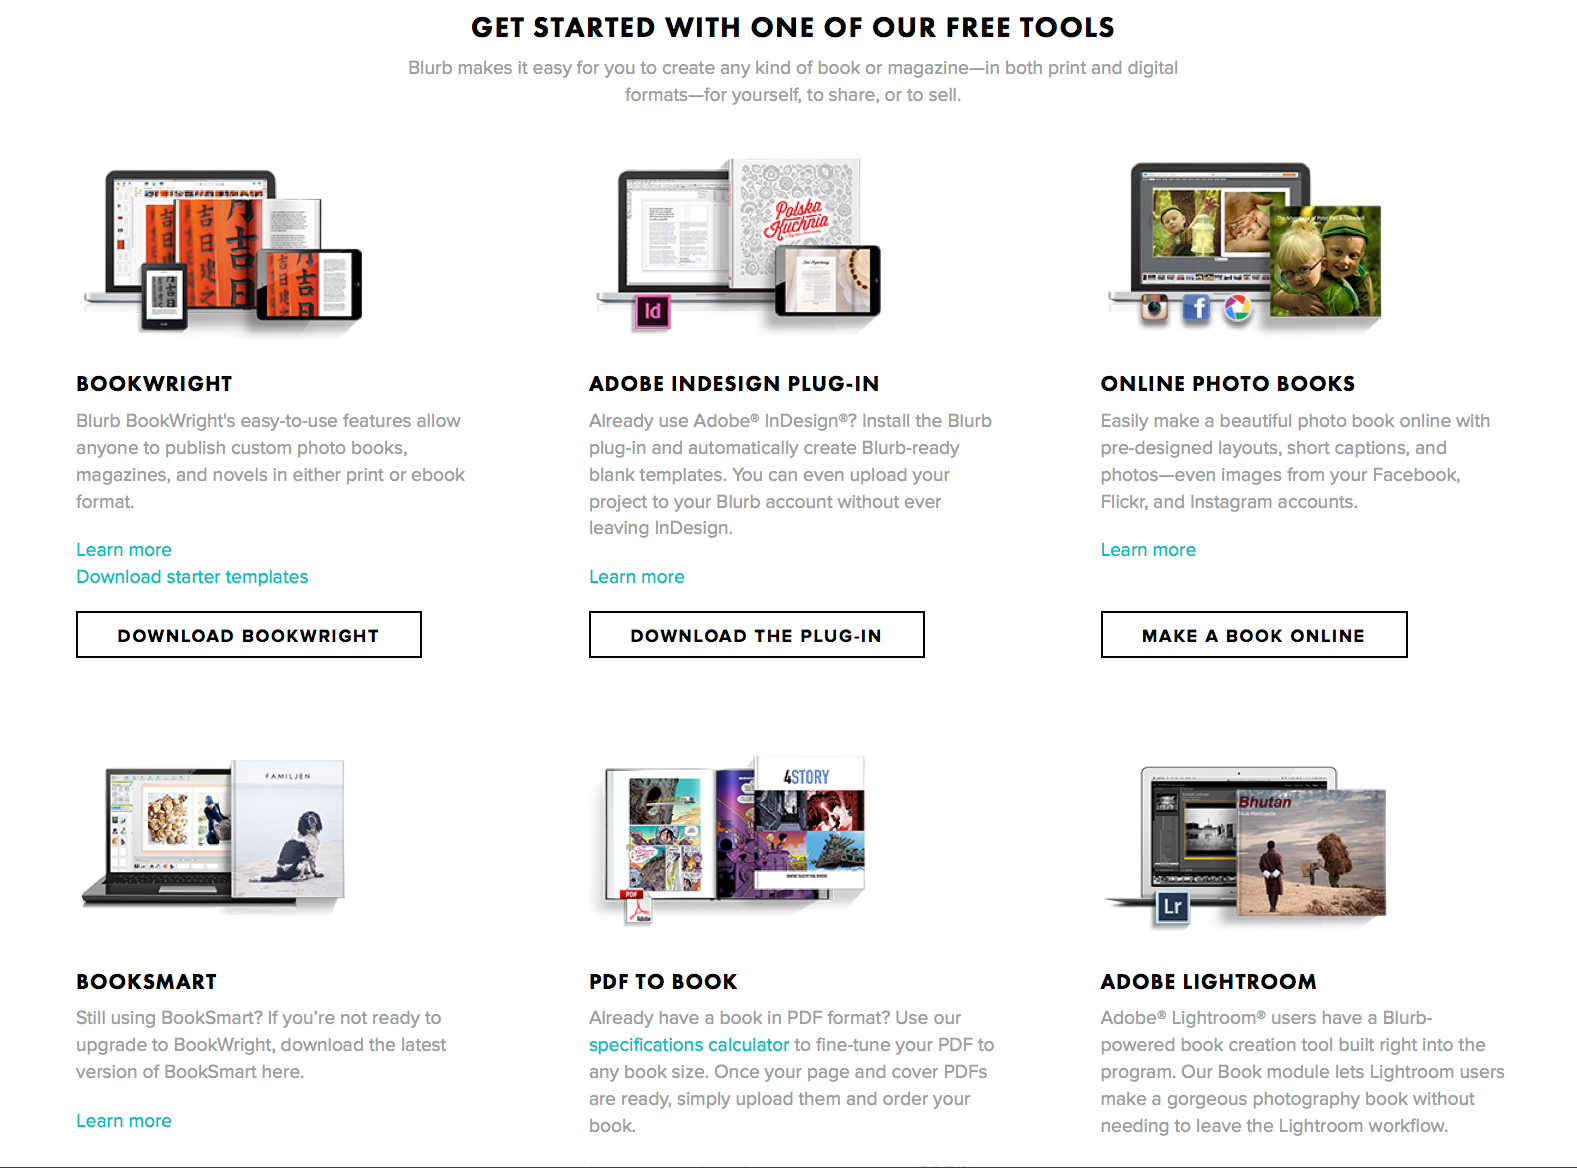
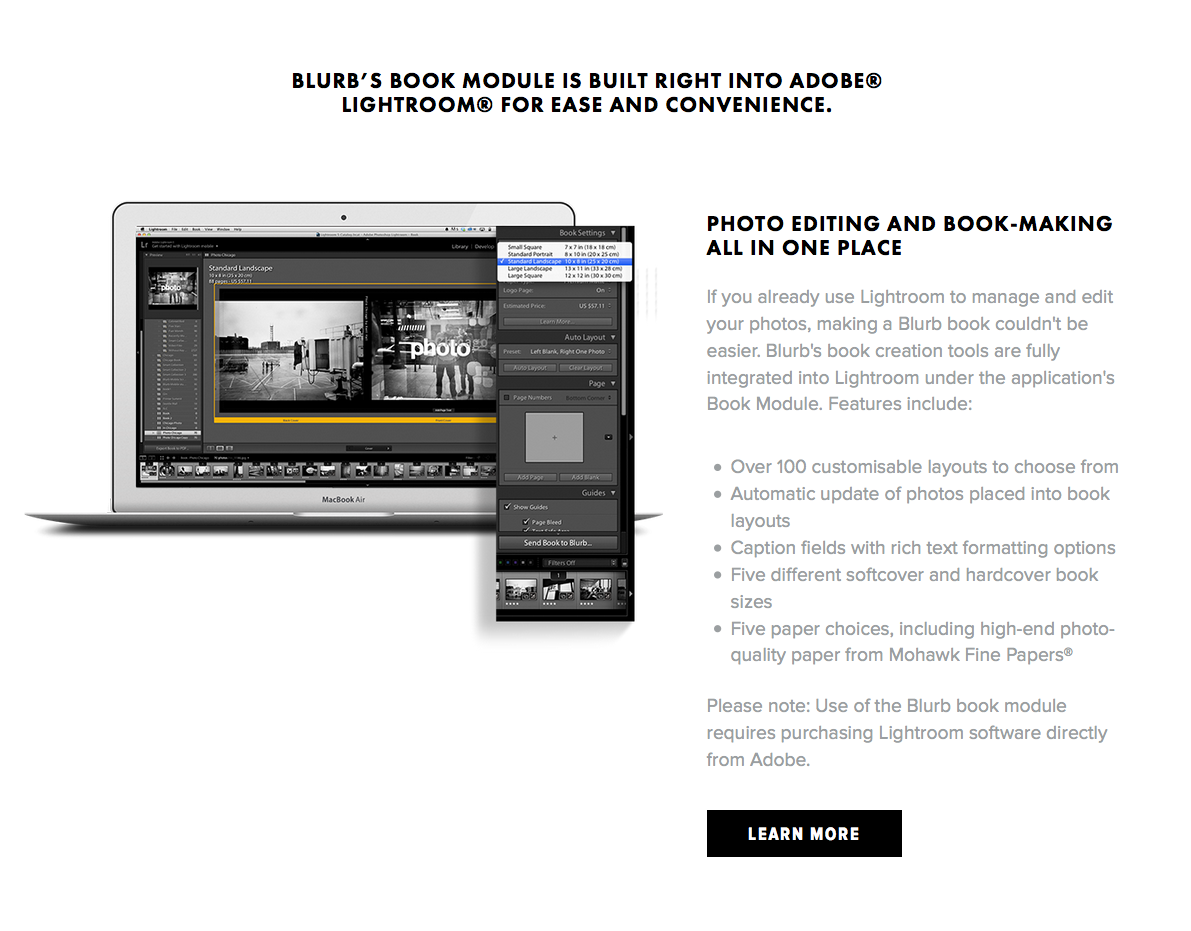
3. Create a BLURB account using your school email address. With Blurb you have different options on how you design your book:
a) Using Lightroom to design your book which is integrated with BLURB. Only for use on school computers, unless you have LR at home on your own laptop.
b) Download Bookwright via Blurb onto your own laptop and work offline at home and you can work indecently of school. Here you have full control of layout/ design features. Once completed, you upload photo book design to Blurb
c) Choose online option if you want to work directly online. Very limited layout/design options (not recommended!)
For those who wish to make their own hand-made photobook using Indesign follow the same steps as below in terms of documenting and annotating your design process. or if you want to customize your Blurb book see me for more details on how to do it.
4. Using Lightroom make a rough selection of your 40-50 best pictures from all shoots. Make sure you have adjusted and standardised all the pictures in terms of exposure, colour balance/ B&W, contrast/brightness etc. Produce blogpost from each shoot with selection of edited images following instructions below.
EDITING:
Save shoots in folder and import into Lightroom
Organisation: Create a new Collection from each new shoot inside Collection Set: PHOTOBOOK
Editing: select 8-12 images from each shoot.
Experimenting: Adjust images in Develop, both as Colour and B&W images appropriate to your intentions
Export images as JPGS (1000 pixels) and save in a folder: BLOG
Create a Blogpost with edited images and an evaluation; explaining what you focused on in each shoot and how you intend to develop your next photoshoot.
Make references to artists references, previous work, experiments, inspiration etc.
EXPERIMENTING:
Export same set of images from Lightroom as TIFF (4000 pixels)
Experimentation: demonstrate further creativity using Photoshop to make composite/ montage/ typology/ grids/ diptych/triptych, text/ typology etc appropriate to your intentions
Make sure you annotate process and techniques used and evaluate each experiment
EVALUATING: Upon completion of photoshoot and experimentation, make sure you evaluate and reflect on your next step of development. Comment on the following:
How successful was your photoshoot and experimentation?
Did you realise your intentions?
What references did you make to artists references? comment on technical, visual, contextual, conceptual?
How are you going to develop your project from here? – comment on new photoshoot, editing, experimenting.
What are you going to do next? – what, why, how, when, where?
5. Print a set of small work prints (4 to one A4 page) on the Laserjet, cut them up in guillotine and lay them out on the big white table for editing.
6. Decide on format (landscape, portrait) size and style of your photo-book. Begin to design your photo book, considering carefully, narrative, editing, sequencing, page spreads, juxtaposition, image size, text pages, empty pages, use of archival material etc.
7. Add your illustrated essay at the end of your photo book, including title, any captions (if needed), bibliography, illustrations of artists work (incl data) and images of your own responses. Think carefully about font type, size and weighting.
8. Produce screen prints of layout ideas as you progress and add to Blog for further annotation, commenting on page layout/ narrative/ sequencing/ juxtaposition of pictures.
9. Make sure all blog posts are finished including, research, analysis, experimentation, annotation and an evaluation of final outcomes.
9. FINAL PRINTS: Select a set of 5-6 photographs as final outcomes and evaluate – explaining in some detail how well you realised your intentions and reflect on what you have learned in LOVE & REBELLION project.
10. Save final prints in our shared PRINT folder (no later than 15:00 end of your Mock exam day) in a high-resolution (4000 pixels on the long edge.) Save each images in your name i.e. first name_surname_title_1, and 2, 3 and so on.
M:\Departments\Photography\Students\Image Transfer\PRINTING\A2 Coursework Prints Spring 2024