
Audio
To begin with, we uploaded our recordings of the narrator speaking onto the adobe audition software, putting the audio on the first line to separate it from future sound effects we planned to add. Our next step was to merge the different sections of our recordings together in such a way that they would blend together smoothly, making it seem as though it was all one audio to begin with.
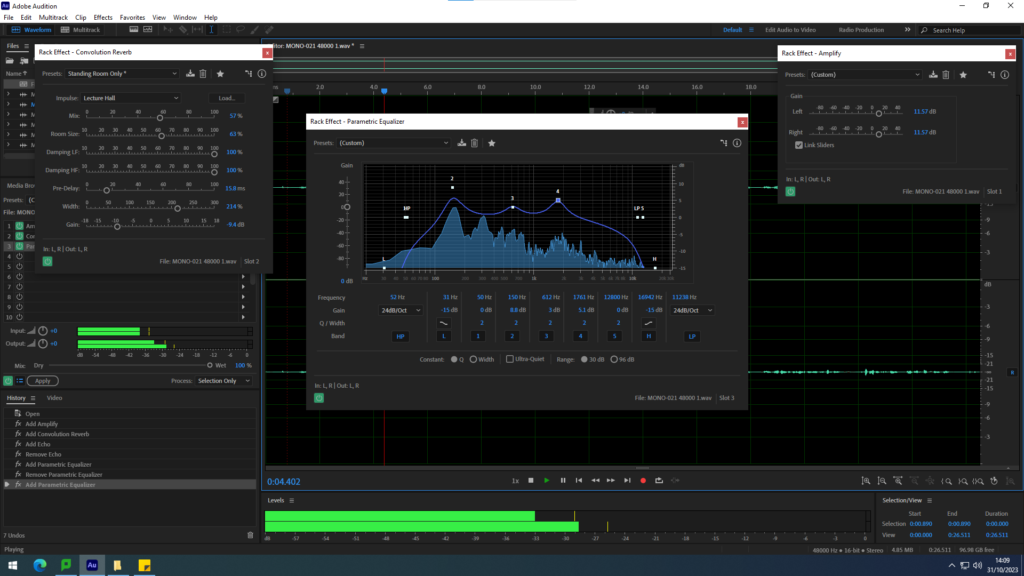
Afterwards, we continued to edit the recordings by adding in effects. Firstly, we amplified the audio to increase the sound quality of the narrator’s voice before adding the parametric equalizer to adjust the volume and pitch. Lastly, we used the convolution reverb effect to add a slight echo to her voice, adding a slight sense of distance.

In order to add sound effects and music to our audio, we downloaded them off of the website: https://www.zapsplat.com/
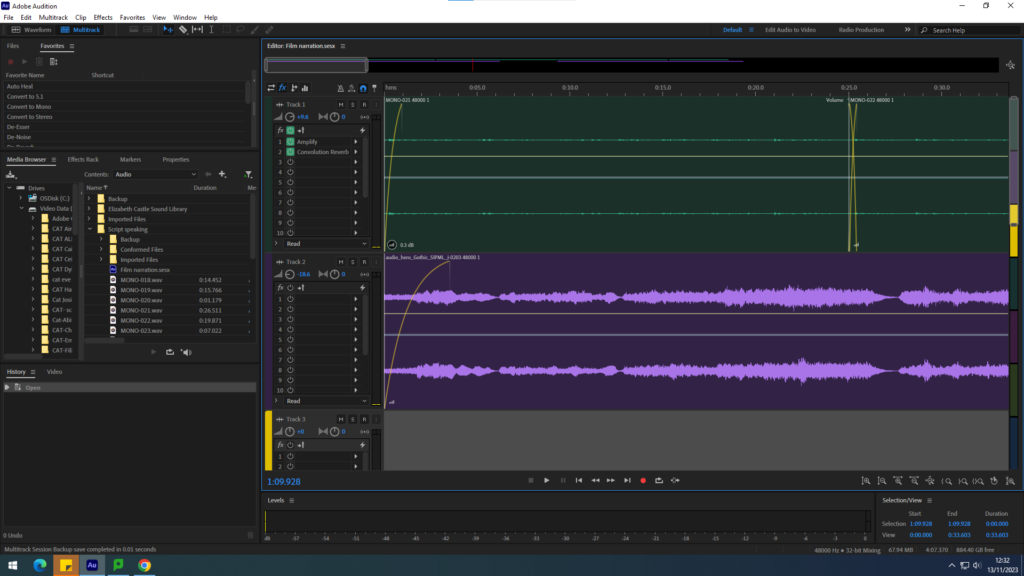
Our next course of action is to input the music. We did this by importing our downloaded music, opting for a dark orchestral style to create a somewhat unsettling atmosphere. The music was placed onto the second line where we then adjusted the volume of it as well as changing the song based on the scene our narrator is talking about to help immerse the viewer.
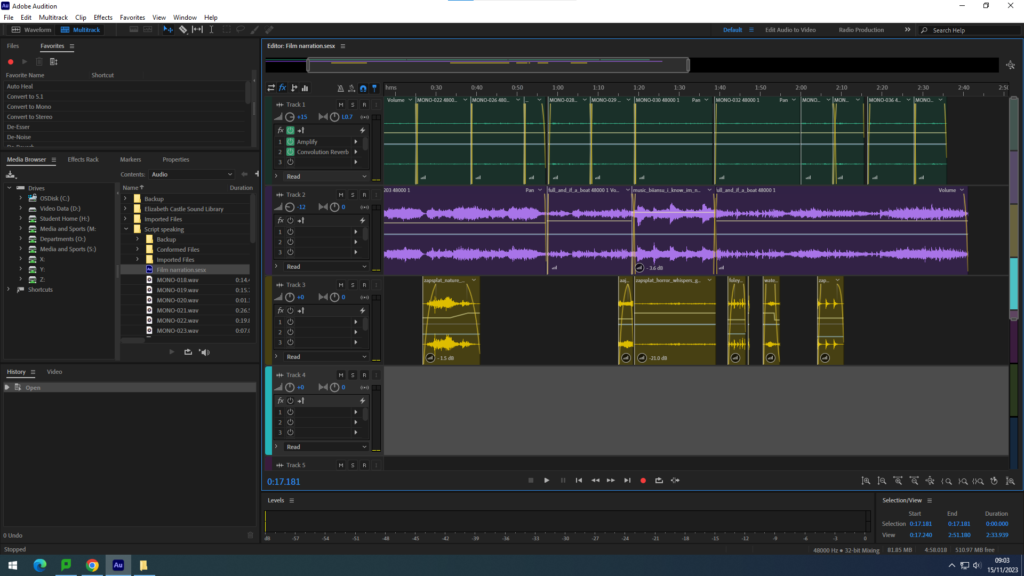
Lastly, we added in sound effects onto the third line. The sound effects help to create a greater sense of realism, producing another way to immerse the viewer. We made sure to include effects relating to the storyline, in order to help visualise what the narrator is reading out.
Film
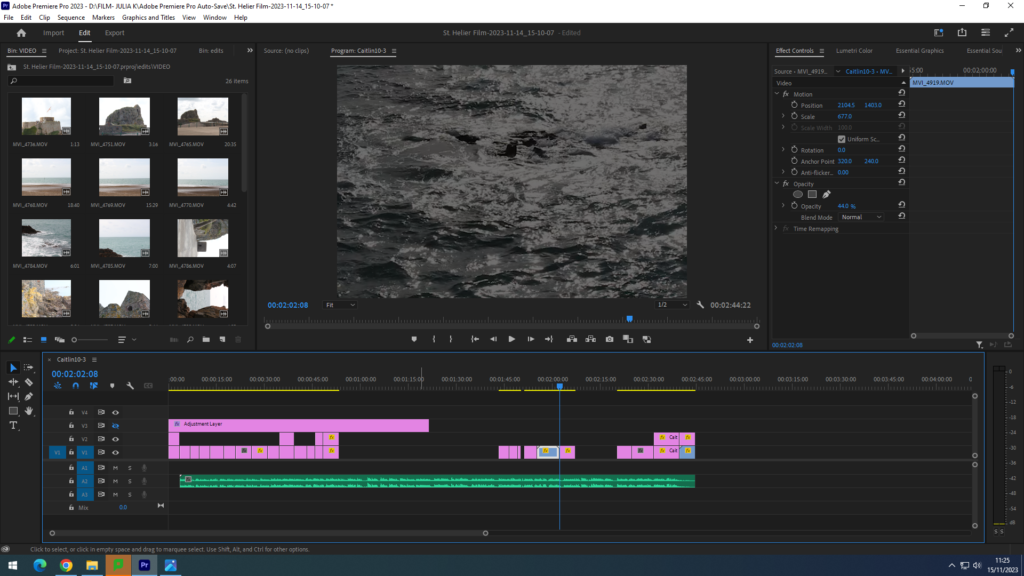
Firstly, we uploaded the photos and videos, creating two bins, from which I could drag in the required media. We firstly put the photos we required in a rough order (taking into consideration the audio that would be added). The pink line is the media we started to put together in our film. After creating a rough sequence, we imported the audio file (the green row).
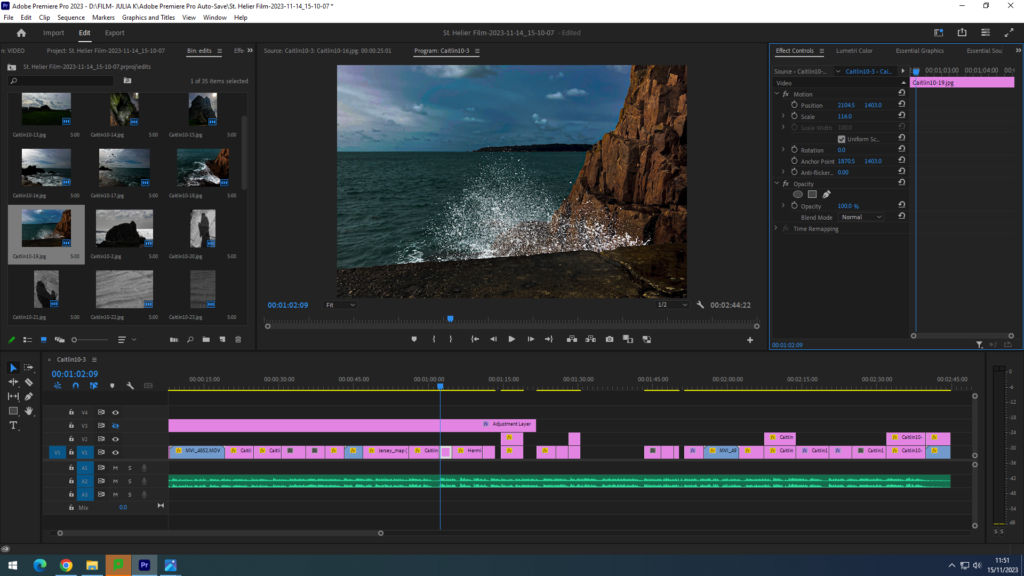
After importing the audio, we began to match up the media to the audio with accuracy, changing the duration of each part. We decided that the audio was the main aspect of our film, therefore the pictures and videos were simply a visual aim for the narration of St. Helier’s life. Every sound effect (for example: thunder rumbling in the distance as a way of presenting the father’s anger) played a key role in the sequence of the photos, since they had to link up with what was being said in the narration. I also used the ‘Lumetri Colour’ effect tool to enhance the look of the photos, for example changing the contrast and saturation of the colours.
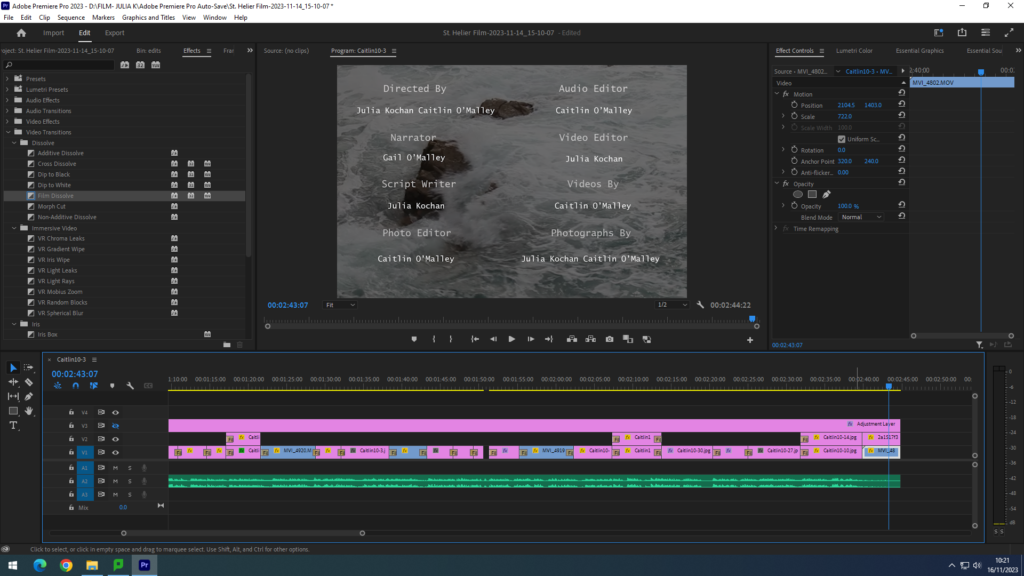
After the layout of the film was finished, we worked on adding text and transitions to further enhance the film. Firstly, we added a title using the text tool, naming our film “The Life of Saint Helier”, choosing a simple title. We also added credits (as seen in the screenshot above) to the end of our film, mentioning the people who worked on the film, once again using the text tool. For the filter, we wanted to keep it simple and used the ‘Film Dissolve” video transition to help the movie flow better. I also added them to the title so that it would appear after a second of the primary frame showing. I added the filters throughout the entire film, causing each frame to merge with the other.
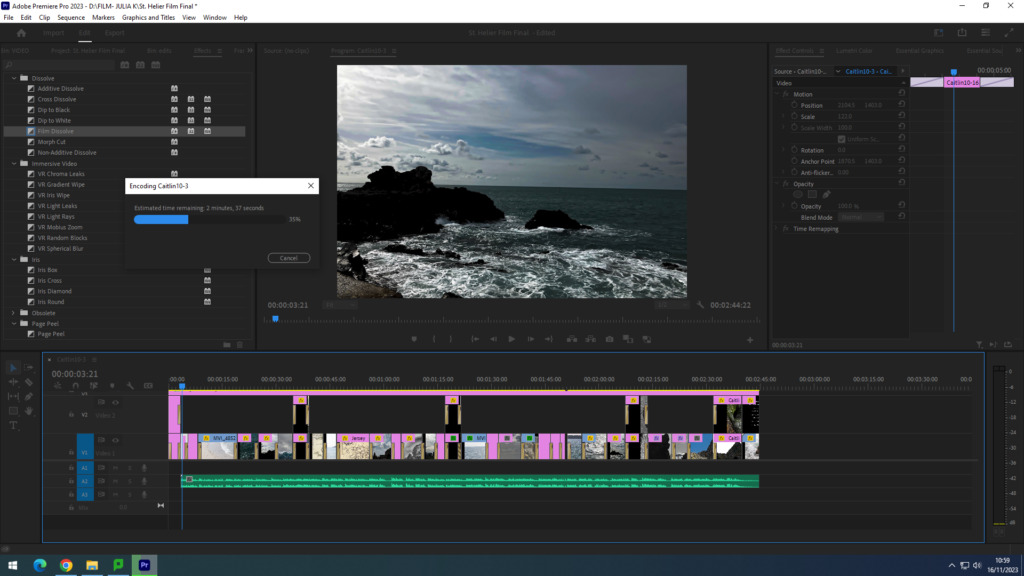
Finally, once everything was in place, I shrunk the overall layout and look a screenshot to show the overall look of the film in Adobe Premiere.