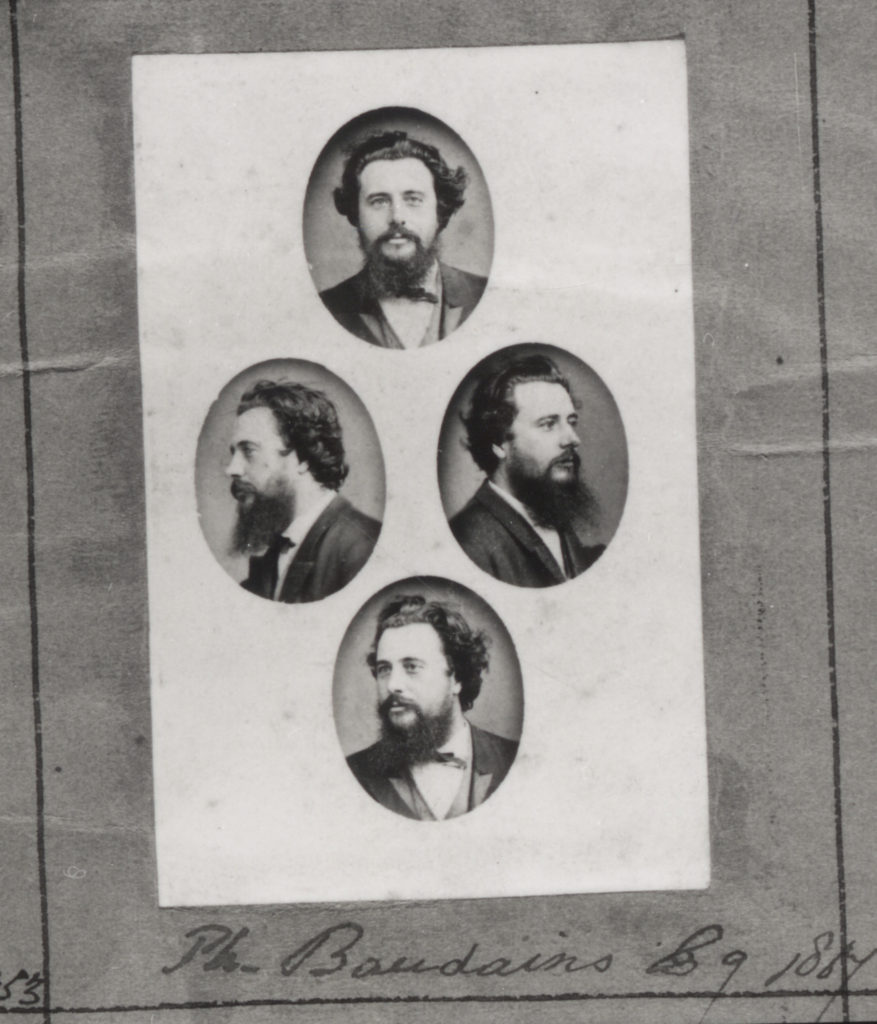
Coming back from studying “the origin of photography” to Henry Mullins, who created over 9,000 portraits of islanders from 1852 to 1873. This is quite impressive as at a time when the population was around 55.000.
His portrait were printed on a carte de visite as a small albumen print, (the first commercial photographic print produced using egg whites to bind the photographic chemicals to the paper) which was a thin paper photograph mounted on a thicker paper card. The size of a carte de visite is 54.0 × 89 mm normally mounted on a card sized 64 × 100 mm. In Mullins case he mounted his carted de visite into an album. Because of the small size and relatively affordable reproducibility carte-de-visite were commonly traded among friends and visitors in the 1860s. Albums for the collection and display of cards became a common fixture in Victorian parlors. The immense popularity of these card photographs led to the publication and collection of photographs of prominent persons.
as well as a full body, in a sitting position photograph, what henry Mullins also did is an addition to the photograph, he presented 4 different headshots in a diamond cameo, which got it’s name because of the layout of the images creating a diamond shape. these headshots were specifically in order of: looking straight at the camera, left side of the face looking to the left, right side of the face, looking Right and a 1/3rd of the face looking away from the camera. the headshots were originally shot in the same format as a large photograph next to them, however what henry did is bleach the rest of the body when developing them, and cut out the unnecessary bleached photograph, so that the headshots are the only ones remaining. he then cut out 4 different slots in a blank card, and the oval cut outs laid on top of the photographs.


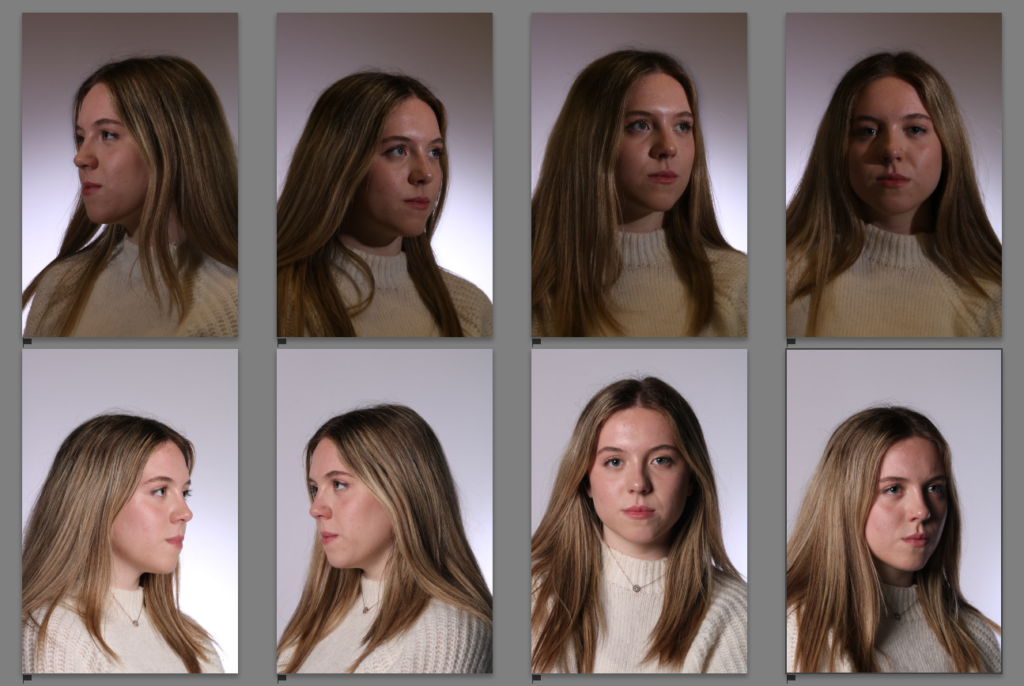
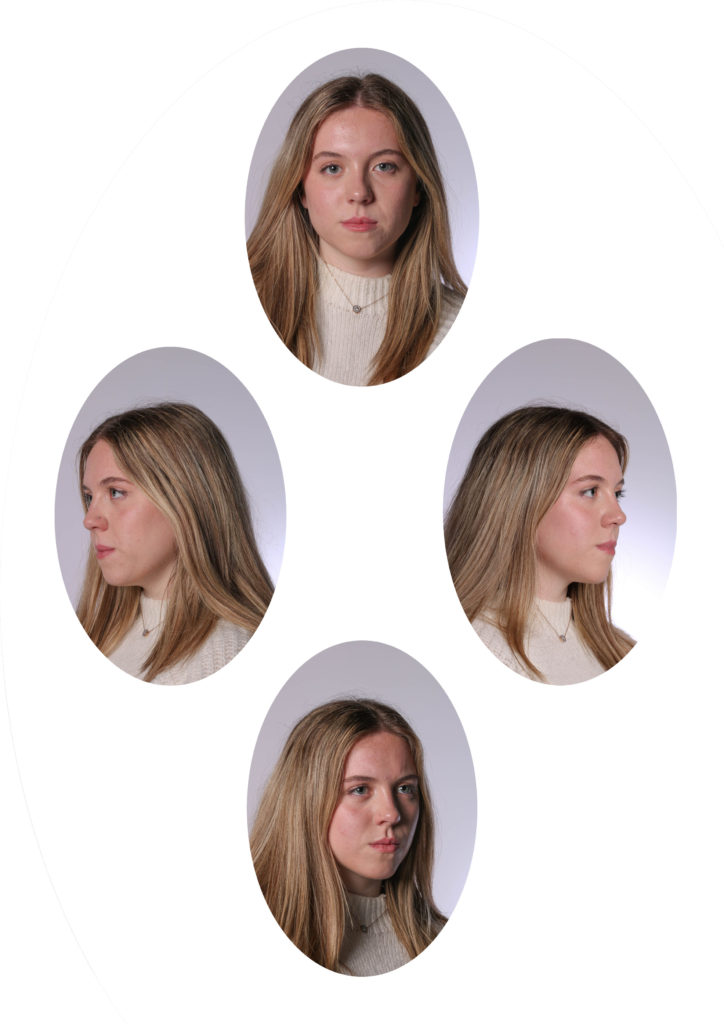
I have arranged a photoshoot to try and re-create diamond cameo technique, however I did it digitally where as originally it would be done by physically bleaching the photograph.


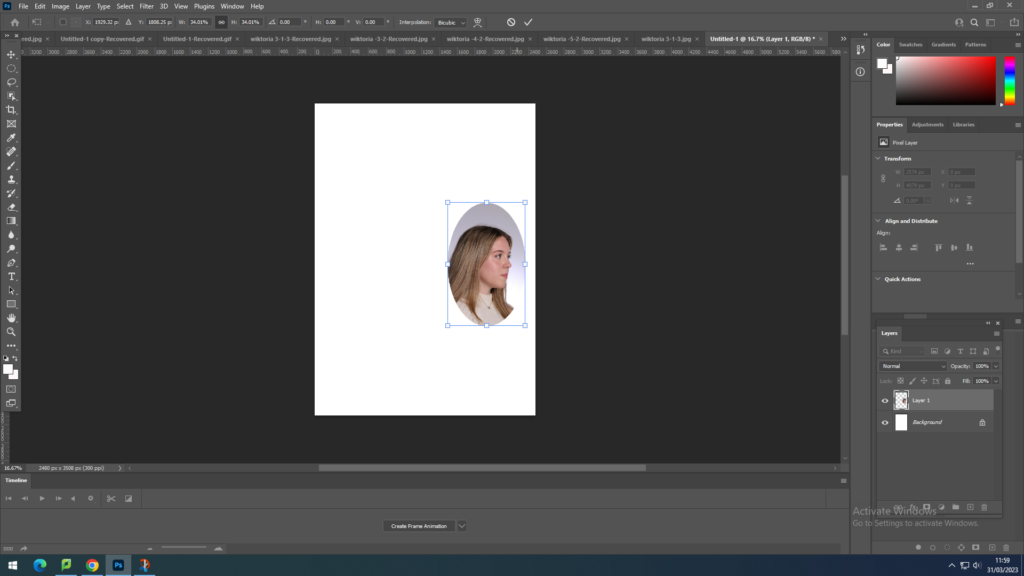
To create a virtual diamond cameo arrangement, I have imported the selected pictures into photoshop. From then by selecting a single photograph, by using elliptical marqee tool I have marked out the area, which meant it was selected in an oval shape.

I needed to convert the background to layer from the selected oval, I had to right click and select inverse + delete.

Pressing CTRL + C an CTRL +V. I have copied and pasted the image onto an opened A4 blank sheet.

Using CTRL + T I was able to shrink the image and arrange it where I wanted it on an A4 Document.

Final Results

