Rembrandt Lighting
It is a lighting technique commonly used for portrait photography. This type of lighting was named after Rembrandt Harmenszoon van Rijn (a Dutch painter). It is a way of lighting a face so that an upside-down light triangle appears under the eye(s) of the subject.


In the early 20th century, a Hollywood director named Cecil DeMille introduced the spotlight and Rembrandt lighting was one of the most famous effects achieved by this. It became a popular way of capturing celebrities as it portrayed them in an interesting and dramatic way.


This technique is a perfect way of creating a dramatic photo as it instantly creates deep shadows and contrast. The upside down triangle draws the views attention to the eye, the key area of the face in a portrait.
How to Create a Rembrandt Lighting Setup
Light: The position of the light source is vital in creating different lighting techniques. Rembrandt lighting is created by the single light source being at a 40 to 45-degree angle and higher than the subject. Use can use both flashlights and continuous lights.
Lens: A 50mm works really nicely for portraits and will give a nice depth of field if you’re shooting at a shallow aperture. But a 35mm will give you a wider point of view and is great to fit more of the body in of your subject.

Butterfly Lighting
Another popular studio lighting technique. Its name comes from the butterfly-shaped shadow that forms under the nose because the light comes from above the camera. You may also hear it called ‘paramount lighting’ or ‘glamour lighting’.


It is a common studio lighting technique due to it being very flattering way of capturing the model. The shadows make the cheekbones and jawline appear sharper, making the face look thinner and more defined.

How to Create a Butterfly Lighting Setup
Lighting: Butterfly lighting requires a key light that can be a flash unit or continuous. If continuos, it can be artificial or natural. In other words, you can use strobes, speedlights, LEDs or even the sun.
A butterfly lighting effect refers to the setup and not to the quality of light – it can be soft or hard light depending on the effect you want.

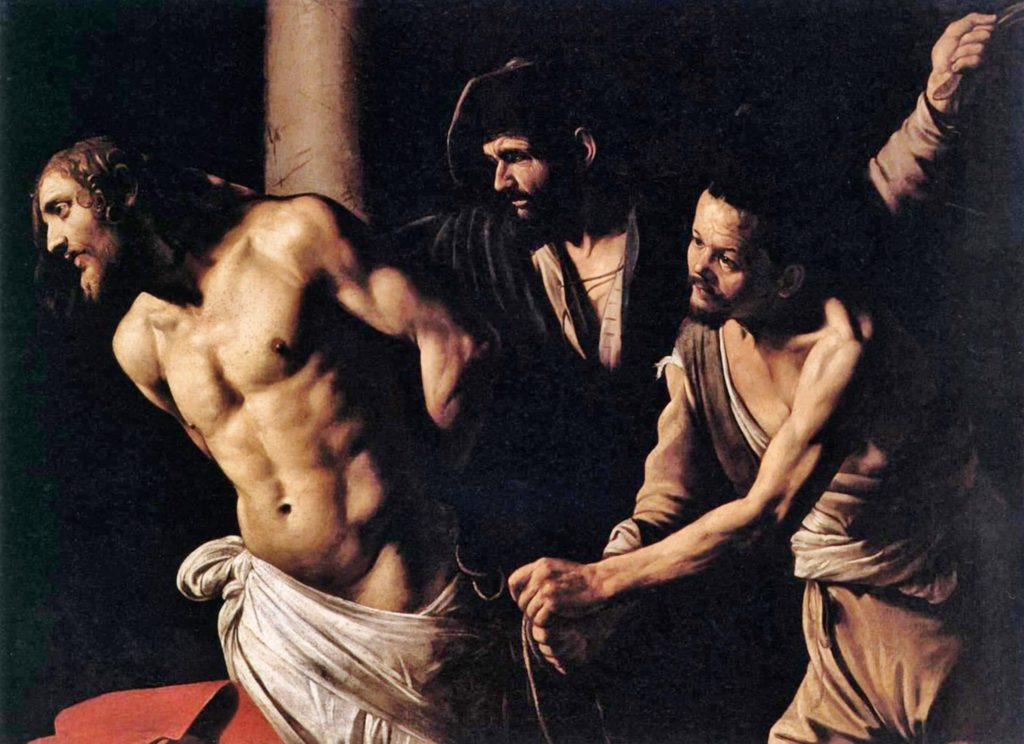
Chiarascuro
It is Italian for lightdark and is the use of high and strong contrasts between light and dark tones. The concept of chiaroscuro emerged during the 15th century but it became truly developed during the 16th century in Italy and Flanders during the era of the Renaissance, becoming a popular technique of art.

The painting consists some deep contrast between dark shadows and highlights, creating this defined, dramatic look.

This can recreated in photography, using a single light to only illuminate certain areas of the face/ body.
How to Create the Chiarascuro Effect

A single light is used to only lighten the most prominent areas of the face, creating a dark and high contrast look. A reflector can be used to illuminate areas of the face that aren’t originally lightened by the key light.
