Studio shoot- exploring lighting

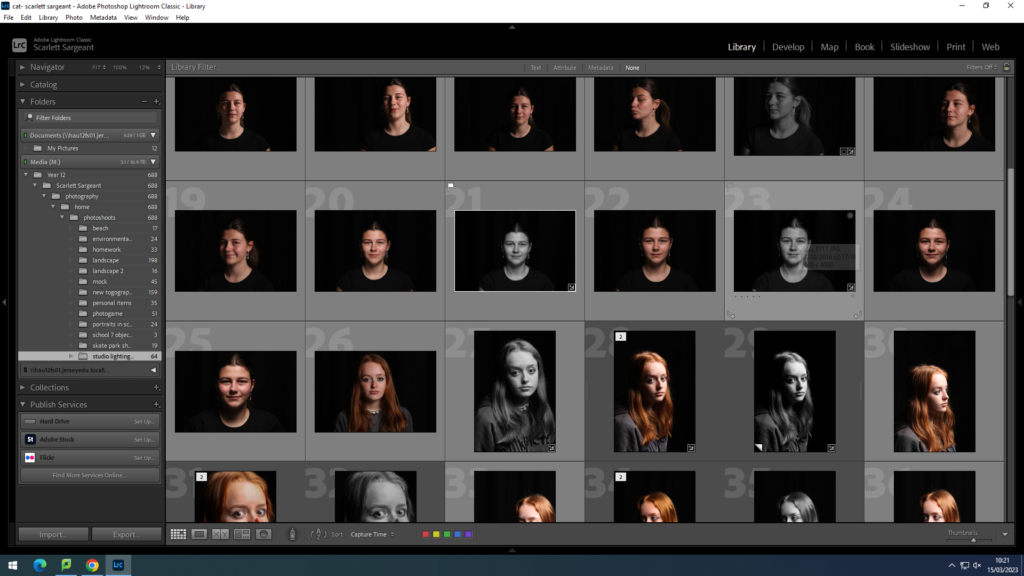
Contact sheet:

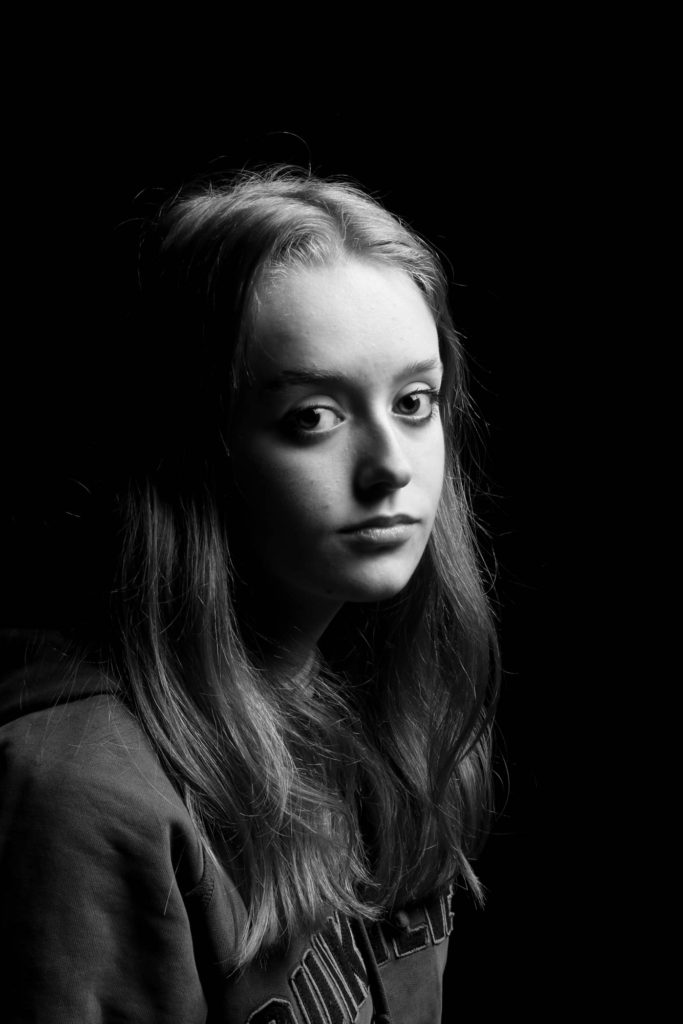
Rembrandt Lighting:

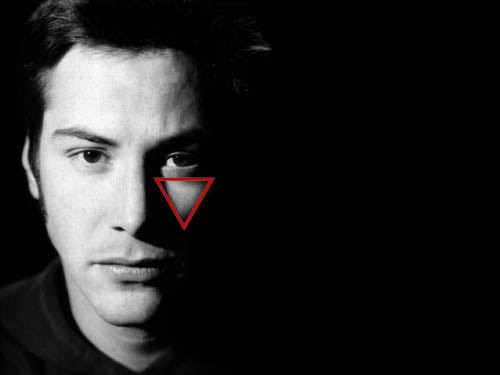
In the early 20th century in Hollywood, spotlights were introduced which created Rembrandt lighting. Rembrandt lighting is named after Rembrandt Harmenszoon van Rijn, a Dutch painter.

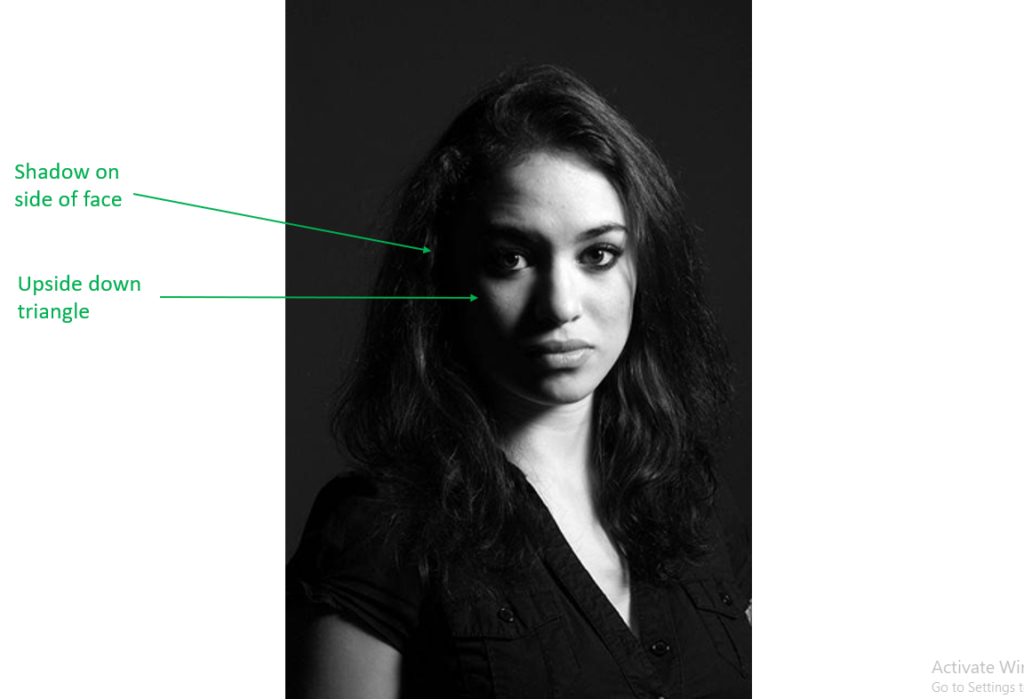
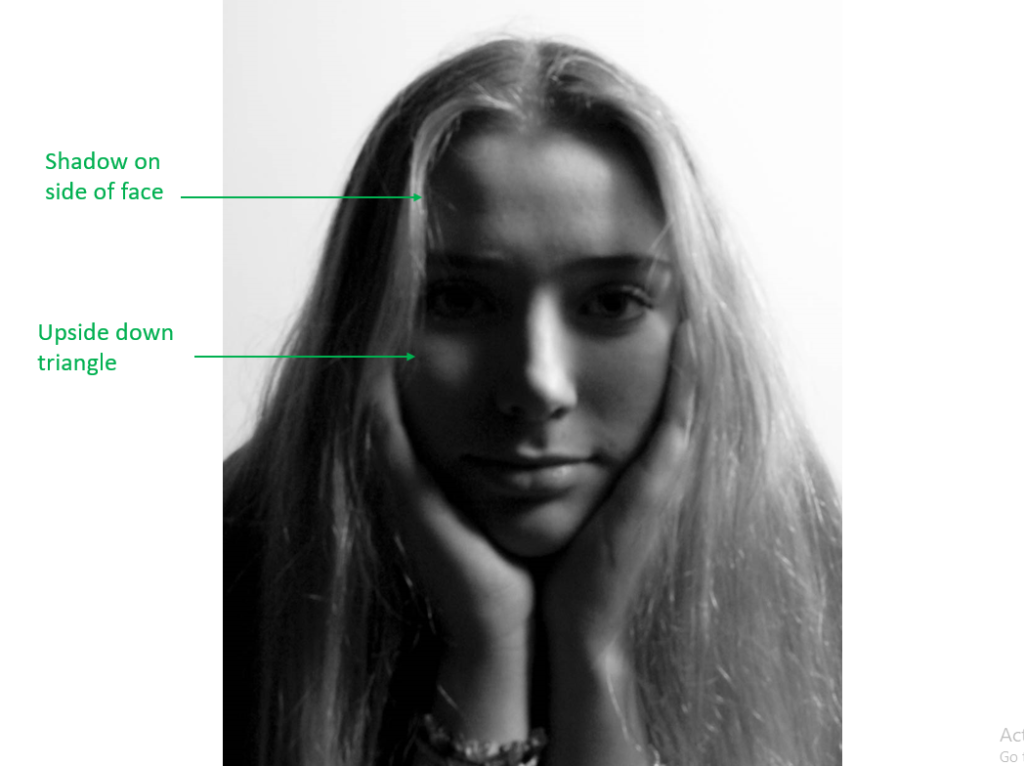
It lights the face up so an upside down triangle appears under the subjects eye. Rembrandt lighting draws the viewer to the image as the triangle adds emphasis to the subject. It can make the portrait appear more dramatic which will attract the viewer to the portrait.

set up

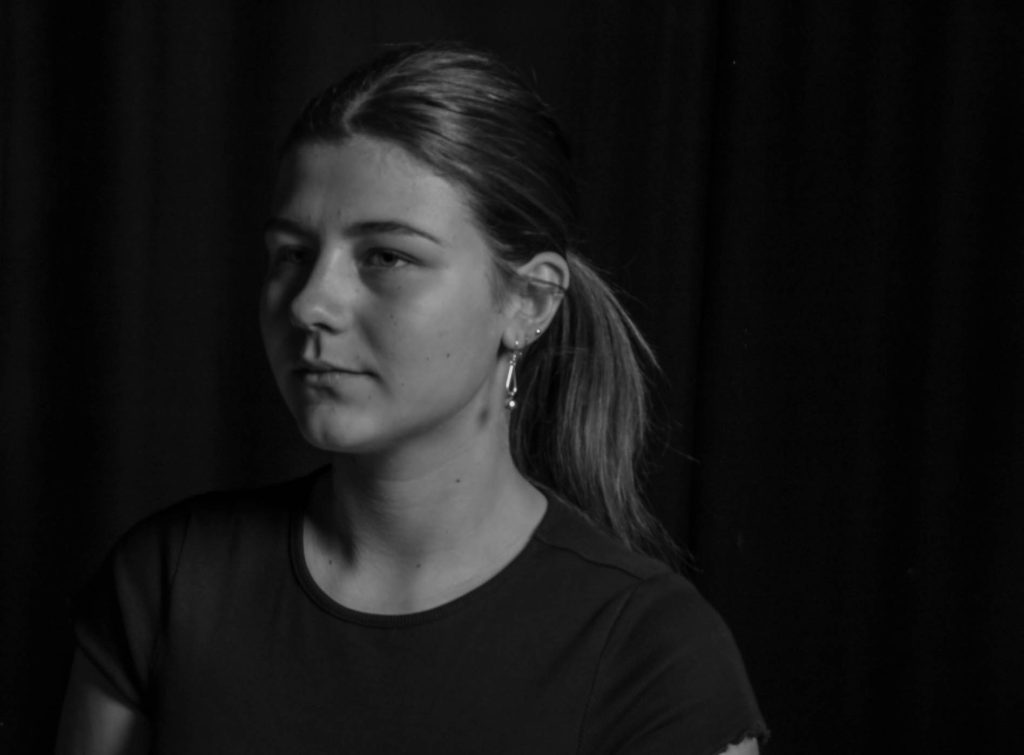
Above is my attempt at Rembrandt lighting technique. In my opinion this isn’t a bad attempt as you can see the triangle under the subjects eye. However, you can’t really see her left eye. If I angled the reflector in a different way the light would be highlight her eye which would improve the overall outcome.

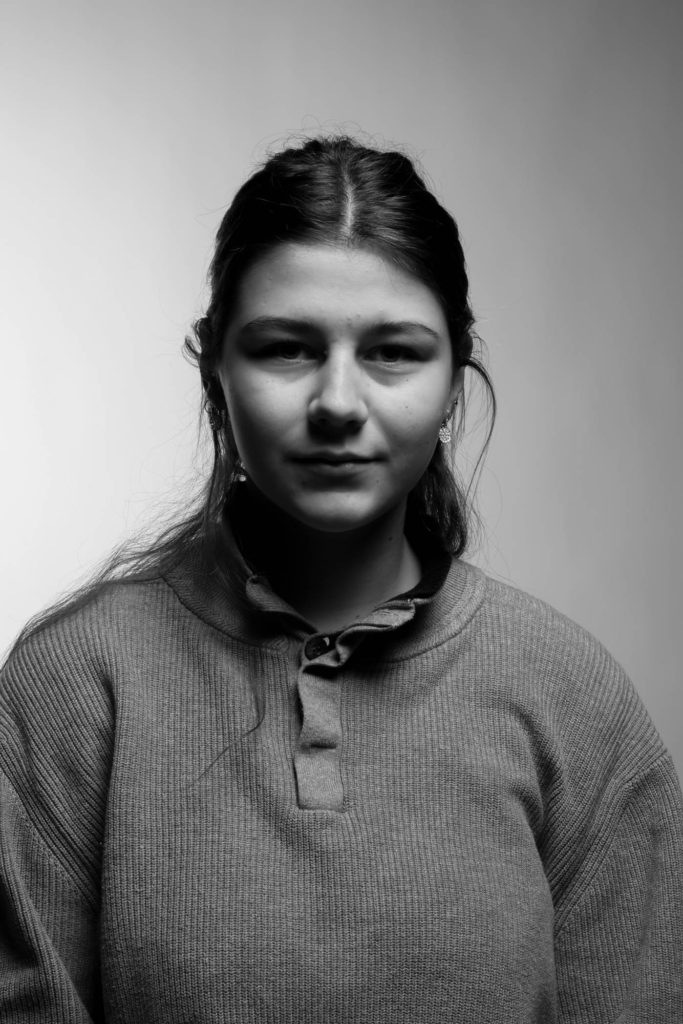
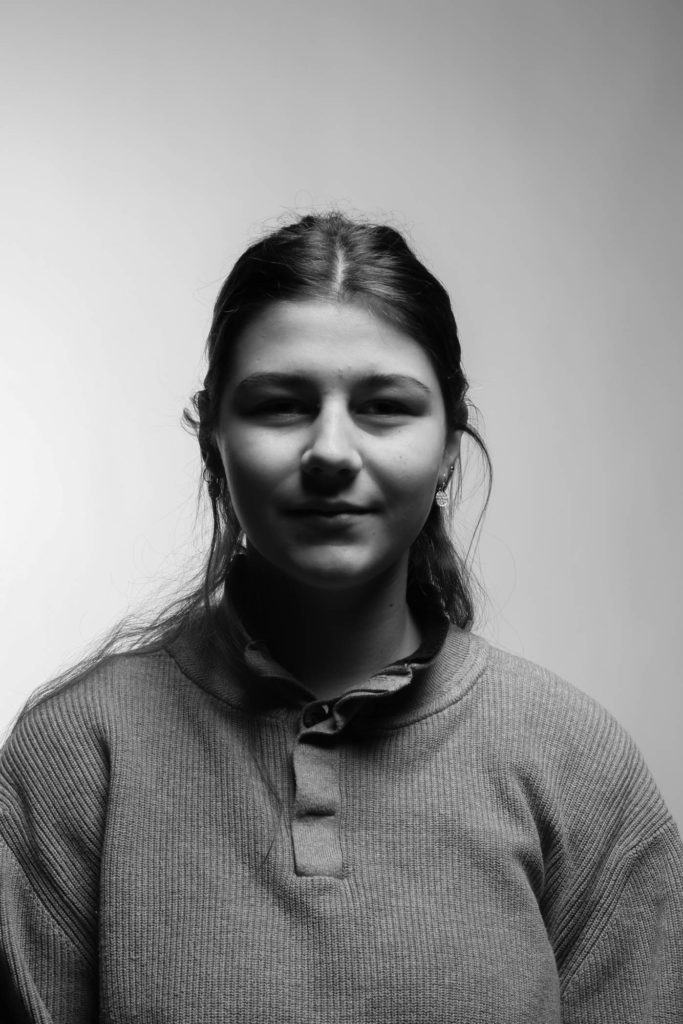
Butterfly Lighting:

Butterfly lighting was invented by Marlene Dietrich, a German silent film actress, in the 1930’s after it was presented on a film.

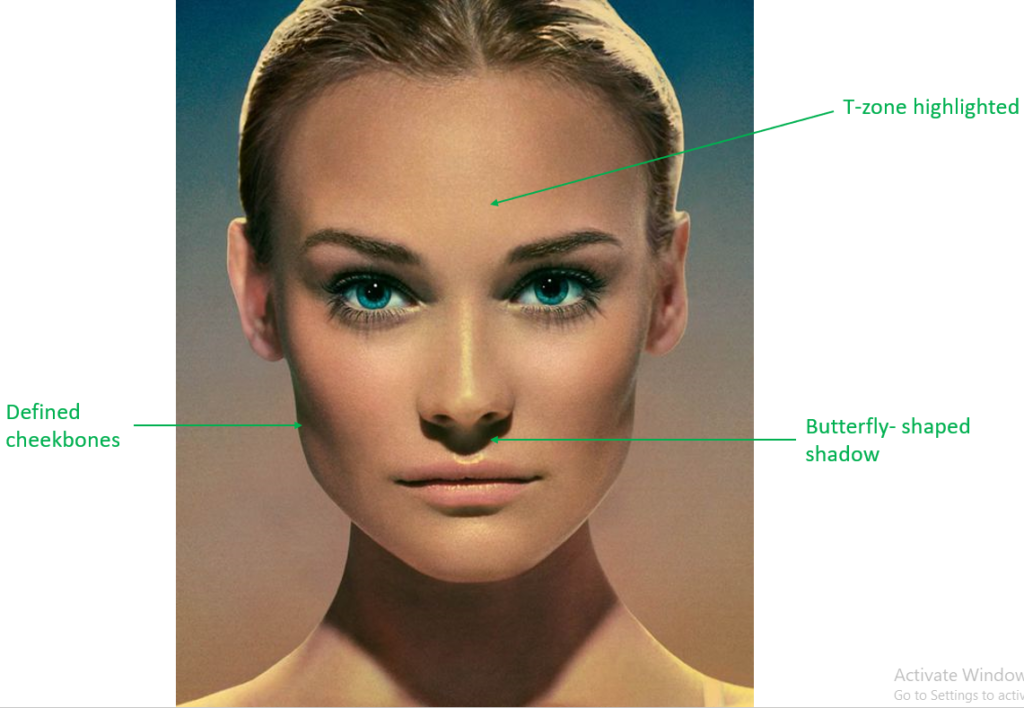
Butterfly lighting gets its name from the butterfly-like shadow under the subjects nose. Butterfly lighting makes the model look thinner as it highlights their cheekbones and jaw line.

set up

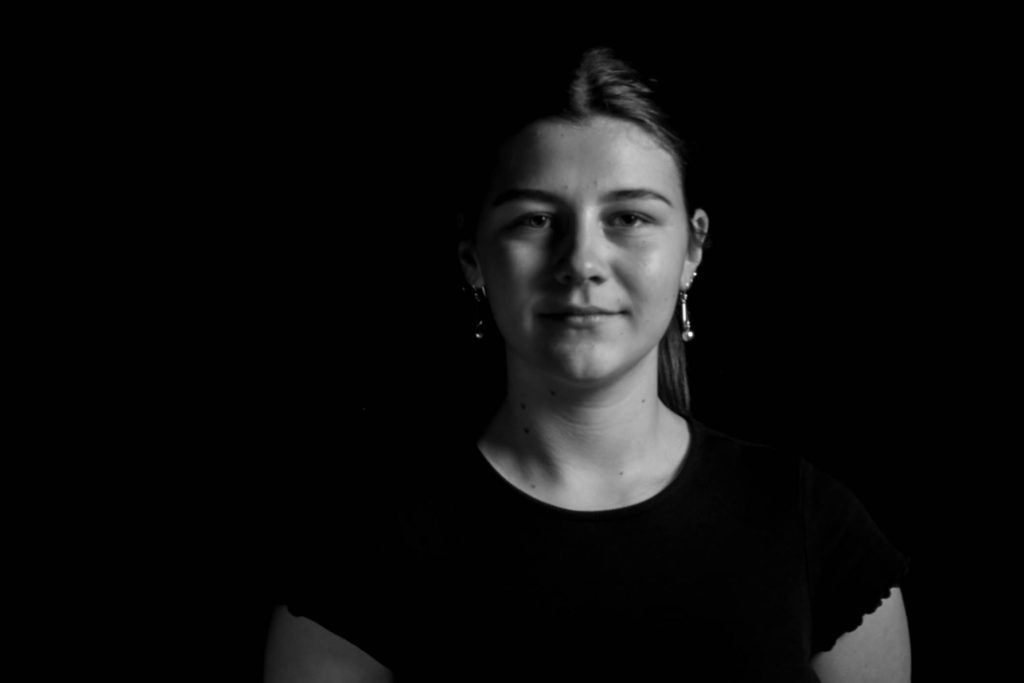
Above is my attempt at the butterfly lighting technique. Overall I don’t think it’s a bad attempt as you can see the butterfly shadow under her nose and her left cheekbone is defined. However, I think that if the subject was on a straight on angle looking directly at the camera then the final outcome would be superior as the right cheekbone would be more visible.

Butterfly Lighting

Butterfly lighting, also known as paramount or glamour lighting, is a common type of lighting used in a studio for portraits. It is called butterfly lighting because of the shadow that forms on the nose looks like a butterflies wings. The lighting comes from above the camera.

Butterfly lighting is was to photograph classic Hollywood stars. It highlights cheekbones and neck and creates shadows below them which makes the model look thinner.

You can use flash light connected to the camera or you can use a continuous light. It can be natural or artificial, soft or hard it depends on the result you would like.

You can also use reflectors to bounce the light back up and soften the shadows.

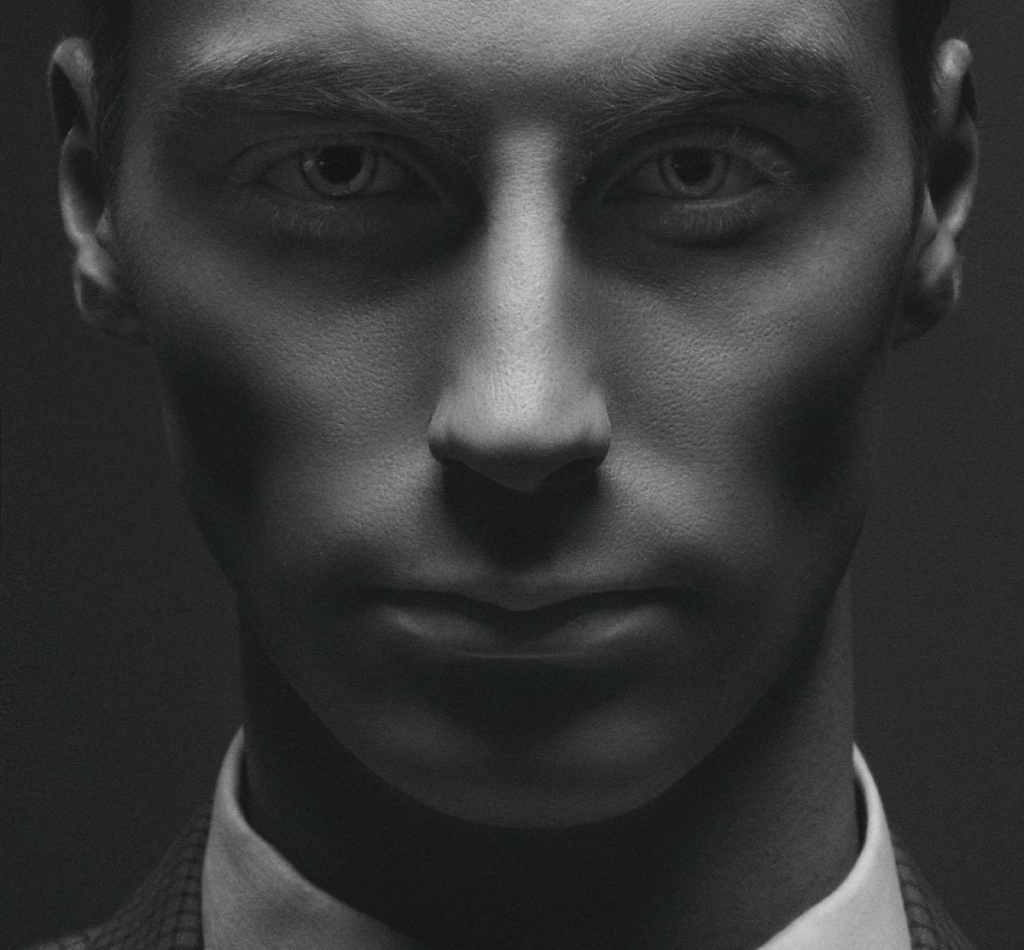
Chiaroscuro Lighting

In filmmaking, chiaroscuro is a high-contrast lighting technique. Chiaroscuro uses a low key lighting setup, where a key light is used as the sole light source to achieve dark backgrounds with starkly lit subjects. It was first introduced during the Renaissance. It was originally used while drawing on coloured paper though it is now used in paintings and even cinema.

The term describes the striking use of the light and shade contrast in painting, drawing or print. The main principle of chiaroscuro is that solidity of form is best achieved by the effect of light falling on it, allowing the shading to give two-dimensional figures a sense of volume.

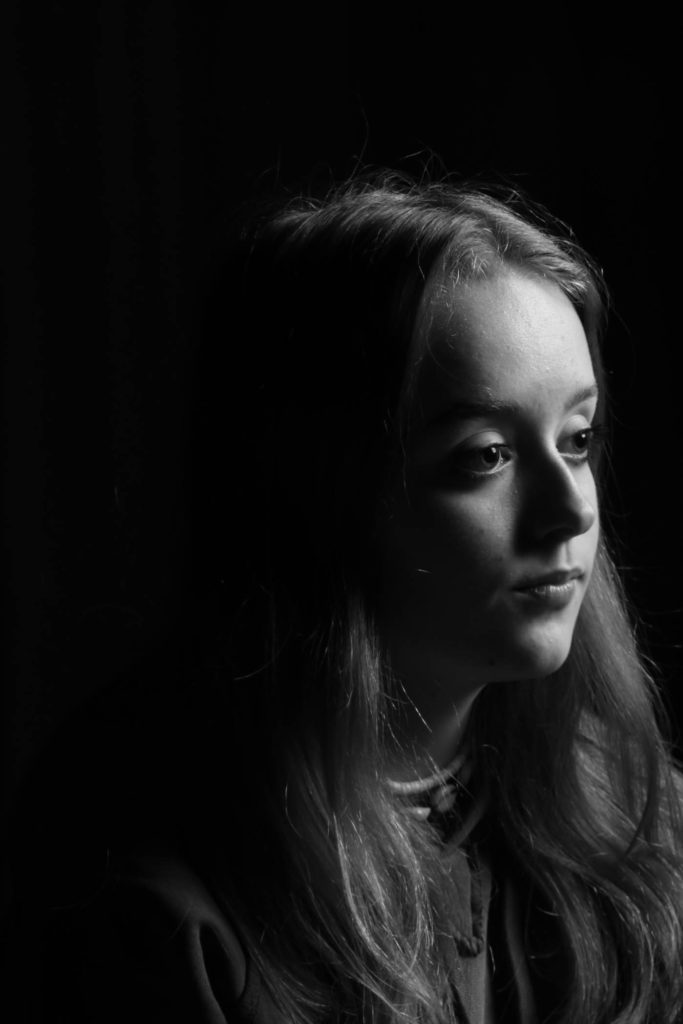
Chiaroscuro in photography: Chiaroscuro using one key light and a variation using a reflector that reflects light from the key light back onto the sitter.

CHIARASCURO LIGHTING

Chiaroscuro photography is a style of black and white photography that uses light and shadow to create dramatic effects. It’s a great way to communicate a feeling or mood for your photos.

It’s sometimes called “high-contrast” photography, the word comes from the Italian words “Chiaro” (light) and “scuro” (dark). Chiaroscuro photos often involve contrasts between light and dark, but they can also include other kinds of contrasts, like lines or shapes that contrast with each other. They can be simple or complex they just have to convey the idea behind them enough for the viewer to understand it.

Set up:

Butterfly Lighting

Butterfly lighting is a lighting pattern used in portrait photography where the key light is placed above and pointing down on the subject’s face. This creates a dramatic shadow under the nose and chin that looks like a butterfly.

Butterfly lighting is used for portraits. It’s a light pattern that flatters almost everybody, making it one of the most common lighting setups. Butterfly lighting was used to photograph some of the most famous stars from classic Hollywood, and that’s why it’s also called Paramount lighting.

It is used for taking flattering, glamorous portrait photos. The lighting is soft on the face. It forms a butterfly-shaped shadow under the subject’s nose, which is the source of the name. It is ideal for portraits as it highlights the subject’s main features, like the nose and cheekbones.

Lighting: Butterfly lighting requires a key light that can be a flash unit or continuous. If continuos, it can be artificial or natural. In other words, you can use strobes, speedlights, LEDs or even the sun.

A butterfly lighting effect refers to the setup and not to the quality of light – it can be soft or hard light depending on the effect you want.

Rembrandt Lighting

Rembrandt lighting consists of a single light source placed on a 45 degree offset from the subject, about 5 feet away. Positioned roughly two feet higher than eye level, the light source is angled slightly downward and hits the side of the face that is farthest away from the camera. It creates a triangle on the side where the shadow is.

Rembrandt lighting is used to create a mysterious or moody portrait. The viewer’s attention should be drawn to the triangle of light on the subject’s cheek. Typically this lighting was used for portrait subjects with round or full faces because it creates a slimming effect.

How to Create a Rembrandt Lighting Setup

Light: Lighting styles are determined by the positioning of your light source.  Rembrandt lighting is created by the single light source being at a 40 to 45-degree angle and higher than the subject. Use cans use both flashlights and continuous lights.

Lens: Use a 35mm or 50mm if space is at a premium – or if you’re looking at including more of the subject than just the head and shoulders. A 50mm works really nicely for portraits and will give a nice depth of field if you’re shooting at a shallow aperture. But a 35mm will give you a wider point of view and is great to fit more of the body in of your subject.

Where does it come from?

Rembrandt lighting takes its name from the famous Dutch painter Rembrandt. He was a master of the chiaroscuro technique. And he often used this kind of light in his paintings, particularly in his self-portraits. Rembrandt loved to paint himself with this kind of light.

BUTTERFLY LIGHTING

Butterfly lighting is a popular lighting technique in portrait photography that creates a soft and flattering effect on the subject’s face. This technique is named after the butterfly-shaped shadow that is created under the subject’s nose. It is a pattern where the key light is placed above and directly centred with a subject’s face. It’s also known as ‘Paramount lighting’.

To achieve butterfly lighting, you will need a light source, such as a studio light or natural light source. You can use a three-point lighting system, consisting of a key light, fill light, and hair light, to achieve butterfly lighting. The key light is positioned directly above and slightly in front of the subject’s face, while the fill light is placed on the opposite side to fill in any shadows. The hair light is placed behind the subject to separate them from the background. you can also create butterfly lighting my using one main light as a 45 degree angle pointing down at the subject, an a reflector underneath the subjects face to create the sense of light coming from underneath.

Set up:

Camera Obscura + pinhole photography

A camera obscura is a dark room with a small hole or lens at one side through which an image from the other side of the hole is projected onto a wall or table opposite the hole however the image is projected upside down.

The camera obscura was used to study eclipses without damaging the eyes by looking directly into the sun. It was also used as a drawing aid, as it enabled the projected image to be traced therefore producing a highly accurate drawing, and was used as an easy way to achieve proper graphical perspective.

This method can be replicated with a pinhole camera. A pinhole camera is a camera without a lens and with a tiny aperture. effectively a light-proof box with a small hole in one side. Light from a scene passes through the aperture and projects an inverted image on the opposite side of the box, which is known as the camera obscura effect.

Nicephore Niepce & Heliography

The first “permanent” photographic method. The name heliography came from the Greek terms meaning sun drawing. This method was invented by Nicéphore Niepce and originated from his attempt to produce an image that could be reproduced mechanically and profitably.

It was the process of Heliography that created the first and earliest known permanent photograph, taken from a nature scene. It was a simple but effective way to communicate and send images over long distances during the late 19th and early 20th century. Its main uses were for the military, survey and forest protection work.

Heliography was a ground-breaking process for its time. Here’s a rough outline of how the Heliography process took place:

  1. The naturally occurring asphalt bitumen, is applied as a coating on glass or metal
  2. This chemical then hardens in depending on the light exposure available
  3. The plate is then washed with lavender oil.
  4. After washing with oil, the only area remaining would be the hardened area where the image formed.

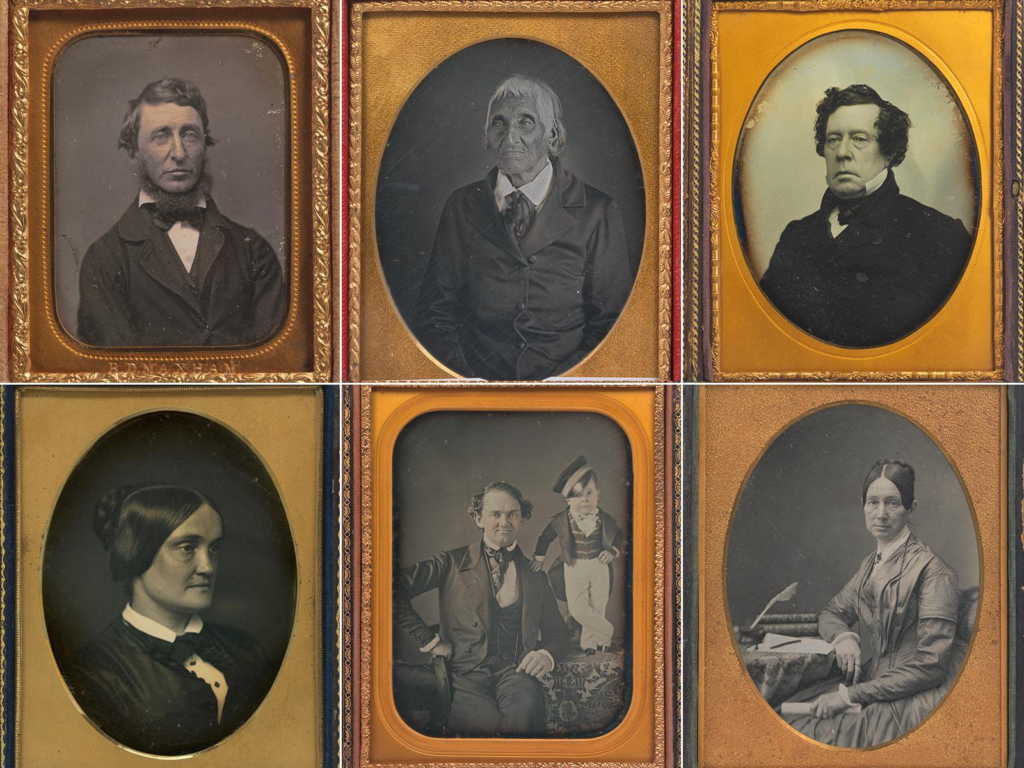
Louis Daguerre & Daguerreotype

Louis-Jacques-Mandé Daguerre was a French artist and photographer, recognized for his invention of the eponymous daguerreotype process of photography.

The daguerreotype was the first commercially successful photographic process in the history of photography. Each daguerreotype is a unique image on a silvered copper plate

A daguerreotype is not flexible like the usual paper material of a photograph and is instead heavy. The daguerreotype is accurate, detailed and sharp. It has a mirror-like surface and is very fragile. The metal plate is extremely vulnerable, so most daguerreotypes are presented in a special housing to prevent damage.

The process to create this direct-positive process includes, creating a highly detailed image on a sheet of copper with a thin coat of silver without the use of a negative. The process requires great care. The silver-plated copper plate had first to be cleaned and polished until the surface looked like a mirror.

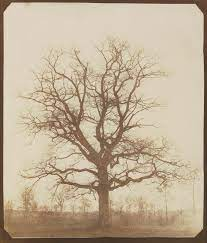
Henry Fox Talbot & Calotype

The Calotype was the first process of its kind that resulted in a negative paper image that was able to be reproduced into many positive images once exposed. 

In this technique, a sheet of paper coated with silver chloride gets exposed to light in a camera obscura; the areas hit by light became dark in tone, making a negative image. The most important aspect of the process lay in Talbot’s discovery of gallic acid that could be used to develop the image on the paper—i.e., accelerate the silver chloride’s chemical reaction to the light it had been exposed to. The developing process permitted much shorter exposure times in the camera, down from one hour to one minute.

The developed image was fixed with sodium hyposulfite. The “negative,” as Talbot called it, could yield any number of positive images by contact printing on another piece of sensitized paper. Talbot’s process was superior in this respect to the daguerreotype, which yielded a single positive image on metal that could not be duplicated.

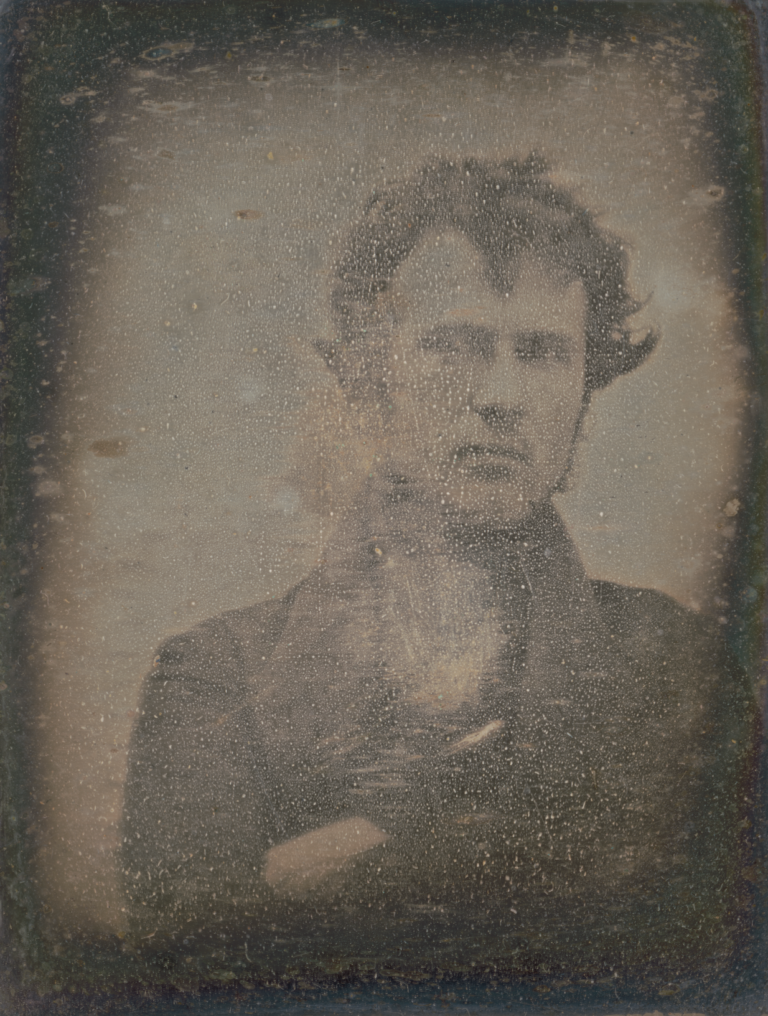
Robert Cornelius & self-portraiture

Robert Cornelius, an amateur chemist, took a self-portrait 175 years ago in the back of his family’s silver-plating shop. On the back, Cornelius wrote: “The first light Picture ever taken. 1839.” It was one of the first Daguerreotypes to be produced in America, only a few months after Louis Daguerre announced his invention.

In February 2014 a daguerreotype self-portrait taken by the American photography pioneer Robert Cornelius of Philadelphia was considered the first American photographic portrait of a human ever produced, and since this was a self-portrait, it was also possibly the first “selfie .”

Julia Margeret Cameron & Pictorialism

Pictorialism, an approach to photography that emphasizes beauty of subject matter, tonality, and composition rather than the documentation of reality. Its an international style and aesthetic movement that dominated photography during the later 19th and early 20th centuries.

Julia Margaret Cameron was a British photographer who is known to be one of the most important portraitists of the 19th century. She is known for her soft-focus close-ups of famous Victorian people, illustrative images depicting characters from mythology, Christianity, and literature, and for sensitive portraits of men, women and children.

Cameron and her pictorialist contemporaries pursued painterly compositions, subjects, and qualities, hoping to elevate photography to a high art. A representation of a person or thing in a work of art.

Cameron herself indicated her desire to capture beauty. She wrote,

“I longed to arrest all the beauty that came before me and at length the longing has been satisfied”

and

“My aspirations are to ennoble Photography and to secure for it the character and uses of High Art by combining the real & Ideal & sacrificing nothing of Truth by all possible devotion to poetry and beauty.”

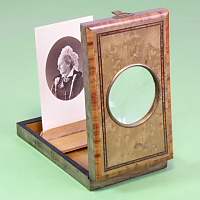
Henry Mullins & Carte-de-Visit

Henry Mullins started working at 230 Regent Street in London in the 1840s and moved to Jersey in July 1848,

His speciality was cartes de visite and the photographic archive of La Société contains a massive collection of these. His subjects are many of the island’s affluent and influential people, including Dean Le Breton, the father of Lillie Langtry.

He was also popular with officers of the Royal Militia Island of Jersey, it was also very popular to have taken their portraits, as well as of their wives and children.

Cartes de visite consist of a print stuck to a card mount and the prints were mostly albumen and, later, emulsion based printing-out-paper. Other processes, including carbon and Woodburytype, were also used.

Cartes de visite reduced the cost of having a portrait taken and made it within reach of most people, as a result there was a dramatic increase in the number of studio photographers. They also started a collecting craze. Cartes were collected of people such as extended family, royalty and the famous.

Bibliography:

https://www.theislandwiki.org/index.php/Henry_Mullins

http://www.earlyphotography.co.uk/site/entry_I23-A.html

https://www.theartstory.org/artist/cameron-julia-margaret/

https://www.moma.org/learn/moma_learning/julia-margaret-cameron-madonna-with-children-1864/

https://www.vam.ac.uk/articles/julia-margaret-camerons-working-methods

https://blogs.loc.gov/loc/2022/07/robert-cornelius-and-the-first-selfie/

https://en.wikipedia.org/wiki/Robert_Cornelius

https://www.amphilsoc.org/exhibits/treasures/cornelius.htm

https://www.britannica.com/technology/calotype

https://en.wikipedia.org/wiki/Louis_Daguerre

https://www.britannica.com/biography/Louis-Daguerre

https://www.britannica.com/biography/Nicephore-Niepce

https://en.wikipedia.org/wiki/Camera_obscura

origin of photography

To embed your understanding of the origins of photography and its beginnings you’ll need to produce a blog post which outlines the major developments and practices. Some will have been covered in the documentary above but you also need to research and discover further information.

Your blog post must contain information about the following and keep it in its chronological order:

  • Camera Obscura & Pinhole photography
  • Nicephore Niepce & Heliography
  • Louis Daguerre & Daguerreotype
  • Henry Fox Talbot & Calotype
  • Robert Cornelius & self-portraiture
  • Julia Margeret Cameron & Pictorialism
  • Henry Mullins & Carte-de-Visit

Each must contain dates, text and images relevant to each bullet point above. In total aim for about 1,000-2000 words.

Try and reference some of the sources that you have used either by incorporating direct quotes, paraphrasing or summarising of an idea, theory or concept, or historical fact.