Mounting Techniques

The final stage of presenting your photographs is by mounting them in a stylistic way. You can either mount them on foam board where the images sit on a piece of foam and actively pop out towards you; or create a window mount where the images have a clear and defined border.

Foam Board

A1 Foam Board Printing and Mounting | Nevex Printing Centre
How to perfectly spray mount and cut foam core presentation boards. -  YouTube

To mount on foam board, you must spray your image with glue so it is able to stick to the board. From there you can cut the foam board down to the size of your image to create a crisp, sharp edge.

Window Mount

Seven ways to frame art, hundreds of variations - window mounting
Bespoke Picture Mount Options | Pure Framing

To create this effect; you must measure the size of your image and take 0.5cm form each measurement to allow the image to be seen but not fall through the mount. Draw the outline of your image using your final measurements then use a bevel cutter to remove the centre of the mountboard. This creates the final window for your image to be seen through.

Photomontage Techniques: Analogue and Digital

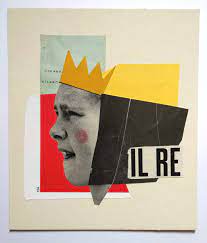
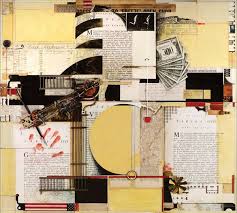
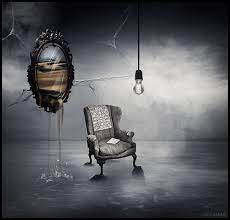
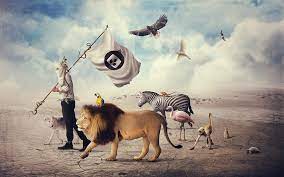
Photomontage is the combing of two or more images to create something completely new and unique. The two ways to do this are through analogue or digital techniques.

Analogue Photomontage

Analogue techniques are used to combine images by hand using a knife/scissors, your hands and glue etc. For example, you could tear up an image and stick parts of it onto another to create a rough and damaged effect. You can then take a photo of your final outcome and re-print it to create a perfect undamaged image.

Digital Photomontage

Digital techniques combine images using software like Adobe Photoshop. These images can look similar to analogue photomontages but they eliminate the mess and retaking of the image when finished.

Photomontage

  • photomontage is a collage constructed from photographs.
  • Historically, the technique has been used to make political statements and gained popularity in the early 20th century (World War 1-World War 2)
  • Artists such as Raoul Haussman , Hannah Hoch, John Heartfield employed cut-n-paste techniques as a form of propaganda…as did Soviet artists like Aleksander Rodchenko and El Lissitsky
  • Photomontage has its roots in Dadaism…which is closely related to Surrrealism
Tatlin at Home by Raoul Hausmann - galleryIntell
Raoul Haussman – “Tatlin at Home” 1920
Hannah Höch, Cut with the Kitchen Knife Dada Through the Last Weimar Beer  Belly Cultural Epoch of Germany – Smarthistory
Hannah Hoch – “Cut with the Kitchen Knife Dada Through the Last Weimar Beer Belly Cultural Epoch of Germany” 1919-1920
John Heartfield Biography by Grandson, John J HeartfieldJohn Heartfield  Exhibition
John Heartfield – “Adolf the Superman: Swallows Gold and Spouts Junk” 1932
Rodchenko's revolution: a socialist with true vision | The Independent |  The Independent
Aleksander Rodchenko – “Bud Gotov” 1934
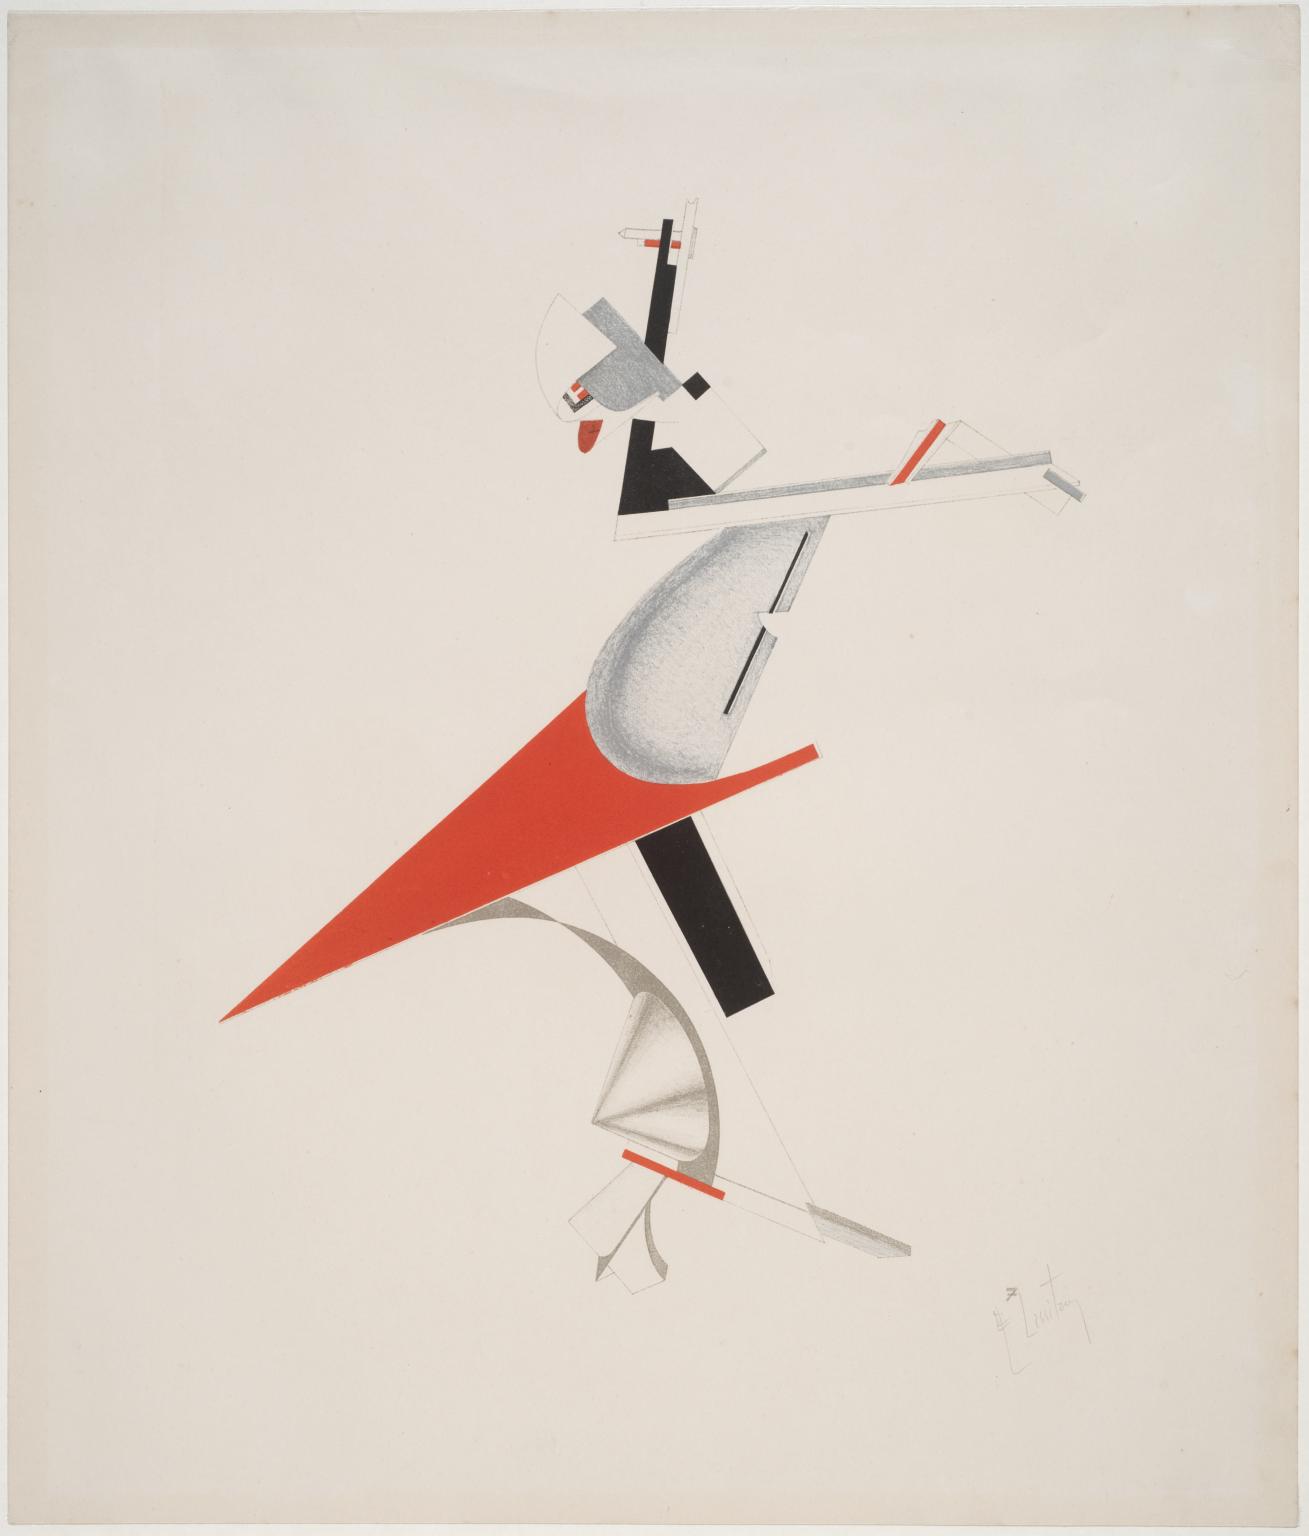
7. Troublemaker', El Lissitzky, 1923 | Tate
El Lisstizky – “Troublemaker” 1923

Photoshoot – lighting Techniques

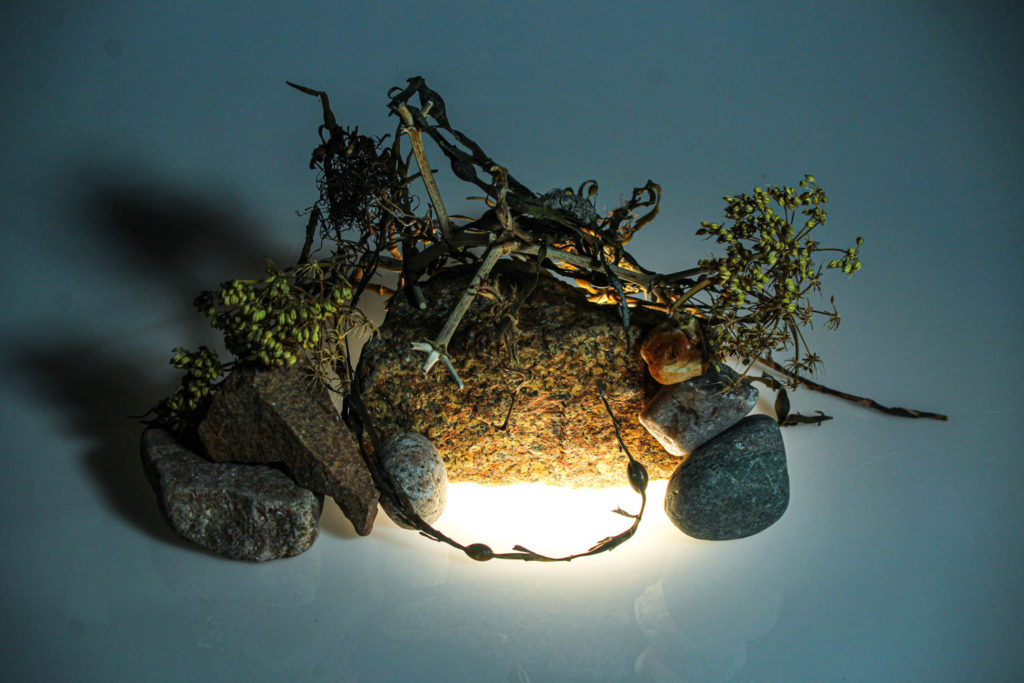
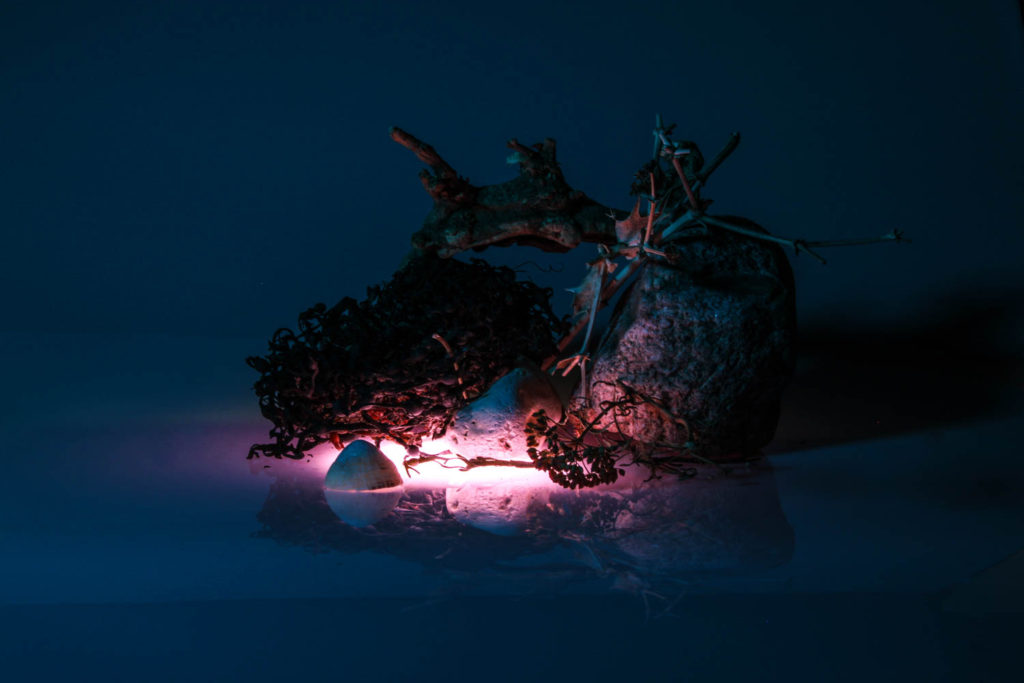
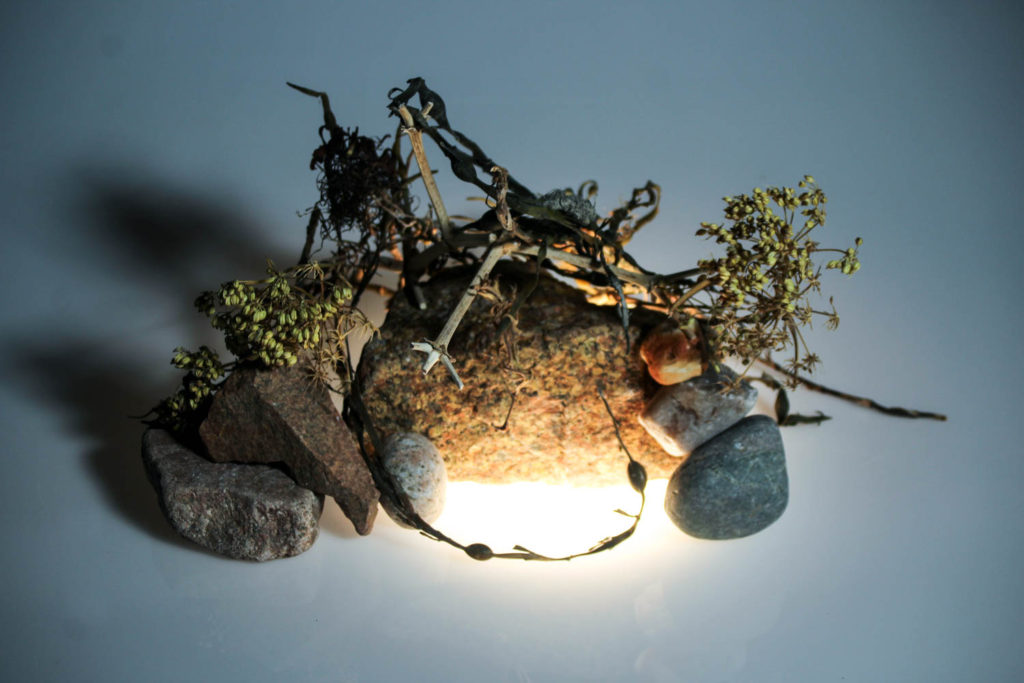
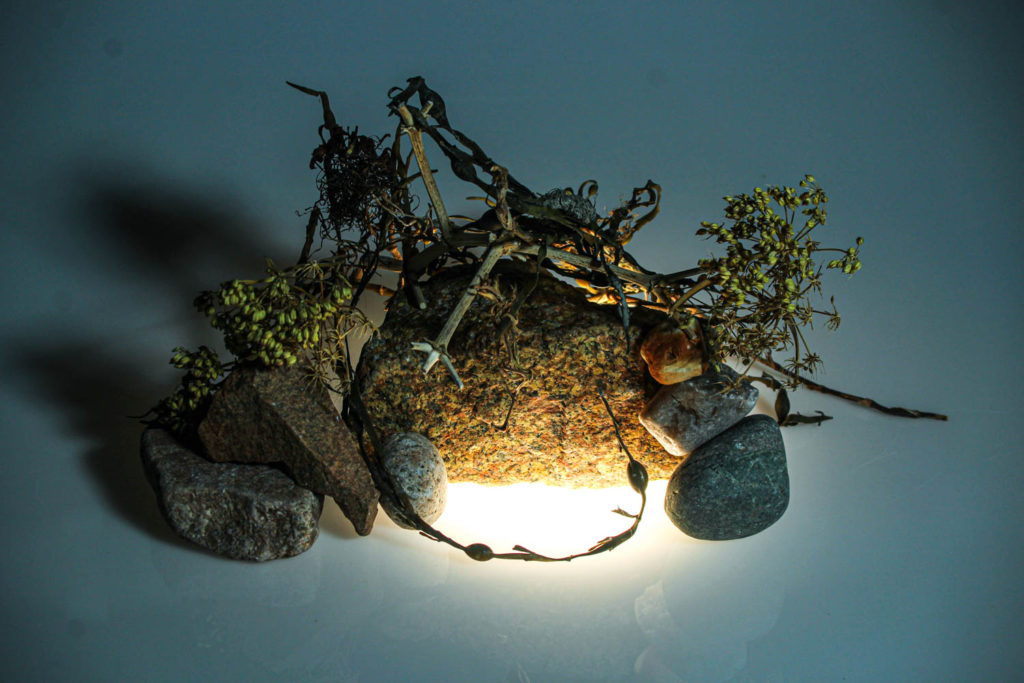
When taking photos in the lighting studio, I have used to types of lighting so far: continuous lighting and flash-heads.

Continuous lighting uses a light that is always on and used as the main source of light for the photo. In the photographs that I have taken, there is a back light used underneath the objects on the product table.

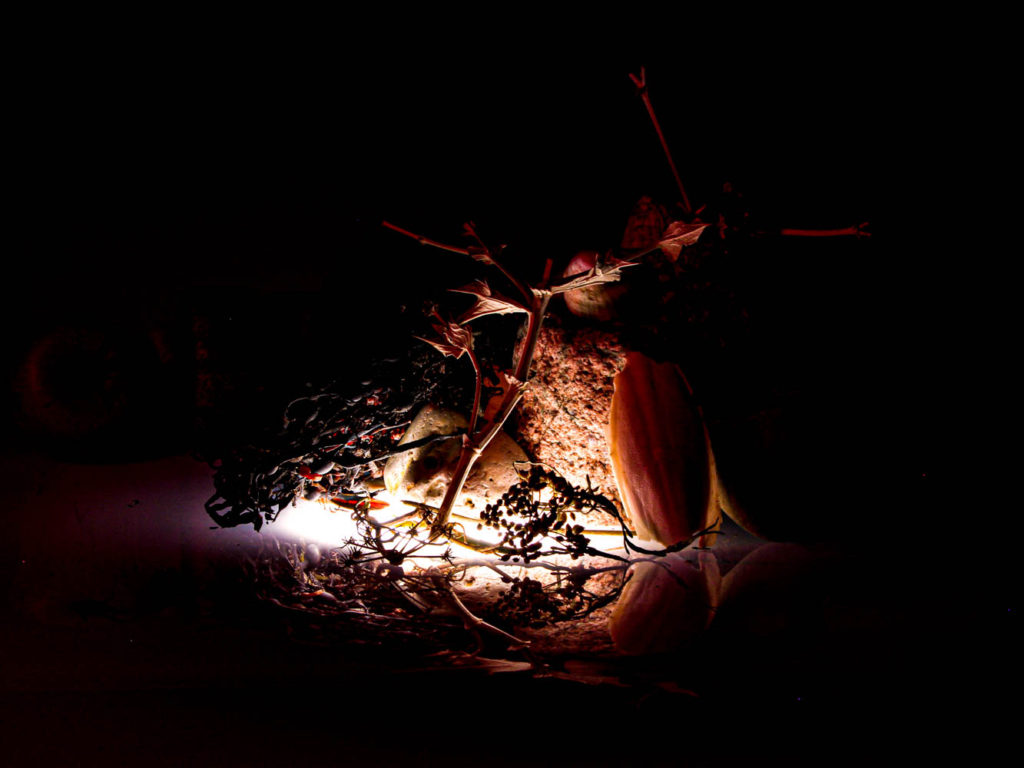
Flash-heads connect to the camera via a flash trigger so when the photo is taken, they flash and create a photo with little or no shadows in it (as shown below).

What is photography?

David Campany’s book ‘On Photographs’ describes the specifics of photography within specific photographs. He mentions how each photo “belongs wherever it is placed” and that means that images are everywhere in society; wall, page, screen, wherever it can be seen. If a photo has no audience, it does not exist.

Campany’s book raises three questions when reading:

1) What shapes our response to photography?

2) Where does the meaning we ascribe to it come from?

3) And how important to our reading of it are the photographer’s intentions?

ONE

In my mind, responses to photography tend to be shaped by how the image looks. However, subconsciously people are drawn to different images by how they make them feel. Simple images like those of the sun or of fire can create a sense of warmth or happiness within its audience or even fear and hatred. Every person will have a different connection to the image and it will depend on the emotions that each person will have at the time when they first see it.

TWO

When we think of photography, we think of it as a way of documenting everything that we never want to forget, be it a memory or aspect of history. However, it is so much more than that. Photography is a way to express yourself through the visual aid of colours, lights etc. It’s still a form of documentation but through the manipulation of the photos it becomes an art form with endless possibilities.

THREE

Essentially, the photographers intentions are very important as a way to aid their audience in how to feel about the image and to properly understand what the photographer could be attempting to communicate through their work. However, I personally like to guess what the photographer wants to illustrate without any information first. This allows me to decide my own opinions of the image without any influence and to establish my own personal connection.

Campany states in his book that “photographs confuse as much as fascinate, conceal as much as reveal, distract as much as compel. The are unpredictable communicators.” I originally had no clue as to what he was trying to say, but when I attempted to apply this theory when looking at an image it makes sense.

Take this for example:

An obituary, of sorts, for the 'death' of artist duo Adam Broomberg &  Oliver Chanarin - 1854 Photography

This is the image labelled “The Press Conference” taken on June 9th 2008 by photographers Adam Broomberg and Oliver Chanarin. They were photographers that connected themselves with the British Army in Helmand Province in the Afghan War. They arrived during the deadliest month of the war and endured 4 days of fatalities until the fifth day, ‘The Day Nobody Died’. After this there were different aspects of military life that a photographer would document, but they instead unrolled 6m of photographic paper that they had taken with them and exposed it to the sun for 20 seconds. The part of their results shown was named as “The Press Conference” as part of an exhibition titled “The Day Nobody Died”.

At first glance, it doesn’t look like anything other than a load of colours, which in my opinion is quite ‘confusing’. The image itself ‘conceals’ its true meaning from its audience. However, it ‘distracts’ a person from their surroundings almost absorbing all space in their mind for thought. It truly is an unpredictable communicator, as once the audience is provided with the photographers intentions behind the photo, then all is clear. With the knowledge provided it is to my belief that the photo shows the insignificance of a simple press conference within the midst of a war, as compared to other aspects. In a normal’ western’ society, being involved in a press conference could seem like a big deal but soldiers have to deal blood, gore and the constant fear that they could die at any moment. Therefore this image reveals a lot more than you would originally think.

adobe Lightroom classic

Importing Images

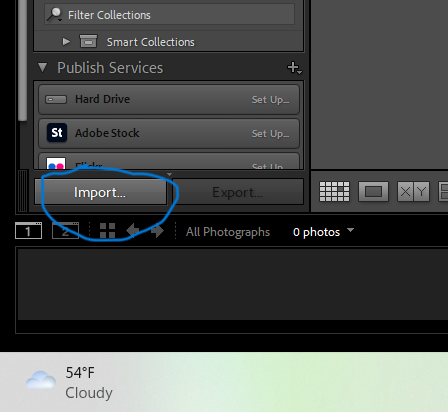
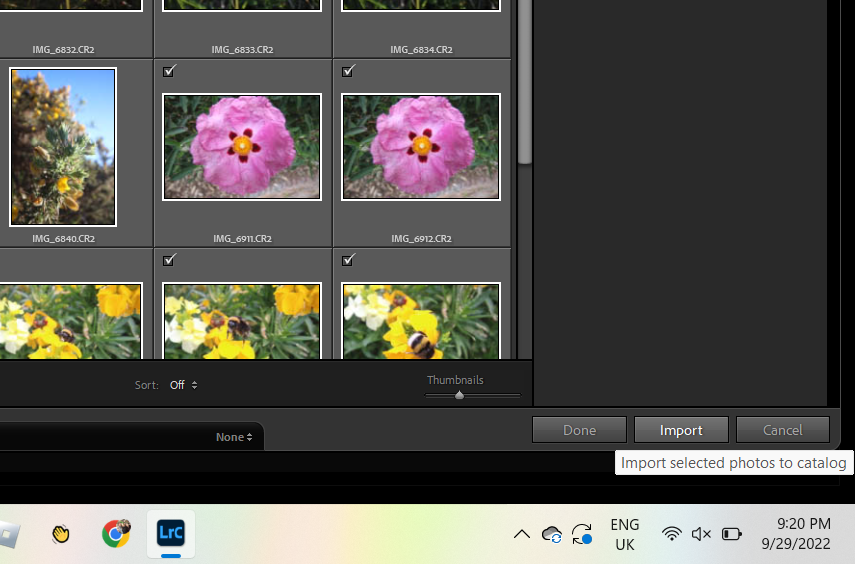
To import images to Adobe Lightroom Classic, first click import in the bottom left-hand corner of your screen. You can then select the photos that you wish to upload to the server. Once chosen click import and you can begin work on your photographs. But first, you should keep yourself organised by creating a collection to separate all your photos into categories.

Collections

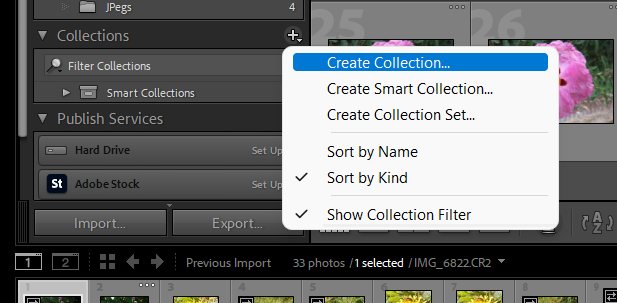
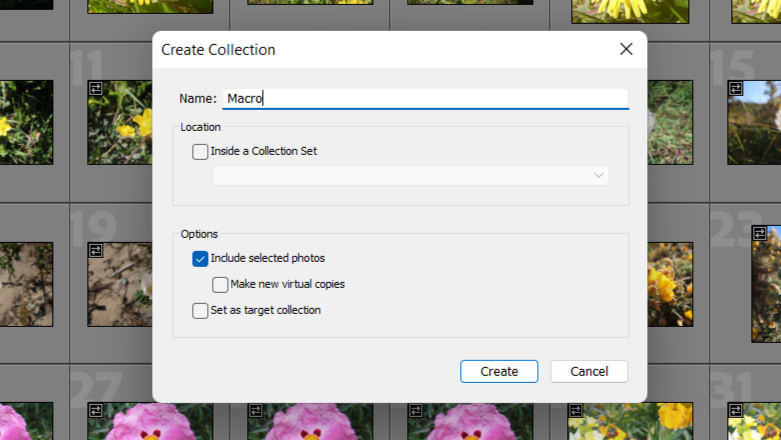
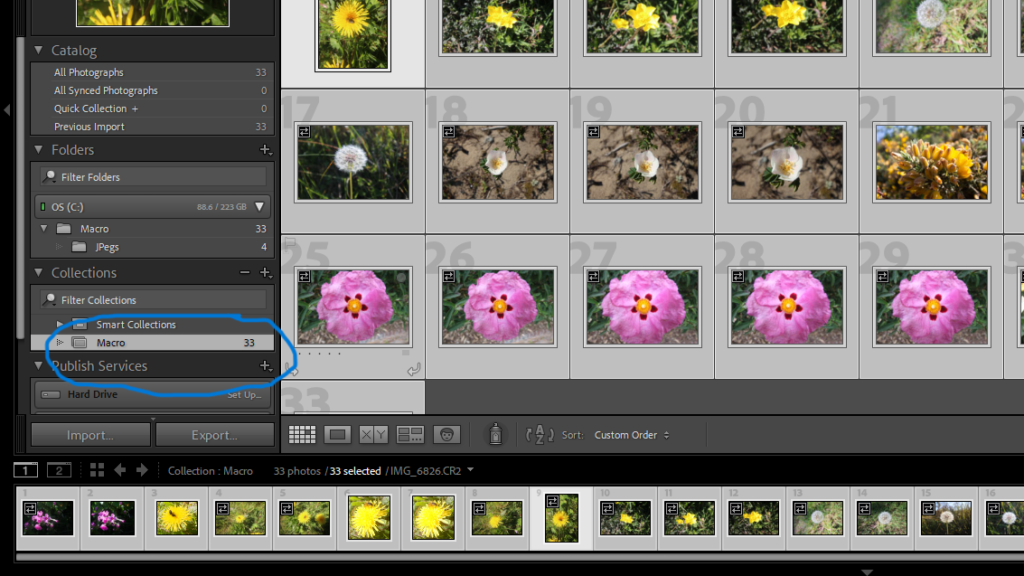
Click on the ‘+’ sign next to ‘Collections’ on the left of your screen, and choose ‘create collection’. Type in the name that you wish to call this and click create. From there, you can move your selected photos into the collection and know exactly where to find them in the future. If you want to transfer all of your photos to a collection, you can use ‘ctrl + A’ and drag them from there.

Library + Quick Develop

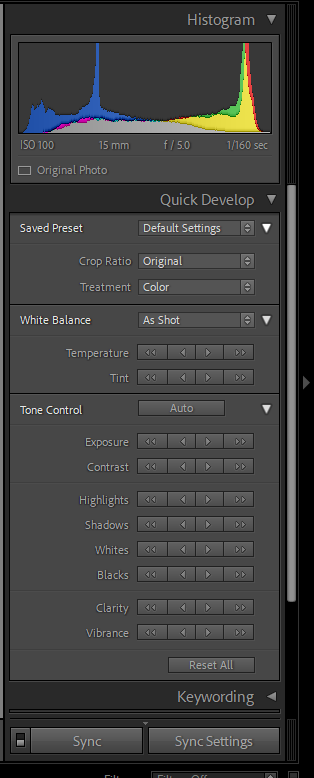
When you first begin to edit photos you can start in the library mode. Here you can click on the ‘Quick Develop’ menu and change the brightness of the photo, the white balance, and the tone; adapting the exposure, shadows, clarity etc. In the top right-hand corner you can see the levels of light intensity (ISO), focal length, aperture, and shutterspeed used to take the original photo. The Library is also where you can change which photo you are working on and decide on favourite photos in the gallery view.

Develop

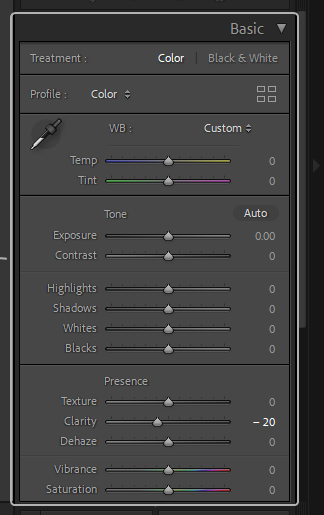
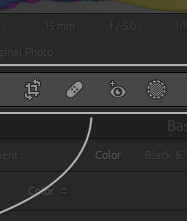
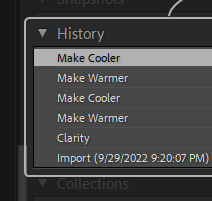
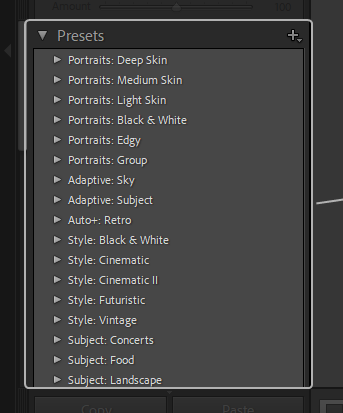
In the ‘Develop’ window, you can edit your photos with more detail. Again using sliders to adjust White Balance, Exposure, Contrast and other tone controls in the basic panel; however, you can also use refining tools such as Red Eye correction and Spot Healing. Using the history panel, you can review the adaptations you have made or revert to previous settings if you prefer other edits. You can also create presets as a way to quickly make adjustments or recreate your work with other images.

Aperture, Depth of Field

What is aperture on a camera? | Digital Camera World

When talking about the aperture of a photograph, a photographer would describe it as the opening in a lens’ diaphragm that allows the passing of light into the camera that would then hit. Aperture is calibrated in f/stops (as shown below); smaller f/stops (f1.4 / f2) means that the photographer has a larger exposure, making the image bright, whereas larger f/stops (f11 / f16) allow a smaller exposure creating a darker image. Each f-number represents one “stop” of light. A stop is a mathematical equation determining the amount of light allowed into the lens.

Taking Creative Control: Understanding Aperture and F/Stops | SIGMA Blog
Depth of Field and Field of View — Cornicello Photography

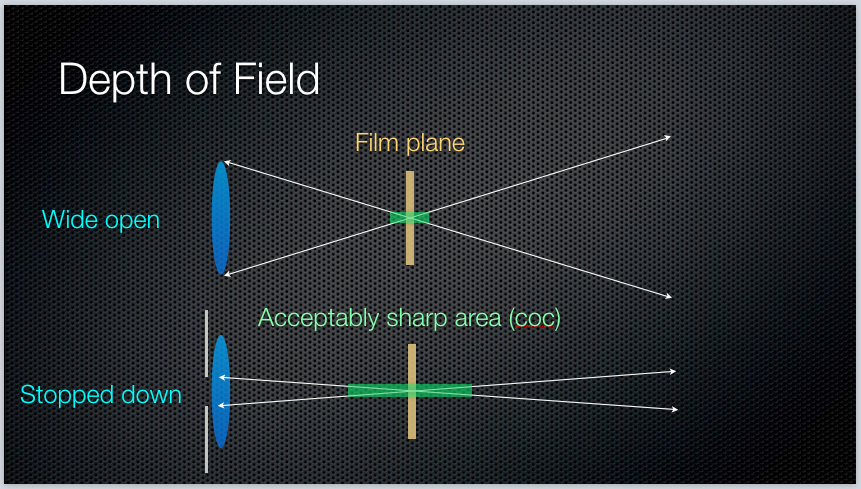
Aperture also effects the depth of field in photos. Depth of Field (DOF) is how much of the image is in sharp focus. A shallow DOF is when the foreground is in focus, and a deep DOF is when the entire photo is in focus, as shown below. Different DOFs allows the camera to take more interesting images rather than simple, sharp-focused images.

Apertures Effect on Depth of Field

My Photos experimenting with Aperture and Depth of Field

In the first image, you can clearly see that the front and left of the picture is in focus with the rest out of focus, demonstrating a shallow depth of field. Whereas, the second photograph shows a deep depth of field where the entire image is in focus.

ISO and White Balance

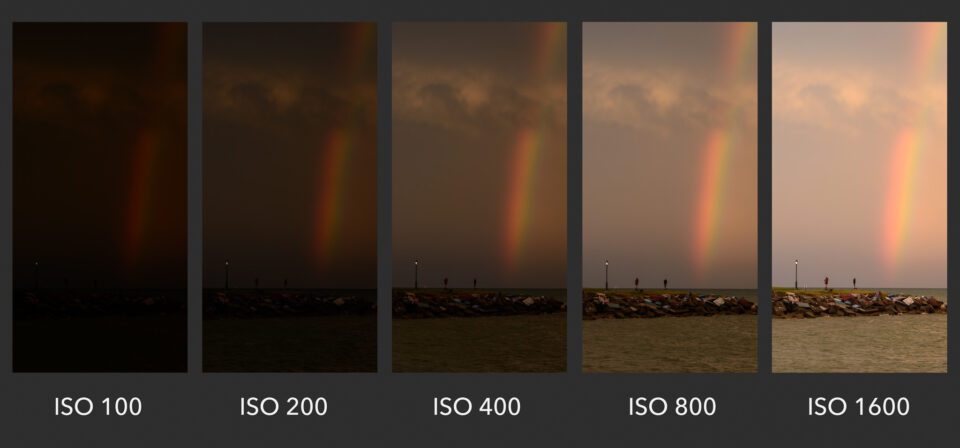
ISO determines the brightness of an image, if you increase your ISO then your image will get brighter. However if your ISO is too high your image could be very grainy, or noisy. Therefore, you should only change your ISO if you can’t make your image any brighter using the aperture and shutter speed.

ISO Brightness Chart
ISO 200 and ISO 3200 Comparison

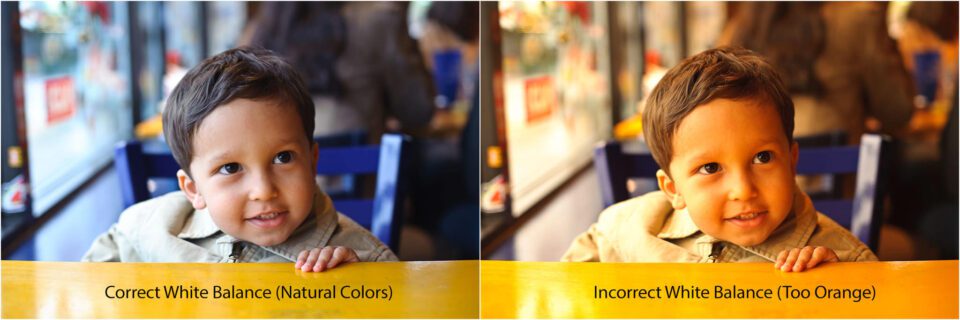
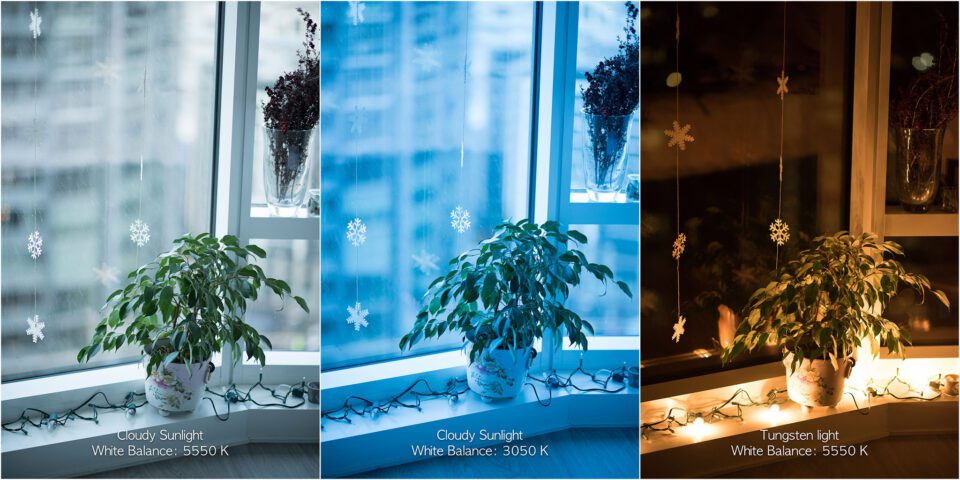
White balance (WB) is the balancing of colours to try and make the image as natural as possible. Our brains automatically adapt WB so that what see seems natural. However, the camera picks up what the actual colours of the scene are, making the images potentially become very blue or orange depending on the warmth or coolness of the image. You can change the WB on your camera by changing the different values of colour warmth manually, or by using the different pre-sets on the camera to automatically adapt the image to the correct WB. However, this is only required when shooting JPEG images. Instead, you could shoot RAW images allowing you to change the WB later using post-processing software like Lightroom.

White Balance - Correct vs Incorrect
This shows the difference between correct and incorrect WB
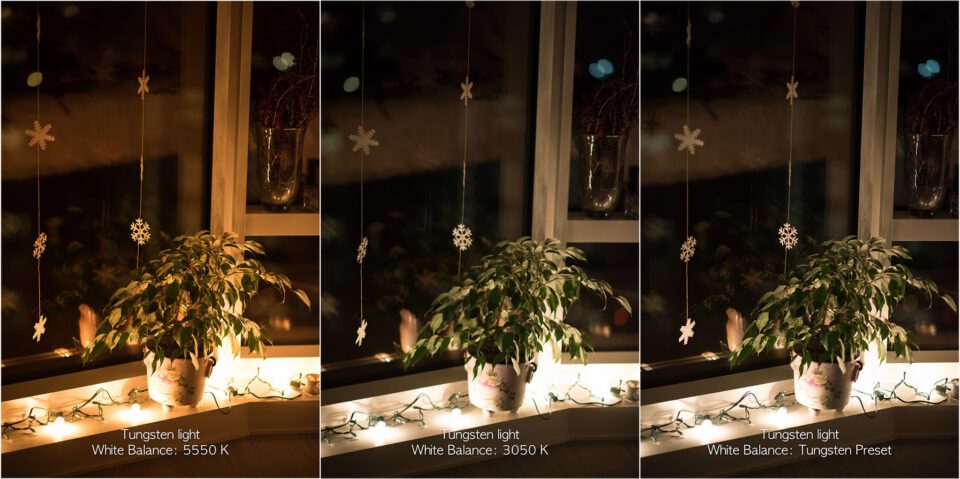
White Balance Tungsten
The image above shows the difference of the image using different levels of colour temperature and the Tungsten light pre-set on a camera during the night. Whereas the image below shows the same image and levels of colour temperature and Tungsten light pre-set, but during the day. This describes the difference of colours of a scene in different lighting states.
White Balance Daylight

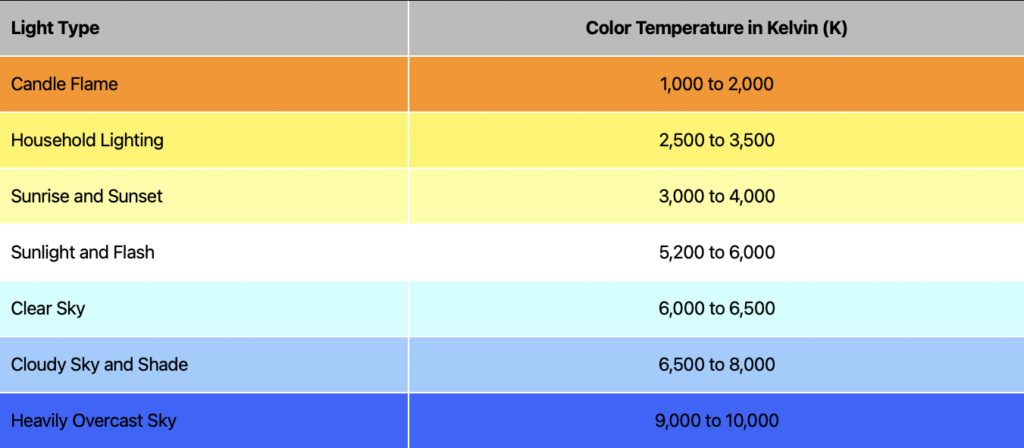
The table below shows the values of different colour temperatures, measured in units of Kelvin.

Focal Length and Focus Points

Focal Length

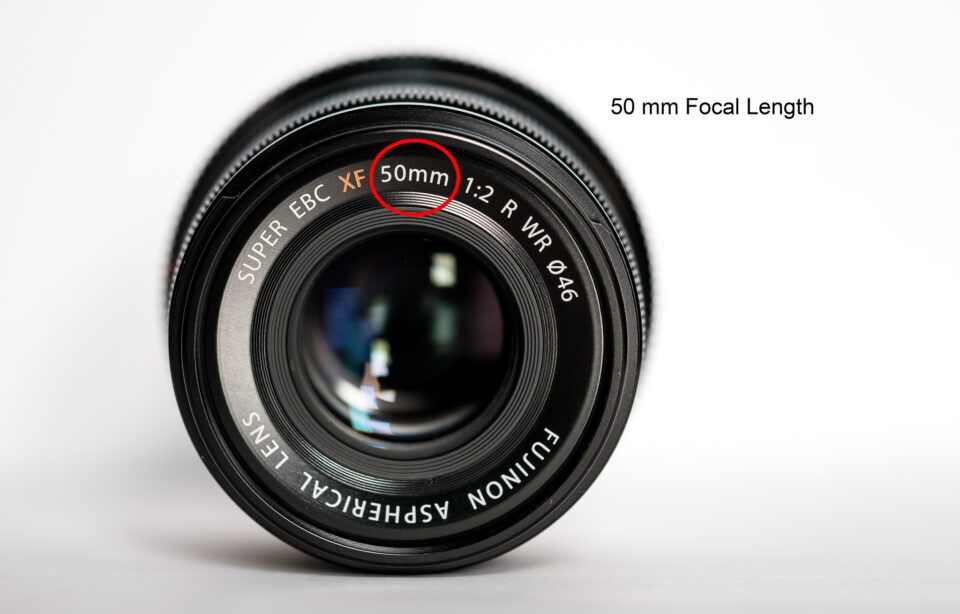
Focal Length is the distance between the centre of the lens and the camera’s sensor. It measures this distance in millimetres. This is determined with the camera focused to infinity. Camera lenses are named by their focal length, for example the lens below is a 50mm lens.

Focal_Length_18
Focal_Length_15
X-T2+XF50mmF2 R WR, ƒ / 2.5, ¹⁄₁₄₀₀ sec, ISO 200

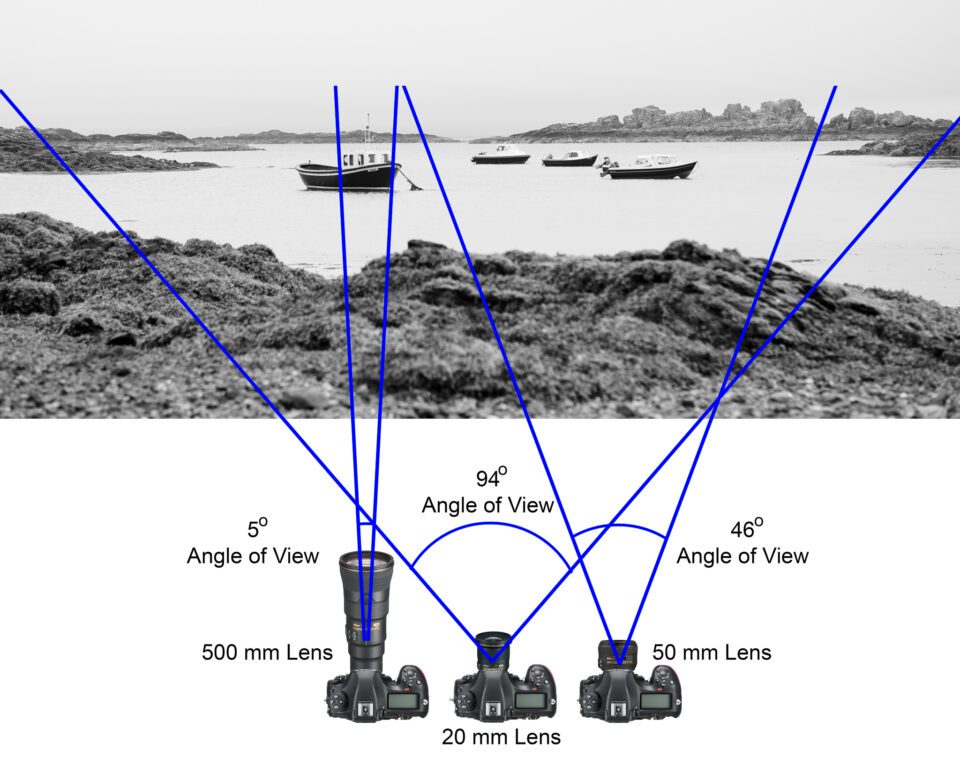
Focal Length tells us the angle of view of the lens. The larger the focal length, the larger the subject within the the image but a narrower angle of view. Whereas, a lens with a smaller focal length makes the subject smaller but has a larger angle of view.

Focal Points

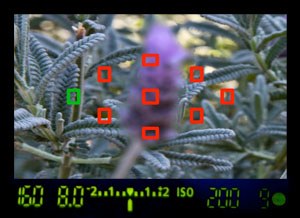
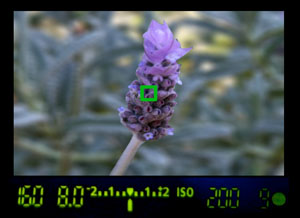
Focus Points are the little squares you see when looking through the lens of a camera. They light up sometimes when you half press the shutter button, but only one or two. Why is this?

When focusing the lens on to an image, you may think that the camera focuses on the entire image before it, however this isn’t true. Even though modern cameras are very smart, they can not focus on every little aspect of an image, the focus points tell you this. They show you where the camera is focusing and what part of the image will come out sharp and clear. In the image below, the points show the background will be in focus, whereas the second image shows that the flower in the centre will be in focus.

selecting wrong AF points
correct auto focus points

The camera will automatically decide where to focus but each of the focus points are looking for something to focus on, so it is really a game of luck. However, you can manually select which focus points you want the camera to use. On most DSLR cameras, there should be a button that you can press to do this; or you can go to the camera settings and choose from there.
How To Focus Your Camera Using Focusing Points - Food Photography Blog

Shutter speed: How it works

What is shutter speed?

The dictionary meaning of shutter speed is ‘the nominal time for which the shutter is open at a given setting’. It’s as simple as that.

However this can be manipulated to produce images such as these:

Lesson 4] Understanding Shutter Speed

How does it work?

Shutter speed can be altered within the range of slow to fast. Photos taken at slow speeds tend to have the subject quite blurry and usually the camera must be on a tripod, sometimes even using a remote, to remove any camera shake that could effect the final photograph. Using a faster shutter speed allows you to stop a moving subject in place with a better clarity, this tends to be used in sport or performance photography, even in still photography to ignore the use of a tripod. Shutter speed also determines the amount of light allowed into the camera, fast shutter speed = dark product/slow shutter speed = light product.

Slow Shutter Speed Examples:

How Using Slow Shutter Speed Helps to Create Unique Photos that WOW
Light Graffiti Slow Shutter Speed - CVHS Photography

Fast Shutter Speed Examples:

Shutter Speed in Photography: The Essential Guide
6,532 Fast shutter speed Images, Stock Photos & Vectors | Shutterstock
What is a Fast Shutter Speed? (How and When to Use It)