All posts by Charlie Wilson

Filters

Author:
Category:

lewis bush

Lewis Bush is a photographer, writer, curator and educator based in London. After studying history and working as a researcher for the United Nations Taskforce on HIV/AIDS he completed a MA in Documentary Photography at the London College of Communication in 2012. Since then he has developed a multidisciplinary practice which includes photography, writing and curation to explore ideas about the way power is created and exercised in the world.

For Metropole (2015) Bush investigated the transformation of London at the hands of unaccountable developers and property speculators. In Shadows of the State (2018), he examined the secret communications used by intelligence agencies, creating images from intercepted signals and uncovering a previously unknown geography of covert radio broadcast sites. More recently he completed Depravity’s Rainbow (2023) which investigates the connections between early space travel and colonialism and the Holocaust, and the impact of that history on the present.

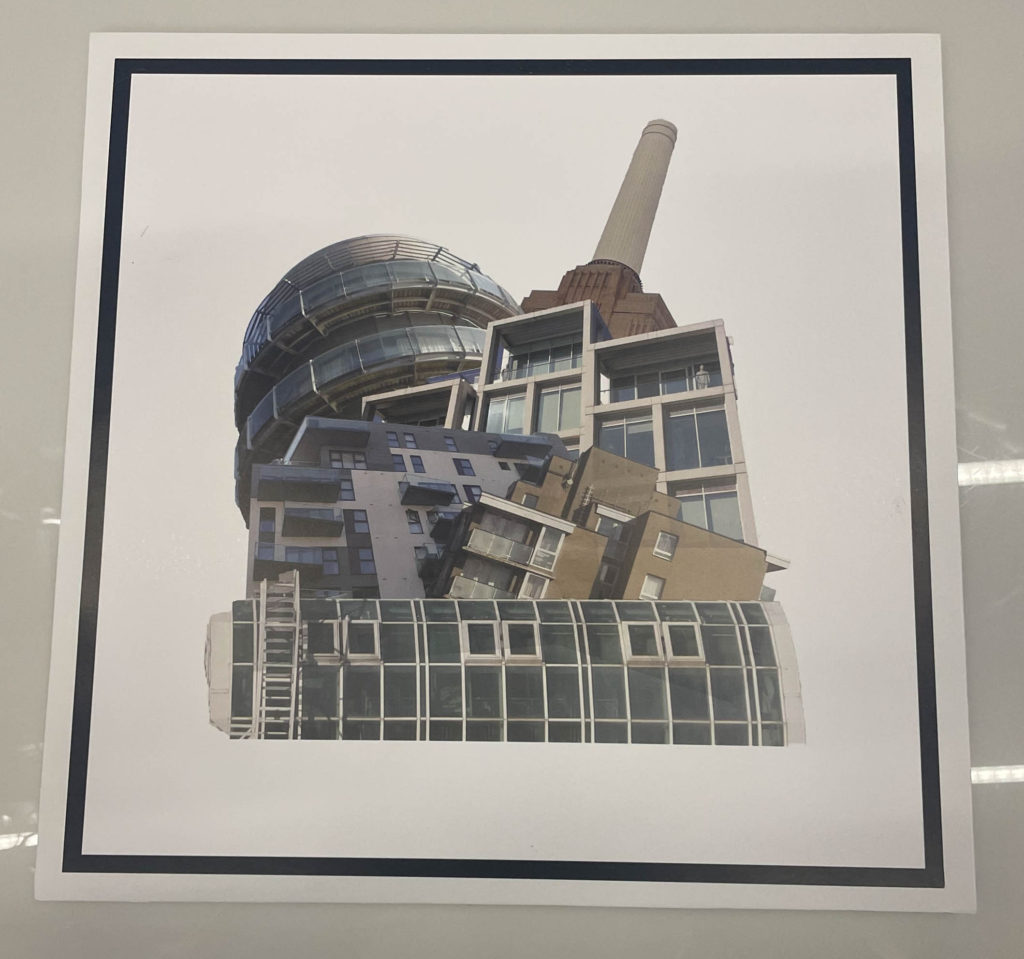
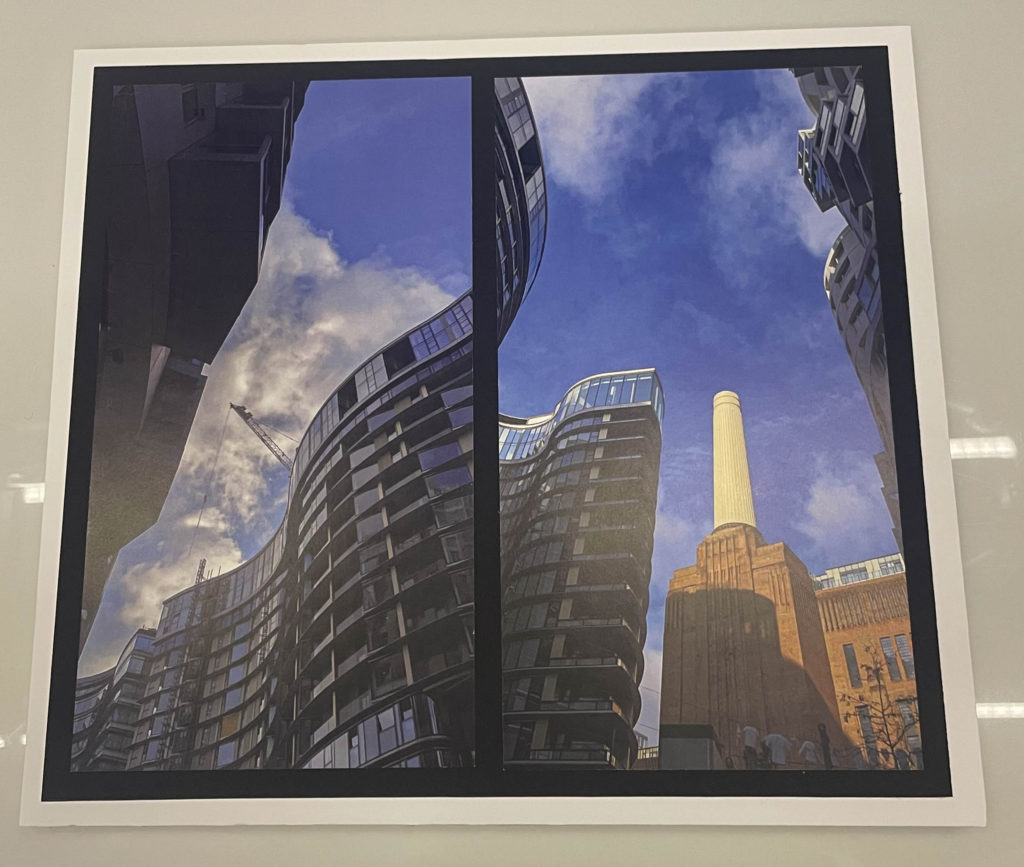
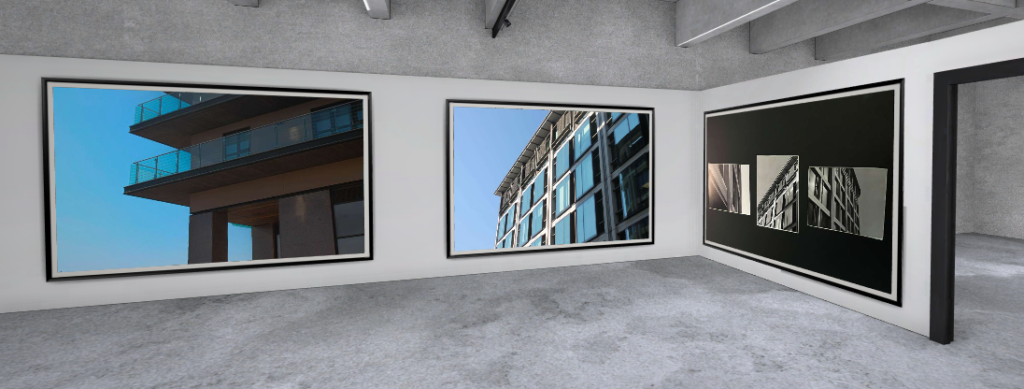
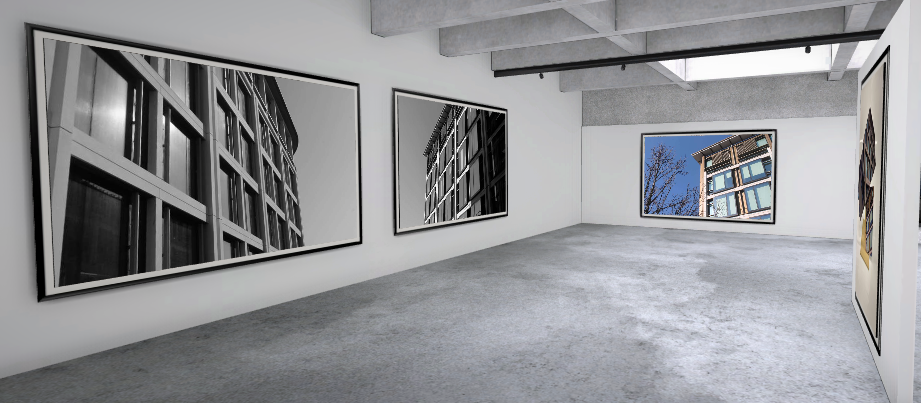
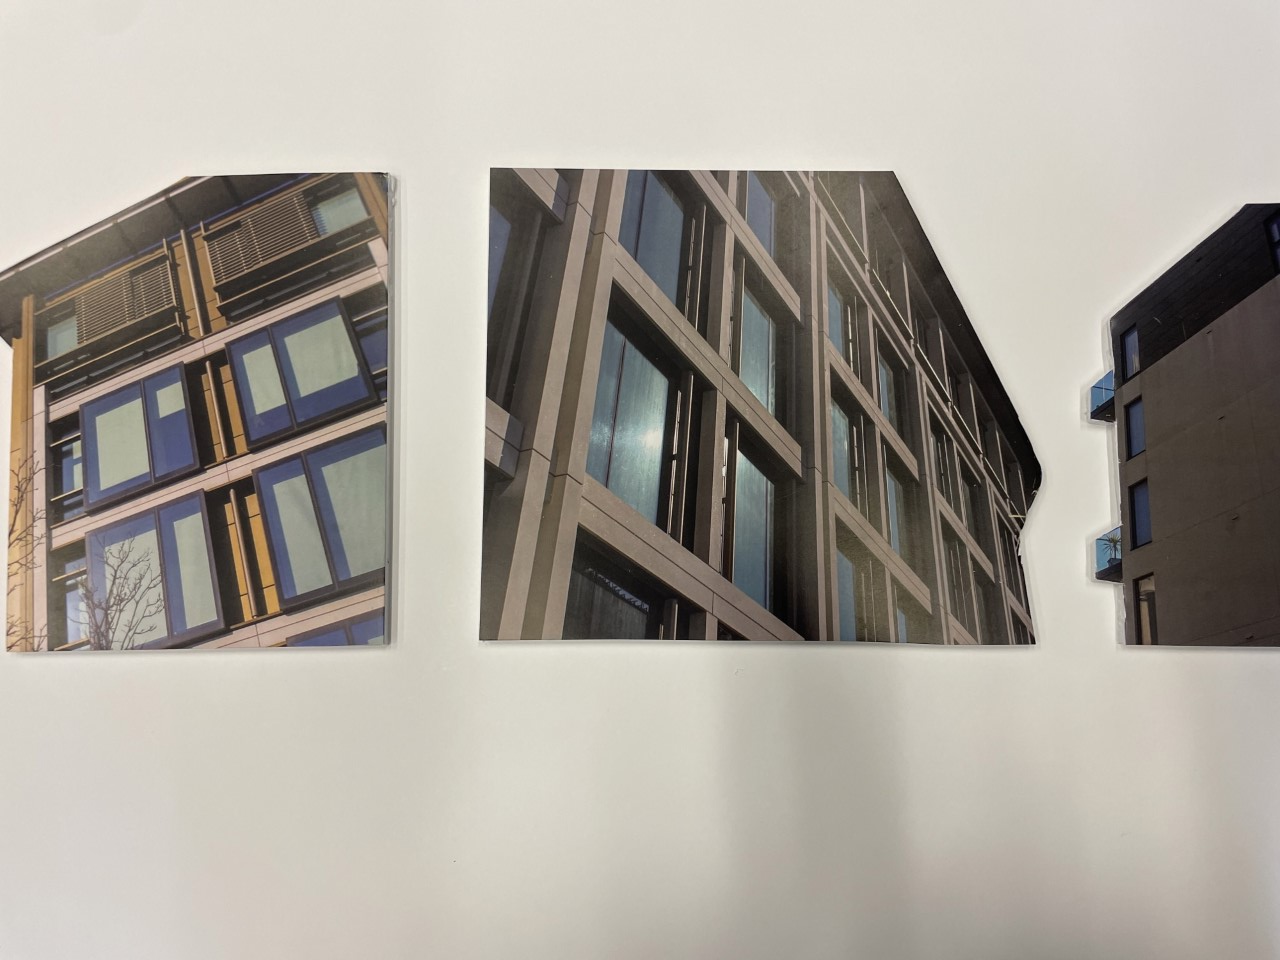
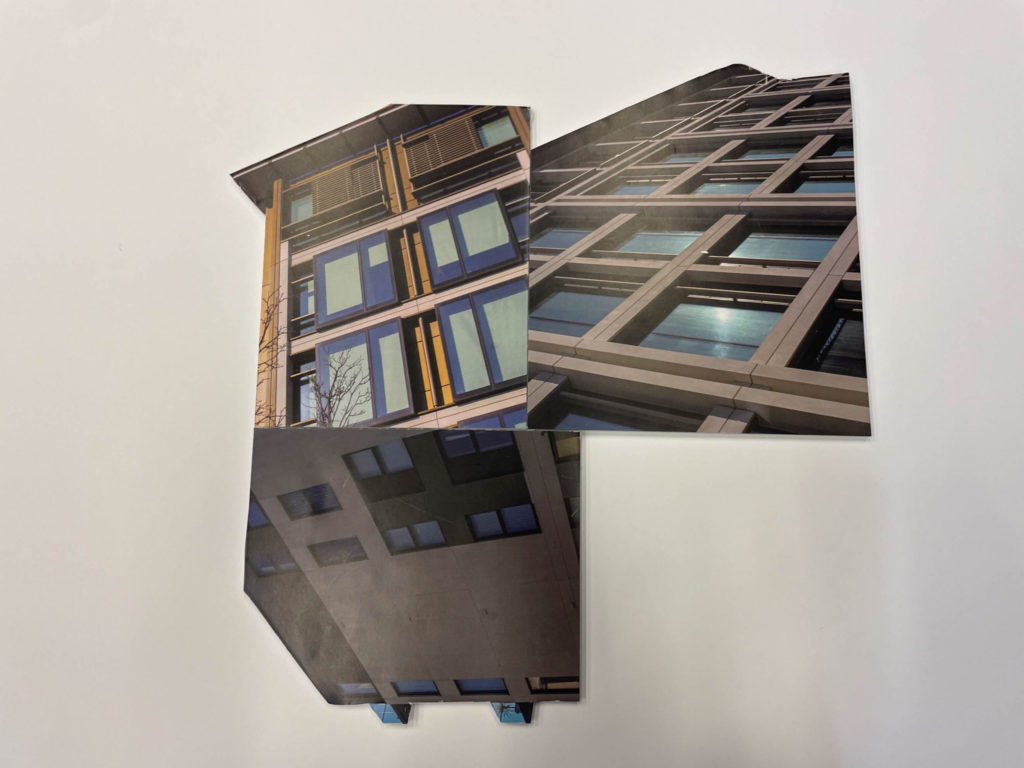
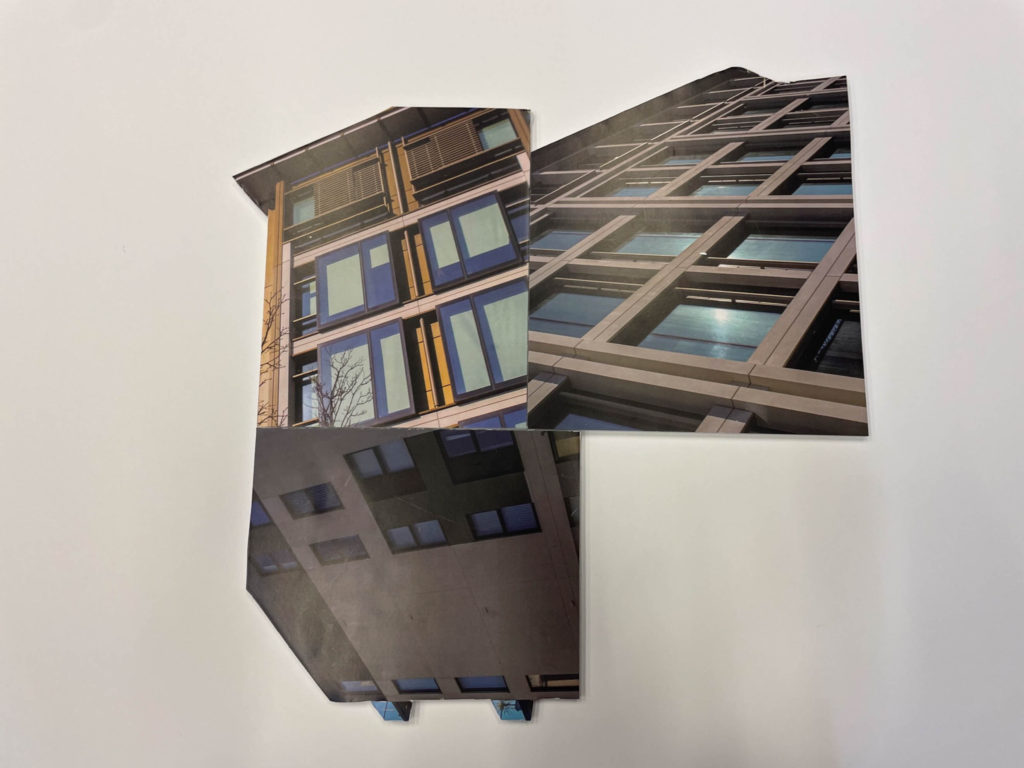
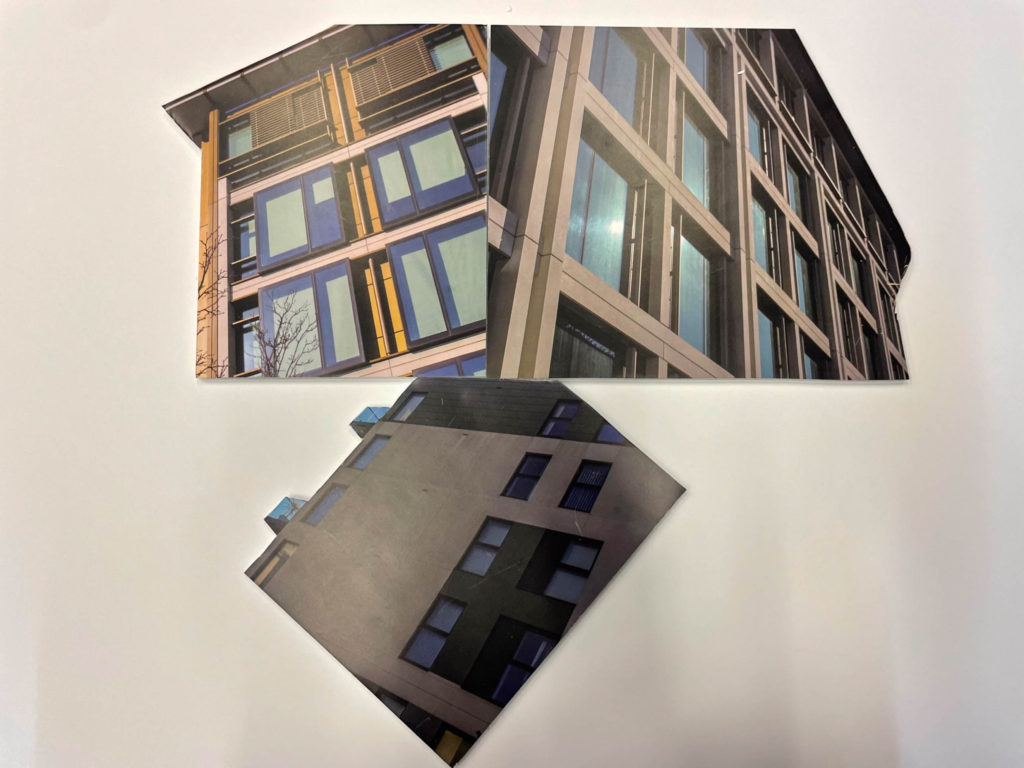
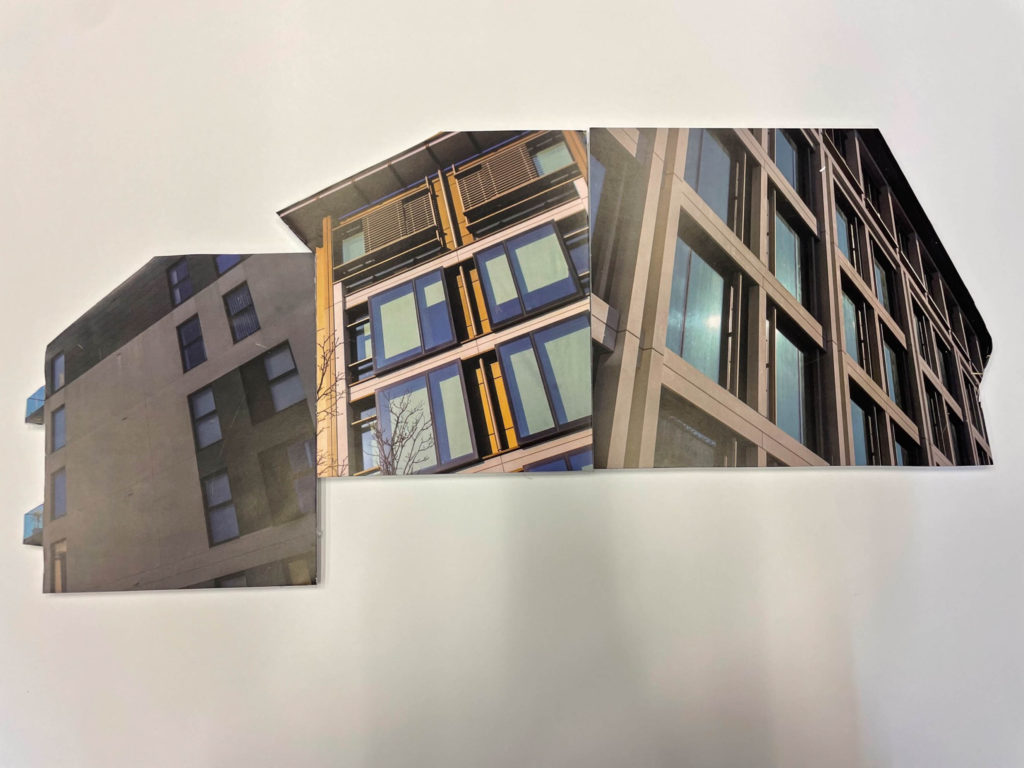
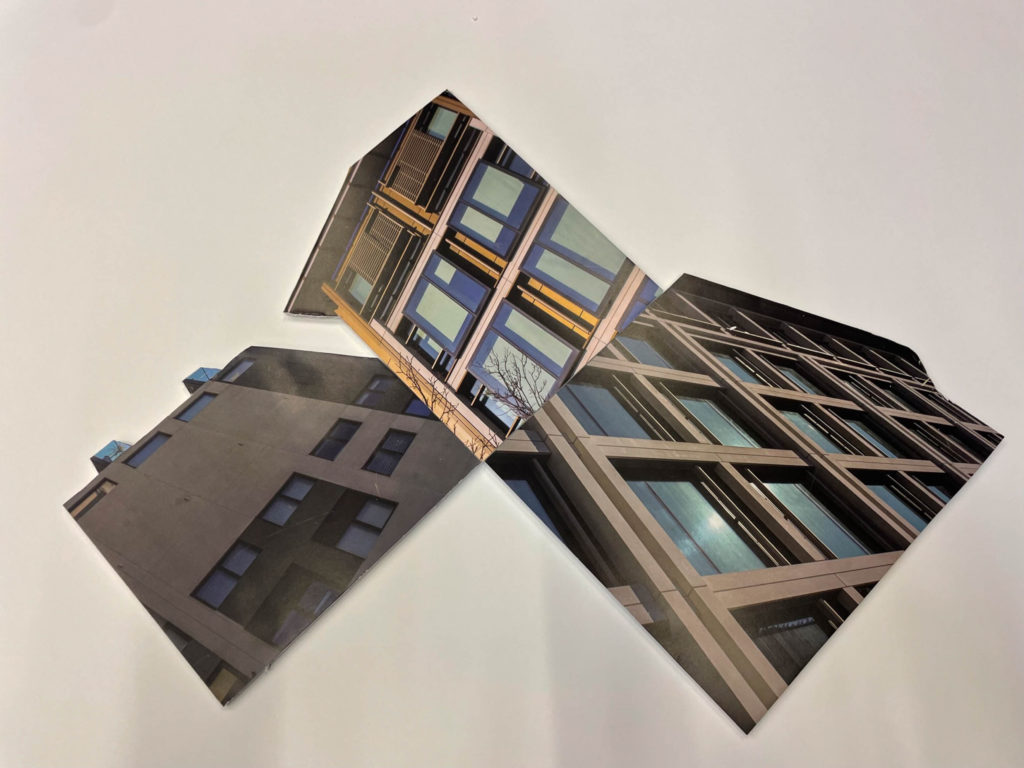
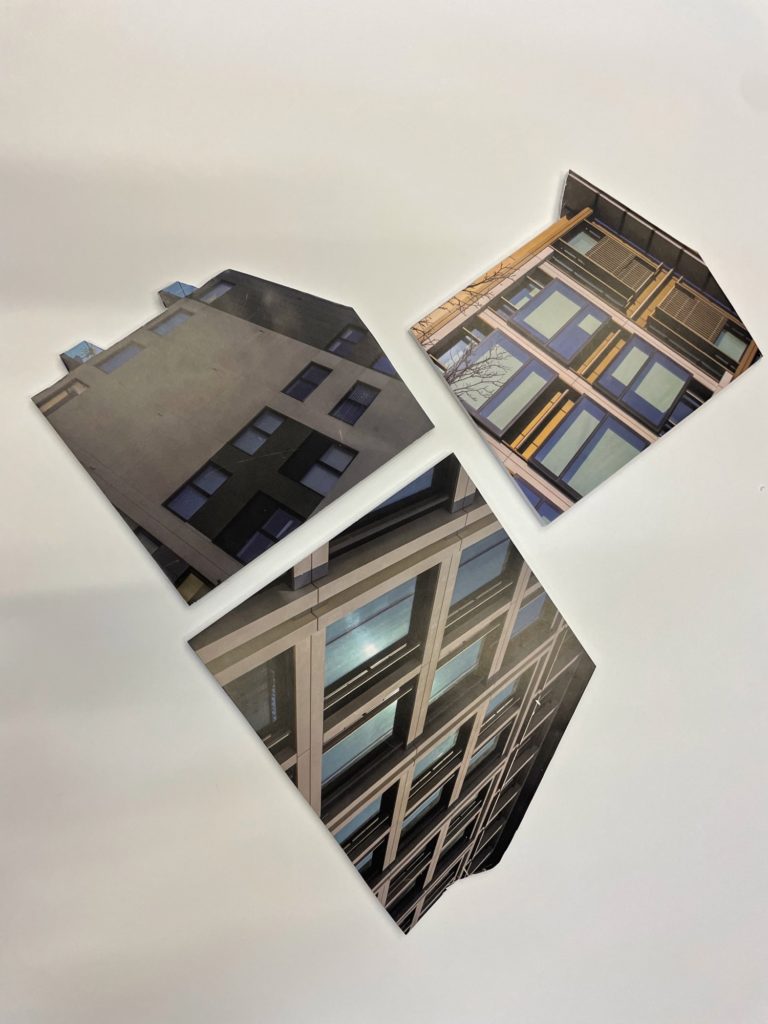
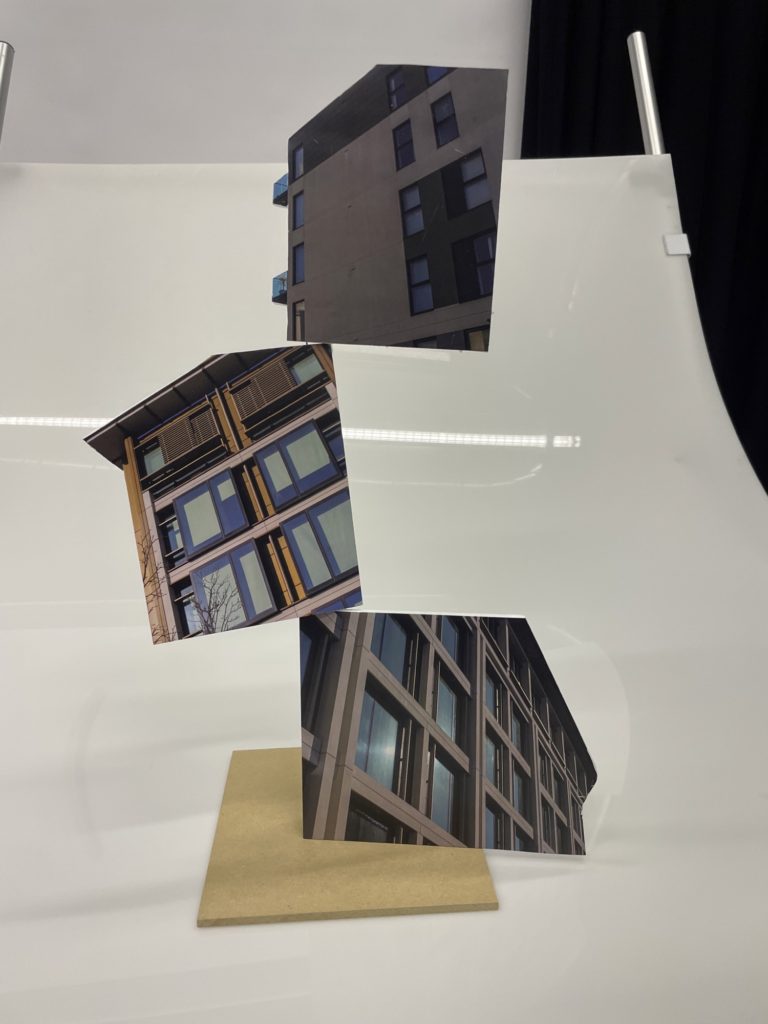
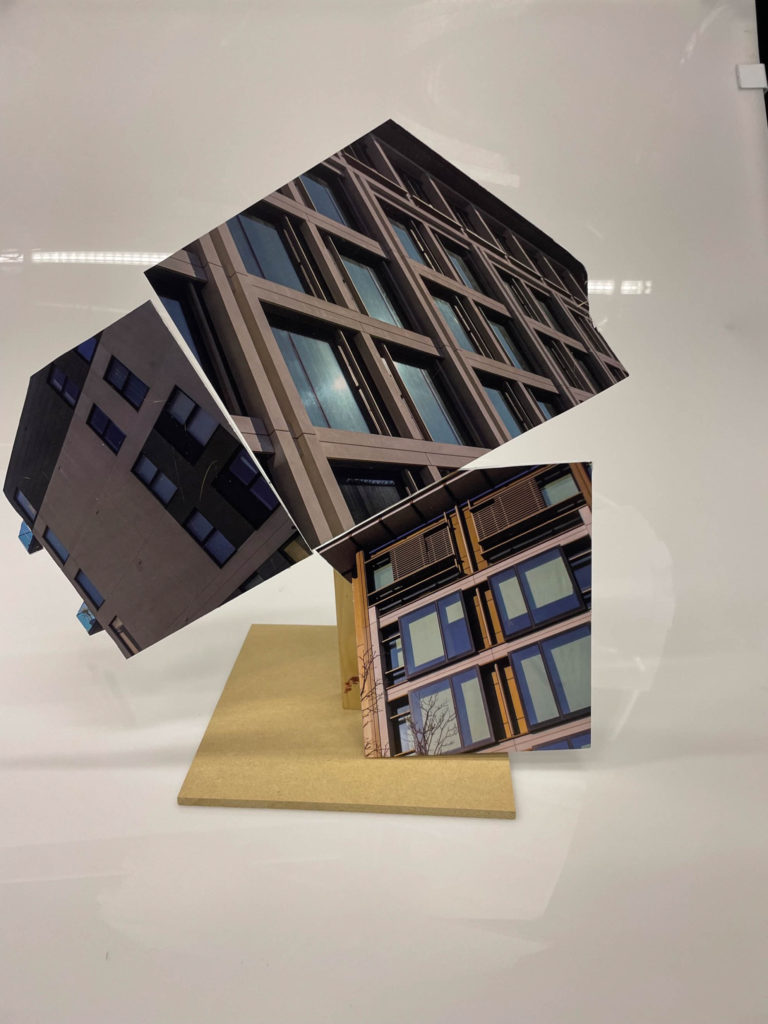
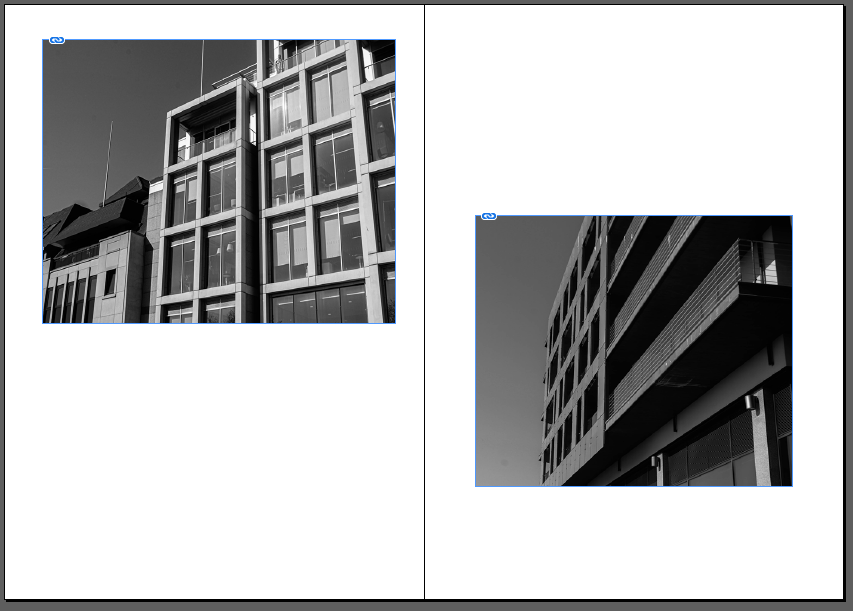
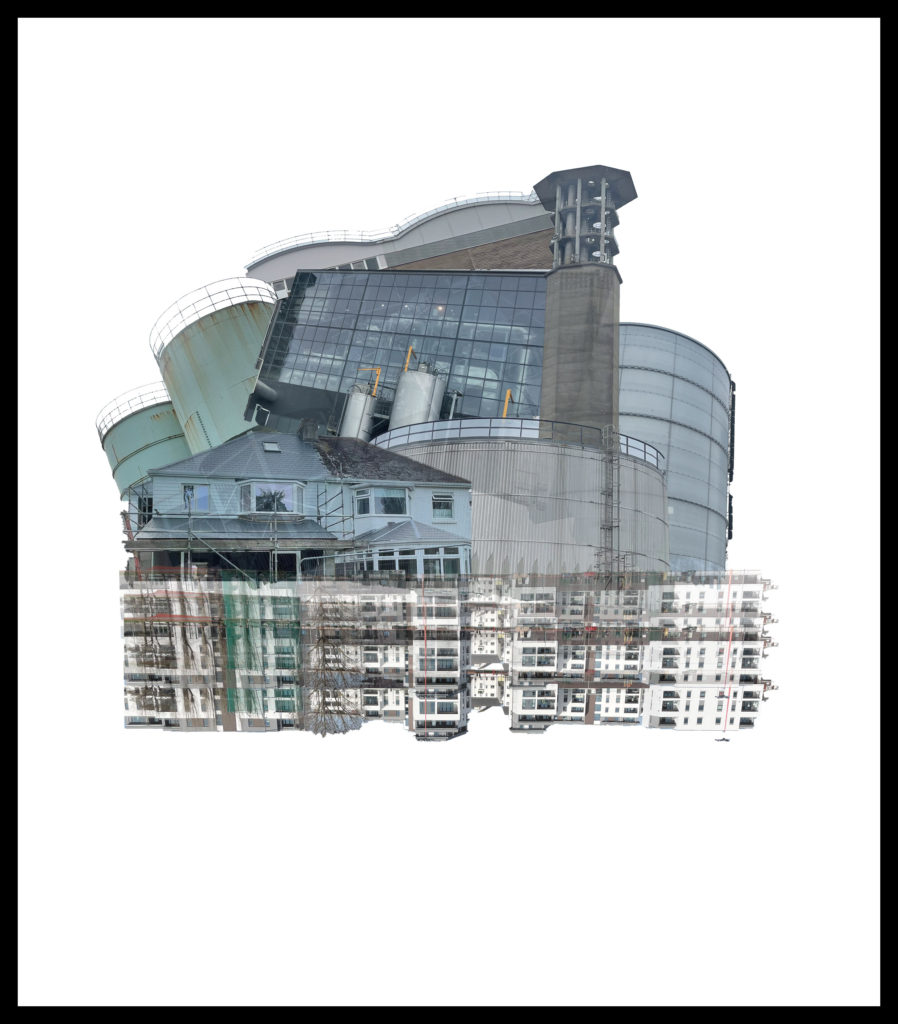
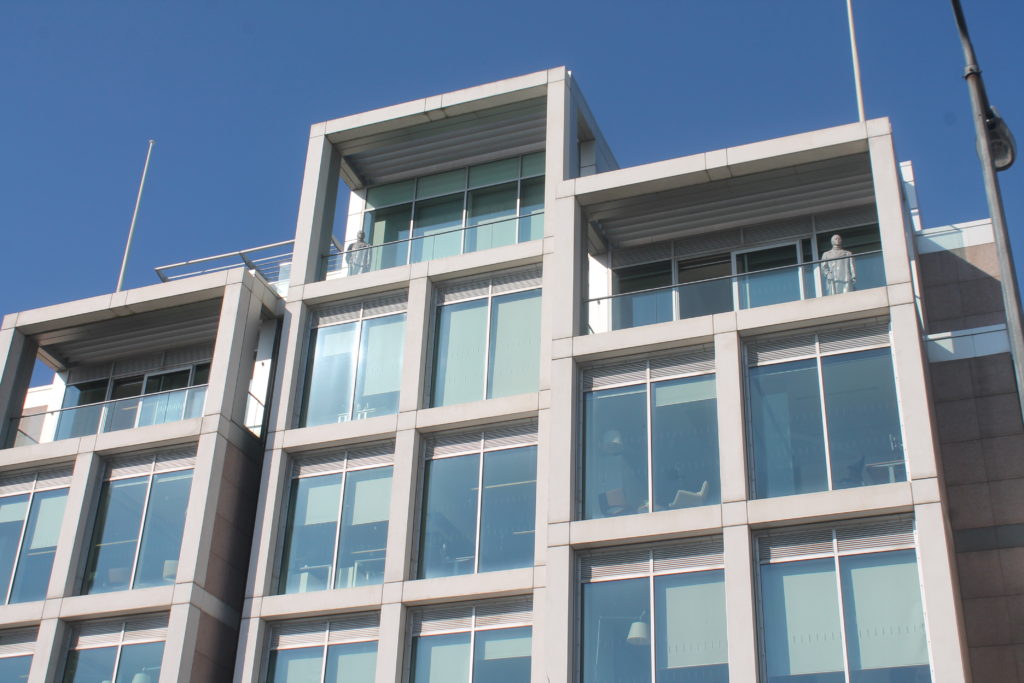
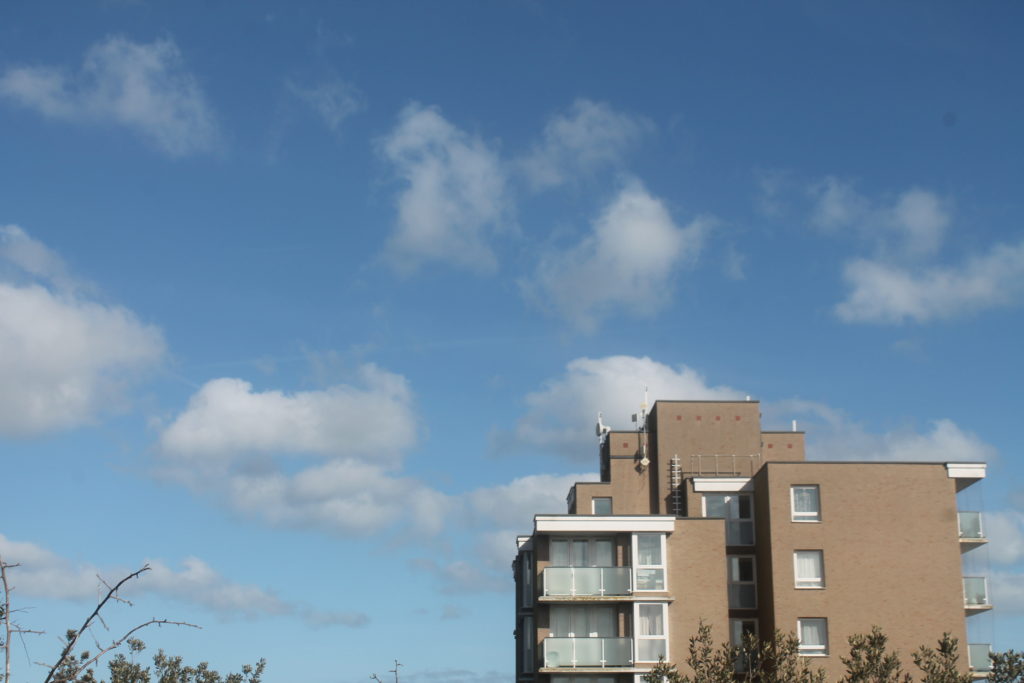
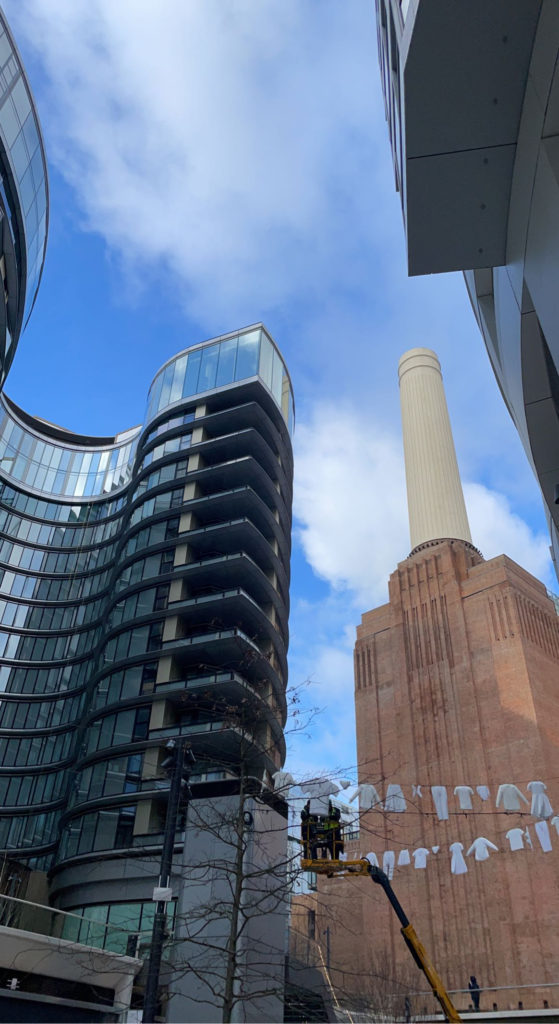
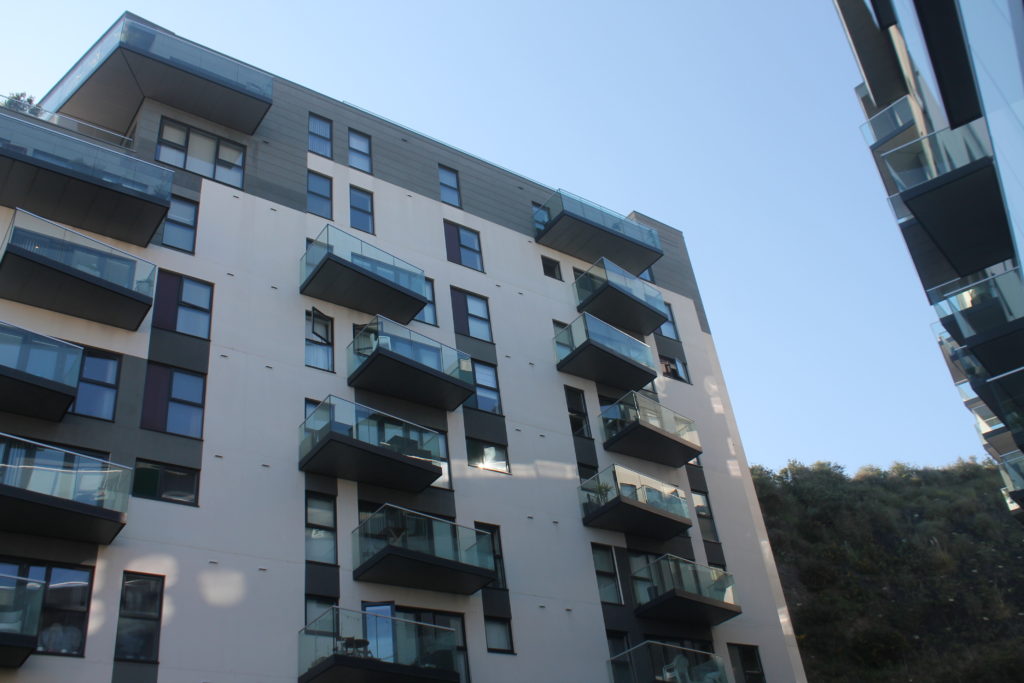
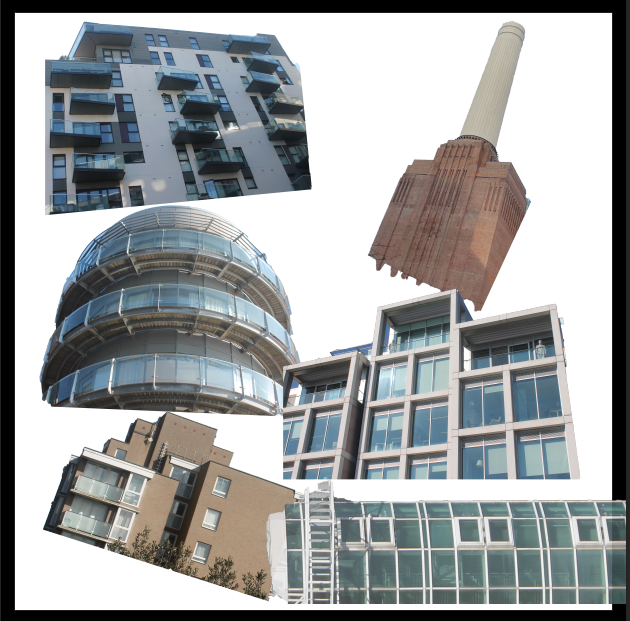
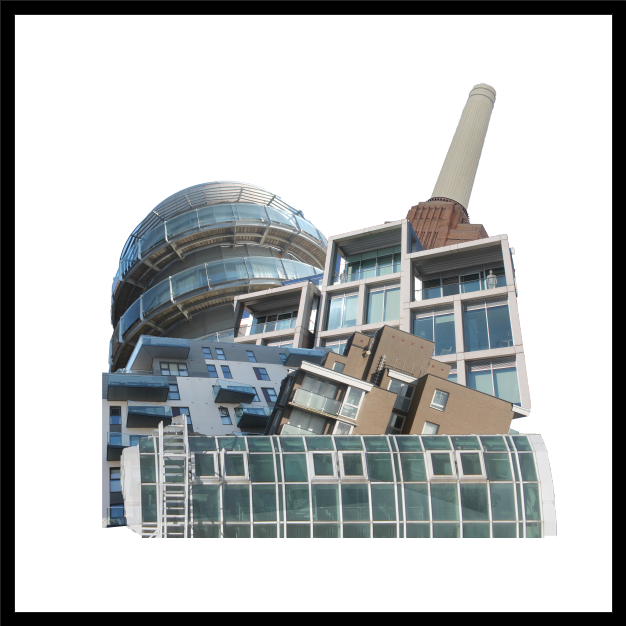
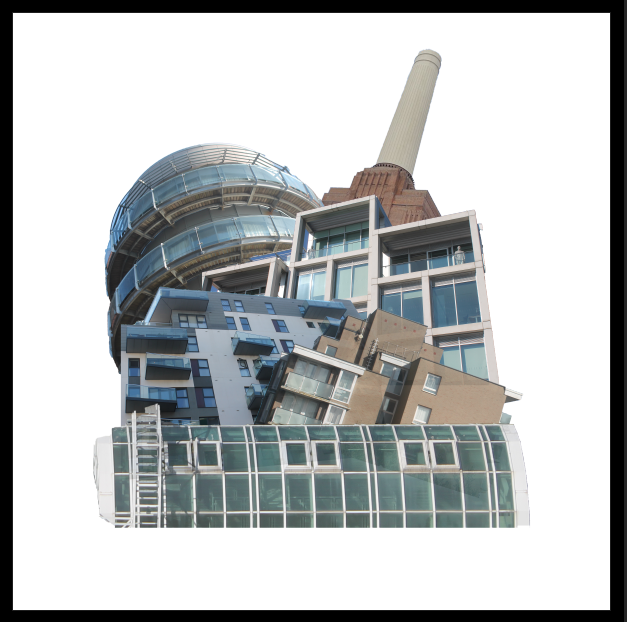
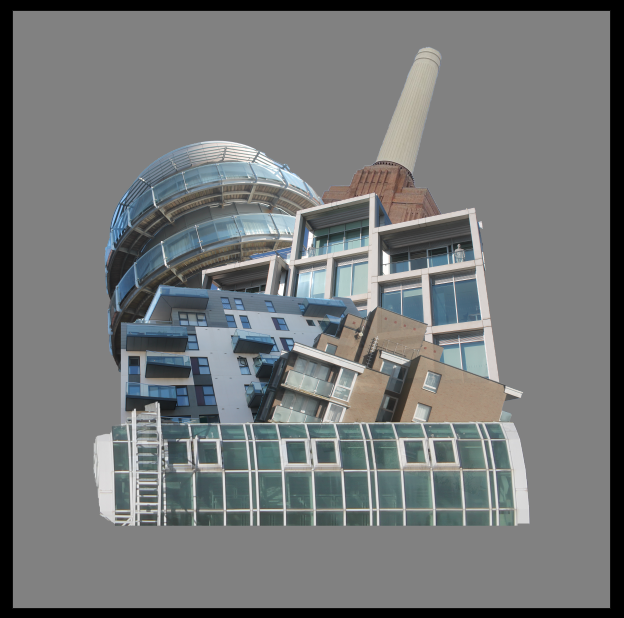
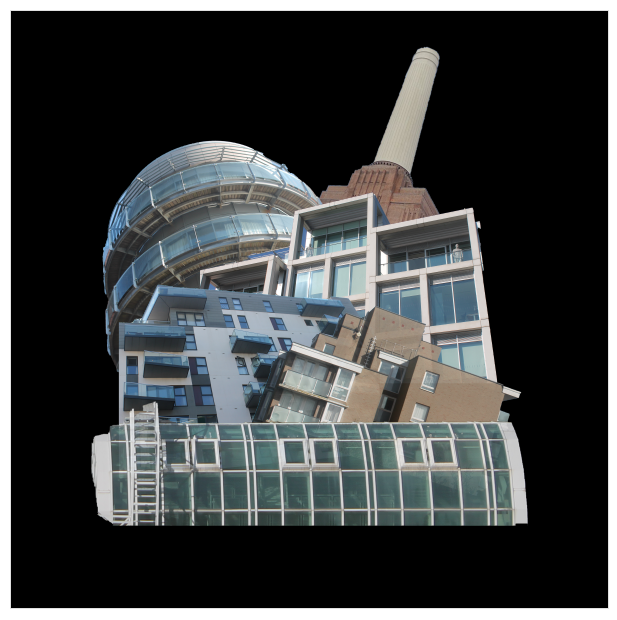
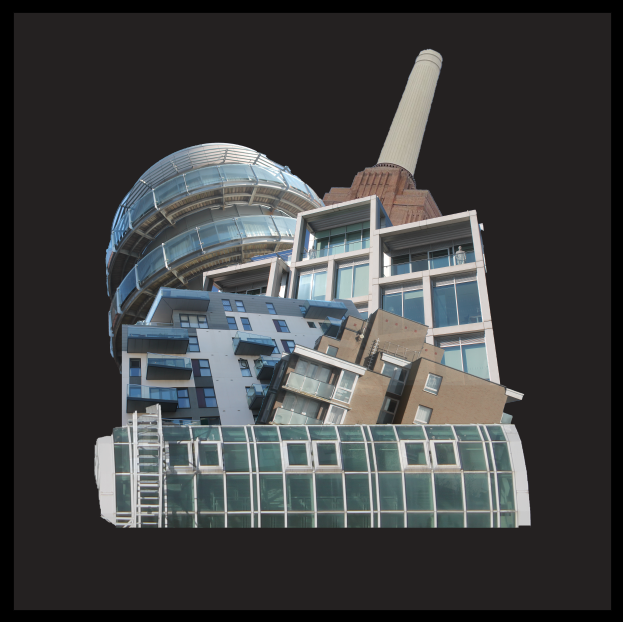
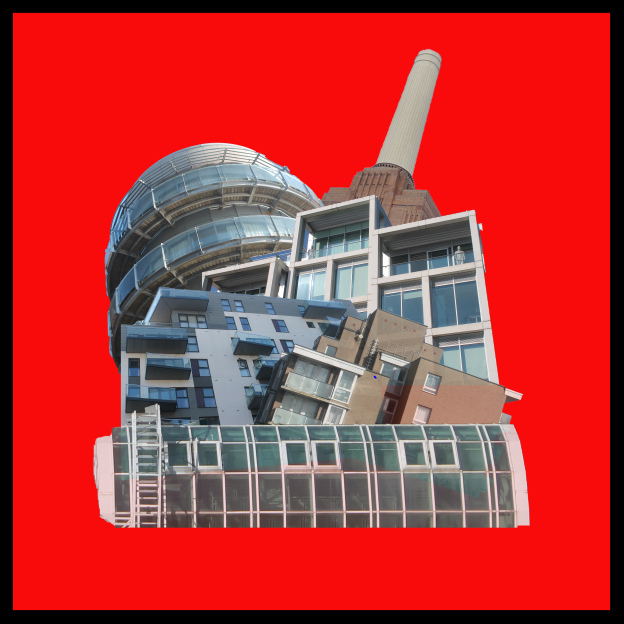
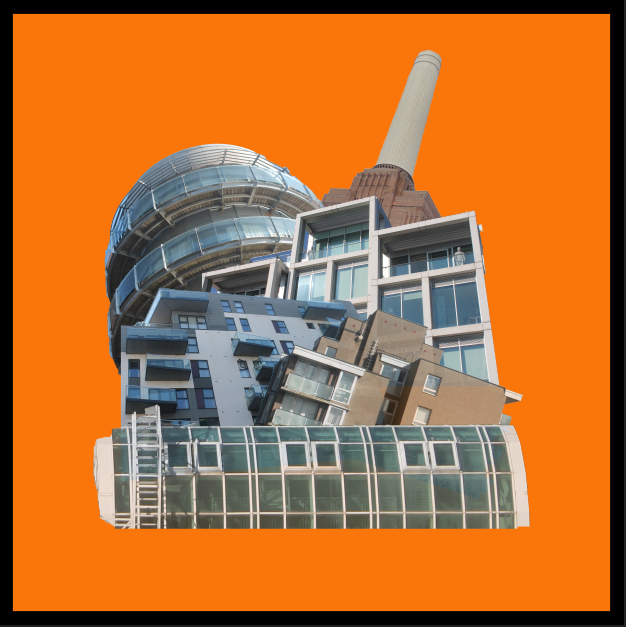
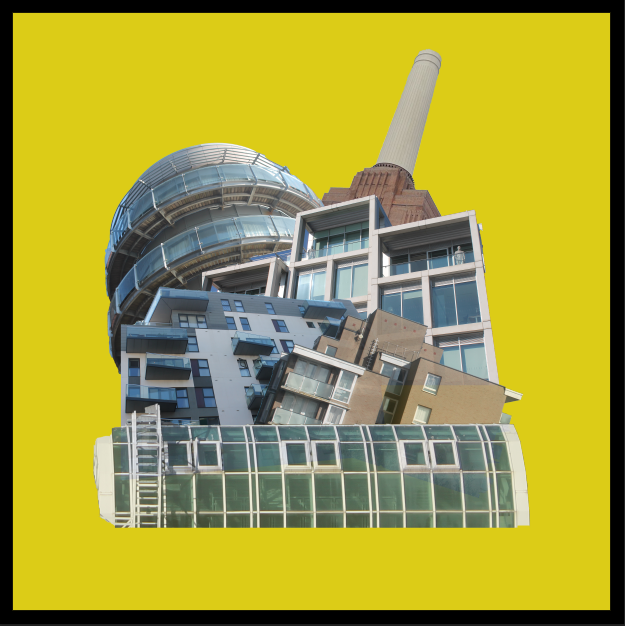
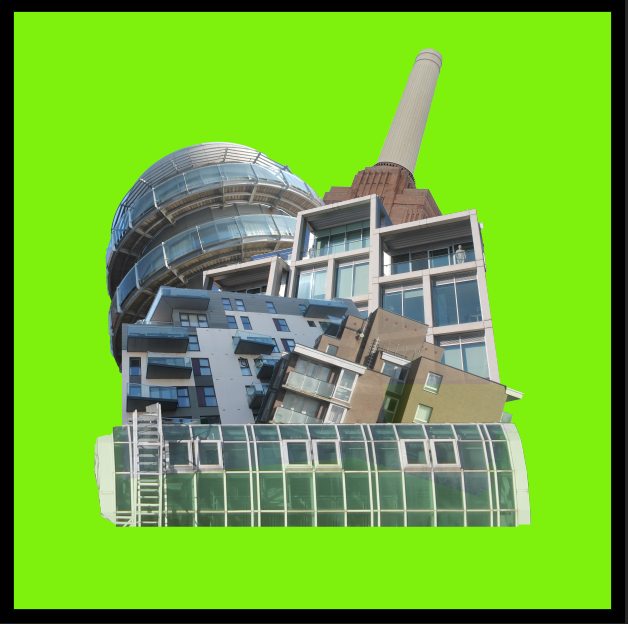
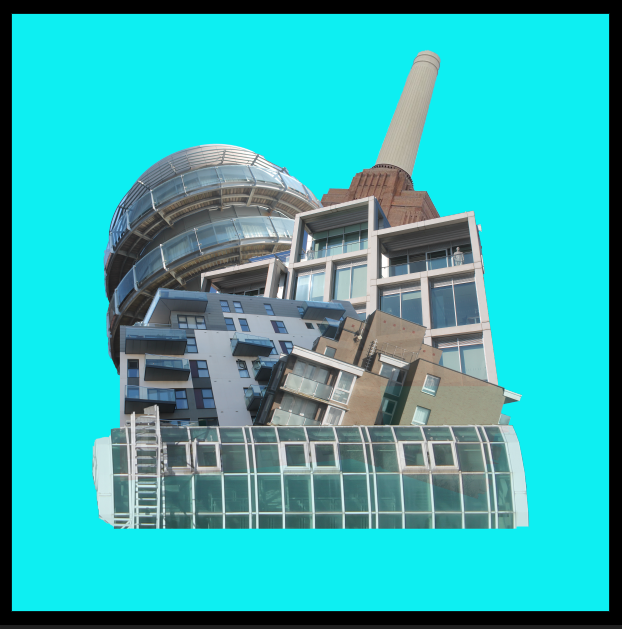
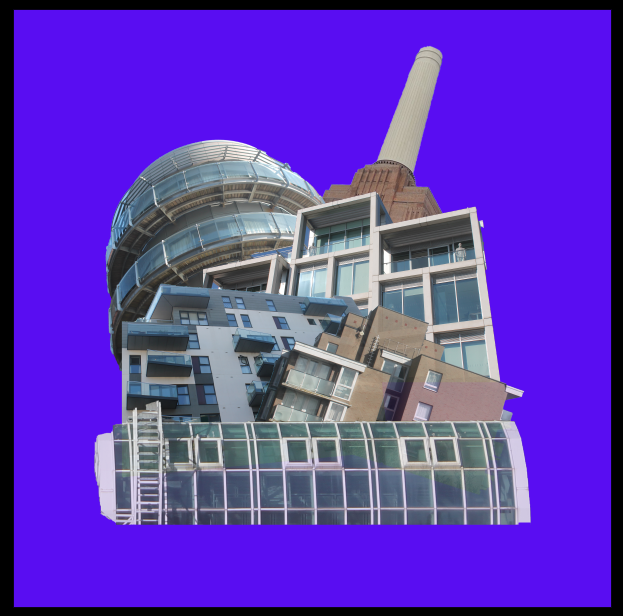
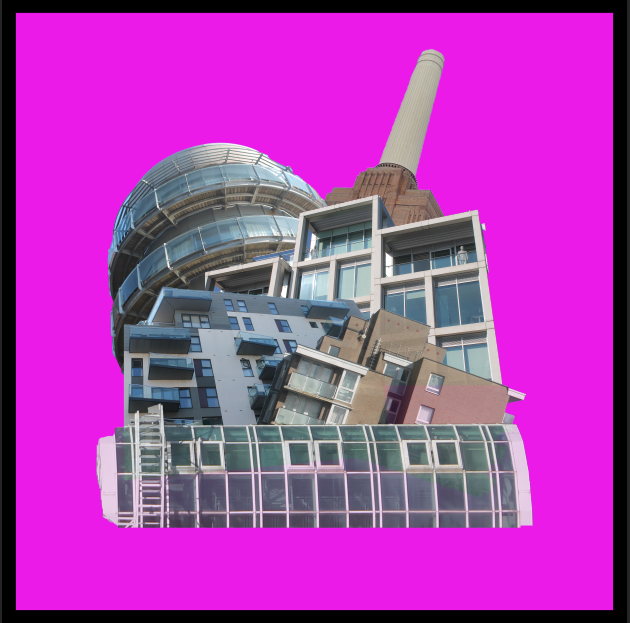
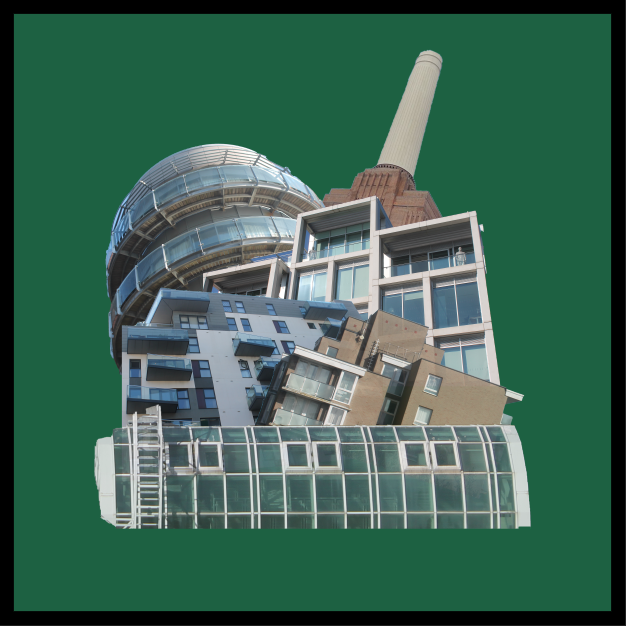
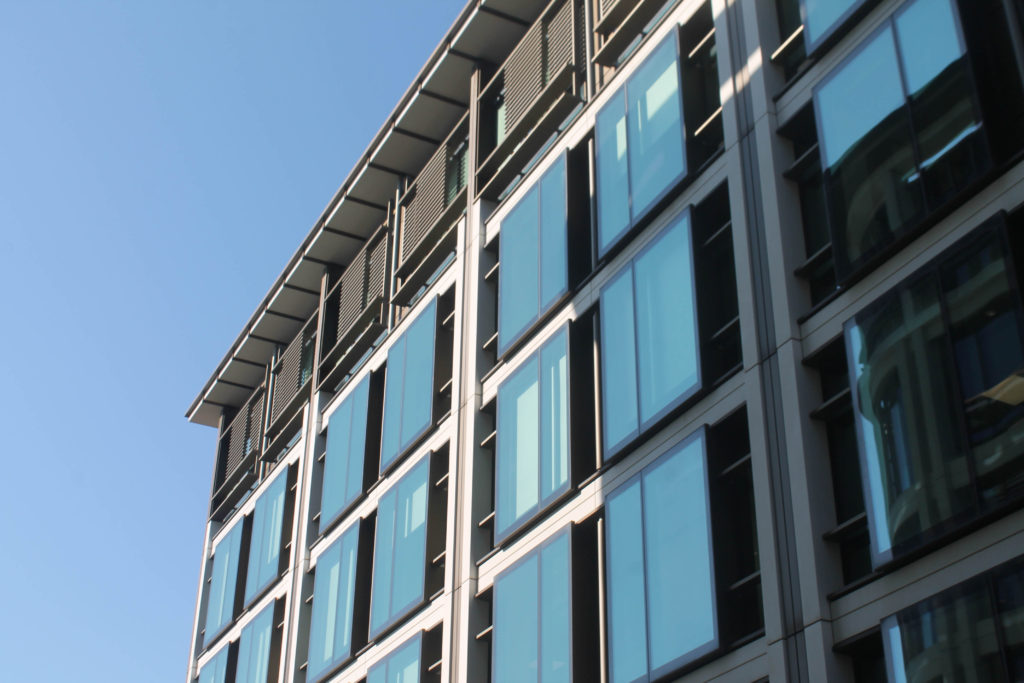
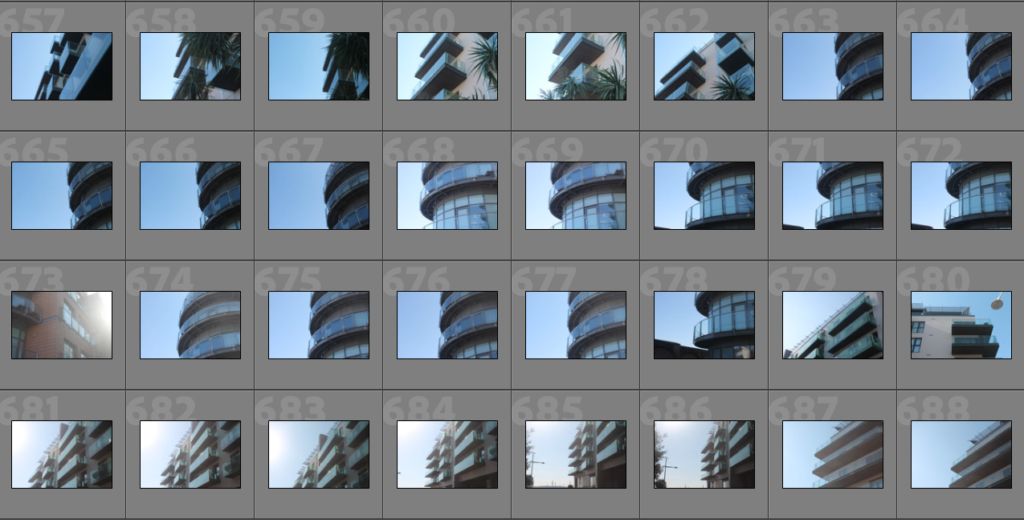
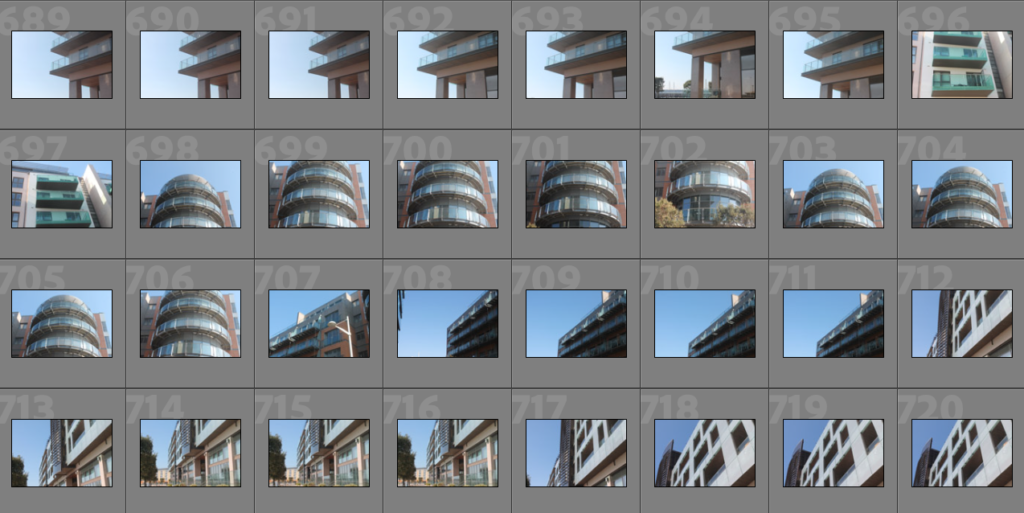
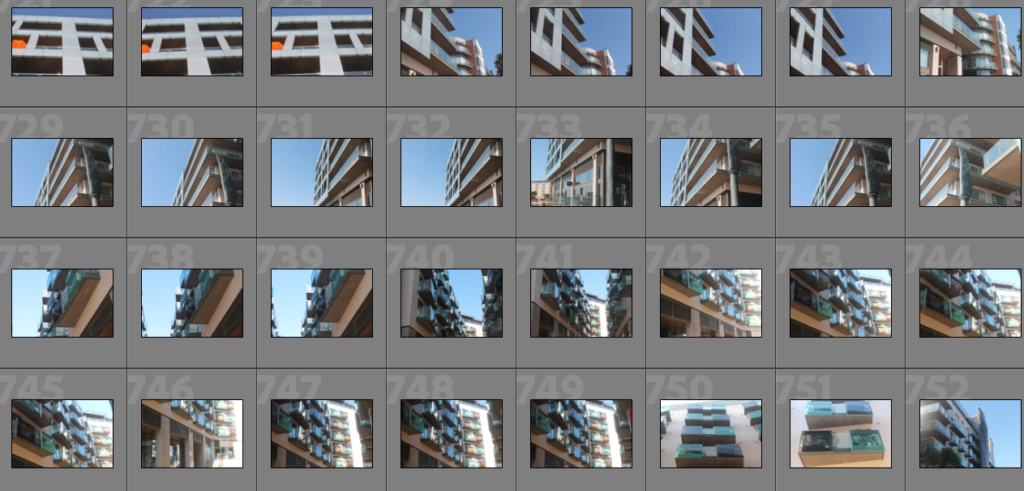
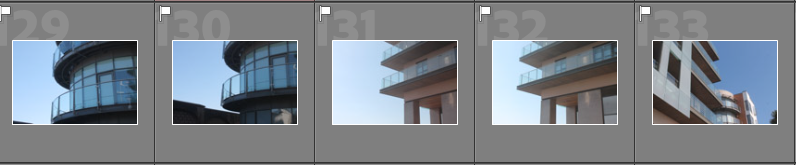
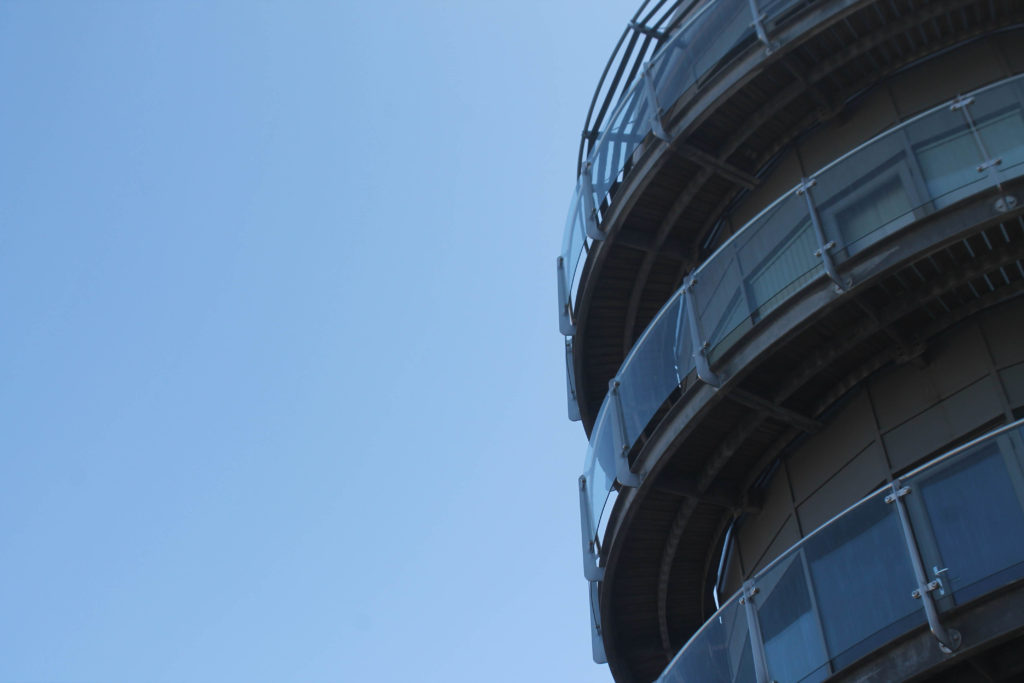
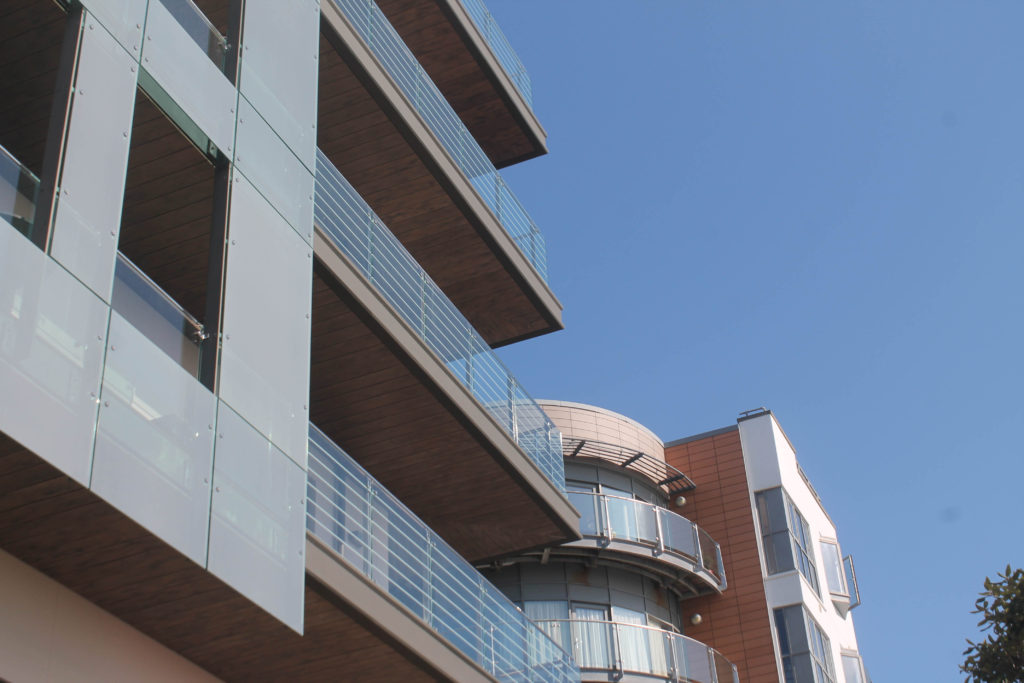
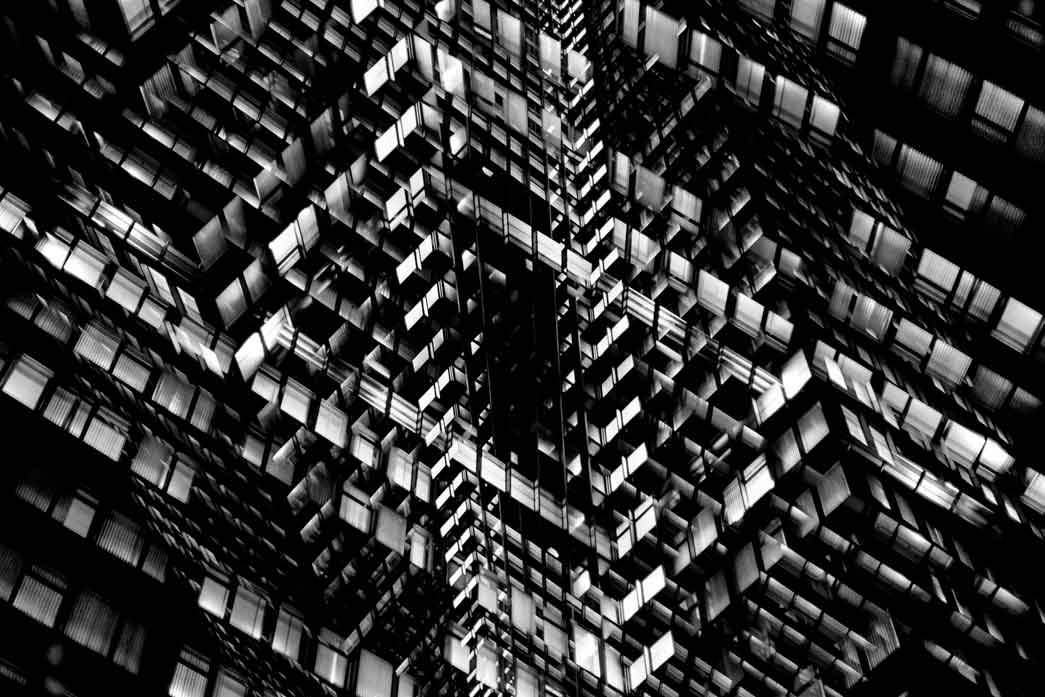
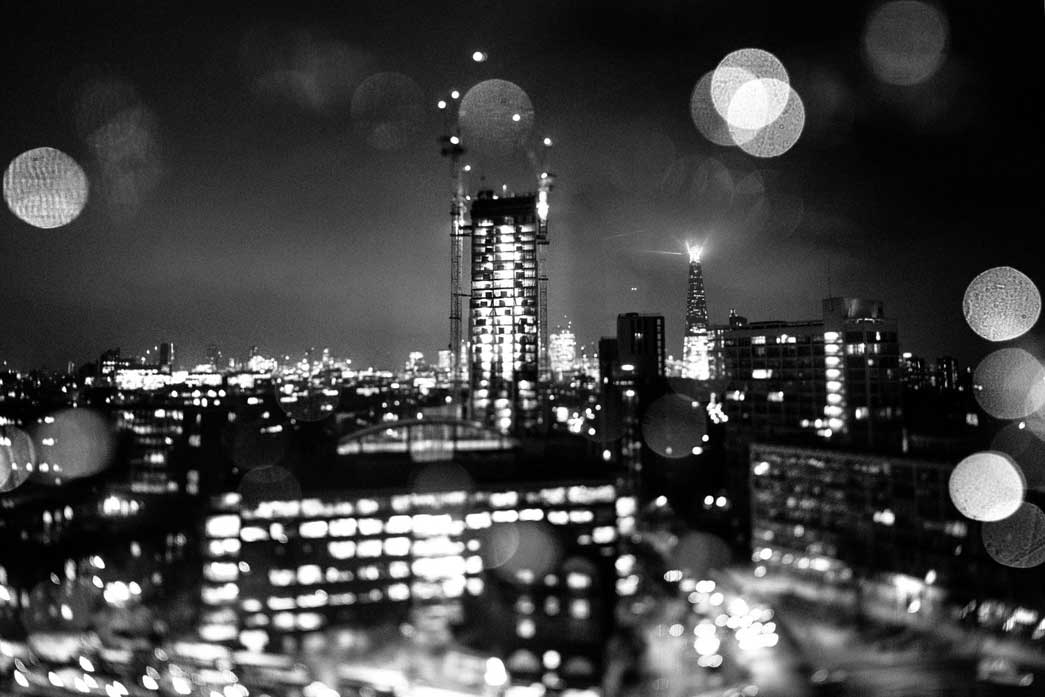
Metropole (2014-2018)

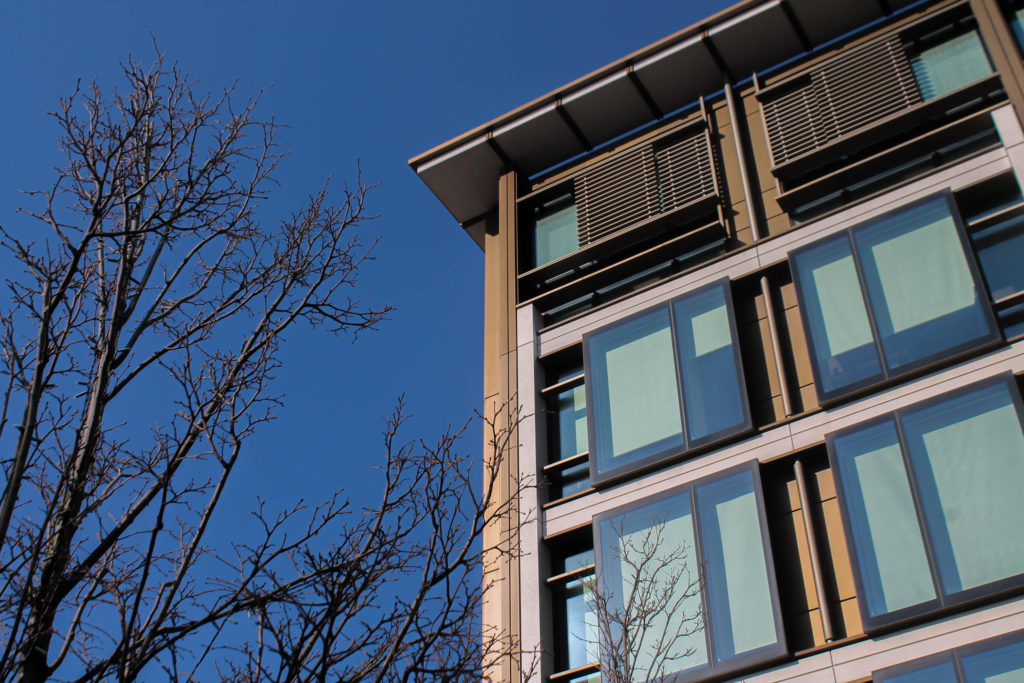
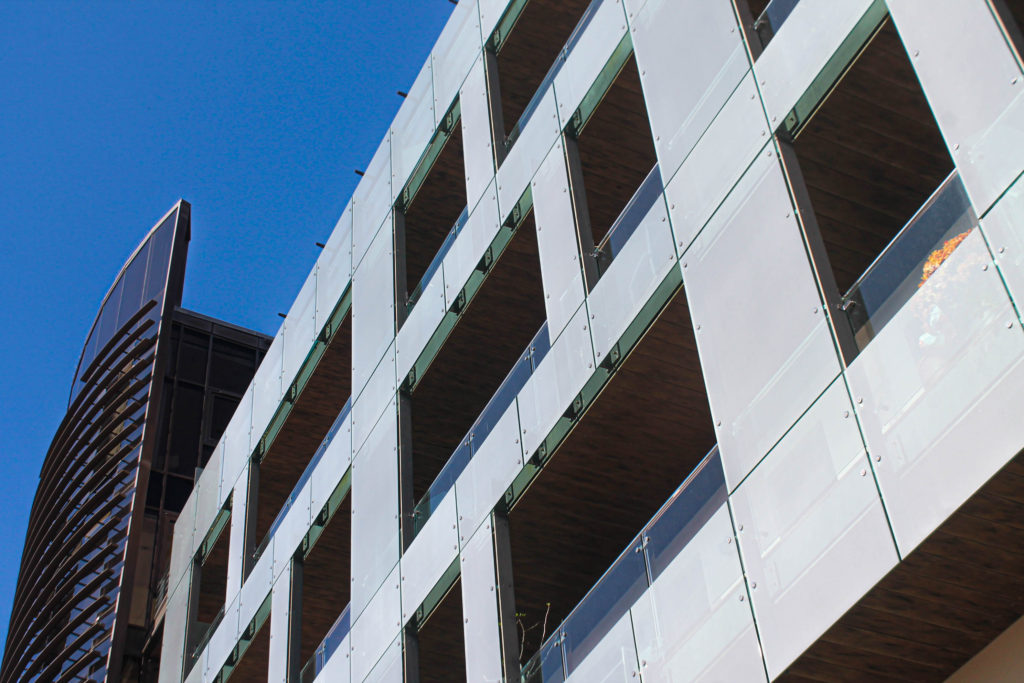
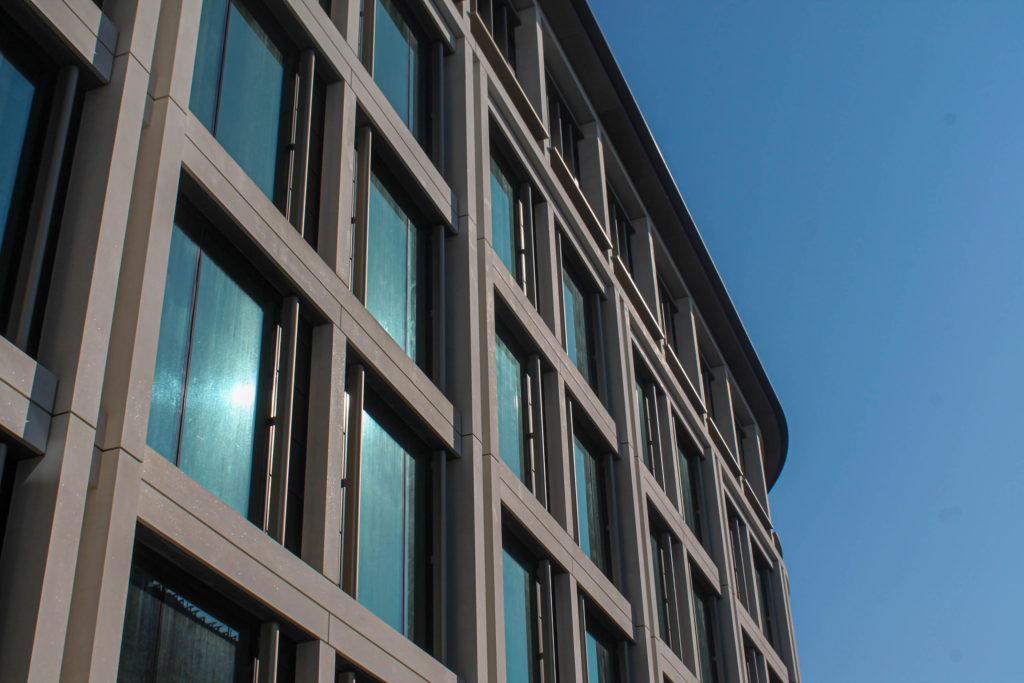
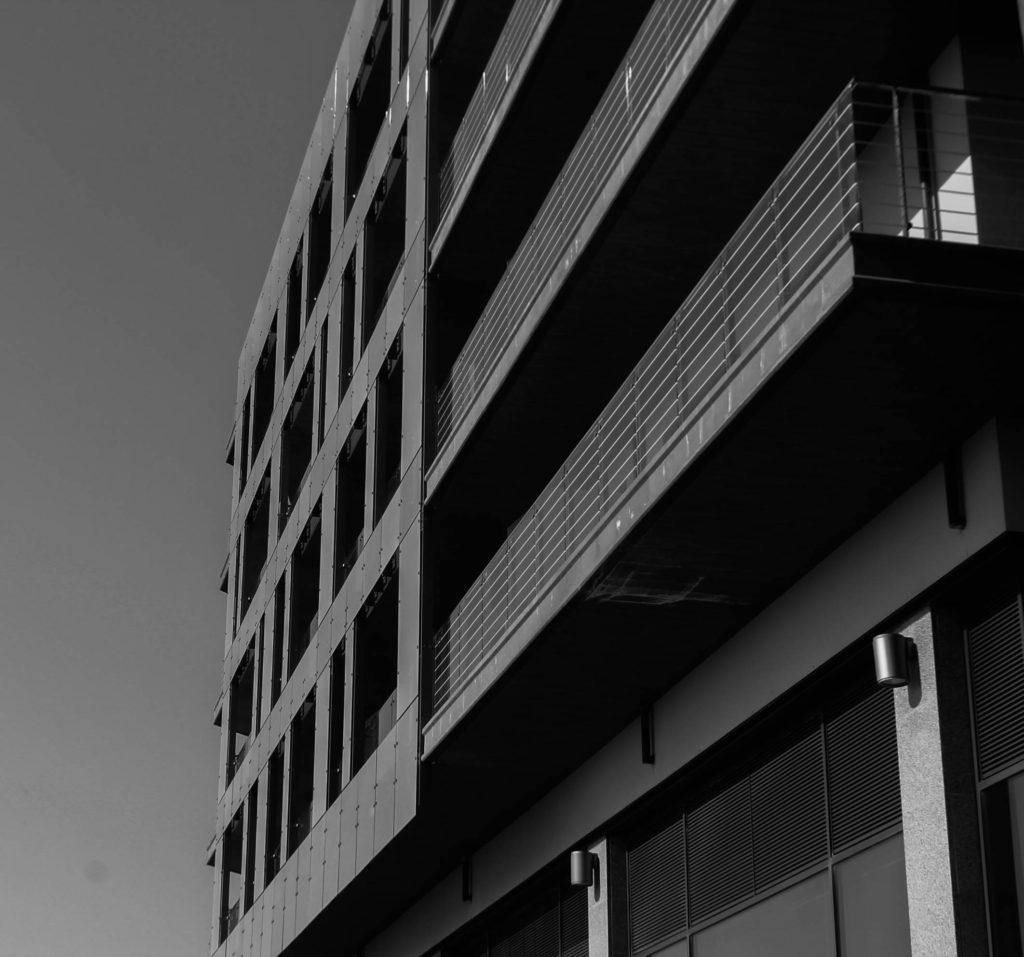
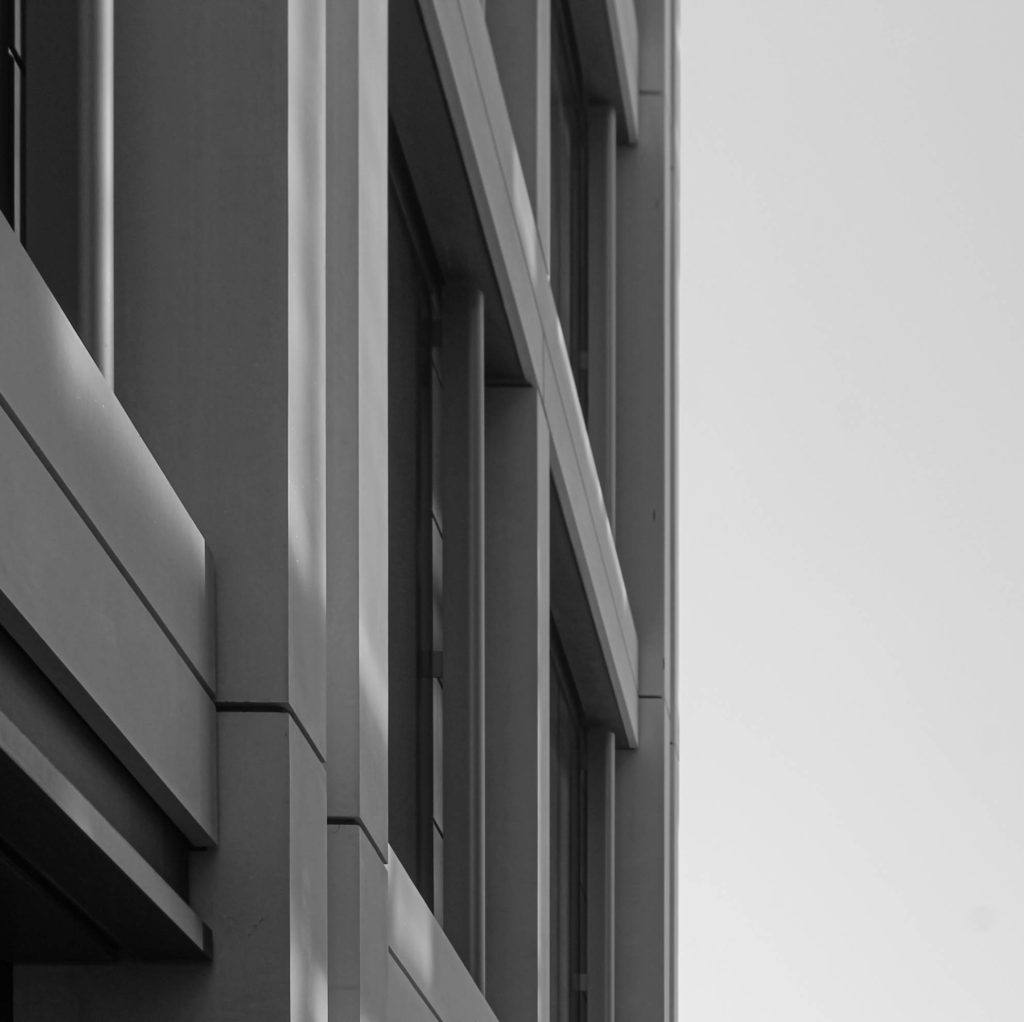
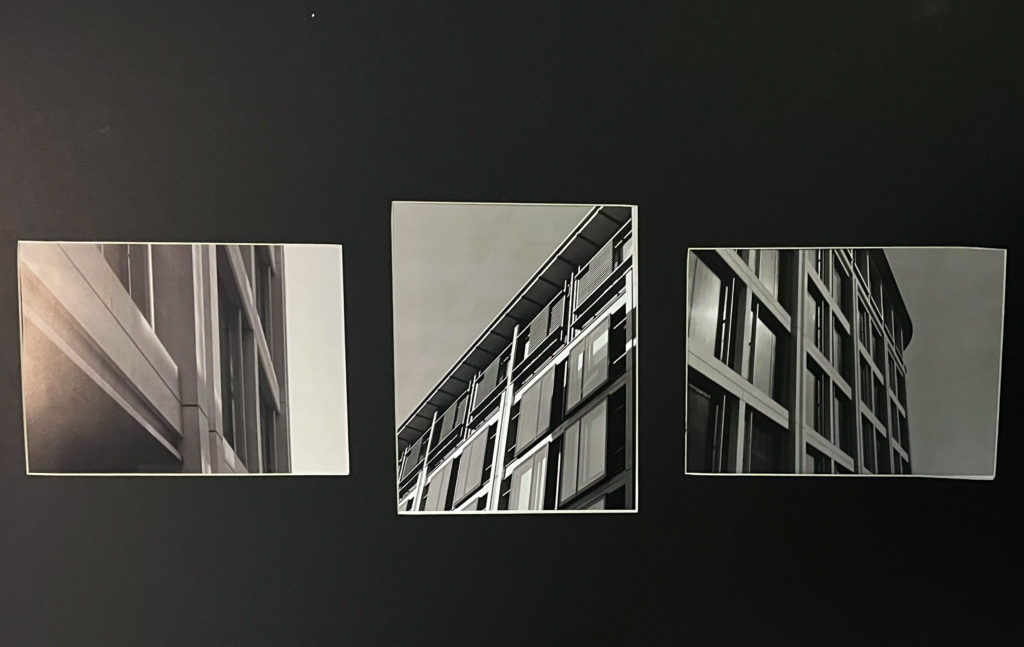
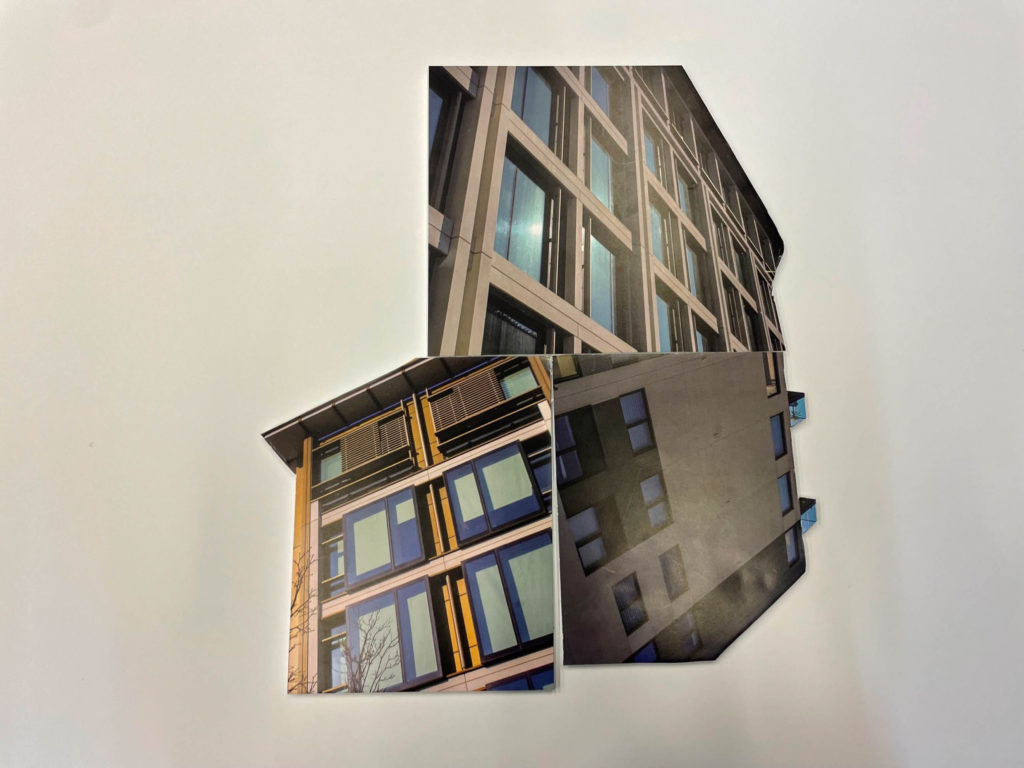
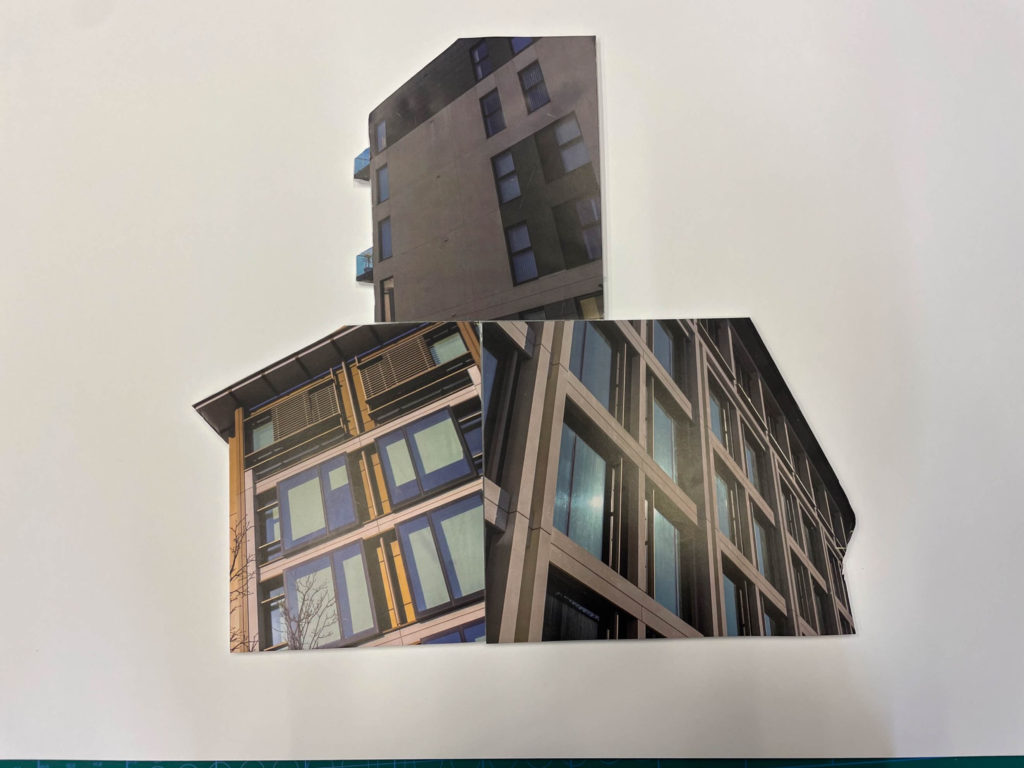
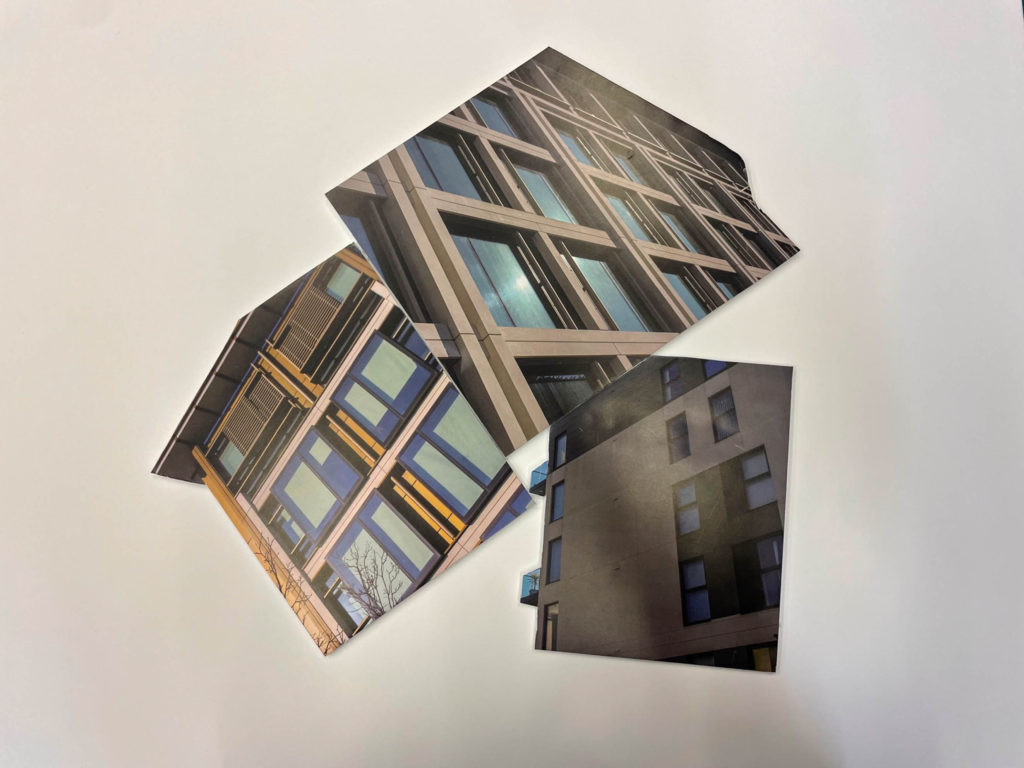
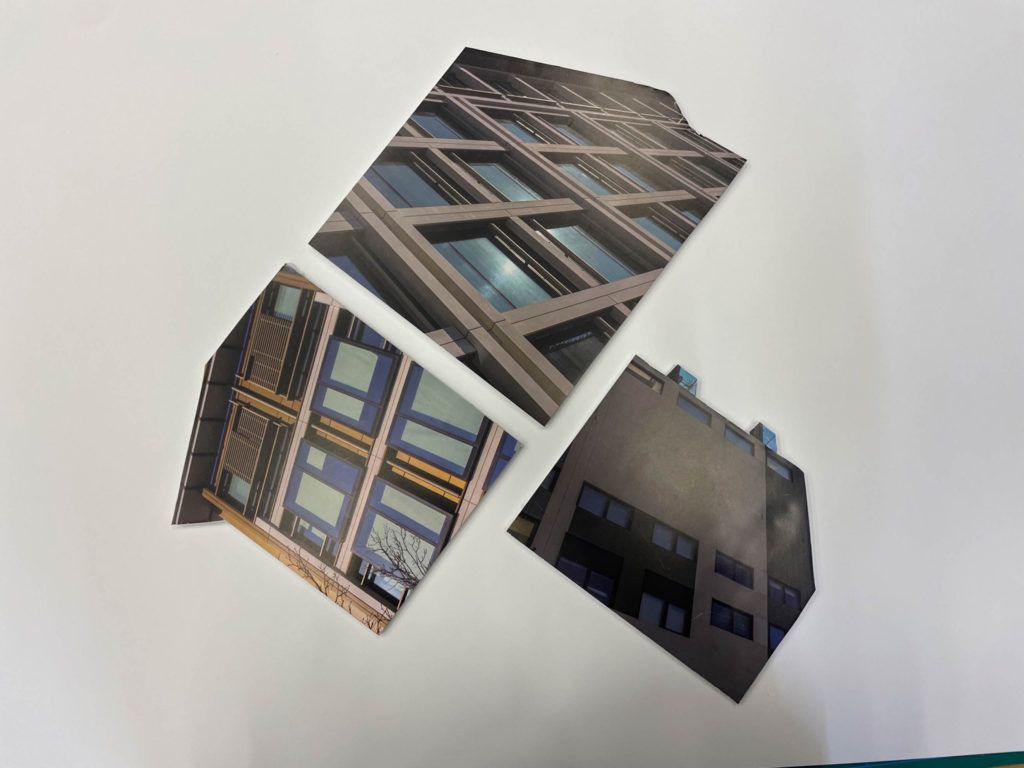
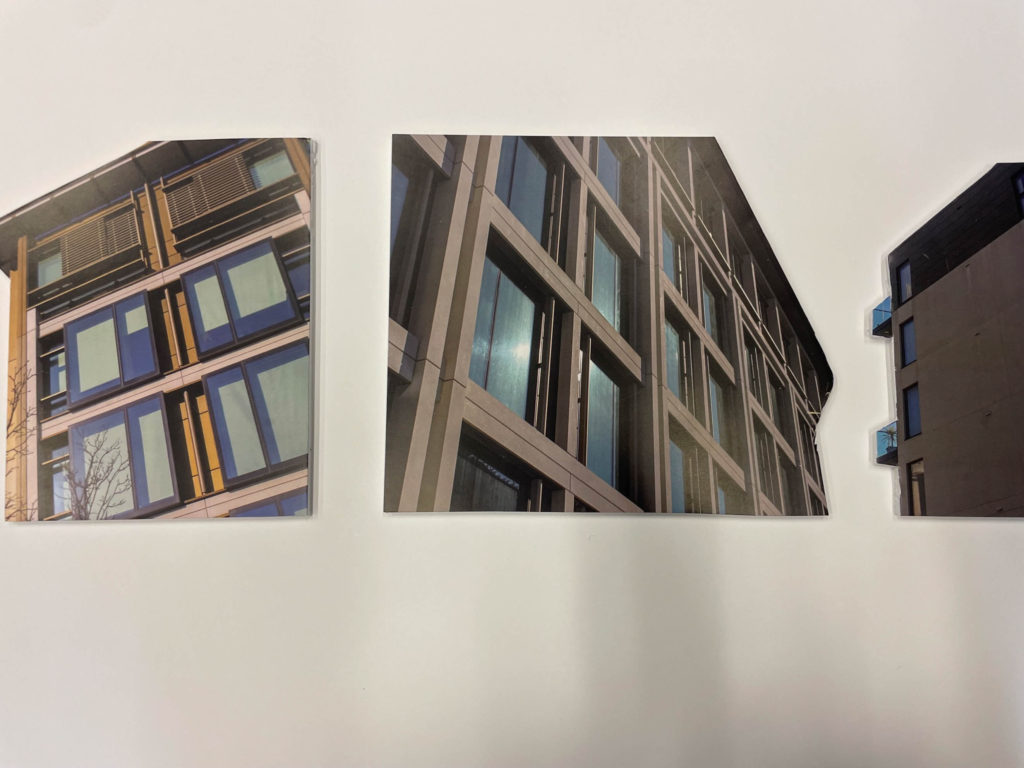
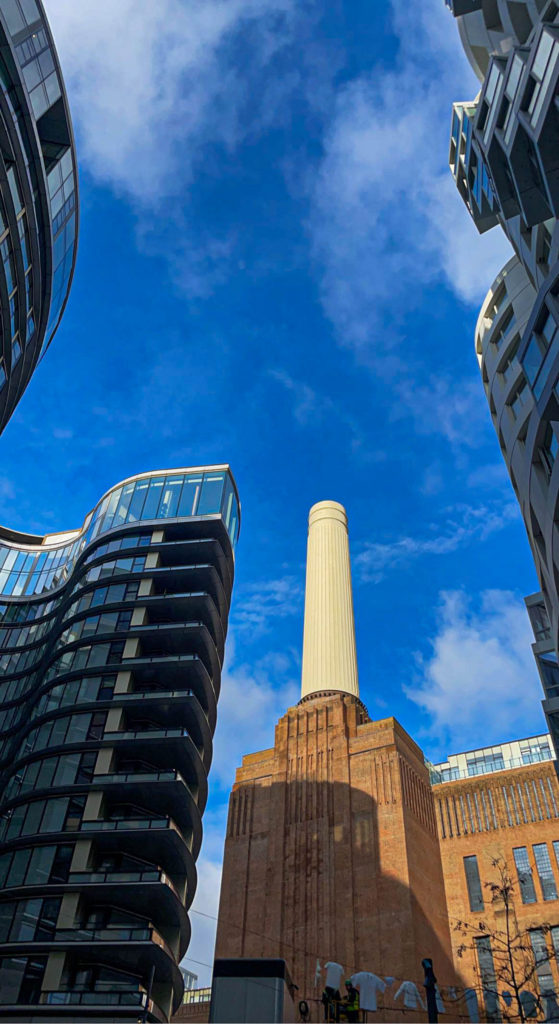
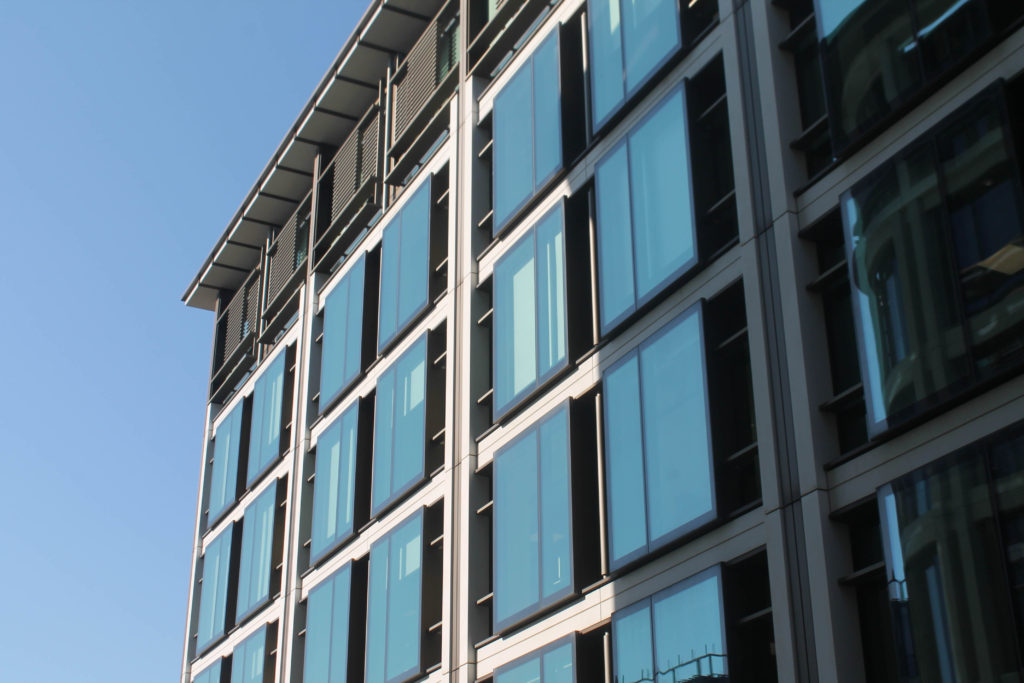
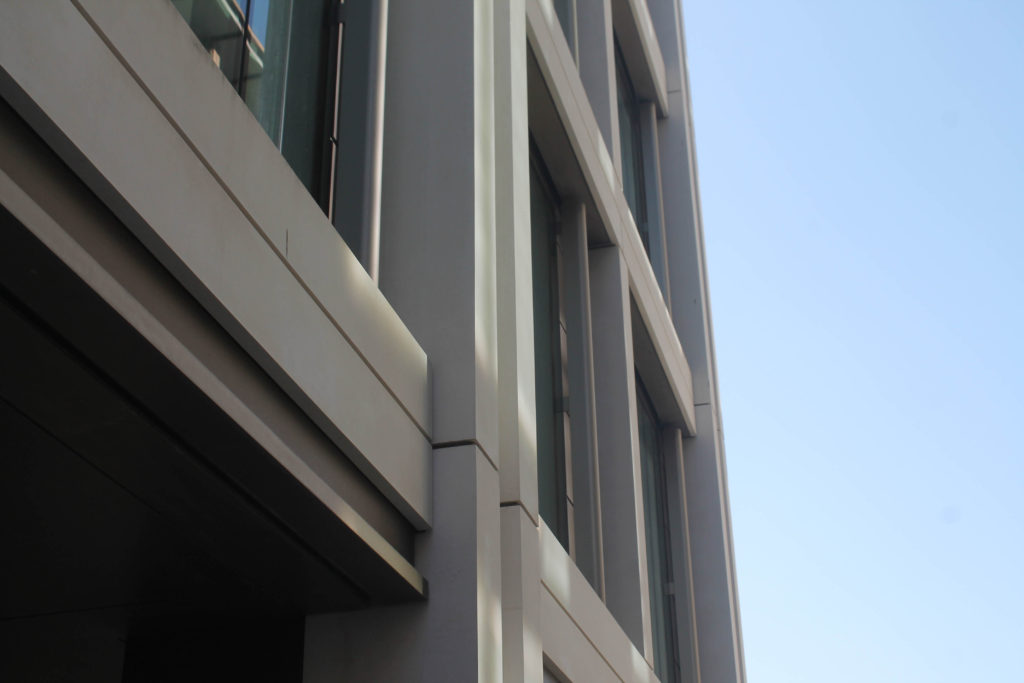
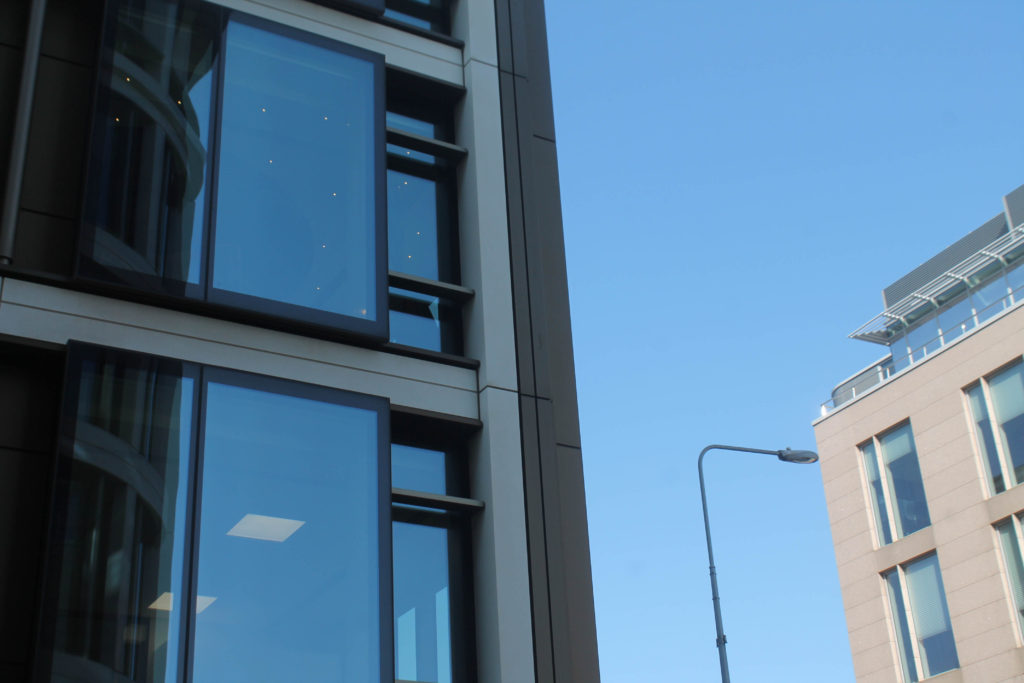
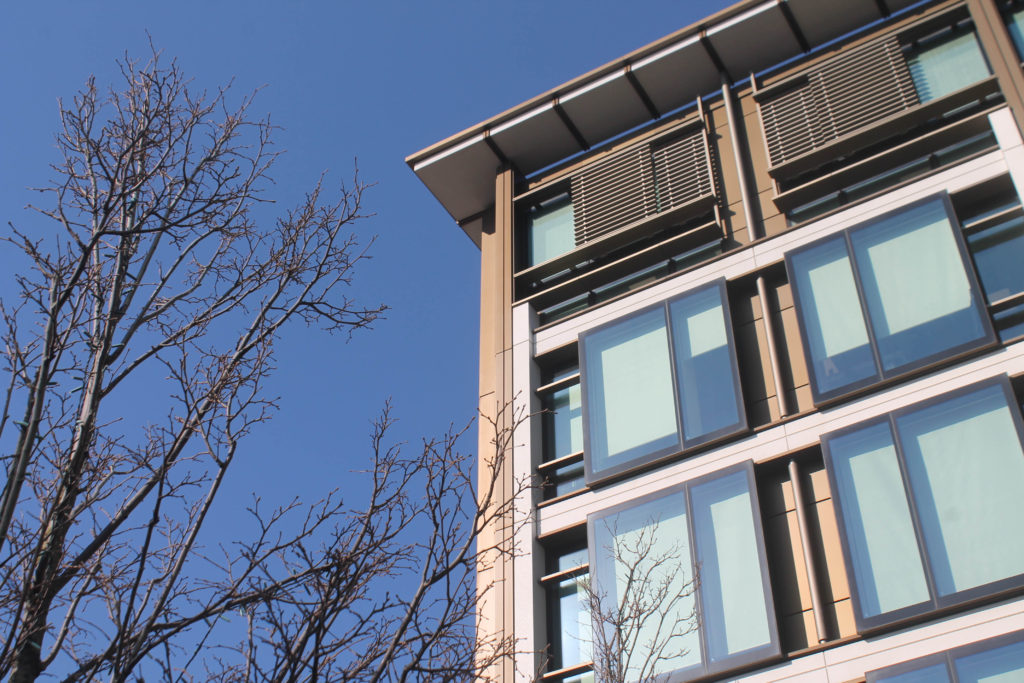
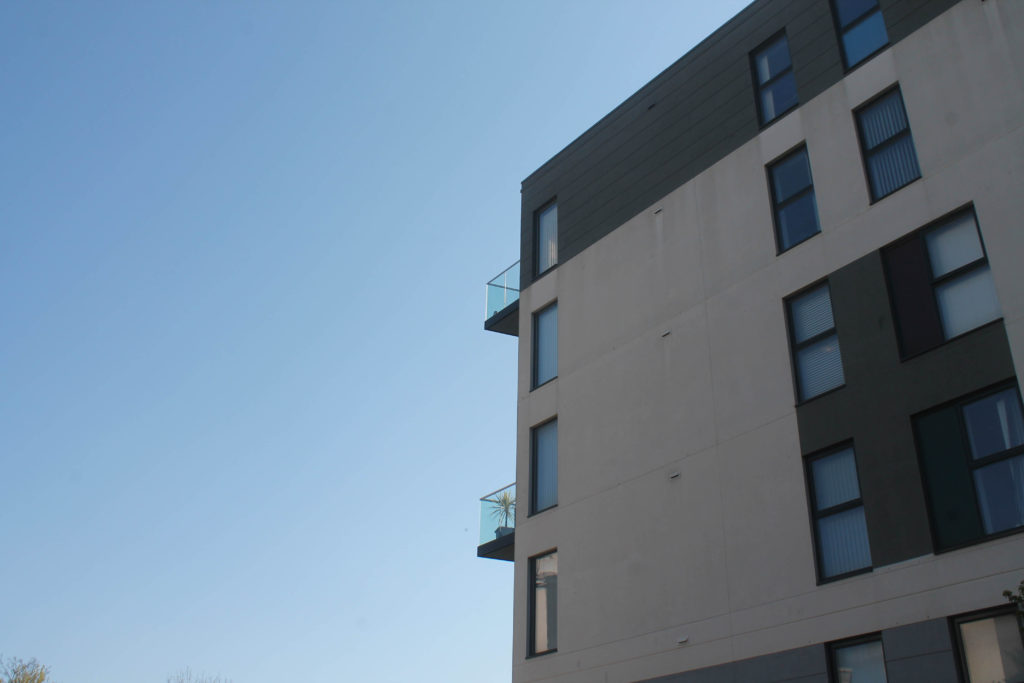
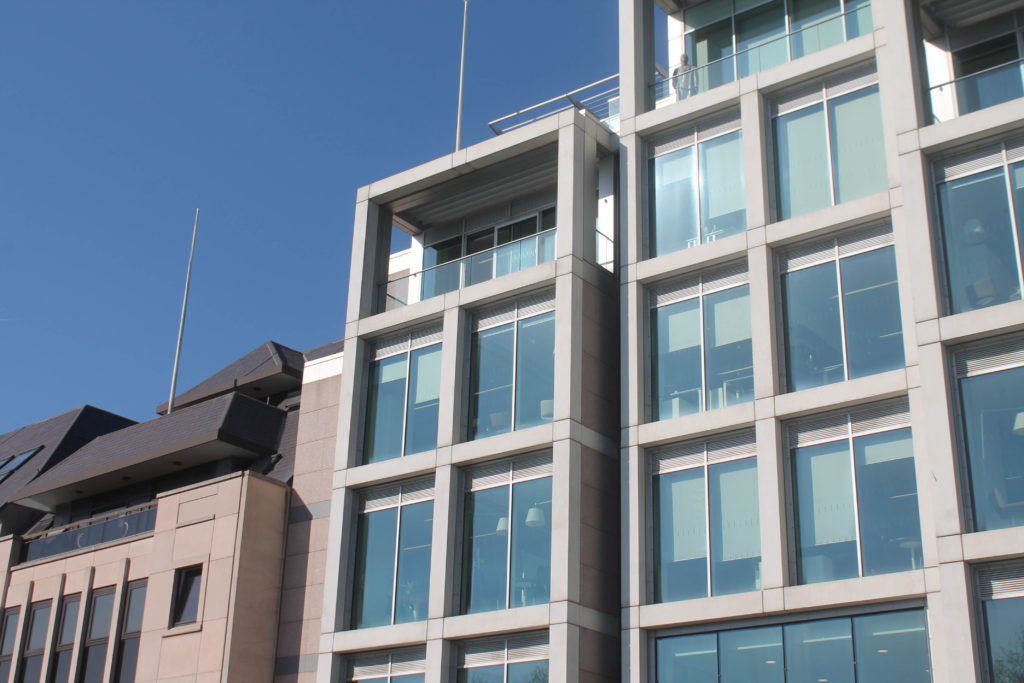
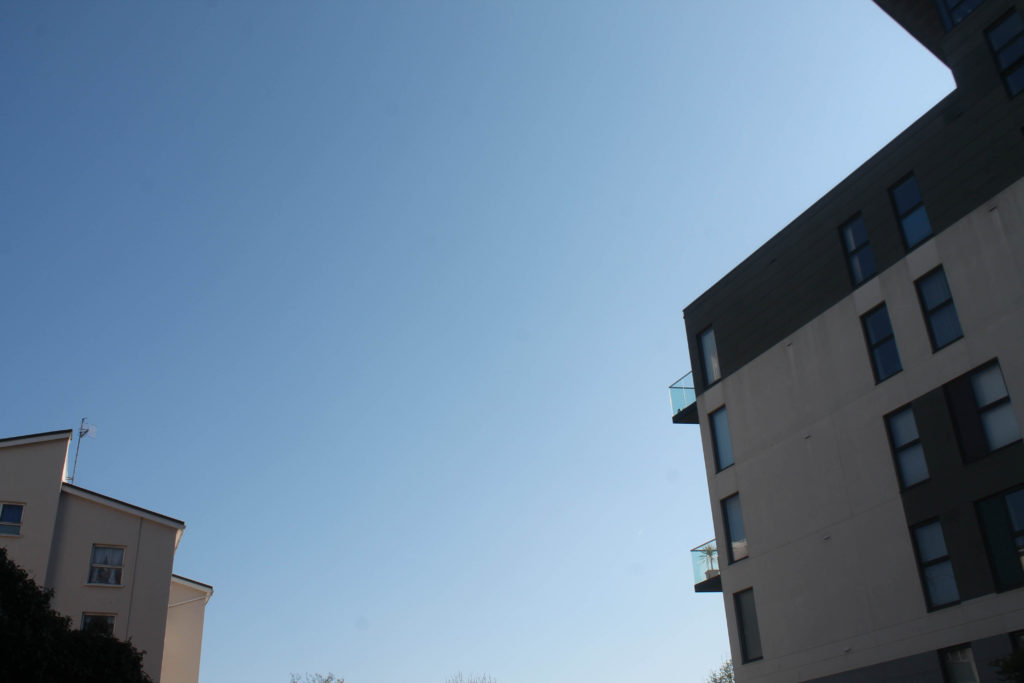
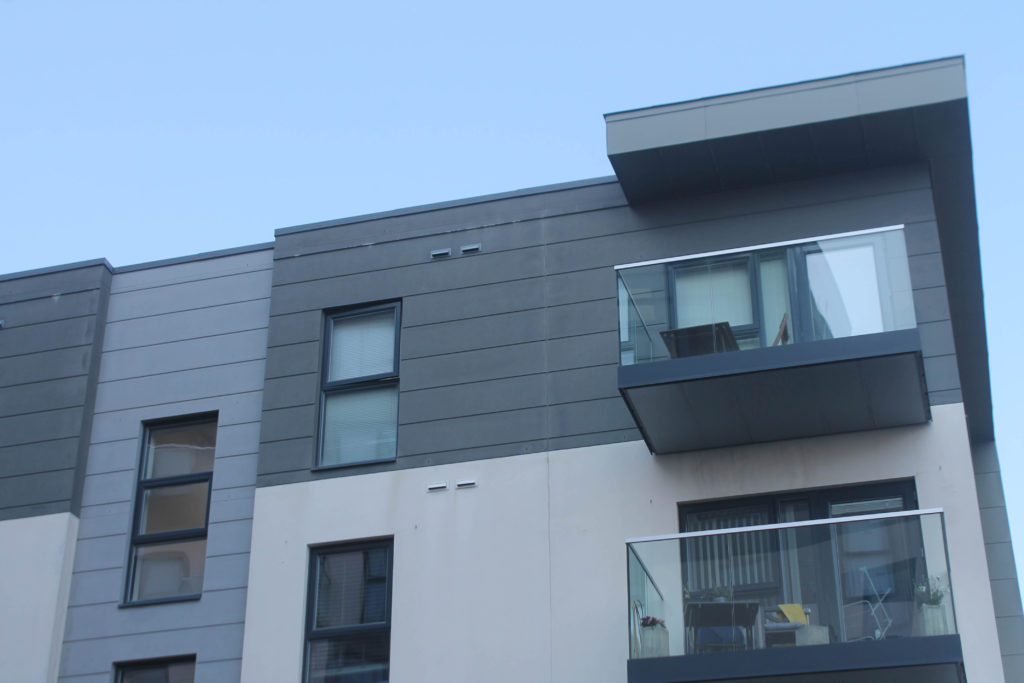
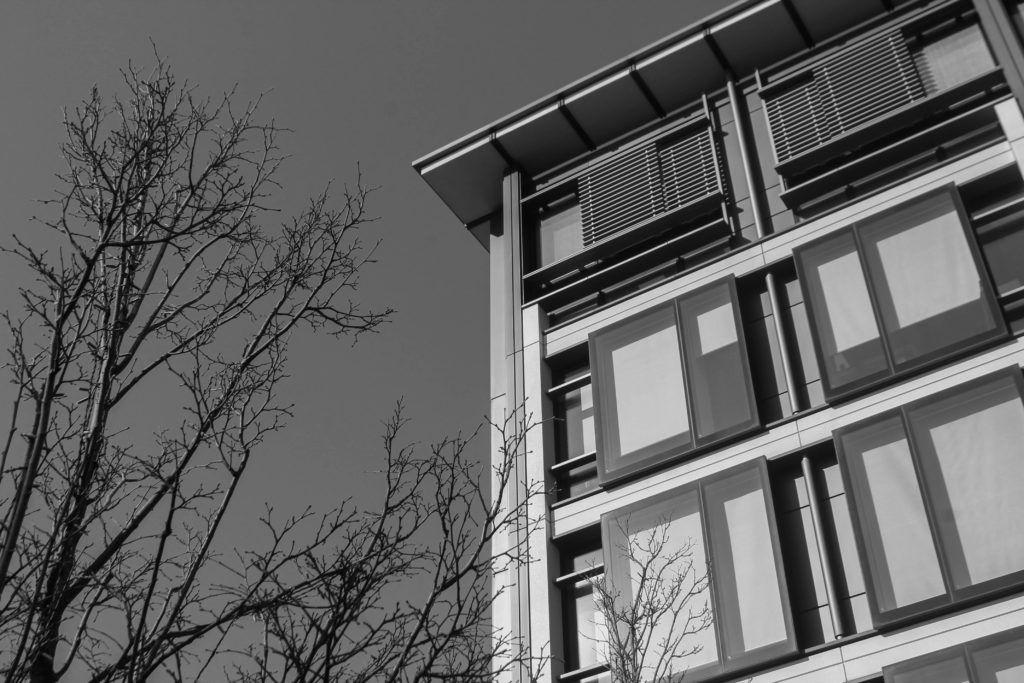
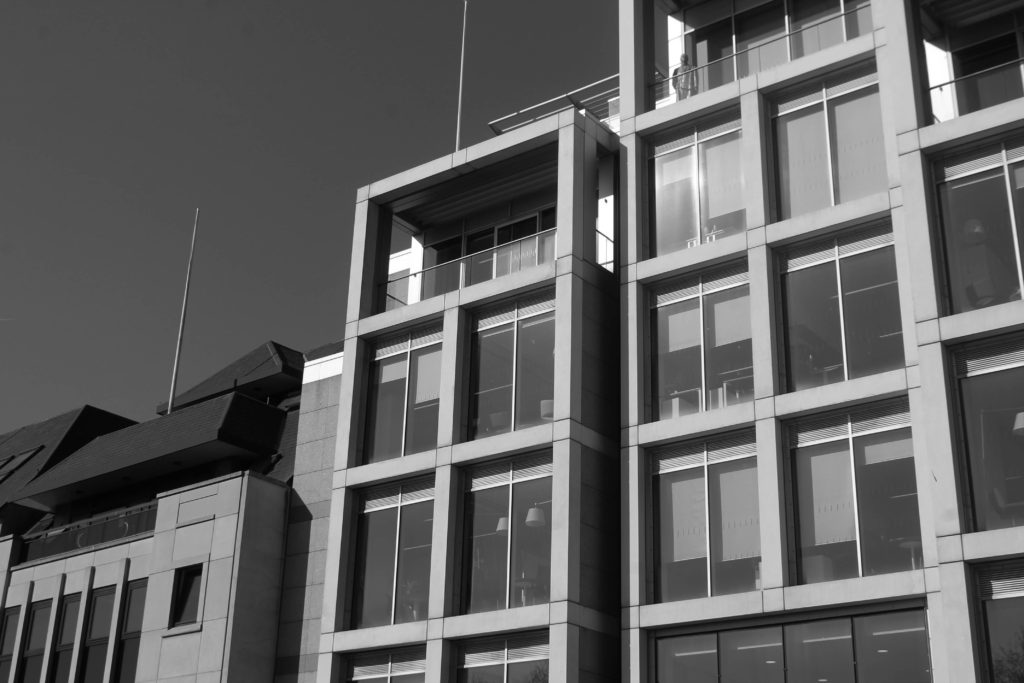
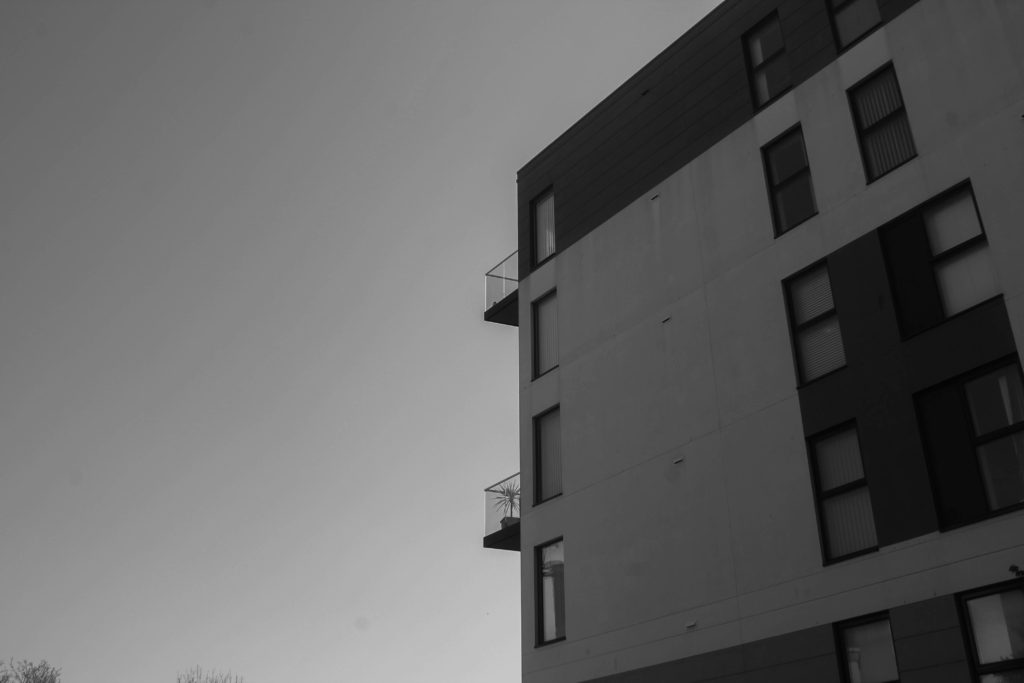
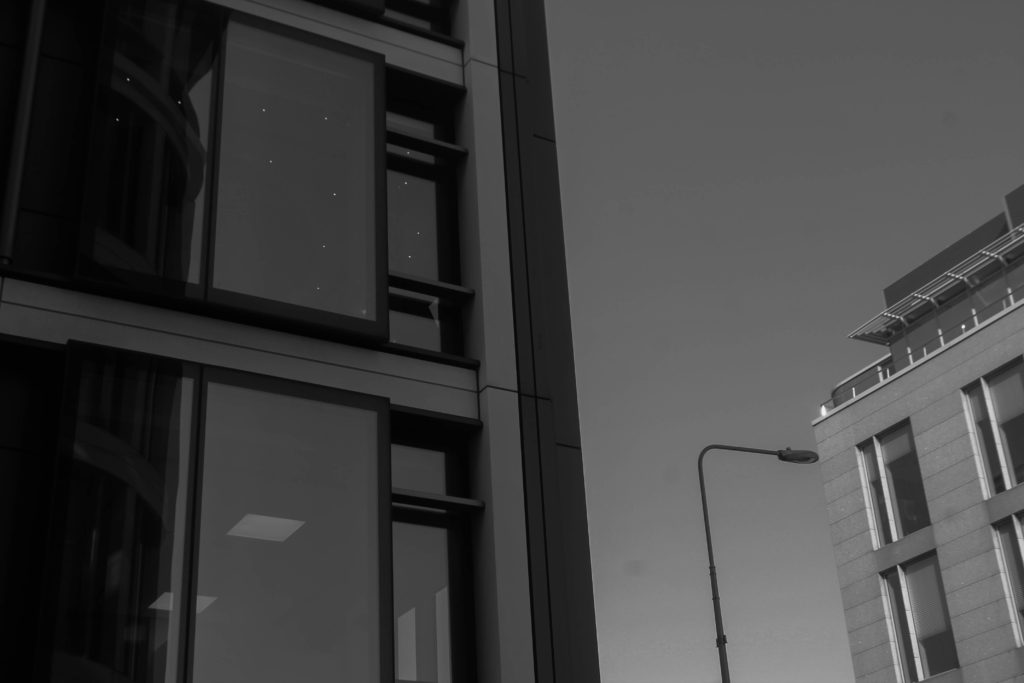
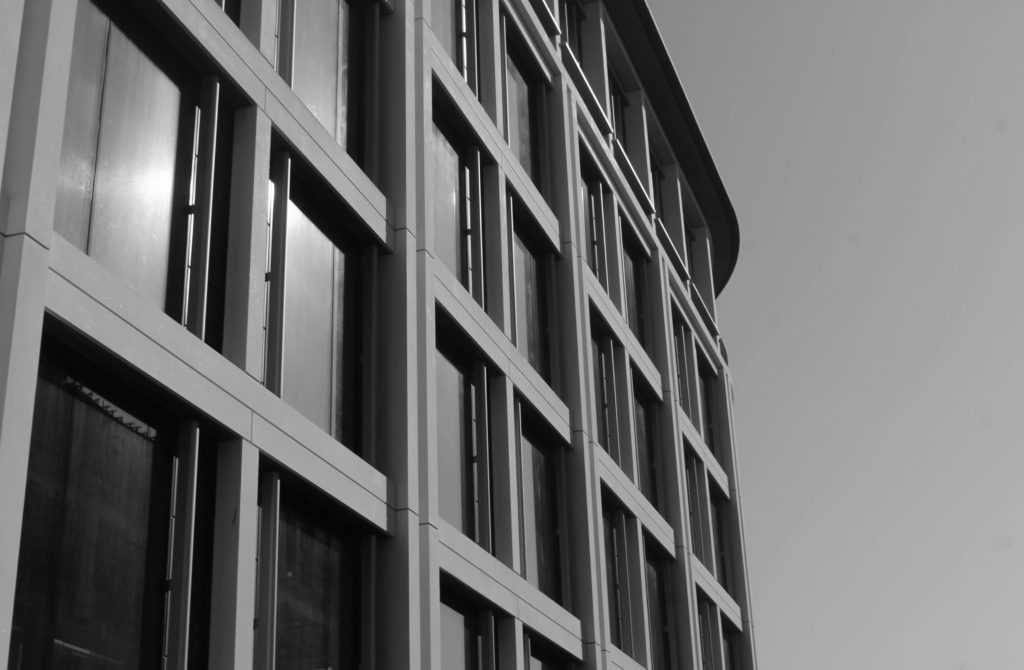
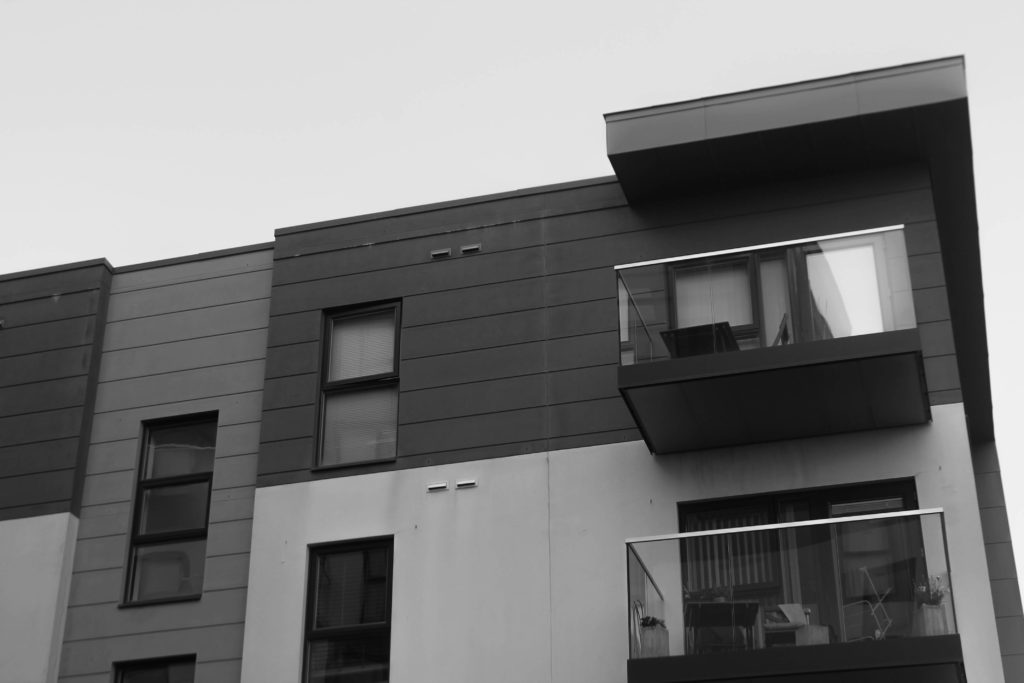
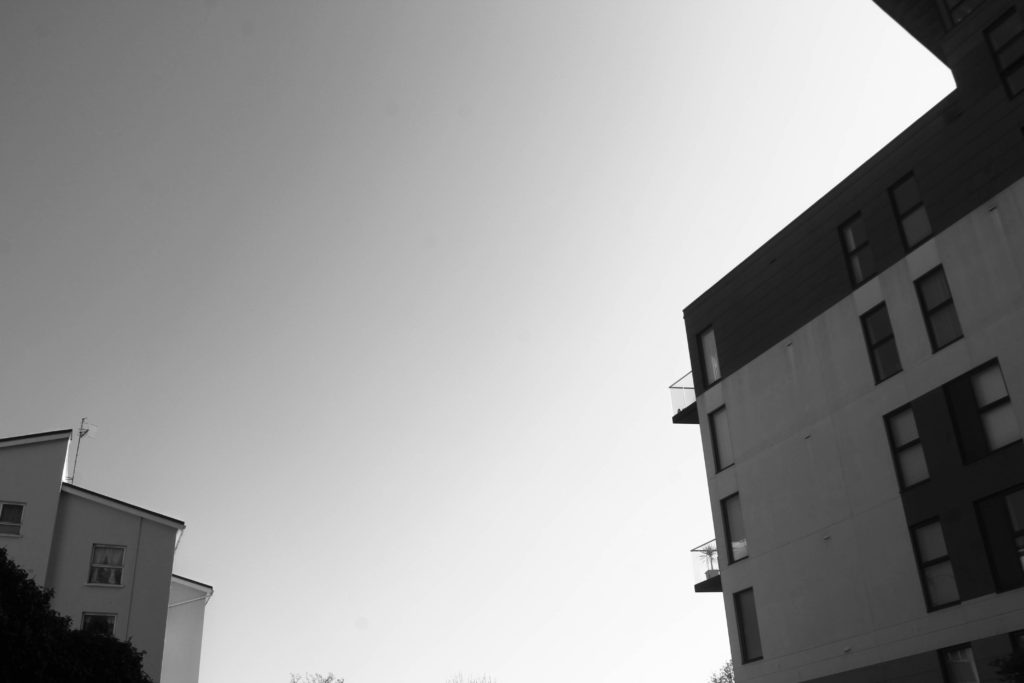
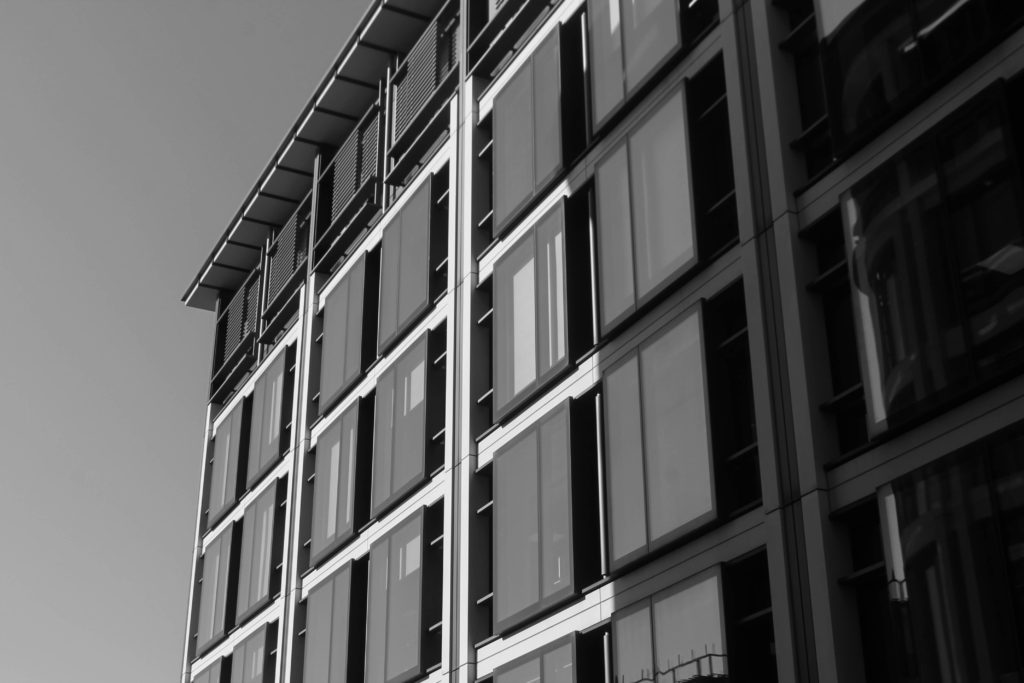
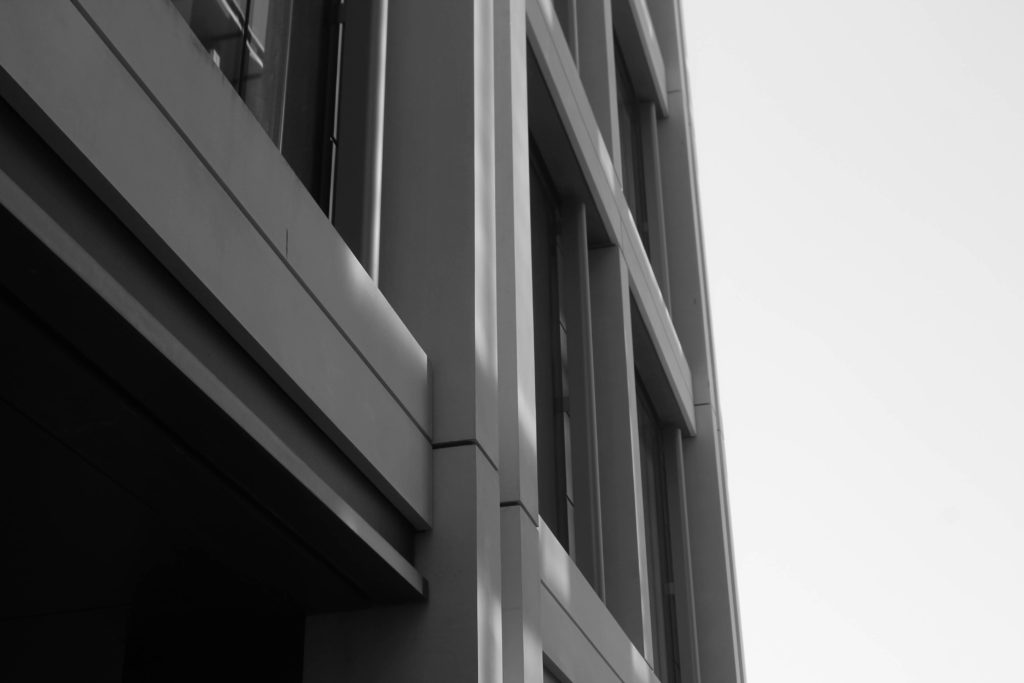
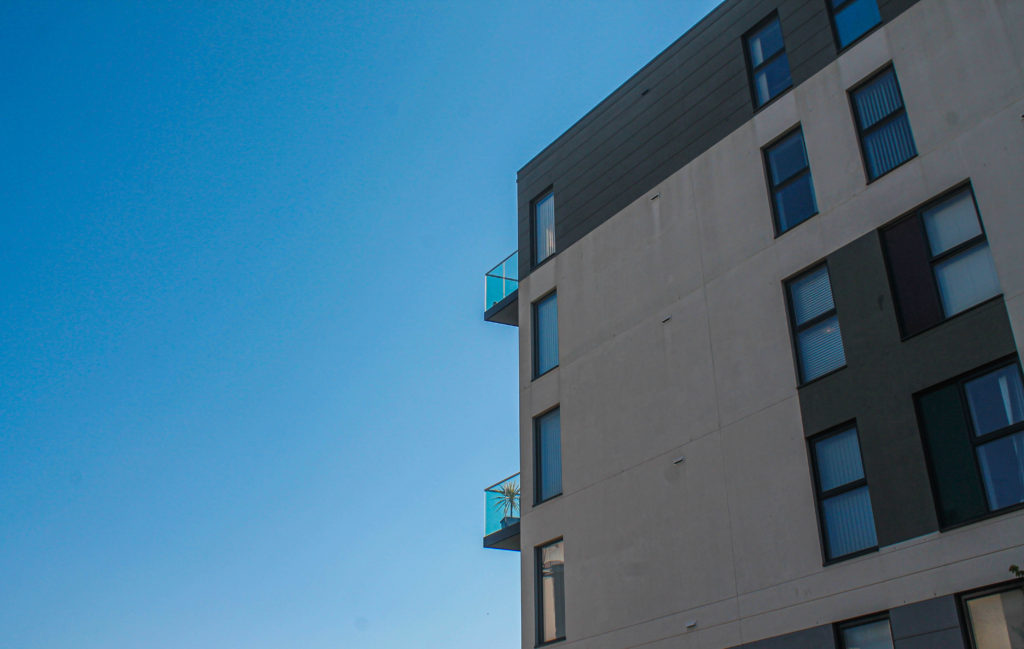
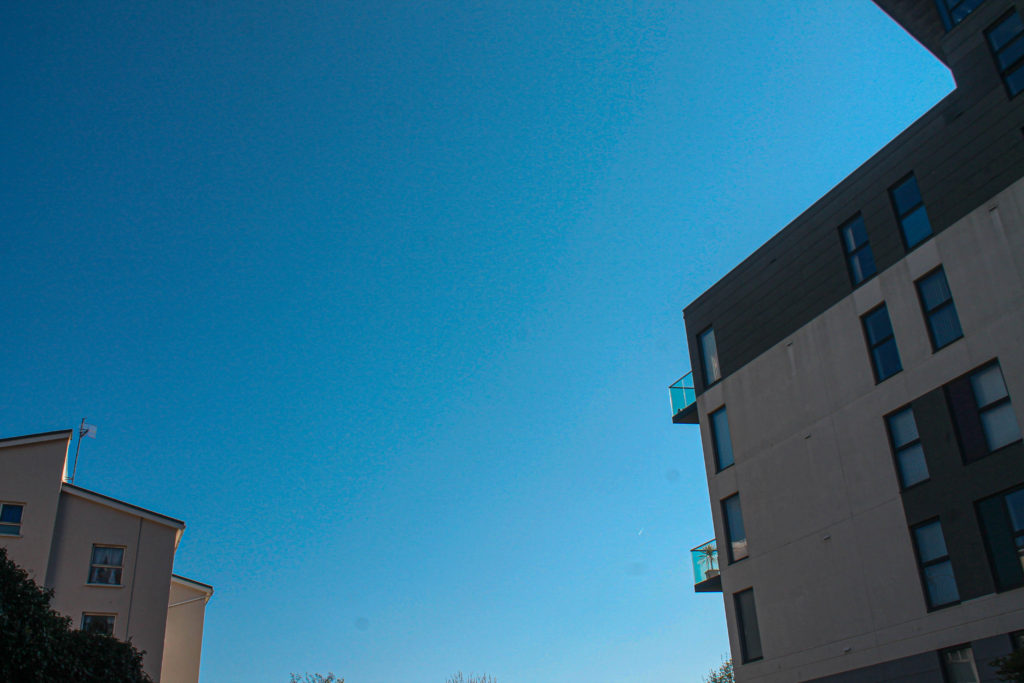
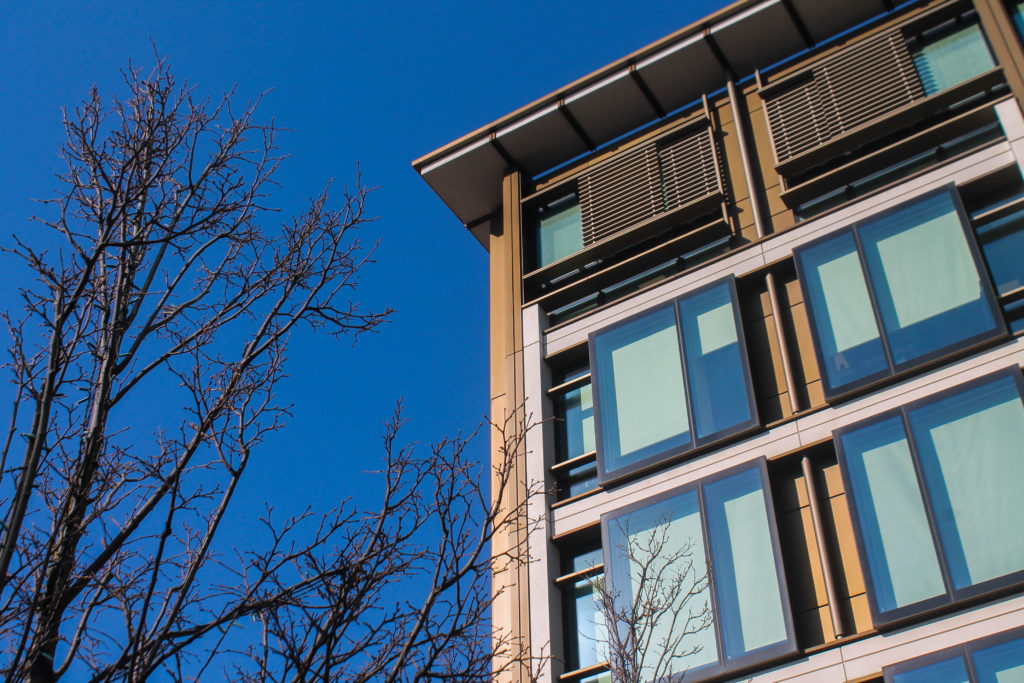
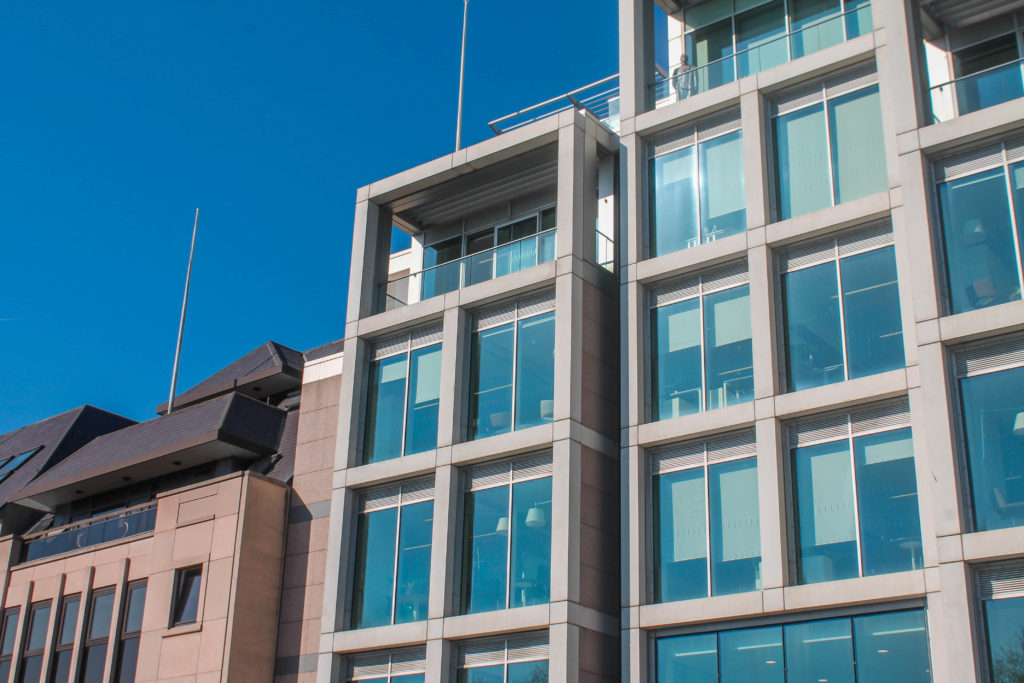
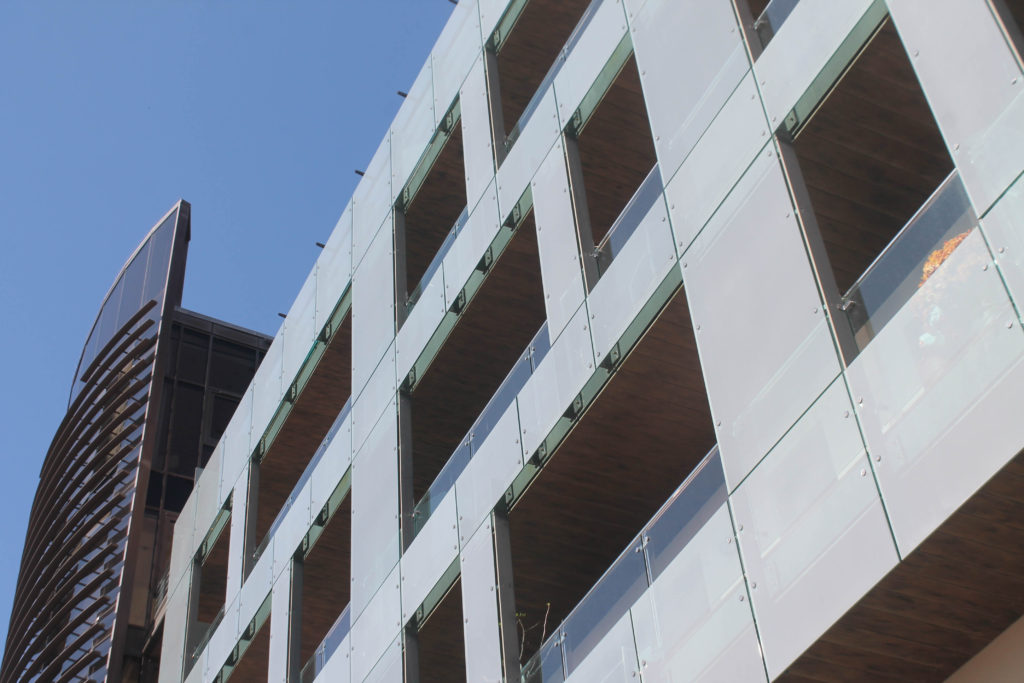
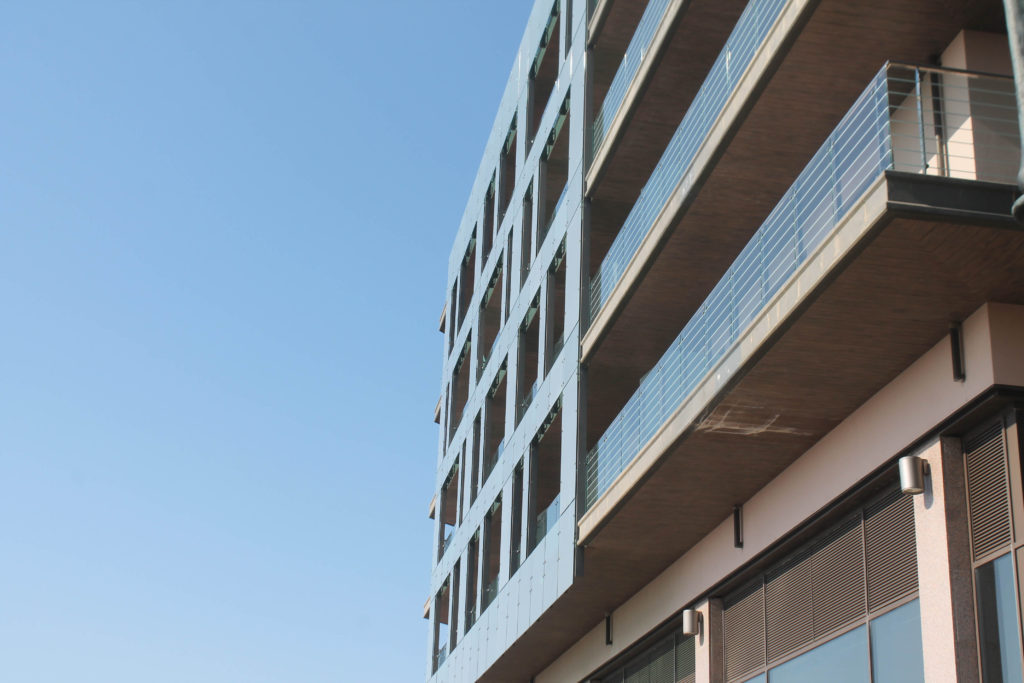
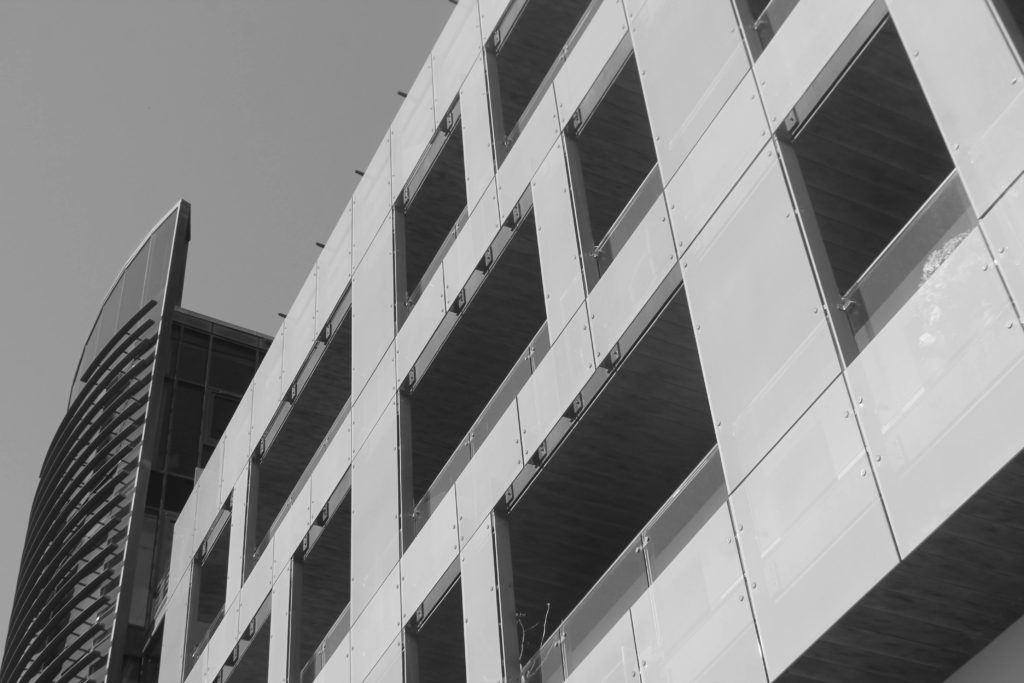
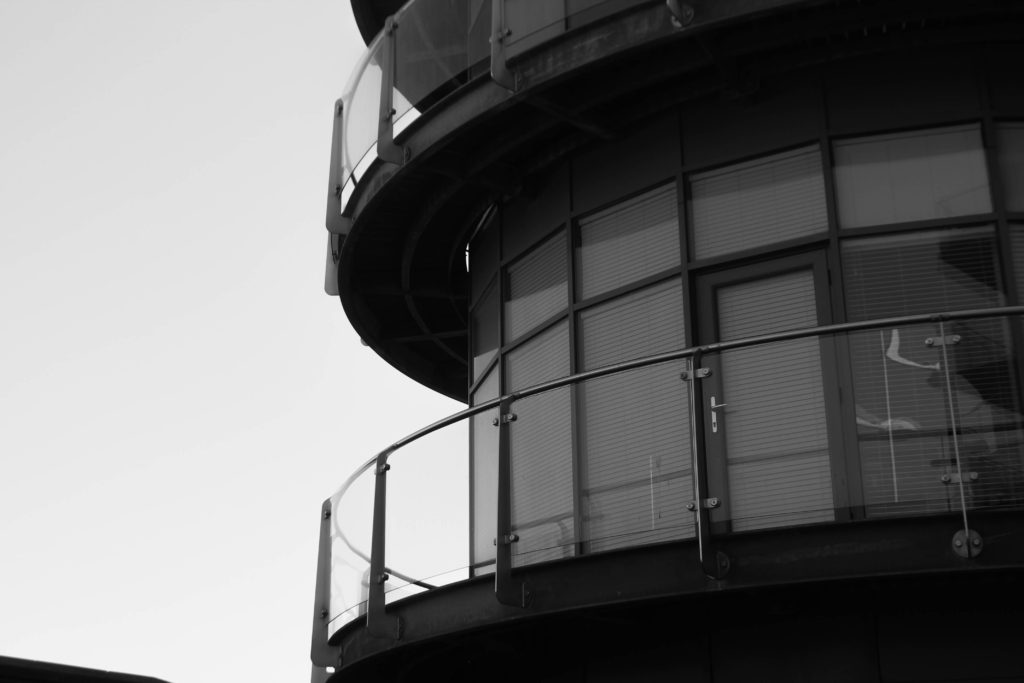
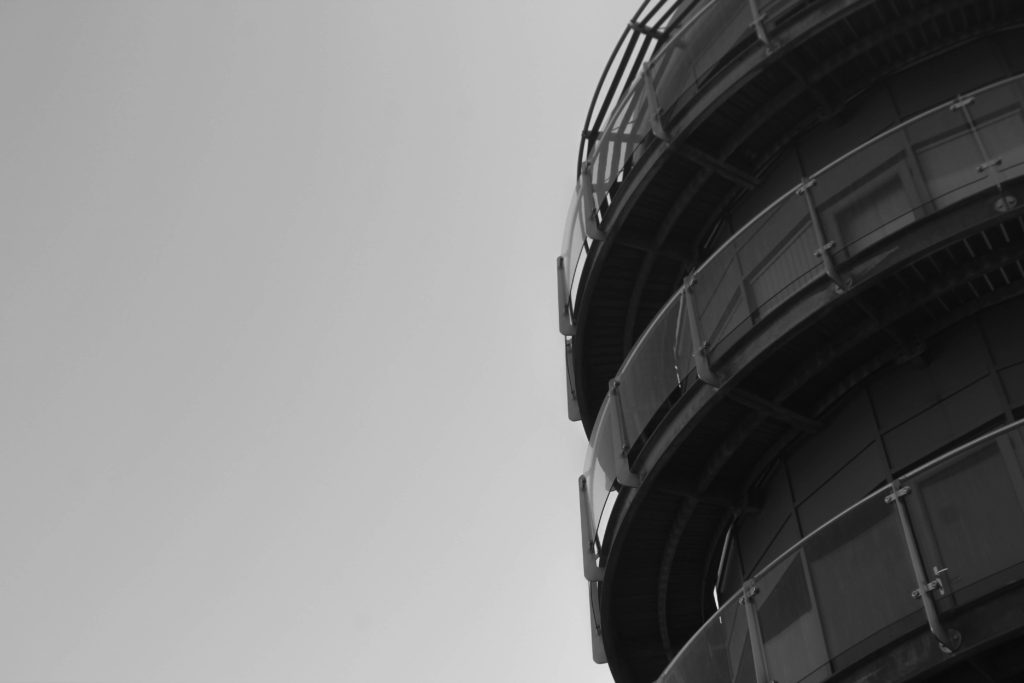
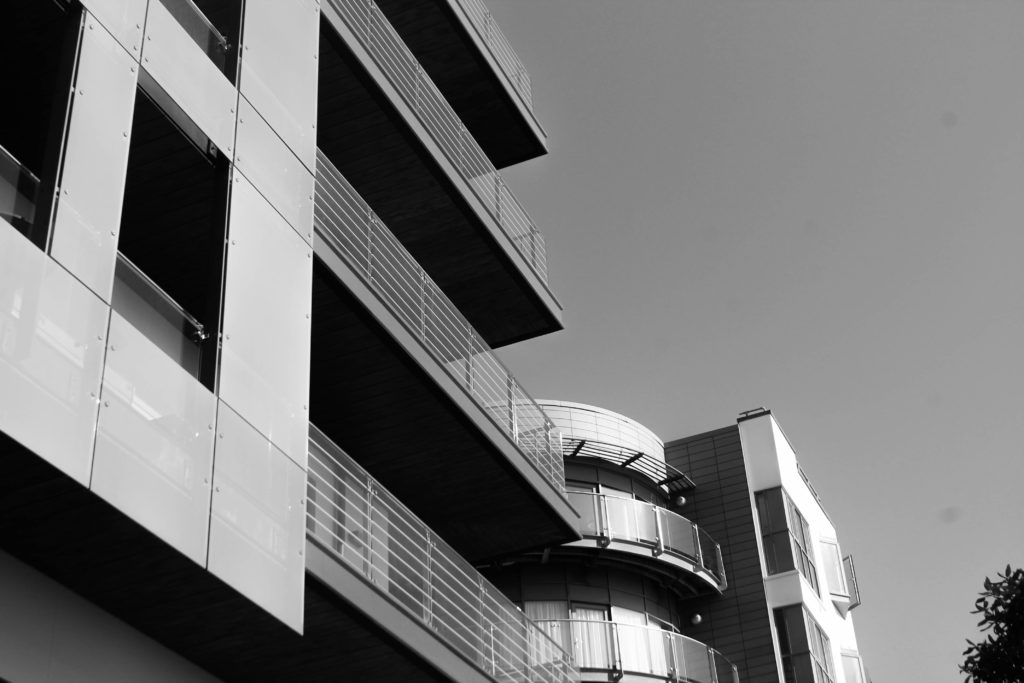
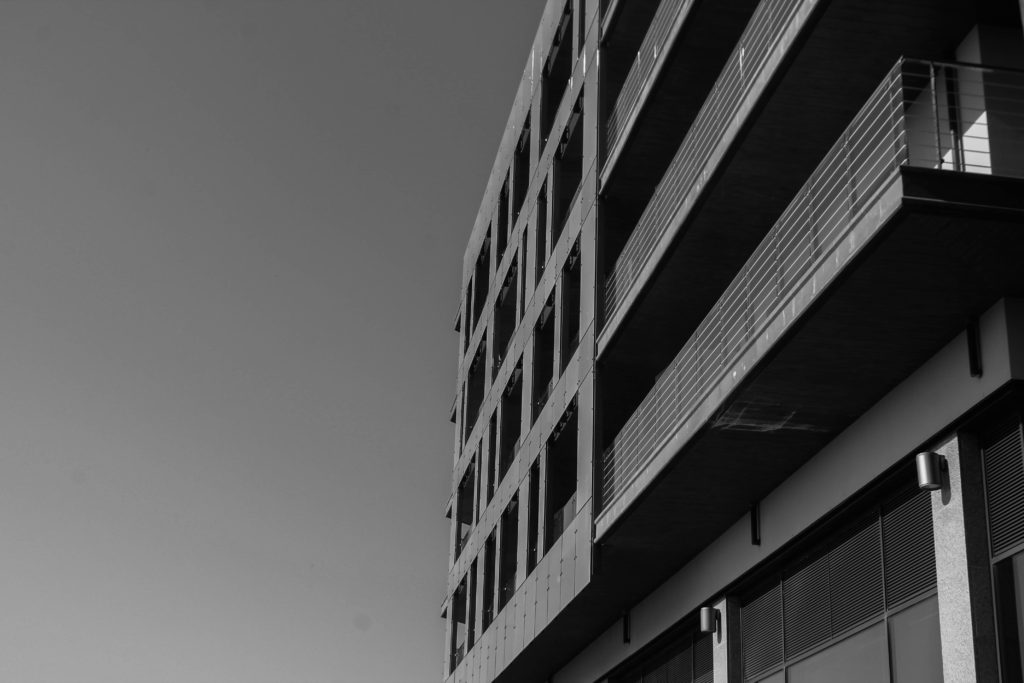
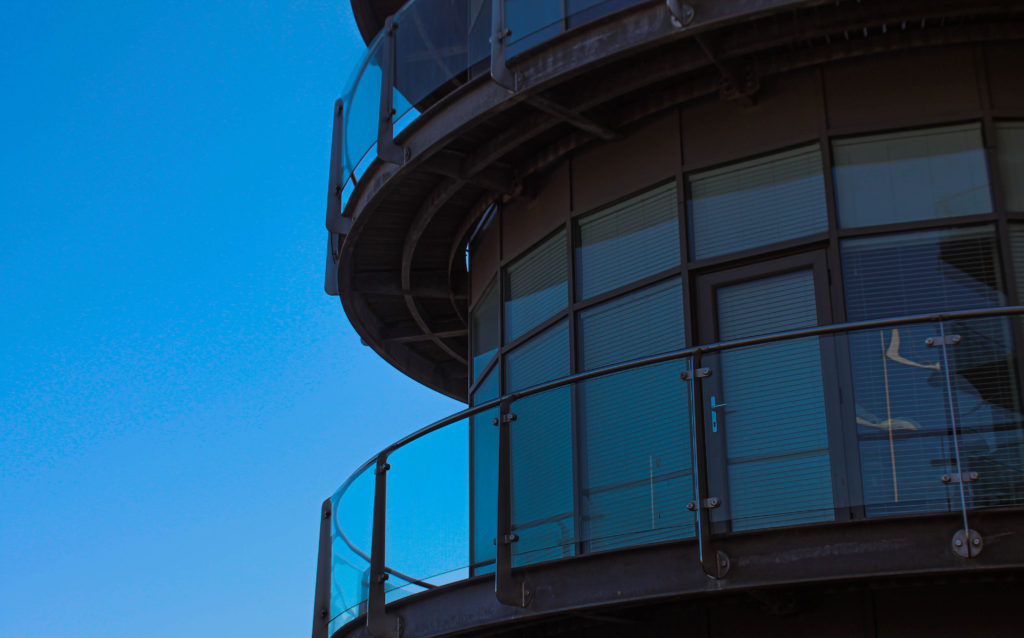
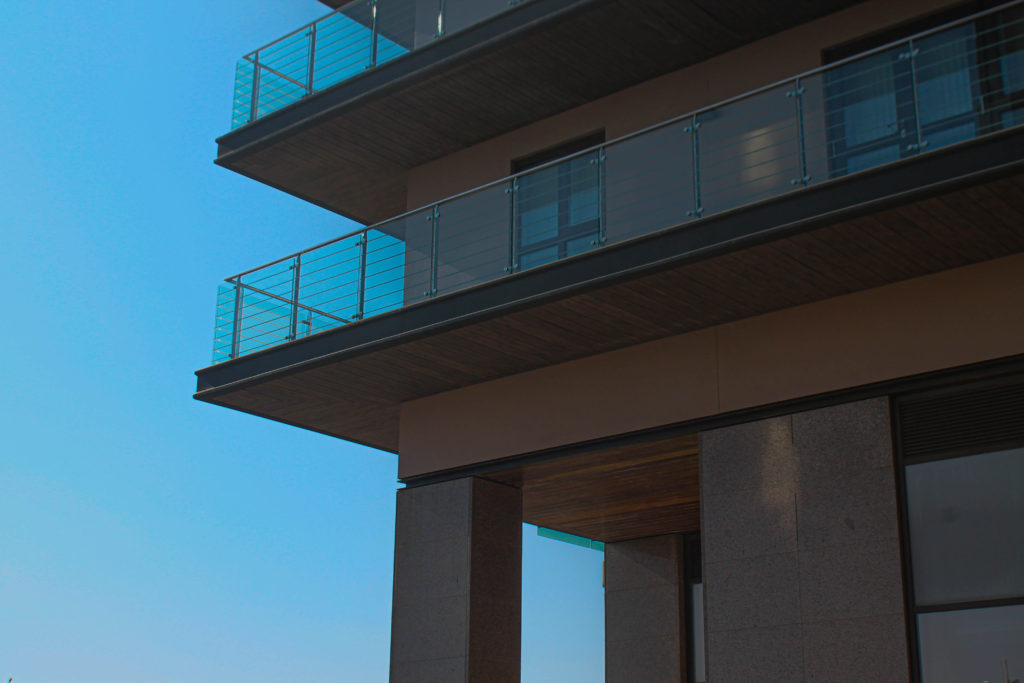
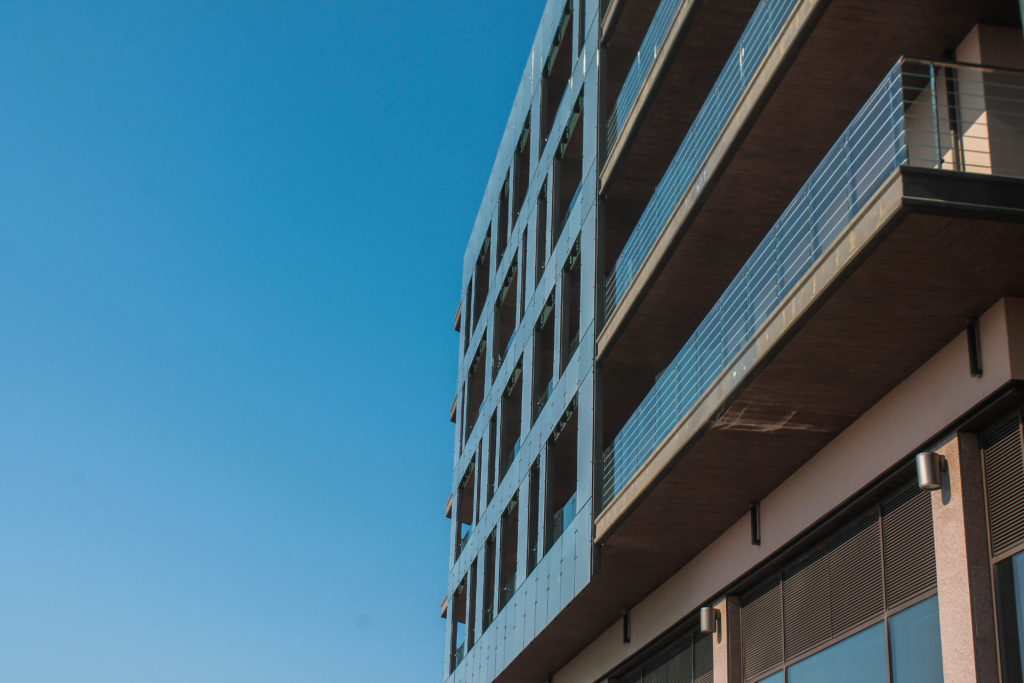
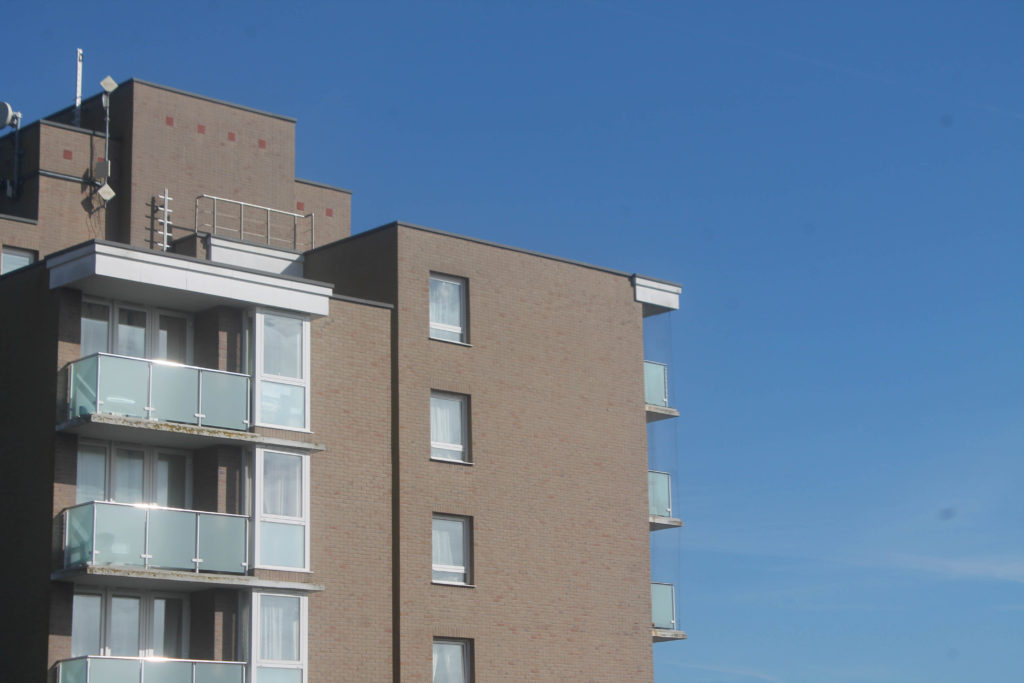
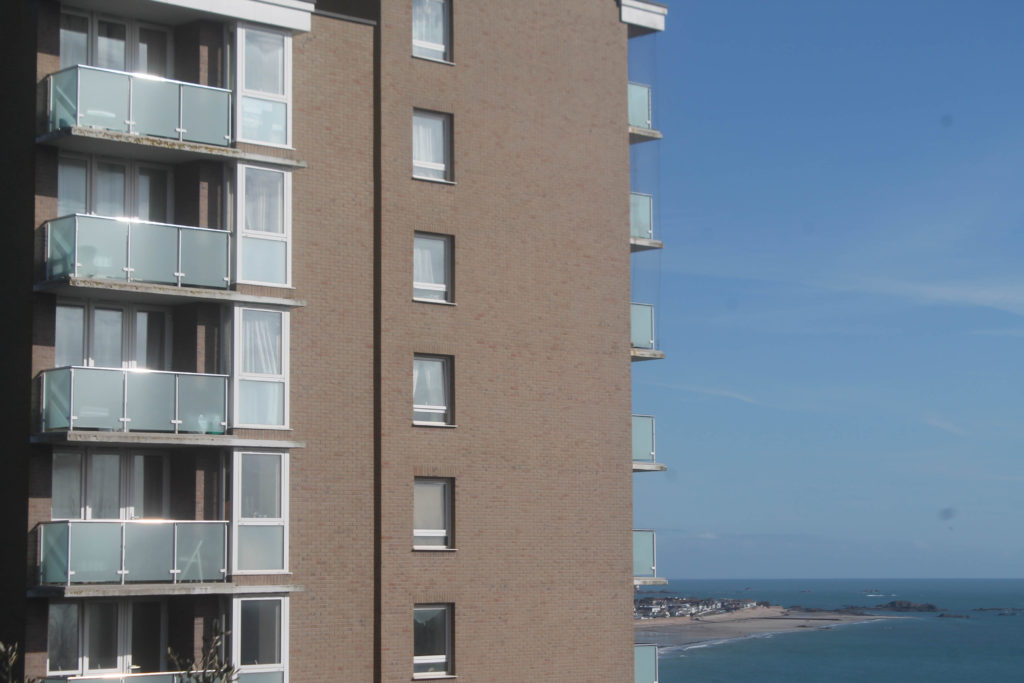
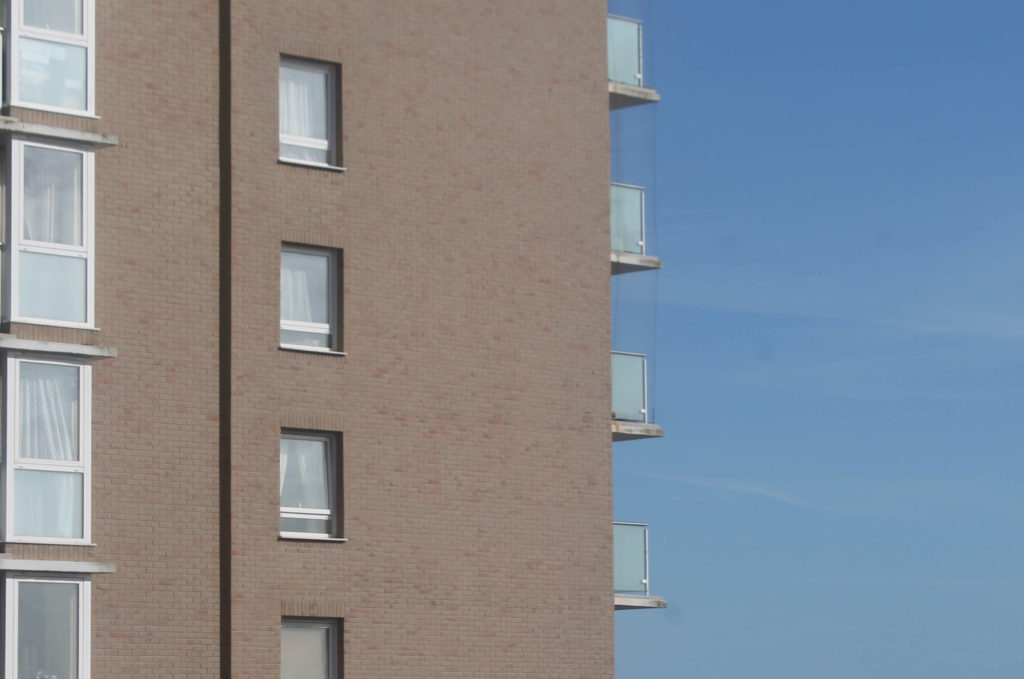
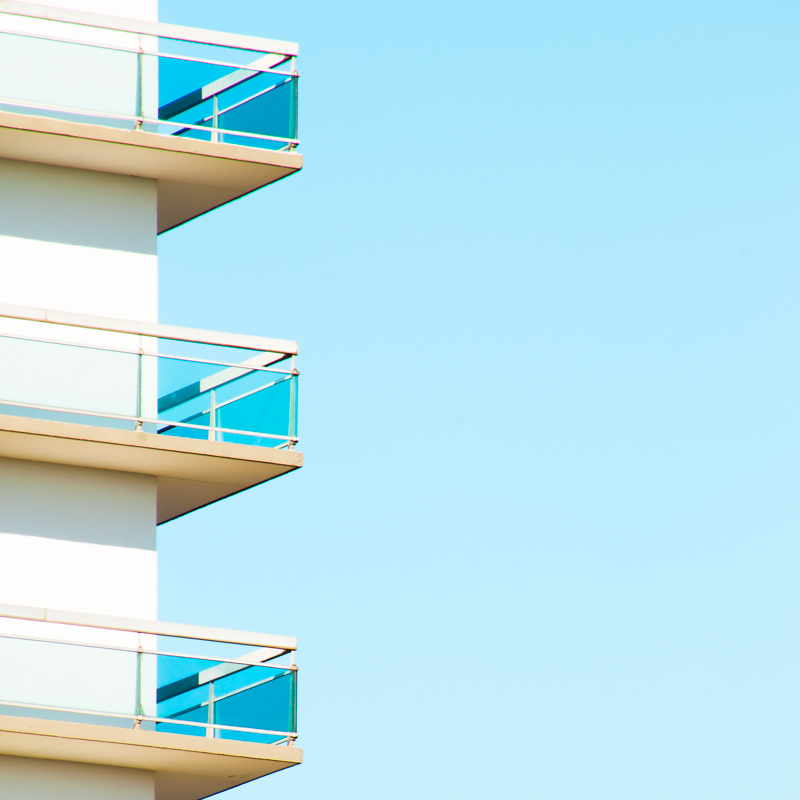
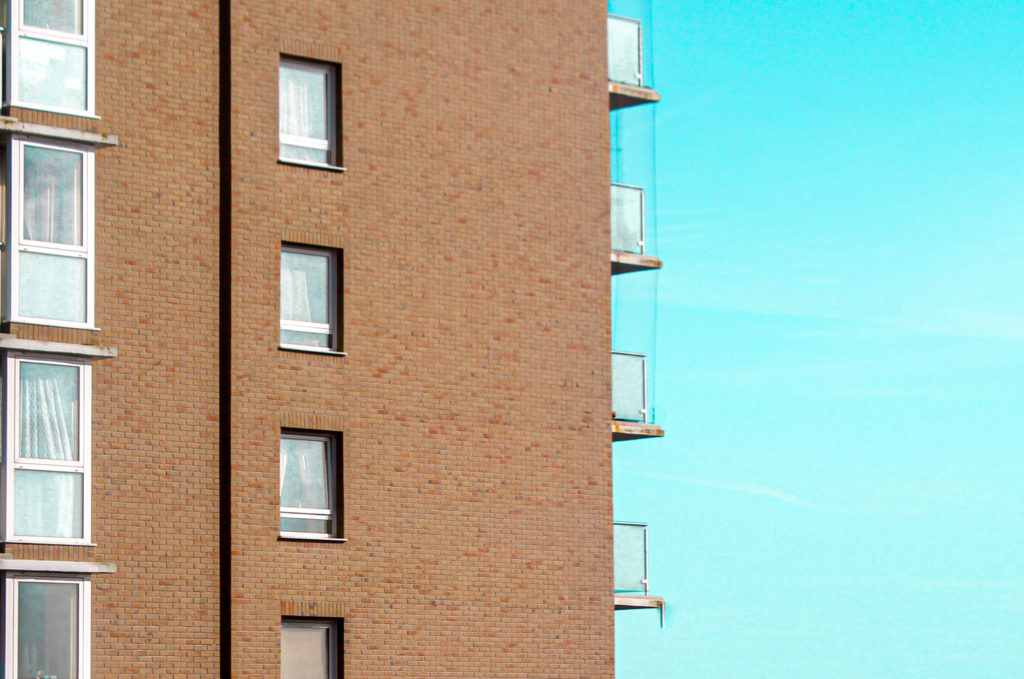
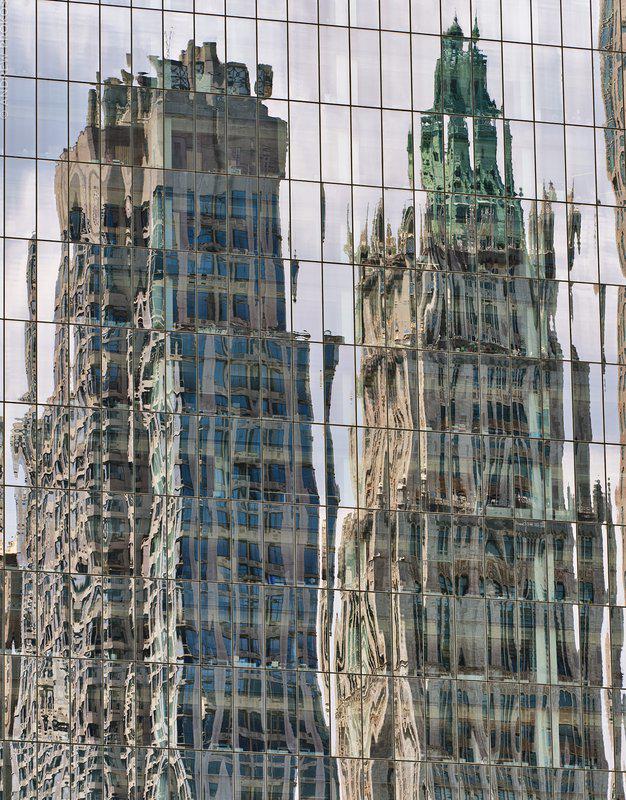
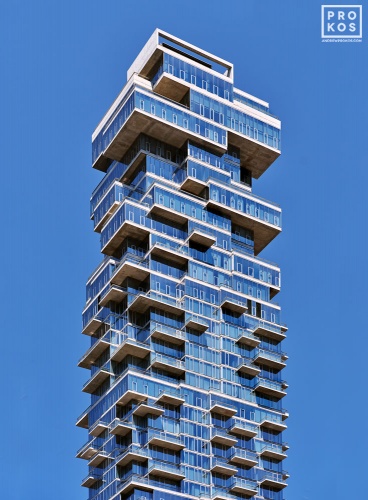
Metropole records the brutally disorientating effects of this by documenting these legions of new luxury blocks as they are constructed and occupied. Multiple exposure photographs are combined with appropriated, repurposed photographs taken from the billboards of the developments, alongside extensive research into the property developers behind these schemes, including their extensive use of opaque offshore financial structures and unaccountable political lobbying.

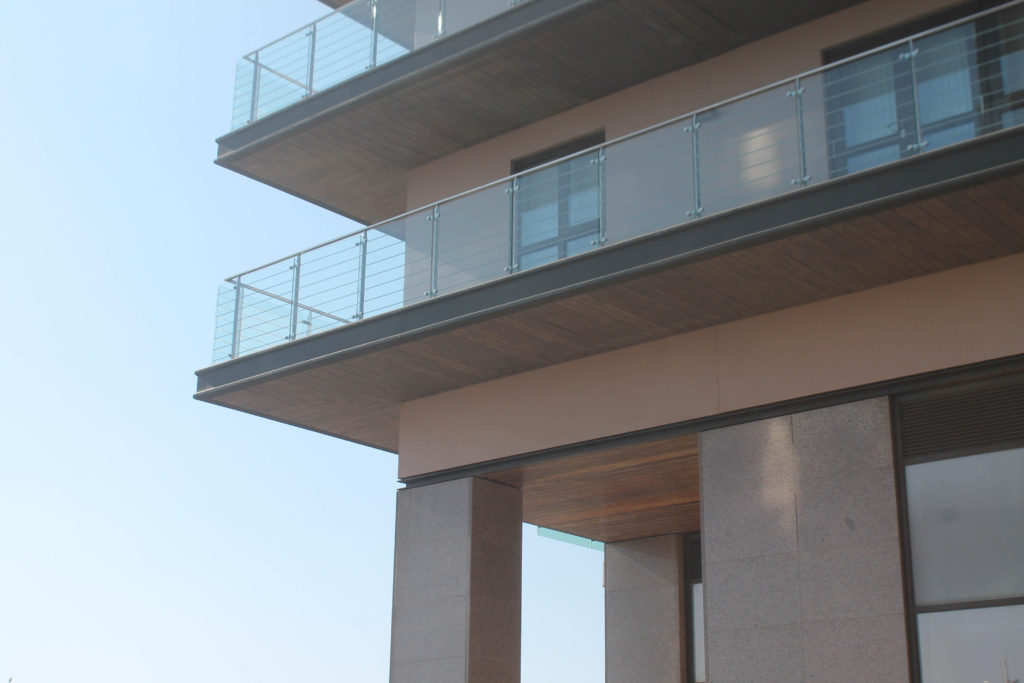
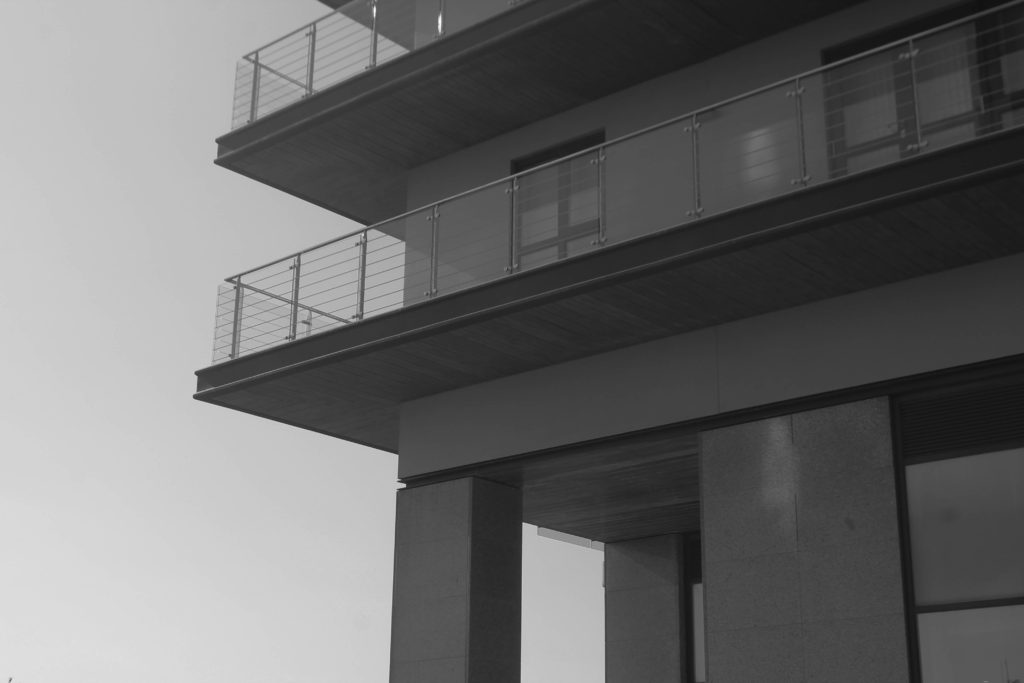
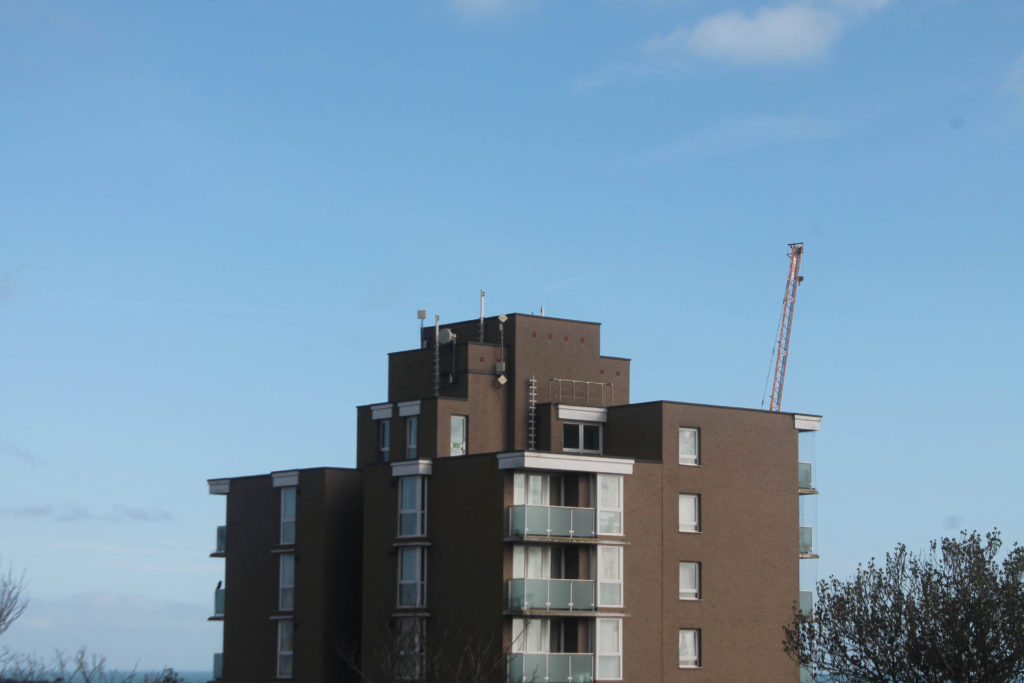
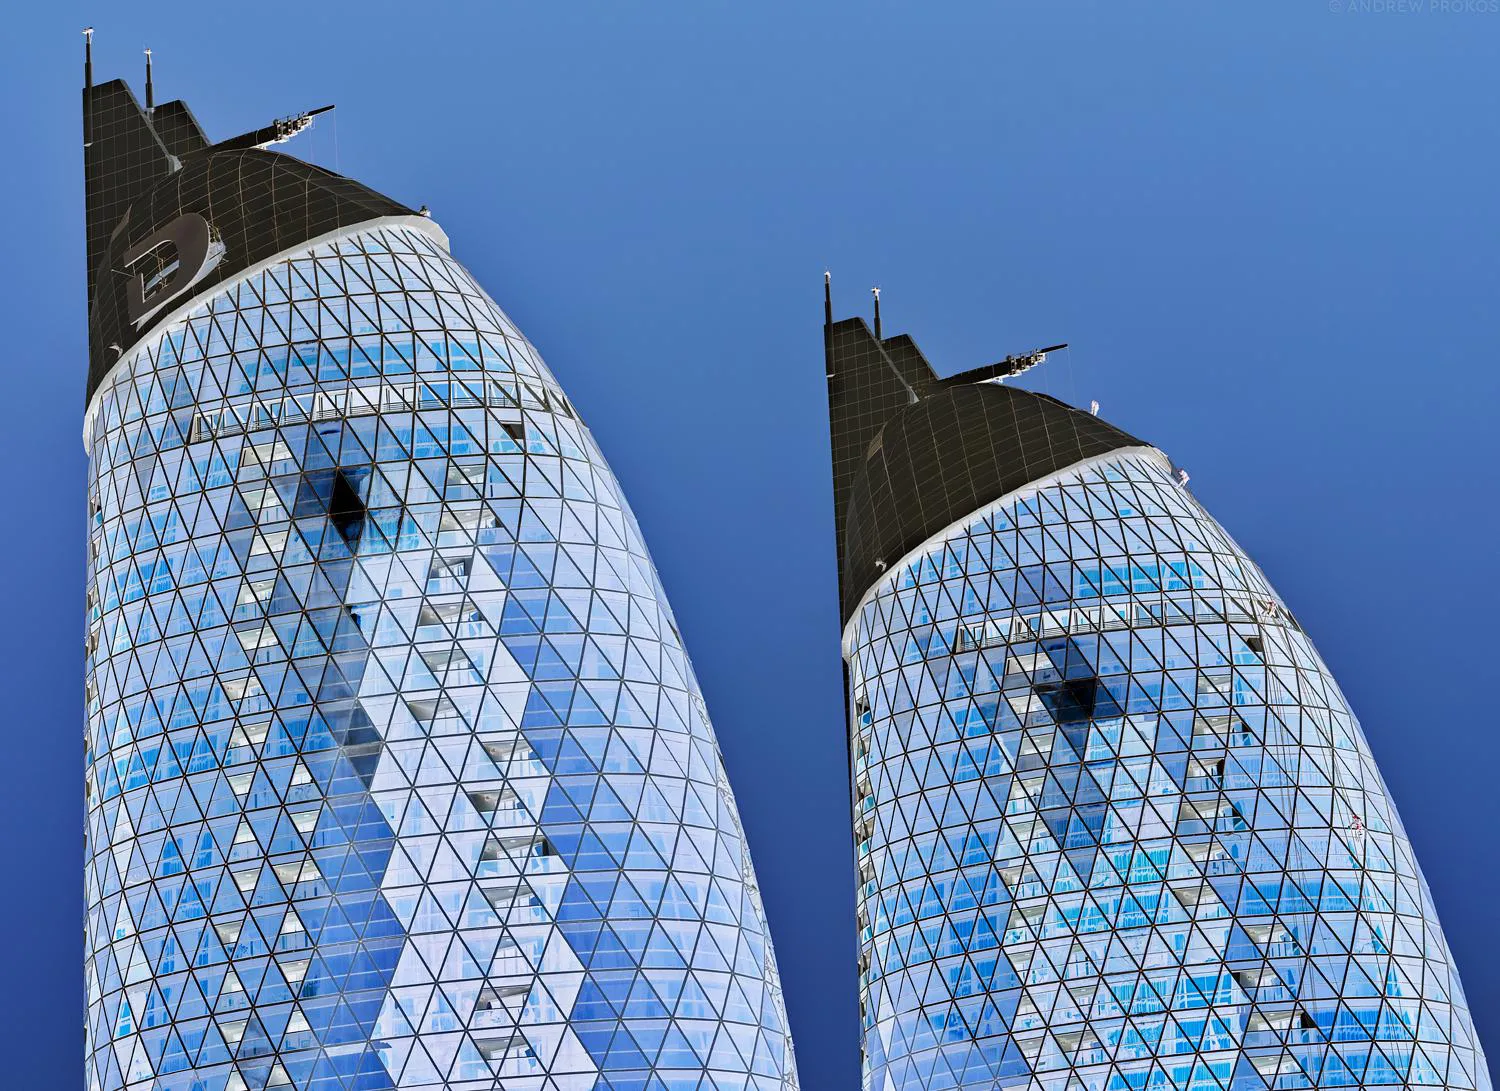
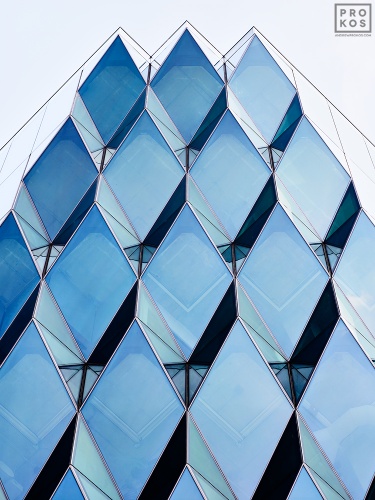
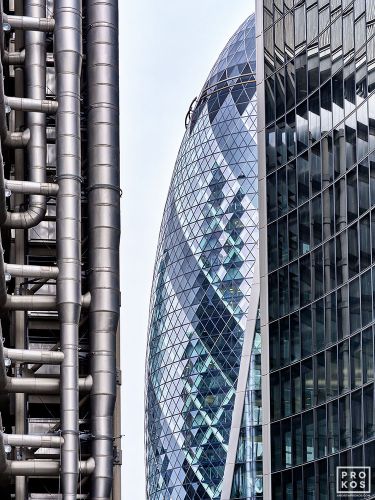
Once known as the Metropole, London was the mother city at the heart of a vast empire which at its peak encompassed a quarter of all land on the planet. Its maternal name belied a profoundly hierarchical and unequal relationship with power radiating outwards from the urban heart, and territorial riches feeding back in return. The British Empire has long since collapsed but in its place has risen a new world power; globalised capitalism. London — rebranded an ‘investment opportunity’ — is now a city of continuous demolition, shifting cranes, and glittering new high rises.

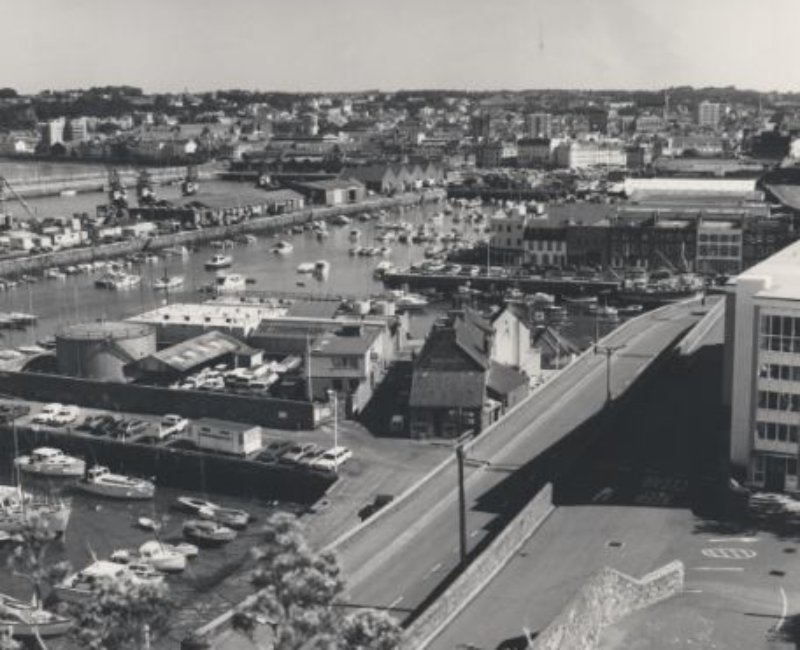
Lewis arrived in Jersey in April after being named Archisle’s International Photographer in Residence. He received a bursary of £10,000 for an exhibition of new work which will take part between 20 and 29 September at Piquet House, on Royal Square.

While most of his time has been spent working on the exhibition, which will look into the finance industry and its influence on Jersey, Lewis has also been going into schools to teach the island’s students about photography. This week’s workshop was part of a partnership between Archisle and Jersey Youth Arts. Carmel Butel, Senior Youth Worker, explained that the workshop helps reach out a wider audience that might not have gotten the chance to see Lewis in schools.

history of finance in jersey

Financial services are a highly important part of the economy of Jersey.

Jersey is considered to be an offshore financial centre and one of the most economically successful OFCs in the world. Jersey has the preconditions to be a microstate, but it is a self-governing Crown dependency of the UK. It is sometimes considered to be a tax haven. As of 2021, Jersey has received an AA-credit rating from Standard and Poors. The first ever bank in Jersey was established in 1796. The island was the first jurisdiction to bring in the world to bring trust and company service providers within a regulatory regime. Jersey-based financial organisations provide services to customers worldwide, including multi-currency banking, offshore mortgages and investment solutions. It is home to banking organisations from across the globe. In June 2020, it was reported that there were 13,450 jobs within this sector. According to Jersey Finance, a group which represents financial sector companies from the island, Jersey represents an extension of the City of London.

In 1961, banks began to establish offshore operations in Jersey to meet the growing demands of British customers. In the 1970s, Jersey authorities decided that bank licences should be limited to the top 500 global banks. The Jersey Joint Stock Bank was a Methodist concern in which the chapels and most of their members kept their money. There were two other joint stock banks, the Jersey Mercantile Union and the Channel Islands Bank. However, in 1862, Jean Le Neveu became the principal director in a new banking venture trading in St Helier as Le Neveu, Sorel et Cie. On 10 December 1863 a deed was passed in which the company acquired the premises of the English Union Bank, and it may have been as a result of that acquisition that the name English and Jersey Union Bank was coined, although Le Neveu, Sorel et Cie continued as the firm’s ‘social signature’ on their banknotes.

Jerseys decline is tourism

The number of people visiting Jersey between January and May 2022 is down by more than 40% on the same period in 2019. There were only 8,170 day visits in the first five months of this year – an 80% drop. Holiday visits are down by 50% and business trips have fallen by 21%. Visits from the UK have dropped by a third, while Channel Island visitor numbers have more than halved.

It is difficult to pinpoint exactly when the decline in tourism began, although a significant pointer would be the Seymour hotel groups plans for a large new hotel at Portelet in the 1980s. The was a large groundswell of local feeling that this would have a detrimental visual impact upon Portelet bay, but eventually planning permission was granted. By that time, however, the Seymour group had decided that the decline in the tourism market meant that the project was no longer viable, and decided not to go ahead with the building. In part, this can be seen as a consequence of the changing tourism market. Sea travel was not as popular, as lower air flights and package tour operators had opened up the continental market, and soon even further afield, as Laker Airlines provided low cost flights to America.

Jersey tourism statistics (May 2022)

By the 1990s, there was a market decline in sea travel, and the UK route was no longer viable for two competing companies, and only Condor ferries remained. In an attempt to boost travellers, faster vessels, the so-called ‘wave piercers’ were brought into play, with the facility to take cars on a roll-on, roll-off basis; unfortunately, they were subject to the vagaries of local sea conditions, and could not sail in bad weather. The frequent cancellations and re-scheduling meant that a growing number holiday makers became disgruntled with the service, and their holiday memories of Jersey were not happy ones. Eventually, the newly formed Jersey Transport Authority was forced to take action, and putting the new contract out to tender ensured that Condor entered into a service level agreement; this involved reinstating one slow ferry service to provide a poor weather contingency. The year 2002 saw the Condor group up for sale to any prospective buyer.

By 2002, the Tourism committee seemed unable to define a clear market strategy, talking of concentrating on ‘infrastructure’, although precisely what this vague term meant was never apparent. The jewel in the tourist calendar, the ‘Battle of Flowers’, celebrating its 100th year was starved of funds; the Clipper race, which promoted Jersey throughout the world, had trouble gaining any sponsorship. The Tourism committee also seemed to be pinning their hopes on the planned hotel on the harbour waterfront boosting the lost visitor numbers, although there was no guarantee that this would be the case, and no indication how the obstacle of high air travel would be overcome or the high cost of living and recruitment of staff. Meanwhile, existing hoteliers called for firm monetary incentives rather than vague promises. No one has yet considered the UK strategy of tax incentives for ailing industries, although this might be considered a viable alternative.

Presentation of final outcomes and evaluation

In this post, I will be presenting my final outcomes from my exam project. To present these outcomes I have displayed them in a few different forms such as, window mounting, foam board, 3d sculpture and a photo zine. All of my final outcomes were developed through Adobe Photoshop, Adobe Lightroom and Adobe InDesign to ensure the best quality editing and display. Also, I am going to create a virtual gallery for another form of presentation, this will be shown towards the bottom of the post.

Final outcome #1

Link for my production of my outcome: https://hautlieucreative.co.uk/photo23exam/2023/04/24/final-image-experimentation/#comments

For my first final outcome I used photoshop to create this. This image was heavily inspired by my previous exam project and Laura Romero who is an artist I studied previously in the year. I experimented this image with many different background variations by using dull and vibrant colours later deciding to stick with the white background. This is one of my favourite outcomes as it is very unique and wasn’t just basic editing.

Final image #1

Final outcomes (Lightroom edits)

All of these images were edited and produced through Adobe Lightroom and were edited very simply. Personally, my favourite out of the lot is the first image presented as it shows both the green side of the world and the financial side of the world. The two images at the bottom were photographed in London and show a message of how different the past and future were with a futuristic apartment complex and an old powerplant that used to run the area.

Final outcome window mount and foam board

For the window mount I gathered three of my prints and experimented with different layouts and order in which the images will be placed, what made the most sense was to have the portrait image displayed in the middle of the mount so it looks less awkward. Next I positioned my other two prints on either side due to their landscape orientation. I chose to use these three images for the window mount because they are all presented in monochrome which creates a good contrast against the black background and the little white border around each print. For my first foam board mount I collected my Photoshop edit and used spray glue to stick it down onto the foam board whilst keeping a white foam border around the black border of the image. For my second foam board mount I collected my two images that correlate each other and positioned them right next to each other and stuck them onto black card. I wanted to increase the depth of the prints by including a foam board piece which I stuck my prints and black card onto, whilst also including a white foam border around.

Virtual Gallery

Virtual gallery link: https://www.artsteps.com/view/64491fbe947dfd6c0ba5667a?currentUser

For this virtual gallery, I wanted to present not only all my final outcomes but other images I developed throughout this exam project.

Evaluation and Critique

Overall, I believe this exam project has gone very successfully due to the range of final outcomes and different forms they were presented in. I presented my images in forms such as, virtual gallery, window mount, foam board, photo zine, digital form, and 3d sculptures. I am particularly happy with with my window mounts and foam board experiments which I have used as my final outcomes. My virtual gallery is presented in a sequential way where images that link have been positioned together which I am happy with. My favourite outcome I produced is my window mount containing three monochrome features of the same building. It is my favourite because of how great the contrast is and it doesn’t have any mistakes that have been made clearly.

How I could’ve improved:

I could’ve improved this project by travelling to more locations around the structural area of Jersey to photograph the buildings. One place I wish I went was the recently done apartments near the Art Centre as they would’ve suited my topic of images very well. Also, I could’ve improved by taking time on my photo zine rather than rushing and hoping to get it complete in time or even creating a photobook with my wide span of images. Overall, I believe I could’ve gathered a wider range of images instead of collecting a lot of images in the same locations. Also I wish I checked the images after taking them as when I imported them into Lightroom some were out of focus, too bright, too dark and not positioned well.

foam board experimentation

For this part of my project, I wanted to experiment presenting my images in a different form to a zine or mounting my images. Firstly I cut out 3 segments of structures I have photographed after sticking the images onto foam board. I used a sharp knife to carefully and smoothly cut out these segments without encountering any rough edges or cutting mistakes. To begin with the experimentation I laid out my three cut outs in a basic sequence to see how it would look.

Foam board layouts

Basic sequential layout

I did around 20 different positions for these cut outs to experiment which format I can present as my final arrangement. I started with a simple shuffle of the images to experiment which format is most effective.

I think most of these layout experiments are really effective and don’t look unorganised. I believe they all create a assembled sequence with no flaws. Every experiment was done by placing these foam board cut outs onto a bigger piece of foam board and created a 3 dimensional effect and added some depth. My favourite layout from these experiments in Experiment #5 because of how the order of the images create what almost looks like a whole new buildings. Also, I like how their are no rough corners or edges due to all cut outs linking up.

3d sculpture experimentation

After seeing how these experiments looked I wanted to create a 3d sculpture that stands high looking like a unique whole building. To create these sculptures I used a straight piece of wire to connect the cut outs together by placing them on top of one another to form an effective layout. However I didn’t do too much experimentation for this area as after around 3 attempts I found a good and effective layout for my sculpture.

As I stated, I only did 3 experiments until I found the effective layout and stance in which my sculpture stands. My favourite sculpture is Experiment #3 as I really like how all the buildings link up near perfectly creating an almost new structure.

Letha Wilson

Letha Wilson is an American artist working in photography and sculpture making who often combines large-scale landscape photographs with sculptural elements of metal and concrete, challenging the two-dimensional nature of traditional photography. I have chosen to include Letha in my post as she has slightly similar work to my 3d sculptures I have created using foam board and cut outs. Her work is much more advanced and unique compared to mine by not only focusing on the topic of architecture but many outdoor images. Her and Felicity Hammond have inspired me to experiment with these sculptures as they are the most unique artists for sculptures as such.

Final sculpture experimentation

Evaluation:

Overall, I am extremely pleased with these experiments as it gives me many new ideas with how I would like to present my work instead of through mounting and digital forms. I used 3 different images of buildings to create one main structure which links together well with no rough edges. I could’ve improved these sculptures by experimenting more with the 3d creations by trying out different layouts. Also, I could’ve made more cut outs on the foam board to further expand the sculpture by introducing new features. The three images I used I selected as final prints that I have mounted and stuck onto foam board so I can present them in another form.

photo-zine development

To present my final prints in a different form than foam board and window mounting I want to create another photo-zine as I think it is an effective way to present my images. I created a photo-zine for My Rock project to present my images from our La Hocq trip. Previously, I created my zine on Adobe InDesign so I am going to do the same but make sure I make these much needed improvements. Most of my final prints will be displayed in this zine perhaps in a monochrome format as well as other images I took in preparation for this project. Not all my images involved will be presented as my final images but only a small selection of 7-10 that I am going to mount. I am aiming to have around 14-18 pages in my zine to include all my best shots of architecture.

Front and Back Cover

Photo zine creation

To begin with the construction of my photo-zine I needed to create a document following the correct measurements and pages in order to craft a good quality zine. I then had to decide if I wanted to keep a monochrome theme throughout the whole zine which I think would look the best. I wanted to keep the front and back cover in colour to attract viewers with the bright blue sky. I chose this front cover because it gives a brief idea of what images will be involved in this zine, the idea of Simple vs Complex architectural structures.

For my first 4 pages I wanted to present my images from the finance district located near the Esplanade as I think they are my most eye catching images in the zine.

Next, I wanted to introduce my first double page spread of one image which is also photographed at the finance district of the same buildings displayed above.

Pages 5 and 6

Then I wanted to present my images from the Waterfront apartment complex, carrying on the theme of monochrome images to make the zine more organised.

After thinking about which location I wanted to present next I decided to use images from all locations again carrying on the black and white images.

Evaluation

Overall, I am happy with my zine but could’ve been heavily improved if I decided to start the creation much earlier in the exam, however I do like how all my images are in black and white as it follows the style of Helene Binet who is one of my chosen artists. I tried to connect the images together by almost making it seem as if two images create one structure such as on page 13. I could of improved this zine by including more close up shots of unique features of the buildings I have photographed. I included one image from my Fort Regent photoshoot to try and mix up the style of images with the photo on page 14 being a structure which is much more simple compared to the rest. I did experiment with only using images from the Waterfront but I believe I did not get enough quality photos for them to be included. I was thinking about creating a photobook instead of a zine however it wouldn’t of been worth making due to a lack of effective images.

final image experimentation

To begin, I wanted to recreate one of my past photoshop edits but with my new images. I am recreating an image from our Anthropocene project which also involved photographs of unique buildings. I first created my edit with Adobe Photoshop by randomly placing cut outs of structures together to form one big building. For this edit I will use around 6 different images of structures and put them together in a random order to respond to my previous edit. However, with this current edit I would like to position the structures in a more neat way to form a real looking building.

Edit from Anthropocene project

Editing Process

Firstly, I began by creating a new photoshop document with measurements of 2000 x 2000 and a resolution of 250. I wanted the page to be a square so my structure can be positioned dead centre on the page. Like my previous edit I wanted to keep the same style of the thick black border around the edge.

Starting page

Next I cut out and added many features of buildings I have photographed to see which would be most effective in this edit. Below shown are the images I used in this edit:

Images I used for this edit

All my cut outs used in the edit

Next, I started by rotating the cut outs to different angles so it isn’t fully positioned at a straight angle. Then I put them together to give me self a slight idea of how this is going to look.

After understanding how this is going to turn out I decided to mess about with the opacity of the cut outs to create a fading effect of the buildings between each other. After finding the right formation of the cut outs I wanted to experiment with the colours of the background to see if it could be any more effective.

Background Colour Experimentation

I decided to experiment with the background colour to see if I could create a contrast between the dull coloured buildings and a bright background. I started off with the more basic colours and then further developed onto the vibrant colours.

Normal white background

Basic colour background

Vibrant colour background

Overall, I much prefer the basic white background with a black border as it matches with colour to the structures used in the edit. Also, I think all bright colours don’t create a good contrast with the structures as most of them are dull colours or white.

Final Image

Evaluation

Overall, I am extremely happy with my final outcome as I think its a very good recreation of my previous edit done in an earlier project. I feel as if the black border brings the image together making the main subject stand out. This image was mainly inspired by artist Laura Romero who makes many similar pieces of work similar to mine. I feel as if all the colours involved contrast between each other in an effective way to not make the image seem awkward. These images I used are from Waterfront, St Helier, Westmount, Fort Regent and a powerplant located in London.

photoshoot 3 – esplanade and westmount apartments

For this being my third and final photoshoot I wanted to make sure I captured more than enough images. I took around 100 – 150 images at these locations to ensure I wouldn’t need to go back. This photoshoot was carried out on the same day as my Waterfront photoshoot because of how clear the sky was. I tried experimenting with different angles of where I was taking the photos to try and involve the blue sky in most of my photos. The structures at these locations are much less complex when compared to the Waterfront which is good for my simple side of the project. I carried on with the attempted theme of Matthieu Venot but I wasn’t trying to replicate his images. Also, these buildings only contain a small amount of colours which is what I was aiming to photograph before going on the photoshoot.

Editing Process

To begin this process I started with the basic P and X flag method to identify which images I was going to edit. Also, when rating my previous images I rated the rest of my photoshoots so the images below have also been rated from a scale of 1-5 (1 being worst and 5 being my favourite). Shown below are the images I want to further develop:

Best Unedited Images:

Black and White

Next I wanted to see how effective my images would be in black and white. I did this to try and experiment the style of Helene Binet as all her images are displayed in black and white, however I much prefer my images with colour and I like how the blueness of the sky contrast with the dull coloured buildings.

Favourite Edited Images

For my final prints I wanted to include some images that are displayed in black and white because I didn’t want to only follow one artists style. Also, the more simple, close up images look a lot better in black and white due to the sky not giving a great contrast to the close up features of the buildings.

Evaluation

Overall, I am very happy with the quality and amount of photos I produced, however there are some images which didn’t turn out the best with bright skies and out of focus images. For my edited images that aren’t in black and white I wanted to attempt to follow Matthieu Venots style again but then differ over to Helene Binets style of monochrome, close up images. In this set of images I seem to prefer the black and white range because the shadows create a really good contrast to the light grey sky. Also, I believe I gained enough images to not have to go back to these locations and focus more on another Waterfront shoot due to a lack of images. I could of improved by taking more close ups of corners of buildings to create more monochrome style images but overall I am very happy with this photoshoot.

photoshoot 2 – waterfront apartments

This was my second photoshoot I carried out for my exam project. I took this photos on the 20th of April because of the perfect weather with a bright sun and very clear blue sky, giving the images a nice blue background. I photographed buildings mainly from an angle from underneath the buildings to cast shadows and forecast light on my main focus being the unique features of these apartments. I tried experimenting with close ups and further angles to decide which idea I would like to further carry out. I tried to follow Matthieu Venots style of taking images but with less vibrant colours and more basic coloured structures. Also, the buildings I took photos of contain much more unique and complex features rather than Venots simple structures containing a maximum of 3 colours.

Contact Sheets:

Editing Process:

To begin, I used the P and X method (Pick and reject) to decide which images I wanted to further expand in my project and potentially use as my final images. Below shown are the images I chose to Pick:


After using the P and X tool I realised I did not get enough high quality images for my Waterfront shoot and I am going to need to go their again. Next I used the star rating tool to rate my chosen images from 1-5 based on which I like best.

My Best Unedited Images

Black and White

Best Edited Images

With these edited images I attempted to follow Matthieu Venots style of work by increasing the blueness of the sky. In my original images the sky is too bright and was barely seen as blue so I used the calibration tools to develop the vibrancy of the sky to try and respond to Venots images.

Evaluation

Overall, I am not fully confident with these images as I didn’t take enough quality images, however the images that did turn out well I am more than happy with. My images is a slight response towards the work of Matthieu Venot because my images contain the light blue sky but with no vibrant colours. I much prefer the coloured variant of my images compared to the black and white because I think the contrast between the blue sky and the dull coloured building is a nice scene to look at. Also, my inclusion of the shadows create great contrast between the sky and the brown like colours. To improve this photoshoot I am going to go to Waterfront apartments again and try and caputre more quality images and take more time when photographing to try and prevent any motion blur, images out of focus, and images that are too bright.

photoshoot 1 – fort regent

The first photoshoot I carried out was located up at Fort Regent. I took these photos during midday at around 1:30pm hence why most images involve a blue sky and bright sun. I chose to travel to Fort Regent because it contains many simple structures as well as a view of all buildings throughout St Helier. Since this was my first photoshoot for my project, I didn’t collect too many images as I still wasn’t sure if I wanted to follow through with my idea, however after photographing up at Fort Regent I decided I want to carry on with my idea. I gathered a total of 120 photographs spanning from simple close ups of Fort Regent, to distant shots of the buildings of St Helier.

Fort Regent

Contact Sheets:

Best unedited images:

My photograph in comparison to Matthieu Venot image:

Here are 11 of my favourite unedited images I took during my first photoshoot in preparation for my exam project. I attempted to follow a similar style to the artist of Matthieu Venot with simple close ups backgrounded by a light blue sky, however the sky wasn’t clear enough to fully execute Matthieu’s style of photos. As you can see in my comparison of my image to my chosen artist, Matthieu image is displayed in a much brighter temperature with vibrant colours. My image compared is not edited so I feel as if I could make my image a lot more similar to Matthieu’s by changing features such as the exposure, temperature, tint and contrast. I want to attempt to create images and edit them to make them much more vibrant and eye catching to help me develop further into my recreation of some of Matthieu Venots images.

For my next photoshoots, I want to follow a similar style of my previous images with a simple close up on a bright sunny day. I am going to go to locations such as, Westmount apartments, Waterfront and also walk around town photographing any interesting and unique structures which I think would suit my idea.

Lightroom edits:

Evaluation

Overall, I believe I could’ve carried out a better photoshoot by making sure of the right camera setting as around 50% of my images came out either too bright or out of focus. However, with the images I did take I think they turned out well and had a good response towards my exam project. For one of my images I wanted to follow the style of Matthieu Venot which I think I did successfully however I didn’t carry on following this style as I think it wouldn’t have looked good for many other of my photos. Also, I think I could’ve taken more images of these buildings so I would have more to work with and edit for my project.

artist reference 3 – Andrew prokos

Andrew Prokos is an award-winning photographer specializing in large-format fine art photography in black and white and in color. His gallery-quality artworks are found in the homes of art collectors around the world and are purchased by interior designers, art advisors, and international galleries on behalf of their clients. Andrew’s fine art photographs have won numerous awards and honors and are featured in prestigious publications and interviews. The photography available for sale through this website is the product of his artistic vision and his almost twenty-year journey as a photographer. You can explore Andrew’s work using the curated photography collections below, which include; architectural photography, abstract photography, black & white photography, color photography, cityscapes, landscapes, long-exposure, and night photography.

https://andrewprokos.com/

Andrew has photographed iconic cities and locations in the Americas, Europe, and the Middle East for over twenty years. His collections of large-scale photographs capture the unique fabric of each location in high-definition and intricate detail. You can explore Andrew’s location photography in the curated collections below, which include photography of New York City photography, Boston, London, Dubai, Abu Dhabi, Rio de Janeiro, Brasilia, Continental Europe and the UK. Also included are locations in the American West such as Seattle, Colorado and Bryce Canyon, Utah. Andrew’s award-winning fine art photography series approach architectural elements and urban landscapes from a conceptual perspective. In his series Andrew touches on themes of transition and temporality, abstraction, and altered visual perception through the use of negative imagery. His series have won numerous awards at international photography competitions, and have been exhibited in museums, galleries, and corporate collections around the world.

Andrews work differs from the simple side of this project with his images containing much more complex structures with interesting features. By studying this artist it can help me further understand the difference between the simple and complex architecture. However, some of Andrews images lead further over to the simple side of architecture by photographing simple but unique structures in a simplistic way. He ranges his photos from black and white to bright, unique colours reflecting off the buildings. He photographs interior and exterior parts of buildings to make sure he captures the whole building.

https://en.wikipedia.org/wiki/Andrew_Prokos

Image analysis:

A color fine art photo of the Guggenheim Museum rotunda in New York City

In this image you can clearly see Andrew has photographed the interior of a building from beneath the main subject. He has positioned his camera nearly straight upwards but tilted slightly. He does this to make sure he captures the spiral staircase leading to the bottom of the building. The image involves a symmetric glass dome with light glaring though to complete the brightness of the inside. The image is clearly captured during daytime which creates the shadows on the staircase to make some sort of spiral pattern carrying through the whole image. I would declare this images more over to the complex side because of the unique, symmetrical dome that is unusual for buildings as such. The image was taken inside of the Guggenheim Museum located in New York City, a city filled with interesting and distinctive architecture.