All posts by Zara Currie

Filters

Author:
Category:

link to romanticism + artist reference

My work’s link to romanticism

In this blog post I have included an artist reference with includes an analysis of my work vs Fay Godwins. I think that my research on Ansel Adams’ work helped me understand romanticism more before going out and taking my own images, meaning I could identify the best weather conditions so that romanticisable features such as clouds were more present.

Furthermore, shooting in black and white of editing my images in monochromatic meant that my final pieces have more of a dramatic feel and this helps demonstrate the nicer features of Jersey natural environments. I also think that the image that I have included in my artist reference is a good example of a romanticised image as it has some of the same features but is different from Godwin’s work. I took inspiration for her work and used this to take some of my own images down at the beach, making this artist reference easier to create.

Artist Reference- Fay Godwin

My WorkSimilaritiesFay Godwin’s
BeachLandscapesHills
RocksFocal pointGrass
Cool tonedClear SkyWarm toned
PeopleSymmetricalNo animals
Zone systemHorizon lineLighter image
Long structureRule of thirdsLimited tones
Straight horizon lineCloudsCurved horizon line
RocksClear foreground Textured
This image has an empty alt attribute; its file name is image-199.png

Image analysis- Fay Godwin

Similarities- I think its important to note that the main focal point of both of these images look very similar, and the centre of both pieces are a path or can have been created by humans. The horizon lines are also located further to the top of both images, meaning that the rule of thirds isn’t really followed in either photograph. Furthermore, I like that both of these images are symmetrical, with the landscape being just surroundings to the paths and this makes both more aesthetic and therefore catching you eye.

Differences- Despite our final pieces of work being quite similar there are multiple differences including the landscape locations themselves as might was taken down at the beach and Godwin’s looks like it was taken amongst some grassy hills, mine also includes a manmade structure as is more a visual representation of our modern world. Overall my piece is more cool toned and demonstrates more range of the zone system, whereas Godwin’s is a warmer tone with less components in the original photograph. I would say Godwin’s piece has more texture then my final image as the clarity of the glass in the foreground means that the natural features come through much more in comparison to the rocks in my image.

Link to romanticism- Despite Godwin’s piece being created during the romanticism era, I think that my piece along with her work together to demonstrate how the world and changed and is now more manmade, as my piece has a built structure and Godwin’s piece is only filled with natural features such as green land and hills. The work of Ansel Adams and the zone system is more obvious in my image as there is a wider range of contrast with the cooler tones of the image, as Godwin’s is more warm toner. Both of our images do romanticise the different landscapes and this is done well with the help of editing and Lightroom and my piece. I like that the monochromatic editing makes the images more dramatic and shows more of the natural beauty of the environment.

rural landscapes- final pieces

Final Images and Analysis

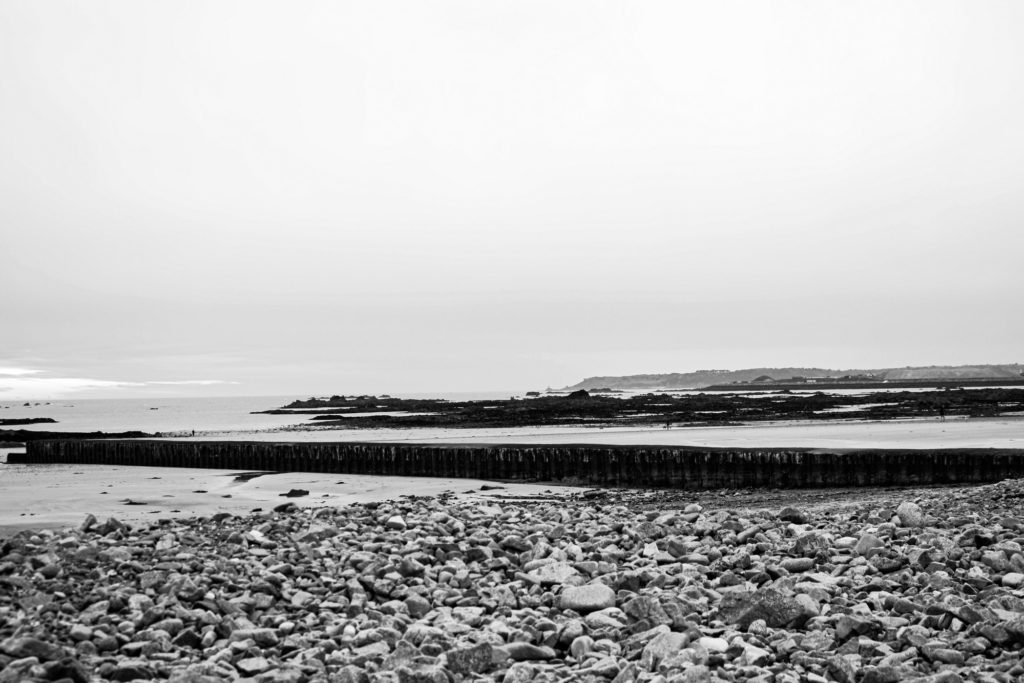
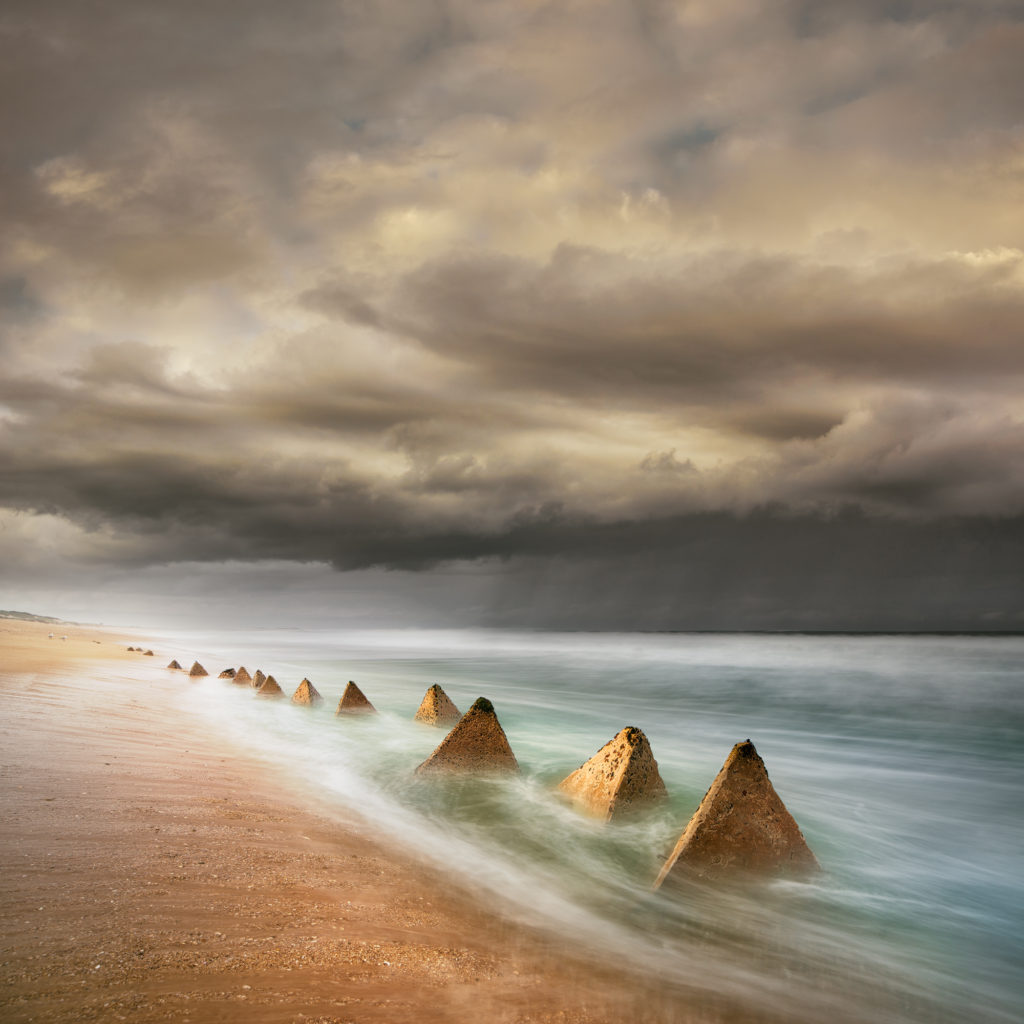
I have selected this as one of my final images as I think that there is many strong features of this image, starting with the perspective of the image, as I had to position the camera low down to the ground, and to make the structure of the image in the centre so that the final piece was symmetrical. Furthermore, the rule of thirds isn’t very present in this piece, but I like that the structure makes up the majority of the width of the image and then it disappears and gets smaller, this then nearly meets the horizon line and creates parallels within the image. I have made this image monochromatic and tried to make the contrast more clear so that the concept of Ansel Adams’ zone system is more present and the fact that this image has a large depth of field means that the wide range of tones is demonstrated all throughout.

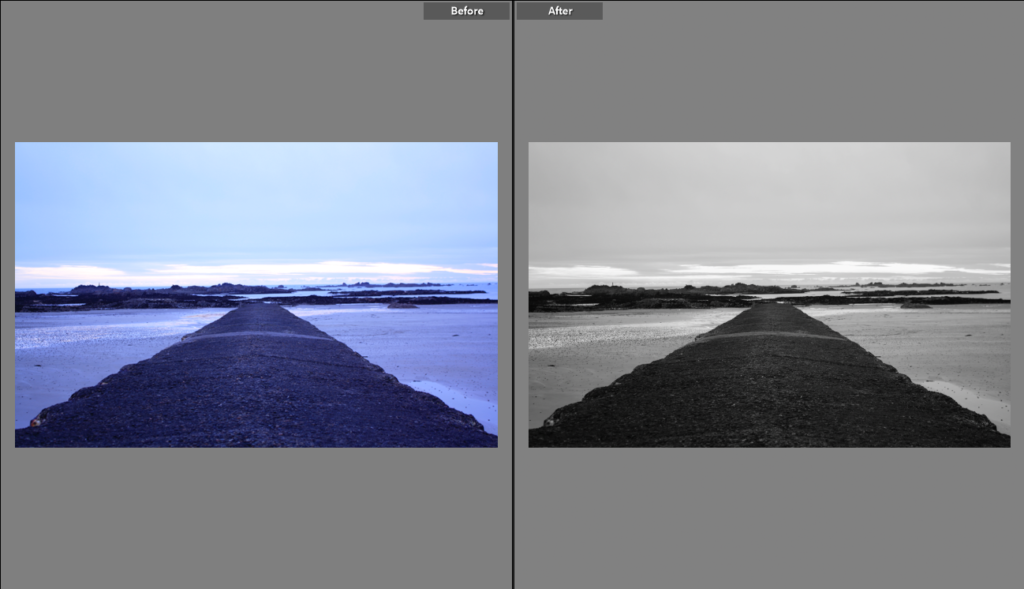
This image was originally one that I thought was unusable as I thought it looker very average in colour, which is why I have edited it in monochromatic. Additionally, I think that the fact that the sky lacks tones and is all white is an advantage as it just means that contradiction between the structures, rocks and sky is made more obvious, making the image stronger. I like that this final piece has lots of components so that the cluttered foreground contrasts with the background. Furthermore, I think that the lack of quality if the image gives it more depth as the it makes the shadows look slightly blurred despite me adjusting the dehaze in Lightroom. This piece does contain some weaknesses including the fact that it could be seen as boring as not true to the project as there is manmade structures in this piece.

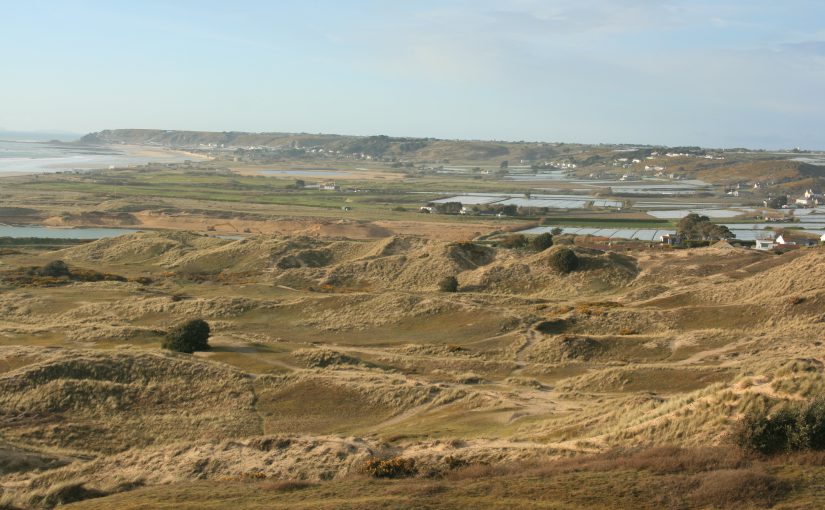
This is another one of my good images from my photoshoot down at the beach, I have selected this as one of my final images as I think that the composition of the image wasn’t planned but turned out to be successful as I like how most of the image is the land and this contradicts with some of my other final images as they most contain sky. I think that the depth of field with this image is important to note as it means that a lot of the landscape is present and it really shows how important this is when taking landscape photos. Its important to note that this image has been edited so that the rocks are very dark and this contradicts with the light blue, yellow and blue sky. Furthermore, I think that the water which lays on the sand that appears blue on the sand and the blue sky help link the image together.

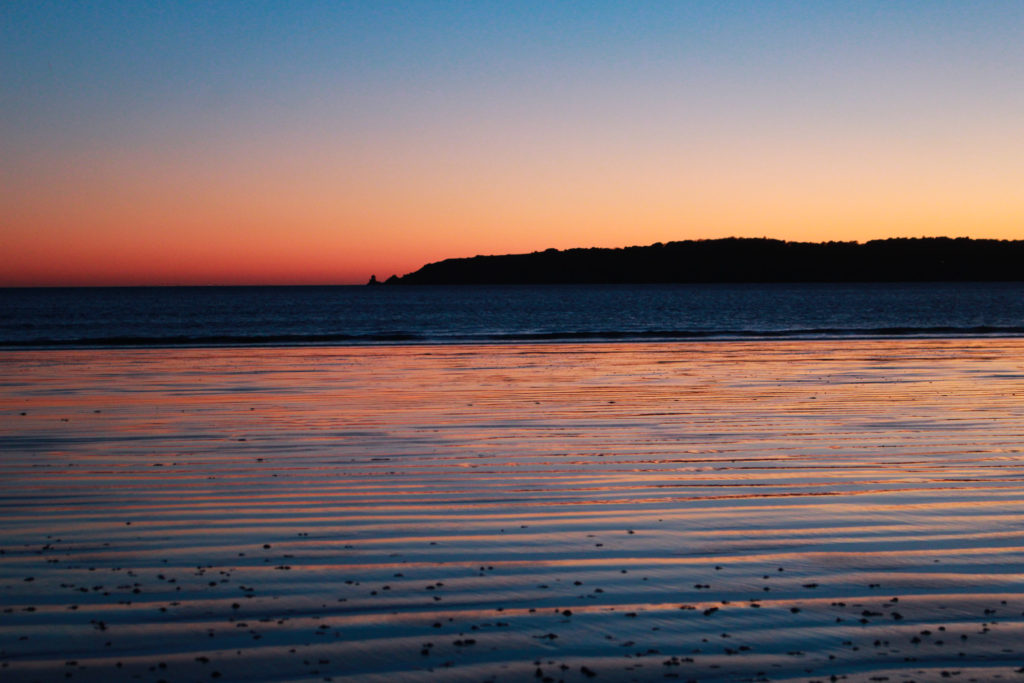
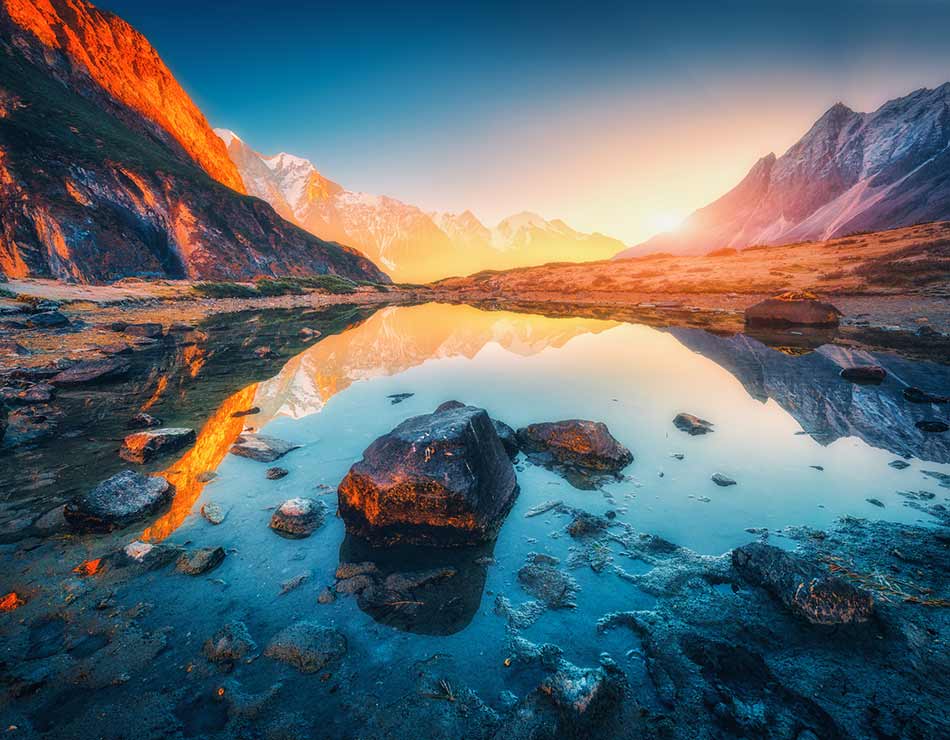
This photograph was taken during my photoshoot along St Aubins beach, the best part of this image is the colours, and I have enhanced these in Lightroom. I really like that the sunsets contains contrasting colours as the orange and the blue work well when reflecting back onto the sand. Furthermore, the composition of the image and the fact that half of the image is a fake reflection and half is natural features means that the photography itself would be seen as a contradiction. I think that the abundance of parallel lines within the image ties the whole image together they help the image become cohesive as its the only part of the image that matches together.

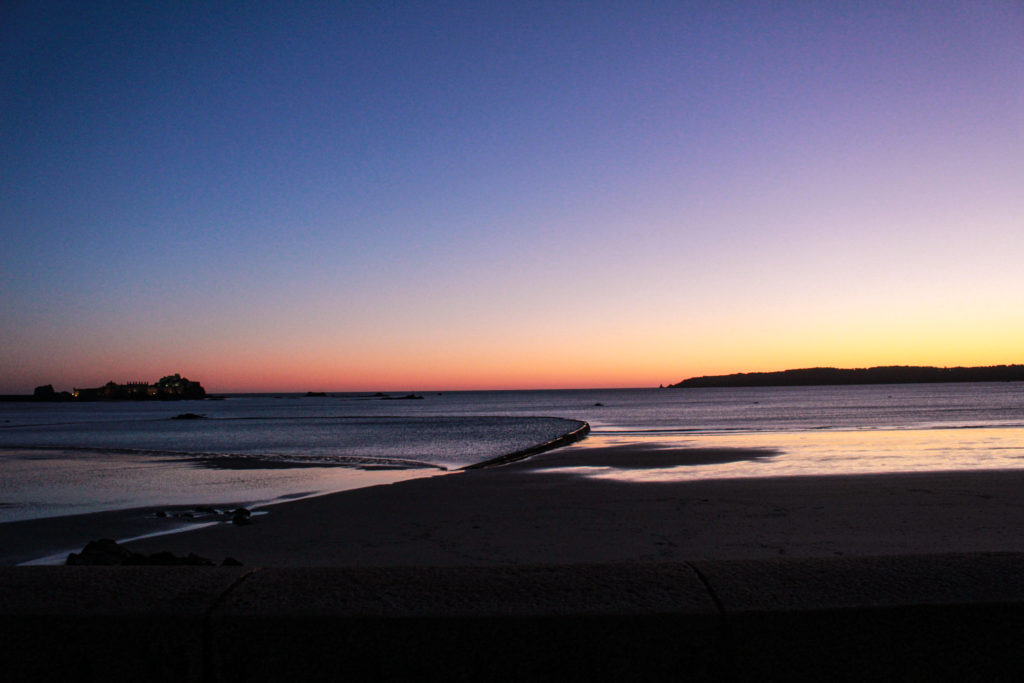
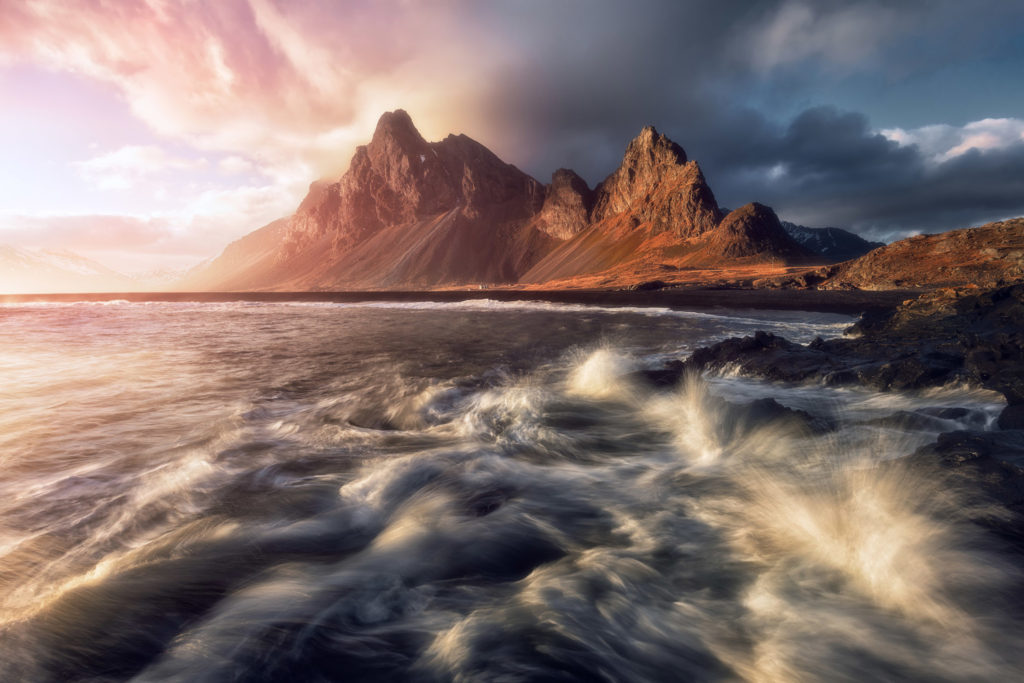
I have selected this final piece because I think that the perspective of the image is really important as it means that more of the natural landscape is in view and creates a straight horizon line and this image is symmetrical as the top half of the image is sky and the second half is land, structures and sea. Furthermore, I like that this image was taken at sunset as it means that the colours can be easily saturated and the blacks in this piece contradict with the yellows and the fact that everything is in focus means this is more clear. One weakness of this image could be that its very generic and many people have seen this type of landscape photography before but I think that the strengths of the image save it.

jersey landscapes

In preparation to start taking images that will show demonstrate romanticism, I have come up with some ideas of where photoshoots could take place as there in Jersey we have a variety of natural landscapes to go to to take good photos.

Potential Locations

  • St Ouens Beach
  • L’Etacq
  • St Catherine’s Woods
  • Fields/ Farms
  • Cliff paths
  • Sand Dunes
  • Reservoirs in St Saviours
  • Green Island

Contact Sheets and Photoshoot Plans

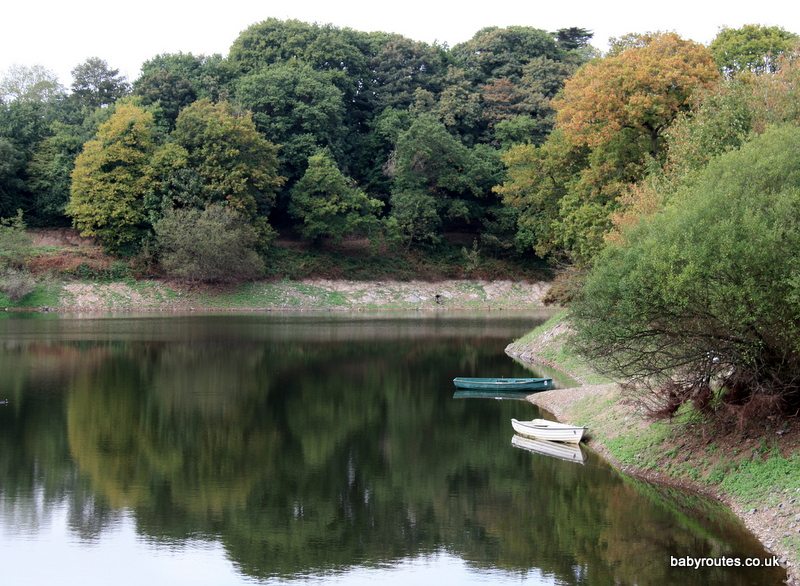
Photoshoots 1 and 2, shown below, were located at St Aubin’s beach and a reservoir in St Saviours, this was in an attempt to generate as many images as possible and get a variety of different images, this allowed me to also get more practise with the camera settings and this meant by my final photoshoot my images were of better quality as I now know how settings such as the ISO and shutter speed work. Also, I took them at different times of the day, one during sunset and one in the afternoon, but the lighting just ended up looking more dull in the reservoir photoshoot.

Photoshoot 3 shown below was located at the La Mar beach in St Clement, I took all of these photos were taken around 5pm, the aim was too have minimal lighting so that my images were turned from colour to monochromatic, the contrast in colours would be greater, also this was good practise when changing the camera settings to adapt to the changing lighting as the sun started to set.

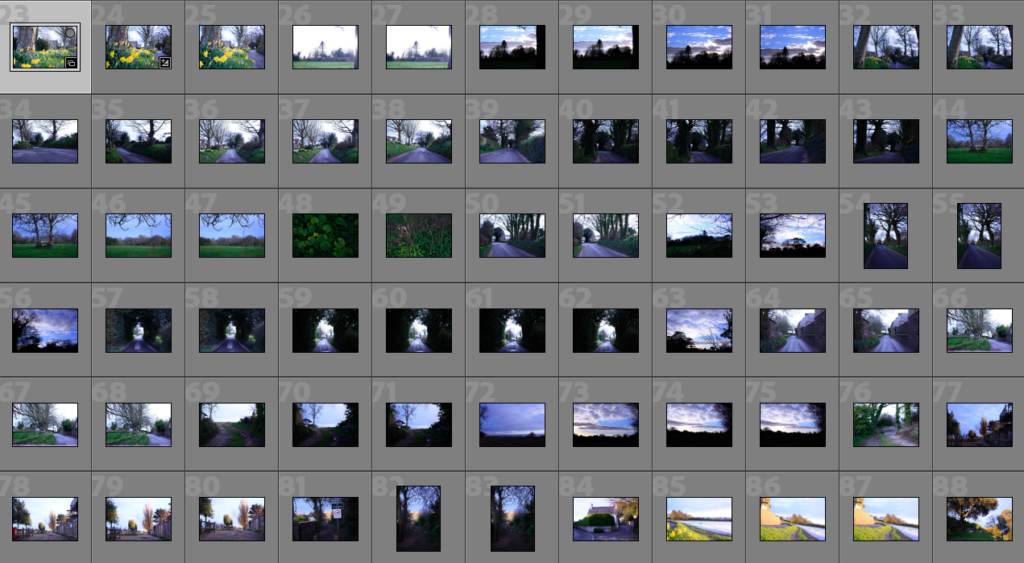
Photoshoot 4 was taken around Le Quesnes garden centre in St Saviour, with the roads full of grass and natural features, and the clouds being defined in the sky, I thought this was the perfect time to take more images for this project. Below I have placed a contact sheet containing some images from this photoshoot.

Image Selection and Editing

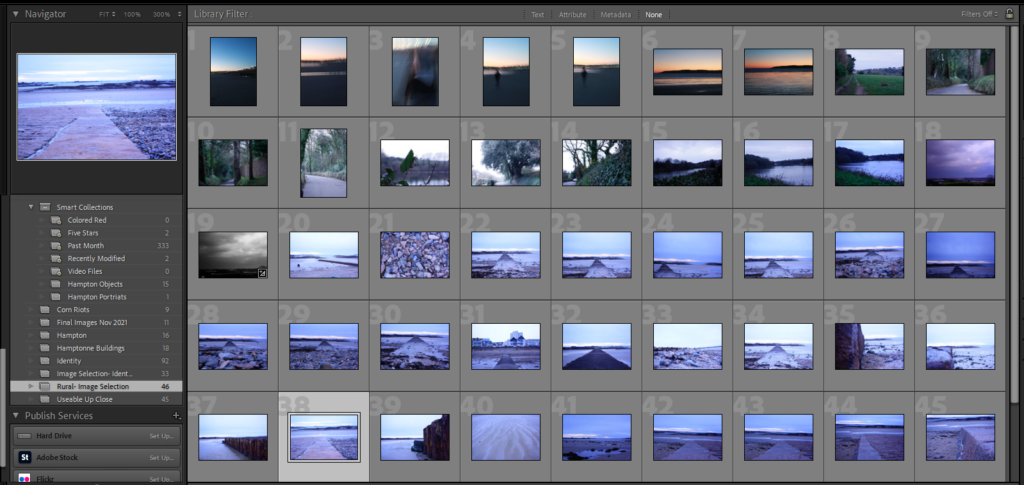
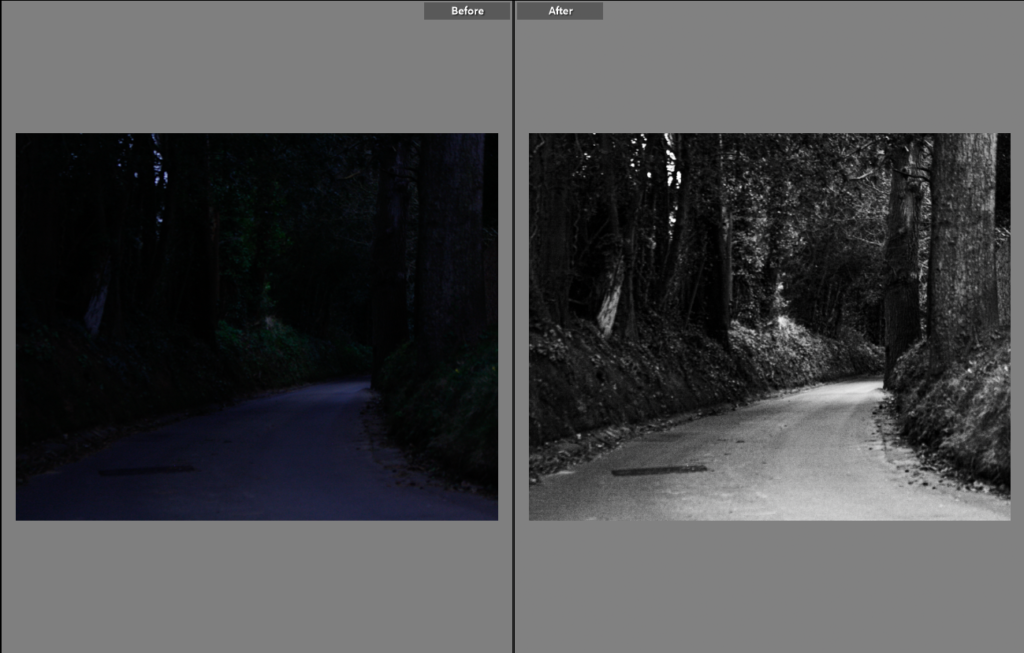
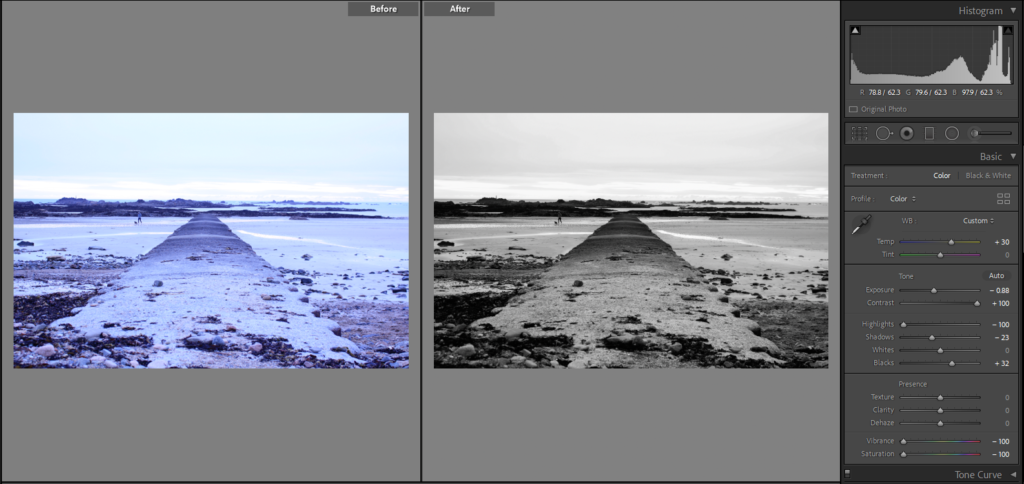
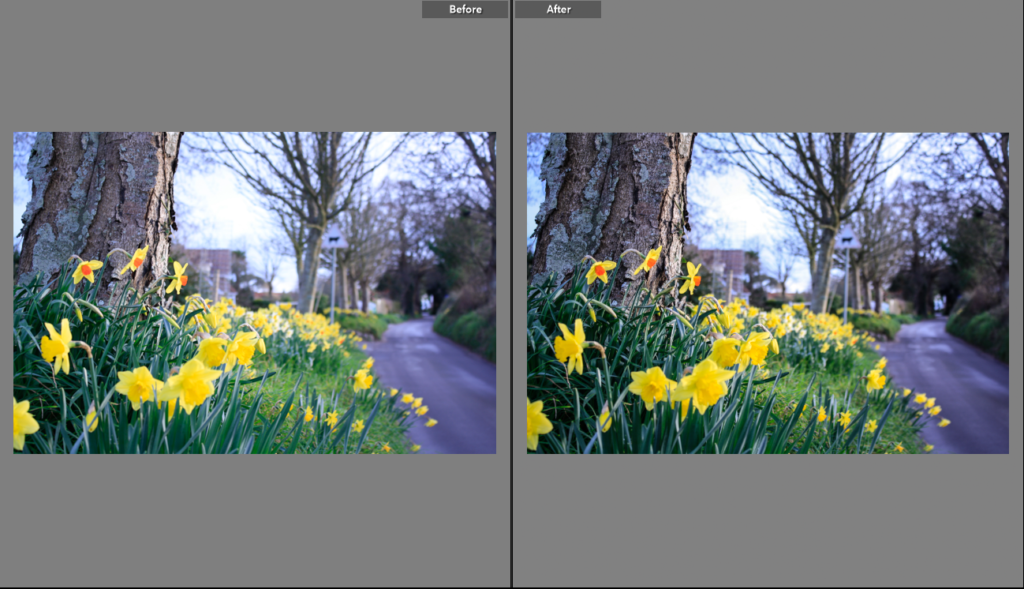
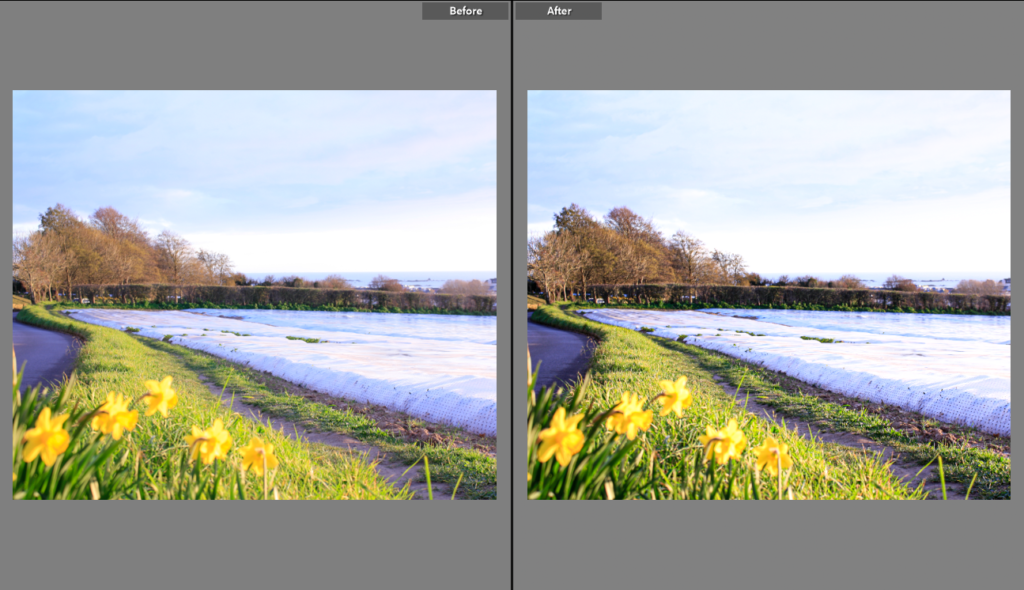
Below I have created a collection showing the majority of my useable images from some of the photoshoots. I have also included examples of me editing some of my potential final images, as I have tried to romanticise some of my images my making them monochromatic. Some of these images were not really edited a lot but were just altered to make them better quality and we images were the editing is drastic I have included the Lightroom settings on the right hand side. I liked editing some of these images in this monochromatic way as it it relates it to our projects theme of romanticism.

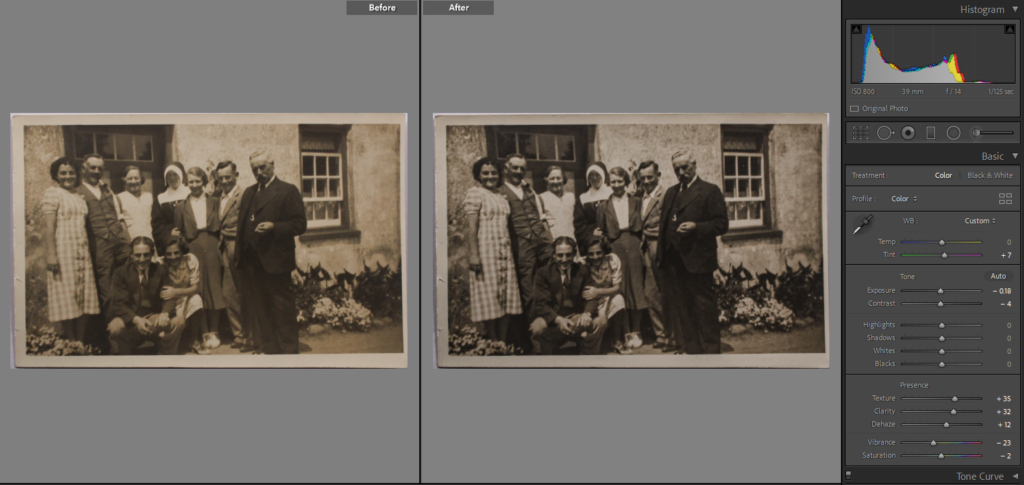
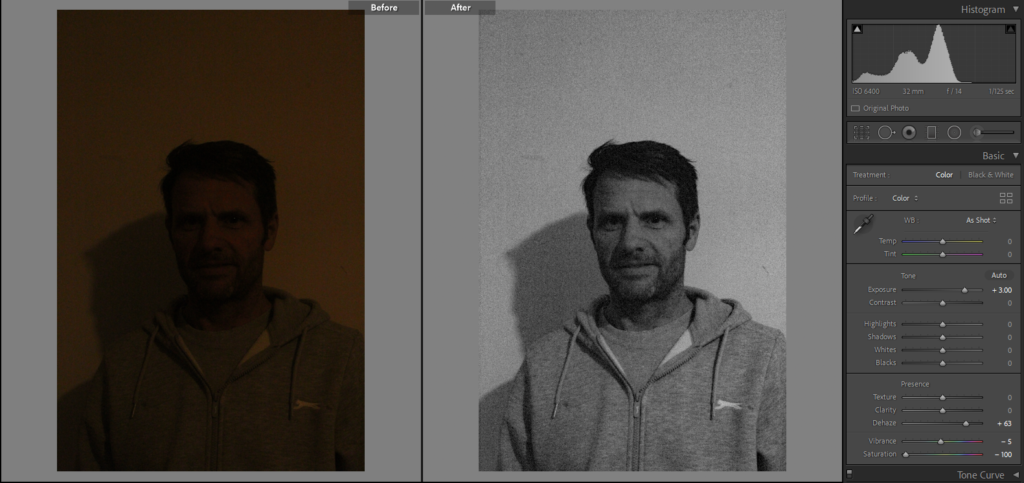
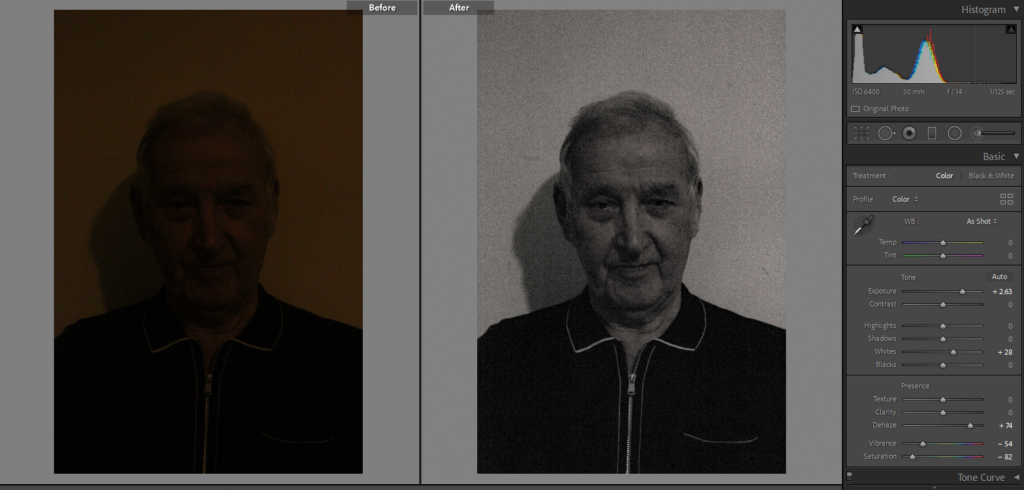
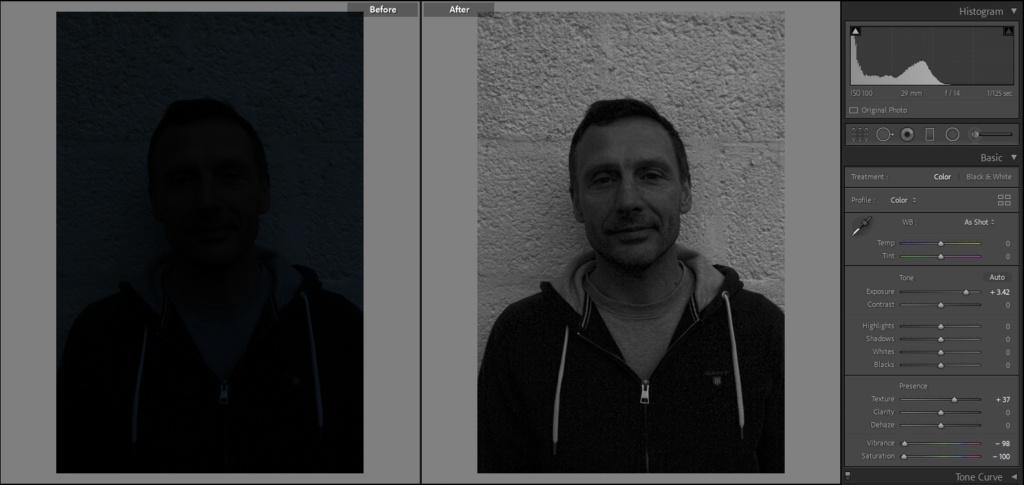
I have edited my images in such ways for multiple reasons, first being that the exposure on the original images was far too low and this needed editing to be fixed in Lightroom. Additionally, I think that the saturation of some of the colours of these images needed altered as it makes the images more interesting and gives them more depth, along with changing the clarity. I think that making these images monochromatic links to the theme of romanticism and shows the natural landscapes from a different view. I have showed these screenshots in Lightroom so that we can clearly see the difference between the images after being edited, this means that we can see the clear difference.

romanticism in landscape photography

The Age of The Enlightenment (1700-1800)


The Enlightenment included a range of ideas centred on the value of human happiness, the pursuit of knowledge obtained by means of reason and the evidence of the senses, and ideals such as liberty, progress, toleration, fraternity, constitutional government, and separation of church and state.

An eighteenth century intellectual movement whose three central concepts were the use of reason, the scientific method, and progress. Enlightenment thinkers believed they could help create better societies and better people.

The Age of Romanticism (1800-1900)

Definition: Romanticism was an artistic, literary, musical, and intellectual movement that originated in Europe towards the end of the 18th century, and in most areas was at its peak in the approximate period from 1800 to 1850.

It started with its emphasis on the imagination and emotion, Romanticism emerged as a response to the disillusionment with the Enlightenment values of reason and order in the aftermath of the French Revolution of 1789.

The founders of Romanticism, critics August Wilhelm Schlegel and Friedrich Schlegel, began to speak of romantische Poesie (“romantic poetry”) in the 1790s, contrasting it with “classic” but in terms of spirit rather than merely dating. It involved breaking with the past, and consciously moving away from the ideas and traditions of the Enlightenment. In so doing, Romanticism fundamentally changed the prevailing attitudes toward nature, emotion, reason and even the individual.
Romanticism | Artchiv

5 characteristics of romanticism:

  • Interest in the common man and childhood
  • Strong senses, emotions, and feelings
  • Awe of nature
  • Celebration of the individual
  • Importance of imagination

Romanticism in Photography

Romanticism means that photography can be made dramatic for the sake of the viewers, making it more interesting to see and telling a real story about maybe the history of the landscape or the purpose of the photography.

My favourite quality of romantic landscapes is how they beautifully dramatize the courtship of light, land, water, and the presence of man on that courtship. Such scenes tell tales about Man’s adapting nature to his needs, and sometimes how nature defeats those very intentions. Romantic landscapes are typically “moody” in atmosphere; they are more about the subjective feelings of the artist, than an objective record of the observable world.

Ansel Adams

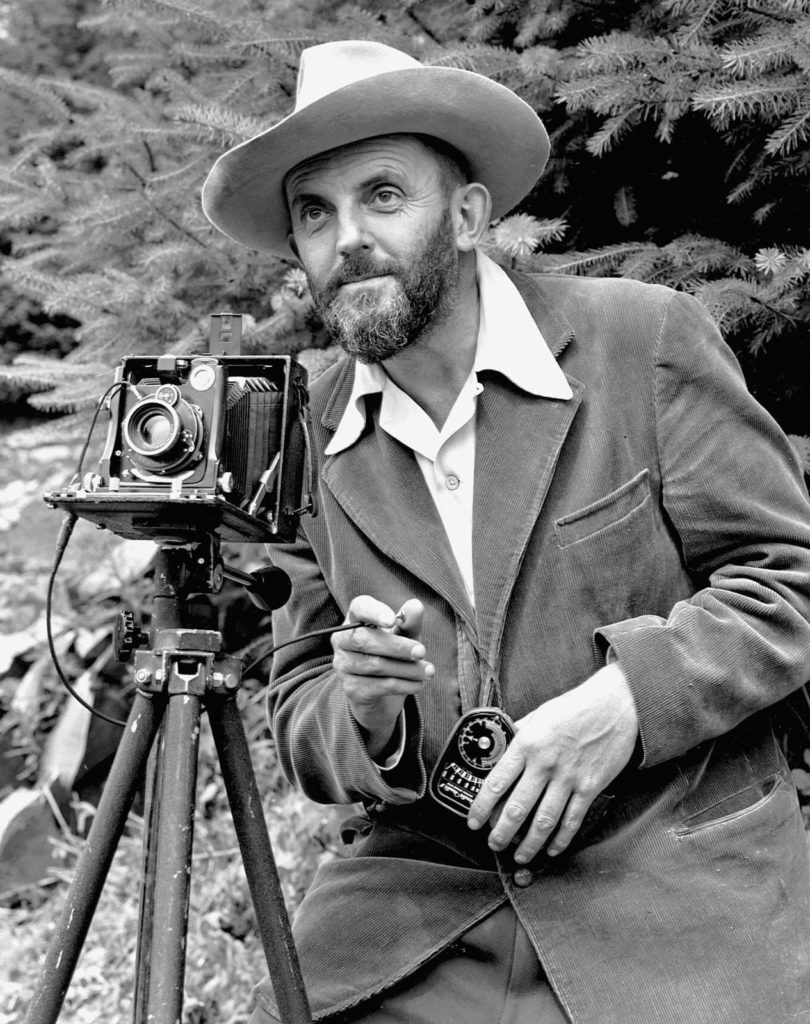
Ansel Easton Adams was an American landscape photographer and environmentalist known for his black-and-white images of the American West. He helped found Group f/64, an association of photographers advocating “pure” photography which favoured sharp focus and the use of the full tonal range of a photograph.

When speaking of Ansel Adams’ photography, the most famous is Monolith, the Face of Half Dome. This was Adams’ first photograph that gathered the attention of the public and the art world. Using his Korona camera, Adams captured his iconic photo of Half Dome in Yosemite National Park after a difficult hike.

Adams was strongly influenced by Alfred Stieglitz, whom he met in 1933 and who mounted a one-man exhibition for him in 1936 at Stieglitz’s An American Place gallery in New York City.

Adams shot in colour for almost as long as he did in black and white. And he experimented with it for the rest of his life, snapping over thirty-five hundred shots. Originally working in the Pictorialist style, widely popular in the 1910s and 1920s, Adams encountered Paul Strand’s photography in 1930, and rejected his earlier painterly, soft focus style for a new “pure” and sharp focus approach.

In 1932, Adams founded Group f/64 with Edward Weston. Active between 1932 and 1935, f/64 comprised a group of photographers – including Imogen Cunningham, Willard Van Dyke, Consuelo Kanaga, Henry Swift, Alma Lavenson, and Sonya Noskowiak – that advocated Straight and unmanipulated photography over Pictorialism.

Pictorialism favoured traditional, soft-focus images, which were printed from manipulated negatives that produced prints more reminiscent of oil paintings than photographs. The group’s name, f/64, referred to their use of the smallest aperture setting (f-stop) on a camera that created an image with the sharpest depth of field.

Image analysis

Iconic Ansel Adams image sells for nearly $1M at Sotheby's auction, total  sales of $6.4M: Digital Photography Review
Most famous piece

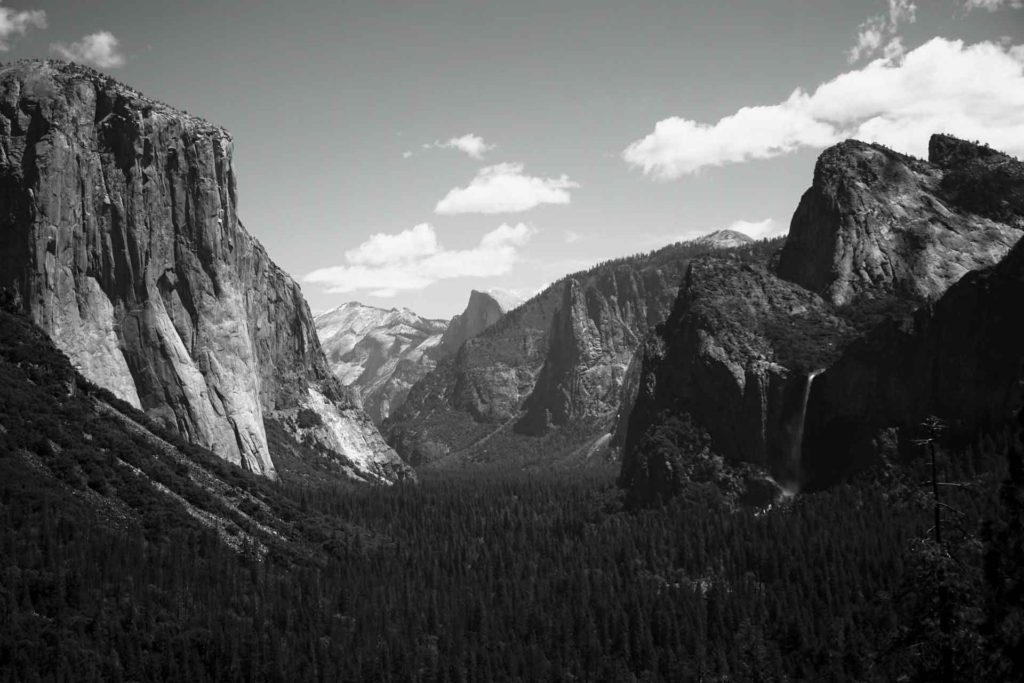
I have selected this image to analyse this image of Ansel Adams’ as I think that this piece, being among his most famous work, is my favourite piece of his. The first reason for this is the contrast throughout the whole image, as the romanticism is really present in this image, with the river is tones 0/1 along with the clouds. with the trees and bottom of the mountains being tones 9/10, and the majority of the vegetation being mid tones. I think that the perspective of this image is important to note as it means that the river and the mountains are the most apparent natural elements of the image, and the image is more symmetrical as the river is part of both halves of the image. I think that this would be Adams’ way of expressing his love for nature.

Furthermore, the fact that the mountains are so far away from where the image was taken means that there is added more depth as this means there are other elements to the image. I like that the all of his work is in black and white, because this adds to the romanticism of his work as the shadows are very strong and contrast very obvious, adding to the tonal values of the image. I thin that Adams’ work is also very popular as the clarity of his images, especially considering the era that his photography was taken and this may have been seen as revolutionary for the time,

Zone System

Adams came up with the concept of that every monochromatic image he took should consist of these 11 tones, for example trees/ shadows should be tone 0 and aspects such as the moon and highlights should be tone 9/10. This meant he was aiming to take photographs and planning what the final result would look like rather then just adapting to the photographs he too. Also, this gave his final pieces of work lots of contrast and made them seem more creative as they was consistent, meaning that his style of photography was recognisable and this helped his develop his name.

How to make a Value Scale -

landscape photography

Introduction/ Mood Board

Definition: Landscape photography shows the spaces within the world, sometimes vast and unending, but other times microscopic. Landscape photographs typically capture the presence of nature but can also focus on man-made features or disturbances of landscapes. Landscape photography is done for a variety of reasons. I have selected these images as I think they are the most aesthetic and they show a good range of skill and a good variety of different landscapes.

Fay Godwin

Godwin was born Fay Simmonds in Berlin, Germany, the daughter of Sidney Simmonds, a British diplomat who had married Stella MacLean, an American artist. She married publisher Tony Godwin in 1961; the couple had two sons, Jeremy and Nicholas. Godwin was less active in her final years; in a December 2004 interview for Practical Photography, she blamed “the NHS.

In the 1990s she was offered a Fellowship at the National Museum of Photography, Film and Television (now the National Media Museum) in Bradford, which pushed her work in the direction of colour and urban documentary. She also began taking close-ups of natural forms. A major exhibition of that work was toured by Warwick Arts Centre from 1995 to 1997; Godwin self-published a small book of that work in 1999, called Glassworks & Secret Lives, which was distributed from a small local bookshop in her adopted hometown of Hastings in East Sussex.

Godwin was introduced to the London literary scene. She produced portraits of dozens of well-known writers, photographing almost every significant literary figure in 1970s and 1980s England, as well as numerous visiting foreign authors. Her subjects, typically photographed in the sitters’ own homes, included Kingsley Amis.

The first edition of Remains of Elmet: A Pennine Sequence, her book collaboration with poet Ted Hughes, was published by Rainbow Press in 1979. The book was also published in popular form by Faber and Faber (with poor reproduction of the images), and then re-published by them in 1994 simply as Elmet with a third of the book being new additional poems and photographs.

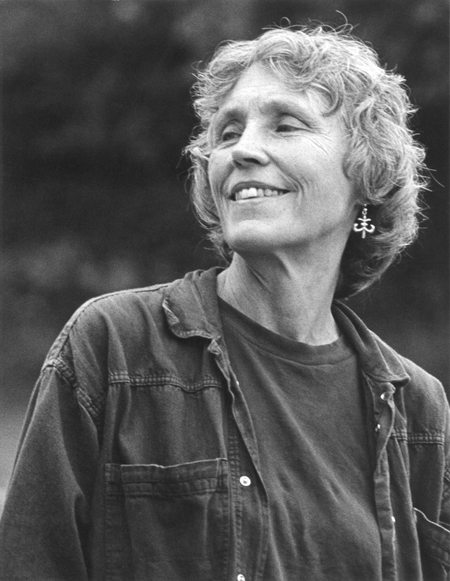
My way into photography was through family snaps in the mid-1960s. I had no formal training, but after the snaps came portraits, reportage, and finally, through my love of walking, landscape photography, all in black and white. A Fellowship with the National Museum of Photography in Bradford led to urban landscape in colour, and very personal close-up work in colour has followed — Fay Godwin

Image Analysis

Fay Godwin | 47 Artworks at Auction | MutualArt

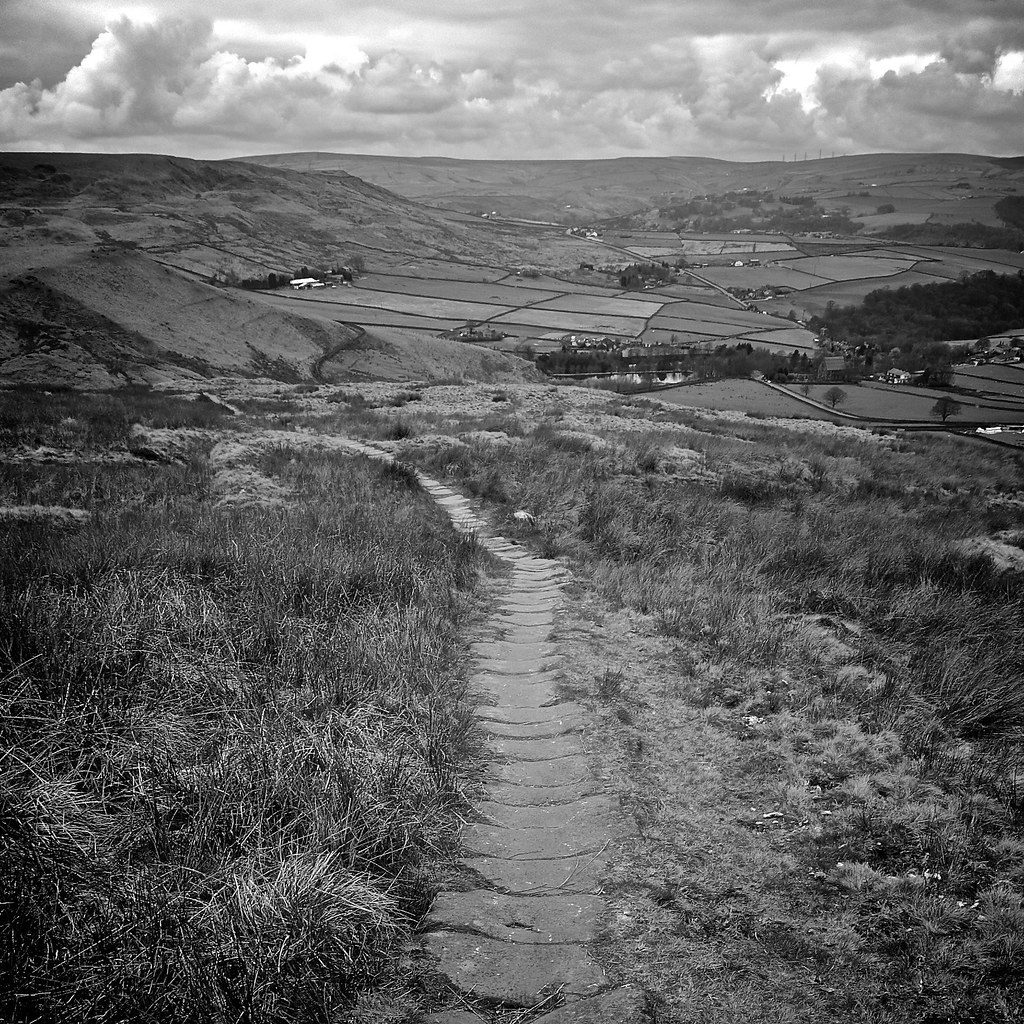
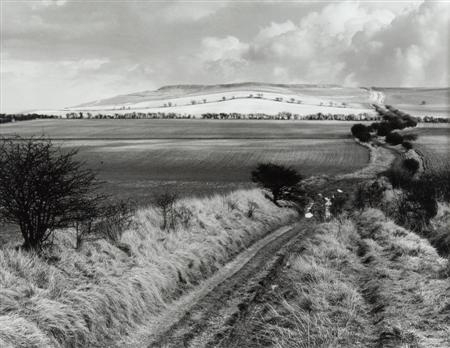
I have selected this image to analyse as I think there are many different components to look at. I like that the way that the camera is angled means that the trial in the foreground takes up all of the image and it slowly disappears to just take up the last third of the image. I think how Godwin has considered (from Ansel Adams’ ideas) that all 11 tones (0-10) in this image and its clear she has considered this when taking the image. The trees all spread through the image are tones 0 as they are the darkest tone, and the sand dunes in the background sand dunes would be considered 9-10 tones as they are very light. Furthermore, its really important to consider the textures in the long grass at the foreground of te image, as this contrasts with the fields and sand further back in the picture, as they are smooth.

In addition, this image is split horizontally into three sections, with the thickest part of the trial in the foreground being one section, the smooth textured field being the next and the very light toned sand dunes in the background being the third, and this gives the image depth and its part of the detailed composition. Also, the perspective of the image means that it gives it a sense of depth, as the foreground appears to be much lighter from the position the image was taken in. The tonal values of the image mean the the depth is heightened as even the outlines of the clouds is clear and the fact that the vegetation in the front matches with the outline of the mountains brings the image together more.

image comparison

Here I have compared one image of Luke Fowler’s with another image of Claude Cahun, to make this process easier we discussed these images in class and which aspects of each are similar and different. I have created a table below using the information discussed and laid it out clearly and in preparation to fully compare these images.
Luke Fowler’s work (left) and Claude Cahun’s (right)
Luke Fowler
Differences
SimilaritiesClaude Cahun
Differences

juxtaposed from top to bottom
1 person
juxtaposed from side to side
portraitmonochromatic edits
2 faces
juxtaposed from top to bottomcomposed of 2 images plain background
from shoulder up
separate imagesmore light tones
landscapetells a storyvisual facial features
not centredscratchy linesside profile
different shadingface is main aspect of image
idea of freedomloss of identity

Full Image Comparison

To compare these 2 images, one composed by Luke Fowler and one by Claude Cahun I have created a this table above to better layout my first ideas, and this has helped me to build my analysis paragraph. Firstly, its important to note that the lighting of these images contrast each other, on the left the lighting is full of gradient terms and medium grey and white tones, whilst the multi exposure, Claude Cahun, piece is a massive contrast between the very light ones on her the faces and the very dark grey background, this means that these images can be linked together of juxtaposed depending on the work.

Furthermore, Fowler’s image is contains other arms of the body and in this case the mans right arm whilst Cahun’s is only composed of faces, this creates the focus just on the face and unlike in Fowler’s, the landscape doesn’t take away from the facial features. Additionally, they can be contrasted as the left is created from two images that are laid out on top of each other (with final piece being portrait) where the right is a multi exposure edit with two different landscape photos (with the final piece being landscape as well) and the fact that the final products are different orientations means this can even be compared.

These images tell two different stories, with Claude Cahun’s exploring the ides of a loss of identity and how the same person can have multiple identities and can feel as if they don’t have one personality or belonging. I can be implied that the message behind Fowler’s image is that identity is lined to this freedom, as he no longer cares about what other thinks when it comes to his identity. This idea is supported by the birds in the background as it contains the sky and birds, which represent freedom and then it links to the freedom within his identity.

final outcomes, evaluation and critique

Below I have displayed my final outcomes, the process of how they were created and why I have chosen them based on how successful they are. In addition, I have outlined the ideas behind each piece of work and their individual strengths and weaknesses.

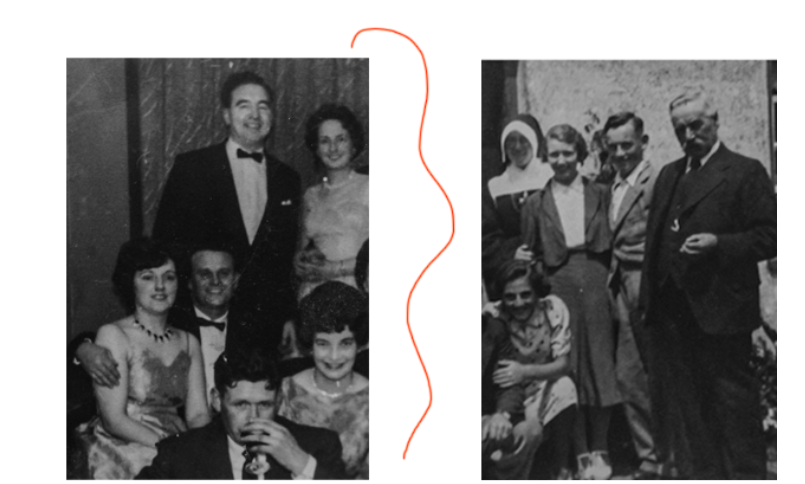
  1. I have selected this image to be part of my final collection as it tells a story of both sides of my family being kept apart, as my mums and side were never close or one family unit. This piece tells a message about how distance between a family can affect future generations such as myself and my brother. To create this work I placed the images in photoshop, selected the half of the images which would be used in the piece, then used the pencil tool along with the red colour to draw the red wavy string down the middle. I like how the red string is the most prominent part of the image, as the red really stands out from the black in the images. In addition, it’s interesting how these images could be linked, yet I have set them quite far apart to convey the idea of a family separation.

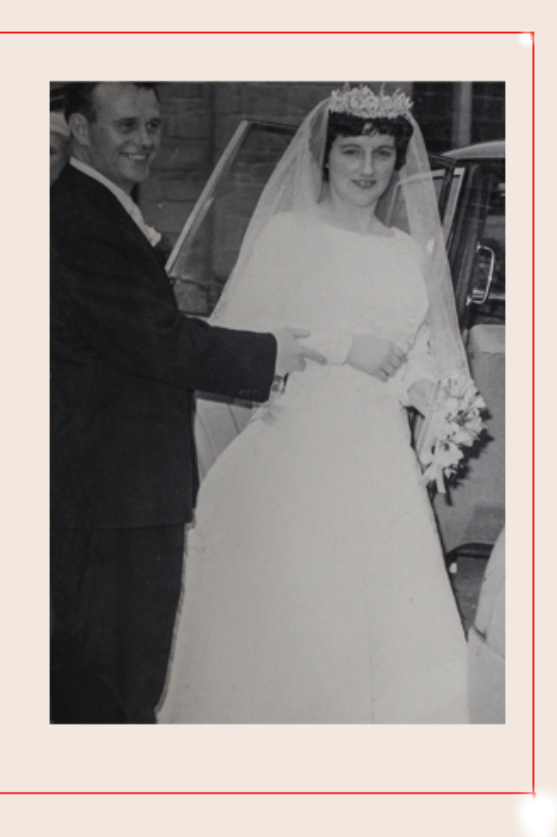
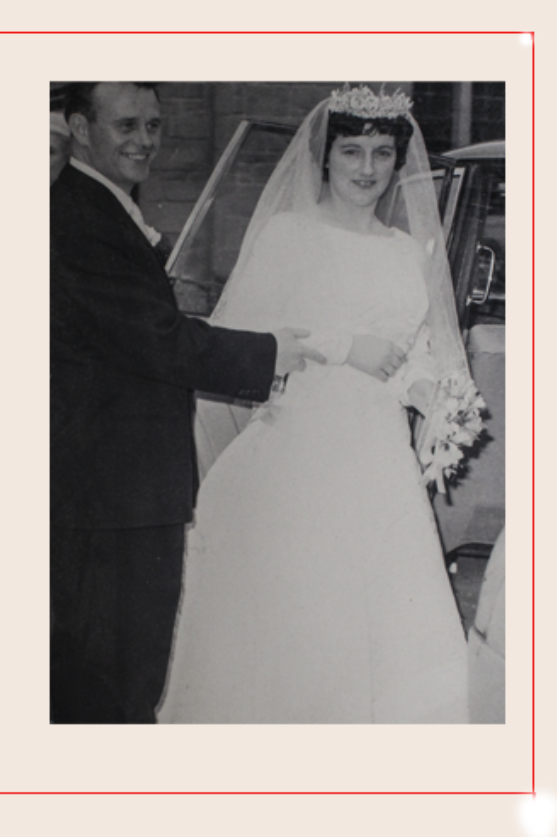
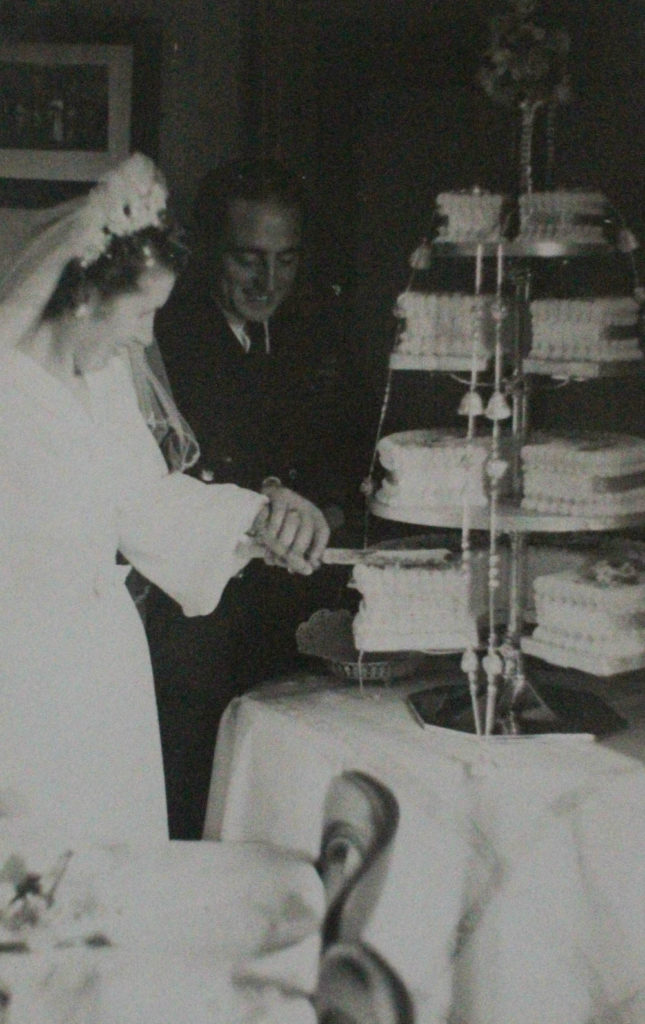
2. Below I have created my second final piece. composed of my grandparents wedding image. To actually create this piece I placed the image into Photoshop, then changed the colour of the background to a more yellow/ beige tone, this was in an attempt to recreate my artists work when he created his ‘Red String’ project, and the red line that is creating a boarder around the image, making it look like the red string around a homemade book. I think this image is only partly successful as although, of course, the red string is digital, it looks too fake and should be made more realistic. However, I think that the legibility of my grandparents wedding photograph makes the image more valuable, as the history of the image incorporated with a new idea of the Red String work makes for modernising an old piece.

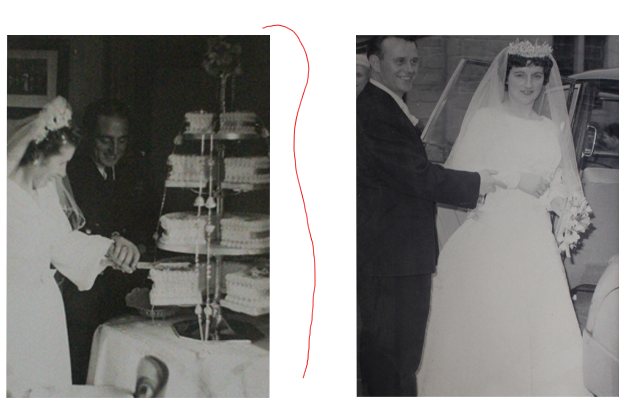
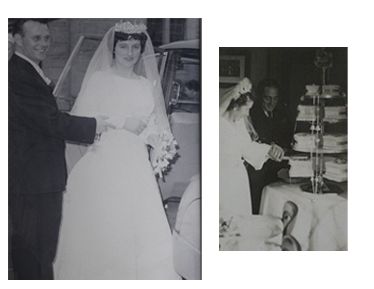
3. Below I have created this final piece which is also linked to Fujii’s work, I have used a wedding picture of my great grandparents on my dads side (left) and a wedding photo of my grandparents of my mums side (right). I have decided to use these two images together instead of separately as it explores the theme of how the separation in a family has effected the lives of the current generations such as me and my brother. I think that this piece is successful as the idea and the actual images contradict each other, and its also obvious that these images are taken within decades of each other.

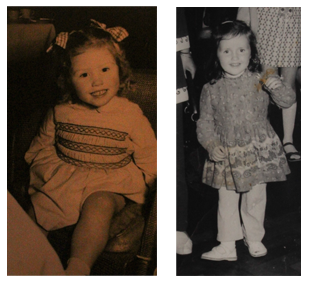
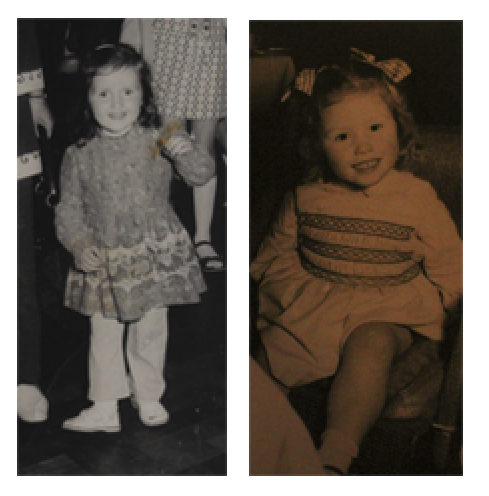
4. For this final piece I have taken old family images of my grandmother (left) and my mum (right) and I have placed them together in photoshop. The aim and idea of this piece was to create something that would show the difference between the ways in which the women which affect my life most today were brought up, and by putting them together I am creating a piece that will illustrate that family ideas can be combine together to effect later generations. Furthermore, even the photos themselves contradict each other as they have completely different tones, with the left being a warm tone and an older image, and the left of my mum being a cooler tone and more recent image. The strengths of this piece is that the quality of the original images is good and even the people features have the same facial features, one weakness is that this final piece is a bit simple.

compare and contrast

Kensuke Koike

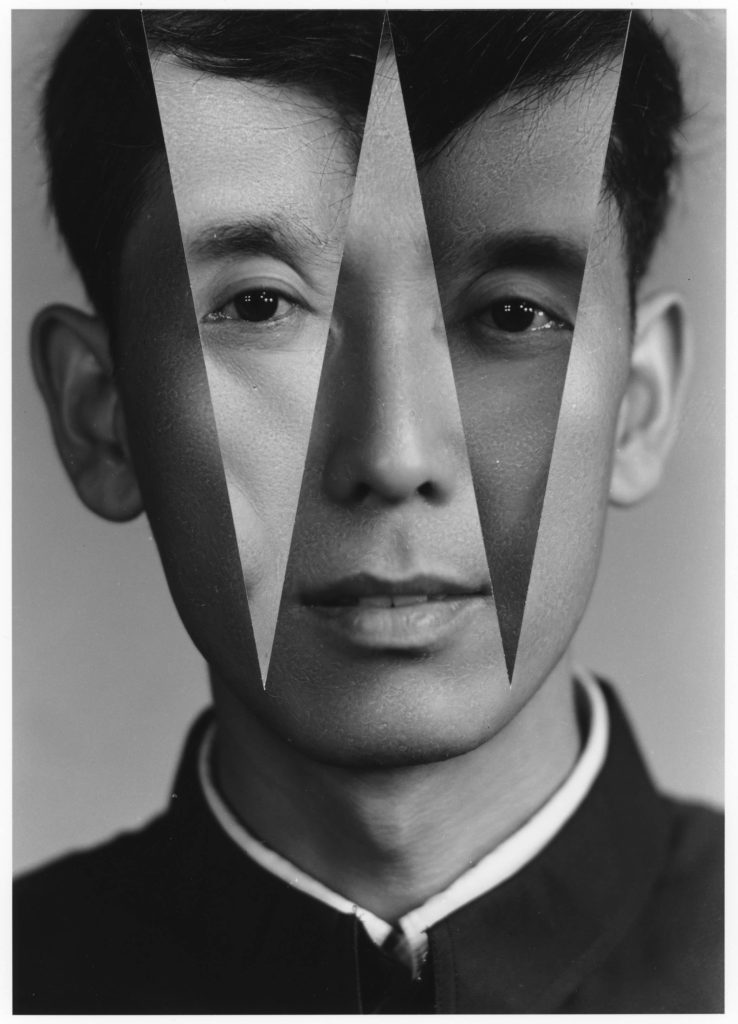
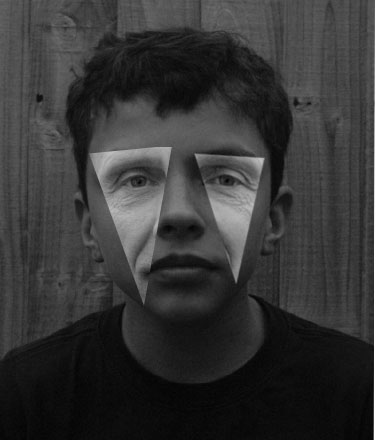
Here I have recreated one of Koike’s pieces of work using photoshop. To make this piece I took two original images of my dad and brother, edited them so make them monochromatic and them took triangle sections from my dads eyes and placed them over my brothers face to create a weird optical illusion. the fact that my dad has so much more facial texture than my brother makes for an interesting image as contrast is created through the difference between smooth and uneven skin.

Furthermore, I like how these two pieces are so similar yet so different, as Koike’s piece is composed of three different people whilst mine is only made of two, but, they both still link to the idea of family identity. I think that the second piece in this gallery is the most successful as the tones are subtle, even though this isn’t as much like Koike’s work, I still think that it came out as a good artist reference as it clear I have mostly copied his work. In addition, I took his style of image and created it in colour, but it think the texture in this image isn’t as visible, so it lacks depth.

Yoshikatsu Fujii

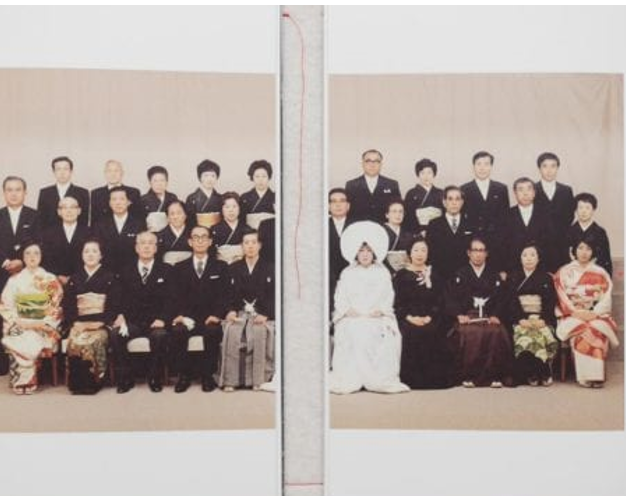
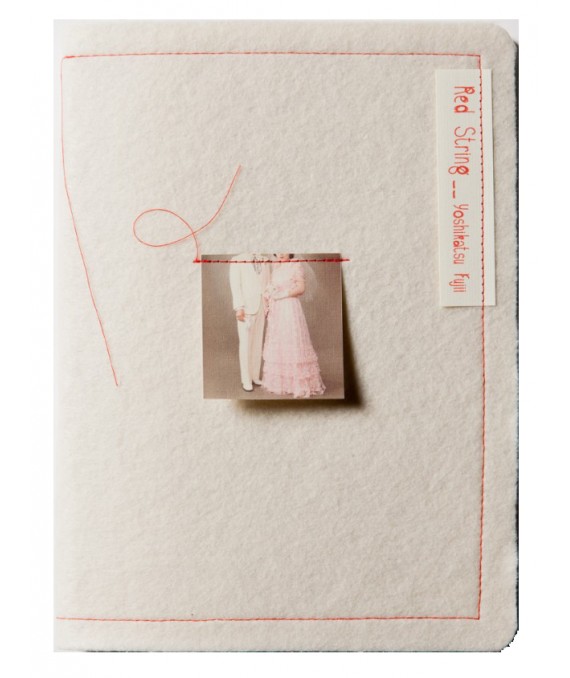
I have combined two old family photographs, one from my mums side and one from my dads. I created this piece by placed these images into Photoshop, then taking a image of an red string from google and placing in it the middle, so it would look the same as Koike’s. The main reason for me recreating his work is because I am intrigued by his ‘Red String’ project, which is based on the distance in his family after his parents separation.

Red String project

Here I have selected two images of my grandparents when they were young, one from my mums side and one from my dads. On Photoshop I cropped both of these images, cropping out some people that weren’t as influential to me and my parents lives, so I was left with less of my family members. Afterwards I used the brush tool, adjusted the side using the bracket keys, and took many attempts and drawing a line down the middle to represent the string in the image above, as there was no images that were useful on google.

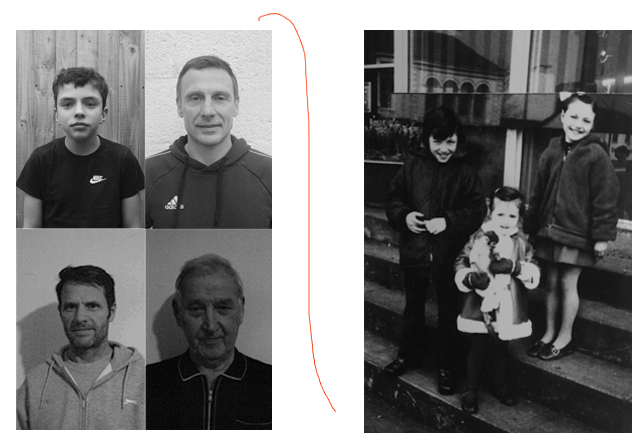
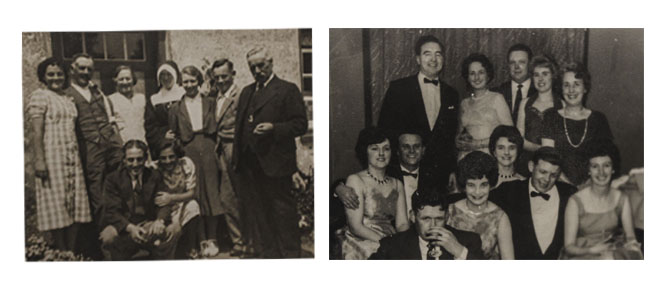
The idea behind this piece is that my dads side of the family would contrast with my mums, the piece on the right is composed of photos of my grandad, dad, uncle and brother. Whilst the right is of my uncle, aunt, and mum, the red string from my dads side not connecting to my mums, the message of this is to represent how these sides of my family are so different, and you can even see which facial features my dads side of my family share.

first experiments

Inspiration

My main inspirations for this project are Kensuke Koike and Yoshikatsu Fujii, as their work links to my themes of family and age identity. To link this to my project as I’m planning to recreate some of their work, some in Photoshop and some using printed out images. Below I have recreated one of Kensuke Koike’s pieces of work. I have done this by taking three images; one of my dad, one of my uncle and one of my grandad. Firstly, I exported these images, then put them into Photoshop to that I could combine the images together.

Photo Montage

I have taken my main inspiration for the photo montage from Zed Nelson, who focuses on making sequences of monochromatic family photos to tell a story. This piece below is similar to his as its part of a sequence and not just one image. Also, these images are edited in the same style (these were originally black and white) whilst Nelson’s are edited to create a sense of authenticity.

Above I have created a photo montage/ juxtaposition of my grandparents of my mums side (left) and my great grandparents (right) at their weddings. This is still inspired by Nelson however I am just merging his style of my own, and relating it to my family and these individuals in the images never met each other. It’s interesting how you can also see the differences and similarities in details such as the weddings dresses and suits.

Also, these images are edited in the same style (these were originally black and white) whilst Nelson’s are edited to create a sense of authenticity. In contrast, my images are placed in this order to juxtaposed each other, firstly they are placed in chronological order as my dads family (left) are older than my mums (right). I selected these particular images to juxtapose how my grandparents on my dads side were brought up compared to my grandparents on my mums. As my dads side were brought up on a Jersey farm and my mums grew up in Scotland and look like they lived a more comfortable life.

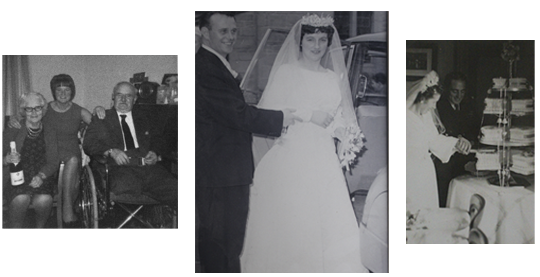
Here I have combined 3 images, one of my grandparents wedding, one of my great grandparents weddings and one of my great grandfather on my dads side, who unfortunately lost his legs to gangrene infection during World War I along with my great grandmother and one of my great aunts. I placed these images in this order so that the family’s way of life can be compared. With my grandparents on my mums side obviously having grown up decades after the affects of World War I affected my great grandparents lives.

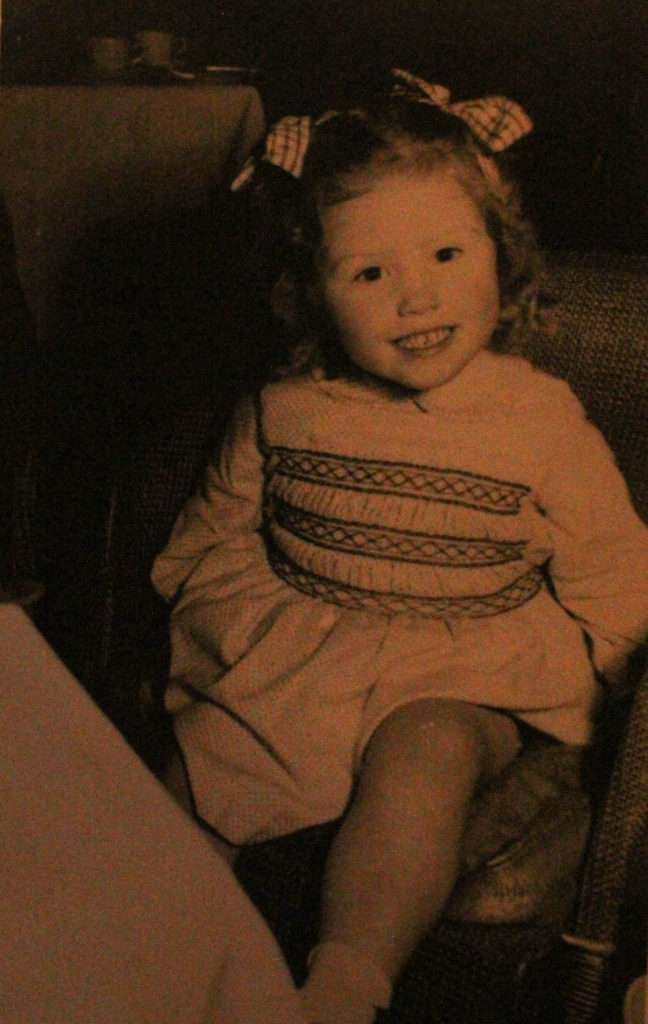
This piece is composed of one image of my mum when was around 6 (left) and a photograph of my grandmother on my dads side when she was 3 (left). I like how the difference in the colour tones of the images make for the start of the juxtaposition, as these were taken around 30 years apart. However, these two women have had a major influence of my life today and will continue to do so.
Multi Exposure

The ideas for my multi exposure work came to mind after researching and recreating Zed Nelson’s work. Despite him not creating multi exposure edits, I thought instead of creating a story through images I could combine objects relating to my family, and my family members themselves. To create these pieces of work I placed the 2-3 photos in photoshop and edited the opacity, this means that one image becomes more prominent than the other, creating a interesting merged affect.

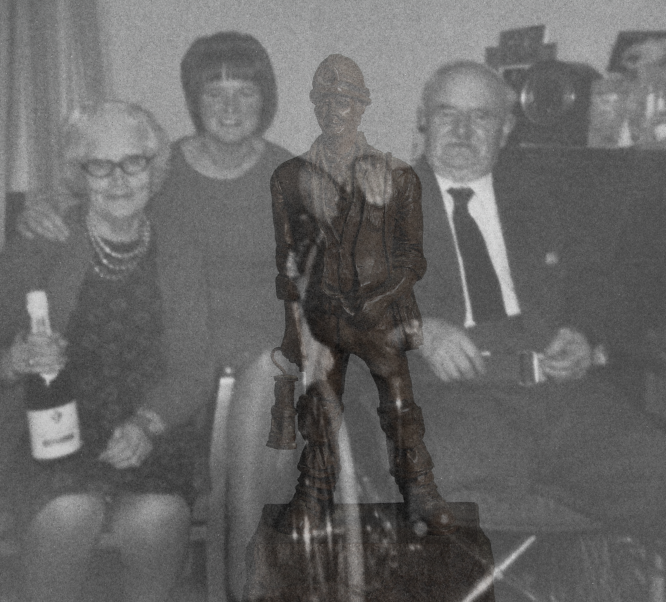
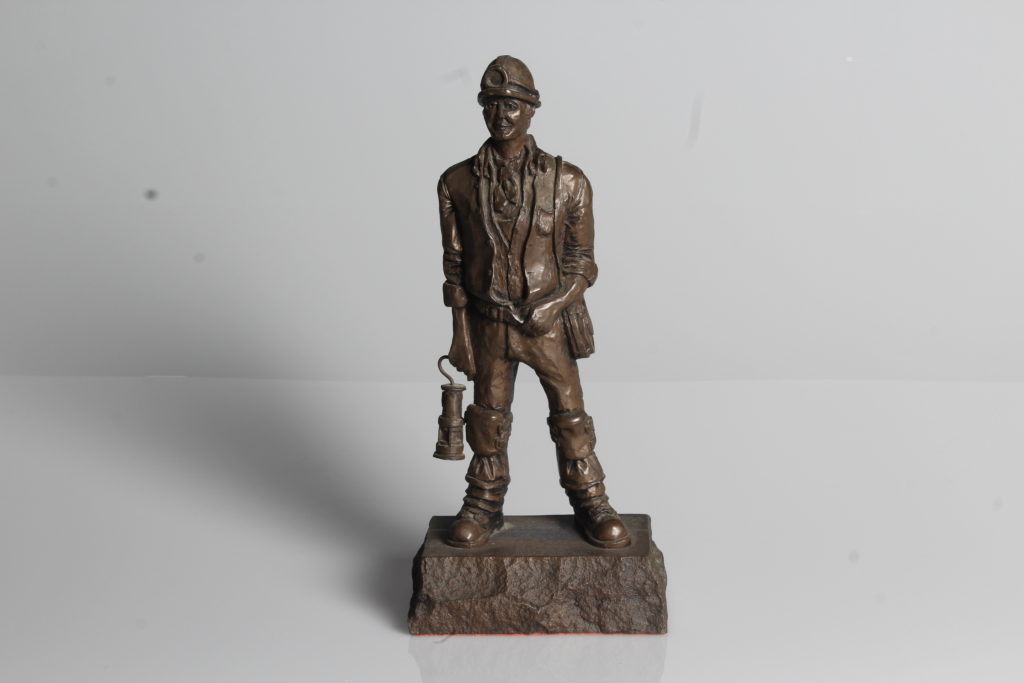
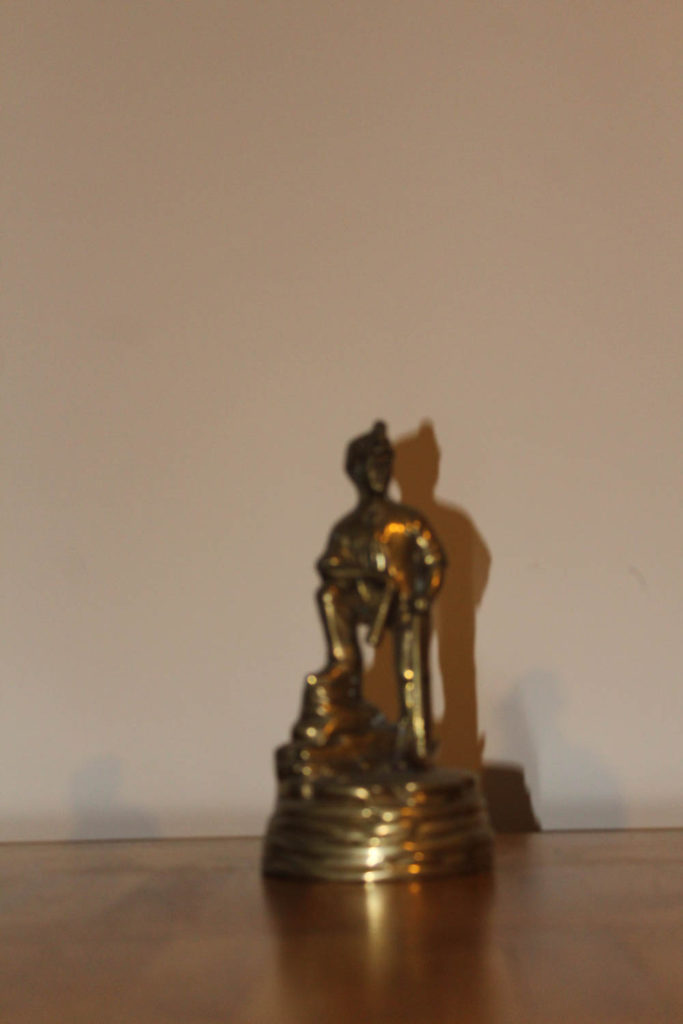
The main object of this image is the miners lamp statue you can see in between the 2nd and 3rd person. I have placed it here next to my great grandfather as he was also a man of trade, as he served in World War I on the frontline trenches, where he unfortunately was infected with gangrene and lost both of his legs, the original image was taken decades after he returned home safely. These photographs link as my grandad (also on my dads side but there weren’t related) was a man of his trade, working down in the coal mines during the 1960’s.

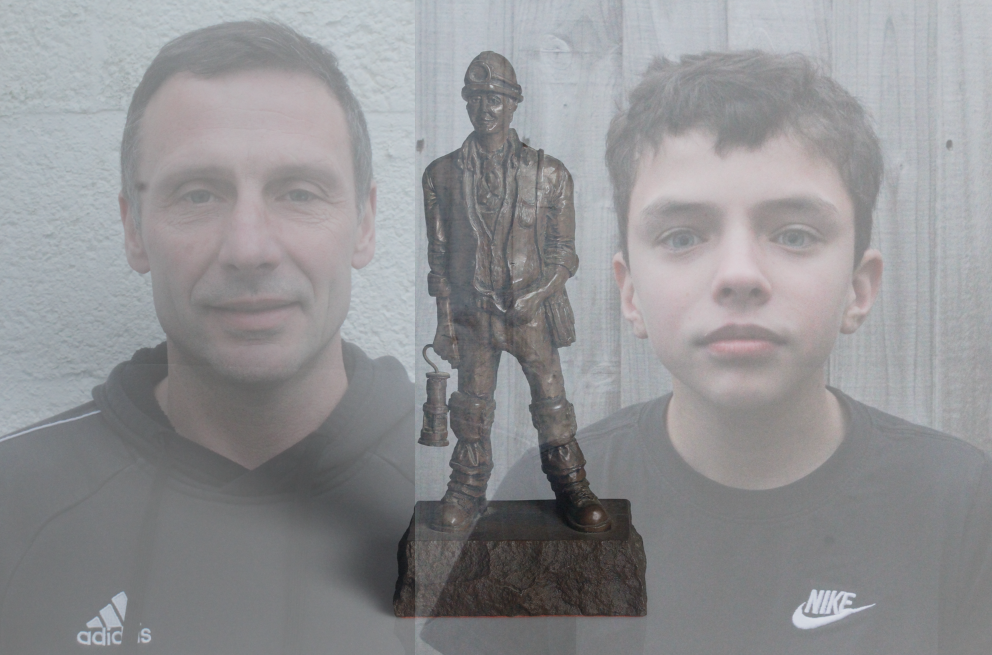
Here I have created an image composed of my grandad’s miners lamp statue, my dad and, my brother. The aim of this piece was to link all three generations of my family members together through both primary images and physical objects. Furthermore, I like how the people in the image aren’t as clear as the statue, implying that the roots of the family are just as important as what family members are alive today.

Failures

Why it was a unsuccessful: The main problem with this image is the clarity, even though I previously knew my first photos weren’t good quality, mostly due to the bad quality lighting the images were taken in, putting them in black and white and increasing the dehaze seemed to fix this problem enough. Also, I did take the three different images at slightly different angles, and additionally in different lighting, meaning that the sizes of the triangle sections were always going to be different sizes and therefore not proportionate.

Why it could be used: This piece of work was originally an attempt to copy Kensuke Koike’s work, but this artist reference didn’t turn out as expected. However. I still put in on the blog to show the real process of creating final outcomes, how some go to plan and other turn out with a lack of meaning and with no links to the project. Even though this piece directing links to one of my artists, I believe that I can recreate some of Koike’s work effectively.

image selection and editing

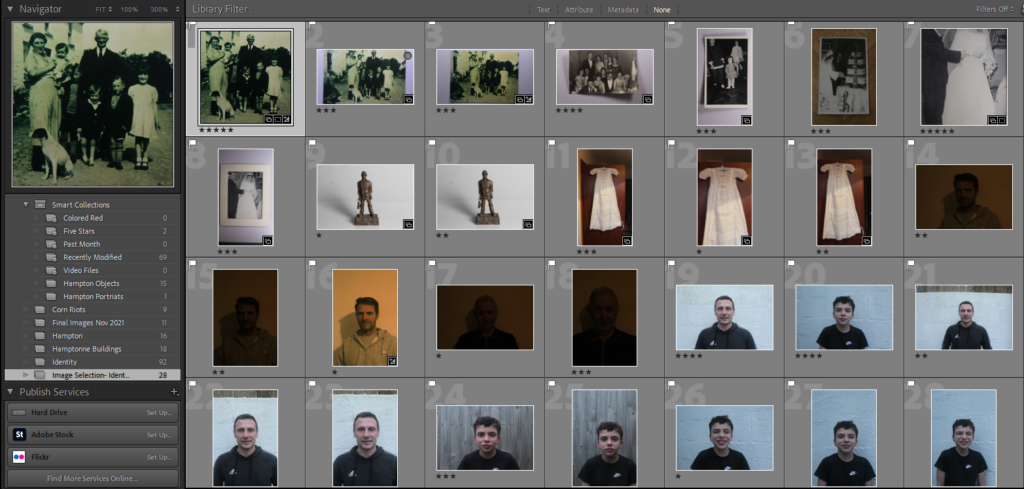
Collection

Before editing any of my images in Lightroom, I have organised my photographs so that I can identify which are of the best quality and which are most likely going to be used in my project. So I made a quick collection in Lightroom and placed my images in this folder, to do so I flagged which ones where going to be moved here, then after I rated them out of 5 stars. This was based on three aspects; the quality, likeliness of being used in my project, and the composition of the photographs, even before being edited.

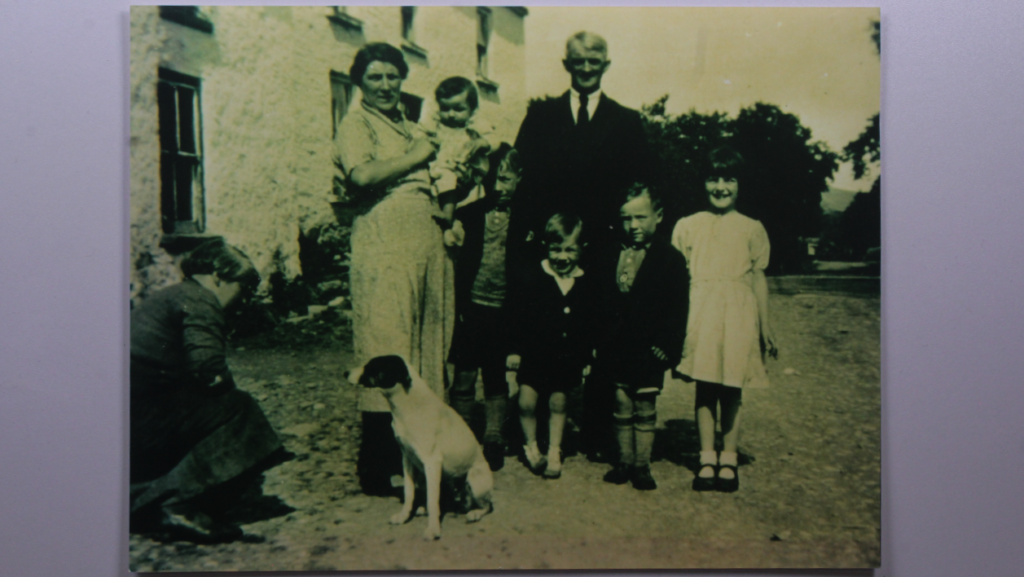
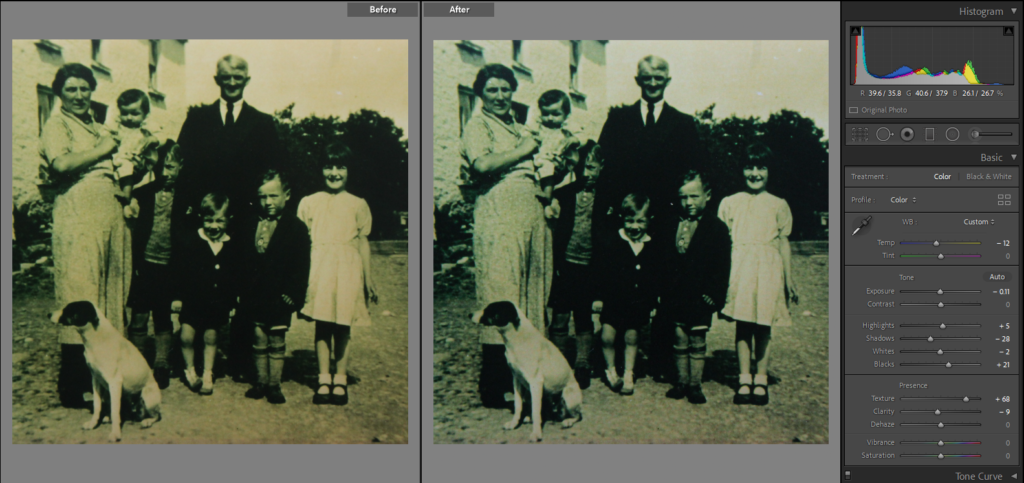
Original Images Before and After Editing:

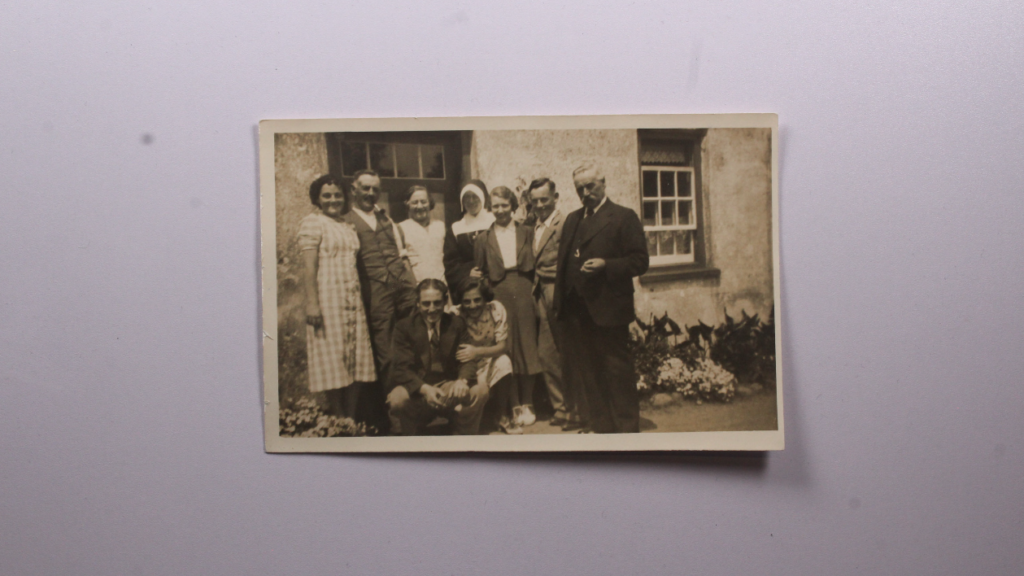
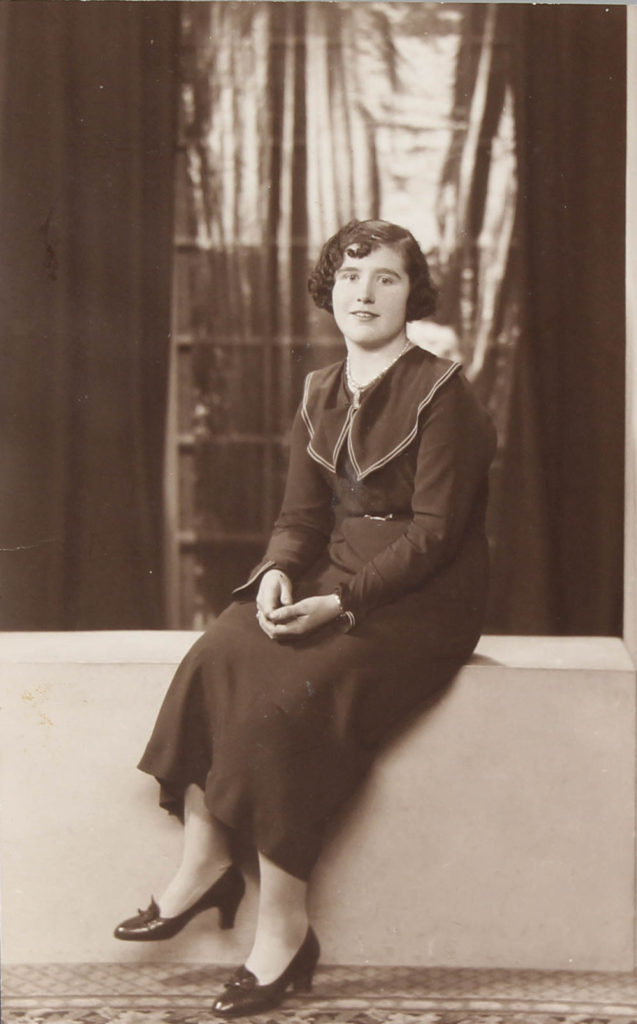
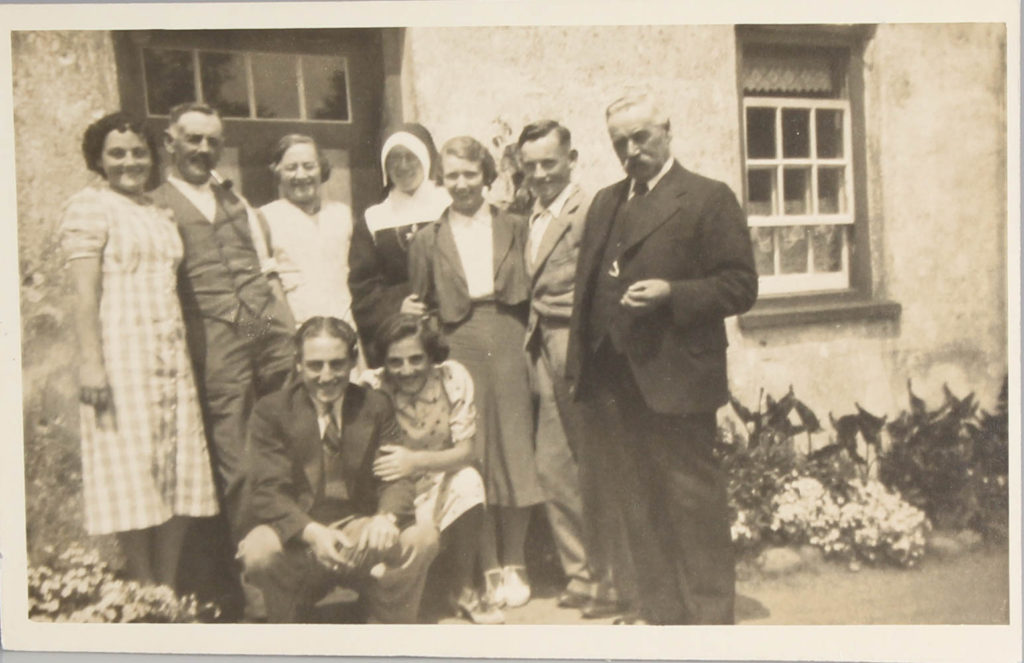
To start off editing this image, I thought it was a good idea to crop off a section from the left of it, as I’m not sure if the man crouching down was relevant to this family photo, also you cannot see his face, meaning he is not adding anymore value to this image. I also altered the textures and black and white tones of this photograph as it adds more detail to the clothing of my grandparents and making the children’s faces more visible.

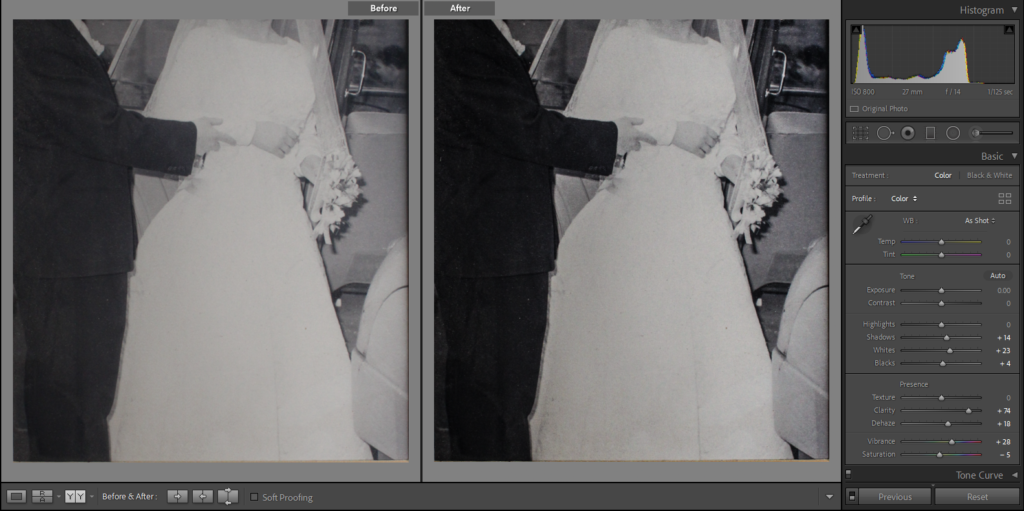
I have taken this image of my grandparents getting married and cropped off the white cardboard frame that the original photograph is normally taken it, and also cropped off their heads. This is in preparation for my Kensuke Koike artist reference where I am recreating part of his work, which is included in his ‘Red String’ project, as this image fits this idea perfectly. I have changed the clarity, vibrancy and shadows of this photo to make the details such as the flowers and veil more visible.

Here I have edited an of picture of my dads side of the family, including my great grandparents and my grandmother when she was young, by keeping the original small white frame around the image but still cropping away the white background. Additionally, I have changed texture, clarity and dehaze settings to make the photograph in an attempt to bring it to life to this old image.

Fixing lesser quality images:

I have taken some images of my uncle (above), I was unaware that the exposure on my camera was far too low, meaning that the quality of images was compromised. However, I have found a use for these images in my project, when doing a Kensuke Koike artist reference I will takes parts of the image where my uncles face is, and make a photomontage also using pictures of my dad and uncle to link to the theme of family identity.

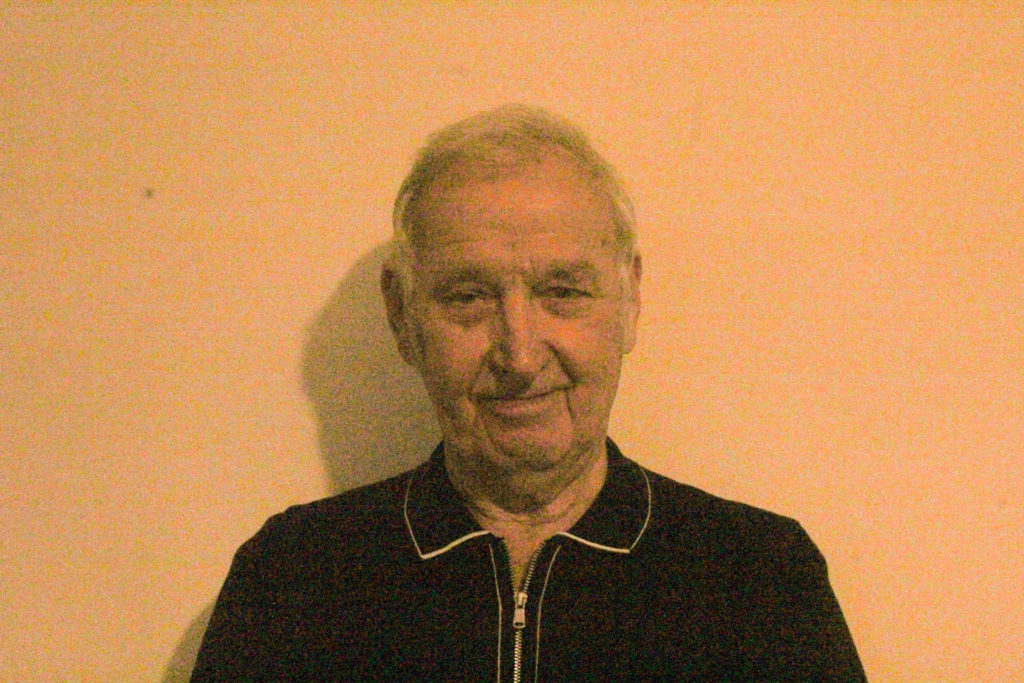
Furthermore, these image came out with a yellow tint, so to fix this I made the photos black and white, cancelling out of the colourful tones and bringing out more texture by editing the whites and blacks, this also added depth to the wrinkles in my grandad’s face. I like how this made them look more old fashioned, linking to other parts of my project when I’m using old family photographs.

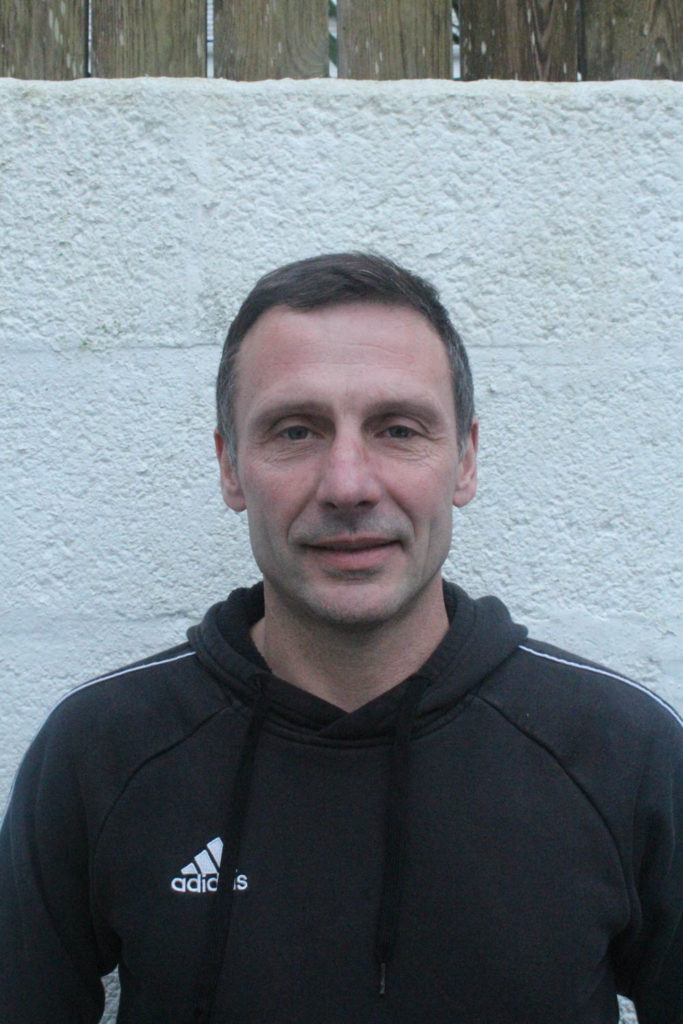
This image of my dad is better quality compared to the ones of my grandad and uncles, so my plan is for the majority of the photo montage to be of his face, and for the rest to be composed of the lesser quality images. Even though these images aren’t as good as some of my other (for example of the miners lamp/ statue, I think they fit in with my project better.

Other Photographs