Lighting is an important part of photography as it can change the way a photo looks through the smallest movement and is one of the key components of taking a good photo. There’s a variety of light combinations that can be used in order to change how bright/dark a photo looks, the black/white balance, the exposure, the warmth/coolness of the image and a lot more.
Natural lighting is one of the most common forms of lighting, using no artificial lights and instead relying on the amount of light outside. Although it’s commonly used, it’s difficult to control as it can leave photos dark/dingy if there isn’t enough light out, being especially hard to use in winter due to the lack of sunlight, however, natural lighting can still create incredible photos but photographers need to be aware of more variables such as:
- Light Direction -> Throughout the day, the sun changes position, moving shadows and can brighten the photo if it’s shining directly onto the subject.
- Light Intensity -> In the early mornings, the light is less intense and will give the photo a softer look as it’s not shining as brightly as it would in midday when it’s the light is at its highest point.
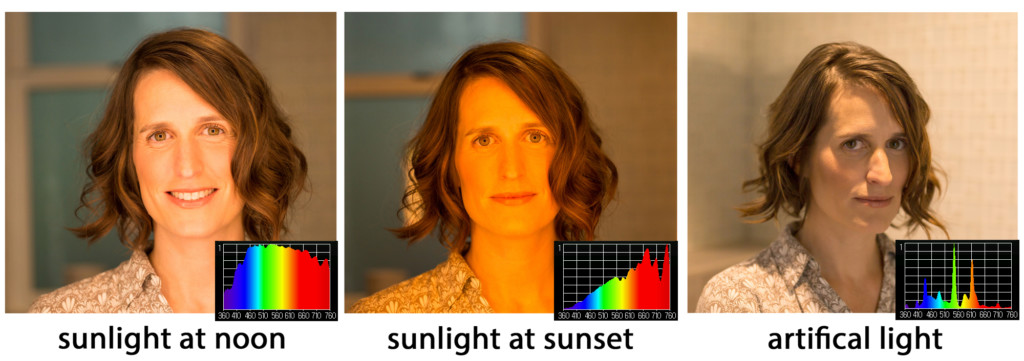
- Temperature -> As the sun sets [specifically in summer], it creates a golden look, giving photos a warm, orangey tint [this is often referred to as ‘golden hour’] whilst winter mornings are darker and will give the photo a colder bluish tone.
- Weather -> Rainy days are more likely to give photos a darker/grey look whilst sunny days could leave photos overexposed due to the light intensity.
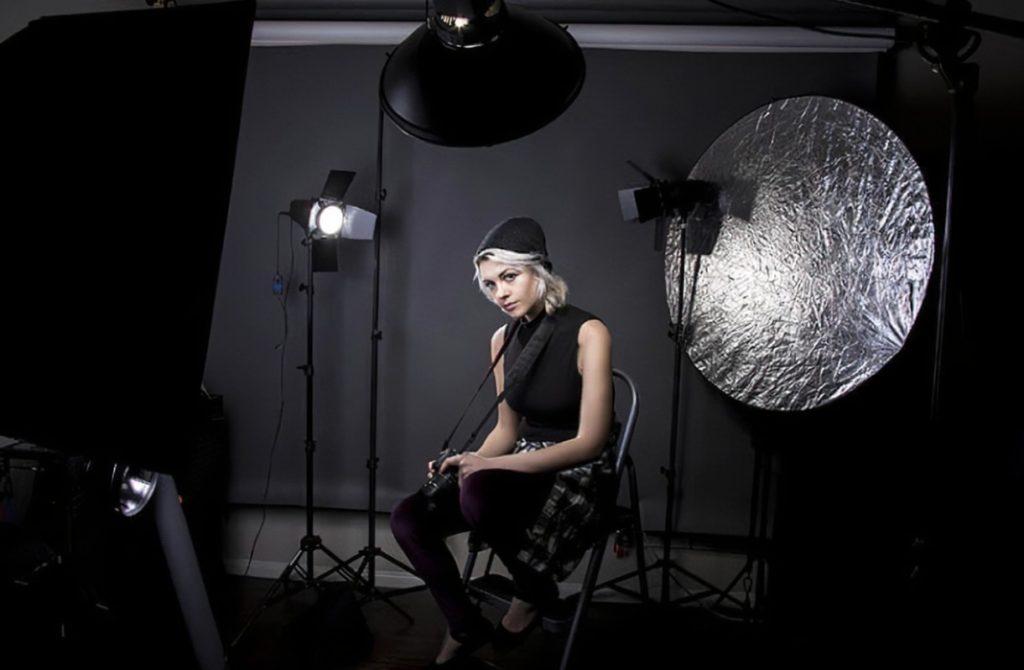
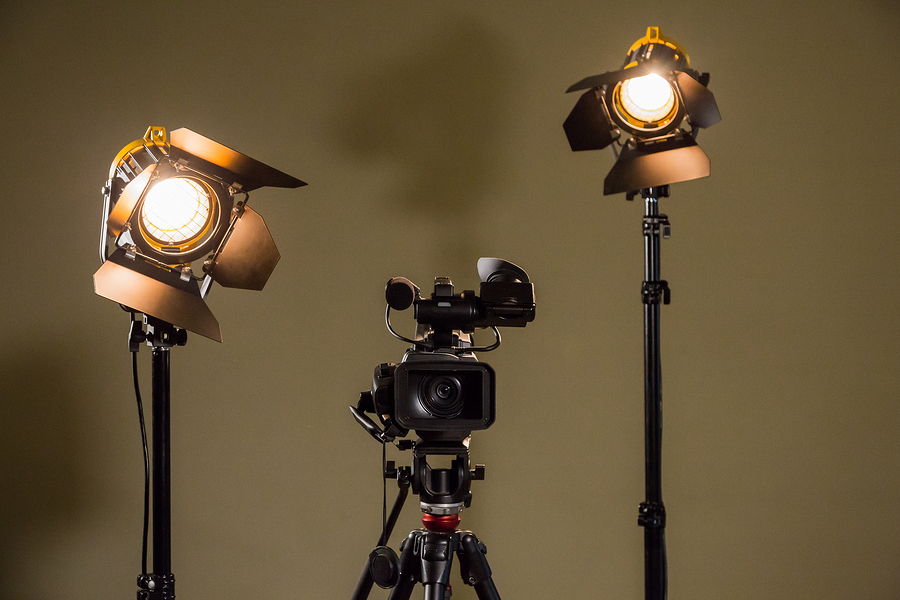
Artificial/studio Lighting is often used in portraiture due to how controllable it is. It can be moved in any direction and can produce both soft and hard lighting with the use of flash or continuous light which allows a bigger variety of lighting choices/combinations. Along with that, the colour of the lights can be manipulated in order to get warmer or cooler toned photos depending on what lights are used. Some examples of artificial lights are:
- Flash head lights -> They connect to the camera via a Bluetooth adapter that sits on top of the camera. This causes the lights to flash whenever a photo is taken and creates harsh lighting. They often have softboxes or umbrellas attached to them in order to diffuse the light and get softer photos.
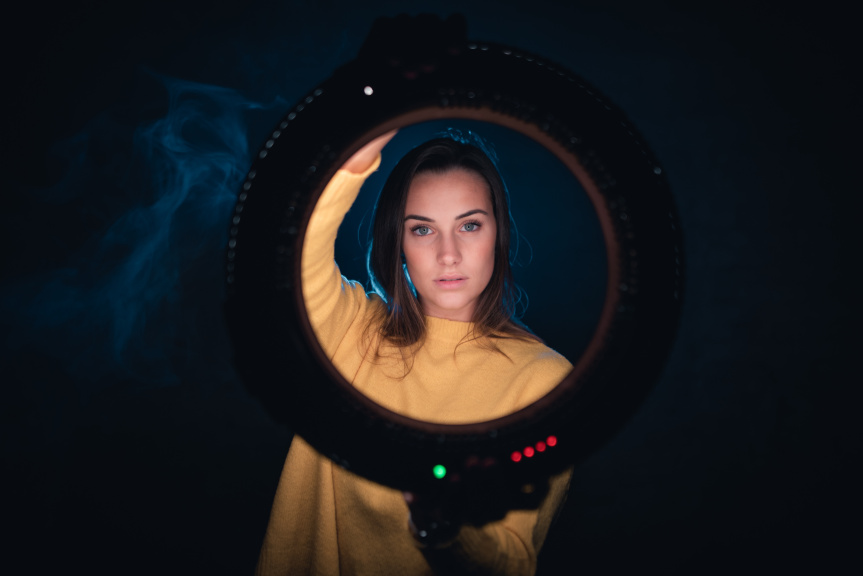
- Ring Light -> A circular, continuous light that’s mostly used for portraits. The camera typically sits in the centre of the ring light which erases most of the shadows as the light surrounds the subject.
- Studio Lamp -> A small light that creates soft lighting and are usually too small to light up an entire image by itself. Usually, they’re equipped with ‘barn doors’ which allows the light to be redirected subtly. They can create both warm and cold lighting and are typically used alongside a bigger light.
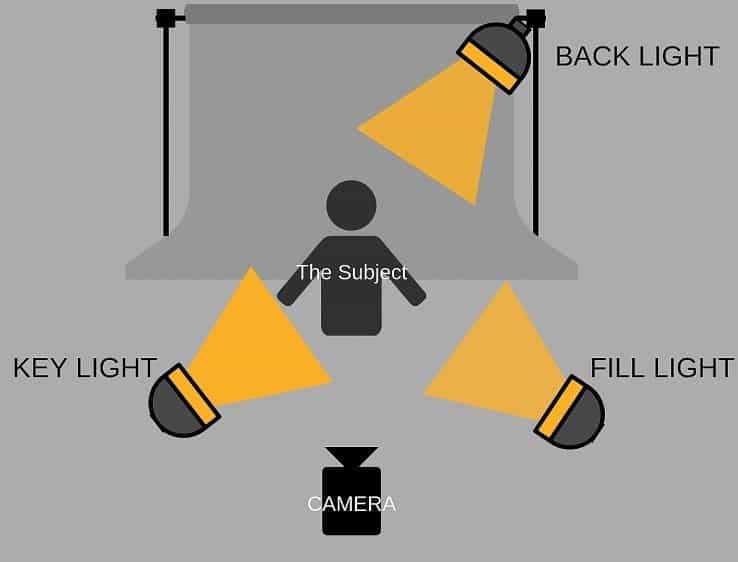
With artificial lighting, there are certain techniques that are used in order to create specific effects: