Examples of Martin’s Work


“We all know our landscape is constantly changing, but as we live in the moment we rarely perceive a big sense of difference”
Michael Marten
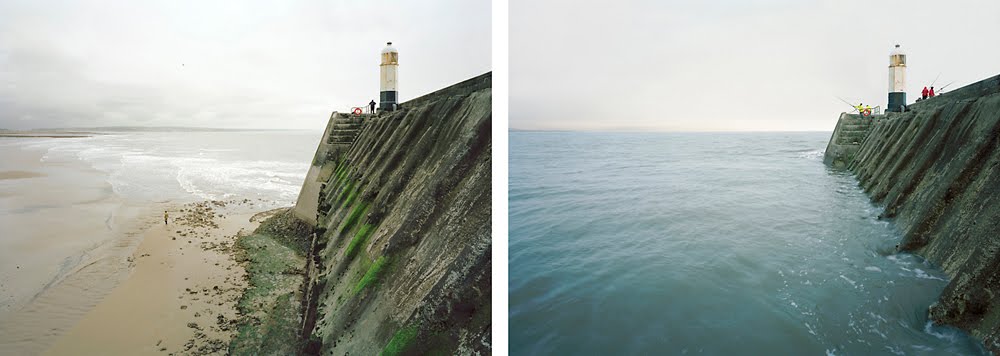
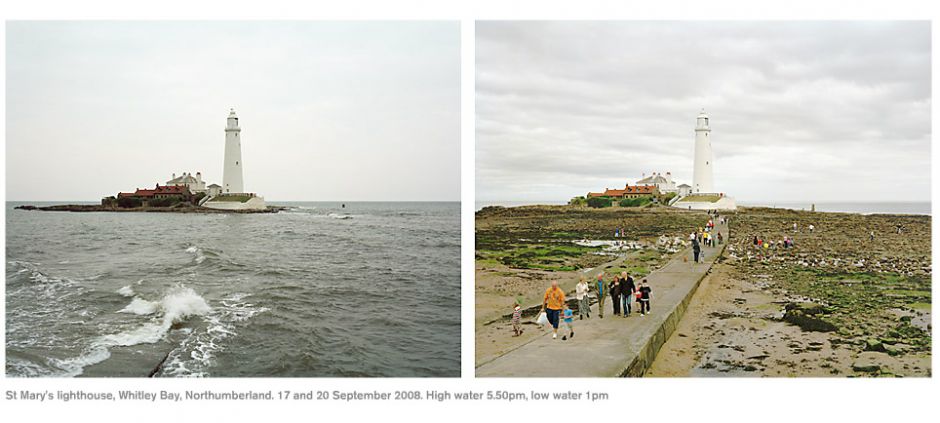
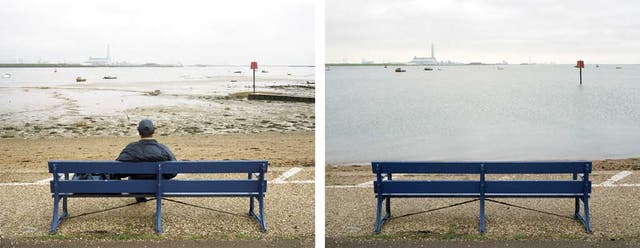
From looking at Martins work I gather that he aims to illustrate the ebbs and flows of our environment by taking two photos of the same coastal location at both low and high water, and displaying them side by side. A majority of his images show intense drastic landscape changes in coastal environments, with minimal editing or colour grading – just him leaving original tones and colours.
What his images portray is very closely linked to islandness in the way that he portrays the sea and tidal changes, which is the defining part of island living and will link in nicely with my personal study as I look into what disconnects the island of Jersey from the rest of the world.
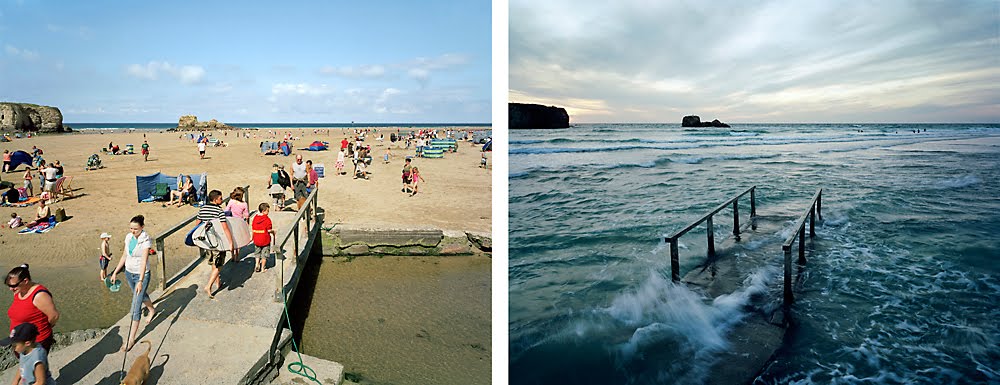
I chose to reference Michaels’s work as I feel that it links well into the overall theme of islandness as it obviously portrays coastal movements of the sea which I a key part of island living; but more specifically my focus on loneliness, isolation and disconnection. This is seen in his photos where he captures busy beaches full of people and then the same beach when it becomes unreachable during high tide.

In these photos, Micheal takes advantage of natural lighting in order to give a massive contrast between the before and after. By efficiently timing his shoots in accordance with the tidal range he was able to capture low tide at a time when the beach was busy with people and the sun was out providing a light, clear image. He has used a tripod to keep the same angle in both images, and by using a wide shot it captures more people, contributing to the contrast in the second image as they would all be covered.
In the second image, the tide has obviously come up covering the beach which was once full of people. The lighting is much darker as the photo was taken later in the day, but when given context from the first image it makes it slightly eerie.
Michael has used the bridge in the centre as a focal point which makes it clear that the two images are of the same place. Michael also used a slightly slower shutter speed to create a bit of blur while the waves crashed over.
I will be attempting to create my own selection of similar images by photographing coastal points such as Gorey Harbour, Le Hurrel Slip, and St Helier Harbour. I will be doing this by photographing POIs at low tide and high tide, keeping a specific angle by marking my tripod and where I place it.


Follow these steps to produce an excellent artists reference
Produce at least 1 blog posts for each artist reference that illustrate your thinking and understanding using pictures and annotation and make a photographic response to your research into the work of others
1. Produce a mood board with a selection of images.
2. Provide an overview of their work and explain why you have chosen them and how it relates to your photobook project on Islandness
3. Select at least 2 key images and analyse in depth, TECHNICAL (lighting, camera), VISUAL (composition, visual elements) (interpretation, subject-matter, what is the photographer trying to communicate), CONTEXTUAL (art historical, political, social, personal), CONCEPTUAL (ideas, meaning, theory of art/ photography/ visual culture, link to other’s work/ideas/concept)
4. Incorporate quotes and comments from artist themselves or others (art critics, art historians, curators, writers, journalists etc) using a variety of sources such as Youtube, online articles, reviews, text, books etc.
5. Make sure you reference sources and embed links to the above sources in your blog post
6. Plan at least 2-3 shoots as a response to the above where you explore your ideas in-depth.
7. Edit shoots and show experimentation with different adjustments/ techniques/ processes in Lightroom/ Photoshop
8. Reflect and evaluate each shoot afterwards with thoughts on how to refine and modify your ideas i.e. experiment with images in Lightroom/Photoshop, re-visit idea, produce a new shoot, what are you going to do differently next time? How are you going to develop your ideas?