
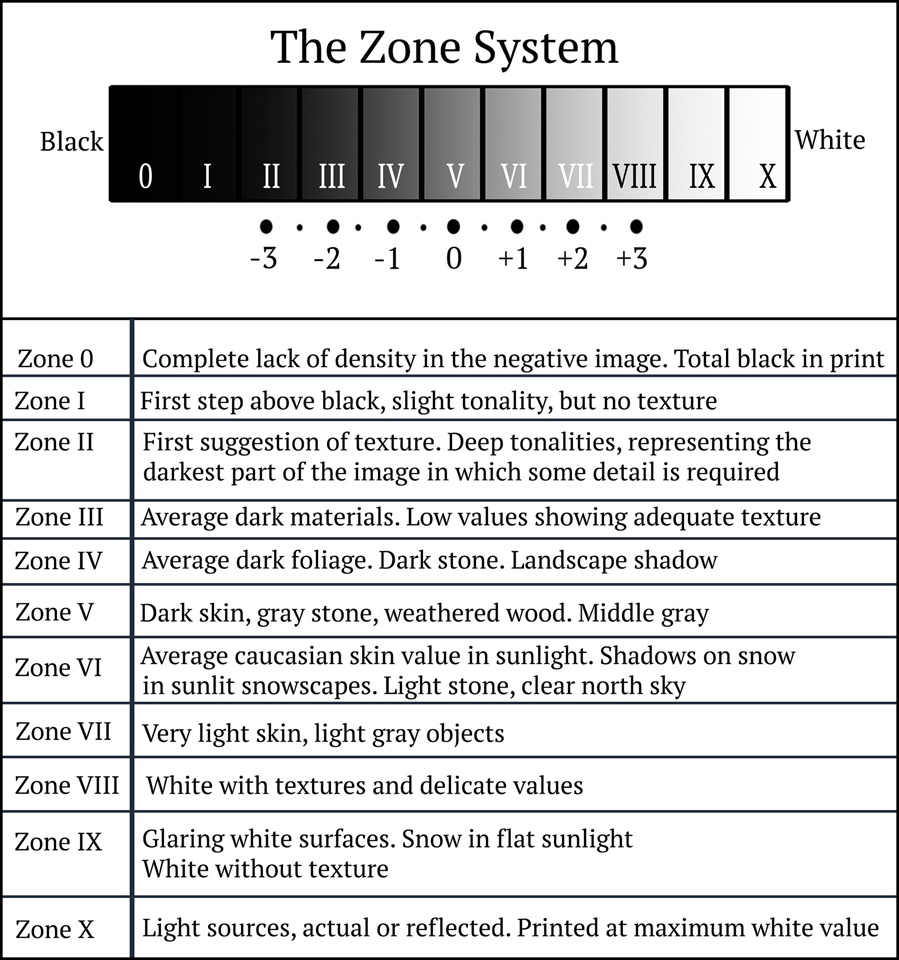
Throughout my edits which I will complete on Adobe Lightroom by selecting them and creating new versions so that I am able to compare to the original and Ansel Adams work through the use of his “The Zone System” which is used in photography, where the photo has been turned into black and white, to show the variety of grey scaled colours which you should be brining in the create a perfect contrasted look.
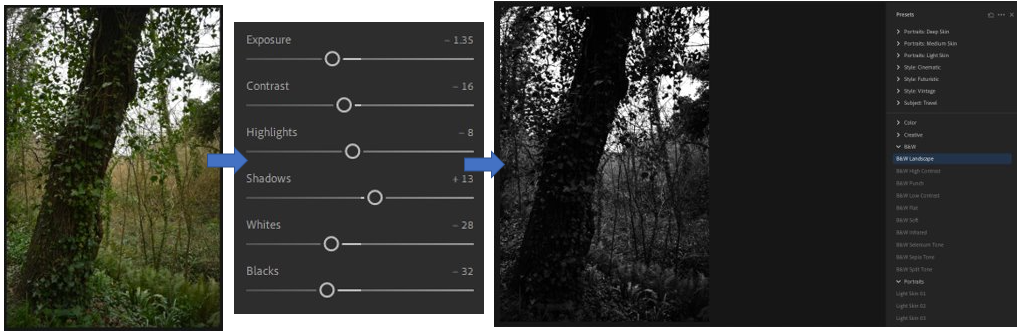
I really liked how these edits turned out because I think that it shows how I have experimented in different ways with the various filters on Adobe Lightroom of black and white, similar to Ansel Adams work, I was able to change the intensity of the filter and experimented with the different ways I could create a large contrast between the grey/white/black colours which I used through the use of Ansel Adams “The Zone System”.
I really enjoyed creating these because I was able to experiment with the large scale of filters which can be found in Adobe Lightroom and then change them to how I thought was fitting by changing the contrast/highlights/exposure etc. If I were to do do these again I would take pictures at various times of day so that the background wouldn’t create an over exposed look which would be casted on to the photo, which many of my pictures had which I found very hard to work with.
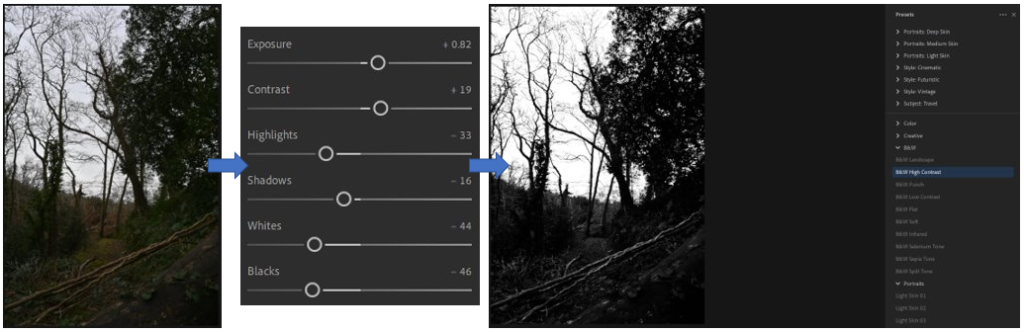
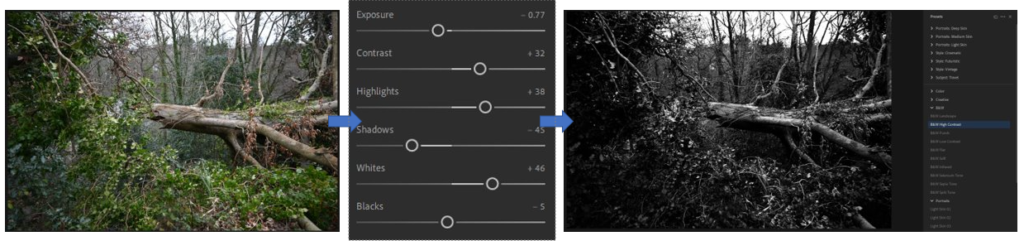
My favourite edit that I think is my most successful and similar to Ansel Adams work which is the last one, this is because of how the tree has fallen and you can see the rip from the trunk and how it is dangling off the side of the hill. It creates a dystopian atmosphere for the photo as it isn’t something that you see very commonly and can see how the wildlife has welcomed this in, as if it is a natural occurrence, as many plants have began to grow on to and around it. I also like in this edit you can see a range of grey scaled colours, many of which are found on “The zone system” which shows how I have considered this in photoshop to make sure there is a similarity to Ansel Adams work. This is clear to see on the trunk where I have been able to highlight various places of it where the nature hasn’t been able to take over yet, compared to the surrounding leaves which are seen around it because they appear very dark in colour which helps to create this image of a frame to highlight how this tree has been destroyed due to the weather through the dark abyss which surrounds this tree.
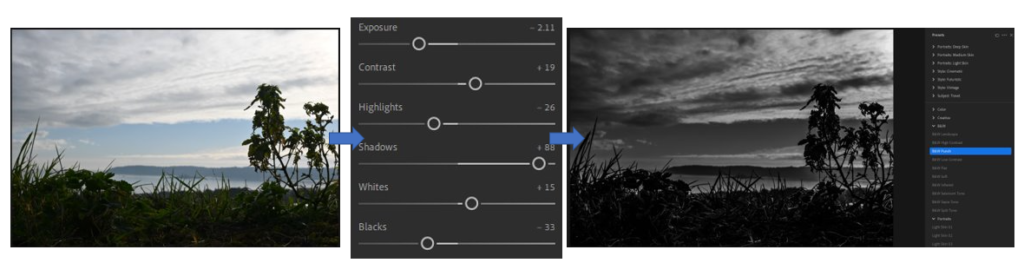
I think that my least successful photo is first edit which I attempted. This is because I left too much grey in the middle of the photo and there is barely any other colours around it which can contrast/highlight against it. If I were to try this edit again I would focus more on the clouds to make them appear darker and more drastic to create a feeling of gloominess on to the photo. I would also try to highlight the plants through the whites/highlights/contrast while editing which would make them appear more in focus more and easier to see as they aren’t able to be seen clearly due to the lighting and therefore this makes it look like a large, dark mark across the photo as there is no dimension to it to add that level of development to the photo to make sure that this effect of having something in the foreground to focus on rather than the background, so that it doesn’t get lost which it has done.