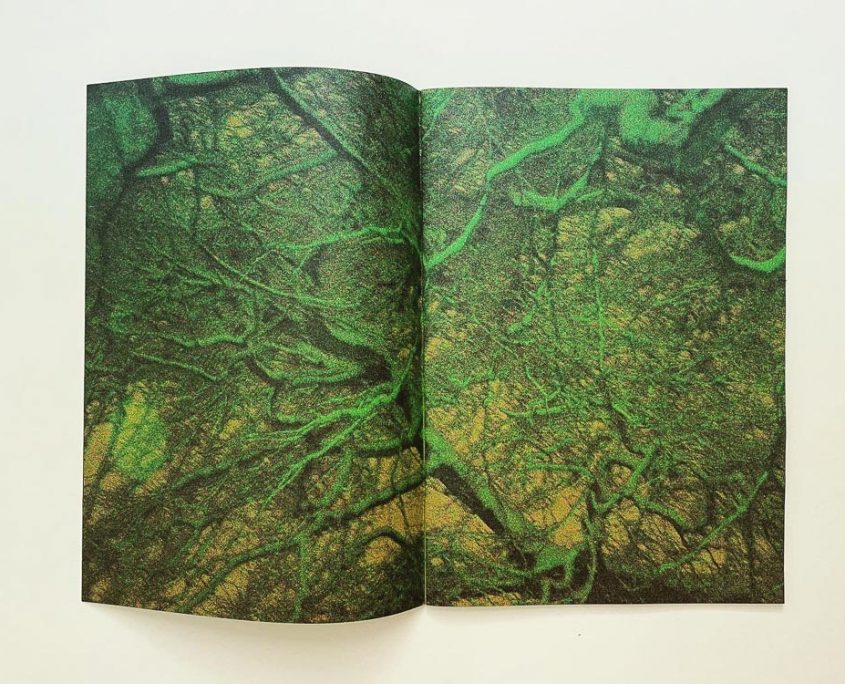
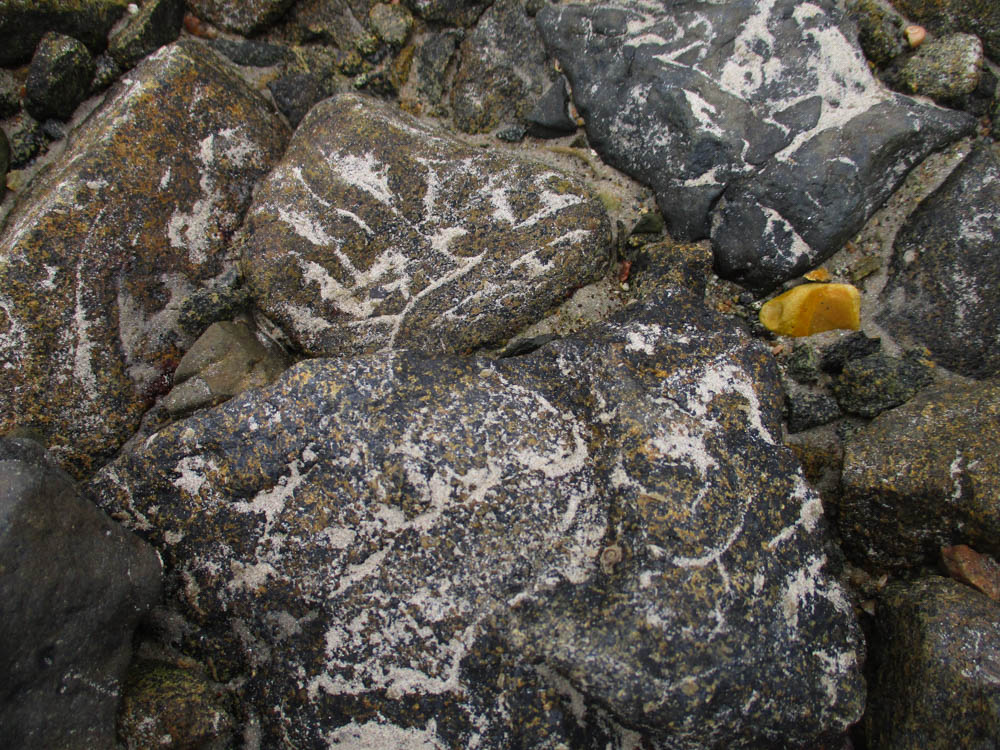
I had a lack of inspiration for my Zine, I created a Pinterest board displaying natural forms (containing images of rock pools, stone formations, plants growing) and I realised that colour is a major part of nature so I decided to highlight colour in simple abstract images of rock pools.
EDITING AND DESIGN
Following my photoshoot at Green Island, I went through my photos which were in my green category (images I have previously decided I like- process shown in this blog post) and edited them, separating more images into possibly final decisions for my Zine.
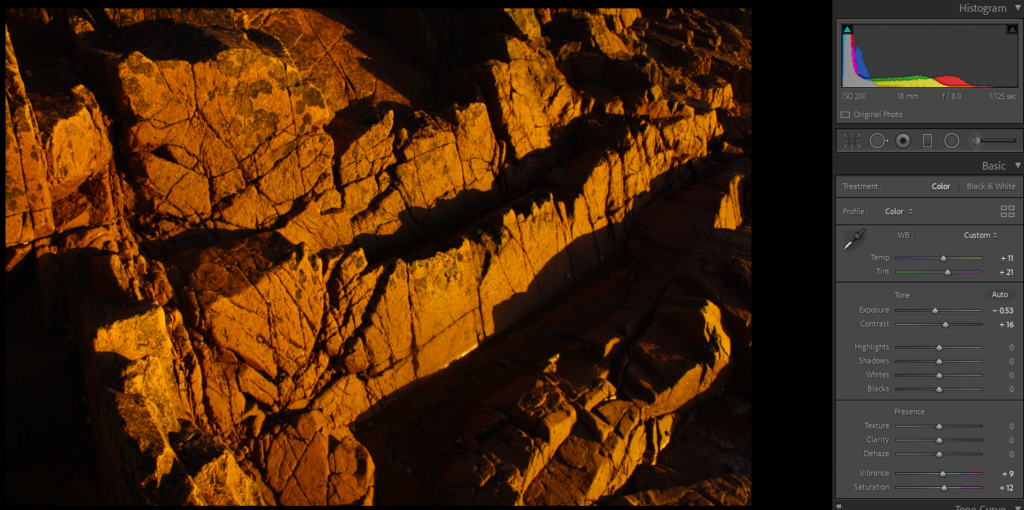
The editing I did for my images was minimal, I only wanted to highlight contrasts and accentuate colours to show a key theme of my Zine.
An example of my editing to highlight colours and contrasts
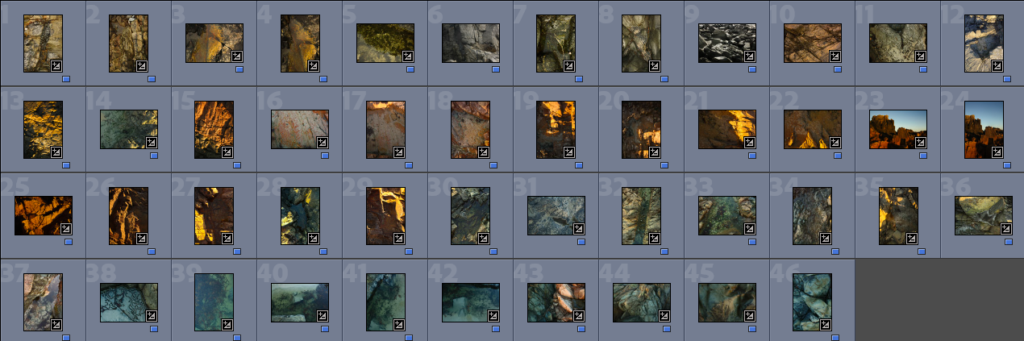
After editing my images I ended up with 46 images which I wanted to put in my zine -with some flexibility if I feel some do not fit with the theme.
On Adobe Indesign I created an A3 document with the measurements; width: 148mm, height: 210, pages: 16, orientation: portrait, columns:2, column gutter: 5mm, margins: top, bottom, inside, outside: 10mm, bleed: top, bottom, inside, outside: 3mm as to create my zine.
I started inserting my images by dragging my saved edited images from my ‘rockpools’ folder on my documents. I cropped and positioned my images on the page then made sure they fit the frame proportionally so the whole image was shown.
One of my pages in my zine
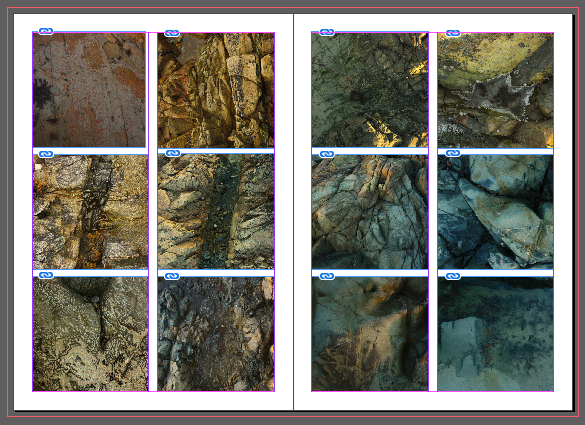
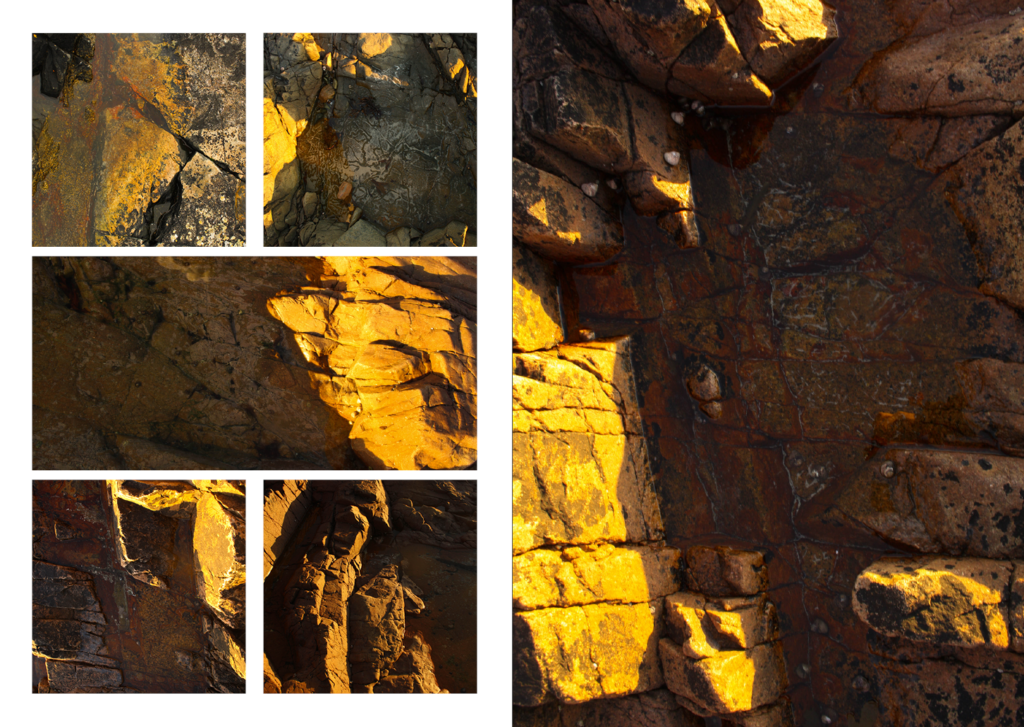
As my main concentration in my Zine was colour shown through abstract images, I decided to have a gradient theme running through my zine where the tones in the images go from warm to cold. Quite quickly I realised I had too many images for a 16 page zine so I added 4 more pages. Throughout my zine I played with designs such as full page spreads, single images and grids- I kept these experimentations as they provide some visual interest through slight irregularity.
My page which has a grid format
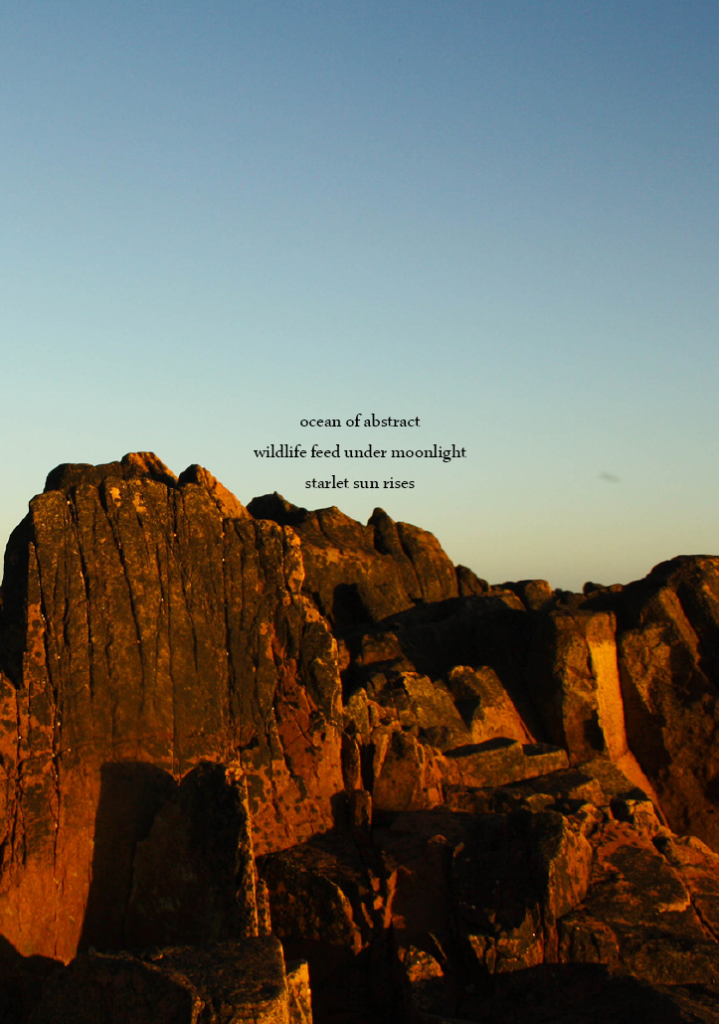
I struggled with deciding a title for my Zine, after trying various names such as “Tidal Pools” and “Heaven is a rockpool” I decided to put a haiku on the front and back as to make clear the Zine can be read from either cover as it displays a gradient of colours which display the day changing and the colours in the rockpool becoming colder (or warmer)
I am pleased with the outcome of my zine, my images carry an abstract theme where colour is a major part of the flow of the zine, the colours go from warm to cold however as I have a “title” on both sides of the zine the zine can be viewed from front-to-back or back-to-front, this was meant display the change of the colours throughout the day. Within the way my images were displayed there is regularity including grids, one page spreads and double page spreads- a lot of this was to be able to fit all my images in my zine as I had around 47 images overall I think this aspect worked as it shows transitions of colour. I decided to put contrasting haikus on the front and back page- on the warmer starting page the final line of the haiku is “scarlet sun rises” while on the colder page the final line is “midnight’s darkness awaits” this once against presents the transition throughout the day of colour and light.
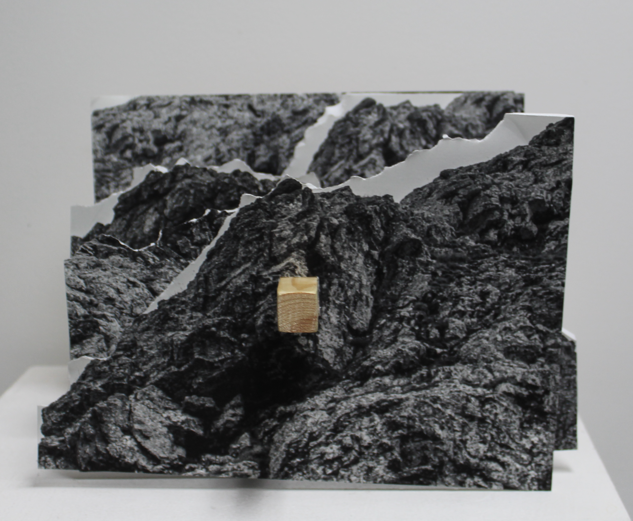
We experimented with 3D sculptures made from our images in response to our trip to L’Etecq as well as give a new perspective of the images we took.
Creating my Photo Sculpture
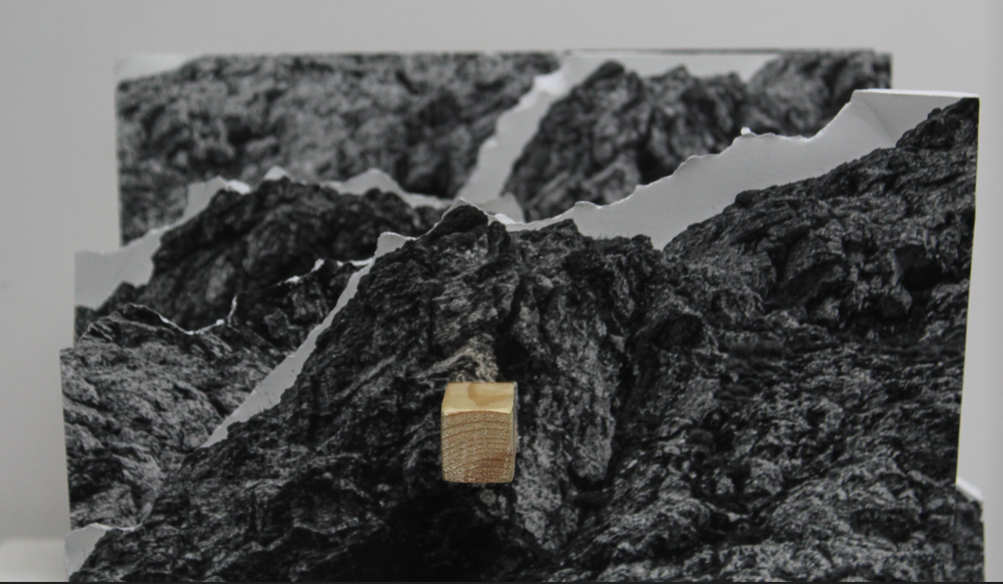
I used the images from my L’Étacq photoshoot to create a photo sculpture. I decided to use black and white images as i think that they contrast against each other better than colour images. After selecting the images that i thought were the best i printed them out and mounted them of foam bored.
I decided to tear the images along the outline of the rocks as this would best show the jagged edges rather than trying to cut them out. After tearing the images i measured each one to find the centre and cut a hole. I then placed the images on a stick from largest to smallest.
Inspiration
I got the inspiration for my sculpture when looking at examples on the Internet. I saw this image and thought it was a really interesting idea. However as it was quite a common idea i knew that i could improve it. I decided that rather then mounting it from the bottom i could connect the images by the centre. This is so that the sculpture can be viewed from any angle and still look good.
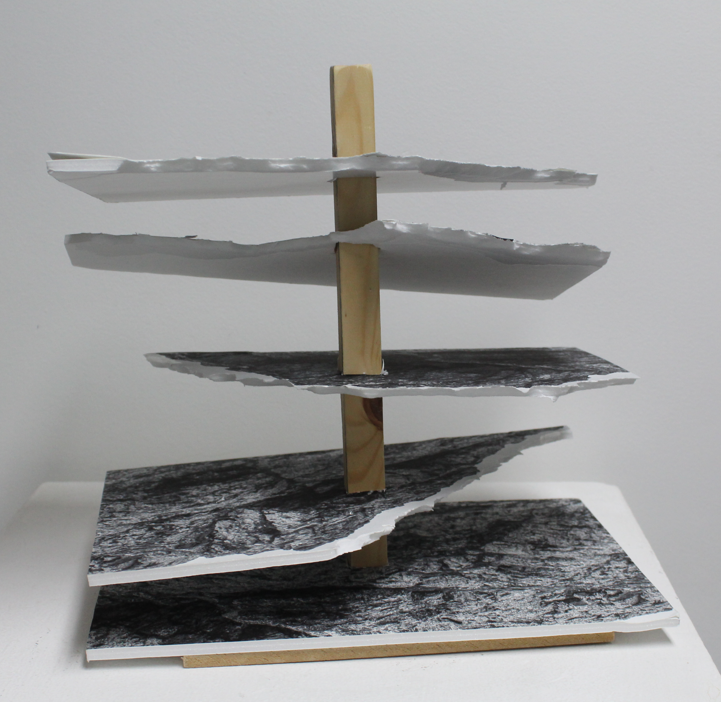
My sculpture
Evaluation
Overall i am very pleased with my photo sculpture. However i think that there are areas that could be improved. Firstly, i think that the the images would look better if the jagged edges where i tour the foam board were on all sides. This would make the images more 3D and look better mounted on the base. Next, i think that i could have done a better job at centring the images on the pole. I would do this by making the holes before i tore the foam as on this model i tore the foam first and it was not always to get the exact centre of the board.
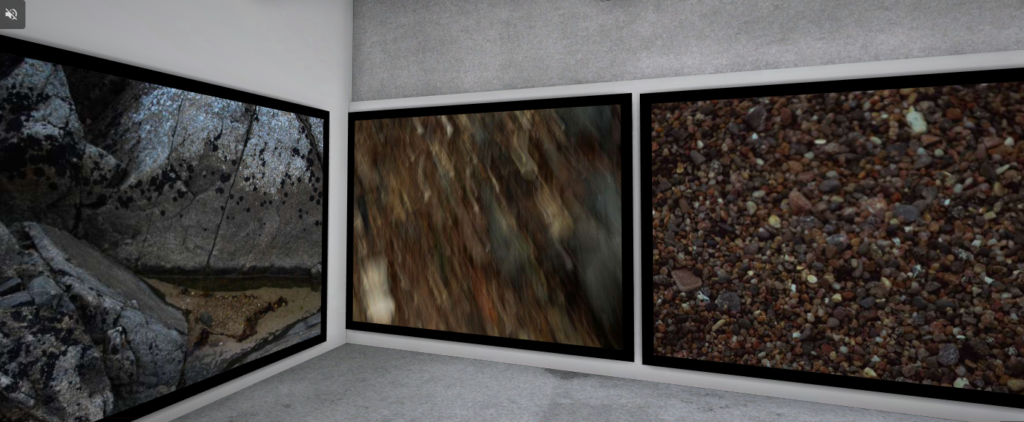
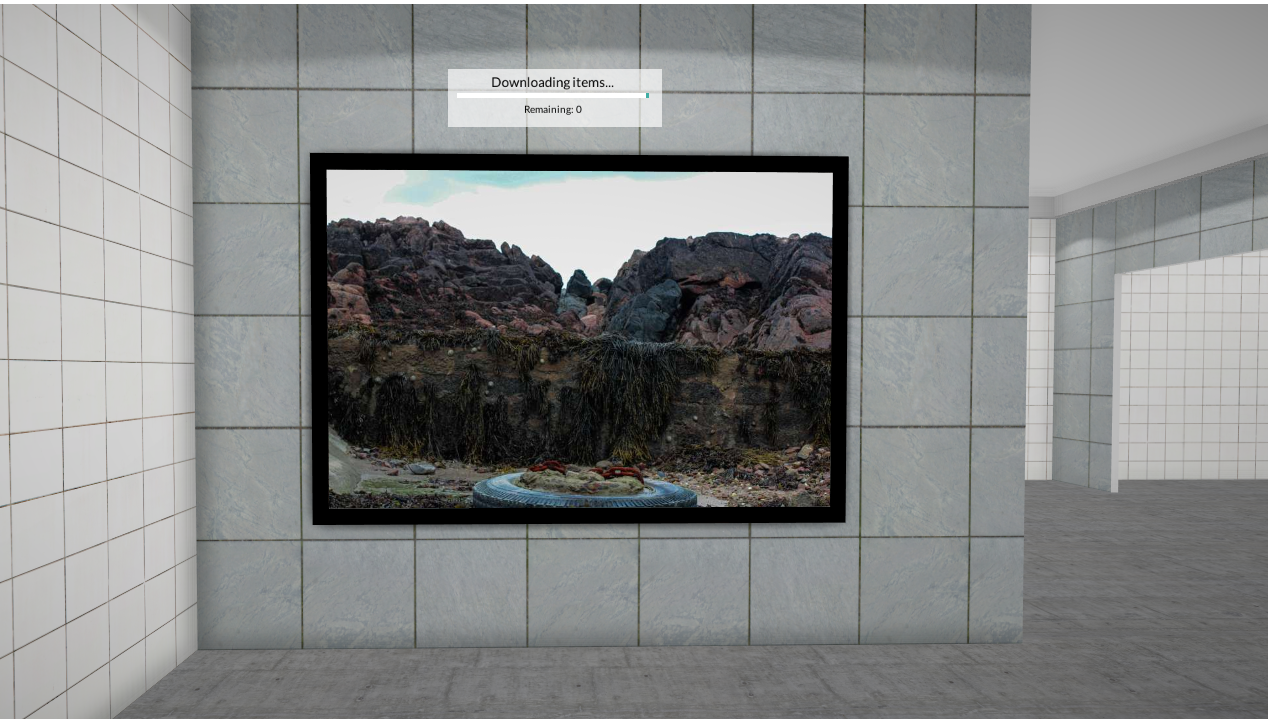
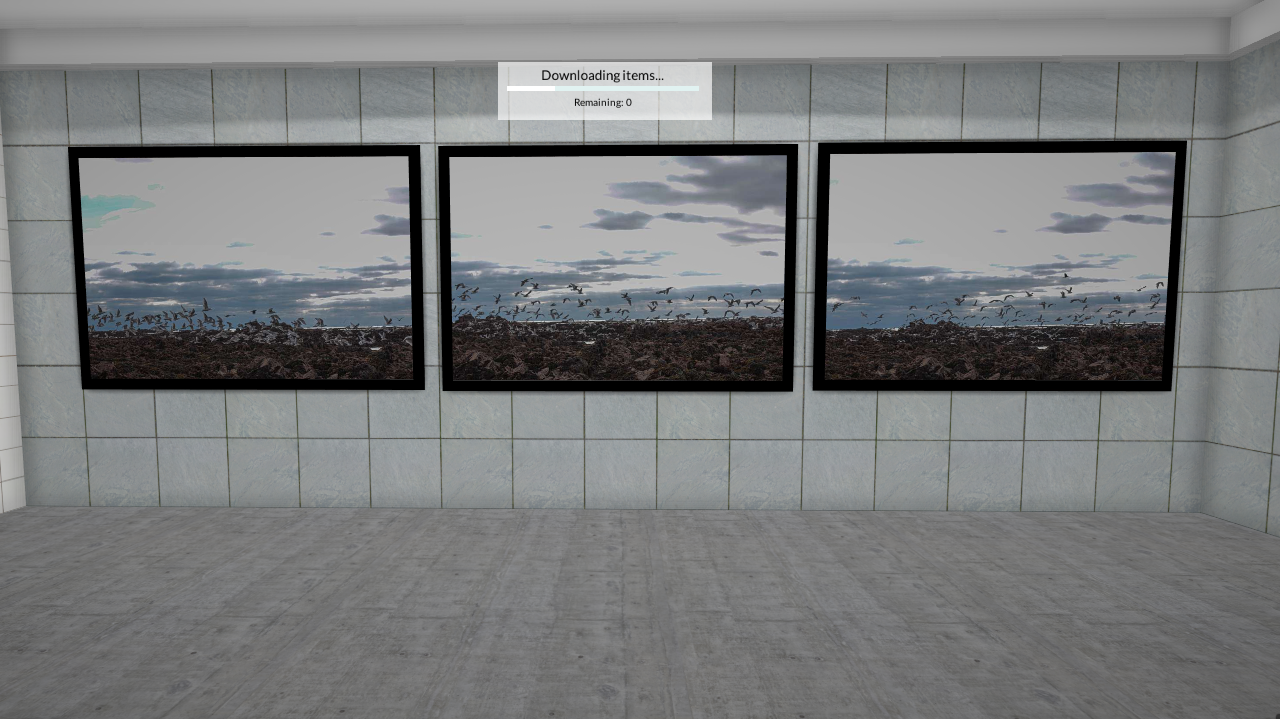
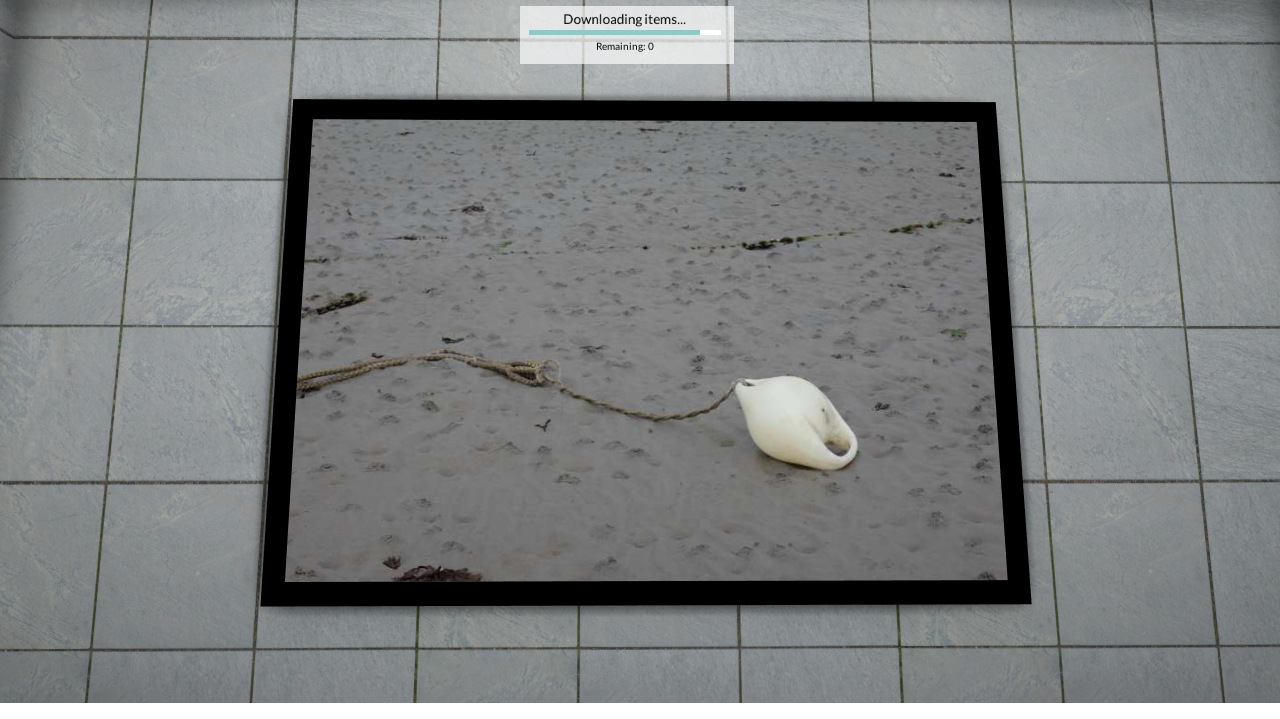
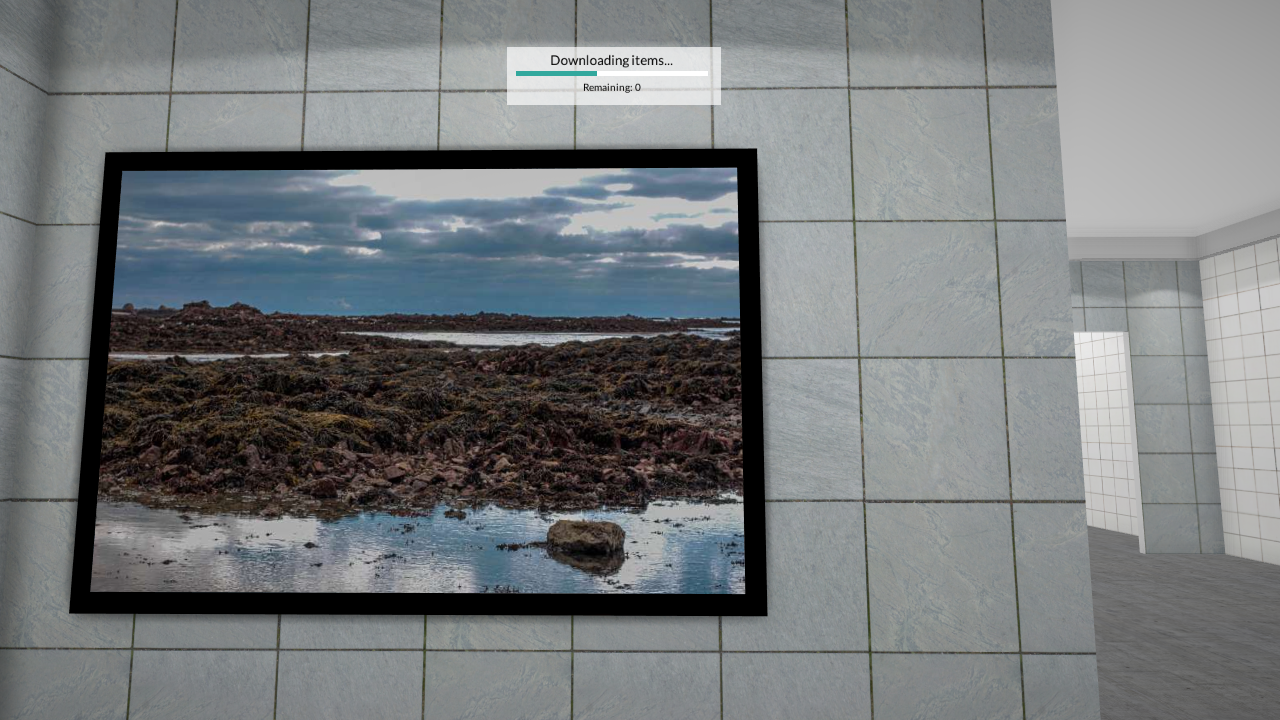
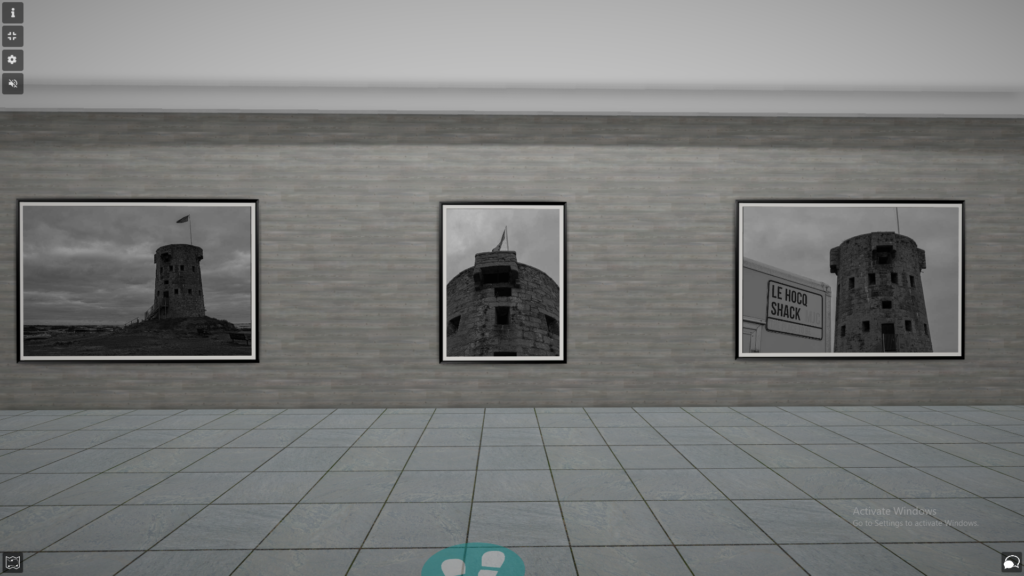
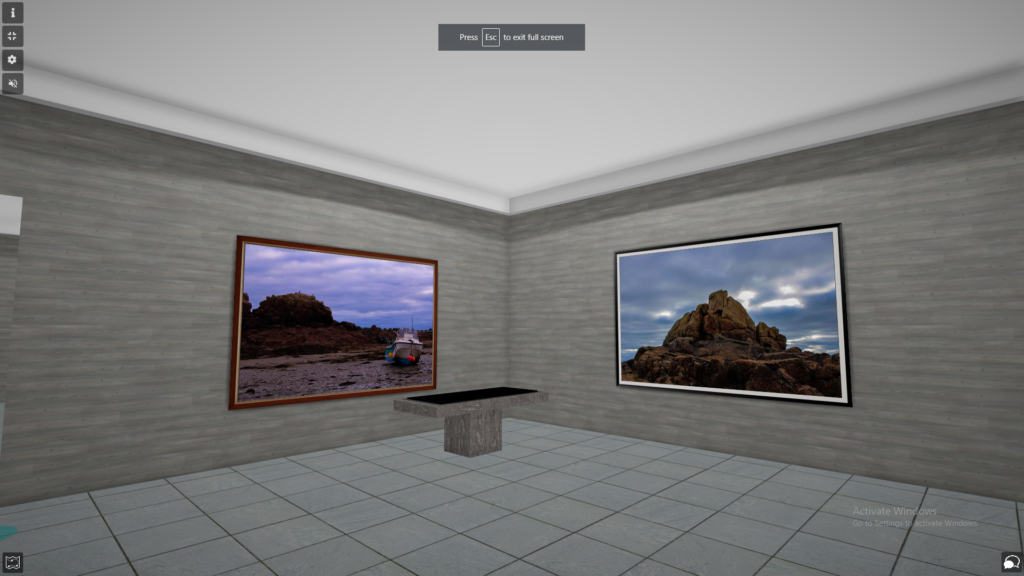
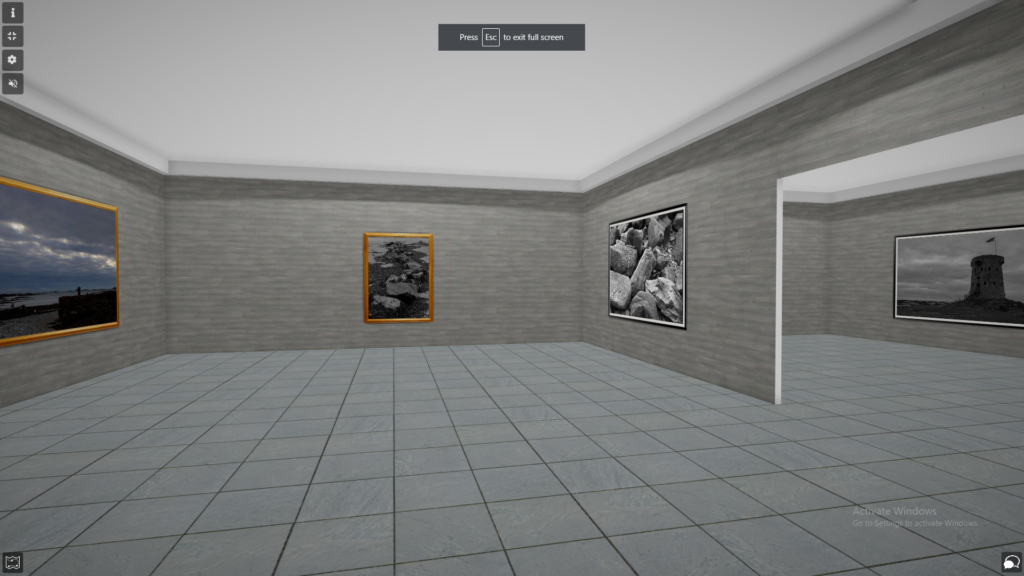
Overall, I am impressed with how my virtual gallery turned out. The gallery displays all my best images from the Le Hocq photoshoot. Throughout the gallery, all the images are used in my Le Hocq photo-zine booklet. I used frames around each of my images involved in the gallery to try and create some sort of contrast between the image and frame. I feel as if the black and white frame outlining most of my images gives the best effect towards the black and white images due to them being the same colours. I tried to place my images together if they had similar features such as the three photos of Le Hocq tower because it keeps the gallery some what organised. Also, the wall and floor textures display my monochrome images in an effective way by keeping a similar colour scheme throughout the virtual gallery.
Virtual Galleries displaying some of the best images from this project
Evaluation
The Final Zine
I think this project turned out to be a success as my zine was successful with regard to following the success criteria, as well as a direct improvement not only (in my opinion) in subject matter/photographic presentation of the images, but also how I planned and constructed my zine to make it into what it turned out to be. Knowing this, I now know that I have improved my skills since then, which will help motivate me to do better in the next project, whether or not I create a zine in it. As for the success criteria, I was able to include a mix of close-ups and landscape images, which adheres to my initial plan for the zine. While perhaps not as colourful and vibrant as I made it out to be, I think my idea of ‘vibrancy’ was met with most (aside from the BNW images in the zine) of the images included. After viewing some of my peers’ works on the blog, I have noticed that a lot of them use vibrant colours in ways that intrigue me, I would like to use their themes and aesthetics as a means of inspiration for my next project also. As for the intended subject matter for my zine, I definitely included a focus on rocks and seaweed, which I found creates a contrast within natural substances.
What went well:
I think my zine stuck close to my original plan I laid out for it, which meant that I was able to accurately follow my own success criterion. As my second zine, I think I have improved how I plan and create my zine from the last time, as the zine followed a sequential order, theme and narrative that I think was much stronger than my first. With this zine, I learnt how to better order my zine, as well as the image selection, to give it a story. I was able to include an image taken by Guiton in my zine, which gave it a link to the archive itself, as well as the history of Le Motte.
What I can Improve on:
I think one of the weak points of my zine was also one of the stronger points: the (almost) symmetrical order it has. Because of this, I felt like my experimentation was not as in depth as it could have been, especially when it comes to the layout of the images. Next time I will be more experimental with how I lay out my images on each page, such as leaving space to place text in and so on.
In order to construct the Zine digitally, I will use Adobe InDesign to lay out each image on each page, as well as include any text and experimentations digitally. My Zine will be 16 pages, some images will take up a two page spread, while others will be one image per page.
Image Experimentation
This is a simple experimentation on one of the images. As the image itself was fairly dark in tone, I thought it would be a good idea to see how the image would look if I inverted it. I don’t think this was that effective so I won’t use this in the zine.
Despite my zine focusing on the vibrancy of the images, I want a few black and white images at certain points in the zine to create a contrast. These are the black and white images I plan on using:
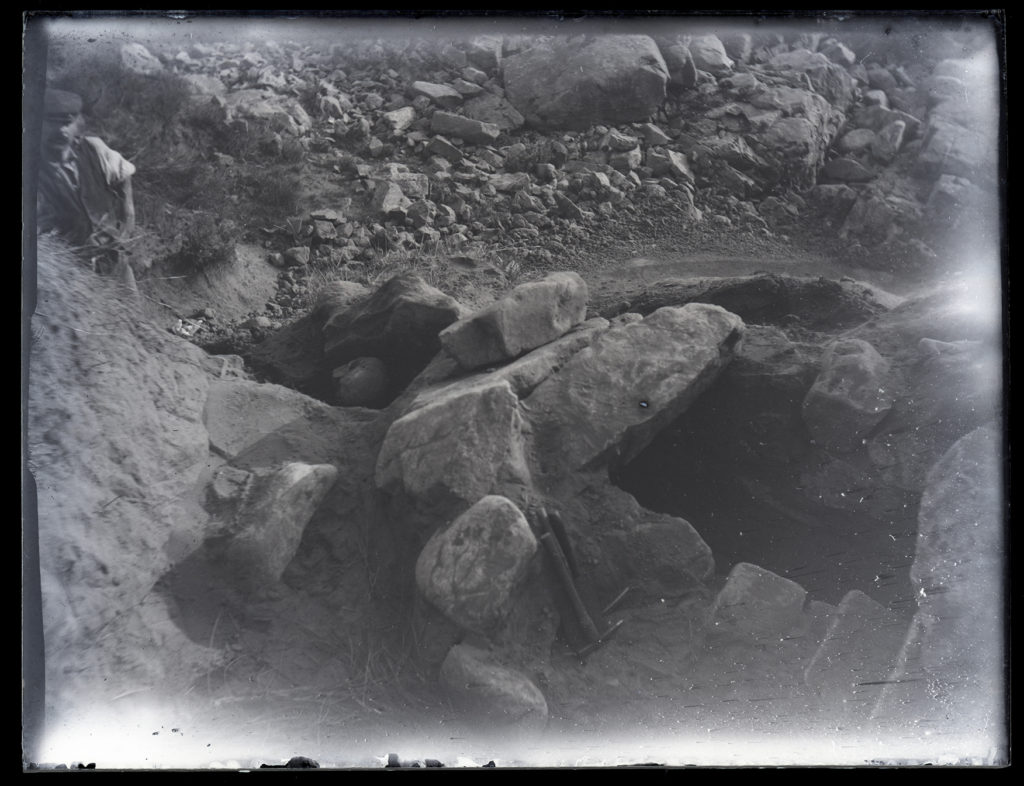
As well as these images, I will be using an archived image taken by Emile Guiton showing the La Motte Excavation:
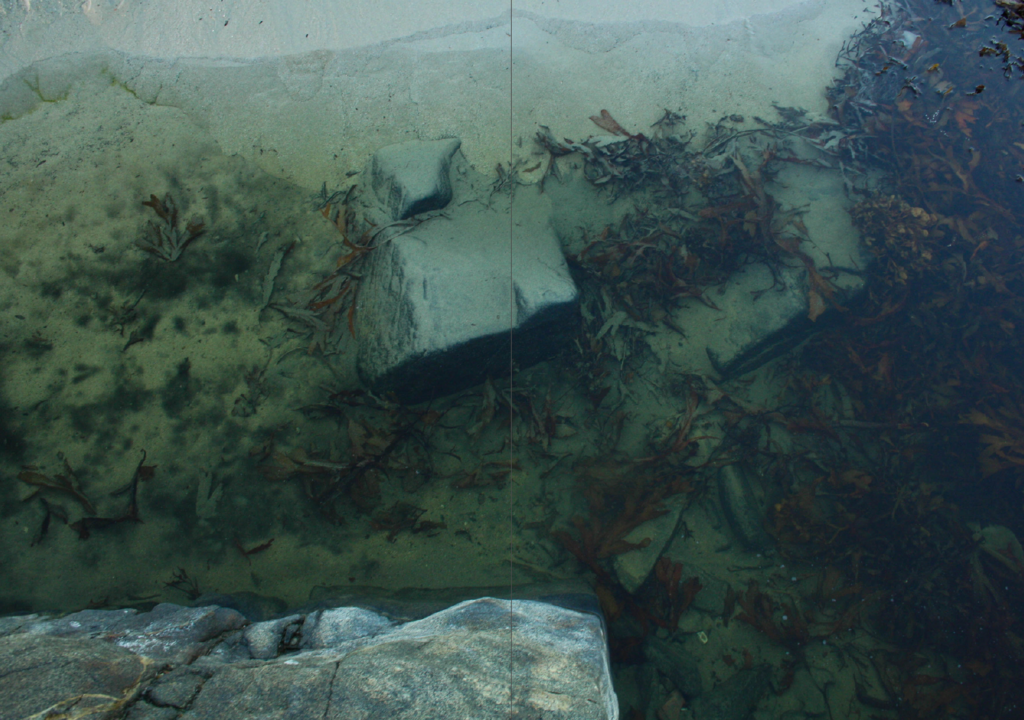
For the seventh page spread, I am planning Guiton’s image on top of it, to create the symmetry that the zine has (the second and second-to-last spreads are both large double-page spread images that are black and white). I will use one of my own images of green island and place an image by Guiton on top. I want to have the viewer lift Guiton’s image up (from tape) to reveal the new image underneath. I think this interaction will create a sense of turning back time, linking nicely to the archive. Above is Guiton’s image I will use.
For my original experiment, I had two images from Guiton on the original Zine and having one of my images being placed over it:
This is the original page spread, with two images of Green Island from the archive.
This is the page spread with my image printed in acetate laid over it.
This is that same image but with the acetate lifted as a demonstration of how it would work.
This is my image as a plain piece of paper laid over the original spread.
This is another demonstration of me lifting the page to see how it would work.
I think swapping the layout of this spread around (so my image is on the zine and Guiton’s is the interactable addition to the page) will be more effective as it will give my image more of an emphasis, it will also fit with the symmetry of the zine better.
Here is an example of the new layout:
This is what the layout looks like on the printed zine:
Zine Layout
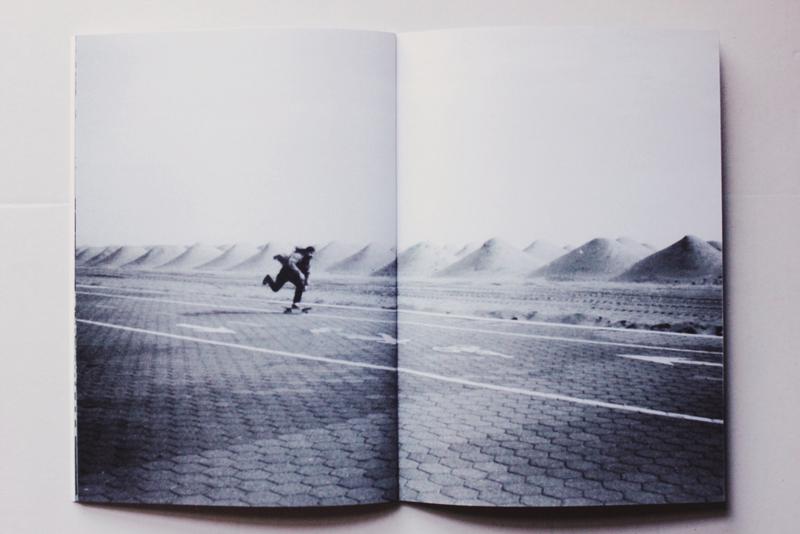
For the front and back page I used one image of seaweed spread between the two. I chose this because it is a colourful image with striking lines and textures. I chose the tower as the main image on the second page spread because it marked the start of the journey of the photoshoot, but also acts as a way to point towards the other image on the left (with the flag). I chose the third image to be a double page spread because it contrasts with the previous pages and the next because of how it is laid out, as well as the fact that it is black and white.
For the fourth page spread, I chose this layout because it fits with the almost ‘endless’ amount of small rocks and pebbles, which is represented by the higher amount of these images in the page. I chose the seaweed to take up a double page spread next because it continues the sequence of the large seaweed images, contrasts with the previous and next page spreads due to it’s colour. The sixth page spread is similar to the fourth (with the sequence reversed) to mirror the other pages. It is also worth mentioning that the zine’s viewpoint is getting closer and closer until the fifth page spread (which is the middle of the zine) where it then starts to zoom out.
On the seventh page spread, I chose two images by Emile Guiton and put them on each page in a uniform sequence, similar to how a document contact sheet would be laid out. The next page spread consists of two images (the one on the left has a frame) which the horizon line of it leads into the image on the right which is a full page image of a rock. The boarder creates an emphasis on the image on the left. The back of the zine is the other half of the image on the front cover.
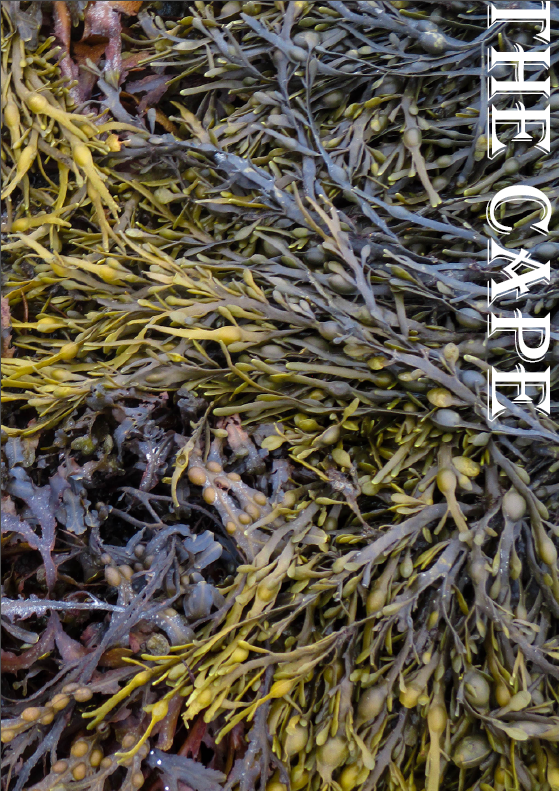
Name of the Zine
While thinking of a name for my zine I wondered what Le Hocq meant in modern English. After searching it up, I found that Le Hocq means ‘the headland’ or ‘the cape’ in English.
I think I will use one of these (perhaps with or without ‘the’) to name my zine.
Text:
As for the placement of the title itself I had a few ideas of where to put the text, the font I will use and the orientation of the text.
I think I will use the layout of having the title in the centre of the page, as it gives the text enough space to stand out, it also isn’t too light/dark as to obscure parts of the font.
In terms of the font, I will use ‘Algerian’ as it is a nice serif font that will give the title an older aesthetic, which I think is fitting for the subjects of the zine.
I also experimented by using an underline to divide my name and the title of the zine.
A sentence: A journey through the bay with sights of rocks and seaweed.
A paragraph: Mirroring my own photographic ‘journey’ through Le Hocq, my story will (somewhat) follow the path I took through Le Hocq. The story will start out with wider landscape photographs and slowly zoom in towards the finer details, until it will zoom back out again to resemble the end of a journey.
Points to Consider for my Zine
How you want your design to look and feel – I want to put a focus on the rocks and seaweed found on the bay. I also want to make my images appear more vibrant, as opposed to a more documentary-like aesthetic, however I may include some black and white images as well.
Format, size and orientation – I will experiment with page spreads and how big the images are in comparison to the page (1/2, 2/3, Boarder Single, Single No-boarder, etc…).
Narrative and visual concept – I want my zine to be a journey of Green Island and the bays around it, including both close up and landscape images to show the wider scale, to the smaller details one might miss.
Design and layout – I will aim to make my zine ‘symmetrical’ in the sense that the first page spread (page 2 and 3) will mirror the eighth page spread (page 14 and 15) in terms of layout and aesthetic. I think this will give a structure to my zine that will help it tie into itself.
Rhythm and sequencing – As stated above I want the rhythm of my zine to be ordered (symmetrical) so that the rhythm, sequence and narrative of the zine is displayed by the arrangement of the images.
Images and text – My images will be mainly landscape images of the bay at Le Motte, including close-ups of stones.
Title and captions – I want my zine’s title (and captions if I decide to include them) to involve the idea of a bay/rocks/seaweed in some way, perhaps a description of all three at once.
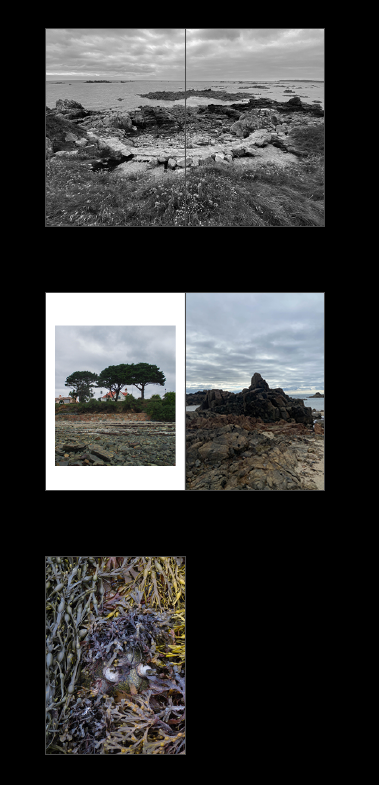
Moodboard
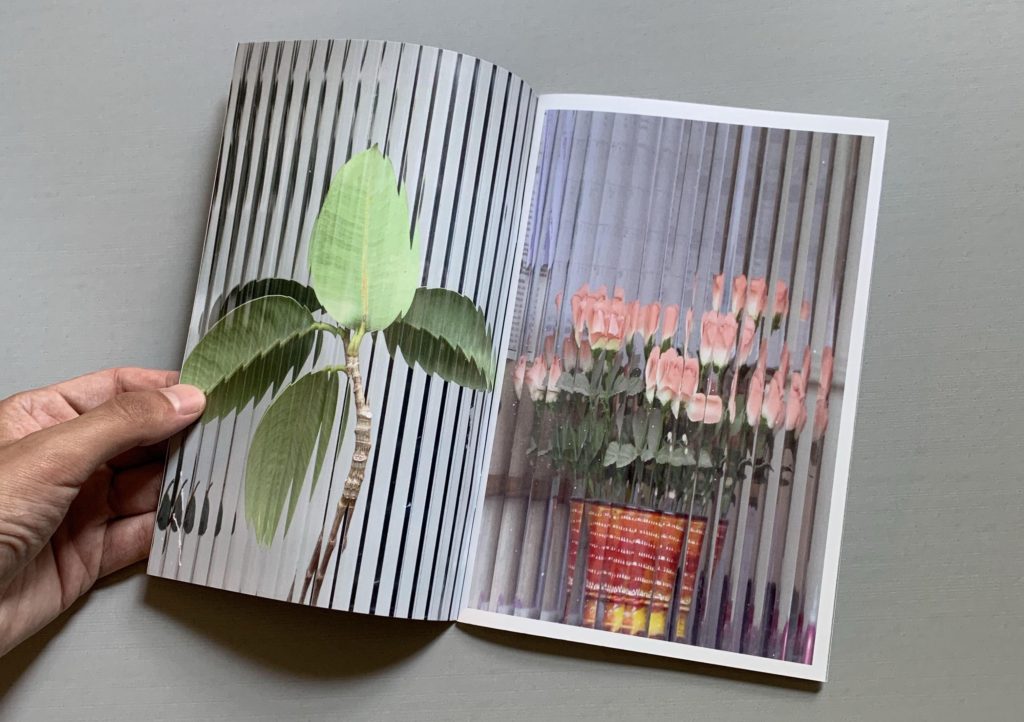
As stated above, I want my Zine to be on the vibrant side, so these are zines that I found that match that description. I will also use some black and white images to create a contrast with the more vibrant ones. The bottom image (largest) in the moodboard fits what I am going for, however this may change during the experimentation/creation stage.
These are some examples of published zines created by the Société Jersiaise: Éditions Emile, which was named after Emile Guiton whom I have written about before. These zines are produced twice a year, each with links to the archive and the history they have recorded. The zines include images stored in the archive (some perhaps taken by Guiton), and some images are created in the modern age for the zine.
Image Selection
These are the images I will be using to create my Zine (all of the images are edited, some with black and white or cropped versions).