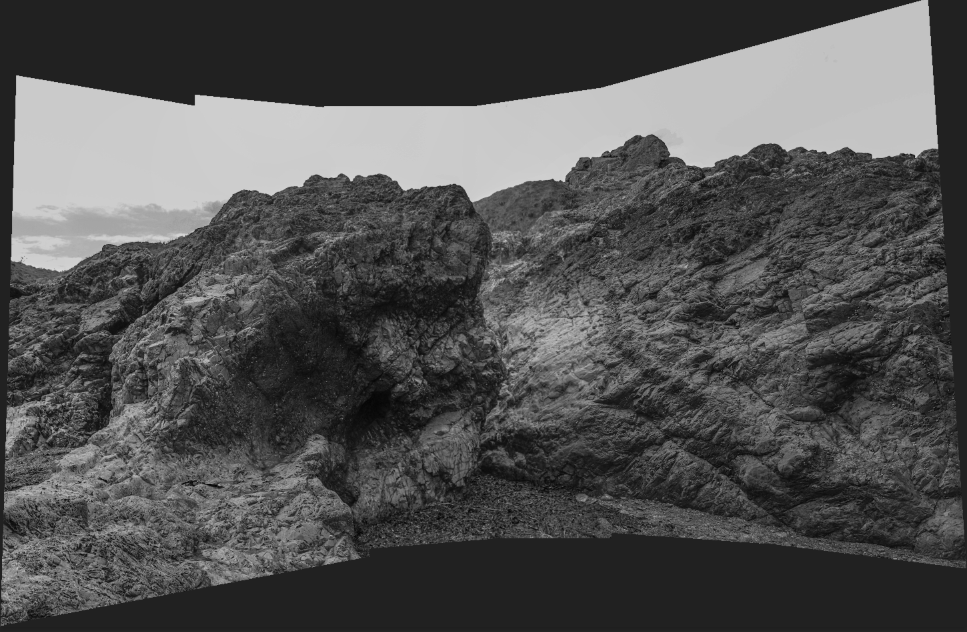
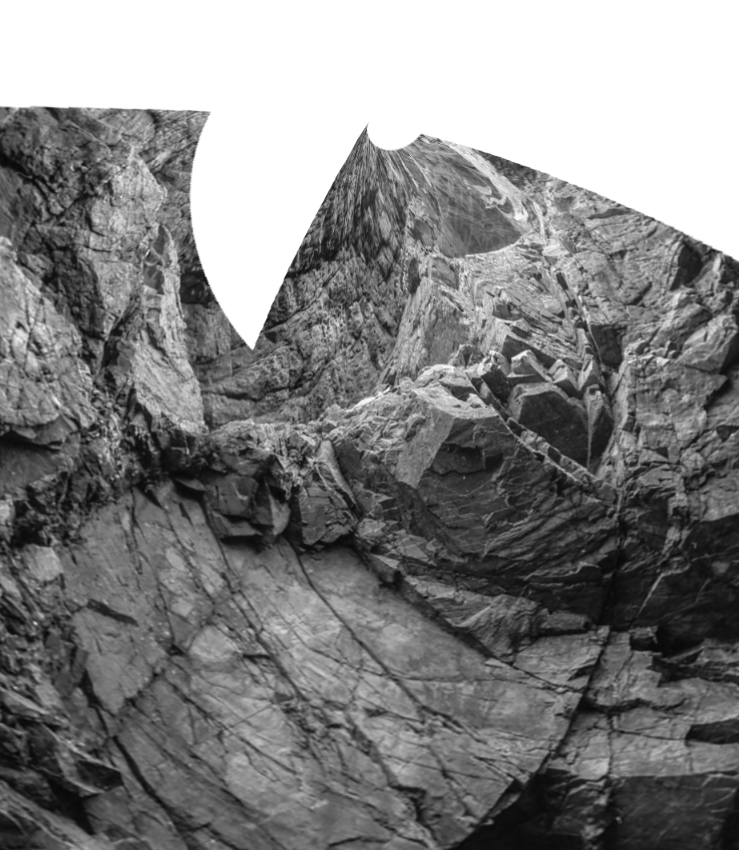
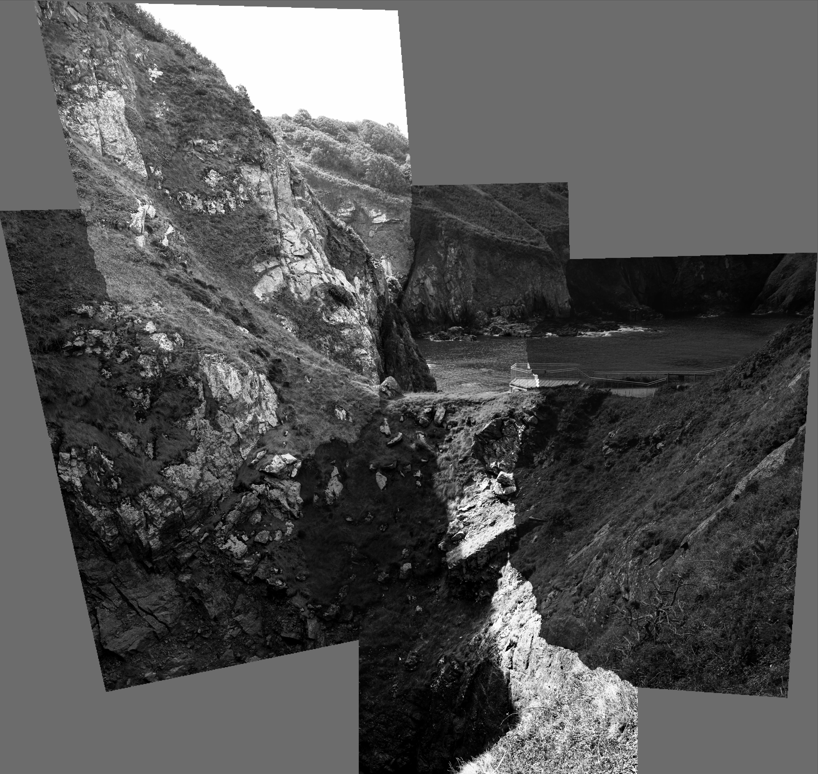
After editing my images in lightroom, I wanted to try out the concept of making a joiner out of my collection of images. I wanted to follow a similar concept to that of what David Hockney does.
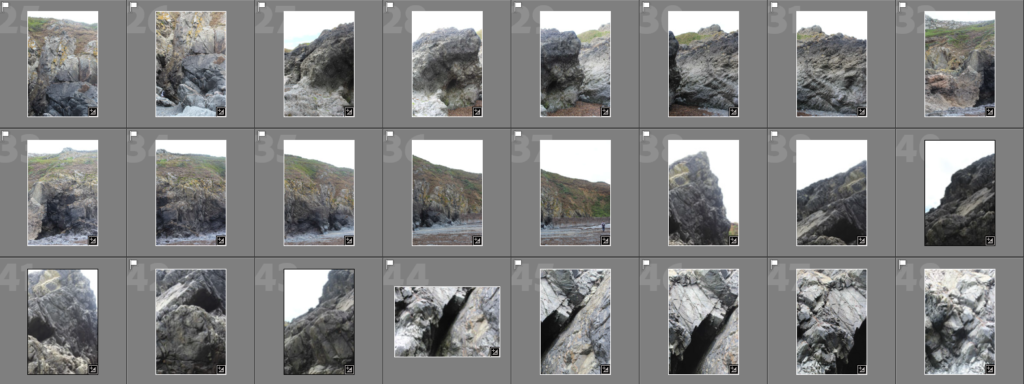
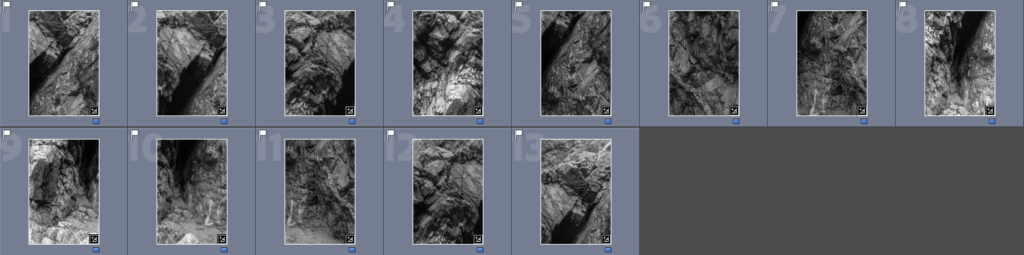
Contact sheets:
After selecting all of the images I wanted to use to compose my joiners, I chose one image from a joiner group and edited it to my liking. Once that was done I synced up the edited settings so that every image was edited exactly the same.
I then colour coded certain images into separate groups as to keep the joiners all together and to not get any mixed up.
Process of making the joiners:
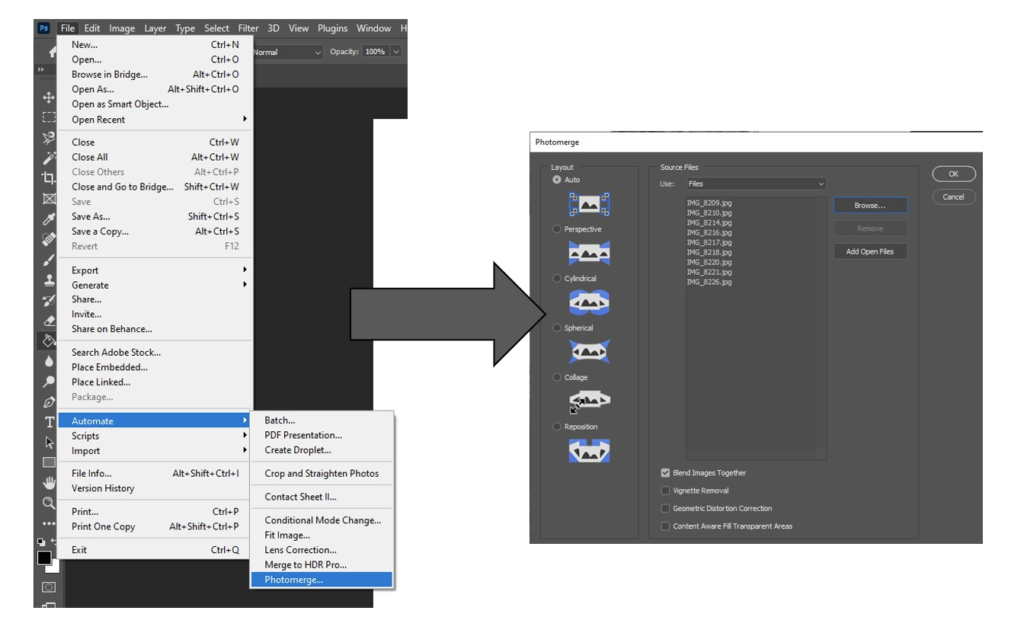
In order to make the joiners, I needed to open up on one of the images included in the joiner and then select ‘Automate’ and ‘Photomerge’.
After selecting those I would need to click ‘browse’ and select all the images I would like to combine as a joiner. After selecting ‘Ok’, it would merge all of my images into a joiner.
—- Failed joiners —-
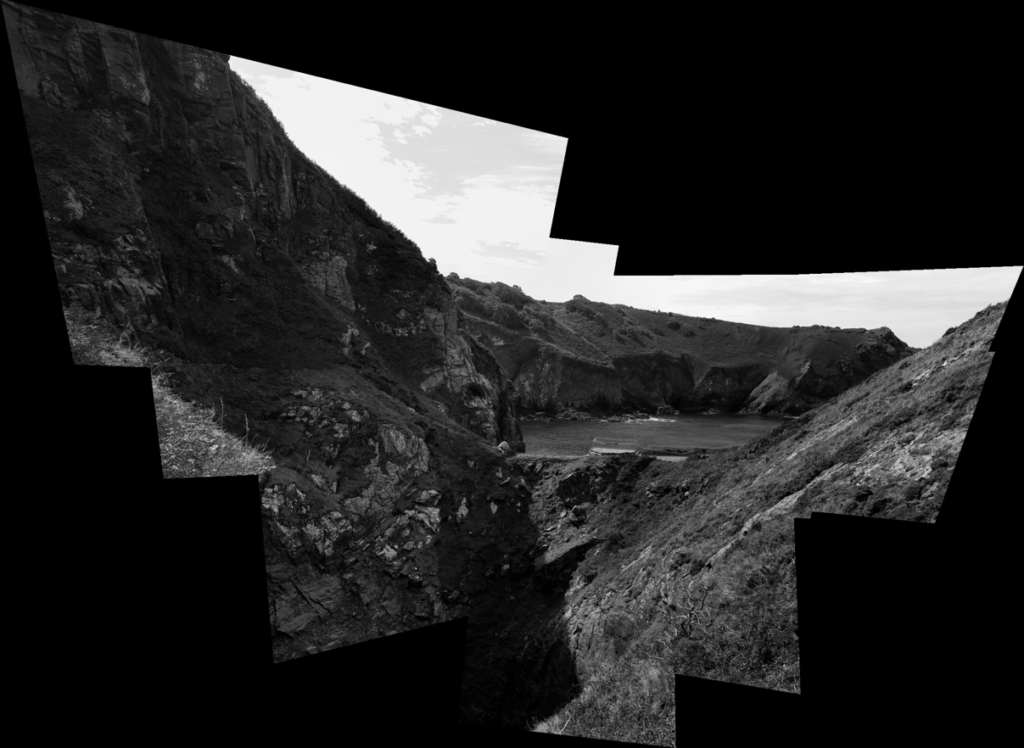
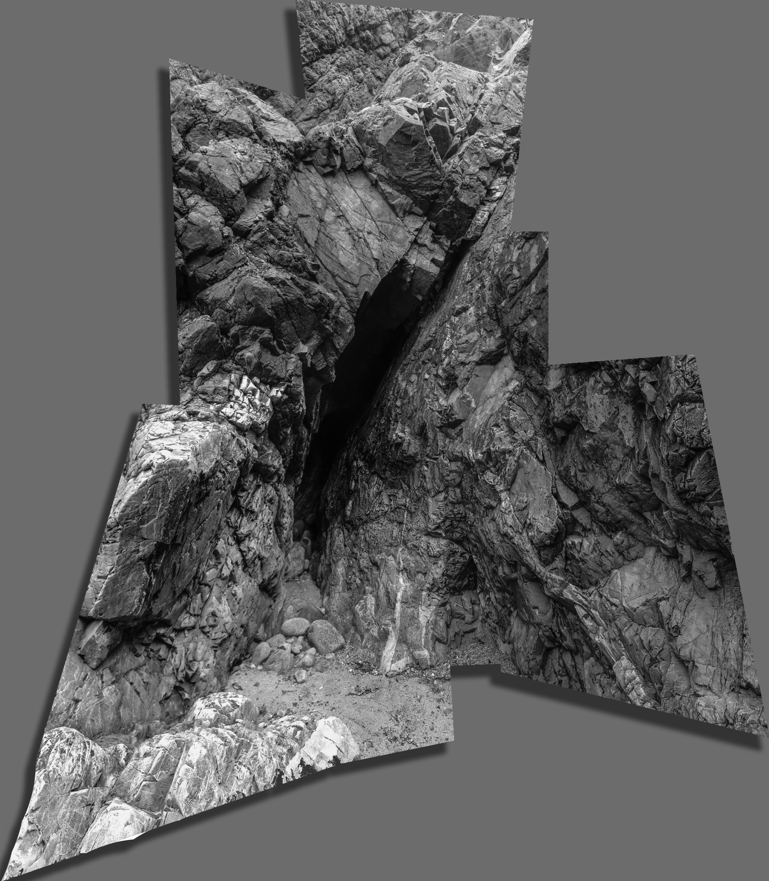
—- Successful joiners —-
3DJoiners experiments
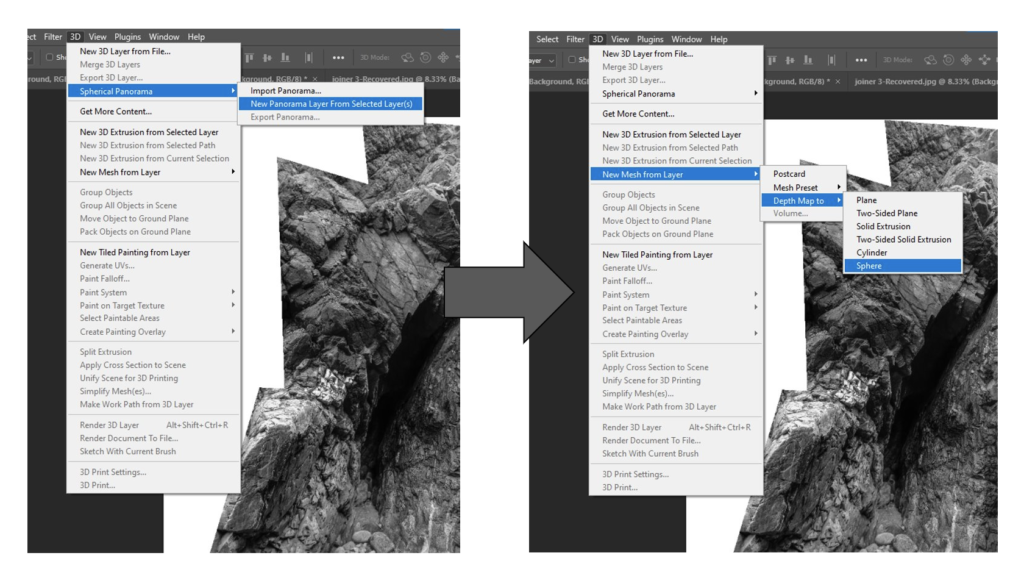
After making my 2D joiners, I decided to take the oppurtunity to experiment with the finalised joiner a bit more and to make them into 3D joiners. There were many different types of 3D formats I could choose between so I took the time to go through a few of them to see if any were to my liking.
How to make a 3D joiner
Results of the 3D joiner experiments —–
One of my joiners as a soda can
One of my joiners as a ring
One of my joiners with a drop shadow to make it look more 3D
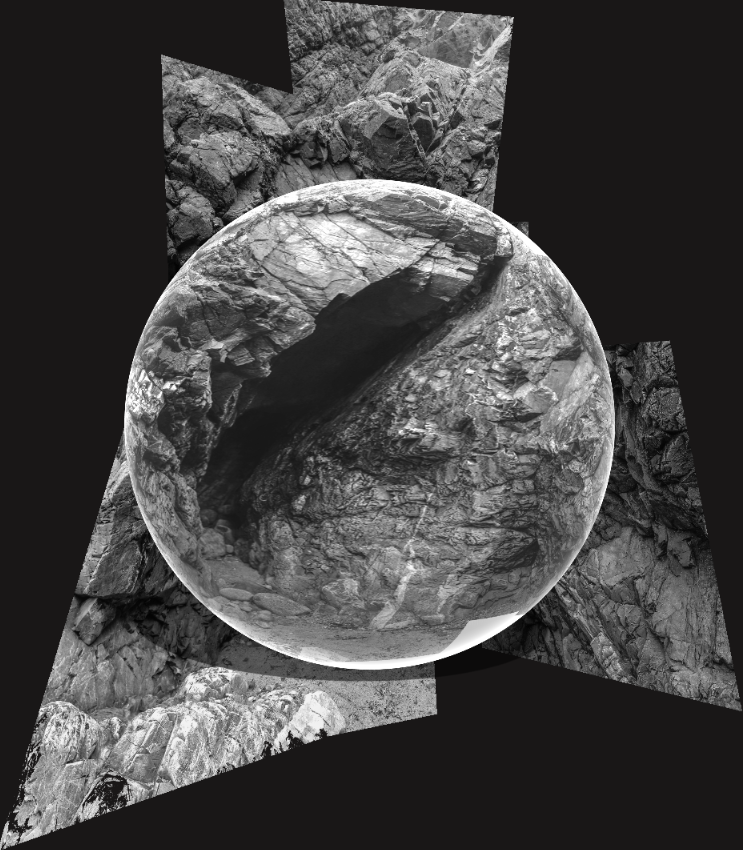
One of my joiners as a sphere
One of my joiners as a sphere with more depth
My joiner sphere with the original in the background
My joiner being put in a panoramaAnother joiner with a pattern overlay
Another joiner which I adjusted the brightness and contrast for on each layer
Before we begin our next creative phase we need to make sure you have chosen your best photo-collage/ joiner and saved in this folder below for our upcoming exhibition at the Link Gallery, Jersey Museum. Deadline Fri 16 Sept. M:\Radio\Departments\Photography\Students\Image Transfer\PRINTING – JOINER\A3
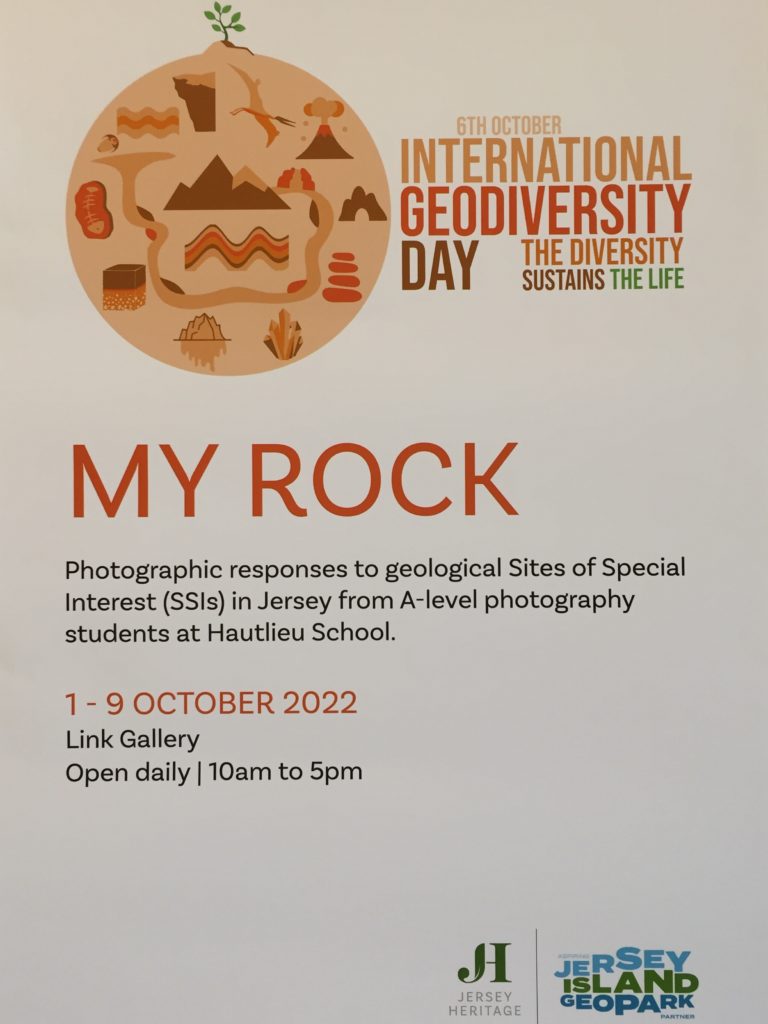
Week 1-4: 6-28 Sept Practice: Still-life, 3D Photo-sculpture and Installation Theory: History of Still-life as a genre in art DEADLINE: Wed 28 Sept EXHIBITION: MY ROCK Link Gallery 1- 9 Oct, Jersey Museum
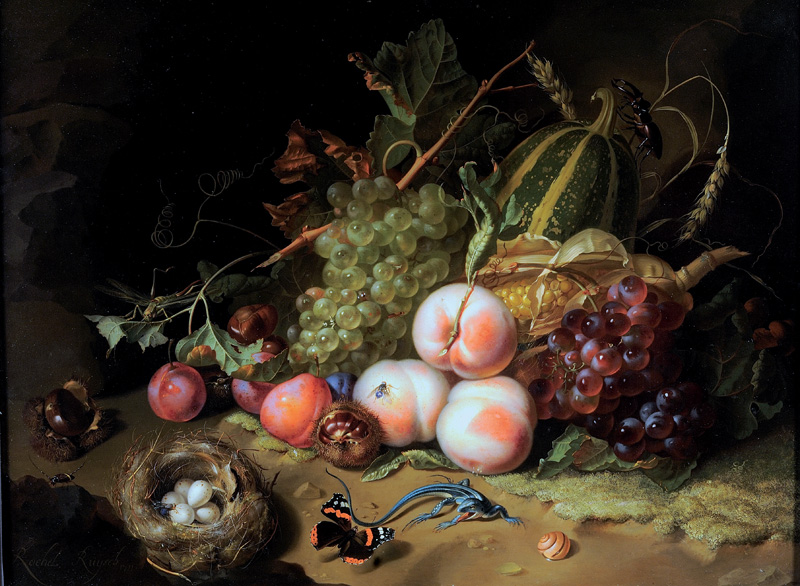
Still life has captured the imagination of photographers from the early 19th century to the present day. It is a tradition full of lavish, exotic and sometimes dark arrangements, rich with symbolic depth and meaning.
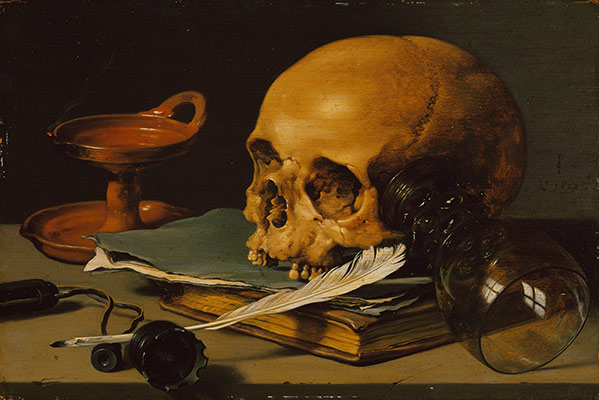
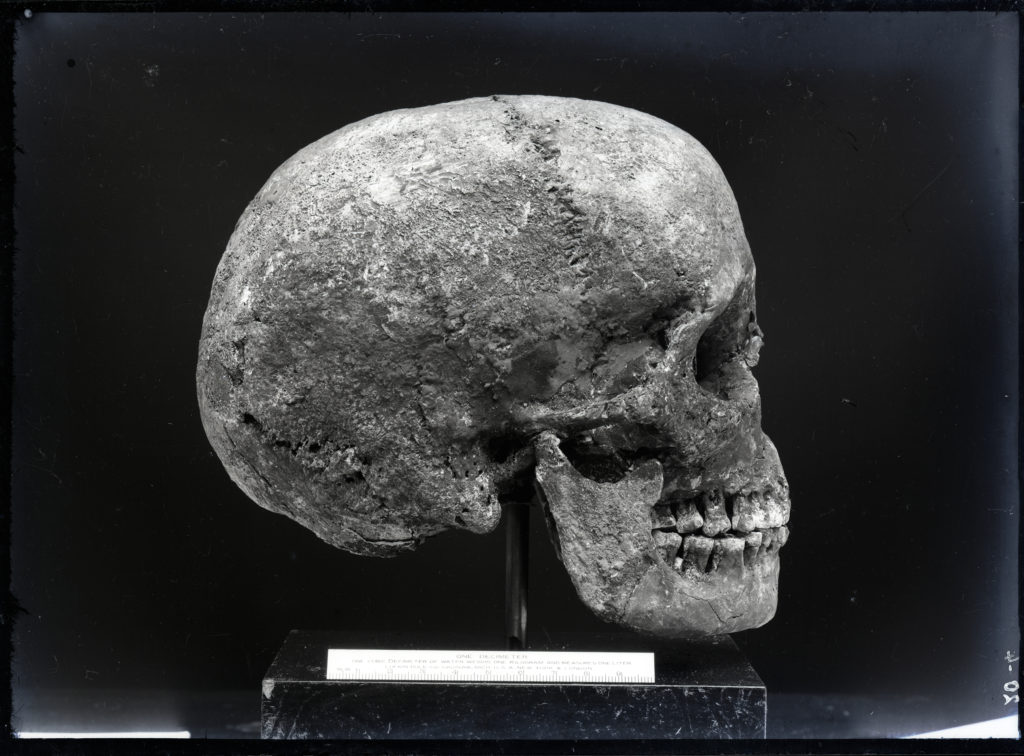
However, before we begin making images of our objects collected over the summer period we need to learn about how still-life emerged as an independent genre, in particularly during the early 1600s Dutch and Northern European paintings. Many of the objects depicted in these early works are symbolic of religion and morality reflecting on the increasing urbanization of Dutch and Flemish society, which brought with it an emphasis on the home and personal possessions, commerce and trade. Paintings depicting burnt candles, human skulls, dying flowers, fruits and vegetables, broken chalices, jewelry, crowns, watches, mirrors, bottles, glasses, vases etc are symbolic of the transience and brevity of human life, power, beauty and wealth, as well as of the insignificance of all material things and achievements.
Throughout its long history, still life has taken many forms, from the decorative frescoes of antiquity to the high art of the Renaissance. Traditionally, a still life is a collection of inanimate objects arranged as the subject of a composition. Nowadays, a still life can be anything from your latest Instagram latte art to a vase of tulips styled like a Dutch Golden Age painting. Read here for more details about the different categories within still-life paintings such as Fruits, Flowers, Breakfast pieces, Trompe L’Oeil and Vanitas.
Vanitas
Flowers
Fruit
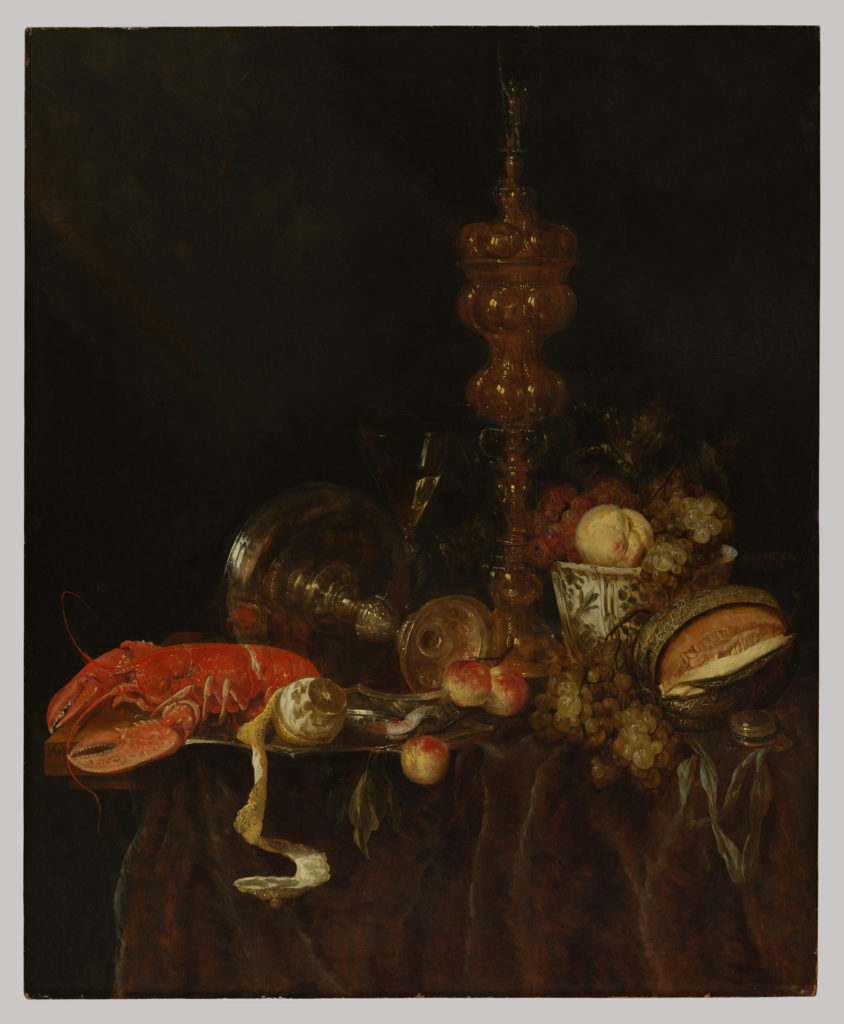
Abraham van Beyeren (Dutch, The Hague 1620/21–1690 Overschie) Brilliant surfaces of metalwork and glass reflect lush fruits and a lobster in this still life. Heavily laden tables like this one, boasting both foodstuffs and imported luxuries such as the blue-and-white porcelain bowl from China, typify Dutch still life in the second half of the seventeenth century. Such paintings represent a shift away from the reminders of immortality and vanity in earlier still lifes and toward a wholehearted embrace of earthly pleasures.
Watch video: What does it mean? Symbolism in still life photography
READ the following two short essay linked with the exhibition above for more understanding of still life in art and photography—with its roots in the vanitas tradition.
1. HISTORICAL CONTEXT: Produce a blog post and describe origin and definition of still life as a genre in history of pictorial practice. Read texts above and below to gain an overview of how still-life emerged.
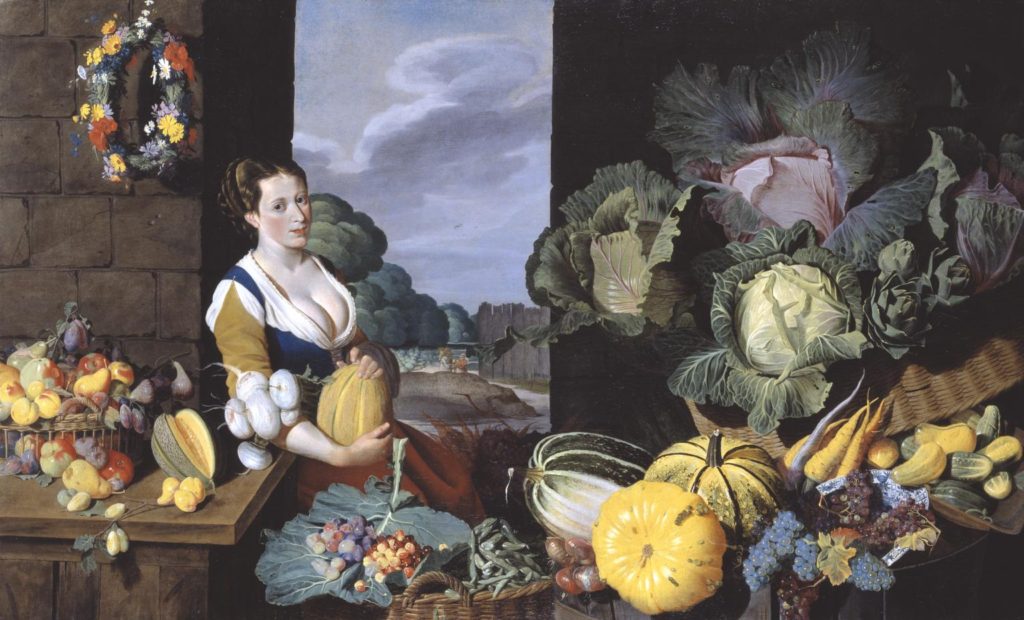
2. ANALYSIS: Select a key painting and comment on the religious, political and allegorical symbolism of food and objects in terms of wealth, status and power, or the lack of.
Cookmaid with Still Life of Vegetables and Fruit c.1620-5 Sir Nathaniel Bacon 1585-1627 Purchased with assistance from the Art Fund 1995 http://www.tate.org.uk/art/work/T06995
Listen to curator Tim Batchelor discussing the painting
For further insights into the symbolic meaning of food and objects in still-life paintings, read this text Secret Symbols in Still-Life
Week 2: 11-19 Sept RECORD > RESPOND
Watch short film: Recreating a Roger Fenton still life photograph
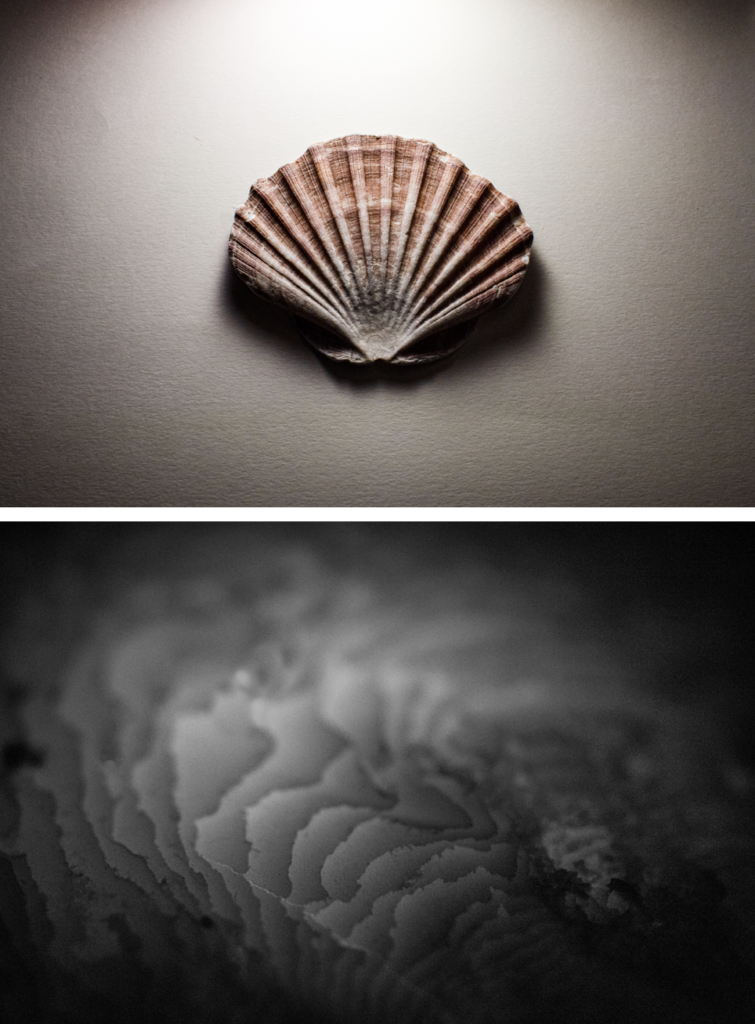
STILL-LIFE: photograph objects you collected over the summer from bays and geological sites of special interest (SSI) and photograph them in the studio using different lighting techniques, backdrops and compositions.
All the above: Matt Brown, Yr 13 photography student 2021
You my wish to remind yourself and refer back to your previous study on objects and still-life that you explored as part of your HERITAGE project last year.
Collect a group of objects that you think combine well. Consider shape and size, colour, texture etc.
For ideas, look carefully at how Mary Ellen Bartley groups, lights and photographs her objects. Aim to create a set of images by altering the layout, lighting, focus, composition etc.
Stack objects
Light & Shadows
Rip & Tear
White monochrome
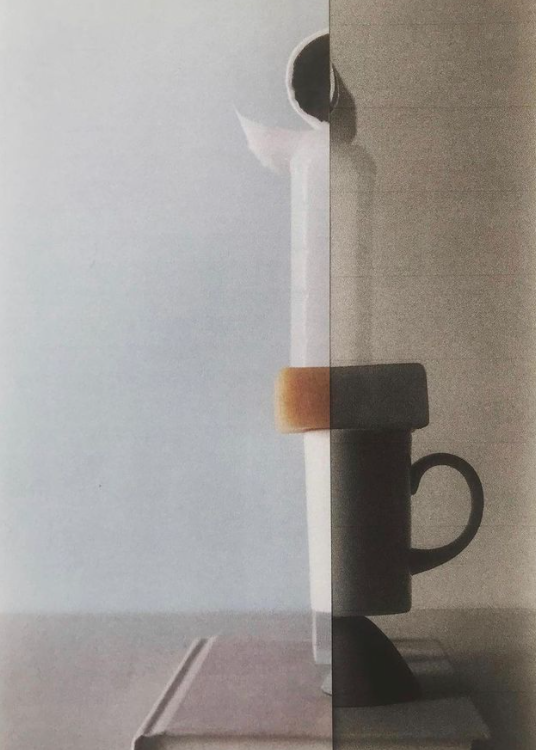
Splicing two images
Conceal & Reveal
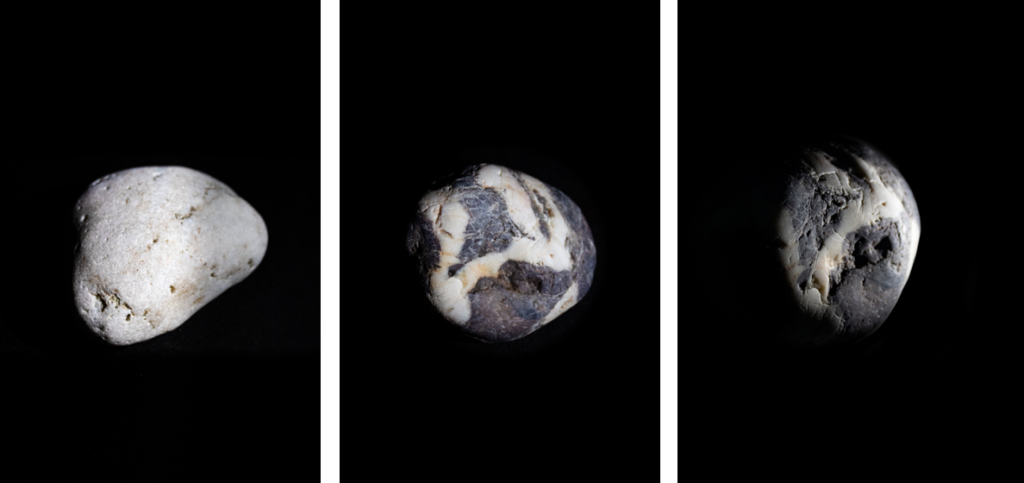
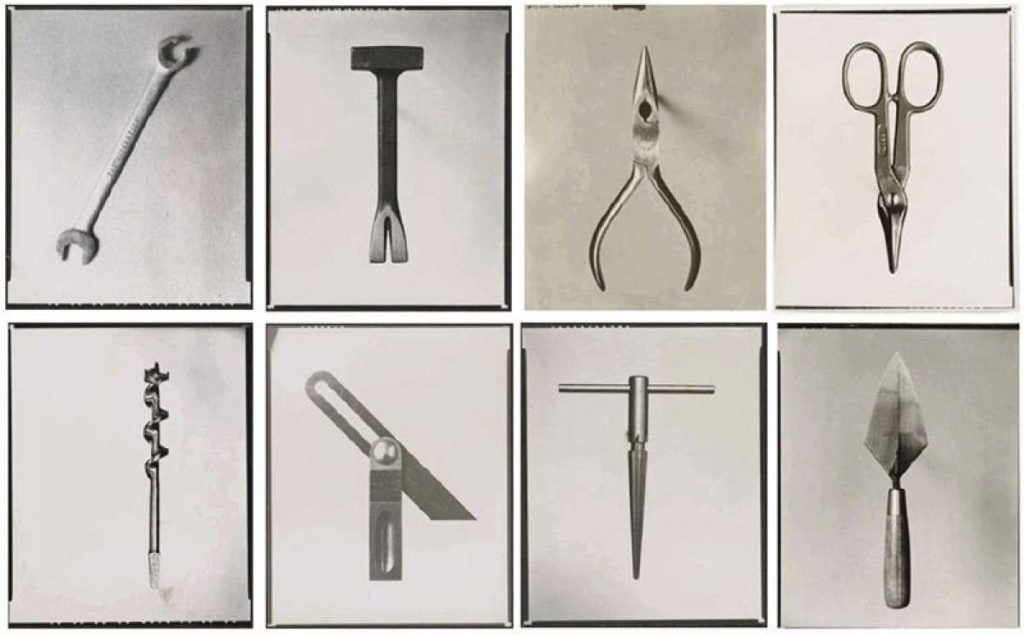
Also photograph individual objects as specimen applying a typology approach, ie. deadpan and uniformly framed and lit in a way that is the same in all images.
Matt Brown, Yr 13 photography student 2021Darren Harvey Regan: The Erratics 2015Walker Evans: Beauties of the Common Tool, 1955
BLOG: Follow these instructions and complete the following blog posts:
EDITING – NEW PHOTOSHOOTS: Upload and process images from any new photo-shoots your have made in relation to PHOTO-ASSIGNMENT from Summer Project using Lightroom.
Save raw images from camera card on M:drive in SHOOTS in your project folder: MY ROCK.
Import images into Lightroom.
Create a new Collection: Shoot 2, Shoot 3, etc under collection set: MY ROCK.
Begin to select images using P (pick) and X (reject)Continue to select your best images in Lightroom using star ratings and/or colour labels.
Produce screen prints for each stage of your selection process and paste into new blog post: PHOTO-SHOOT 2, PHOTO-SHOOT 3, etc
In Develop mode, adjust images both as Colour and B&W images appropriate to your intentions.
Export images as JPGS (1000 pixels) and save in a folder: BLOG
Add a selection of your best edited images (8-12) to the blog post above and write an evaluation.
Week 3-4: 19 Sept – 2 Oct EXPERIMENTING > DEVELOPING
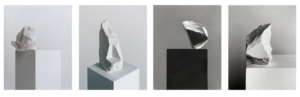
PHOTO-SCULPTURE: Print a selection of your images and mount them onto foamboard/ mountboard cut-outs and begin to work analogue with knives/ scissors and glue constructing a 3D photo-sculpture.
Jack Dale
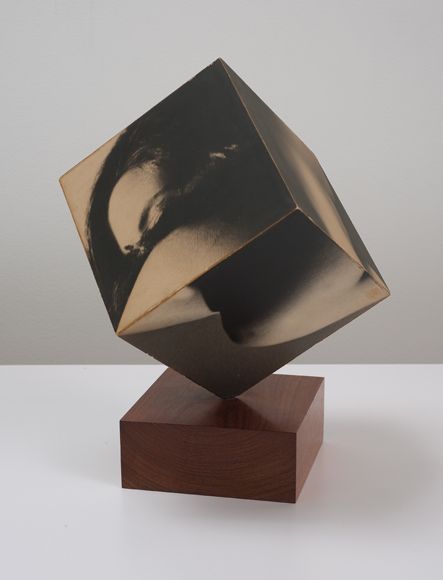
Robert Heinecken, Figure Cube, 1965
Lauren Pascarella, Photographic Sculpture
Ideas for constructing a photographic sculpture
Joseph Parra
Jody Powell
Noemie Goudal
Lethe Wilson
ARTISTS REFERENCES. As inspiration for your photo-sculpture select at least two artists references as a case study. Explore, discuss, describe and explain key examples of their work relevant to your project and intentions. Follow these steps:
1. Produce a mood board with a selection of images and write an overview of their work, its visual style, meaning and methods. Describe why you have selected to study their work and how it relates to your project.
2. Select at least one key image and analyse in depth using methodology of TECHNICAL>VISUAL>CONTEXTUAL>CONCEPTUAL
3. Incorporate quotes and comments from artist themselves or others (art/ media /film critics, art/ media/ film historians, curators, writers, journalists etc) using a variety of sources such as Youtube, online articles, reviews, text, books etc. Make sure you reference sources and embed links in your blog post.
4. Compare and contrast your chosen artists in terms of similarities and contrasts in their approaches, techniques and outcomes of their work.
3DDESIGN PROCESS: Make sure you produce a blog post that show stages of your experimentation using camera/ phone to document your 3D photo-sculpture as it develops. Make sure you annotate the various processes and techniques that you are using and also describe creative decisions and choices that you make.
FURTHER EXPERIMENTATION: You can produce more than one photo-sculpture and create an installation of several pieces. Be creative and not afraid to make mistakes, Try out the following:
Print off a selection of carefully chosen images that you can then paste to either foamboard or mountboard. Then cut and arrange these choices so that you can create a free-standing photo-sculpture (see Lethe Wilson above)
Print same set of images (or chose a different set) — and then rip, tear, cut-n-paste to create a photo-montage. Re-photograph this and develop the composition into a final outcome using same method as above.
Layering various sizes of foam board with images and re-create a shape of a rock, or details of granite from geological sites of special interests.
Construct a organic or geometric shape first out of cardboard/ mountboard and wall paper your 3D sculpture with your own images
Manipulate images first in Photoshop using various tools and techniques to distort, blur, pixelate, liquify, render, stylise etc before printing and gluing onto your 3D model.
Consider incorporating other elements such as text, typography, figures, found material.
For example, add Jerriais words into your photo sculpture – see Other Resources below for ideas
Consider Jersey myth and storytelling as part of the meaning behind your photo-sculpture
INSTALLATION 3D Photosculpture > 2D image Upon completion of your 3D sculpture photograph your sculpture as an object experimenting with creative lighting techniques in the studio playing between light and shadows, creating a false sense of scale and size. Produce a blog post with a set of your most successful edited images and annotate.
WHOLE CLASS INSTALLATION As a whole class we will create an installation of all 3D photosculptures. Follow same process as above and add your most successful edited images to the blog post above and annotate.
FINAL PRINTS Select a set of your best 3 images and save into shared folder below. Mount prints and create a blog post with final presentation and include evaluation below.
M:\Radio\Departments\Photography\Students\Image Transfer\YR13 MY ROCK
EVALUATING: Upon completion of your final outcomes and experimentation, make sure you evaluate and reflect on your creative development. Include images from our exhibition: MY ROCK at Jersey Museum (1-9 Oct) and comment on the following:
How successful was your experimentation?
What references did you make to artists references? – comment on technical, visual, contextual, conceptual links?
How are you going to develop your project from here? – comment on research, planning, recording, experimenting.
What are you going to do next? – what, why, how, when, where?
INSPIRATIONS: Artist References
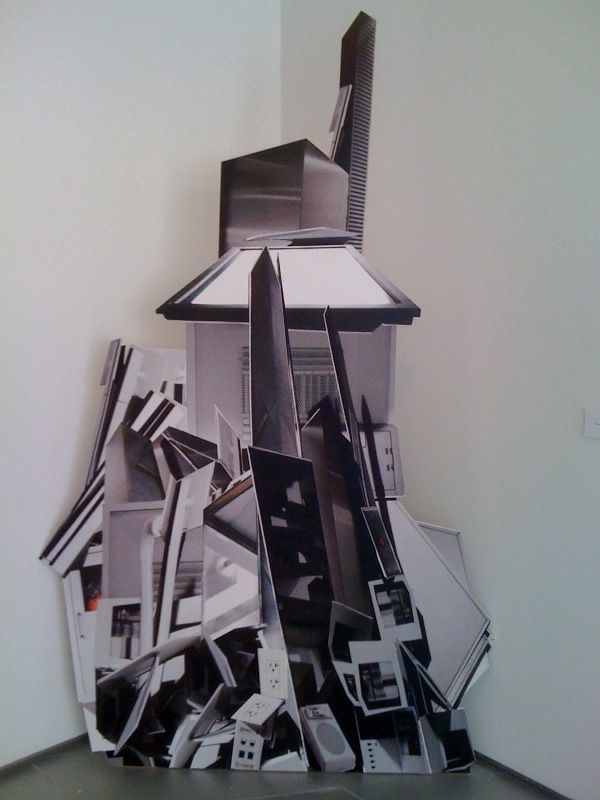
Photographic installations which are site specific and 3-dimensional is very in vogue right now. Here are a selection of artists exploring the material nature of a photographic image (print, negative etc) and the idea that photographs can be sculptural.
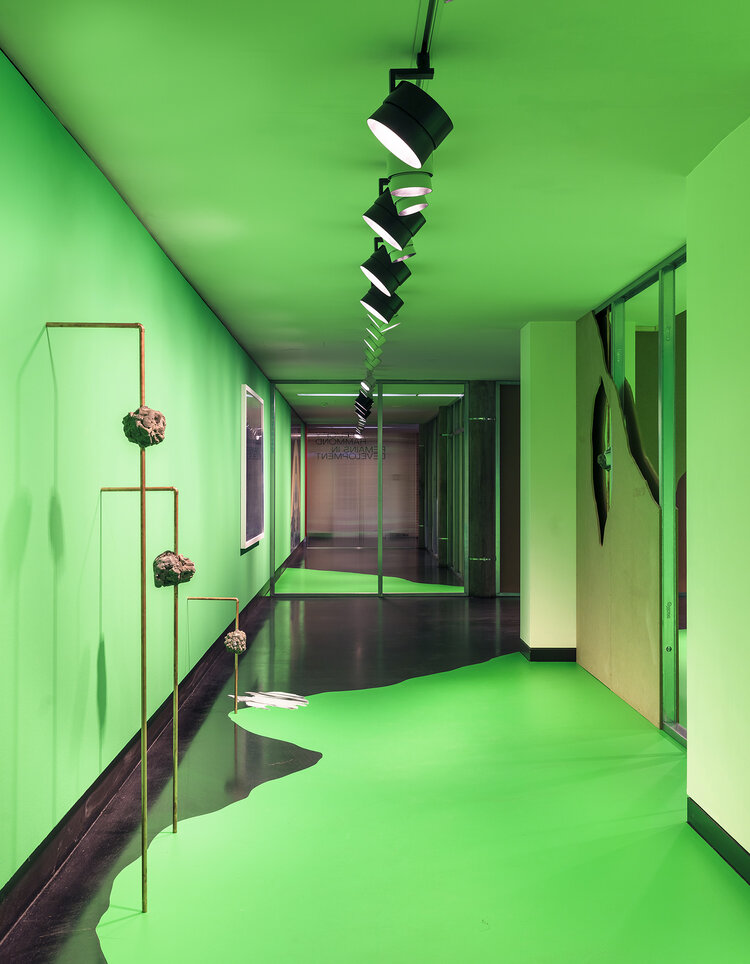
Felicity Hammond
Felicity Hammond is an emerging artist who works across photography and installation. Fascinated by political contradictions within the urban landscape her work explores construction sites and obsolete built environments.
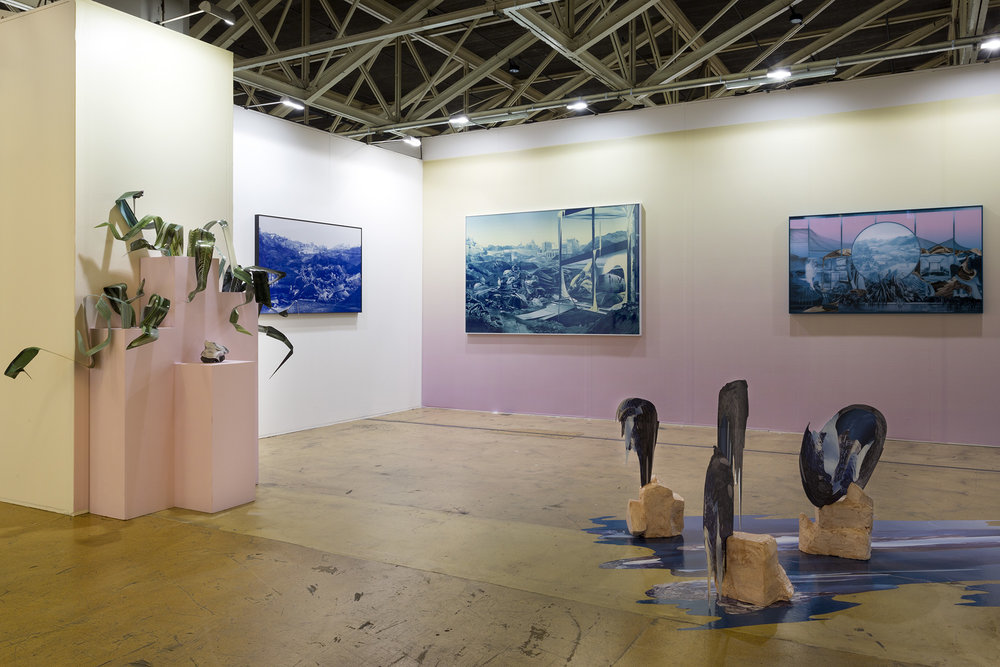
The Space Between @ ART ROTTERDAM 2017The Space Between @ ART ROTTERDAM 2017
In specific works Hammond photographs digitally manipulated images from property developers’ billboards and brochures and prints them directly onto acrylic sheets which are then manipulated into unique sculptural objects. Here a few selected works you can use as case studies
Case Study:World Capital (2019) Ink jet prints on vinyl and dibond, wood, rubber, water, concrete, steel, acrylic
Conversations about the homogenisation of the built environment have taken many forms. From Walter Benjamin’s writings about the effect of capitalism on nineteenth century Paris, to Ian Nairn’s scathing review of the growing ubiquity of town planning, the crisis surrounding urban identity has been and will continue to be widely contested.
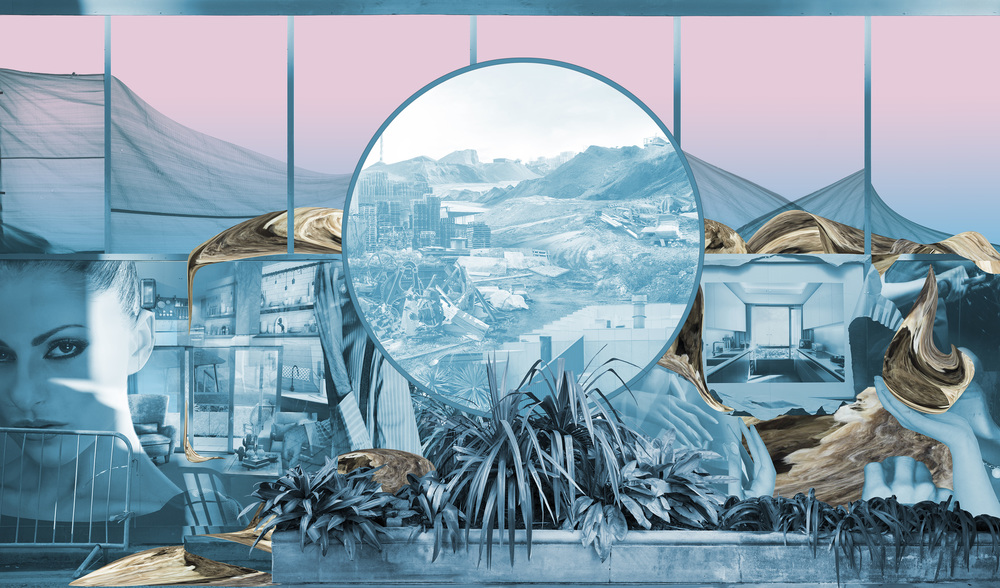
In World Capital the conversation turns towards the way that digital technologies have influenced the global image of the city. Offering a commentary on the role that the computer generated architectural proposition plays in the increasing uniformity of the urban realm, the work outlines the ways in which the proliferation of the virtual world has contributed to urban indifference.
Combining images used to market contemporary housing alongside relics of the industrial past, the work collides local history with the global image that supersedes it. Re-imagining the Great Thames flood of 1928 which destroyed much of the site of the exhibition (now known as London City Island) World Capital recalls the area’s industrial and troublesome past, propelling its history into the near future.
In her work, British artist Felicity Hammond confronts the social, political, and economic contradictions of the postmodern city, whose buildings and façades shape our collective identity and open up a future by obliterating the past. Hammond’s large- scale collages combine found images from glossy real estate brochures with her own photographs. They are reminiscent of apocalyptic historic images, but they never reveal the locations of the places they show or how they relate. Instead, the collages reflect the increasing homogenization of big cities, resulting from a process of urban development steered by power struggles between international real estate companies, profit-driven investors, and gentrification critics.
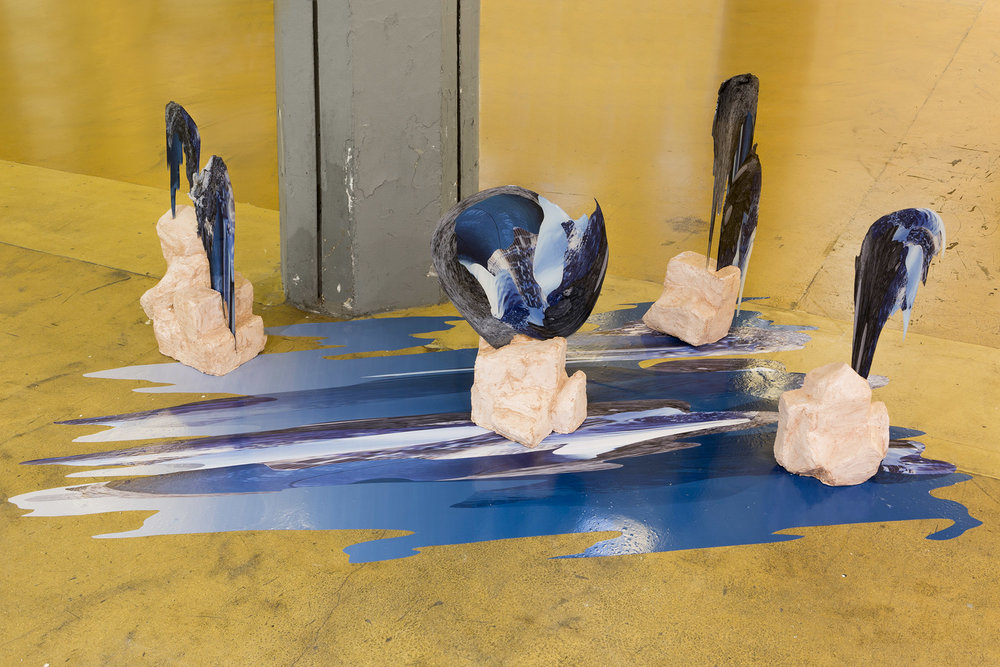
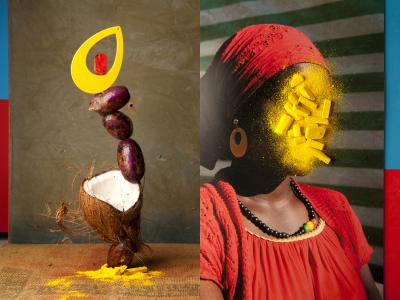
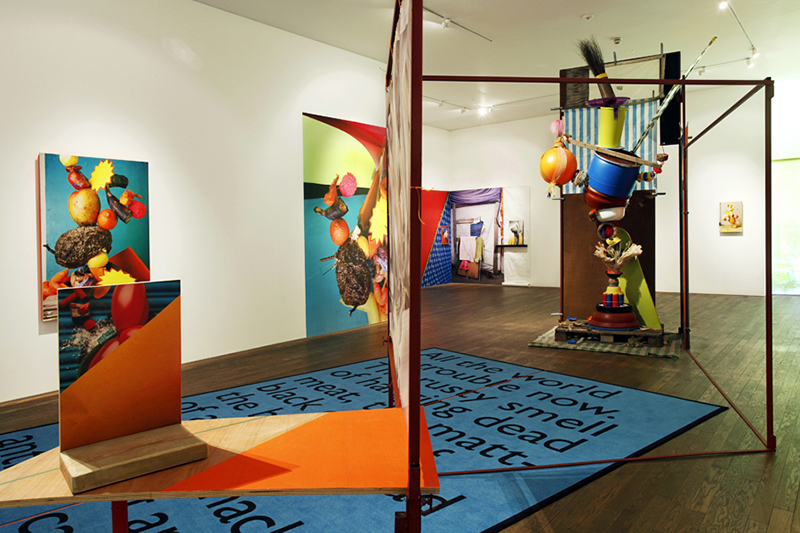
Lorenzo Vitturi’s vibrant still lifes capture the threatened spirit of Dalston’s Ridley Road Market. Vitturi – who lives locally – feels compelled to capture its distinctive nature before it is gentrified beyond recognition. Vitturi arranges found objects and photographs them against backdrops of discarded market materials, in dynamic compositions. These are combined with street scenes and portraits of local characters to create a unique portrait of a soon to be extinct way of lif
His installation at the Gallery draws on the temporary structures of the market using raw materials, sculptural forms and photographs to explore ideas about creation, consumption and preservation.
Helen Chadwick Piss Flowers
INSTALLATION: Create a miniature installation on the white table in the classroom/ studio with your various photo-collages and 3D photo-sculptures and re-photograph it in-situ producing a new set of 2D images. Use proper studio lighting techniques, such as spotlights, chiaroscuro, flashlights and coloured gel for dramatic effect. Mount camera on a tripod frame different compositions that play on our sense of scale & shapes, form & texture and reality & fantasy. Consider making a backdrop out of paper or paint a backdrop that will add an effect.
INSPIRATIONS: Artist References
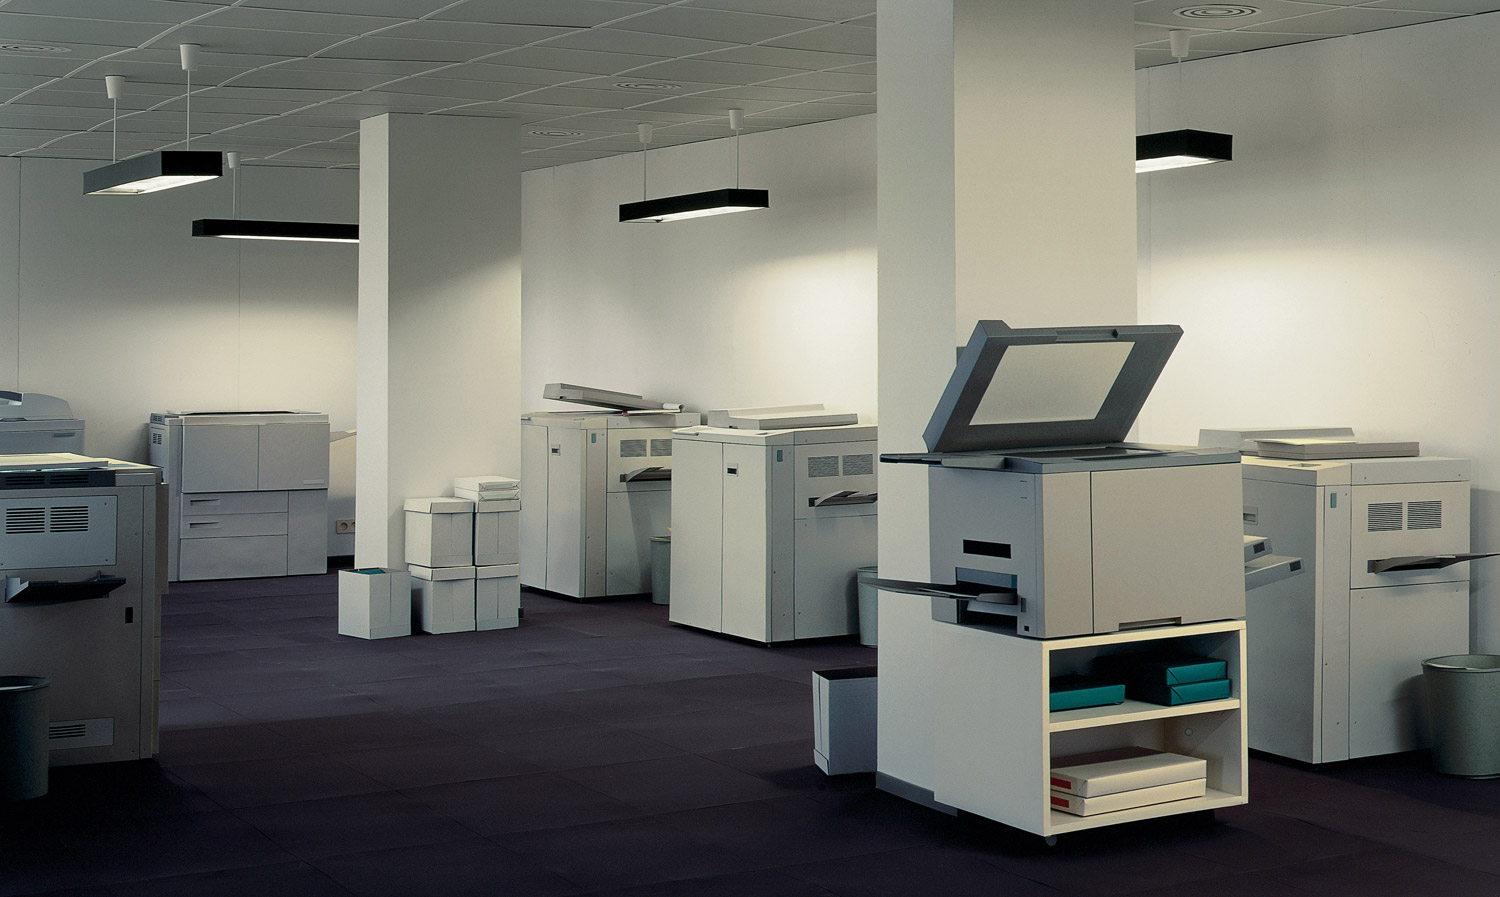
Look for inspirations from artists, such as James Casebere and Thomas Demand (see below) and compare/ contrast their work to your own images that you produce from photographing your sculptures.
James Casebere
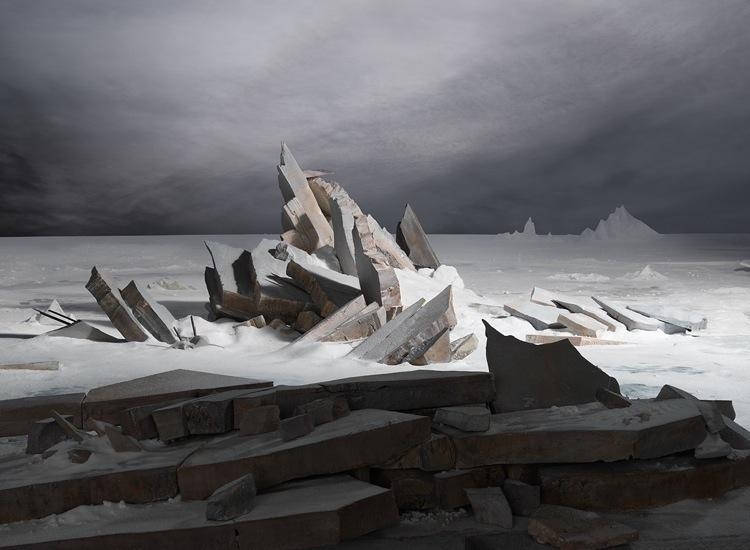
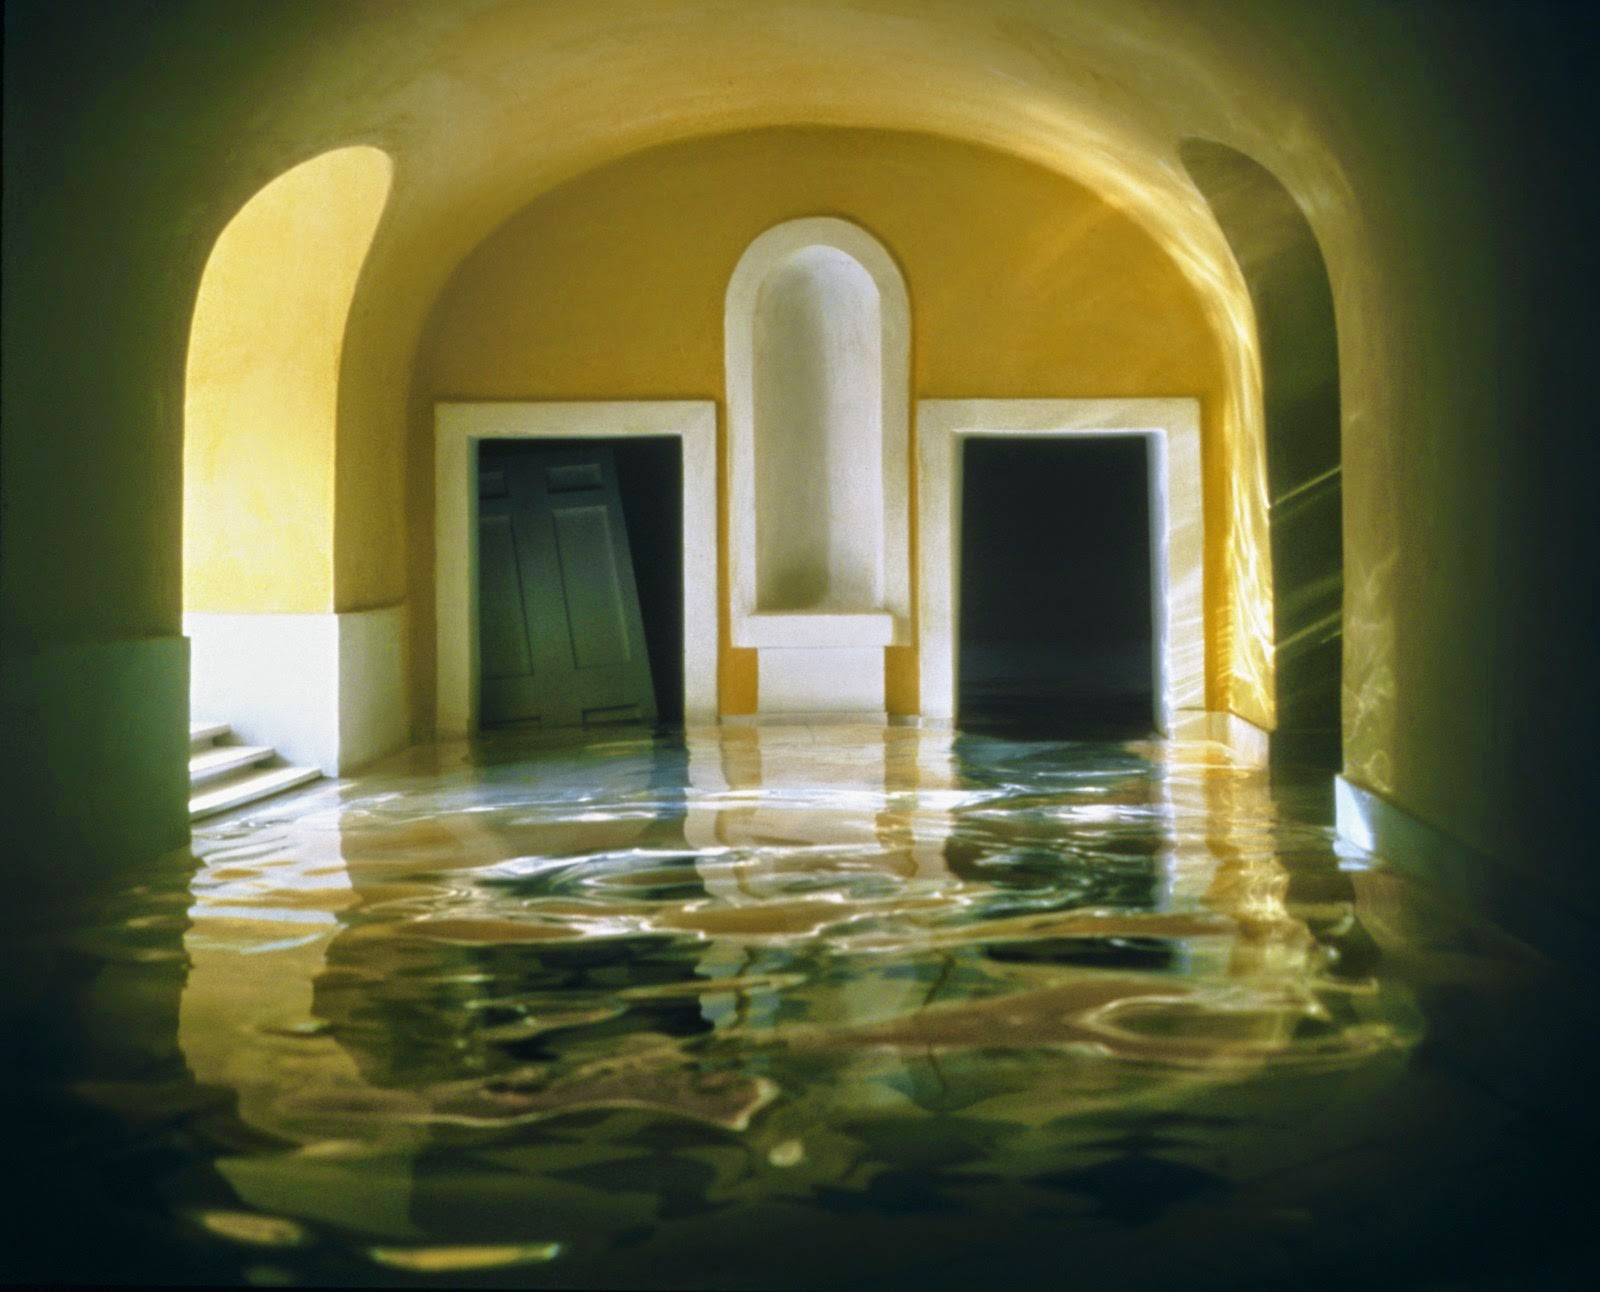
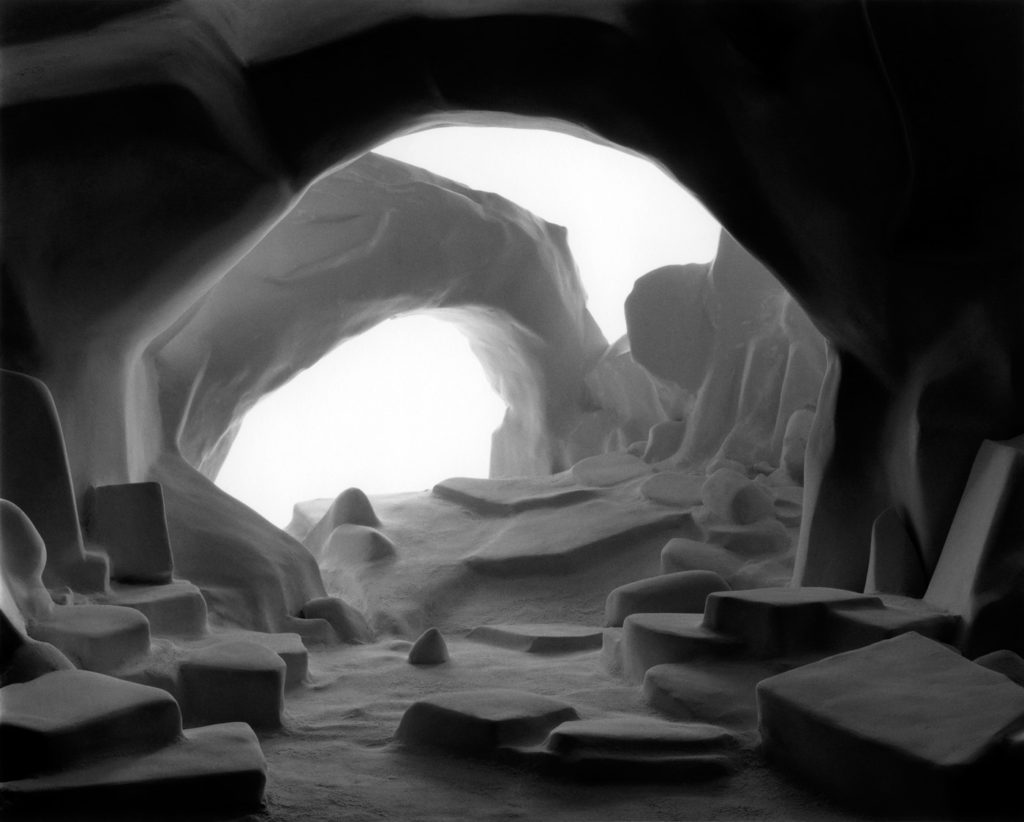
James Casebere pioneering work has established him at the forefront of artists working with constructed photography. For the last thirty years, Casebere has devised increasingly complex models that are subsequently photographed in his studio. Based on architectural, art historical and cinematic sources, his table-sized constructions are made of simple materials, pared down to essential forms. Casebere’s abandoned spaces are hauntingly evocative and oftentimes suggestive of prior events, encouraging the viewer to reconstitute a narrative or symbolic reading of his work.
Caspar David Friedrich
James Casebere
While earlier bodies of work focused on American mythologies such as the genre of the western and suburban home, in the early 1990s, Casebere turned his attention to institutional buildings. In more recent years, his subject matter focused on various institutional spaces and the relationship between social control, social structure and the mythologies that surround particular institutions, as well as the broader implications of dominant systems such as commerce, labor, religion and law.
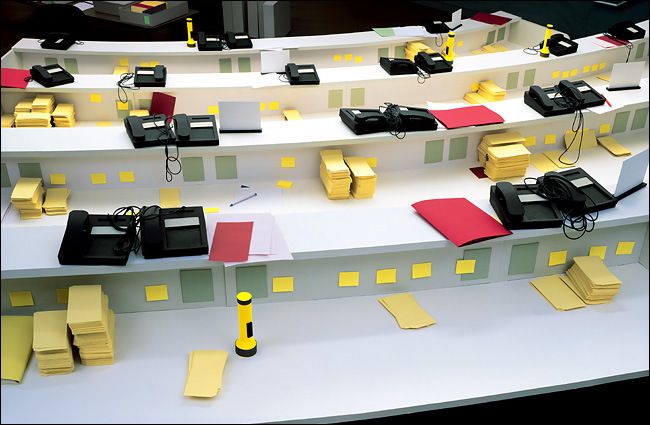
Thomas Demand
Demand studied with the sculptor Fritz Schwegler, who encouraged him to explore the expressive possibilities of architectural models at the Kunstakademie Düsseldorf, where Bernd and Hilla Becher had recently taught photographers such as Andreas Gursky, Thomas Struth, and Candida Höfer. Like those artists, Demand makes mural-scale photographs, but instead of finding his subject matter in landscapes, buildings, and crowds, he uses paper and cardboard to reconstruct scenes he finds in images taken from various media sources. Once he has photographed his re-created environments—always devoid of figures but often displaying evidence of recent human activity—Demand destroys his models, further complicating the relationship between reproduction and original that his photography investigates.
Thomas Demand builds models of the scenes of political and societal events and photographs them. This has made him one of the photographers most in demand today. Now his depictions of German history can be seen in Berlin.
Read interview here on BBC with Thomas Demand about his work and process of making Sadam Hussein’s kitchen. Discusses death of photojournalism (see also Jeff Wall)
Thomas Demand is his studio photographing one of his paper models
See my books on the table for resources and images about how Demand creates his sculptures.
Pacific Sun, a joint acquisition by LACMA and the Israel Museum, Jerusalem. Consisting of 2,400 frames that capture the artist’s meticulous recreation of YouTube footage of a cruise ship struggling in the midst of a violent storm, the work reveals Demand’s interest in opposing reality with the artificial. Demand’s earlier works dating from the early 1990s were also discussed, illuminating his cross-disciplinary practice spanning sculpture, architecture, photography, and film.
Theory: reality vs artificial
Jeff Wall constructed photography
Week 5: 3 – 9 Oct Practice: Zine-lab Theory: Archive DEADLINE: FRI 21 OCT
TUE 4 OCT:FIELD STUDIES & RESEARCH La Hocque & Societe Jersiaise Photo-archive
Activities: 08:45: Leave Hautlieu by boach to take us to La Hogue 9:15: Shoot at La Hogue/ Robin Bay/ Green Island/ La Motte 11:30: Coach to Societe Jersiaise, 7 Pier Road 12:00-12:30: Intro to archive and its collections: Look at Guiton’s set of images from La Motte archaeological dig and images from La Cotte. 12:30-13:20: Lunch 13:20-14:00: Research activity – students exploring online catalogue – link to Guiton’s images above and other collections 14:00-14:10: Break 14:10-15:00: Sequencing/ storytelling task: using Guiton’s set from La Motte and also La Cote De St Brelade 15:00 Coach return to Hautlieu School
IMAGES: explore the following
Landscape & views: rock formations along the coastline set against wider natural environments
Shapes & Form: Look for interesting granite that you may frame as rock face
Abstract & close-up: move in closer and look for textures/ patterns/ colourisation/ surfaces/ repetition within granite.
Photo-collaging: produce a series of images that overlap each other to form a much wider and detailed picture. (See Hockney and Allchurch for inspiration)
Narrative: Consider how to tell a story about Geological site and include a variety of images, including figures in a landscape
Emile F Guiton – La Motte excavation
BLOG POSTS
ARCHIVES: The Société Jersiaise Photographic Archive contains over 100,000 items dating from the mid-1840s to the present day and is the principal Jersey collection of nineteenth and early twentieth century photograph. Archives can be a rich source for finding starting points on your creative journey. This will strengthen your research and lead towards discoveries about the past that will inform the way you interpret the present and anticipate the future.
Produce blog post about Societe Jersiaise Photographic Archive with a specific focus on Emile F Guiton collections held in the archive that will inform your zine design.
You can find Guiton images and images from other collections here on our shared school folder:
In our final year of A-level photography we will study how different narrative structures can be used to tell stories from looking at the origin of photo essays in photojournalism to contemporary photography as well as cinema and literature.
This term we will begin to focus our attention on narrative in photography and explore visual storytelling as apart of our Personal Study, that includes developing a new body of work based around the theme of ‘islandness’, presented either as a photobook and/or a film, and writing an essay.
The aim is to produce a 16 page photo-zine in InDesign based around the images you have produced from exploring a bay or geological sites of special interest, that you selected to photograph as part of your Summer Project: MY ROCK.
NARRATIVE is essentially the way a story is told. For example you can tell different narratives of the same story. It is a very subjective process and there is no right or wrong. Whether or not your photographic story is any good is another matter.
Narrative is constructed when you begin to create relationships between images (and/or text) and present more than two images together. Your selection of images (editing) and the order of how these images appear on the pages (sequencing) contributes significantly to the construction of the narrative. So too, does the structure and design of the photo-zine. However, it is essential that you identity what your story is first before considering how you wish to tell it.
In order for you to understand better how narrative works in photography let’s consider the differences between narrative and story when making a photo-zine. For a more in-depth understanding of NARRATIVE and PHOTOGRAPHY go to blog post below.
Once you have considered the points made between the differences in narrative and story and done some research around Jersey’s geography, bays and geological site of special interest that you explored with your camera, ie. west coast or east coast, write the following:
Images > new photographic responses, photo-shoots of objects…
Archives > images from SJ photo-archive, found imagery…
Texts > experiment with typography, key words, poems…
EDITING: photo-shoots from school trip.
Produce a blog post with evidence of your photoshoot and editing and selection process.
In Lightroom make a rough edit of 50-60 images, then go through then again and reduce to 20-30 images and third round of editing to an ordered series of 12-16 images. Use screen prints to show editing process and add to blog with annotation.
Adjust your final set in Develop Mode and produce both colour and b&w versions of the same set, remember to crop for emphasis, and use other tools such as spot removal, graduated filter and adjustment brush, if needed
Produce a blog post where you evaluate your first edit of images, reflect on what story you are trying to communicate and how you can improve and develop your narrative.
SEQUENCING: Print your final set of 12-16 images as small work prints using print Microsoft wizard (4 images per page, 9x13cm) Cut images using guillotine and layout on table and begin to sequence them to construct a narrative. Consider the following:
Think about your theme or story. Think about start, middle and end images.
Which images are major (establishing shots, full page, double page), and minor (portrait, detail shots, small images, multiple images on the page etc.)
Think about visual relationship between images and their juxtaposition e.g colour, shapes, subject, repetition, landscape, portrait, objects, details etc.
What happens or changes over the series of images?
Are you using your best images?
Include archival images from Emile Guiton’s collections, such as La Motte (Green Island) or La Cotte (St Brelade)
You can find Guiton images and images from other SJ collections here on our shared school folder:
COLOUR – SHAPESSHAPES – GEOMETRYREPETITIONOBJECT – PORTRAITTypography and graphic elements
Week 6: 10 – 14 Oct DESIGN & LAYOUT Complete the following blog posts
RESEARCH > ANALYSIS: Research zines and newspaper design made by artists and photographer that will provide visual stimulus for your page design. Produce a mood board and consider the following in your analysis:
Café Royal Books is a small independent publisher of photography photobooks or zines, and sometimes drawing, solely run by Craig Atkinson and based in Southport, England. Café Royal Books produces small-run publications predominantly documenting social, historical and architectural change, often in Britain, using both new work and photographs from archives. It has been operating since 2005 and by mid 2014 had published about 200 books and zines and they are held in major public collections
Editions Bessard is a paris-based independent publishing house created by pierre bessard in 2011. Focusing on working with artists, writers and curators to realise intellectually challenging projects in book form.
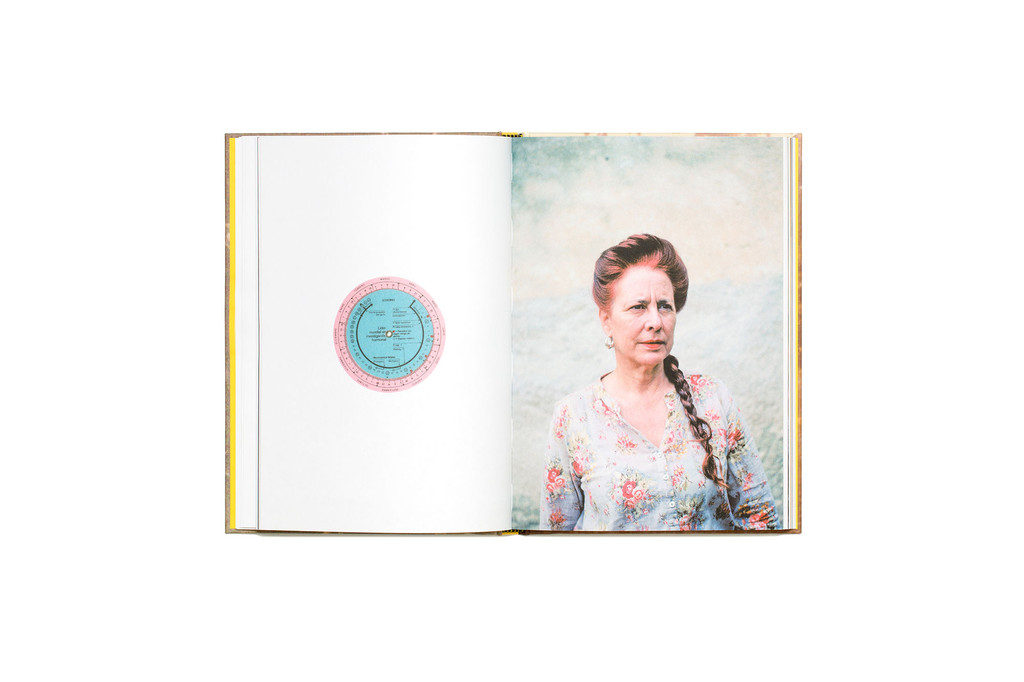
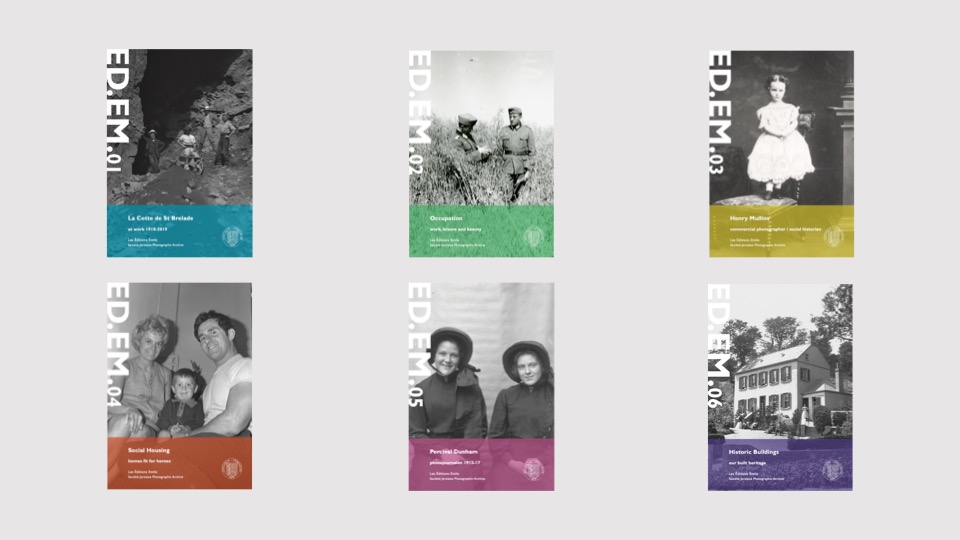
The new imprint Éditions Emile is named in honour of Emile F. Guiton, the founding father of the The Société Jersiaise Photographic Archive. The first set of publications is a series of small photo-zines comprising of 48 pages with an average of 30-40 images and a short text providing further context. With plans to publish three editions annually, each issue of ED.EM. will take a fresh look at a specific collection within the archive, by pairing it with either another collection or contemporary work, in order to re-contextualise the images, keeping the collections active and relevant for new audiences both in the island and beyond.
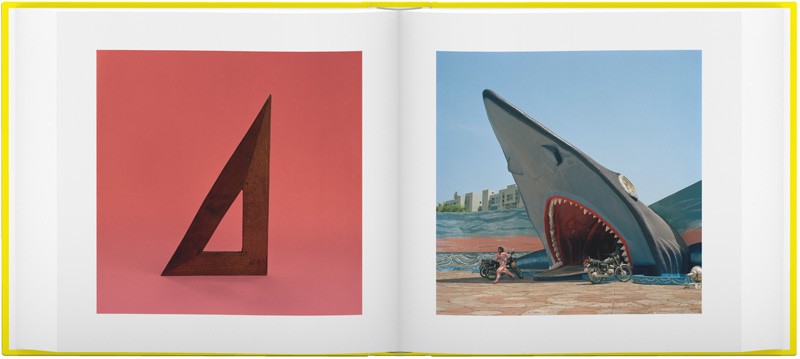
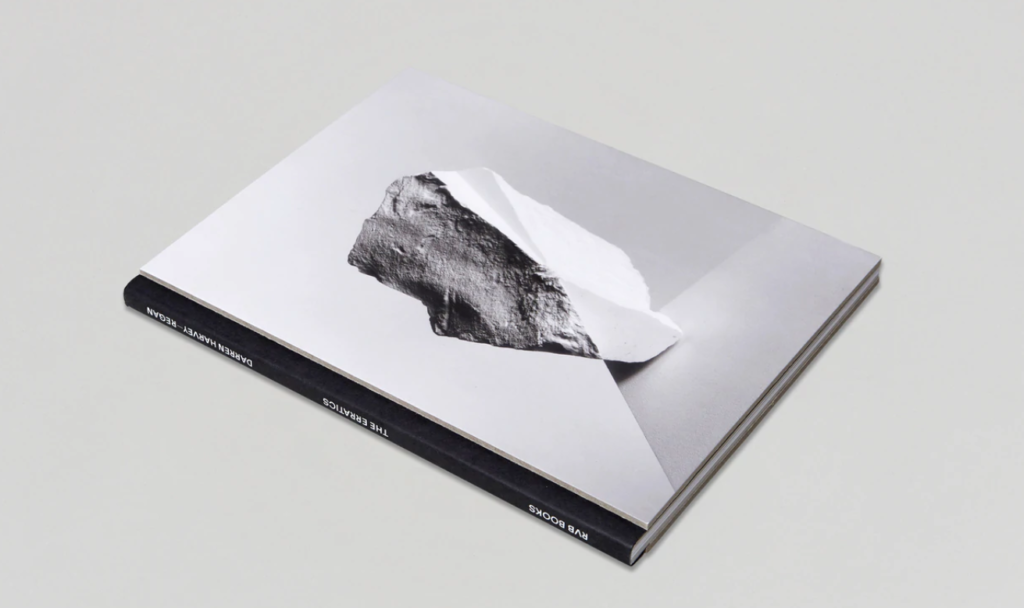
Darren Harvey Regan
Entwining image and object, the work of Darren Harvey-Regan (b. 1974 Exeter) often sees a hybridisation of the conventions of photography and sculpture. As quietly humorous as they are frustrating his works challenge the viewer to distinguish where representation ends and the object begins. “The presentation of photographs in interaction with objects serves to highlight the inherent tensions within representation; between the photograph as an object and the image of the world it contains. In this way, I consider the photograph as being something not only to think about, but to think with.”
Create 2-3 examples of alternative layouts for your photo-zine using Adobe InDesign and complete a visual blog post that clearly shows your decision making and design process using screen-prints.
Make sure you annotate!
See examples of previous students blog charting his zine design process, here.
Week 7: 17 – 21 Oct PRINT & PRESENT Complete the following blog posts
PRESENTATION > EVALUATION: Print, fold and bind final photo-zine and hand in for assessment.
Write an overall final evaluation (250-300 words) that explain in some detail how successfully you explored the first part of the IDENTITY & COMMUNITY project. Consider the following:
Did you realise your intentions?
What did you learn?
Zine; including any contextual references, links and inspiration between your final design and theme, incl artists references.